CDW
-
Posts
7,755 -
Joined
-
Last visited
Content Type
Profiles
Forums
Gallery
Events
Everything posted by CDW
-
 mea culpa; my workshop is too cluttered. I must clean it out/clean it up. too many places for gremlins to hide.
 -
I too lost one of my 1:32 P-51D LG doors somewhere in my shop. I have looked and looked but it hasn't turned up yet. When I least expect it or no longer need it, it will probably turn up.
-
SPAD XIII c1 by modeller_masa - Roden - 1/32 - PLASTIC
CDW replied to modeller_masa's topic in Completed non-ship models
The best thing I know to say about Roden: they produce kits that no one else produces. Thanks for your reply. Your description sounds par for the Roden course. -
SPAD XIII c1 by modeller_masa - Roden - 1/32 - PLASTIC
CDW replied to modeller_masa's topic in Completed non-ship models
I love it! Came out beautiful. What parts did you find most challenging? I have the same kit and would like to be prepared. -
My dear old dad taught us these priorities: First is family, even your cousins. Second was your church, then third your neighbors. He taught that care and support for these institutions was mandatory, not optional. Times like these emphasize the importance of these time proven principles.
-
I have not heard yet but lots of them were hit hard. Power is down and gasoline almost impossible to come by around here. It will not start getting here until Monday and it will be spotty for a while. My advice to my friends: where ever you are, be prepared to make it/survive on your own for at least a month. Longer if possible. If you assume it’s an automatic that the government or some random NGA is going to come to your aid, you may be sadly mistaken.
-
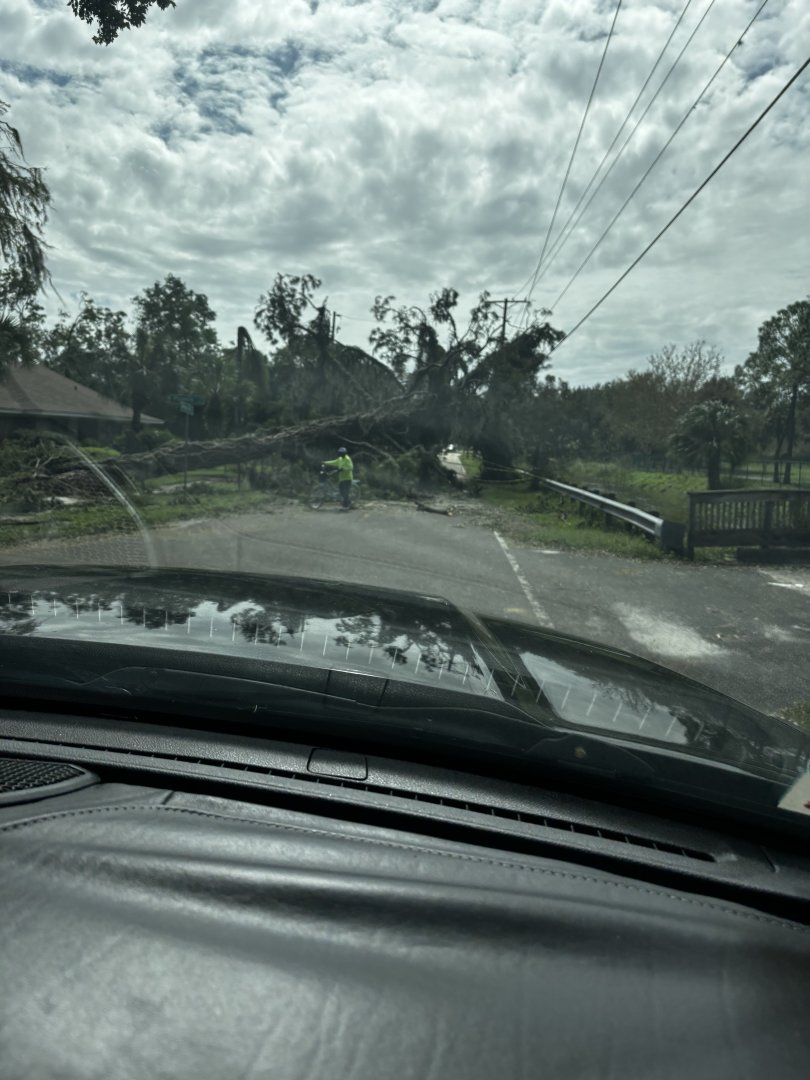
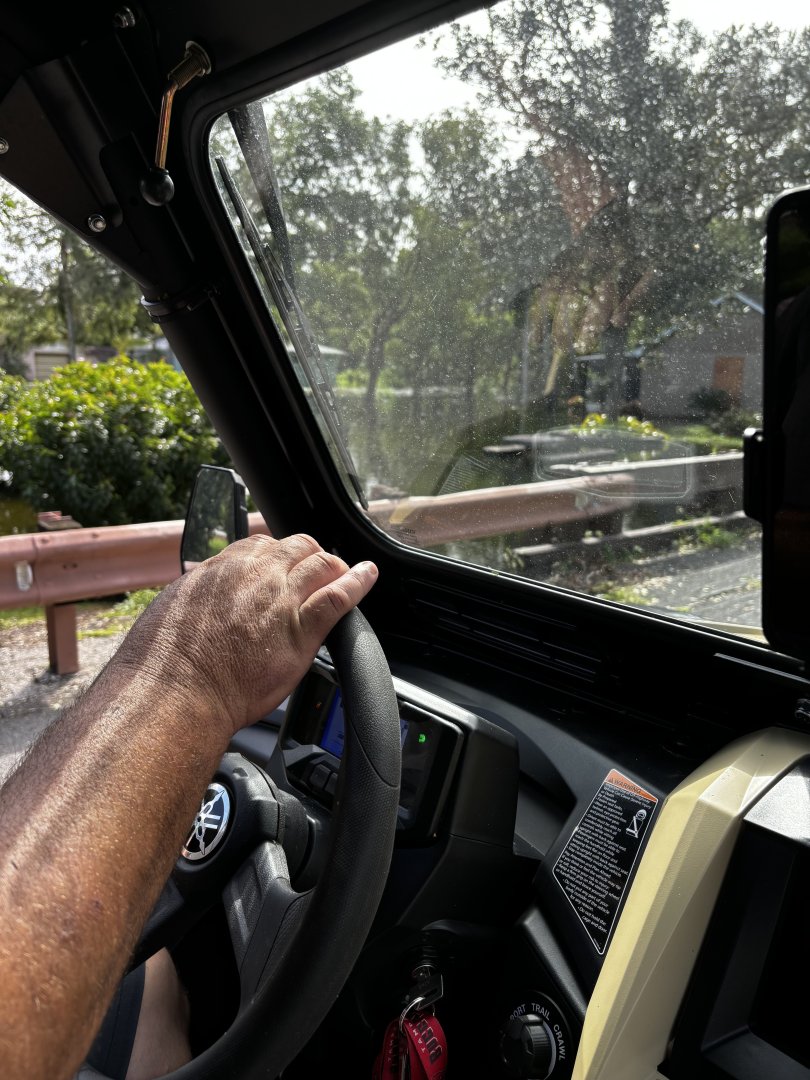
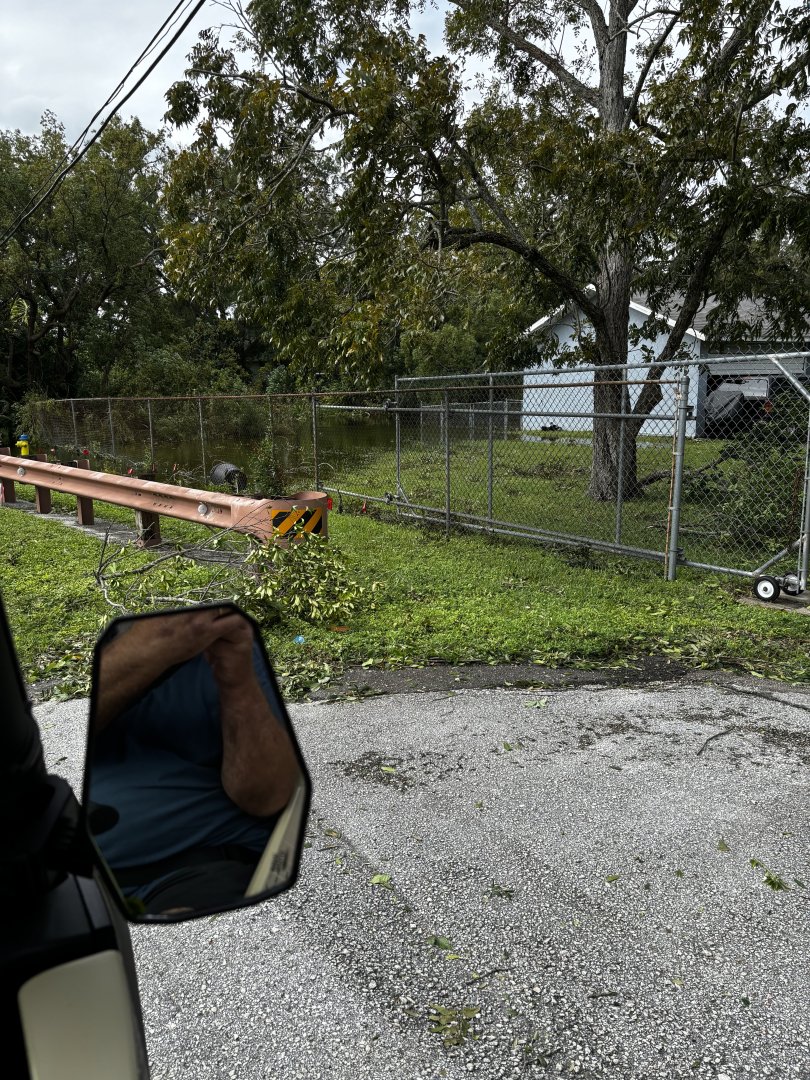
On my way home from buying fence materials
-
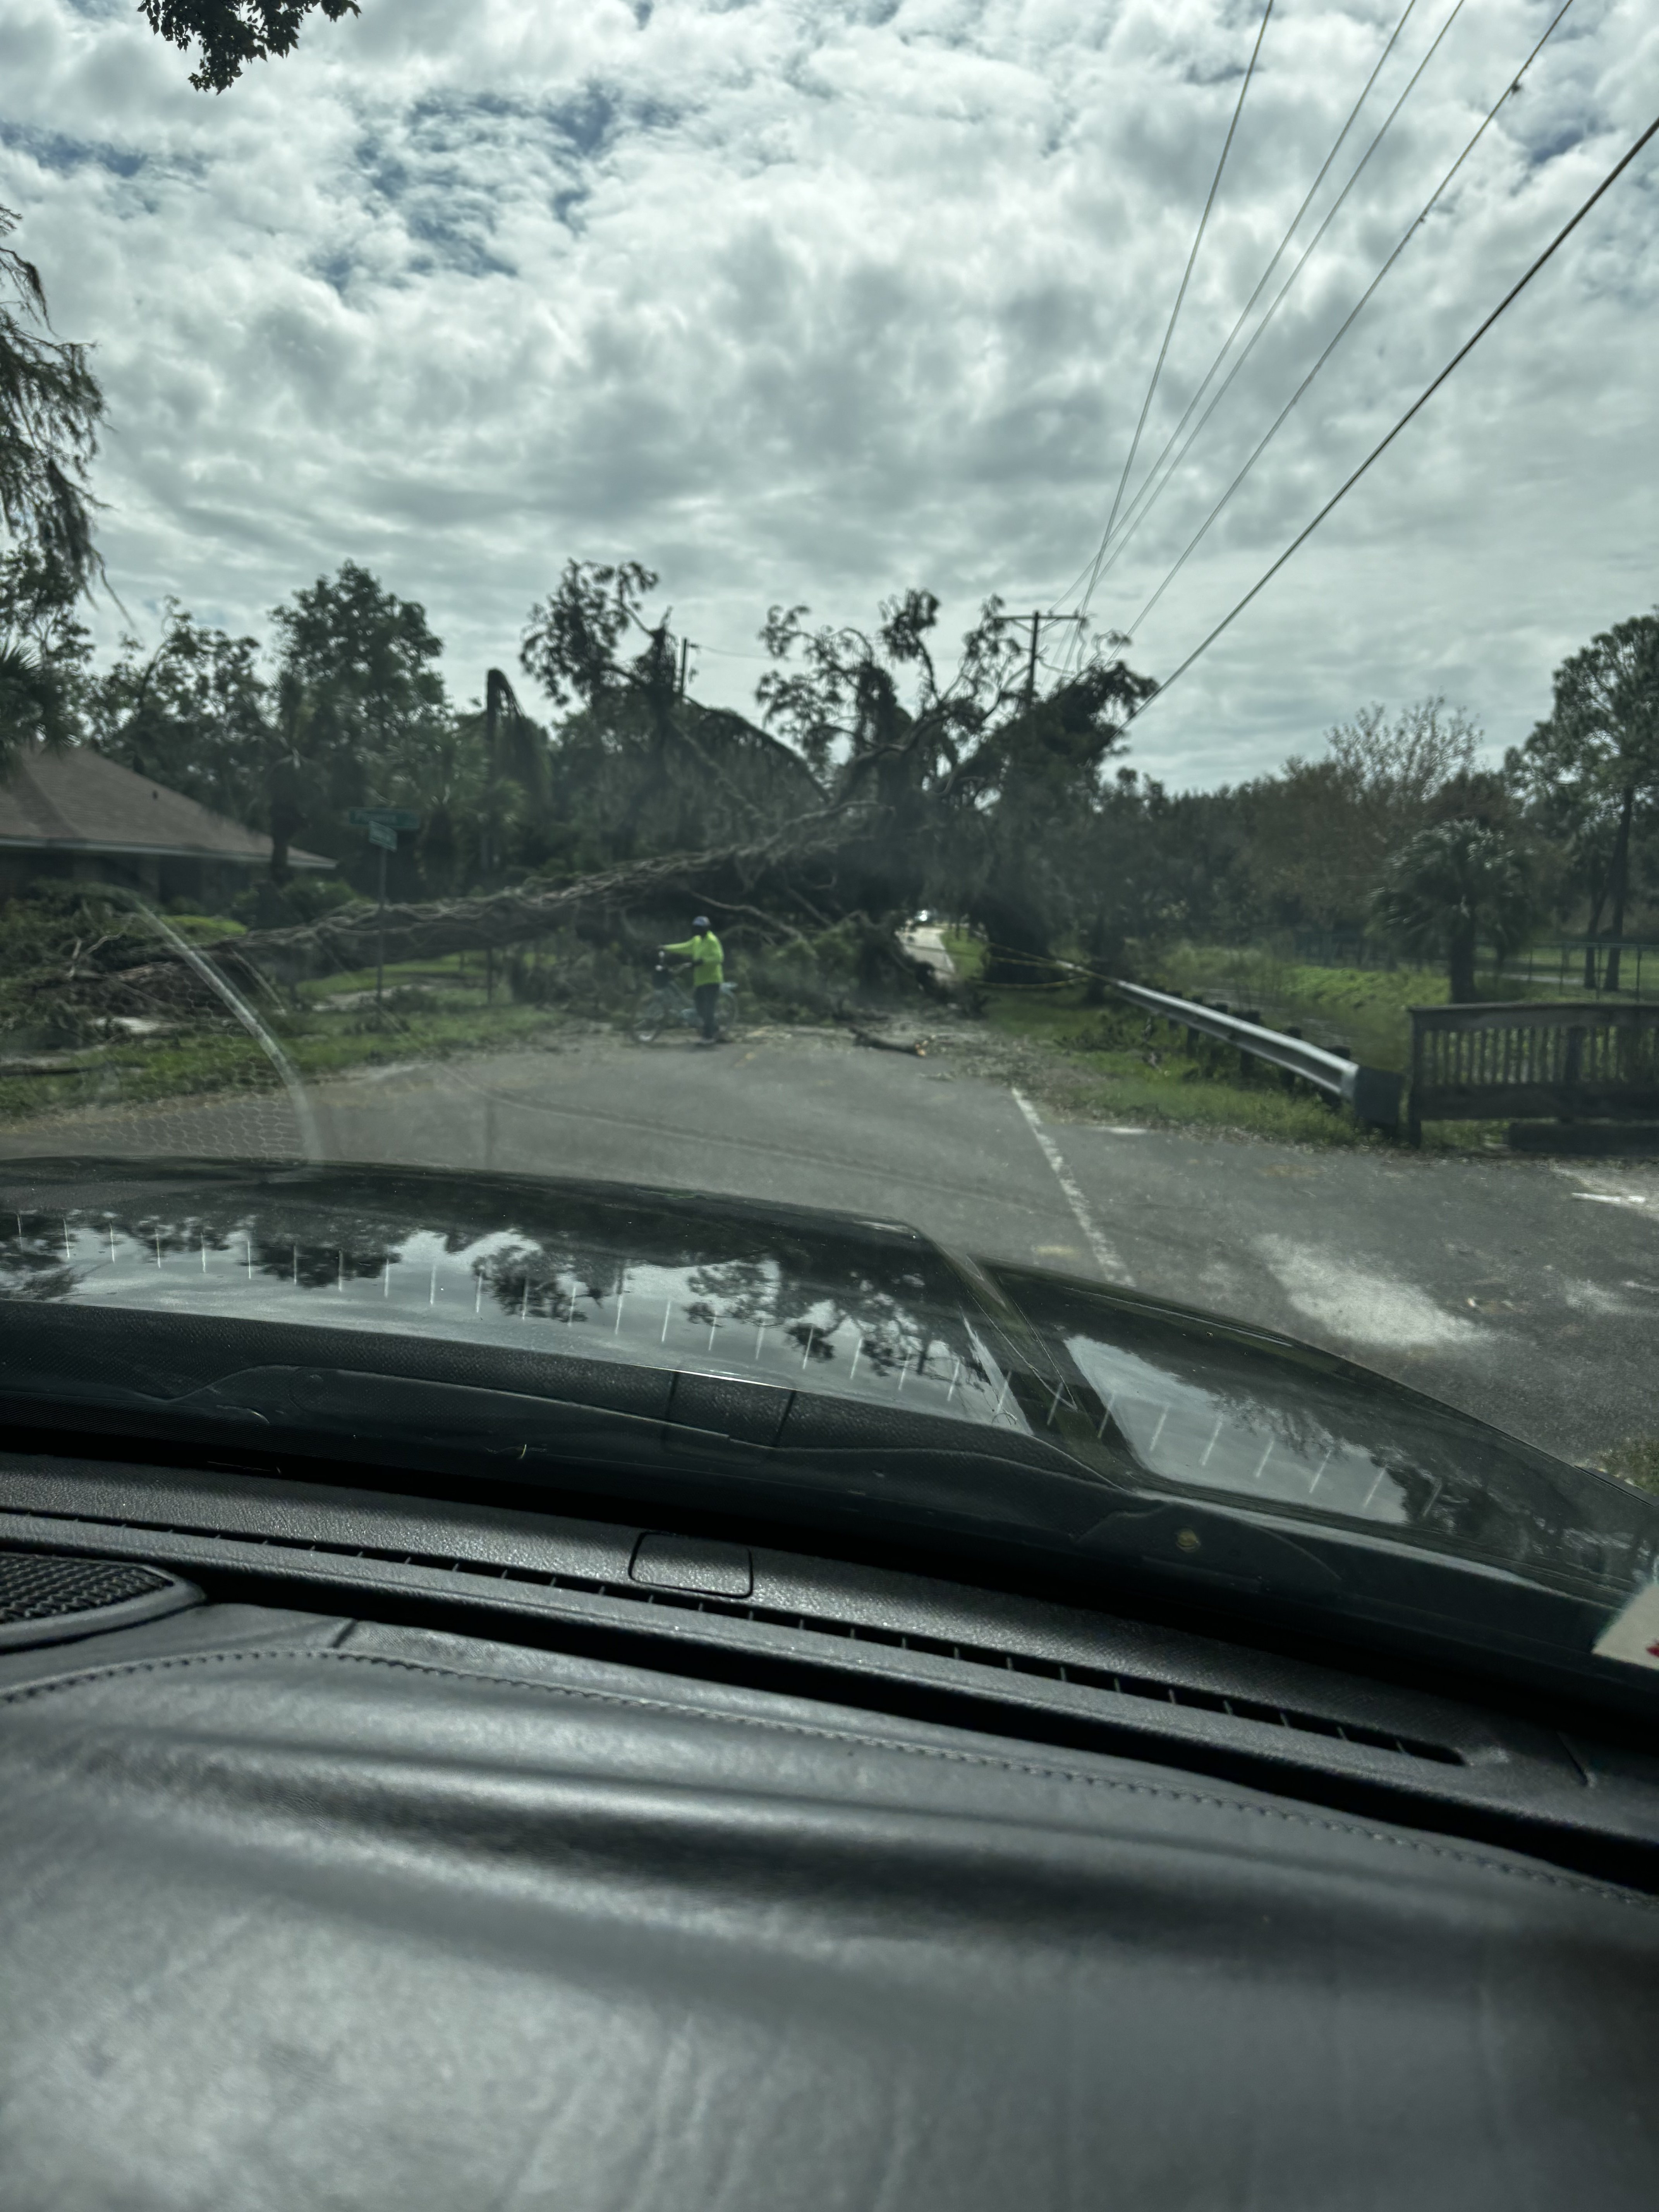
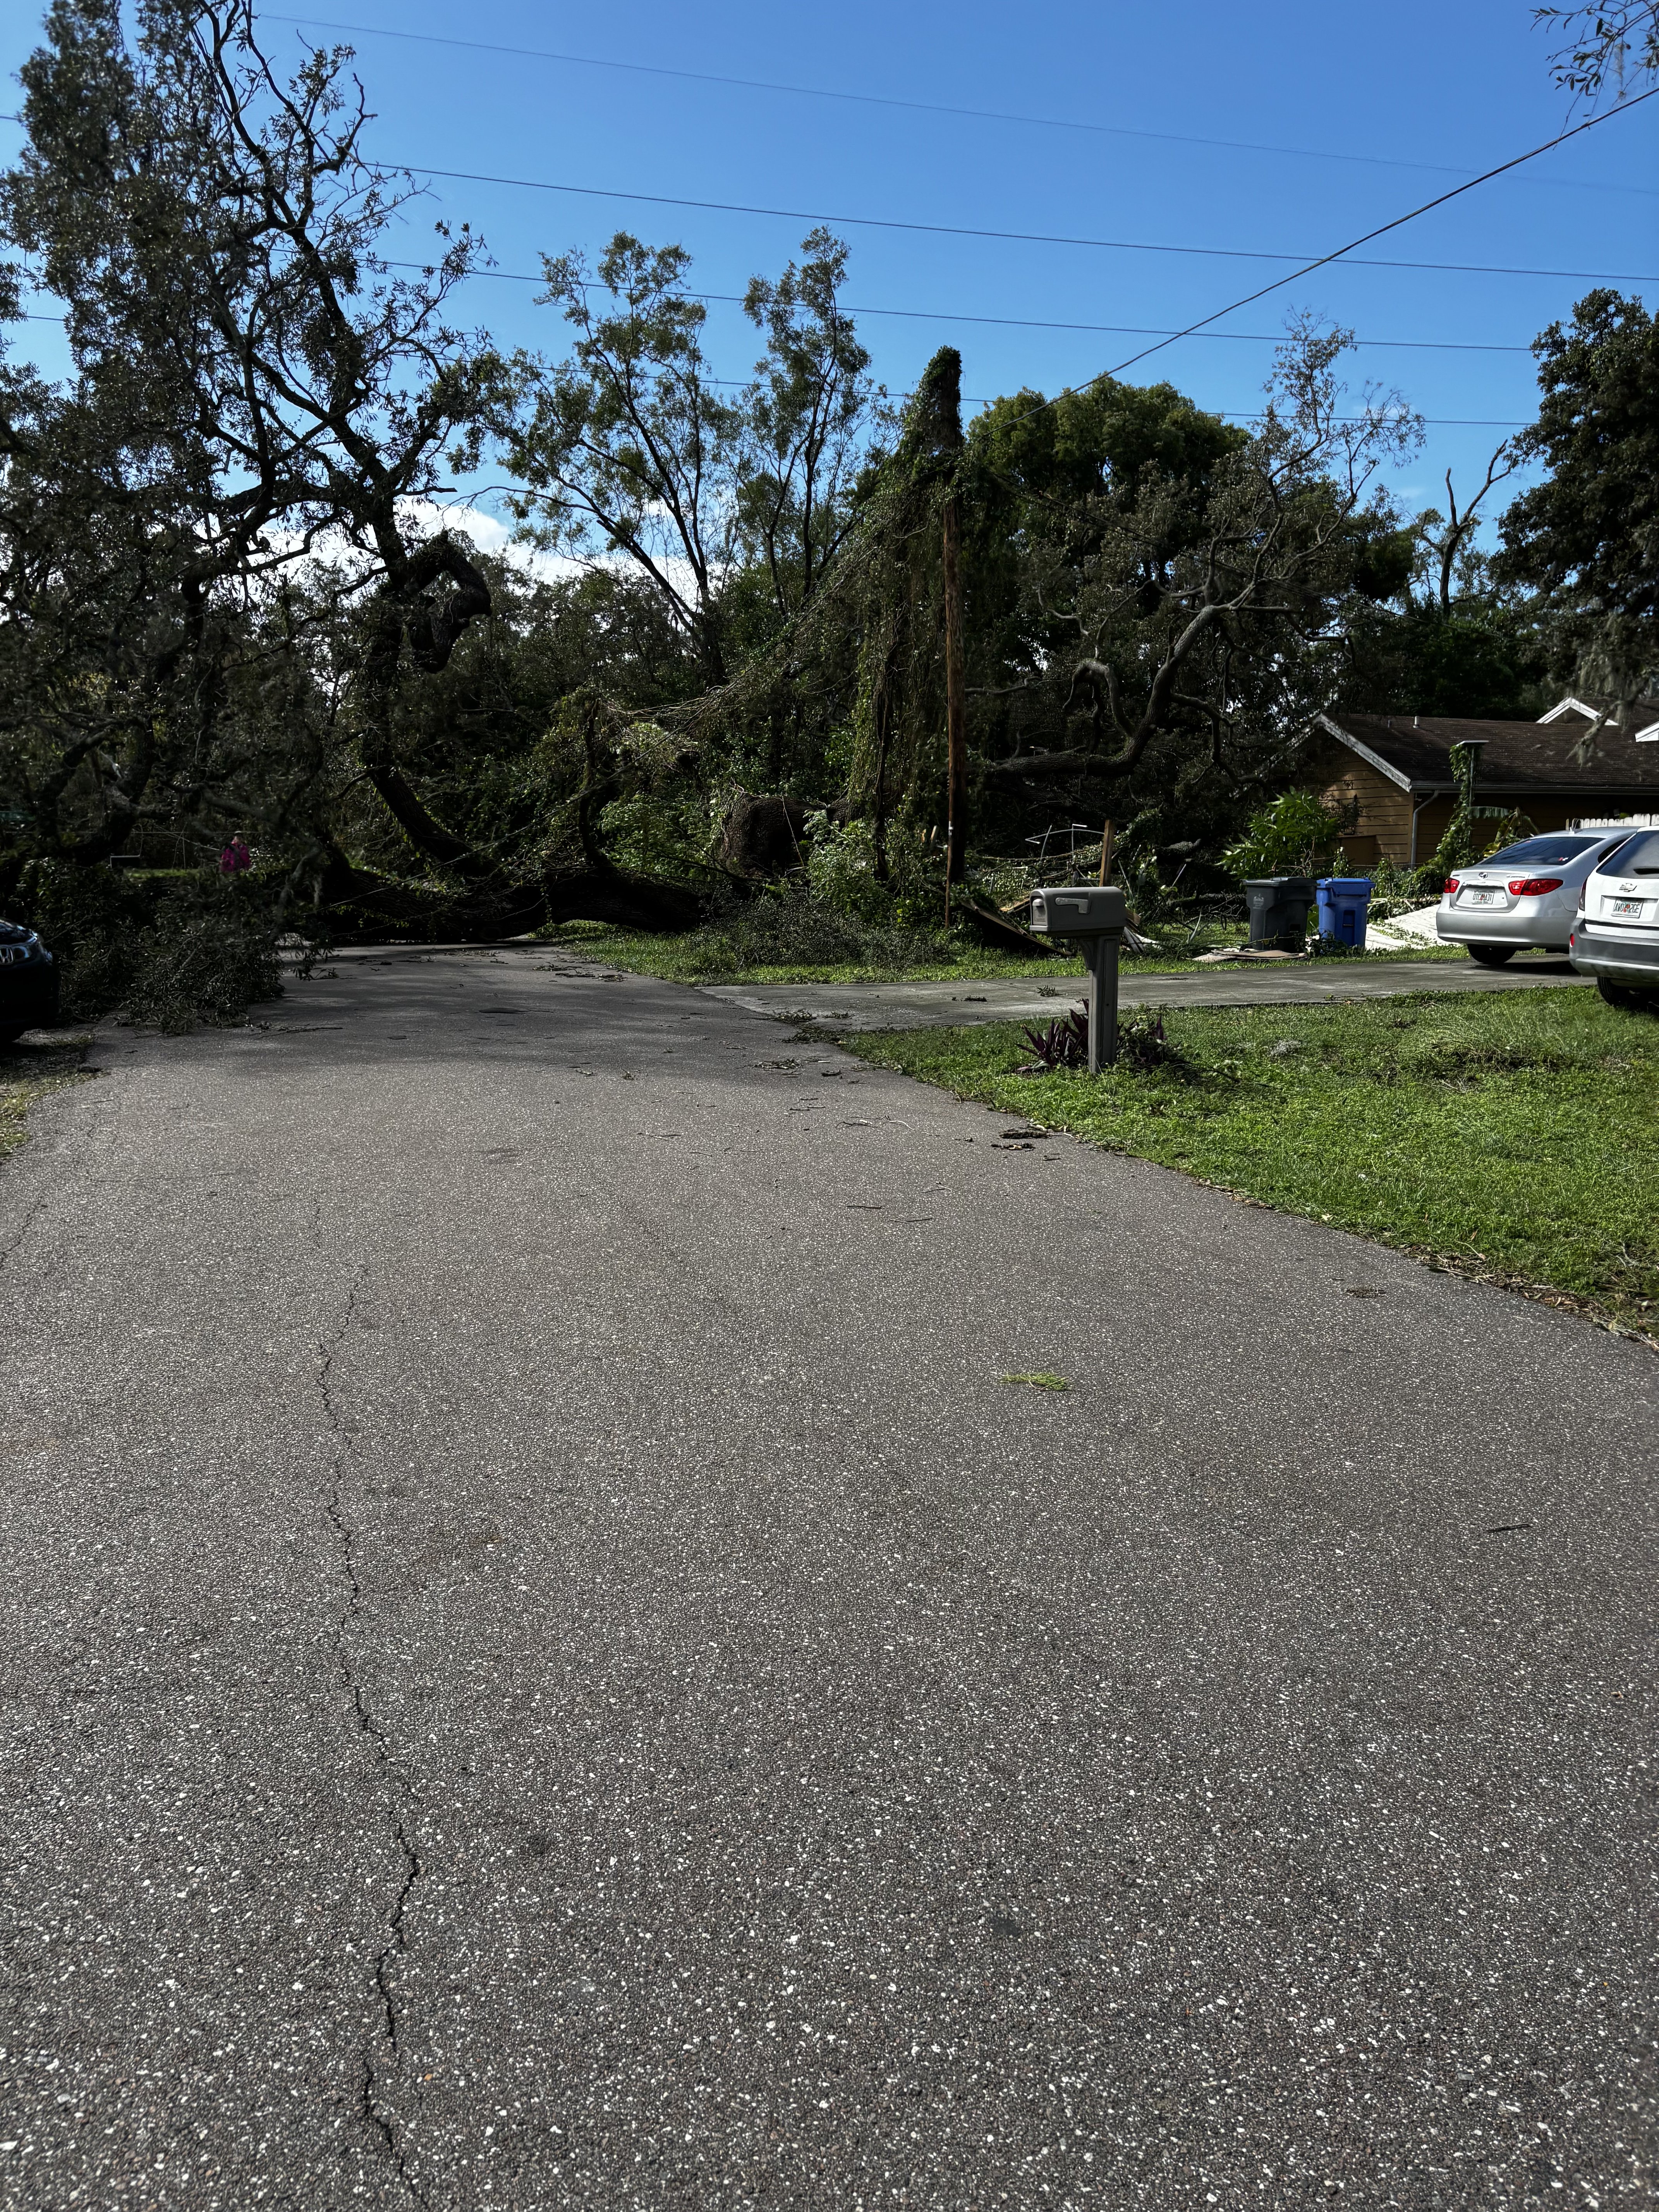
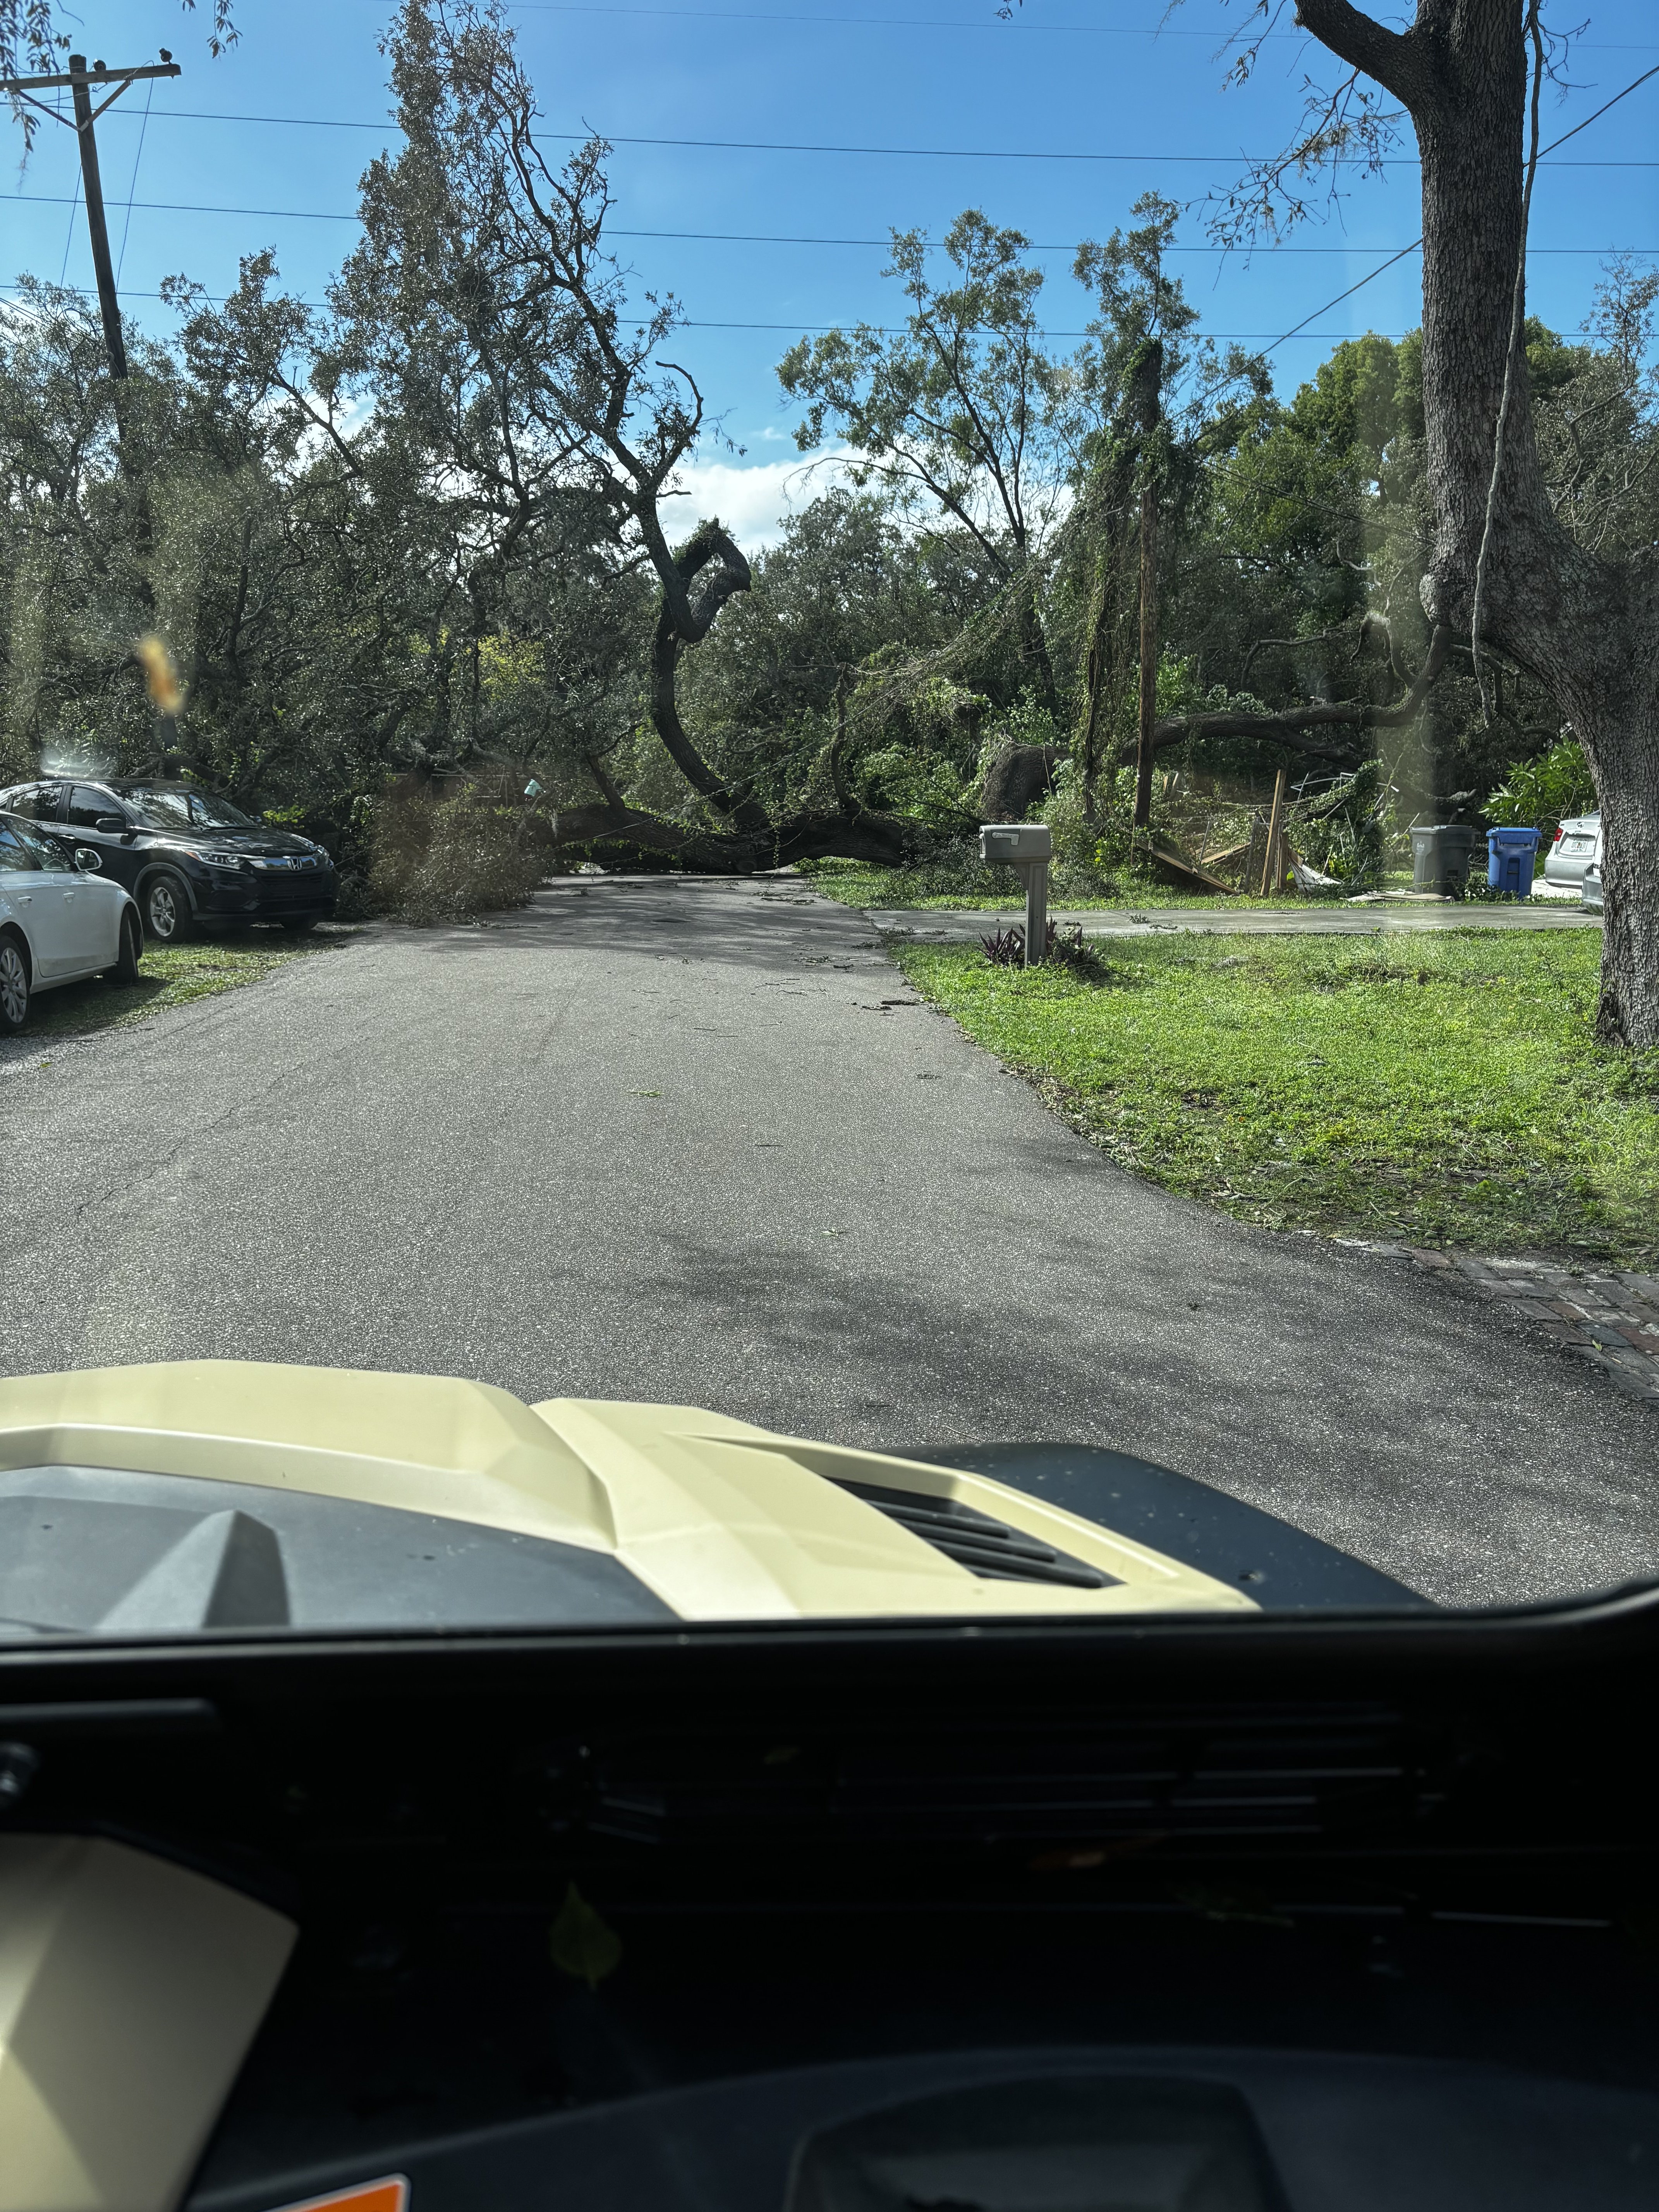
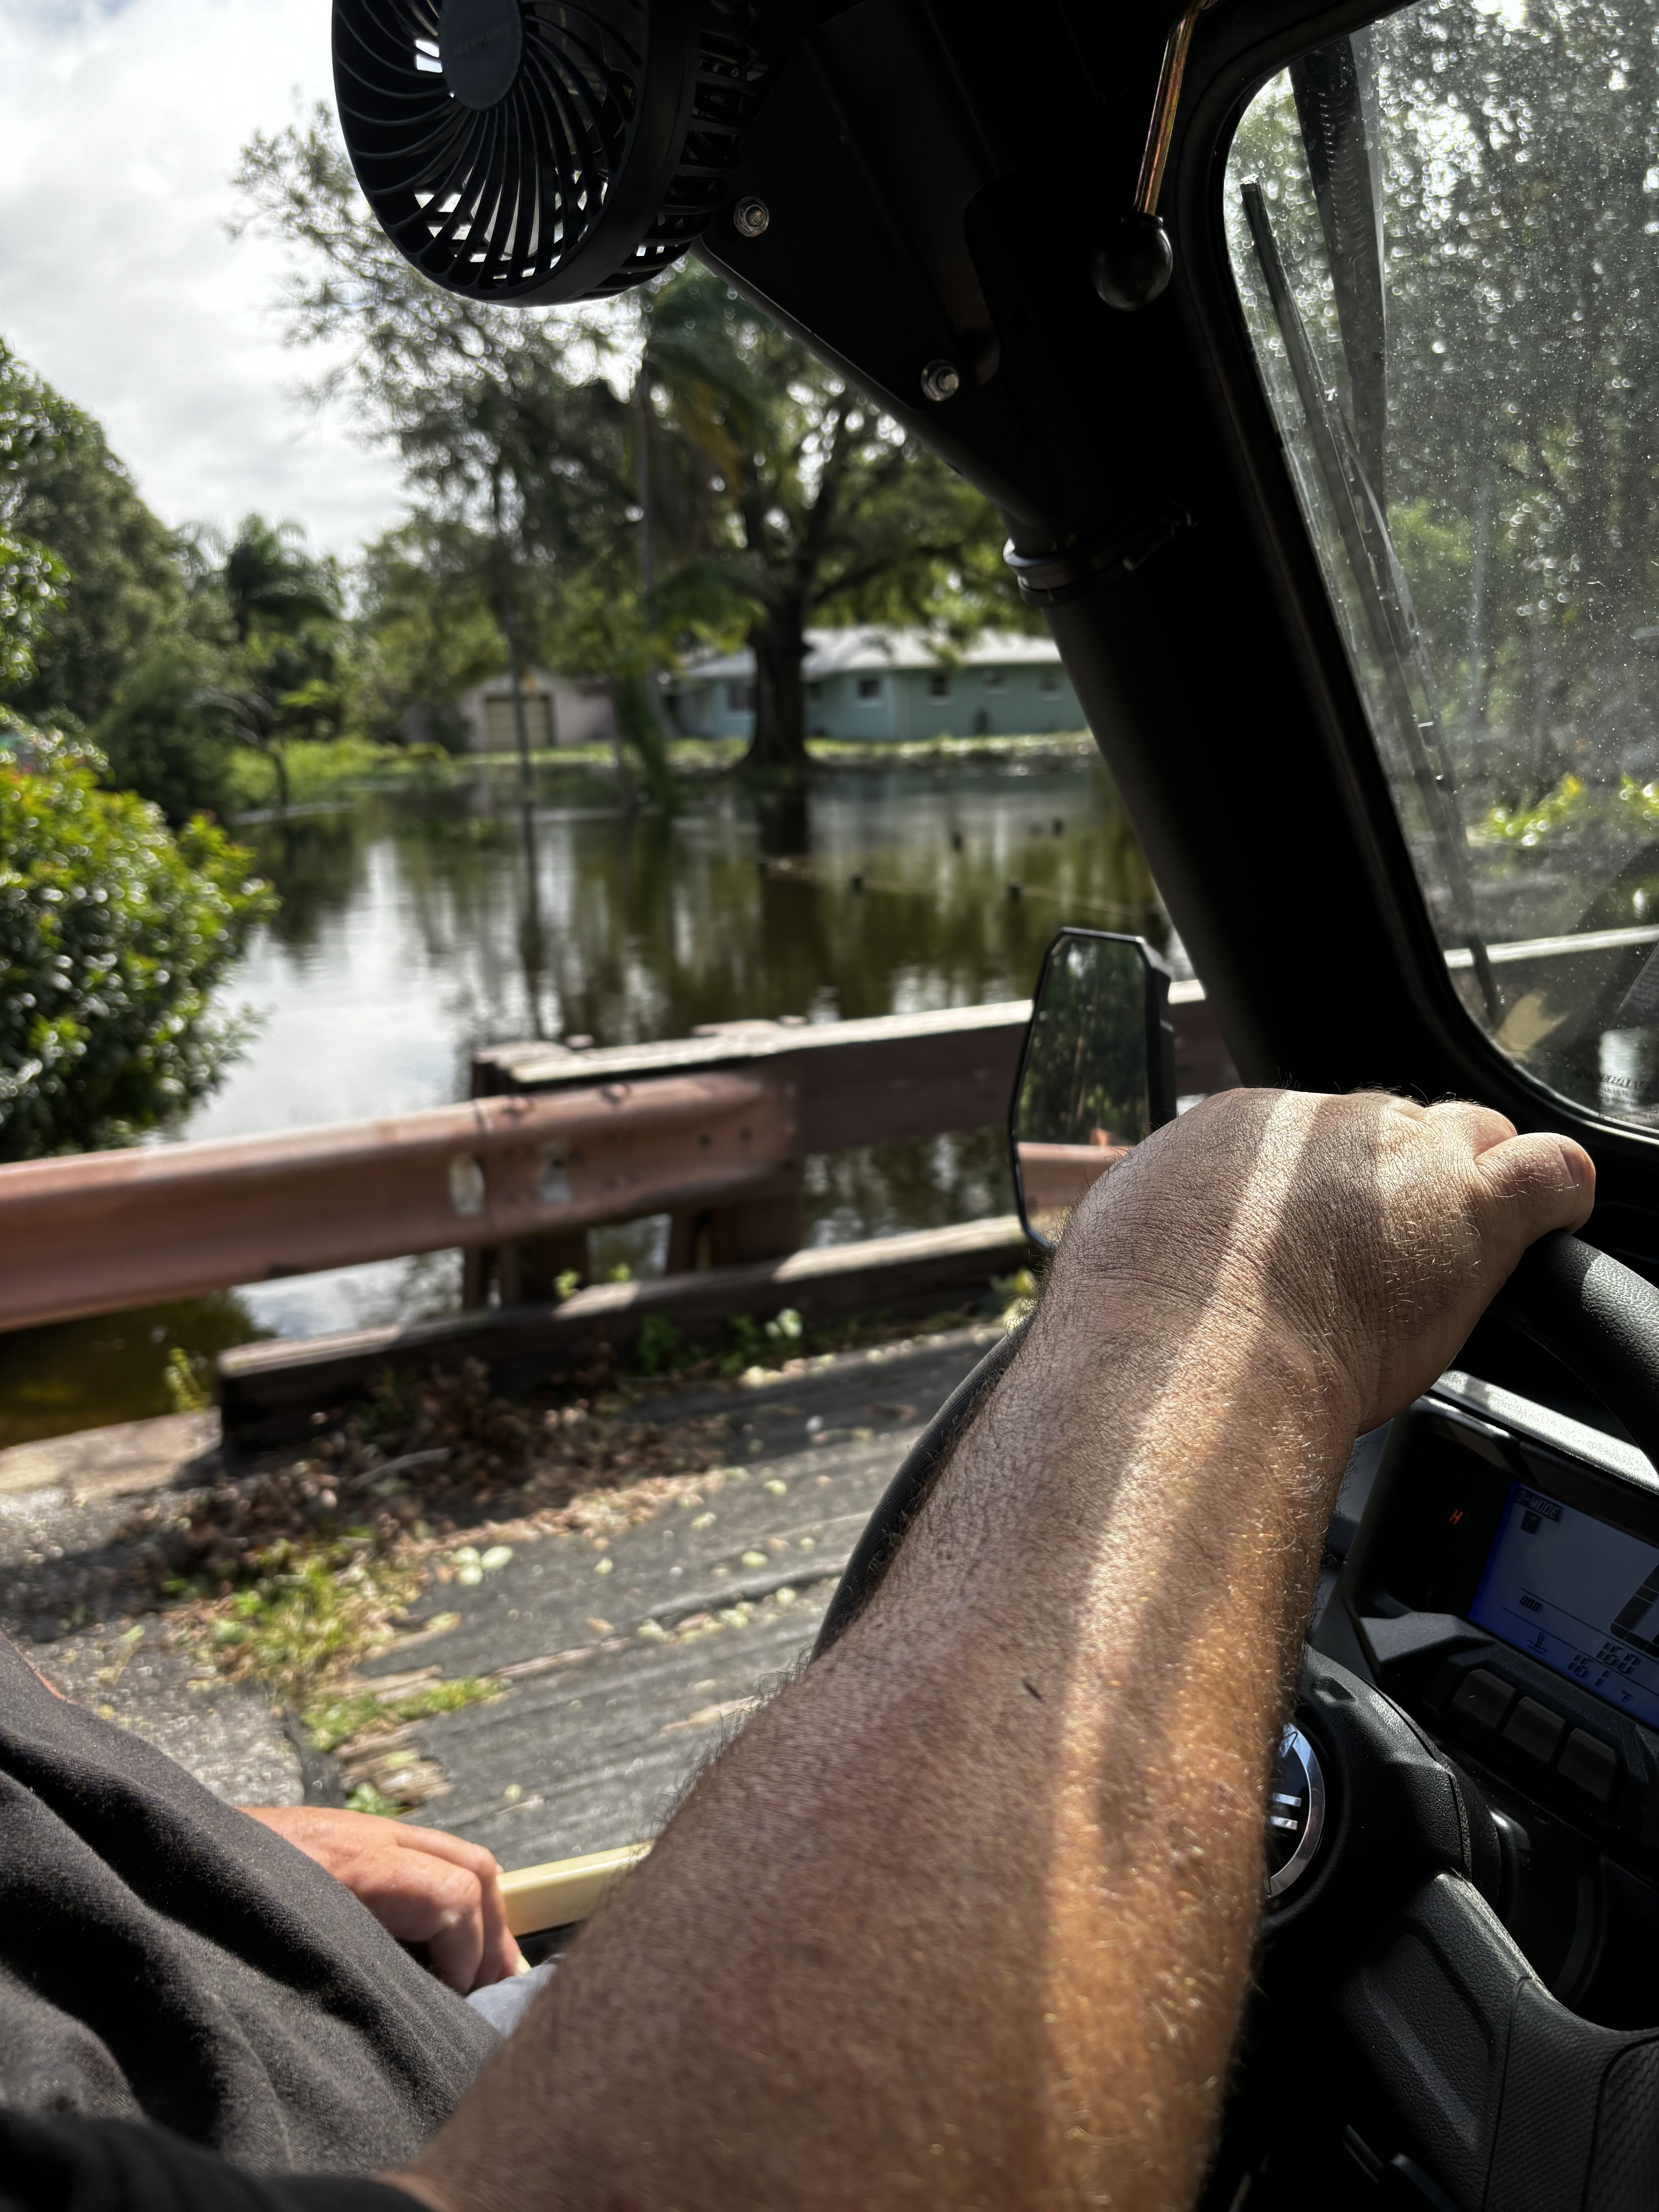
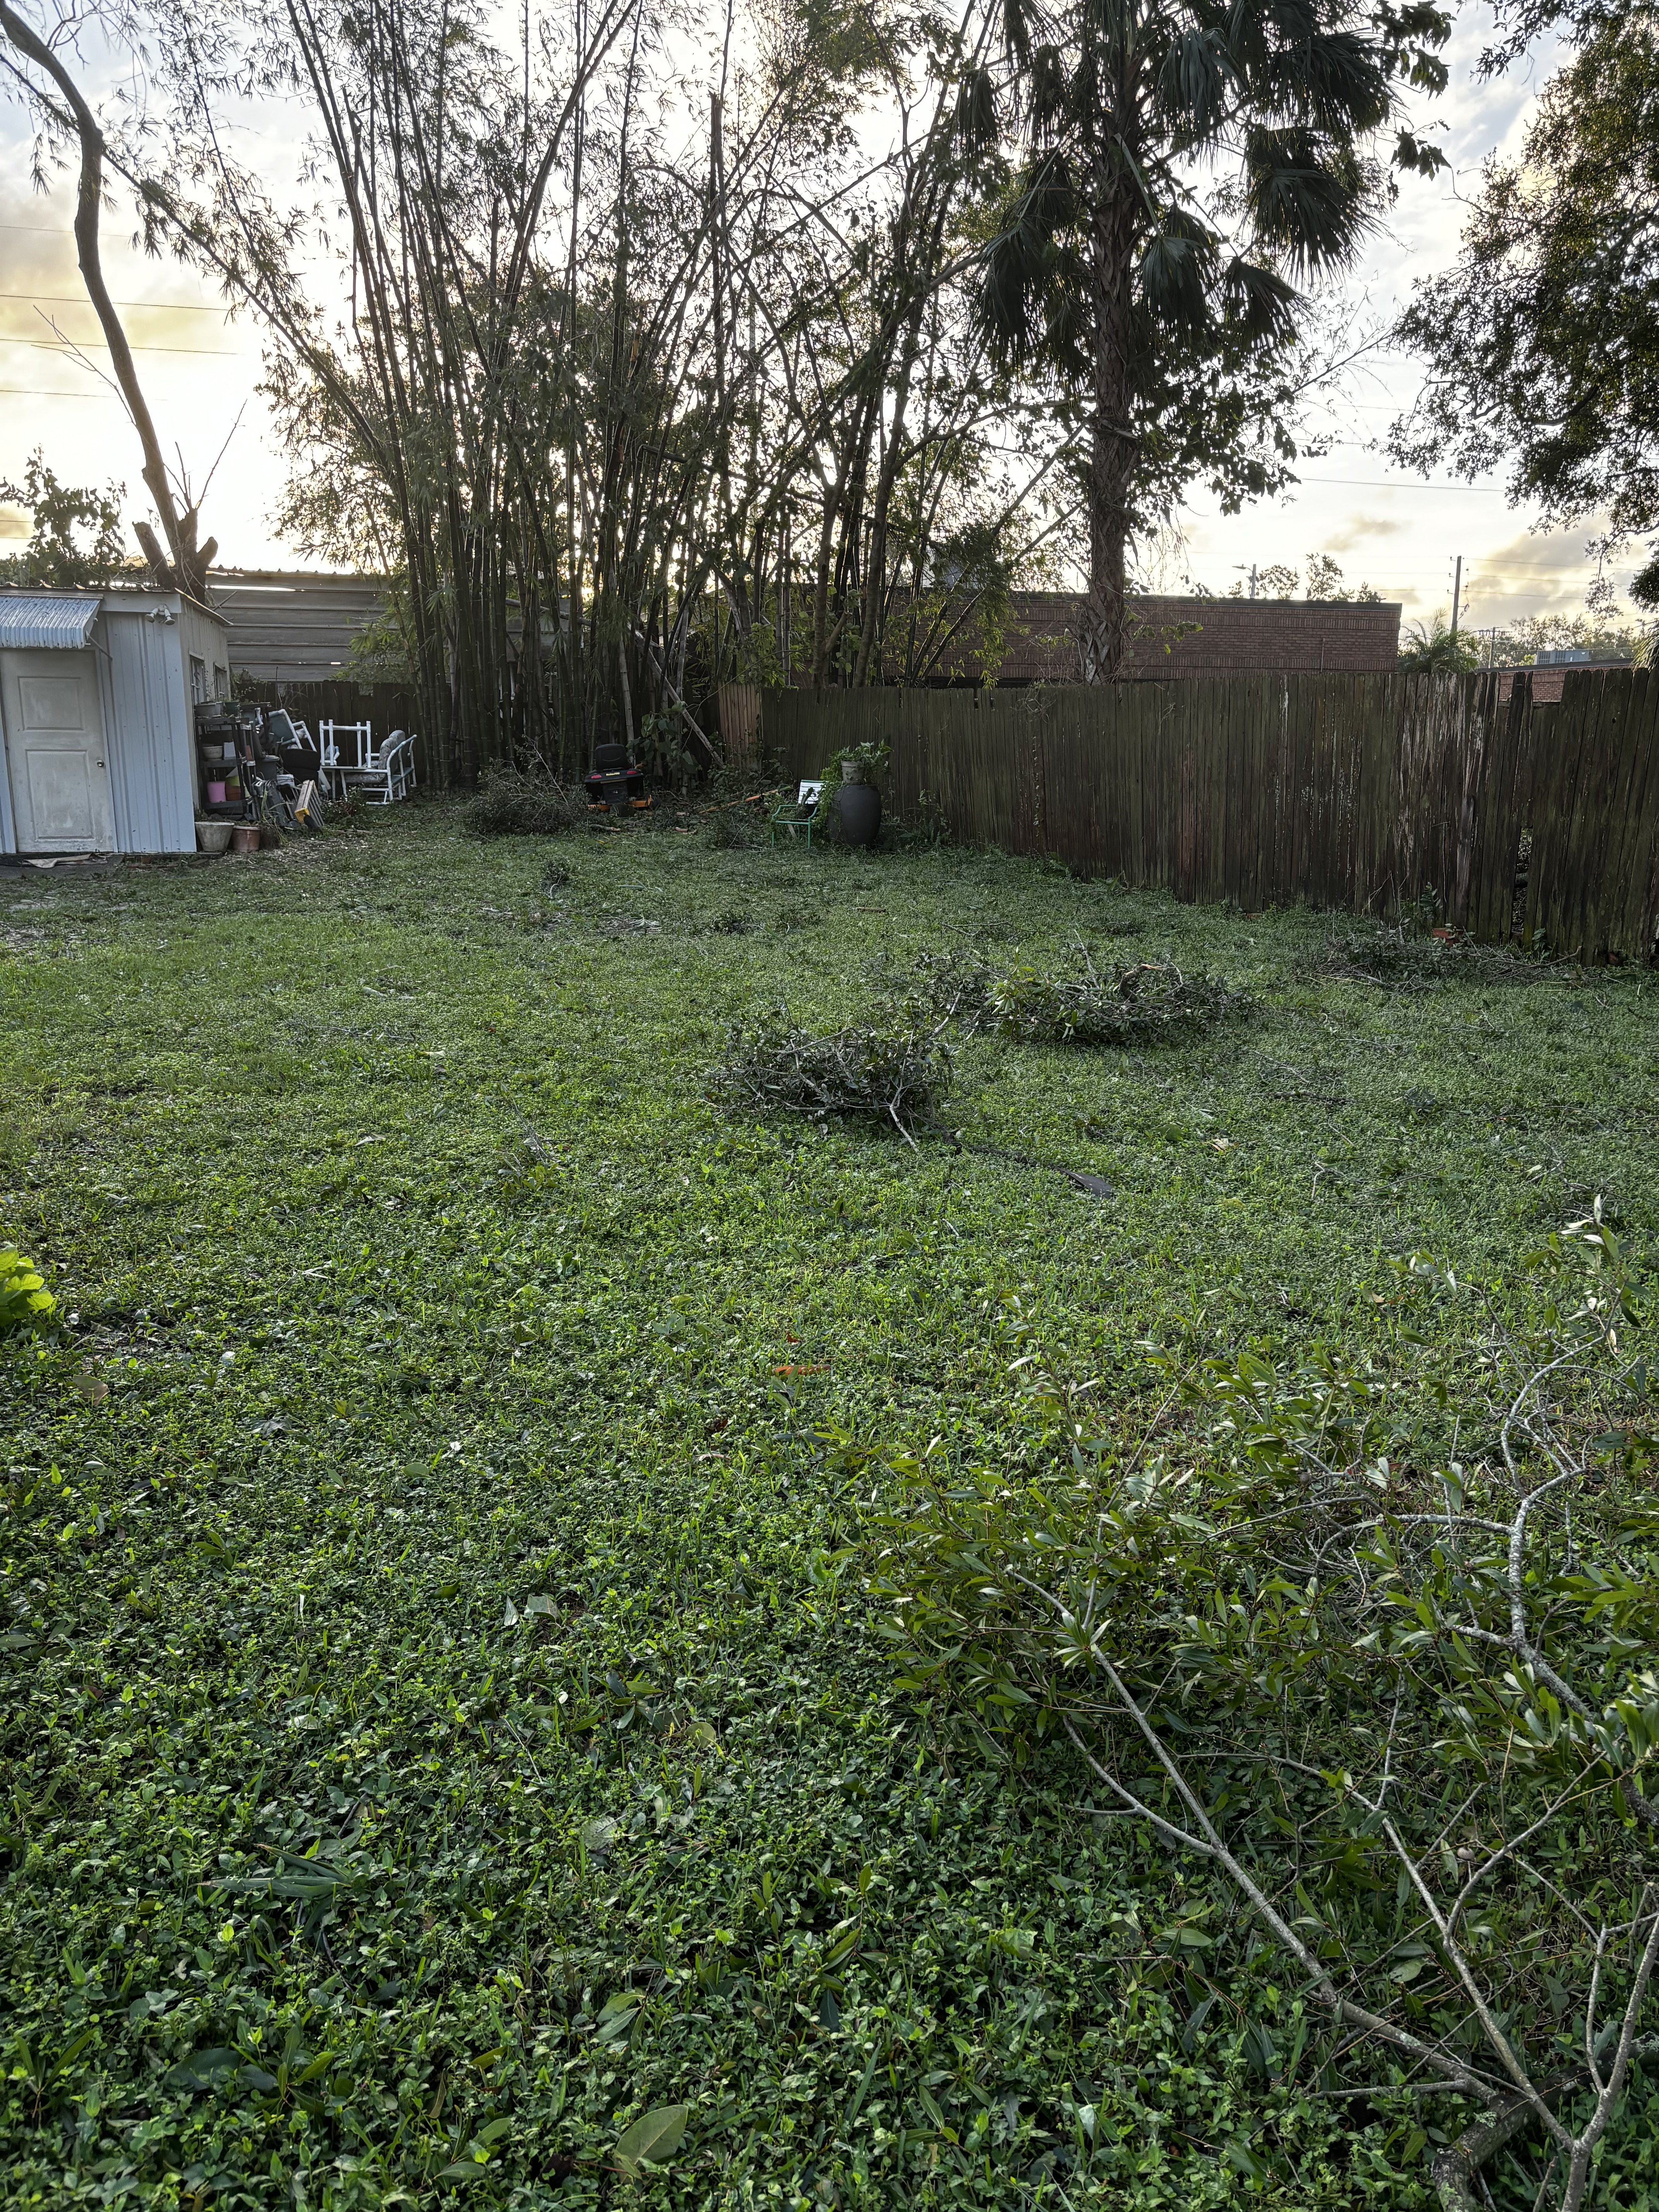
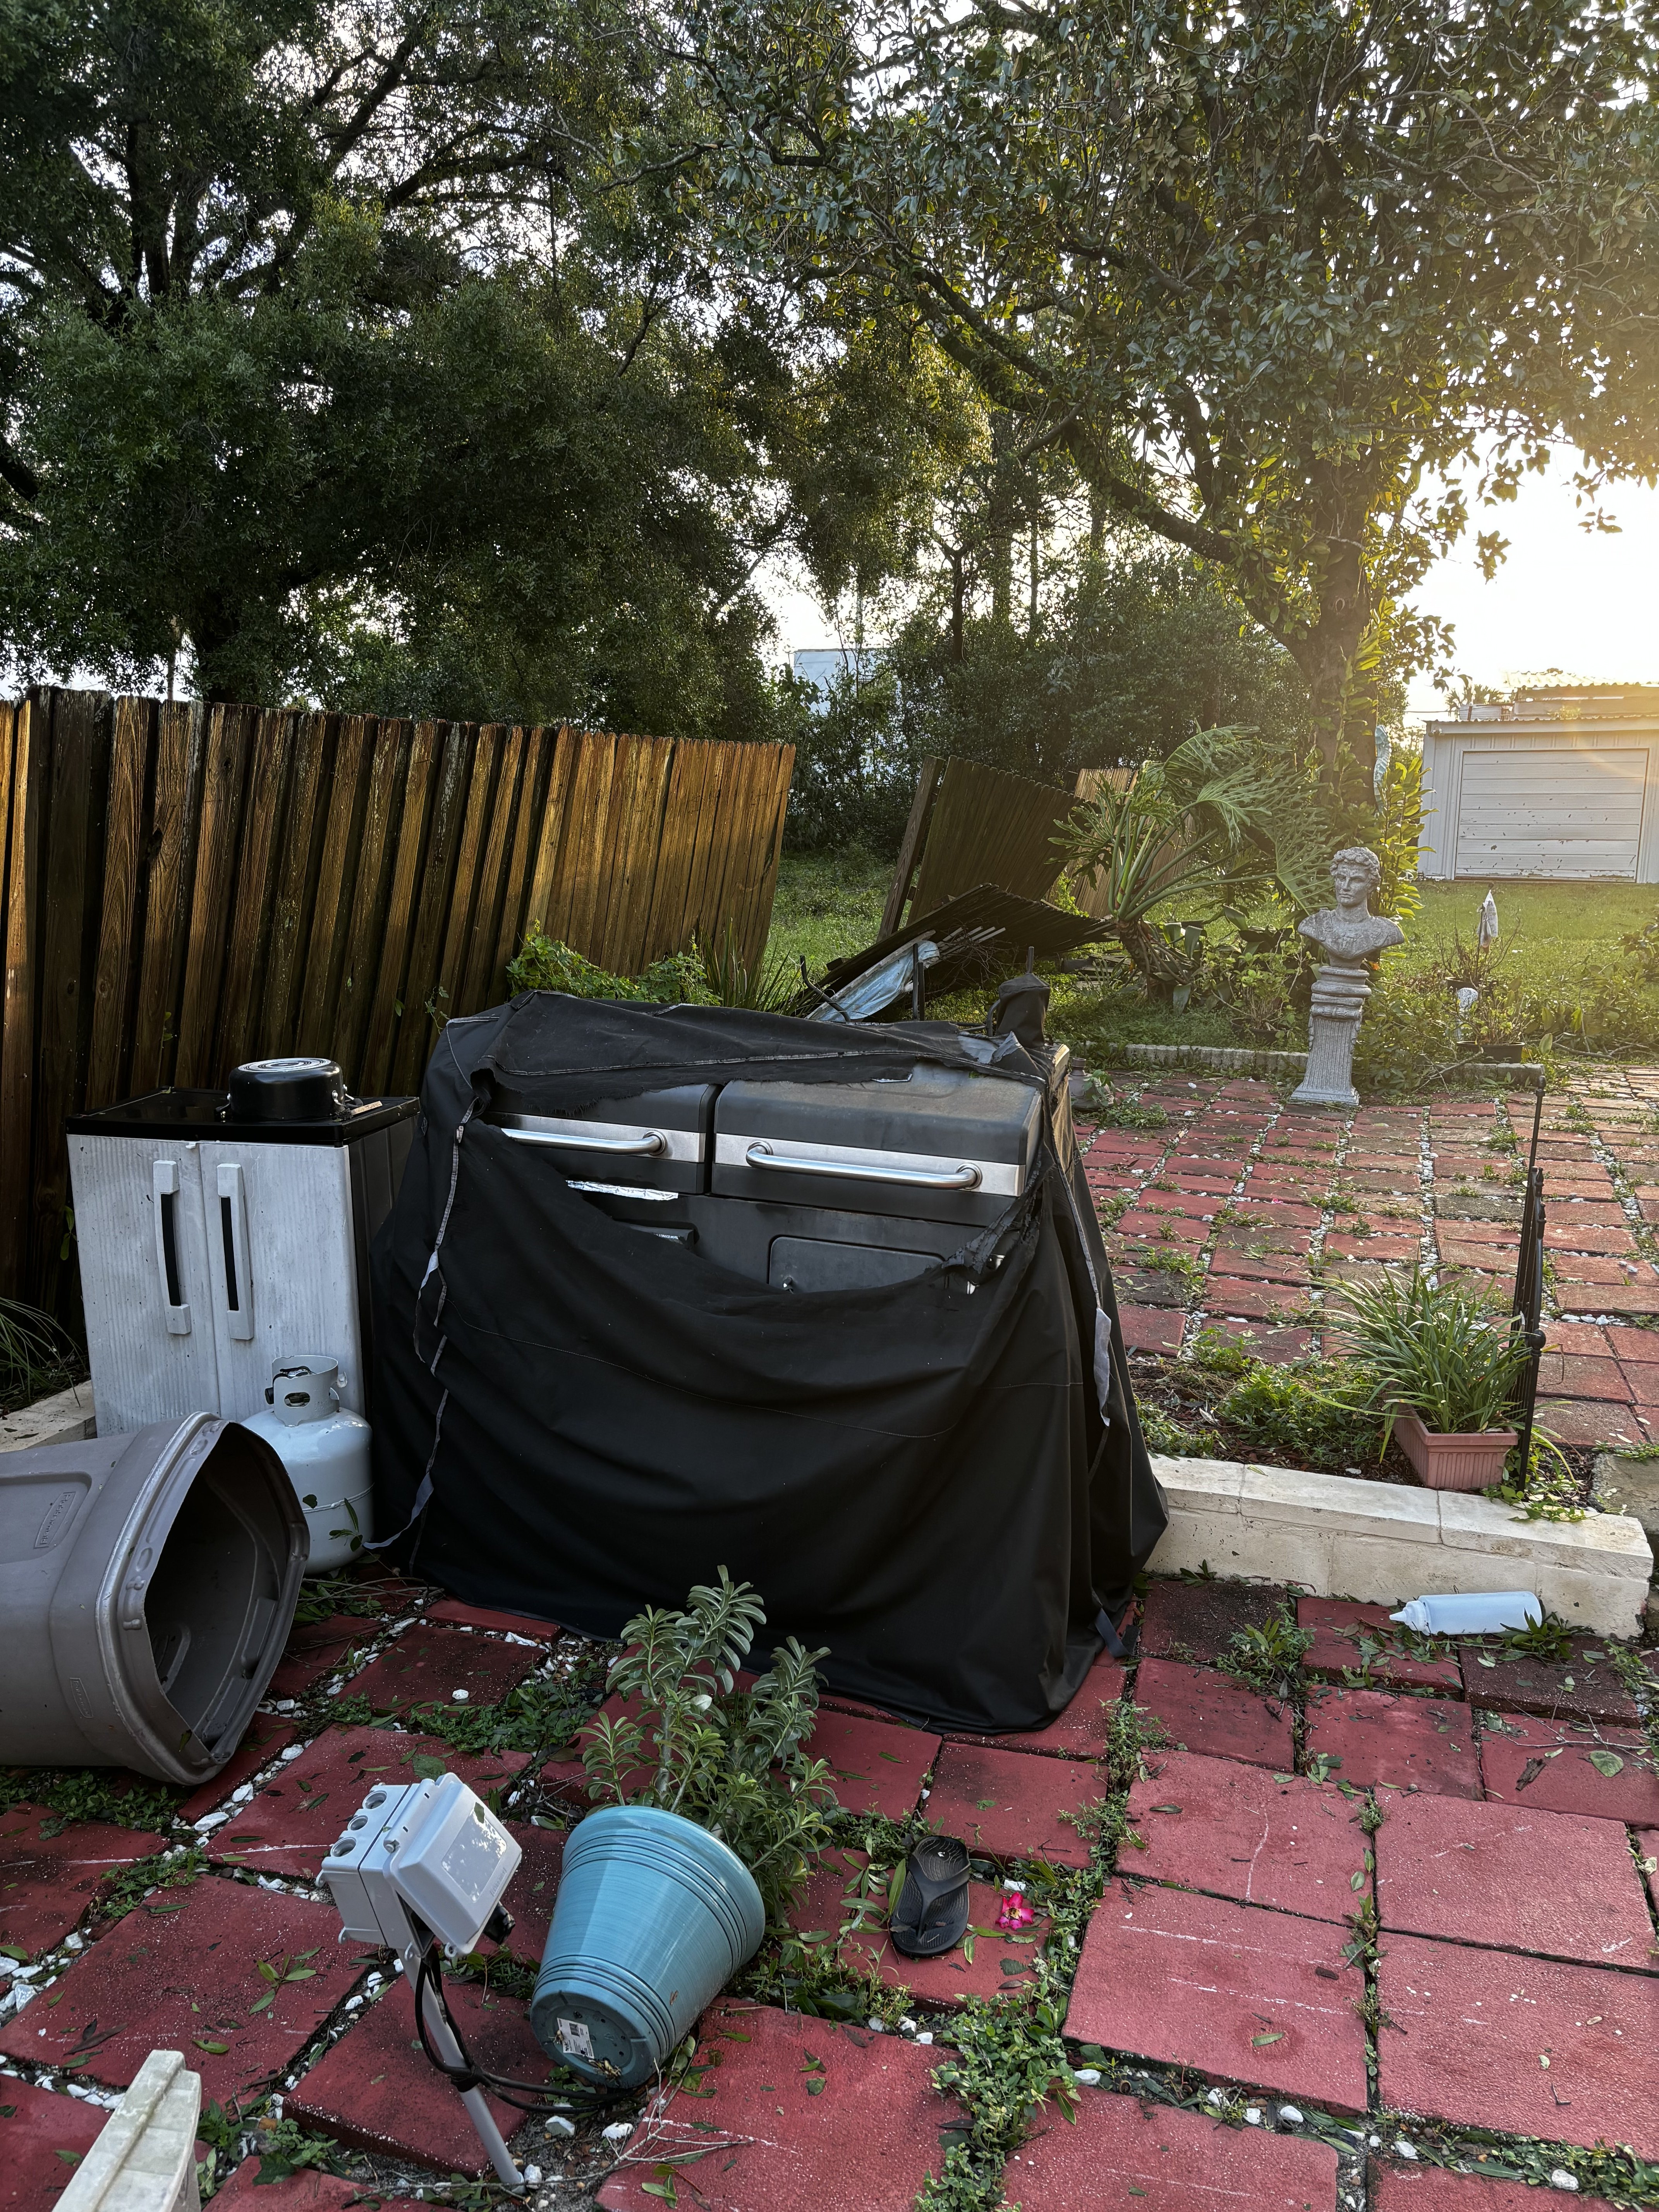
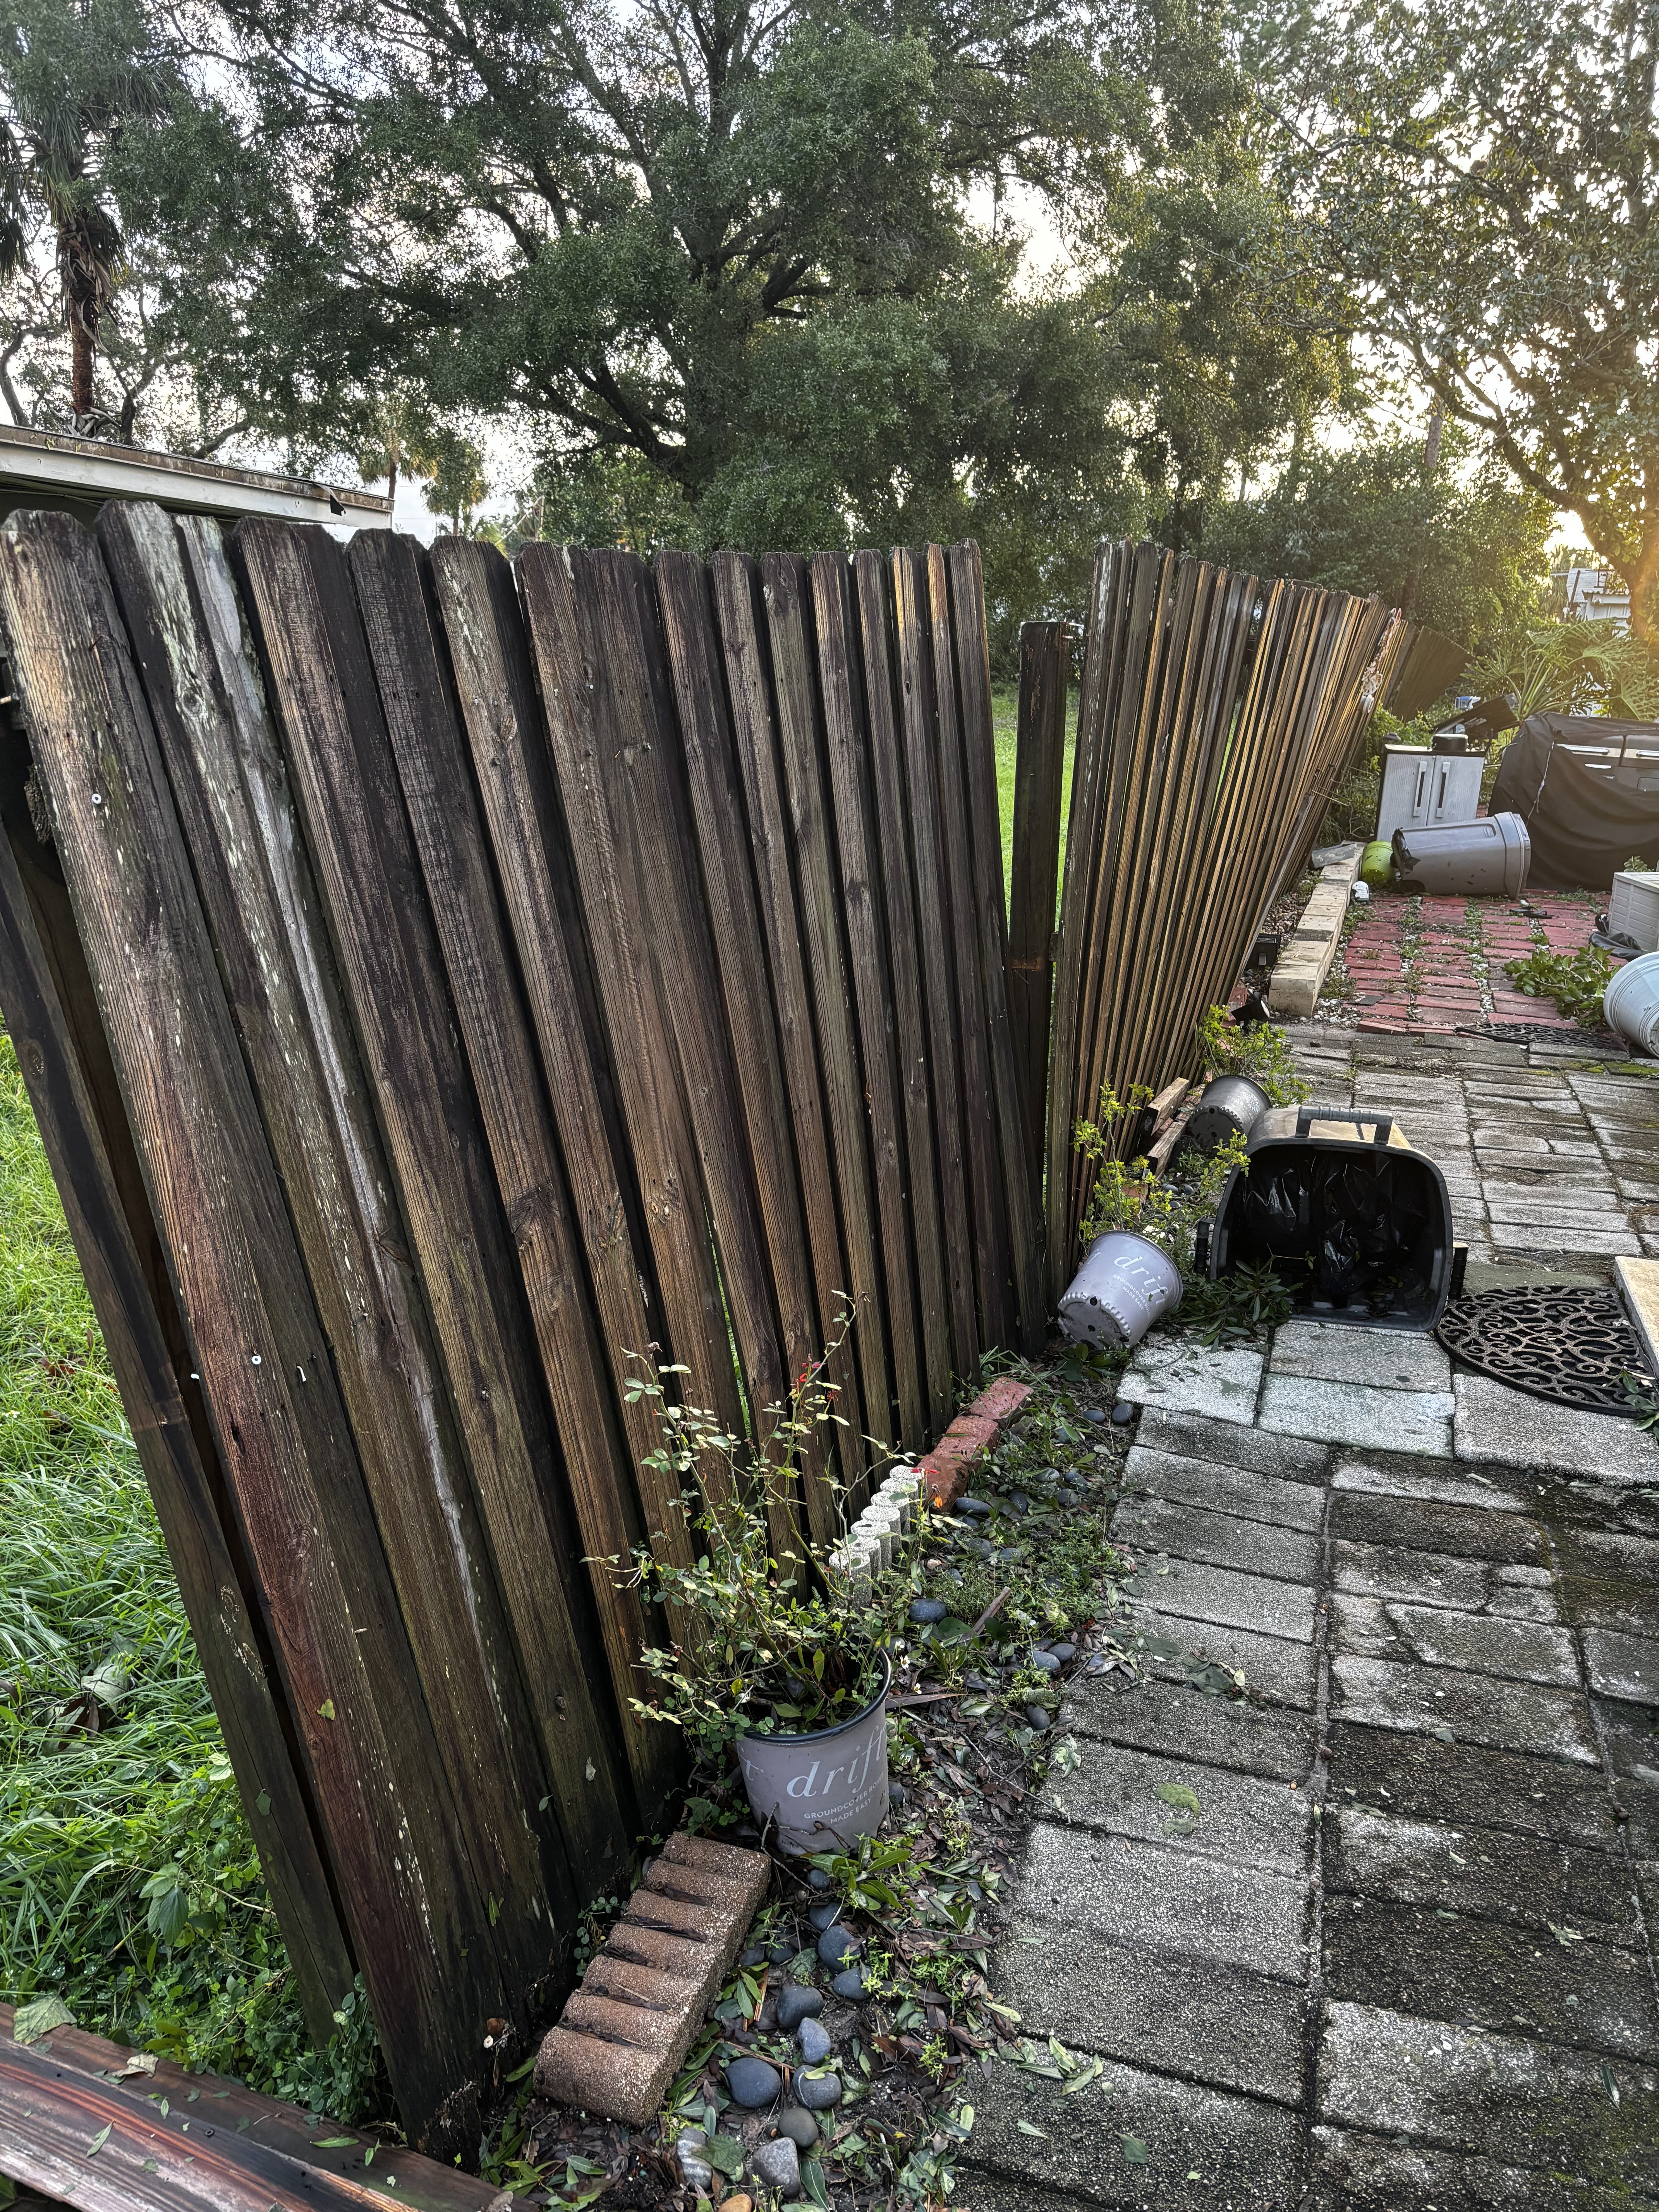
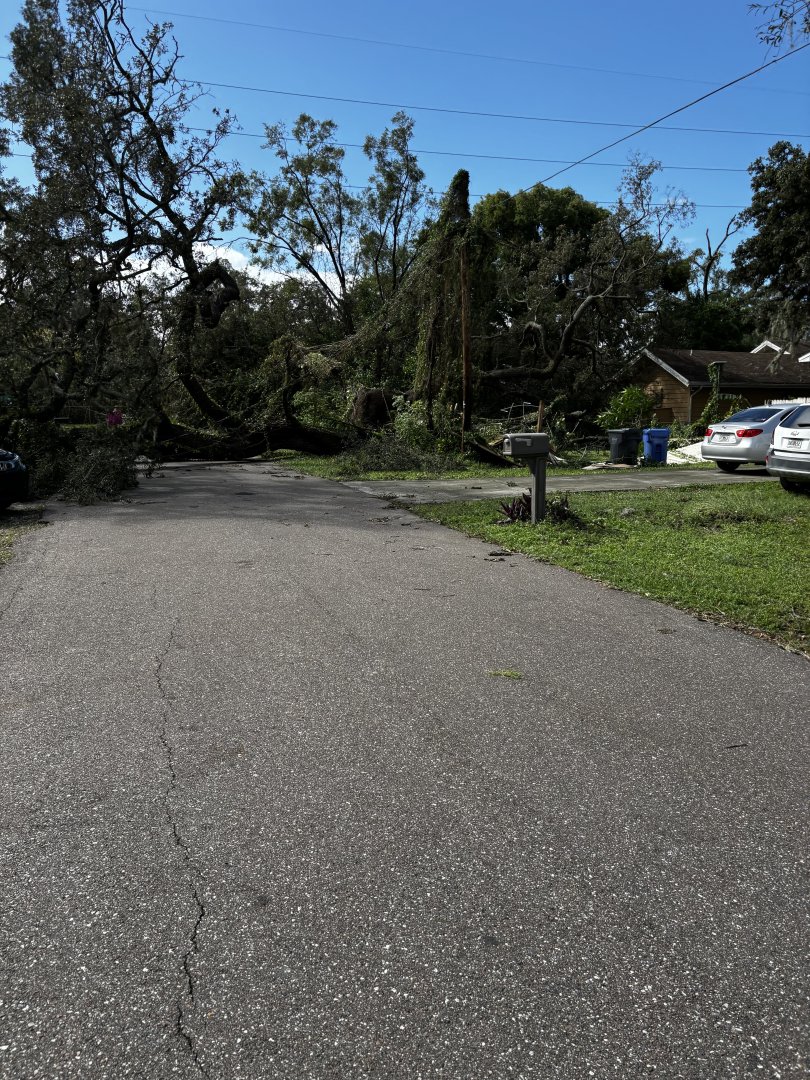
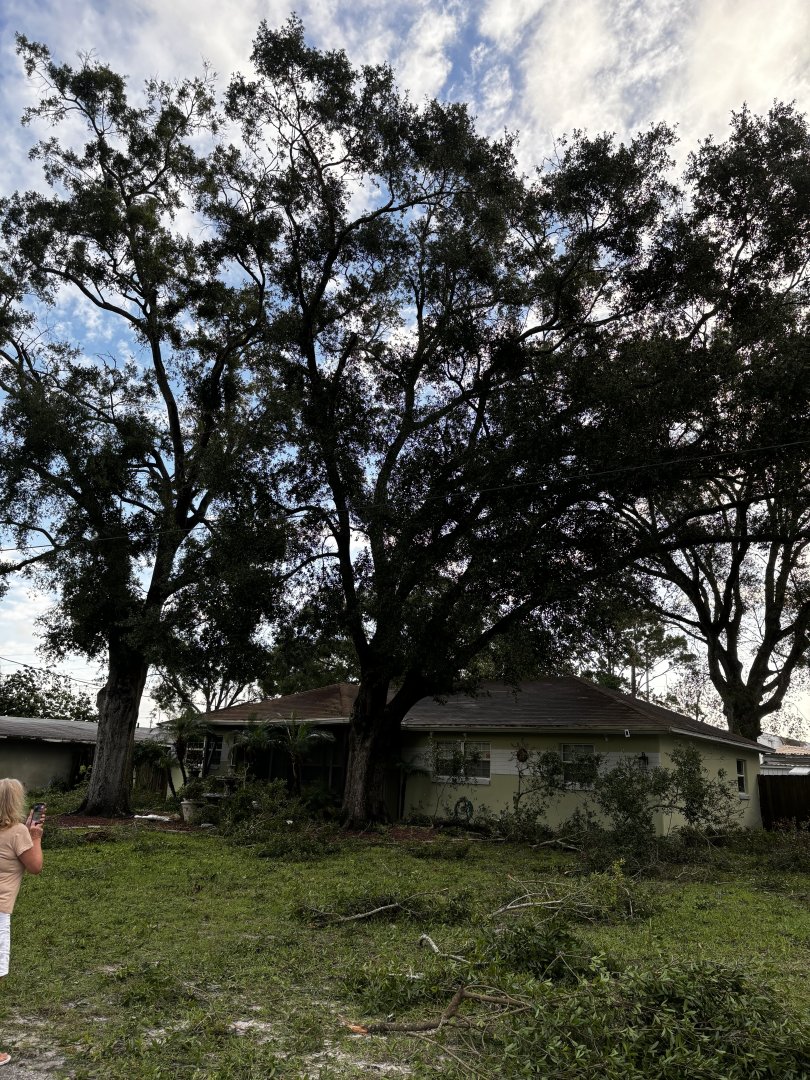
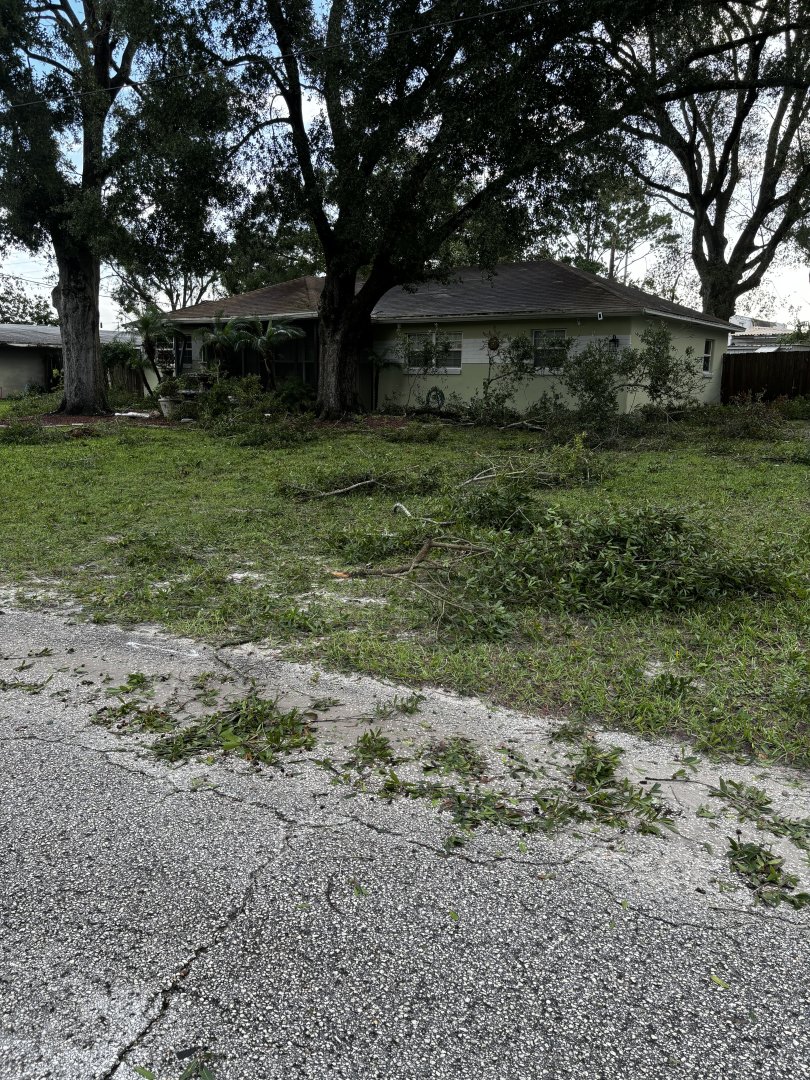
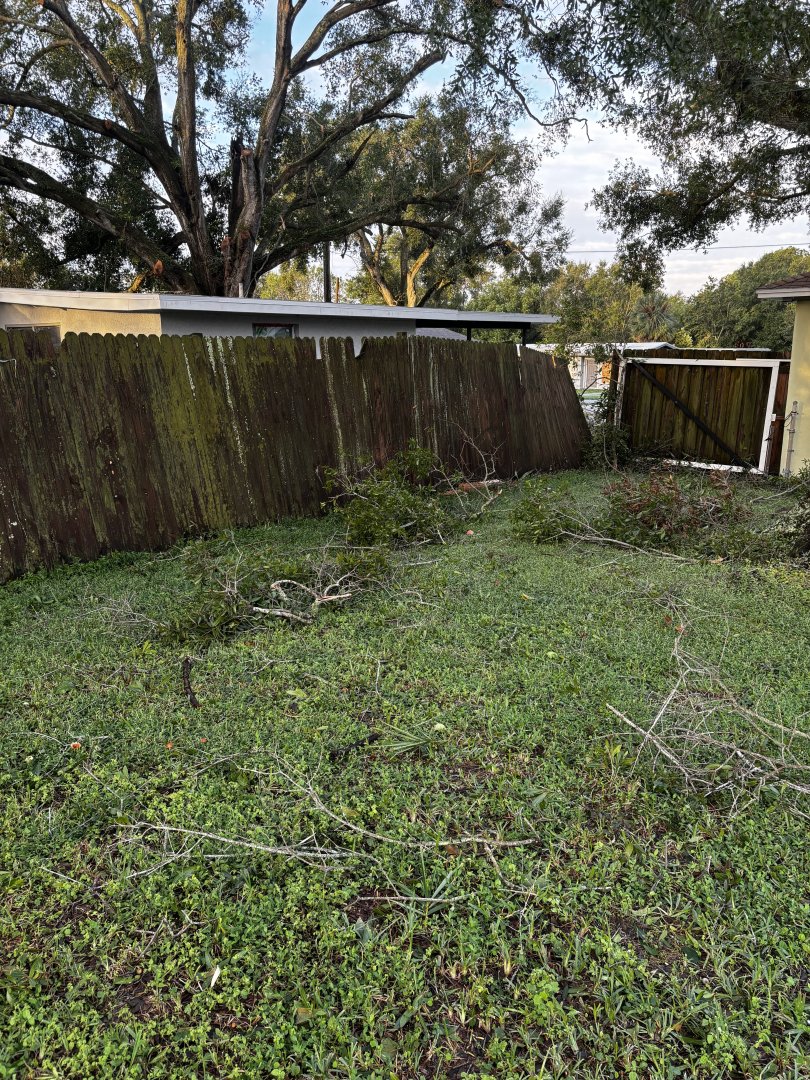
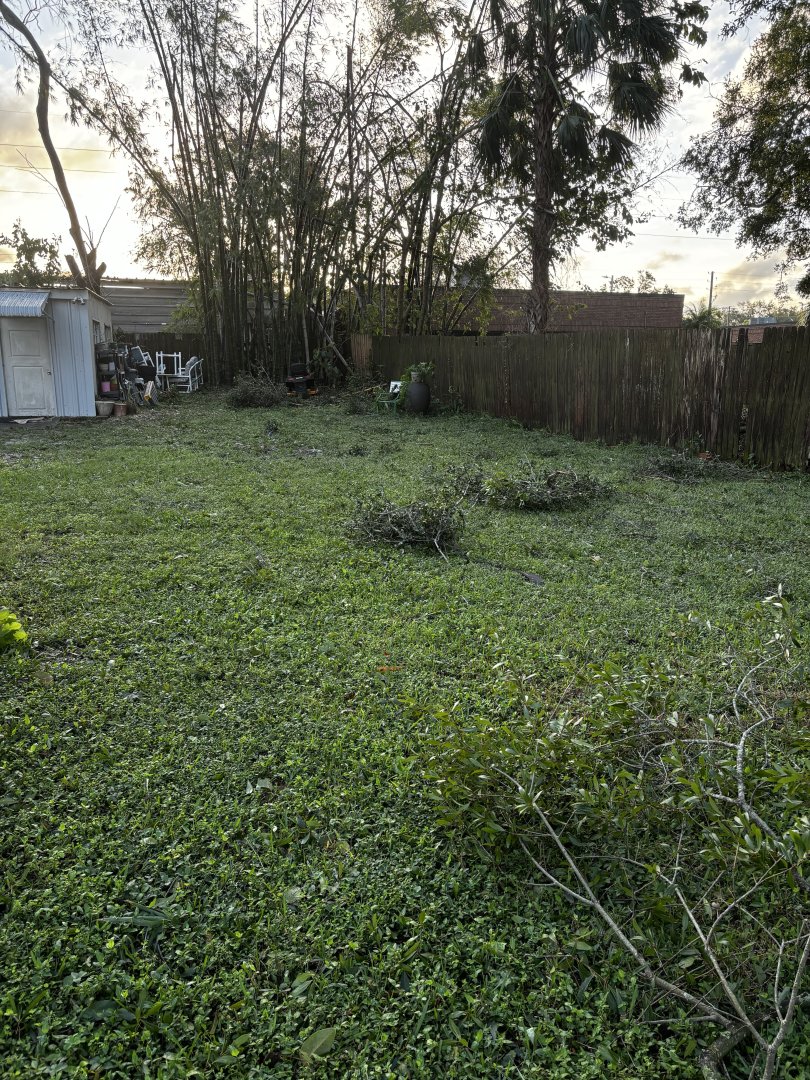
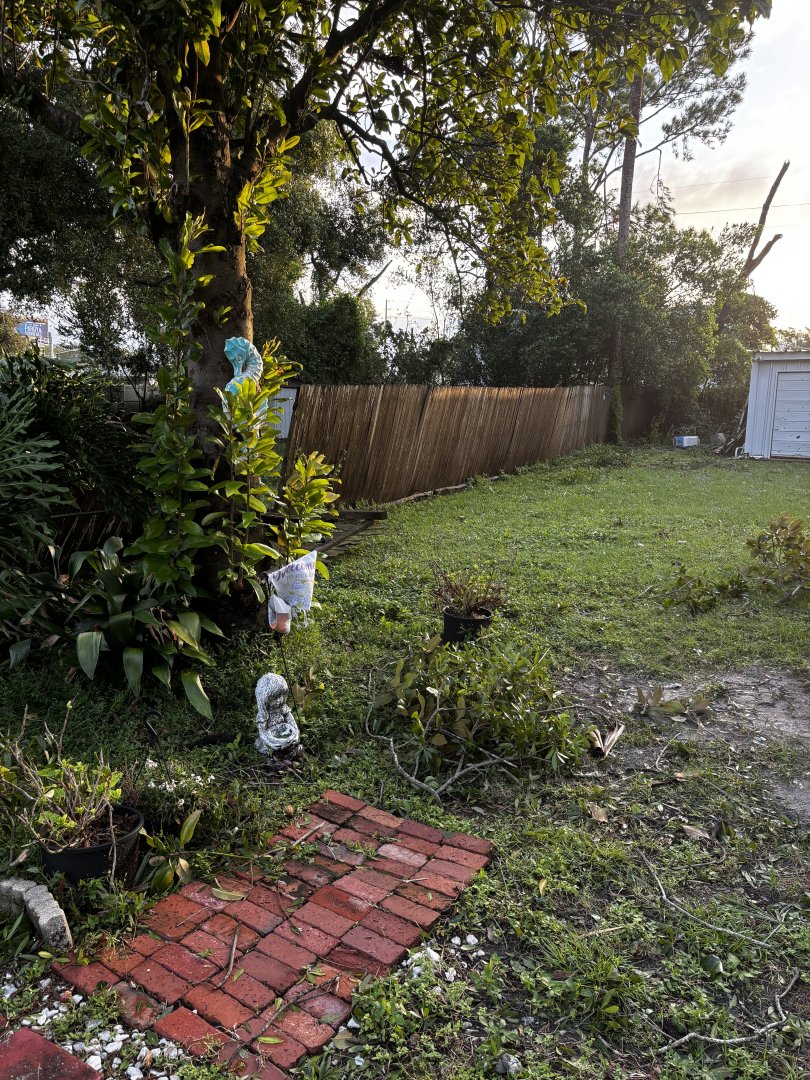
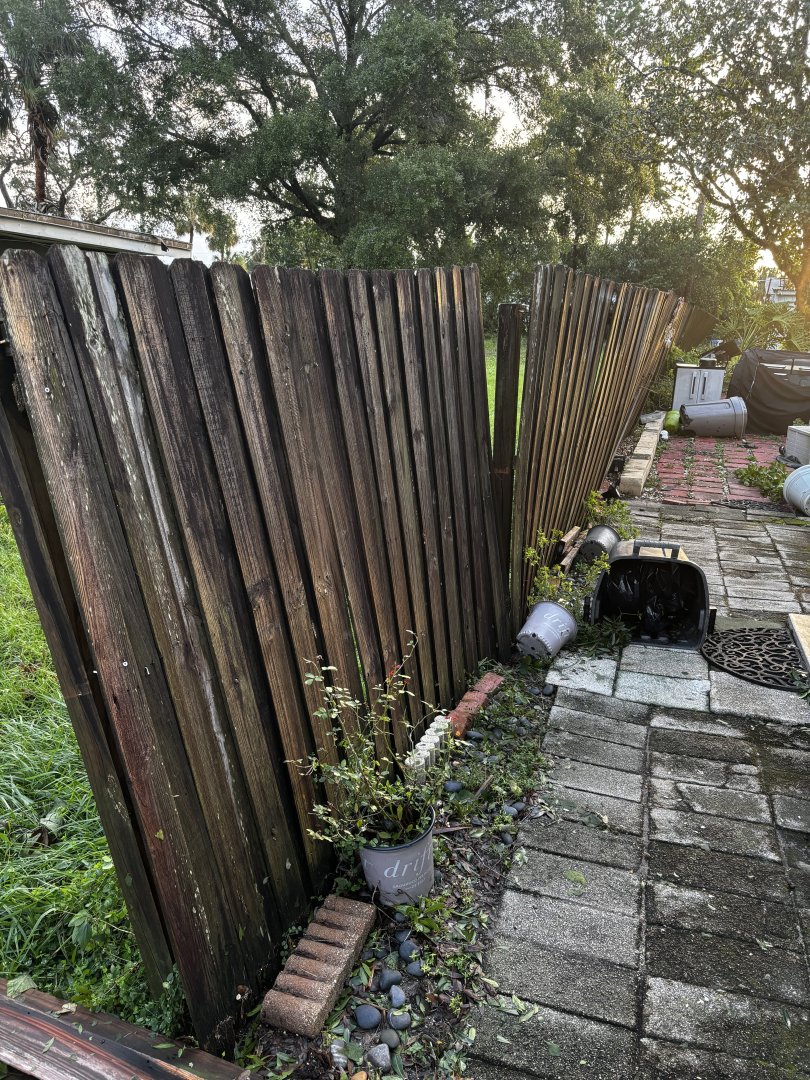
We made it through a long night safely. The wind was loud and constant for hours. Not sure of wind speeds but don’t doubt gusts exceeding 100 mph. My wife hated the noise of it. An unsettling whistle of sorts. First light revealed limbs down all over the place. Some shingles blown off the roof but no leaks. Privacy fence blown down, about 300 feet of it. Power is out. Running my generator. Chain sawed large limbs into smaller pieces drug it out to the roadside. Took a ride on the side by side around the neighborhood. Trees down all over the place. Localized flooding. Saw damaged homes everywhere. Lots of people out clearing their debris. Everyone is cleaning up already.


-
Big tornadoes popping off all over the place south of here. The worst weather is in the southern part of Florida thus far.
-
This is the storm report show I watch. It's live, real-time coverage.
-
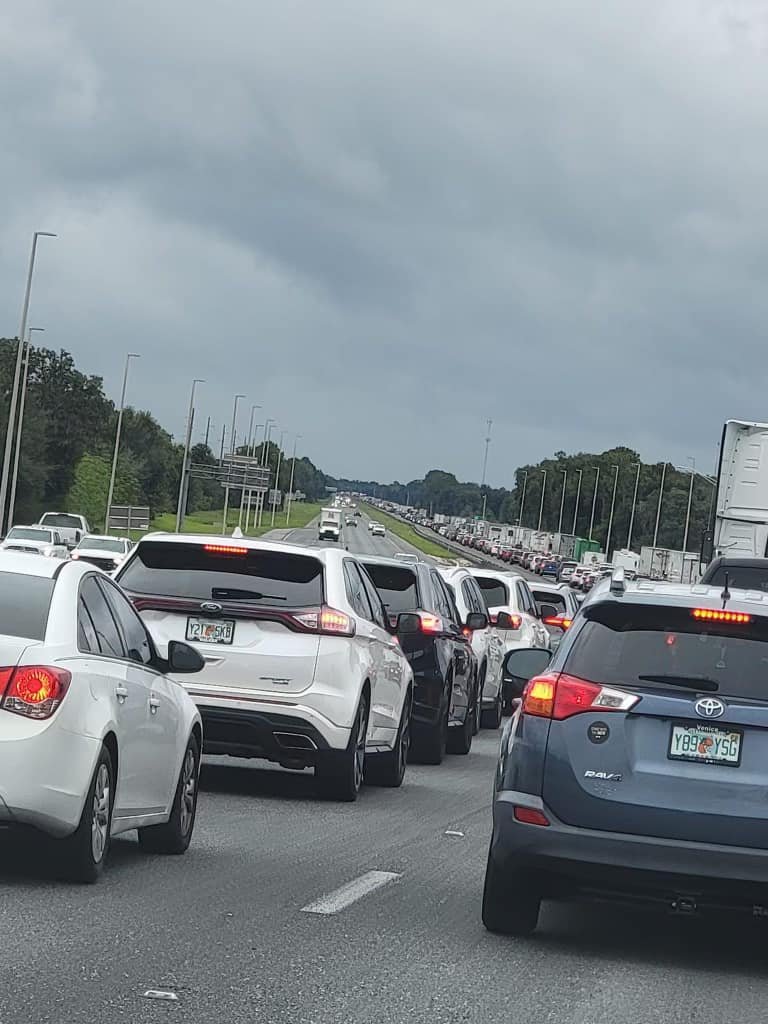
This is what it looked like yesterday on Interstate 75, 15 miles north of Tampa. All the people trying to evacuate. I didn't see any gas stations today who have gasoline in Tampa. I filled all my tanks up this past Saturday. No telling when gas stations might get fuel again, but it could be many days, depending on how much debris the hurricane causes.
-
Good website. I'll save that one. Thanks Jav.
-
I am not in an evacuation zone. I'm in flood zone classification X, which means a .2 chance in 500 (or less) of flooding. My main concern is wind and flying debris.
-
This is the meteorologist I follow. Opinions from experts vary. The prediction models all vary, too.
-
There are variables. One involves how soon the cool jet stream impacts the system turn to a more southerly track that takes it partially over the Yucatan Peninsula. If that happens it could significantly change the storm intensity as it makes a final approach to the west coast of Fla. we will know more tomorrow.
-
My favorite meteorologist, Ryan Hall, predicts the storm will not develop as a dangerous one, but lots of rain. My motto is, prepare for the worst and hope for the best.
-
Wow, great news to hear from you, Ken. The last time a cat3 hurricane landed a direct hit on Tampa Bay was 1921, over a hundred years ago. In those days, people had enough sense not to build on the shoreline. The storm surge on that event was over 20 feet. If this storm continues on this track at a level of intensity that is being predicted, it will be an event of greater magnitude and severity than any other ever experienced here before. TROPICAL STORM MILTON (noaa.gov)
-
My niece and her children live in that area. They have no electric power, not communication lines, no running water, no way to access bank accounts. Major roads are completely washed out. It is a desperate situation. She is a schoolteacher, and their school was totally demolished. Nowhere for the children to go to school until something can be arranged as an alternative site. Local businesses have had to resort to a manual set of books and lines of credit for people to trade for essential supplies. Very limited fuel supplies. It's bad. Real bad.
-
Has anyone heard from Ken (Canute)? That area got hit so hard, I'm worried about him.
-
Great subject material, Jav. Your cockpit looks super!
-
What a beauty. She looks very scale and authentic. You did an outstanding job on her. Something to be proud of.
-
That surge is devastating and deadly.
-
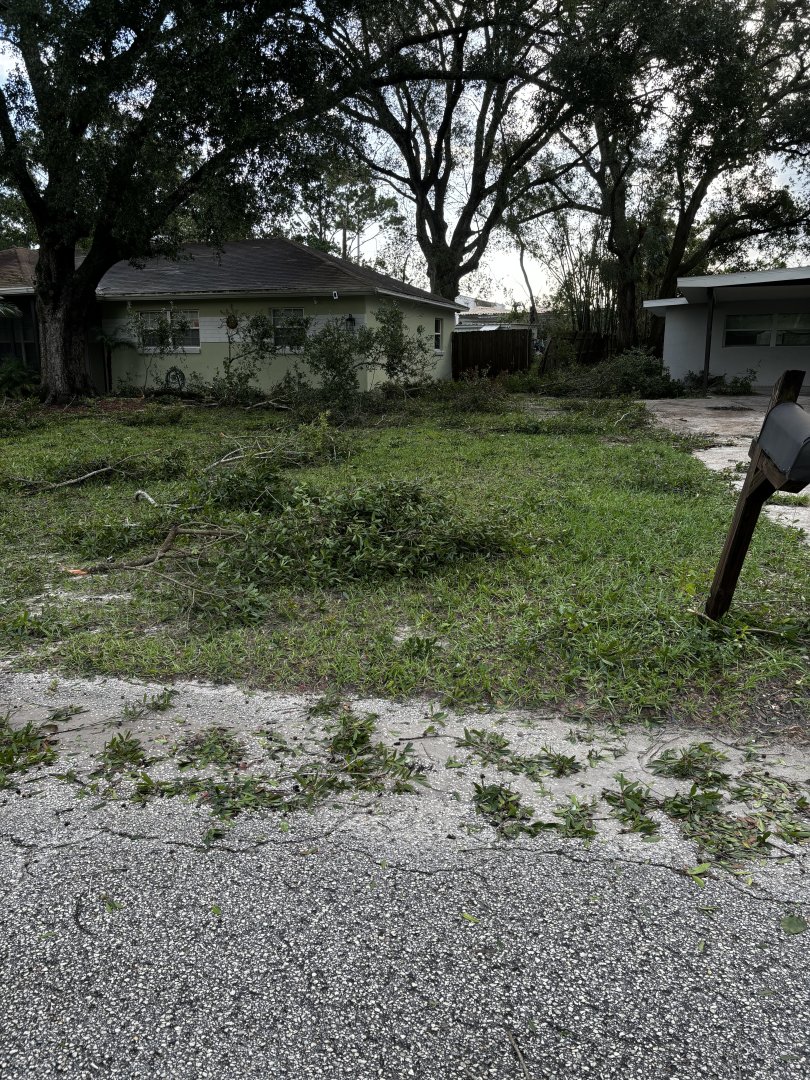
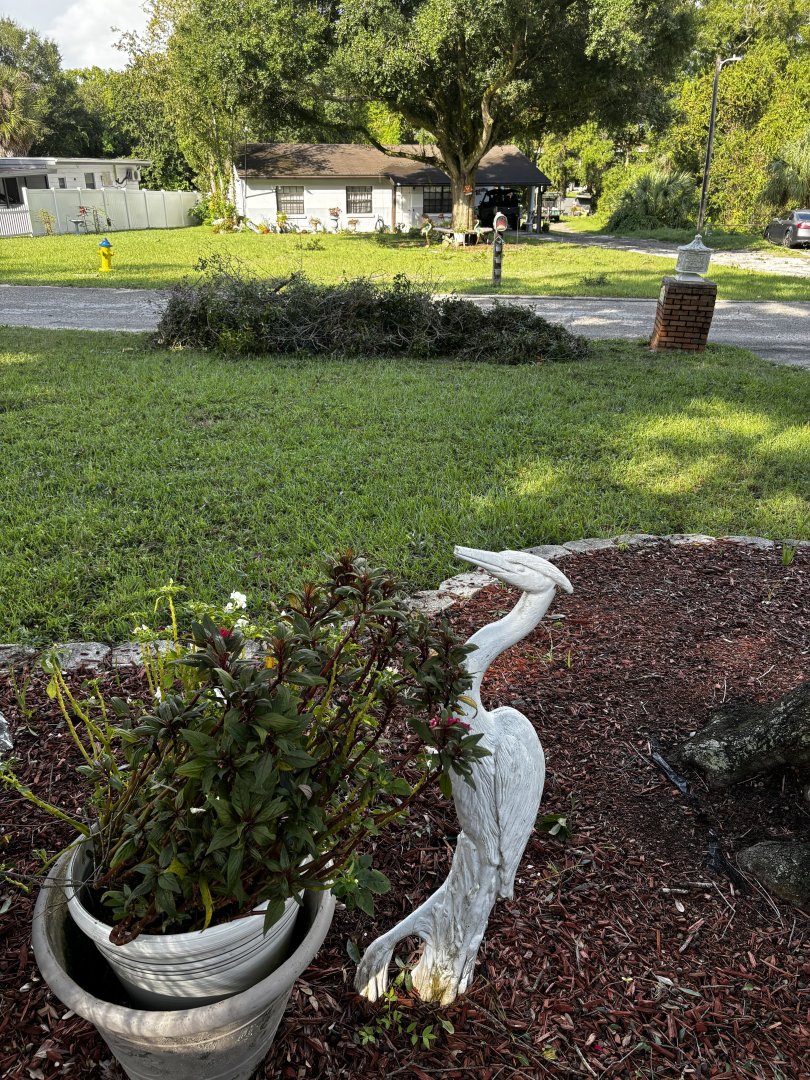
Picked up this pile from the front yard this morning. There’s twice as much in the back yard. More rain is inbound today.
- 264 replies
-
- 11
-

-
Storm surge is the greatest threat from Hurricanes. Much greater threat than wind. The old saying is, run from the water, hide from the wind.