HOLIDAY DONATION DRIVE - SUPPORT MSW - DO YOUR PART TO KEEP THIS GREAT FORUM GOING! (Only 13 donations so far - C'mon guys!)
×

CDW
-
Posts
7,742 -
Joined
-
Last visited
Content Type
Profiles
Forums
Gallery
Events
Everything posted by CDW
-
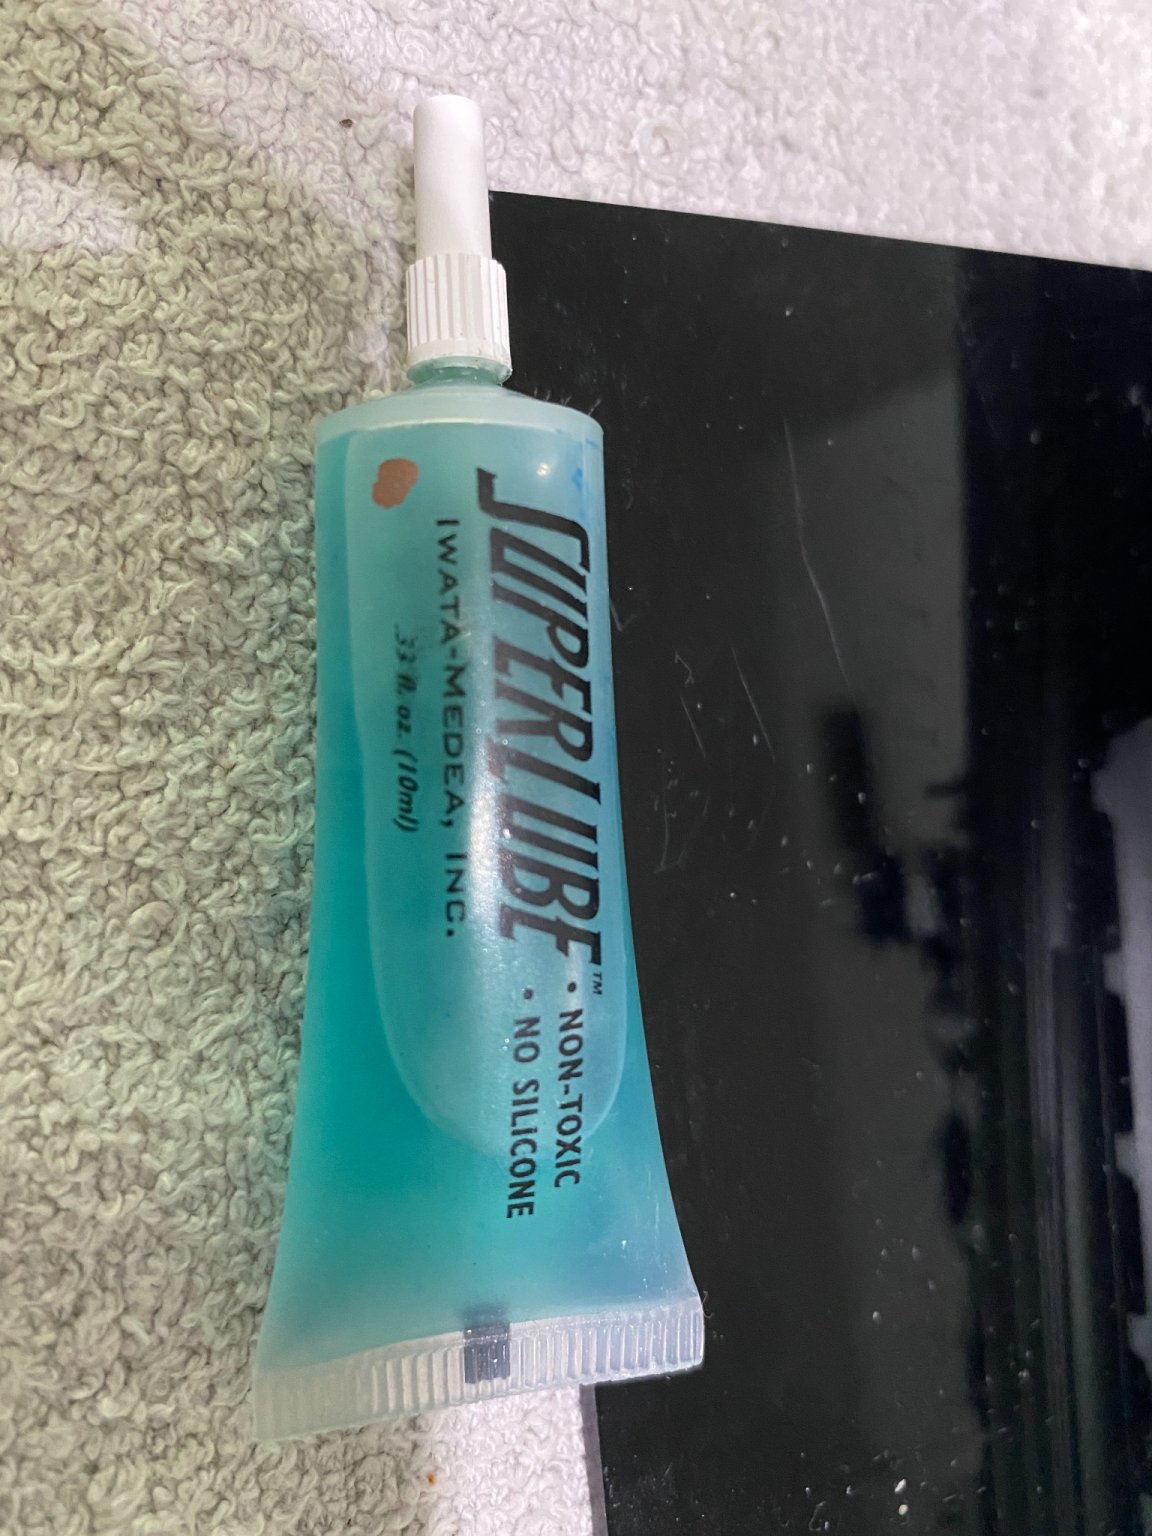
 I use this Iwata product for lubrication of my airbrushes as I reassemble them after cleaning. In very light quantities.
-
The very best spray cans I ever used were of DuPont automotive lacquer paints, but I have not seen those cans available in many years. An adjustable flow nozzle sounds very unique. I am not familiar with any spray paint cans that have this feature, but I am going to have a look to see.
- 225 replies
-
- 5
-

-
- I Love Kit
- Hood
- (and 2 more)
-
Whether you buy one pre-made, or make one yourself, you will want it to have lights, a turn table, and a fan that vents the air to blow outside your window using ductwork as seen in this item advertisement from Amazon. Amazon.com: VIVOHOME Portable Airbrush Paint Spray Booth Kit with 3 LED Lights Turn Table and Filter Hose for Model Cake Craft Nail Toy Part
-
Alan I should have mentioned to be sure to buy one that matched your print bed size/range. Once I started using that pad, it solved my issue of the print coming off the print plate. I tried glue sticks, hair spray, and just about everything else, to no avail. One day I visited a 3D print shop here in Tampa and they turned me on to the need for a pad. That did the trick. Hate to say it in fear I may jinx you, but filament coming off the spool smoothly is another area of failure. Several times I had issues where the filament would get hung up, similar to what happens on a fishing reel...a bird's nest backlash sort of thing. We have to trust the filament has been wound onto the spool from the factory so as to not be "crossed". I think it's very easy to accidentally get the filament out of sorts when you finish one print job and use the same spool to start another print. Unless great care is taken, that filament can become wound underneath itself and as a print job progresses, it comes to a point where it can no longer come off the spool.
- 460 replies
-
- 7
-
-
- Finished
- Flower-class
- (and 1 more)
-
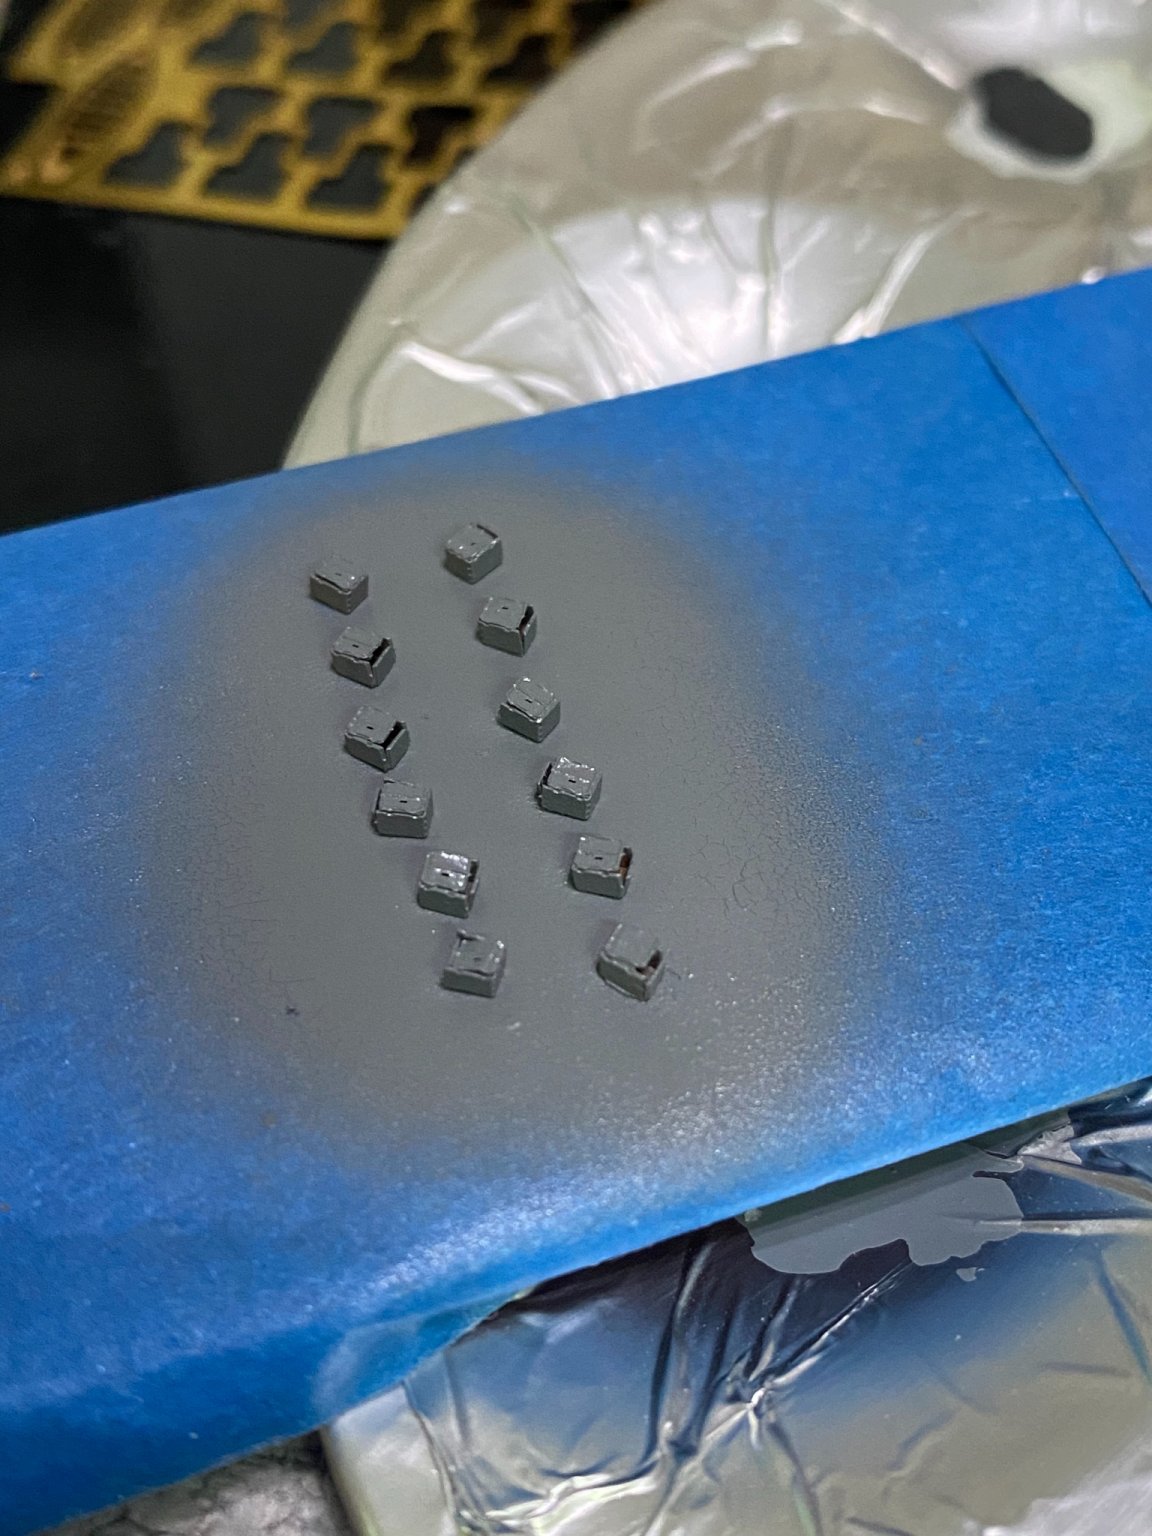
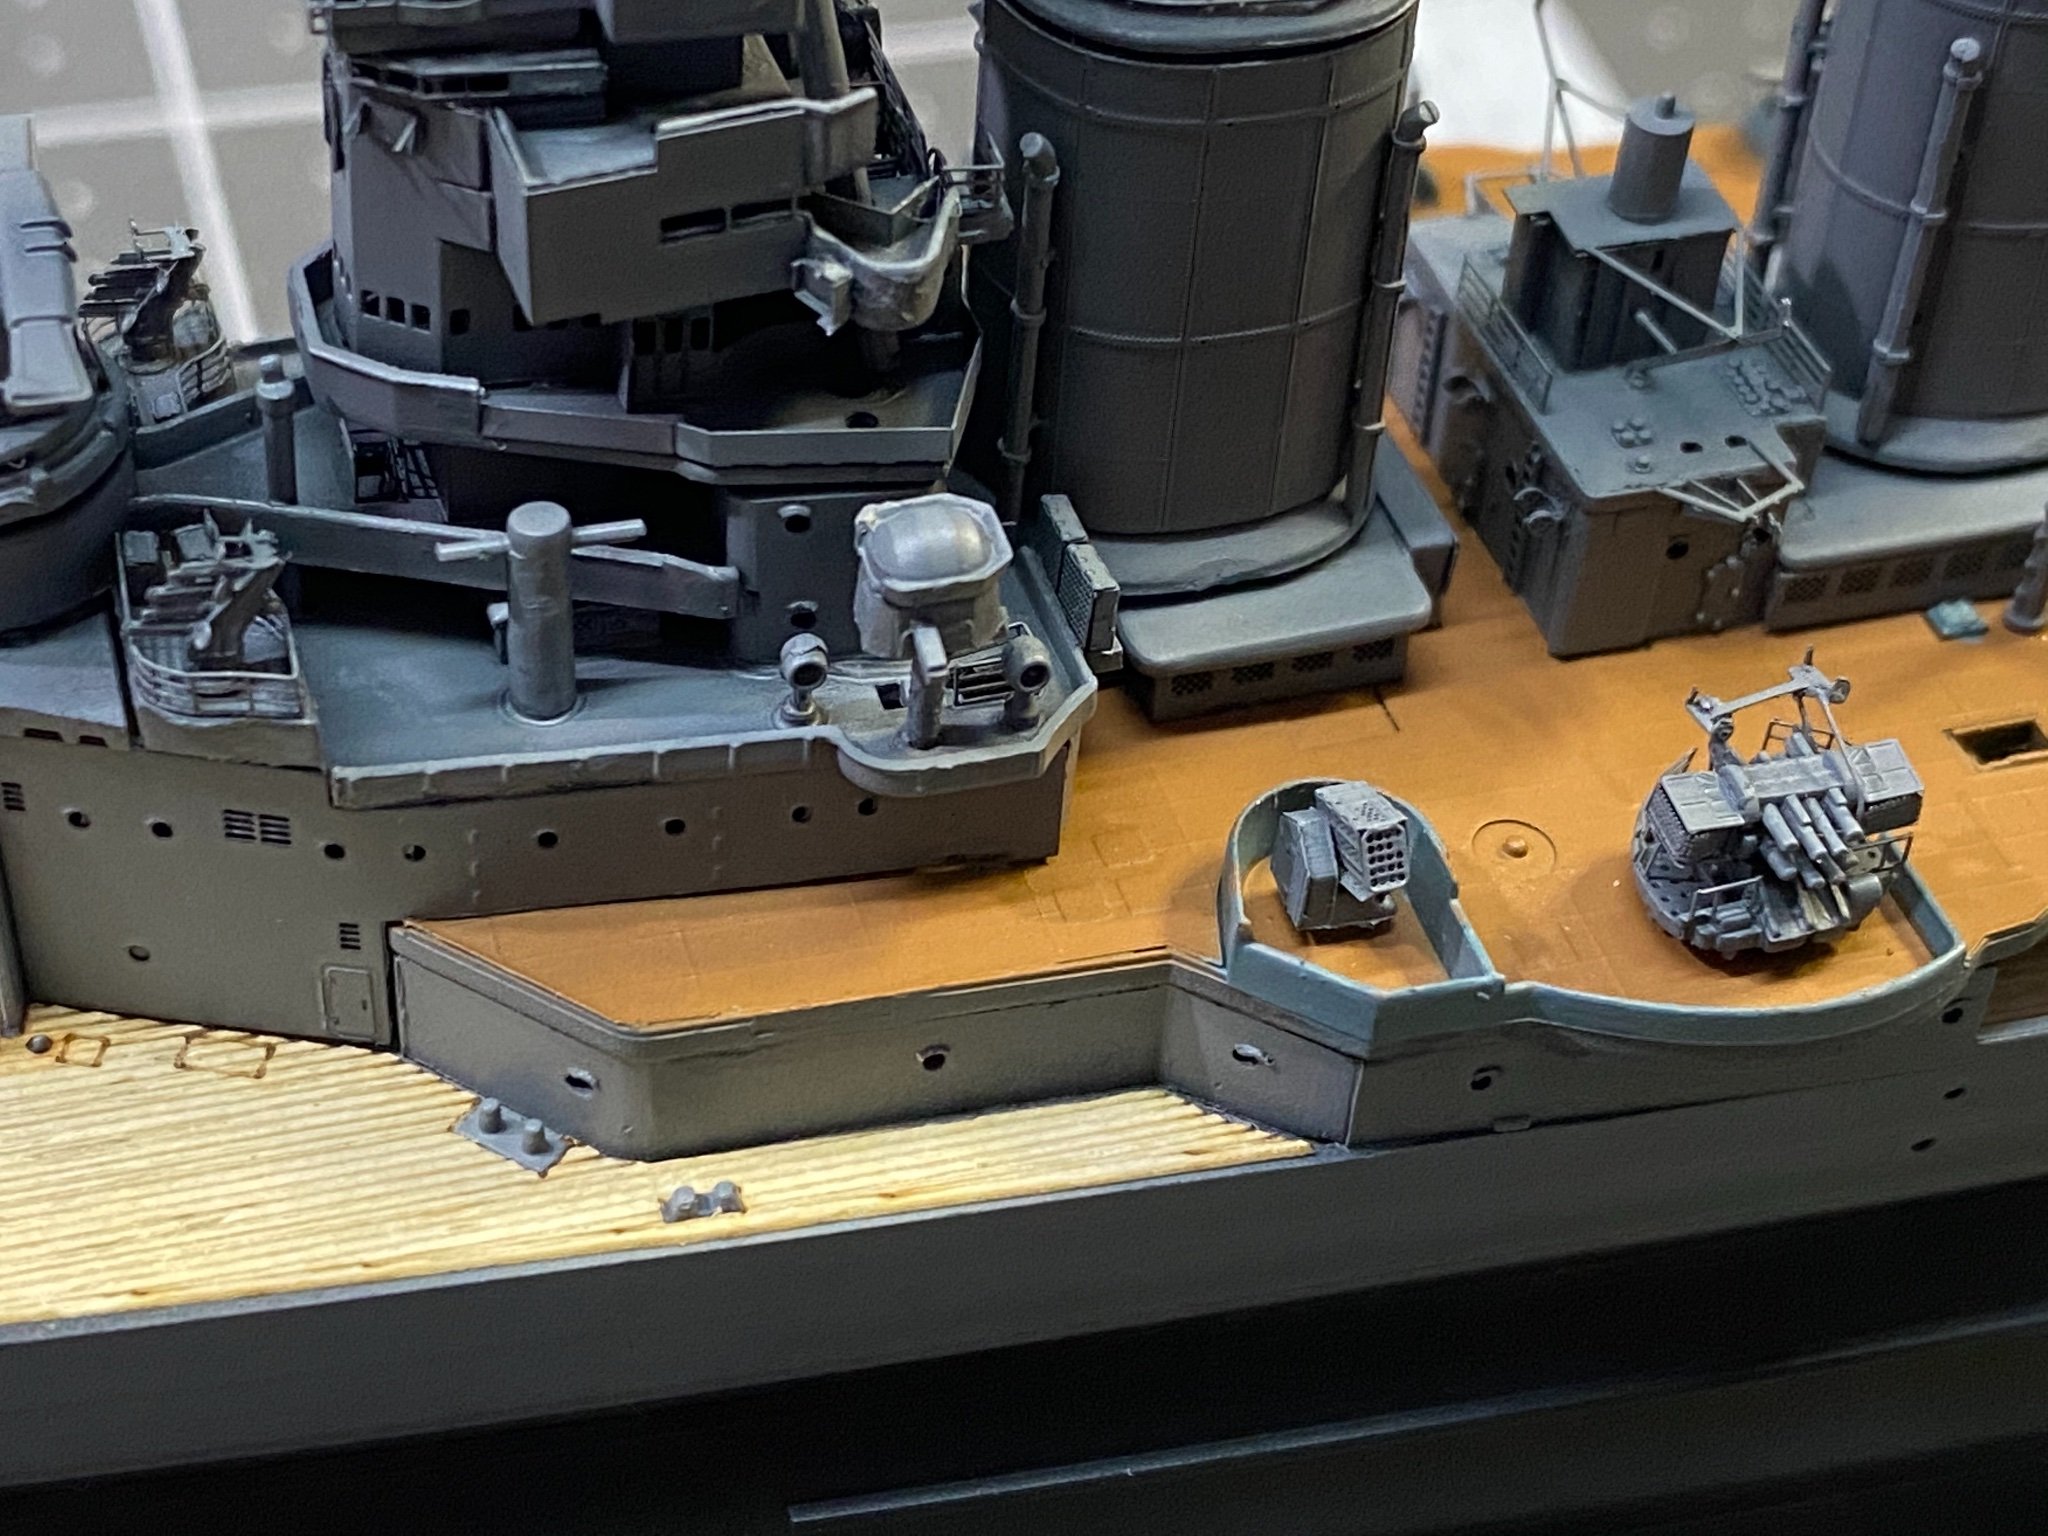
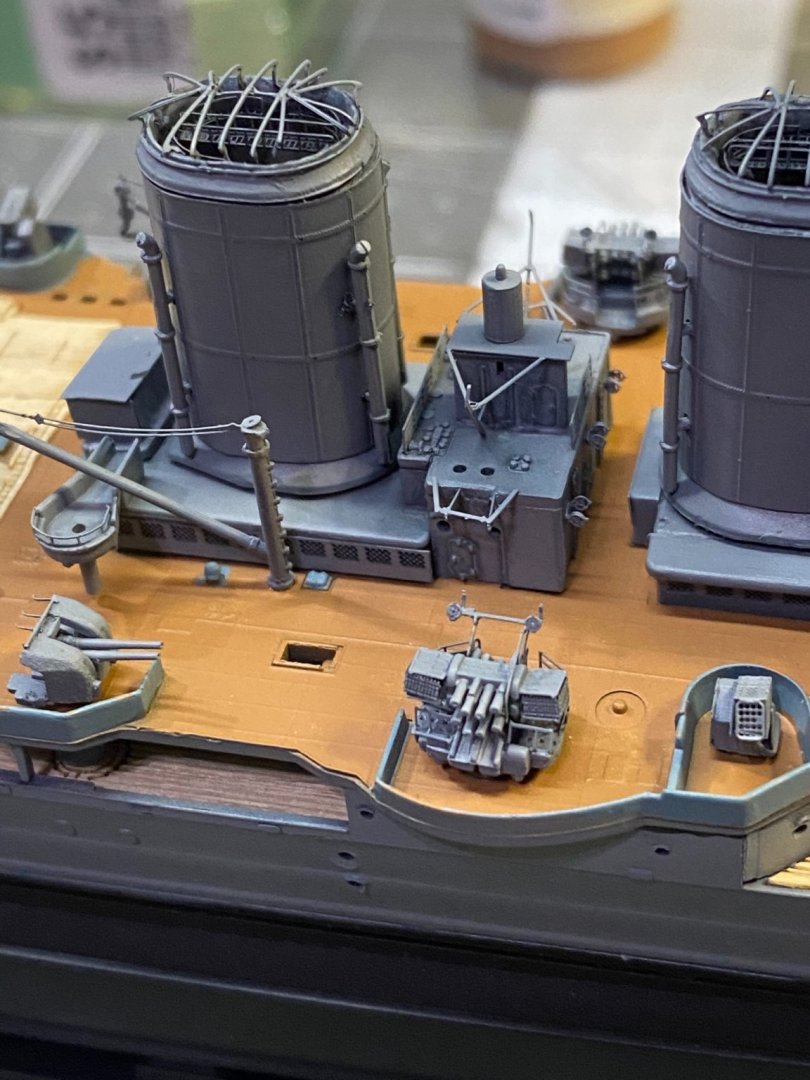
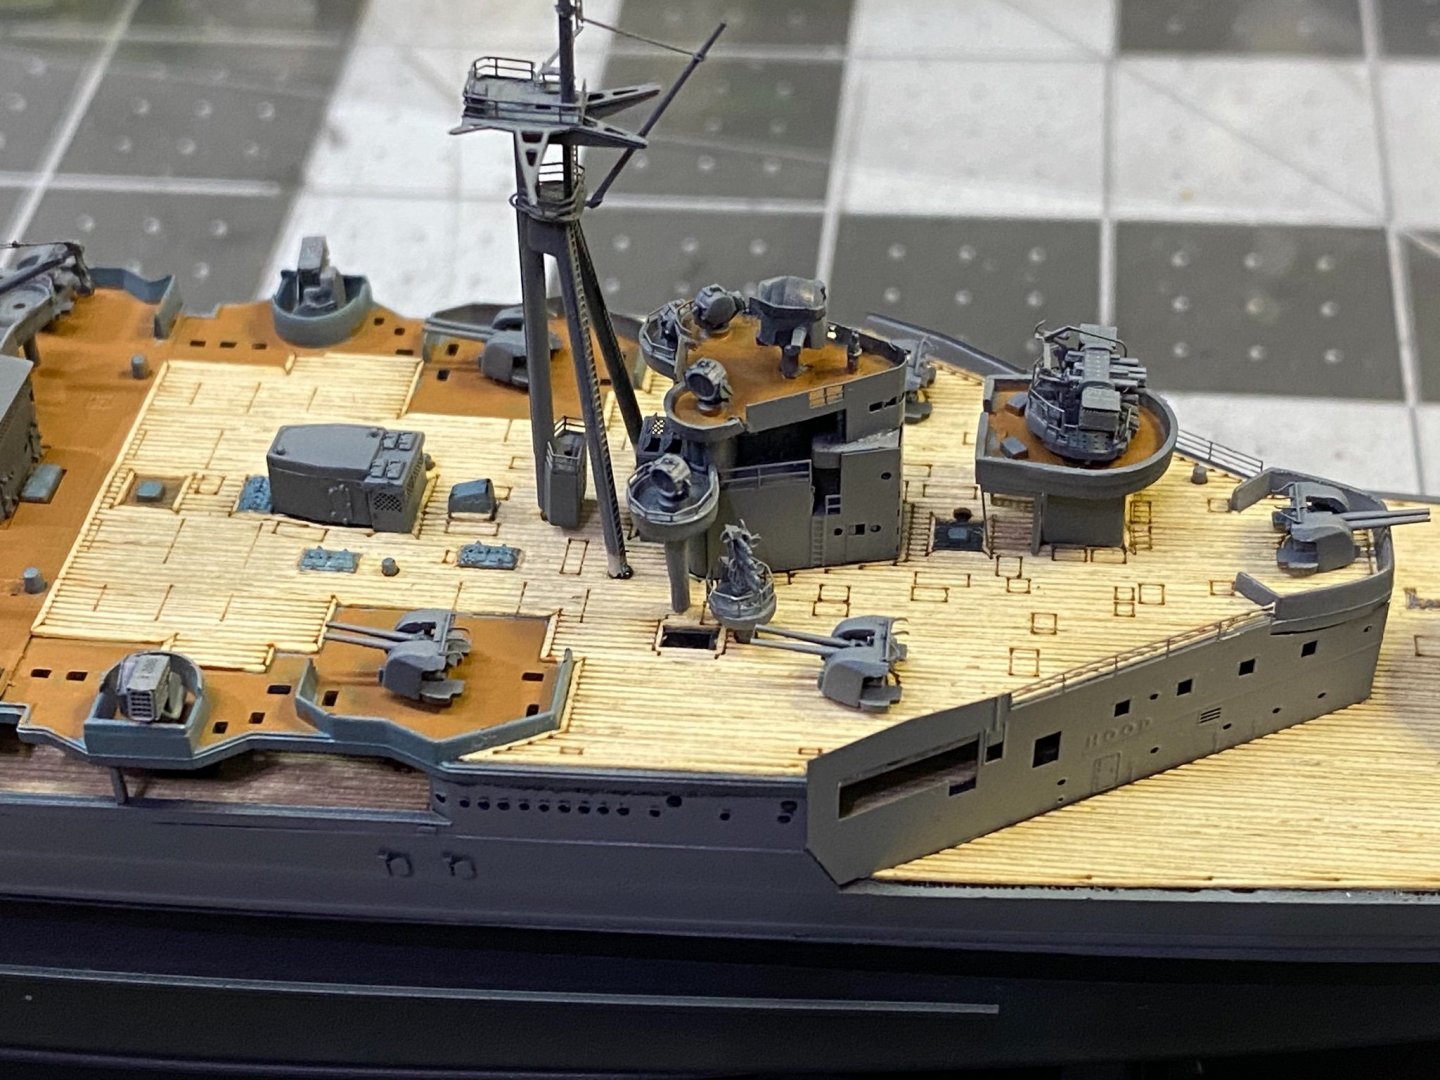
Oh, by the way, I tried out Mig Ammo One Shot primer for the first time on the photo etch ammo lockers seen in the previous photos. The primer is (gray or black) acrylic, and it seems to cover photo etch very well with no tendency to peel or flake off.
- 225 replies
-
- 8
-
-
- I Love Kit
- Hood
- (and 2 more)
-
One inexpensive change you can make is to use a mirror instead of the glass bed that came with your machine. Mirror glass is much flatter and less likely to be deformed. Also, cannot emphasize enough how much difference a build pad can make. Like this for instance: 3D Printer Magnetic?Hot Bed Sticker Pads for Ender-3 Build Surface 235 X 235 MM | eBay
- 460 replies
-
- 7
-
-
- Finished
- Flower-class
- (and 1 more)
-
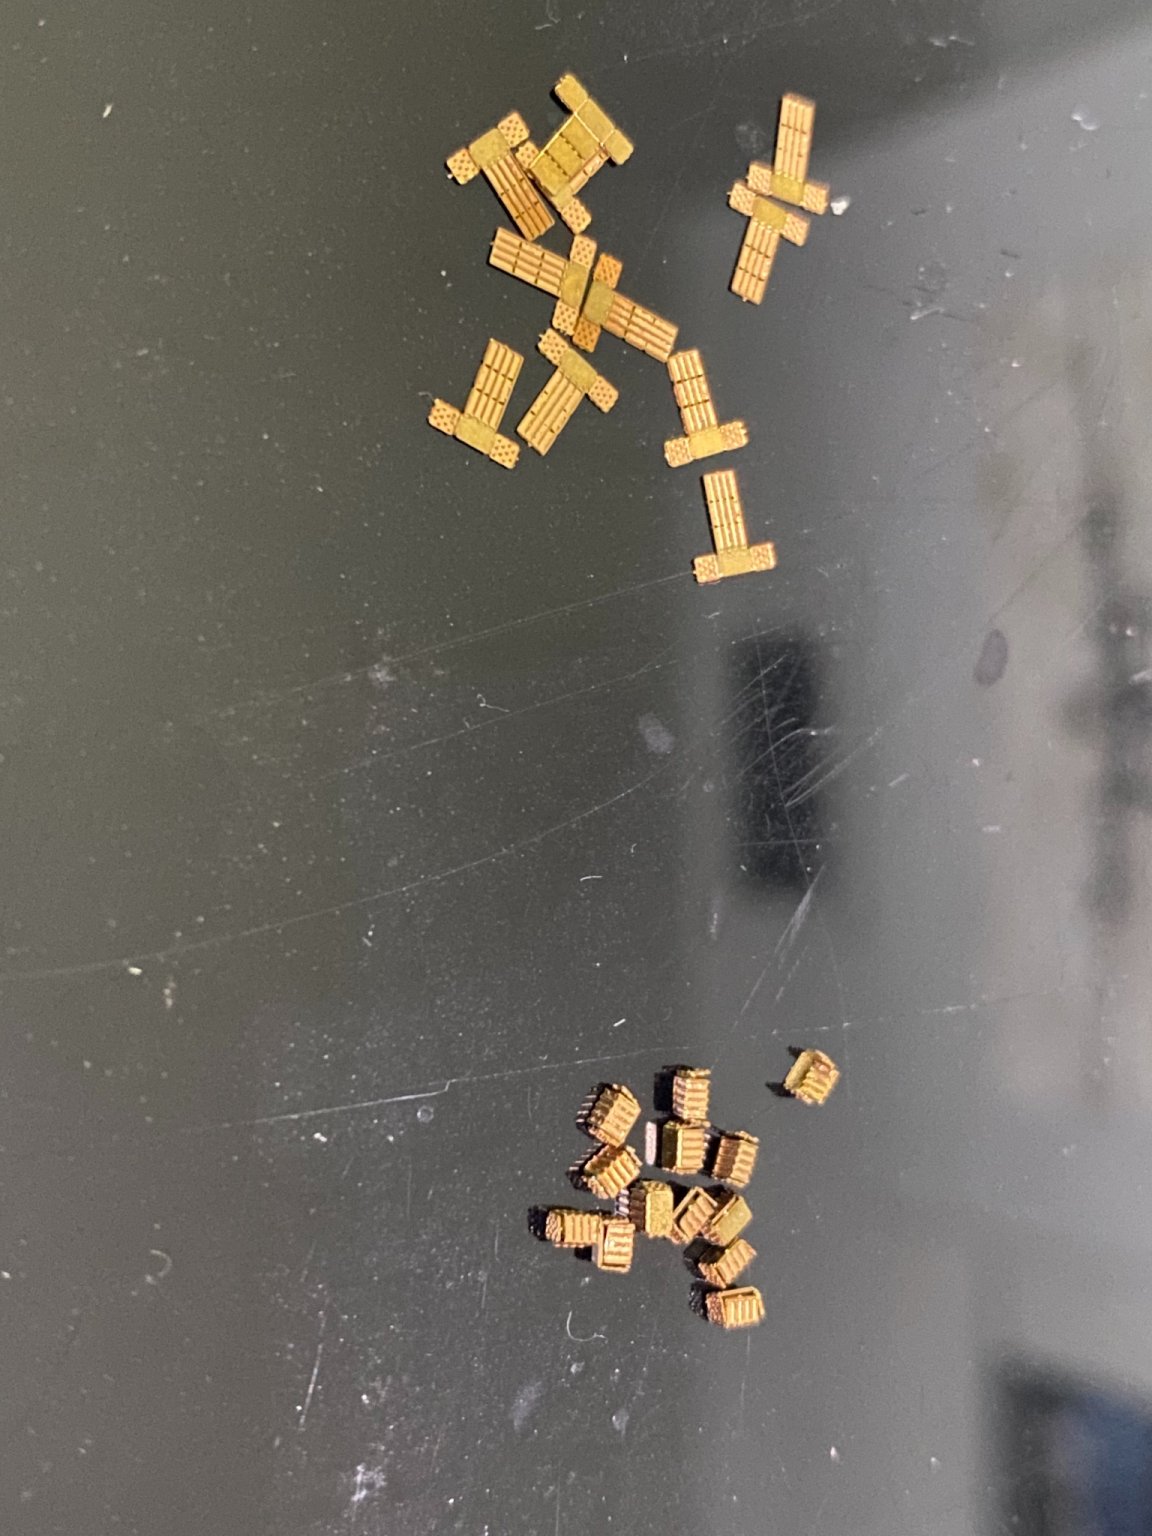
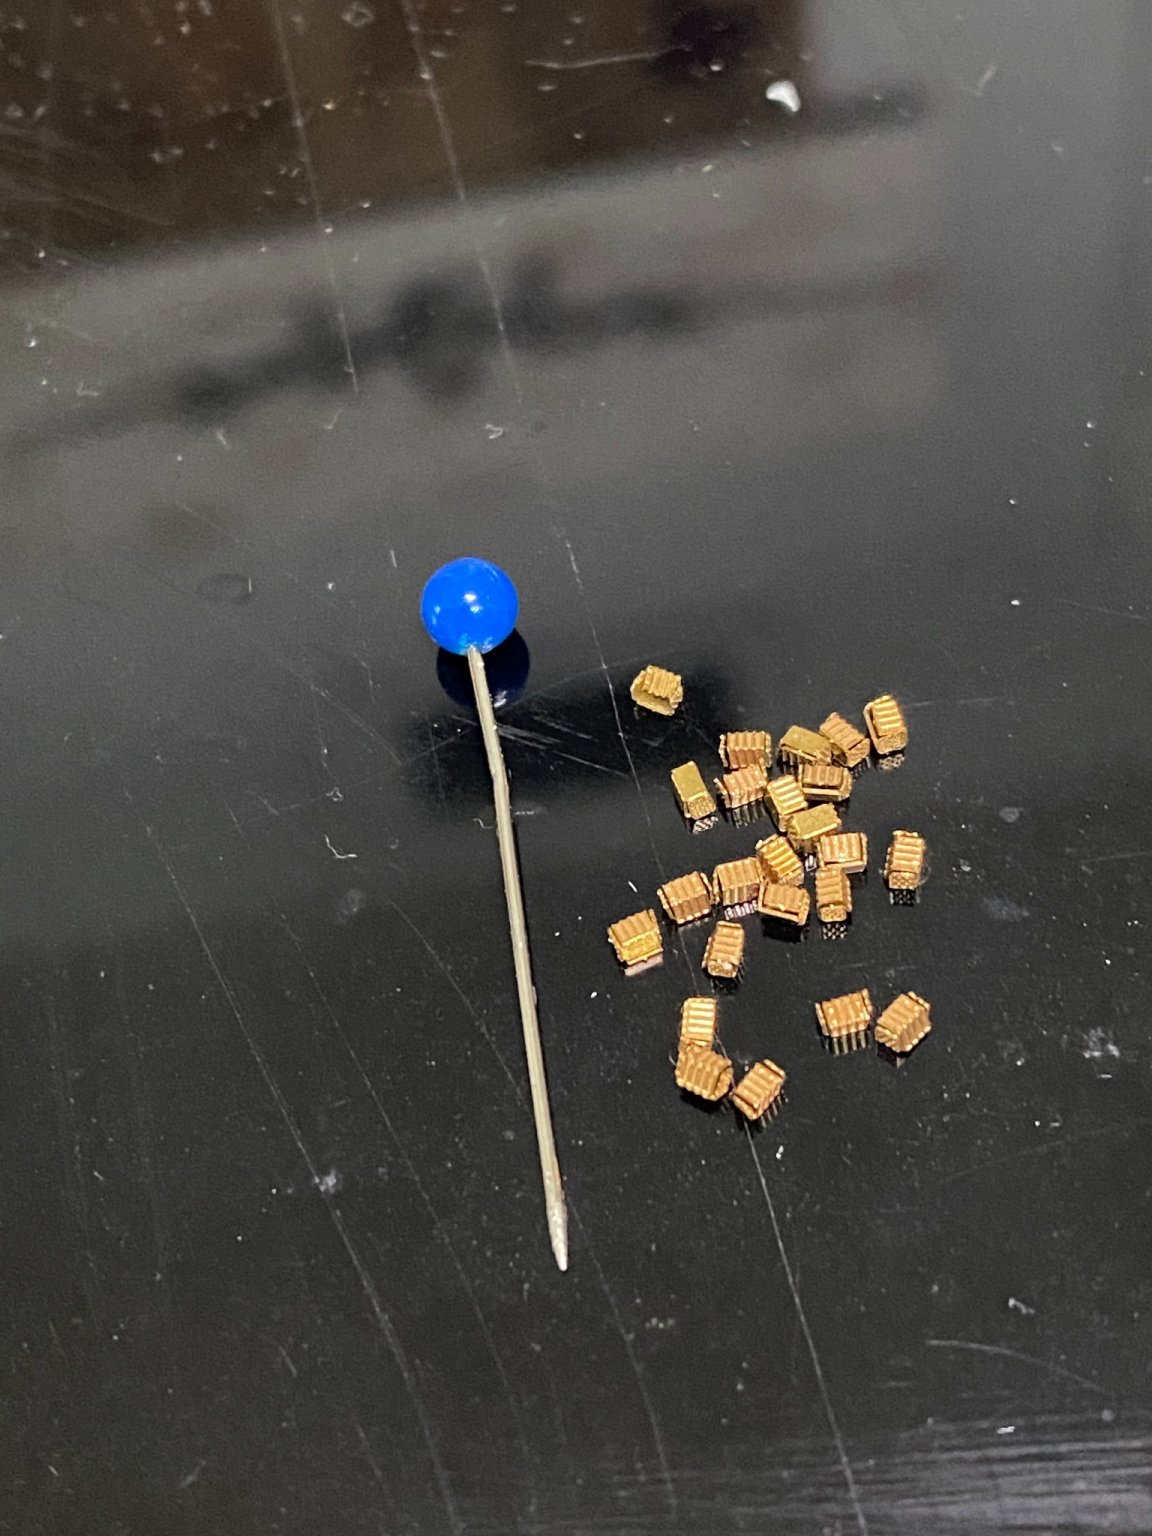
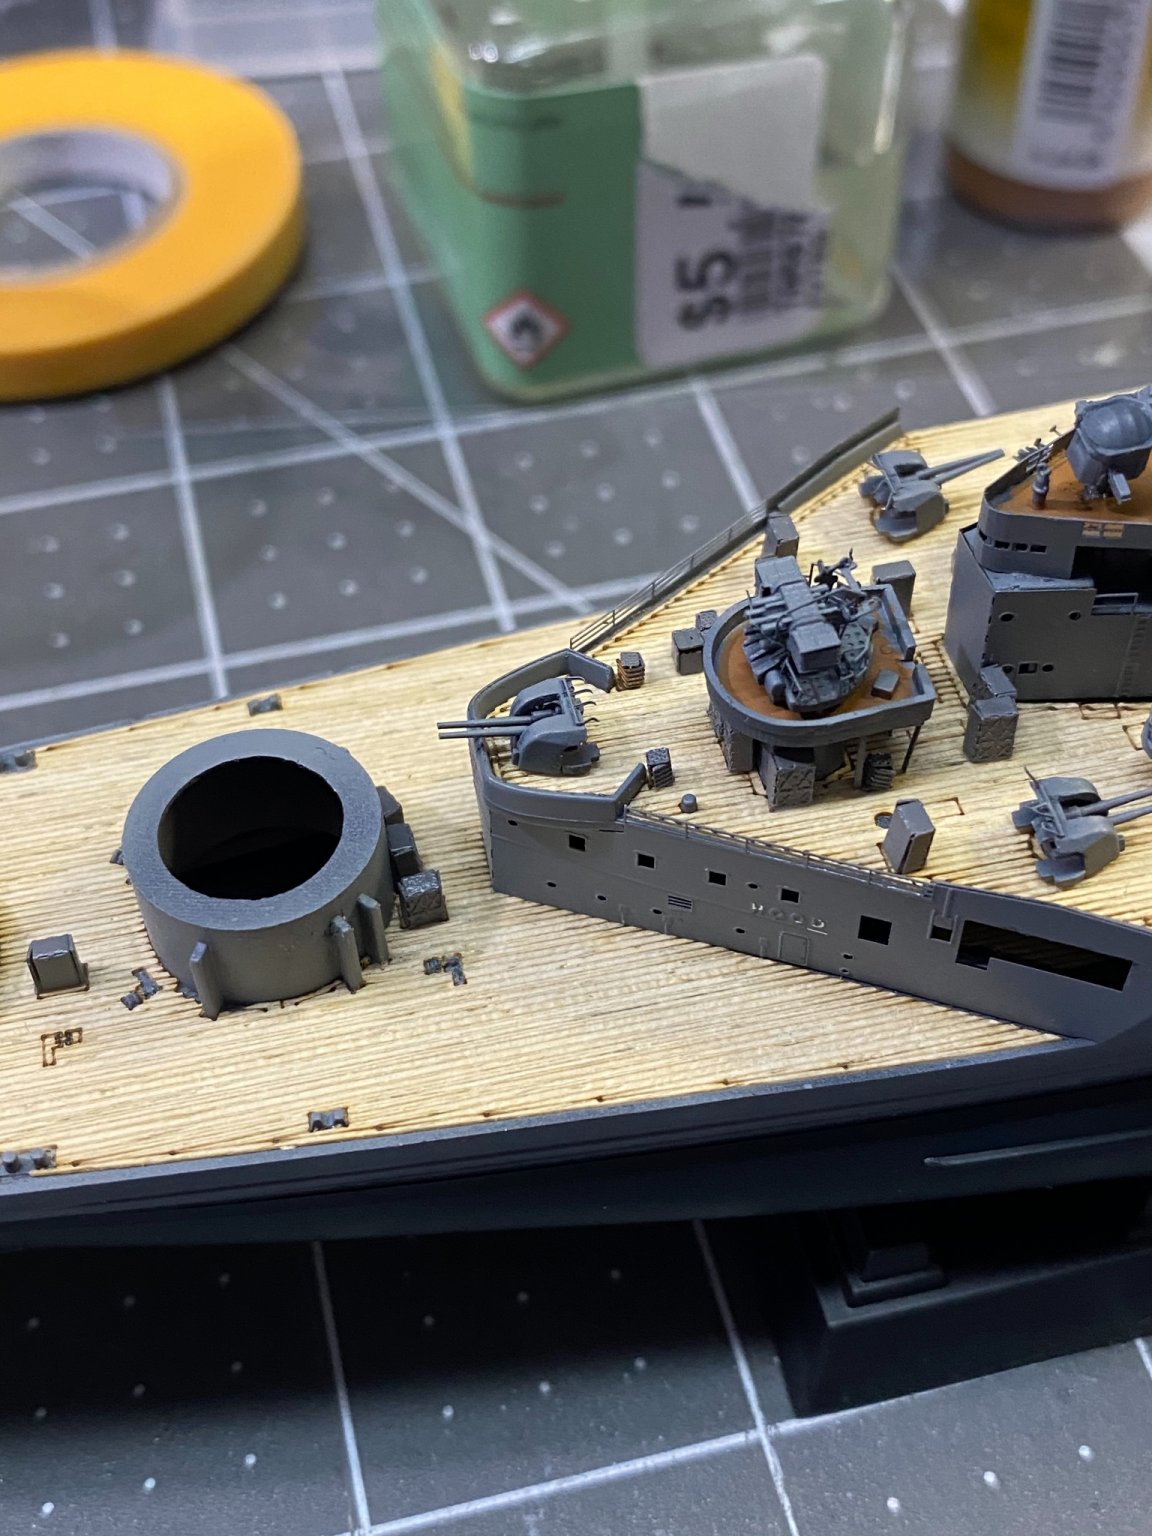
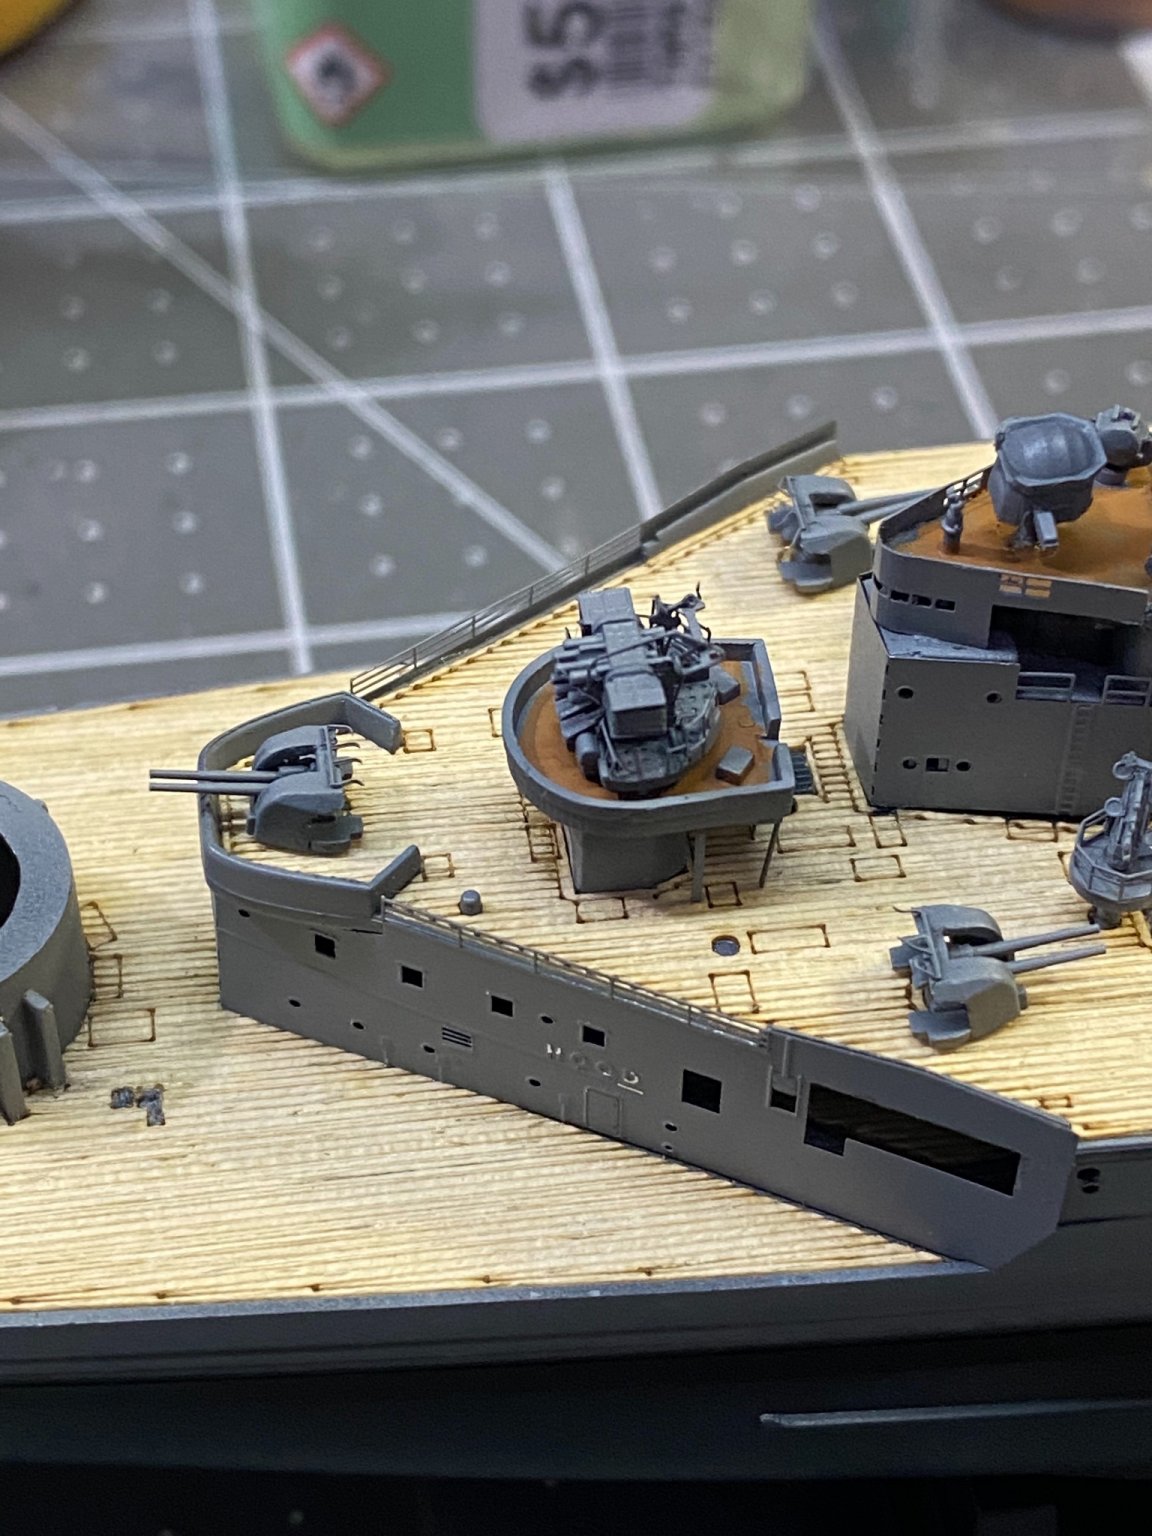
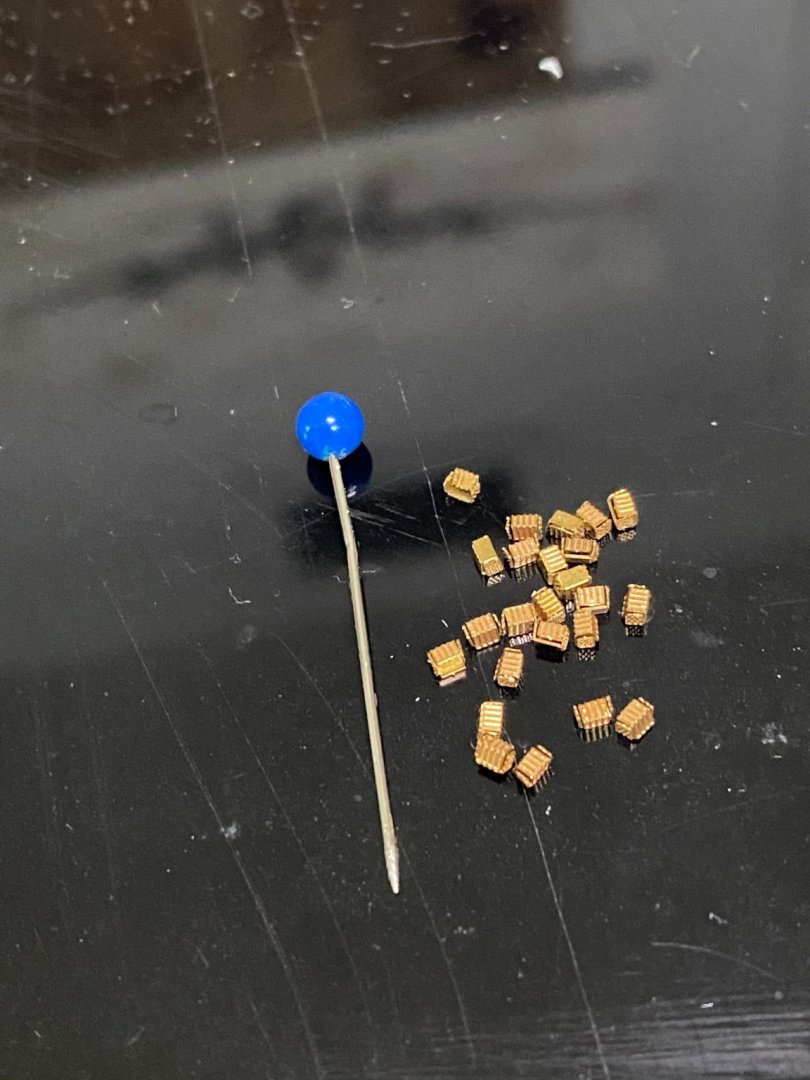
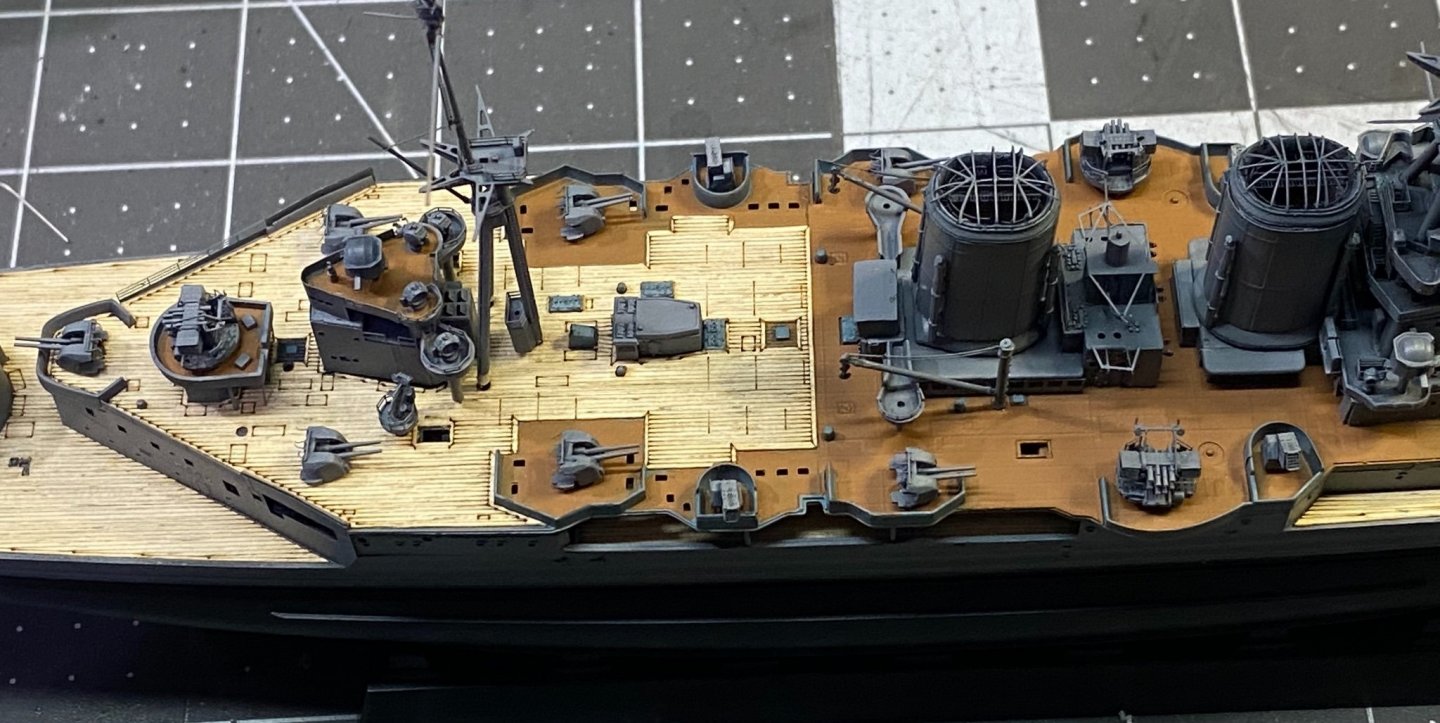
Fun with ammo lockers and storage boxes. Just kidding about the fun part. 😳


- 225 replies
-
- 11
-
-
- I Love Kit
- Hood
- (and 2 more)
-
Alan Sounds like your extruder is too far away from the print bed. If too far away, the filament cools too quickly and does not adhere well to the bed. If it's too close, the extruder will push the filament on the bed. PS: At one time, I had all kinds of problems with my project moving off the print bed and tried all sorts of things to correct the problem. Finally, I bought a print pad and that solved my adhere issue. The print pads are cheap and it's worth a try if you cannot get your issue sorted out. Printing directly on glass just did not work well for me.
- 321 replies
-
- 7
-
-
- Finished
- Flower-class
- (and 1 more)
-
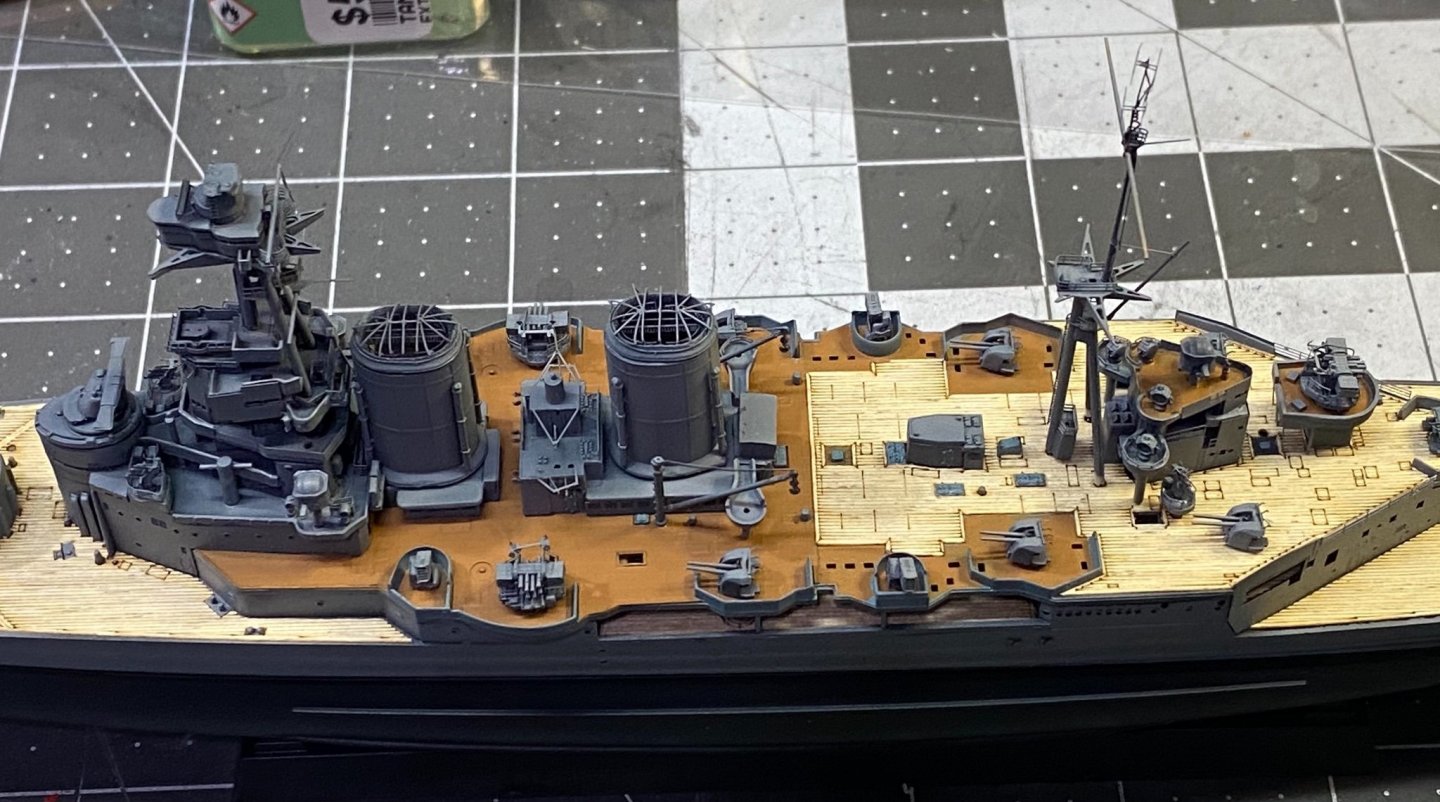
Thanks for the compliments Lou. it's been fun to build this far and look forward to more offerings from this company. Keeping my fingers crossed, they are an excellent value for the dollar spent.
- 225 replies
-
- 6
-
-
- I Love Kit
- Hood
- (and 2 more)
-
I don't plan to cut or remove any deck portions not pre cut.
- 225 replies
-
- 5
-
-
- I Love Kit
- Hood
- (and 2 more)
-
Great choice OC! You will get a lot of pleasure with the airbrush system. 95% of the problem issues new users experience with airbrush relate to learning the correct ratio of paint to thinner for the particular paint you're using, and keeping the airbrush clean and free of clogs. Like Ken said, practice, practice, practice, Congratulations on your new purchase.
-
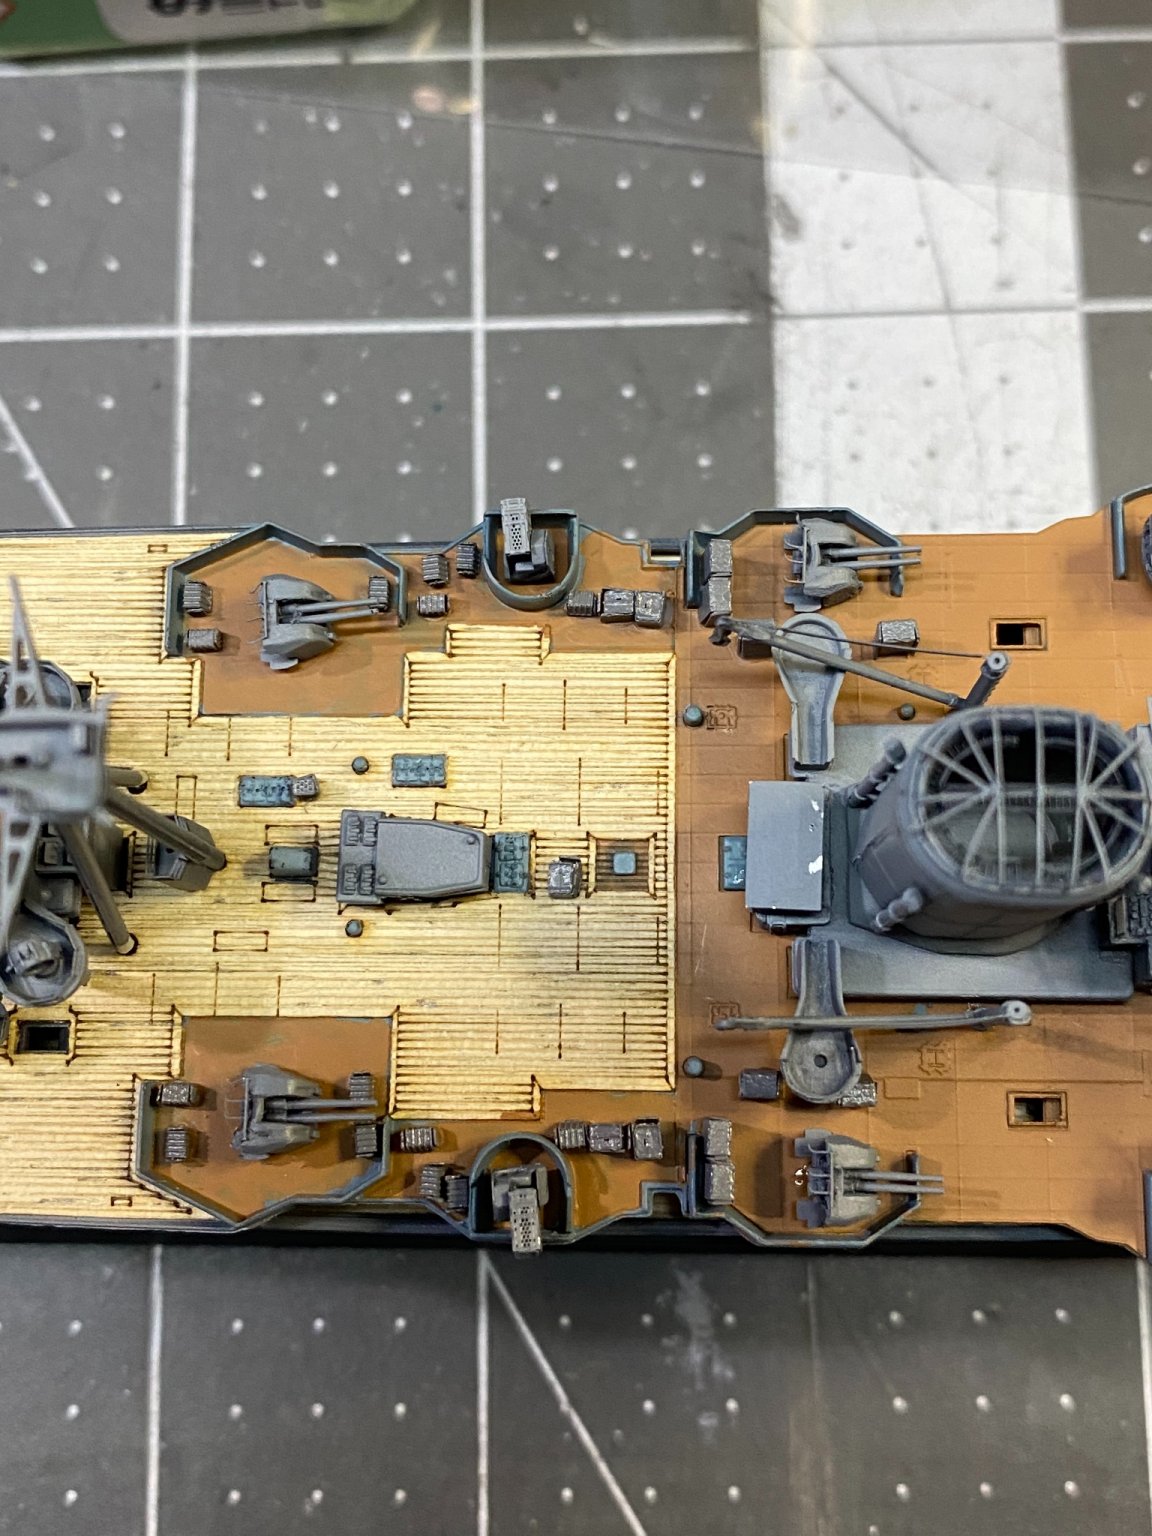
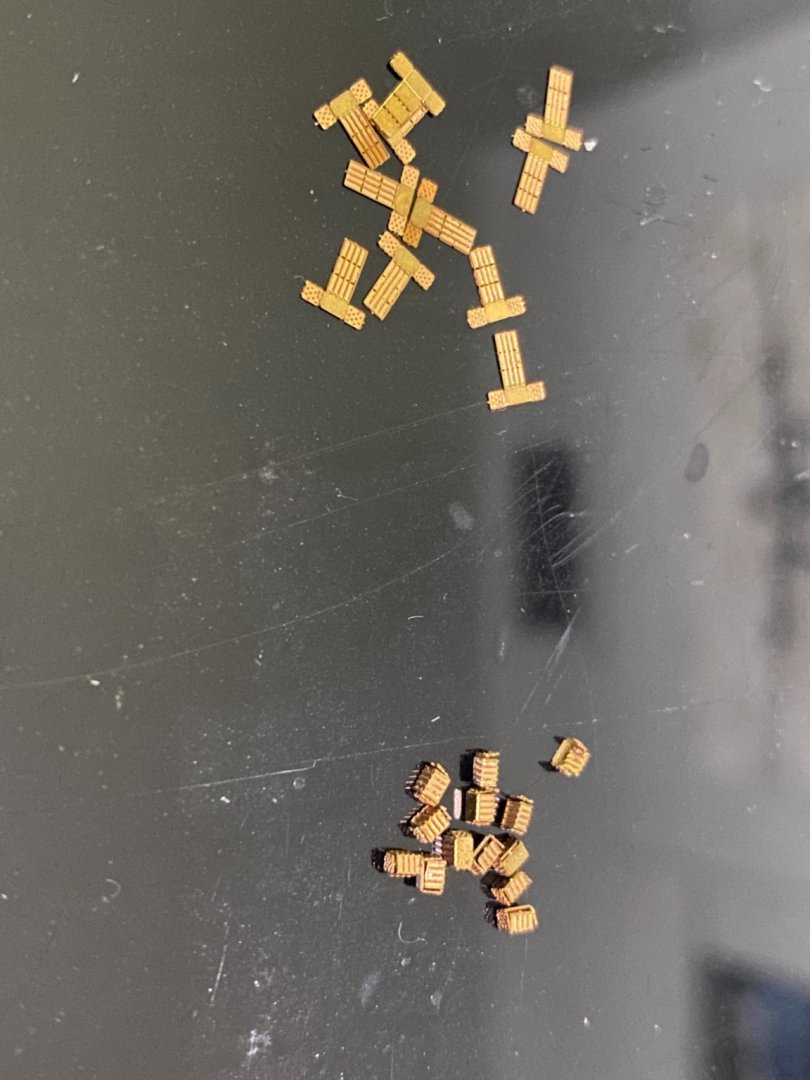
If you look closely at the decks, there are numerous rectangles scattered all over, about 50 or 60 of them. These are locations for storage lockers and ammo boxes for the most part. Got a whole lot of micro "hold-and-fold" photo etch to create the lockers and boxes, then primer and paint them before installing. Not really looking forward to that but will grit my teeth and getter done.
- 225 replies
-
- 5
-
-
- I Love Kit
- Hood
- (and 2 more)
-
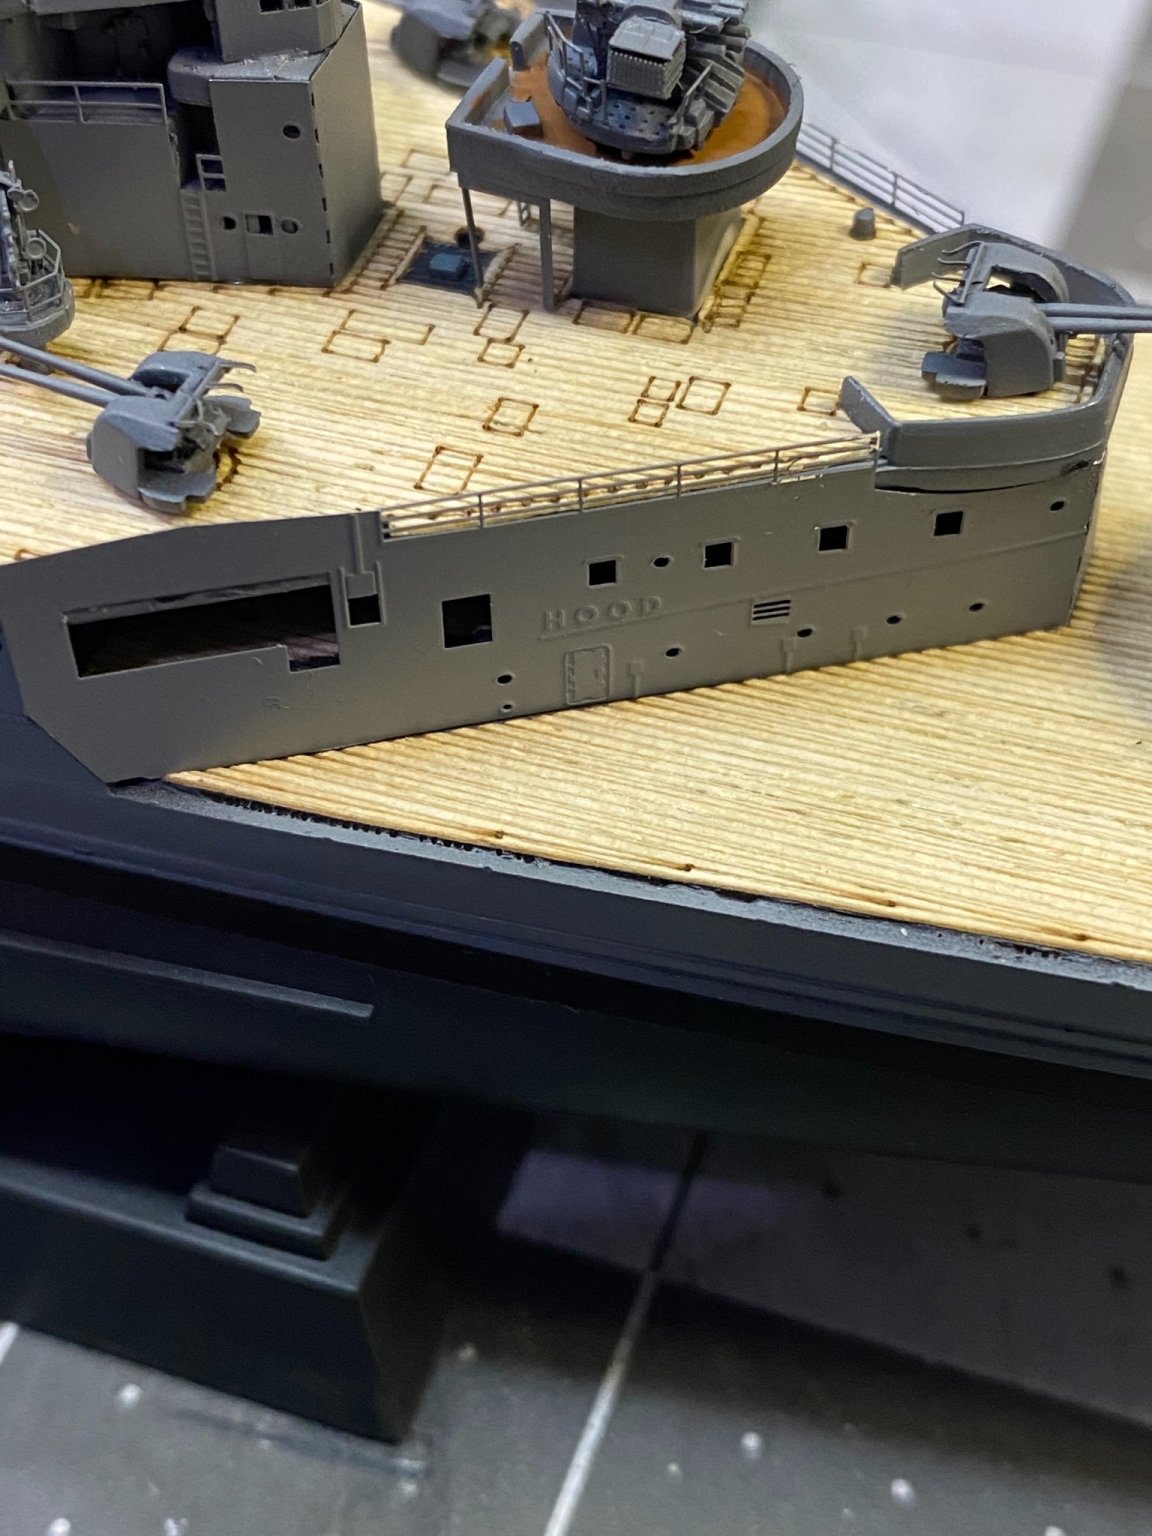
Added the secondary’s, the rocket launchers, and Pom Pom guns. Added the rear superstructure with the “Hood” placard. Survived a “near death” experience when I nearly dropped the model on the floor. Caught it before it hit the ground and only suffered minor damage...now repaired.


- 225 replies
-
- 11
-
-

-
- I Love Kit
- Hood
- (and 2 more)
-
I would choose the first setup, the compressor with the air tank attached. It's worth the extra money to get that compressor with the air tank. And by the way, that is a very good airbrush.
-
Think about it as learning to ride a bicycle. After you have learned to ride one and used it a couple of years, you can then appreciate a higher quality one. Until then, you are concentrating more on learning to use it than you are the quality of it. So I would say yes, a cheap one should be fine to get you through the learning curve which will take a while. I'm going to be honest and tell you it took a year or more before I ever got the hang of proficiently using my airbrush. And even after that, you learn more and more the more you use it year after year.
-
It's not as simple as using a CAD plan. To be suitable for 3D printing, special attention is required to massage the CAD plan so it can "guide" the 3D printing process. The holy grail is learning to prepare your own 3D plans so that way you can model anything you wish, but man, that is an intimidating and long process learning to do it not to mention the cost of the drawing software. Purchasing a tried and proven plan such as Yves has done is the way to go, but there are a lot of CAD drawings out there not suitable at all for 3D printing.
- 321 replies
-
- 10
-
-
- Finished
- Flower-class
- (and 1 more)
-
That is very impressive. The inner detail makes it extraordinary.
- 321 replies
-
- 6
-
-
- Finished
- Flower-class
- (and 1 more)
-
I feel bad for the gentleman because he's not likely to get more than a 1/3 of what he's asking for the items, if that. My best guess is he will be lucky to get $200 for the lot locally unless someone feels some compassion and gives him more just as a gesture of kindness. Going rate is .10 cents on the dollar when in a distress sale.
-
Thanks for your comments Roger, greatly appreciated. I would love to see photos of your updated Revell U-Boot. I have that same set and have never started it. Yours may be the encouragement I need to start mine. If you have questions, I will be happy to answer any if I can.
- 225 replies
-
- 5
-
-
- I Love Kit
- Hood
- (and 2 more)