HOLIDAY DONATION DRIVE - SUPPORT MSW - DO YOUR PART TO KEEP THIS GREAT FORUM GOING! (Only 13 donations so far - C'mon guys!)
×

CDW
-
Posts
7,742 -
Joined
-
Last visited
Content Type
Profiles
Forums
Gallery
Events
Everything posted by CDW
-
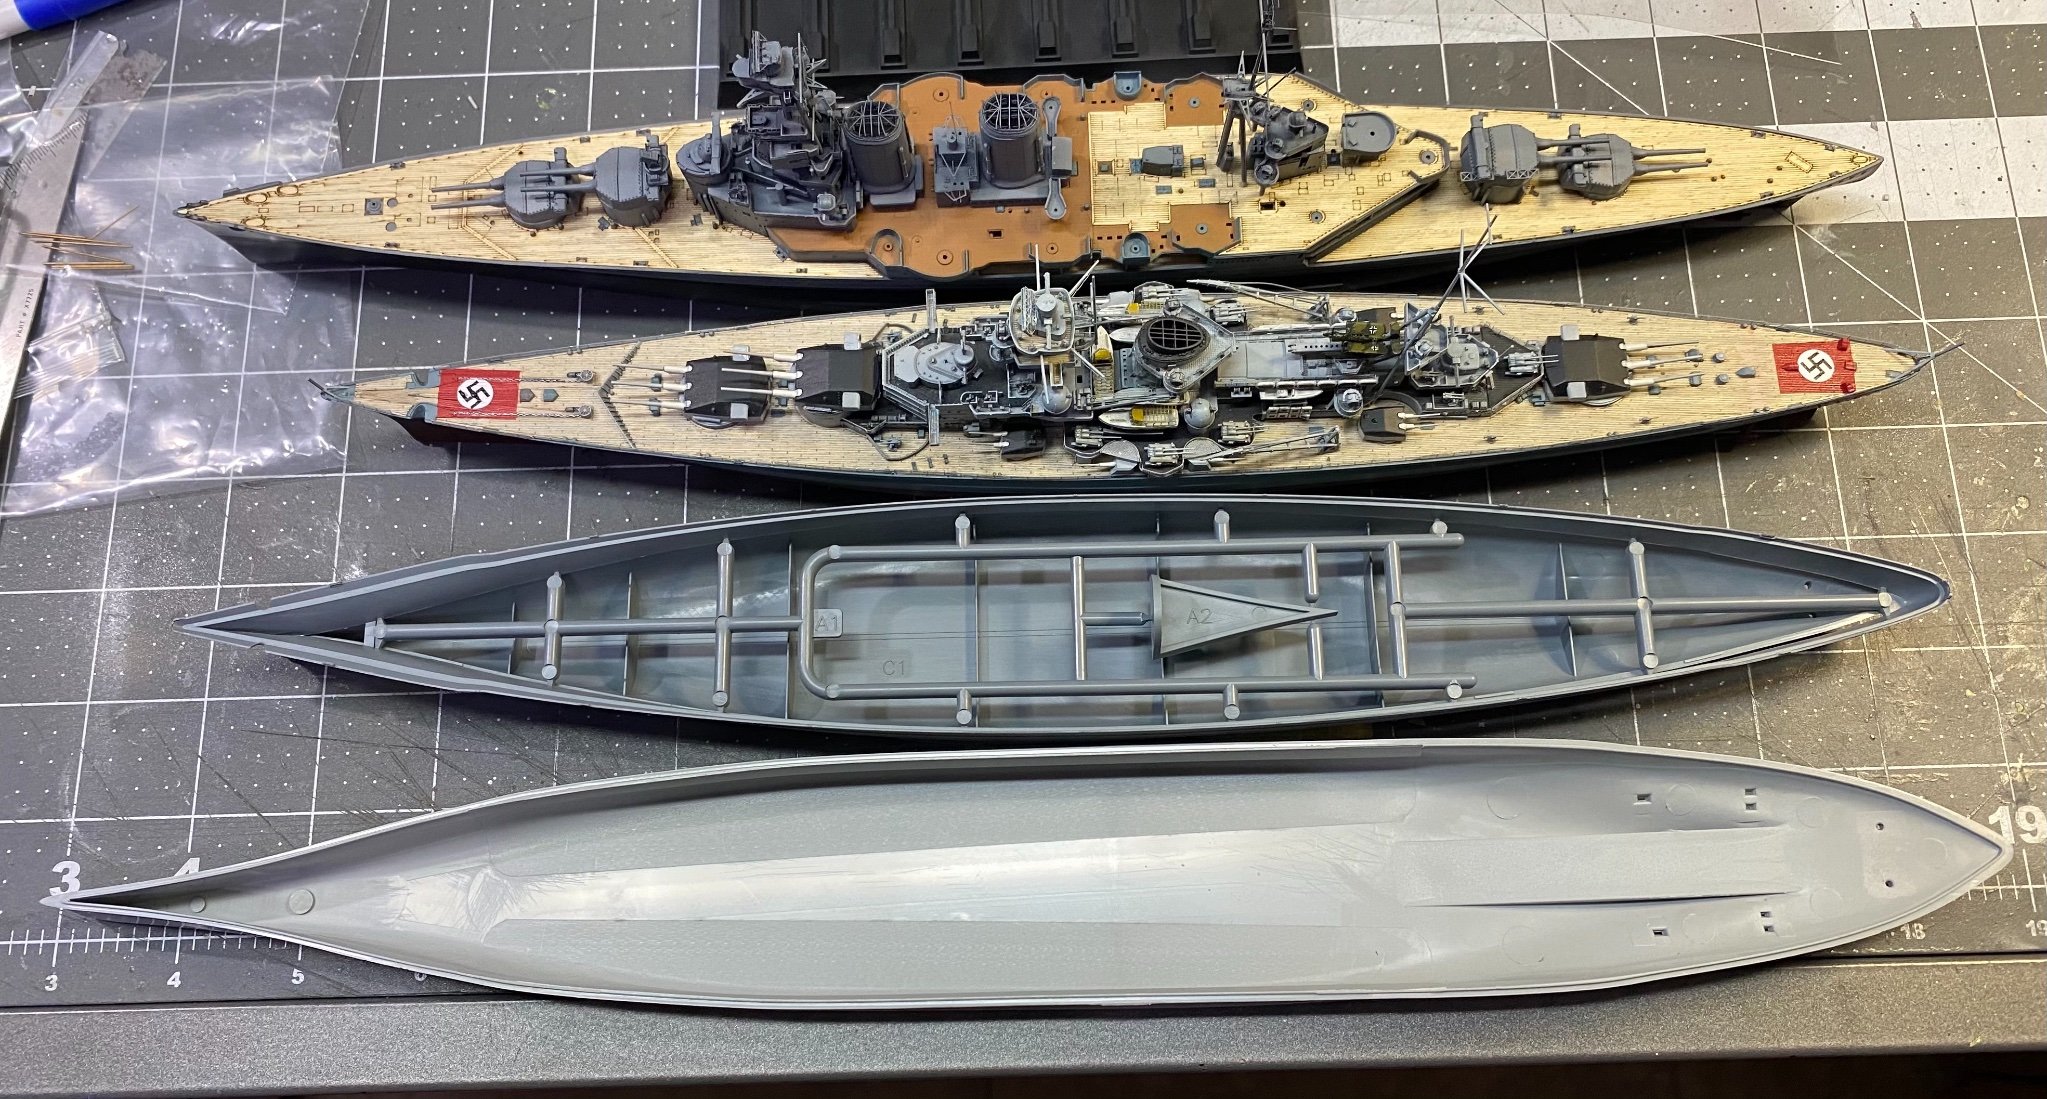
 My grandson and I were looking at the Hood model tonight and comparing it with other battleship hulls in this scale. From top to bottom is Hood, Scharnhorst, Bismarck, Montana (a drawing board ship). Interesting. The Montana would have been a monster size ship had the war continued on longer.
- 225 replies
-
- 6
-

-

-
- I Love Kit
- Hood
- (and 2 more)
-
Looking sharp and neat! Well done OC
-
Testing out a new shadow box I just made for this and future ship projects.
- 225 replies
-
- 9
-
-
- I Love Kit
- Hood
- (and 2 more)
-
Thanks Roger. I am anxious to see how Flyhawk renders the details in their amazing tooling and injection molded plastic. Their work in that regards eliminates the need for a lot of tedious photo etch work to correct deficiencies in the original plastic molded parts.
- 225 replies
-
- 3
-
-
- I Love Kit
- Hood
- (and 2 more)
-
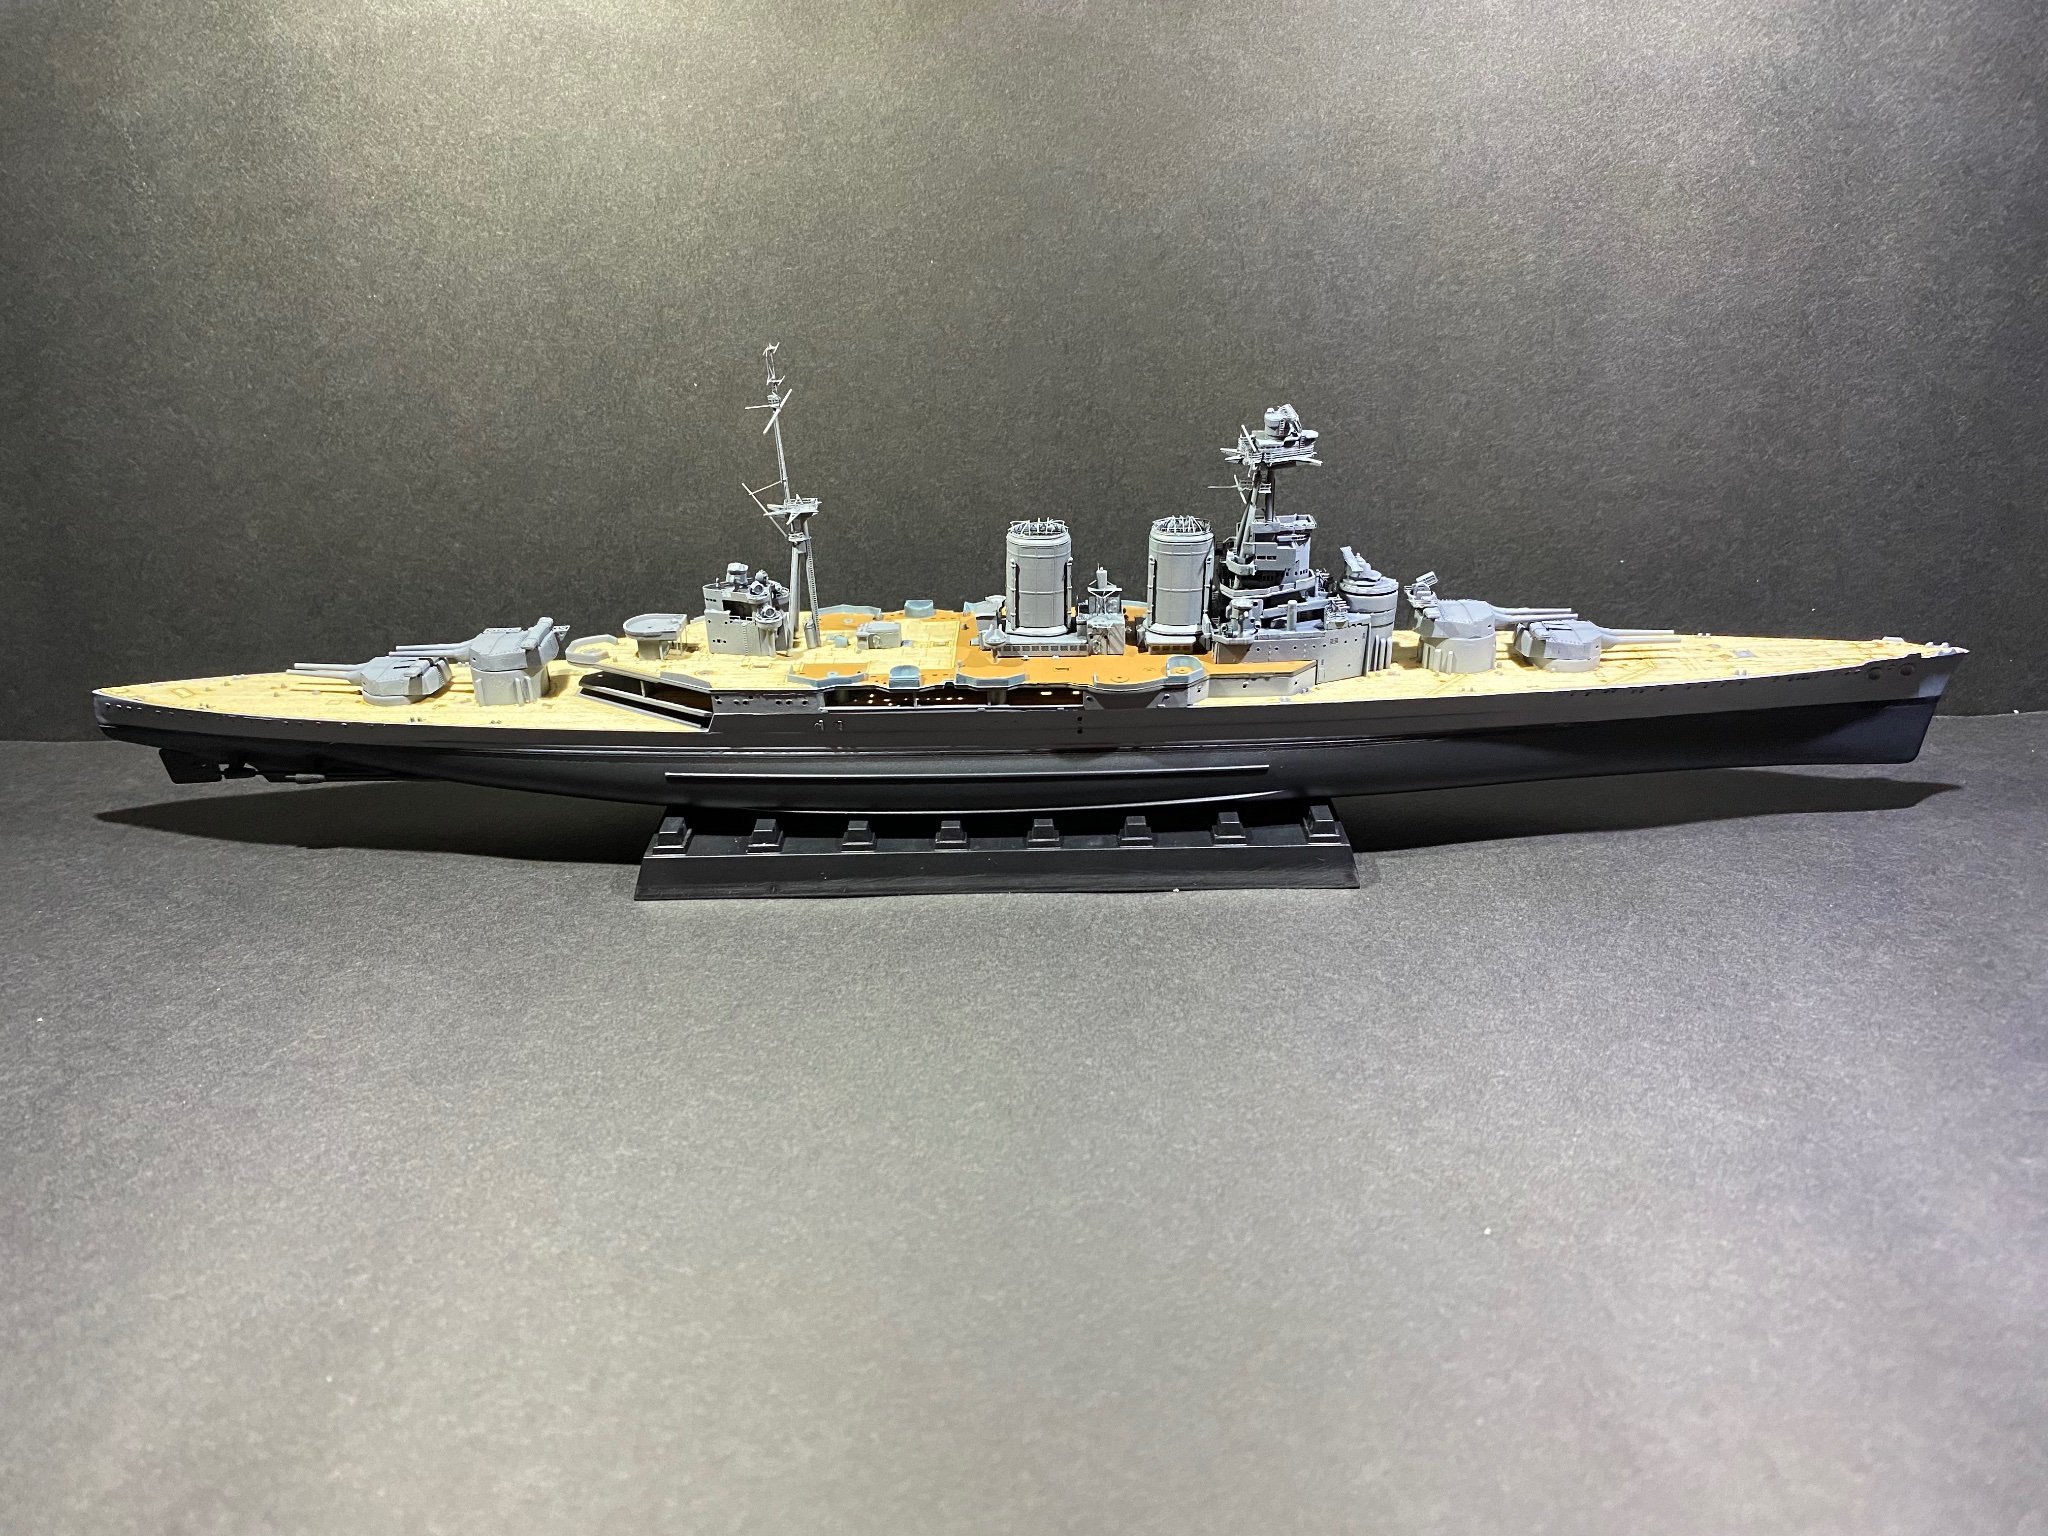
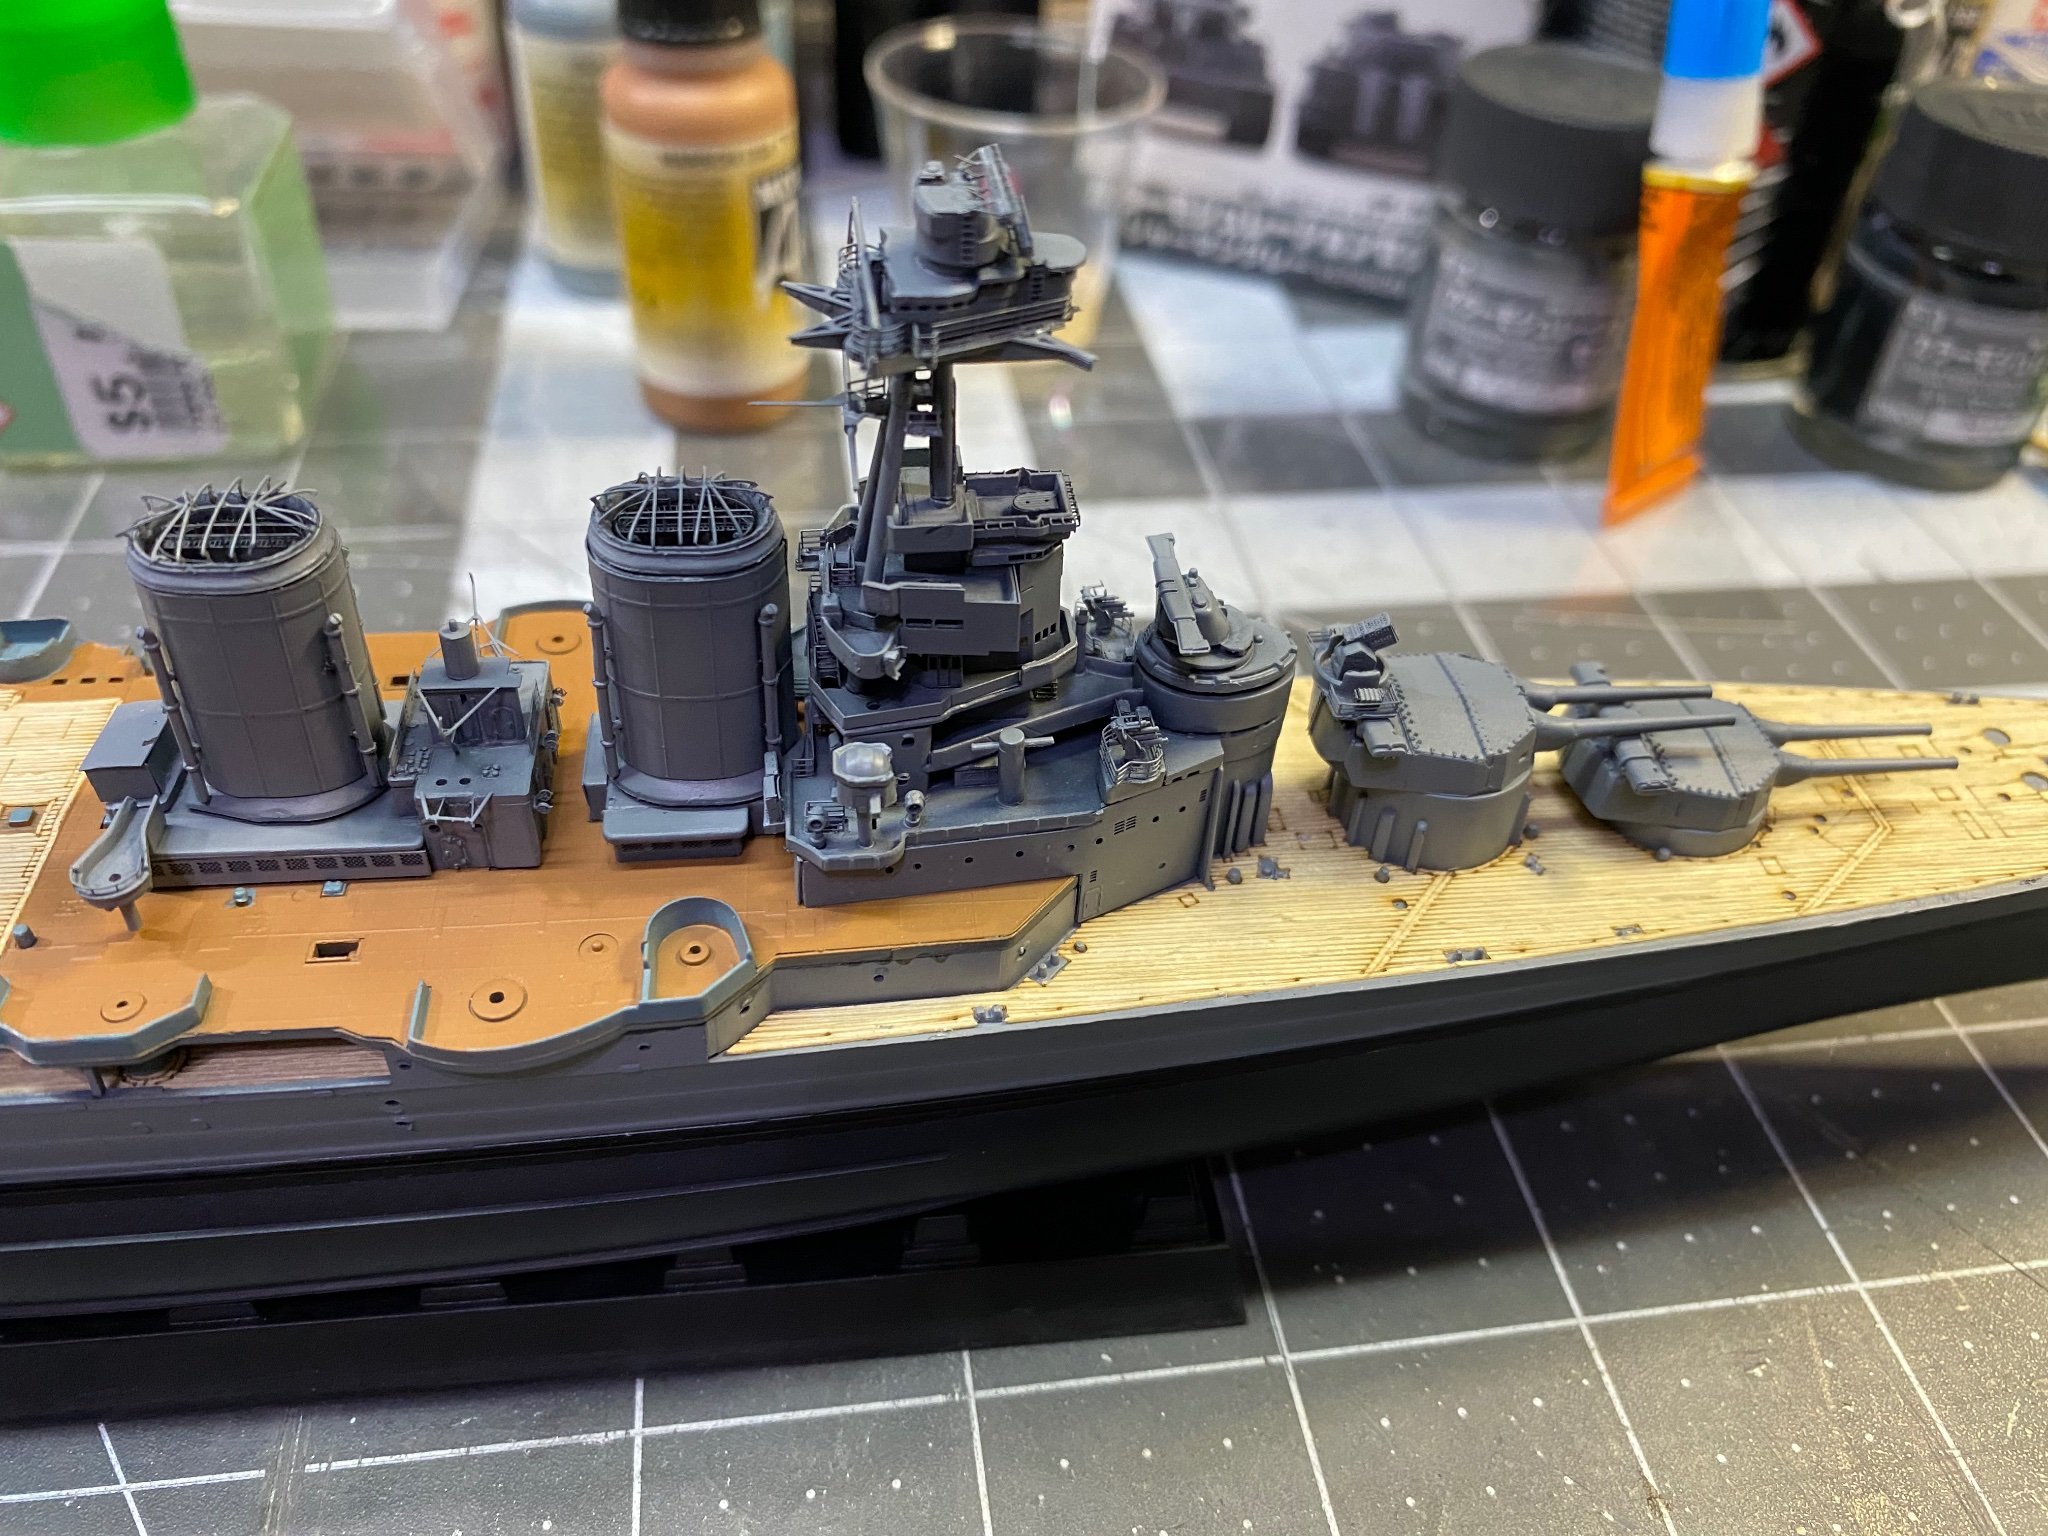
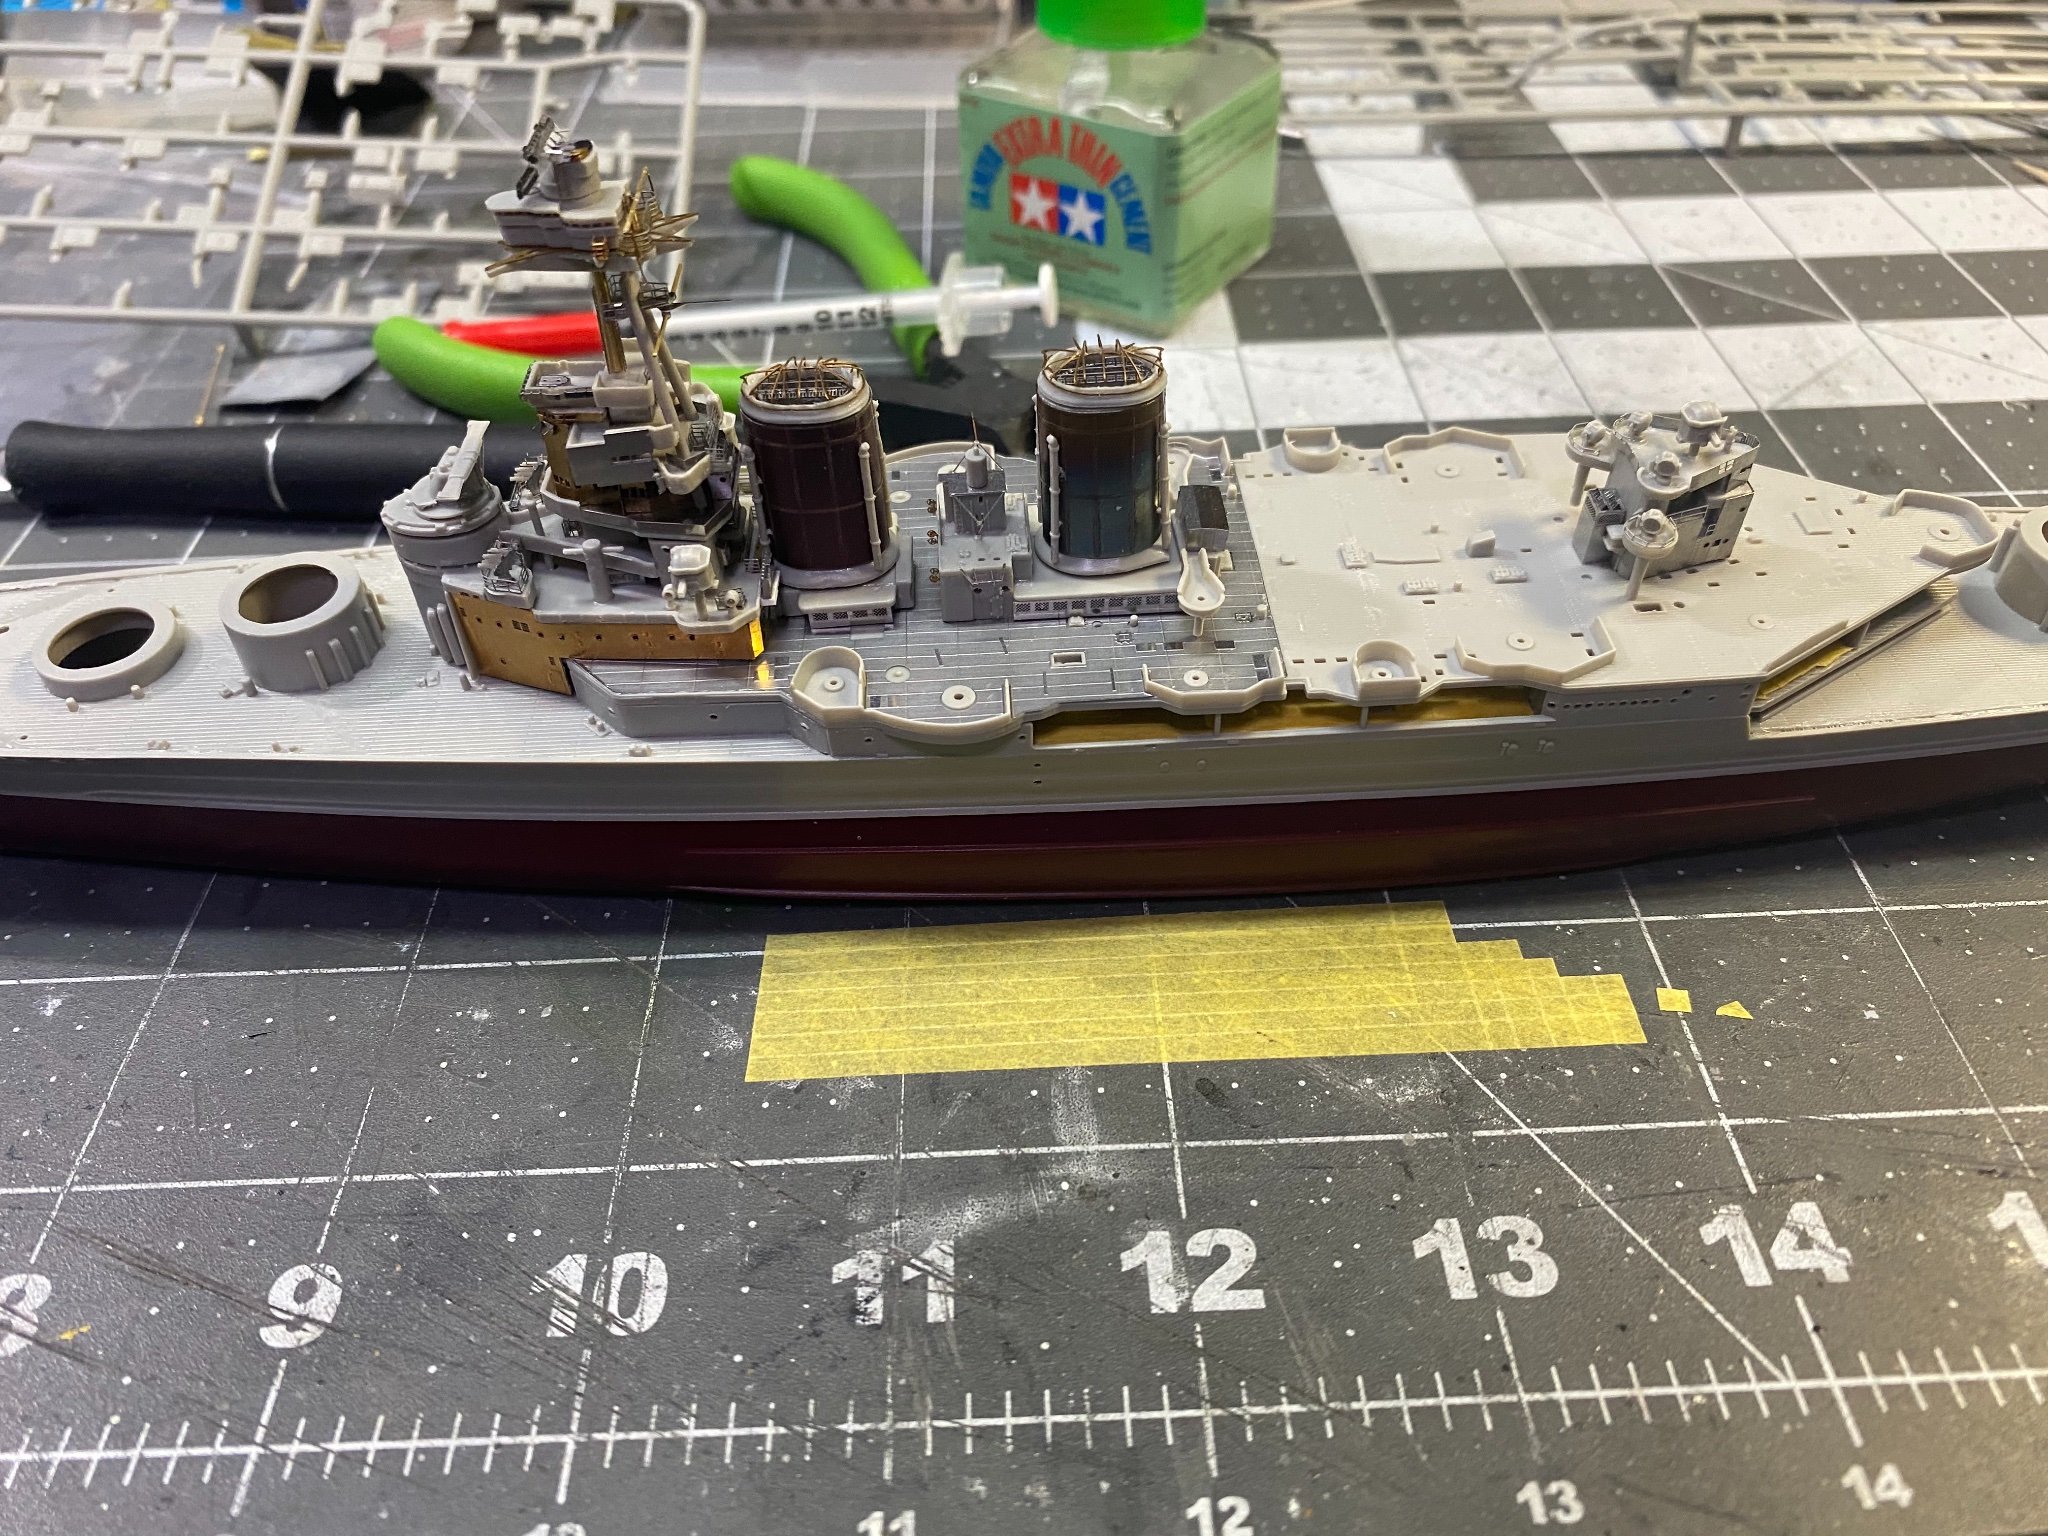
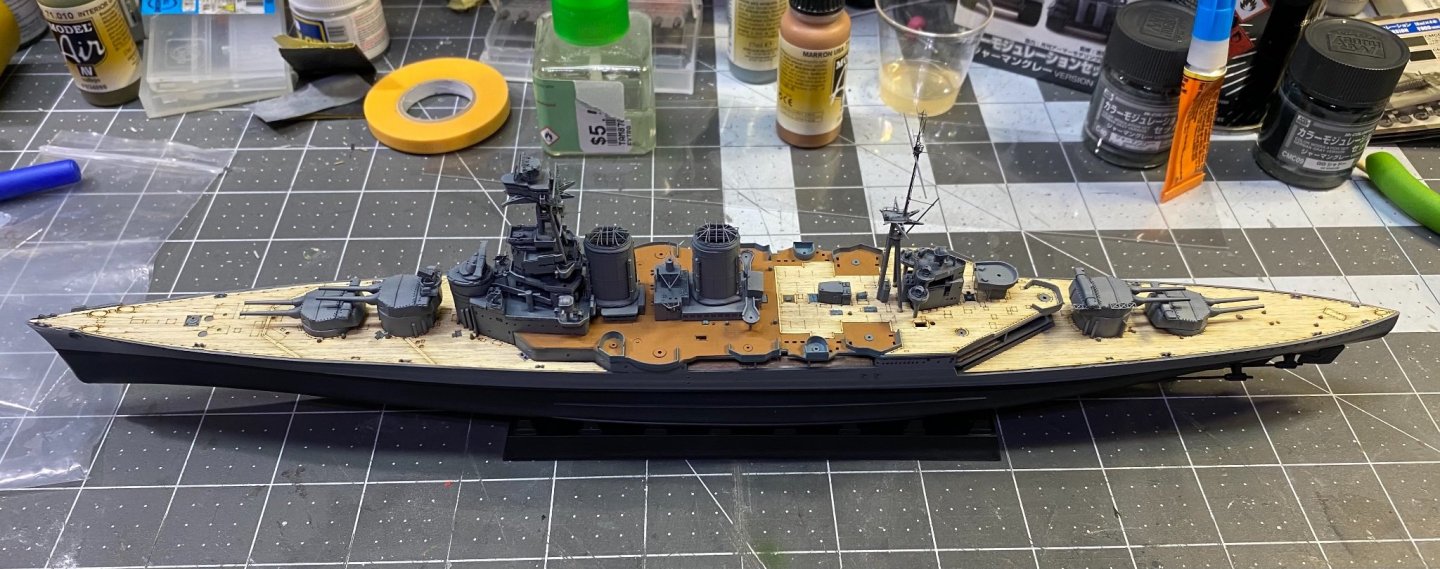
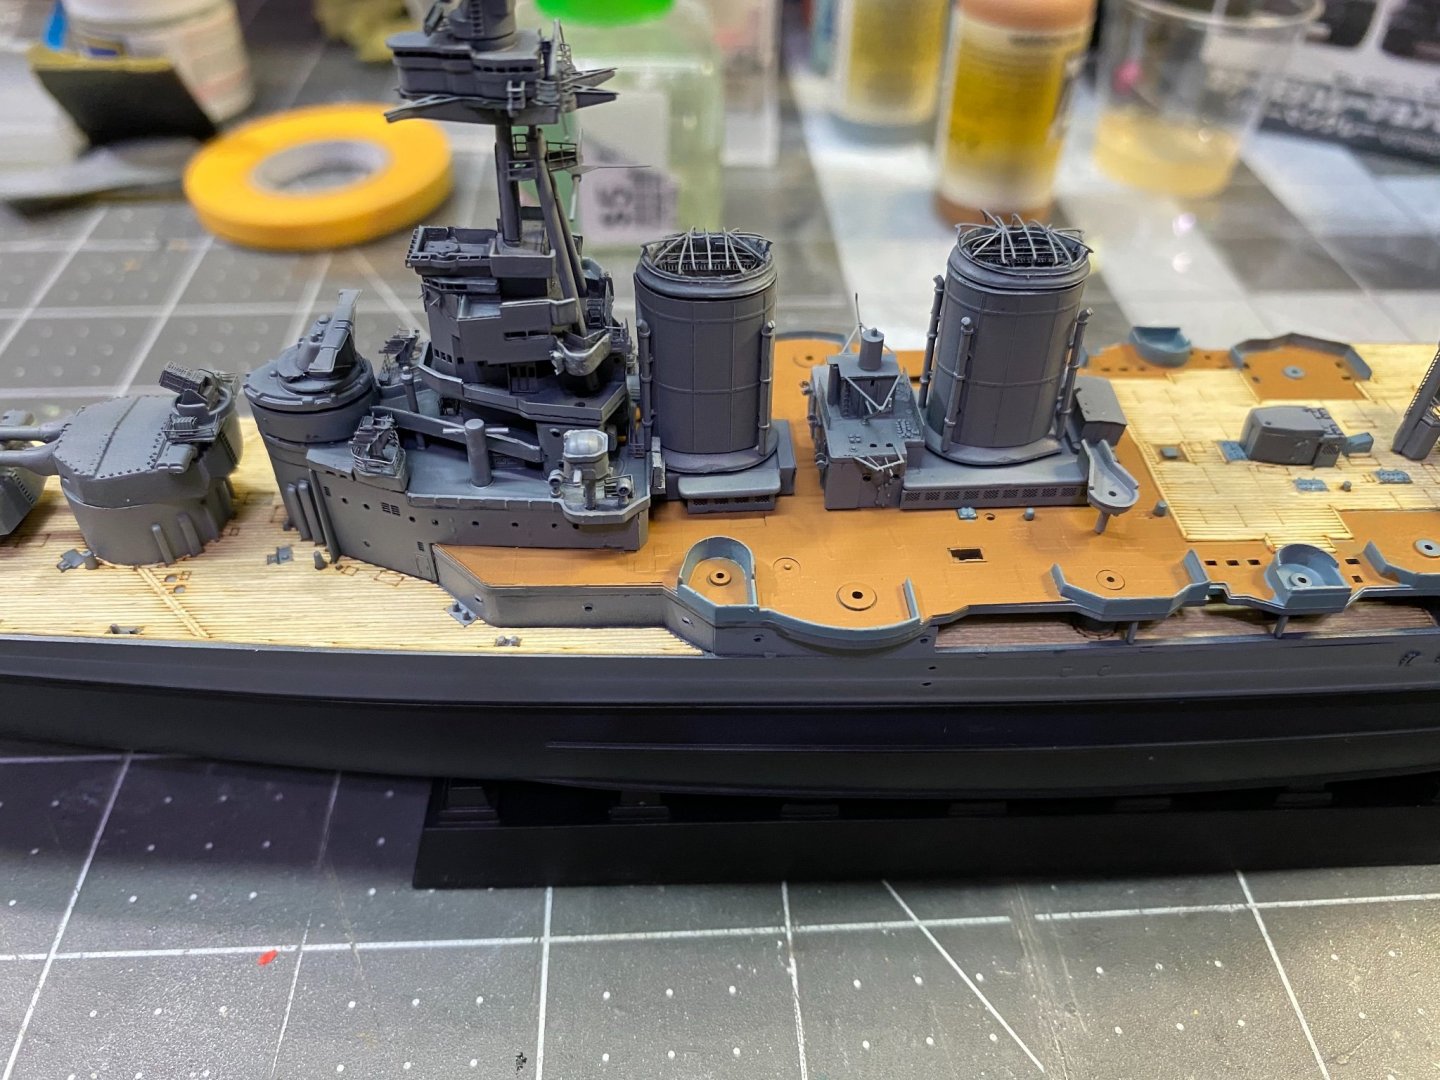
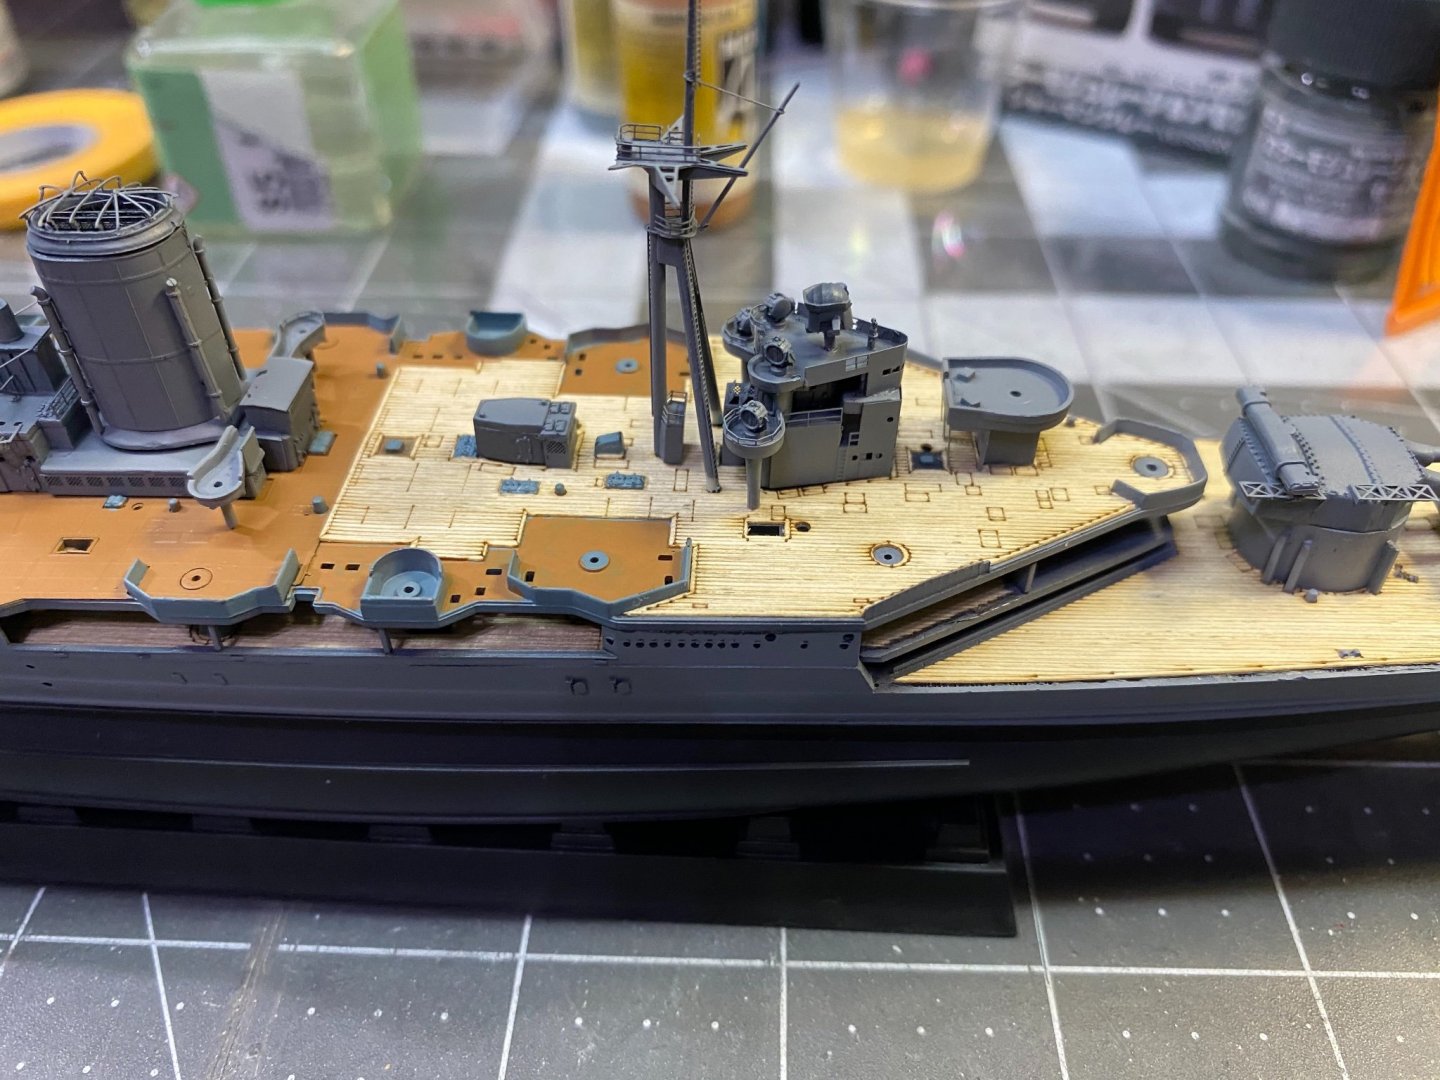
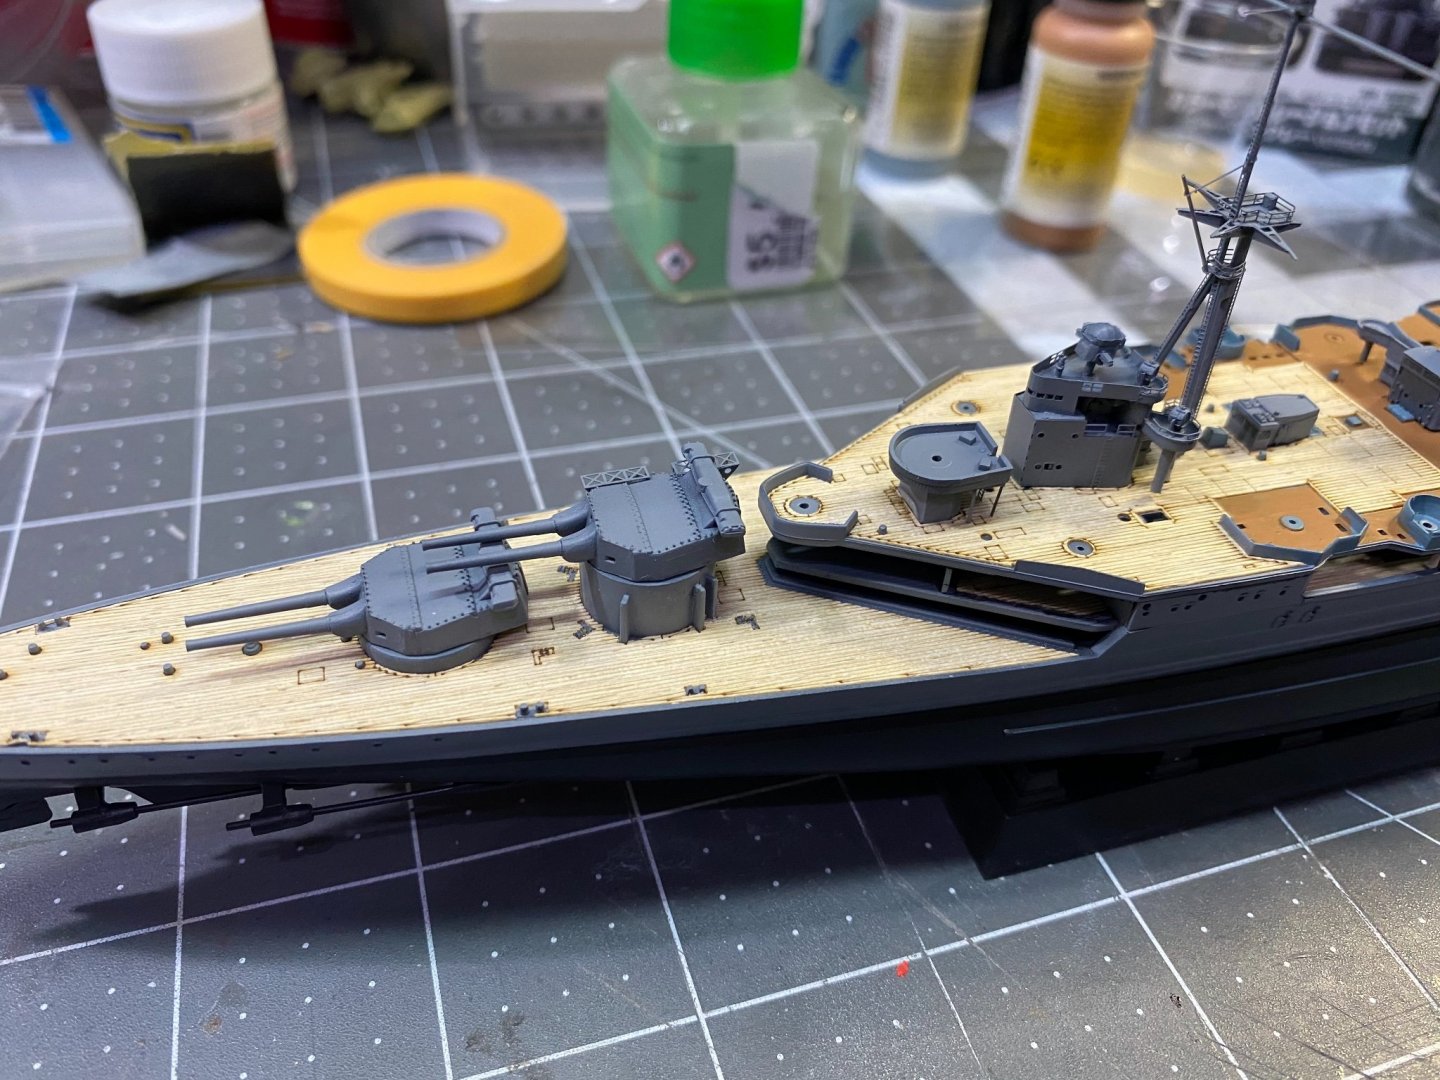
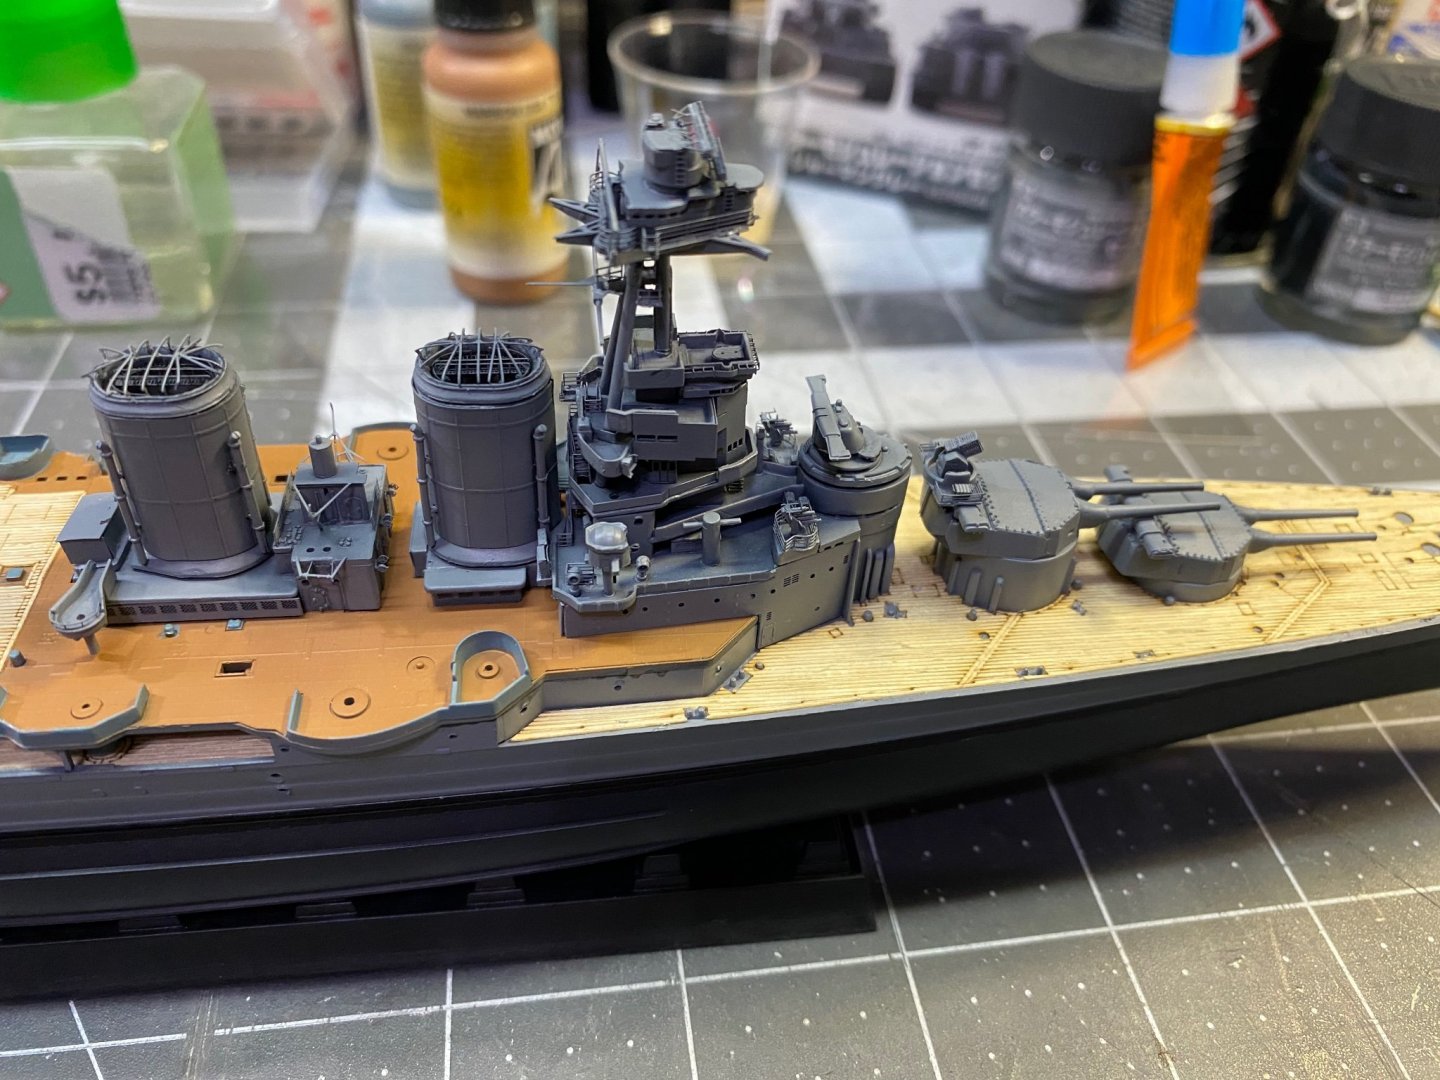
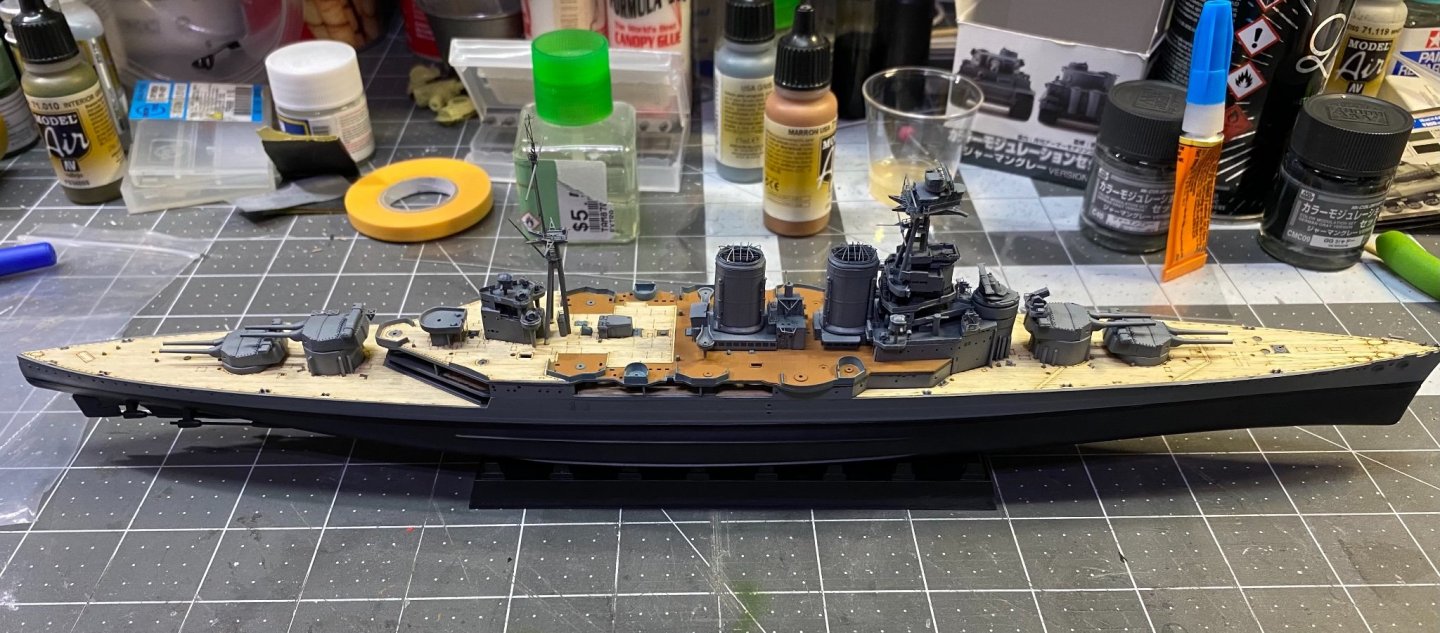
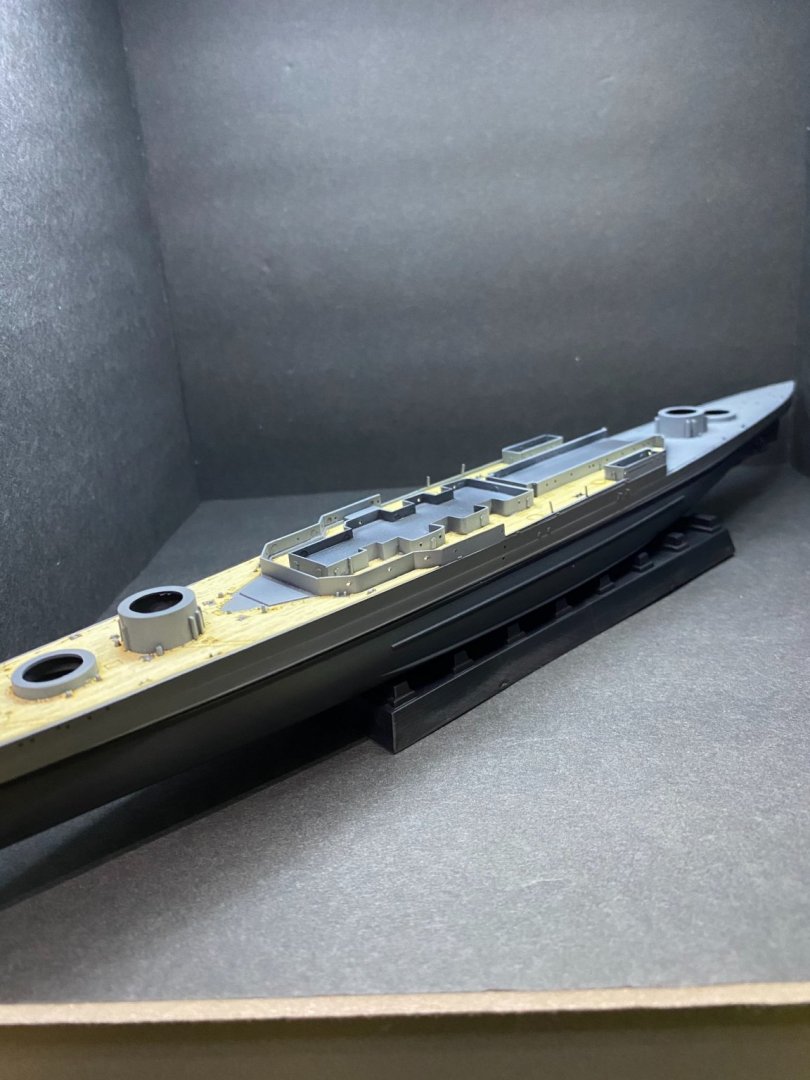
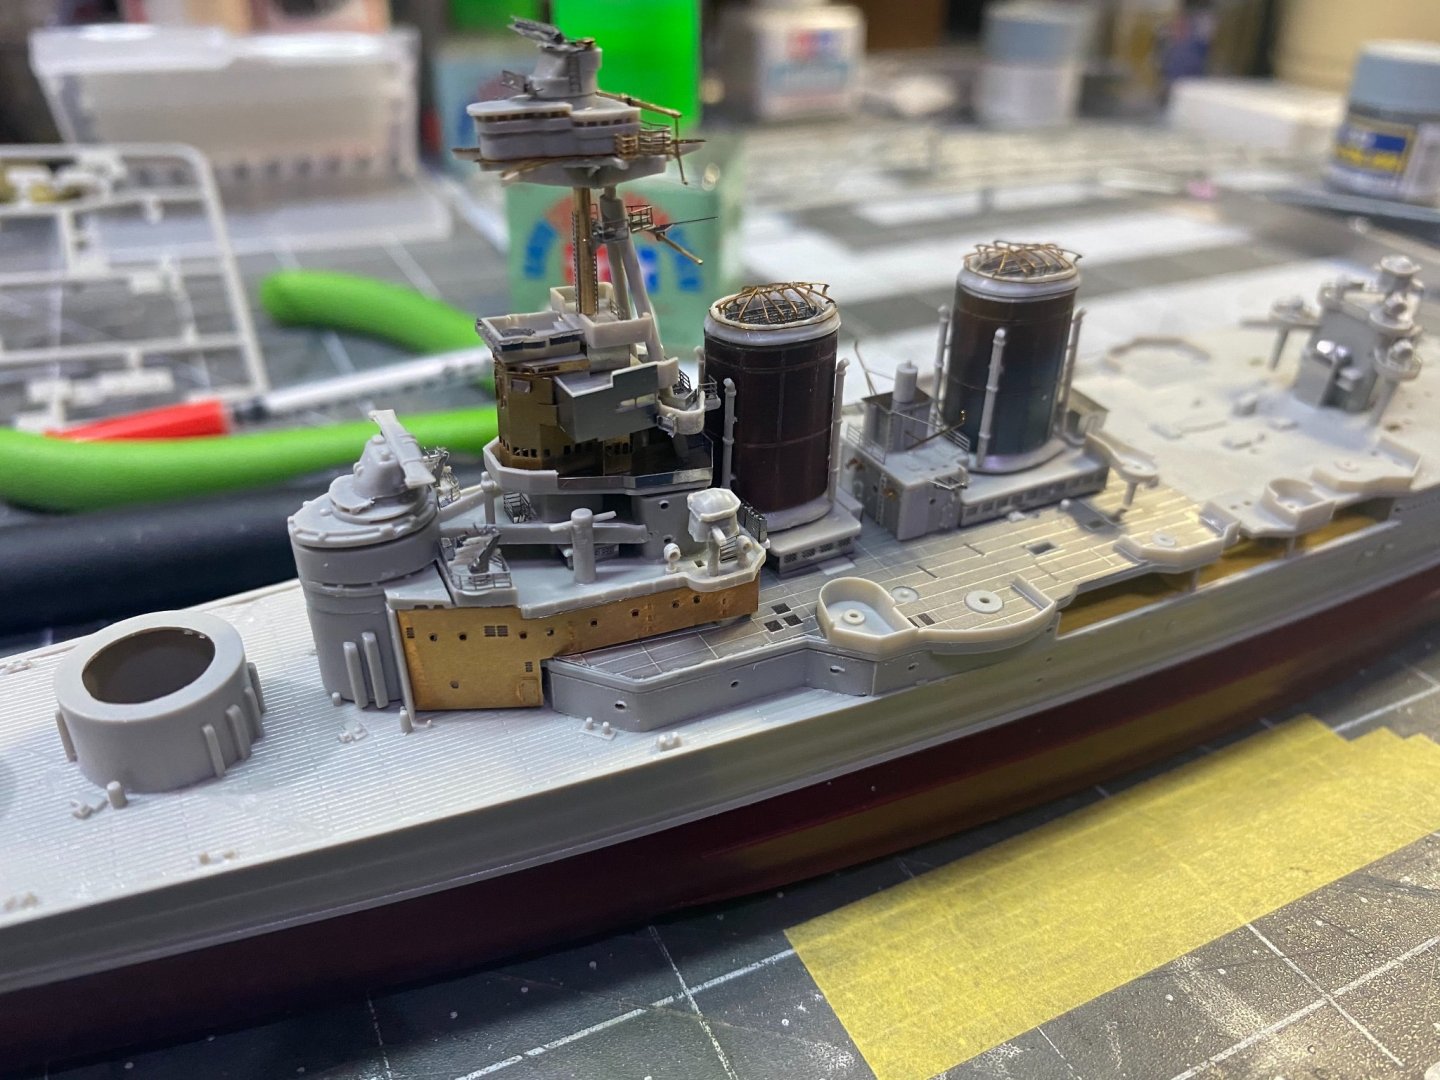
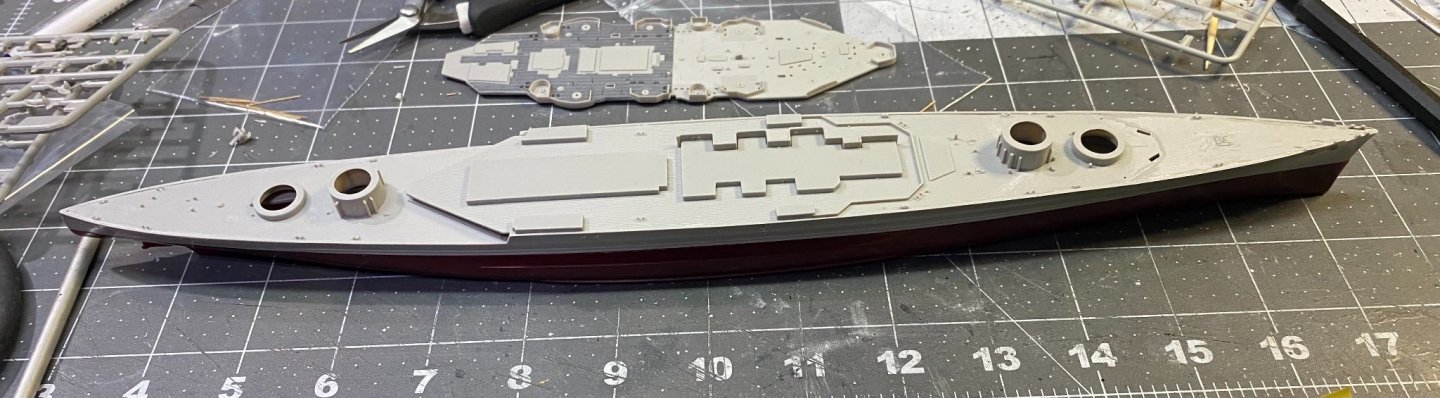
With a lot of the hard work put in on the front end, building and painting all the superstructure and armament pieces, the Hood falls together quickly. there will be another slow period adding some of the other small deck details which are plentiful.
- 225 replies
-
- 8
-
-
- I Love Kit
- Hood
- (and 2 more)
-
You're getting such great results Yves. Very impressive model and the fit is superb.
- 321 replies
-
- 7
-
-
- Finished
- Flower-class
- (and 1 more)
-
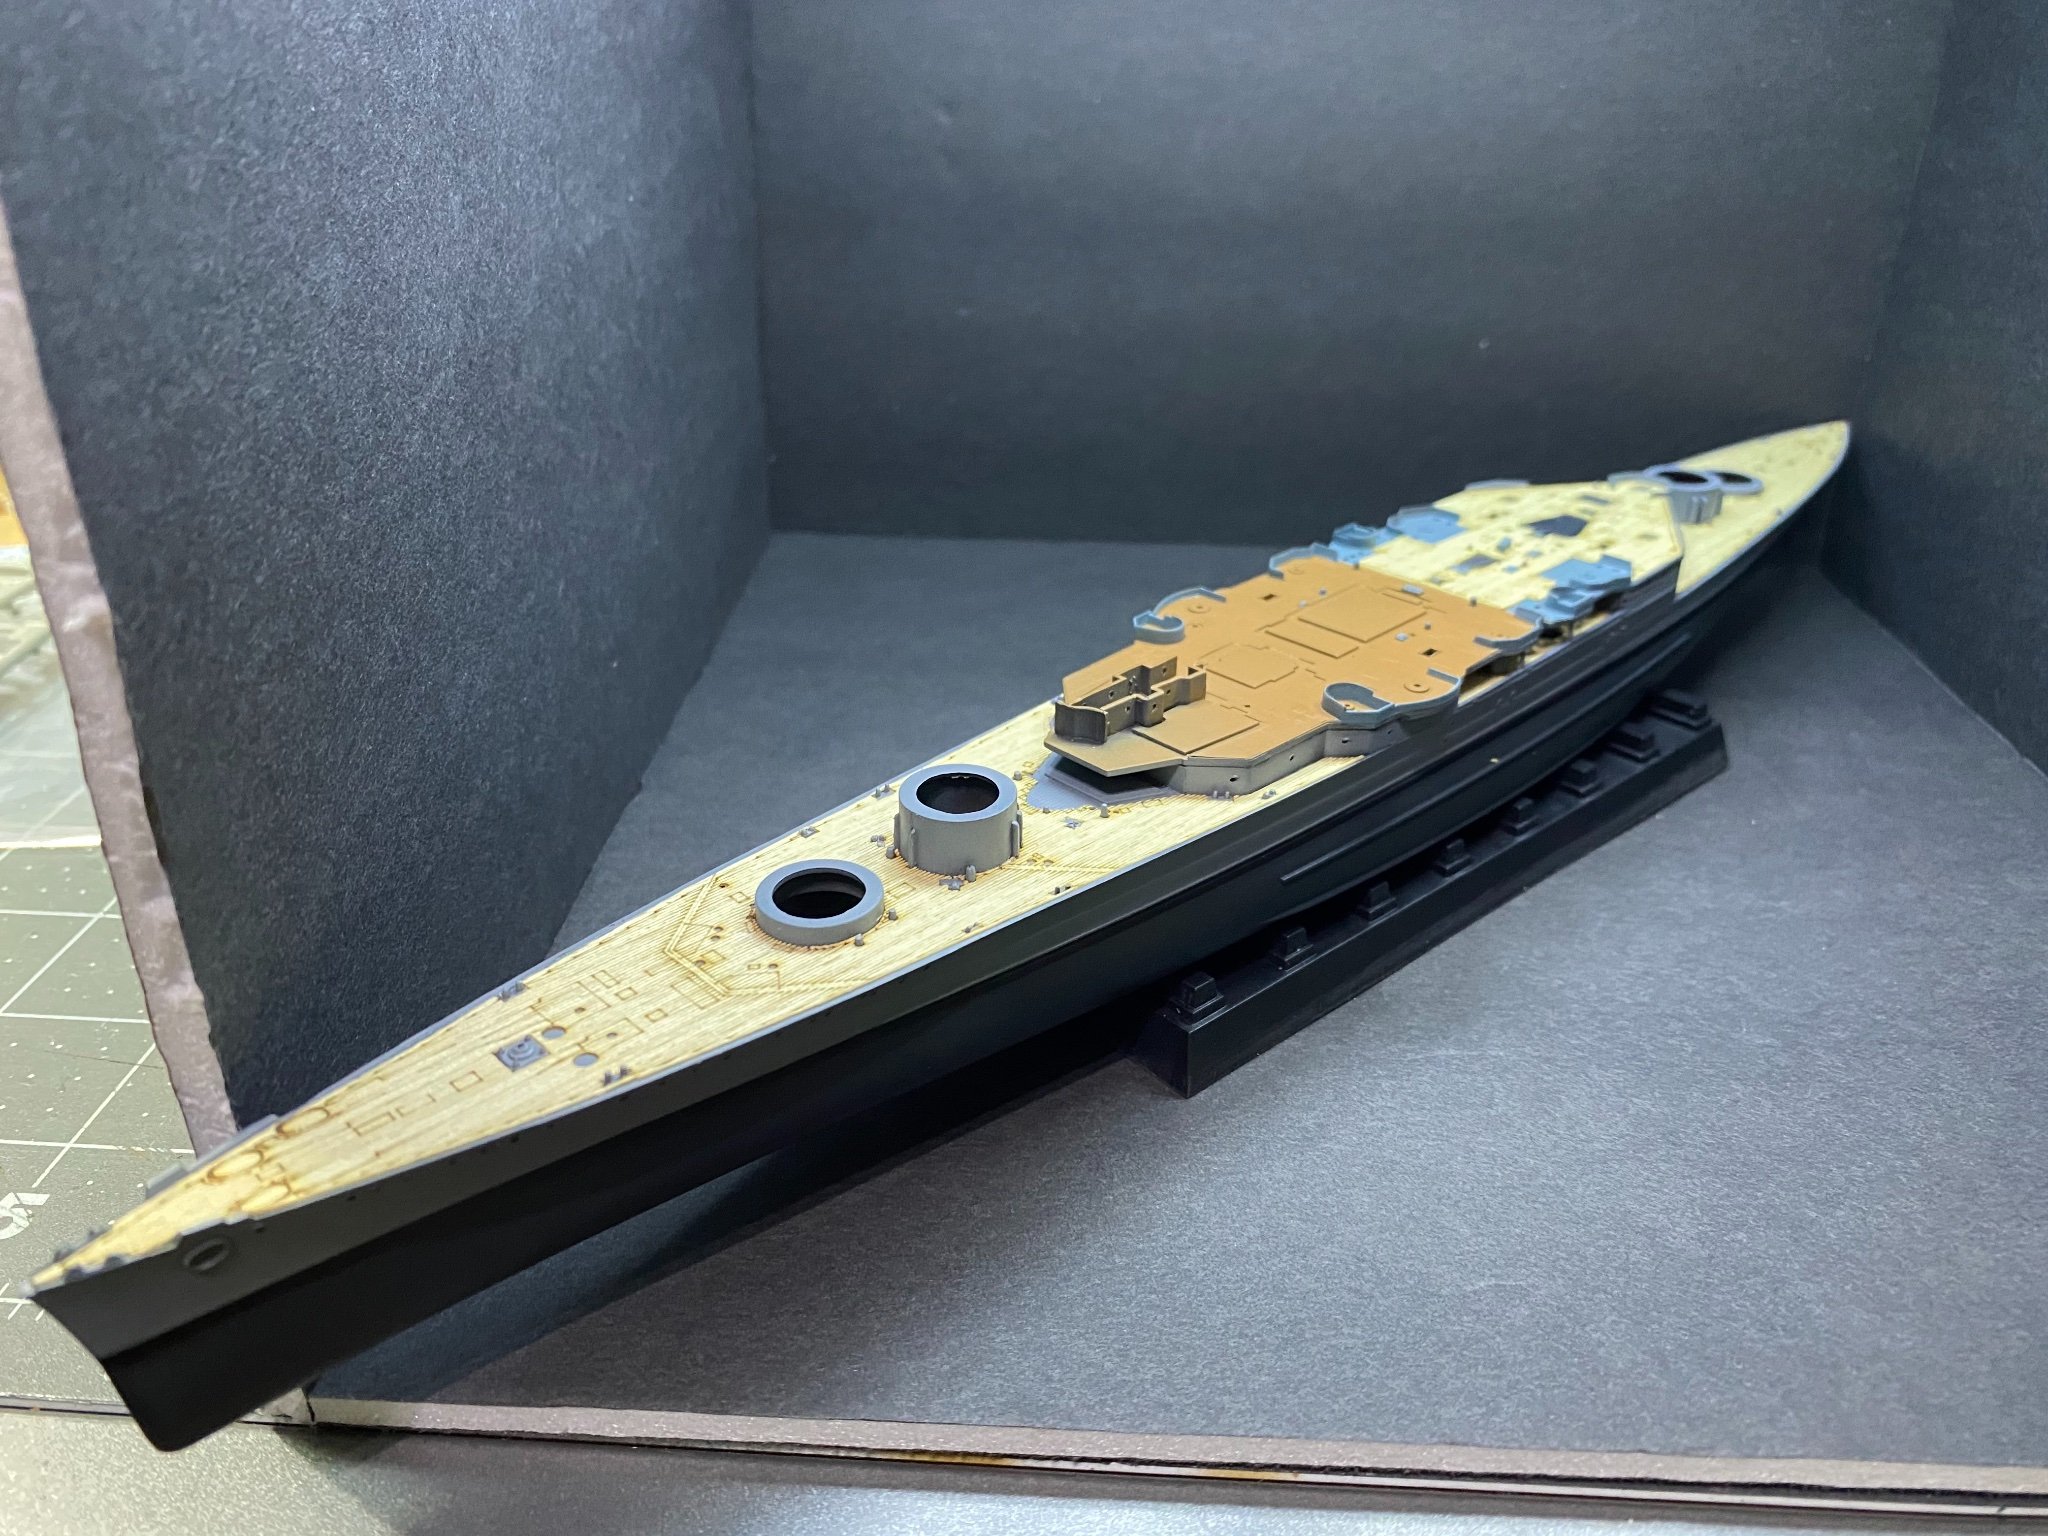
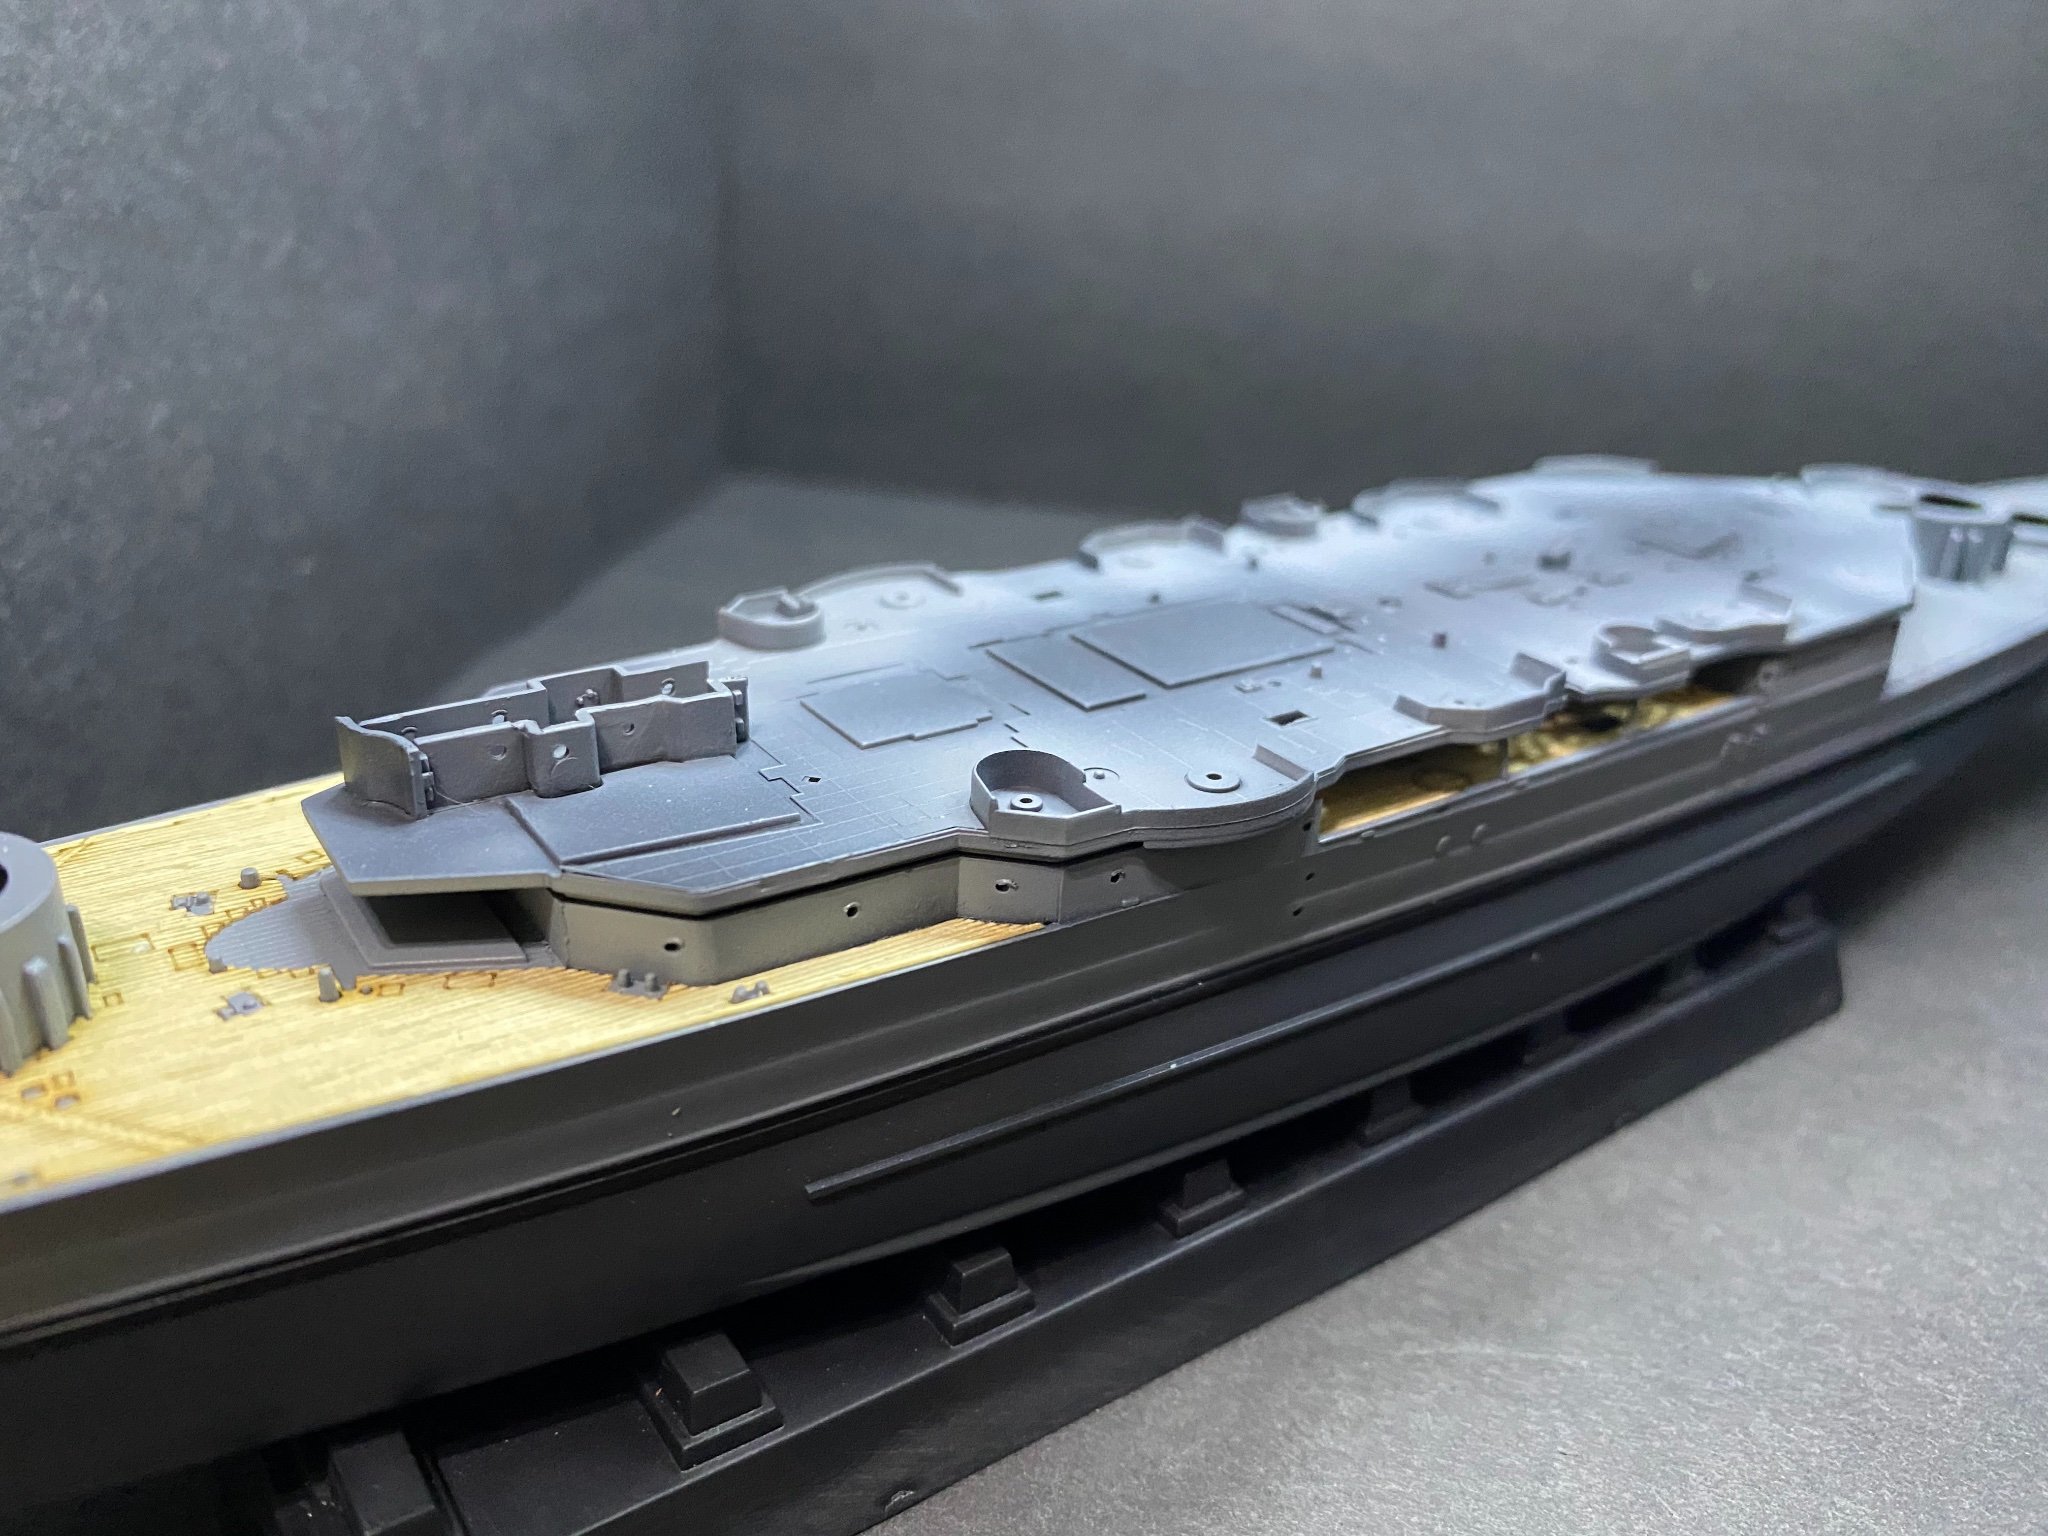
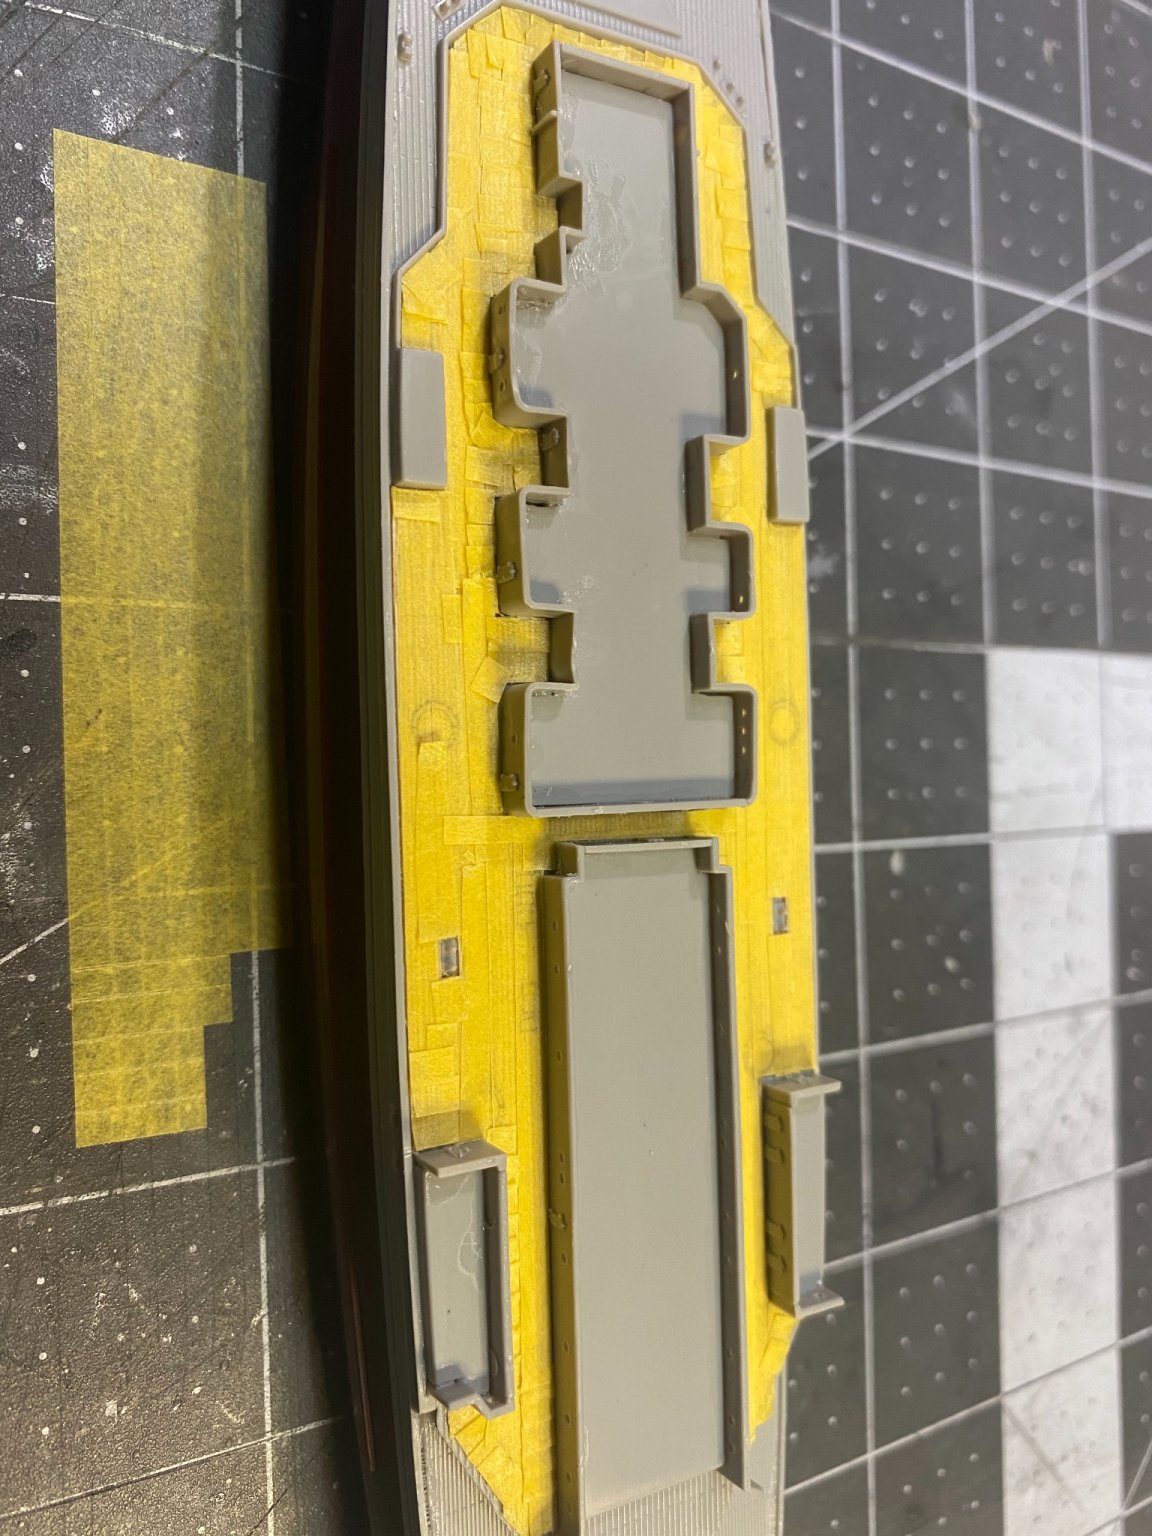
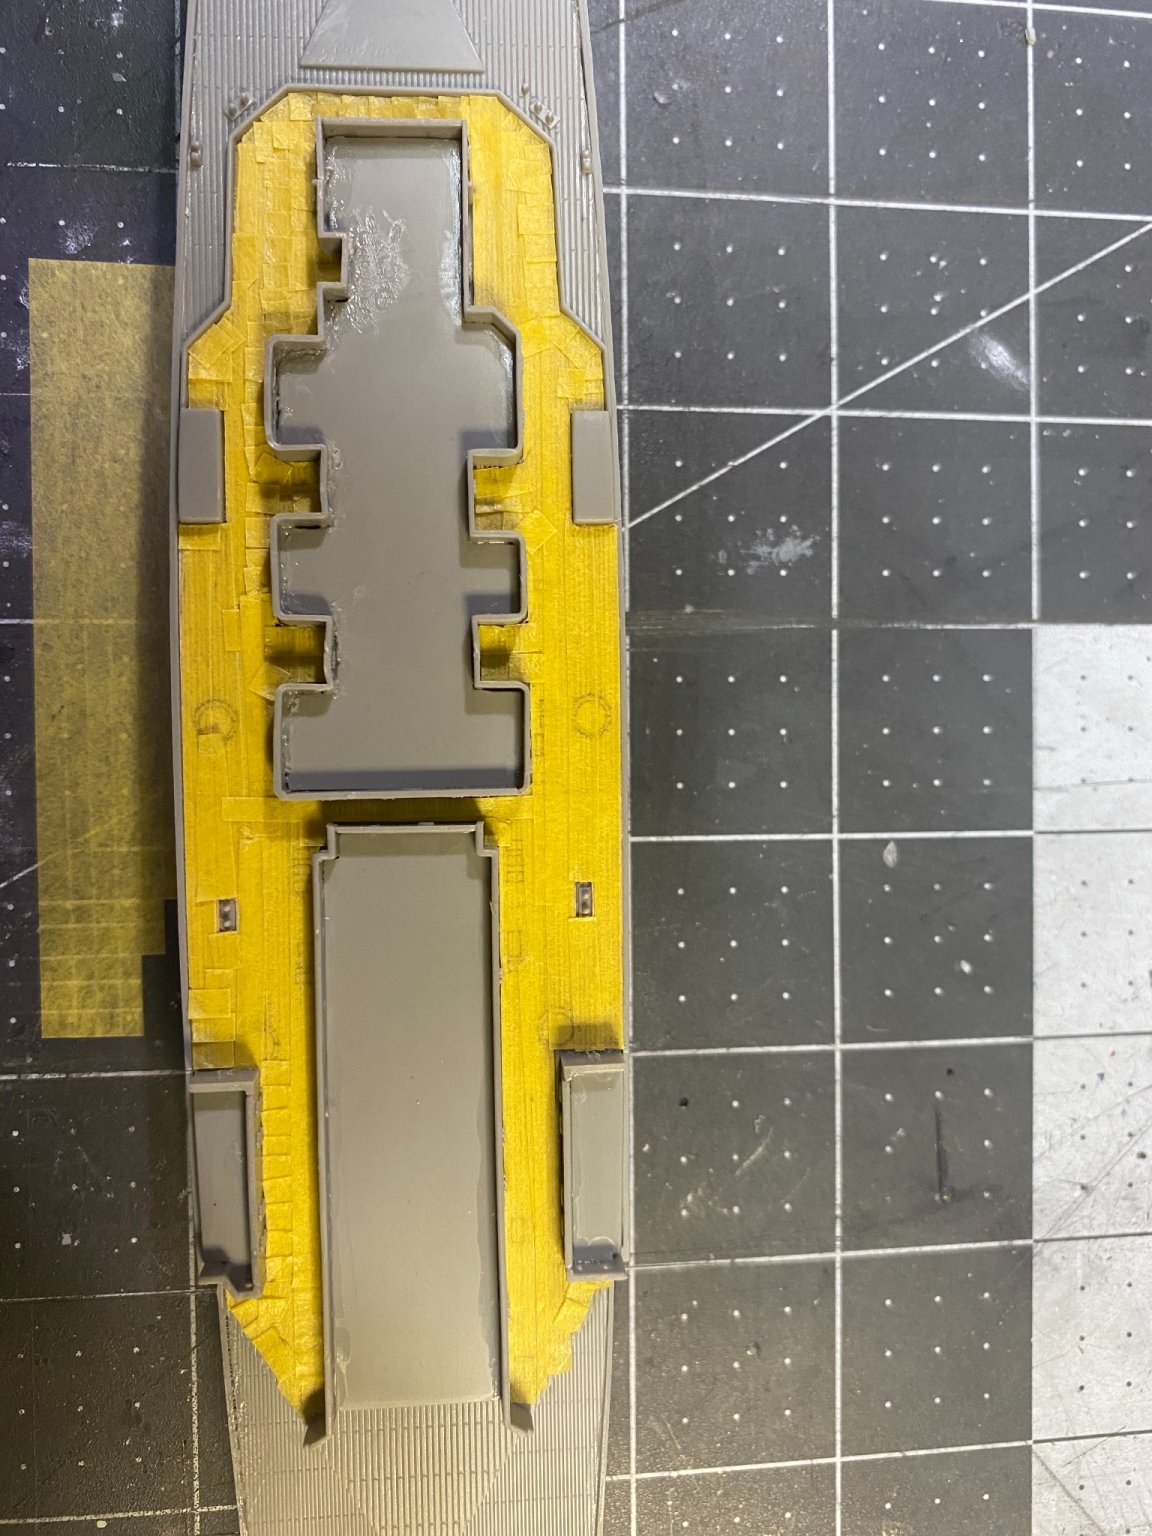
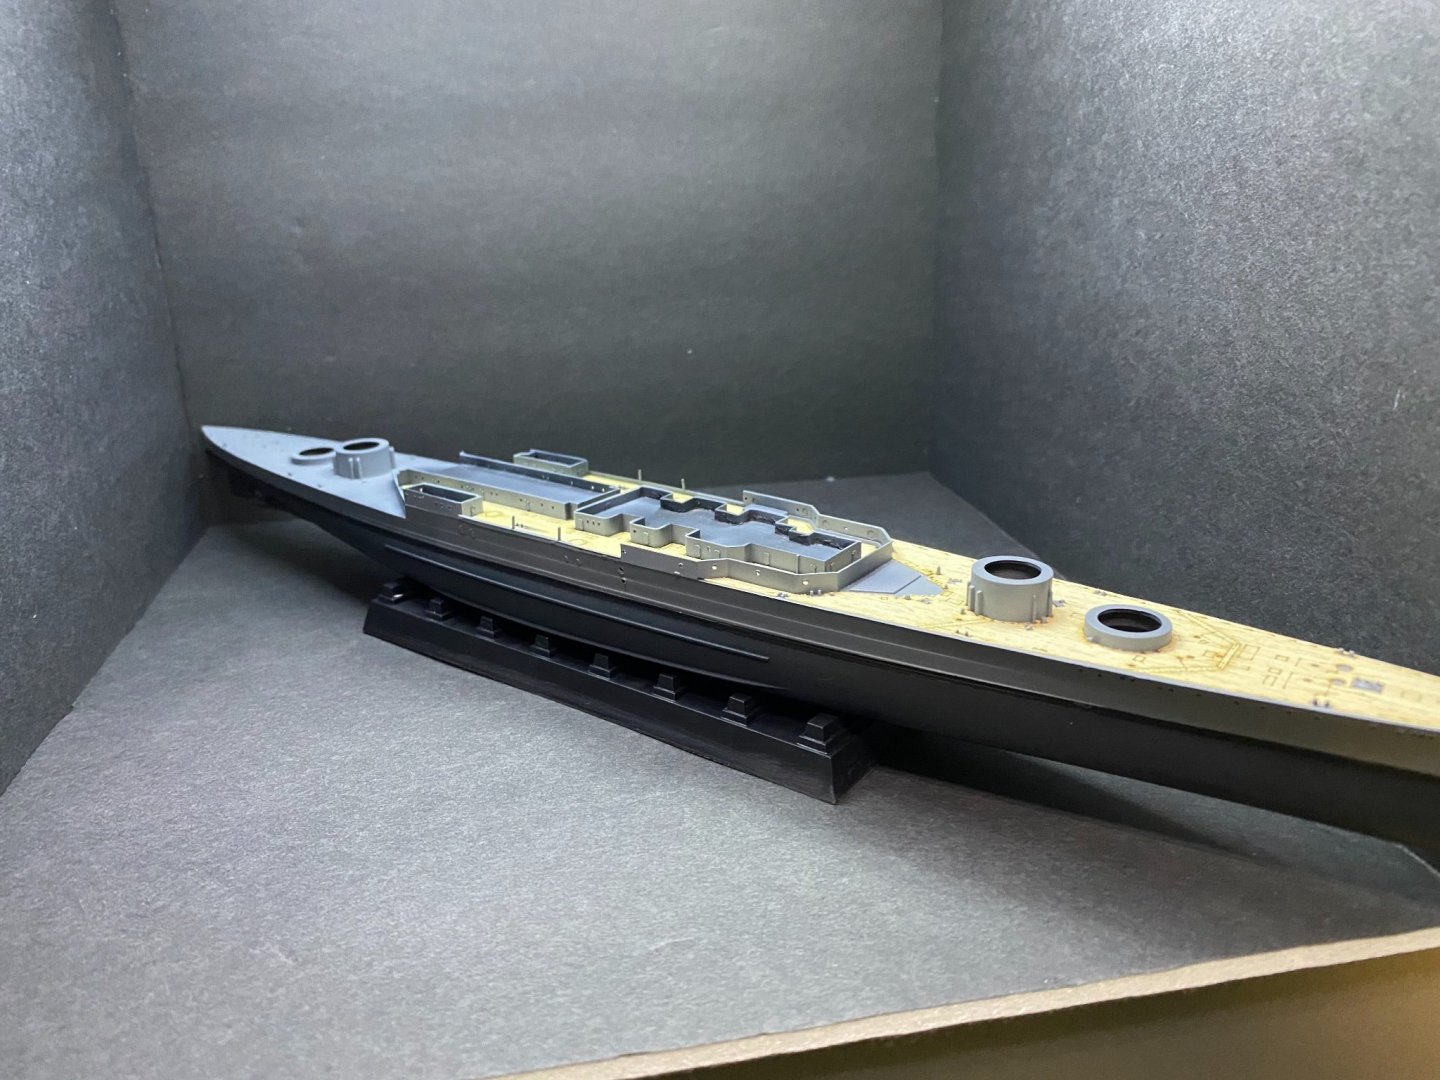
Deck wood treatments applied, now ready to begin adding the various superstructure and gun details to the decks. Going to need a larger shadow box for photos of battleships and aircraft carriers. This one was built for model cars not ships, but they are cheap and easy to make from Dollar Tree products.


- 225 replies
-
- 6
-
-
- I Love Kit
- Hood
- (and 2 more)
-
It's a great primer/leveler, so first coats should be Mr Surfacer. They make it in 500, 1000, 1200, and 1500. The lower numbers give the greatest fill capability for small scratches and imperfections, but it can obscure fine details. I used black1500 on the Hood.
- 225 replies
-
- 5
-
-
- I Love Kit
- Hood
- (and 2 more)
-
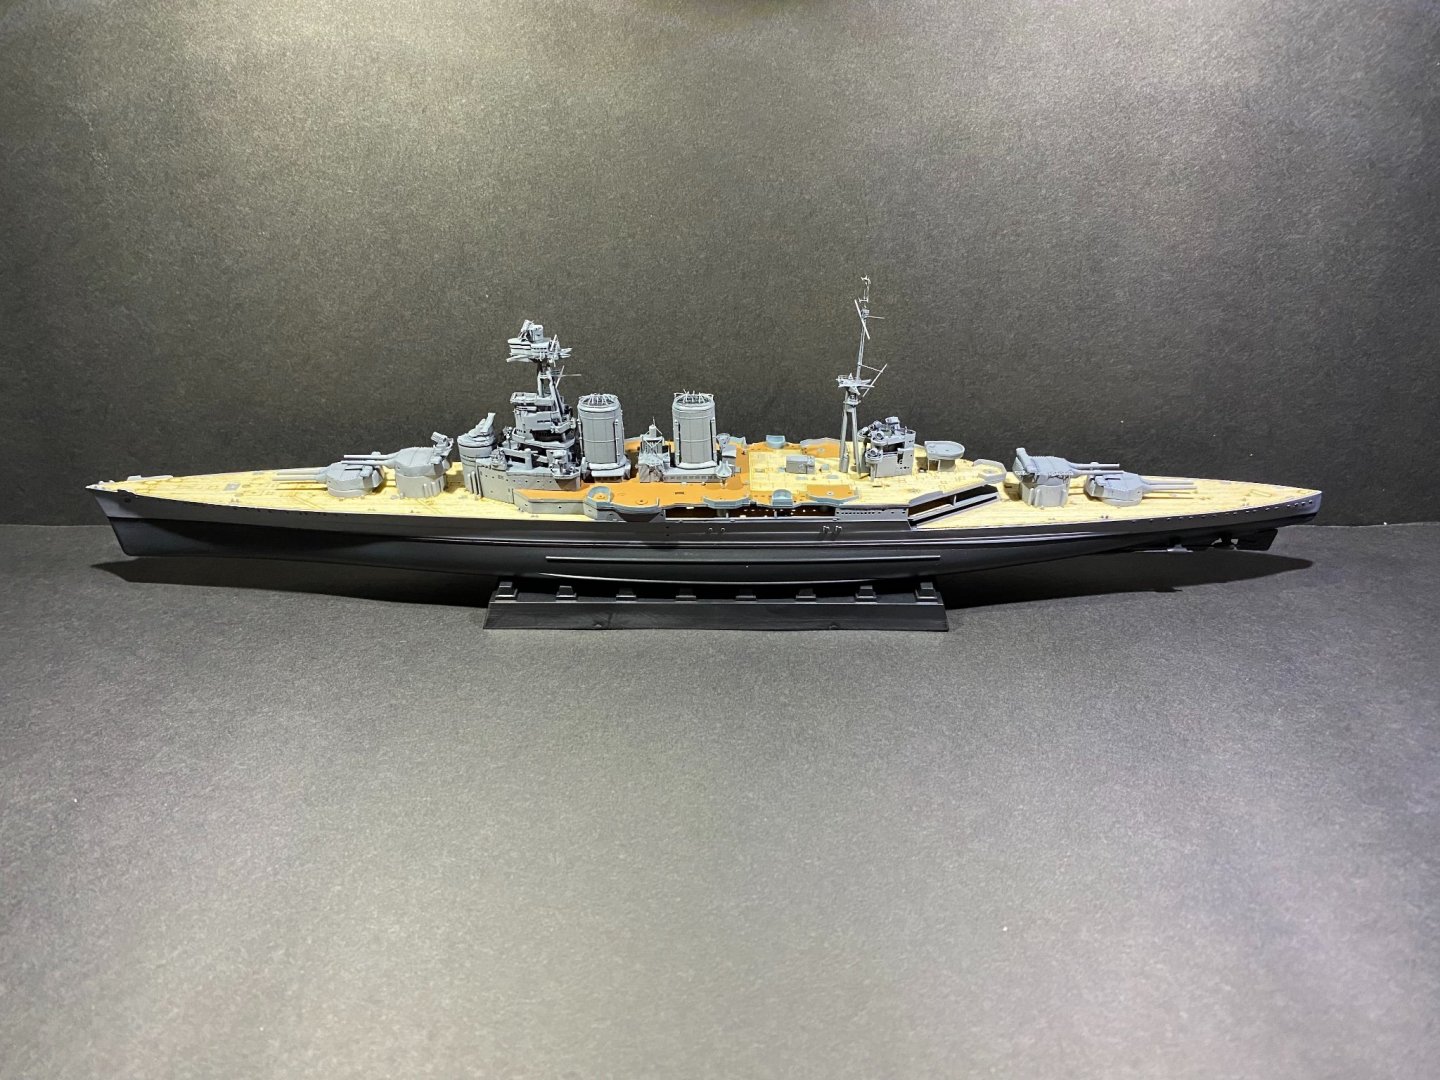
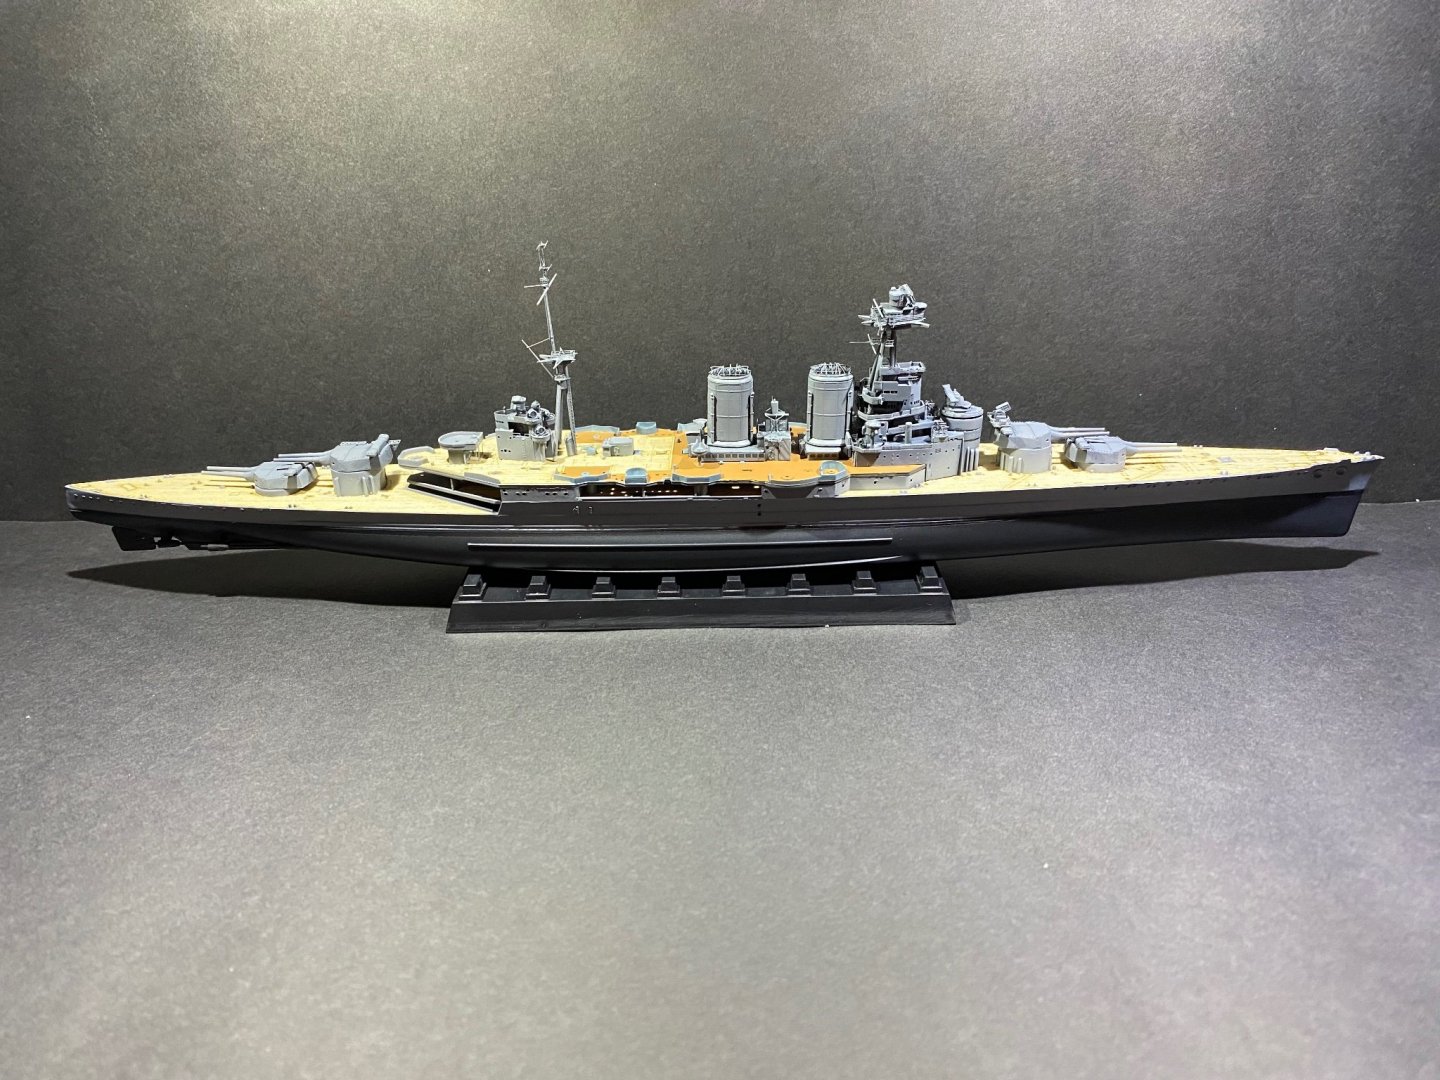
Here’s my interpretation of a gray anti foul hull Hood. The last two photos show how little of the wooden deck shows up under the next deck level.

- 225 replies
-
- 7
-
-
- I Love Kit
- Hood
- (and 2 more)
-
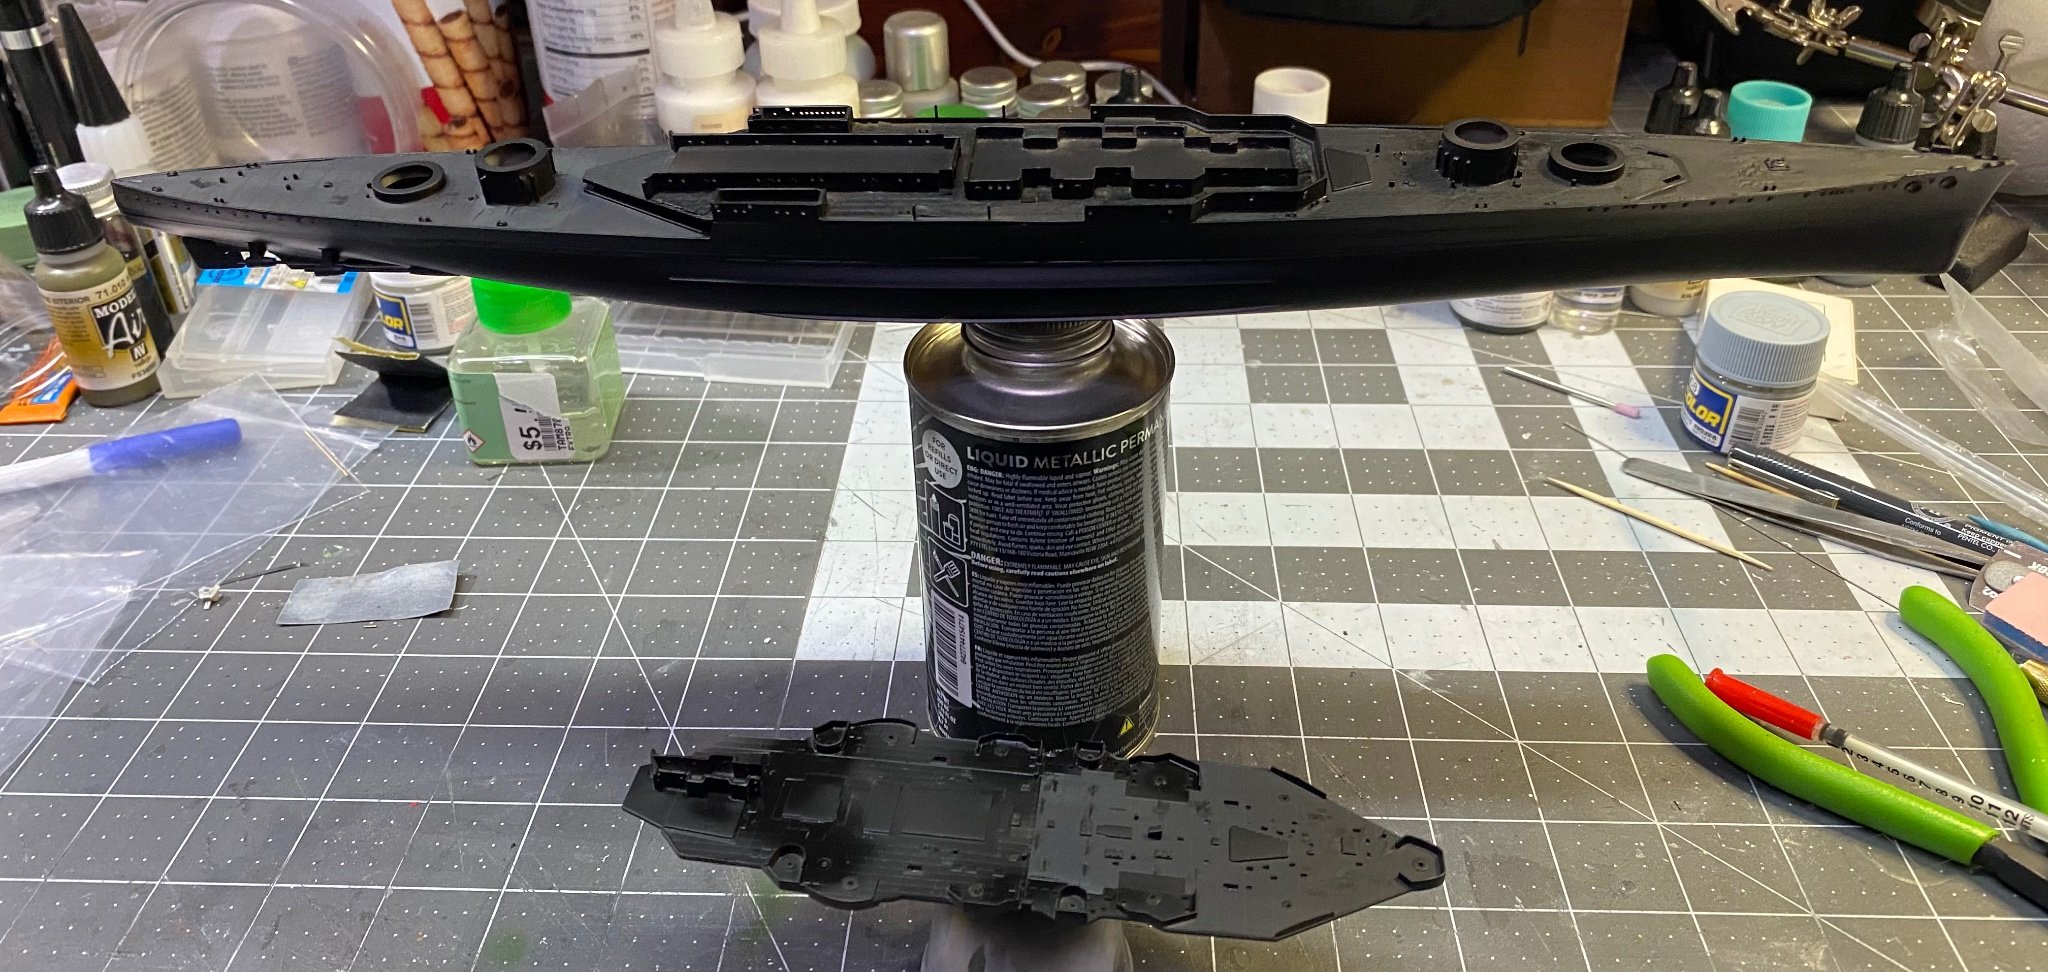
What do you think about a speculative all black HMS Hood? Just kidding of course. 😄 with the gray paint scheme, am starting out with Mr Surfacer 1500 as a base. Will add progressively lighter shades of gray to give depth and shadows.

- 225 replies
-
- 9
-
-
- I Love Kit
- Hood
- (and 2 more)
-
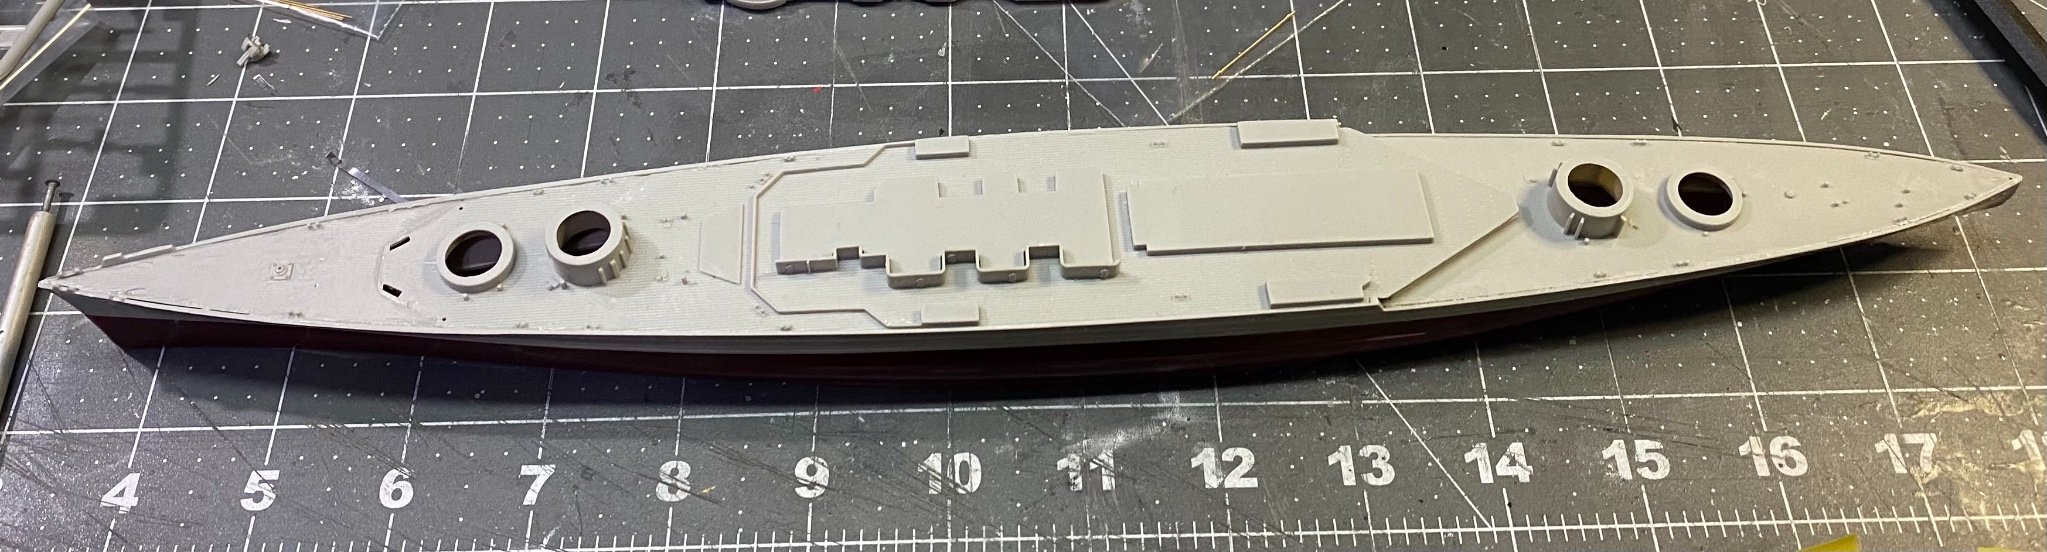
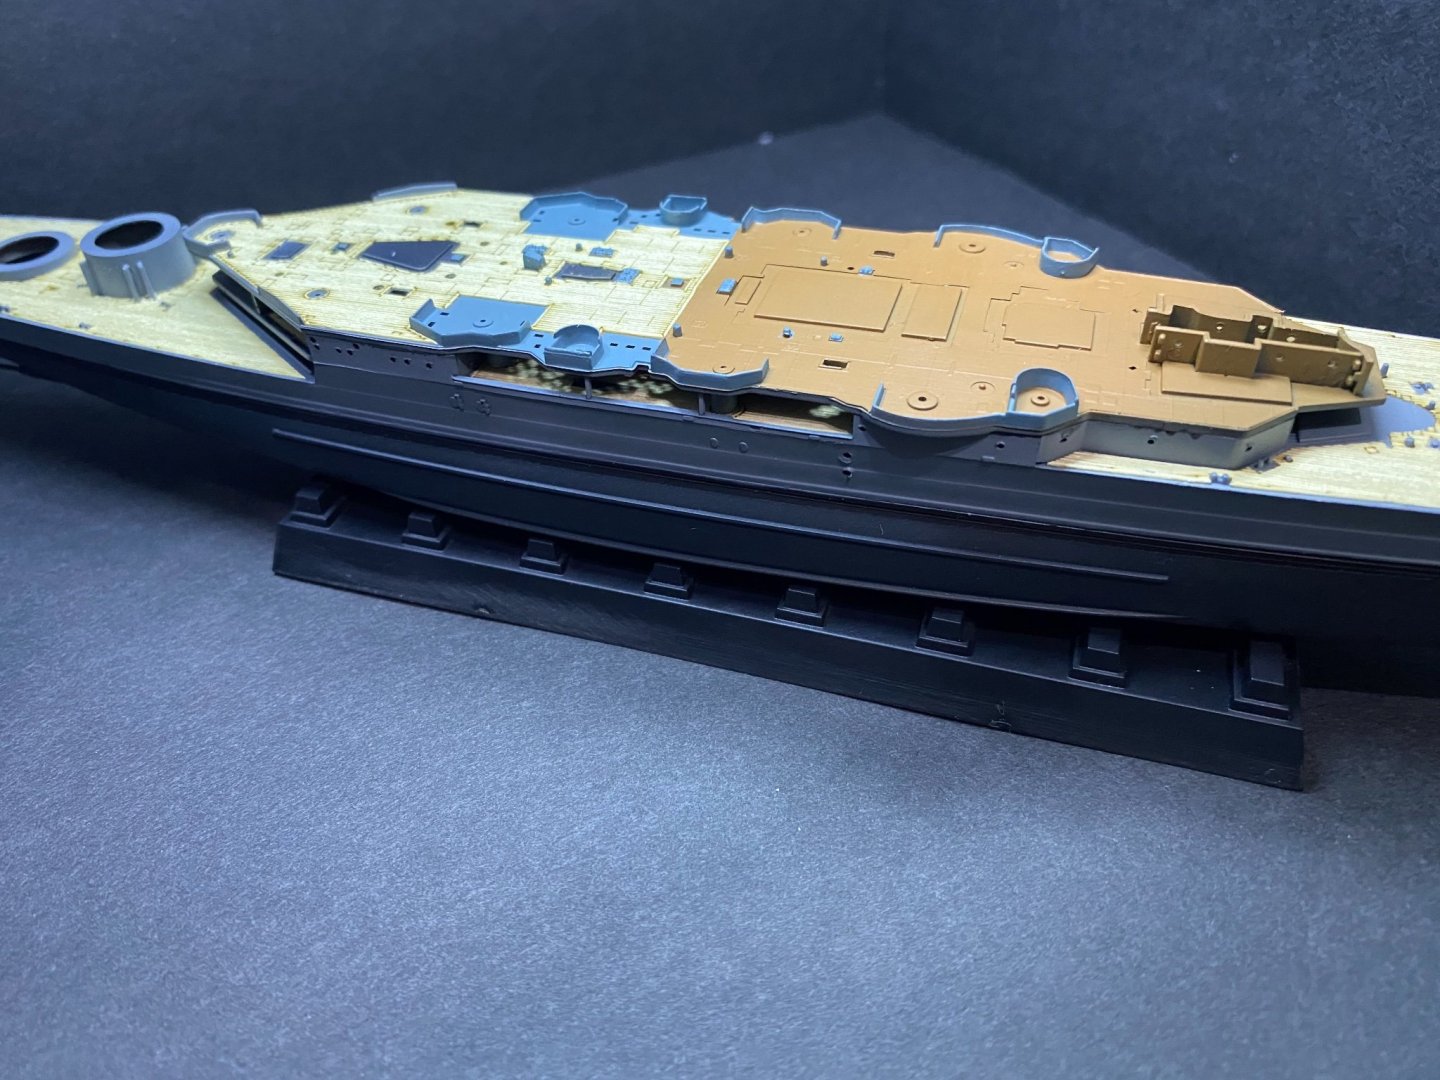
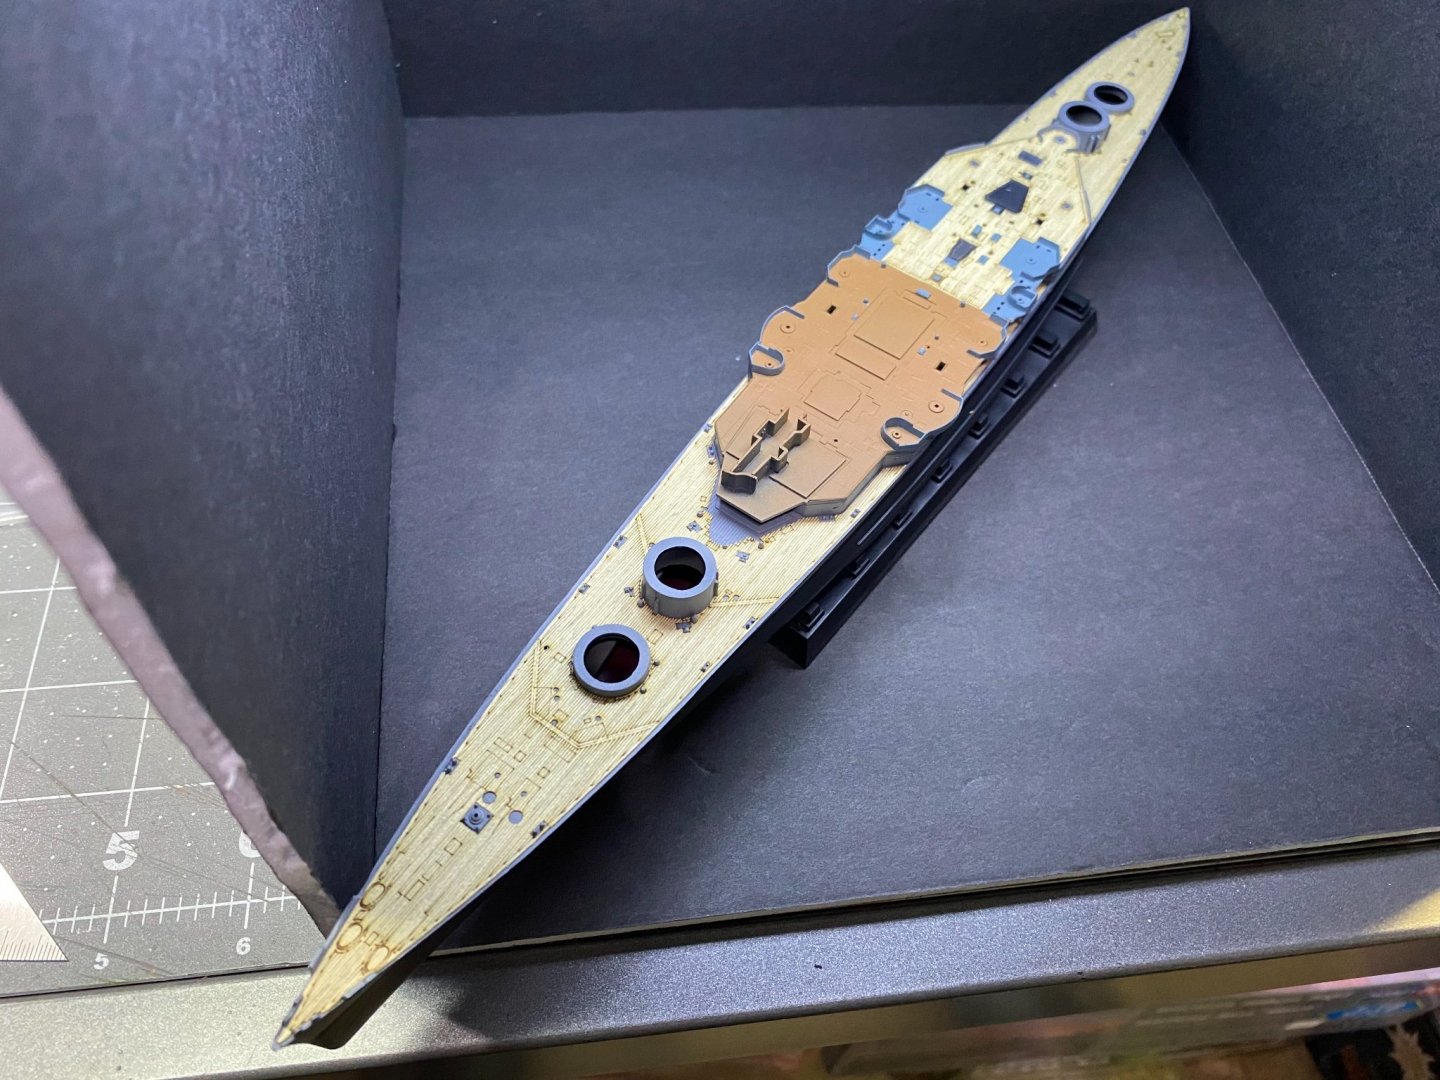
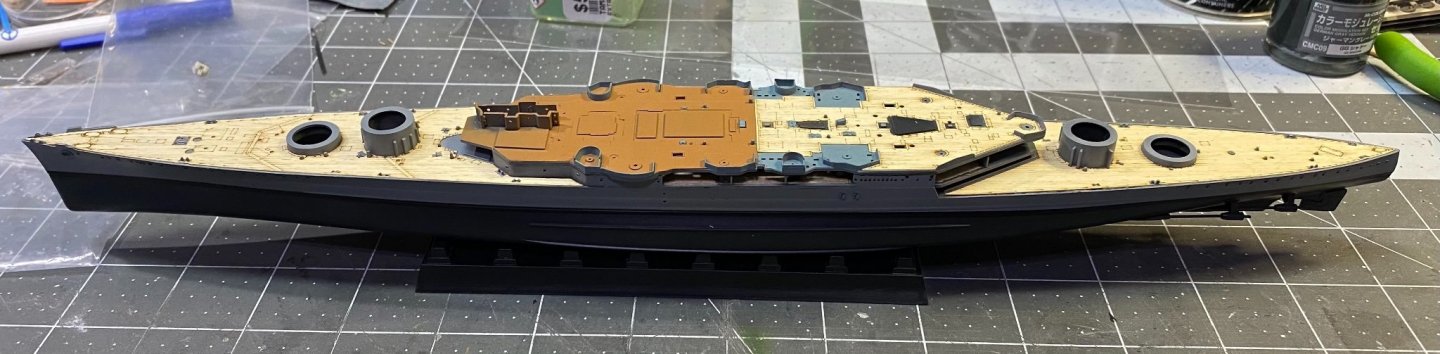
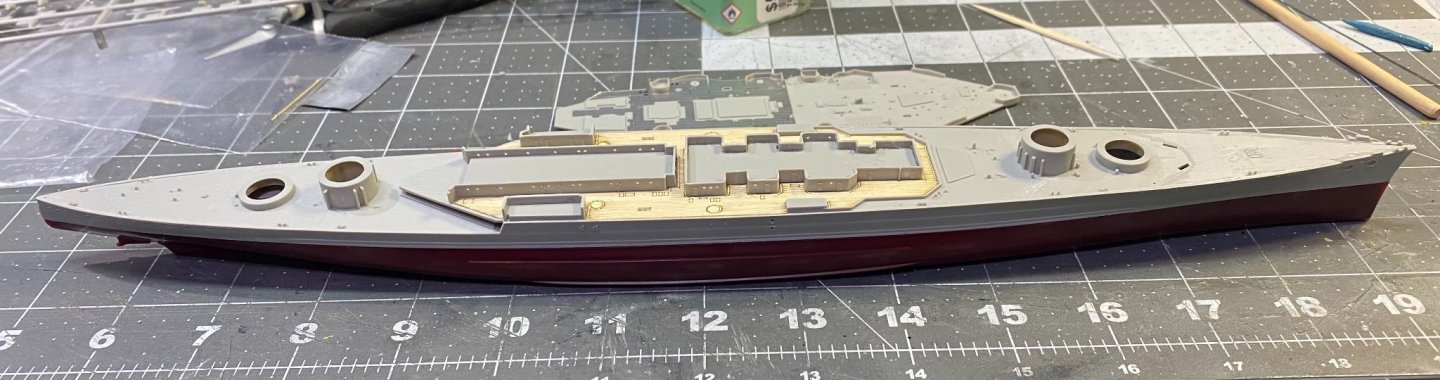
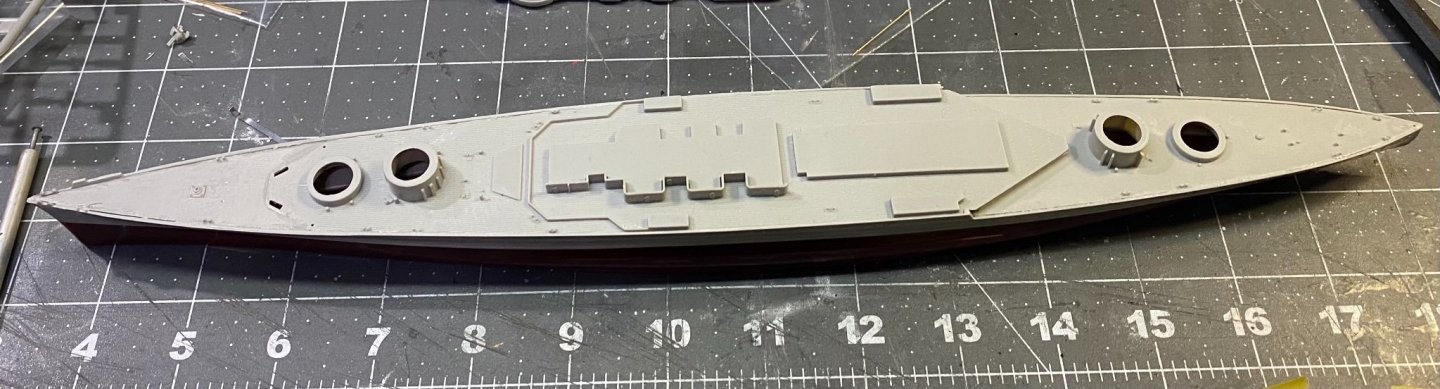
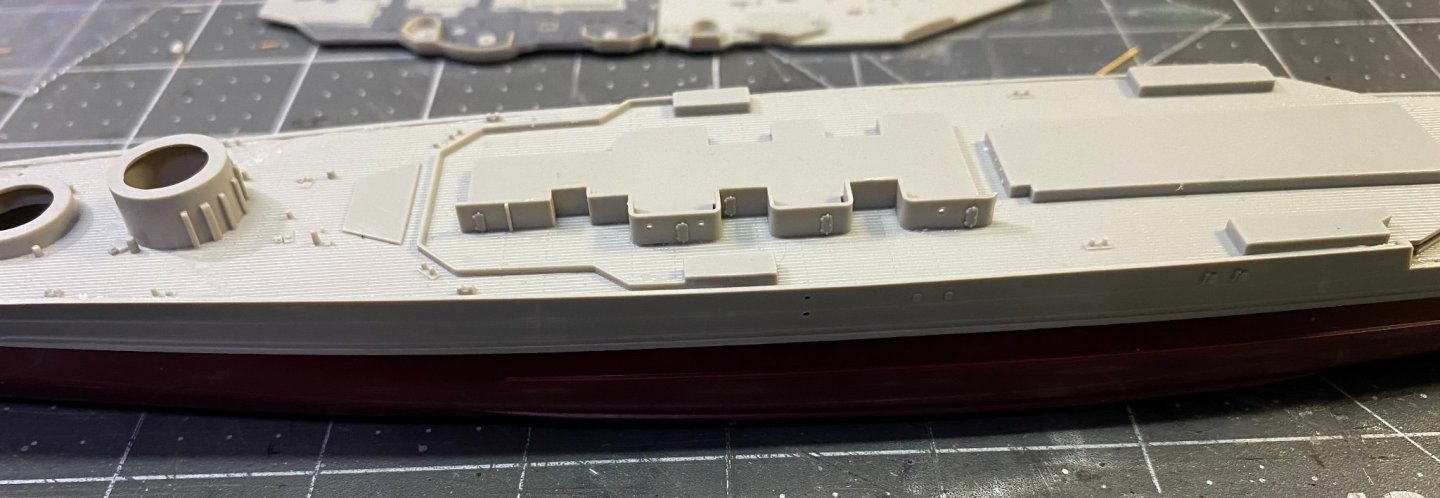
Wood deck is masked off and model is getting ready for paint. Added some more superstructure first deck side parts, then staged completed sub assemblies for a dry fit.


- 225 replies
-
- 10
-
-
- I Love Kit
- Hood
- (and 2 more)
-
Thanks for the research OC. I see a lot of "speculative" statement qualifiers in the text, though I cannot clearly make out all of it, it's blurry. I like the looks of the gray anti fouling and may go with that. it's just odd to me I don't see photos where modelers have followed this scheme. Usually, modelers are fairly hard core when it comes to color, but that certainly doesn't make them infallible. In the long run, no one who visits my home and sees the paint scheme on my Hood model will know the difference one way or another in any event. I have not attended or entered a contest with judges in years. If you did, the info you found would be valuable to back up a gray interpretation.
- 225 replies
-
- 4
-
-
- I Love Kit
- Hood
- (and 2 more)
-
That gentleman is an amazingly skilled modeler. Wow.
-
That hull turned out so nice. Congratulations on such a successful outcome and on your first try at that. The seller of the shape files needs to make you and photos of your work his advertisement.
- 321 replies
-
- 9
-
-
- Finished
- Flower-class
- (and 1 more)
-
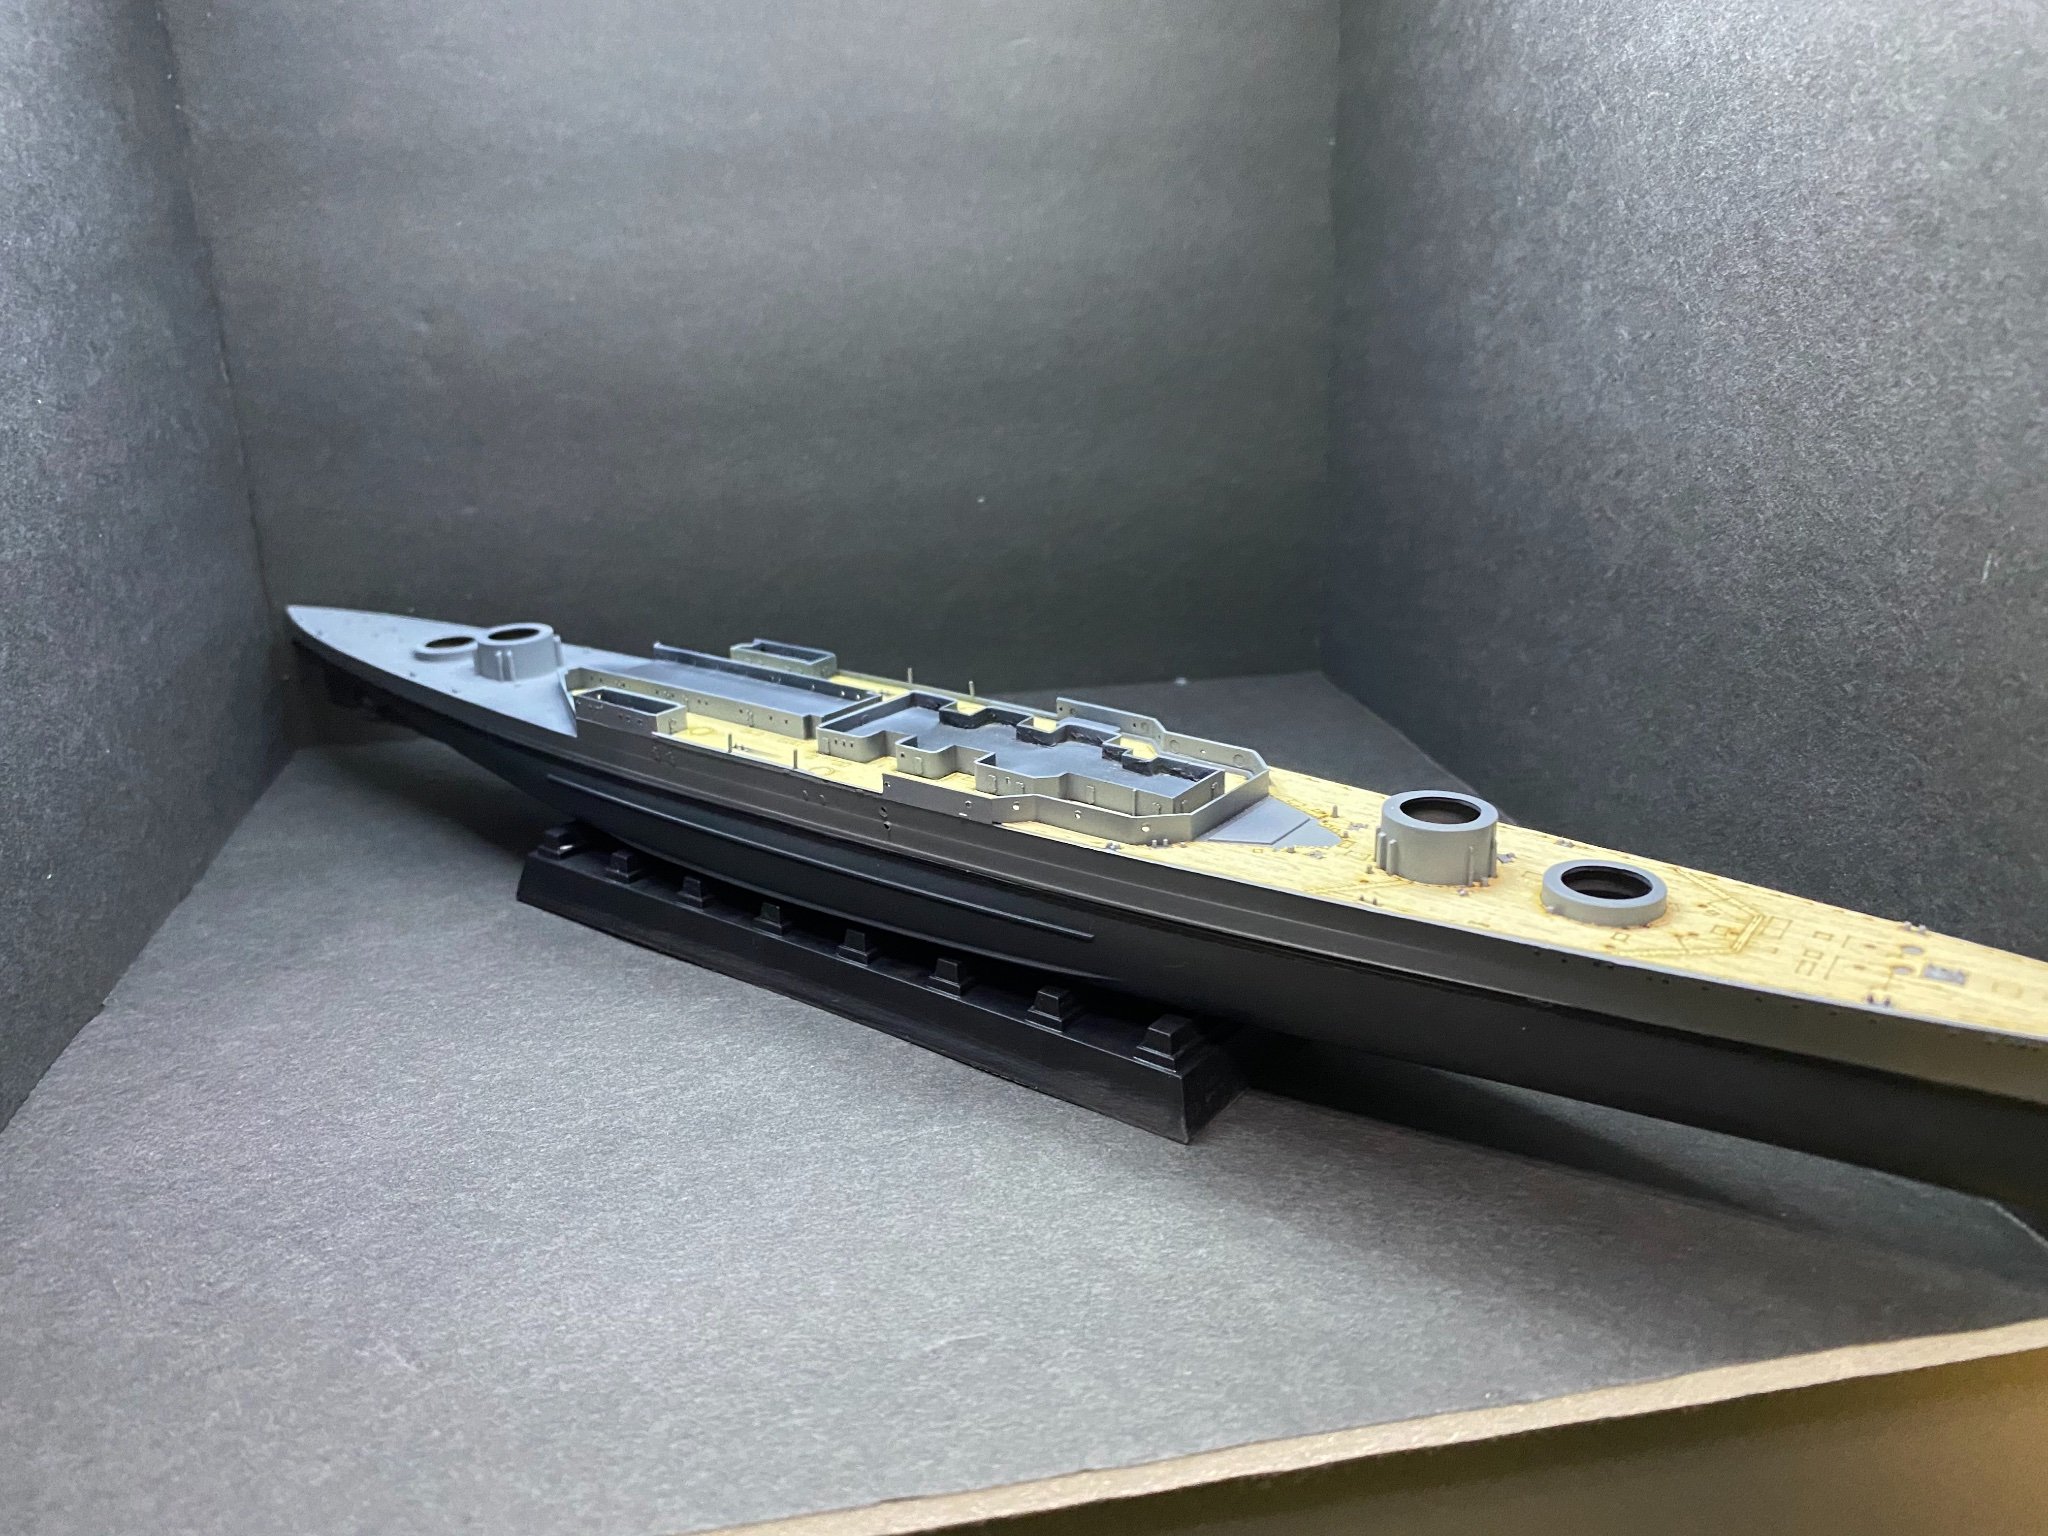
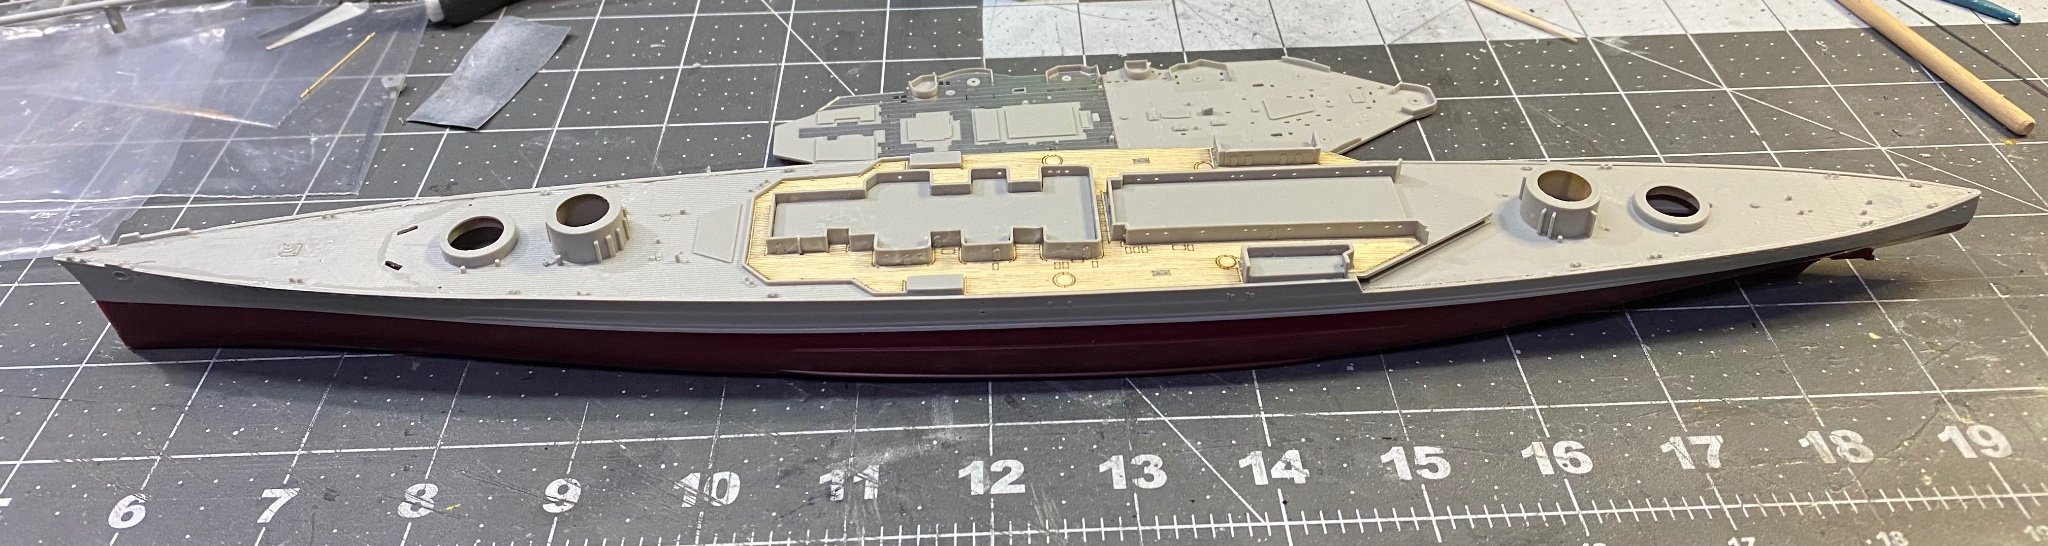
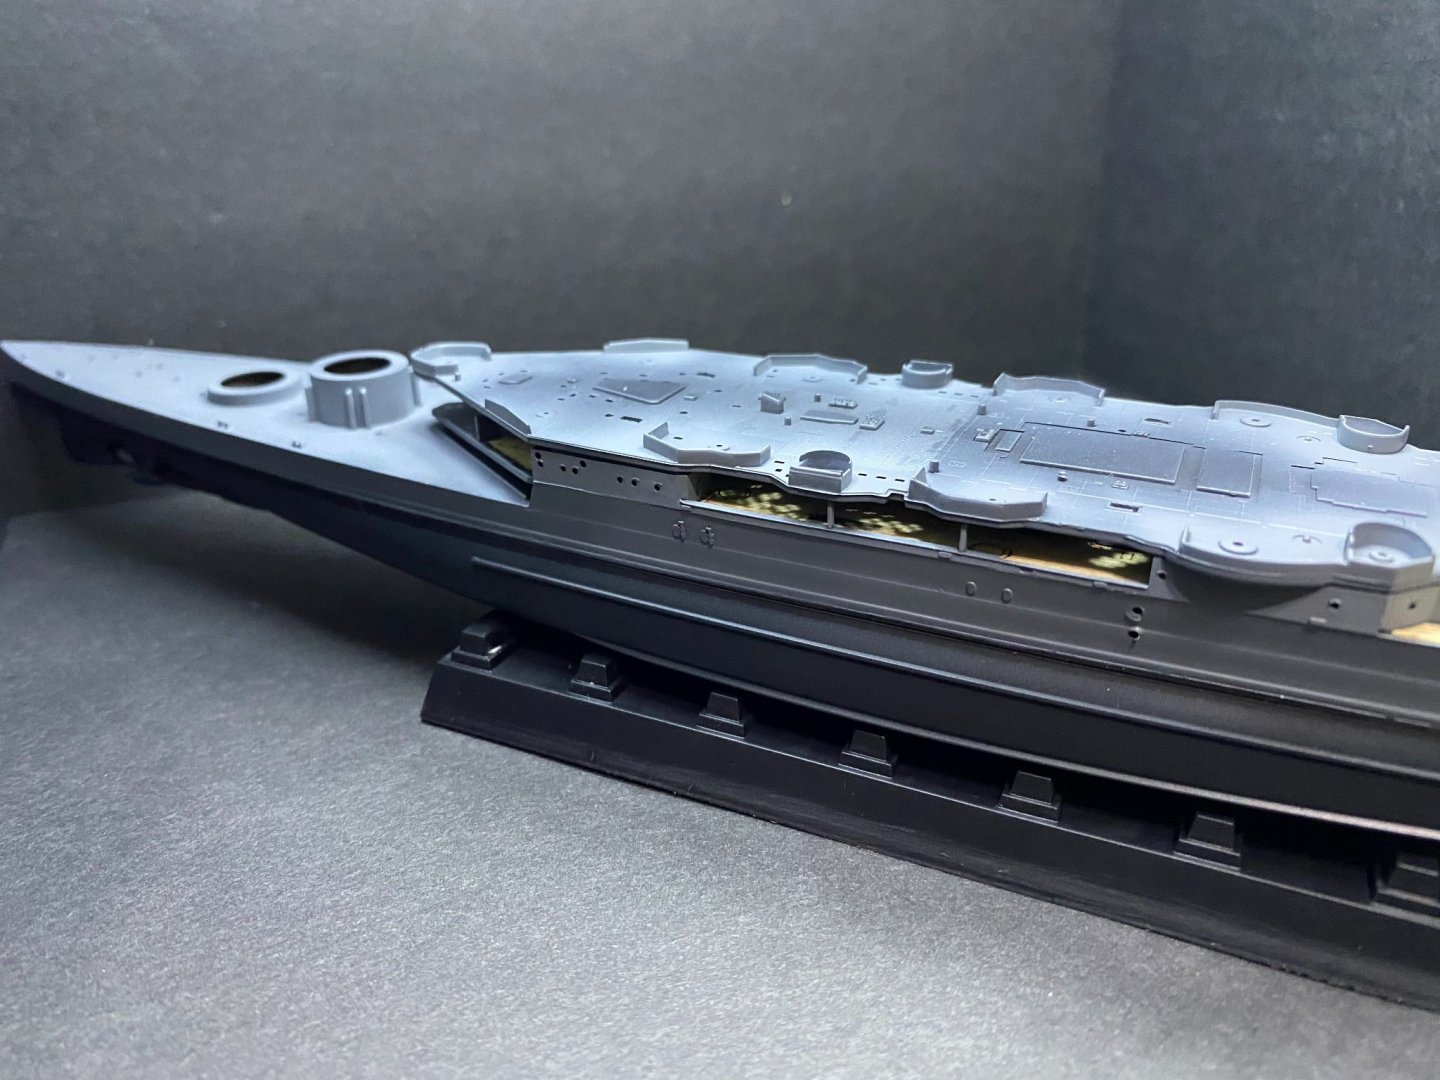
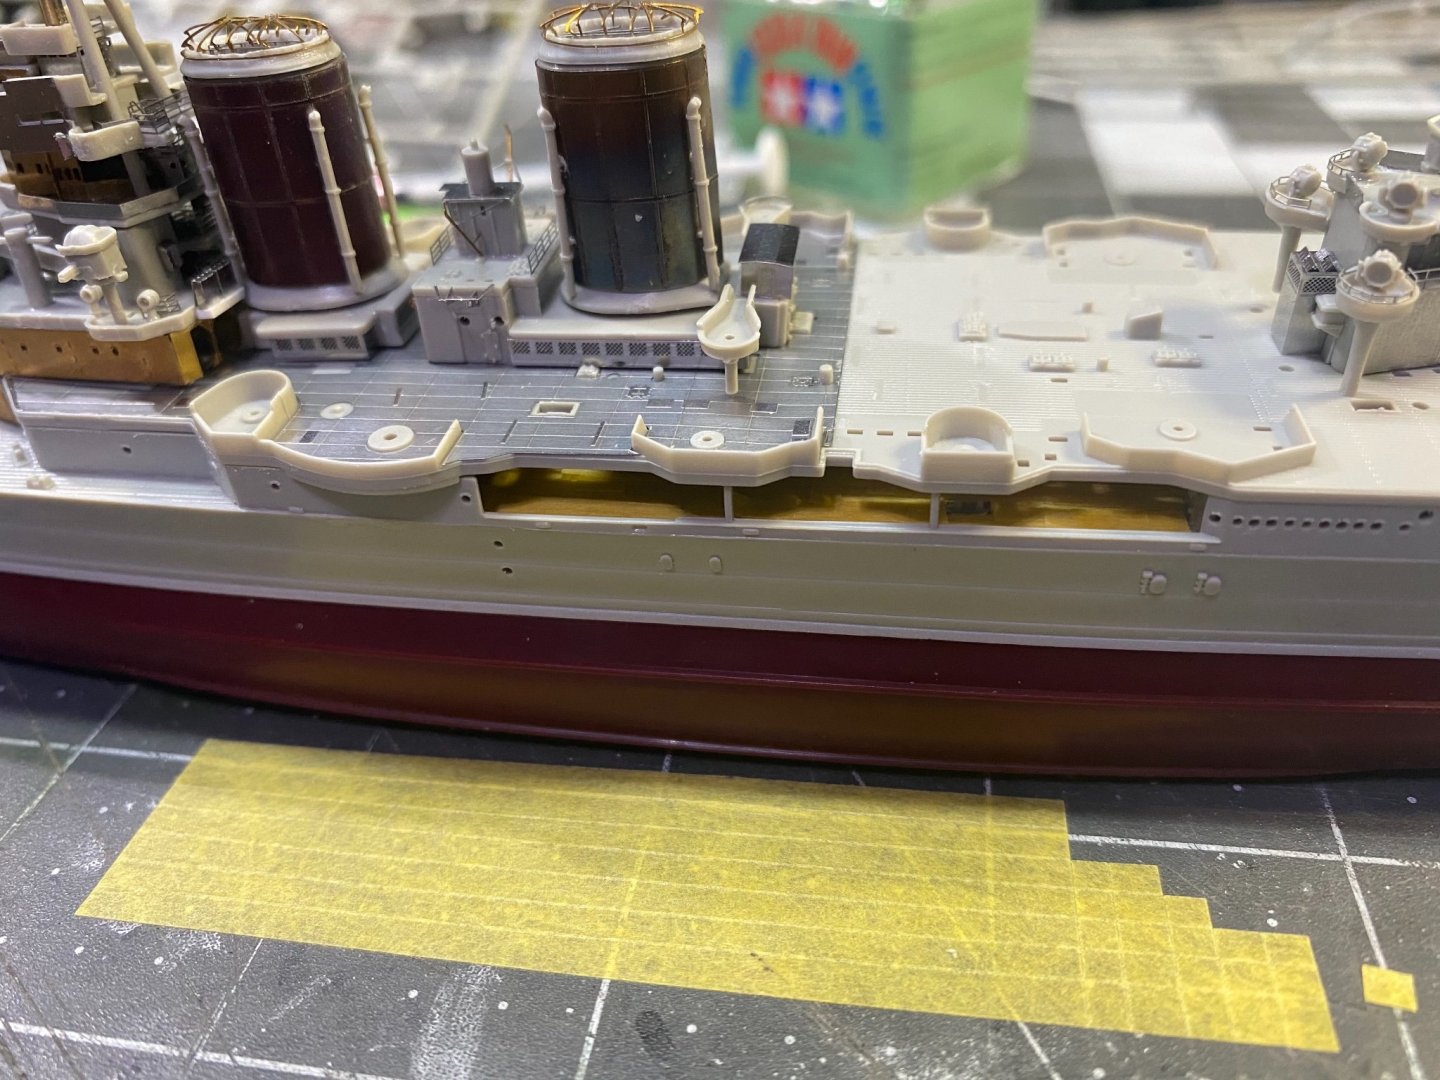
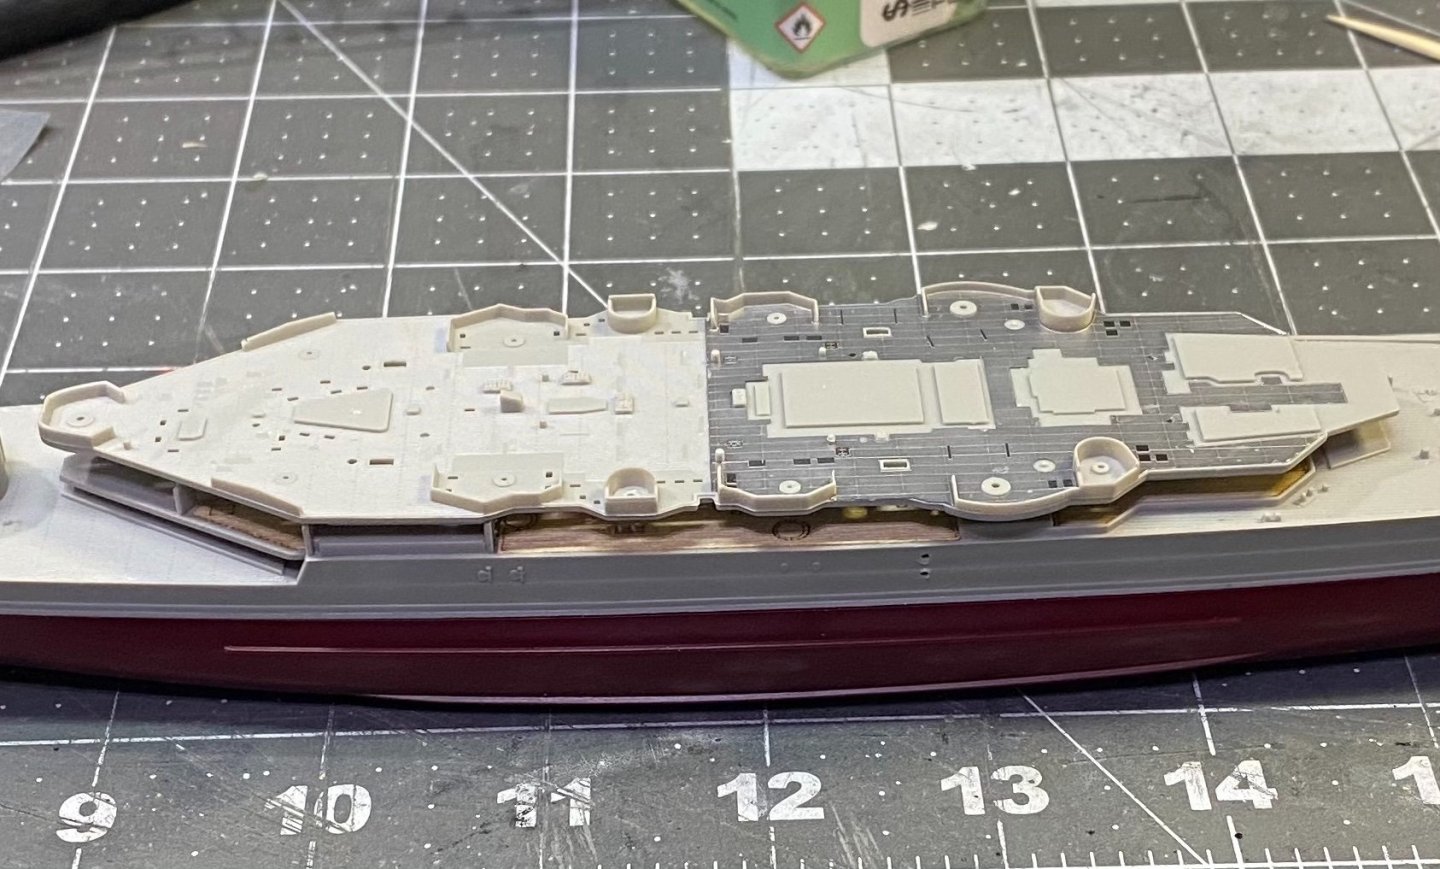
Sides came off and the wooden deck was applied before gluing the superstructure sides in place. Will have to mask off the deck before painting the superstructure. In the end it’s much ado about little because another deck covers most all of the wood deck beneath. The second deck is resting in place without glue, just sizing it all up.

- 225 replies
-
- 7
-
-
- I Love Kit
- Hood
- (and 2 more)
-
Seems to me an automated self leveling feature would be well worth the extra investment. Maybe the newer machines are better about staying level. I printed out a set of big adjustment screws that helped a lot, too.
- 321 replies
-
- 7
-
-
- Finished
- Flower-class
- (and 1 more)
-
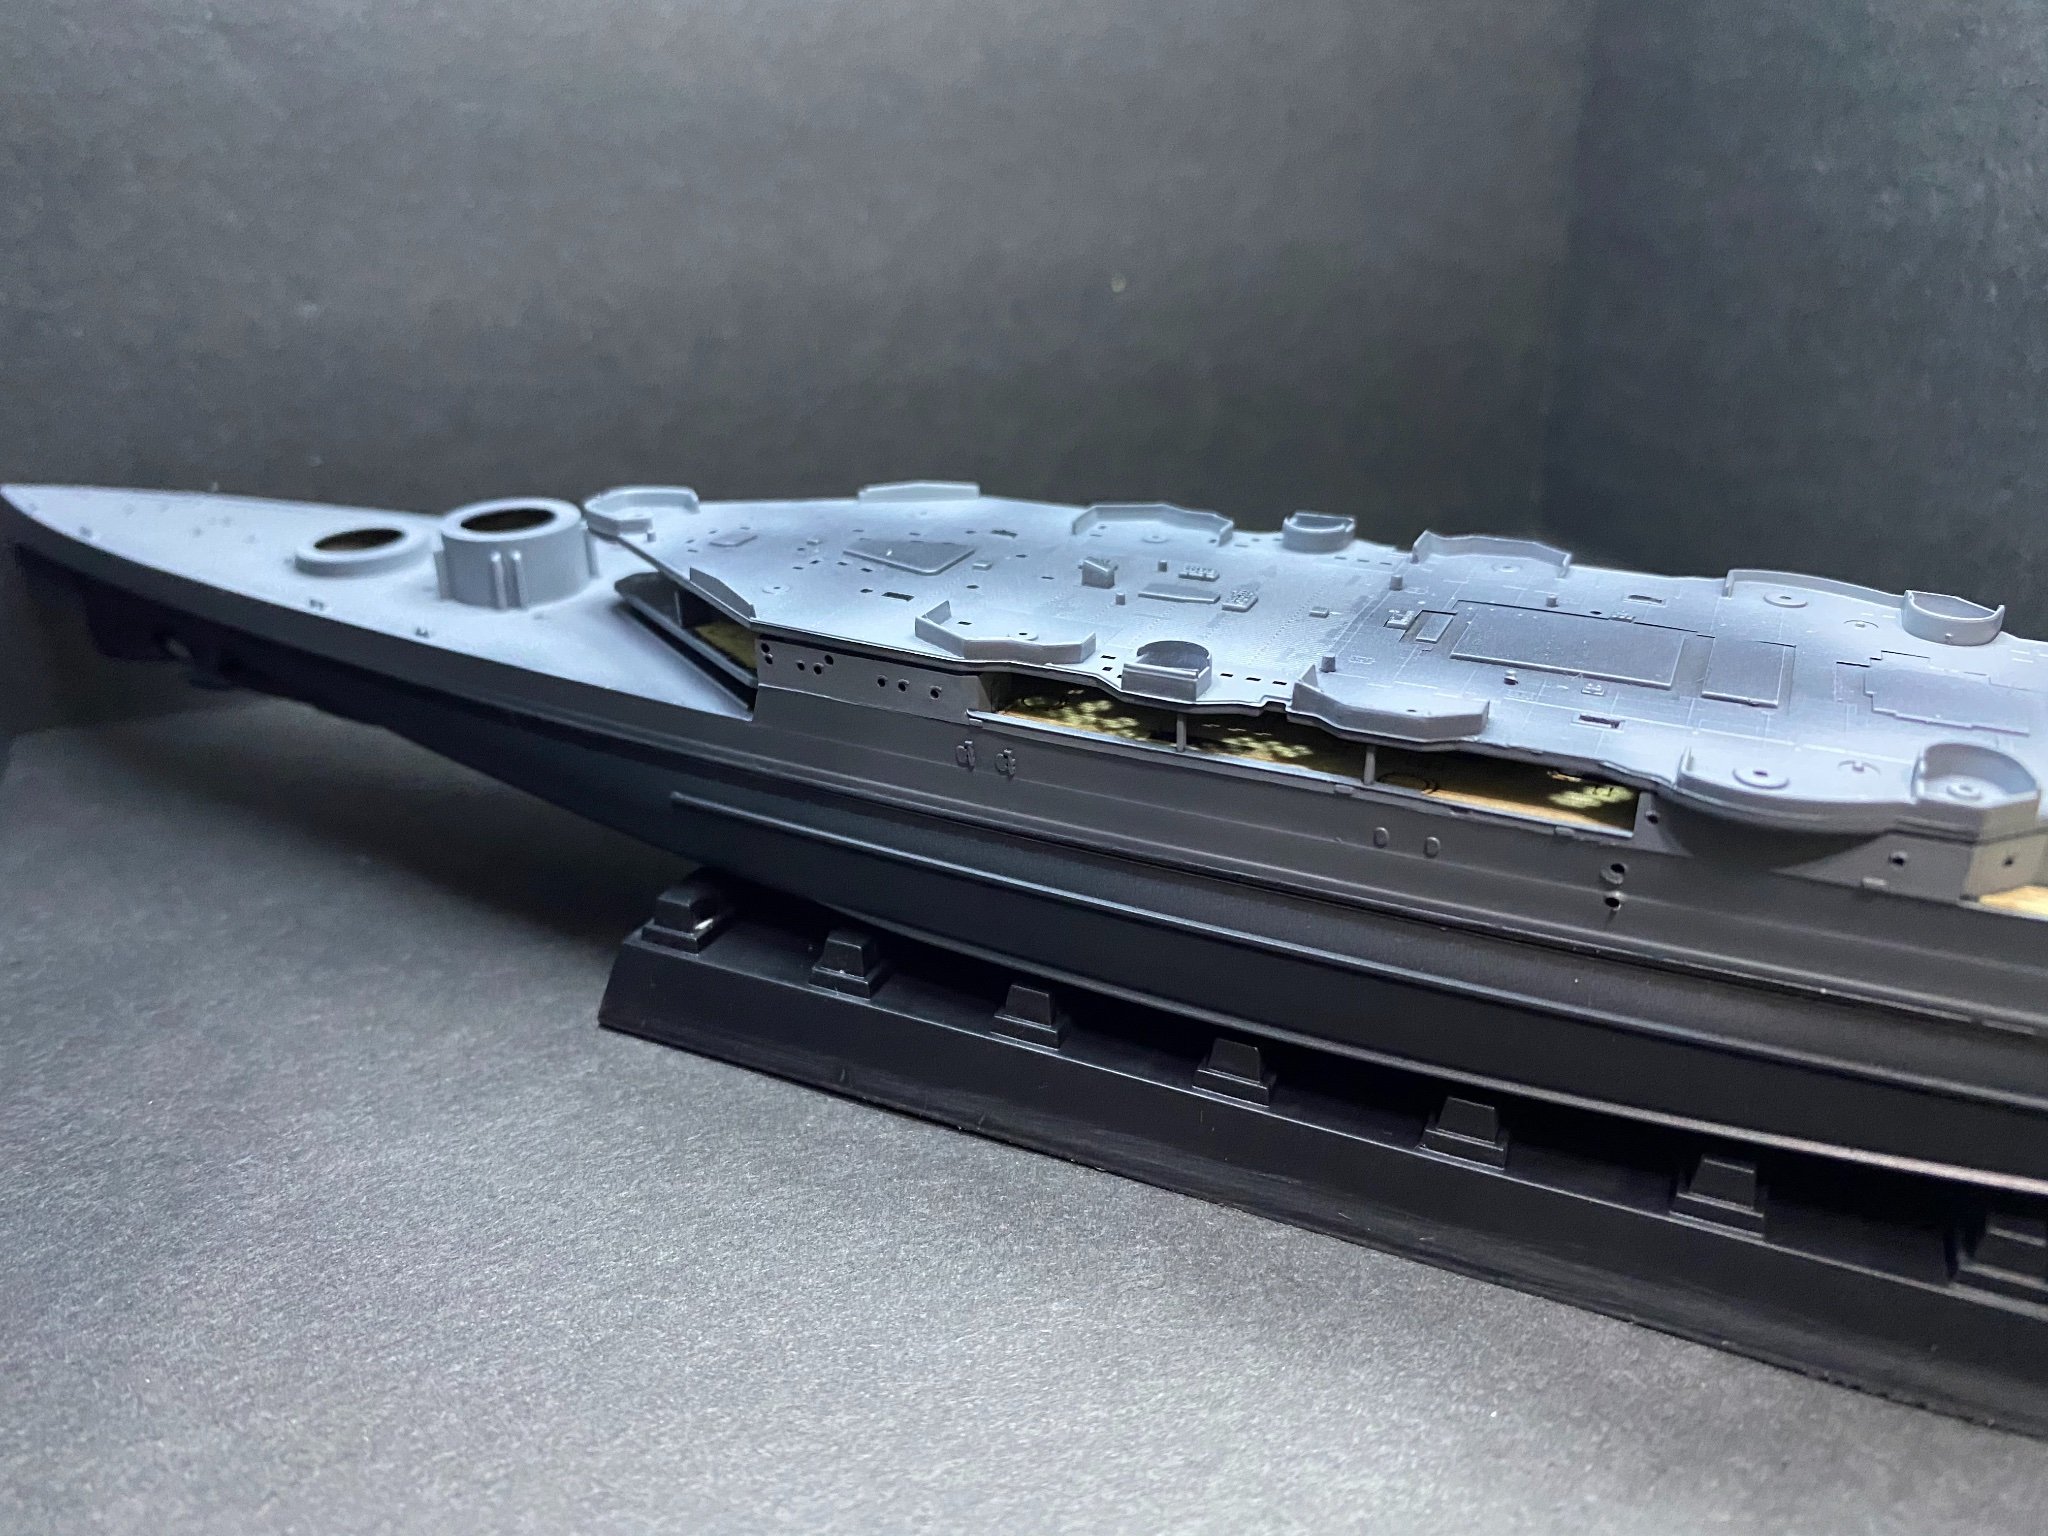
I'll do a bit more searching before I decide on the hull, meanwhile the superstructure side is coming off and will lay the wood deck first. It would have been nice if the sides could go on first and then would not need to mask the wooden deck before painting the superstructure.
- 225 replies
-
- 5
-
-
- I Love Kit
- Hood
- (and 2 more)
-
I know it's been said the HMS Hood was (dark?) gray below the waterline, but it's odd I could not find a single full hull photo of the ship with the lower hull depicted as gray. Everything I see is hull red below the waterline. Seems to me if I paint my hull gray or dark gray below the waterline, I am going to own the one unique ship who is depicted as such.
- 225 replies
-
- 6
-
-
- I Love Kit
- Hood
- (and 2 more)
-
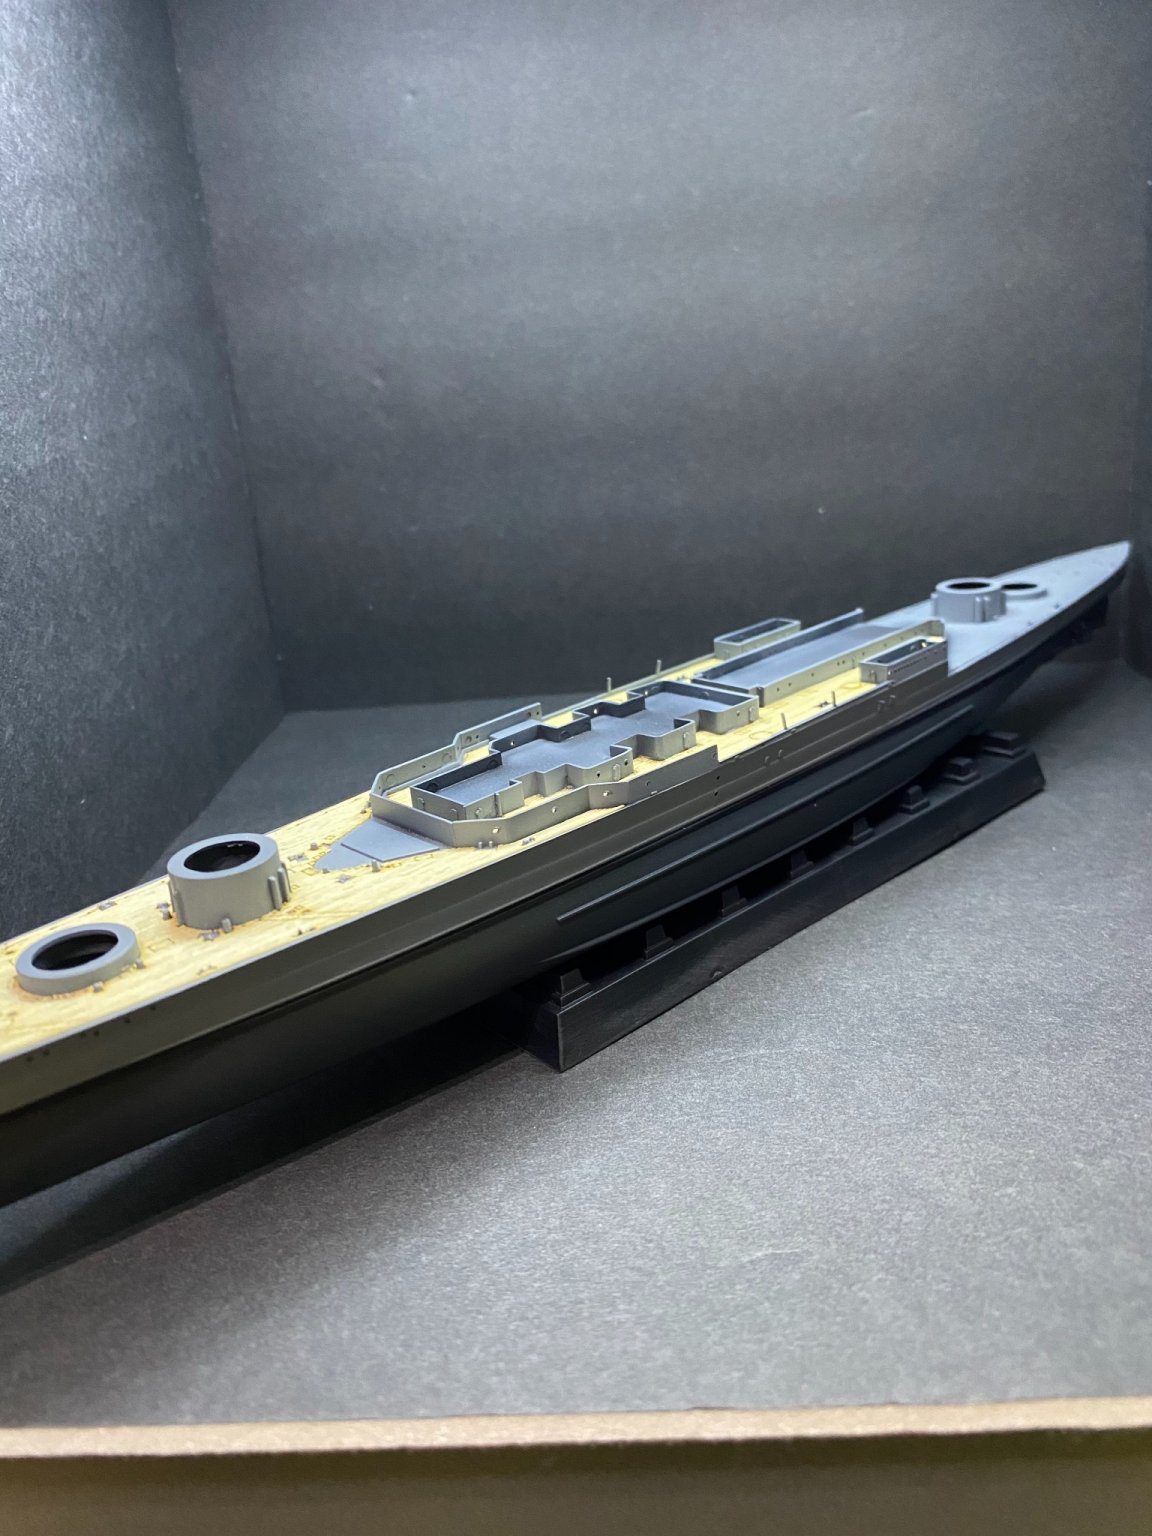
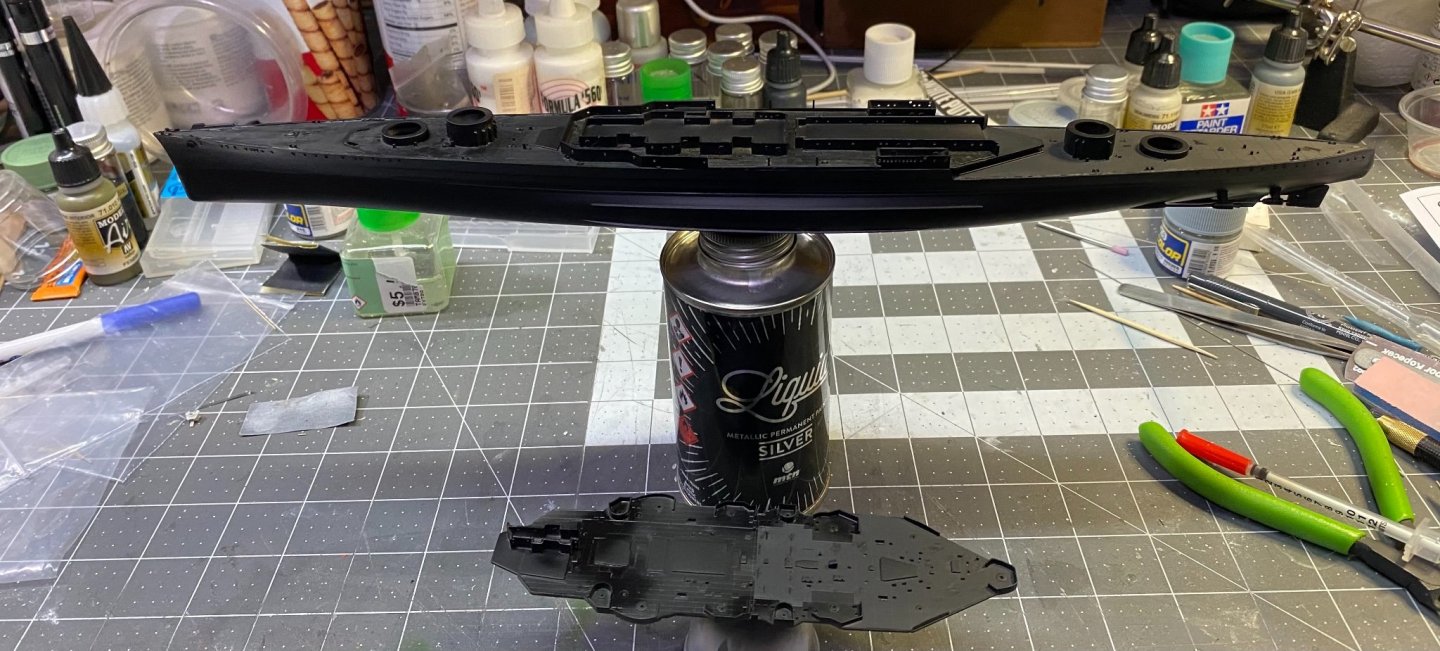
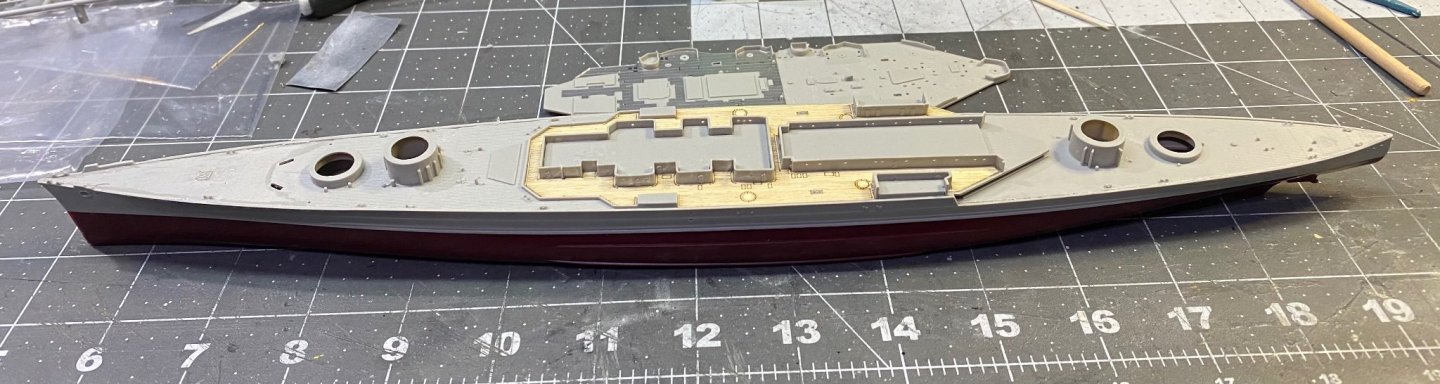
Put the upper and lower hull together along with the main deck pieces, then began adding the superstructure sides when I realized I may be getting ahead of myself. Not sure the wooden deck appliqué fits along side or underneath the sides. If underneath, will need to remove the side I added. No construction sequence is given so it’s hit or miss.
- 225 replies
-
- 7
-
-
- I Love Kit
- Hood
- (and 2 more)
-
The CR10 was the second 3D printer I bought. The first was a Prusa and I learned in a month it wasn't quite enough to do things I wanted to do. My CR10 is a version 1 machine, so am interested to learn what kinds of upgrades were done since I bought mine in 2018. One thing I learned before I boxed it up was that I needed to purchase a semi-expensive slicer program. I was using Ultimaker Cura 3.3.1 for free. that program was good enough for most things until I began a project that required more advanced software. I am 3 years behind the curve at this point and am not familiar with what's new.
- 321 replies
-
- 8
-
-
- Finished
- Flower-class
- (and 1 more)
-
You're going to do great with it I am sure. I thought the Geisenau had two main guns in each turret instead of three as depicted in the kit, but then again, I am not well read on that particular ship. Perhaps it went through variations in it's career.