CDW
-
Posts
7,760 -
Joined
-
Last visited
Content Type
Profiles
Forums
Gallery
Events
Everything posted by CDW
-

B-25 Mitchell "Meet Miss Runyon" by Javlin-HK-1/32
CDW replied to Javlin's topic in Non-ship/categorised builds
The stripes look just right to me. Like you, I think this is the way they were in real life. Did you free hand paint the stripes? If so, that's a great job. -
B-25 Mitchell "Meet Miss Runyon" by Javlin-HK-1/32
CDW replied to Javlin's topic in Non-ship/categorised builds
Thanks for sharing that video. Exactly what I needed to see. Not quite as difficult as I had imagined since they can be moved to a correct position before they set. Interesting to note that it's probably advantageous to cut them out with a little extra margin to allow easier removal of the clear film. Now I'm excited to try out my decals. I have a boatload of HGW wood grain decals for my WW1 models that I have not tried yet. -
B-25 Mitchell "Meet Miss Runyon" by Javlin-HK-1/32
CDW replied to Javlin's topic in Non-ship/categorised builds
If I understand correctly, these decals would eliminate the need to clear coat before applying the decals (to prevent silvering). Like other new things, will need to test and practice to get the hang of it. These decals may turn out to be a slower process to apply, but the results should be much better in theory. I'm wondering how difficult they will be to position properly the first go 'round. Seems like that might be problematic. Unlike slide decals, these can't be moved around to a correct position, it's got to be right in the first placement. -
Ouch! That's quite a well secured barrier wire to rip a fuselage in half. One of my next projects will be the building of our former president, George W Bush's TBM Avenger in 1:32 scale.
-
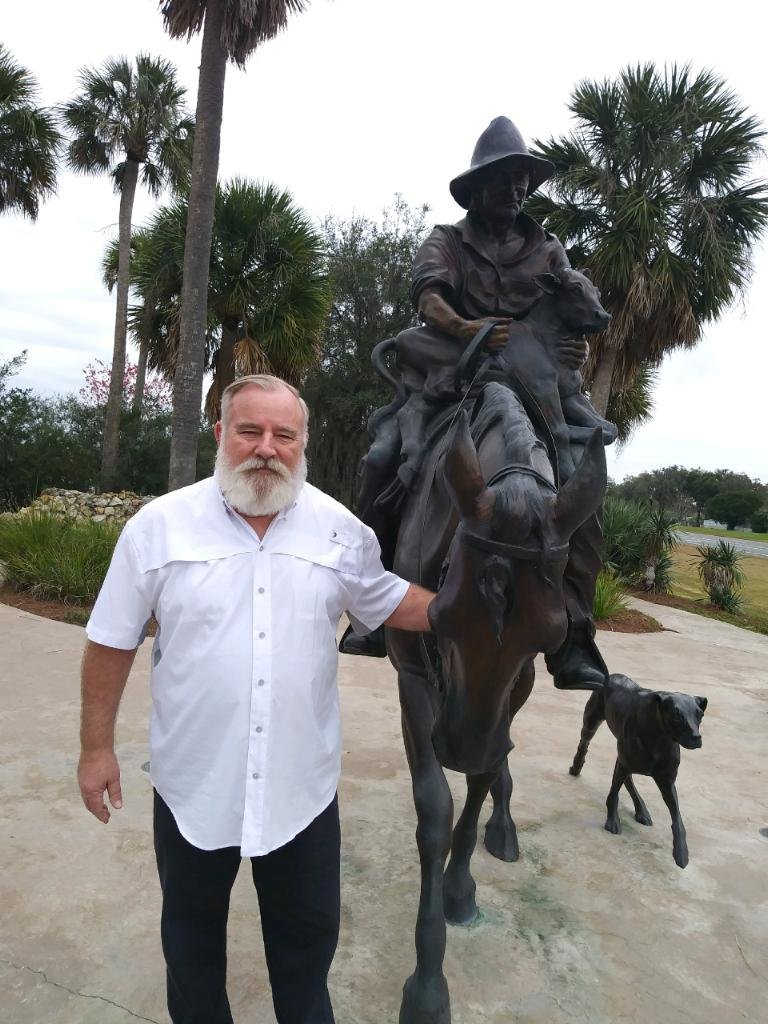
While visiting my family in central Florida today, my wife snapped these photos. My 2nd great grandfather was the first to settle in Sumter County Florida when he and his brothers each bought 160 acres as part of the Armed Occupation Act in 1843. He was a cowboy and a farmer. This area remained largely agrarian until the past 25 years when a huge retirement infiltration occurred. Showing respect to the original settlers, these monuments were built.

-
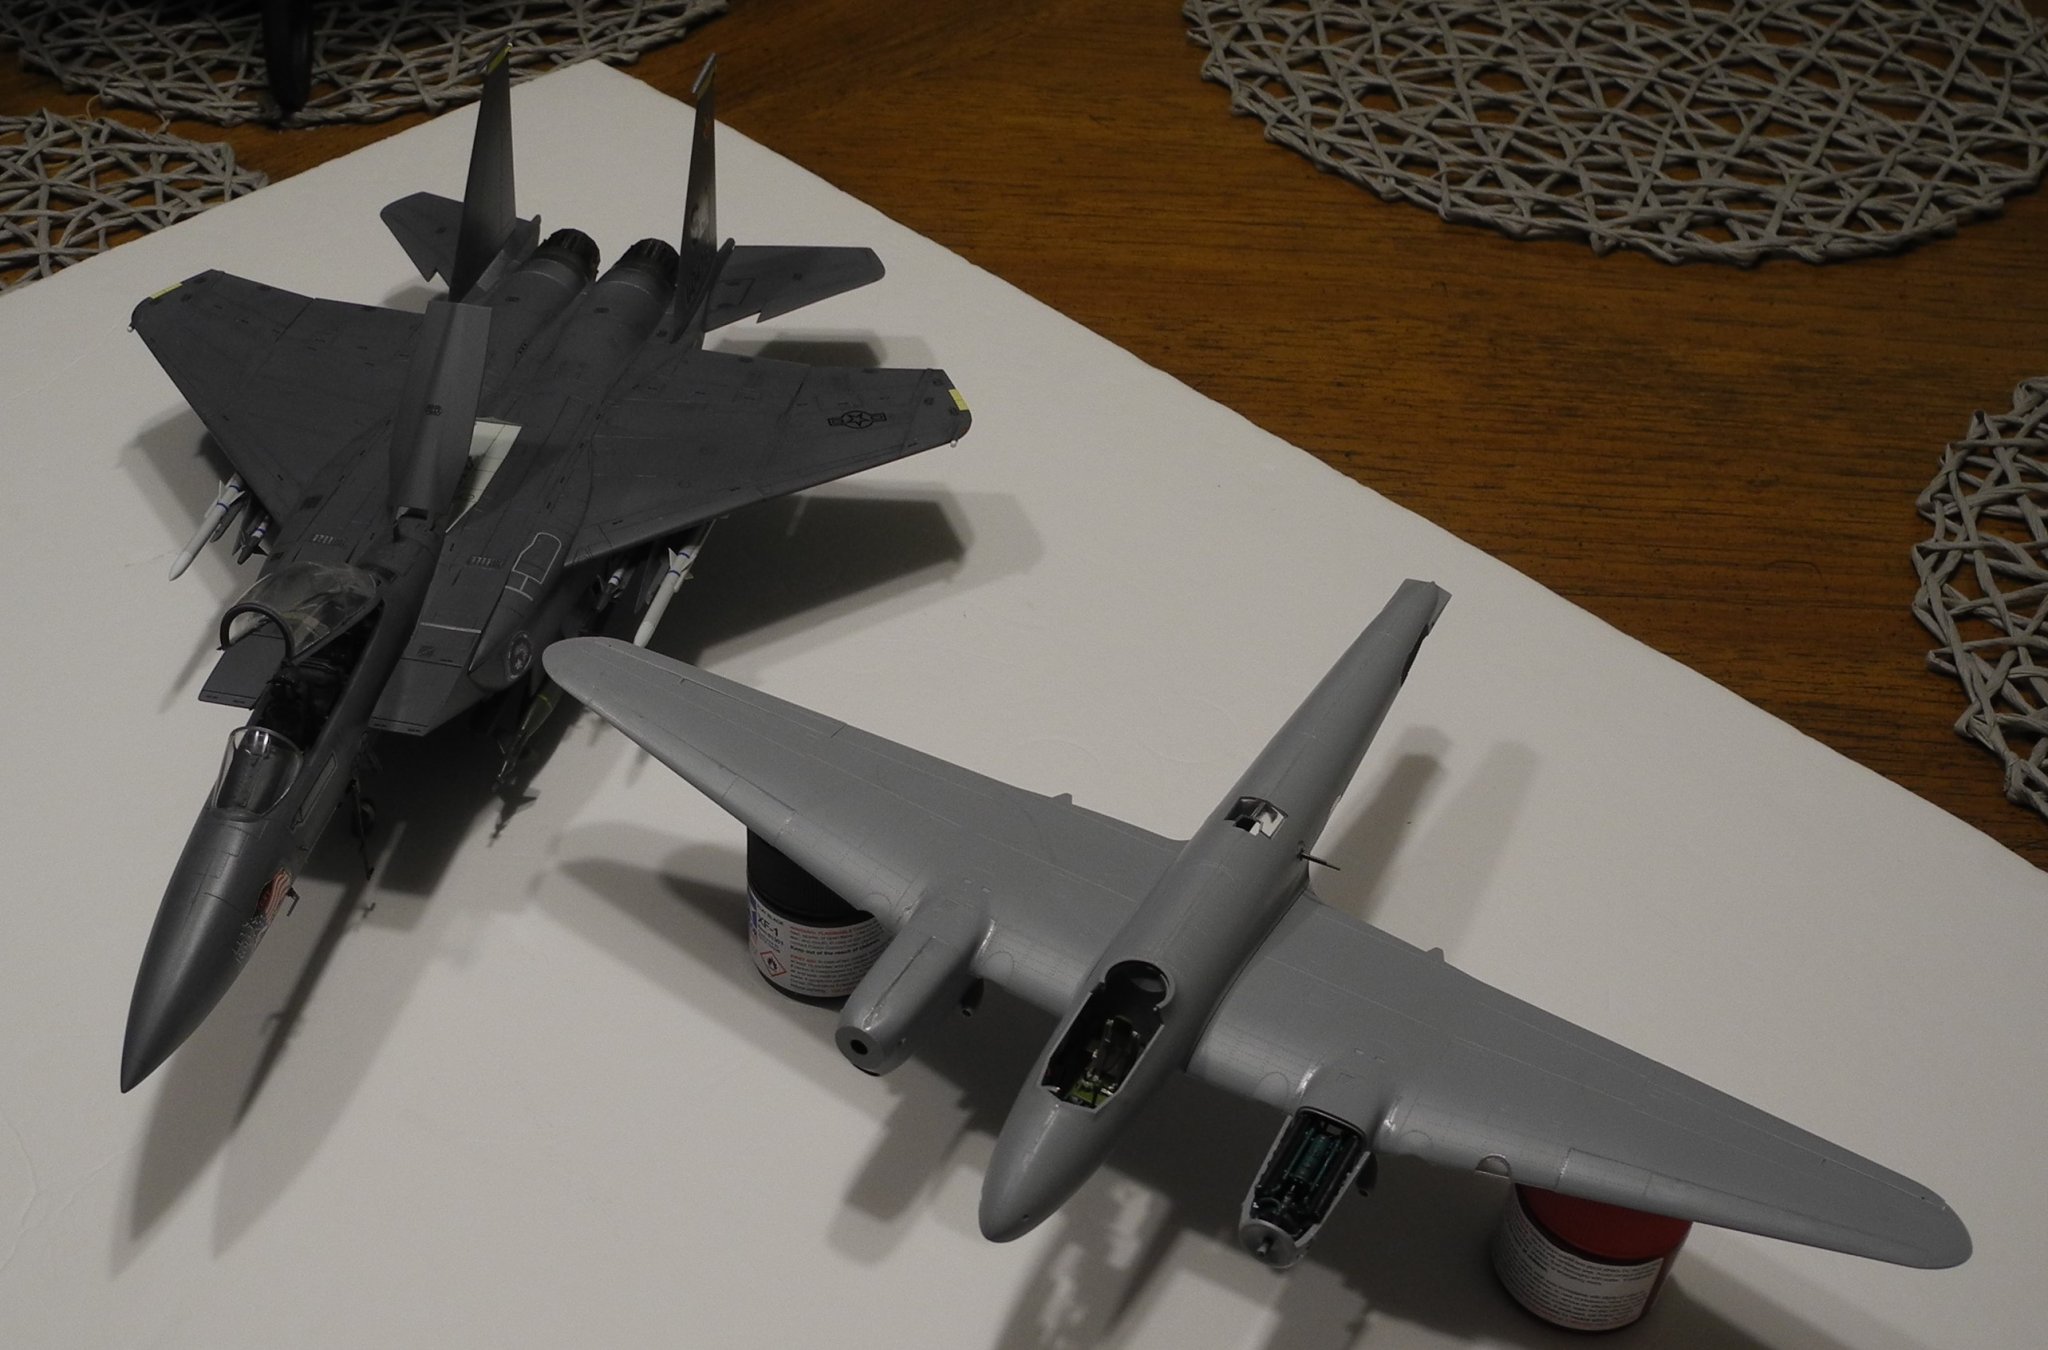
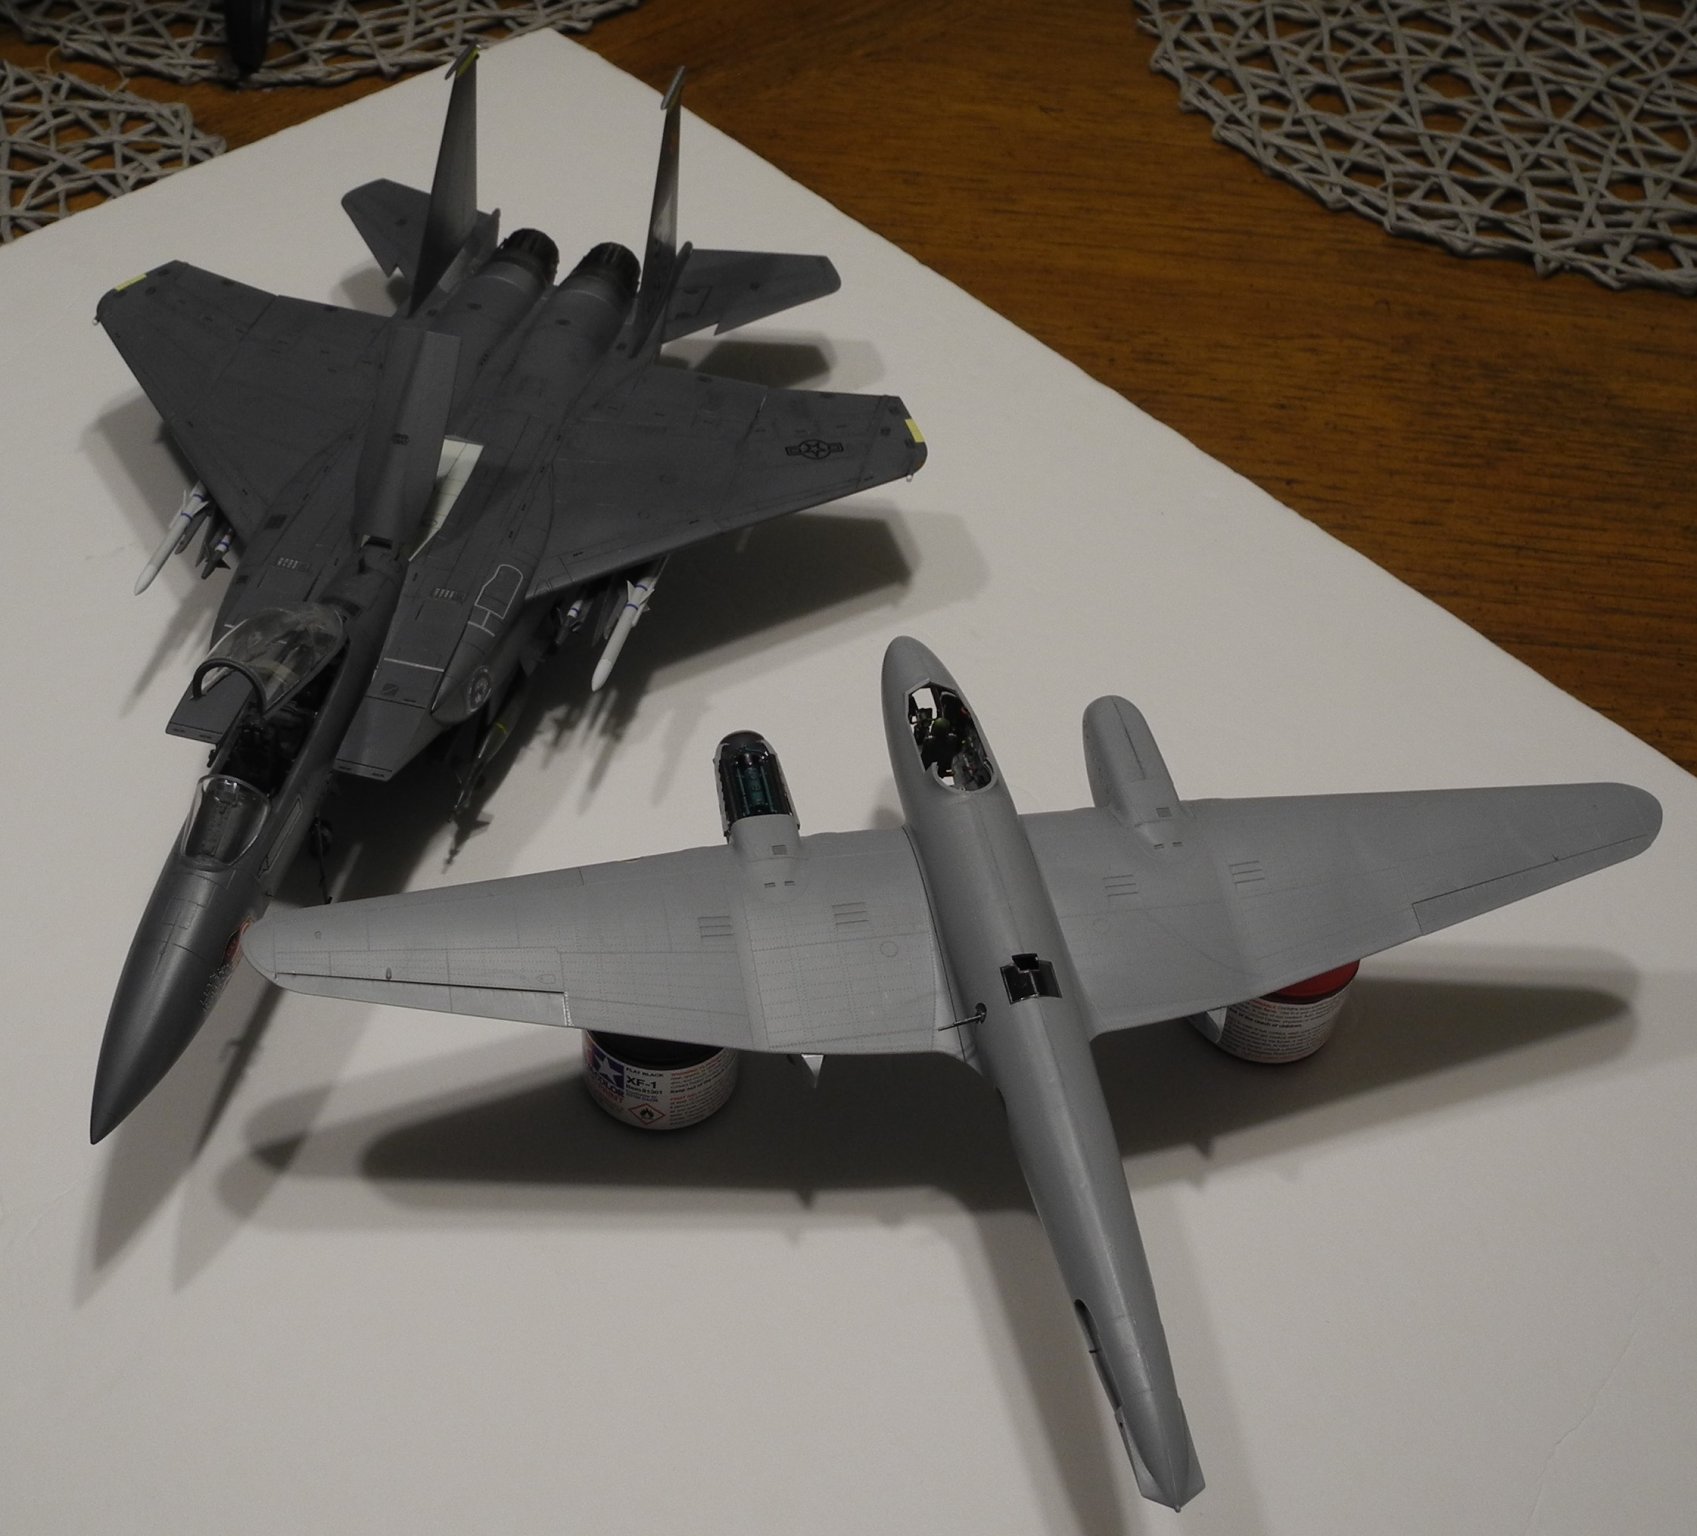
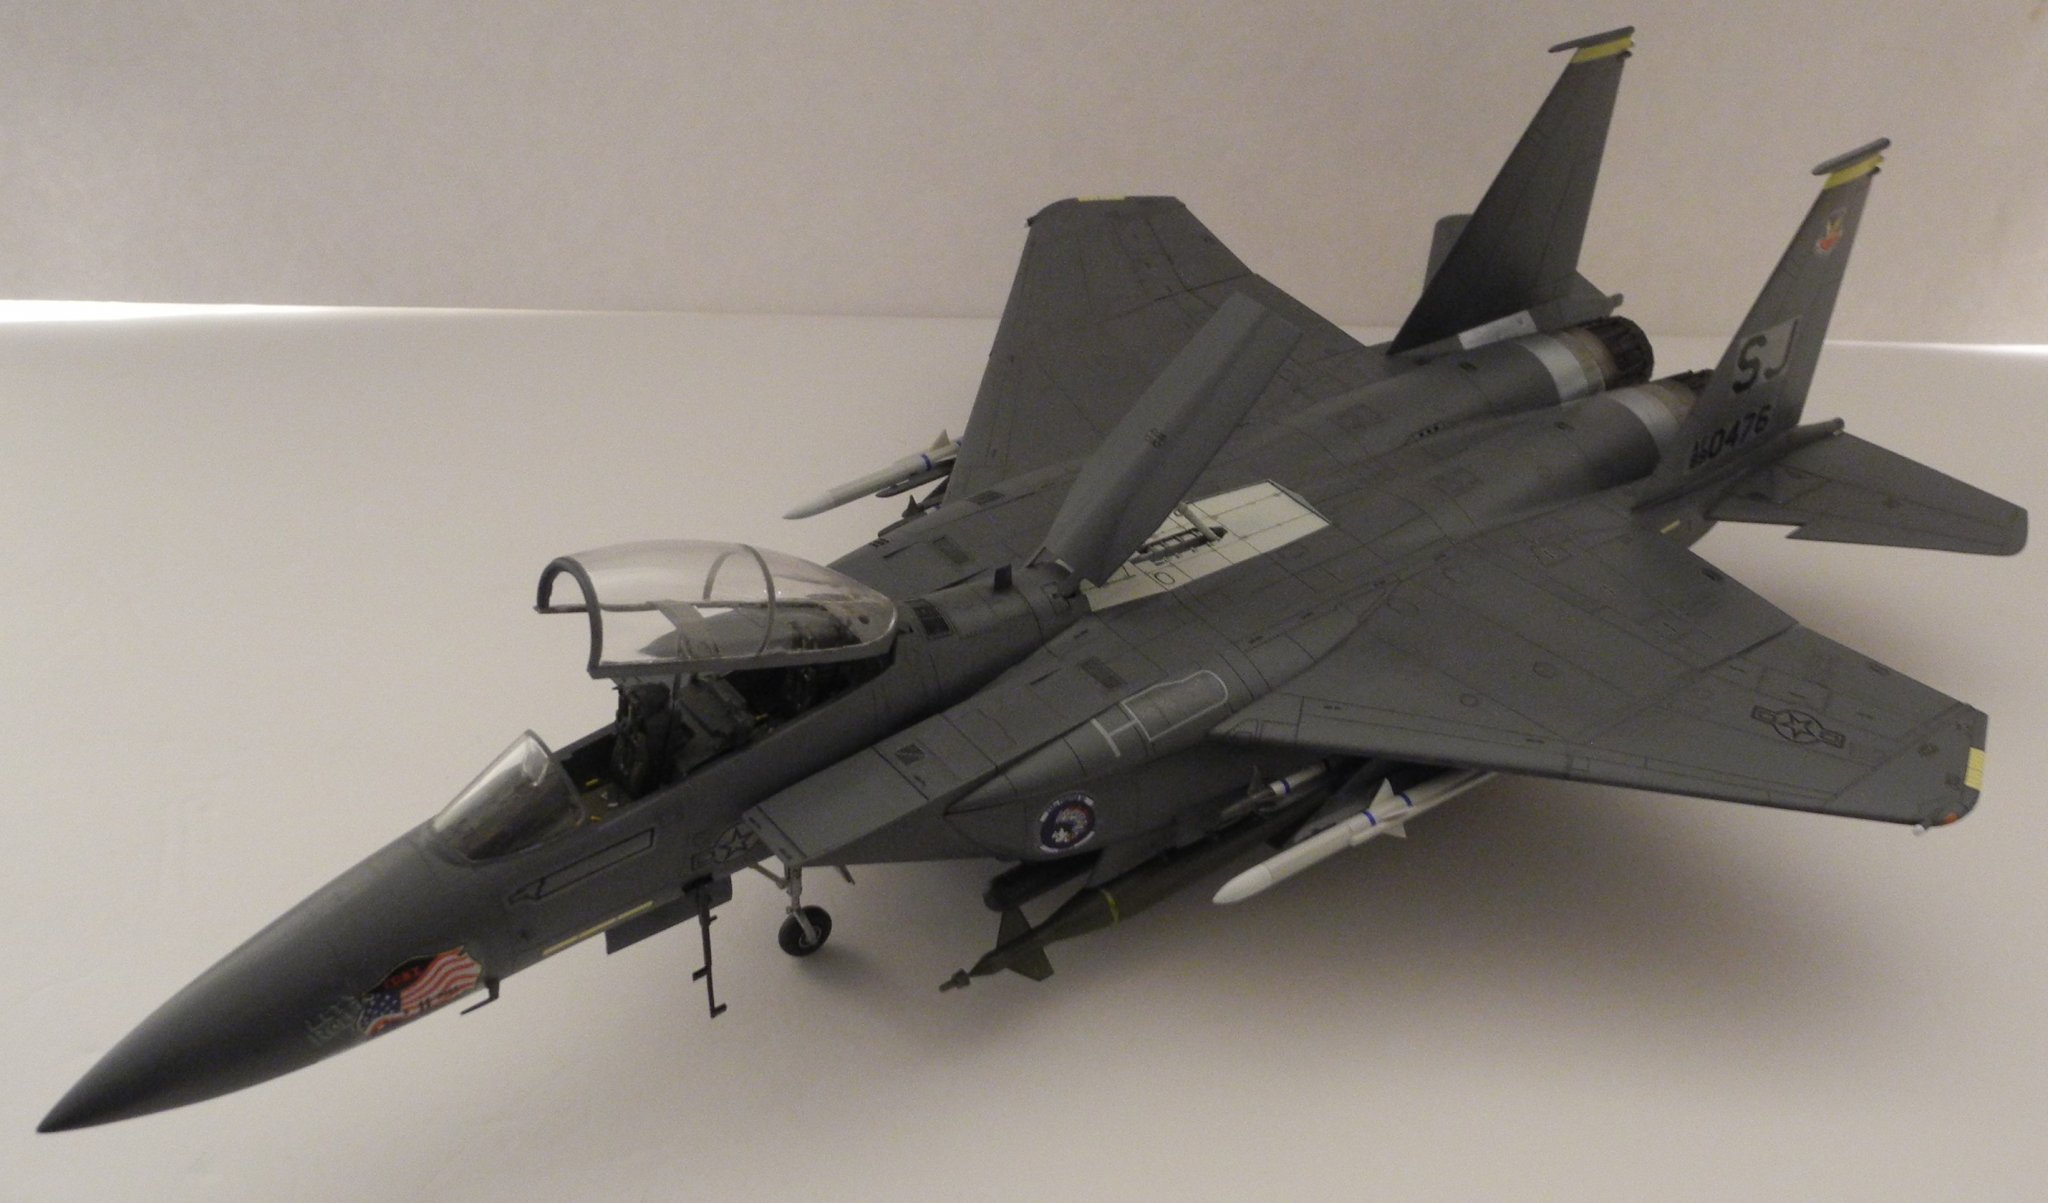
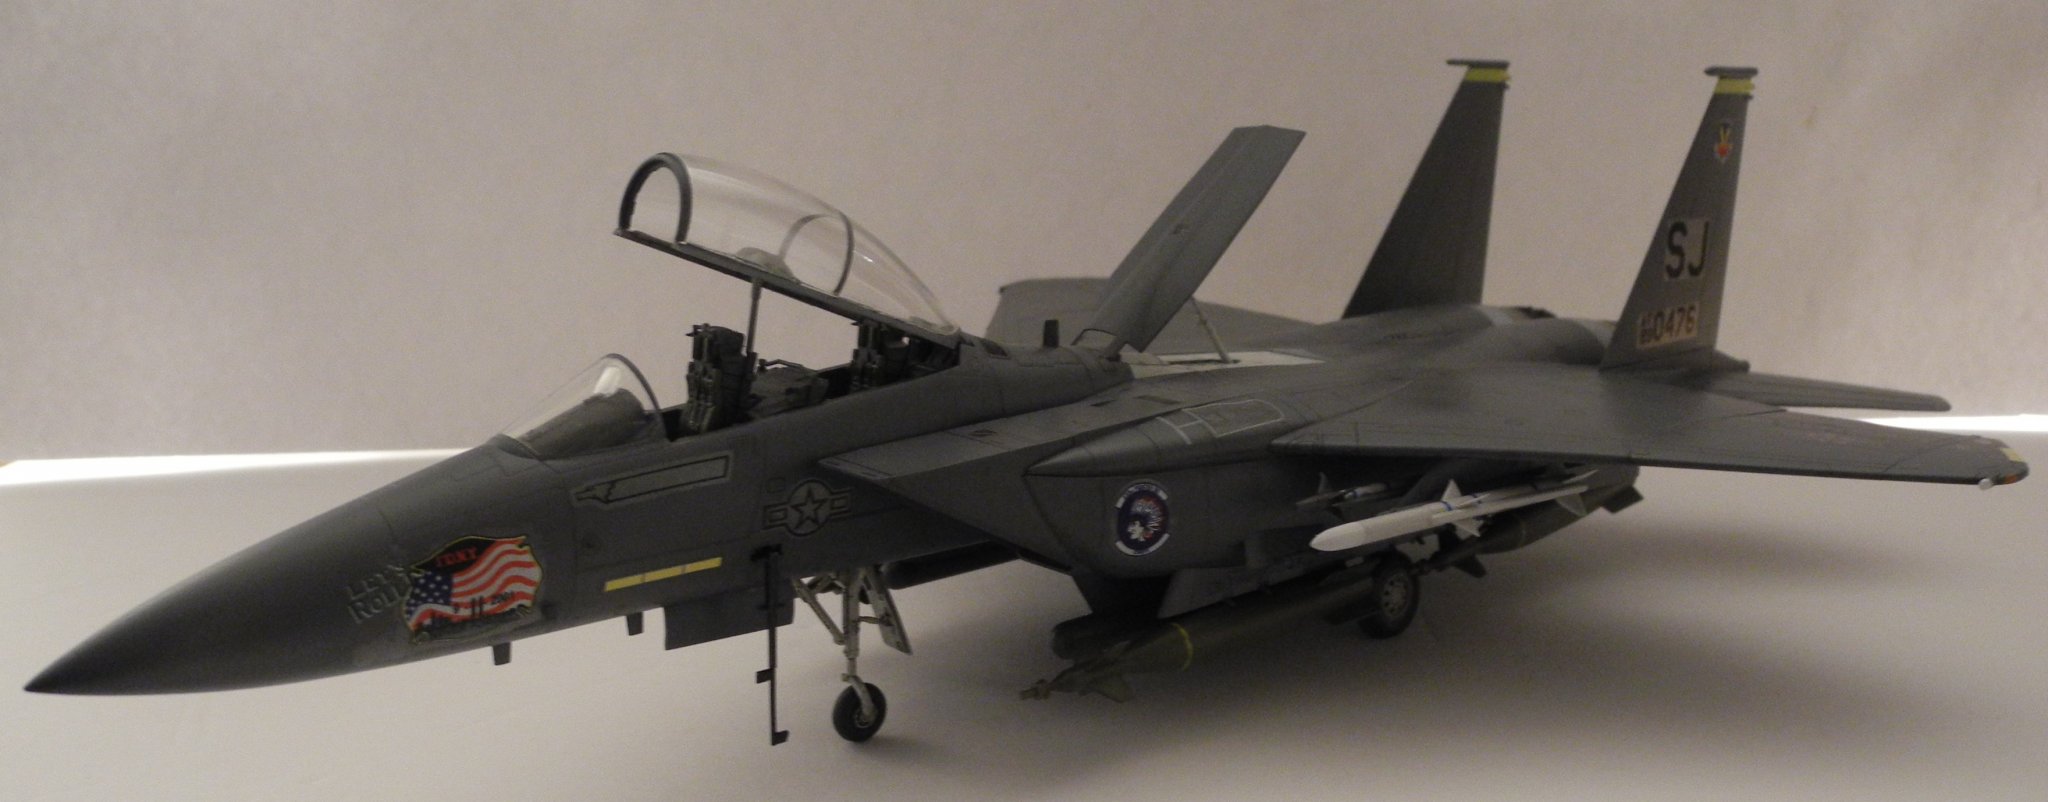
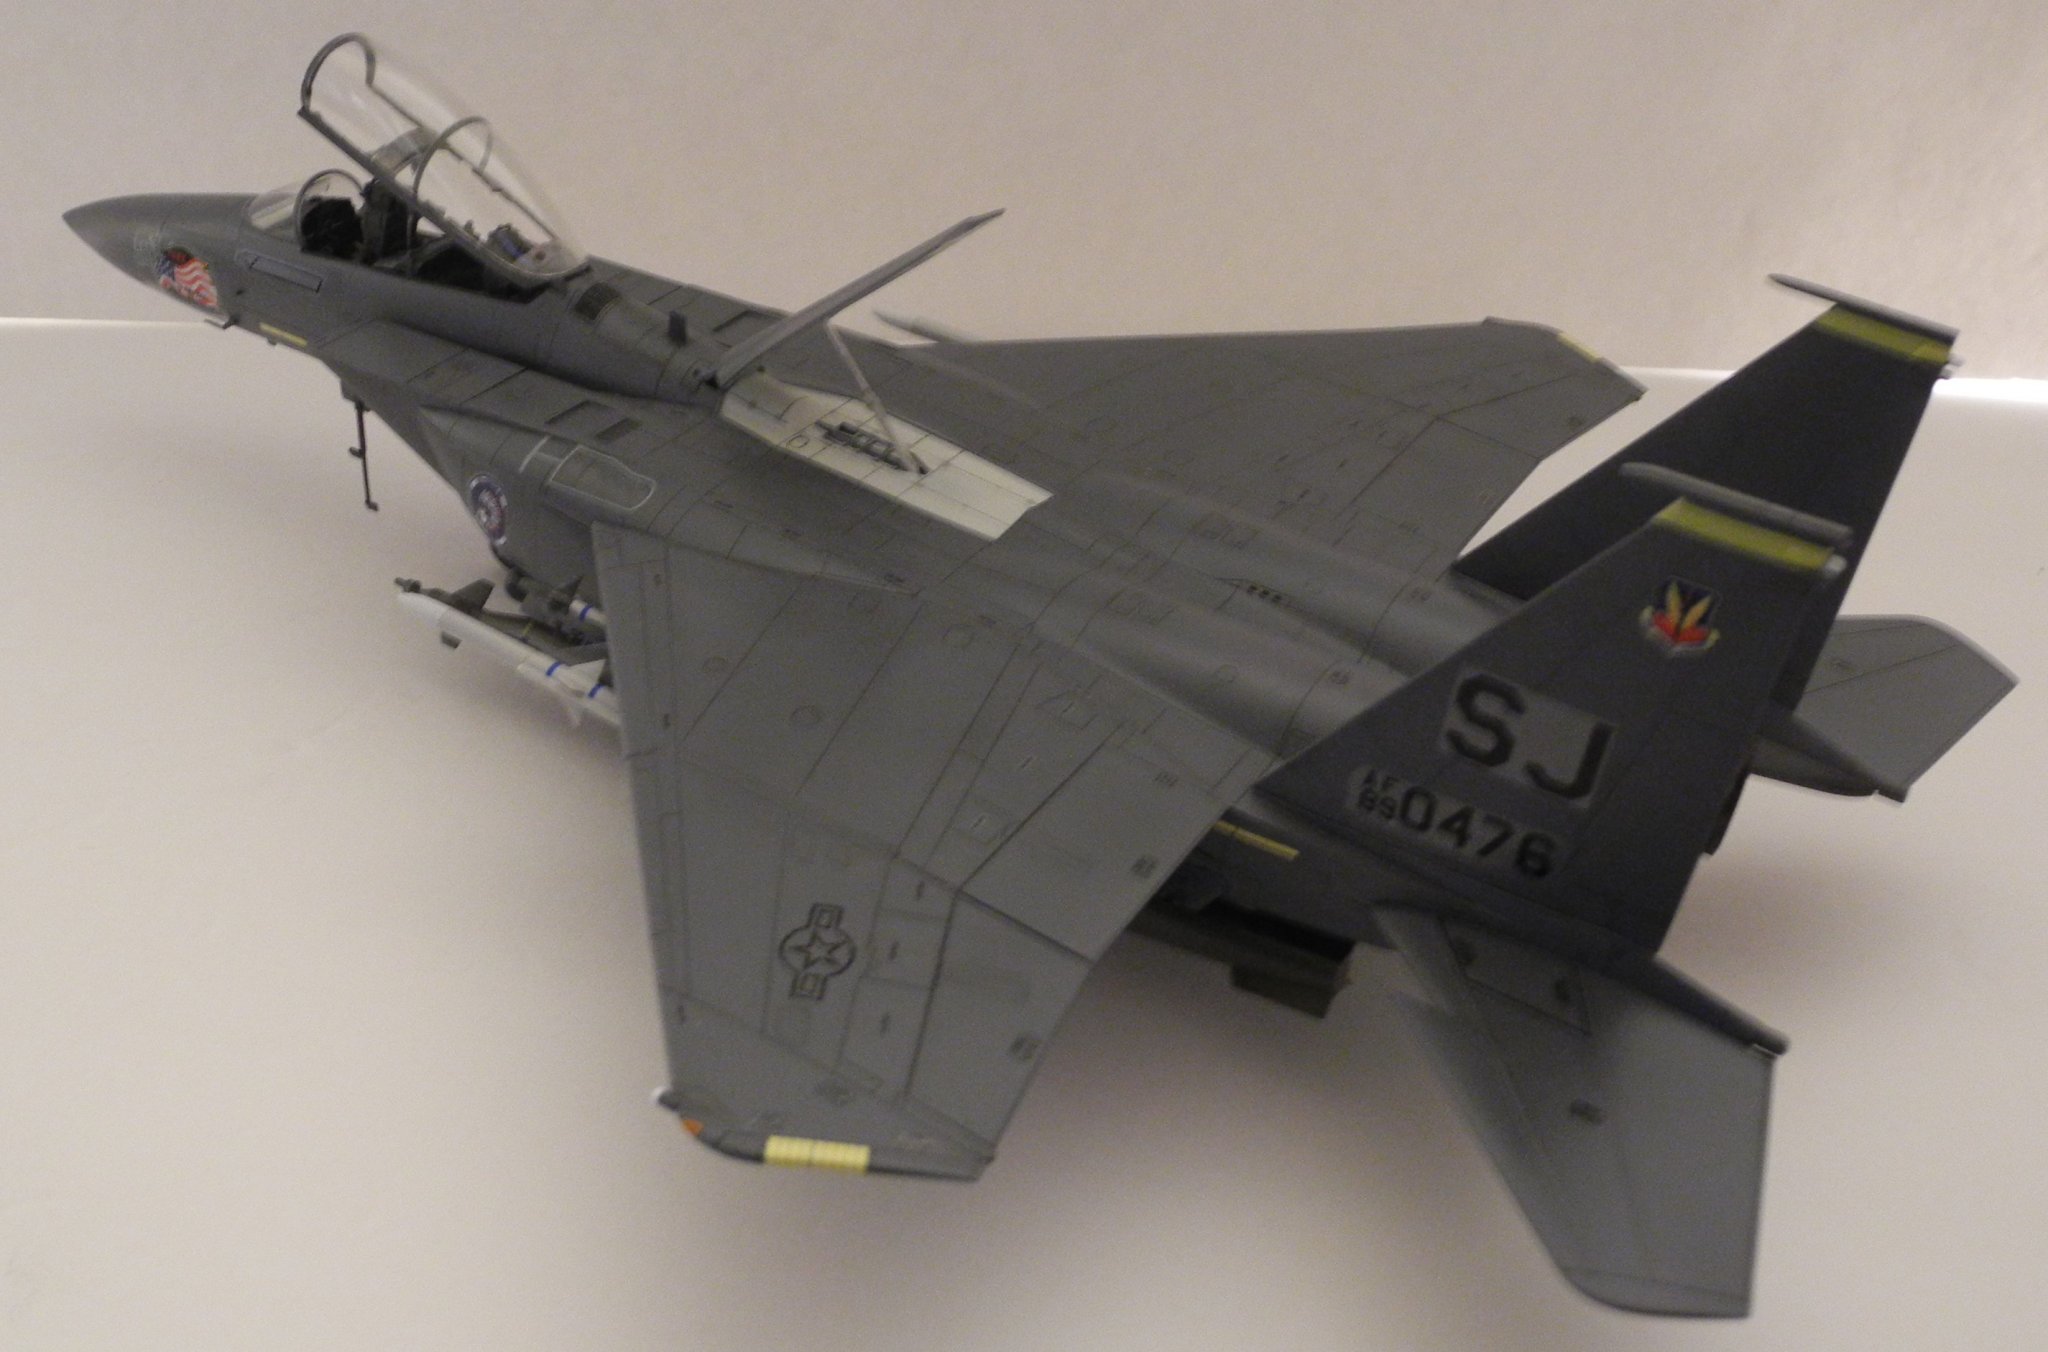
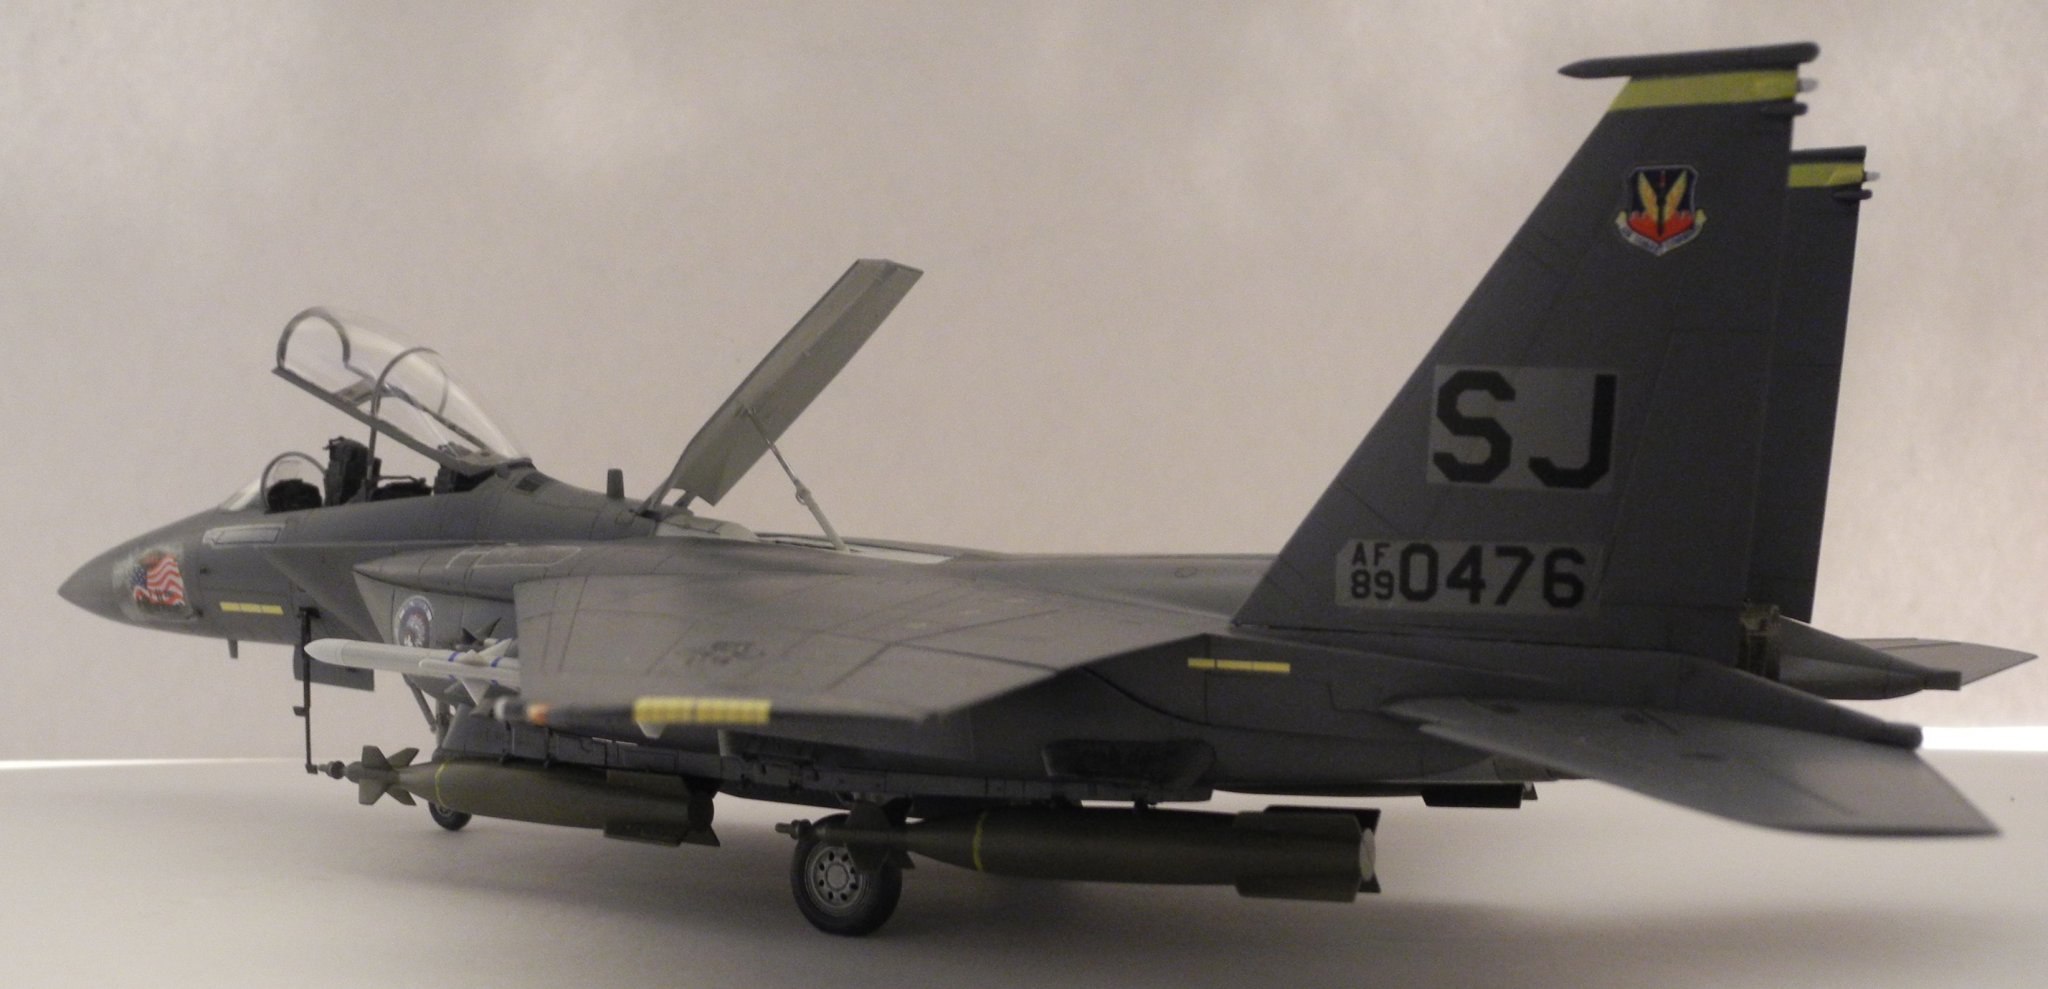
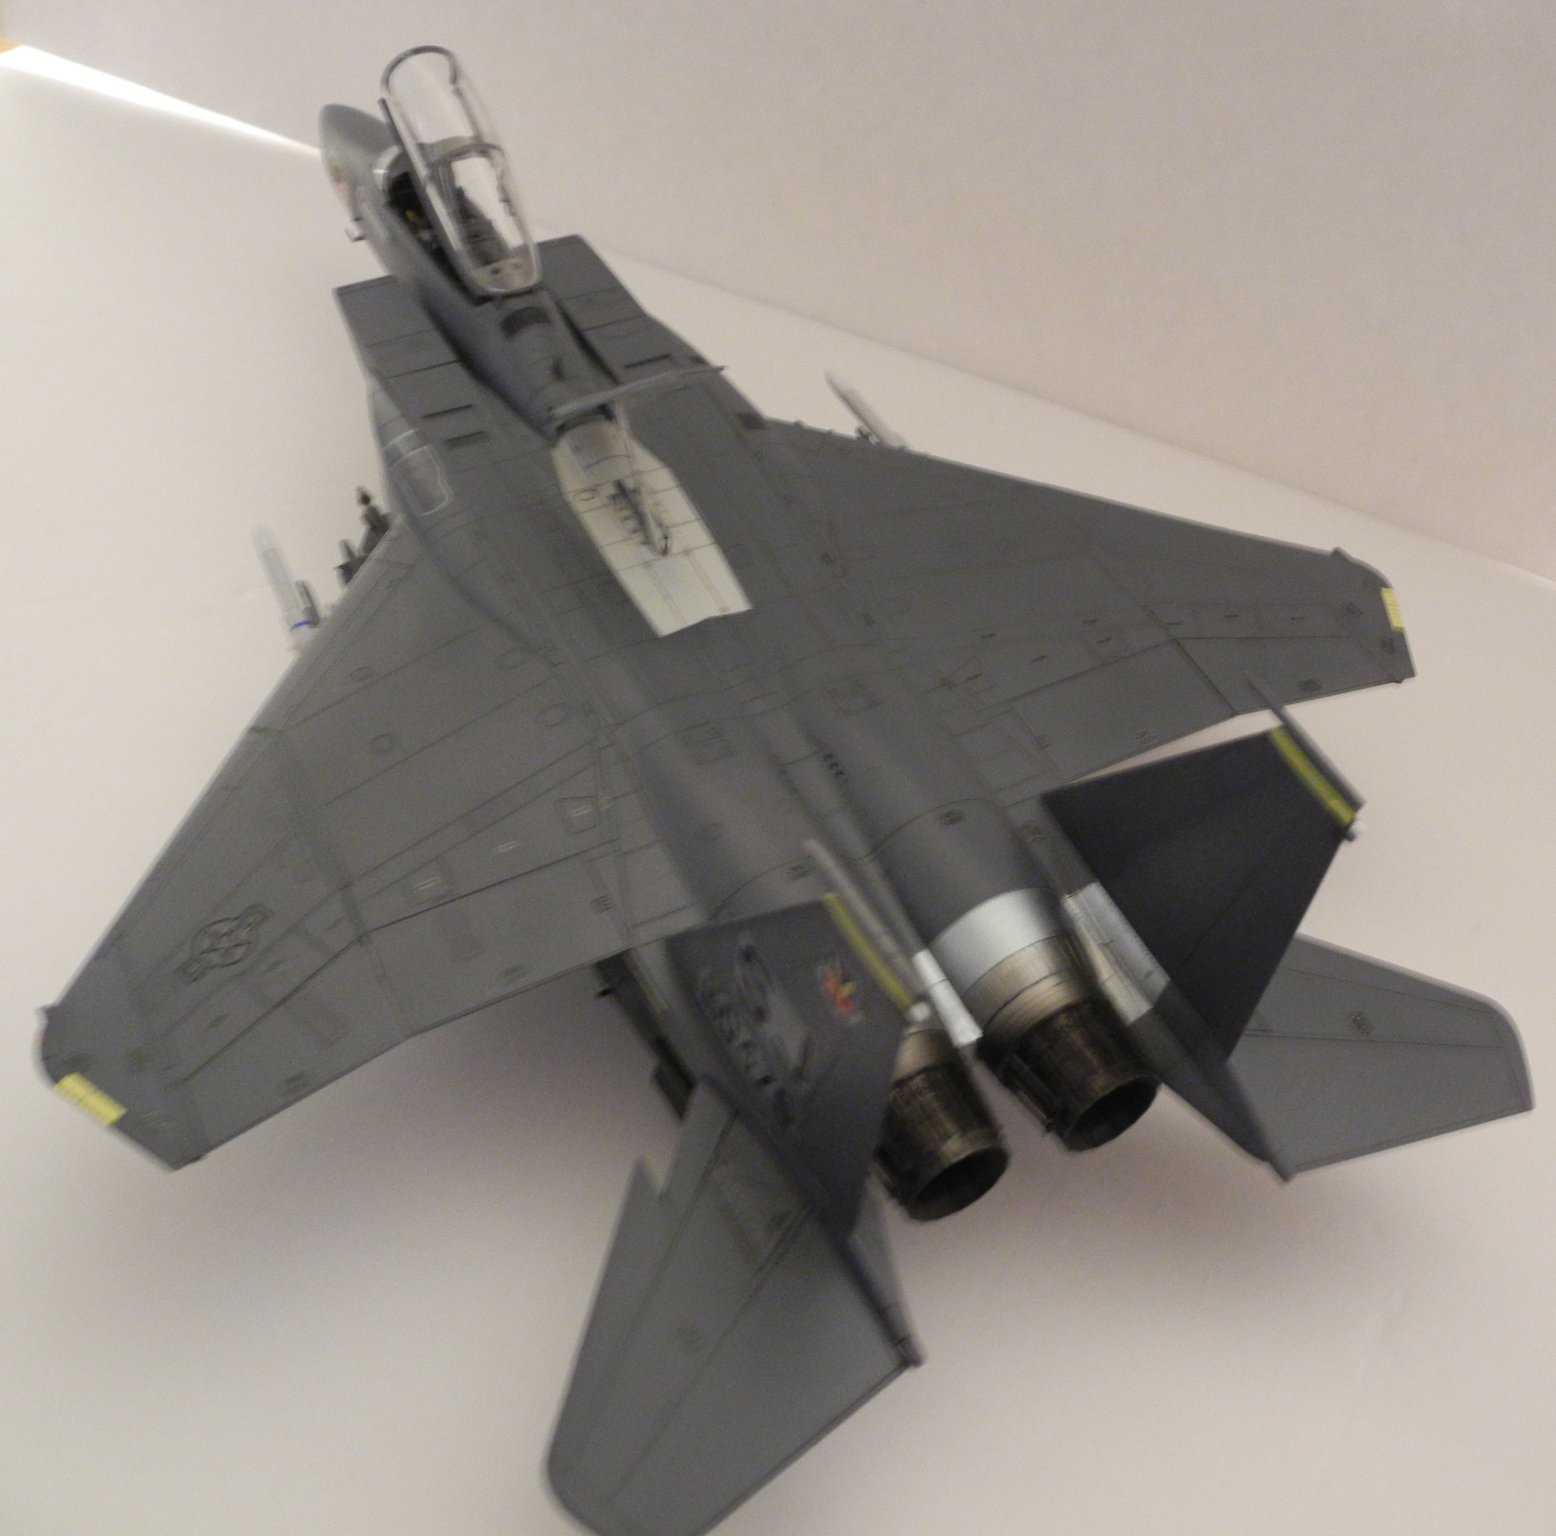
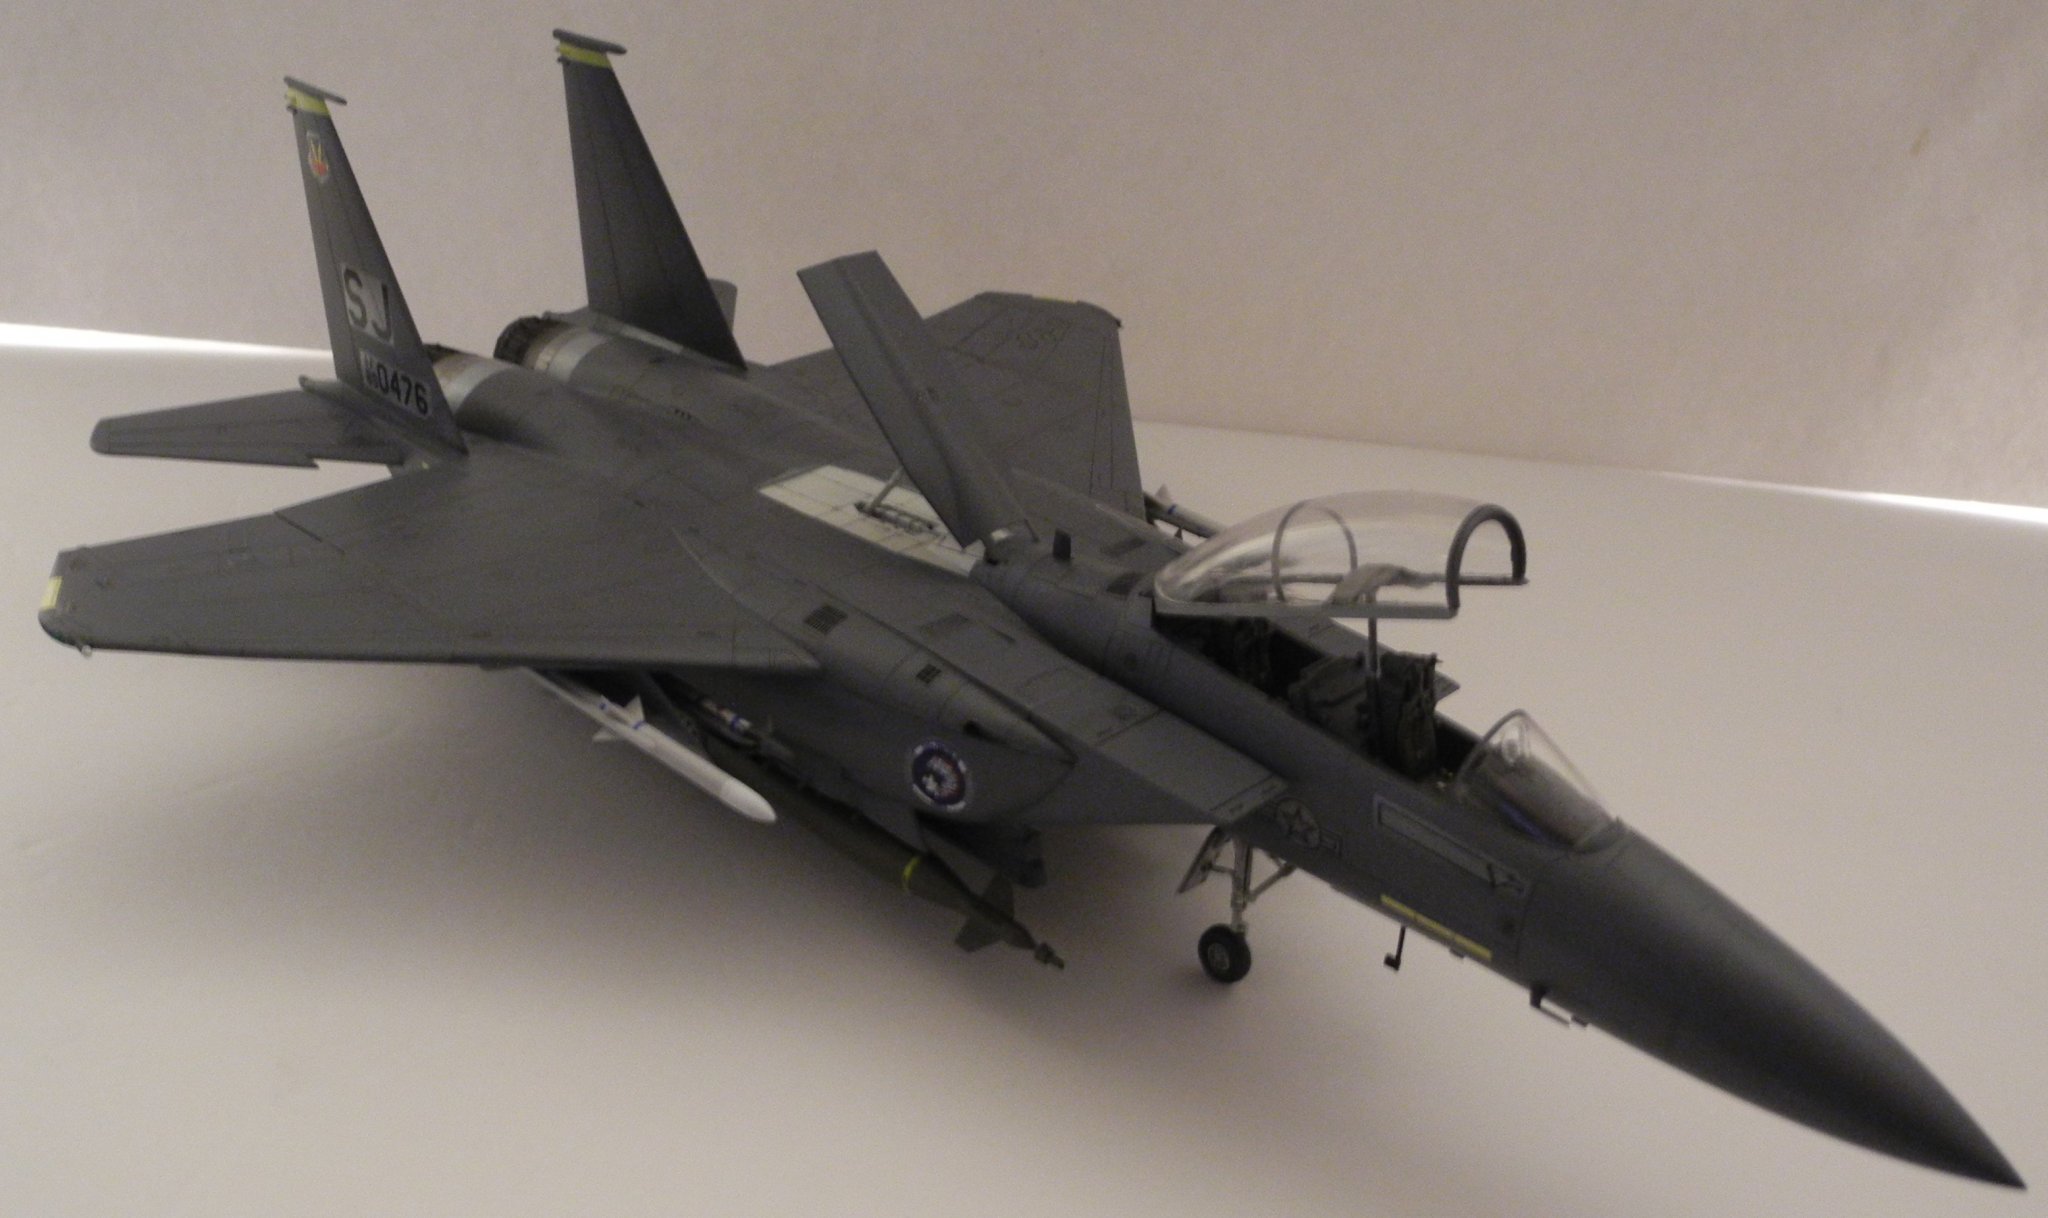
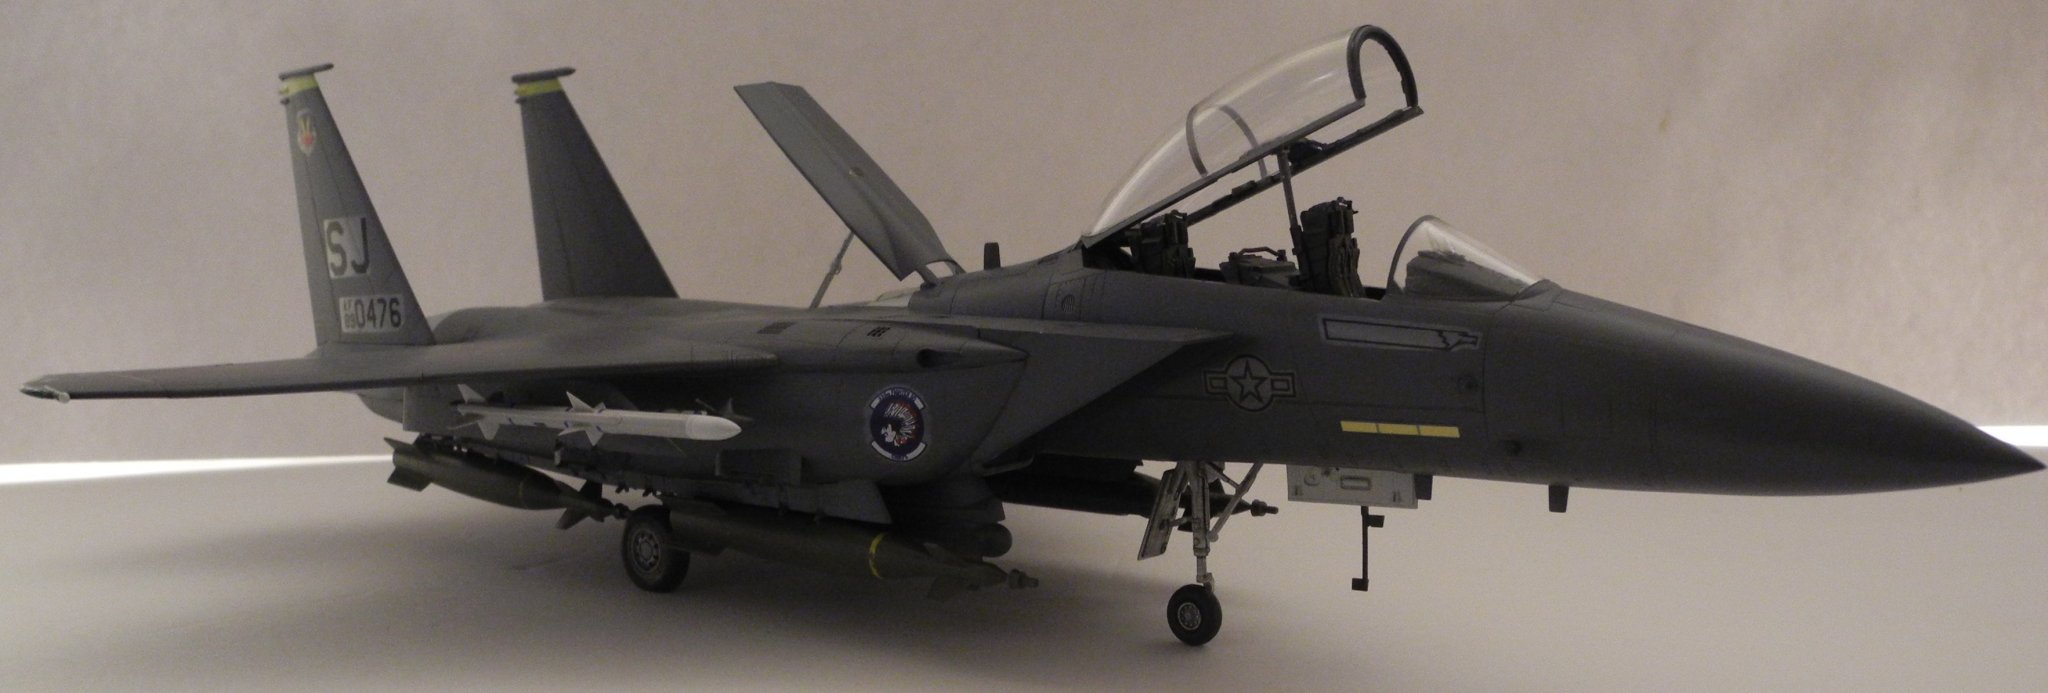
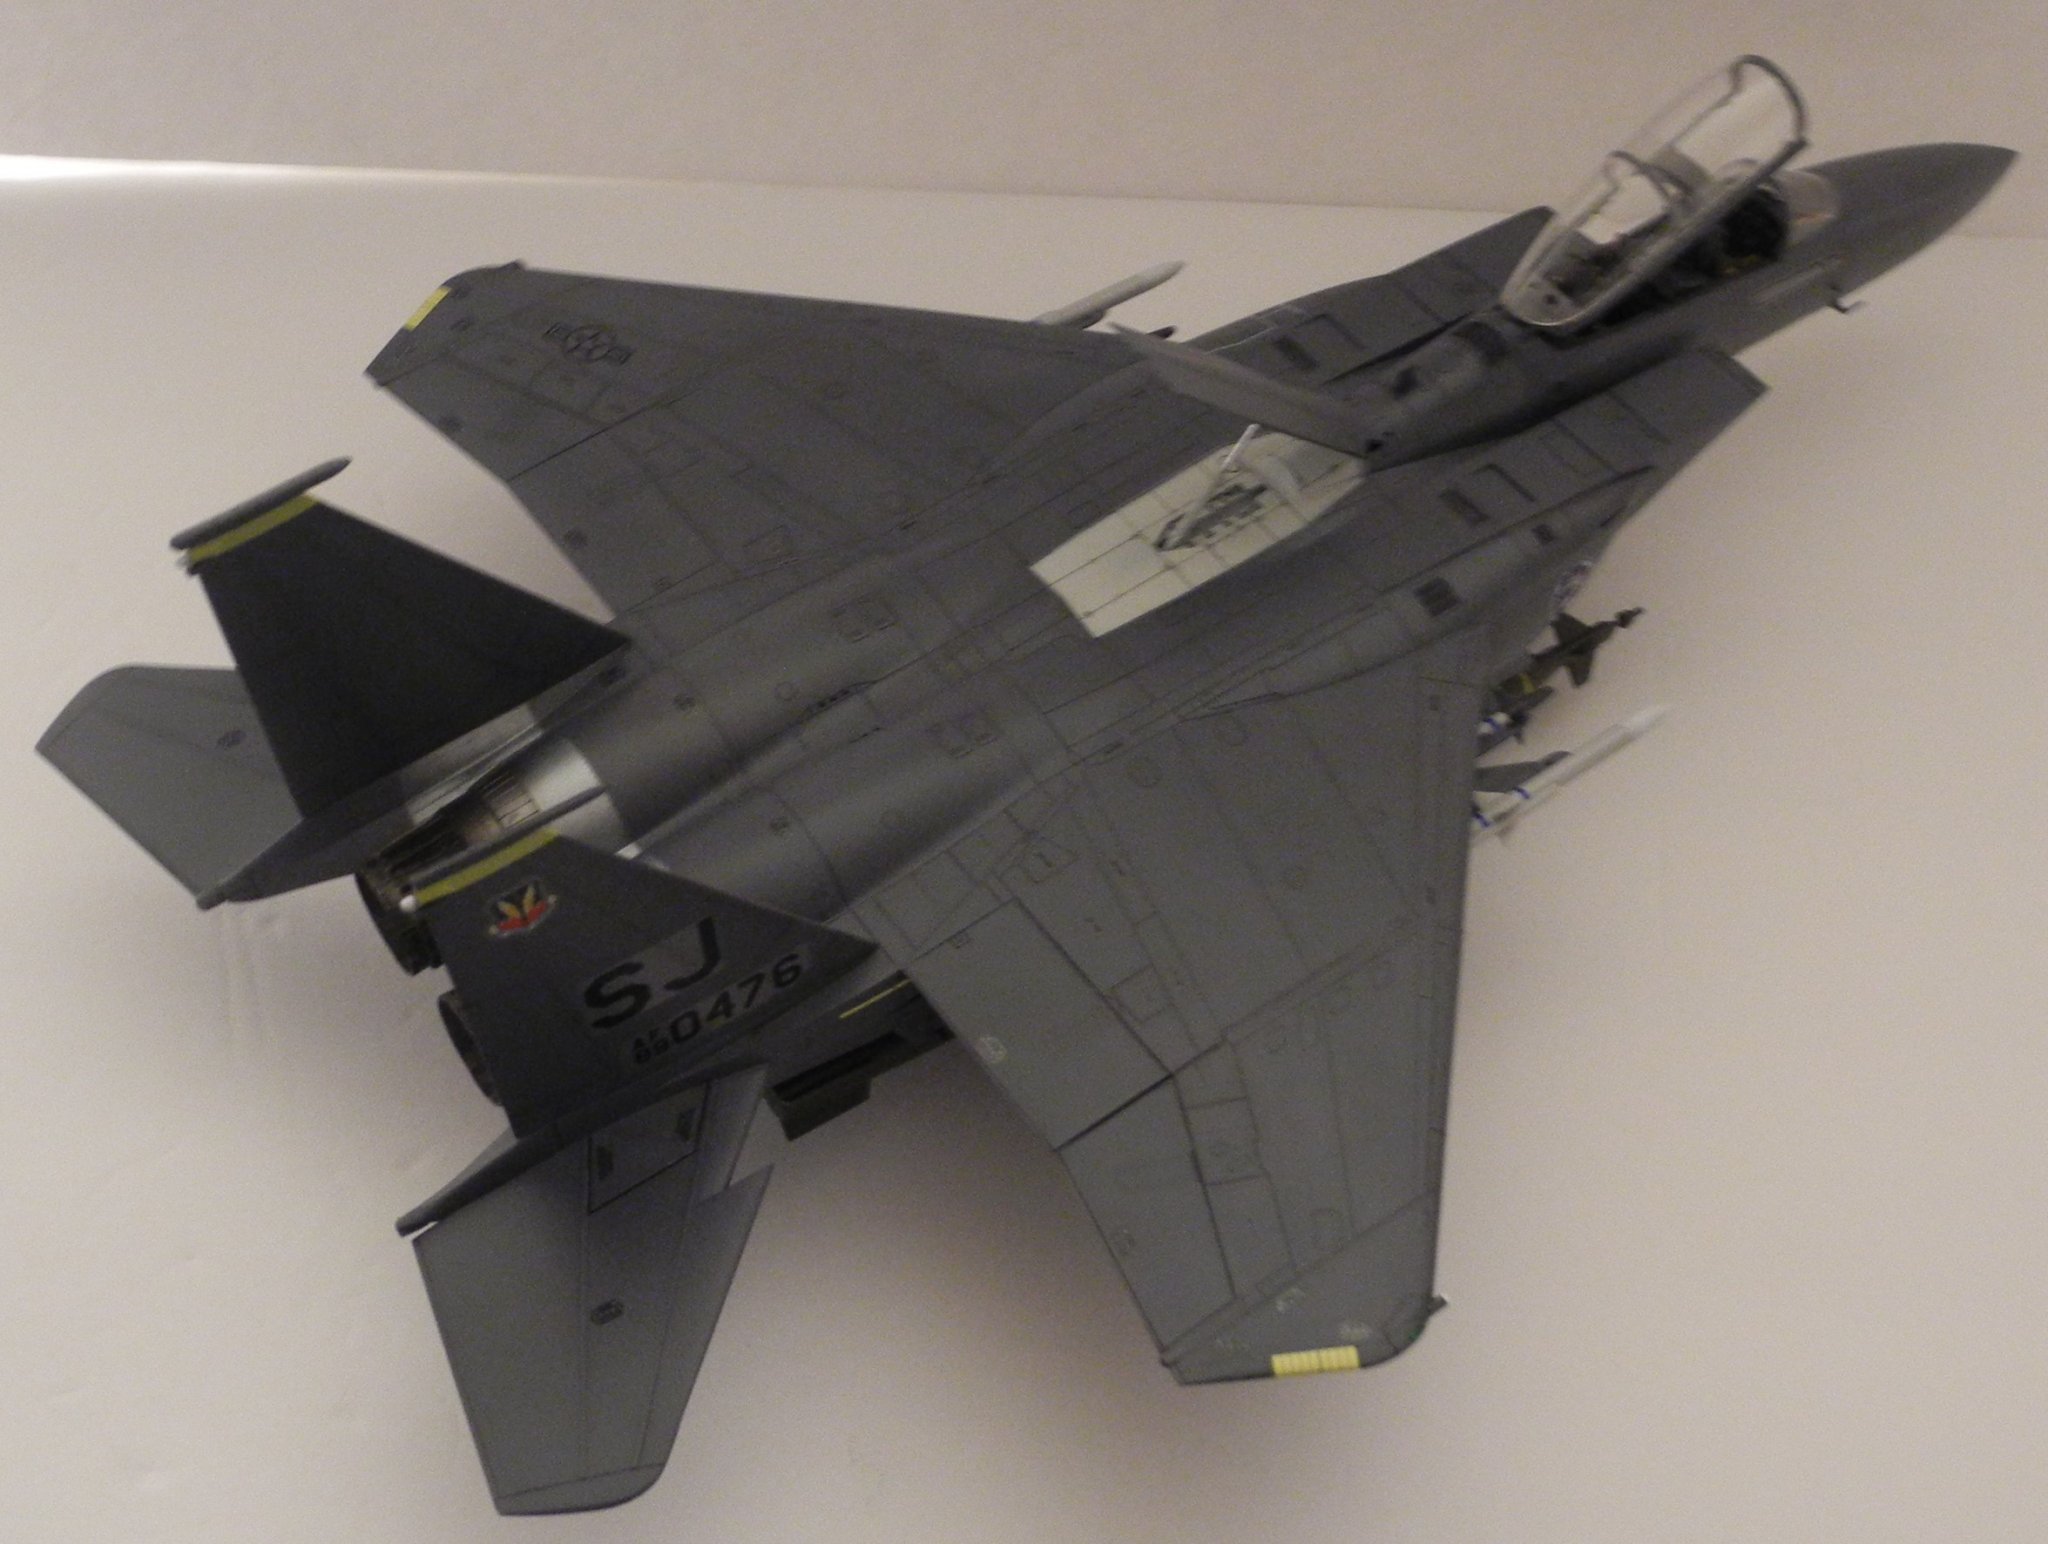
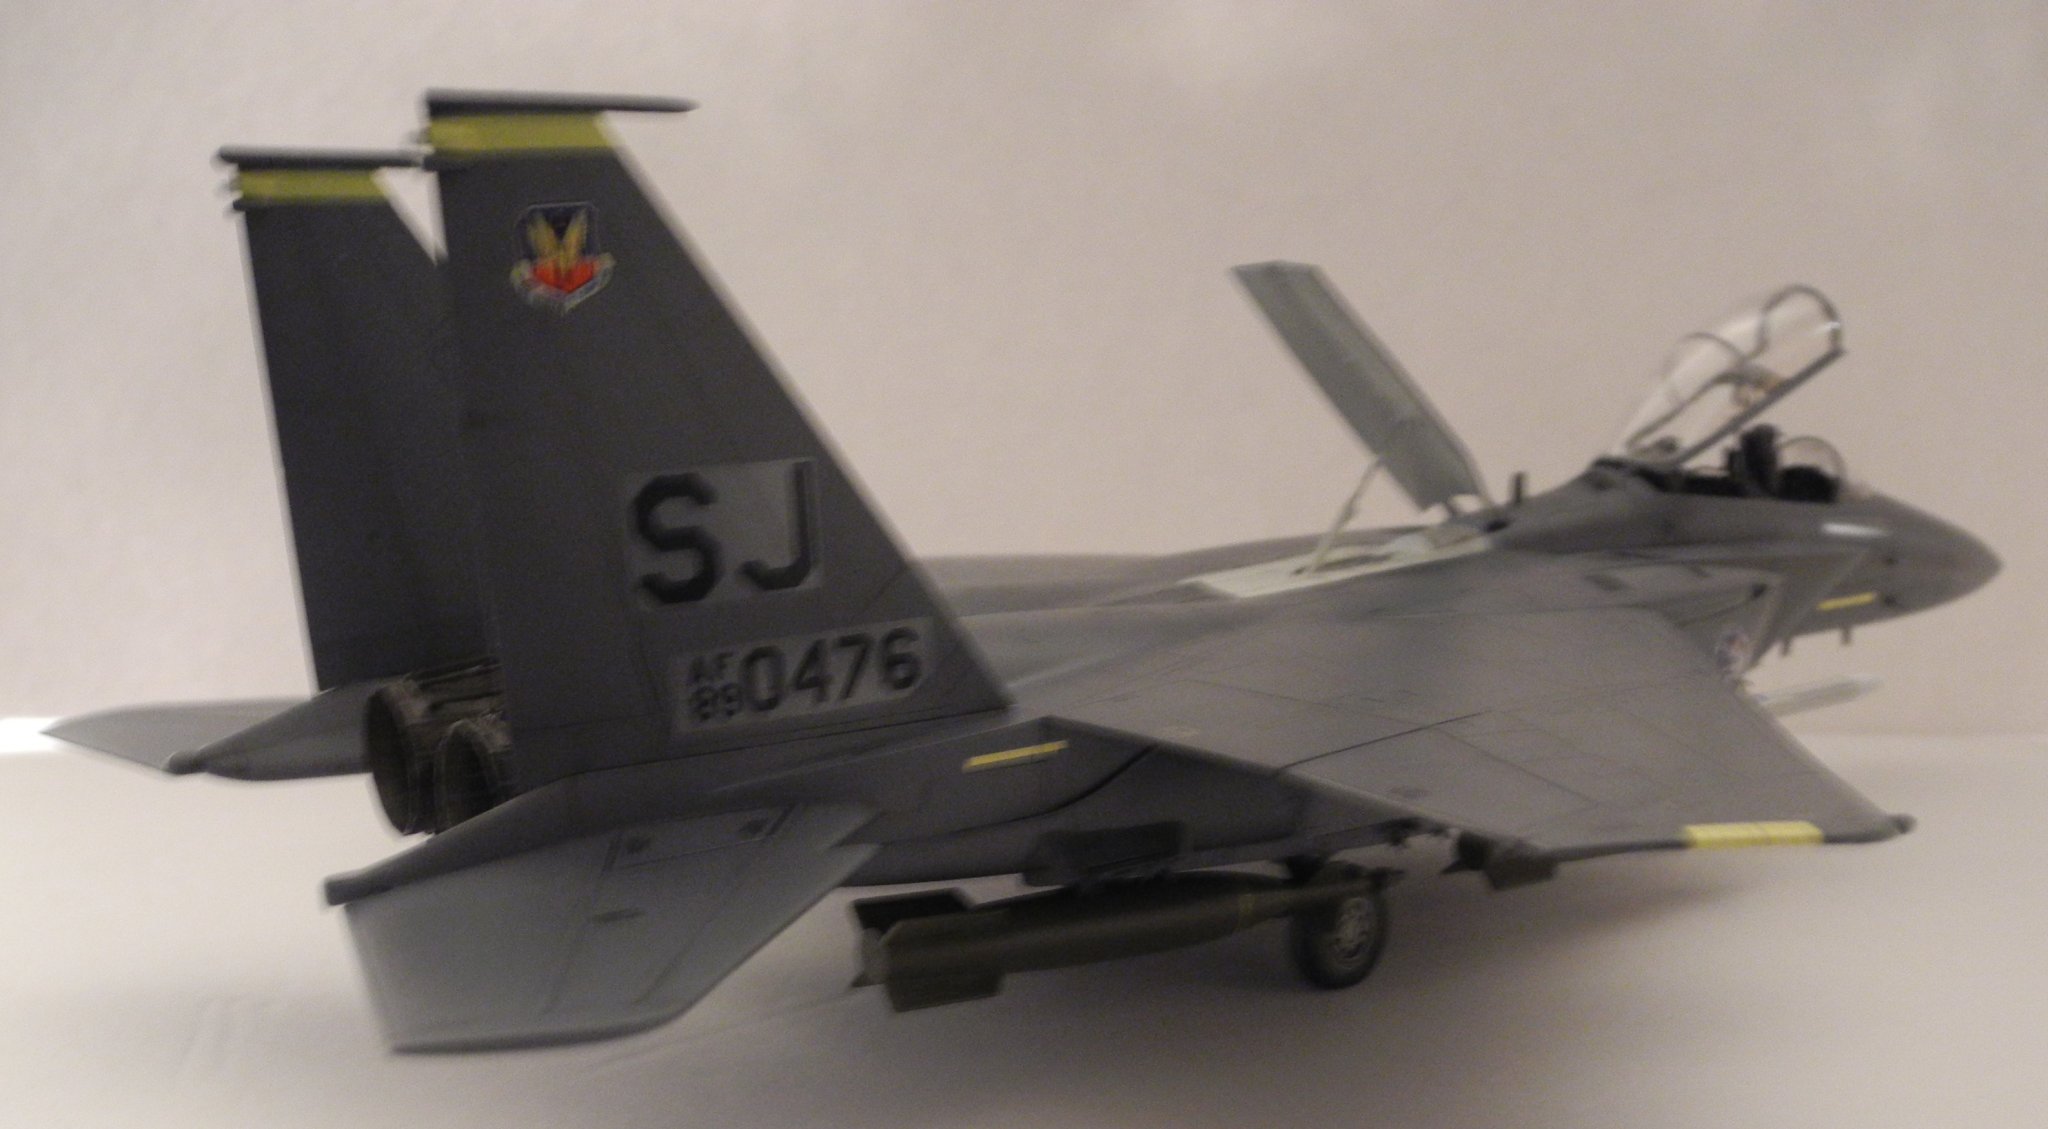
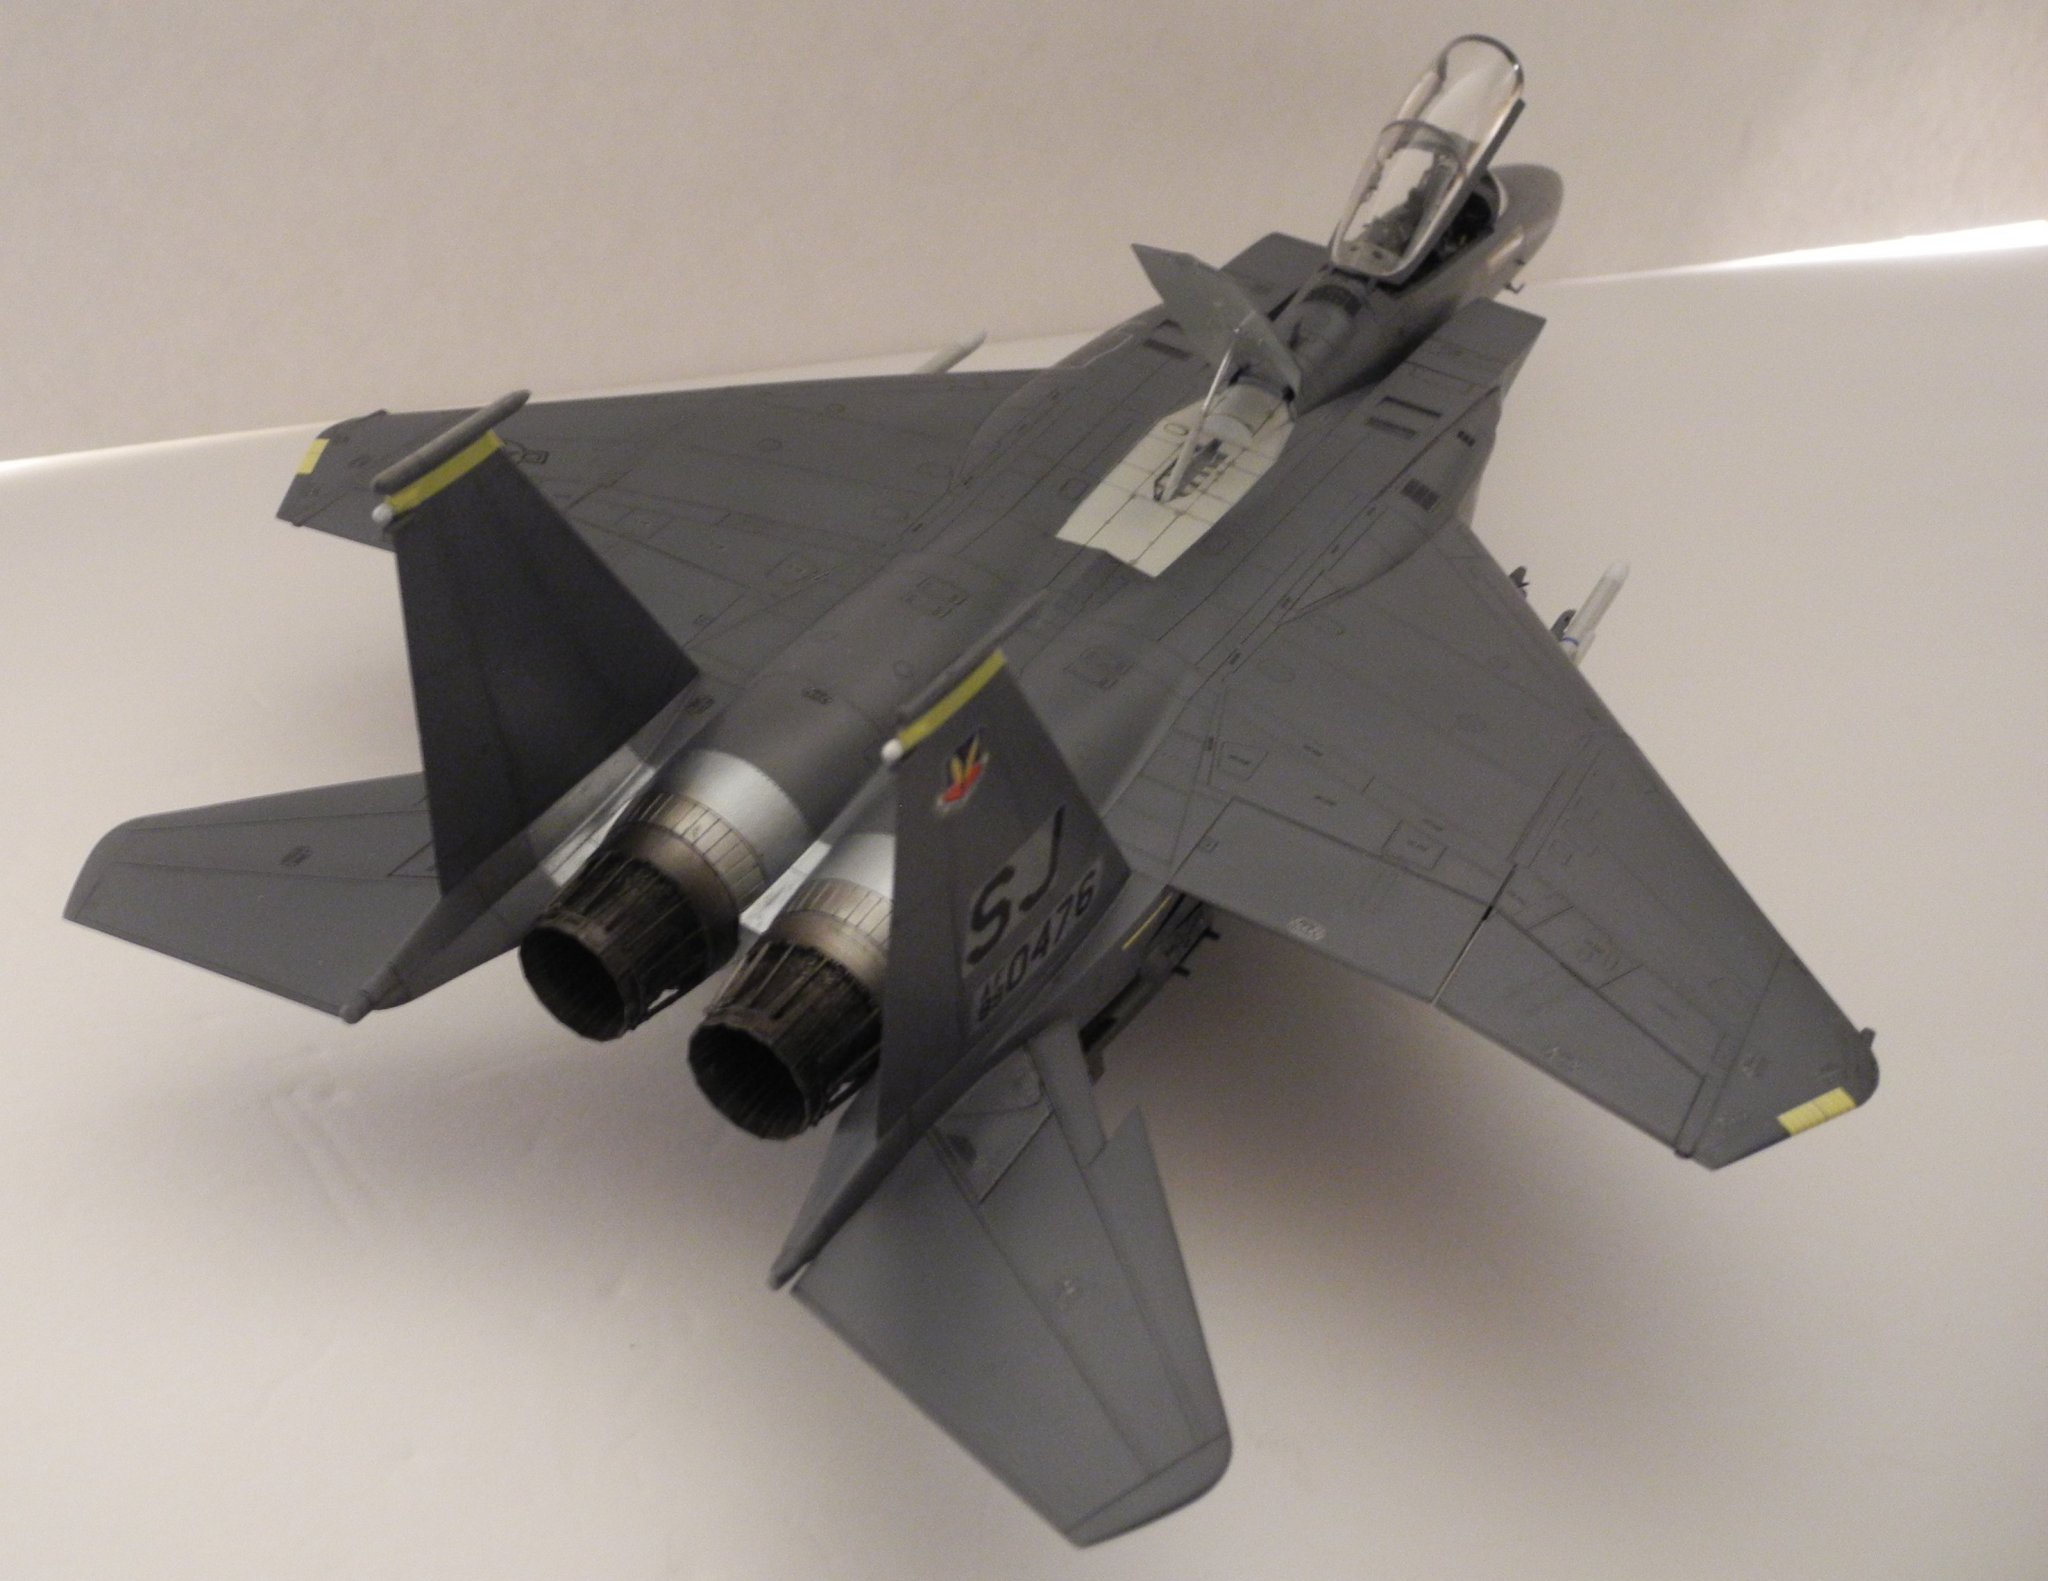
With the fuselage buttoned up, the wings are dry fitted and the aircraft posed along side the F-15E. With both planes in 1:48 scale, this gives some reference for the size of the PE-2.


-
No, I didn't try to order replacement parts. I shudder to think how long it might take to get replacement parts from Russia. As it is, they are not unusable, just not as clear as they should be. The "clear" is distorted, like maybe the parts came out of the molds too soon or something like a technical problem.
-
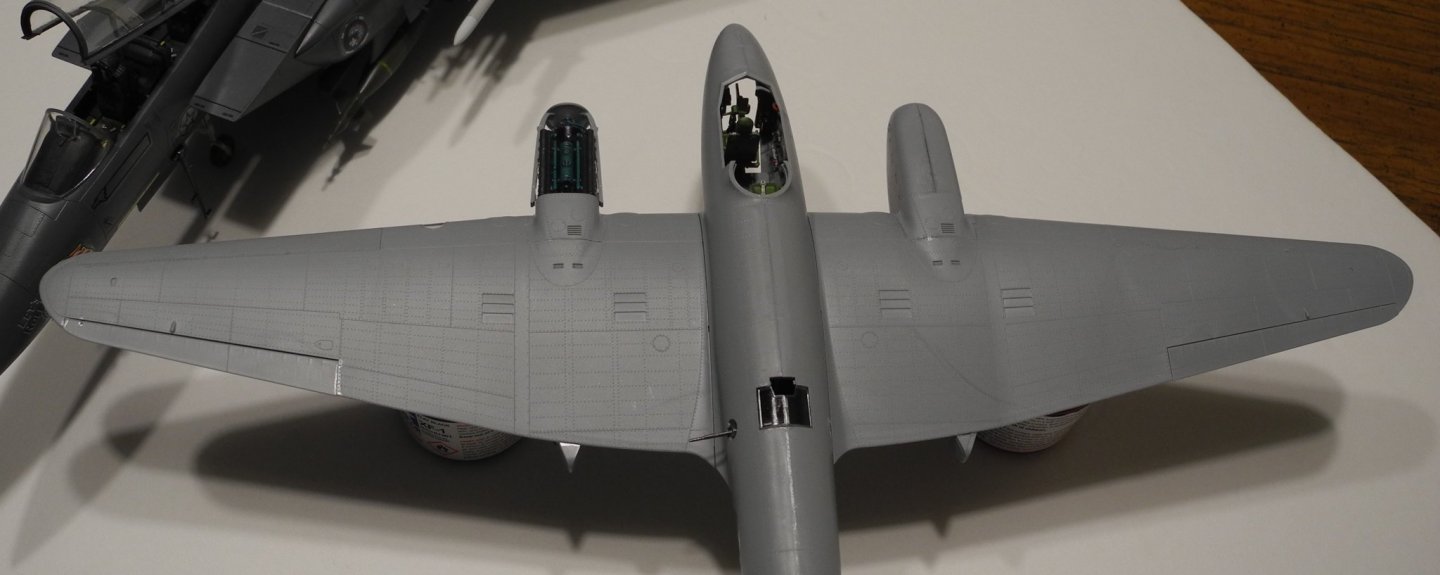
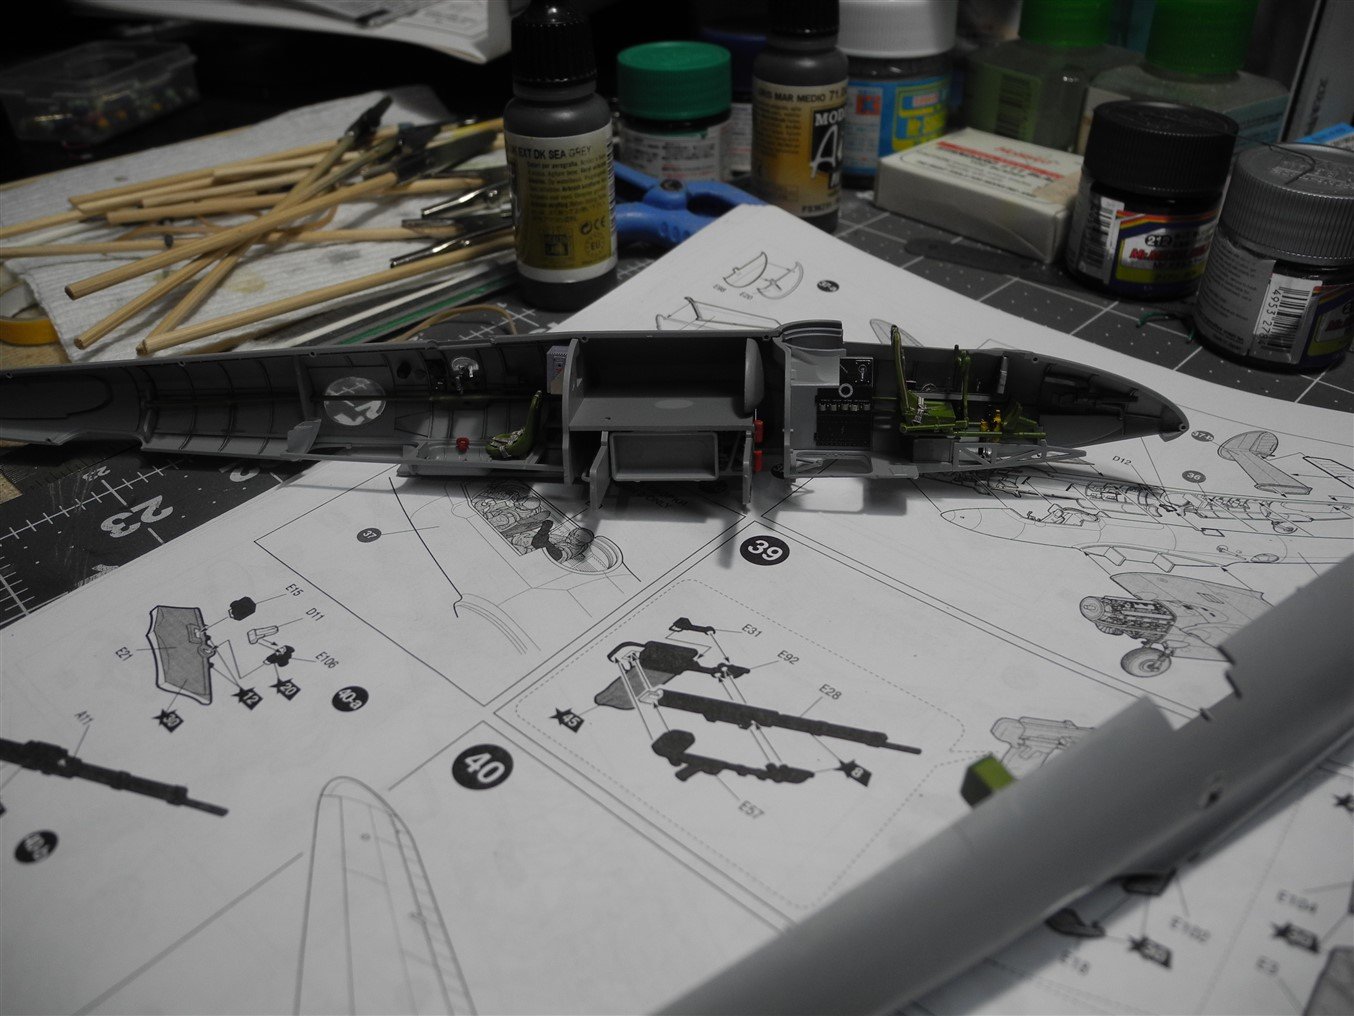
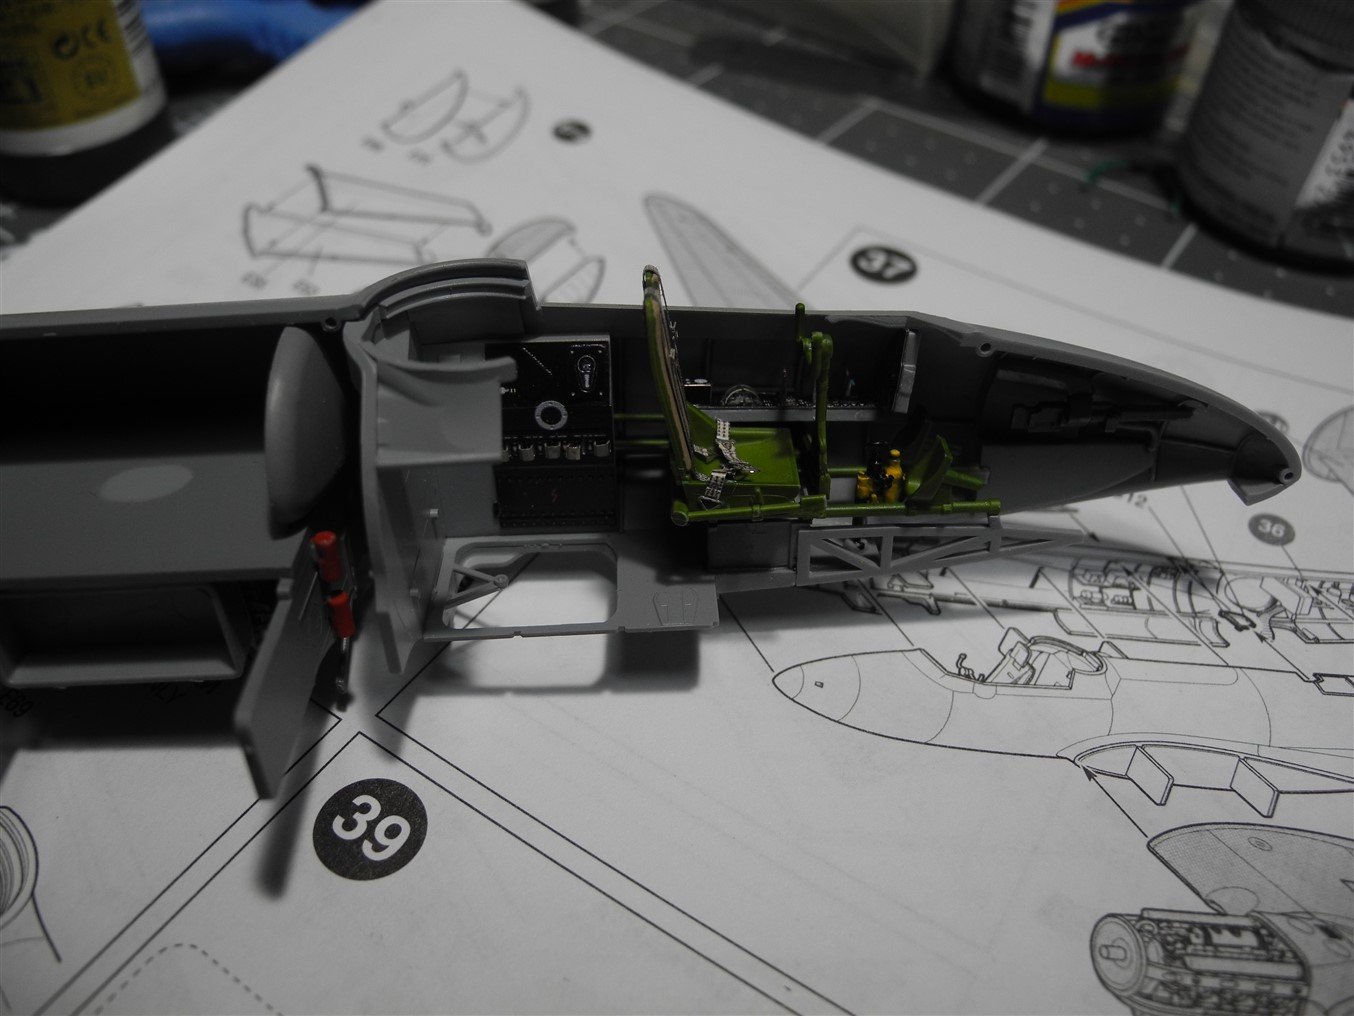
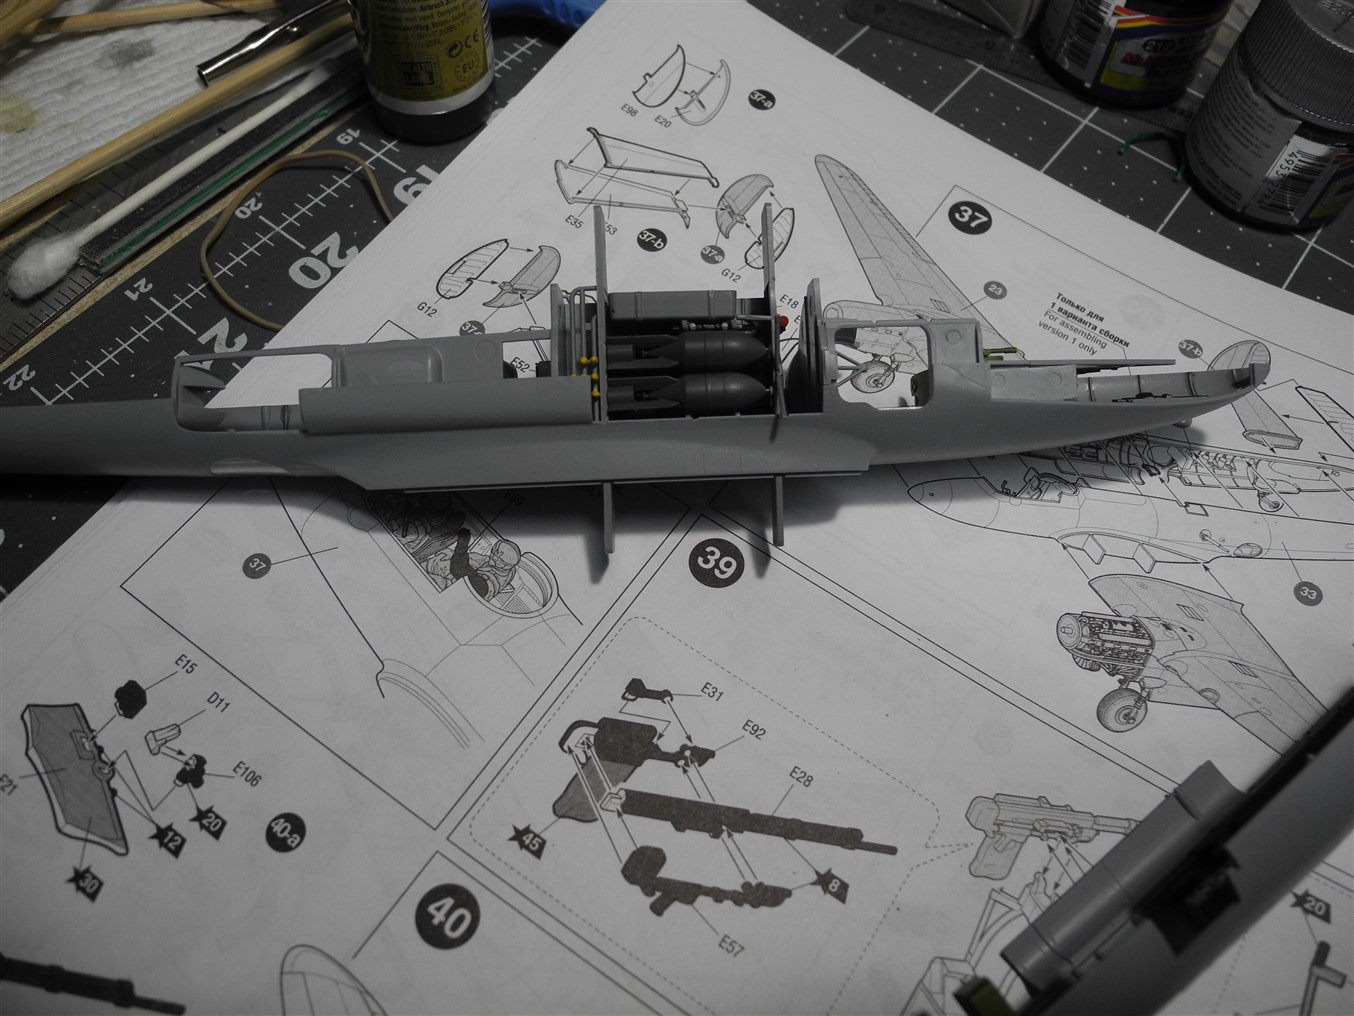
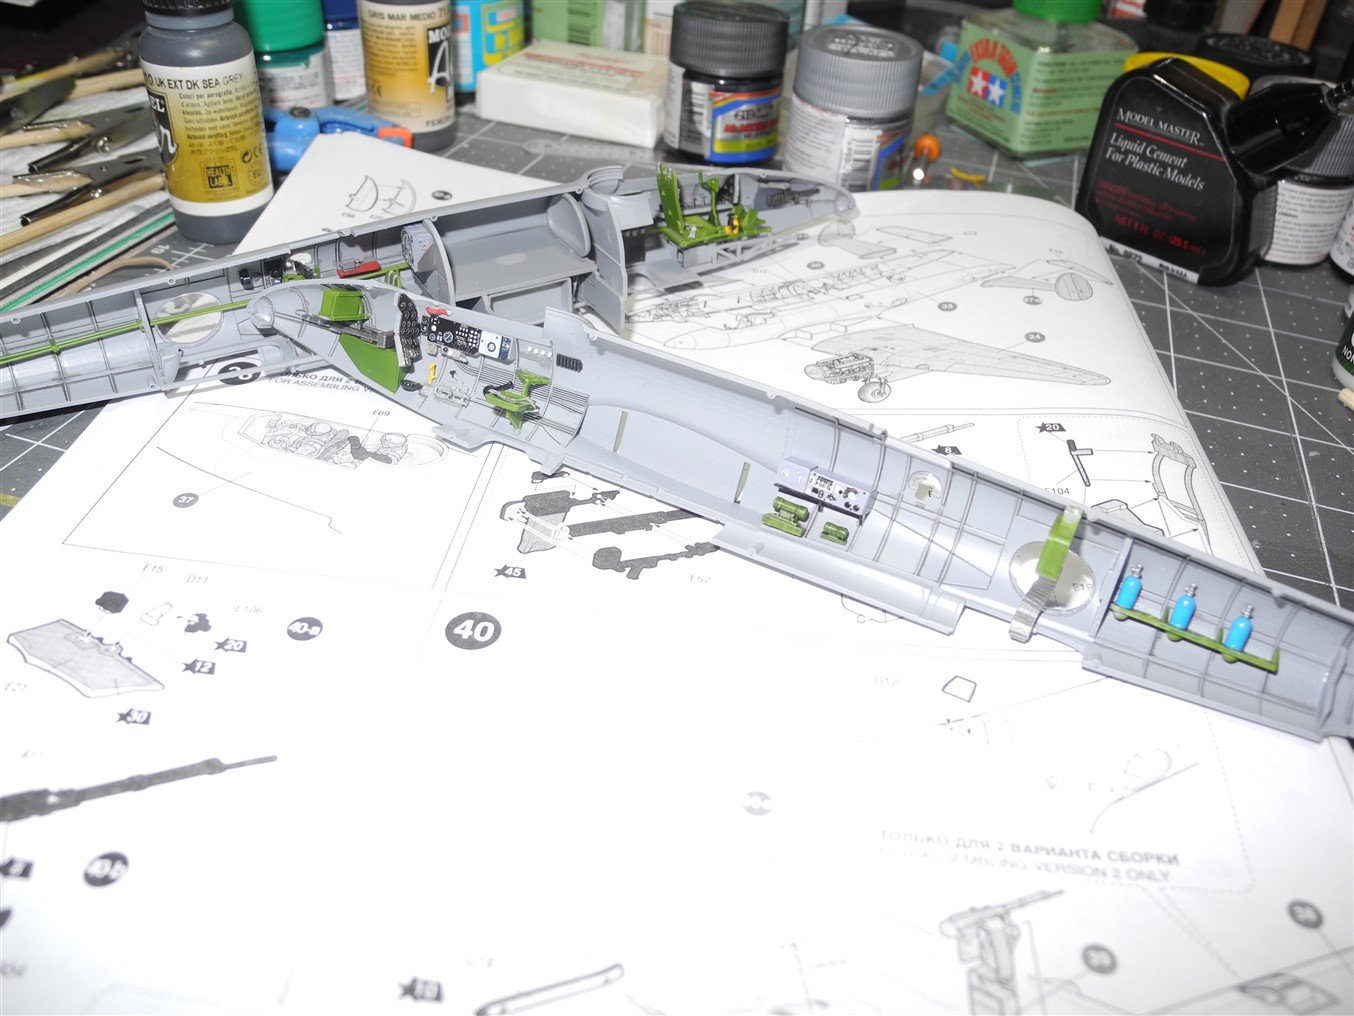
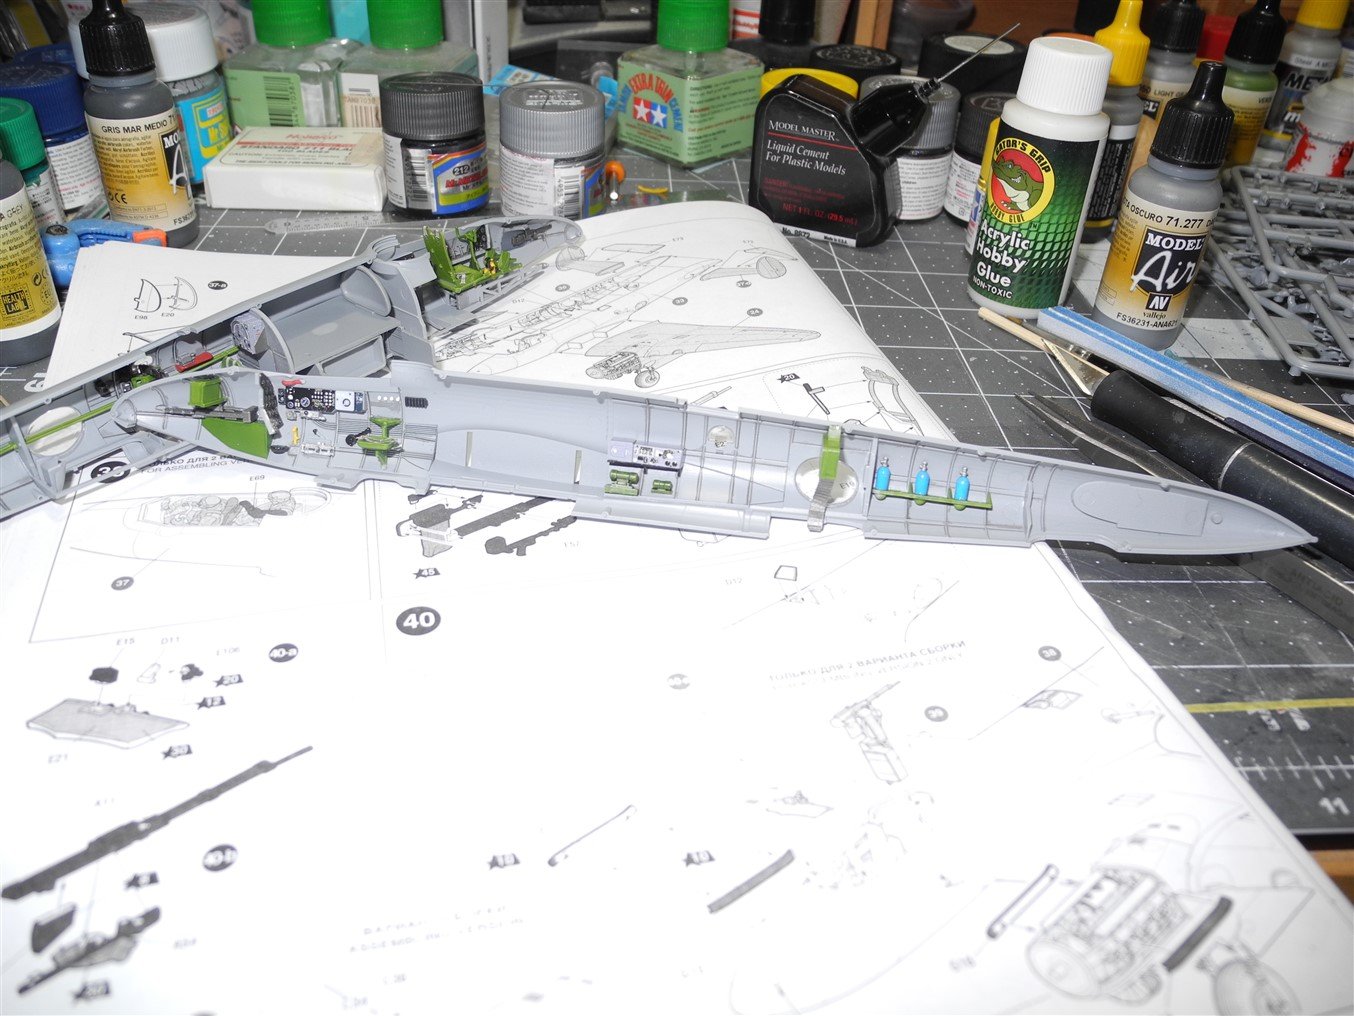
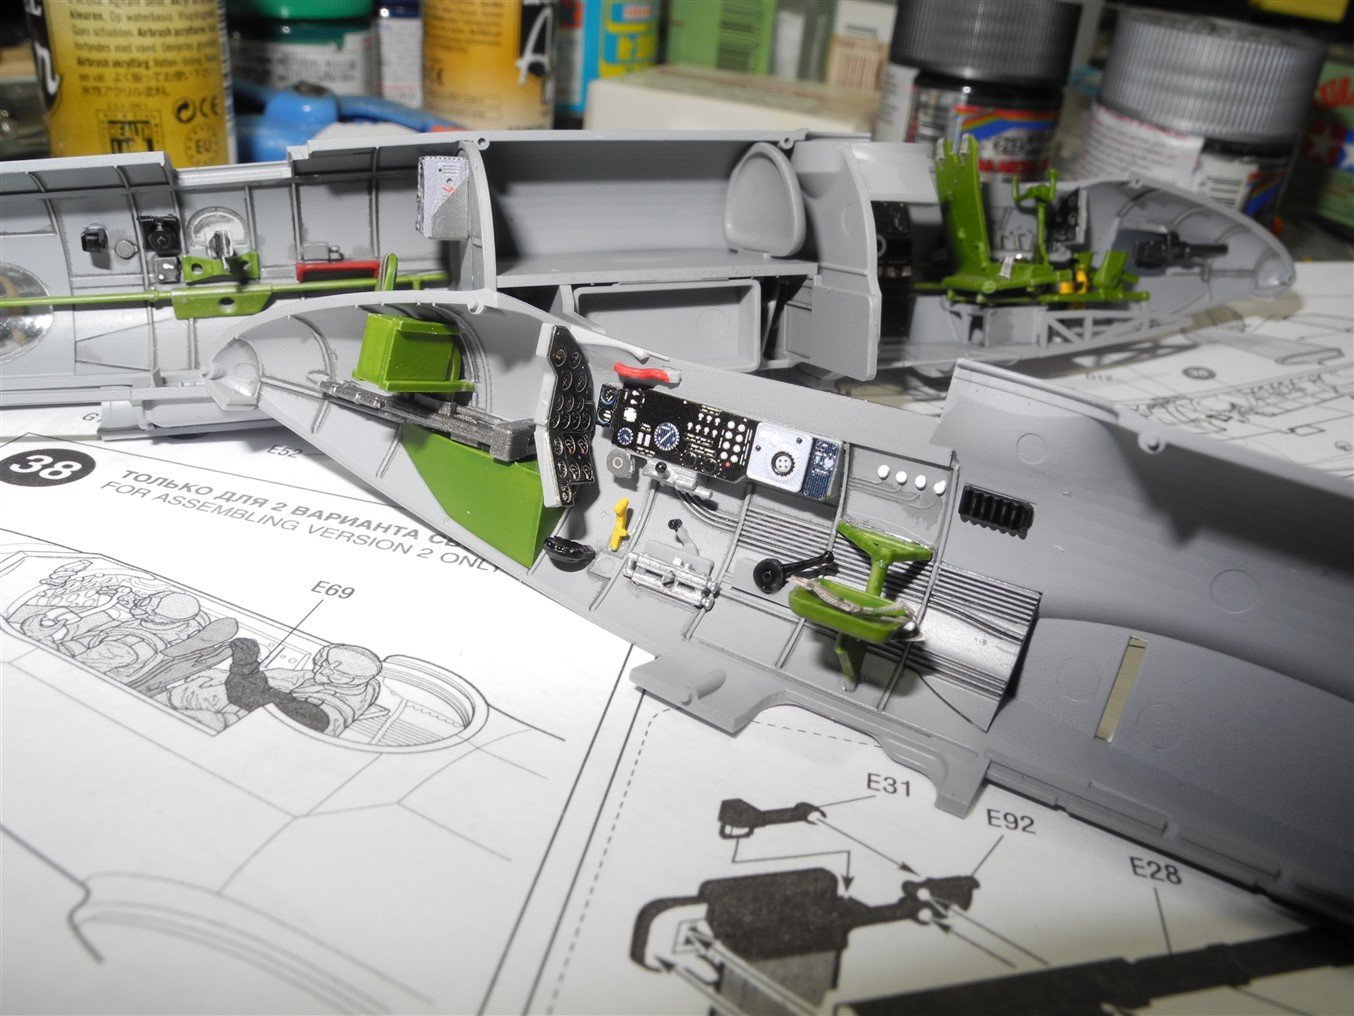
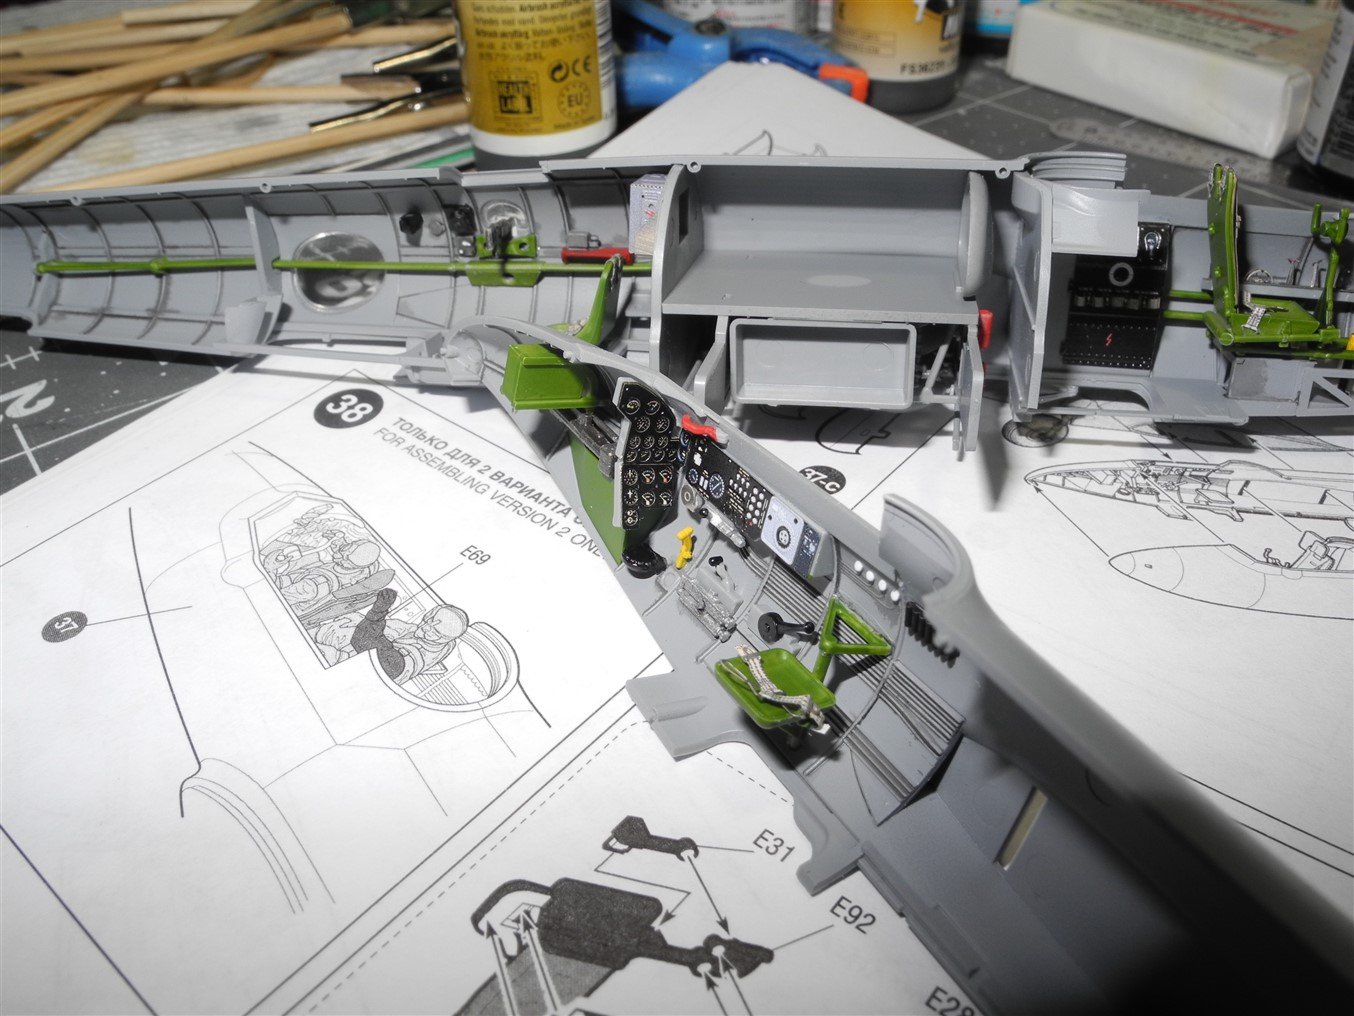
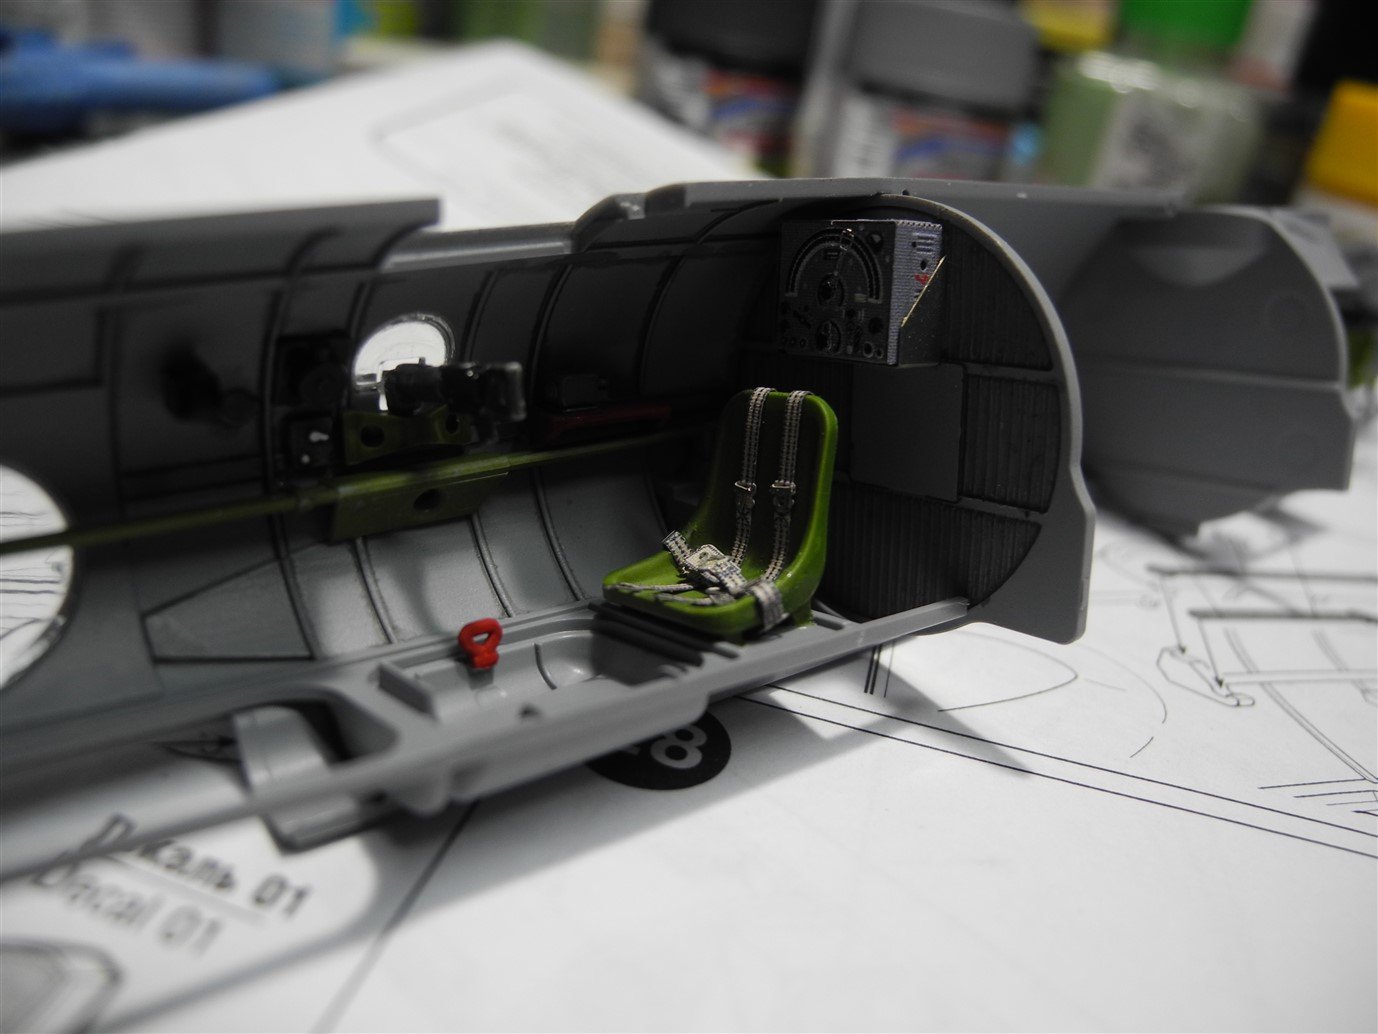
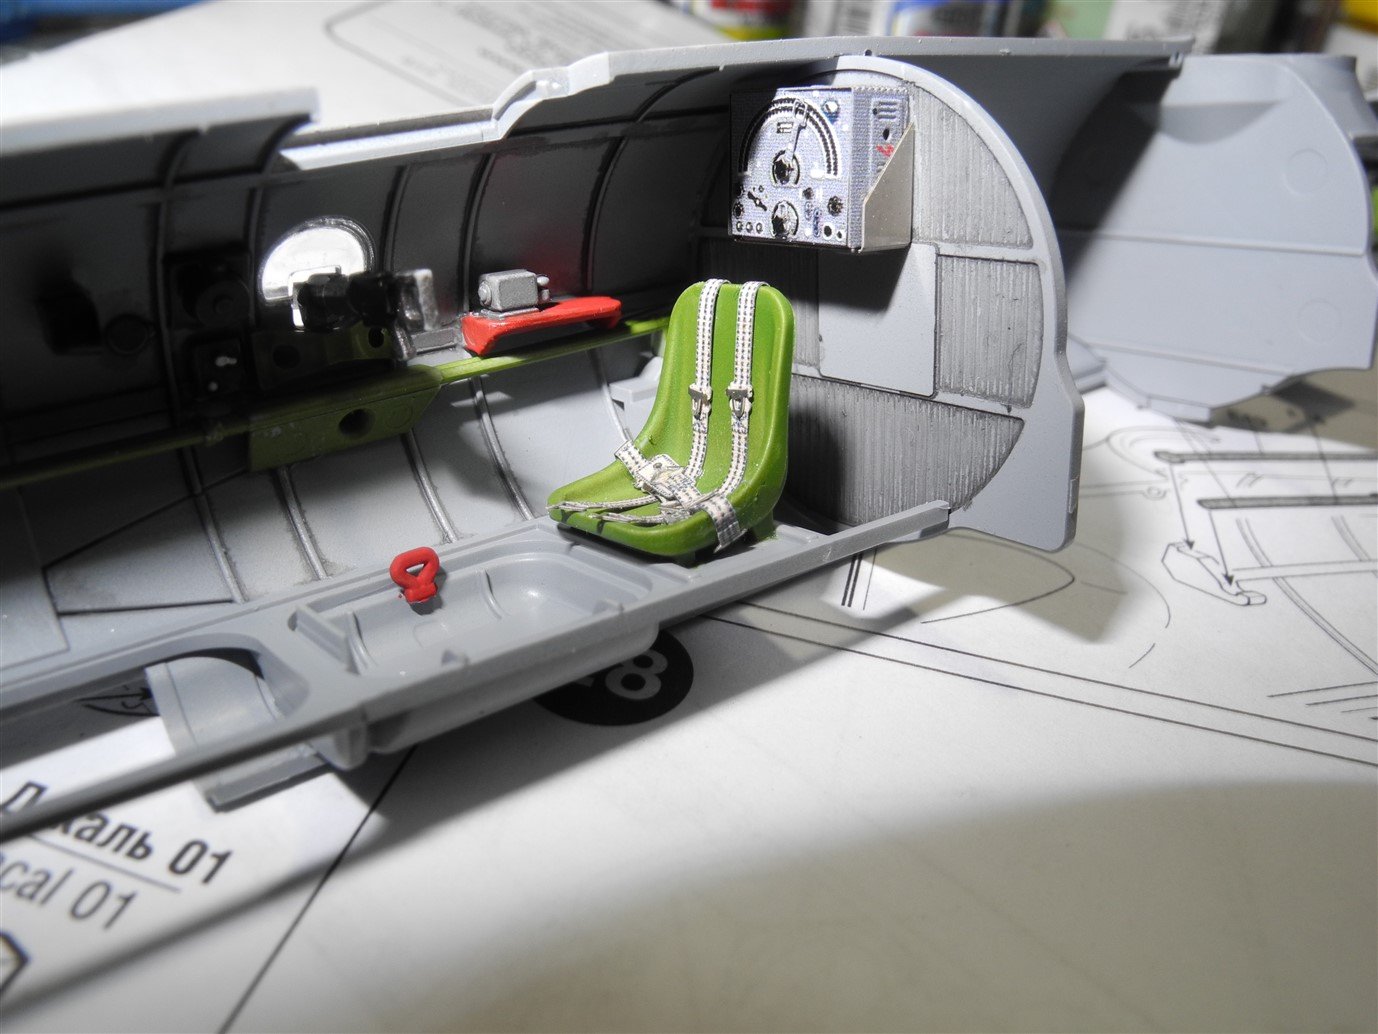
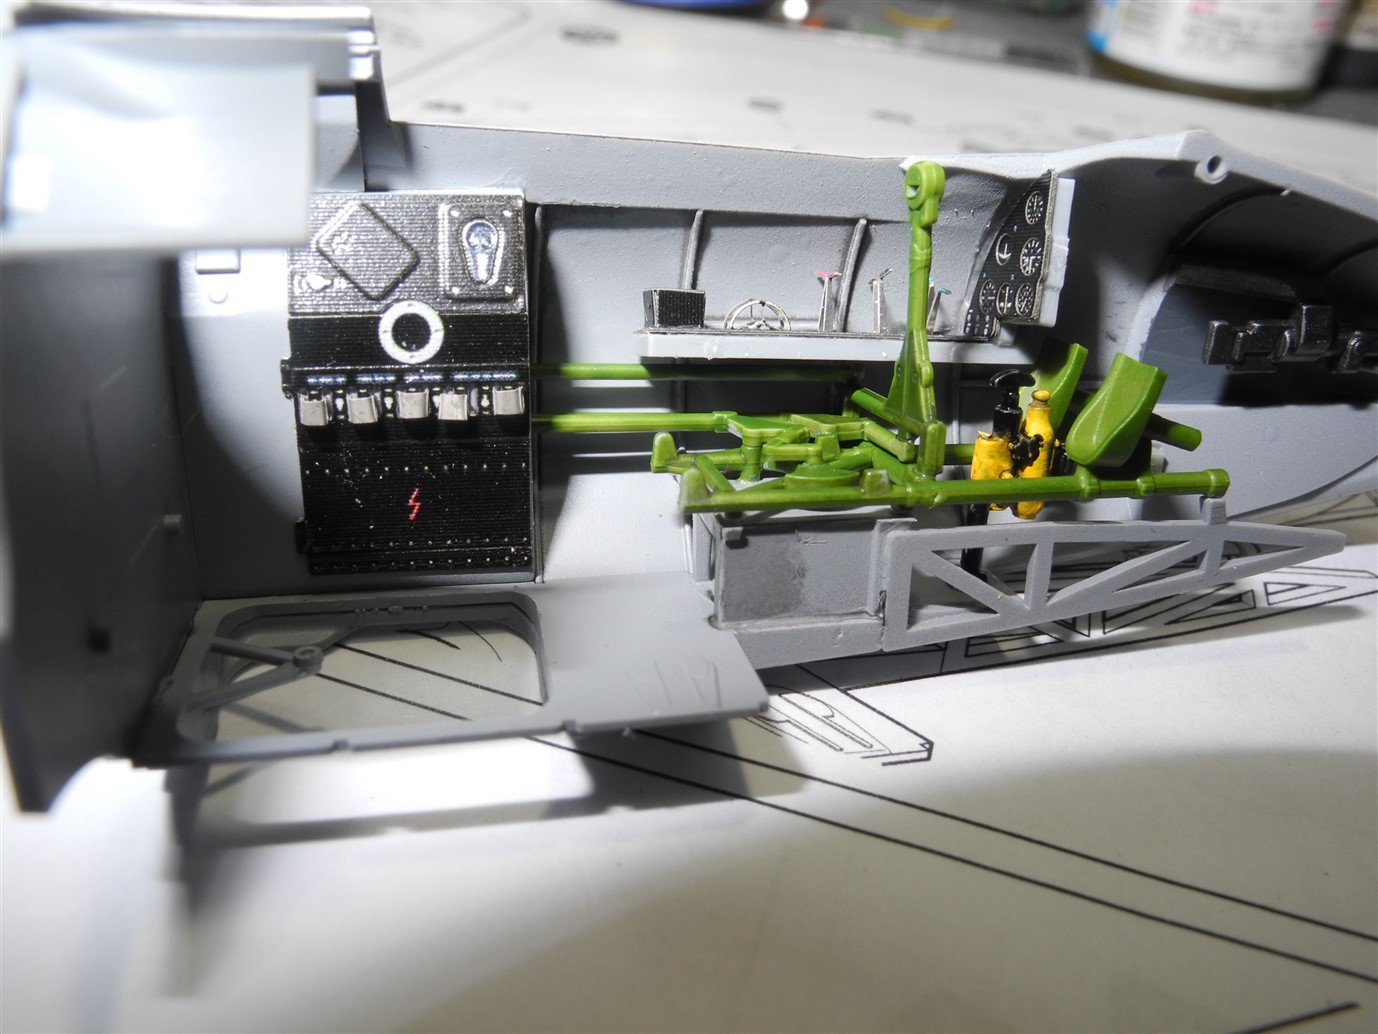
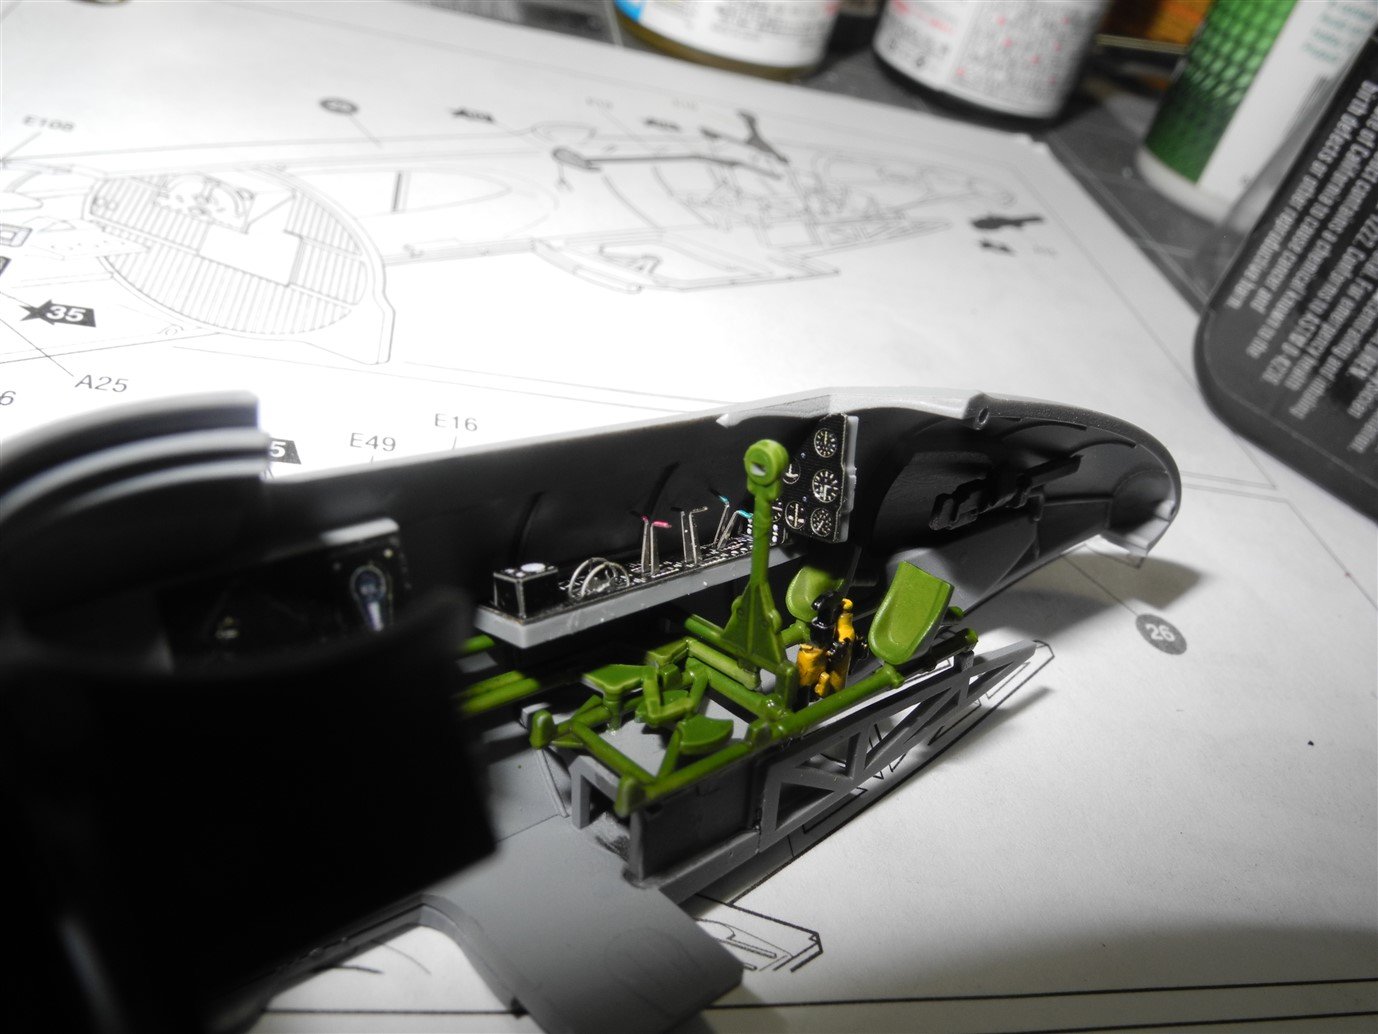
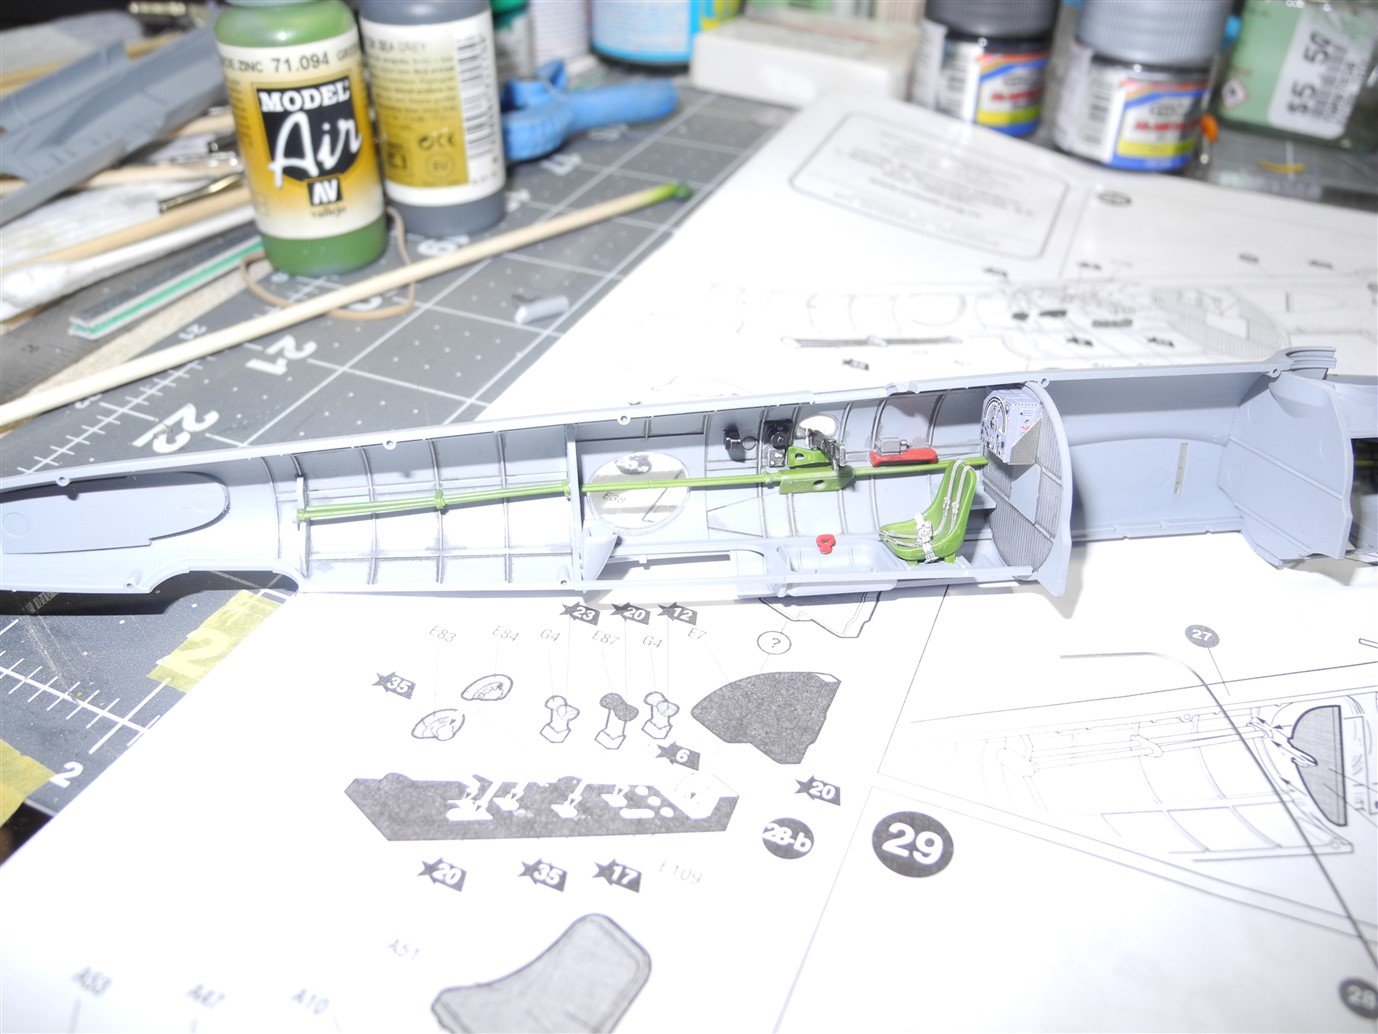
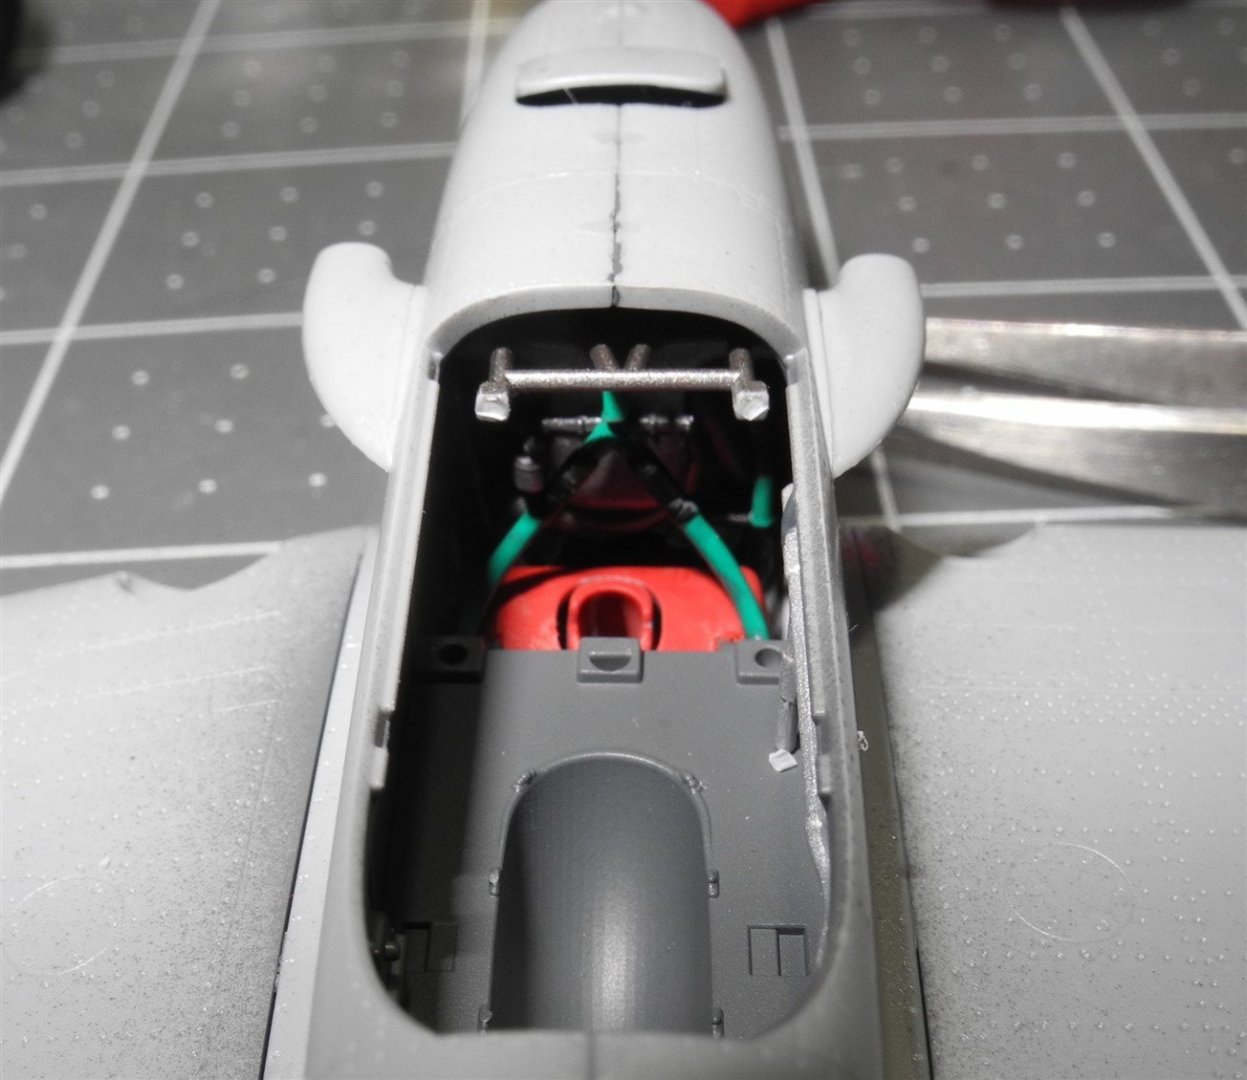
Both halves of the fuselage interior have been built out and are ready for joining. The port side carries the pilot and radio operator/gunner, while the starboard side carries the co-pilot/navigator/gunner It's interesting to me the gun layout on this aircraft/dive bomber. Two heavy machine guns are carried in the nose, while there is a waist gun mount interchangeable between port and starboard, then there's a dorsal gun just behind the pilot as well as an auto cannon carried in the ventral position for strafing targets to the rear as the plane flies past. The plane is on the small side for a twin engine bomber, but everything is neatly packed inside the aircraft. The bomb bay gives an excellent illustration of why I believe some of the photo etch is redundant/not useful. The photo etch set provides numerous pieces for upgrading the bay, but as you can see from the photos, none of it would be visible unless the bombs were left out. I opted to include the four bombs in the bay and eliminate the photo etch. Realistically, the kit parts are very good in detail anyway as it is. In addition to the bomb load shown, there are two heavy bombs carried under the wings. I've seen reference photos of PE-2's carrying rockets under each wing as well. That would have been an interesting option if it was offered or as an aftermarket set.
-
That's just super. The hangar has just the right look of "depth" with all the details and subtle differences in paint/color.
-
Working out the interior details. Too bad most of this gets covered up to the casual observer once the fuselage halves are joined. However, judges with flashlights will be able to see much of it. 😁

- 71 replies
-
- 11
-

-
Indeed, that is some painfully tedious work, but congratulations, you worked your way through it and it will look great on your model.
-
B-25 Mitchell "Meet Miss Runyon" by Javlin-HK-1/32
CDW replied to Javlin's topic in Non-ship/categorised builds
I know who you are talking about, but I have not seen the video. I will look for it. Yes, these decals are supposed to look just like painted on graphics. -
Sikorsky CH-53 by mtaylor - FINISHED - Revell - 1:48 - PLASTIC
CDW replied to mtaylor's topic in Non-ship/categorised builds
My big brother brought back LOTS of stuff he had bought there in Nam. I've got ivory and gold Buddha necklaces, ruby and gold necklaces, tiger tooth and gold necklaces, solid gold rings, etc, etc. He bought it real cheap back then. I never once heard him mention MPC's, so I wonder if he came along before that practice? -
B-25 Mitchell "Meet Miss Runyon" by Javlin-HK-1/32
CDW replied to Javlin's topic in Non-ship/categorised builds
The detail looks super nice Javlin. And that canopy looks huge! In 1:32, I guess it IS rather large. I've been eyeballing that 1:32 HK B-24, but wow, that thing would take up a lot of space. You were right in something you said earlier, detailing is almost mandatory in a model of this scale as everything is so much more visible. On a side note, you mentioned HGW seatbelts and it provoked a question I have about HGW wet decals...have you ever used them before? I have a few sets and I came close to using a set on my F-15E ordnance until I read their instructions. These wet decals are applied in a way that's different than any other wet decals I've ever used before. Evidently (as far as I understand the instructions), the decal is first soaked in water (normal), then placed on the model (normal), then after the decal sets for a while, some type of clear film is carefully removed from the top of the decal (abnormal). It almost sounds like a dry transfer decal except water is used. It was enough to change my mind about using them on my ordnance and decided to wait until I heard from somebody who has actually used them before. -
I dipped the clear parts last night. They came out much better, more clear than what they were before the treatment. I guess the lack of clarity came from imperfection on the outside.
-
In this case, it's not a matter of not liking Future, it's that the clear plastic is not clear, it's foggy from the inside out. Future can't fix that, but I guess it can't hurt to try and see what happens. What I have said before is that I've had mixed results spraying Future through an airbrush to use as a clear coat on a painted model.
-
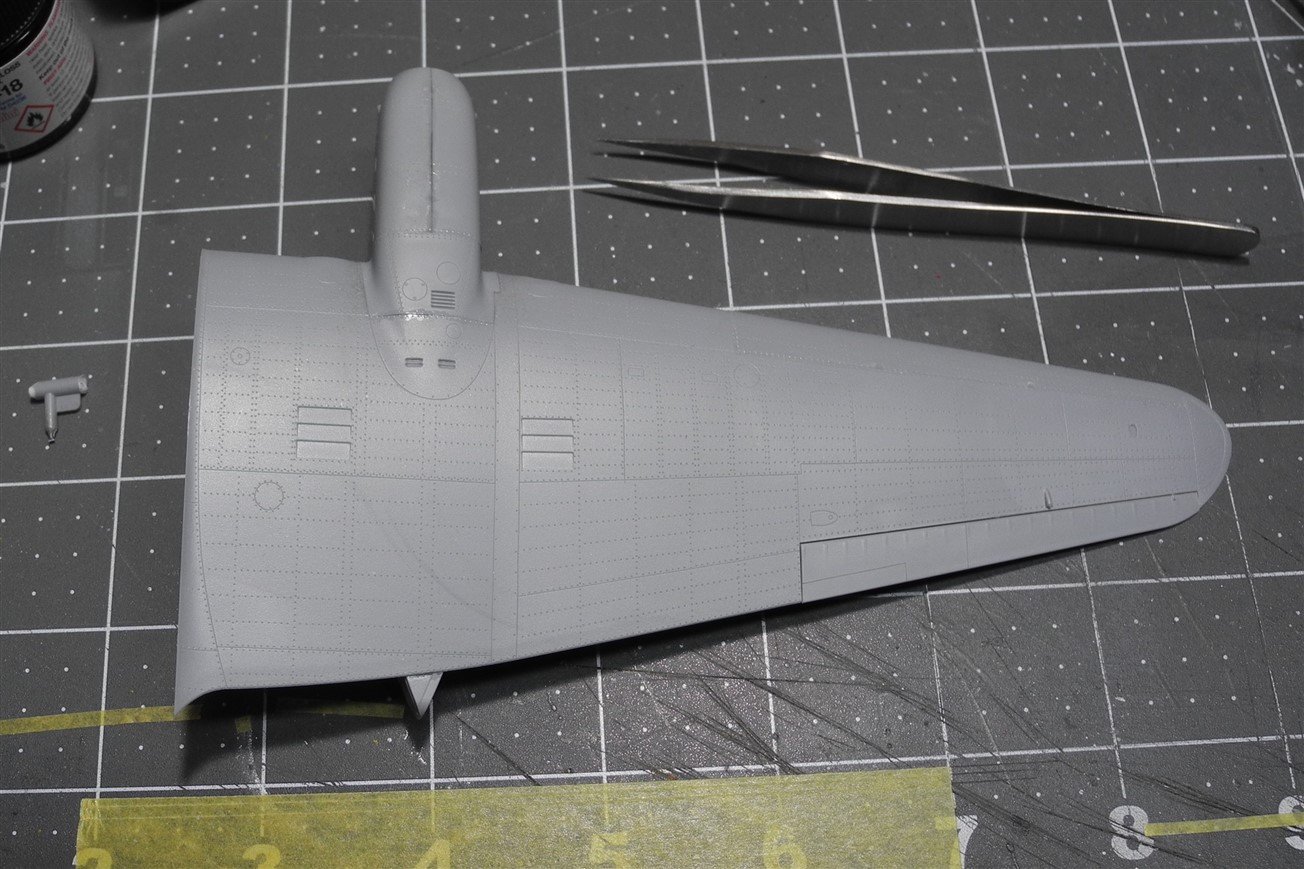
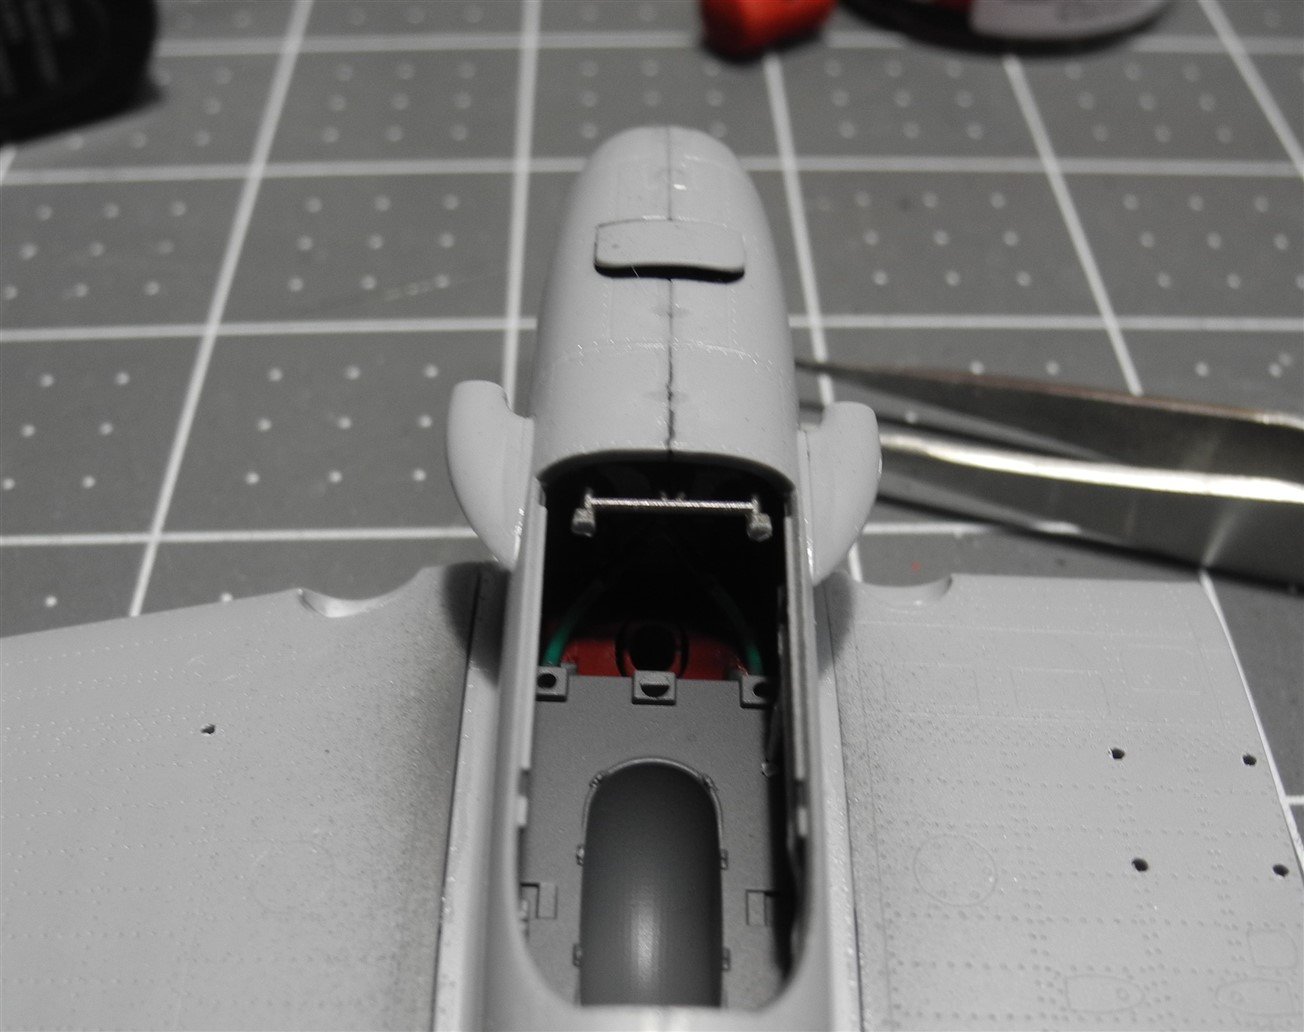
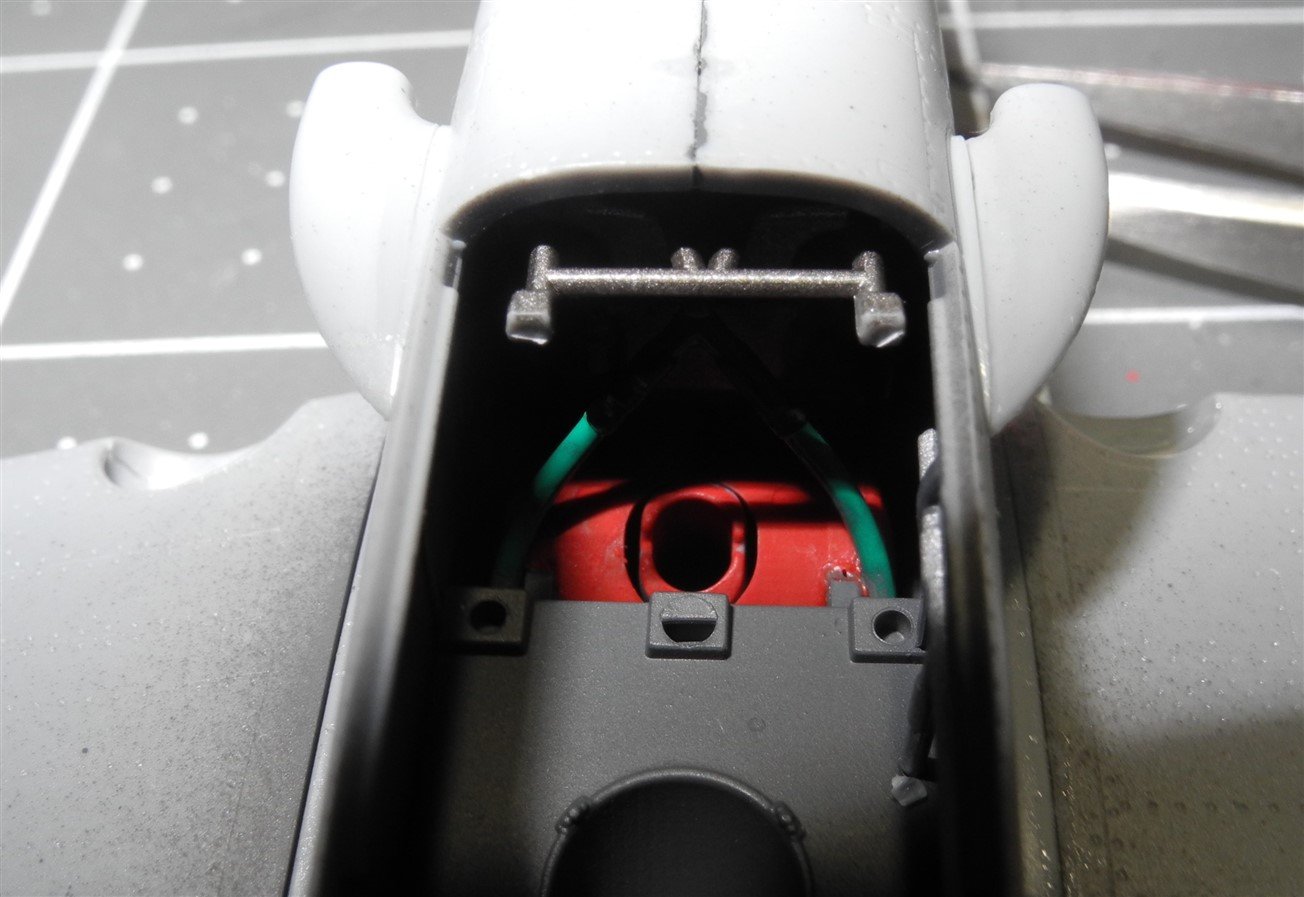
No, they do not identify the various parts. Certainly, those are dive brakes under the wings but I'm not sure if those are slats on the leading edge. Maybe, but not sure. The only slightly disappointing aspect of this kit are the clear parts. They are not crystal clear, rather a little foggy. Acceptable but not as high quality as the rest of the kit.
-
Hey OC, I am really looking forward to the painting stage with this kit.
-
Sikorsky CH-53 by mtaylor - FINISHED - Revell - 1:48 - PLASTIC
CDW replied to mtaylor's topic in Non-ship/categorised builds
Looks like a CH-53 office to me. 🙂 Great start, Mark. I always find my photos are a buzz kill because photos have a way of showing little details I don't see with the naked eye. A good way to "proof" your work. I like the story, did the guys know it was a nudist camp ahead of time? We once had to do a job at a nudist camp here in Florida, and I gotta tell you, most of the folk at the camp were people I would never ever want to see in the nude again. Almost gave me nightmares for weeks afterward. -
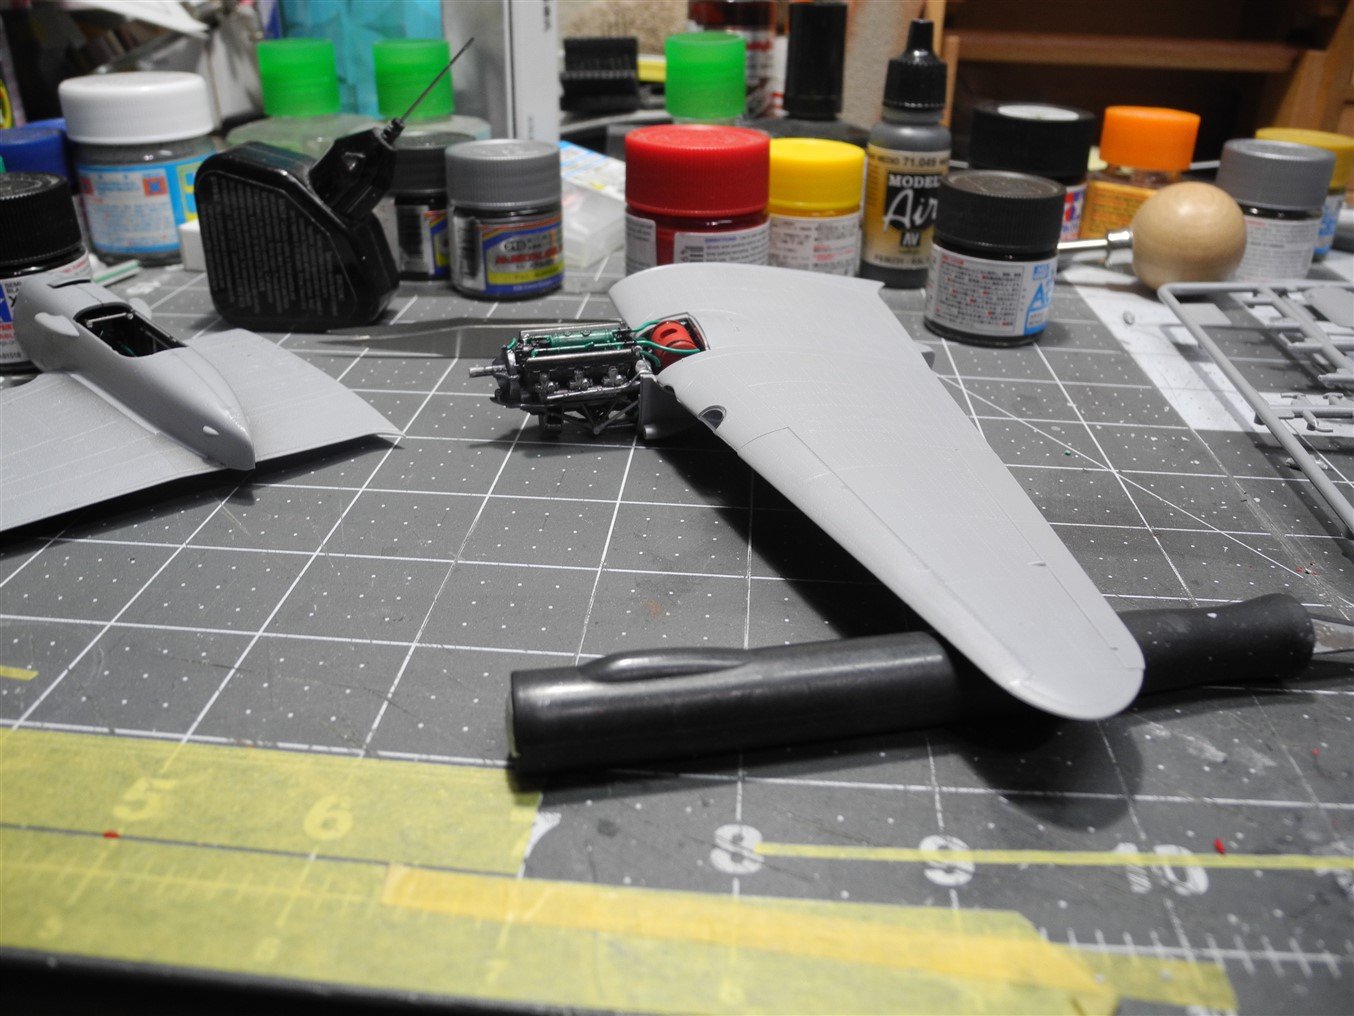
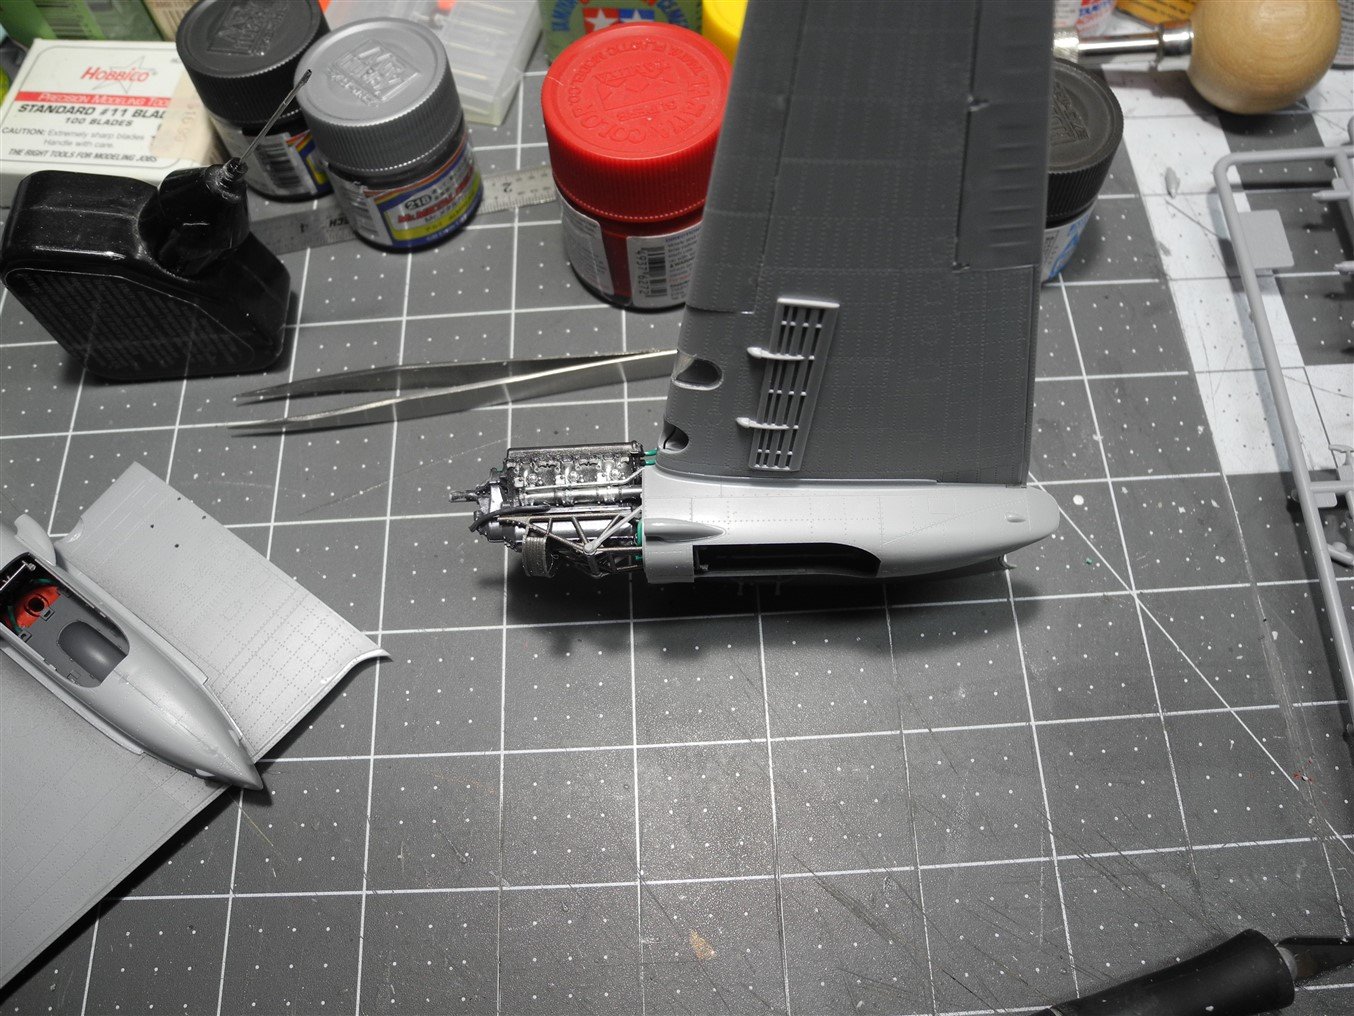
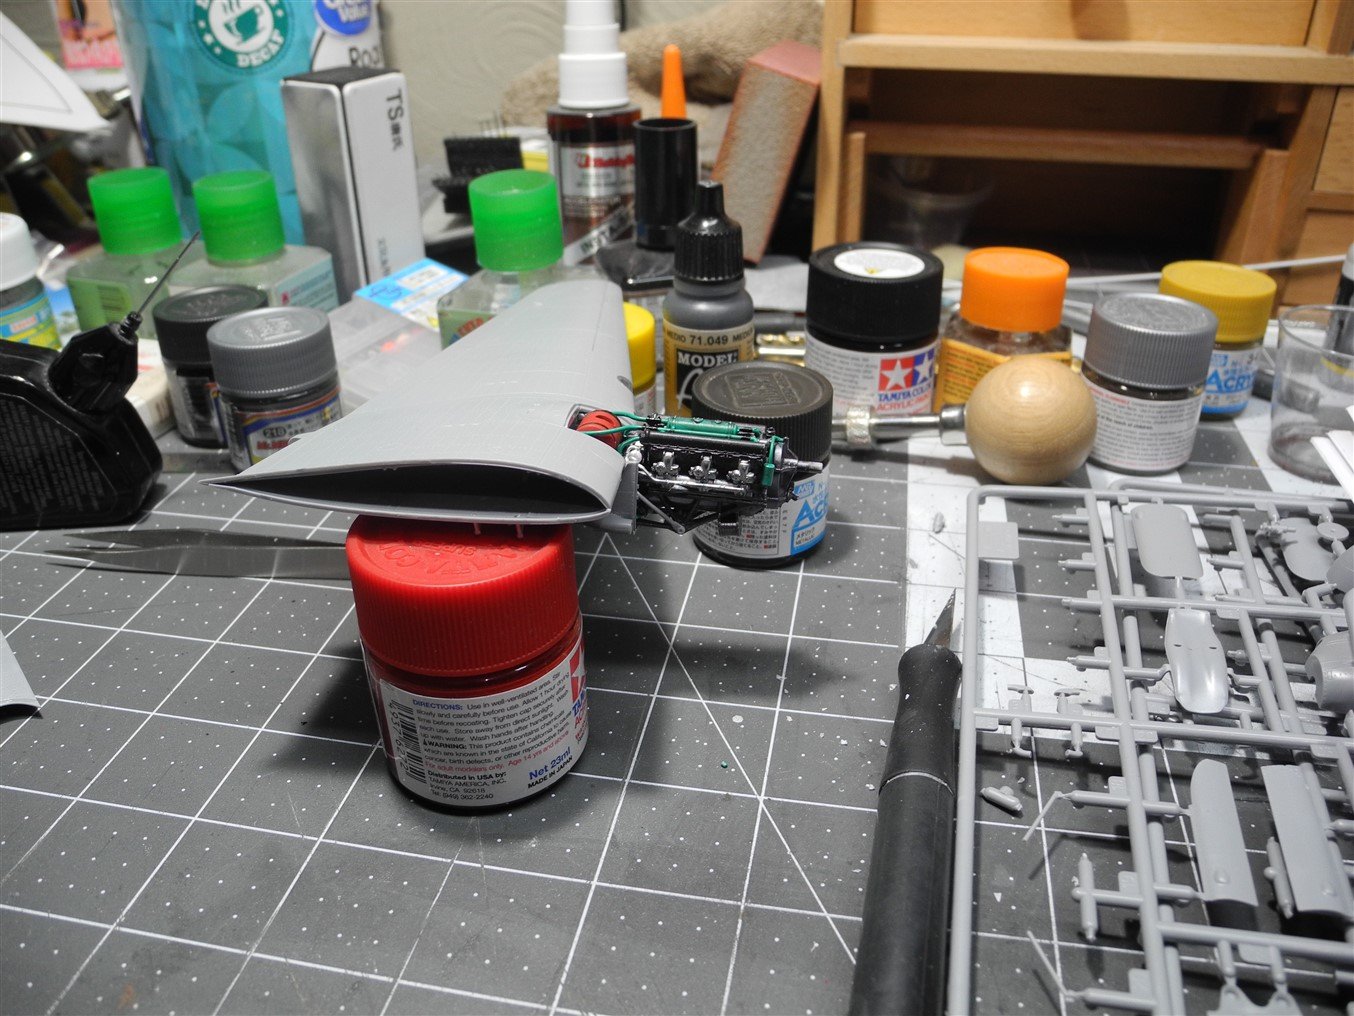
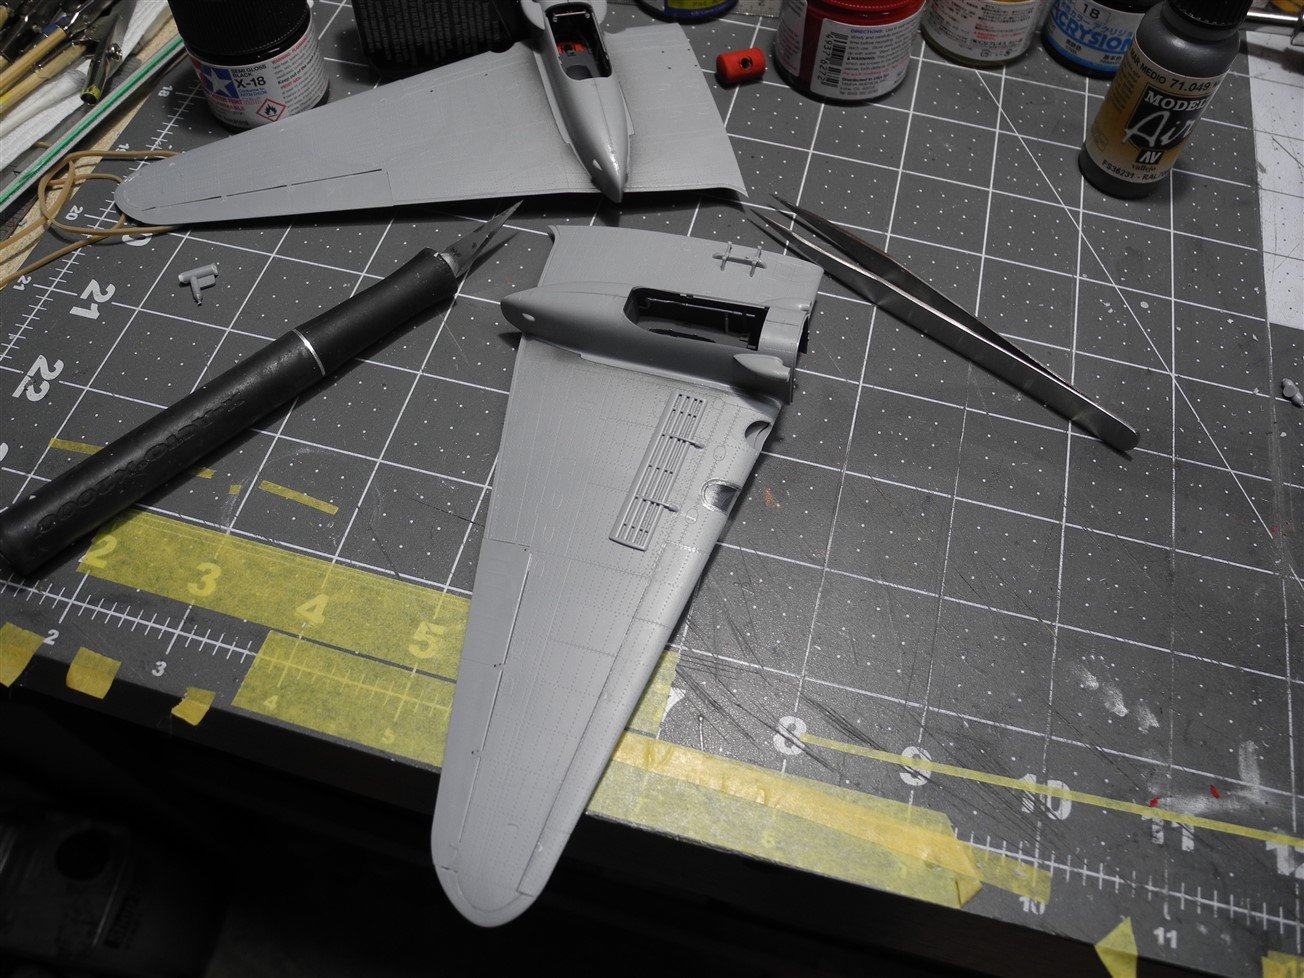
This is a progress update going through step one through step twenty three. The photos don't look like much except a couple of wings until you go back to my first post to examine steps 1 - 23 and see the detail that goes inside the wings. A remarkable amount of detail which can be seen to some extent but a lot of it is buried. One engine nacelle is closed while the other will be open to expose the detailed engine, oil tank, and piping. The wheel wells have great detail right out of the box. You'll notice my landing gear has not yet been installed and won't be installed until the aircraft has been painted. This is without a doubt one of the best detailed and well fitting kits I have built. The model would lend itself well to a diorama where a crew was performing maintenance. I won't do one with this kit, but will consider doing another as a diorama.

- 71 replies
-
- 10
-
-
I guess I got lucky, mine did not require any weight in the nose. Thanks for the kind comments.
-
There was a contractor superintendent I worked with in the 70's who was a WW2 B-17 tail gunner. Amazingly, the old gentleman survived two missions where his B-17 was shot down and he managed to bail out. As you may know, this was no small feat for a tail gunner as he had to crawl through a very small space to enter or exit his gunner's position. Many tail gunners were lost who were never able to escape that position once an airplane began going down. His first time, he parachuted over France where he was rescued by French resistance. The second time, he was captured by the Germans and spent the remainder of the war in a POW camp.