CDW
-
Posts
7,730 -
Joined
-
Last visited
Content Type
Profiles
Forums
Gallery
Events
Everything posted by CDW
-

Bugatti Type 35B by CDW - FINISHED - Italeri - 1:12 Scale
CDW replied to CDW's topic in Non-ship/categorised builds
Thanks Ken! -
Bugatti Type 35B by CDW - FINISHED - Italeri - 1:12 Scale
CDW replied to CDW's topic in Non-ship/categorised builds
Thanks OC -
Bugatti Type 35B by CDW - FINISHED - Italeri - 1:12 Scale
CDW replied to CDW's topic in Non-ship/categorised builds

- 155 replies
-
- 14
-

-

-
Bugatti Type 35B by CDW - FINISHED - Italeri - 1:12 Scale
CDW replied to CDW's topic in Non-ship/categorised builds
Thanks Rob. I’m having fun experimenting with this as well. It’s something I rarely ever attempt to do, showing age wear and grime. -
Bugatti Type 35B by CDW - FINISHED - Italeri - 1:12 Scale
CDW replied to CDW's topic in Non-ship/categorised builds
It’s where I used an oil wash over the bare metal finish to show grease and grime accumulation. -
Bugatti Type 35B by CDW - FINISHED - Italeri - 1:12 Scale
CDW replied to CDW's topic in Non-ship/categorised builds


- 155 replies
-
- 14
-
-
Bugatti Type 35B by CDW - FINISHED - Italeri - 1:12 Scale
CDW replied to CDW's topic in Non-ship/categorised builds
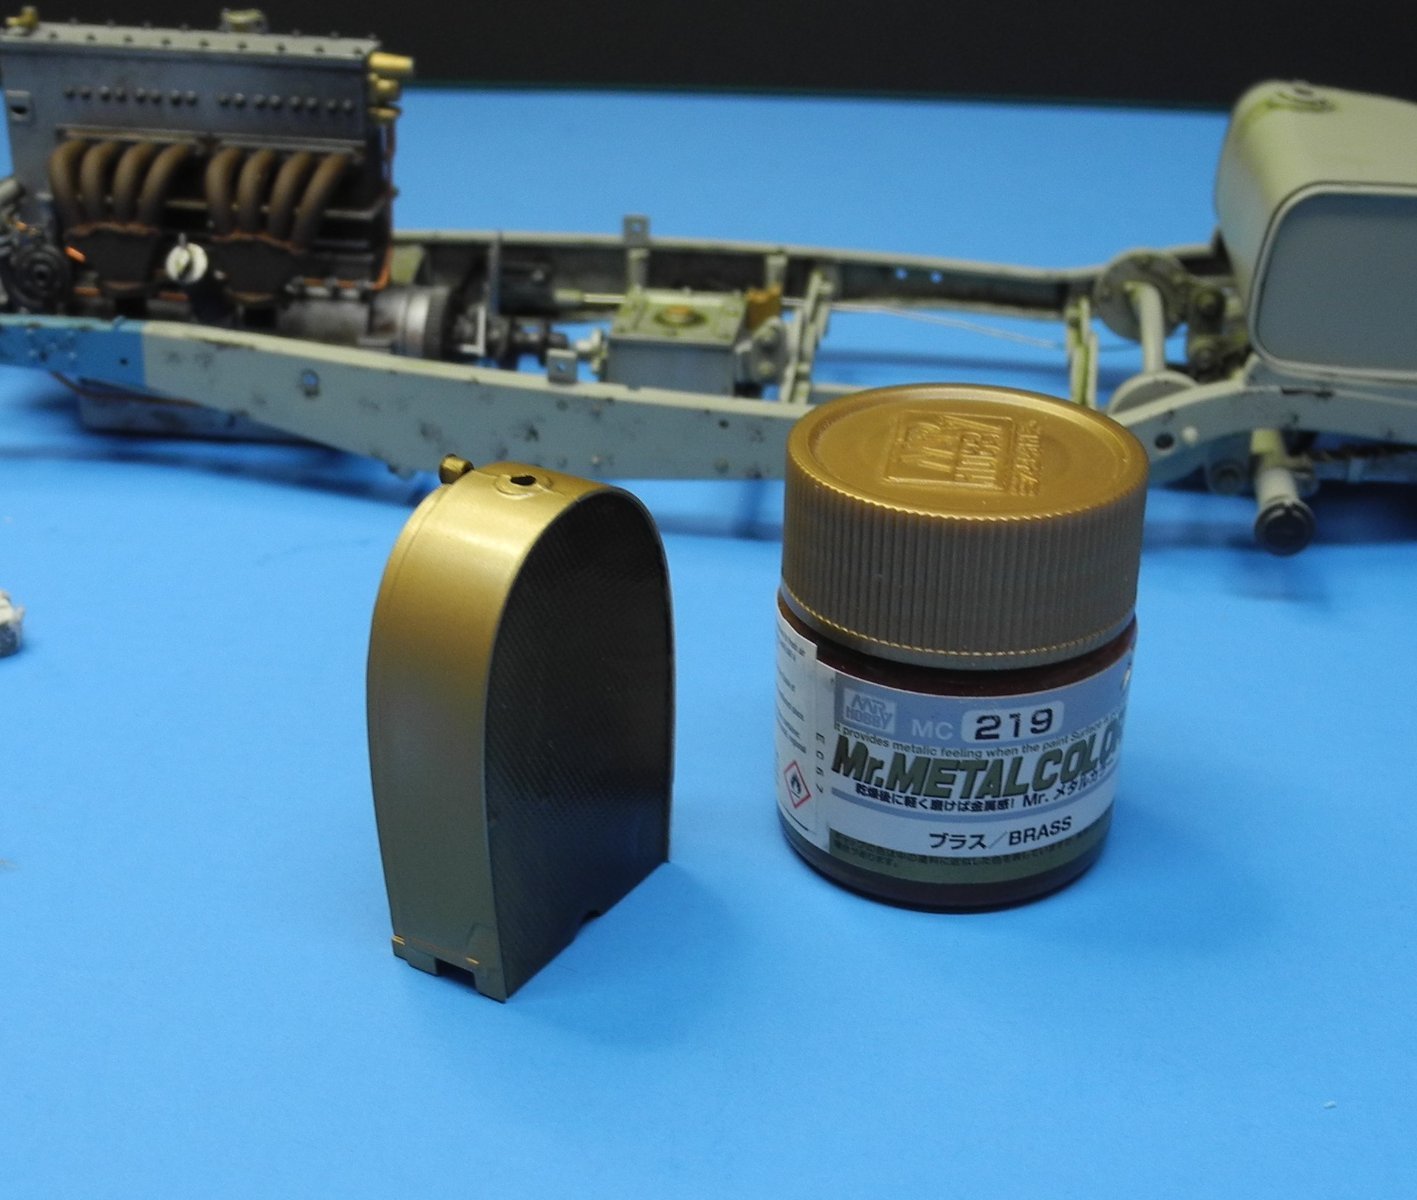
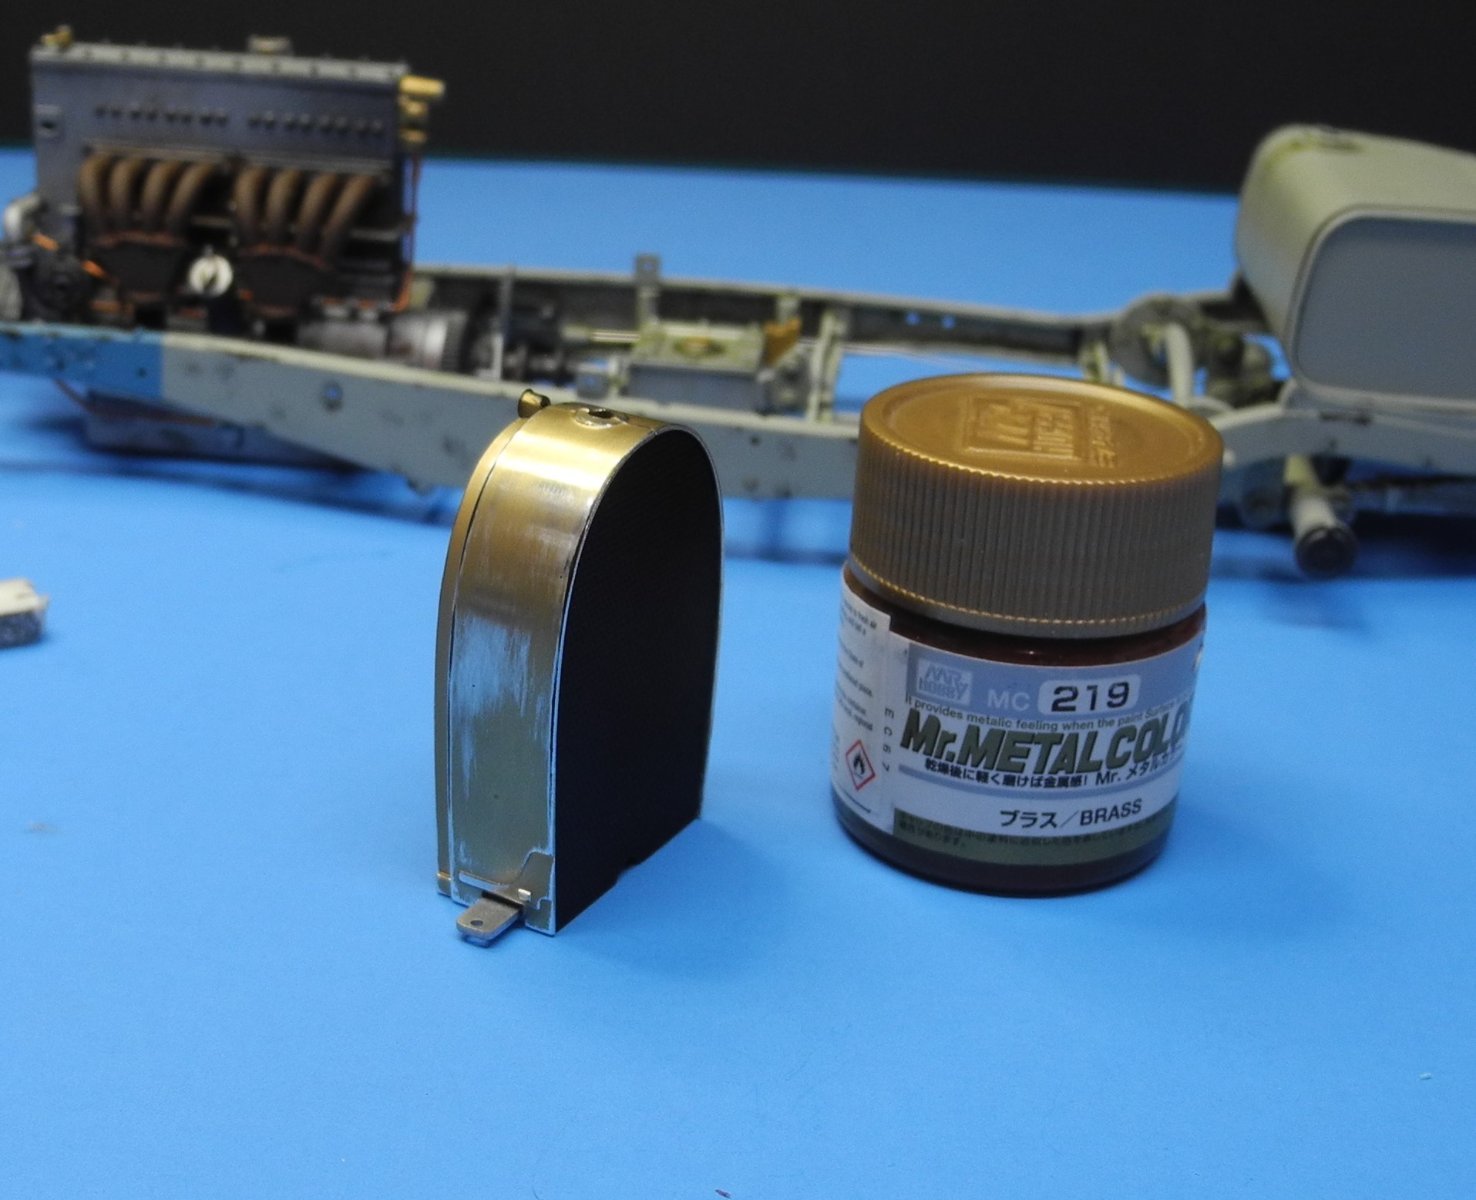
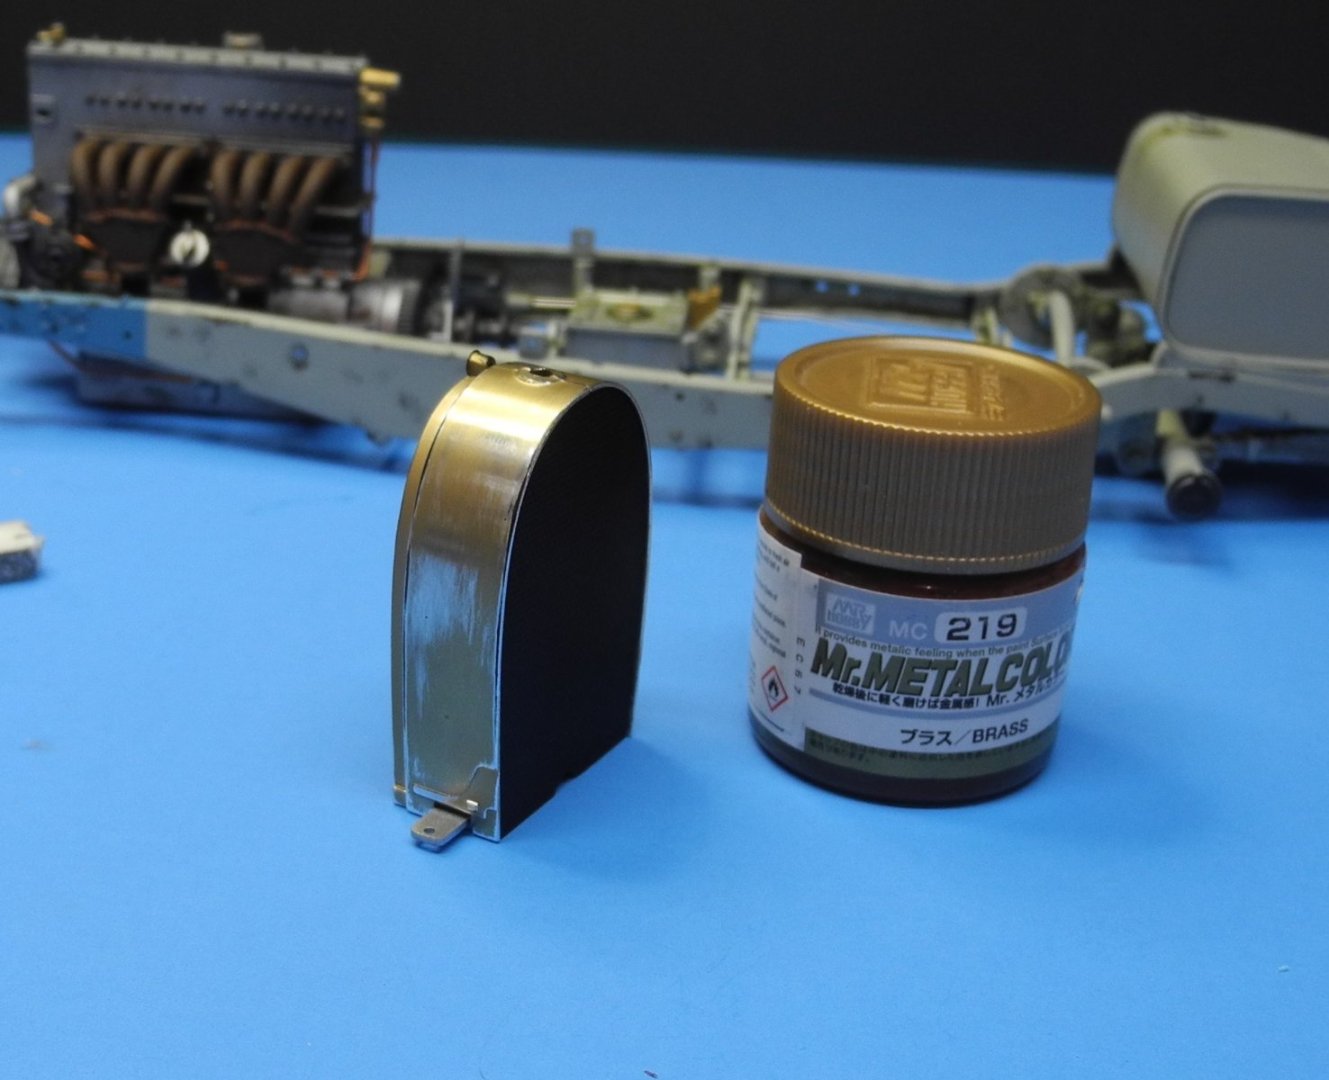
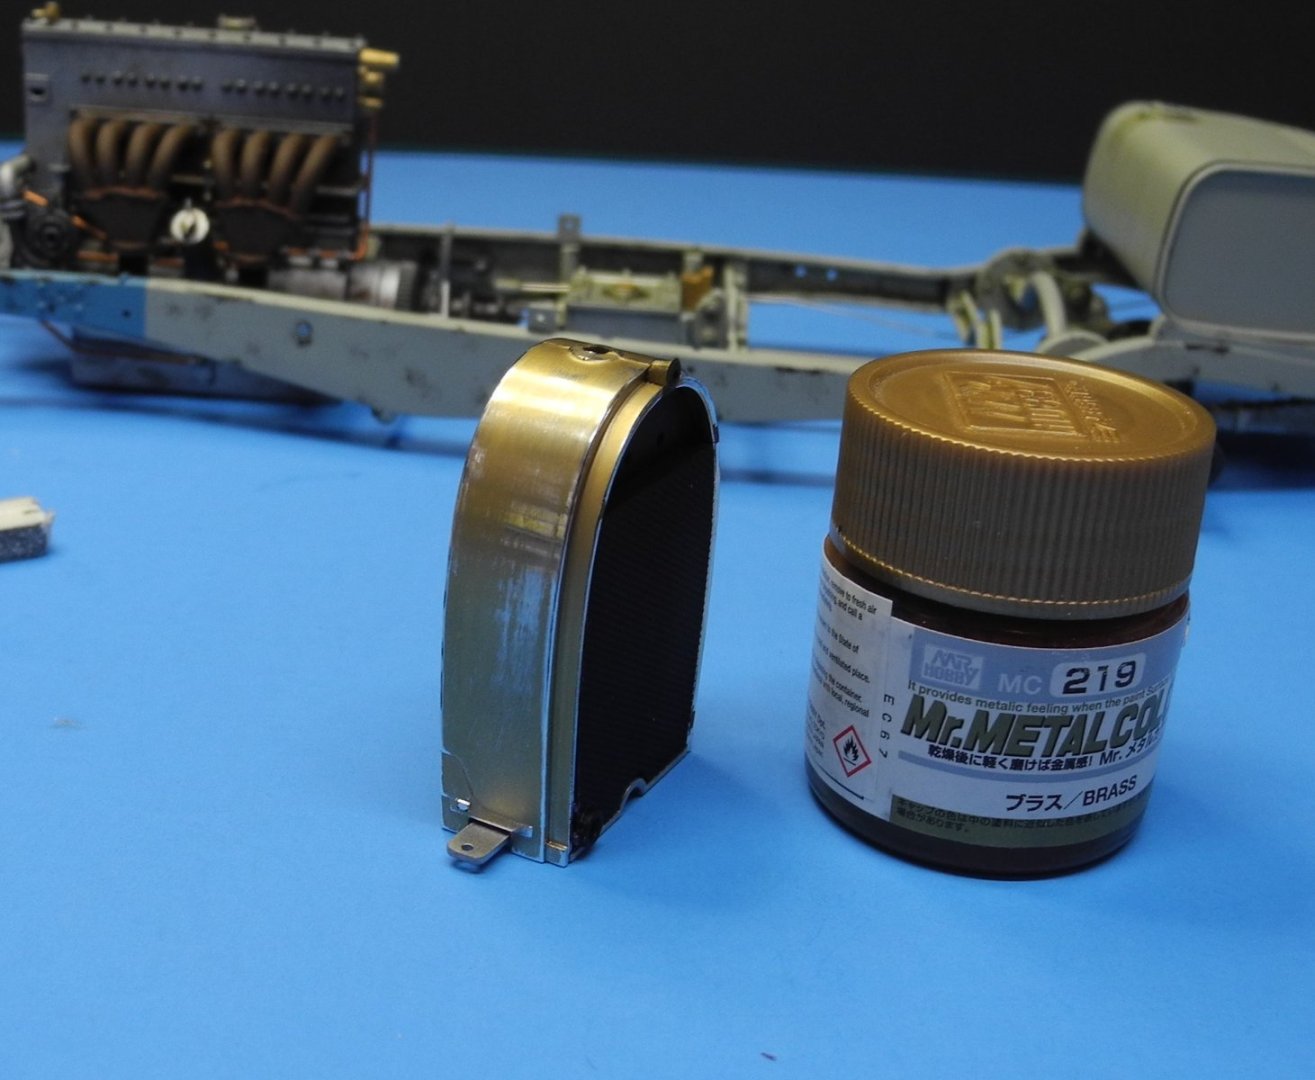
After painting the radiator core halves flat black, I masked them off with Heller Maskol then assembled the chrome radiator halves. I used a 12,000 grit polishing sponge to dull down the chrome before painting the chrome with a light coat of Mr Metal Color gold. Once dry, polished down the metalized gold so that some of the chrome shows through in an effort to make it appear to be old chrome plating that was worn away after many decades of time. That nasty seam at the top of the radiator gets covered with a photo etch piece later on.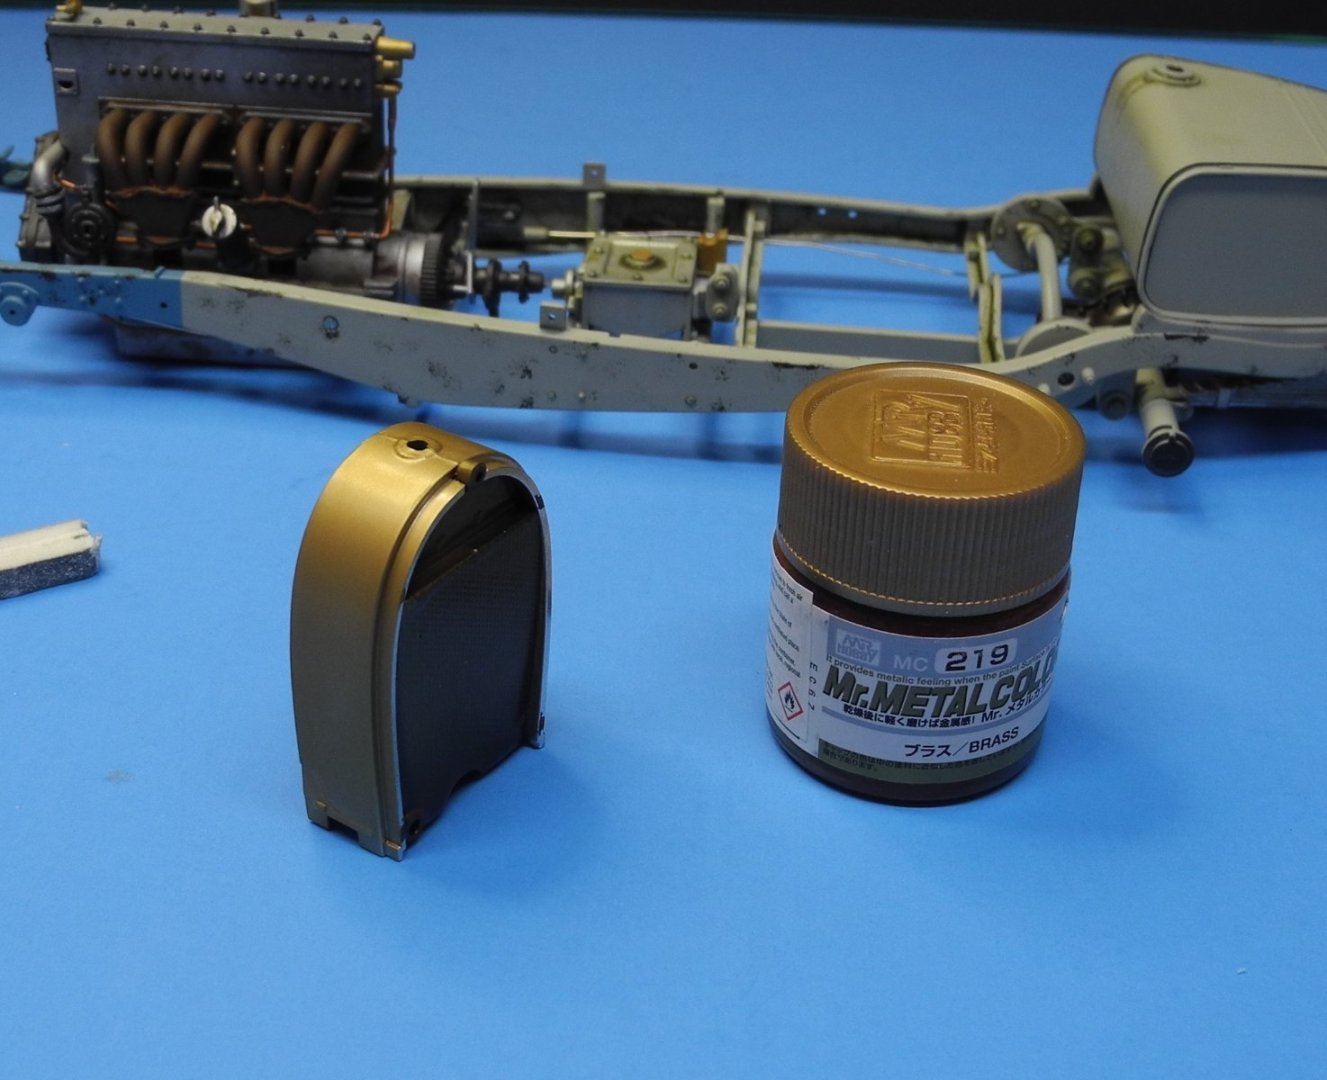

- 155 replies
-
- 12
-
-
Bugatti Type 35B by CDW - FINISHED - Italeri - 1:12 Scale
CDW replied to CDW's topic in Non-ship/categorised builds
Thanks Rob. I’m having a lot of fun with the model and like you, learning about the real car as I go along. -
Bugatti Type 35B by CDW - FINISHED - Italeri - 1:12 Scale
CDW replied to CDW's topic in Non-ship/categorised builds
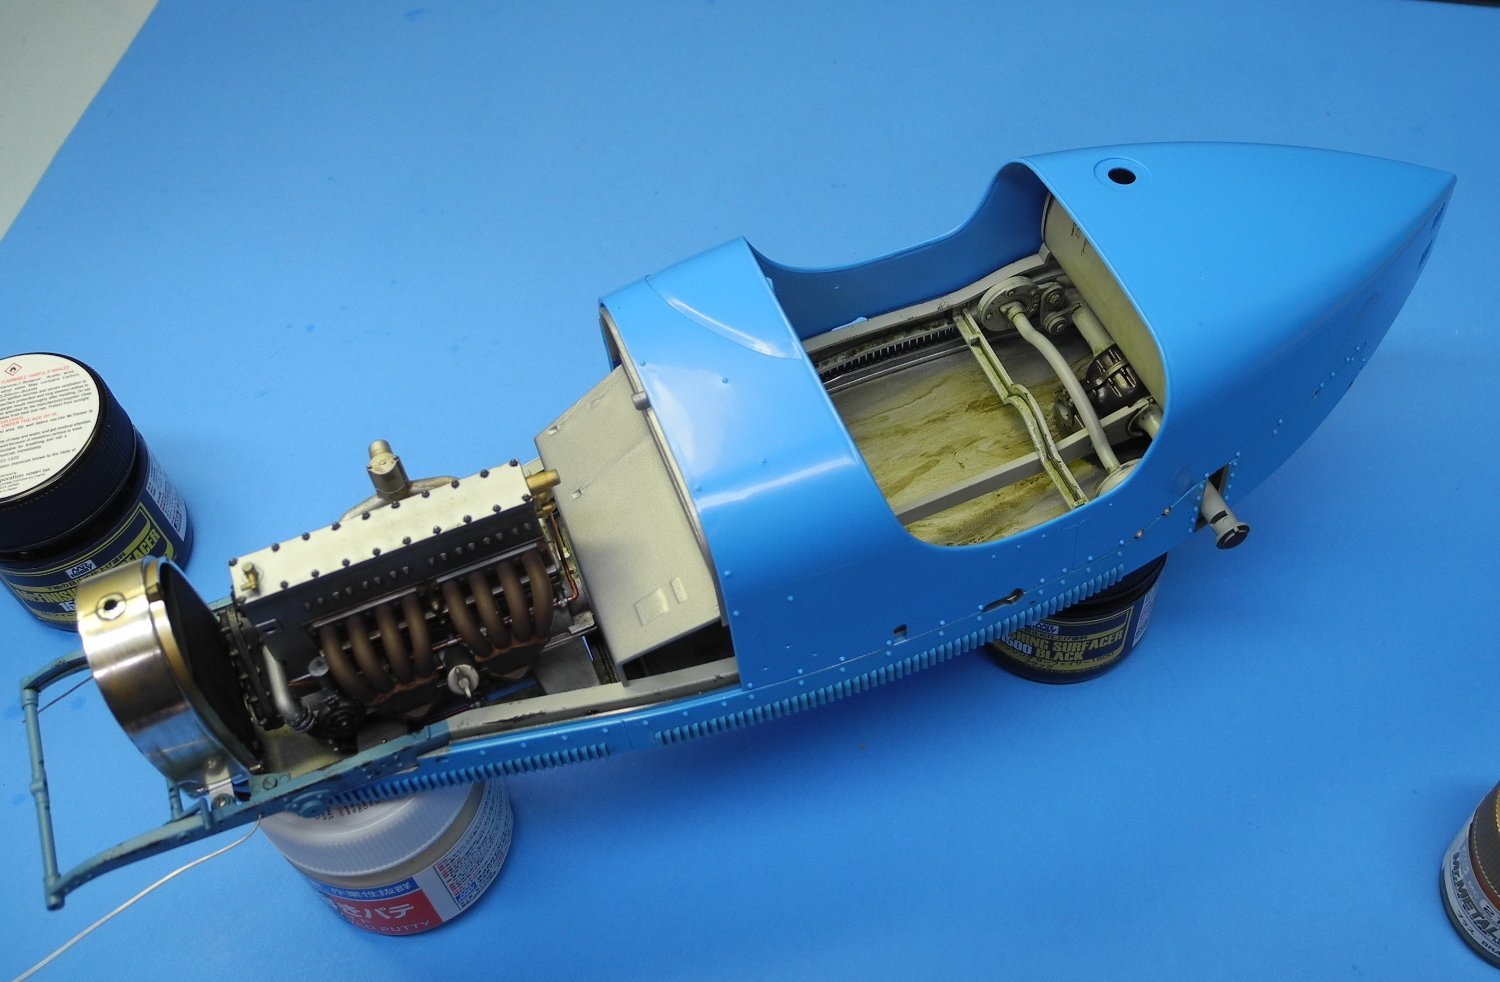
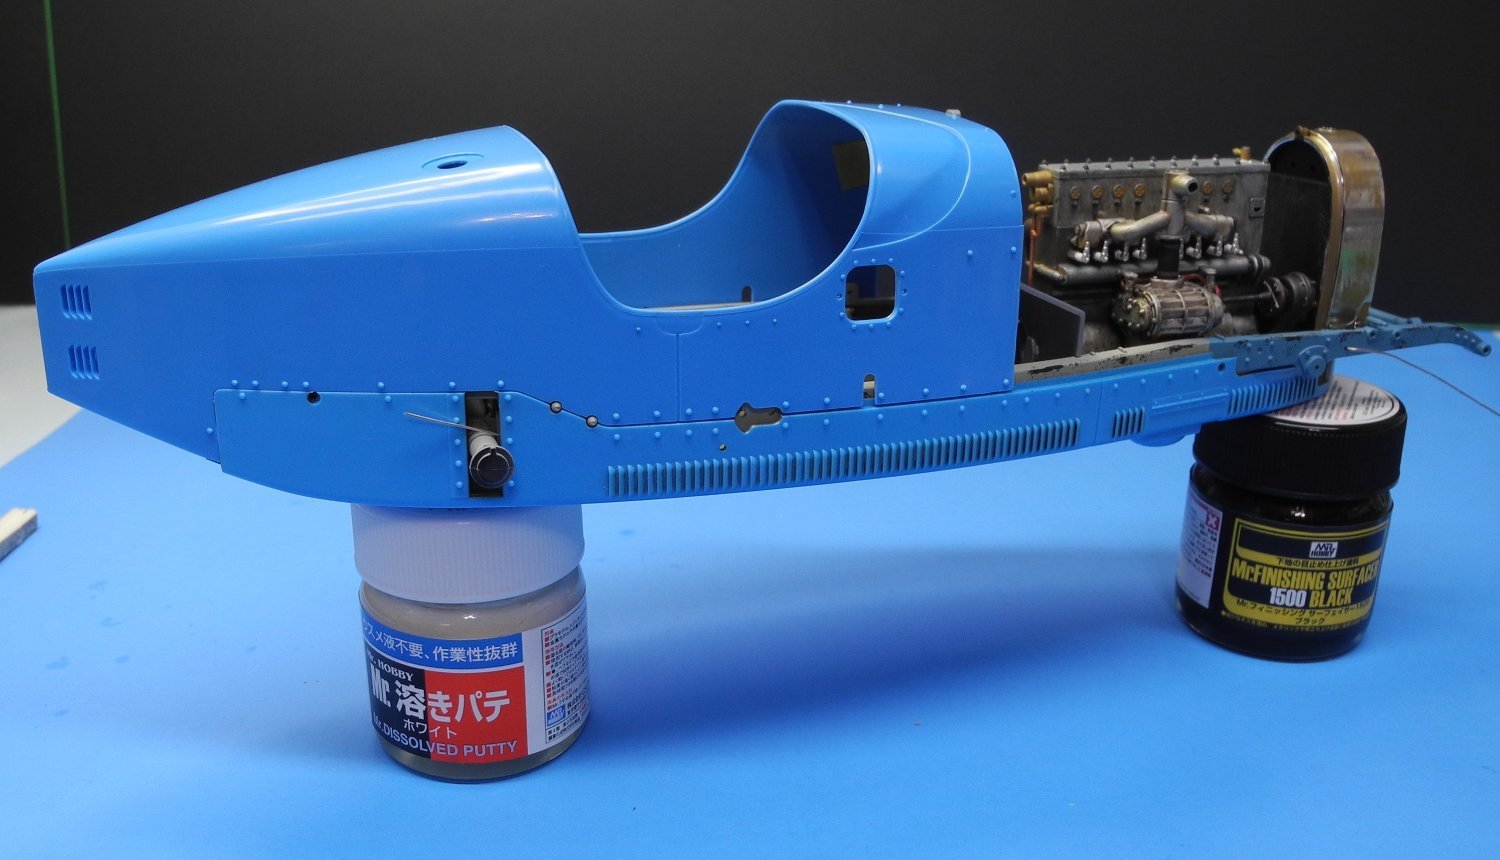
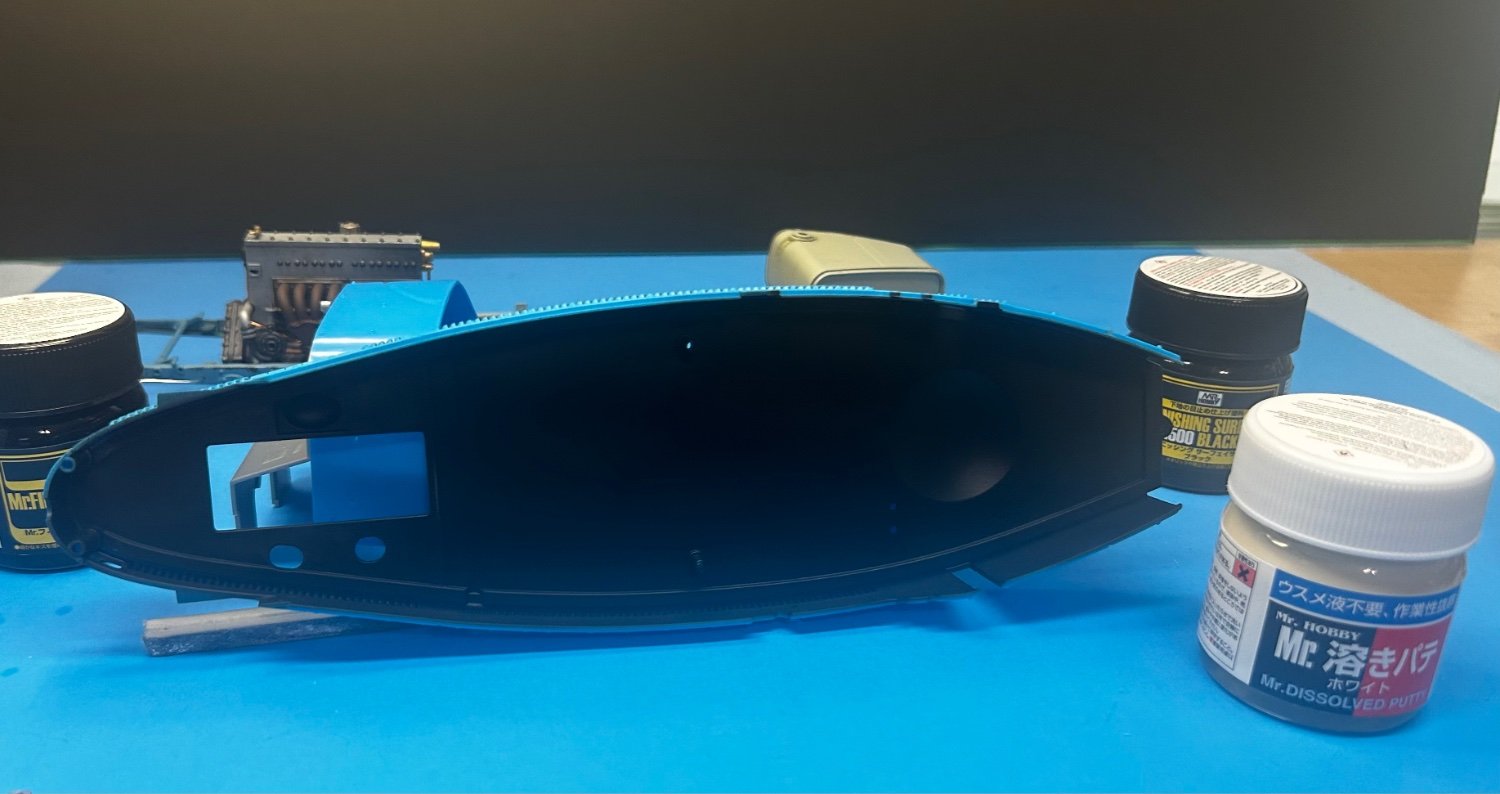
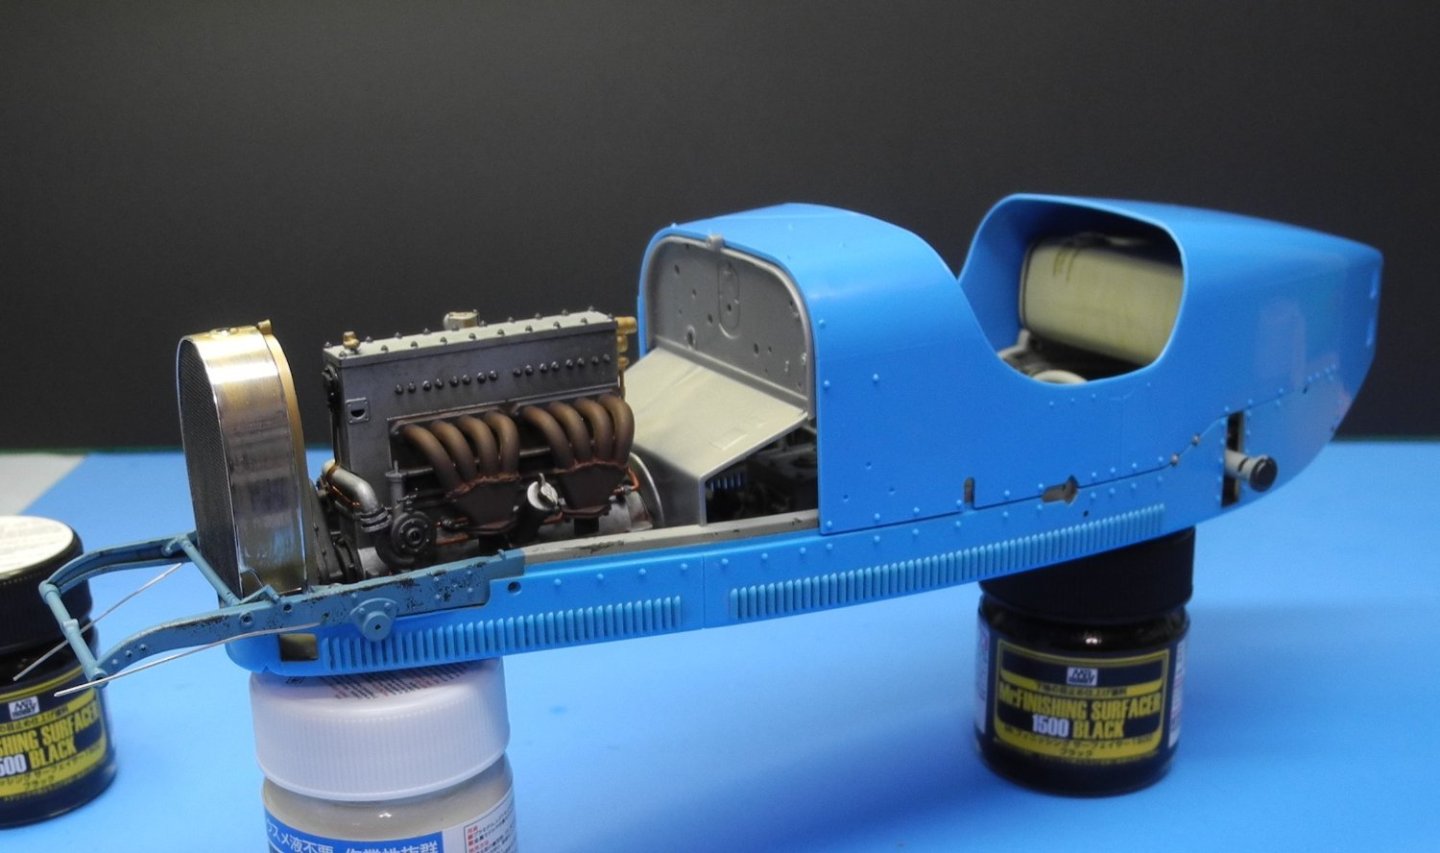
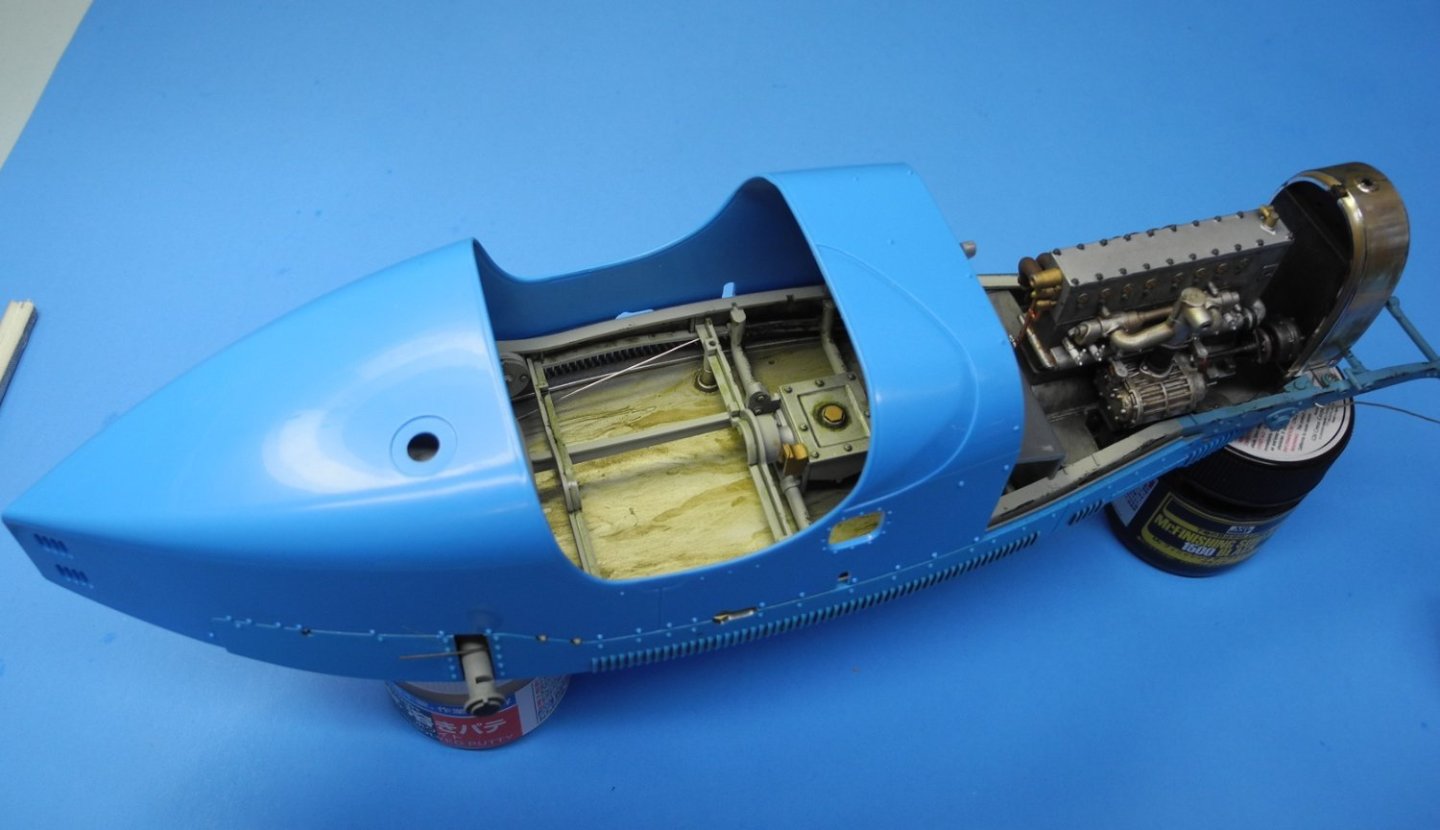
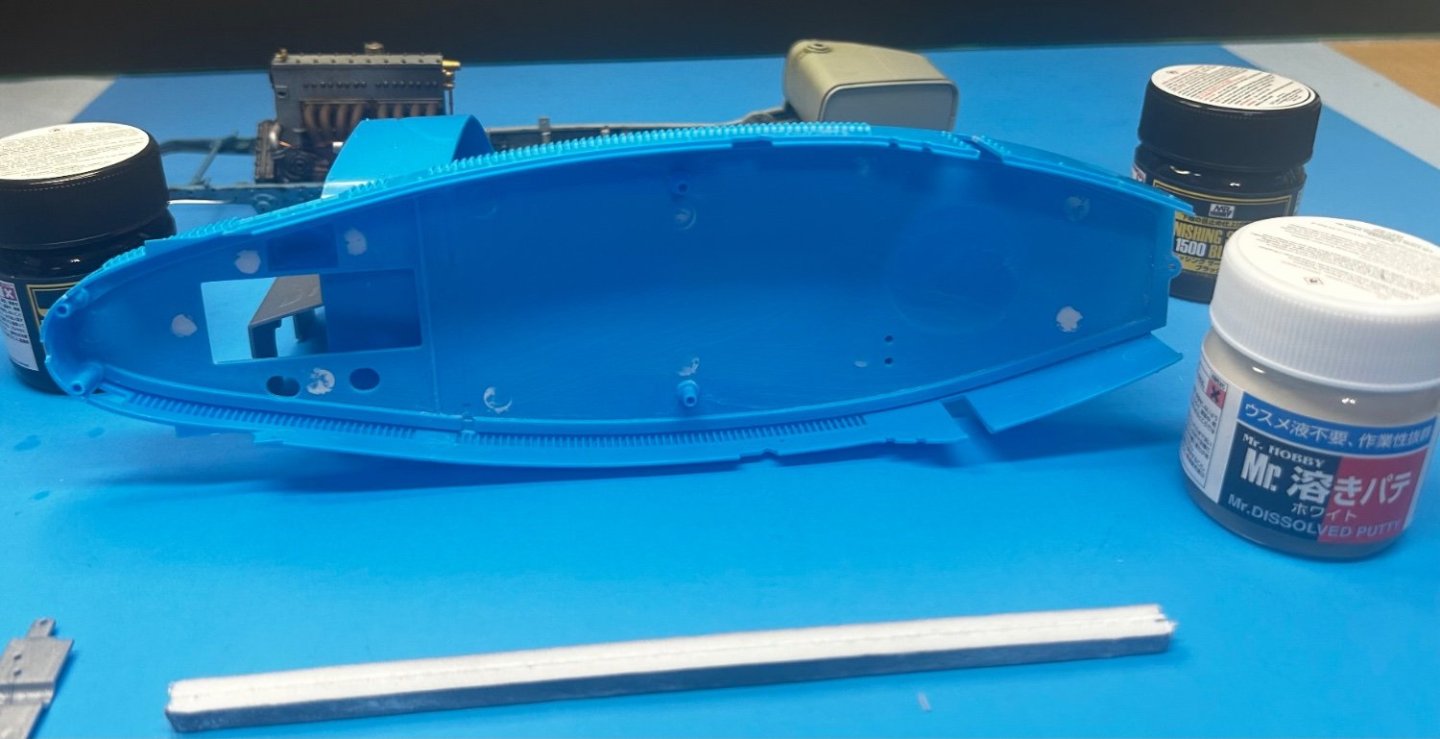
The body panels were made of aluminum. The lower body pan had a number of ejector pin marks that needed filling. For the first time, tried using Mr Disolved Putty. It goes down readily with a paint brush and is self leveling. After it dries is easy to sand. After allowing the putty to dry over night, sanded it down and primed the pan with Mr Finishing Surfacer 1500. Ready for aluminum paint then weathering. I should mention this car has no floorboard. The body pan is the floorboard. Weird to me but that’s the way it was/is.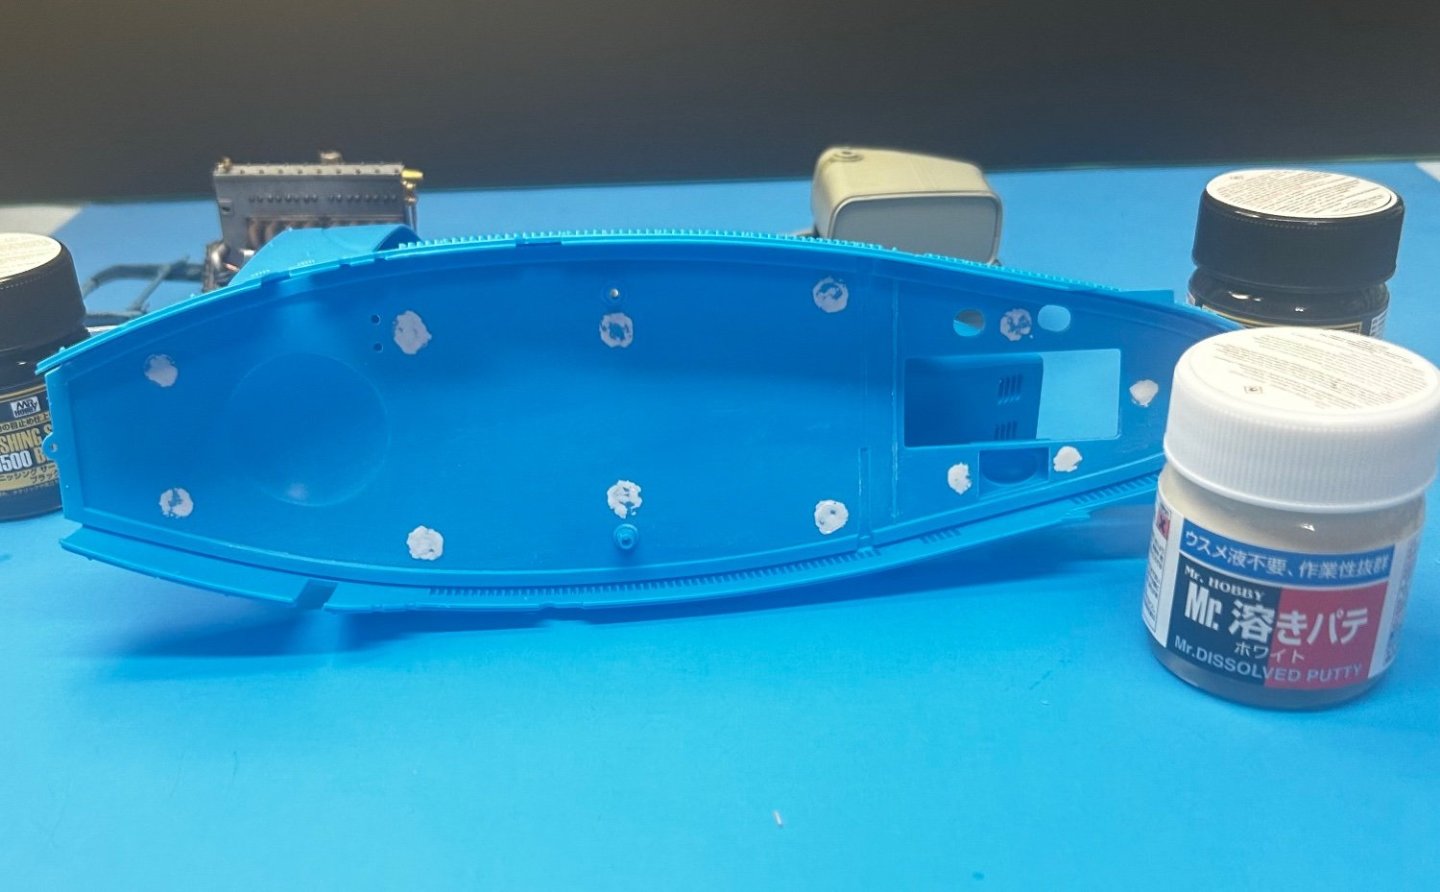

- 155 replies
-
- 12
-
-
RGS Rotary Snowplow by yvesvidal - DURANGO PRESS - On3 - 1/48
CDW replied to yvesvidal's topic in Non-ship/categorised builds
Wow, what a great-looking model Yves. A very difficult build it looks to me. -
Bugatti Type 35B by CDW - FINISHED - Italeri - 1:12 Scale
CDW replied to CDW's topic in Non-ship/categorised builds
Thanks for the input guys. Very interesting. If I stay true to the particular subject I'm modeling, the unrestored winner of the '29 Monaco GP, I would not do the safety wires at all as it didn't have them. Probably removed somewhere down through the years I guess. I need to think this over as I may regret adding it later.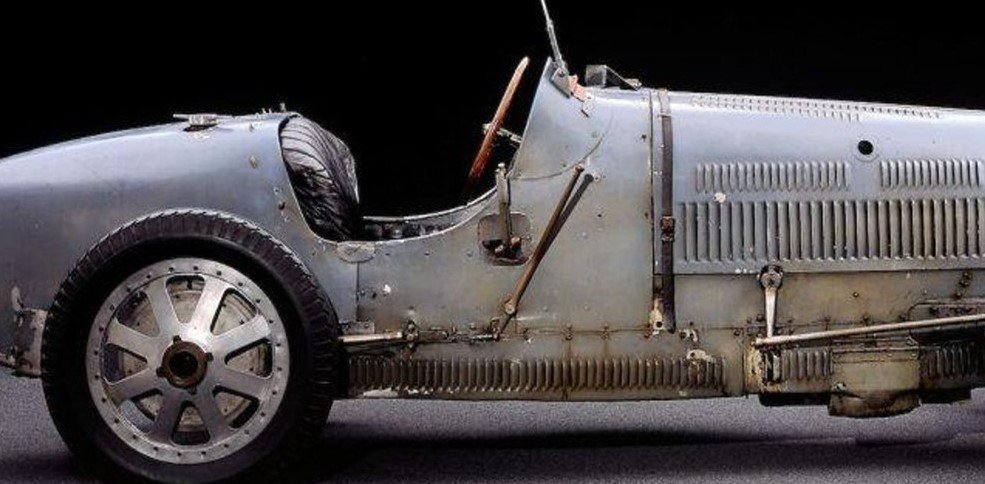
-
Bugatti Type 35B by CDW - FINISHED - Italeri - 1:12 Scale
CDW replied to CDW's topic in Non-ship/categorised builds
The Model Factory Hiro kit comes with those details as parts of the assembly of the model. It's a small detail but I think it would make the model more interesting. Need to look for some very fine silver wire although I do have some fine copper wire. -
Bugatti Type 35B by CDW - FINISHED - Italeri - 1:12 Scale
CDW replied to CDW's topic in Non-ship/categorised builds
Here is a reference photo of a restored Bugatti. I'm thinking about filing off the raised details then drilling and placing pins along the lines where the lower and upper body parts fasten together, then joining them together with wire as on the 1:1 car.
- 155 replies
-
- 10
-
-
Bugatti Type 35B by CDW - FINISHED - Italeri - 1:12 Scale
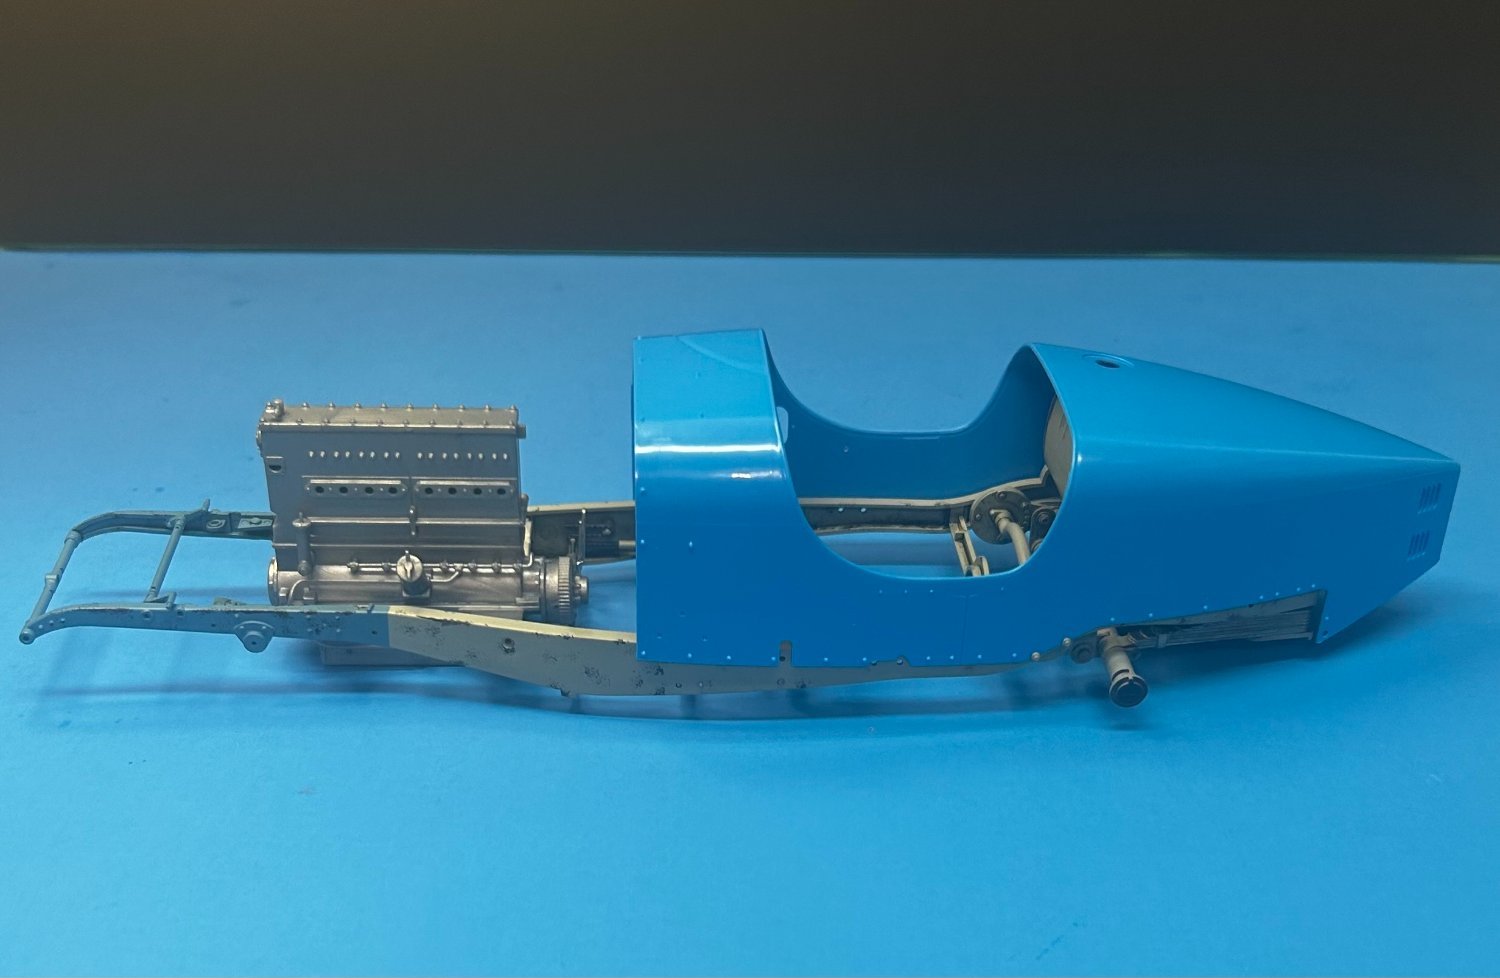
CDW replied to CDW's topic in Non-ship/categorised builds
Thanks Scott. I was kinda worried about the chassis alignment, keeping it straight and true/not warped but as it turns out, Italeri engineered the kit to self-align with the fit of the engine block and body pan. There are some small screws in strategic locations that keeps everything on the straight and narrow. Seems as though Italeri took their game to a higher level with this kit. Besides that, I doubt that any other kit maker will offer a Bugatti Type 35 at this scale and at this price point. I think I paid around $150 for it through Amazon. The epic MFH version of it fetches around $800 or more. If somebody like Tamiya did one, my guess is it would sell for something north of $300. Craig -
Bugatti Type 35B by CDW - FINISHED - Italeri - 1:12 Scale
CDW replied to CDW's topic in Non-ship/categorised builds
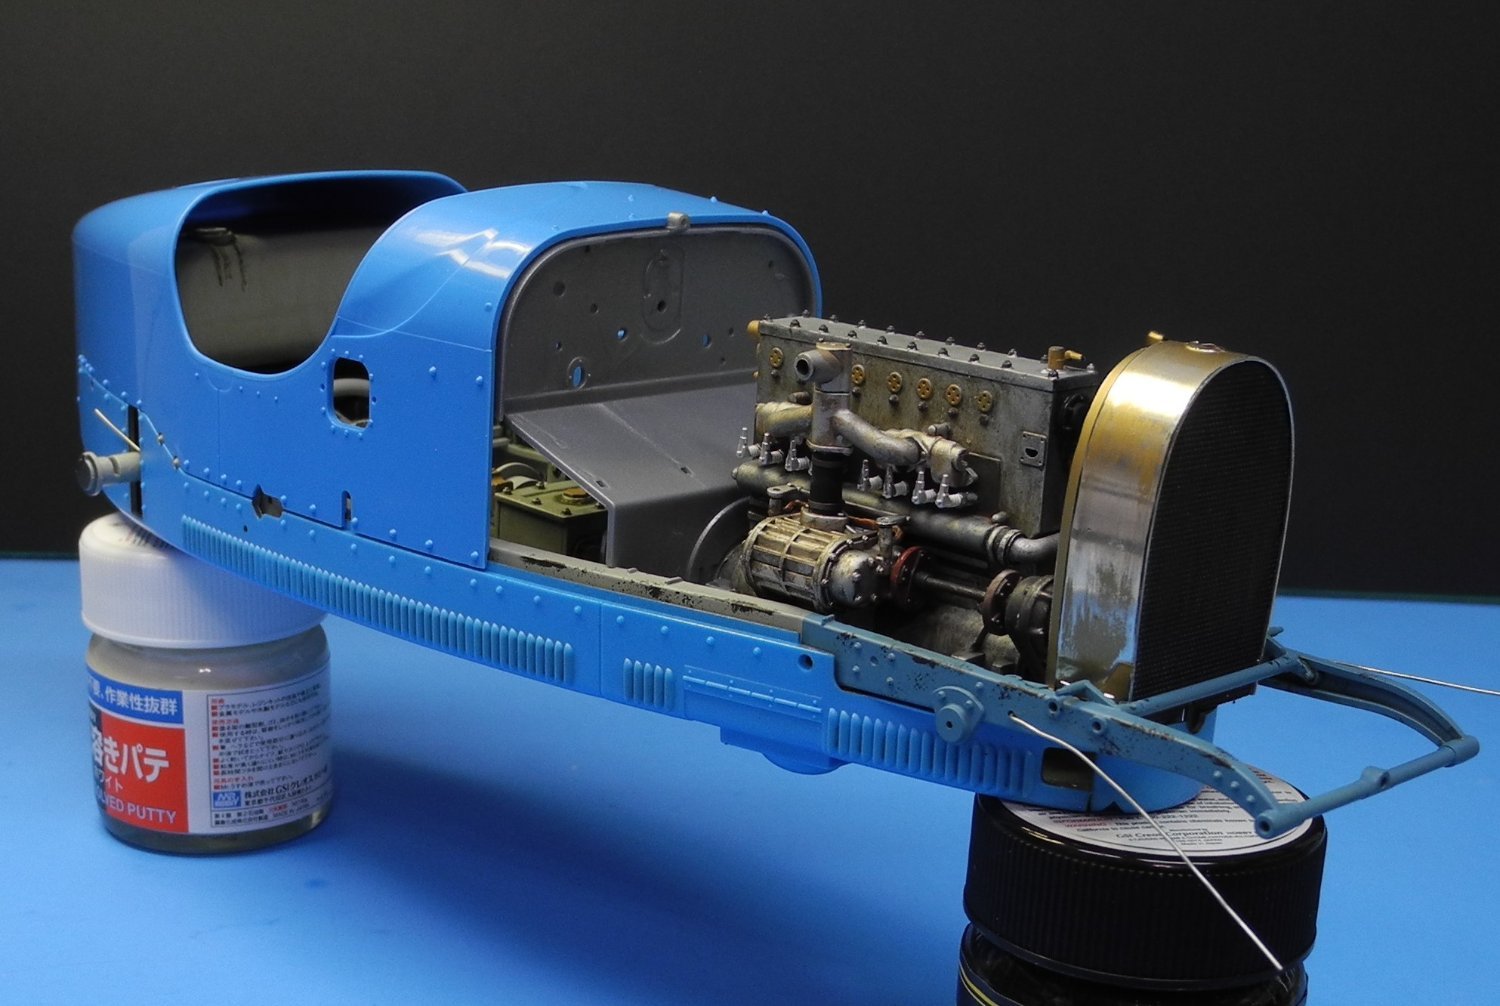
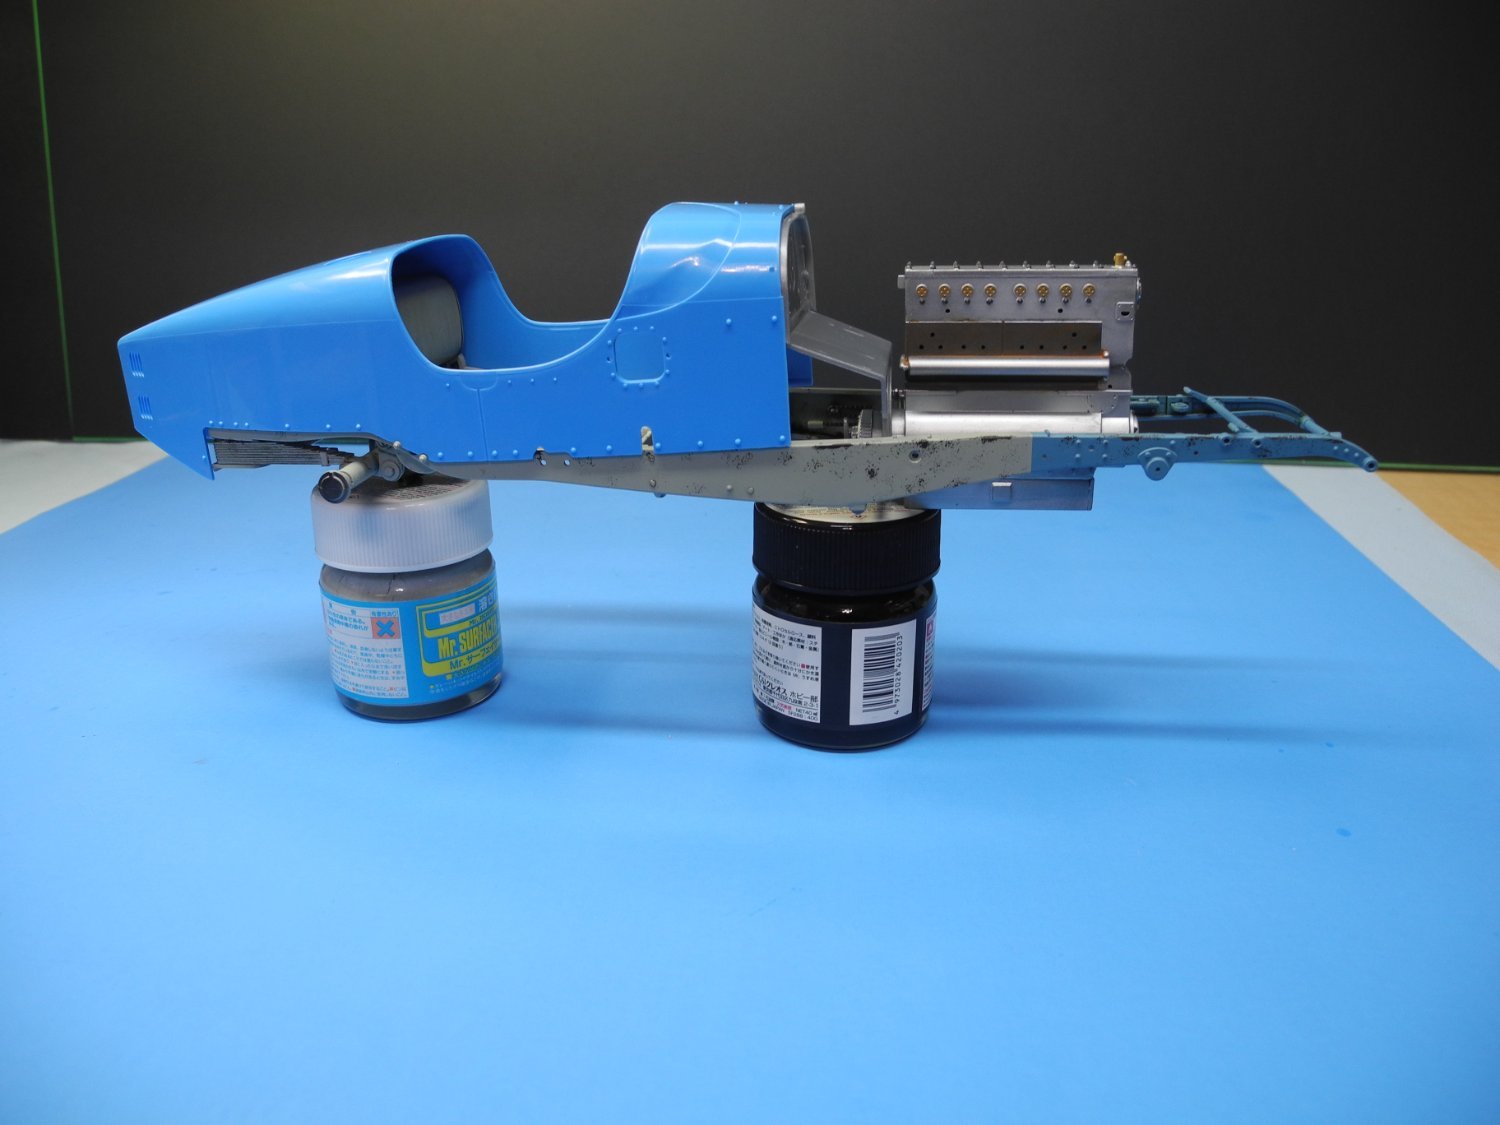
Body to chassis dry fit looks okay to move forward.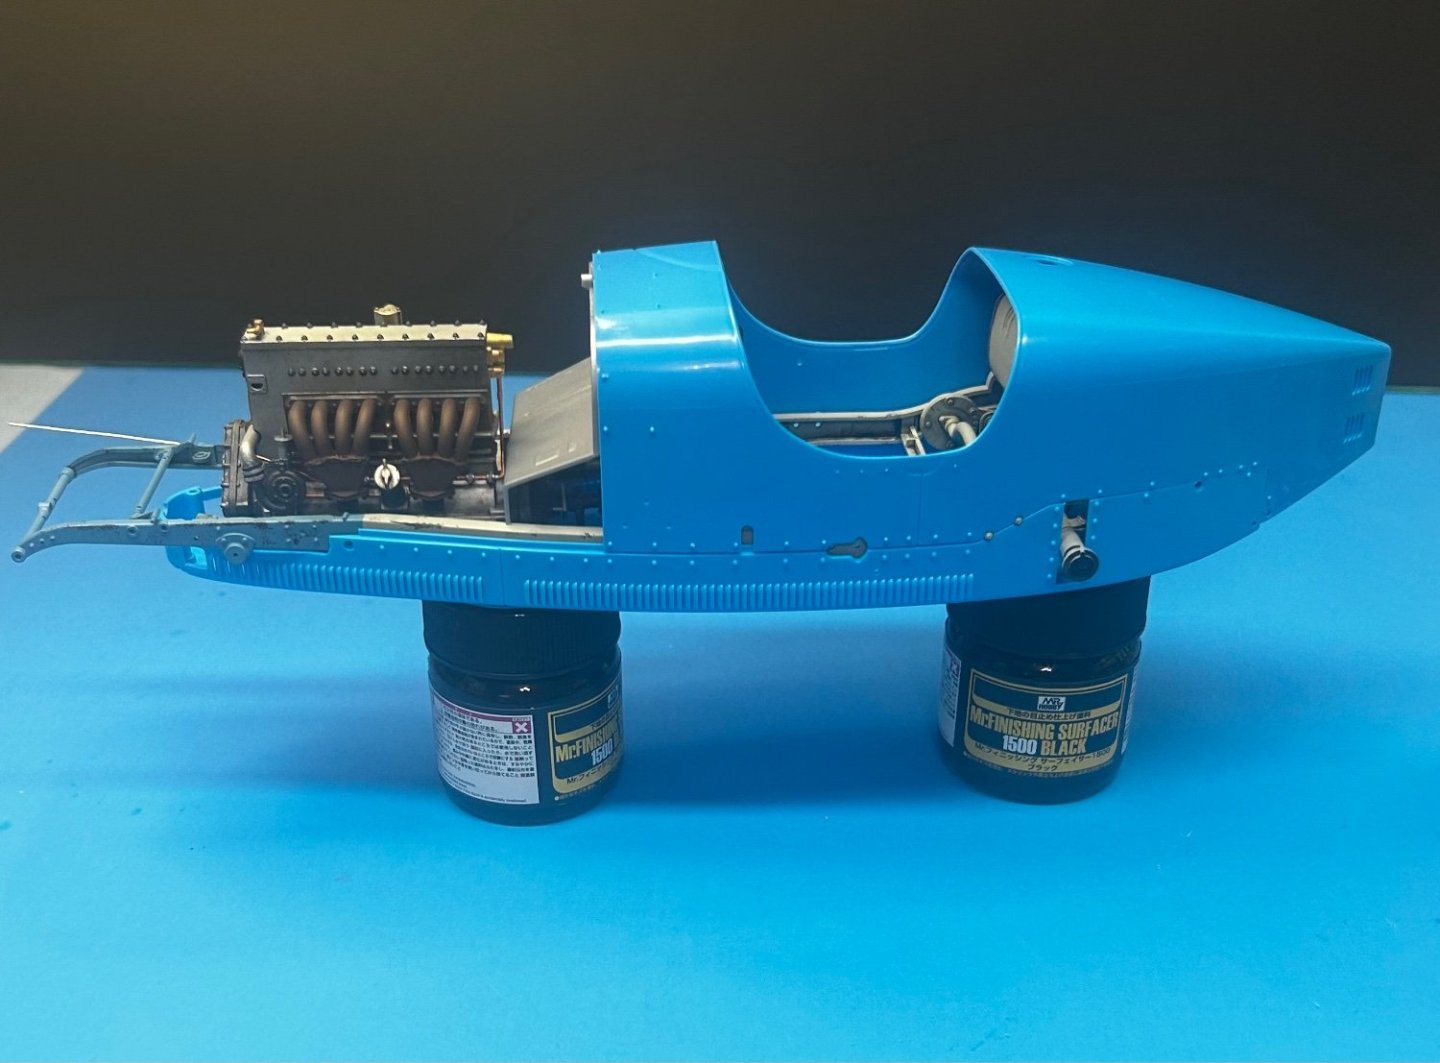
- 155 replies
-
- 12
-
-
Bugatti Type 35B by CDW - FINISHED - Italeri - 1:12 Scale
CDW replied to CDW's topic in Non-ship/categorised builds
Guess what new kit comes out this month (it's already released for sale in Germany)? I have one on backorder at Hannants.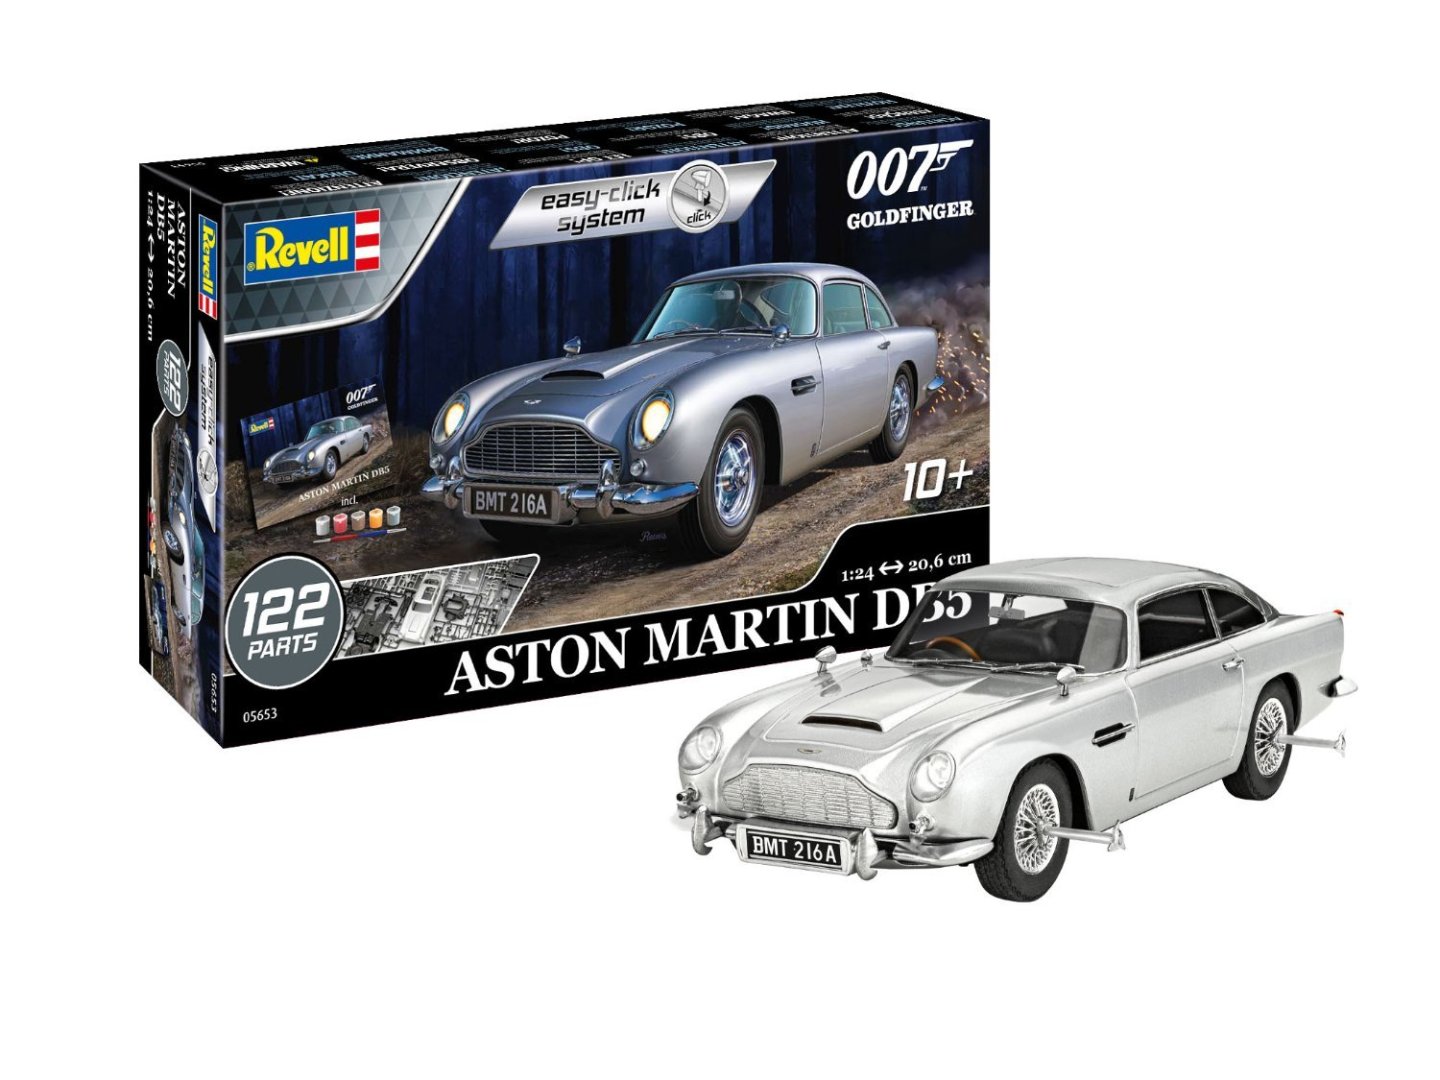
- 155 replies
-
- 10
-
-
-
Bugatti Type 35B by CDW - FINISHED - Italeri - 1:12 Scale
CDW replied to CDW's topic in Non-ship/categorised builds
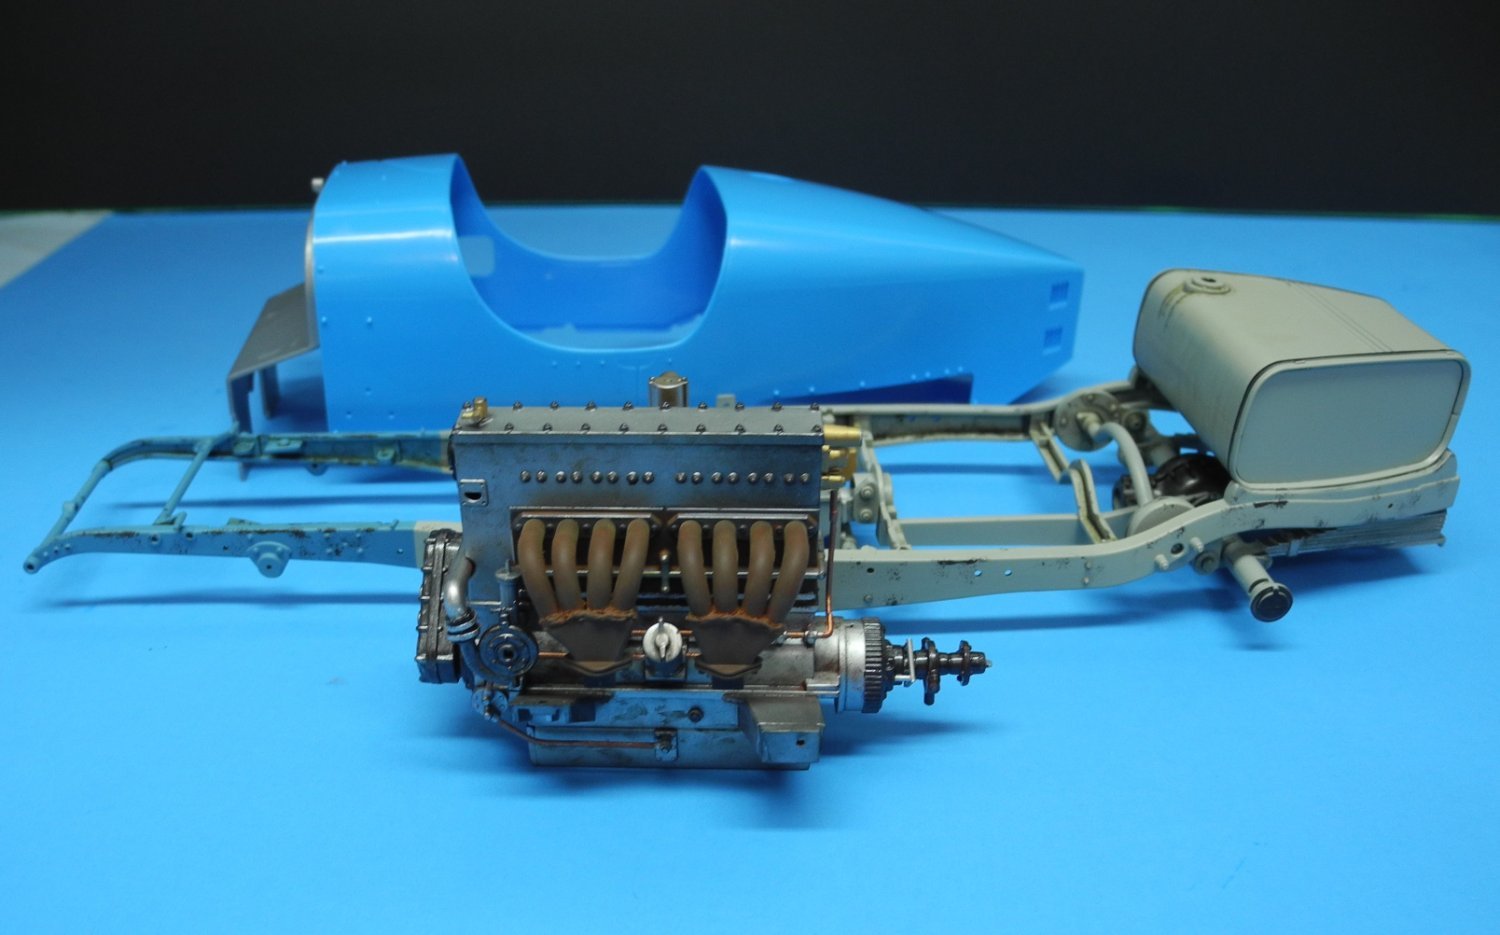
Thanks for the kind comments gentlemen. Exhaust manifolds painted red-brown then dusted with pigment powders. -
Bugatti Type 35B by CDW - FINISHED - Italeri - 1:12 Scale
CDW replied to CDW's topic in Non-ship/categorised builds
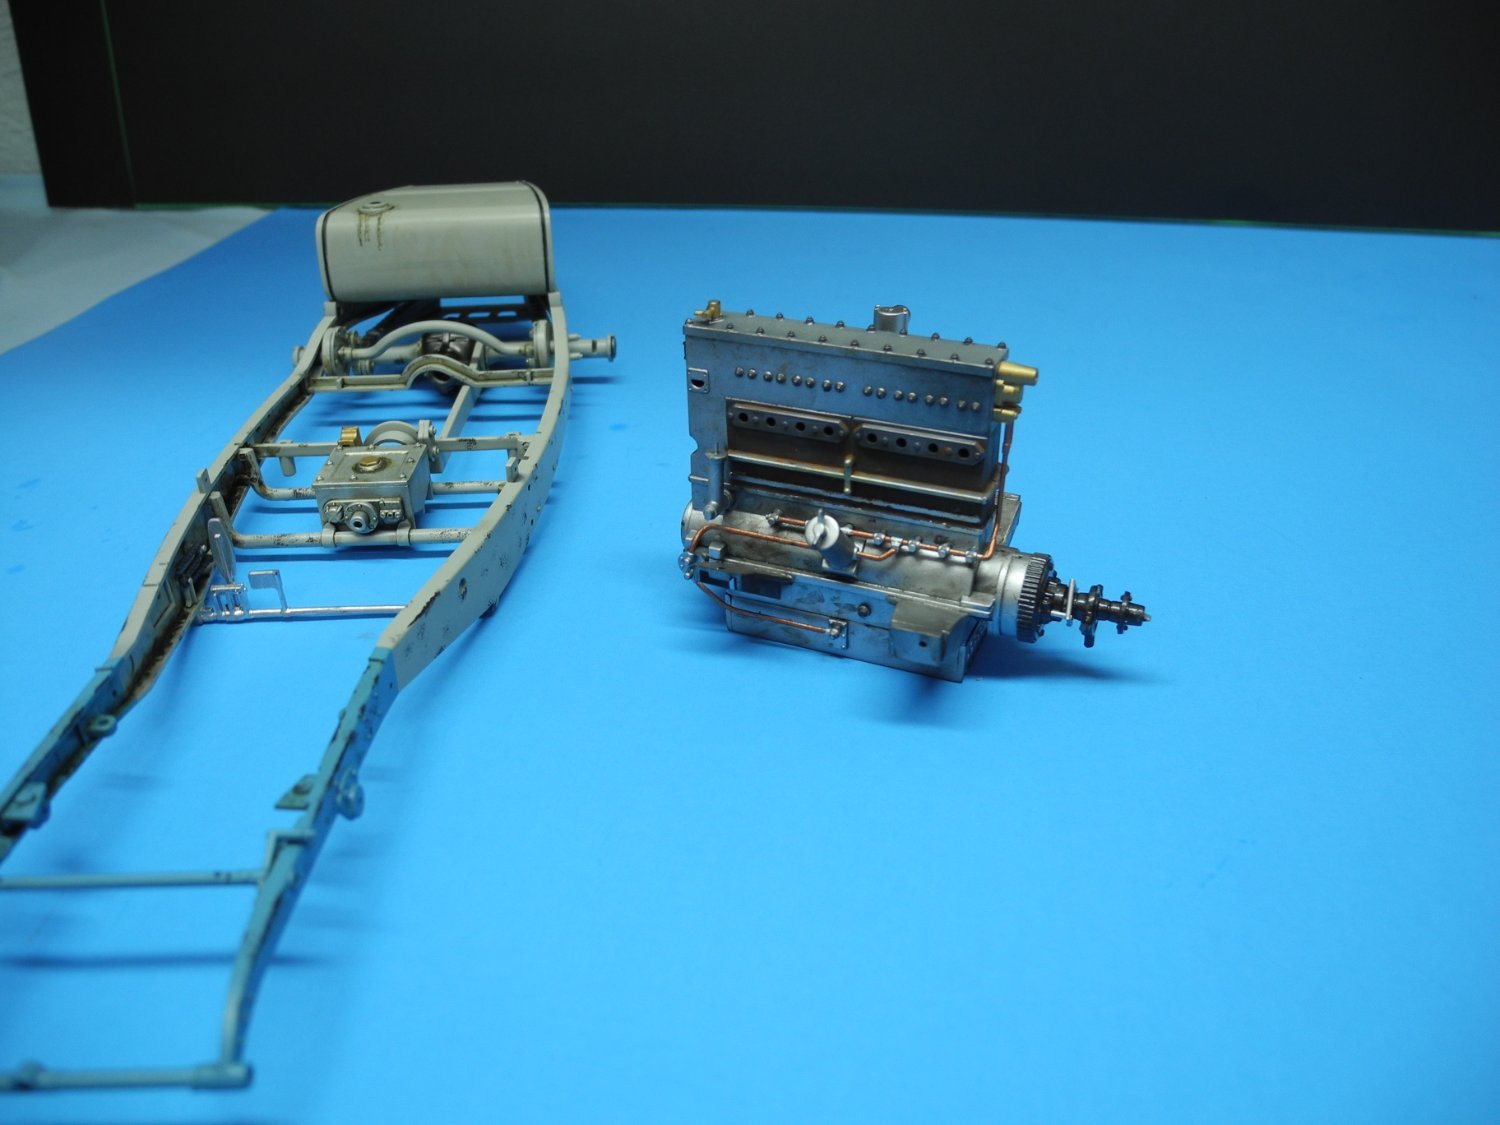
Need to add ignition wires, magneto, and radiator hoses then the engine construction will be complete. All will get a coat of dull lacquer to seal and unify the colors.
- 155 replies
-
- 16
-
-
-
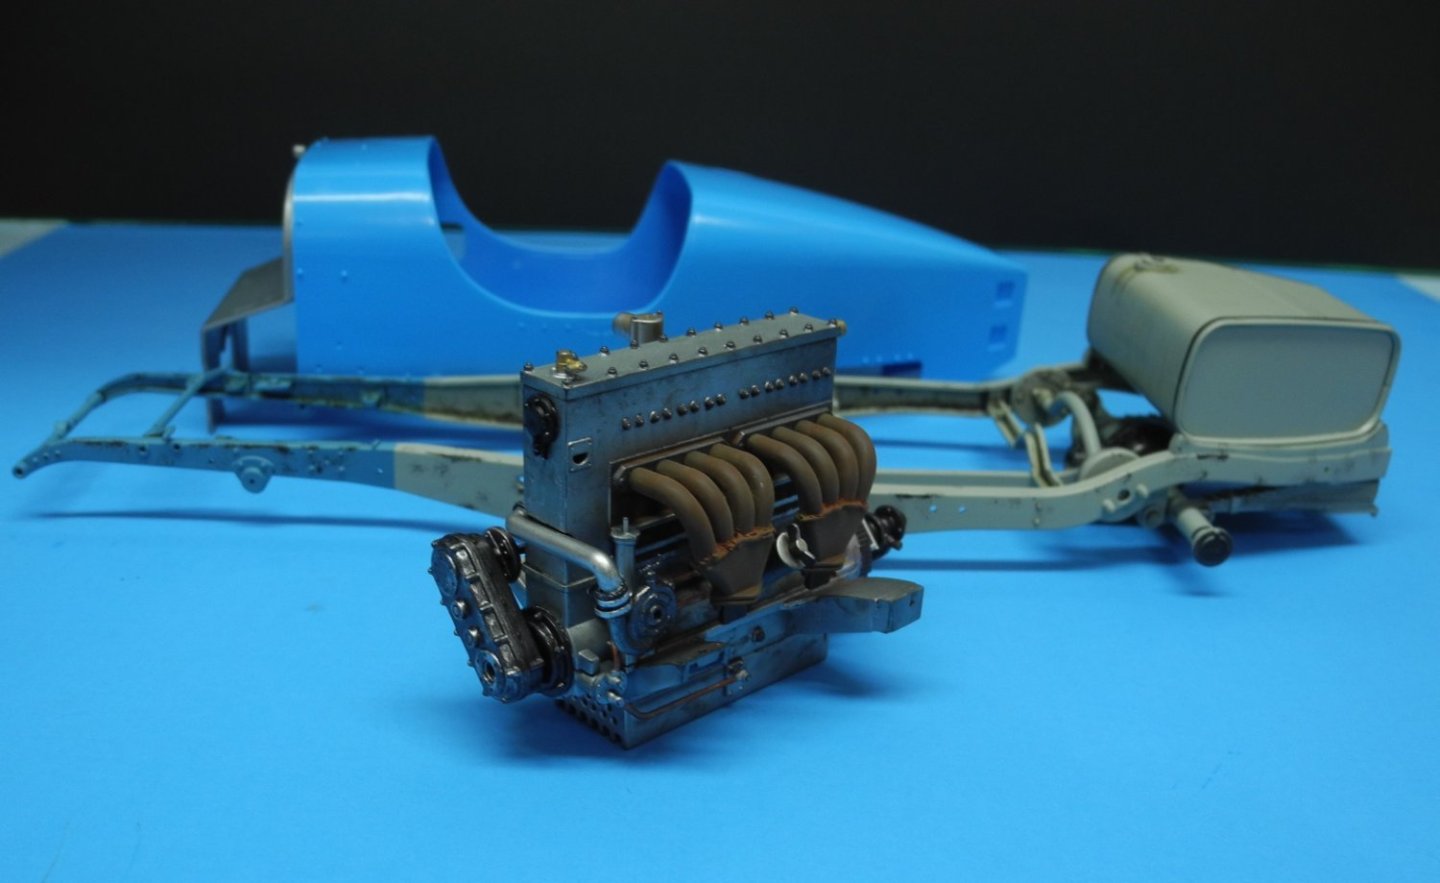
Bugatti Type 35B by CDW - FINISHED - Italeri - 1:12 Scale
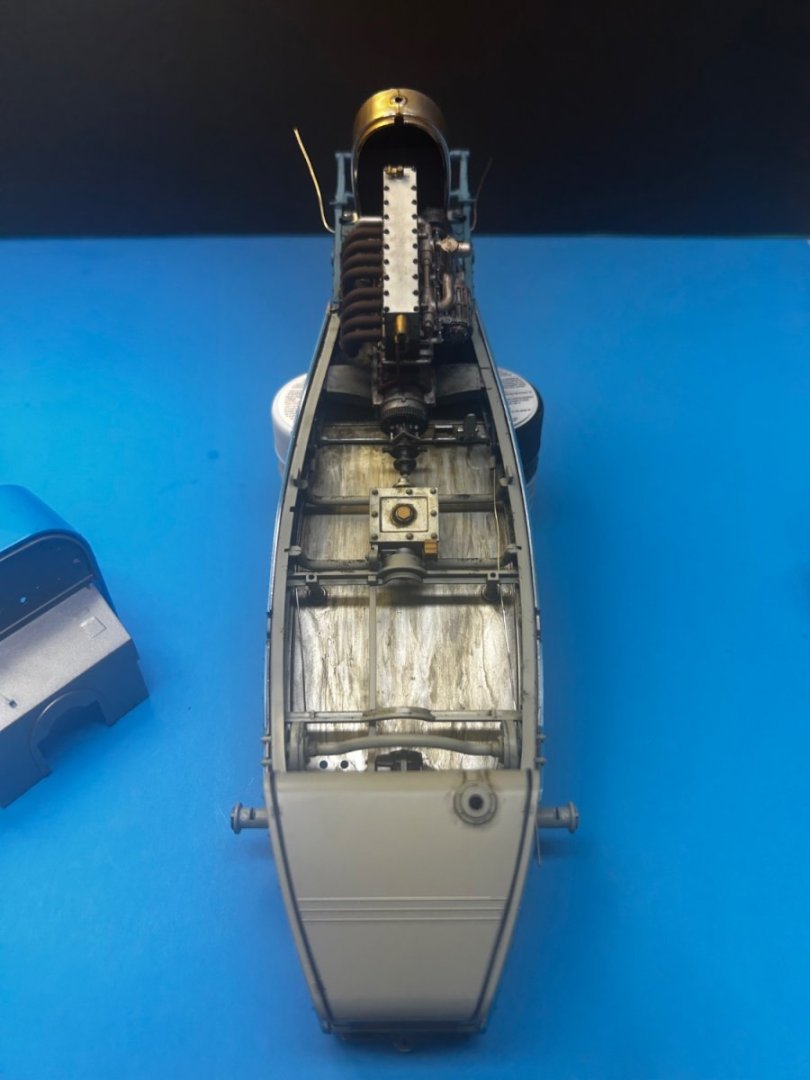
CDW replied to CDW's topic in Non-ship/categorised builds
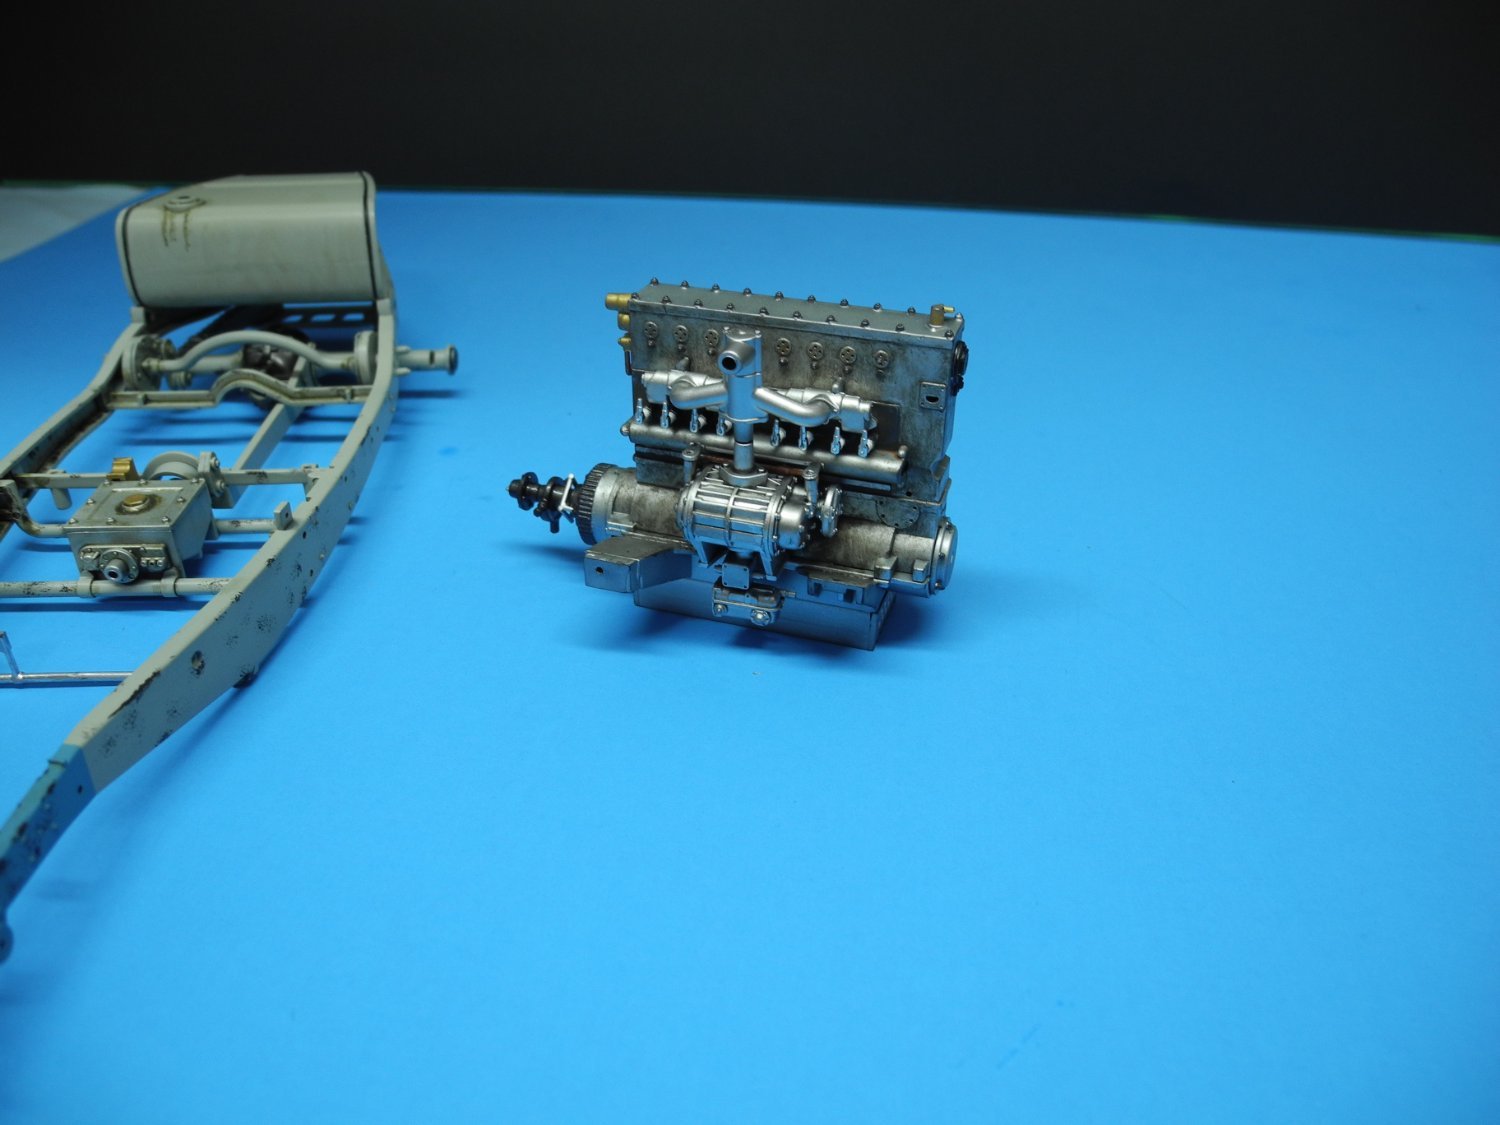
Moving forward with construction and weathering of the engine. More to do. Taking it slow and easy.


- 155 replies
-
- 13
-
-
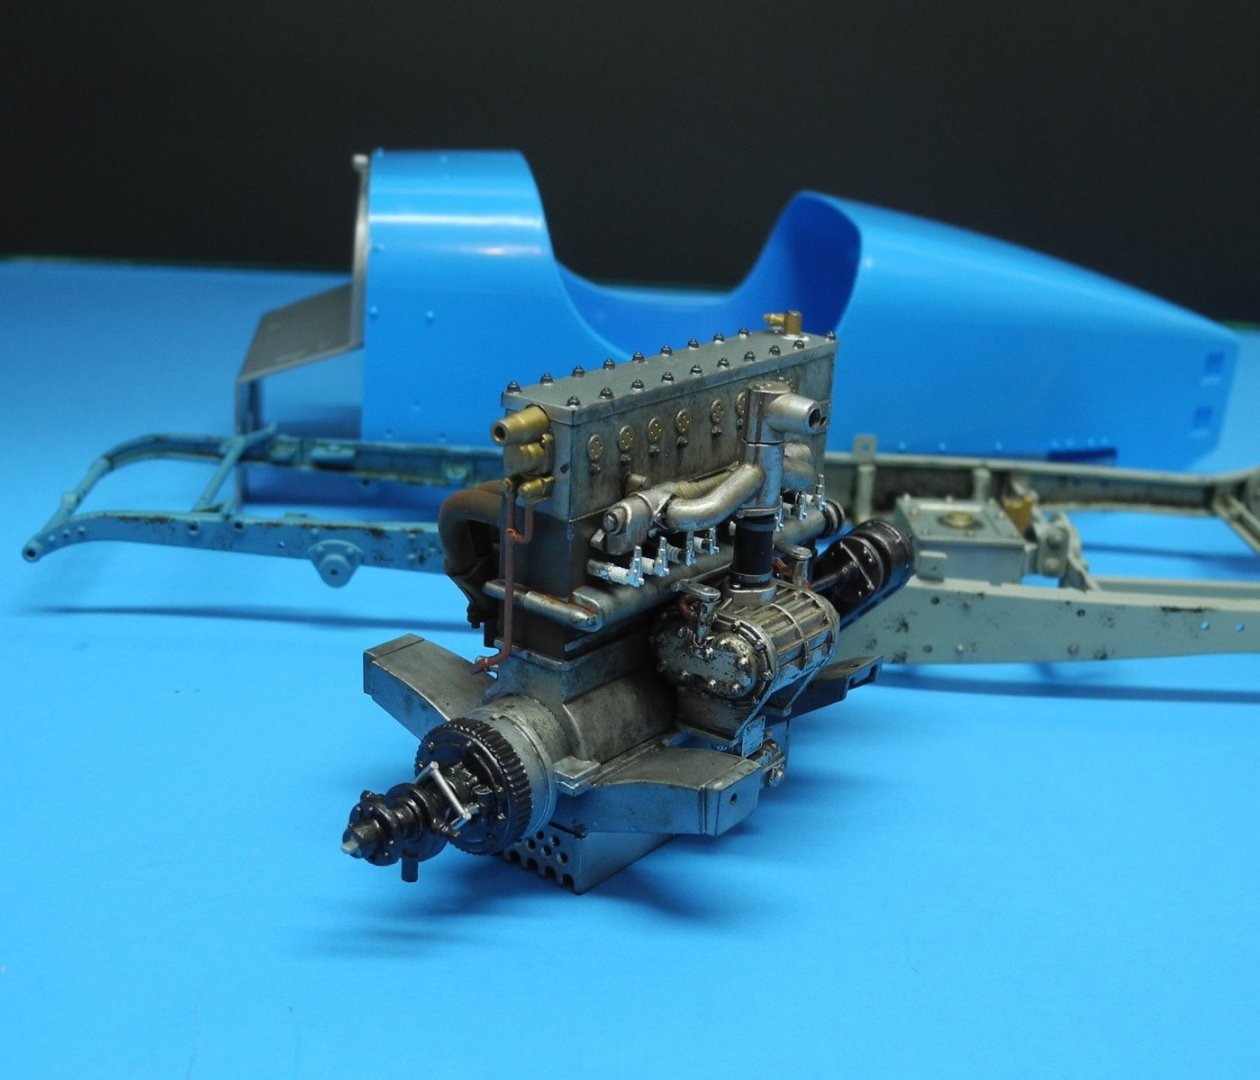
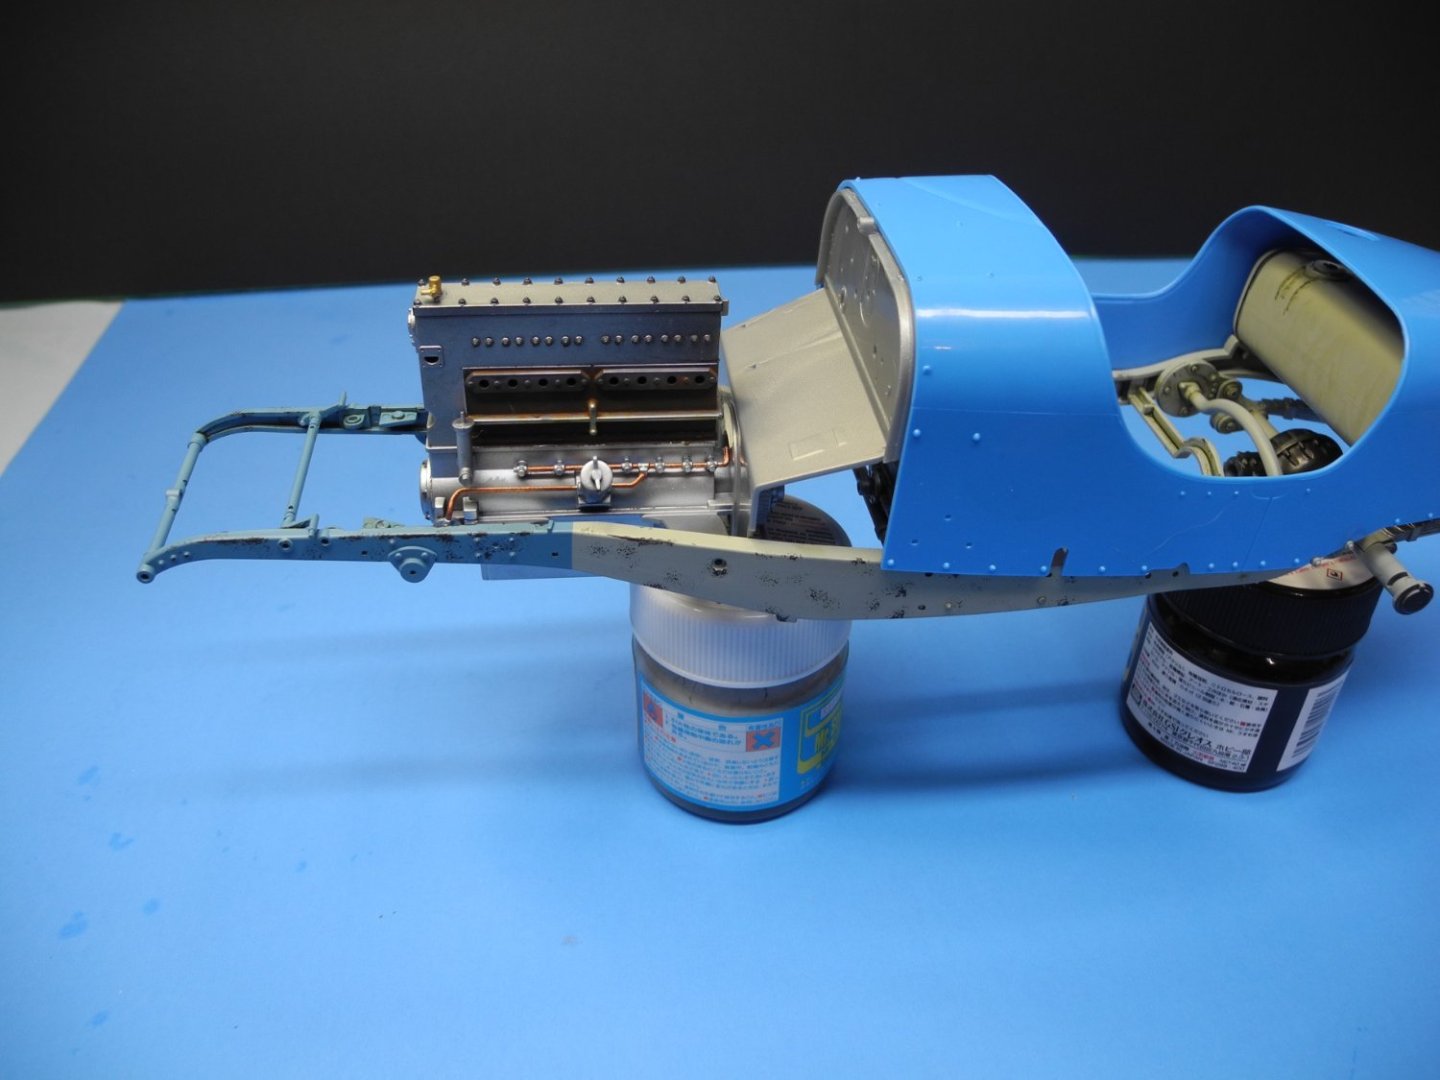
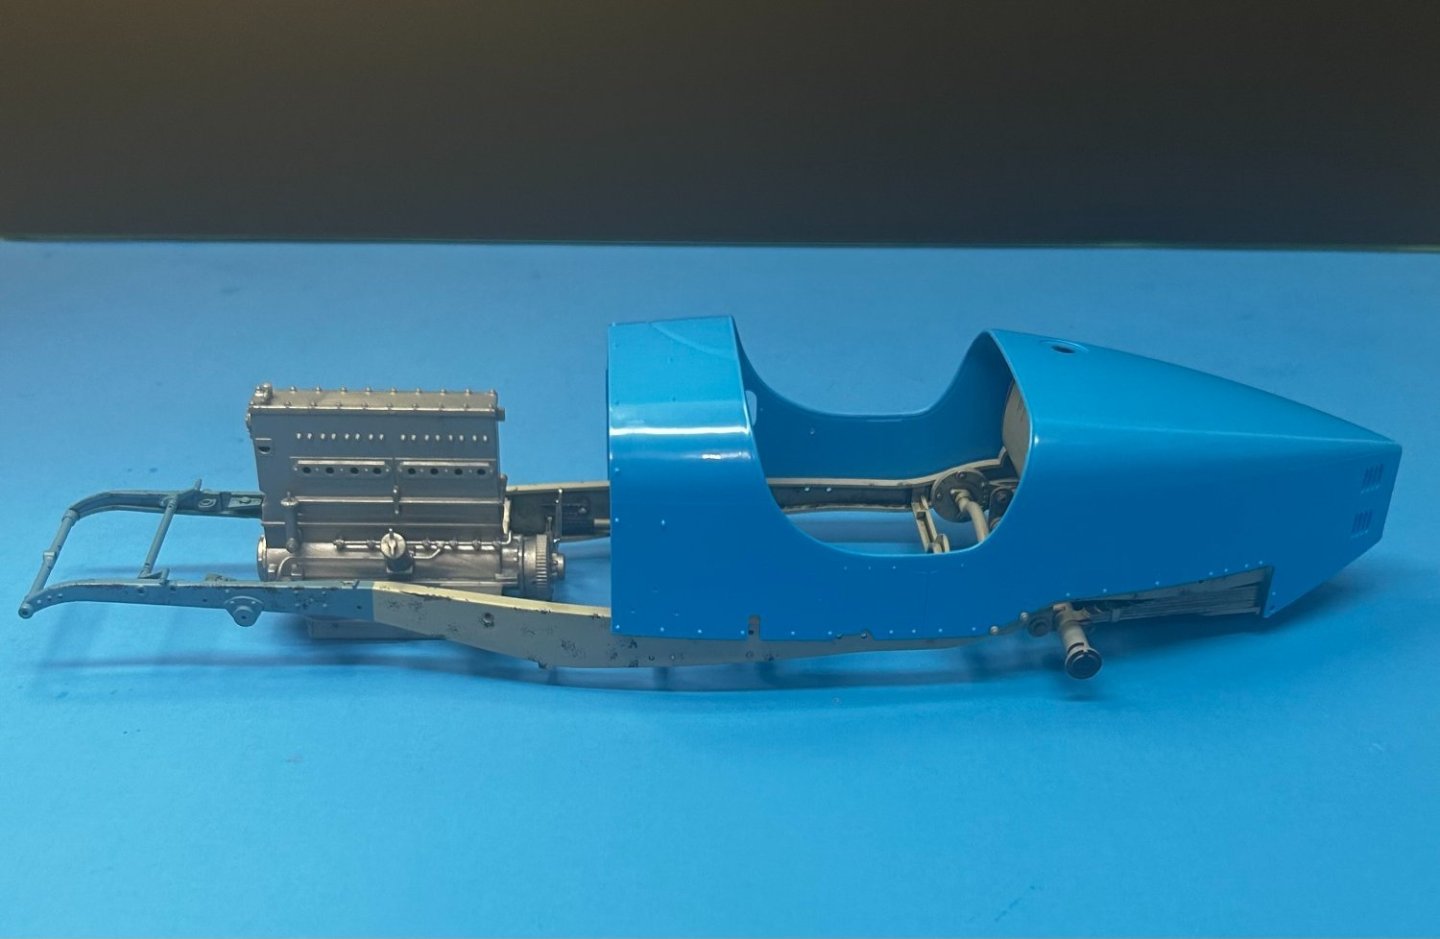
Bugatti Type 35B by CDW - FINISHED - Italeri - 1:12 Scale
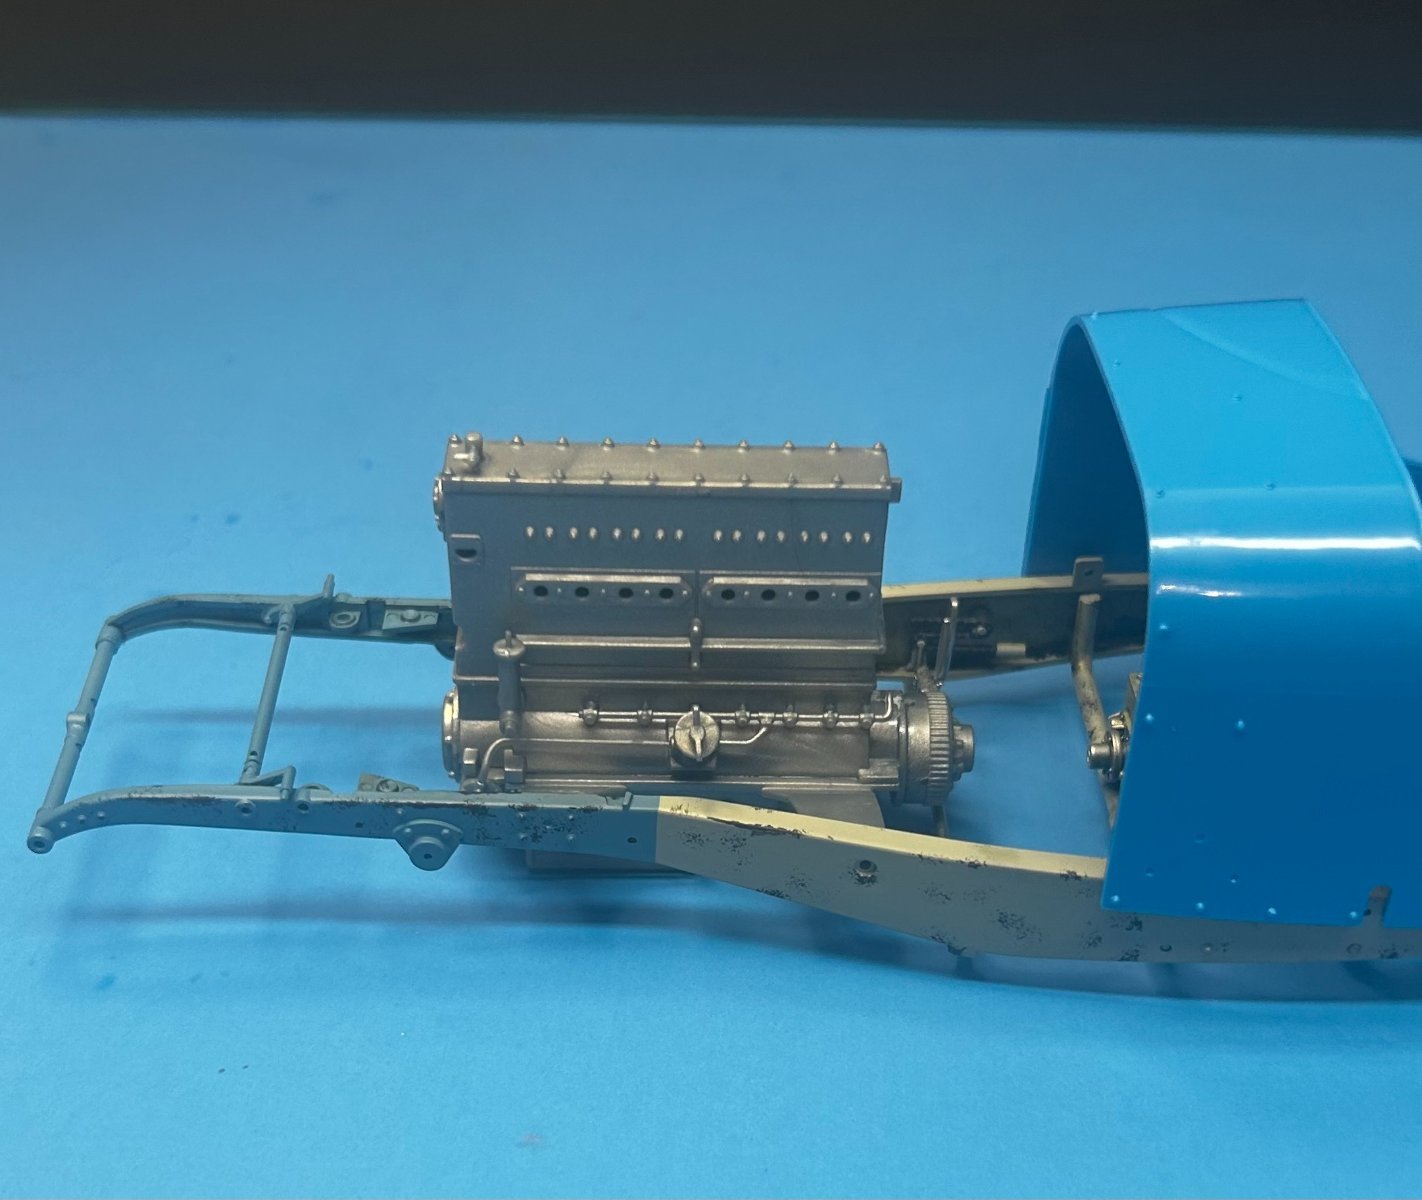
CDW replied to CDW's topic in Non-ship/categorised builds
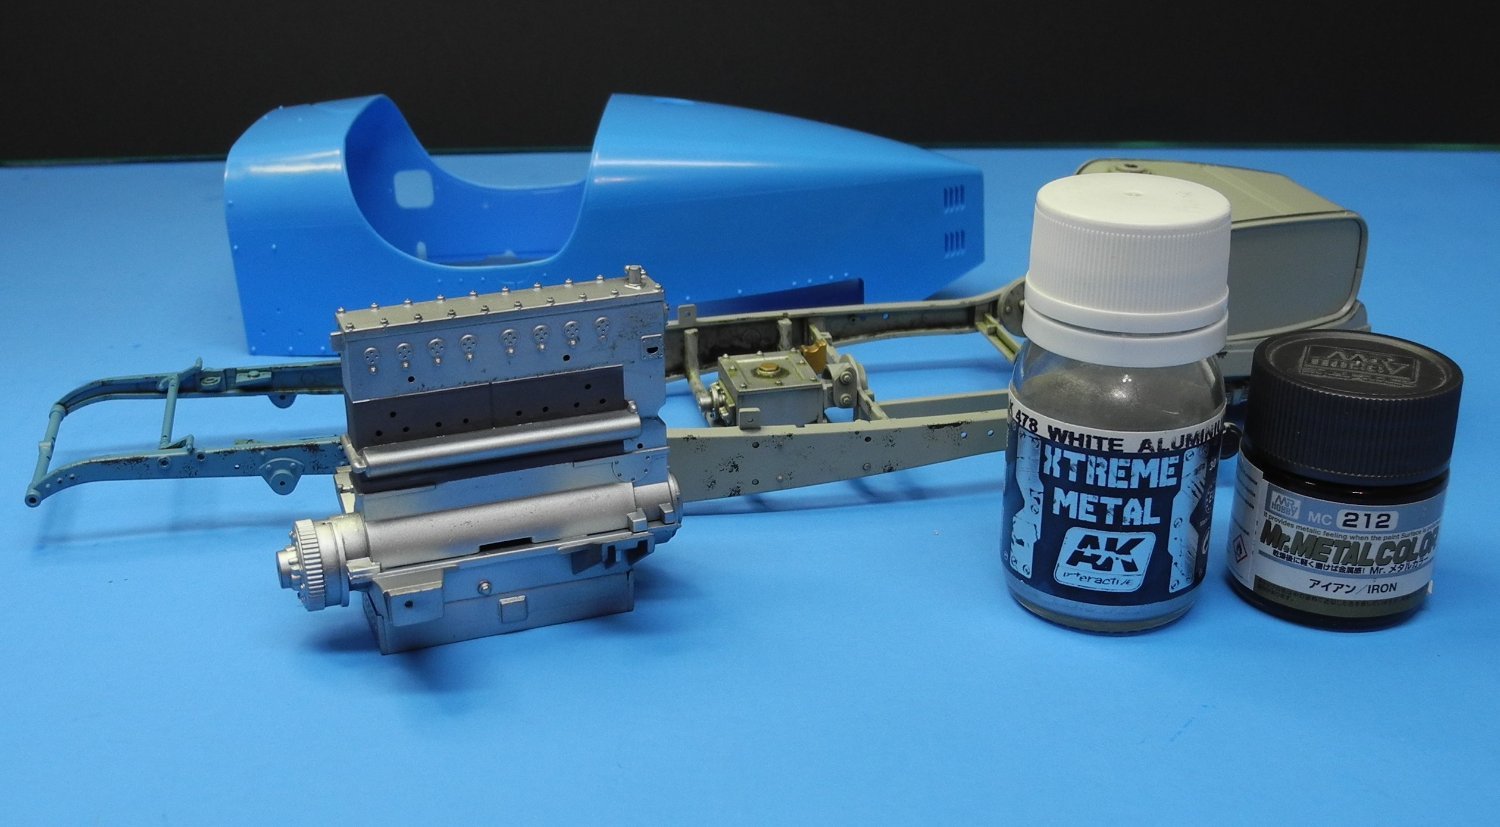
Began construction and painting of the 2,263cc, overhead camshaft, 3 valves per cylinder, supercharged, 8-cylinder inline engine. The basic engine colors used were AK Xtreme Metal white aluminum, and Mr Color iron. Various other colors and parts will be added along with a thorough weathering of the engine in later phases. I thought I had thrown it out, but I somehow managed to pick up and use a defective roll of Tamiya tape I had discovered in a previous build. This particular roll of tape leaves a pesky residue after it is removed. Fortunately, it can be removed (the residue) with IPA and a cotton swab. From the photos, I can see there is still some of it residing on the engine block which I will need to remove after making this post. Photos have a way of bringing out imperfections easily missed with the naked eye.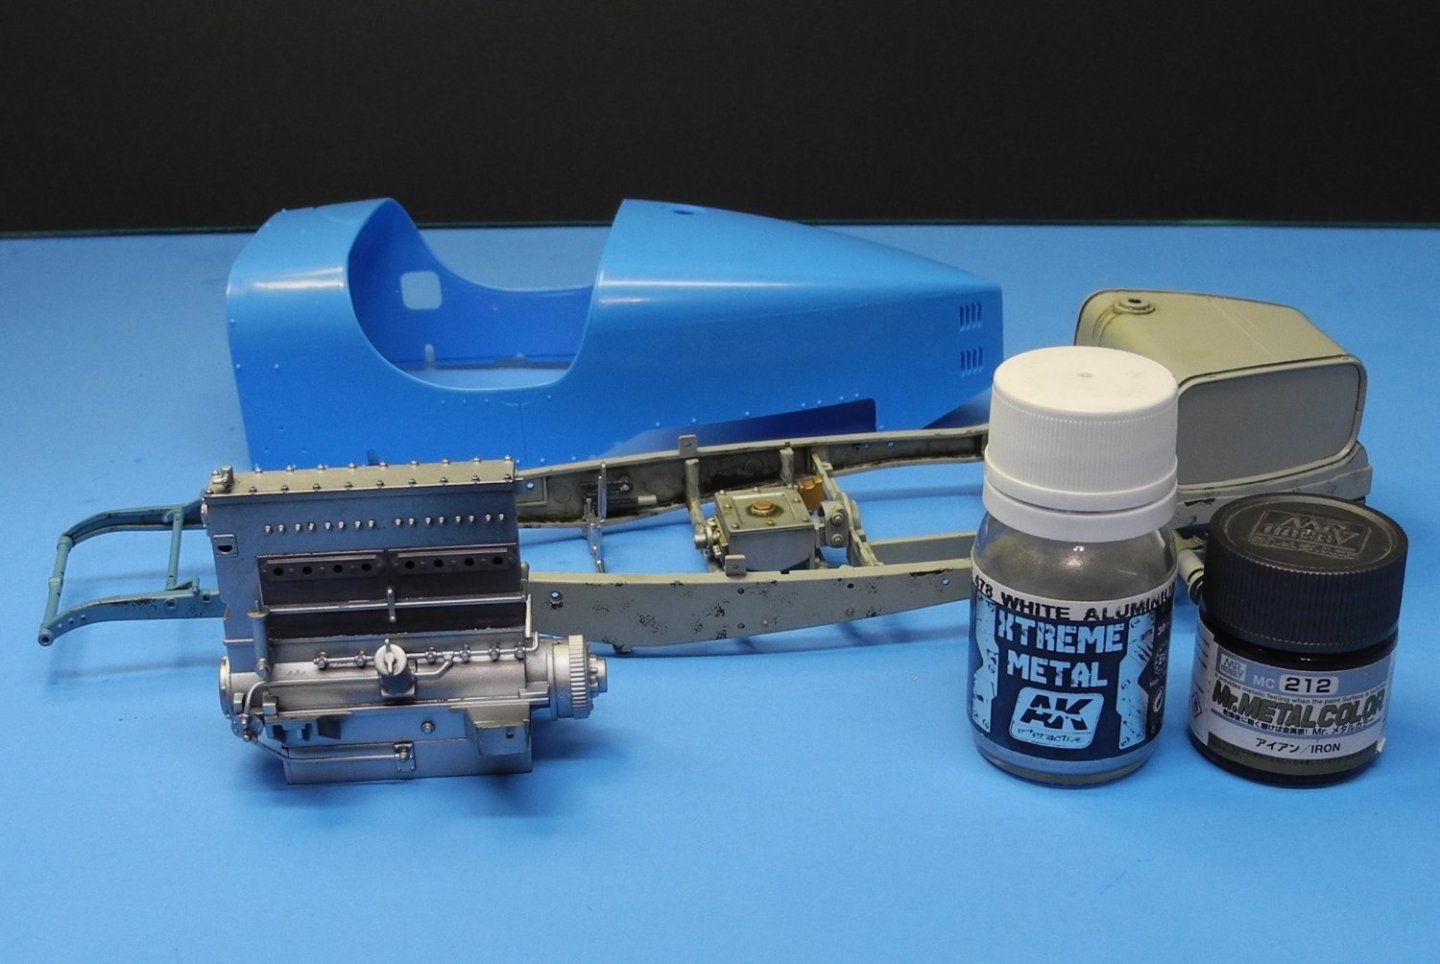


- 155 replies
-
- 17
-
-
My mother was born a Caruthers. Her mother was a Polk. Both our Polk and Caruthers families have frequent gatherings, we call them reunions, where all the cousins come together to share dinner together, great conversation, and just keeping up with how we are doing. It helps that most of us still live in or near Florida. I must say that I often doubt whether the younger generations will continue our traditions. I hope they will. We have taught our children to do this.
-
Wow, what an ordeal. You have a ton of patience to see this through and it's paying dividends. Looks great, Chris.
-
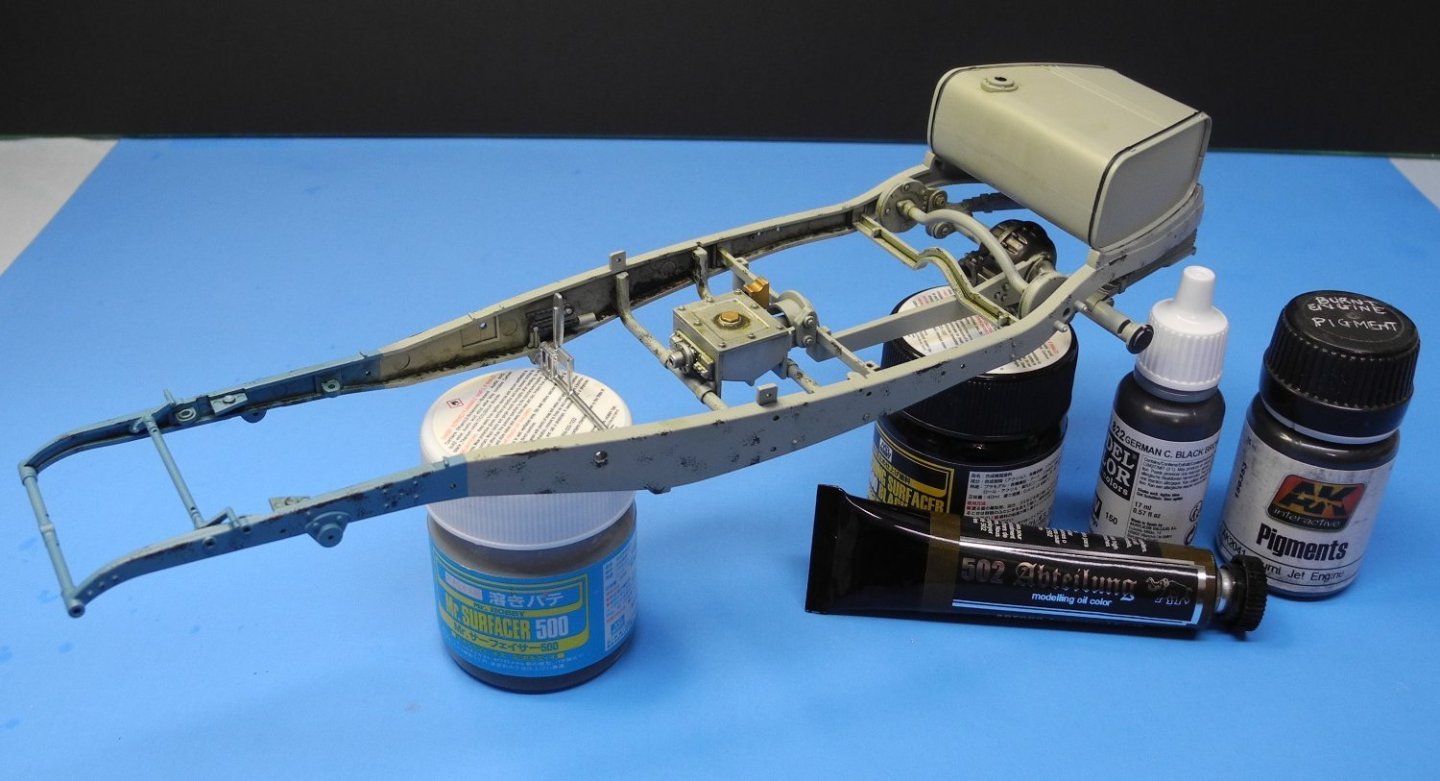
Bugatti Type 35B by CDW - FINISHED - Italeri - 1:12 Scale
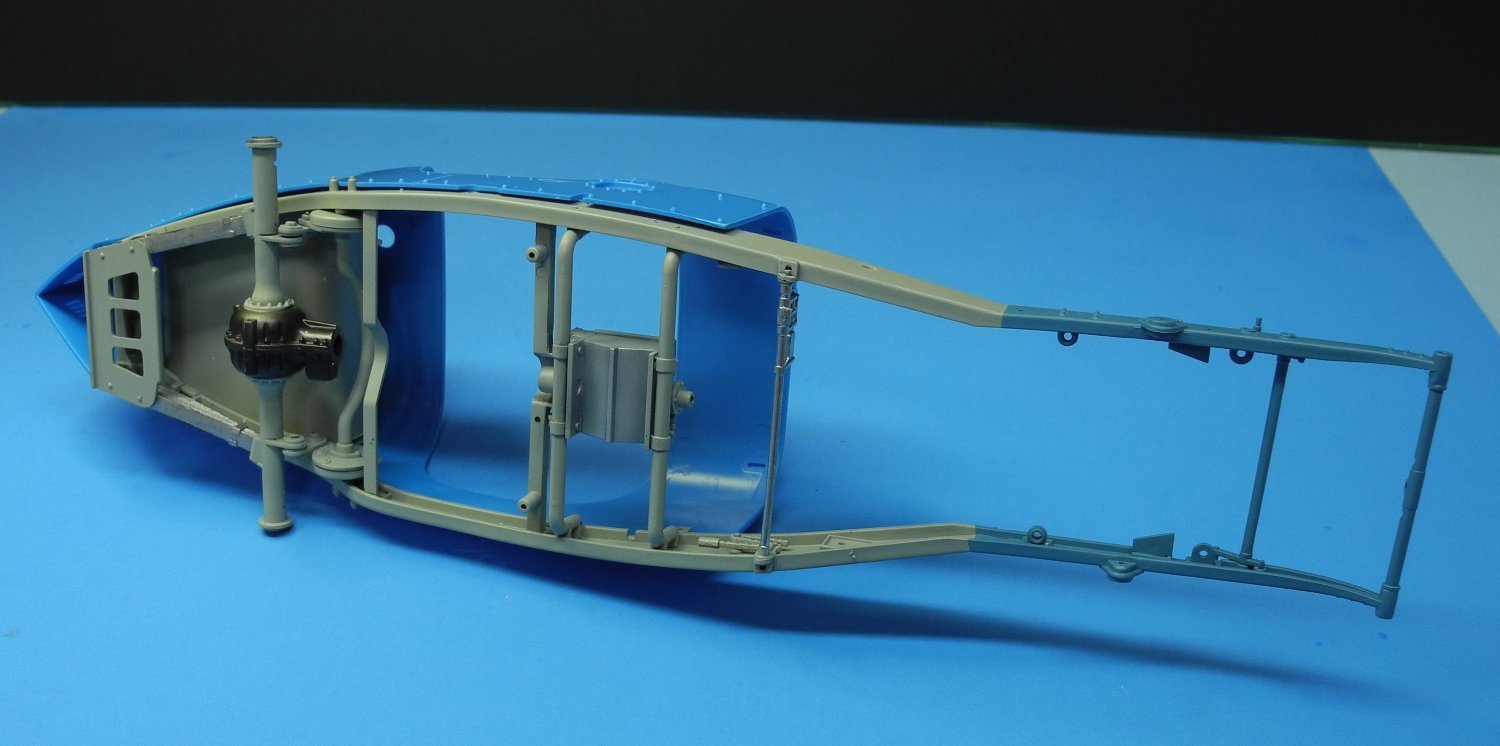
CDW replied to CDW's topic in Non-ship/categorised builds
I used oils, pigment powders, and acrylic paint to add chipping, oil and grime to the chassis. The oil color is "industrial grime earth".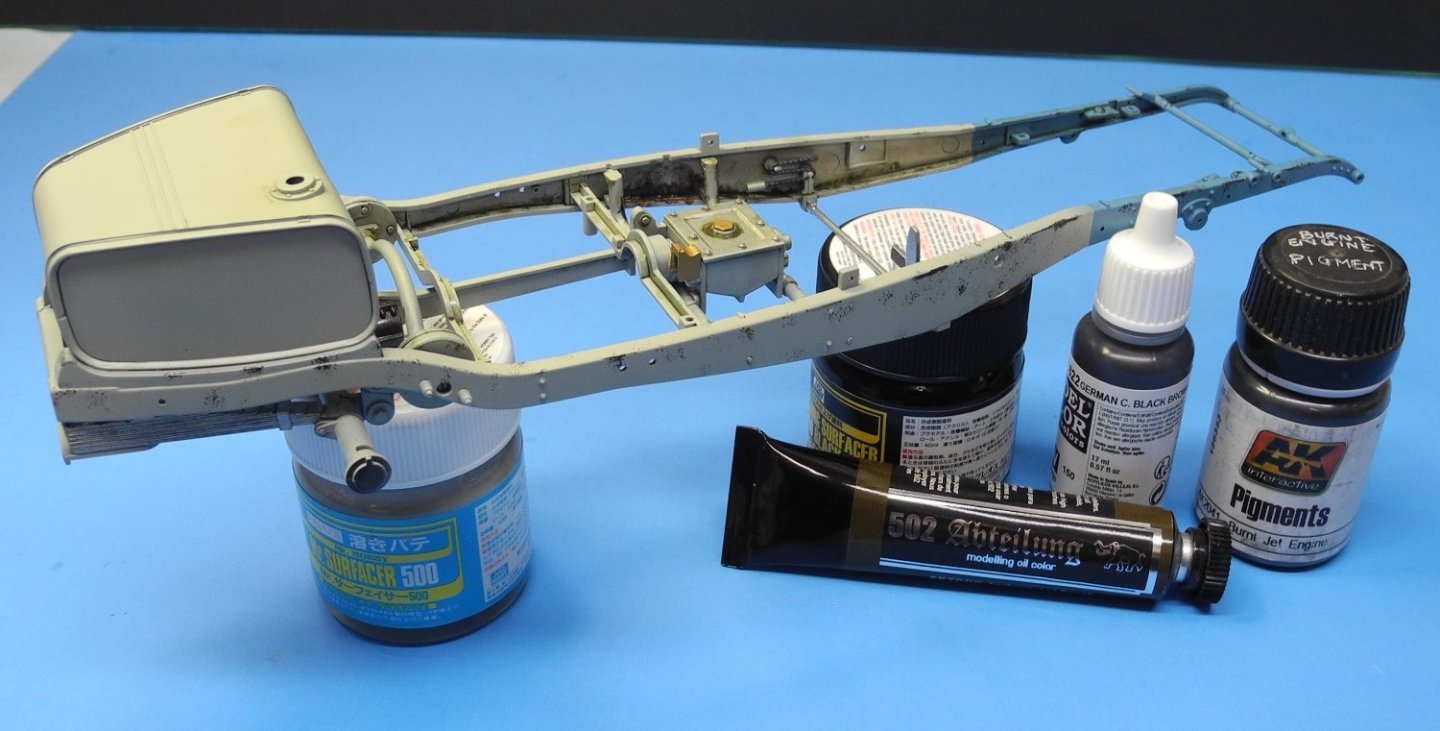
- 155 replies
-
- 17
-
-
Bugatti Type 35B by CDW - FINISHED - Italeri - 1:12 Scale
CDW replied to CDW's topic in Non-ship/categorised builds
Any green is definitely an issue with the camera and lighting. I am a novice at best with a camera. -
Bugatti Type 35B by CDW - FINISHED - Italeri - 1:12 Scale
CDW replied to CDW's topic in Non-ship/categorised builds
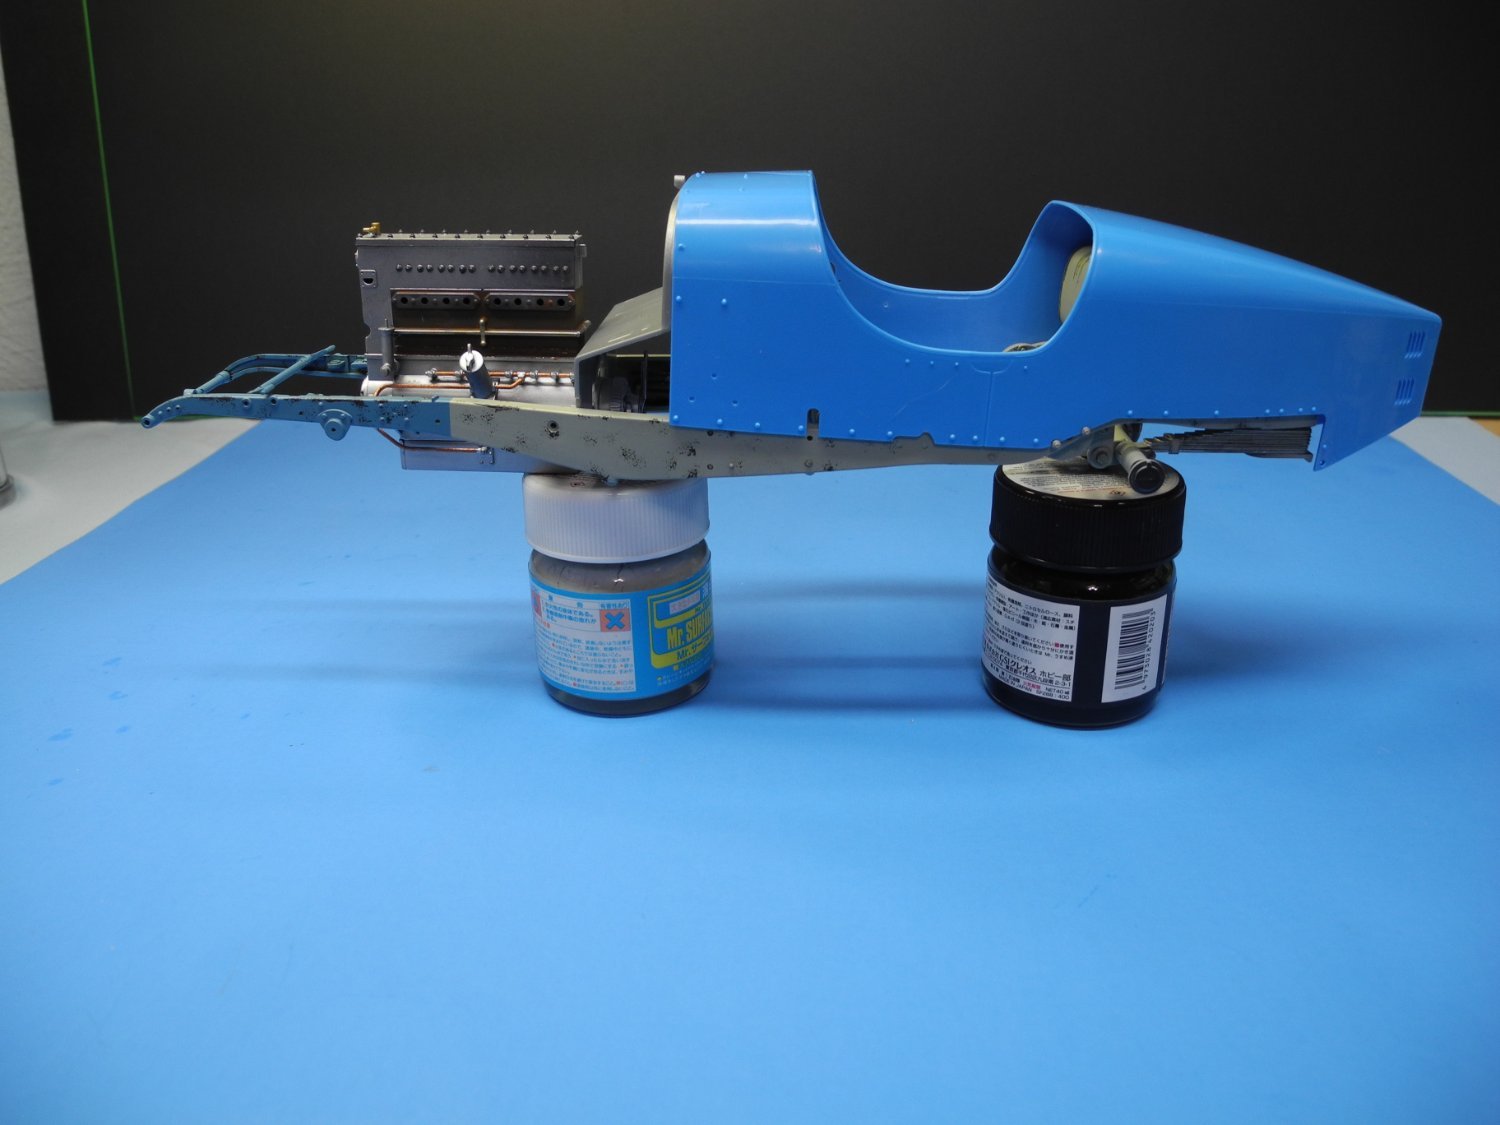
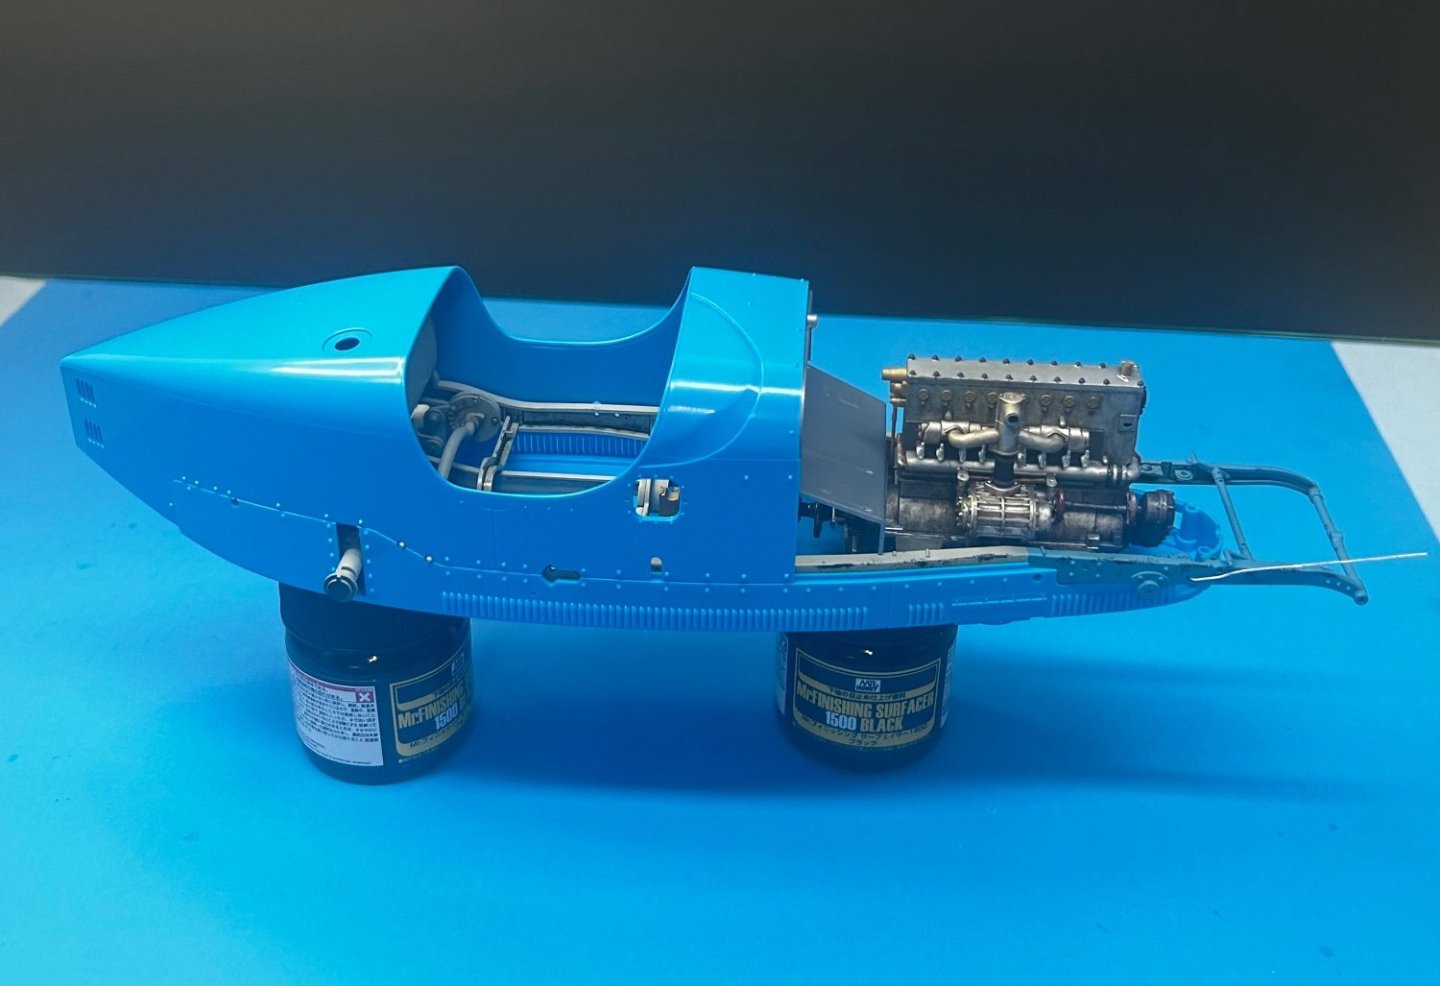
A test fit of the upper body shell to the chassis is successful. No fit issues at all that I can see.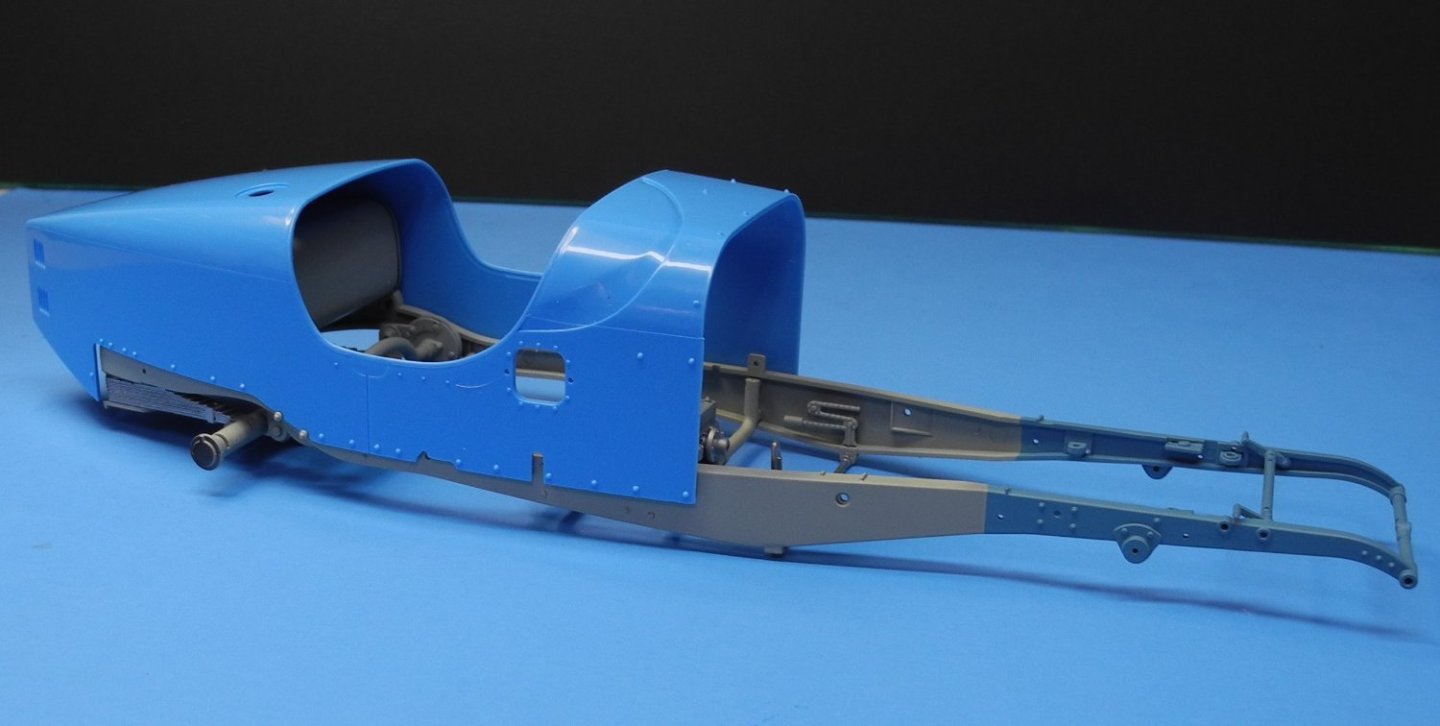


- 155 replies
-
- 13
-