HOLIDAY DONATION DRIVE - SUPPORT MSW - DO YOUR PART TO KEEP THIS GREAT FORUM GOING! (89 donations so far out of 49,000 members - C'mon guys!)
×


JeffT
-
Posts
2,552 -
Joined
-
Last visited
Content Type
Profiles
Forums
Gallery
Events
Everything posted by JeffT
-
 looking good! are you planning to leave two sections open? Forward and aft?
 -
I have this model also. My wife is from South Korea and wants me to build it. Its also available here: http://www.ebay.com/itm/220435859097?ssPageName=STRK:MEWAX:IT&_trksid=p3984.m1438.l2649
-
Byrnes table saw accessories
JeffT replied to Neill's topic in Modeling tools and Workshop Equipment
Thanks. -
Byrnes table saw accessories
JeffT replied to Neill's topic in Modeling tools and Workshop Equipment
Can that be demonstrated? I can't visualize how to do that. -
I have no experience with Proxxon but I have a Dewalt which I find to be an excellent saw. Previously I had a Craftsman and the difference between the two is very noticeable to me.
-
Looks like you're doing pretty well on your build Bob. I don't mind questions at all.
-
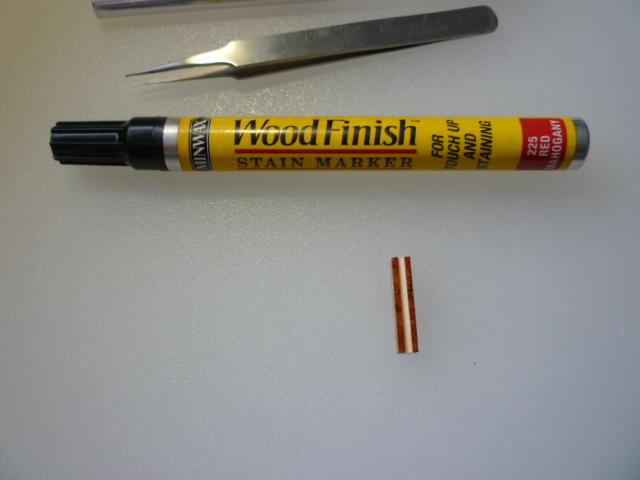
Thanks Sarah. The stain pens are handy, no muss, no fuss. The brass nails I used have a rounded head, so all I had to do was cut the head off and glue it on.
-
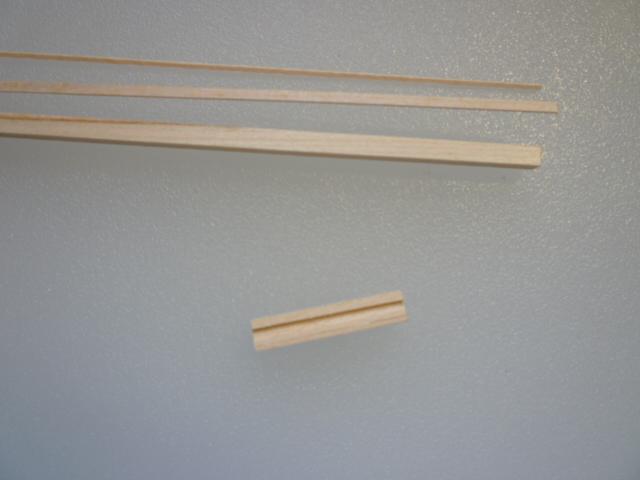
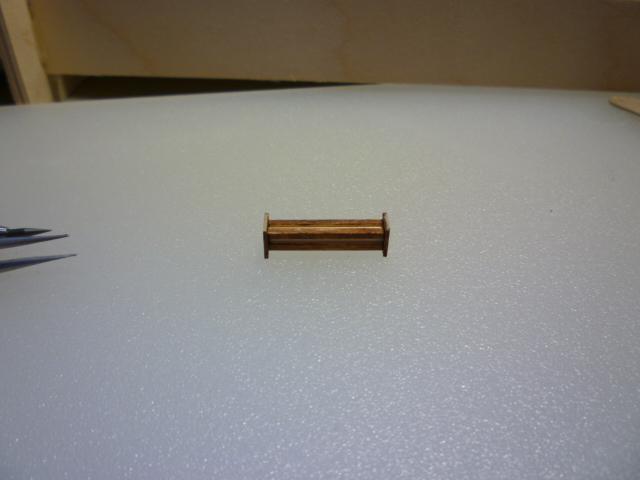
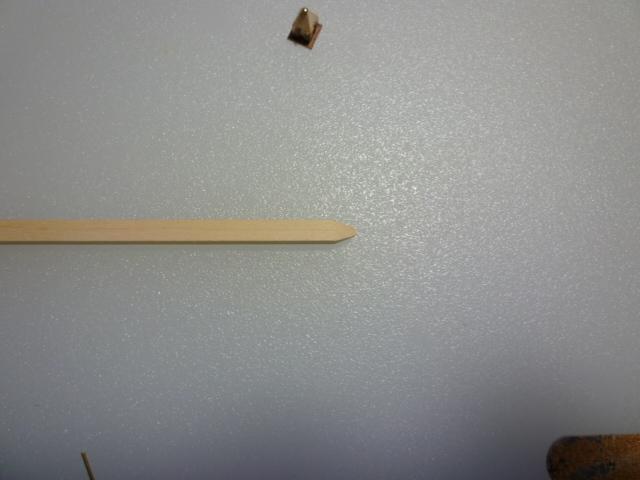
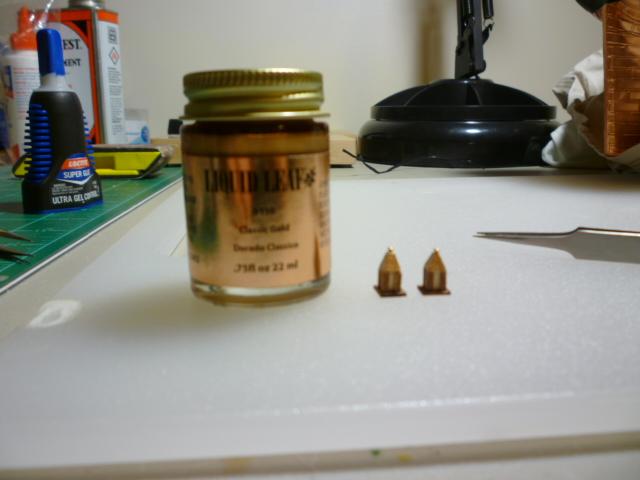
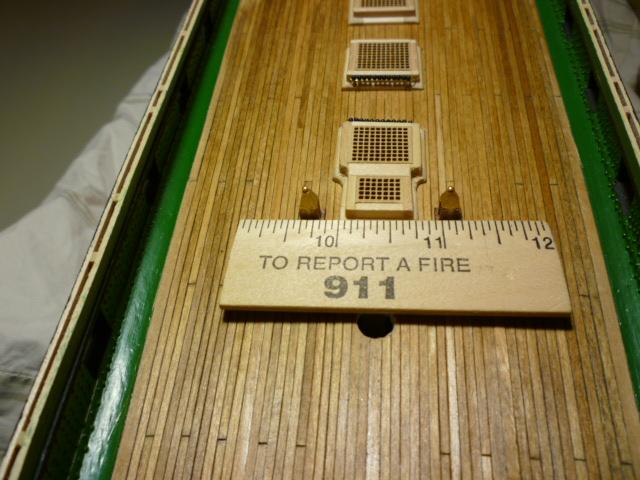
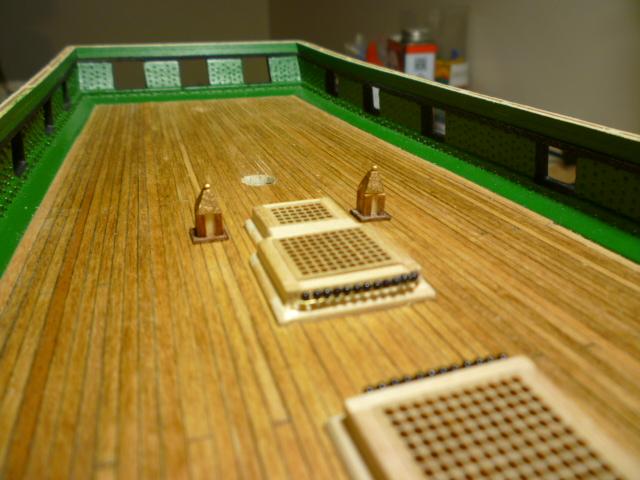
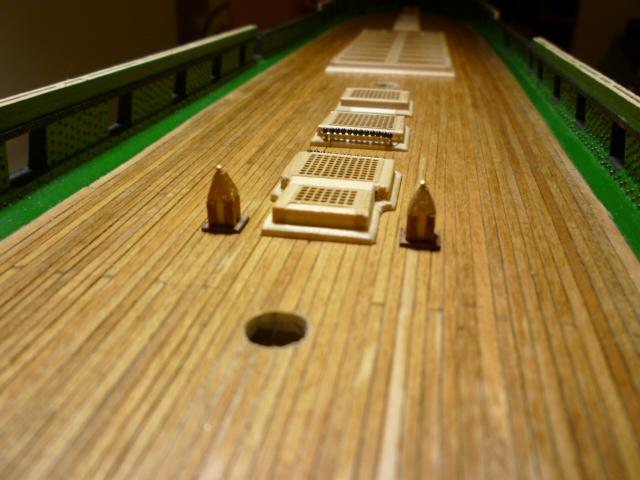
Thanks Jay. I've just finished the binnacles and the next step is the ships wheel. I think I will skip that for the time being while I figure out what method to use in building it. I'll move on to the capstan instead. The following pictures show how the binnacles were made. The first thing I did was glue some strips of wood together to form the basic shape of the binnacle. The practicum method suggests to cut the pieces to size but I found it way to difficult to work with such small pieces. So I cut the pieces to a longer length and worked from there as the following picture shows. The plans suggest that the corner pieces of the binnacles were made of mahogany. I don't have any so I used a stain pen to color the wood. I cut some 1/4 inch square pieces for the base and glued them on. Then it was just a matter of cutting the two pieces out to size. Making the top per the practicum was not optimal in my opinion. It had you constructing the pyramid shape from multiple pieces. I chose an easier way by using the Byrnes sander to create a little pyramid on the end of a 5/32 square dowel. I cut it off and glued it to the top of the first piece. The picture shows the dowel and a completed piece. To make the lantern on top I just used the head of a brass nail. For the color of the top piece I deviated from the practicum again. Instead of gluing a piece of gold leaf on each side of the top, I just used gold leaf paint that I got at Michaels. Much easier. After that it was just a matter of gluing them on to the deck. You may also notice the shot racks on the gratings. I left the brass wire unpainted since i like the way it looks. Another view and one more
-
nice to see this log back up. i'm really looking forward to seeing this open hull design.
-
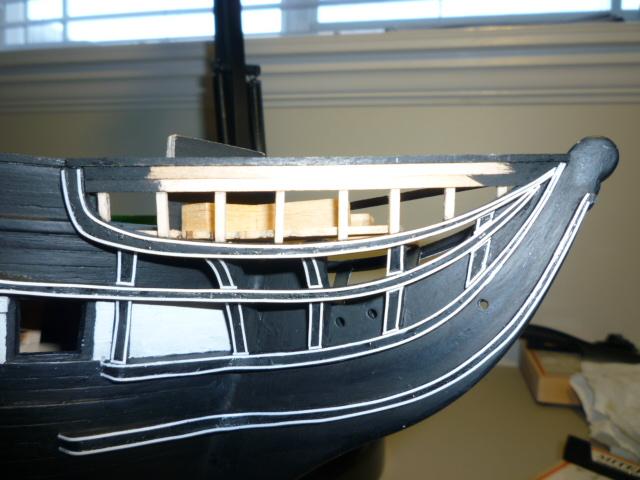
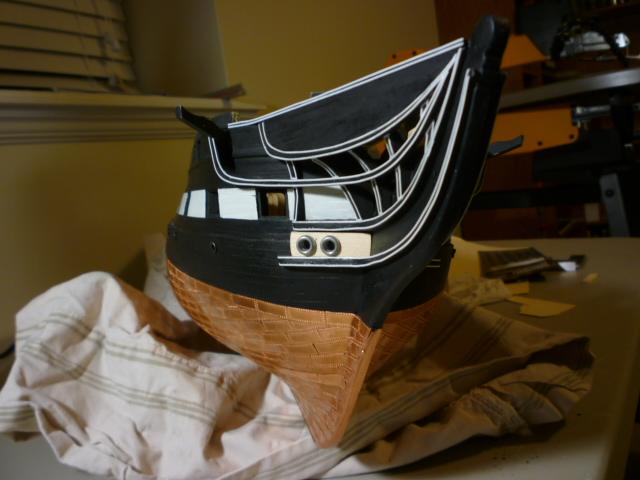
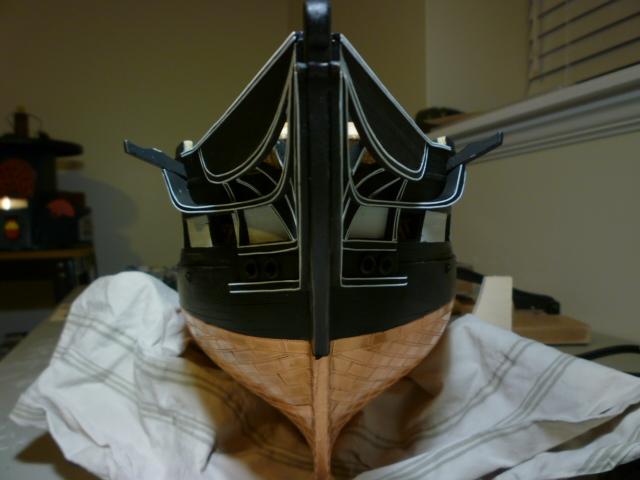
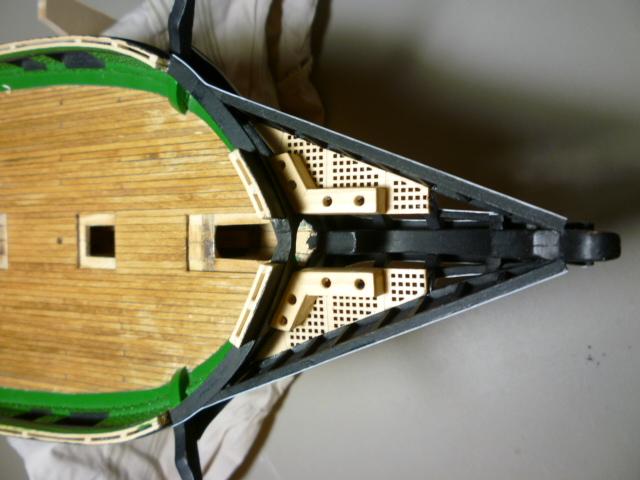
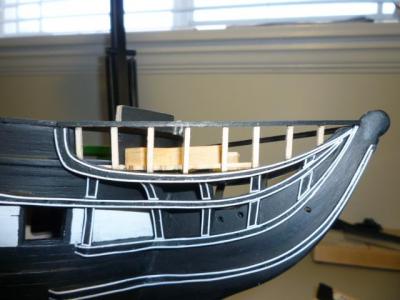
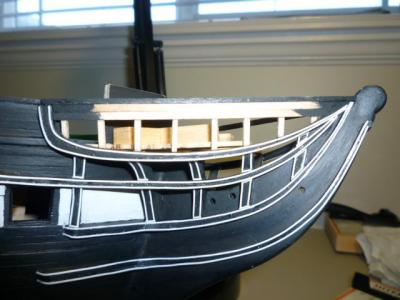
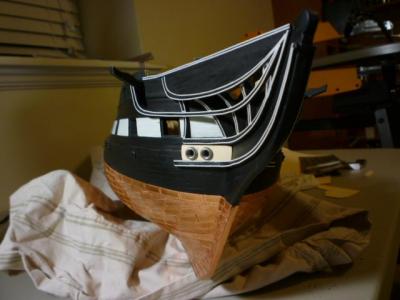
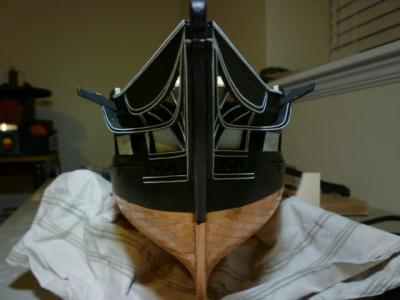
Now that MSW is back up and running, its time for an update. I have finally finished the work on the bow after what seems like an eternity. The exception is the scroll work which I'll do later. This is kind of a major milestone in the Conny build as it completes all the major structure and hull work. I can't believe I actually made it this far since this is only my second ship kit. If I follow the order of the practicum the next step will be the outer hull details like the gunport covers, davits, and chainplates. However, I think I'm going to skip ahead to the next chapter and do the deck details first because it seems like it would be too easy to knock stuff off of the hull if I do hull first. Pictures follow.

-
you're right Harvey. There is really nothing to lose by trying. thanks Jason!
-
Thanks Harvey, Greg, and Andrew. I would like to try and carve it one way or another but I've never carved anything so I don't have much confidence. I made the trip to Boston a few years ago to see the Constitution. It was a fantastic experience and Its a must do! So make the trip Andrew!
-
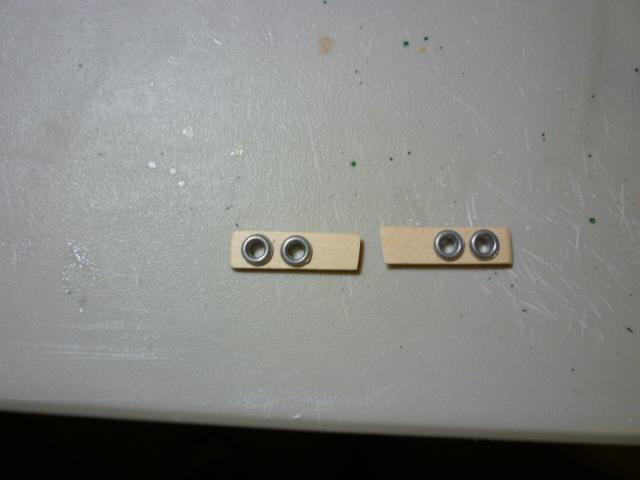
Jay, I haven't decided yet what to do with scrolling on the bow. I think I'd like to try to carve it but the practicum really leaves out a lot of the detail on how to do it so I don't know. I may try it to see if I can do it. I did see what you did with the hawse pipes and I'm doing the same thing right now as a matter of fact. It does look like the right way to do it based on the plans and pictures.
-
I have my copy also!
-
Glad to see you got the log back up. Shes looking good!
-
Welcome back and glad to hear you are feeling better.
-
Excellent idea, thanks for posting.
-
I use a mechanical lead holder with 4H lead from my drafting/architecture school days such as this: http://www.utrechtart.com/Kohinoor-Adapto-Lead-Holder-MP38148-i1011444.utrecht http://www.utrechtart.com/Prismacolor-Premier-Turquoise-Mechanical-Pencil-Lead-Refills--2-0-mm--pack-of-12-MP33300-i1010974.utrecht and also a sharpener which gives a nice sharp point, like this: http://www.utrechtart.com/Alvin-Small-Rotary-Lead-Pointer--Sharpener-For-Mechanical-Pencils-MP49597-i1017015.utrecht
-
No doubt about that Jay. The bow has been the hardest part for me so far.
-
Thanks for rebuilding the log. I've been wondering how you are doing with your build.
-
You'll do fine CaptainSteve. Keep in mind that the Conny is only my second build. If i can do it, you can do it.
-
Good to see you have your build log back up and running. Marc - .035 rivets are the recommended size.
-
Echo by Rustyj - 1:48 - cross-section
JeffT replied to Rustyj's topic in - Build logs for subjects built 1751 - 1800
thanks for reposting Rusty. Looking forward to seeing your updates. -
Good to see your build log back up. I couldn't help but notice that big blue box the model came in. I guess Model Shipways has switched to some new packing. I bought the Sopwith Camel airplane model kit from them a week ago and it came in the same type of box.
-
I used copper plates from Caldercraft. I tried using the copper tape but had a difficult time with it and just ended up making a mess.