HOLIDAY DONATION DRIVE - SUPPORT MSW - DO YOUR PART TO KEEP THIS GREAT FORUM GOING! (89 donations so far out of 49,000 members - C'mon guys!)
×


JeffT
-
Posts
2,552 -
Joined
-
Last visited
Content Type
Profiles
Forums
Gallery
Events
Everything posted by JeffT
-
 Looks like a good build to follow. Thanks for the pictures of Ga-Geo Island. I was in Korea for a year and it sure is a beautiful country.
 -
Glad to hear the keels are successfully installed.
-
Thanks Jay, Geoff, and Wacko. I have a soldering iron that allows me to adjust the temperature, so I hope that does the trick. I also have some scrap brass that I can use for practicing. I finished carving the interior of one boat last night. It took me a couple hours. It wasn't easy and I ended up doing it all by hand. I tried using the dremel like Bob showed but quickly found out that is too risky. Those burrs might be the answer Geoff, thanks!
-
The rigging is looking great.
-
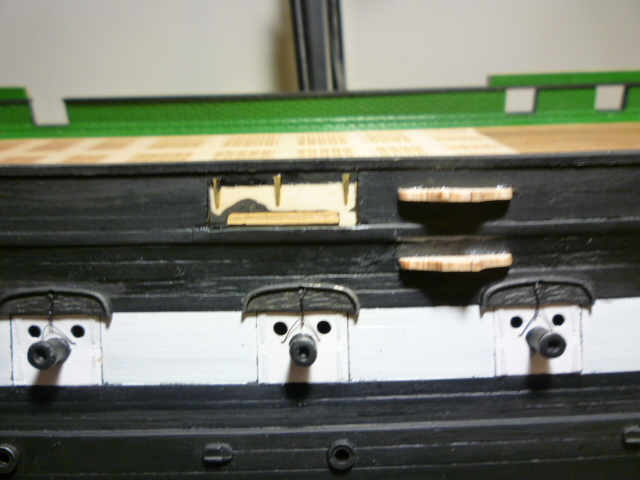
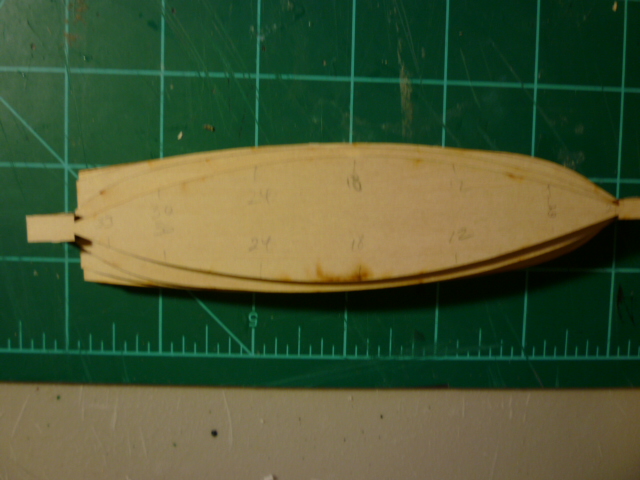
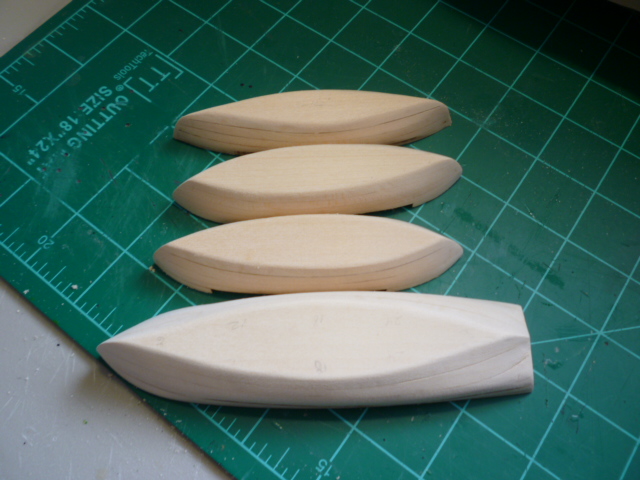
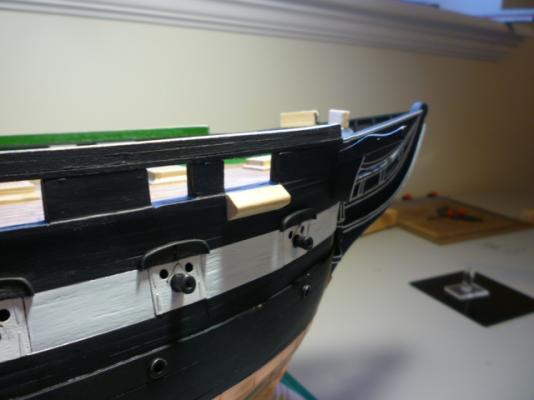
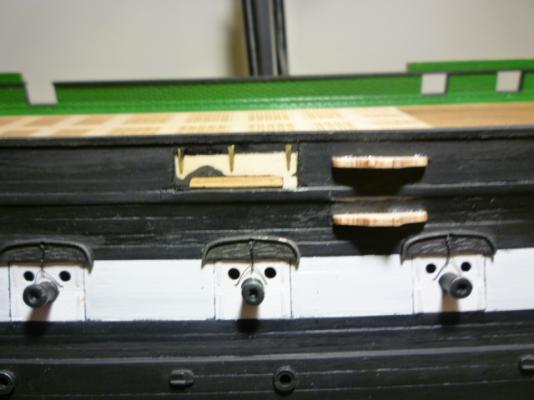
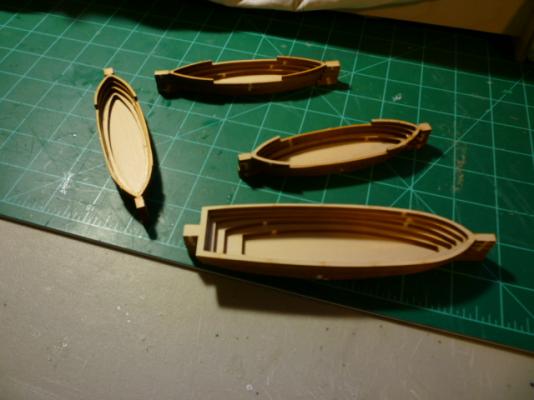
Thanks for the pic Geoff, that helps me build a better mental view. I think I won't paint my deadeyes since I like the natural color of the wood. Another update. I have started working on some of the little details. I got the anchor stowage done and the sheaves. I really would have liked to do the sheaves a little earlier, like around the time I planked the bulwarks. Oh well, lesson learned, don't blindly follow along with the practicum. Its probably better to plan ahead. I also started working on the little boats. These are built bread and butter style in layers and then carved to shape. Its the first time I've tried this so I was a little worried about getting the shape right. It turns out that if you just shave off the edges of layers that it kind of just falls in place. I did take a little too much off at the bottom of the stern on the pinnace. It was the only area I had trouble visualizing and the plans didn't help much. It will be easy to fix with a little filler though once i add the keel. I'll be applying a layer of filler over the whole thing anyway. I still need to carve out the insides, that will be a little more difficult. forward anchor stowage starboard mid stowage and door boat layers glued together here you can see the edges that need to be carved away and after carving


-
looking forward to seeing this build too!
-
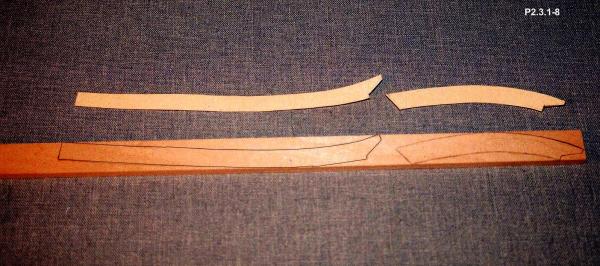
You can glue strips together to make wider stock like themadchemist mentioned, but that's assuming you have enough stock to do so.
-
This picture shows what I mean.
-
In situations like this I usually cut the curved piece to shape from a wider piece of stock material, if available.
-
The Gorch Fock will be an interesting build. Looking forward to seeing your log.
-
Posting etiquette
JeffT replied to dvm27's topic in Using the MSW forum - **NO MODELING CONTENT IN THIS SUB-FORUM**
I don't mind others posting pictures in my log. Its very helpful when I'm looking for tips and advice. -
agreed! nicely done on the framing.
-
If there is one thing I love about this hobby, its the history and the stories behind these great sea going vessels we get to see reproduced here. To hear this story first hand makes this build one to watch. Looking forward to seeing you follow in your honorable fathers footsteps in building this vessel as he did.
-
Your deck detail looks very good. Are you replacing the kit belaying pins?
-
ROYAL CAROLINE 1749 by Doris - 1:40 - CARD
JeffT replied to DORIS's topic in - Build logs for subjects built 1501 - 1750
Thanks for the pictures Doris. -
ROYAL CAROLINE 1749 by Doris - 1:40 - CARD
JeffT replied to DORIS's topic in - Build logs for subjects built 1501 - 1750
Looks good. How did you do the roman numerals?- 883 replies
-
- 1
-

-
- royal caroline
- ship of the line
- (and 1 more)
-
Great looking ship. I love the deck detail.
-
I'm glad to hear that I'm not the only one that burns various fingers with sandpaper. I though I was doing something wrong.
- 1,668 replies
-
- 1
-
-
- syren
- model shipways
- (and 1 more)
-
i haven't ordered any yet. i'm still debating but i got the contact info a while back.
-
Jay, Contact the US rep for morope: Martin Meyer Model Shipswright 5821 N.Navarre Chicago, IL 60631 E-Mail: Curlee11@aol.com
-
a few more. http://shipwrightjournal.blogspot.com/2012/06/uss-essex-by-model-shipways-near-finish.html
-
I'm not sure if this was posted here before but here are some good pictures of the Essex prototype. http://shipwrightjournal.blogspot.com/2012/05/announcing-frigate-essex-by-model.html
-
ROYAL CAROLINE 1749 by Doris - 1:40 - CARD
JeffT replied to DORIS's topic in - Build logs for subjects built 1501 - 1750
The decorations look very nice.- 883 replies
-
- 1
-
-
- royal caroline
- ship of the line
- (and 1 more)
-
I think its petty standard for some ship models to supply walnut as a second layer of planking.
-
Looking good so far. Just curious, is this based on the Mantua plans?