

waspy
-
Posts
40 -
Joined
-
Last visited
Content Type
Profiles
Forums
Gallery
Events
Posts posted by waspy
-
-
looking great Heinz!

- Seventynet, mort stoll, Heinz6672 and 1 other
-
 4
4
-
just a little update:
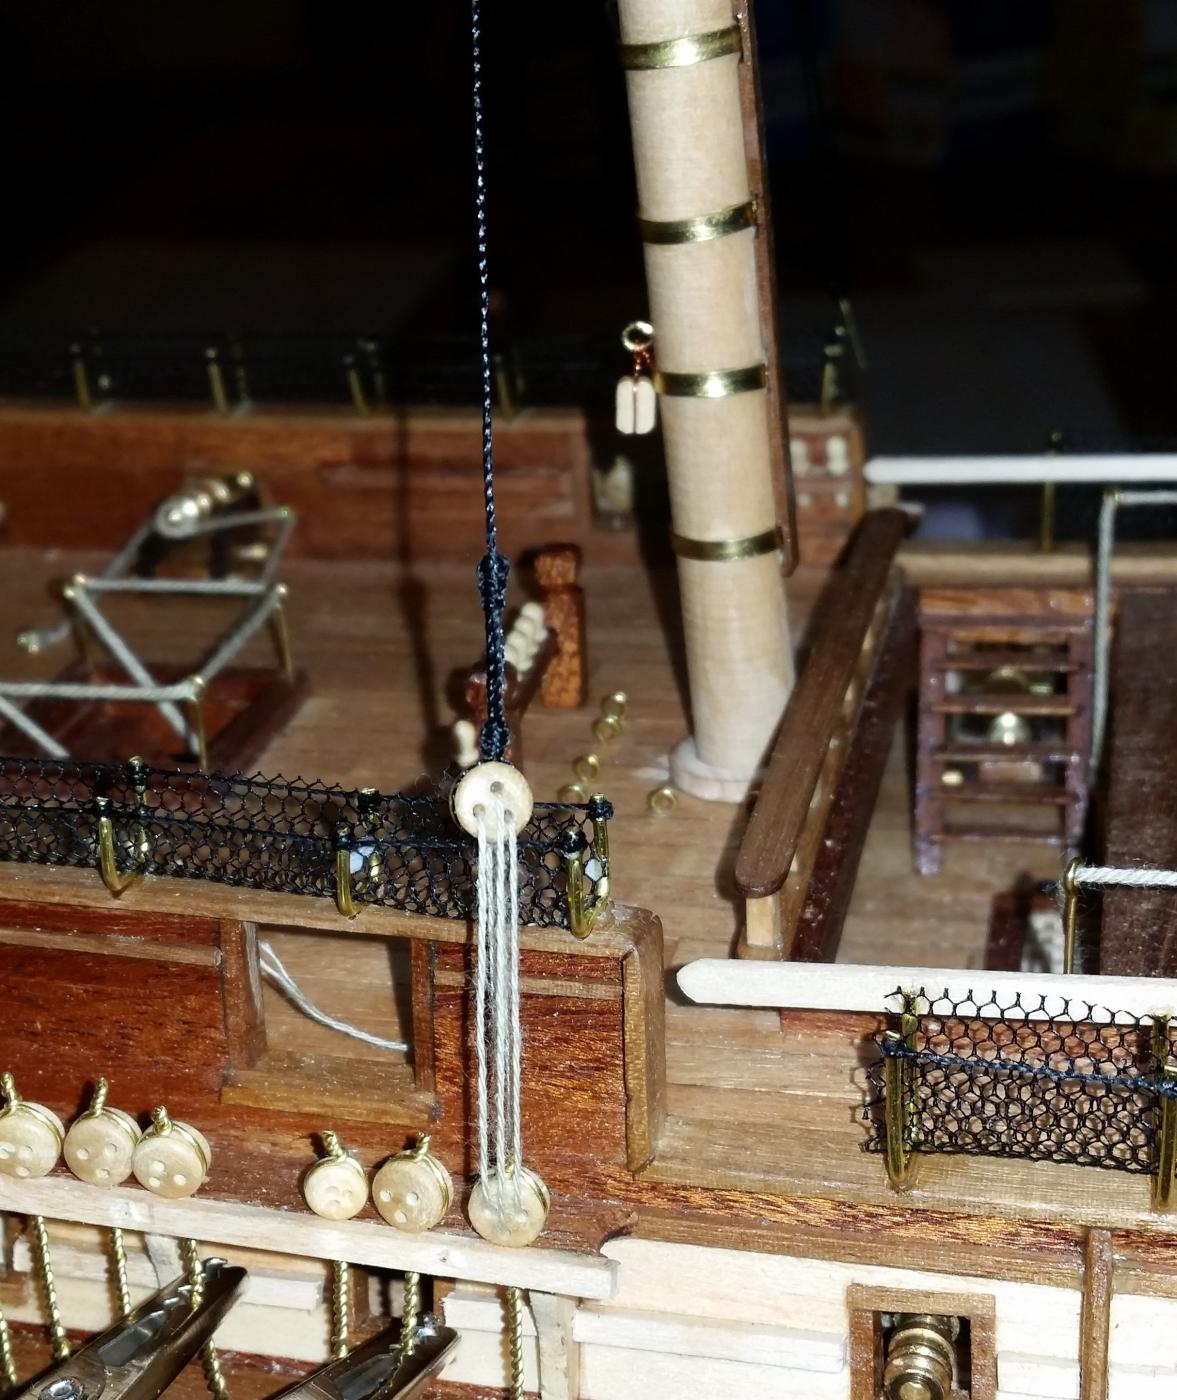
lower fore and main masts completed, lower mizzen on its way....
Lower main stuck in place and the very first shroud attached to it's deadeye


- cristikc, GrandpaPhil, MEPering and 1 other
-
4
-
looking good as always! ....
Constructo certainly have left us to our own imagination when it comes to the rigging - very limited to the detail of where all the ropes are supposed to go!
What is the title of that book Paul ? - the pictures look much more informative than the book on rigging that I am trying to decipher!

-
thanks
Ian, I kept having to re-check the plans to make sure the bowsprit was the correct length coz it looks SOOOoo long lol
-
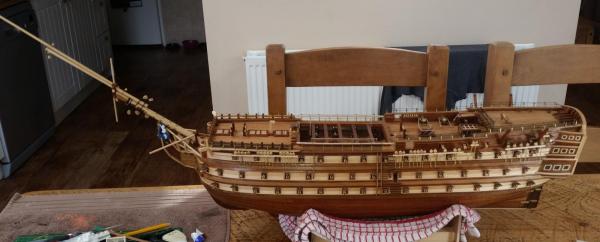
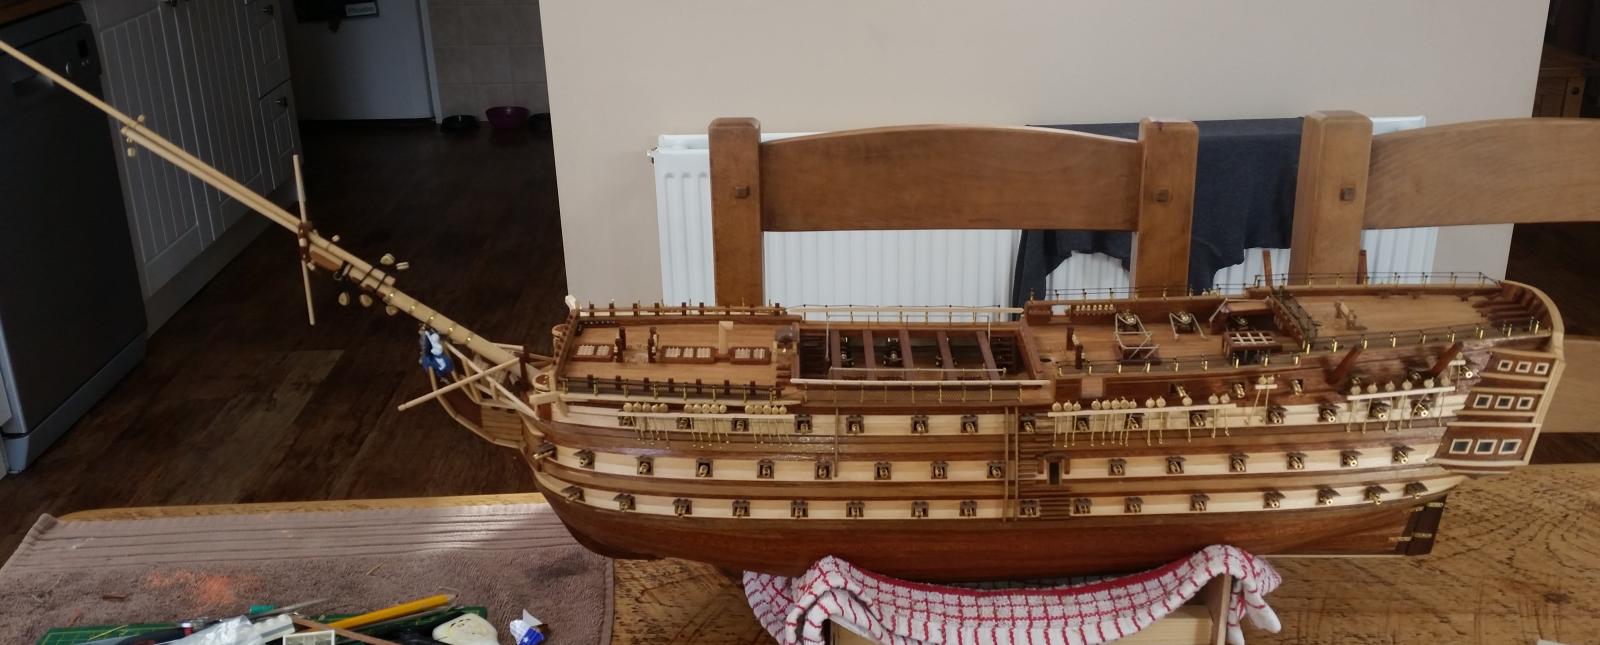
just a quick post to see overall progress so far: half the hammock nettings in place and bow sprit fitted:
Waspy
- MEPering and BLACK VIKING
-
2
-
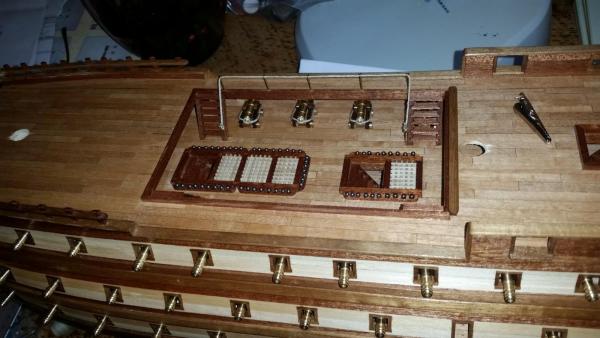
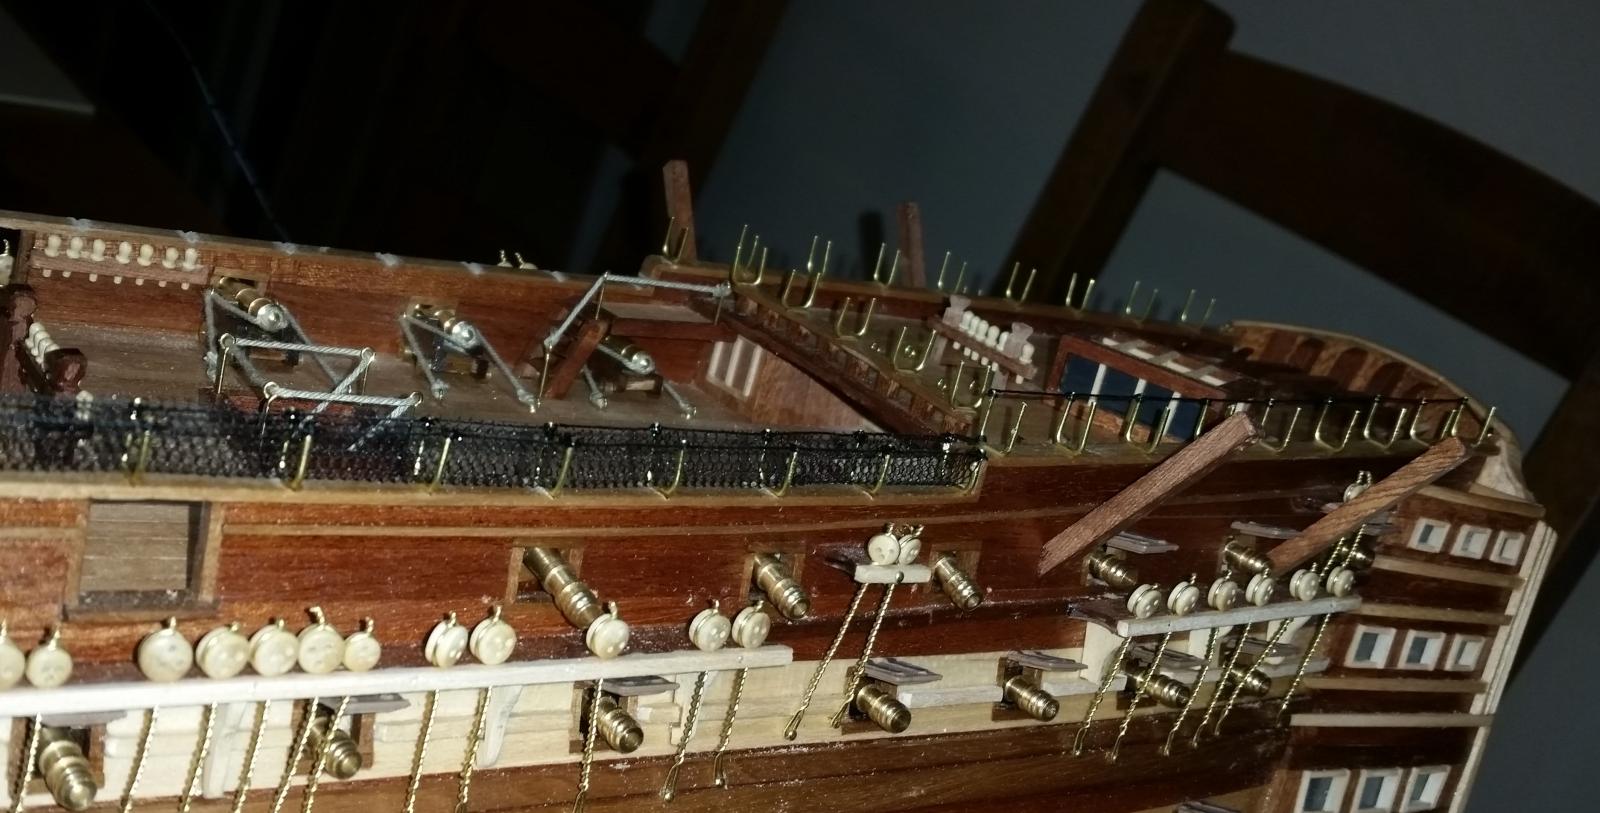
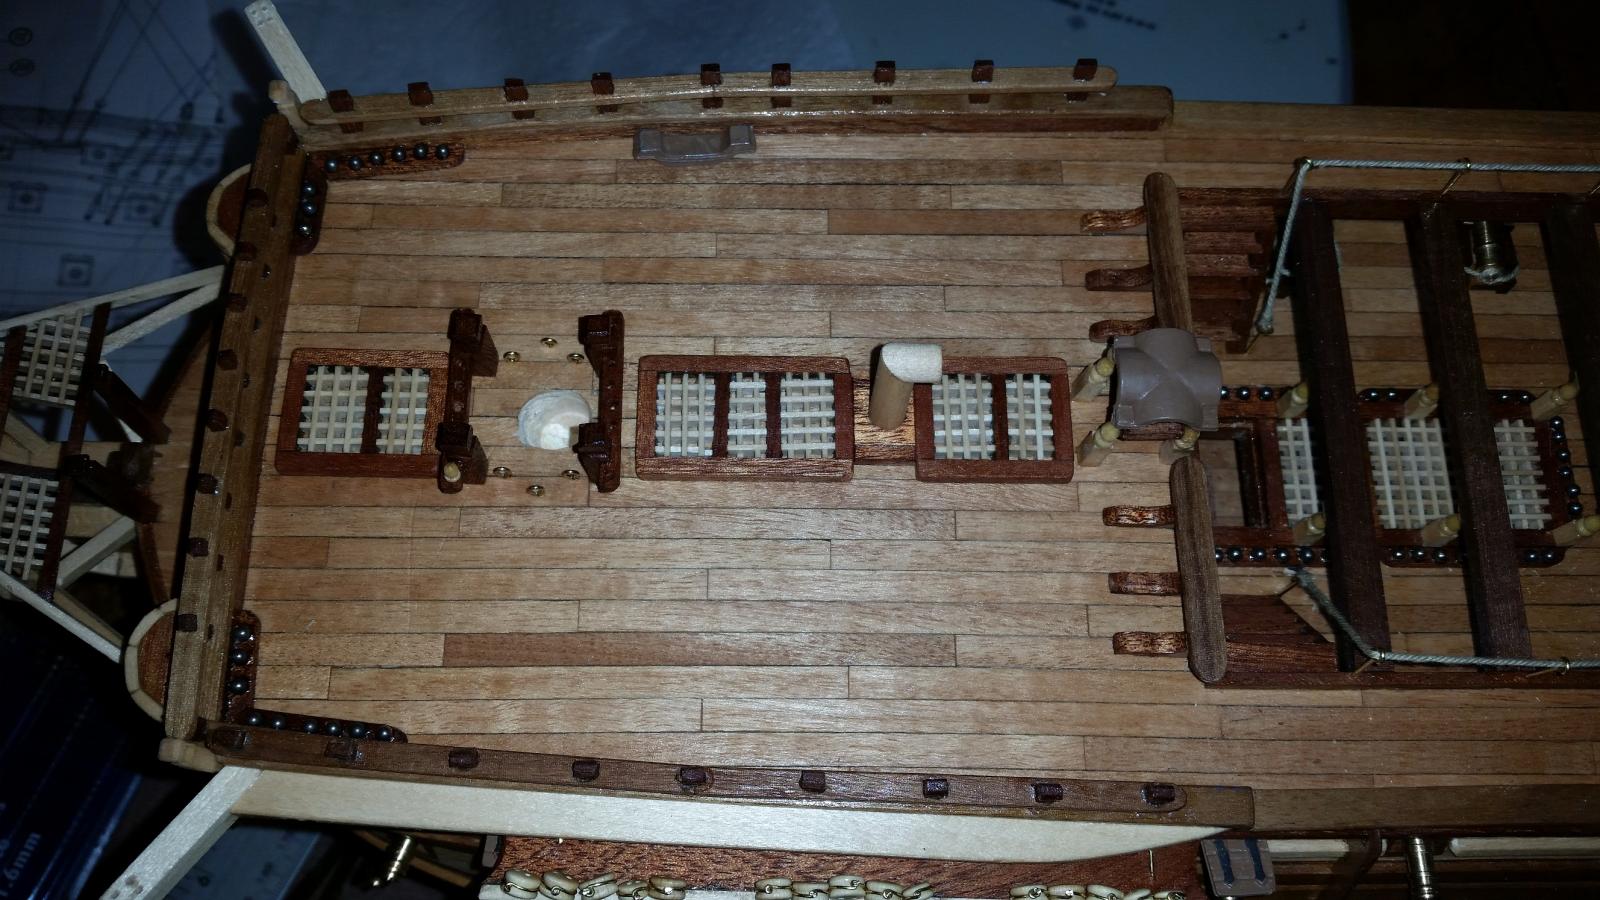
lifeboat davits in place and most of the deck furniture fitted including the last of the pin-racks and the hammock netting well under way.....I thought I'd struggle with the hammock netting and spoil the look of the ship at 1:94 scale.....but it's really looking good so far

- Seventynet and MEPering
-
2
-
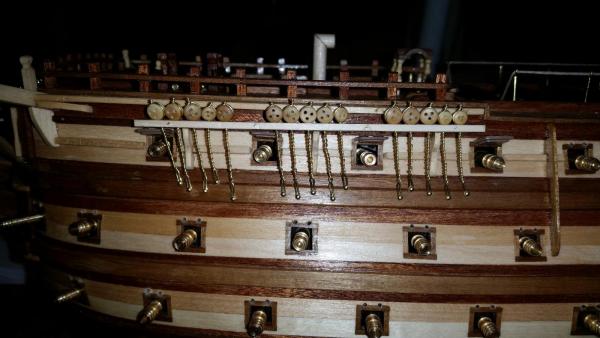
evening all
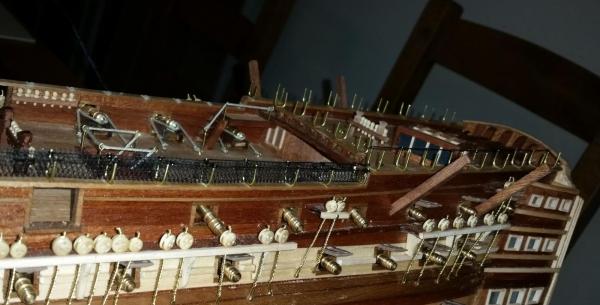
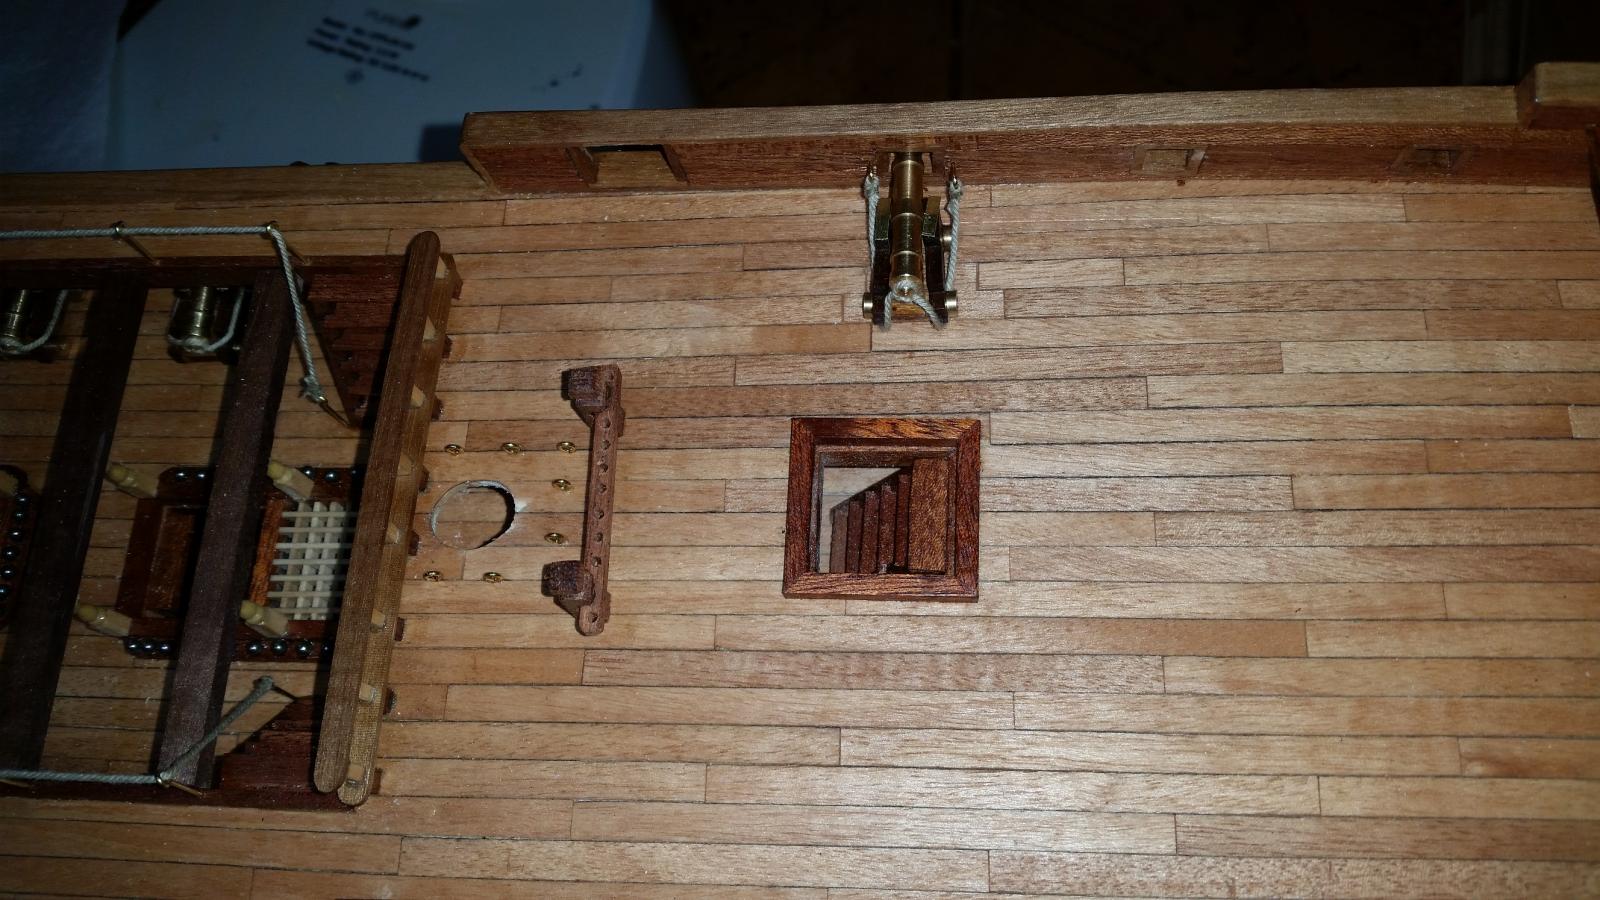
Chains all completed both sides and have been continuing on rigging the cannons on the upper deck and have completed one side of the ladder to the quarter deck...I know the rigging is not accurate but at this scale there's a limit to my ability (Constructo's instructions make no mention of rigging the guns at all!)
And as variety is the spice of life I made a start on the bowsprit. With no lathe I had to make do with my drill to use as a wood turner to taper the ends....which worked ok - certainly good enough for me. In my usual effort to make things easier to suit my ability, after 2 failed attempts, I gave up trying to square off the top section of the mast and just kept it round - I think it would be much easier to turn square stock to a round instead of round stock to square. I'm sure some of you will shudder but I don't think it detracts from the overall finished effect....

I've started on the main mast and top, I'll grab a photo of it when it's further along....
that's all for now,
Waspy
-
-
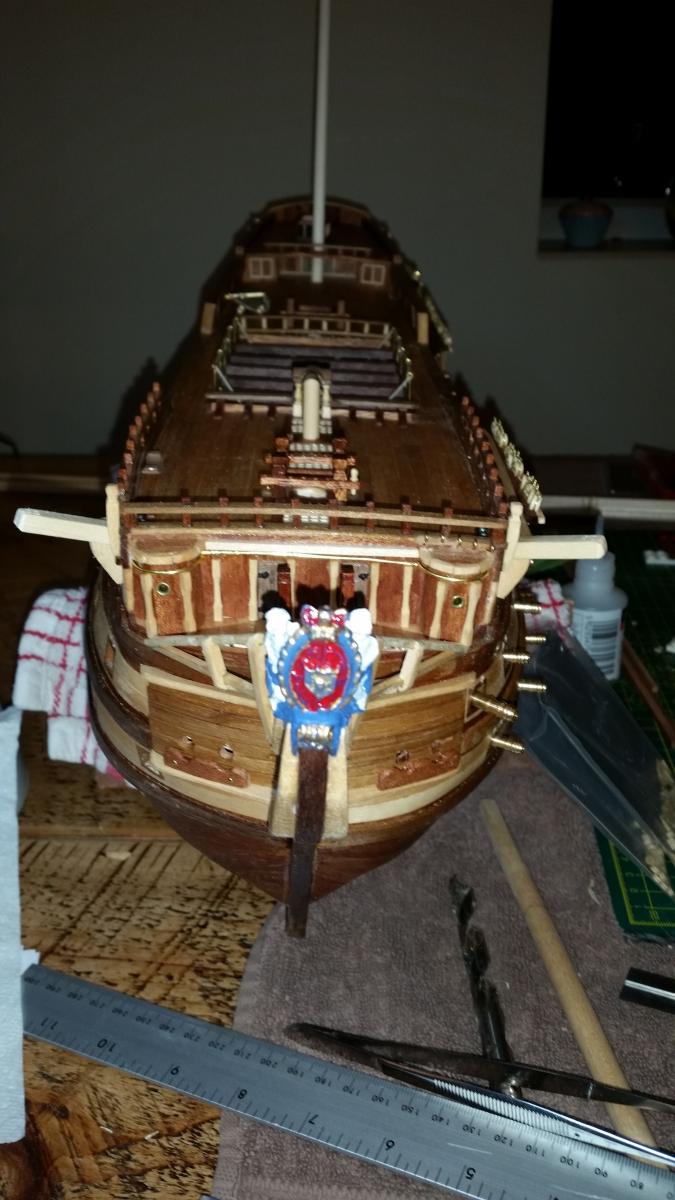
some progress in the last week (some real life jobs fell through.....so I had 3 days off to kill
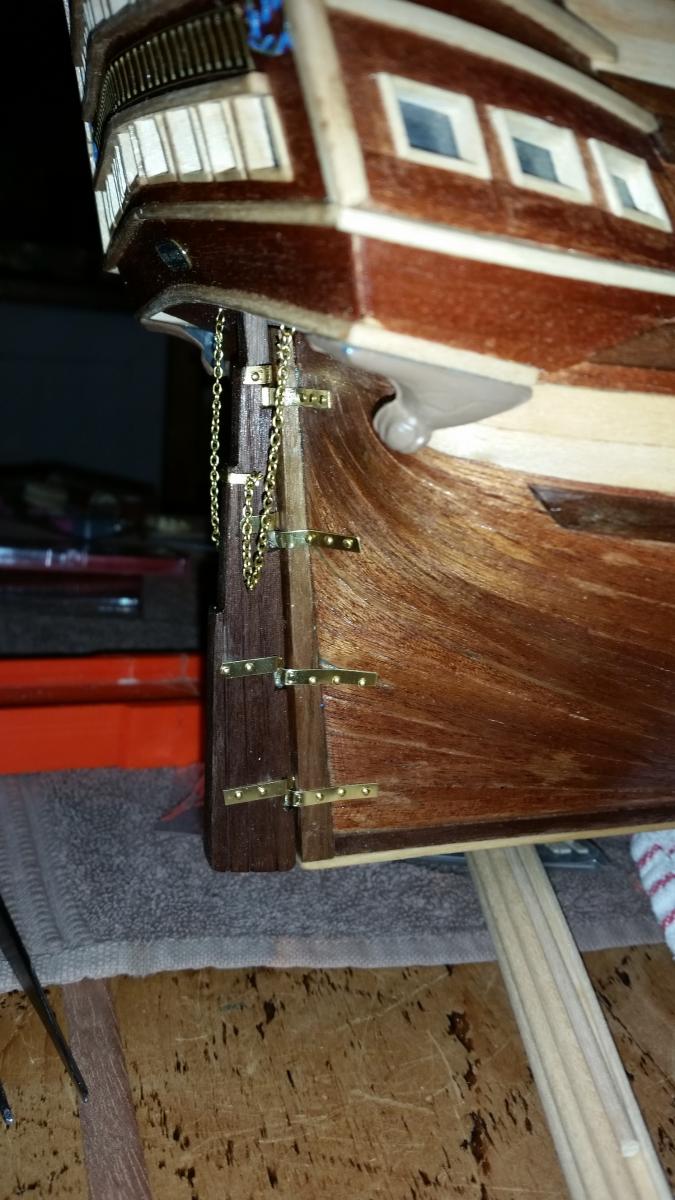
)worked on the rudder - amazed the difference it makes to the overall look of the stern - chains are too long right now, I'll get around to adjusting them in the future....
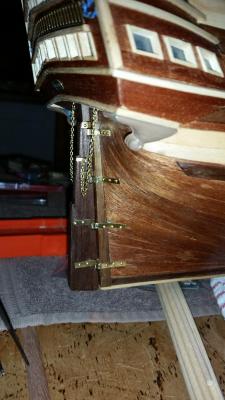
added the bow doors and figure head....not sure why my camera doesn't like taking pictures of painted parts.....I'm not suggesting my painting is great.....but it looks much nicer than this photo makes it look lol


added the side reinforcements and the steps.....I really like how the steps turned out, but they are a bit squashed and out of line at the top - a symptom of me moving the gun-ports off-plan to avoid the BH's .....so many lessons to learn, I sure hope I remember them all for next time


assembled some of the chains, and was really chuffed with how they looked....until I saw them in the photo close up, I might have to try and re-make most of them a bit tidier....
added some of the deck furniture and riding bits....and what I assume to be the chimney for the ovens....or maybe it was the blacksmiths forge?

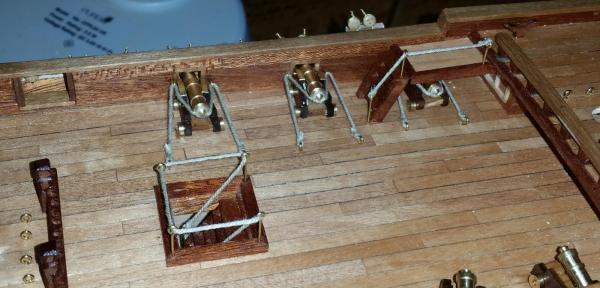
right now I'm experimenting on how to rig the upper deck cannons.....I think it needs a rope attached to a bolt on the deck at the rear....but now quite sure the best way to deal with the slack on the main rope attached to the bullwarks....

That's all for now,
Waspy
- Seventynet, MEPering and BLACK VIKING
-
3
-
-
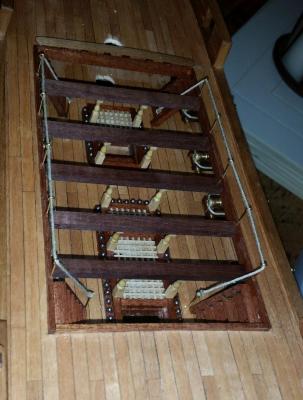
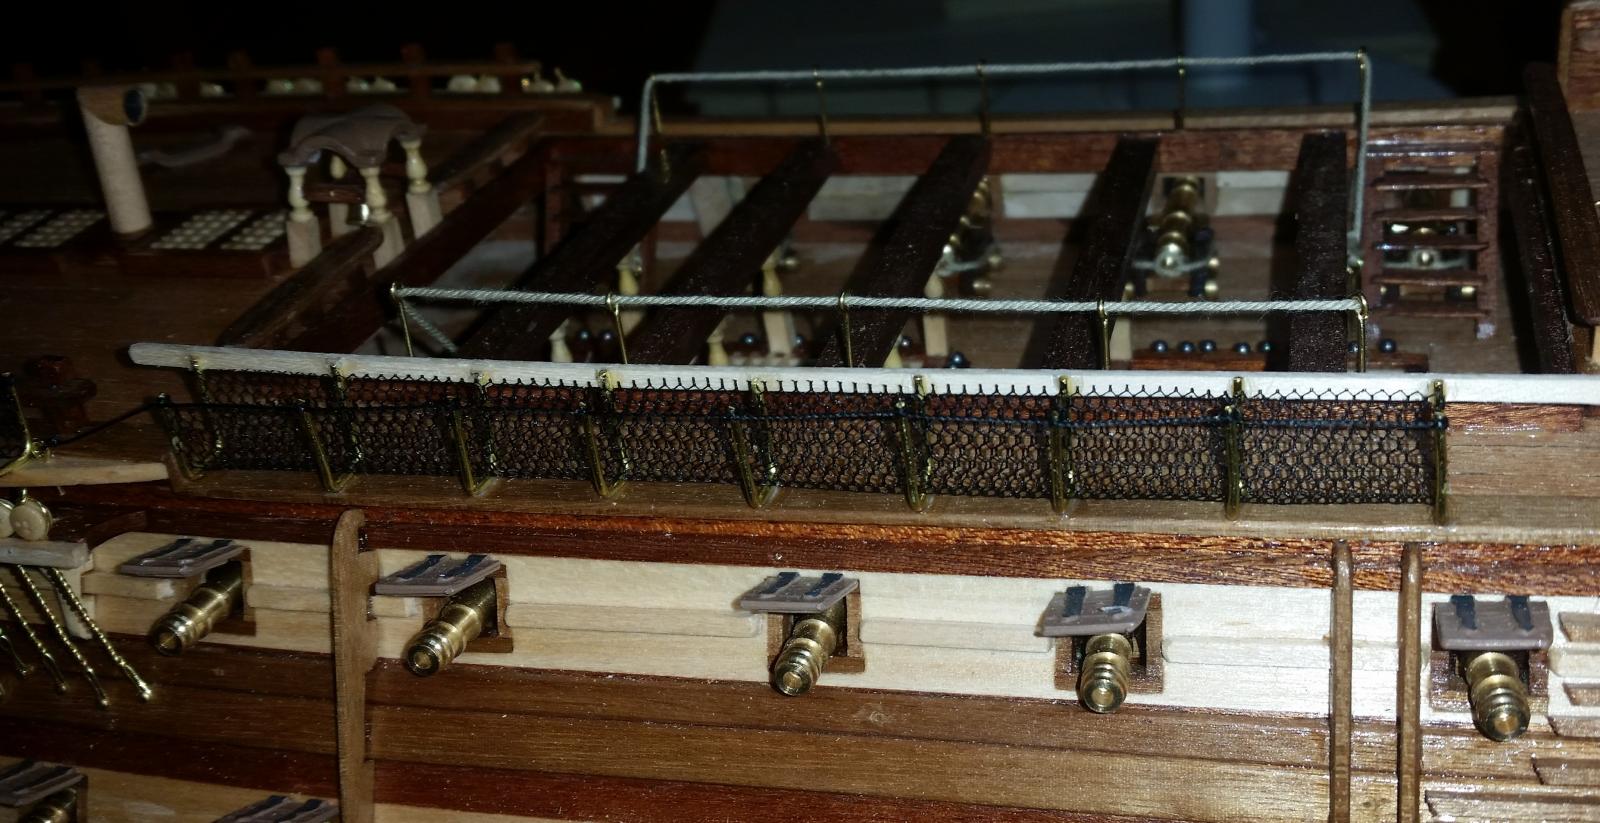
waist railings, beams and supports all in..... I'll cover the waist with something now to try and minimise the inevitable dust of the next year or so.....
-
evening all.
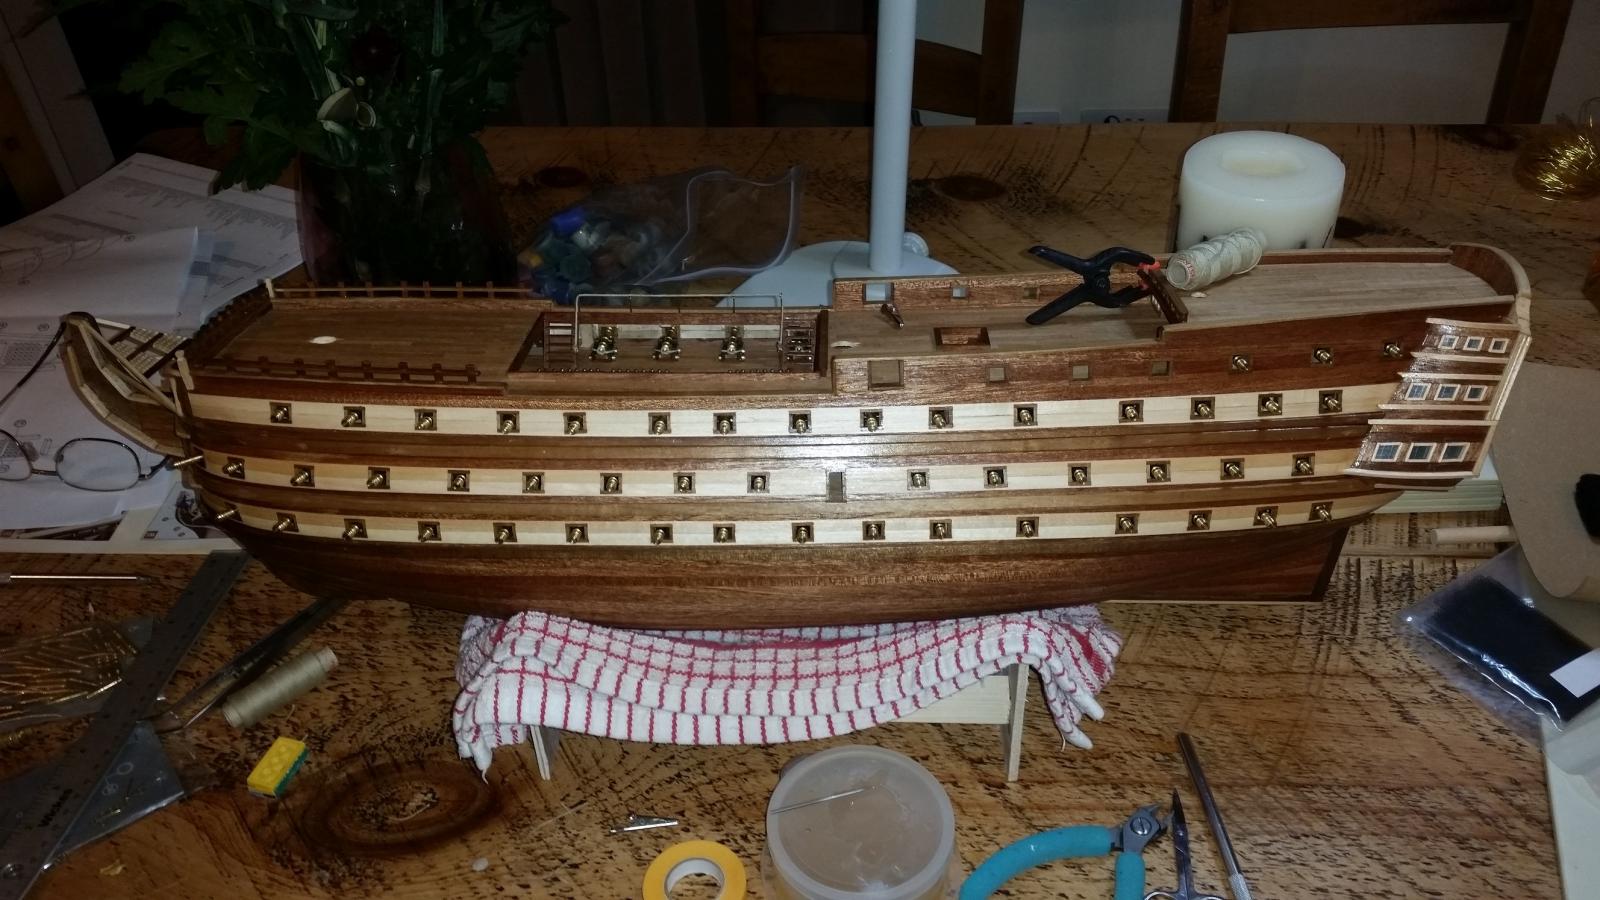
I've been a busy bunny and got all sorts done on my Victory, but I keep jumping from one part to another to keep up the interest....even if it's not logical to most of you perfectionists
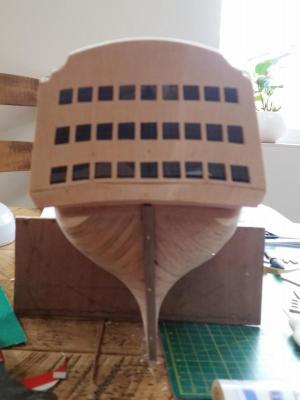
As you can see from the first photo, I have simplified the bow-detail a lot to keep it within my very limited abilities - certainly not an accurate model - but I still love it
I've assembled all my gun-deck cannons and added a little rope detail - and started on the steps and detail of the waist
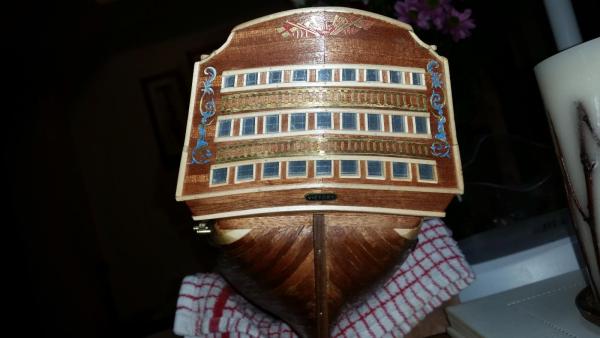
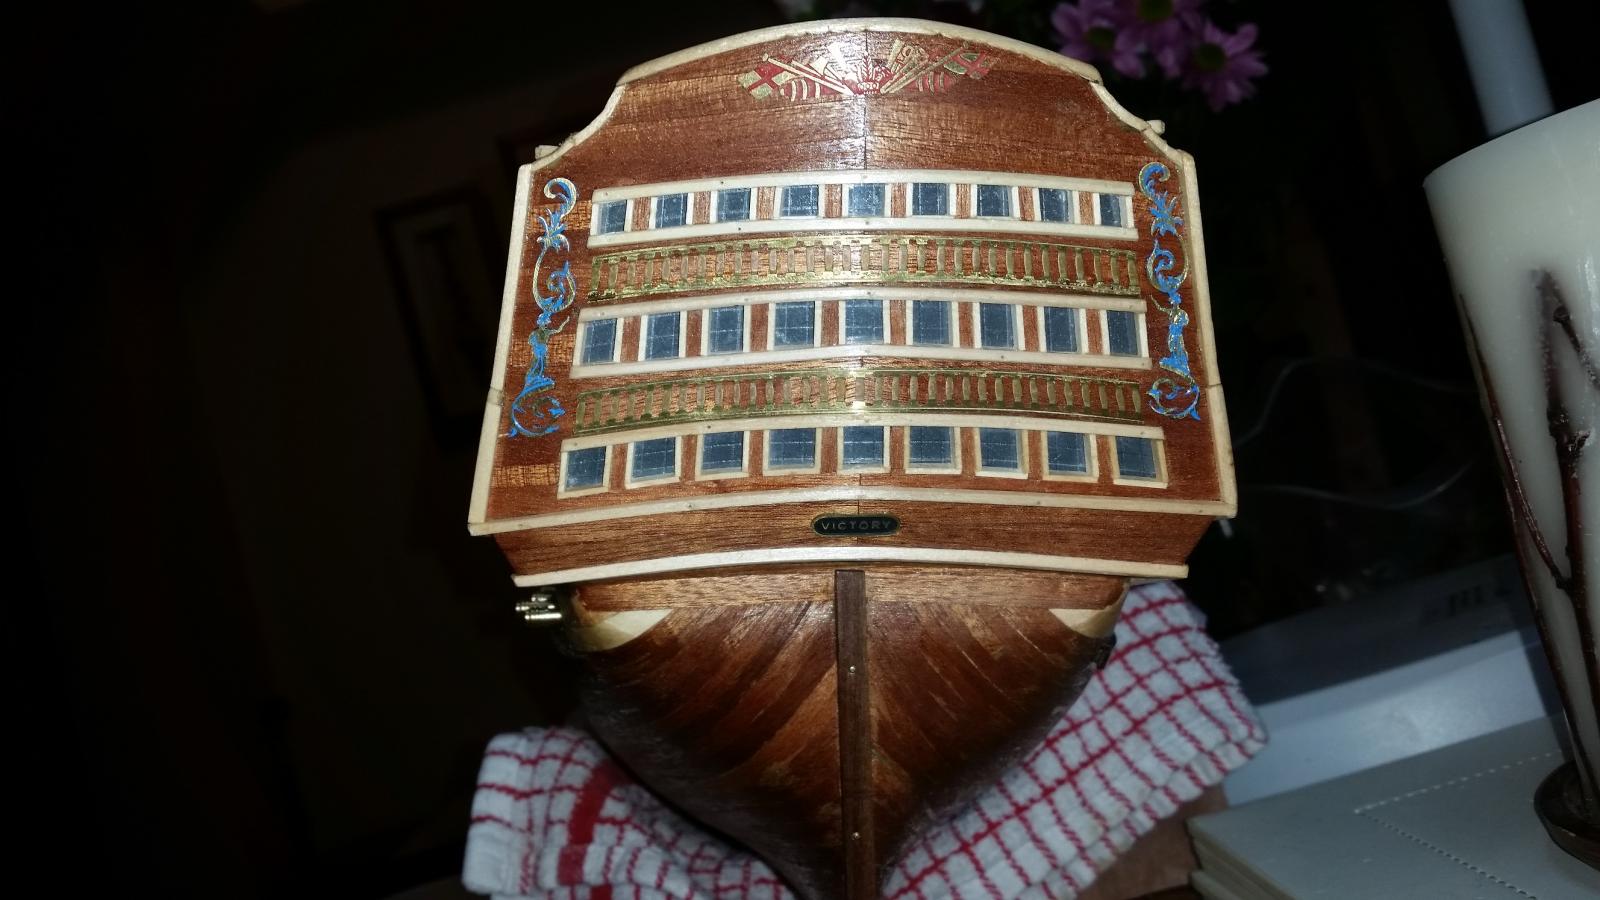
I worked on the transom and windows some time ago but I don't think I posted any pictures. I've now added the etching details. (don't know why the camera makes the sides look so blue! it looks awful in the picture but in real life the blue is just very fine lines picking out the detail - didn't matter how many photos I took, they all came out blue like that?)
and I've given all the hull a couple of coats of button polish - I'm really loving the colour of the different woods now

- MEPering, challenger86 and Seventynet
-
3
-
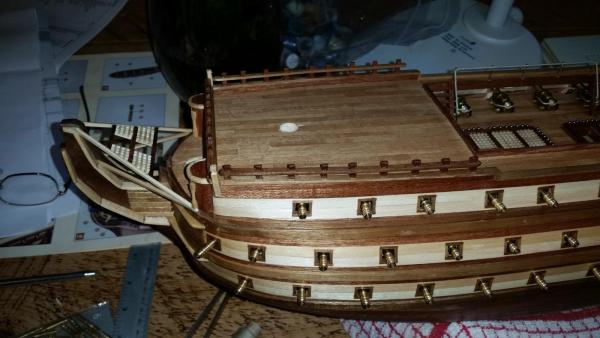
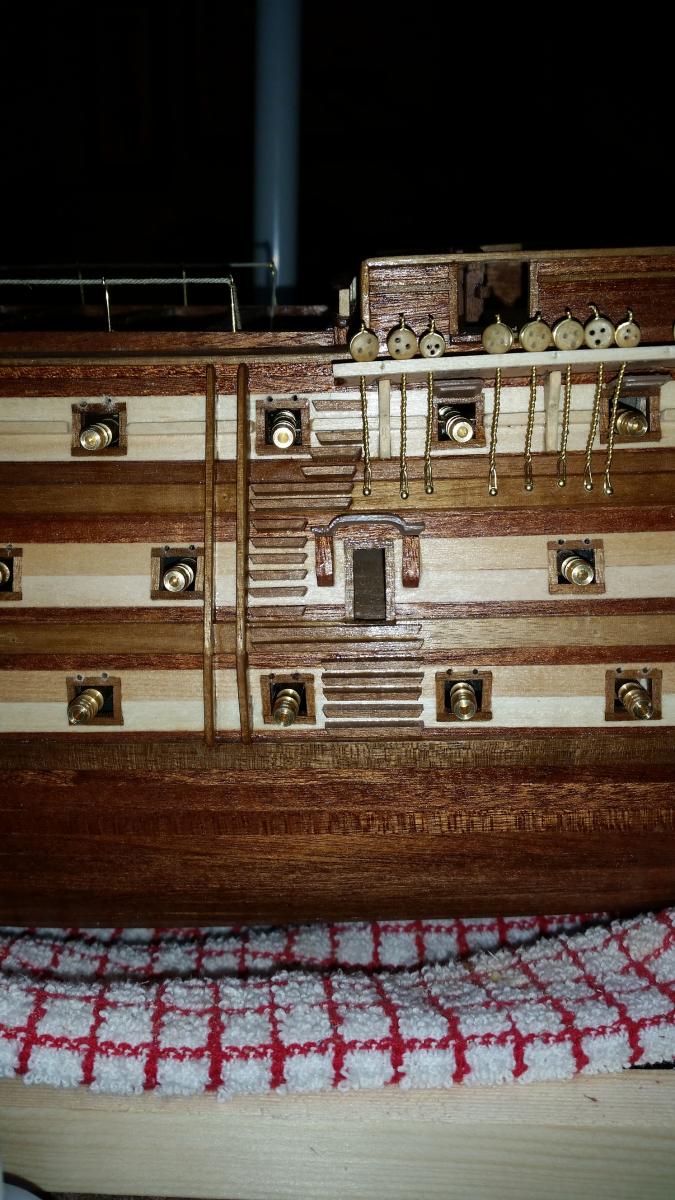
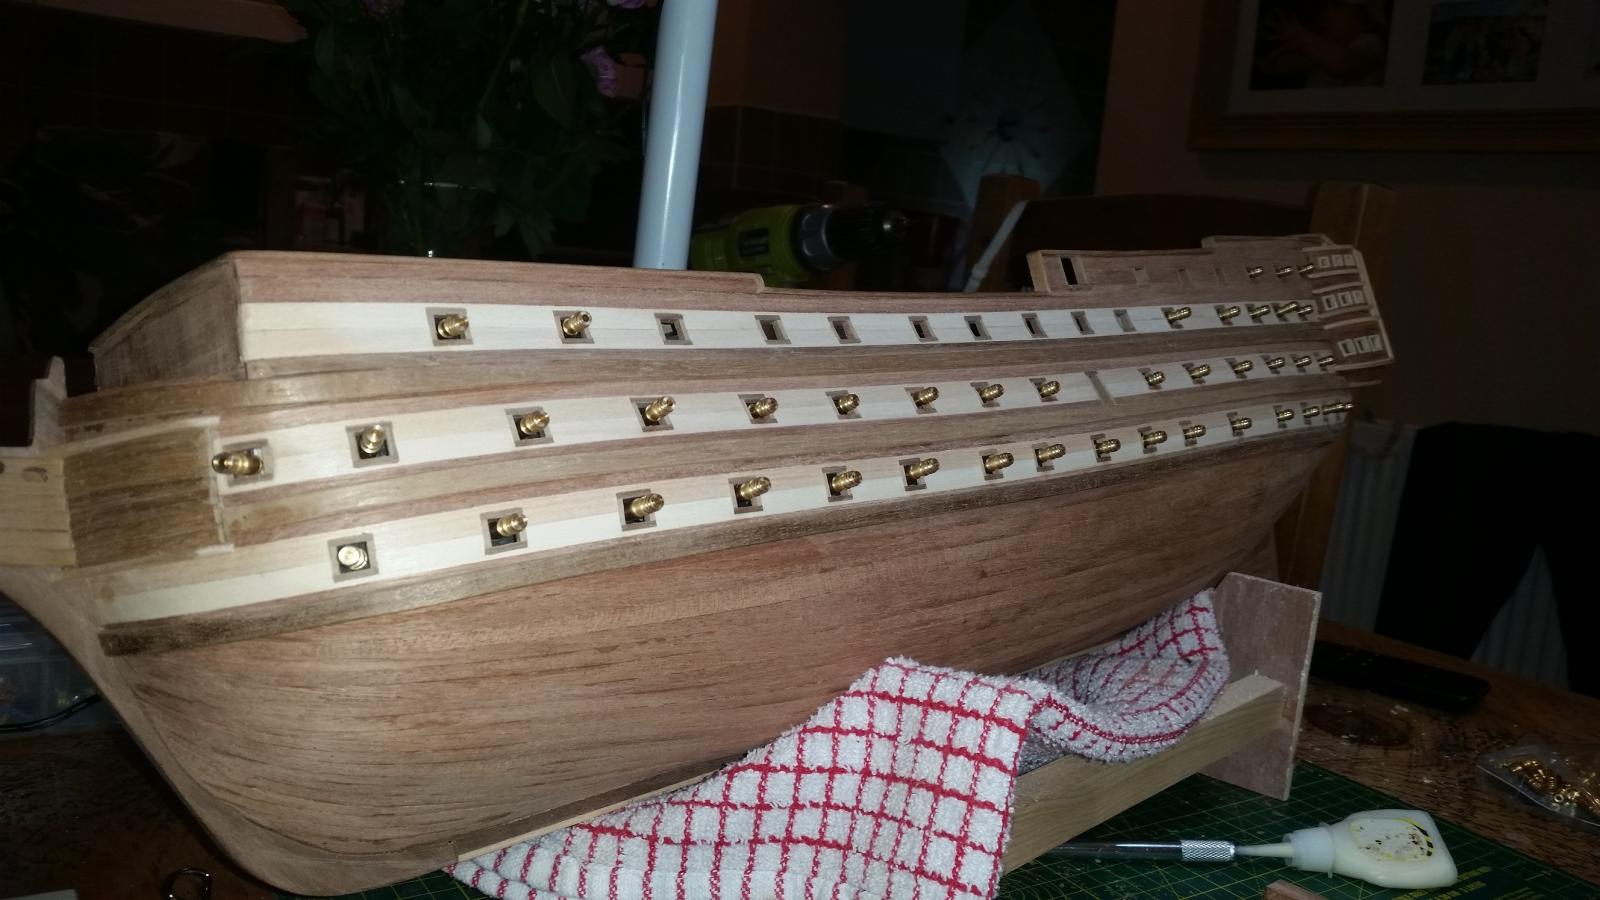
gunport update......
All gun ports complete....yay!
managed to get them lined up on this side so only 2 or 3 have ended up over a bulkhead. Some of the back-boards didn't line up, but for those that didn't I managed to glue some extended panels onto the existing back boards before drilling the holes for the false cannons. Although that means some of them will be poking out 2mm further than the others....at least I can have all the ports open and filled with cannon on this side
Waspy


- Seventynet and MEPering
-
2
-
-
gun ports all, marked, cut out, lined and sanded on one side. lots of mistakes and glitches....but plenty of lessons learned for the other side. As the other side is the one that will be finally displayed, I shall cover all my mistakes by having the gun ports closed on that side
Most importantly, I learned that
1. It's better to move the gunports 'off-plan' slightly so as to avoid the bulkheads as much as possible (why the model designers didn't take bulkhead position into account during design I will never understand!) specially in the waist area
2. The forstner bit works very well, but it lacks delicacy....at times it needed too much pressure to get through and as a result I damaged several areas of the back boards as the drill bit pushed through. It also really struggled to get though the double layer of planking on the bulwarks. I actually found using a 2mm drill bit around the edges then cutting to join the holes was much more accurate and controlled, So I will be forsaking the forstner bit for the other side entirely.
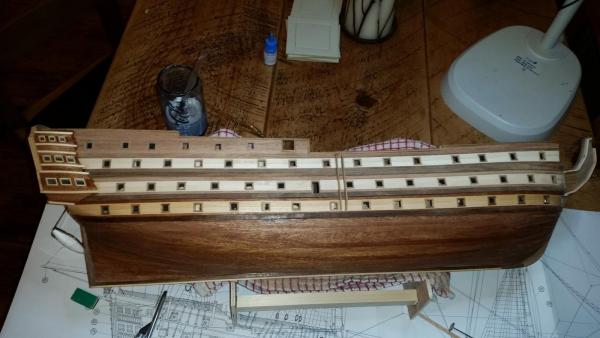
All holes marked up on the other side ready for drilling.....I really hope they line up with the back boards better on this side....if not I will have to try and extend the back boards with key-hole surgery through 10 mm square gunports! not something I like the idea of, but the displayed side HAS to have all it's cannons run out!
Waspy
- Seventynet and MEPering
-
2
-
thanks for the tip on the Forstner bit.......works great
-
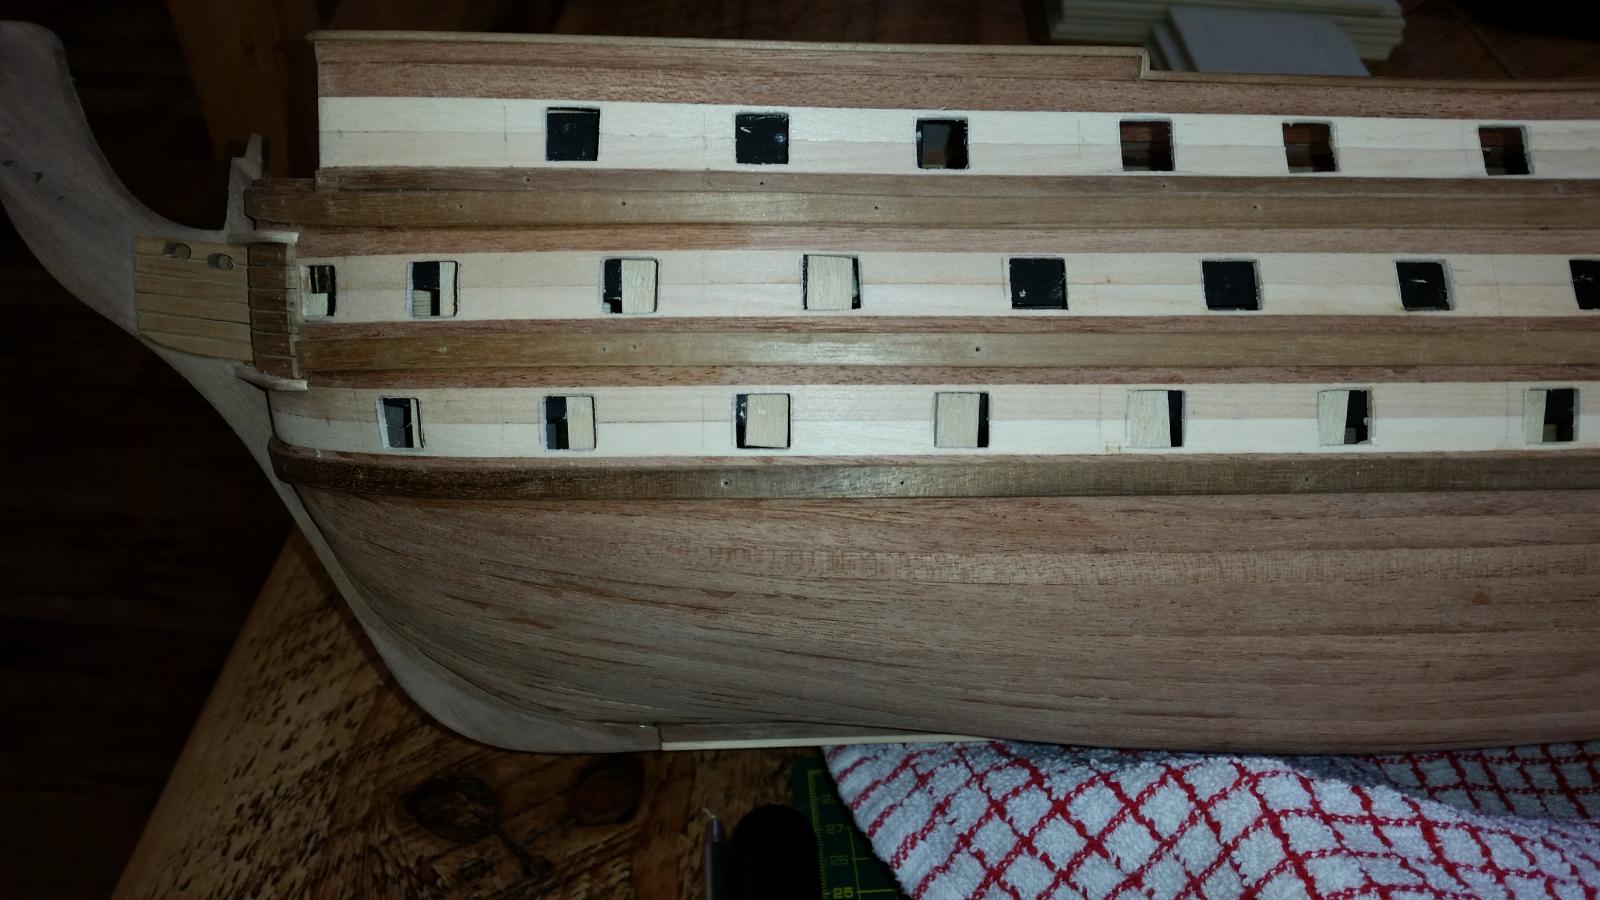
Some VERY mixed results while marking and cutting out the gun ports......
I marked the centre points from the plan: no problem.
I then used a 10mm forstner drill bit to cut out the opening. On the whole that worked out really well, but it needs quite a bit of pressure on the drill so needs great care not to go through to the backboard for the false cannons as it gets through the planking.
It's then a simple matter of a sharp blade to carve the corners out to turn the circle into a square. Once the trims are in and sanded I'm really happy how they look.
The 2 huge problems I have are 1. some of the gunports line up with the bulkheads, as you can see from the picture. While I have managed to carve out some of the bulkhead, I'm not sure how I'm going to carve it out to the correct depth to fix the false cannons in those ports....
And as you can see from highlight number 4 .... the lower gun ports don't line up with the backing boards for the false cannons.....I have no idea how or why that happened - I can't see where I have deviated from the plans for that to happen - but the only solution is to have the gunports closed on the lower deck......which is very disappointing

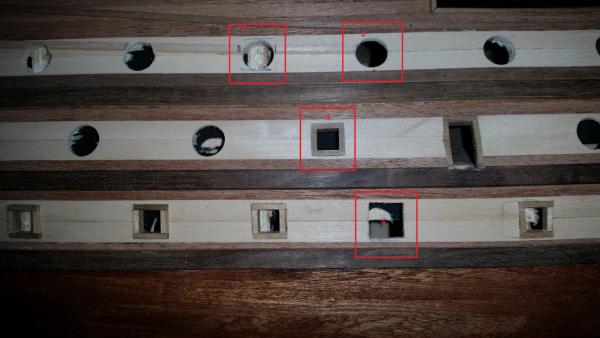
If anyone has any bright ideas....do let me know
Waspy
-
spars and cannon looking great Paul!
-
Hi Ian
The constructo version comes with the upper gun deck in 2 halves. Once I fixed the deck I layed my first plank right down the middle covering the joint....no problems. I can't imagine it would be a problem for the Caldercraft.
Waspy
- Canute, Seventynet and mtaylor
-
3
-
thanks challenger, I had already noticed your ideas for cutting out the gun ports and am planning to use the process
the constructo version only has whole cannons in the waist that I can still access, the rest of the cannon on that deck are false cannons.
-
thanks Ian.......gunports.....the idea of marking them out correctly is worrying me enough....let alone cutting the buggers out!
Waspy
-
A very productive few days - amazing what can be accomplished when you have the house to yourself!
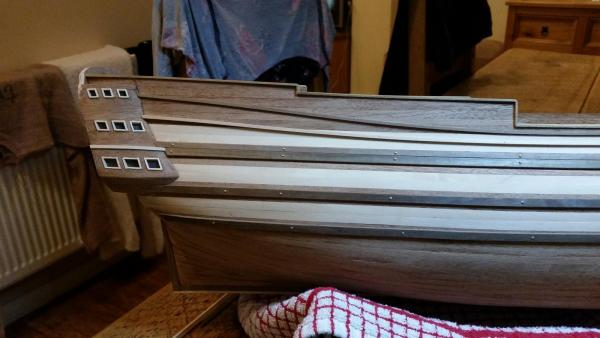
bow and stem reinforcements, transom, one side of the stern galleries and one side of the wales.
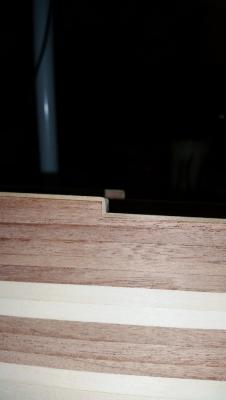
For some stupid reason the instructions call for blue paper behind the windows and the clear acetate to be cut into each separate window! I did away with the blue paper which looked awful, painted the back black and sandwiched a single piece of acetate between the 2 transom pieces.
going to get a bit busy at work for the next few weeks but hopefully I'll still find an hour or 2 in the evenings.
Waspy
-
bulwarks and gallant rails all fitted.

I cheated a little with the gallant rails: the plans called for some very sharp bends on some of the corners, but the mazonia didn't want to bend cleanly, so I squared them off, mitred them and then sanded the mitre to try to simulate the bend instead - certainly worked out neater than the bend did
-
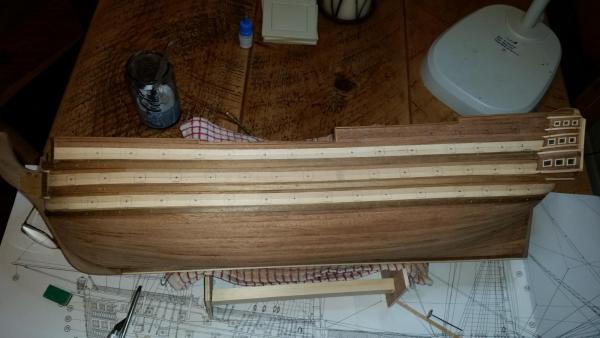
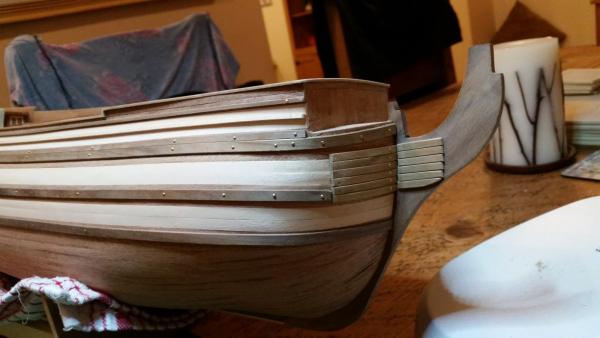
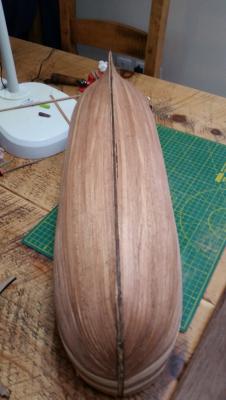
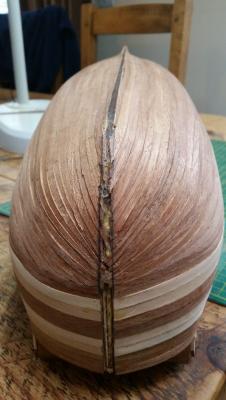
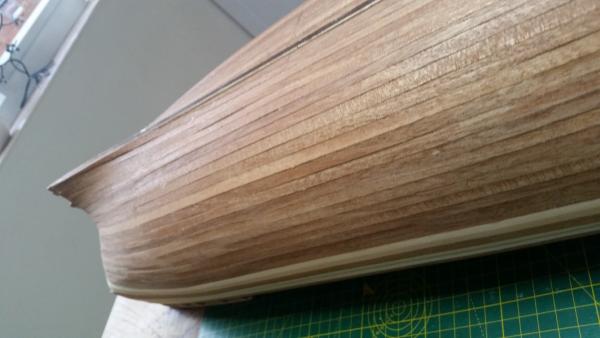
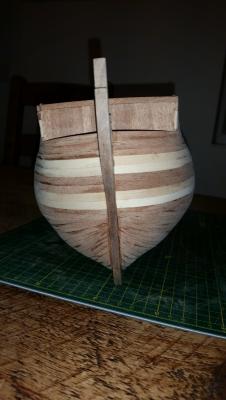
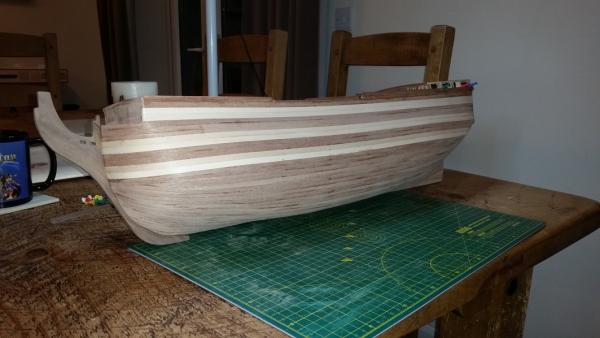
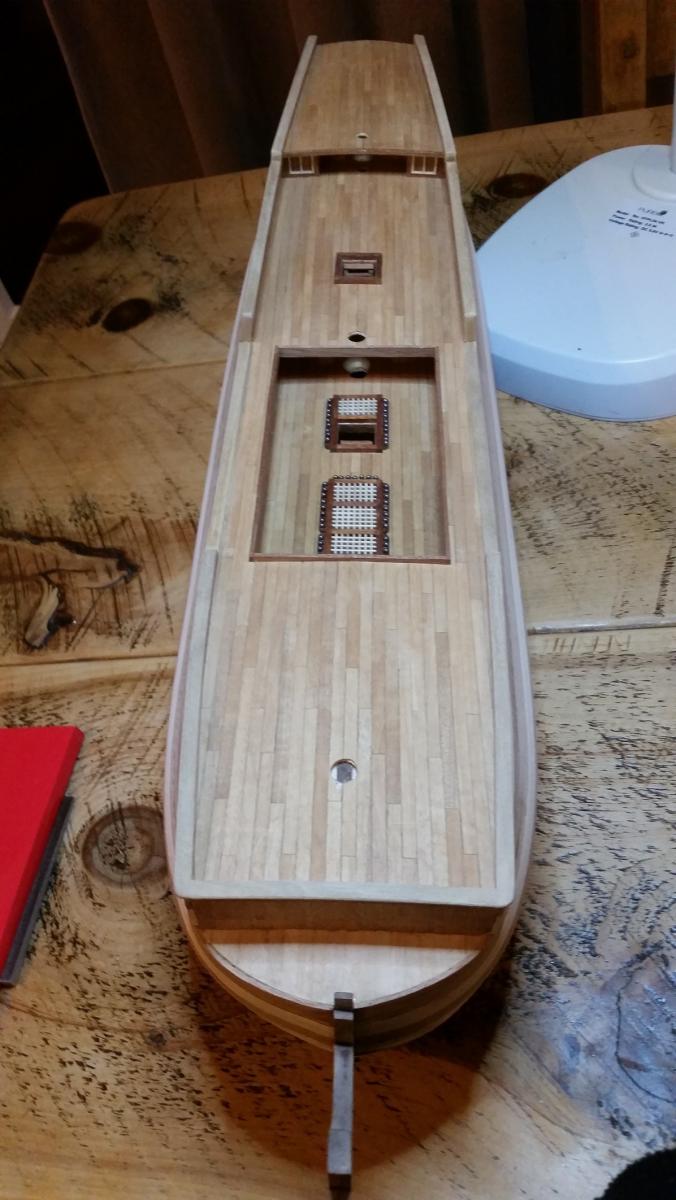
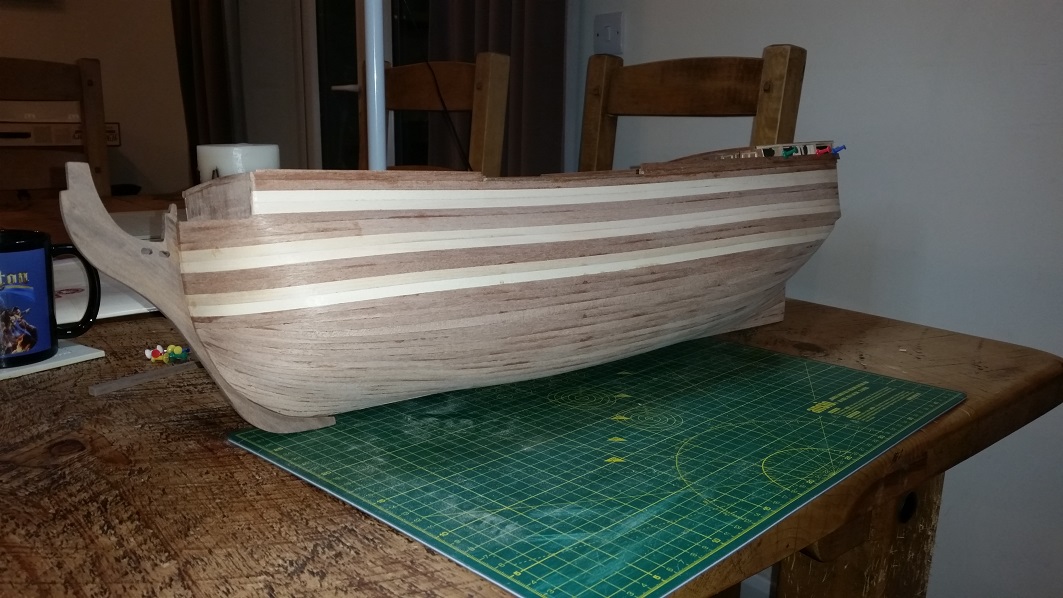
Planking finally finished!!
I always knew that planking was going to be a major challenge. There is a limit to how much reading up on the subject beforehand can teach you (at least for me) I learn by 'doing' and making mistakes.....and boy did I make a ton of mistakes.
The most important mistake was being too 'heavy-handed' while fairing the bulkheads, which as you all already know was the root cause of a lot of the other mistakes to follow.
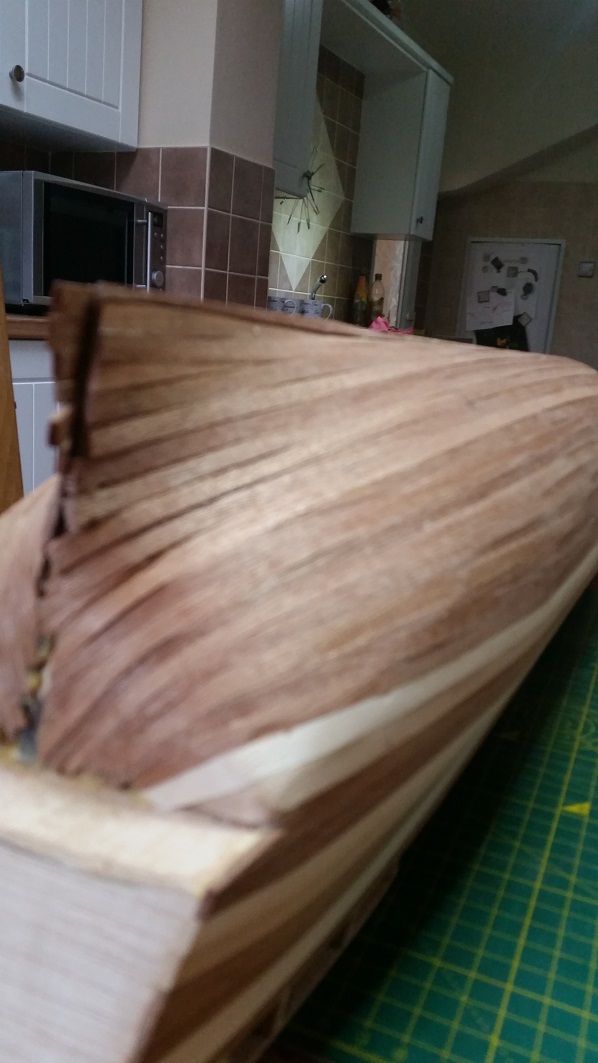
I wasn't going to post any close-up photos of my work pre-sanding because, compared to most of the build-logs on here it's extremely rough and shoddy looking! .....but then I realised that new members coming here and just seeing perfect workmanship is actually quite intimidating and to see some photos of work done very wrong.....might make them feel a bit better about theirs
the bottom 2 photos show the same planking after a very rough first sanding and the stem attached.....it will never win any awards, but I know by the time it's all sanded properly and varnished it will still be a model that I'll be proud to show my kids! and at least I know where I went wrong for next time......except that by the time I've finished this one and started another, so many years will have passed that I will probably forget most of the lessons learned
now onwards and upwards to the bulwarks and gallant rails.....

- Rainbow, Seventynet, Kevin and 1 other
-
4


HMS Victory by waspy - Constructo - First time modelling with wood
in - Kit build logs for subjects built from 1751 - 1800
Posted · Edited by waspy
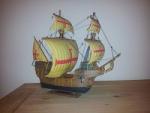
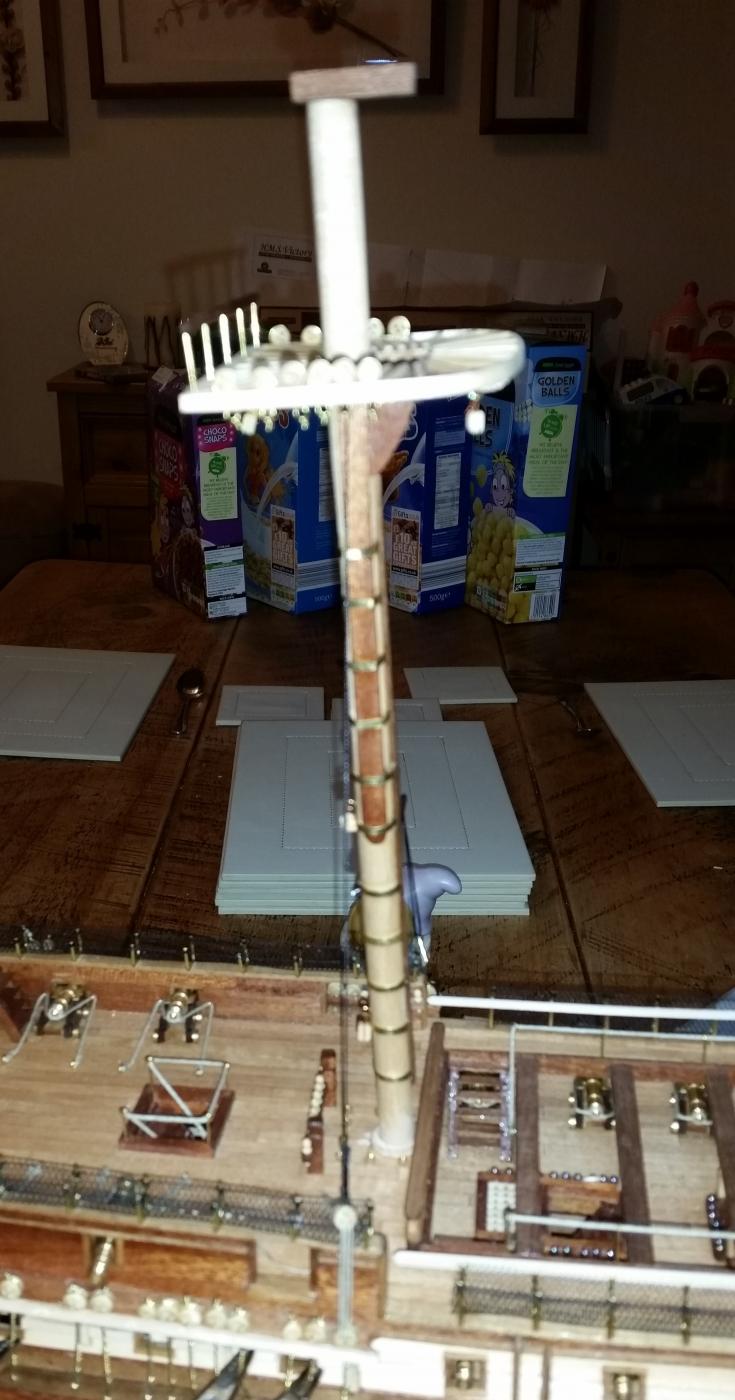
With the nice weather outside, progress has slowed considerably, but in the last few days I've fixed the main mast, attached all the lower main shrouds and have now started on the ratlines.
That now means I've got plenty to do when I've got a spare 5 minutes that don't need all my tools out.....just thread, scissors and tweezers
*edit*
just seen the pictures and a couple of the shrouds have twisted at the top.....gonna have to address that before any more ratlines go in....
Waspy