Check out our new MSW Sponsor Innocraftsman
×


mikiek
-
Posts
2,276 -
Joined
-
Last visited
Content Type
Profiles
Forums
Gallery
Events
Everything posted by mikiek
-
 That beech could make a cool deck me thinks. I'm curious how it takes stain. Natural might do very well. I would also like to find something besides walnut. I ordered 5 different species and will be cutting sticks myself.
 -
Thank you all for the likes and kind comments. If you knew the history between the owner and my dad (both in photo) and our families you would know how special the moment was. Those two go back literally to before I was born. And I'm no spring chicken. Most folks don't keep connections like that.
-
Owner got his boat back today

-
David - are you able to determine what kind of wood the hull is?
-
Looks like mostly sanding to me Tom. Be careful with the filler. It's easy to fill all the grain and even the joints between planks. You can lose the "plank effect" if your not careful. It'll get too smooth. None of that work was done perfectly back then. Something you reminded me of with your bowsprit. When you start putting all the cleats and stuff on especially at the foot, the bowsprit won't slide thru the opening anymore. Not enough clearance with everything glued on. So make all those parts, but be careful what you glue on. If the part is inside the bulwark, don't glue it until you have permanently fixed your bowsprit into the bits. Looking forward to seeing some paint! Stock ip on the masking tape.
-
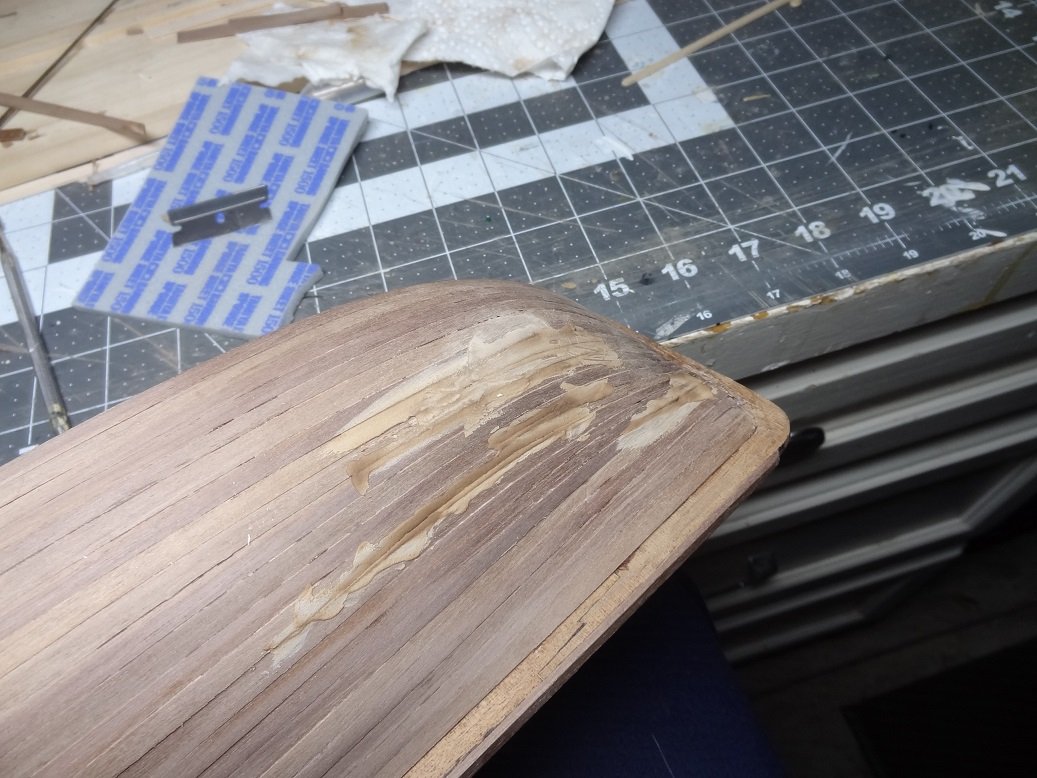
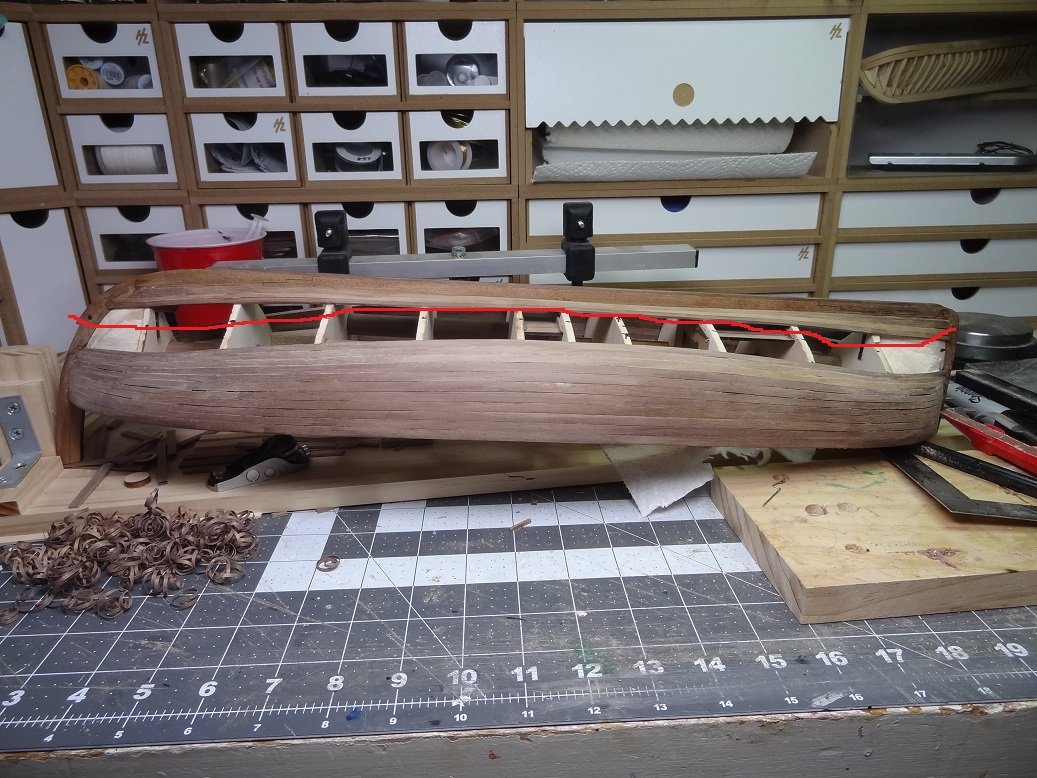
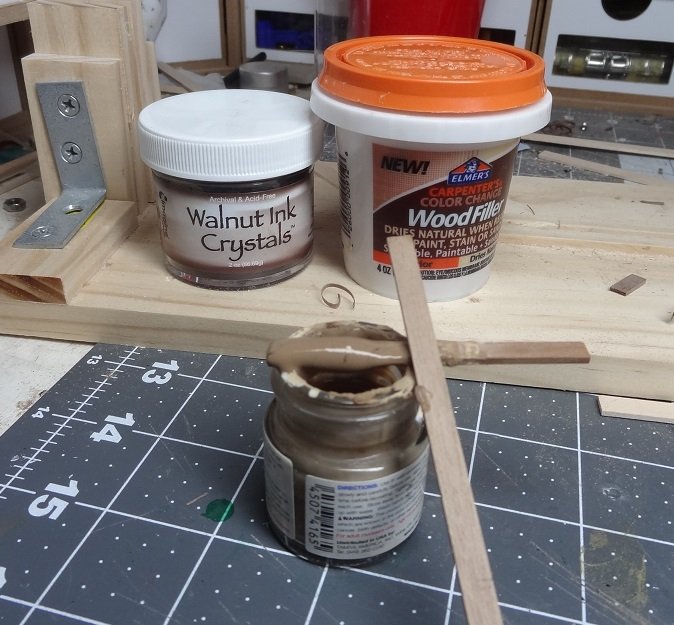
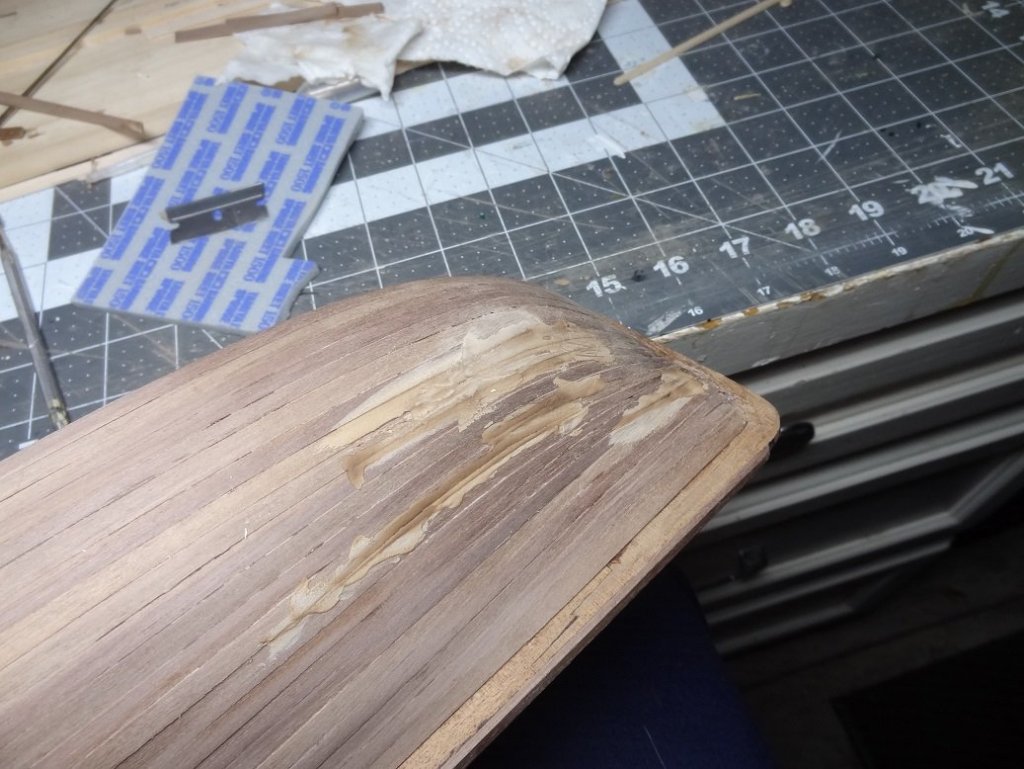
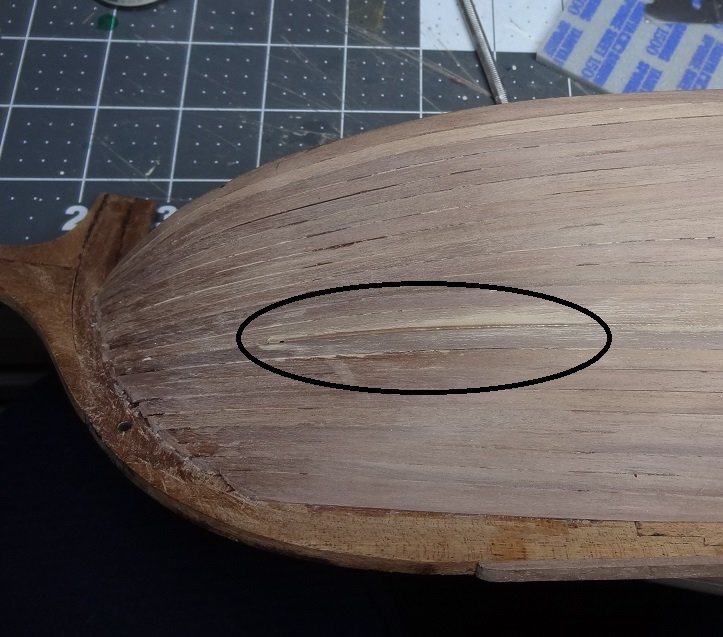
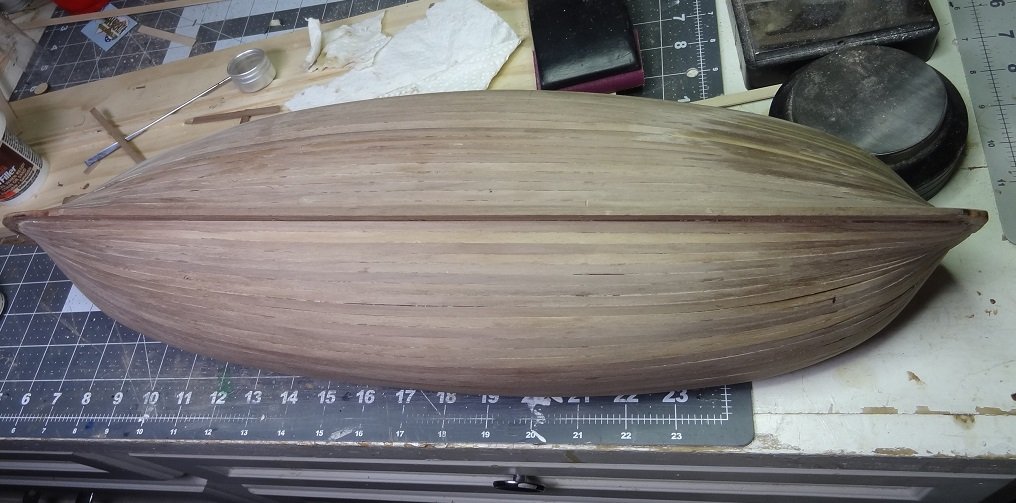
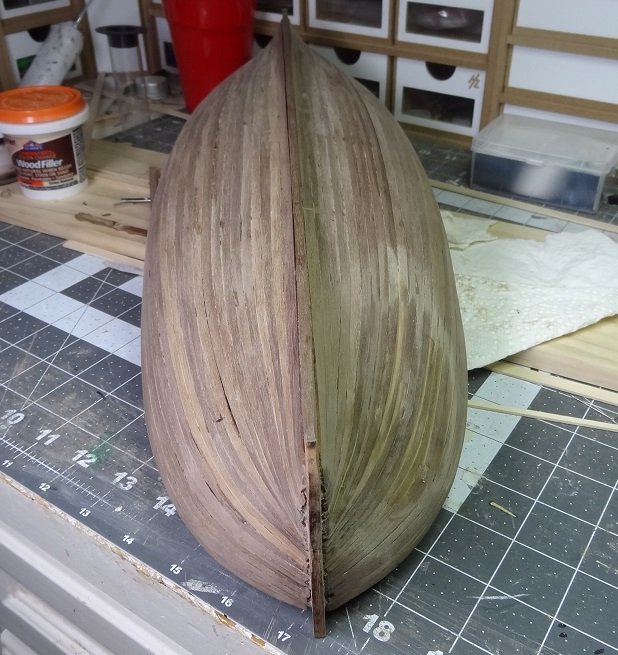
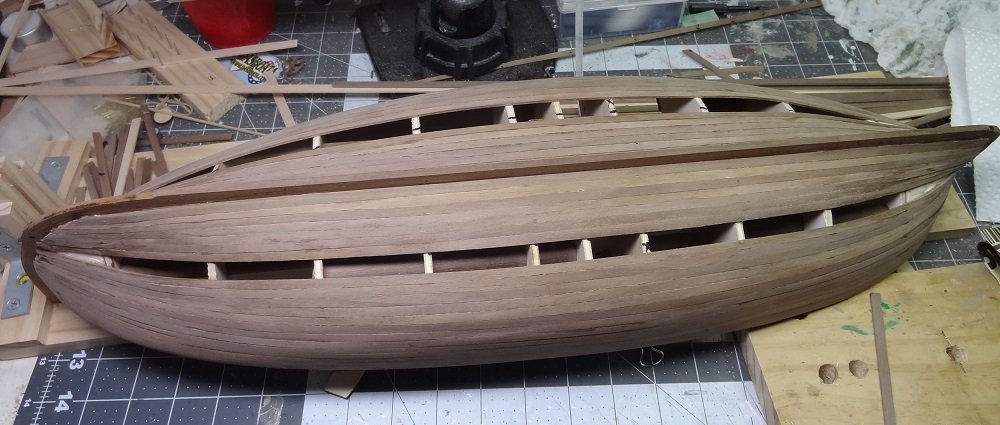
Finished the hull and barely stopped to admire. The last few strakes dropped right in. And I won't mention the div*****s. I do have some small gaps that are more than I can tolerate however. So I dived right in to the repair work. Actually, it is some experimentation. I haven't given up the idea of finishing the raw wood rather than painting. My gripe is the spotting left from glue and filler when I apply stain. Glue barely absorbs it, filler usually either absorbs too much or not enough. I'm left with discolored spots on the hull. Well glue is glue and all you can do sand down past it. Filler on the other hand has possibilities. I've posted about mixing certain fillers with a bit of water so that you make a paste and can apply with a paint brush. I'm going beyond that this time and attempting to color the filler the same color as the walnut sticks used for planking. Honestly, I think it might work. I'm using Elmer's filler and walnut crystals for the dye. The ratios are all by eye so if you try this at home you're on your own. After applying to a couple of spots the first thing I see is the color lightens up as it dries. So what matched well when applied ends up lighter than desired. I added some more crystals to darken. Now the mixture looks darker than the wood when applied. I think the key will be to only apply where it is needed and not slather the entire hull. Before it dried completely I took a wet (yes wet not damp) rag and wiped the excess off the hull surface. I am only trying to fill the gaps between planks after all. Here's a spot after that. Not too bad. I've been griping about having to glue the strake ends straight to the stem & stern. In several places this left an unsightly gap so I'm trying to fill those as well. And I guess I should add a few obligatory pix of the planked hull. Gotta get back to the shop to wipe down the excess filler......
- 204 replies
-
- 4
-

-
- trajta
- marisstella
- (and 1 more)
-
I guess I'm used to multiple planks per strake. Yeah, it's more effort to cut the sticks, but IMO they lay a lot easier and quicker. This is my first shot at using single stick walnut for a strake - I'm not overly impressed. Missing the rabbet didn't help. NOTE TO SELF: Always make a rabbet even if it's not called for.
- 204 replies
-
- 2
-
-
- trajta
- marisstella
- (and 1 more)
-
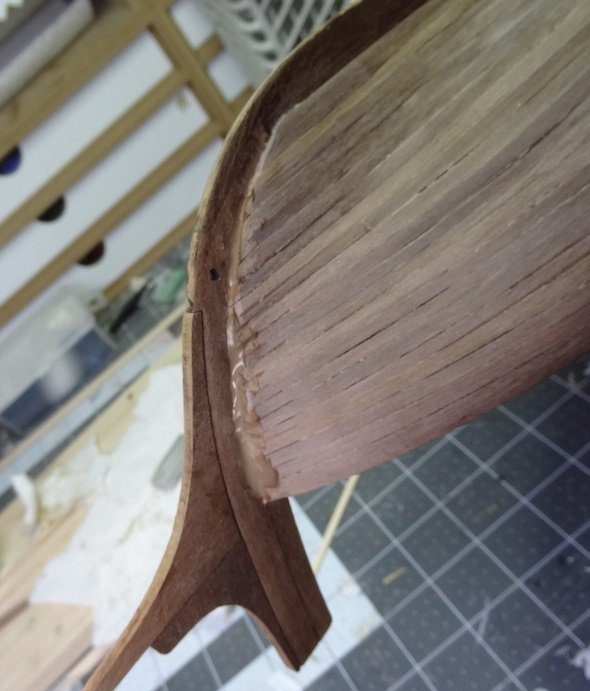
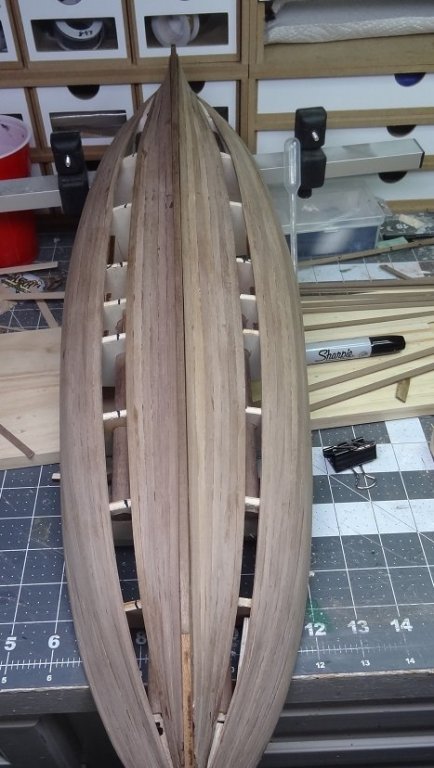
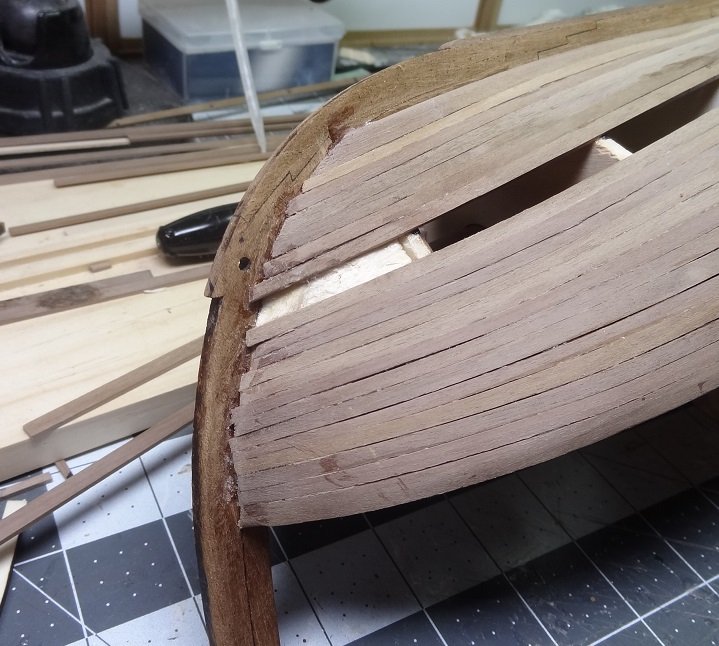
Yes she still lives. Hull planking has been very slow. I've had a tough time getting strakes glued at the bow & stern. Clamps are next to impossible to use there, so it's been the finger clamps which really slows things down. I was getting 1 maybe 2 strakes per night. As the pix will show, there will have to be some filling of some sort at that point where the strake ends come into contact. That will have to be stuffed in between the strakes and the stem or stern post. I still have 5 strakes left to lay, but I always like getting to this point. I can already tell the last few sticks are going to fit like a glove. The dividers came thru again. Not a single stealer or any other partial plank. So I'm kinda proud of that. There will have to be a decision made as to paint or stain. A few strakes (some of the early ones) have enough of a gap that they will need attention. I hate using filler on a surface that I want to stain. I've tried all the tricks for that but always end up with the "filler spots" when the surface is finished. I hate painting over walnut but that may be where I'm headed.

- 204 replies
-
- 4
-
-
- trajta
- marisstella
- (and 1 more)
-
Agreed Doug - while some eyes would notice those things, most do not. It took some time before I realized it. The cutaway build I did is very attractive despite the design drawbacks. Yours will come out nicely I'm sure of it.
- 99 replies
-
- 2
-
-
- essex
- cross-section
- (and 1 more)
-
Doug - I found scale to be all out of whack on the cross section I did. A handrail that would have hit a scale person right about the chin. I like the brass rails.
- 99 replies
-
- 1
-
-
- essex
- cross-section
- (and 1 more)
-
Tom - that barrel almost looks like brass. Mine were pewter. If you're not satisfied with the height, you could make some slightly oversized wheels. Don't forget the quions too. Depending how far you shove it under the cascabel it will give the muzzle some additional height. It doesn't look bad as is.
-
Thank you Antony. I believe that's it.
-
When Clamps Don't
mikiek replied to mikiek's topic in Building, Framing, Planking and plating a ships hull and deck
Hi Mark - yes it seems like I am down to the ole finger clamps. I don't know if it's the cold or what - it's about 50F in the shop - but the CA (medium) is not setting even after a few minutes. Hence the need for something to hold the end down for 15-20 minutes while the wood glue sets. -
Working on my hull planking. This build is a little different in that it doesn't call for a rabbet. Sure I could have added one. I should have added one. I'm left gluing the tips of planks to the stem & stern and I'm having a tough time getting a clamp to stay put there to hold the plank. It wasn't too bad at first starting at the wale and working down. Now I'm about 2/3 finished and I can't get a clamp to hold in place. A rabbet gave the stick something to bite into, to wedge against. I was hoping some of you might post a pic or two showing how you do it.
-
I think I've heard of that. I wish to heck I could remember what that slope is called.
-
Very cool story David. It's nice to know the history. The restore I did has what sounds like a similar deck. One solid "slab" with the planks drawn on. Maybe an easier thing to do at the time. I imagine getting a consistent batch of 3/32x1/16 sticks might have been a challenge 60 years ago. For sure the Byrnes saw wasn't around yet
- 40 replies
-
- 1
-
-
- virginia
- marine model company
- (and 2 more)
-
Bulwarks looking good Tom. Getting a little ahead but based on your decisions and while I'm thinking of it. If you glue your structures to the deck, don't forget the centerline slope (can't recall the nautical term for that). Your deck will slope from the centerline down and out to the waterway. The bottom of your structures need to account for that otherwise they will rock like a see-saw. They will be sitting right on the fulcrum.
-
That reminds me - keep a lookout as you break it down. Try to look inside places you might not break down. On my recent restore I found the manufacturer's stamp on the deck underneath the skylight structure. Megow's Models. Apparently, they stopped making models in the late 40's . You never know what you might find.
- 40 replies
-
- 3
-
-
- virginia
- marine model company
- (and 2 more)
-
Was it thread? Some prehistoric Amati style rope? You are quite fortunate to get the parts & plans. That should save you a lot of photography. You mentioned a friend gave this to you. Is he the builder? If no, does he know the builder? I'm just wondering about the background of the build.
- 40 replies
-
- 3
-
-
- virginia
- marine model company
- (and 2 more)
-
Looks like fun David. I just finished a 75 year old restore for a family friend.I know what you mean about the dust build up. Oddly enough, saliva makes a great cleaner and dissolved old glue very well. I'm curious if you can determine what kind of line was used for the rigging? Mine was all black (even the running) and it looked very similar to todays braided fishing line. I was able to salvage almost all of it.
- 40 replies
-
- 3
-
-
- virginia
- marine model company
- (and 2 more)
-
I believe they call that "Natural" stain There is such a thing believe it or not. It's a Minwax color (or non color). I use it quite often. No color, it just gives kind of a wet look. Do you not have any thinner? Add a little to what you have left.
- 228 replies
-
- 3
-
-
- gunboat
- model shipways
- (and 1 more)
-
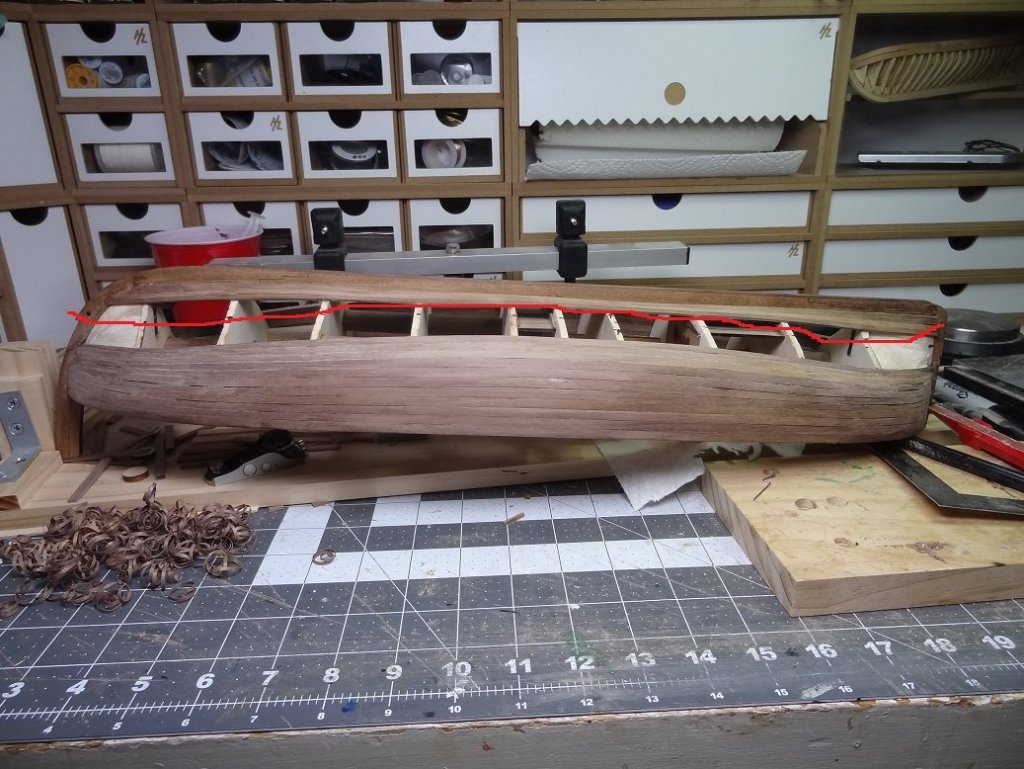
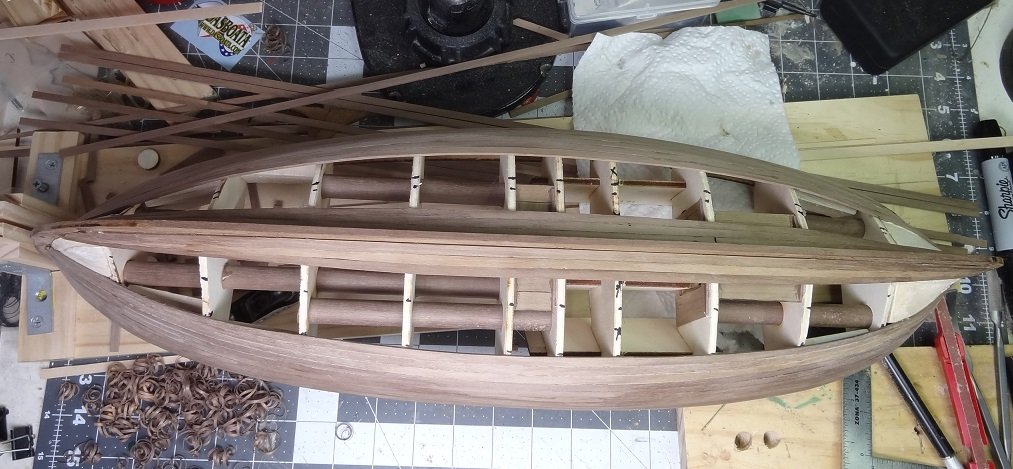
Two and a half bands done now. It's so weird seeing them on the frames. With the hull upside down and looking at the hull from above, the unplanked area has a perfect football shape. As I would have expected. However from the side you can see they run all over the frames. I'm not concerned, the dividers tell me it's all as it should be. It's just funny what a 3D shape can do to things. I have recalculated the remaining space into 2 bands. Another easy thing to do with dividers. It actually worked out pretty good as the widest part of the gap looks to be divisible by the plank width. Four sticks in each band with only a little shaping at the outside frames. We'll see. I am struggling somewhat with the walnut sticks. More than a few have broken on me. Even with wetting and bending them first. It's also looking like I am going to have to work some magic with a few gaps. I hate using filler on material that will be stained - it always leaves spots because stain doesn't absorb as well as on the wood. I've tried the glue & sawdust routine - the results were not much better. I may go back and try dying the glue again. I did that once before but didn't take the time to get a perfect match. I was using walnut ink crystals for the dye so you would think (at least I would think) that a close match with walnut planking is possible.
- 204 replies
-
- 3
-
-
- trajta
- marisstella
- (and 1 more)
-
That's why I'm a boxwood biggot. If it only stained better it would be all anyone needs.
- 204 replies
-
- 1
-
-
- trajta
- marisstella
- (and 1 more)
-
Do a good inspection of your paint job on the waterways. Make sure it is what you are looking for because after you do the deck painting the waterways will be problematic. Actually I found painting any of the interior parts (bluwarks, ports, etc.) to be more challenging after the deck is in. It's hard to mask the deck and/or the bulwarks for further painting. I planked a deck frame outside the model so I did not have to answer the other question. One consideration I had as to when to install the planked deck frame to the boat, is access to the interior. We don't really have any interior furniture or the like with Niagara, but being able to reach in, grab some frames with a couple of fingers and turn the whole thing upside down is very convenient. As you start closing up the hull you lose that ability. I would think being able to reach in thru the deck area to grab frames to access the underside of the hull might be more helpful meaning you do the hull first. All that said there's no reason why you can't do both at the same time. You get tired of one, work on the other. Regarding your deck you do have decisions to make: 1. Will you make a nibbing strake? Your instructions talk about this. 2. If yes, you can make one at various levels of detail. What you decide here will have an effect on how you shape the bow ends of your deck planks. 3. Check the deck plan. You can see they call for a thinning down of the planks as they get close to the stern. It is questionable as to whether this is a modern day feature and if the original Niagara had this vs just straight old planks from bow to stern. Since it takes a lot more work to thin them down I'm in the camp that thinks it was straight planks bow to stern. They were in such a hurry to build Niagara. I did the thinning down method but that was before I decided to go for historical accuracy over current day. The plans are current day. If I had it to do over I would go with straight planks, just for the historical accuracy. 4. Will you cut holes (or squares) in the deck for the coamings or just make them and glue them on top of the deck? 5. What planking butt pattern will you use? There is a great article here that describes how to lay them out. You just need to decide how many strakes in your pattern. I went with 5. On a side note, You are about to hit the point where you will need to decide whether you want to represent current day accuracy (described in plans & instructions) or more historical accuracy. Since there are no plans for the original a lot of it is guesswork along with some common sense. The designer and leader of the effort even said that excellence is not required. Good is good enough. They were in a terrible hurry to finish Niagara and Lawrence, so I imagine anytime there was a design decision to make, the one that could be done quicker was chosen. They also realized the boats they were building did not need to last for decades. One battle was all that mattered. Either they won that battle and didn't need the boats again or they lost the battle and didn't need the boats again. With all that in mind, questions arise as to whether there were structures like the skylights on the original. If you look closely at the deck plans you will see that the structures are directly in the way of men using the capstan. Probably doesn't matter now - I'm sure most of the capstan functions are mechanized. But in 1812 - climbing over the roof of a structure while working the capstan would have been a PITA. It's quite possible that there was just grates to cover the openings. Paint is another consideration. And part of this was just personal preference. As I began painting with the specified colors, Niagara began to look like a circus wagon to me. Fire engine red. French's Mustard yellow. Way too gaudy. I ended up toning those way back for a couple of reasons. One, it is highly doubtful that those shades were even available in that part of the world in 1813. Erie PA. was really out in the sticks. The common red was much more of a boxcar ochre. Yellow was more of an earth tone - I call mine Dijon Yellow after that type of mustard. Remember they likely had to mix the tints from local ingredients. Would they even have bothered? There is a lot of debate as to whether the whole hull was just painted black (an easy color to make) or even painted at all. A little history to go with your build. I found the history of Niagara and the Great Lakes area to be quite interesting. But a lot of what I just said is my formulation of what went on at the time based on what I have read. The fact is there is so little documentation of what went on that we will never know. I could be right on or way out in left field. At any rate you still have a few decisions to make pretty soon.
-
You were reading my mind. I couldn't figure how you were going to paint everything. Never realized that things weren't glued yet.
- 190 replies
-
- 1
-
-
- pinnace
- model shipways
- (and 1 more)