Supplies of the Ship Modeler's Handbook are running out. Get your copy NOW before they are gone! Click on photo to order.
×


mikiek
-
Posts
2,276 -
Joined
-
Last visited
Content Type
Profiles
Forums
Gallery
Events
Everything posted by mikiek
-
 Thanks for checking in Doug. Welcome back. I'll do my best to keep her there this time.
- 204 replies
-
- 2
-

-
- trajta
- marisstella
- (and 1 more)
-
Thank you Per. I will be giving it back to the owner. Hopefully it will be another 75 years before it needs help again. I won't be around for that but maybe my first mate will. I will probably make the suggestion to put it under some sort of cover.
-
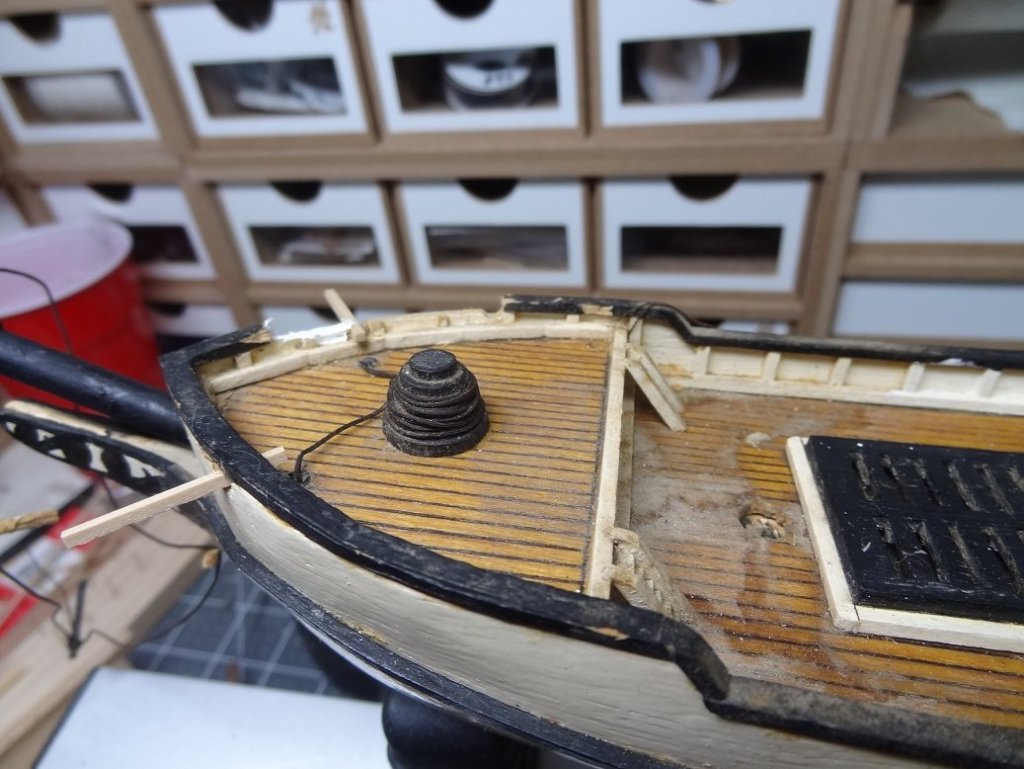
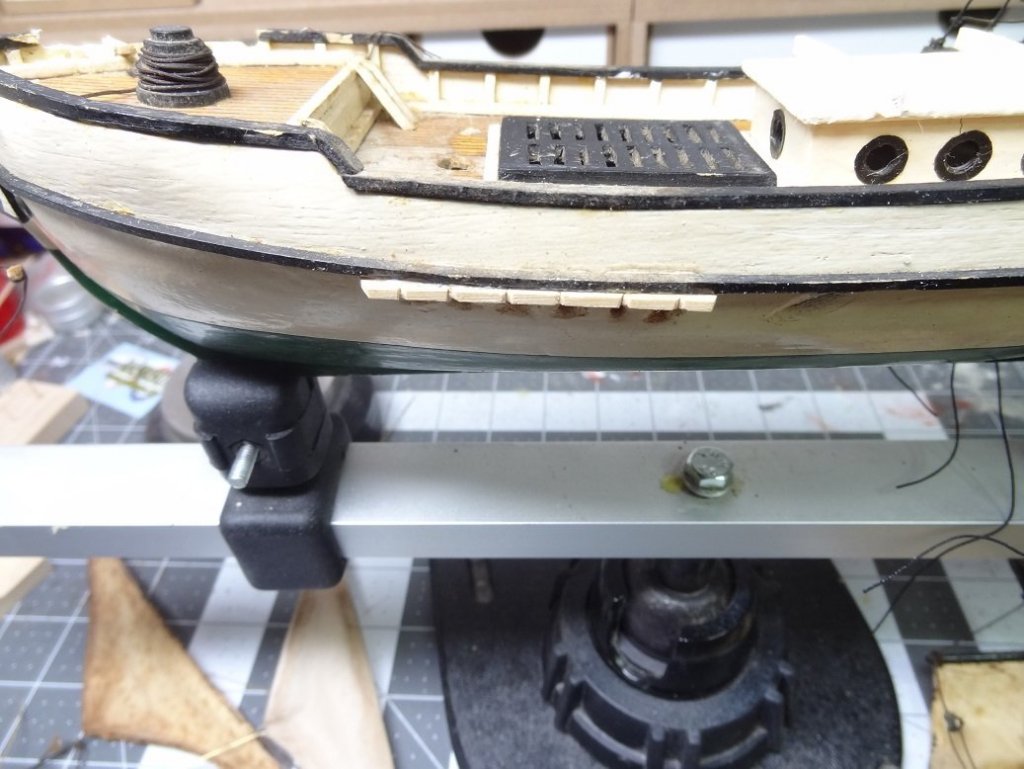
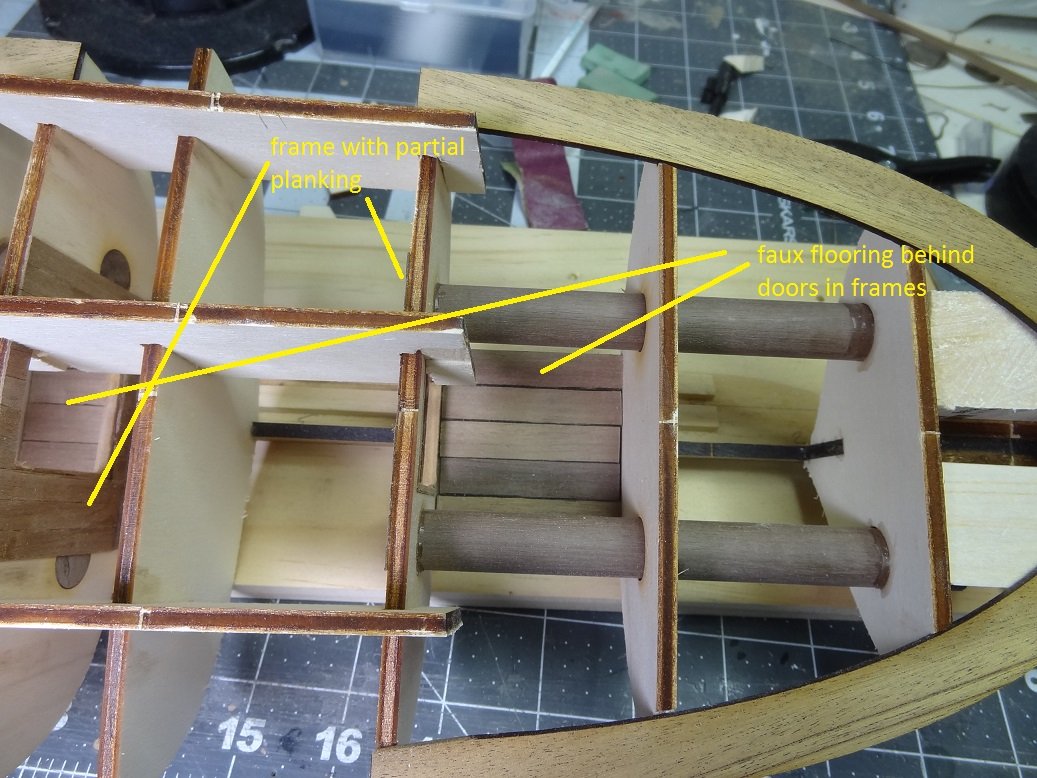
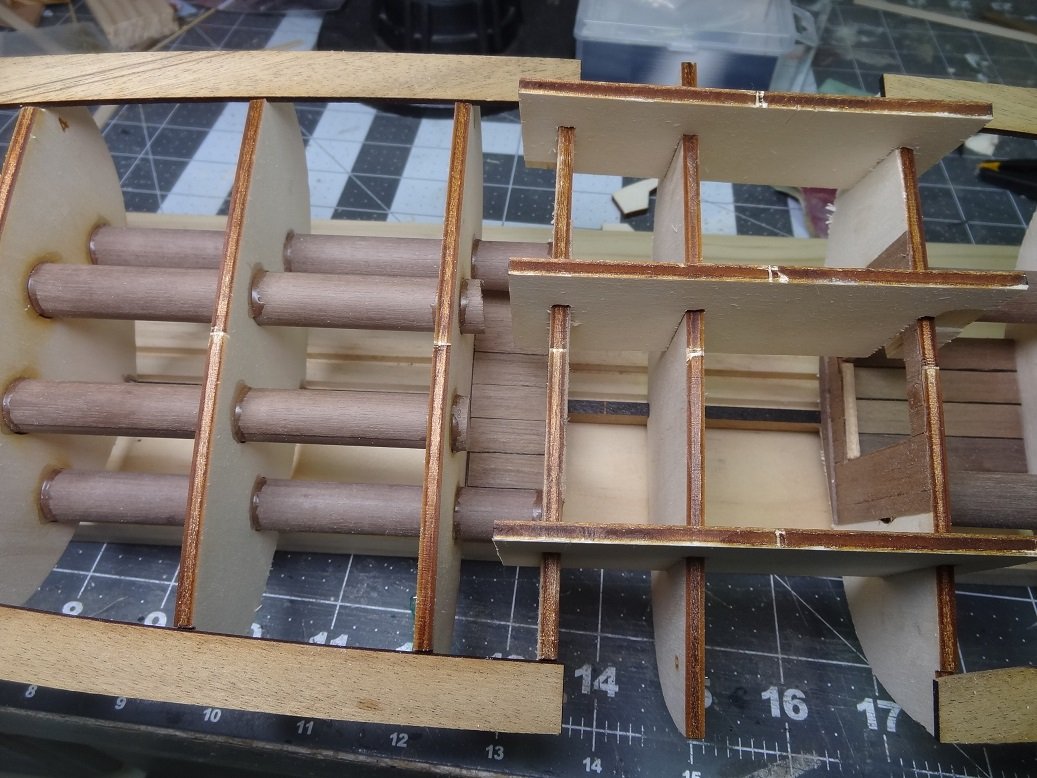
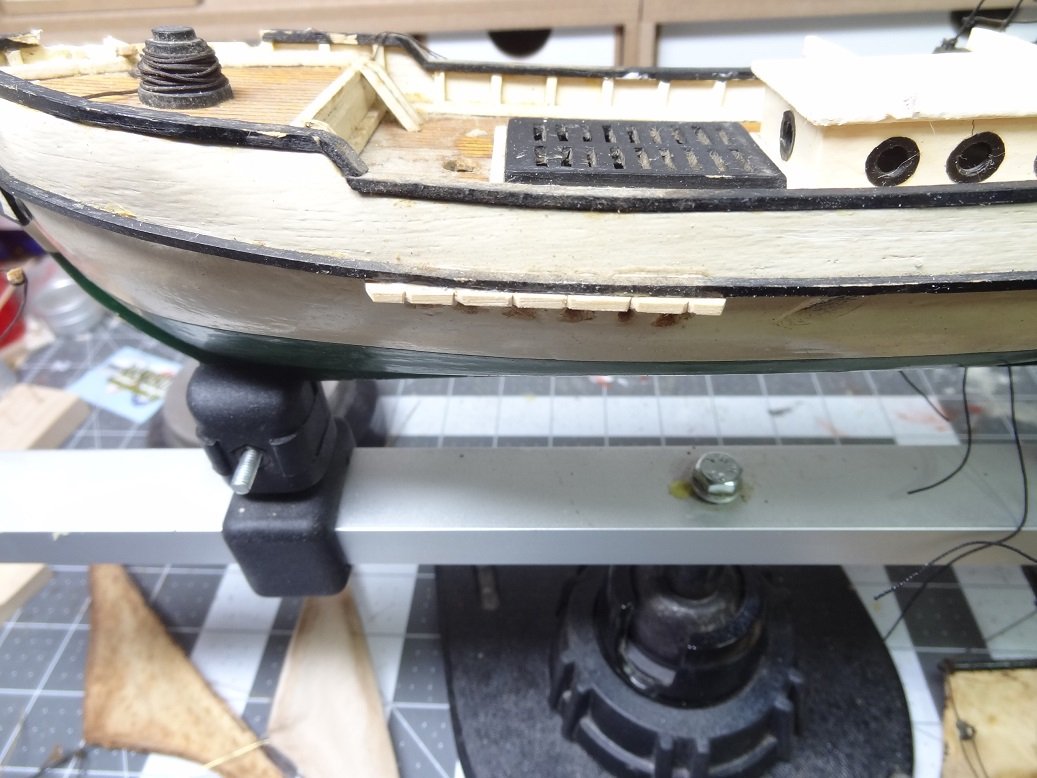
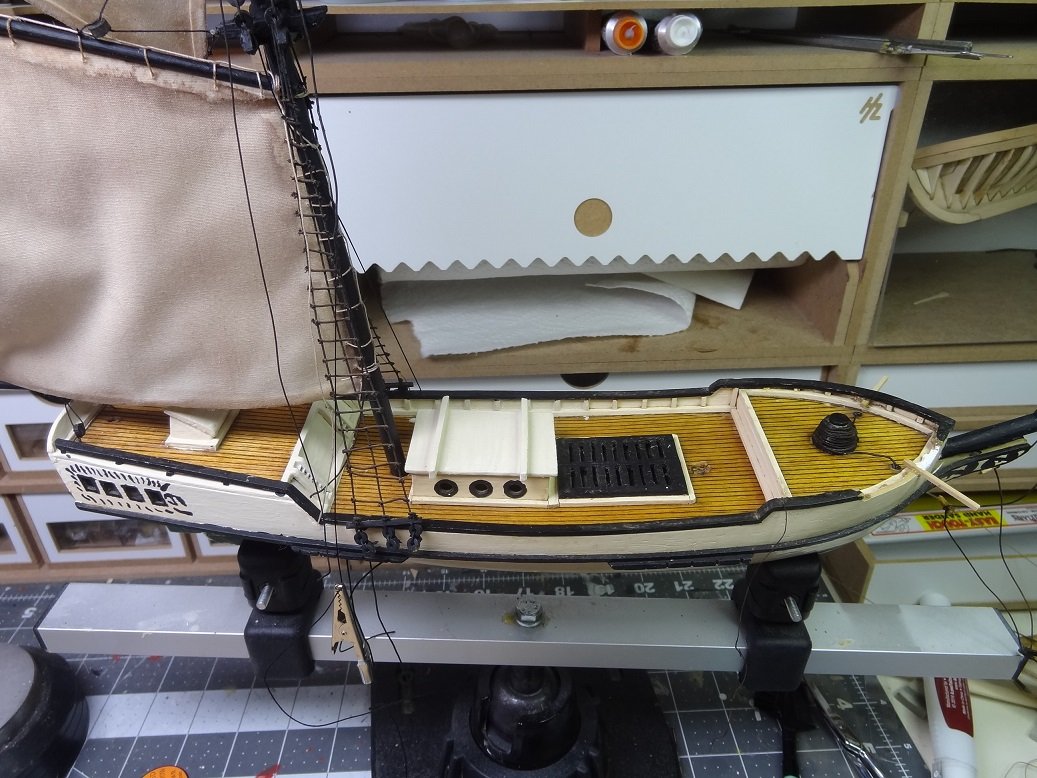
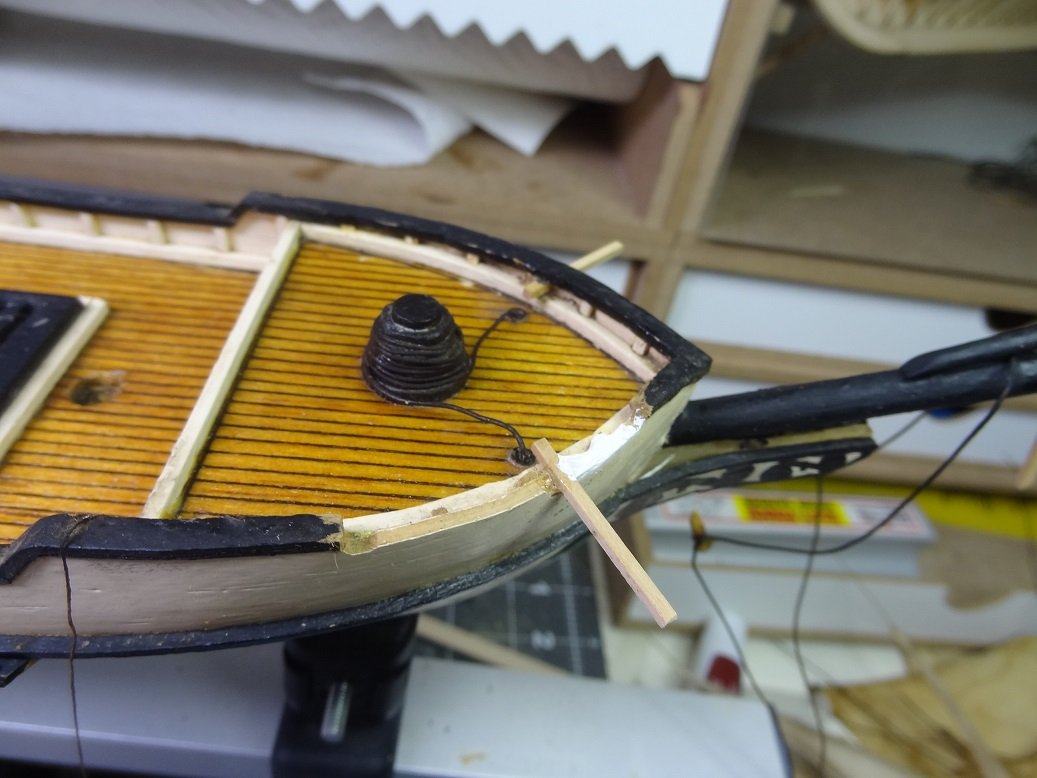
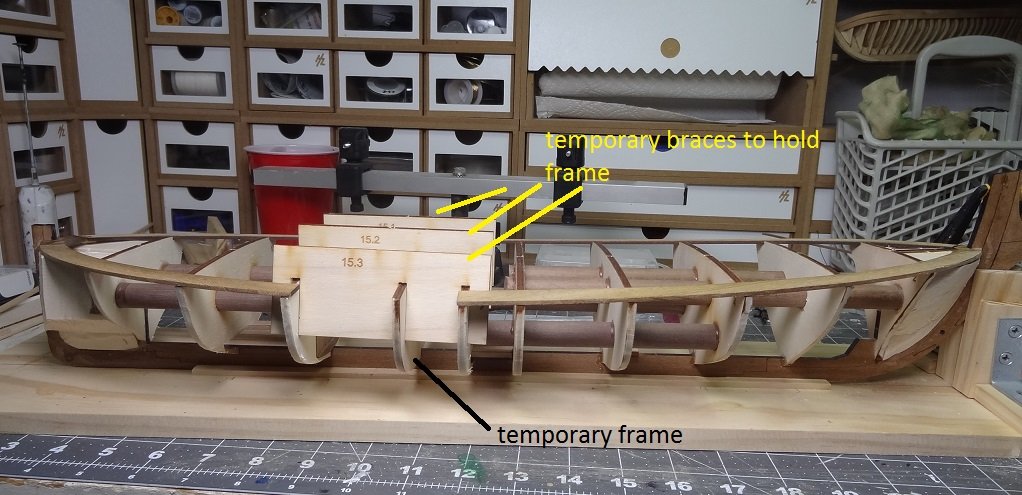
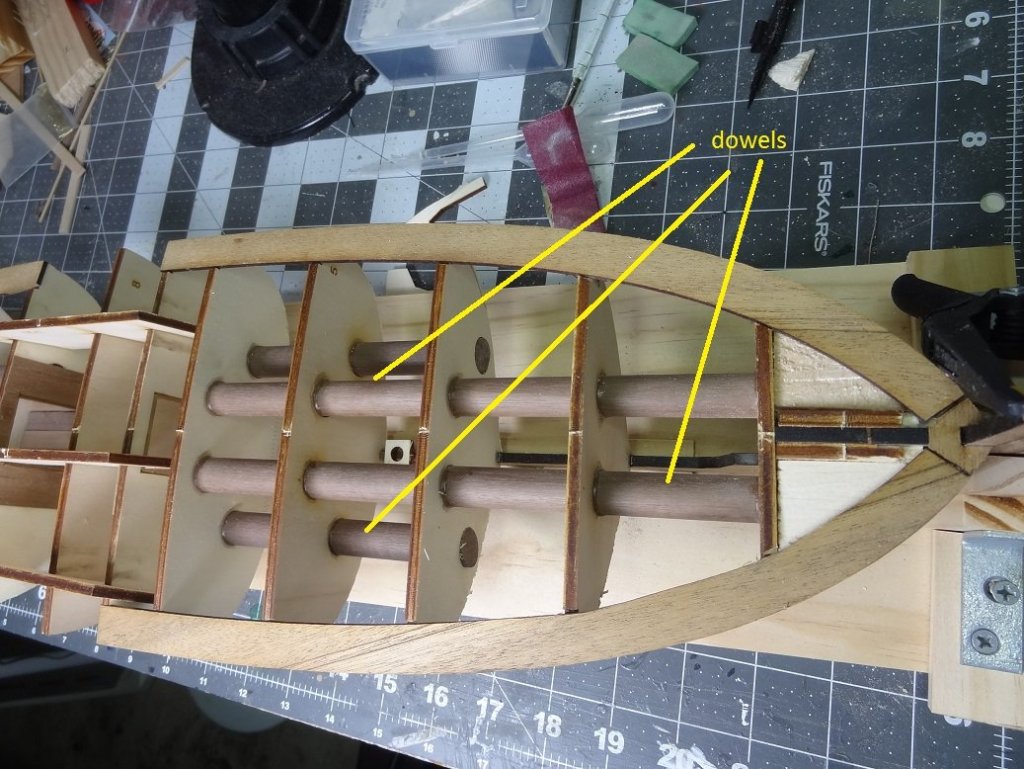
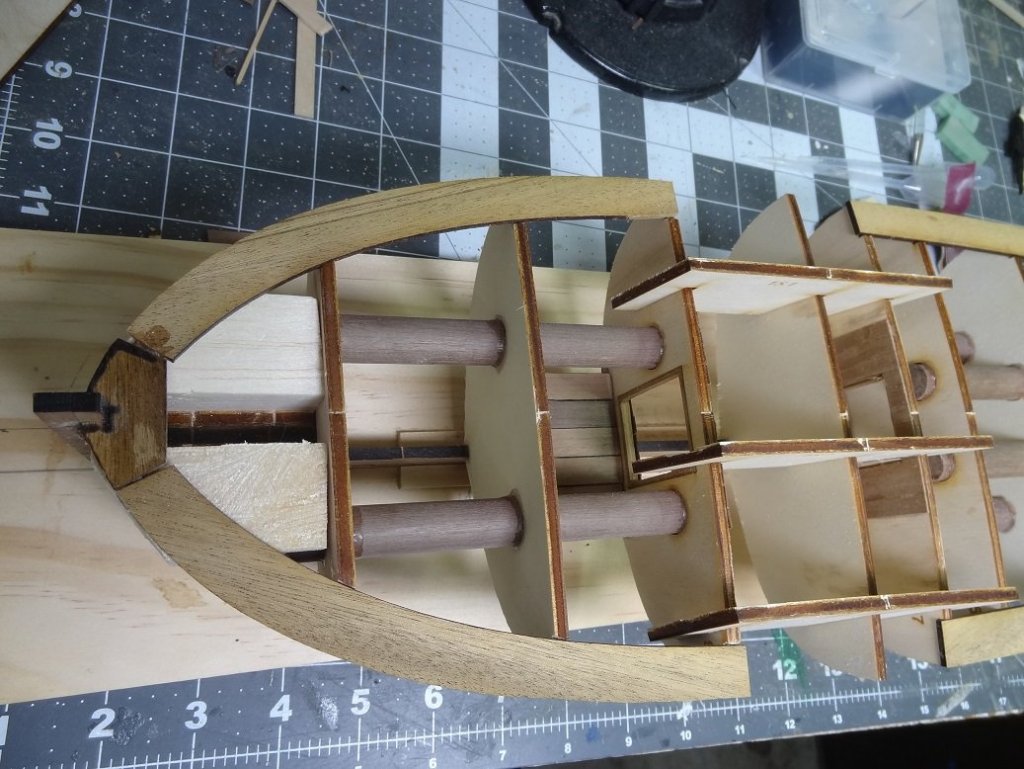
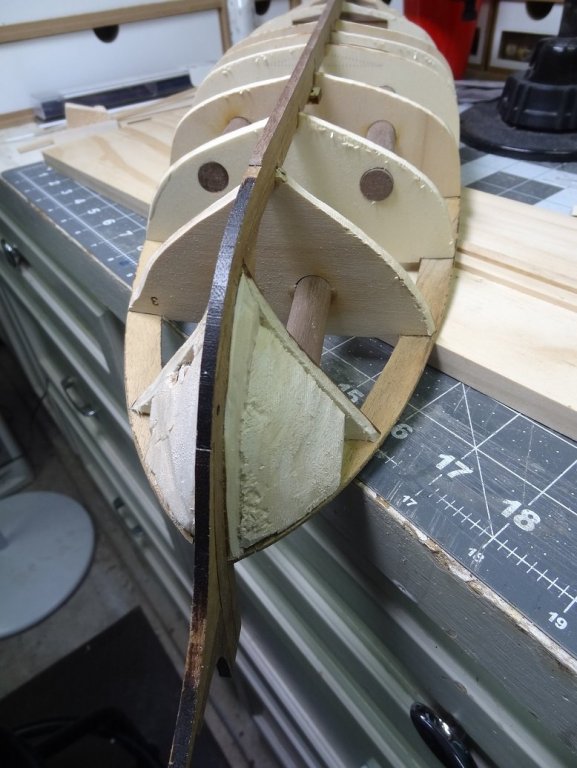
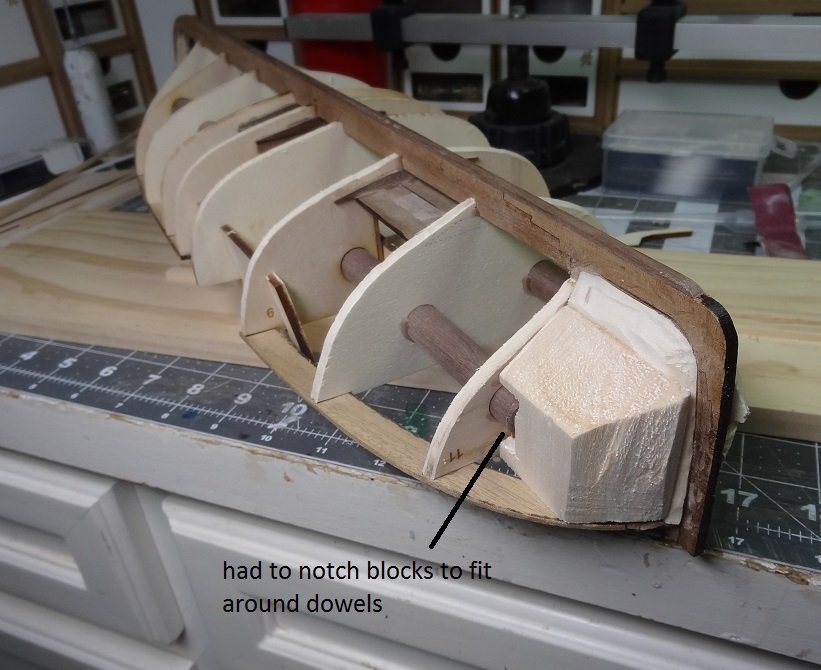
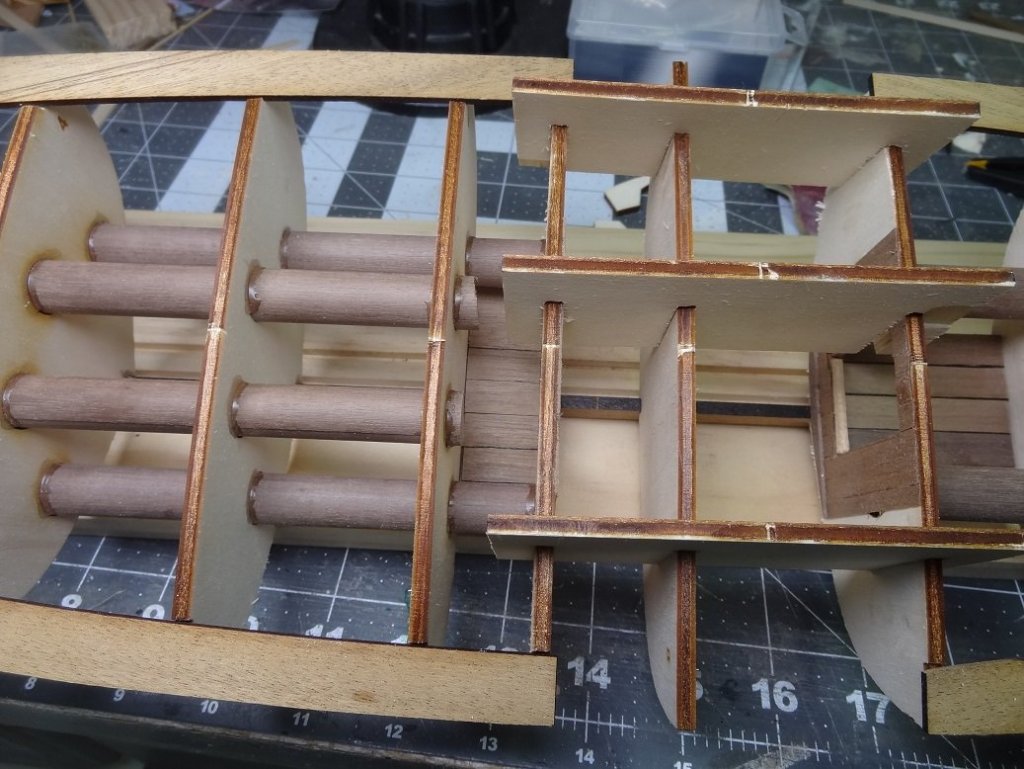
Considering it was July when I last posted I feel I owe you guys some explanation. Trajta has been on the shelf after my meager start. I had a lot going on at that time both in regards to builds and personal life. Frankly I was totally exhausted to the point where it was affecting me physically and mentally. I was easily frustrated with a short fuse and given all the questions I was coming up with regarding this build - questions I should have known the answer to - I put the kit away. I had made a commitment to finish Niagara - rigging was all that was left. Something I really don't like to do - more frustration. So here we are now, mid December. Things have improved somewhat, while I am still trying to recover from the exhaustion, I at least now know what was causing most of my problems. The knowledge alone has helped me a great deal. Niagara is finished, I just finished a model restoration and I am ready to take on Trajta once again. In our last episode, I was attempting to add some planking to an inner frame(s). Trajta has a large opening in the deck that exposes the hold and the planking is to dress this up a bit. I've got about half of that completed, but decided to move on to getting frames on the keel. The Marisstella design here is interesting. The notches used to fit frames to keel are fairly shallow compared to a lot of kits. However this is offset by the use of some large dowels that are inserted thru pre drilled holes in the frames. When glued in place the frames are very sturdy and come fairly close to being parallel to each other and perpendicular to the keel. Gluing the frames was uneventful except for being sure which direction the frames planked earlier were facing. The opening I mentioned earlier has a frame in it at the moment but it is lightly glued and has no dowels running thru it. It will be removed down the road. I did some fairing after that, it didn't take too much. Was about to lay the first plank when I realized there was no rabbet. I reviewed the plans and instructions and saw no indication of one. As it turns out this build doesn't use a rabbet. Planks just butt up the the stem and stern post. The garboard is just supposed to be glued where the frames meet the keel. That's going to be interesting. Given this, I am breaking down and making filler blocks. I not a big fan of blocks but it looks like the planks are going to need some help bending to the bow & stern and without a rabbet to hold them in place it looks like they are needed. So that's about where I am right now. Finishing up the blocks (bow & stern) and getting ready to lay some sticks. Here's a few shots.

- 204 replies
-
- 4
-
-
- trajta
- marisstella
- (and 1 more)
-
Hey Don - Thank you. I'm a little nervous about the sails. All of us here know sails are never spotlessly clean so I did my best to dirty them up. Not sure how the owner is going to take that. He did say do what you want. This was a good short project. It's back to Trajta now.
-
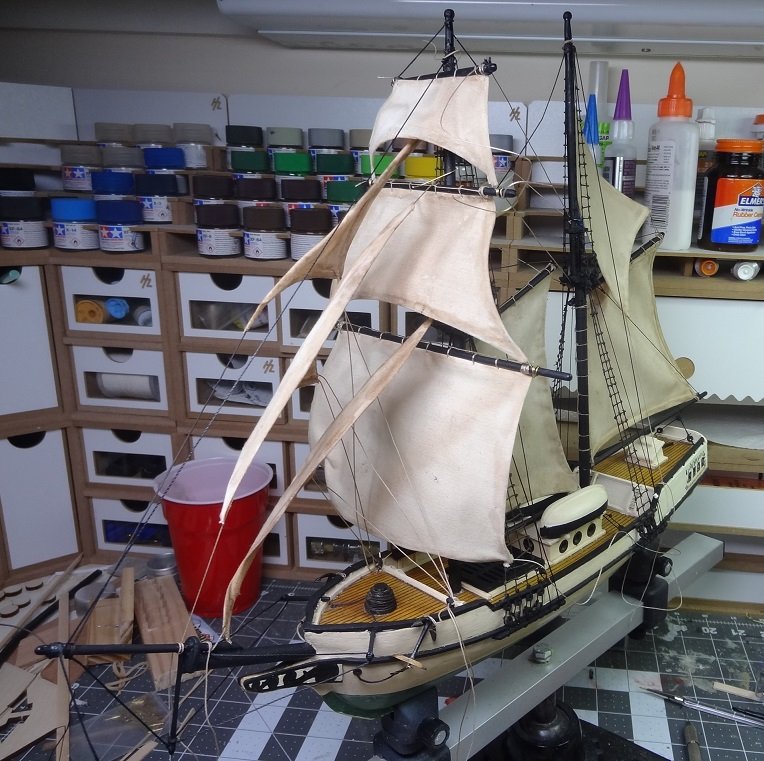
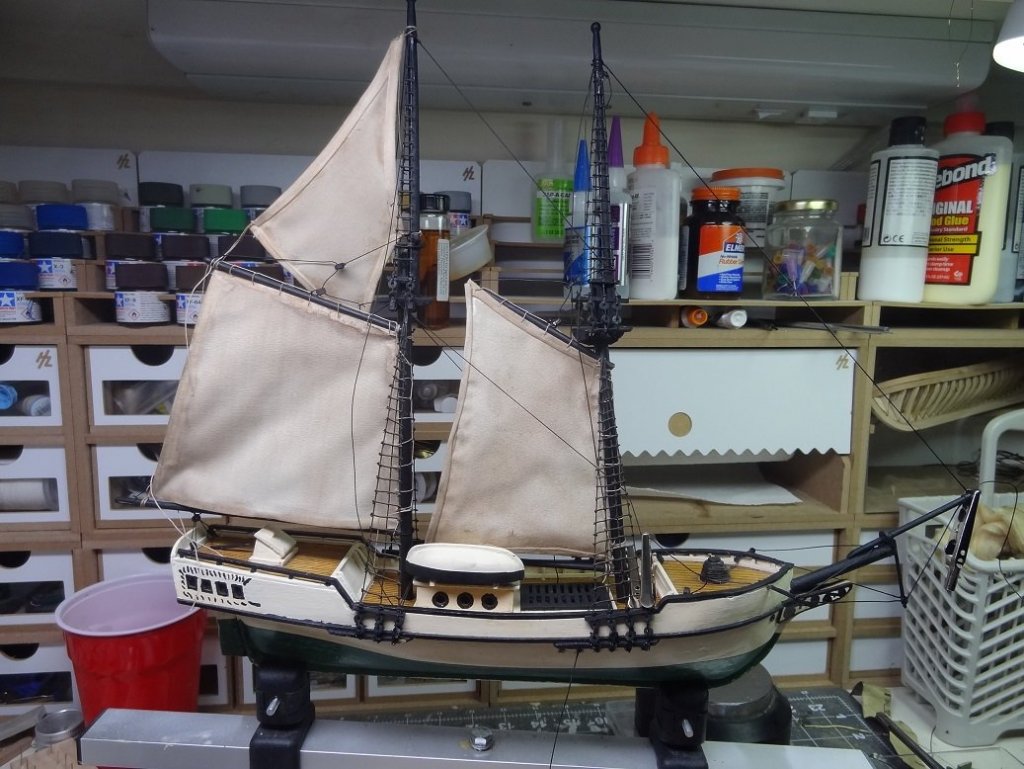
I'm calling this one finished. Pix posted below, but go back to the start of this thread and take a look how it started out so you can see before and after. Restoration is an interesting endeavor. I did my best to keep as much as possible of the original build. That was by far the hardest part of this build. So much I wanted to add or change. The most radical thing I did was change the running rigging from black to tan. Not too big of a sacrilege I hope. Here she is - Hispaniola (II) I posted what I think are some strange but interesting circumstances regarding this effort here.


-
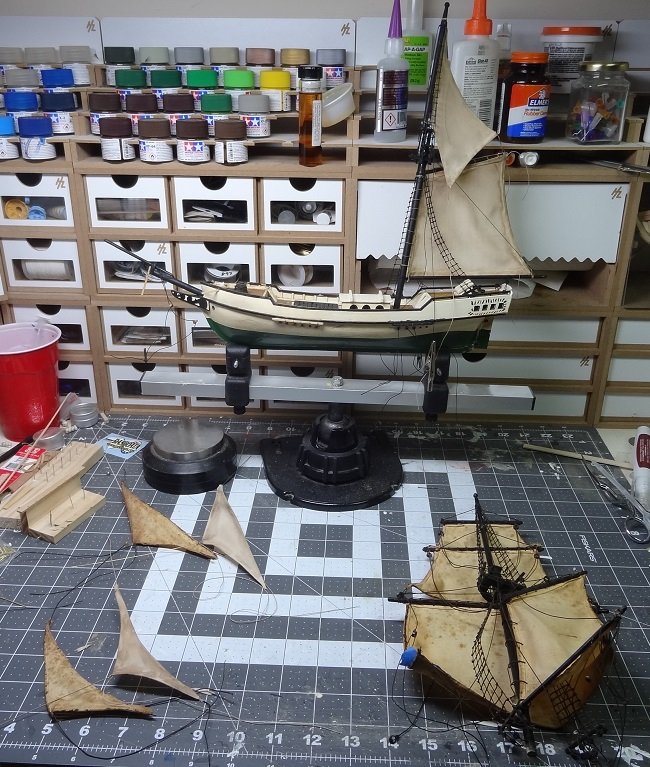
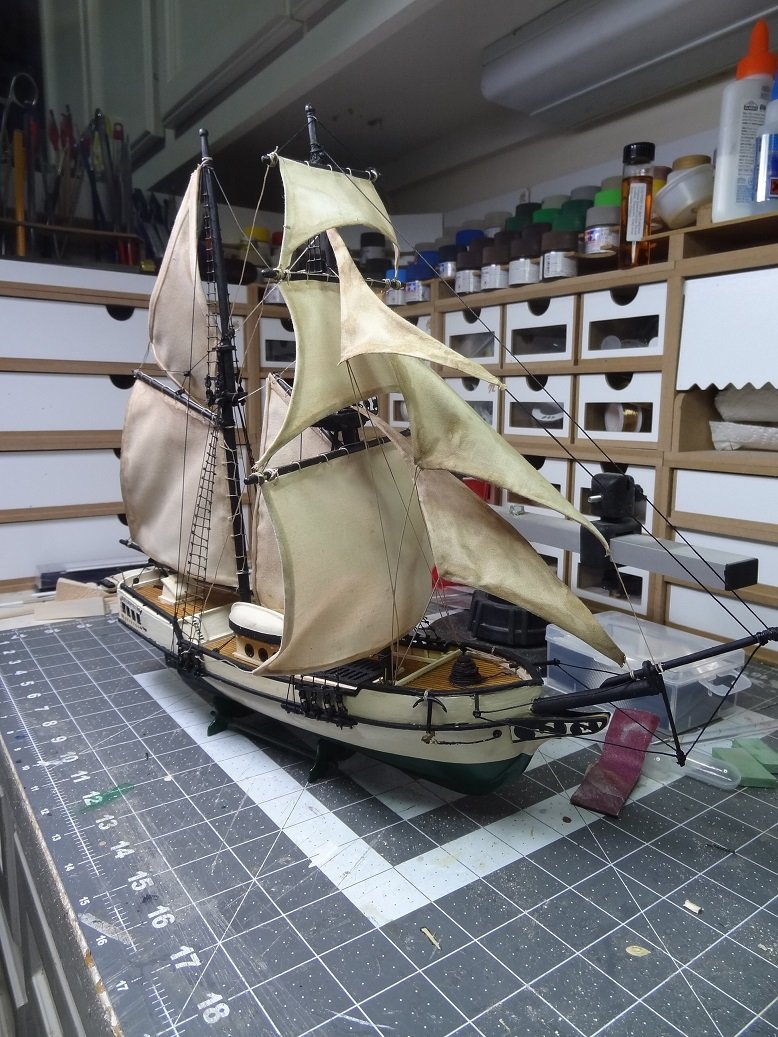
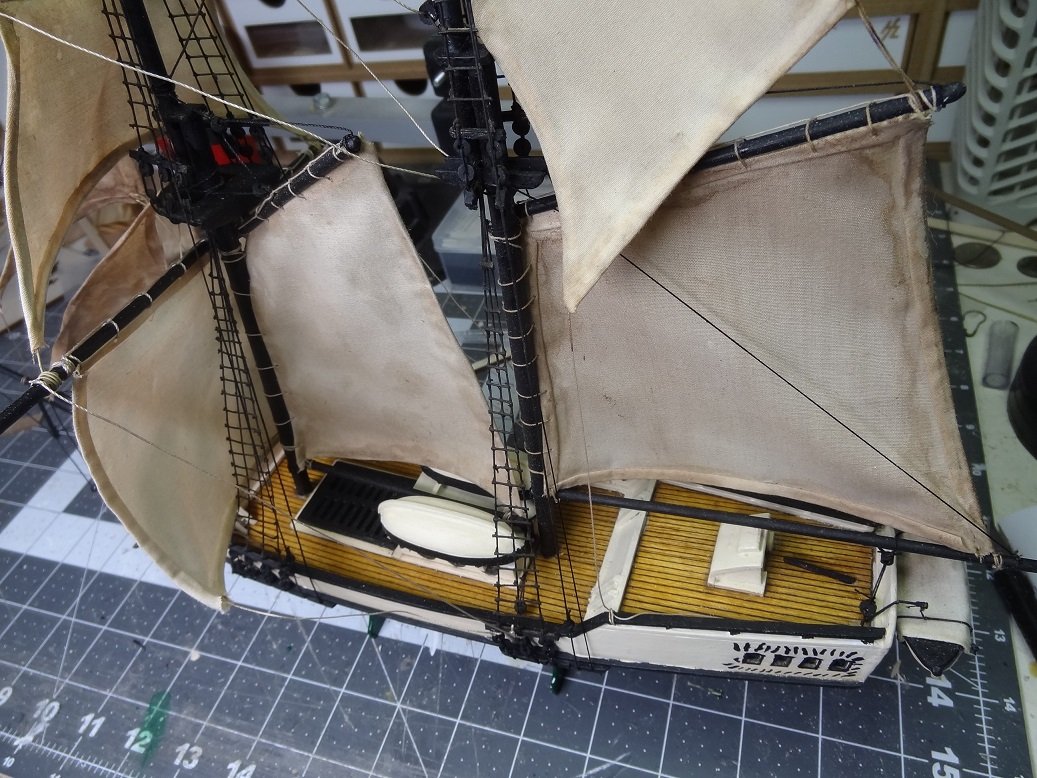
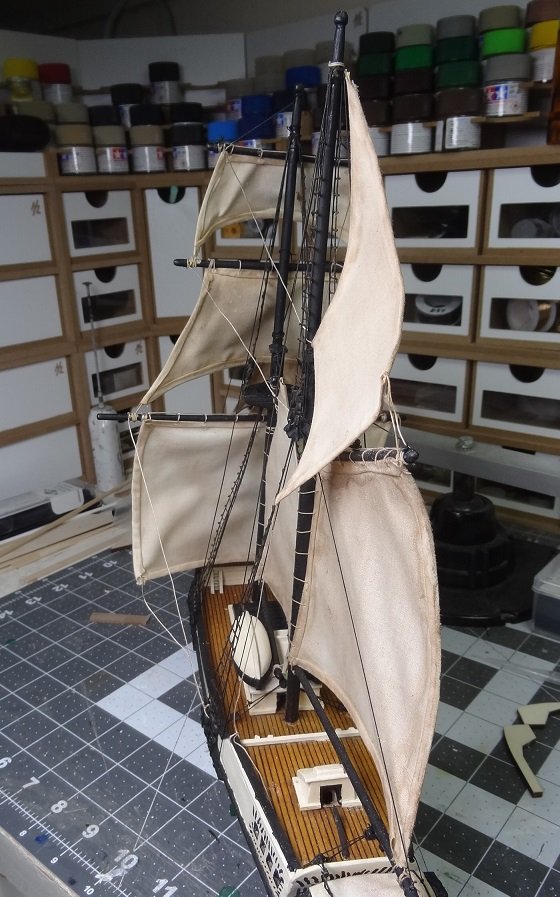
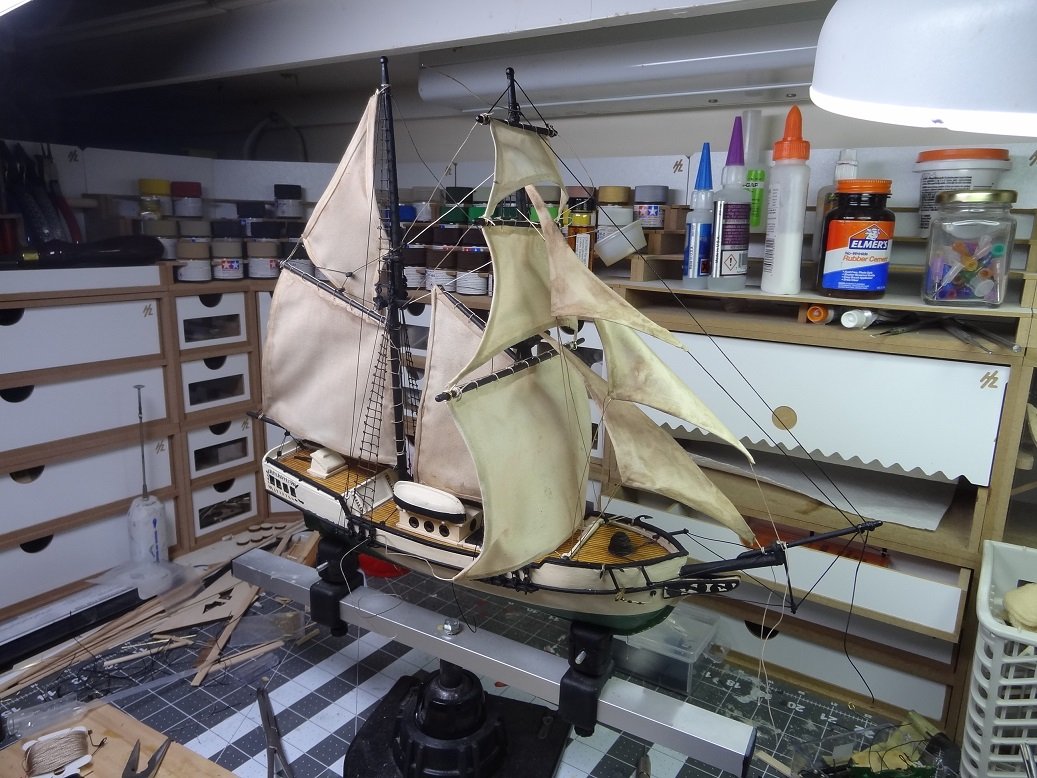
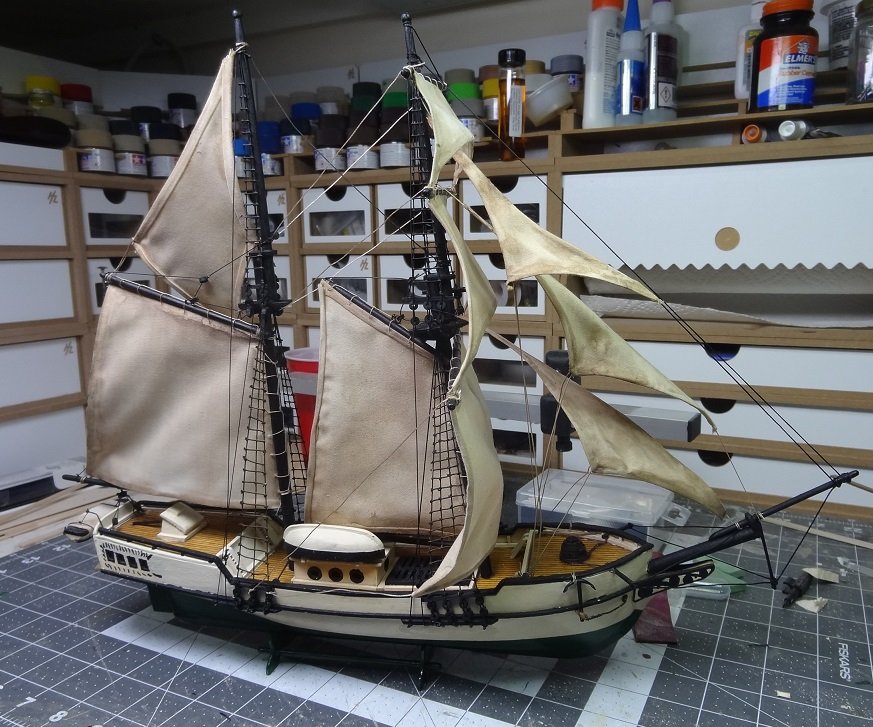
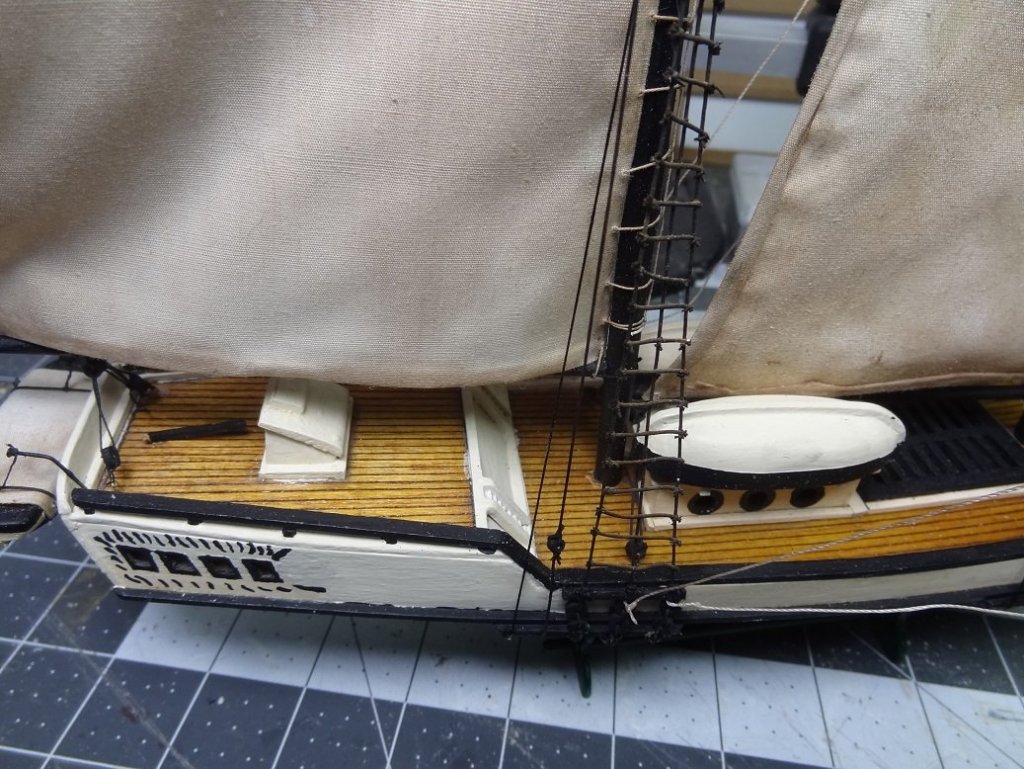
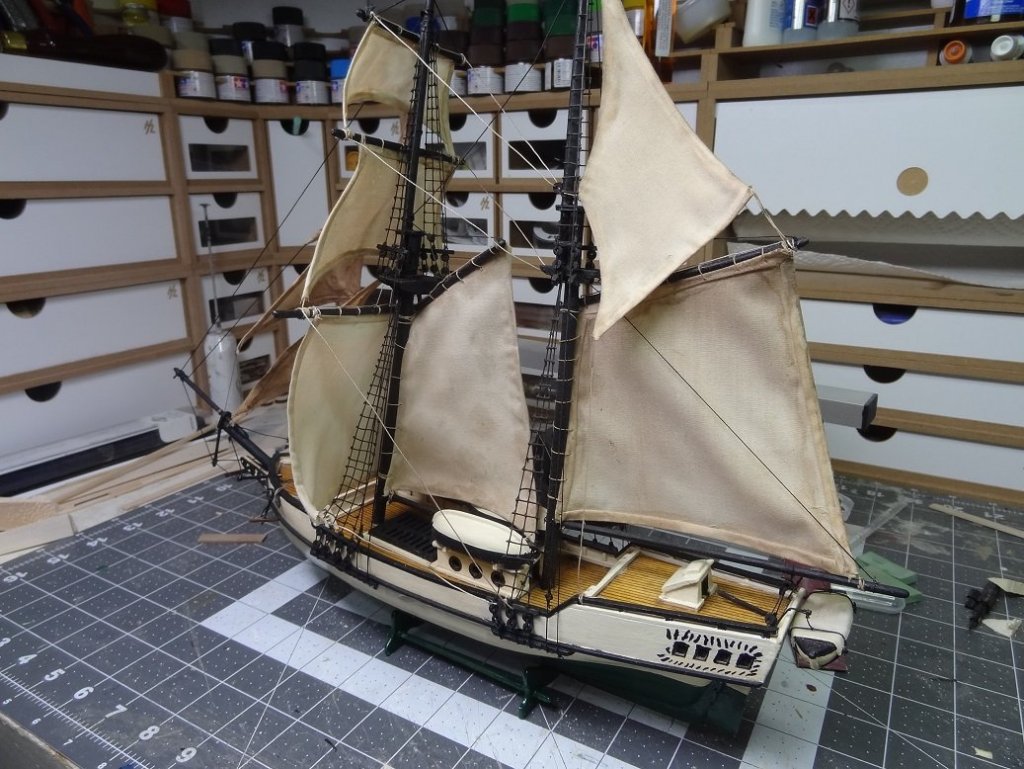
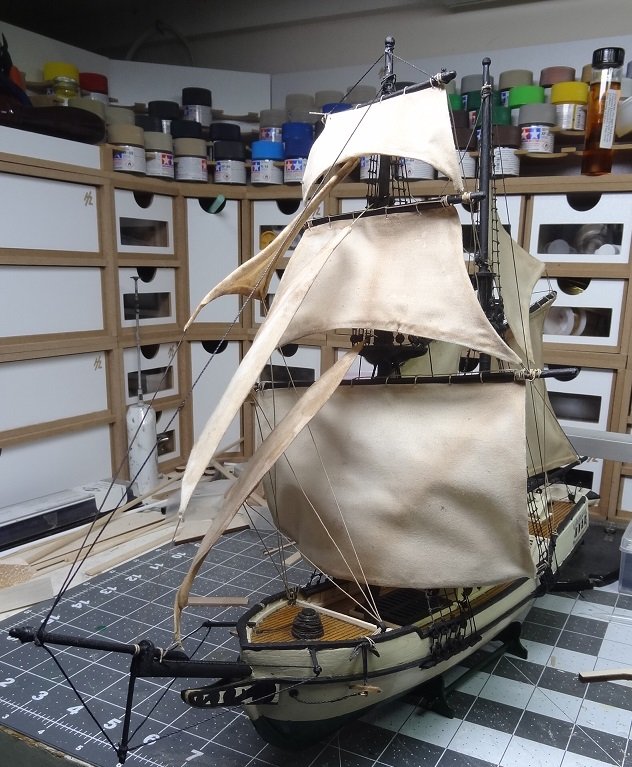
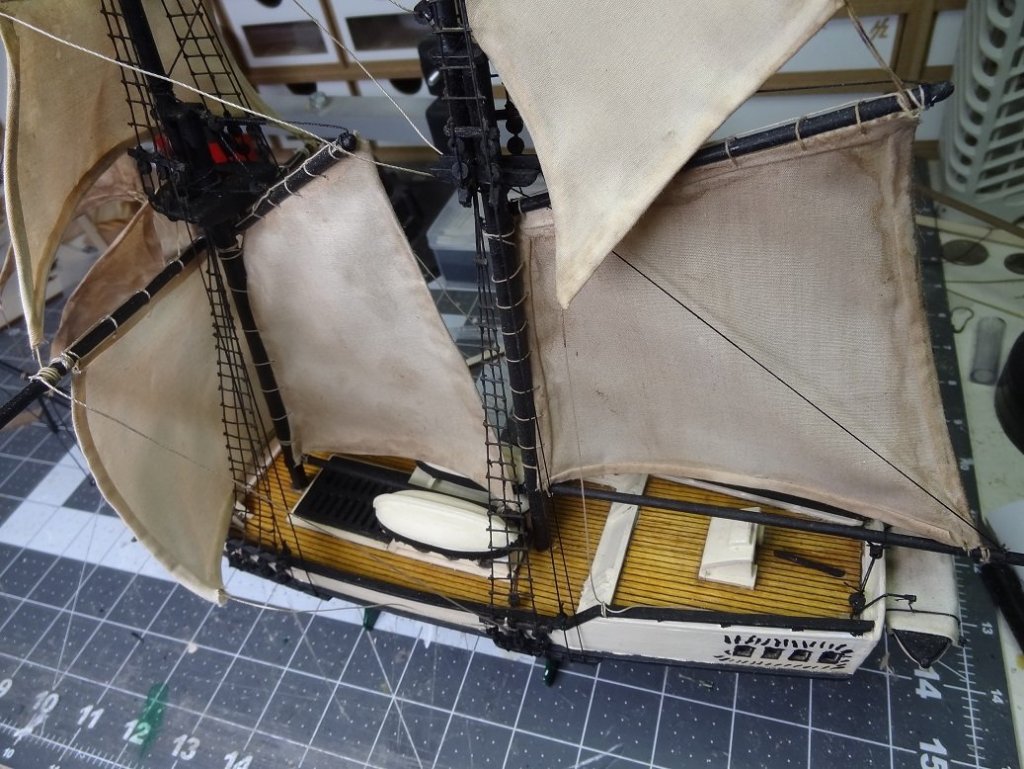
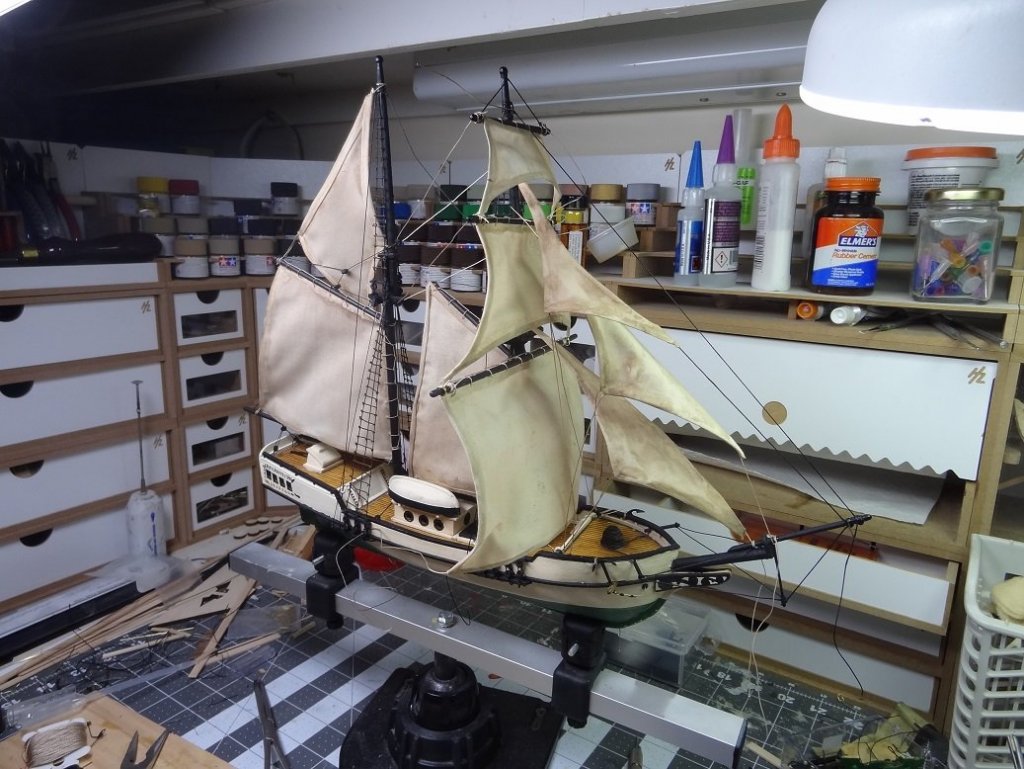
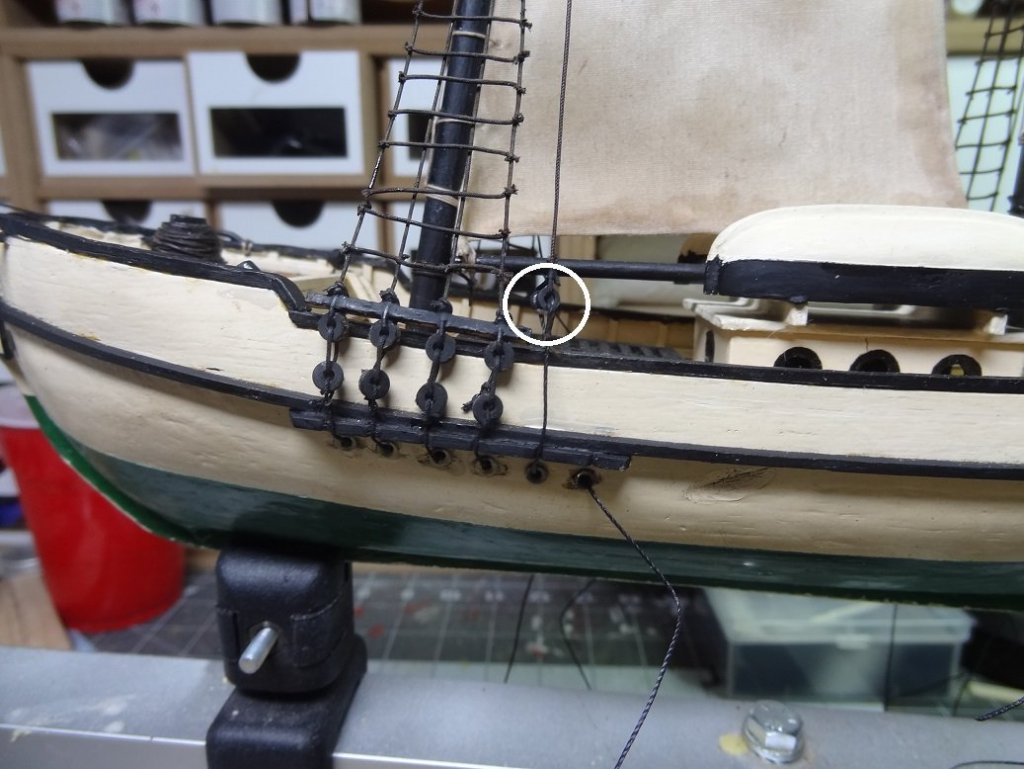
Now we're talking I finished up the last square sail last night and after letting everything dry I put the sail assembly together this evening. Keep in mind this rigging is there just to give the impression of ropes hanging & laying about. It is not an accurate representation. For instance the sail assembly is made by taking the top gallant sail (which is lashed to the t'gallant yard) and tying the clews to the top yard. The top yard has the top sail lashed to it and the clews tied to the course yard. Which of course has the course sail lashed to it. So you can pick up the t'gallant yard and you'll be picking up all 3 sails with their yards. And DANG IT I forgot to take a pic of that. Anyway the t'gallant yard fastens to the top of the mast and basically that hangs the entire assembly. There are some braces to be added. The jibs have wire in the hems that extend out from the corners 7-8 inches. The wires are used to fasten the sails to the mast and deck. They are bent a bit to give the sails some shape. I've said it before, this is a very cool technique to use to put some action into the sails. Wires were also used in the square sails and again I like the shape you can add. I think I have dirtied up the sails enough although not evenly from bow to stern. Oddly you can barely see it in the pix. They were dyed with walnut crystals. The I darkened the mixture and splattered that on the sails. I also got a lot of the fabric glue smeared on the material and that darkened just a tad when it dried. I guess overall it will do. So tomorrow it'll be the braces, some touch up painting and finally made up my mind to paint the hull. Trying to mix a matching green was no easy feat. Here's how she sits tonite:

-
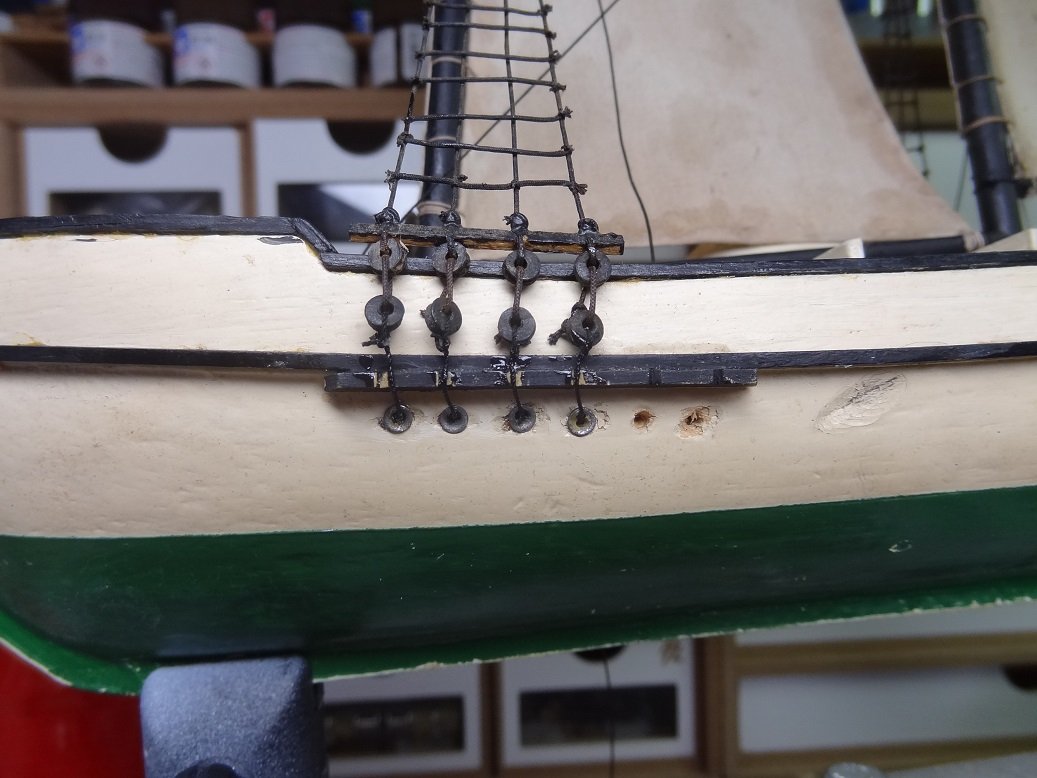
Well I've been working this restore almost every night but haven't had much to show. I'm trying to finish up this weekend (doubt if I'll make it) and some things are coming together. Like the main, I took everything off the fore mast pretty much in 1 piece. Got the mast cleaned up and the fore deck as well. The fore has been stepped and now I can start working with the stays & shrouds while I'm doing to the sails. My idea for connecting shrouds to channels worked out pretty well and the shrouds with ratlines fastened up pretty easy. As per my goal I was able to keep the original shrouds & rats. The backstays were tougher since there was not enough rope to reconnect - I did realize this when I originally cut them. So I ended up using a bullseye to fasten the stays to the rope coming up from the channel. Yup, I deviated from the original on this but there were few options. I did the mizzen? for the fore mast. Still working on the square sails. My biggest screw up so far is the hems for the sails are not all on the same side. She's coming along. Maybe the hardest thing is going to be repainting the name on the transom. I've tried twice already and have painted over my attempt both times. Who woulda thunk that would be so difficult?


-
You know, I remember thinking about this kit right before I bought it. Looking at it online, I figured it would be a cinch to knockout. A small footprint. No rigging. A cheap price. How hard could it be? WRONG! It's coming along well Steve.
- 190 replies
-
- 3
-
-

-
- pinnace
- model shipways
- (and 1 more)
-
That's why I'm kinda partial to Minwax Natural now. I just makes the wood look wet but no color change. You know now that I think about it, that finish you had on Phantom would look pretty good here also. The only problem is you would have 2 boats the same color.
- 228 replies
-
- 3
-
-
- gunboat
- model shipways
- (and 1 more)
-
Just wanted to be sure. I got burned once doing that. Tested on basswood, real material was boxwood. It looked awful. Hardwoods take stain a lot differently than softwoods.
- 228 replies
-
- 3
-
-
- gunboat
- model shipways
- (and 1 more)
-
Elijah - the wood you are going to stain - is it all the same species? I ask because I have the Provincial stain and it looks different on different woods. It gets pretty dark on softer woods (basswood) as it soaks in a lot. On harder wood (boxwood) it fills in the grains but doesn't soak in as much. Make sure you do a color test with the same type of wood.
- 228 replies
-
- 3
-
-
- gunboat
- model shipways
- (and 1 more)
-
Assembly line is great for a lot of what we do. I just got burned on the materials planking and decking. You almost have to cut planks one at a time because they must end on a frame. So you can't just go and cut a bunch of 4" planks. When you get to the deck you can decide on a standard size (I went with 20 footers) and cut more at one time but you still need to be aware of that width problem I mentioned. I heard somewhere - treat each plank as its own project. SO TRUE!
-
When you are cleaning your dual action do you know about the 'backflush'? Put a little cleaner in the cup. Put the cap on tightly. Unscrew the little crown on the end where the paint comes out. Don't lose it, they can be expensive. Put a finger or thumb over the opening at that end - careful you can stick your finger with the needle. Run the brush for a few seconds, both air & paint. If you do it right you'll get a spray or mist coming out the tiny hole on the cap. Your basically forcing air backwards and that can blow out stuff that normal cleaning doesn't move. Empty any extra cleaner from the cup - it will be all dirty. Then add a bit of fresh cleaner and spray normally. There may be a way to do the same with the bottle type but I don't know it. I have both types and the single action bottle brush rarely gets used.
-
One other question Per - does your airbrush have the bottle underneath or the cup on top?
-
Per - what paint are you using and are you thinning it? Even the "airbrush" paint can stand to be thinned out. There are various ratios but surprisingly you can add a lot of thinner. Vallejo also makes some good additives. And of course your weather can have a major effect on how the paint comes out.
-
I think that's the right decision Tom. More realistic too. One thing to watch out for though. I would have thought the planking sticks would be fairly consistent in width. My mistake. One night I grabbed a handful and cut them all to the appropriate length and tossed them in a pile. Thought I would be saving some time using the assembly line method (one task at a time). The next night when I started planking I just grabbed a plank from the pile and glued it to the frames. Pretty quickly I realized I was having to sand the long edge of many of the planks so they would match the previous plank when the ends were butted up to each other. Trying to evenly sand down even a 4" edge is problematic. The moral of my story is take 1 stick. Cut it to plank size. Glue all those planks in place. Lather, rinse repeat. You'll have the same issue on the deck.
-
re: fairing - you can fair all you want right now. You will still have to do more as you lay planks. Strake by strake. Don't knock yourself out yet. Have you decided if you are going to plank with a whole stick or cut sticks for each strake?
-
It's the only way to fly....
-
Hey Don - had to search around to see what you're up to now that Trabakul is retired. This one looks cool. Interesting bow line. Think I'll tag along.
-
Reminder - don't forget to mark your bands before you go any further. Also you'll want to add your garboard and a strake or two above it before too long.
-
re: holes in chock rail - depending on how/what you are going to rig you may not need any. I didn't. You are about to hit the most difficult area for planking the stern for the next 5-6 strakes. You will need some twist and after that a bend upwards. I actually put a twist in the sticks - similar to how we bend them. Soak them, clamp at the half way point with one anvil, put half a twist in the stick and hold the end with a second anvil. Heat to dry or let it dry naturally. The stick will look a bit like a corkscrew. Be aware that sticks on the port side need a twist in the opposite direction as those on the starboard. Don't remember which but one side takes a clockwise twist. The other side a counter clockwise twist. The twisted sticks will lay almost naturally around the curves at the stern. I documented that pretty well in my log.
-
Per - this project has been quite different than what we're used to. Tearing something apart as the first step feels odd. Remembering how it goes back together - even with pictures - has been trying. Really a wake up call to how bad my memory is getting. There is a thrill that you just don't get from a build. That is seeing the dirt & crud or loose ropes and then admiring when it's cleaned and back together again. Also an exercise in self control. So many little "touch ups" I want to do. Given that this is almost an antique kit - Megow's is long gone - I have to stick with how it was supposed to be assembled, with the same type of parts. I may experiment with the hem. With the double fold and the adhesive I don't think a sewing machine needle could get thru it. Of course that leaves the hand sewn option
-
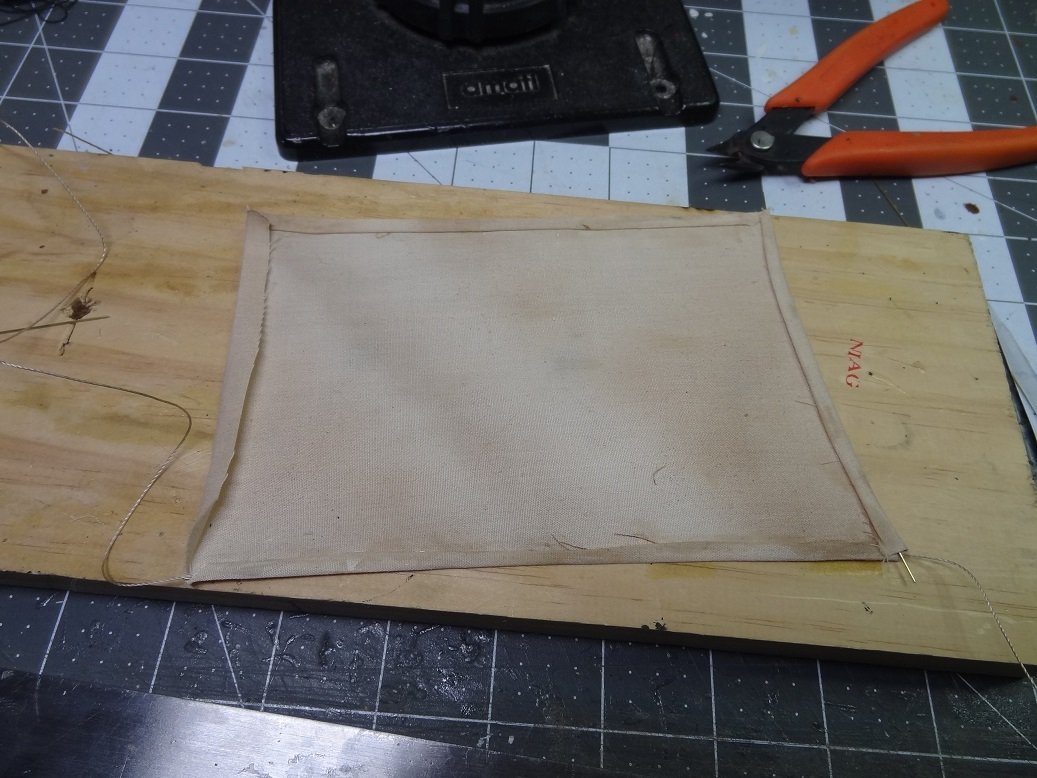
Sail making is taking longer than I thought. Cutting , dyeing and hemming. The last takes longest. I have to load the hem with a piece of brass rod, double fold and then glue. It takes about 1 hour for the glue to dry enough so I can safely handle the sail to glue the next hem - 3 or 4 per sail. I still wonder if I am making the right decision by gluing only. No stitch. I'm still really liking the wire in the hems. It's going to be fun to shape all the sails. I will definitely use the same technique should I ever decide to add sails to one of my builds. Making the jibs at the moment, but I decided to go ahead and pull the foremast. I couldn't stand seeing all that dust any longer. Got that cleaned up and a first coat of varnish. Much better. Broke a few pieces during this process. I've been commenting on how easy it is to "unglue" many of the parts due to the age. It appears that time has taken it's toll on the wood as well. The rail pieces are as brittle as they can be. This is the second piece of rail I have broken. Also broke one of the fore channels while removing the mast. I caught myself trying to "improve" on parts. Rather than belay pins with racks most sail sheets tie off to a wooden ring (those fake deadeyes) that is fastened to the deck. IMO the rings are kinda bulky, so I was about to replace those ( I had to pull them out of the deck anyway) with a brass eyebolt seized to a brass ring. No huge thing but still a step away from the original equipment. I made a few more wood rings and am back to using those. I'll save my brass for my builds.