mikiek
-
Posts
2,276 -
Joined
-
Last visited
Content Type
Profiles
Forums
Gallery
Events
Everything posted by mikiek
-
 Thank you Don. I agree. When those masts and sails go up it will add a lot more. Besides, I'll have to learn how to make sails.
 -
May have to postpone the christening today. I slapped another coat of varnish on the deck this morning. Not sure it will be dry in time. Per - traveling with the fleet is getting difficult. 1 - T37 sailboat, 2 - Dragon Force sailboats, 1 tug with barge and soon 1 trimaran (with 7' mast). Plus sails, tools, chairs, etc. If the trailer wasn't filled up with astronomy gear it would be perfect.
- 96 replies
-
- 4
-

-
- tugboat
- Tippecanoe Boats
- (and 2 more)
-
Hi Don - glad you came by. The big concern is how badly all this will interfere with the shrouds as the hammock installation passes under them Whether they do or whether they don't, this is the path I'm going down. Now back out to the garage to tie up more hammocks.
- 843 replies
-
- 2
-
-
- niagara
- model shipways
- (and 2 more)
-
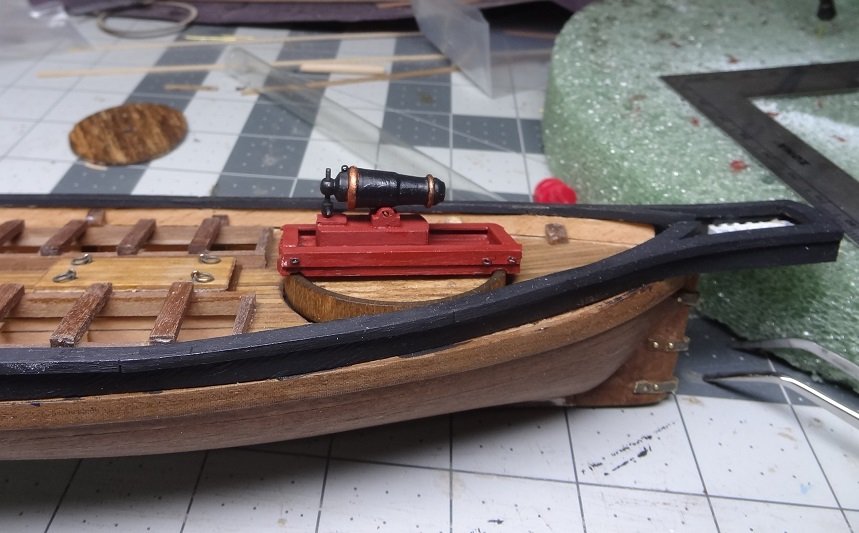
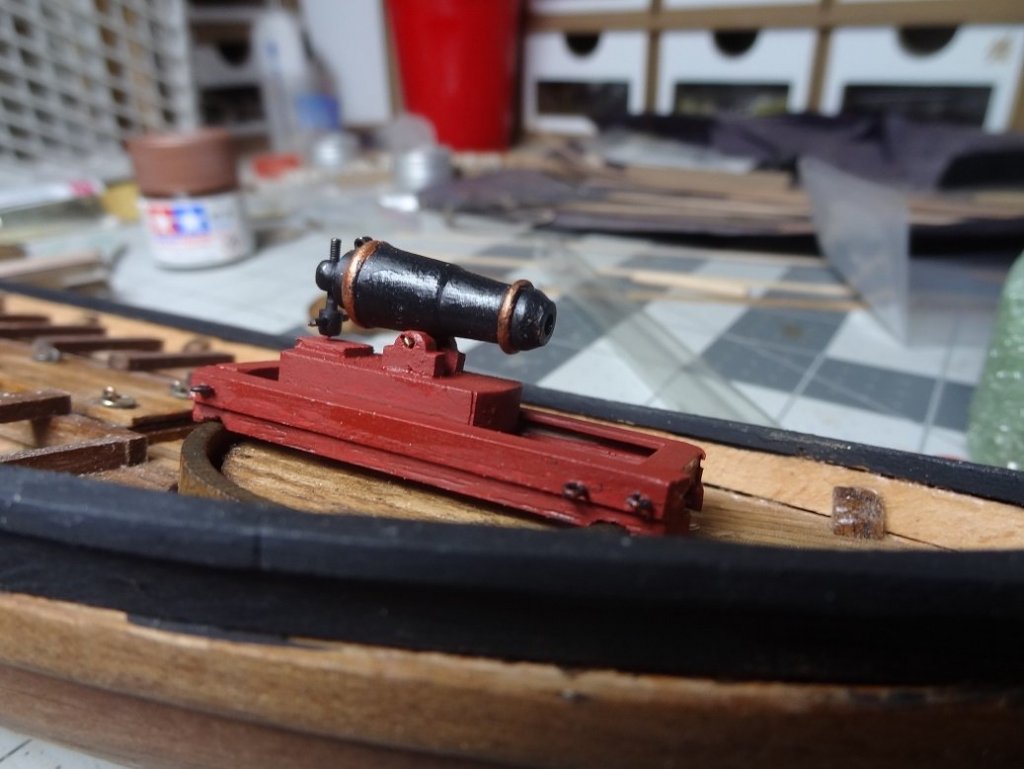
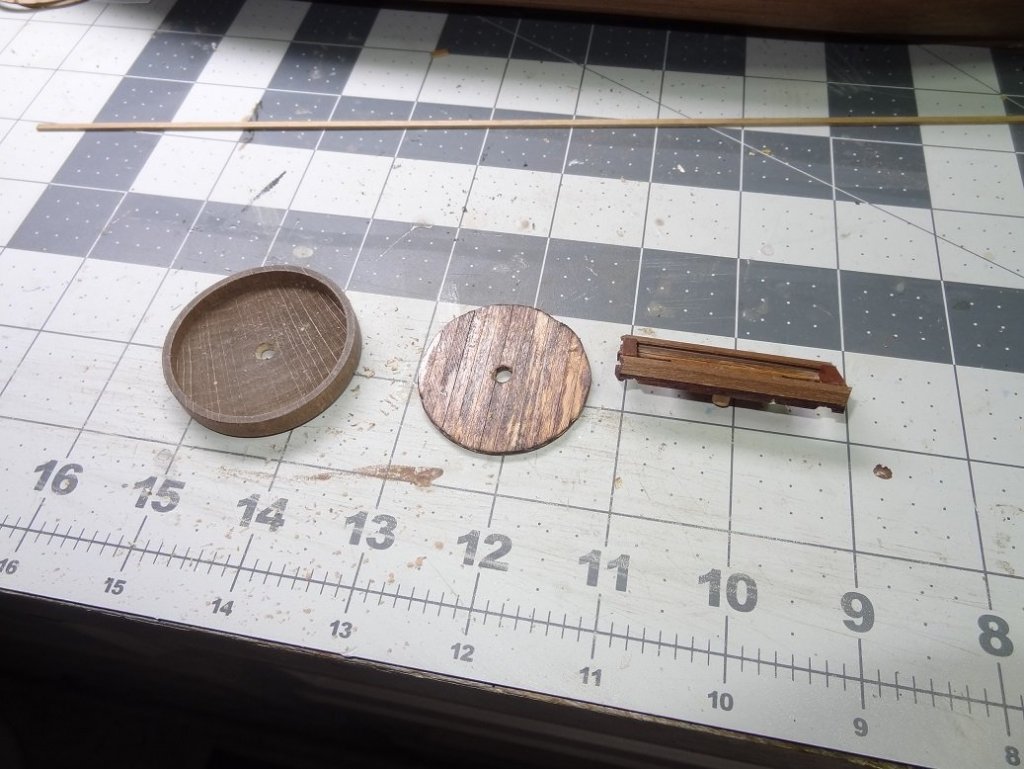
I've done some serious multi tasking in the last 24 hours. Arrow, the tugboat and Niagara. When things are clicking, it's really fun. I put together the carronade carriage today. It's not glued in yet but I might before I shut down tonite. The kit provides 2 round wooden platforms for the guns. They're not bad but they are a little small in the hole in the deck where they will sit. The earlier pix show this and also the pieces underneath the deck. It didn't look real good so I painted the area underneath the platforms black to make the pieces not so obvious. The carronade was a little funky. The parts came in a plastic bag with no instructions. You have to glue the trunnion loop and what I believe is the breech rope loop to the barrel. It will be a pretty wimpy breech rope as that loop can't be any bigger than 1/64". I really prefer a chunky piece of Syren rope for the breech. The long gun is next and then masts & yardarms.
-
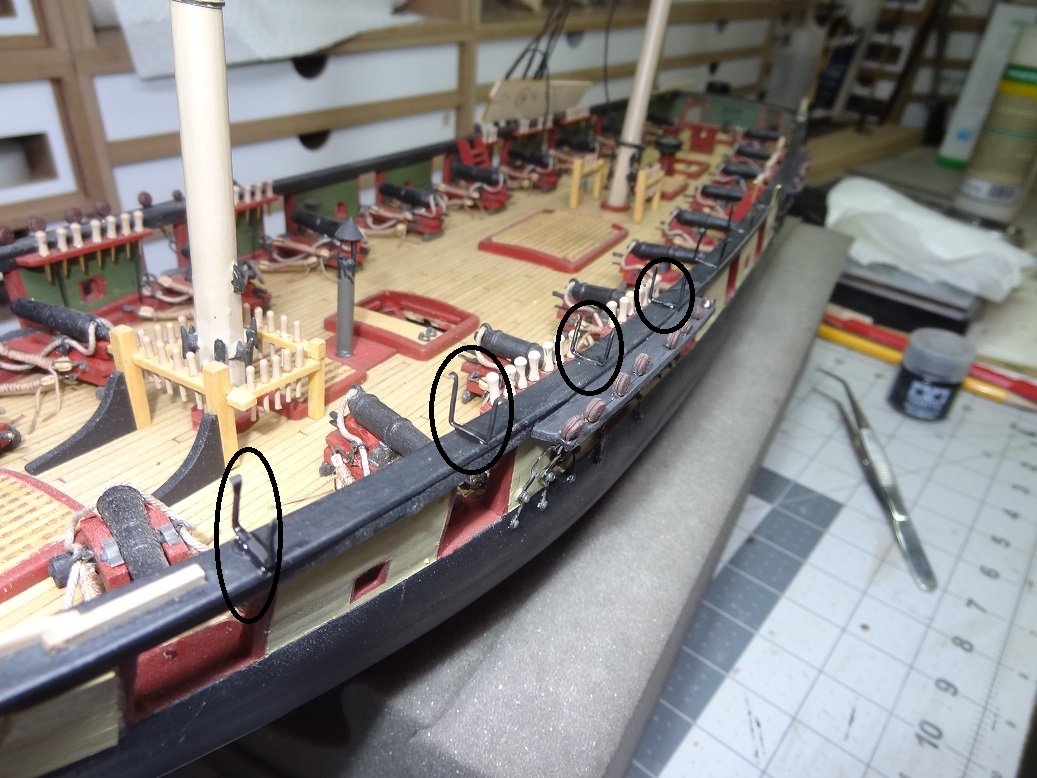
Well I am committed now. Hammock stanchions are glued on the port hand rail. I placed them with a dot of CA just to get them on but then went back and epoxied them. I'm suspecting they will get a fair amount of abuse and I don't want to have to try and reglue them later. After the epoxy dries I will add one of those webbing with sticks contraptions I showed a few posts back.

- 843 replies
-
- 5
-
-
- niagara
- model shipways
- (and 2 more)
-
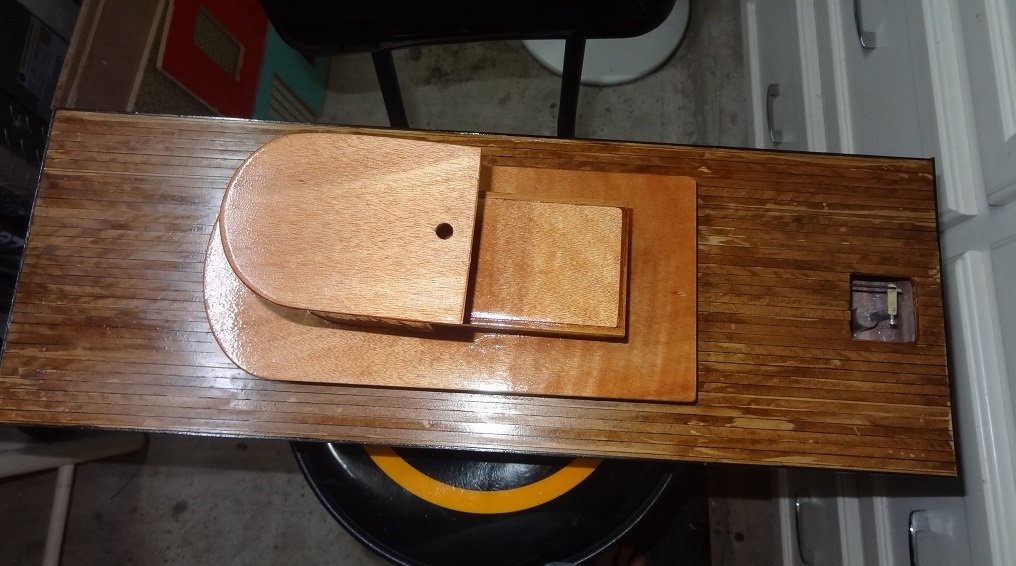
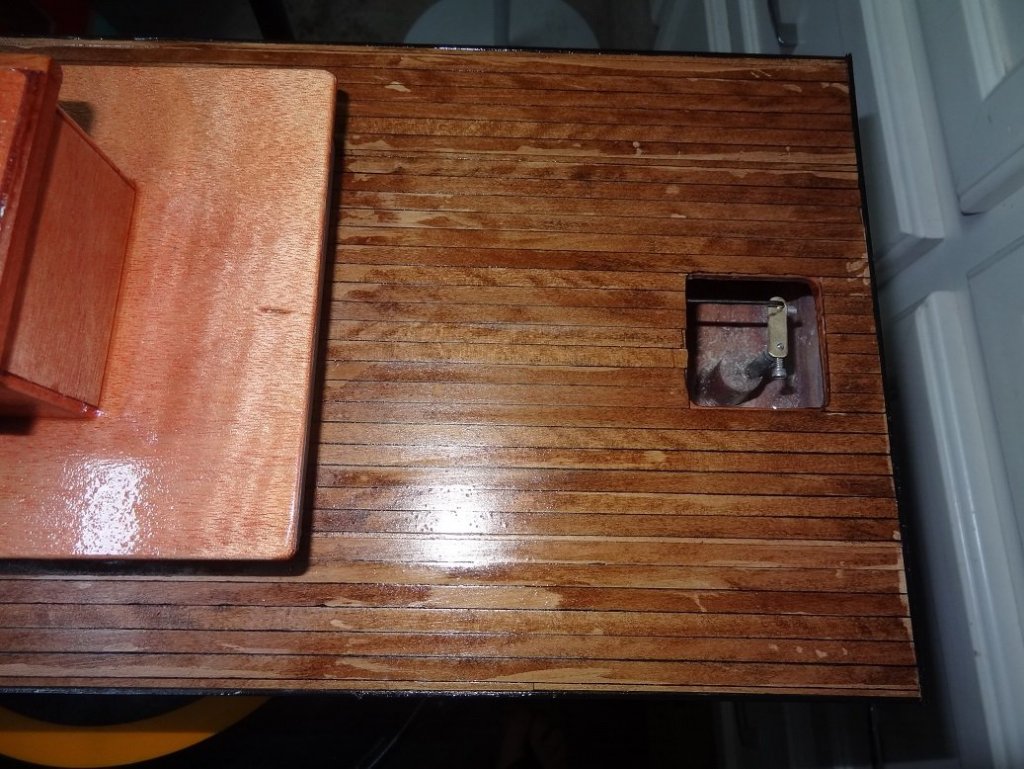
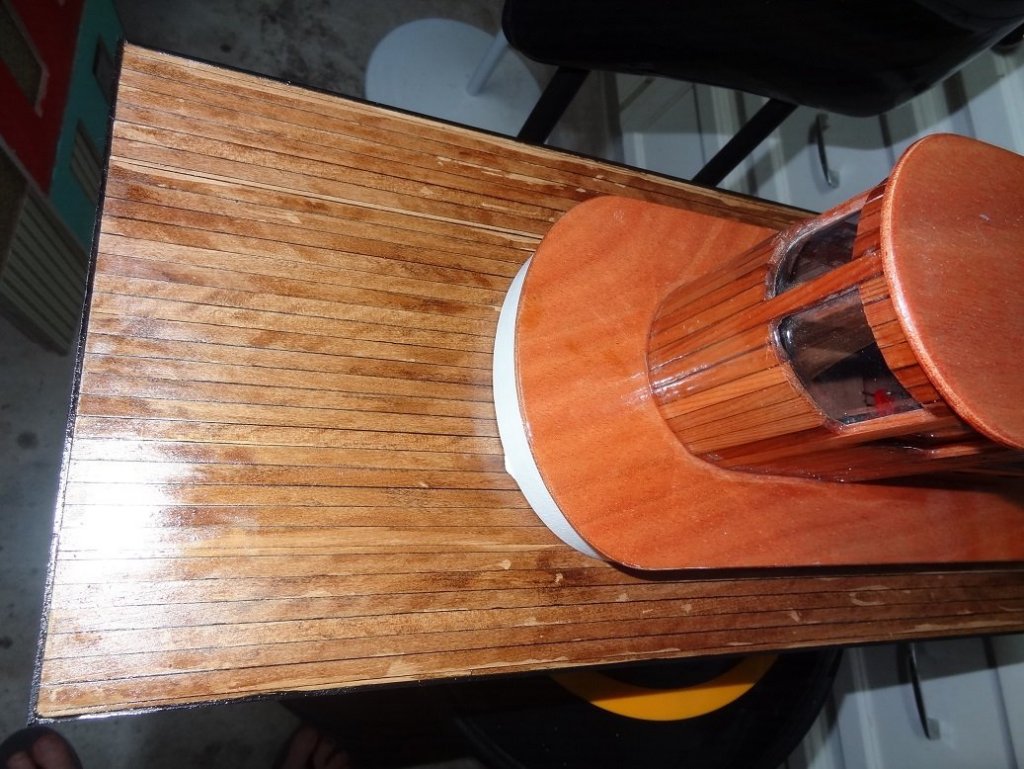
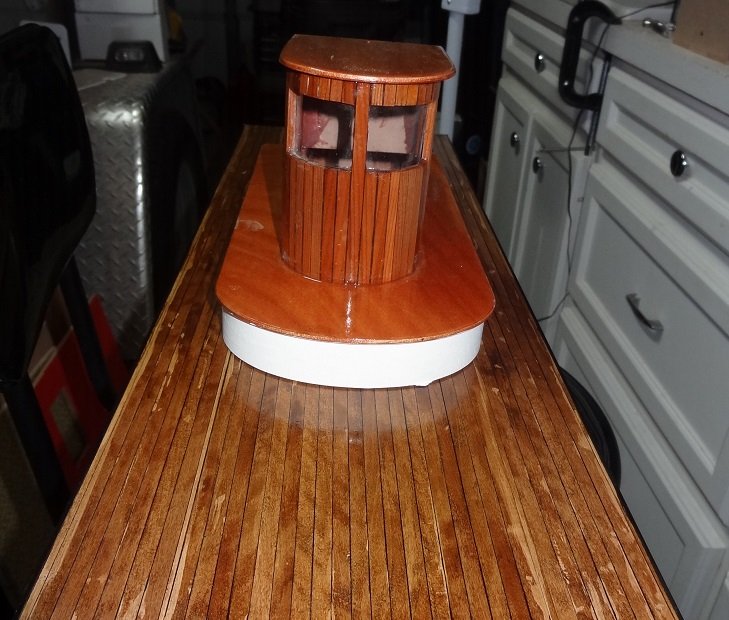
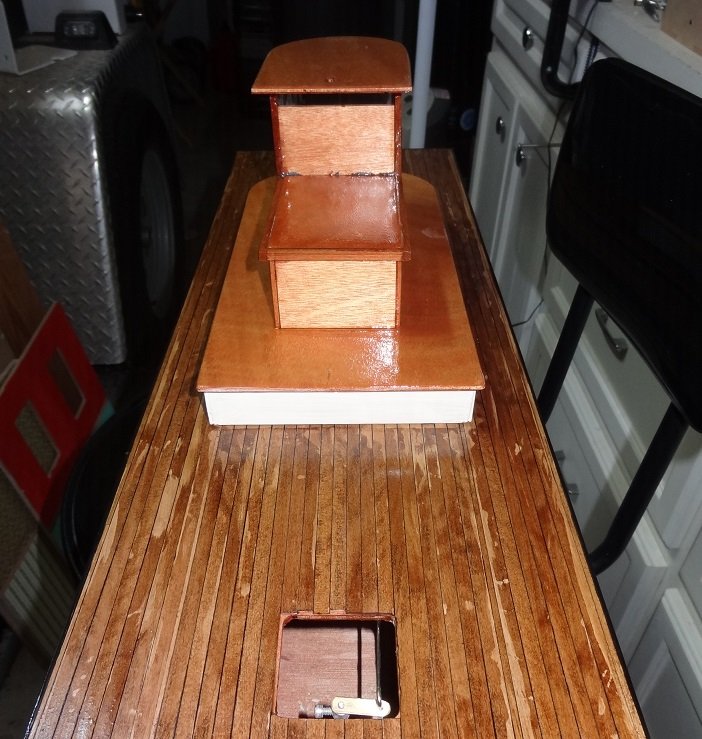
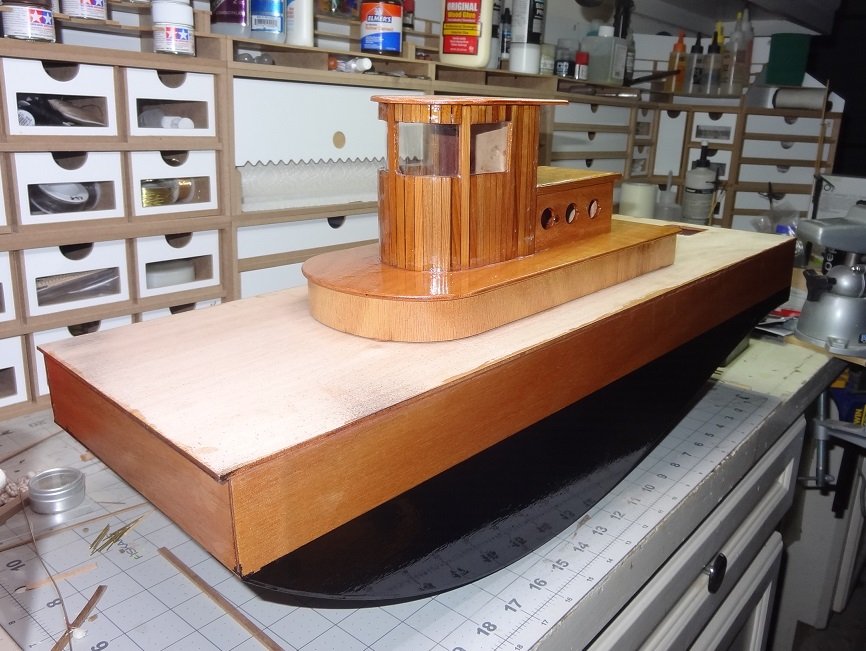
Got a lot done in the last 24 hours. Deck is planked, stained and first coat of varnish. I used 1/4" x 3/32" boxwood sticks, miscalculated and ran out before I was finished. That was disheartening as it was early this morning, I was on a roll and had planned to finish planking. Fortunately I had a 3/32" sheet and was able to rip enough from that to get the rest. Staining (Minwax Provincial) really showed up all the spots where I didn't sand the glue off well enough. I was going to sand the stain off and try again but then I thought for a tugboat, all the spots kinda add to the ambiance. So I left them. I used a satin finish on the deck rather than the glossy that is on the sides and bottom. Got to thinking, all the wood is covered now so I could put it in the water tomorrow. We'll see. Pix are a little dark this time, not sure why.

- 96 replies
-
- 4
-
-
- tugboat
- Tippecanoe Boats
- (and 2 more)
-
Don't feel too bad Matt - 0.5 is very thin and difficult to work with. At that thickness most wood can easily crack or fray. You could try filling your gaps but there can be some evils involved with that, particularly if you are leaving the hull natural. Some real fine sand paper or 600 sanding sponge could smooth some of that out without sanding thru the veneer.
- 50 replies
-
- 1
-
-
- artesania latina
- Virginia
- (and 2 more)
-
Don, E.J., thanks for the feedback. I have a lot of boxwood strips so I imagine I'll go with those - maybe darkened a little bit. I have some walnut and maple sheets on order - I could make planks from those. But I'm not sure when they will arrive and I would like to get this build finished this weekend. I definitely want the tires, however that must be a hot item in the model car world. Lot's of sites have them and lot's of sites are out of stock. Had not thought about the tires being useful, but you are right E.J. And I do plan on this tug being a rescue boat for my RC sailboats.
- 96 replies
-
- 4
-
-
- tugboat
- Tippecanoe Boats
- (and 2 more)
-
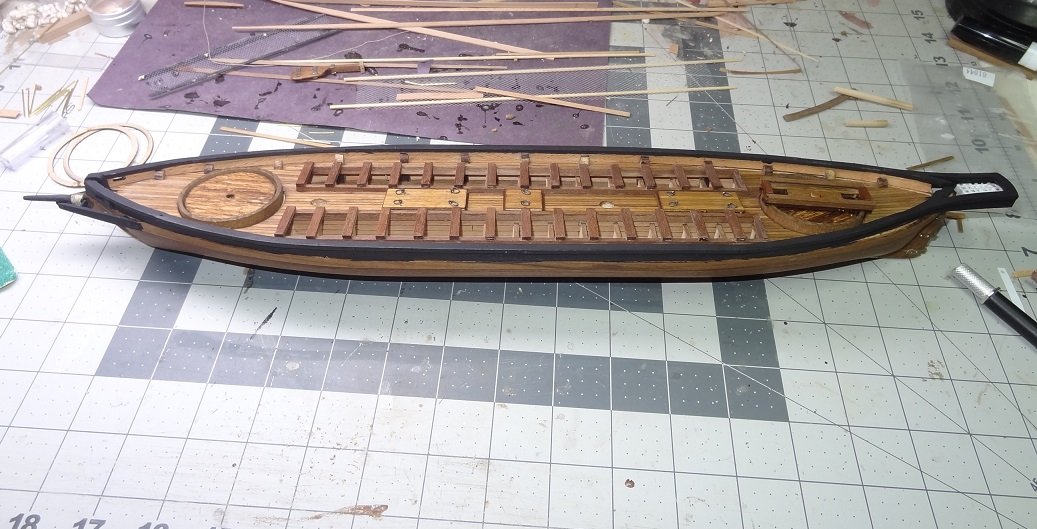
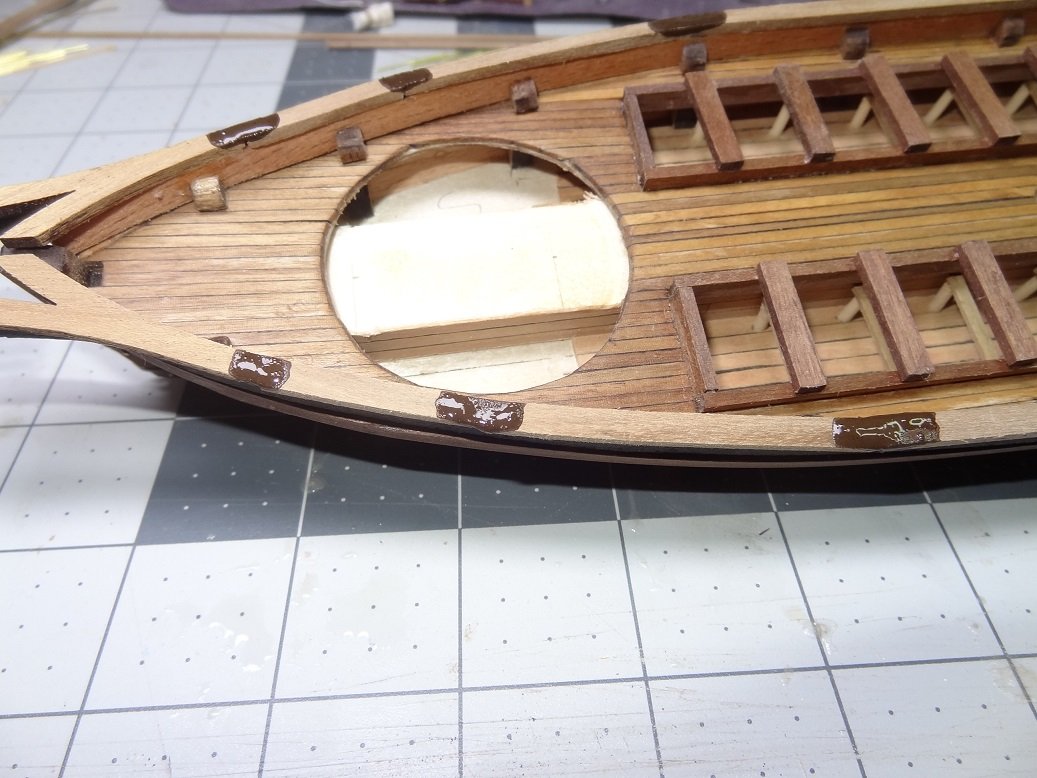
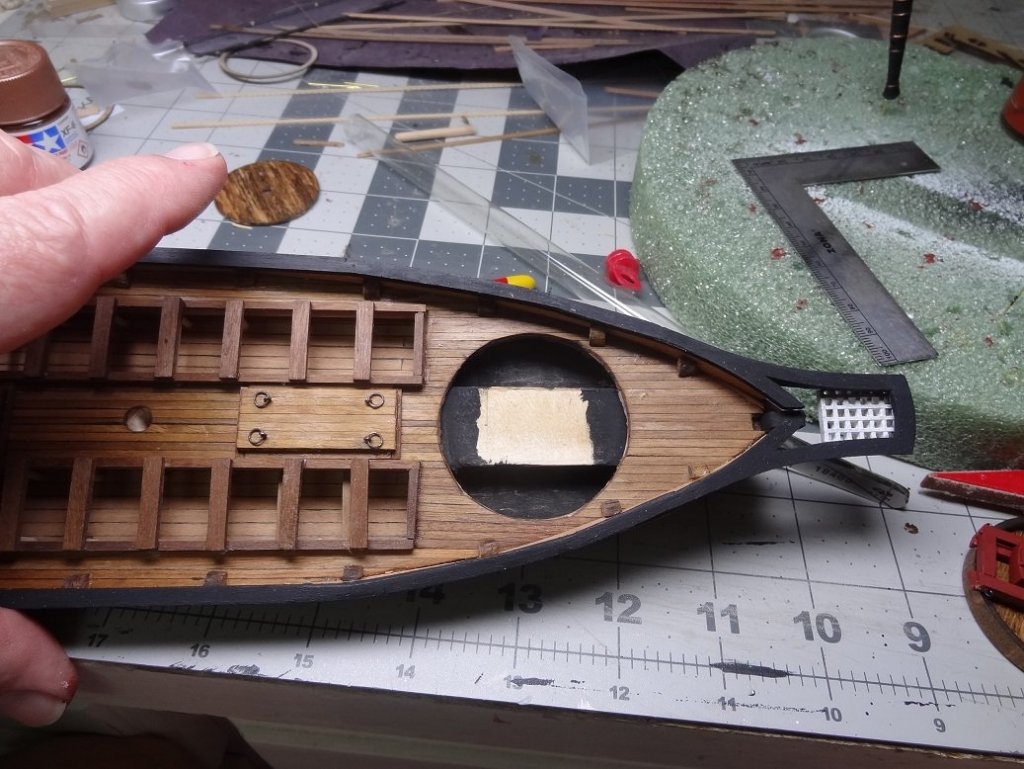
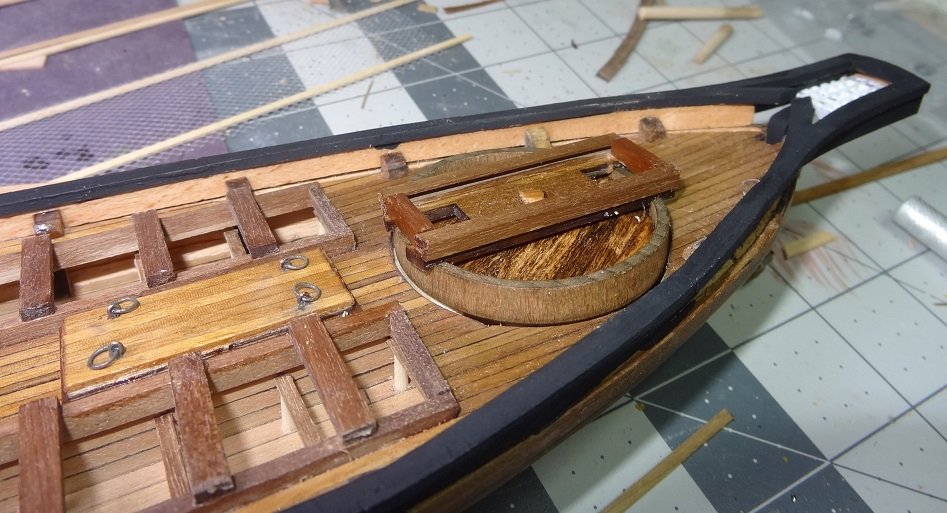
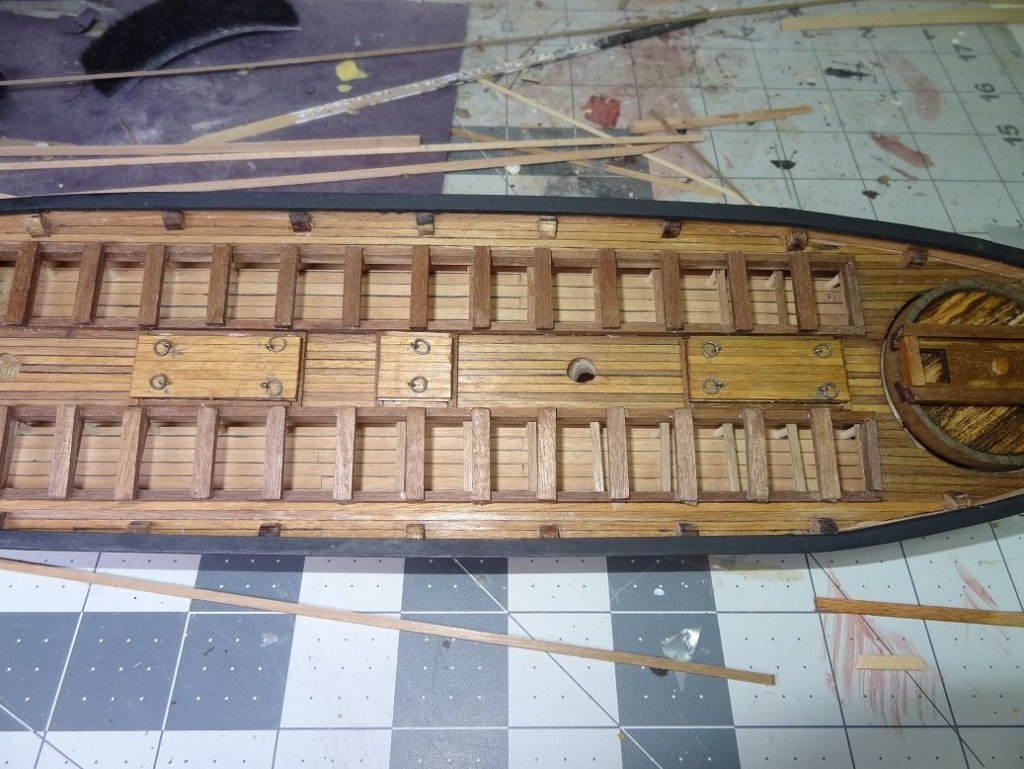
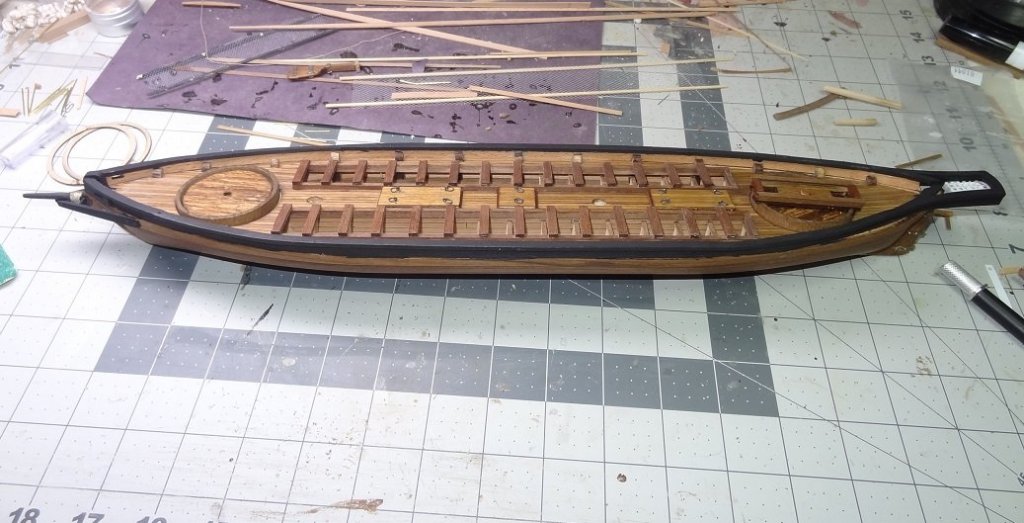
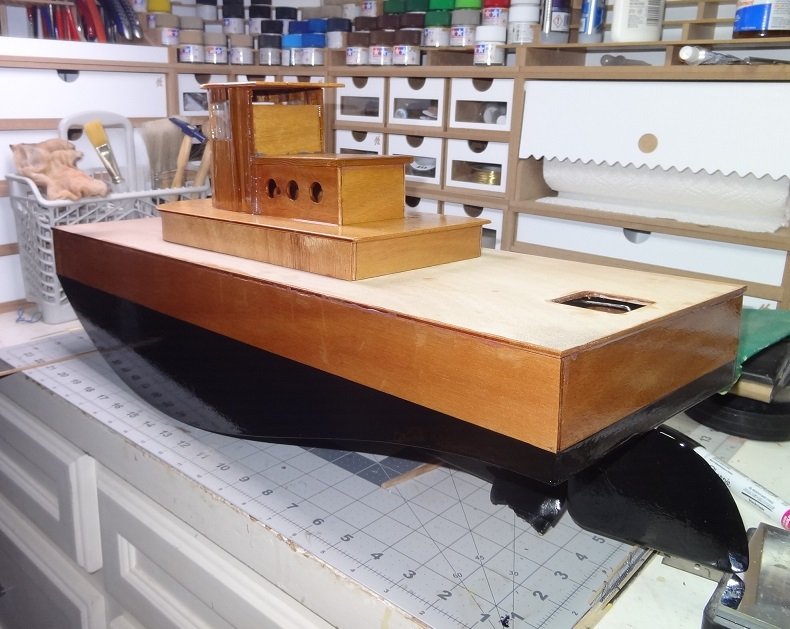
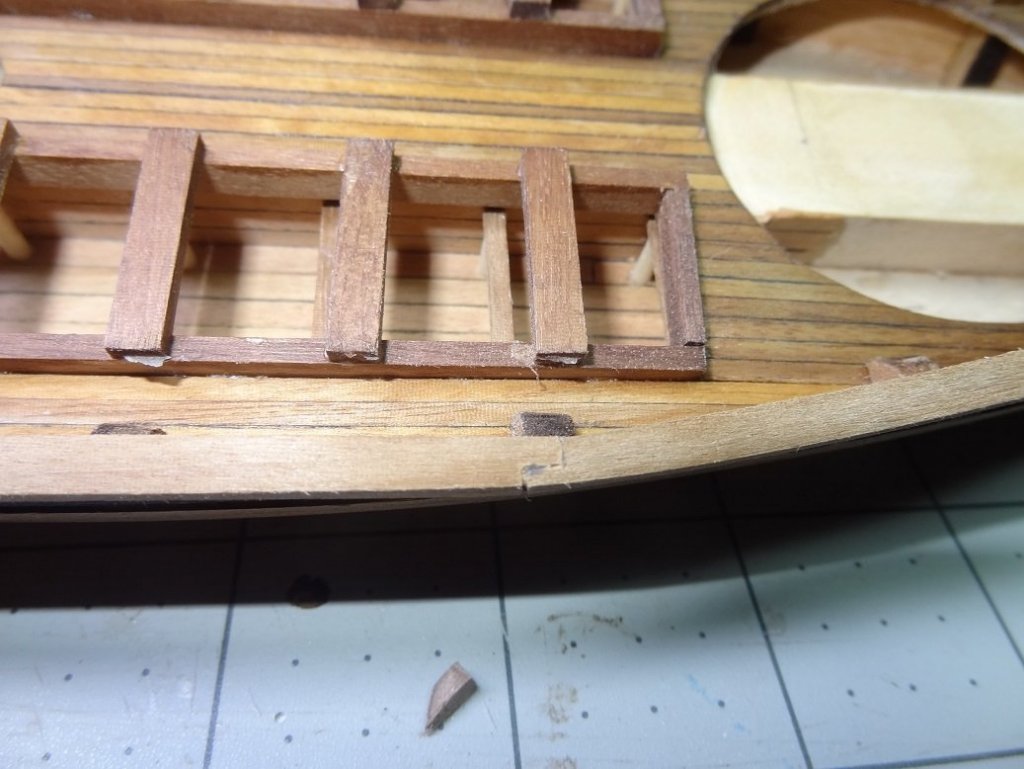
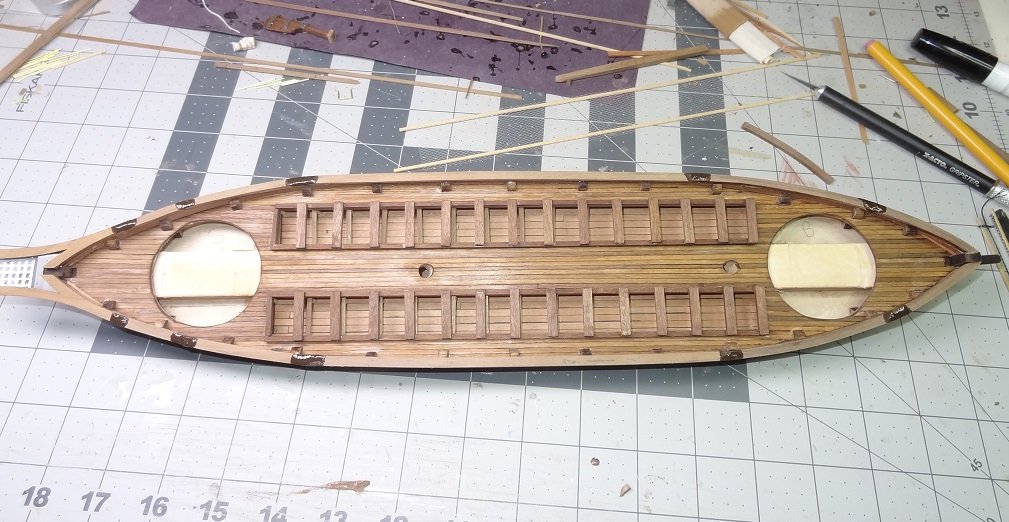
Work presses onward. Hatch covers are in place. Makes me wonder how much storage there really was. I guess just enough for powder & balls for the guns. My understanding is that once in position, the rowers would take up muskets but I don't know where those might be stashed in the interim. I've started on the gun platforms. A little planking in the round. It'll be nice to get those big holes in the deck covered. These are going to look cool rigged with the tackles to rotate the platform. She's coming along.
- 138 replies
-
- 11
-
-
Well I did pick up some Titebond III today. I believe planking is the only option now. Too much overspray from painting the hull. If the deck was solid wood I'd be sanding right now, but it's plywood with a thin mahogany veneer. If you do much sanding on it you go right thru the veneer. It should look pretty nice planked. I'm thinking some pretty wide strips, maybe 1/4". I still want to get some model tires to hang around it.
- 96 replies
-
- 5
-
-
- tugboat
- Tippecanoe Boats
- (and 2 more)
-
Just noticed the pintle & gudgeon hinges. Nice idea!
- 653 replies
-
- 4
-
-
- trabakul
- marisstella
- (and 1 more)
-
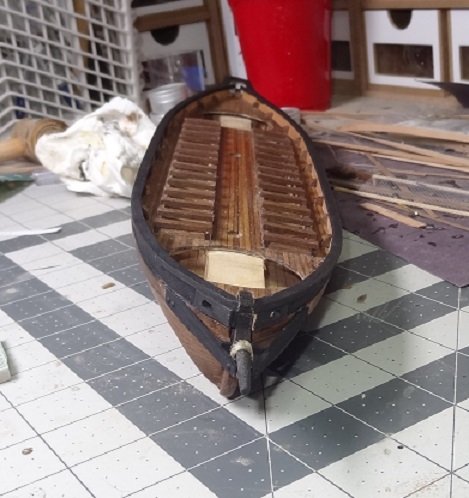
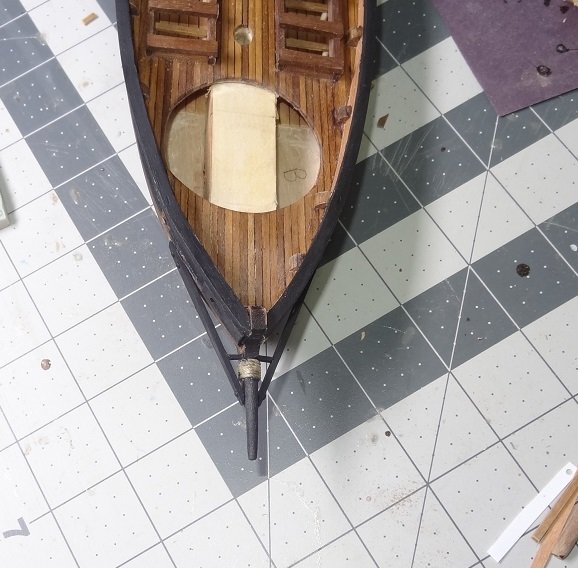
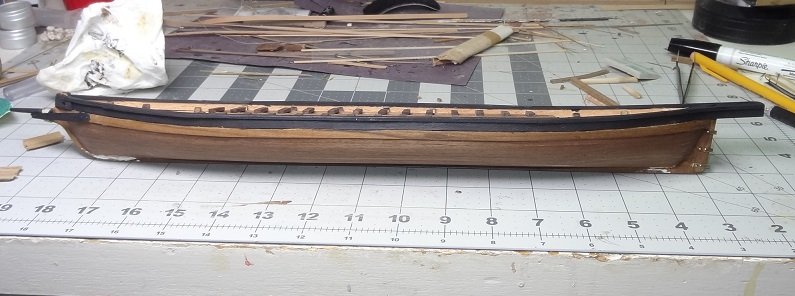
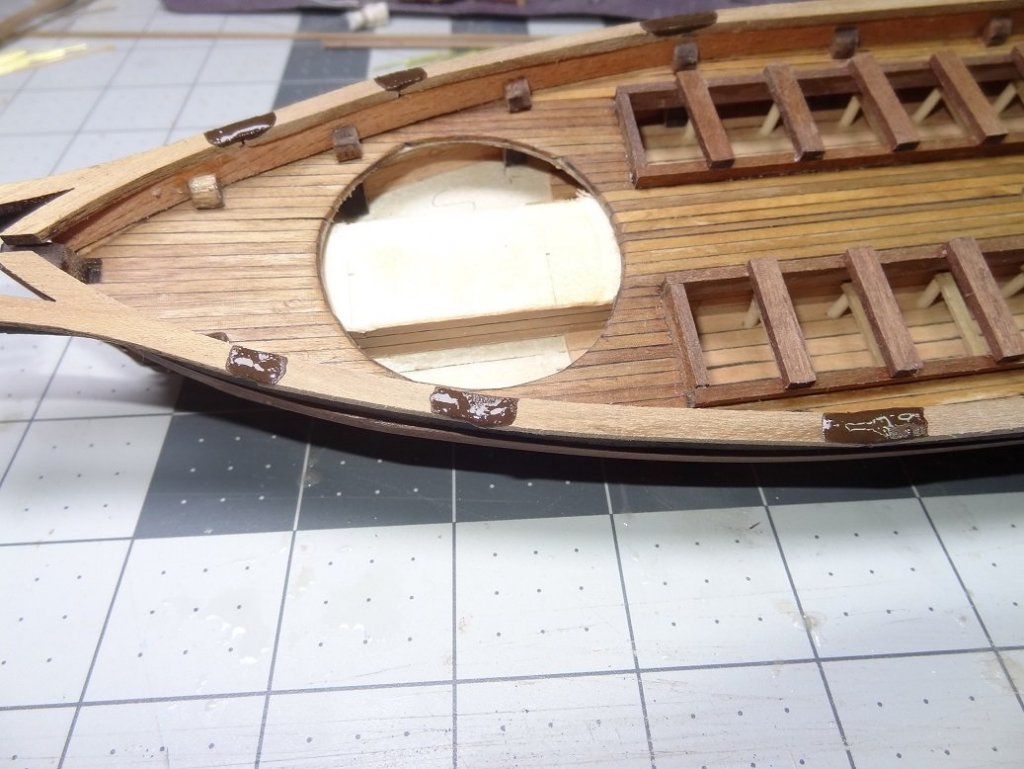
I got an early start this evening. The hawse holes are cut, the bowsprit is in (if you can call it a bowsprit) and the bulwarks are painted. You would think I would have learned my lesson by now about painting in mid build. It's bound to get scuffed up and will require a final coat. She's got nice lines. I'm hoping to finish the hatches tonite.

- 138 replies
-
- 10
-
-
No beveling? That's almost criminal.
-
Laser cut planks? Now there's a new one. Are they accurately cut?
-
Per - I was wondering about the space left for the rest of your planks. It looks like the bow area is narrowing down some. You may be doing some tapering of the planks.
-
Hey Steve - Thank you. The grunt work is almost finished, then it's time for the fun stuff. The guns will be interesting. They are on a sliding carriage mounted to a revolving palette. I have to wonder about firing one to either side - the boat must have really rocked something fierce.
-
She keeps getting better and better Mike. I'm still waiting to see how you deal with the cap rails.
- 129 replies
-
- 2
-
-
- finished
- model shipways
- (and 1 more)
-
Per - is it just the angle of the pic or are you going to have a squeeze at the bow with your planking?
-
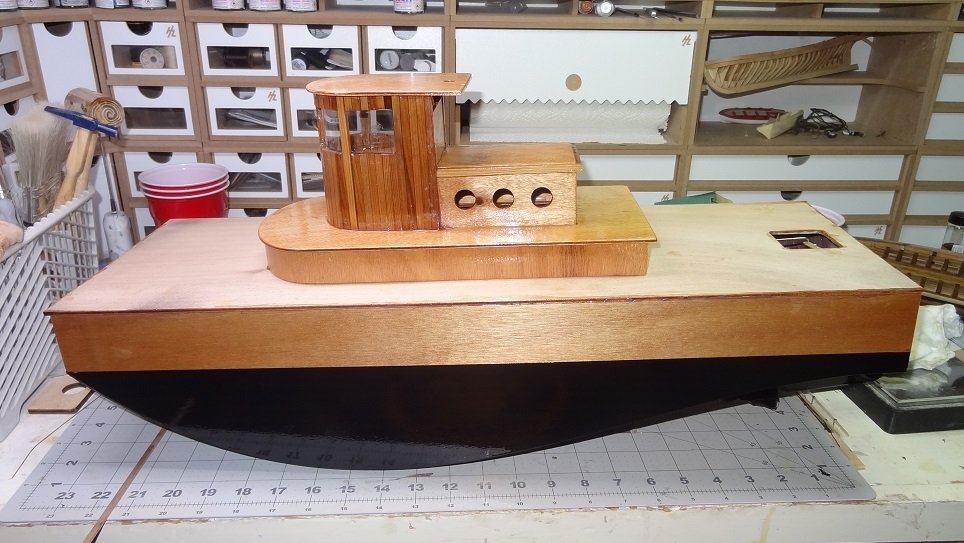
With the deck glued to the hull I couldn't resist doing a little painting and varnishing. A long way from finished, but she is taking shape. I am one step closer to planking the deck. Overspray from painting the hull got all over the main deck. Lots of little black dots. It will probably sand off but I can leave it if I plank. The one scary thing about that is using epoxy to glue down the sticks. I tried that on my T37 sailboat and it was a mess. As much as I rave about this epoxy, it is extremely difficult to use for planking. I've also thought about adding some brass hand rails in a few places. Not sure if it would just get beat up down the road. Was also thinking a bunch of model car tires around the hull would look cool. I'm tempted to fill up the tub and see how she floats
- 96 replies
-
- 6
-
-
- tugboat
- Tippecanoe Boats
- (and 2 more)
-
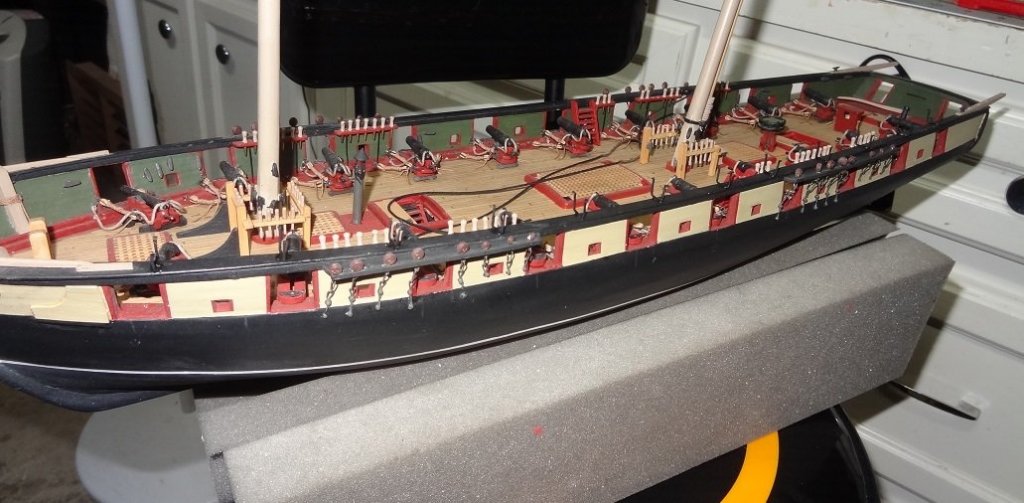
I have had (and still have) some serious reservations about the rigging for this build. Not so much about the complexity involved but more about the time needed to do it. I've been working this build since October 2015 and there have been some major life changes along the way. My needs from this hobby have changed because of that, at least temporarily. I want to accomplish tasks quickly, with something to show for it. A little instant gratification. Spending the next 6 months on rigging is just not an appealing thought right now. That said, I did pick up the Lauck Street practicum DVD set and the rigging lessons in there seemed to have sparked my interest a little. On the other hand, I like the way Niagara looks now, with no rigging or masts. So where (or maybe how) Niagara ends up is still a big unknown right now. She will always be there, so there is no rush.
- 843 replies
-
- 4
-
-
- niagara
- model shipways
- (and 2 more)
-
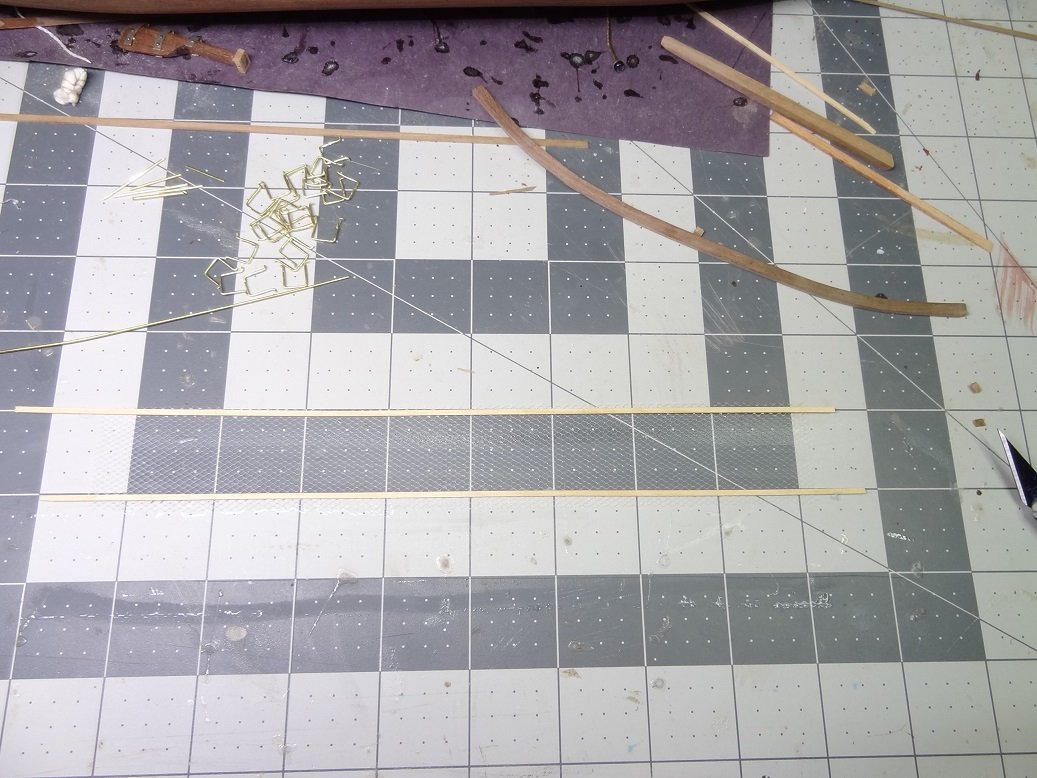
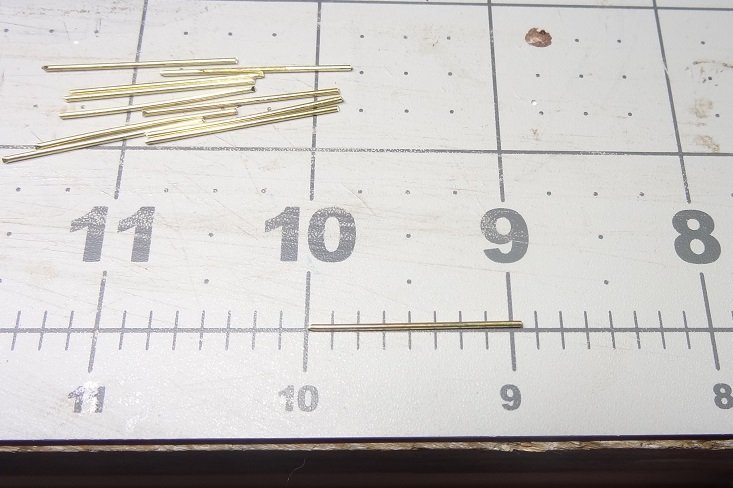
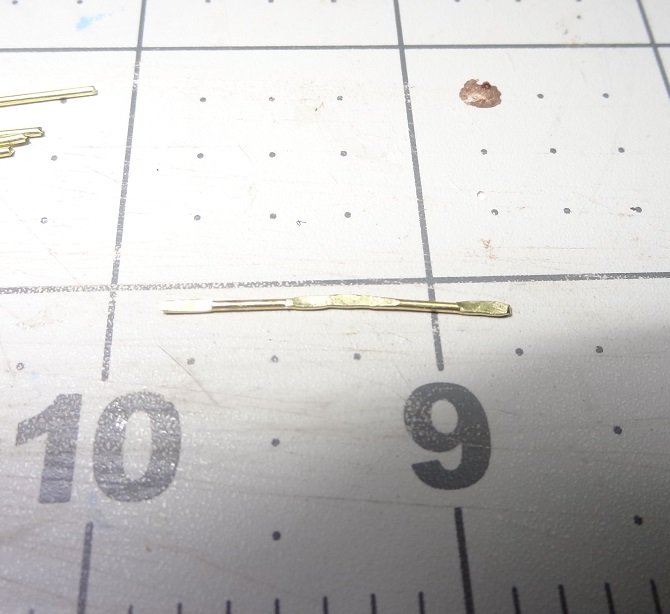
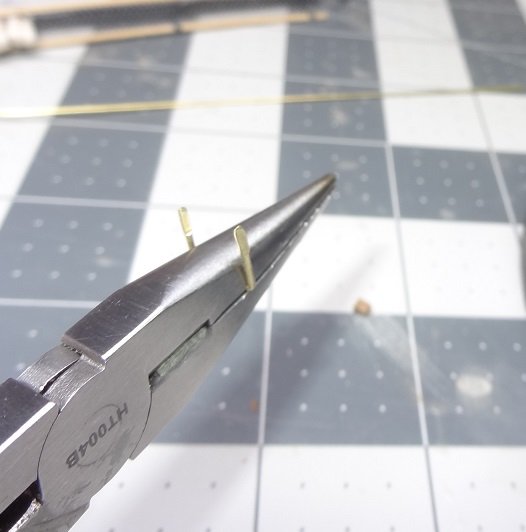
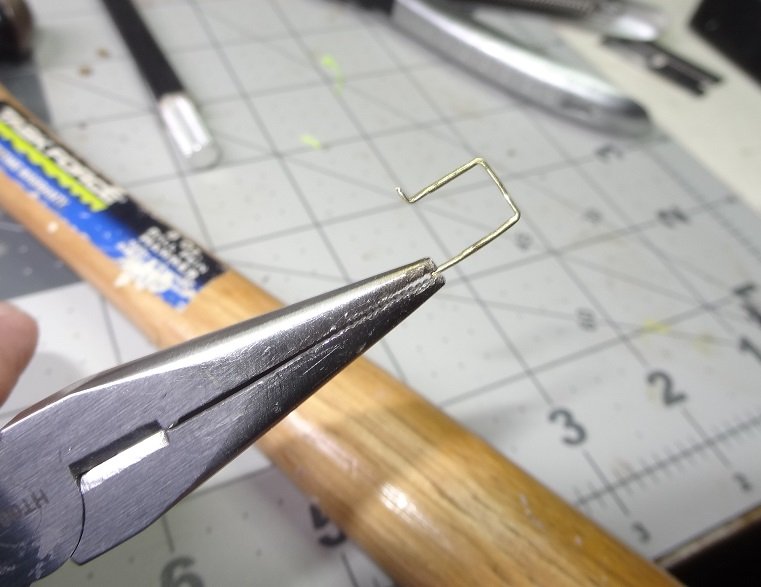
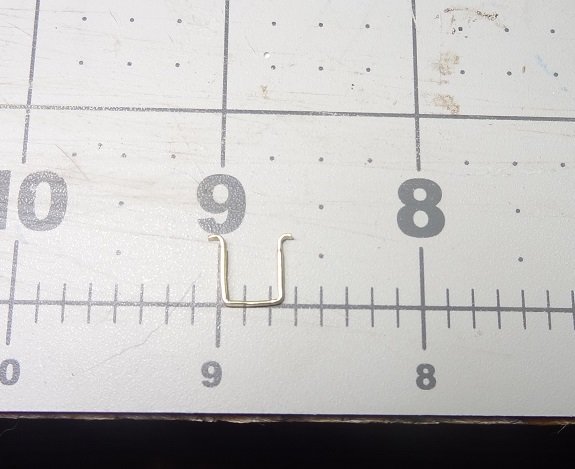
Bet you thought this thread was dead didn't you? There's been a lot of deliberation on this build. I have a few more "deck items" to complete and then rigging. I've been thinking hammocks for way too long. But I believe it was a worthwhile endeavor. I'm still working towards something like the last prototype. No covers, just stanchions with rails, webbing, stuffed full of hammocks. I'm going off the beaten path for this but it's the look I want. That's about 15" of structure on each hand rail. Thinking ahead a bit, I think all the hammock stuff must be done before rigging. There's just too much in the way afterwards and it would complicate a relatively easy job. So now is the time! I made a few stanchions over a month ago and completely forgot how I made them, so I'm adding some pix here so I'll remember. If they help someone else, even better. I started with some 0.8 brass rod. Cut pieces just slightly over 1" long. Then with a 5/8" punch I flattened each end and some of the center. I have a small long nose pliers with the widest part of the nose being exactly the width I wanted the stanchions to be. This helped a lot with consistency. So I grab the brass right in the center with the pliers and bend each side. While still in the pliers I hammered the bend to get a reasonbly sharp 90 degree angle. Then grab the very tip and put a 90 degree bend to the outside. This creates a lip for the wood rail that will be glued to the stanchion. Clip off any excess, you hardly need anything extending outwards. One down 19 to go. I'm figuring a stanchion every 1 1/2" along the hand rail. 15" total length with a small break at the ladder. I completed all 20 last night. This morning I spent about an hour comparing them all. I lined them all up next to each other to compare width and especially height. These things MUST be very consistent. When the rail is glued to them it will become very obvious as the rail would snake up or down at each glue point if the height is off. The webbing. The material is called tulle. Available in fabric stores and online. I cut a strip 1 1/4" wide. This stuff is very thin. The white tulle is darn near impossible to see on a white surface. Use a piece of dark construction paper underneath. The sticks here will be the rail that is glued to the stanchion. They are glued (I used Elmer's) to the tulle. The sticks are thin enough that they will bend as the hand rail curves at the bow. I opted not to solder a small post to the center of the stanchions. While it might give some additional strength to the installation it seems like a lot of extra effort to me. In the case of Niagara, the stanchions need to sit flat on the rail, not elevated at all as there is NO extra clearance between the stanchions and the shrouds. Learning what I have about epoxy from my tug boat build, I believe a spot of that will provide enough strength when mounting the stanchions. The only negative side is I better get it right the first time, because tearing off an epoxied stanchion would likely damage the rail. So, slow & steady with several walk throughs before the real thing.


- 843 replies
-
- 5
-
-
- niagara
- model shipways
- (and 2 more)
-
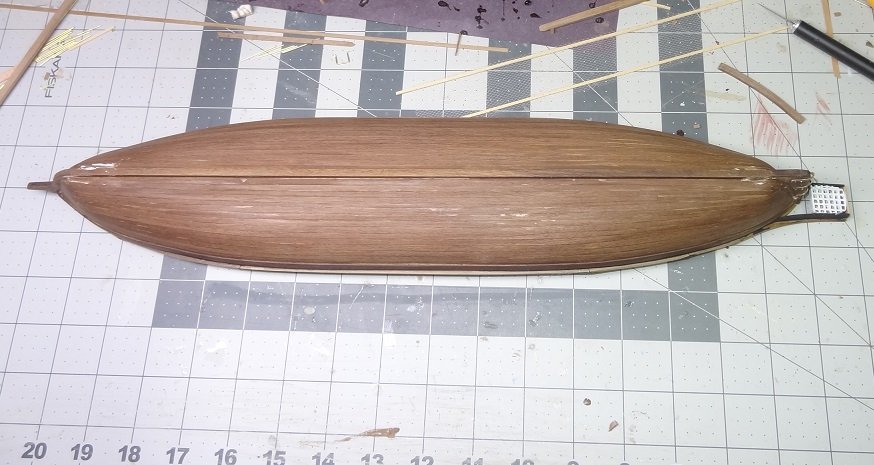
Hull is officially finished. I feel like I said that before. I played around with coloring filler so it would not be so obvious after staining. I could have done better and I am still working on that, but it's a side project now. The white you see in the pic is some Tamiya filler. I was going that route at first, then got sidetracked with the color thing. The hull will be painted white below the water line. It was an interesting weekend - working on 3 different builds. Sometimes all within the same hour. OK, 4 builds if you count re-rigging one of the RC sailboats. The stern platform is finished. It kind of funky, but it is what the instructions called for. I've also finished the cap rail. The stern platform piece was laser cut, the rest I had to make. I used several pieces on each side to get around the curvature at the bow & stern. A simple scarph joint was used to join the pieces. There's still filler on the joints. The cap rail will be painted black like the bulwark plank. I'm about to drill the hawse holes in the bow and then the bowsprit is next. Other than being short a few walnut sticks, I have no complaints with this kit. The instructions along with illustrations have been adequate. I've barely touched the plans. I still think it's going to be a real unusual but nice looking build when it's completed.

- 138 replies
-
- 12
-
-
Filler for Natural Wood?
mikiek replied to mikiek's topic in Building, Framing, Planking and plating a ships hull and deck
I had not run into that Bob. I'm finding that even with a darker filler mix the hull appears fairly lite from all the dust. I brush it with a paint brush but it is still lighter. What is working for me is a damp rag wipe down after sanding. -
Filler for Natural Wood?
mikiek replied to mikiek's topic in Building, Framing, Planking and plating a ships hull and deck
That was one of the sites I hit. Thanks to all who have contributed to this thread. I have learned something