HOLIDAY DONATION DRIVE - SUPPORT MSW - DO YOUR PART TO KEEP THIS GREAT FORUM GOING! (Only 20 donations so far - C'mon guys!)
×


mikiek
-
Posts
2,276 -
Joined
-
Last visited
Content Type
Profiles
Forums
Gallery
Events
Everything posted by mikiek
-
 Don - although it interferes with my model building I am having fun with it. It's kinda cool building a boat that you can actually get wet. I have their tri-maran on order. Bob - this guy Will is a wizard with epoxy. All kinds of interesting tricks. And he explains them all very well - both in his videos and the kit instructions. I've learned so much from doing his builds. As a for instance, I think my old problems with the 15 minute 2 tube epoxy was not mixing it well enough. Will is adamant about that. Used to be the 15 minute stuff was still gooey the next day. I know I added the proper amount of hardener, but if it ain't mixed in it ain't gonna work. Will stresses 30-60 seconds of mixing before use. Anyone that has dealt with Tippiecanoe will tell you they are a top notch outfit. Great products and great customer support.
- 96 replies
-
- 4
-

-
- tugboat
- Tippecanoe Boats
- (and 2 more)
-
Filler for Natural Wood?
mikiek replied to mikiek's topic in Building, Framing, Planking and plating a ships hull and deck
I will file those away for future use. My next few kits are either painted hulls or walnut. For walnut I believe I will stay with the crystals. It appears that there is a defined set of colors for the universal tints? Went to 2 sites and both had the same colors but different brands. -
You know Per, I had been toying around with the planking idea. I guess even a modern day tug might be wooden planked? It would add some interest, but it would also cover up the nicest piece of wood in the build. You know how that mahogany plywood looks with a slick coat of varnish on it. I was also looking around for something that I could use to make the round windows look more like portholes. Some sort of round frame. A few life preservers and some rope coils would be interesting as well. And there really is a rescue arm although not hydraulic. Once I get that on the boat I can try sailing in a few new places that I have been scared to try. If the T37 gets stuck the tug can come get it.
- 96 replies
-
- 4
-
-
- tugboat
- Tippecanoe Boats
- (and 2 more)
-
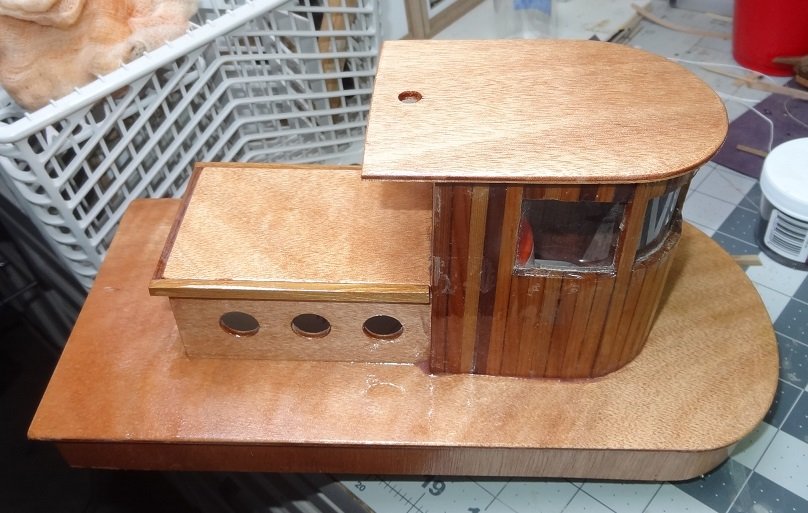
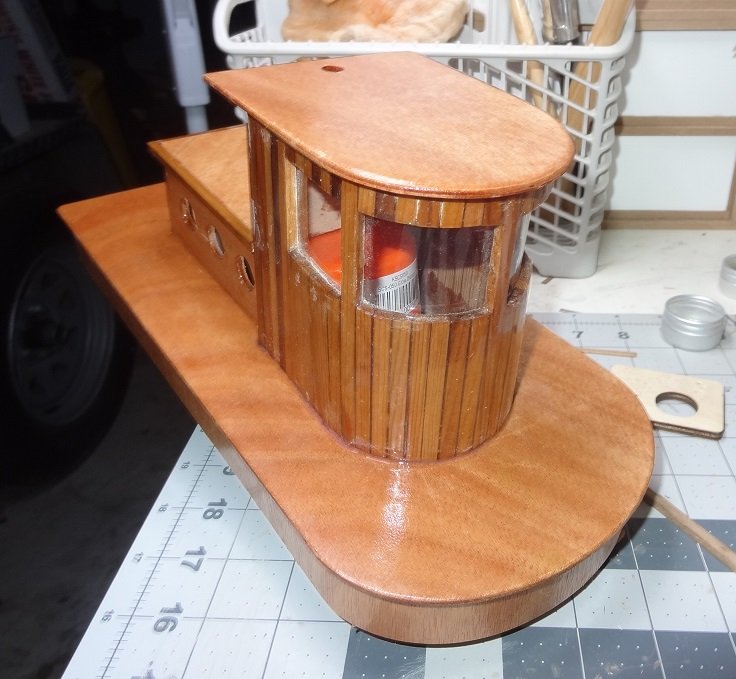
I have glued the deck to the hull! This was an interesting exercise as I had to mix more epoxy for this than I have ever used before. It's a race against the clock to get it in place before it thickens up. I kind of like the technique used for this as well. It's clear coat and thick stuff as usual although the thick stuff needs to be a little thinner than usual - barely runny. The reason for this is that you apply the epoxy to the inside upper edge of the hull, slap the deck on and then turn it upside down. Gravity pulls the epoxy down and it ends up settling at the joint between the deck and hull, making a nice fillet. Once again it would have been difficult to take step by step pix, so here is what I ended up with. The thing that bugs me about epoxy is that now I have to wait until tomorrow to see what it looks like Paint or varnish or both? That's what I need to decide now. I was talking to Will (Tippiecanoe owner) this afternoon and he suggested varnishing it all for now and then paint it down the road when I get the urge and the right combination. That's probably what I will do.

- 96 replies
-
- 4
-
-
- tugboat
- Tippecanoe Boats
- (and 2 more)
-
Got a good thread regarding filling for a hull you're going to stain here. This came up as I had a few thin gaps in the strakes after planking. I needed to do something with them but filling something you're going to stain is quite different than filling something that will be painted.
-
Filler for Natural Wood?
mikiek replied to mikiek's topic in Building, Framing, Planking and plating a ships hull and deck
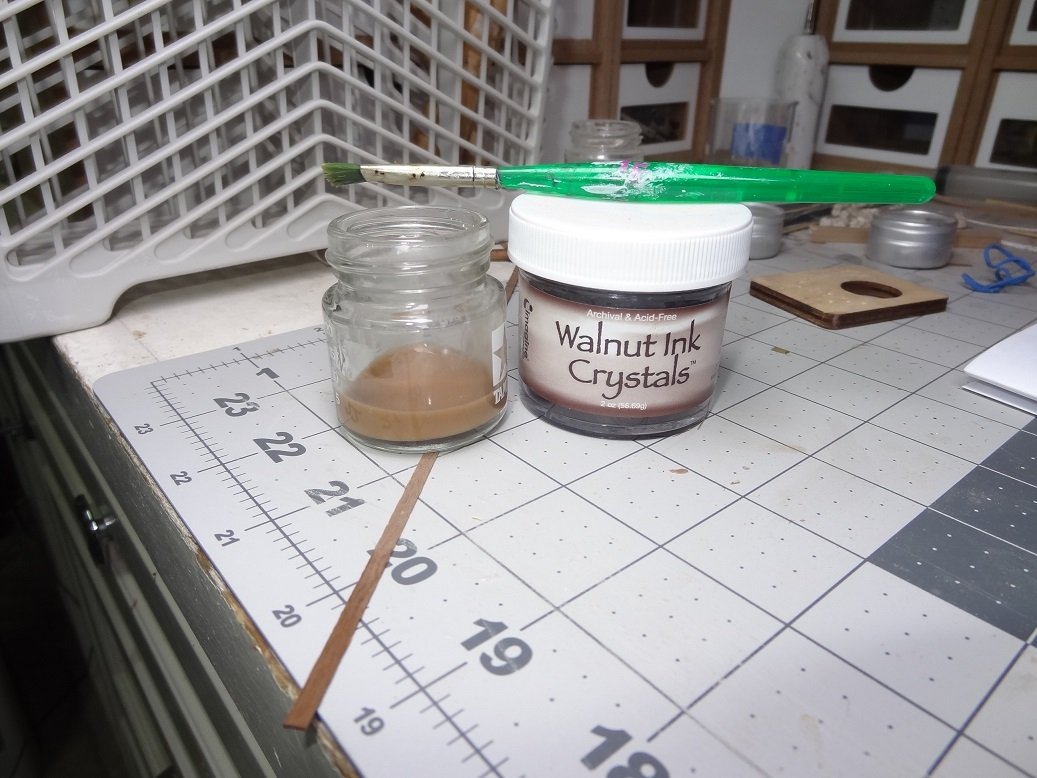
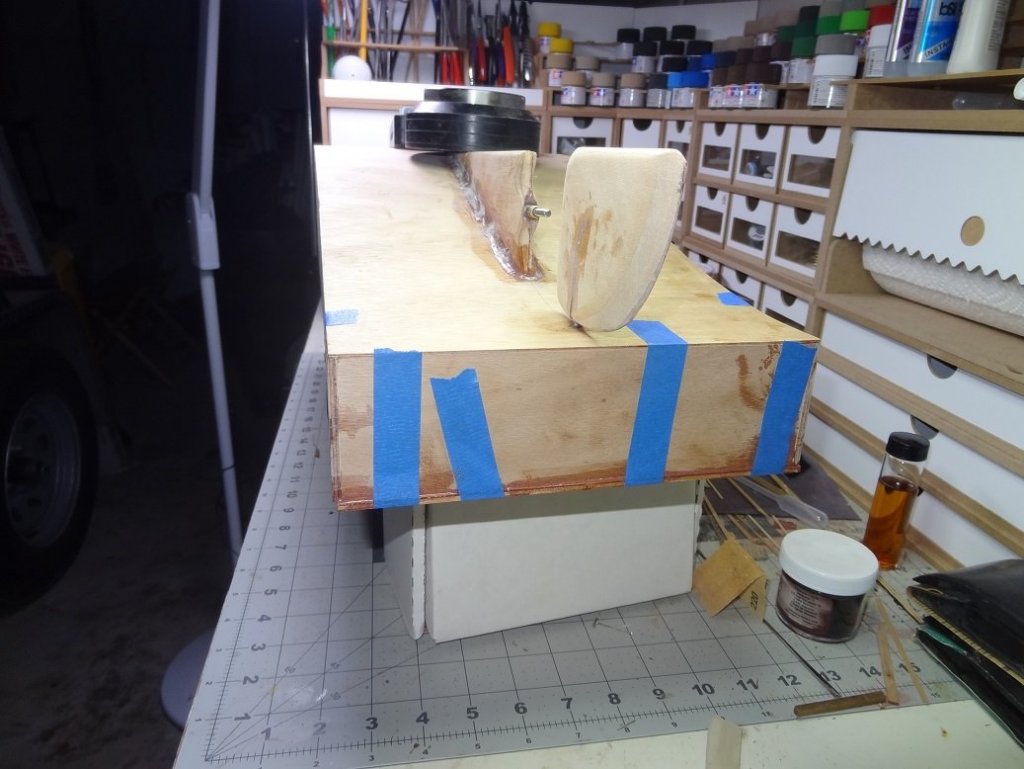
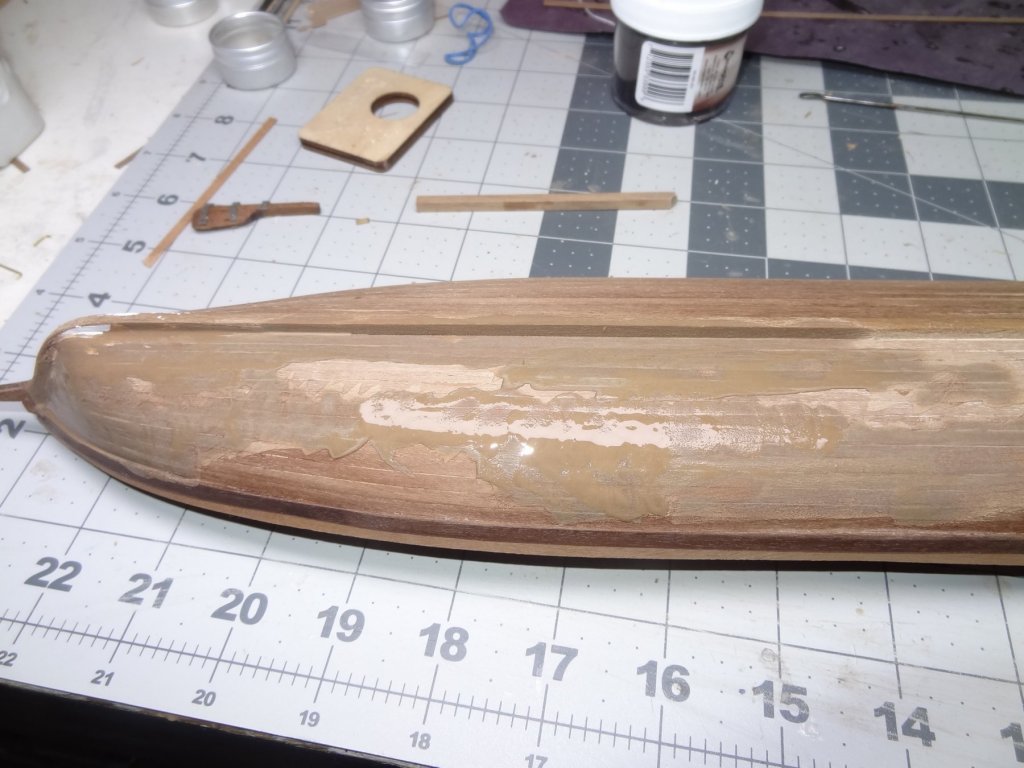
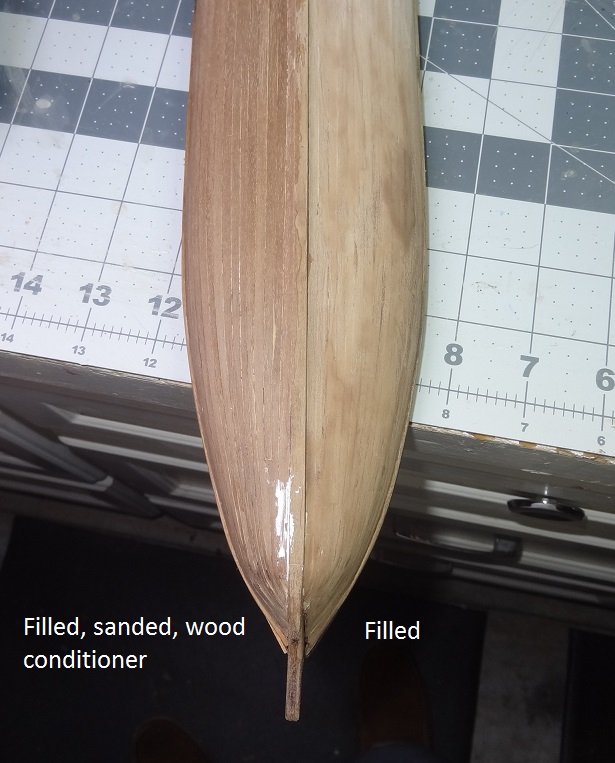
Working off vossiewulf's suggestion I am using the same old filler I always use and adding the walnut crystals to that. I also add a splash of water to thin out the filler - it ends up about the consistency of a milkshake. I then use a paint brush and paint it on. This works well as I can apply a thin layer or pile it on where it needs it. My first attempt at coloring looked good mixed up and wet on the hull, but it lightened up when it dried. After sanding, I went ahead and rubbed on a pre-stain and then the natural stain. Sadly it came out like I figured - the lighter colored filler was lighter colored after the stain. I decided to give it another shot, this time making the mix darker. This one is still drying in the garage but it looks like it might be a success. You can compare the color of the mixing jar. The first attempt looked like coffe & cream. The second more like milk chocolate. Poor Arrow is becoming a testing ground. I guess if I can learn something it will be worth it. Besides the hull below the waterline is supposed to be painted white. That will cover up some of the evil. In the end, I think this method for a walnut hull with the walnut crystals can work. Not sure about woods with a different tint. Maybe the universal tints vossiewulf mentions could work.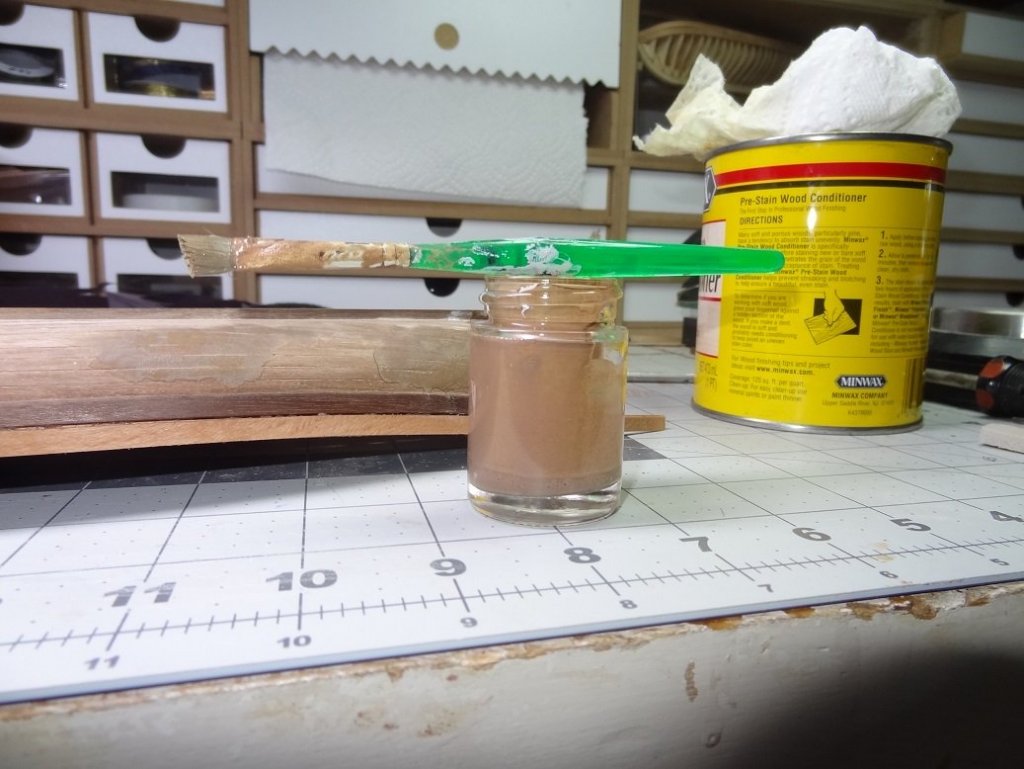
-
Fantastic accomplishment young man! I hope you are proud - you should be. It's been a real pleasure watching you grow during this process.
- 701 replies
-
- 3
-
-
- phantom
- model shipways
- (and 1 more)
-
Maybe after I get my 24 channel transmitter Per. Lights, a horn, hydraulic rescue arm
- 96 replies
-
- 4
-
-
- tugboat
- Tippecanoe Boats
- (and 2 more)
-
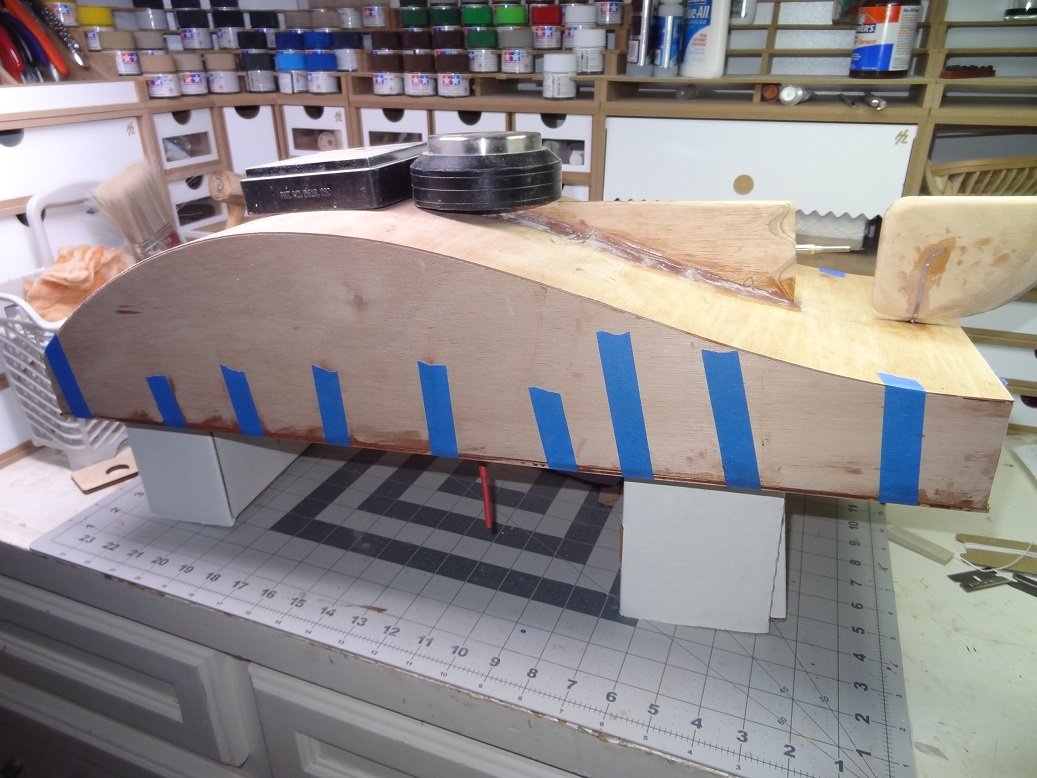
Went thru the instructions for mounting the deck to the hull. I'm going to have to dry run that a few more times. You gotta mix a whole lot of epoxy for this step. There's just a couple of pages of instructions left. I'll need to decide on a paint scheme pretty soon and get started on that. I did put a thin coat of varnish on the deck structure this evening. First of many. On the sailboat build I lost count, 7 or 8 I think. You can begin to see how nice the wood looks. It'll be difficult to decide paint or varnish. Probably some of both.
- 96 replies
-
- 4
-
-
- tugboat
- Tippecanoe Boats
- (and 2 more)
-
Thank you Matt. Kits are hit or miss. Some brands seem more reliable than others. I just finished one where the instructions and the plans did not match up. Both on positioning and dimensions. Plus they were in Italian. If it was me, I would work on the rudder. If it gets hosed up it's pretty easy to make another. Another option might be to extend the stern post. Looking at the last pic you posted (I guess from the instructions) and your one from earlier, The upper end of the SP is not landing in the same spot. Maybe the ticket is to do all of the above. That way no single part gets enlarged too much. That's what you have to watch out for.
-
Thanks Elijah. This is the 2nd kit from Tippiecanoe Boats and they are both well designed. Even the instructions are great.
- 96 replies
-
- 5
-
-
- tugboat
- Tippecanoe Boats
- (and 2 more)
-
My suggestion would be to cut a completely new rudder. Welcome to the world of kits! Should you choose to add on, you might do a little research on rudders. Quite often they were not a solid piece. Rather several pieces that fit together. See post 194 here. You might take that approach. Take a chunk out of the current rudder and have your new piece fill it back in as well as add more material. Just keep in mind you will be wanting to round off the inner edge and sand to sharper edge on the outside so your addition needs to stand up to some sanding.
-
Hi Per - with the RC joystick I can slow the motor to where it's barely turning.
- 96 replies
-
- 4
-
-
- tugboat
- Tippecanoe Boats
- (and 2 more)
-
Hey Bob - it was mostly plug & play. I'm no expert but it appears that the components are quality stuff. I was actually glad to get the motor off my workbench. All sort of tools and the like were sticking to it. A fairly beefy magnet inside.
- 96 replies
-
- 4
-
-
- tugboat
- Tippecanoe Boats
- (and 2 more)
-
Thanks Mike - I have a pear wood replacement set for this build. I gave up during planking - Just couldn't get the wood bent correctly. I'm thinking of trying again with the kit basswood. Should bend and shape a lot easier. Seeing your build come together is making me want to get back to it.
- 129 replies
-
- 2
-
-
- finished
- model shipways
- (and 1 more)
-
Filler for Natural Wood?
mikiek replied to mikiek's topic in Building, Framing, Planking and plating a ships hull and deck
Sounds a little like what I was trying to do with the walnut crystals. Maybe I need to try some crystals directly in some filler. However your suggestion may cover the multitudes of other colored wood. -
Filler for Natural Wood?
mikiek replied to mikiek's topic in Building, Framing, Planking and plating a ships hull and deck
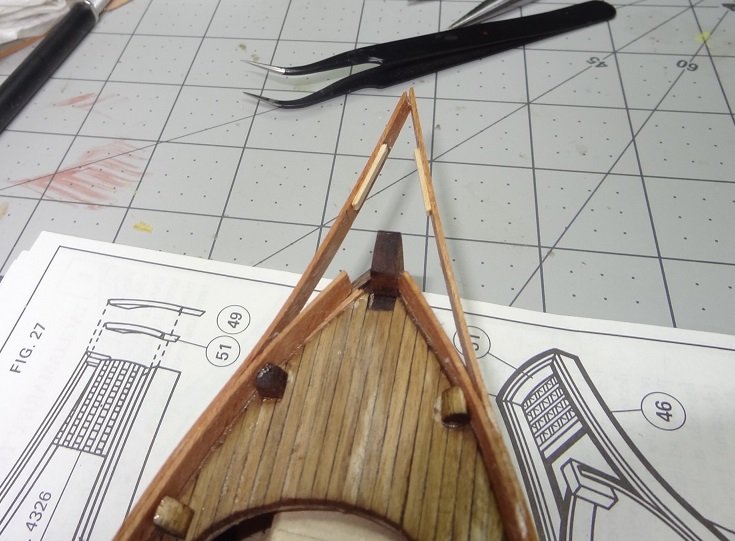
Chazz - it turns out on my current build that the stern post and stem are not installed until after the hull planking. For a variety of reasons I ended up going against that and installed those parts about half way through planking. There is also no rabbet called for in the plans so the planks (while glued) just lay on the stem and stern post and there is a bit of a gap there. Plus the plank edges look a little rough. I've been considering whether to live with it or try to fill it. If I do fill I think it would call for a layer of filler starting at the plank ends and going back maybe 1/4". So that's where I am headed with these last few posts. Also, I probably should have been clearer in my OP. When I stain I normally don't try to color the wood. I use a natural stain to enhance whatever color the wood happens to be. So while many fillers claim to be stainable, with the natural stain if the filler dries to a white, it will still be fairly white after the natural stain is applied. -
Matt - I've no idea what your plans call for but many rudders on later period ships don't go outside the transom. A hole is drilled right next to the stern post and the rudder ends up inside and comes out on the aft deck. It almost looks like that is what yours should do. Also, is it still a problem if you turn the rudder around - so the edge we see in your pic faces the boat? One more thing. Your pintles & gudgeons will extend the rudder out from the stern post a little, giving you a bit more clearance.
- 50 replies
-
- 1
-
-
- artesania latina
- Virginia
- (and 2 more)
-
Filler for Natural Wood?
mikiek replied to mikiek's topic in Building, Framing, Planking and plating a ships hull and deck
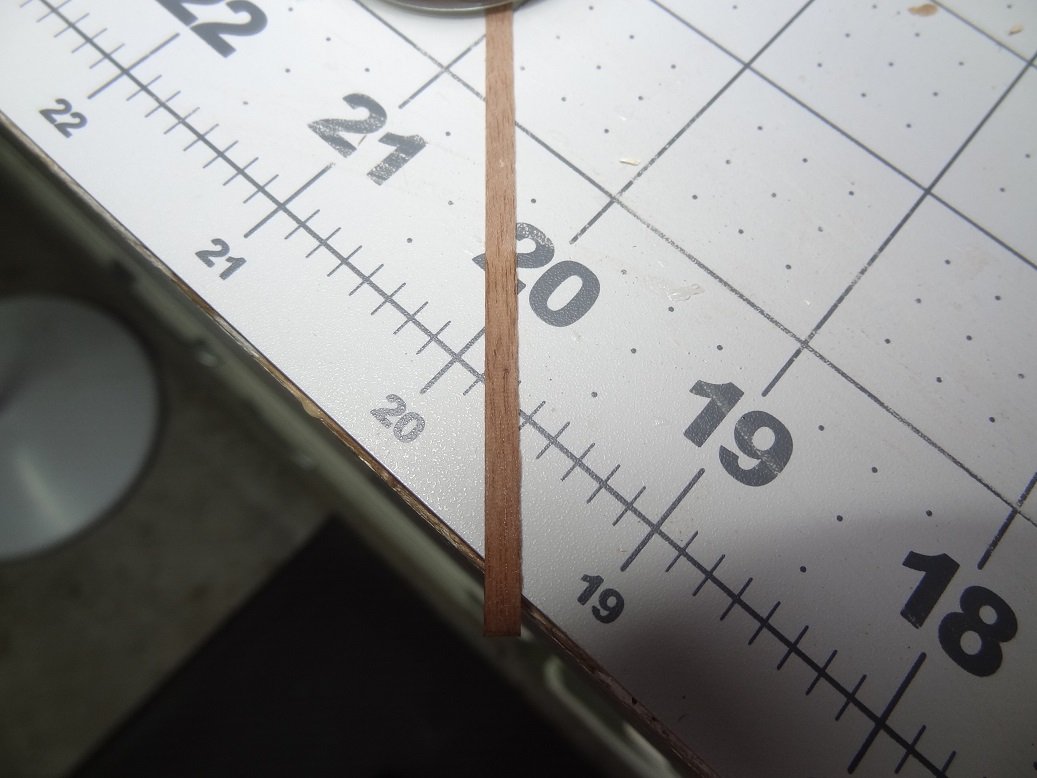
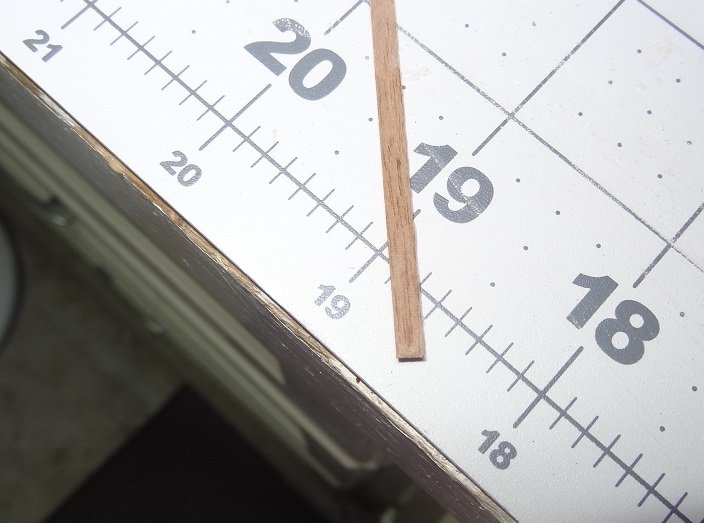
Thinking outside the box for a sec. I think we all agree that trying to stain wood that has some filler (any type) on it could result in inconsistent coloration. So what if you stained first and then filled? That would mean the filler color would have to match the wood. What I just tried might only work on walnut but it might be a start. And walnut is a popular wood for planking. I bought this product to try to dye white linen material for sails. It did a pretty good job but it has been sitting on a shelf since then. On the left started out as Elmers 50/50 with water. Then pinch by pinch I added the crystals until the color of the mixture matched the wood. It didn't take much. I painted it on a plank. This is still wet. This is dry. I could have but did not add some walnut dust from sanding. That would have thickened up the mixture some and allowed it to fill a crack better. But it is a start. And like I said this would go on after the staining. I'm going to stay with this effort. We'll see where it goes.

-
Hey Mike - going back to your post #78 - did you have to bend that riser plank(s) before you put it in? Also how did you get the risers positioned correctly on the frames?
- 129 replies
-
- 1
-
-
- finished
- model shipways
- (and 1 more)
-
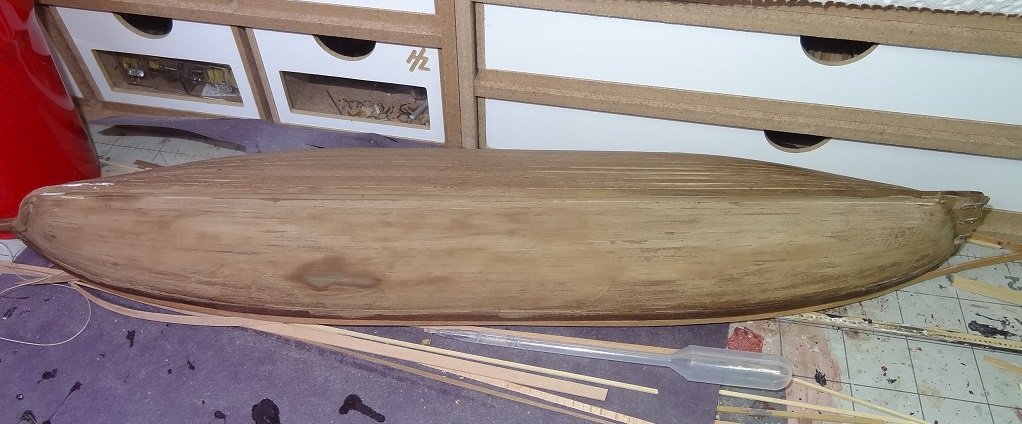
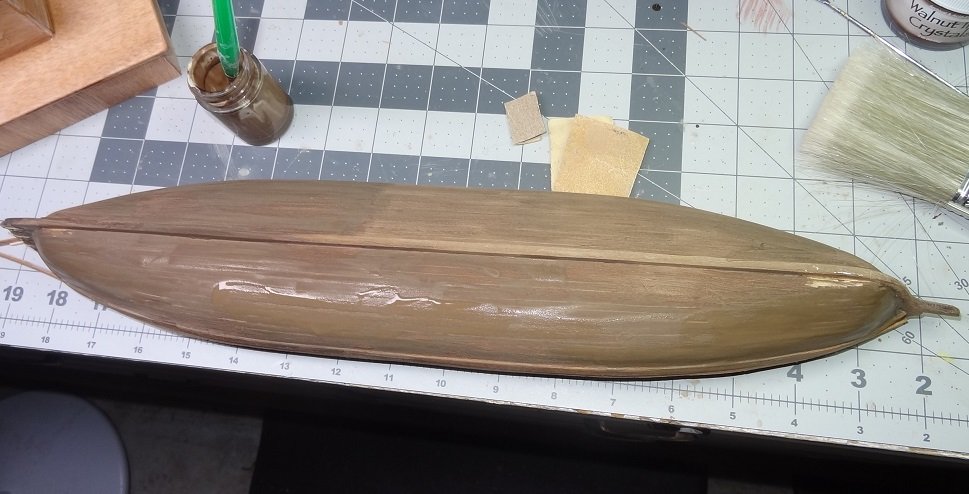
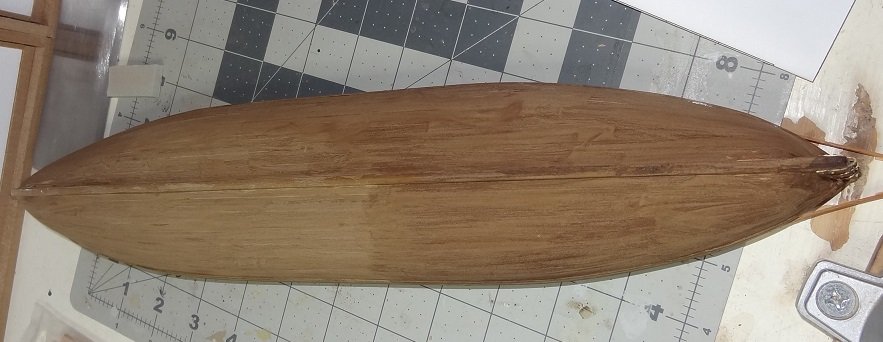
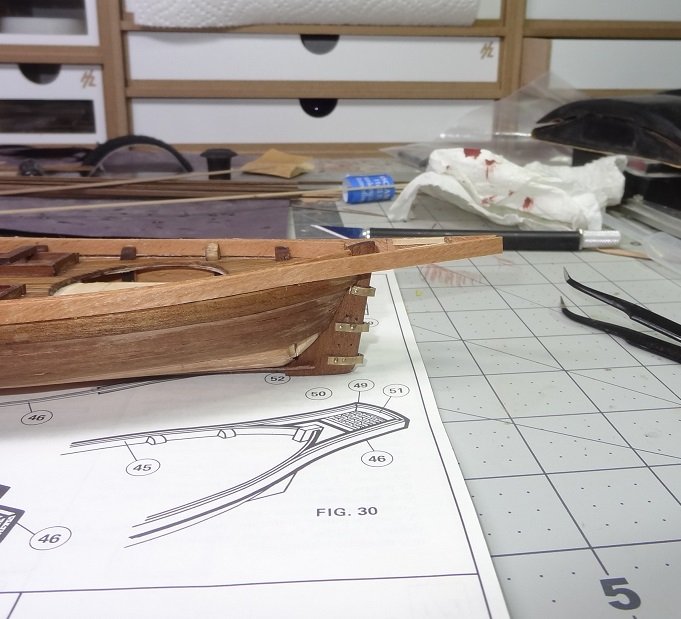
Planking and associated tasks are finished. I have mentioned before that the instructions say to plank and then add stem and stern post. I tried that but it just wasn't working. You've no idea how long to leave the strakes at each end, the long ends were getting in each others way and several got broken throughout the process. So about half way down I installed the stem and stern post. It was much easier after that except for the fact that I didn't have a rabbet to stuff the ends into. A close look shows that the ends just lay flat on the pieces. Not overly attractive but I'm not sure I'm going to do anything to fix it. Lesson learned. Afterwards I glued the keel. It's a little taller than it needs to be so I will have to plane it down and then everything should be ready for some stain. As much as I harp on the proportional dividers, I must say it's nice to put them away! Stern platform and cap rails are next.
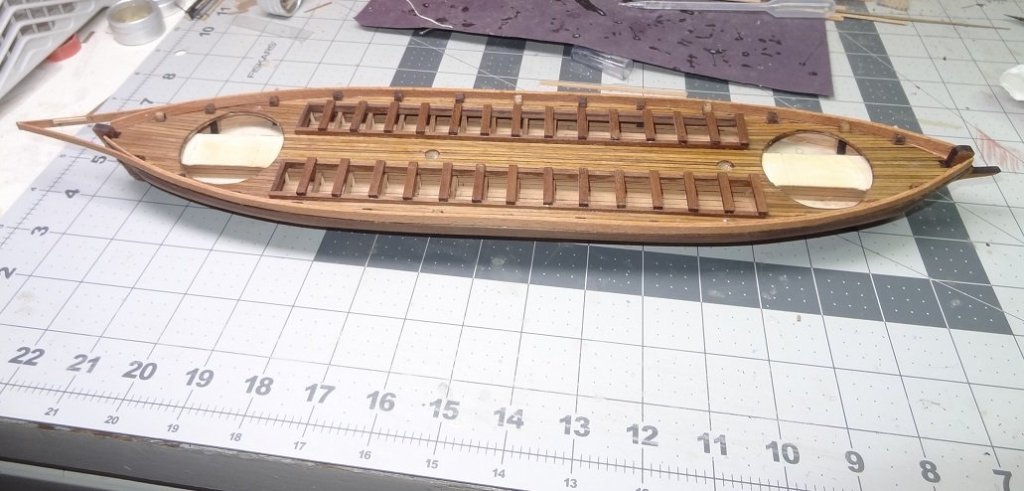
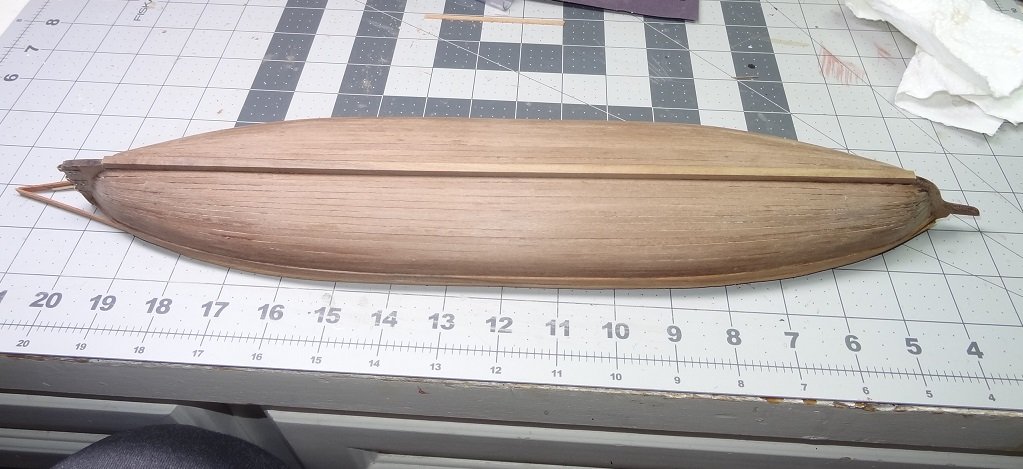
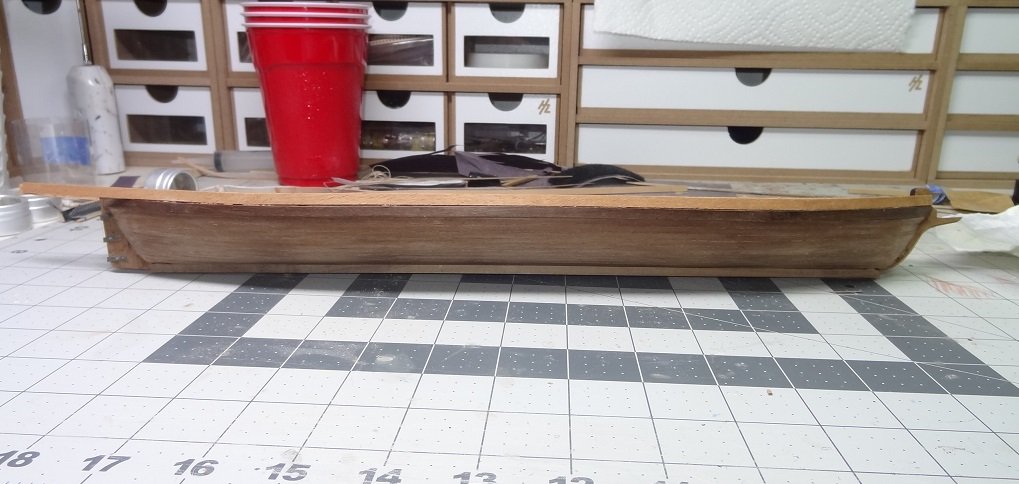
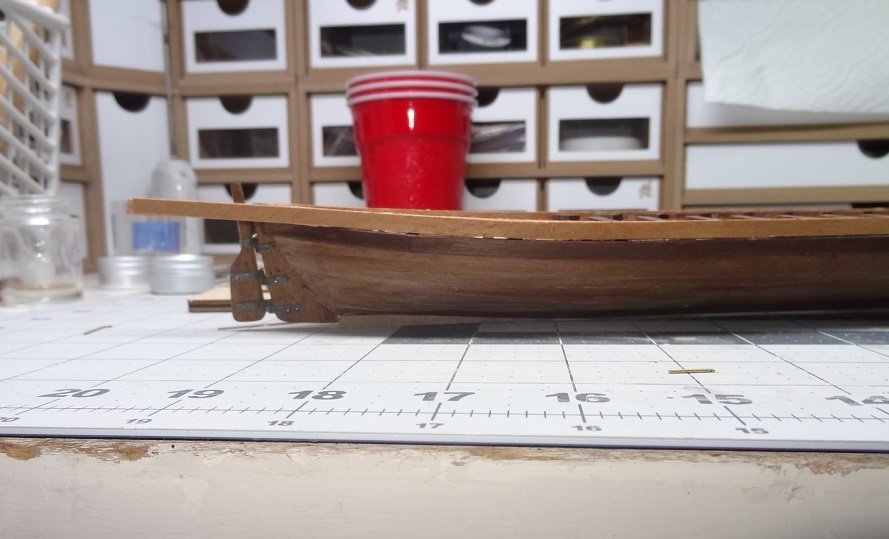
- 138 replies
-
- 13
-
-
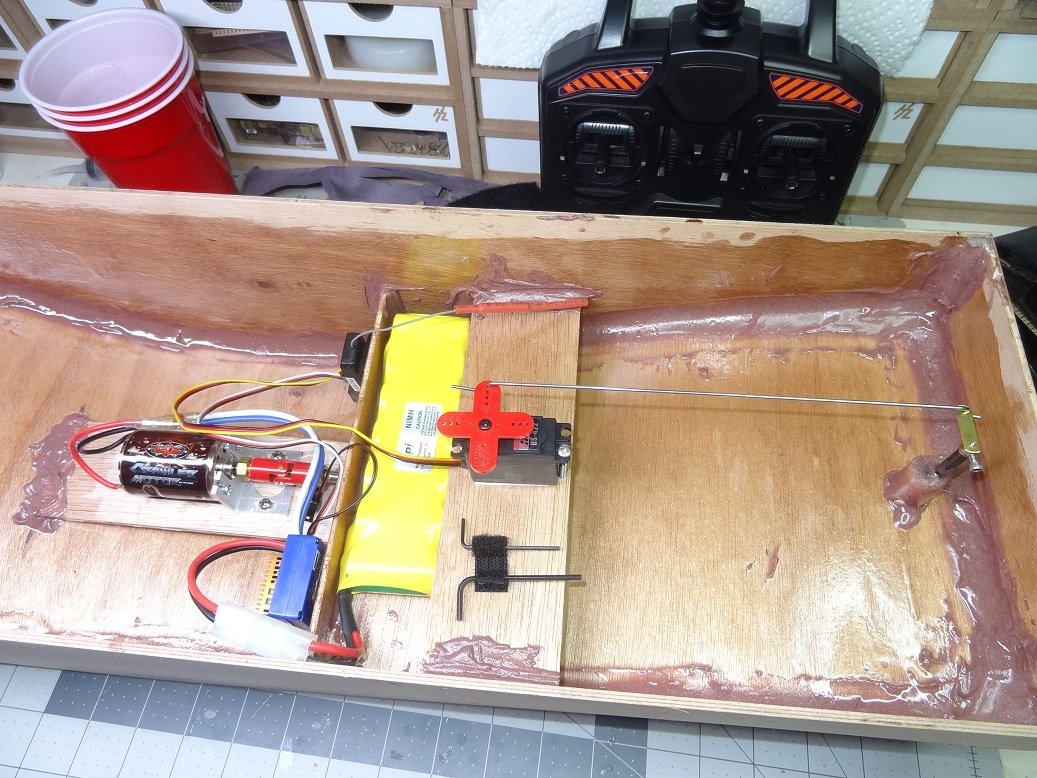
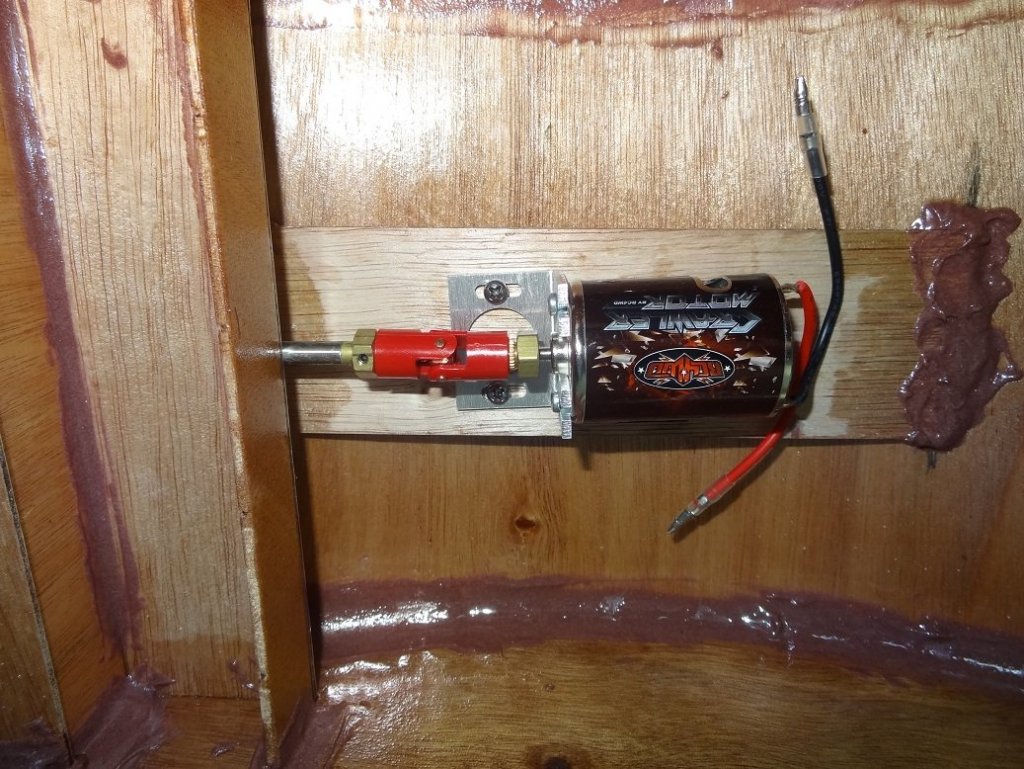
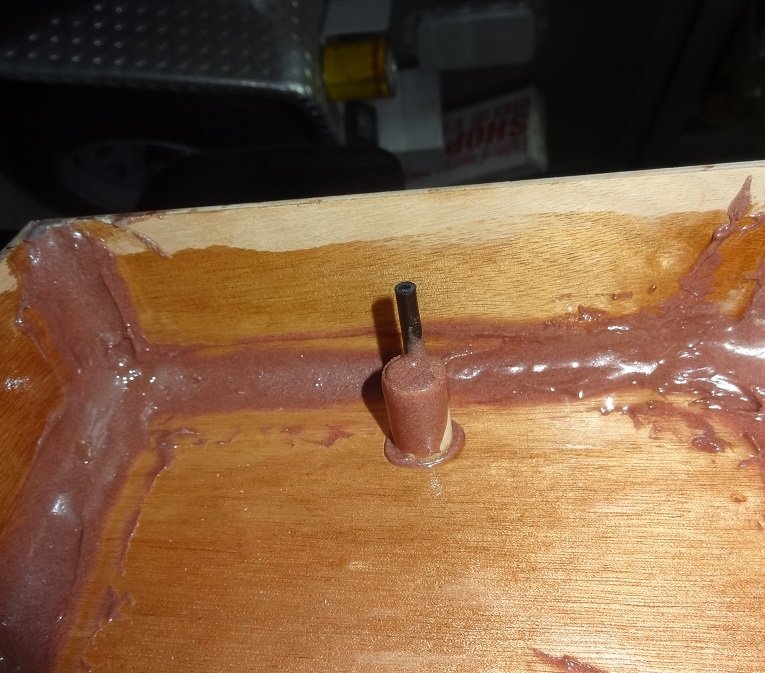
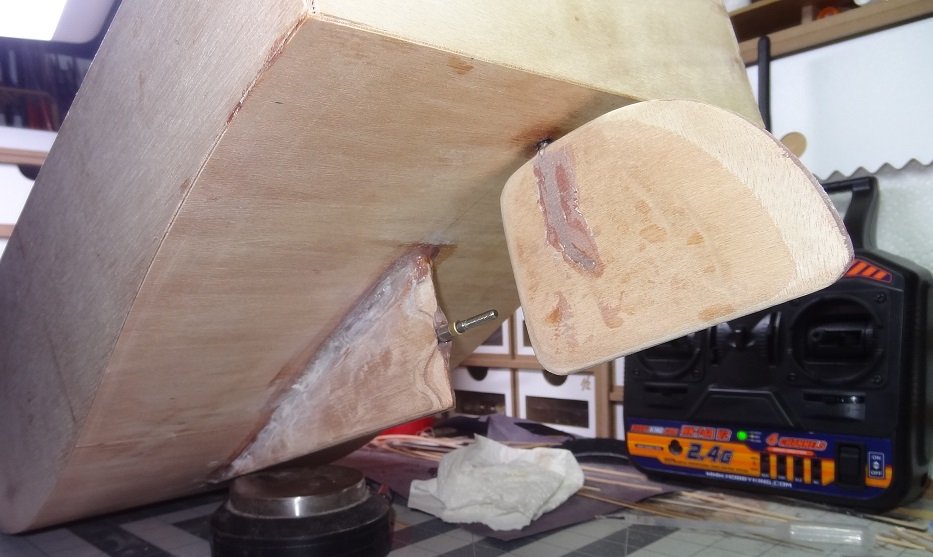
As promised I got to install the electronics this weekend. Motor, receiver, speed transformer, battery pack and rudder servo. Most of it was very easy. The only problem was positioning the motor on its platform and getting its shaft in line with the prop shaft. I thought I did pretty good but it's making some racket when I power it up. But at least it's all wired and running! The motor. Rudder column and shaft tube (slathered with epoxy) The works. Rudder installed. Gluing the deck to the hull comes next. Then a lot of sanding and decisions about finish. This mahogany plywood looks gorgeous with only a lacquer coating (several really). But every little spot where I got some of the thickened epoxy shows up really bad. So I may paint some areas.

- 96 replies
-
- 5
-
-
- tugboat
- Tippecanoe Boats
- (and 2 more)
-
I might have to argue the age thing with you Steve Along the same line I was thinking of tying a pencil to a string and dangling it from the ceiling over the workbench. Right about nose level.
-
Steve - while planking Arrow this evening, I have been thinking it all over. For smaller scales Joel is probably right. Super dark lines between strakes is overkill. A rookie mistake on my part. Now you're saying the pencil will darken up with some stain - that may be all I need. I do prefer to see the 'caulking' and I like it to be fairly uniform. But that's just personal preference. My biggest problem at the moment is remembering to do SOMETHING! Can't tell how many times I forgot to make a caulk line at all on Arrow's deck.
- 138 replies
-
- 11
-
-
Joel - on my gun station build (1:23) the instructions actually said to insert walnut veneer strips between each strake. The kit supplied them. I didn't like the idea at first but it did grow on me. Looking at it now, it looks good. And I think that's about the only thing that won't get destroyed or damaged by moisture, liquids, sanding, etc. The walnut color is not too bad for a caulking look. Of course I would not want to have to make them by hand. On the other hand, that method is only good at the larger scales.