HOLIDAY DONATION DRIVE - SUPPORT MSW - DO YOUR PART TO KEEP THIS GREAT FORUM GOING! (Only 20 donations so far - C'mon guys!)
×


mikiek
-
Posts
2,276 -
Joined
-
Last visited
Content Type
Profiles
Forums
Gallery
Events
Everything posted by mikiek
-
 Very nicely done Simon. I agree with Per - let the wood shine.
- 120 replies
-
- 2
-

-
- mercury
- victory models
- (and 1 more)
-
Planking processes
mikiek replied to MESSIS's topic in Building, Framing, Planking and plating a ships hull and deck
Just to stir things up - here is a whole different take on planking See post #32. It takes care of correctly shaping the planks for you. -
Filler for Natural Wood?
mikiek replied to mikiek's topic in Building, Framing, Planking and plating a ships hull and deck
Mark, Dennis - Thank you. Sounds like the only real choice. I tried that on something else one time and it didn't work too well but I did not dilute the glue and the mixture came out the consistency of Play-Dough. 50/50 sounds like the ticket. Unfortunately the planks are so thin there is very little dust when I attempt to sand them. I do have some other sticks in the kit that I can sand down. Sounds like a job for the new Foredom belt sander I got recently. It'll turn wood to dust in seconds -
Probably not the best title but I couldn't think of anything better I'm planking my Arrow hull now - the 2nd planking is walnut. This will be my first build where I will not be painting the hull. The wood is a nice color so if I do stain it I will use a natural stain, matte varnish on top of that. I'm taking my time with the planks but am still ending up with hairline gaps in places, poor cutting in others. In other words, for a nice smoothly finished hull, I have some gaps to fill. So what do you use as a filler that will match the color of the sticks I'm using to plank with?
-
Planking processes
mikiek replied to MESSIS's topic in Building, Framing, Planking and plating a ships hull and deck
When you lay the garboard be sure to keep an eye on the upper edge - the straight edge. Most people have a tendancy to slide the garboard too far forward. To the point where the bow end wants to start curving upwards. This is too far. What happens is all the subsequent planks above the garboard will pick up that curve, compounding the problem. The trick I use is to lay the garboard against the keel - lower edge in the rabbet - bow end about 2 inches behind the stem. Keeping the garboard in the rabbet, slowly slide it towards the bow watching the leading edge. When you see that upper edge begin to lift up stop sliding, backoff a bit and try again. You want to stop sliding right before the point where the edge begins to lift. -
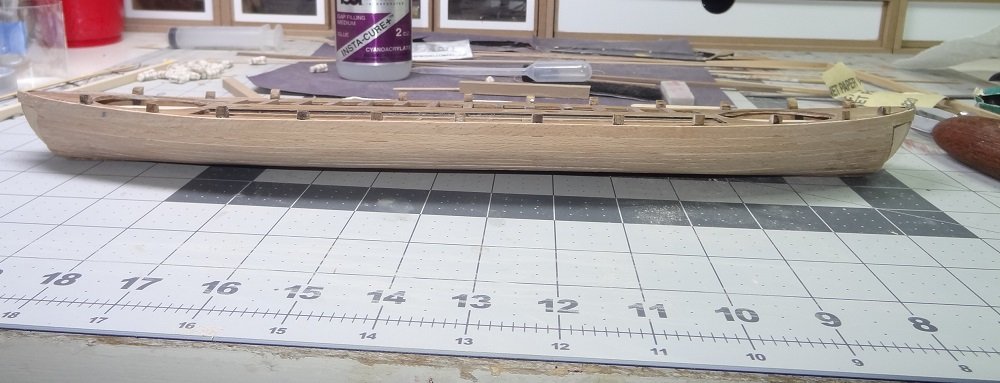
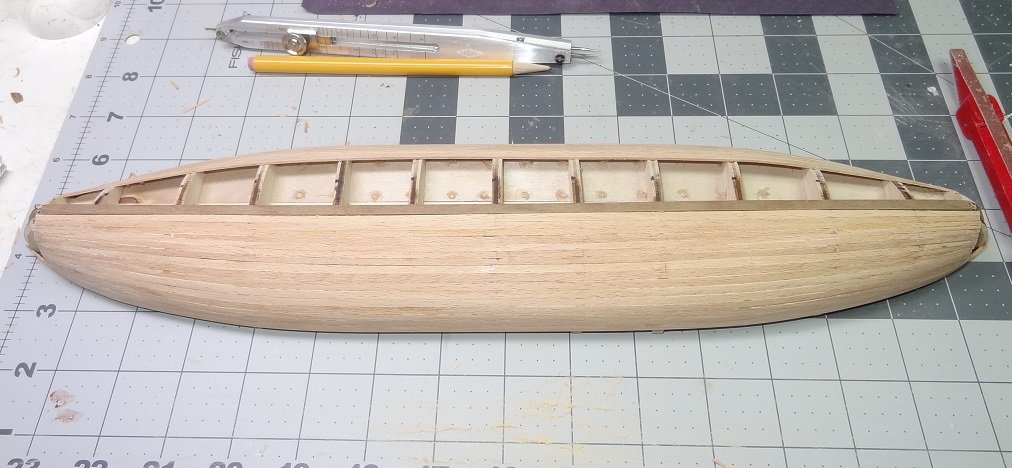
Now into planking round 2. I have not added the stem or stern post. I'll just have to wait and see how that works out. Was wrong about the 2nd planks they are pretty thin. At first I thought they would be easy to lay - the first 2 under the sheer strake I did not shape at all and they went on easily. Same for the "garboard". Then I went thru the same routine as before, marking the bands. The frames are all covered up now so I drew some lines from the keel up to the sheer strake. Still using the dividers I began to measure inside the bands in order to shape the planks. Then I had to cut/file the strips and that's where the fun started. The strips are 3mm x 0.5mm walnut and they don't cut worth a darn. Several have split and this is the one set of sticks where there are few extras. Resorting to just pressing down with a knife which works OK but then they are too flimsy to sand. It took 30 minutes to complete 4 strakes. On the positive side, planking over a first layer is quite easy. I've been used to gluing sticks to frames. Now I can put glue anywhere along the run. I guess overall, I prefer a single layer. Doing a 2nd layer is too much like rework. And I HATE rework.
-
This thing is huge! I'm curious as to what detail items are included in the kit? Doing that gun deck section was cool at 1:25 - lots of items you wouldn't even consider at 1:48 or 1:64. This could be even better. If you want to bash a little, you might try looking at some model car sites. A bud builds these and he adds things like miniature Car & Driver magazines, cigarettes, traffic tickets. There's a ton of little odds & ends you could add to this. Just a thought.
-
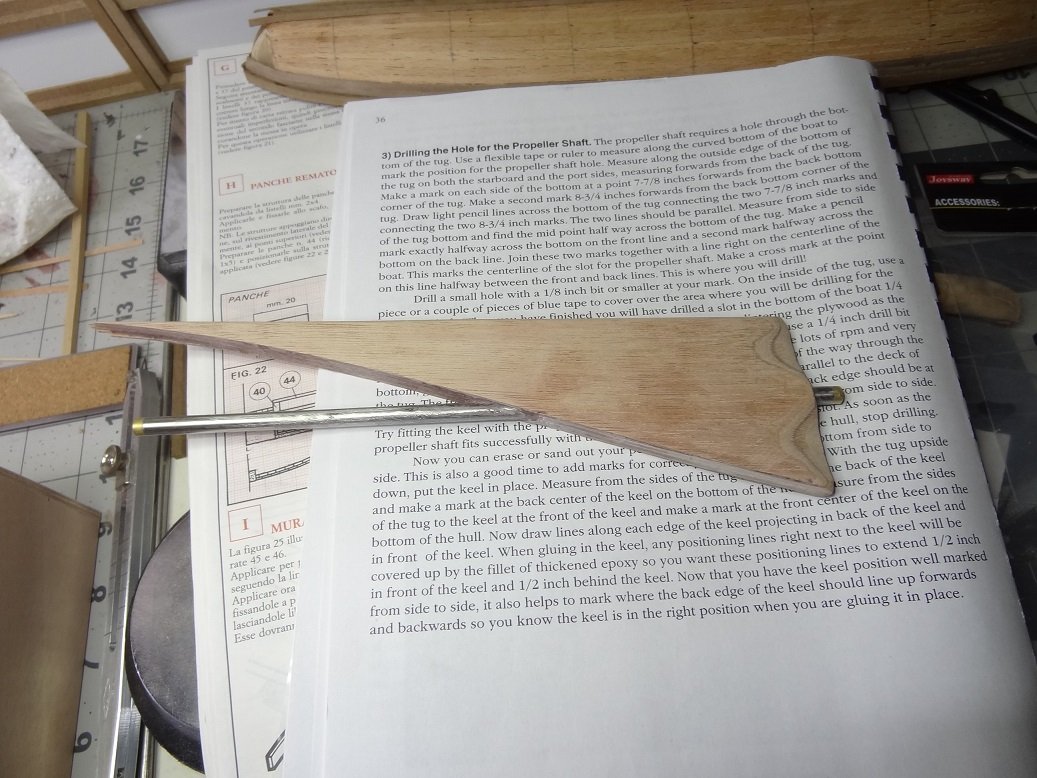
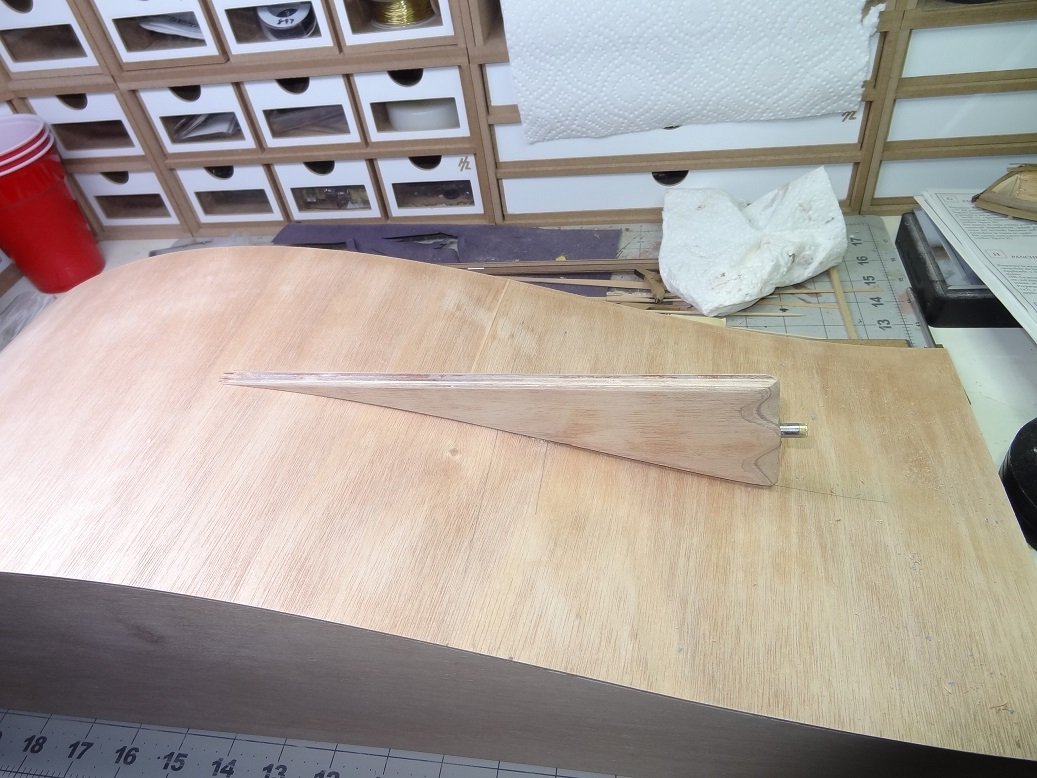
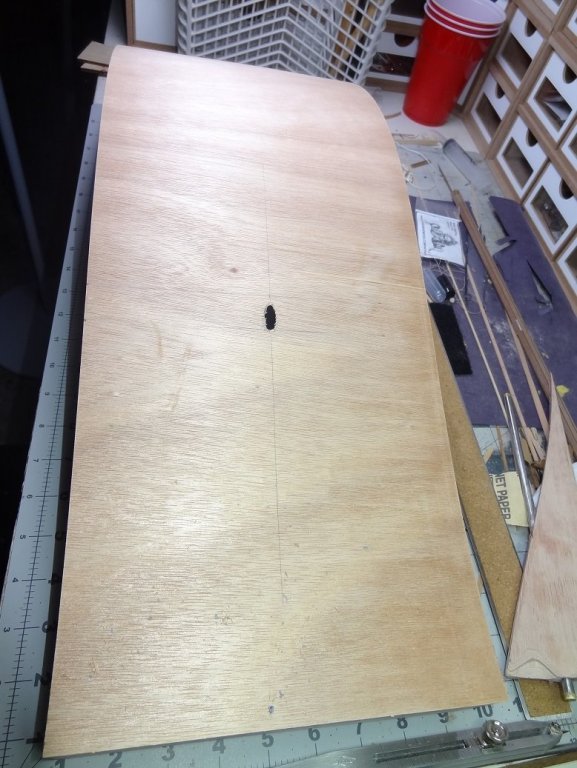
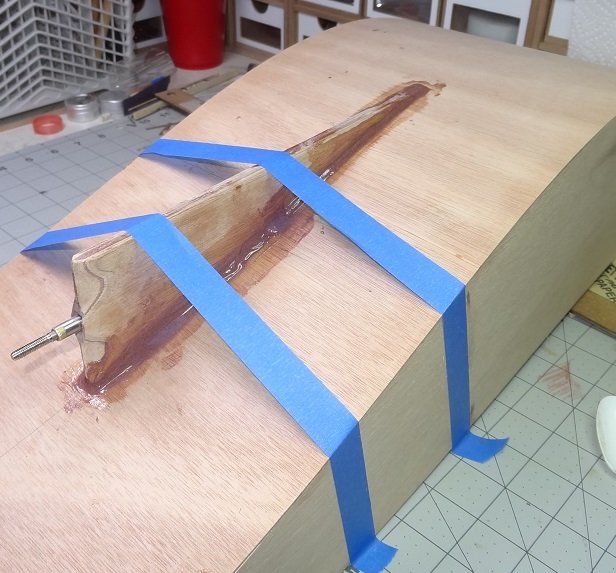
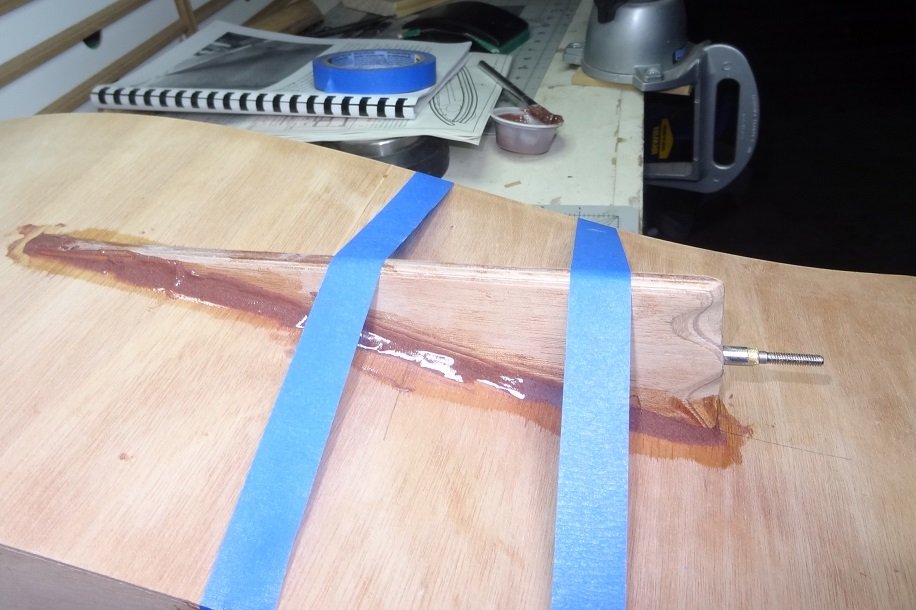
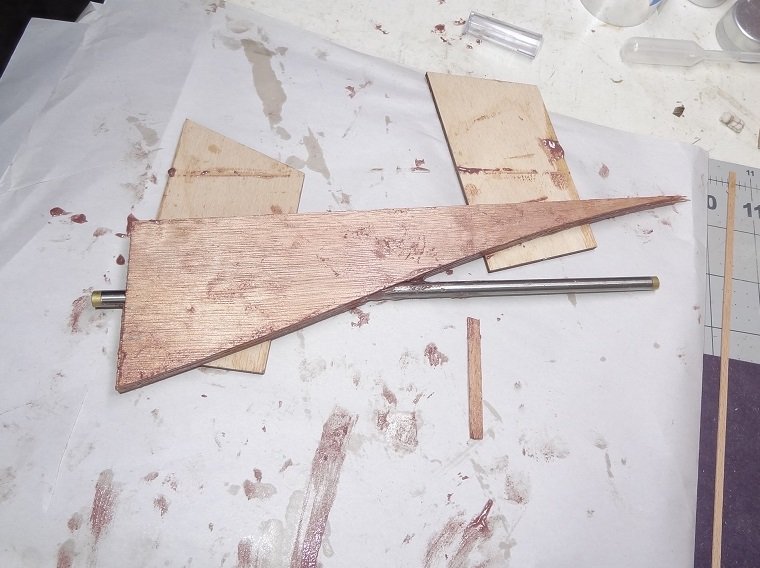
A quick diversion to the tug tonite. Keel was finished a few days ago, tonite I installed it on the hull. First off I marked and then drilled successively larger holes - ending with 1/4". The plywood on the hull is quite thin so I put some tape over the hole and then began to work the drill forward and back to elongate the hole. The keel, ready to go. Then it was pretty much the regular routine. Clearcoat and thick stuff making a fillet around the keel. It's is a little unusual in that they don't normally call for fillets on the external parts. The phenol thickening powder tints the epoxy purple and that's how it dries. Not very attractive compared to the clearcoat which can be beautiful. I was going to paint the keel anyway, maybe I'll paint the entire bottom. I will say I'm feeling pretty comfortable with the epoxy process now - thick or thin. It is some really good adhesive and incredibly strong and waterproof. On a side note - I pulled the trigger on the Tippicanoe T50 Trimaran today A 50" long hull standing almost 7' tall from tip of keel to tip of mast. It's a screamer. Zero to sixty in.... well sometimes I get carried away Should be an interesting build. I'll share it with you guys when I get started. Now back to Arrow.

- 96 replies
-
- 4
-
-
- tugboat
- Tippecanoe Boats
- (and 2 more)
-
Simon - you have me thinking about carving and ornamentation now. I found a good deal on Corel Reale de France - more decorations than I've ever seen. And if that wasn't bad enough, I bought a pneumatic carving tool. I hope to try it out on that build. More toys for boys
- 120 replies
-
- 2
-
-
- mercury
- victory models
- (and 1 more)
-
Wow! You sneaked that in very quickly. Just a day or so ago you were still tying strings You did a fantastic job Per. I like the stand too.
- 335 replies
-
- 4
-
-
- 18th century longboat
- Finished
- (and 1 more)
-
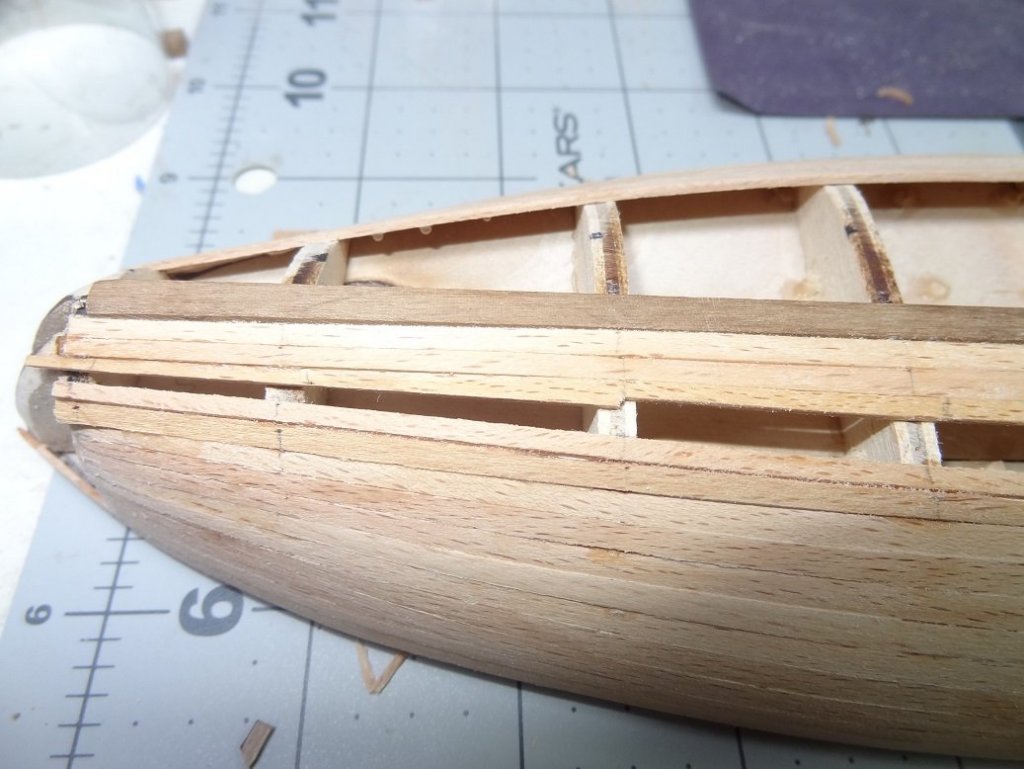
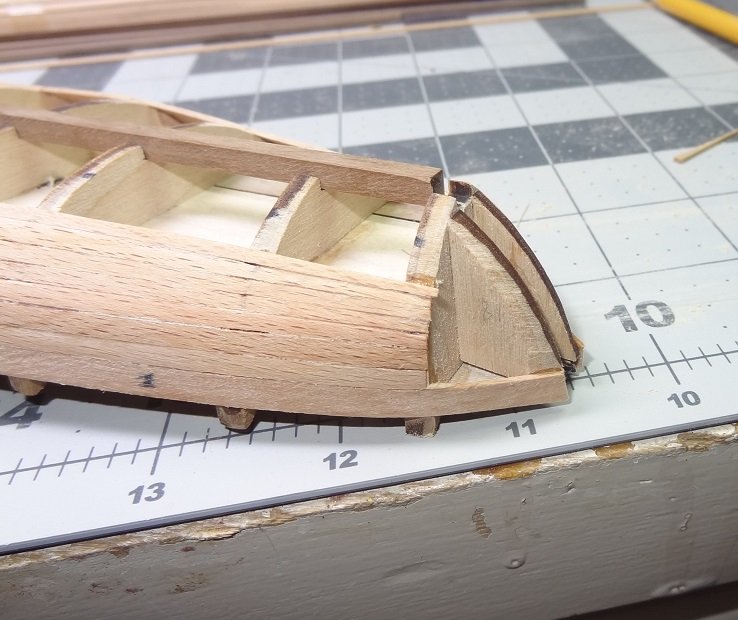
Joel - I'm really thinking of getting out of order here and adding the stem & stern post before the last planking. If not, I'm uncertain how I would get the planks at the bow & stern to be the proper length. Probably would add a rabbet as well. The sticks for the 2nd planking are full thickness walnut. Bending them at the bow & stern will be necessary and I'm thinking having something for the ends to 'bite' into would be helpful. I just couldn't figure out if there was some meaningful reason why the pieces would be added after planking.
-
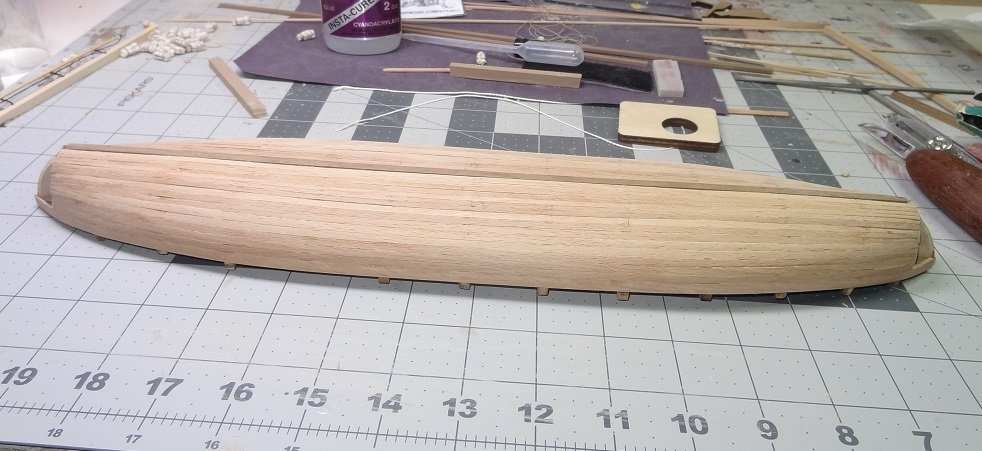
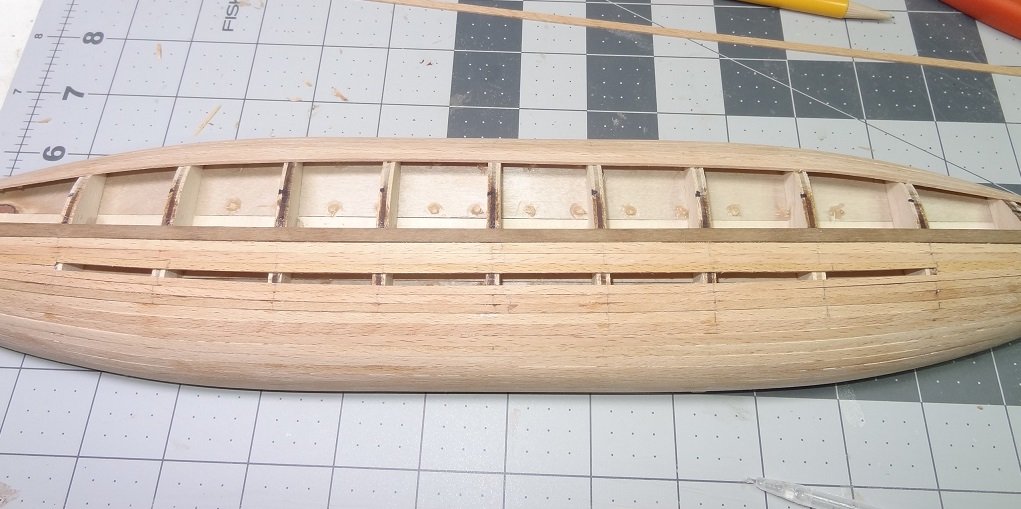
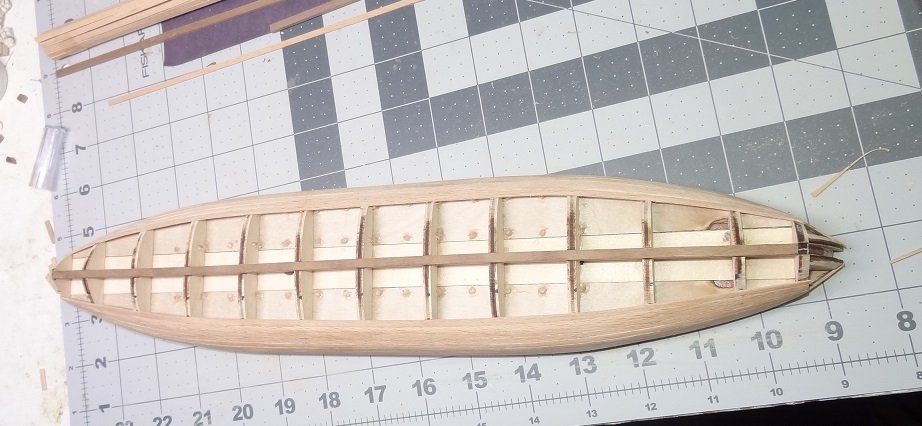
First planking is complete. If anyone is counting, I did have to do a stealer on the other side as well. It didn't come out quite as tight as the first one but it will do. I think I'm going to put the planking tools away for a while and work on the deck items. One BIG question. As I mentioned previously, the order of steps in the instructions are 1st plank, 2nd plank, THEN add the stern post and stem. Does this make sense to anyone? Planking without a rabbet?

-
The ones I use are going for $125 on Amazon. The same company makes titanium products for >$500 . Not sure what that's about.
-
Derek - thanks for following and I hope it works as well as it does for me. Would you mind posting a pic of your dividers? Hey Darrell - I'm still scratching my head on the double plank process. I guess since our first build was a single plank kit and they came out pretty good, I was wondering after that. This build just reinforces that. The only thing I don't know is if the double plank builds are dependent on the extra hull thickness for other parts. Would it throw off the placement of some other part because the hull is thinner? I do hear that sometimes the 2nd layer material is more of a veneer than a full plank. That could make it tough to use the 'good' wood for a first and only layer. This kit has full sticks for both layers.
-
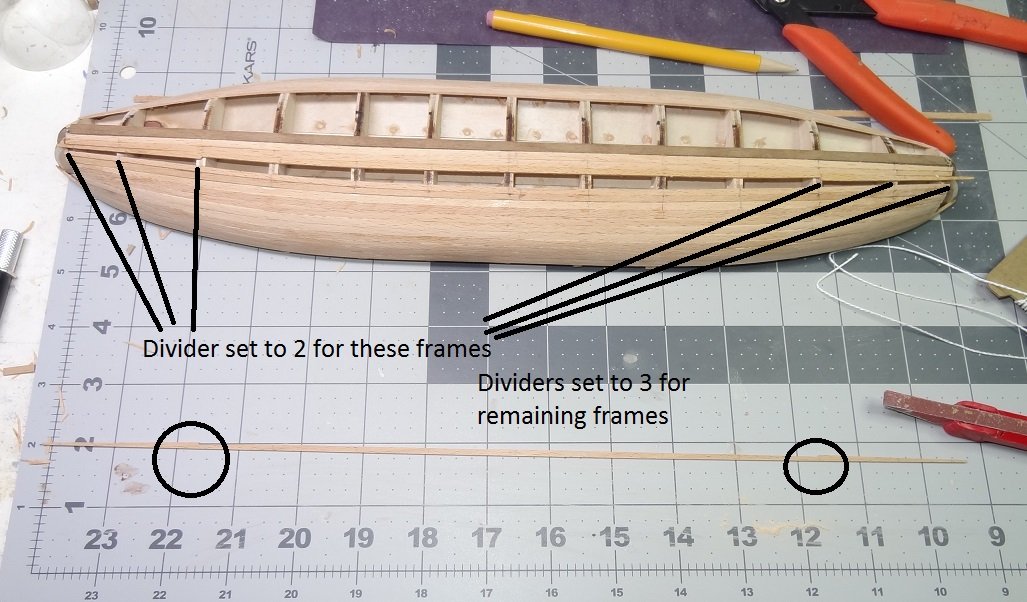
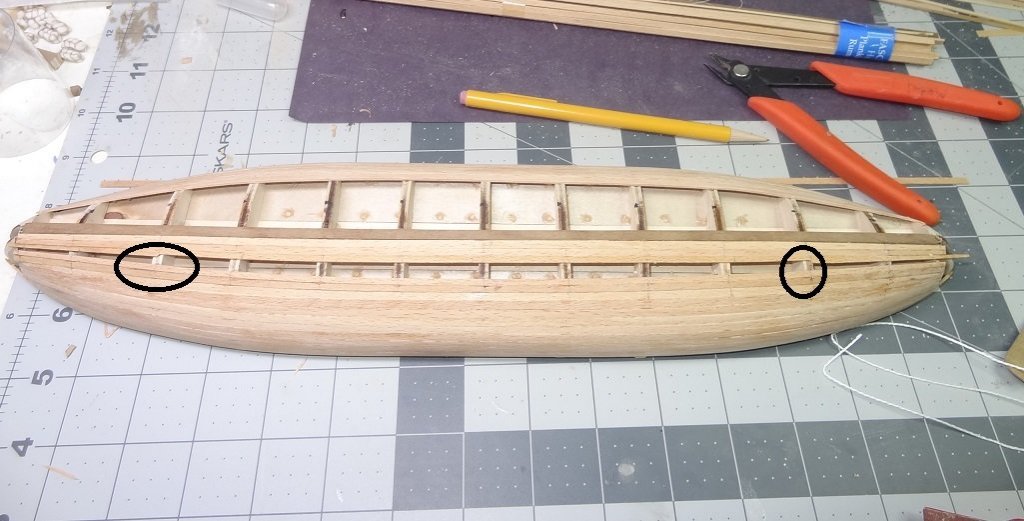
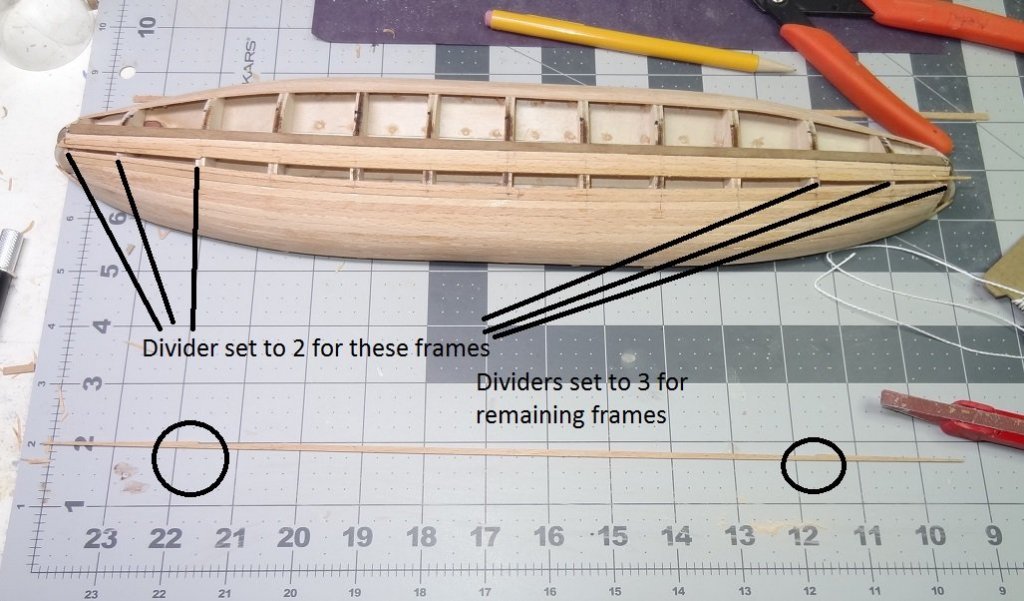
Ran into a bit of trouble last nite - was getting close to finishing the port hull and I realized I would be having a gap after the last plank was laid. The dividers told me this with about 4 planks left to go. The proportional width it was coming up with at the middle frames was wider than the plank. It turns out the plank widths are not terribly consistent. Guess I laid a few that were not quite 3mm. No real worry - just had to make a stealer. Once again the dividers helped out with shaping the last few planks. At the wider part of the gap I needed almost 3 planks (8.35mm). Out towards the bow & stern only 2 planks would fit. So I needed to lay 2 full length planks and a third stealer in between a part of them. I decided to make the transition at the third frame at each end. Here's what I did. I'll assume you have read my previous post on basic divider usage. For the 2 full planks I set the dividers to 2 and measured the 3 frames at each end. With the small end of the dividers I made marks on the planks. Starting at the fourth frame I set the dividers to 3 and measured and marked the planks. Obviously the part of the plank with the '3 marks' were narrower than the ends with the '2 marks' After cutting and sanding the 2 full planks they were glued in place. This left me with the gap I needed to fill with my stealer. Another common use for dividers is transferring measurements. So after cutting the stealer to length I measured the gap at each frame and marked that width on the stealer. The stealer was then cut and sanded. The stealer filled the gap perfectly. I suspect I'll have the same problem on the other side. This is only the first planking so realistically I probably didn't have to do all this but it was a good exercise.
-
Petersson's books are good. I just wish there was more verbiage in them. They're all the same format - great illustrations with barely a word. Lauck Streeet has a rigging practicum where they started with his book and added descriptions. Have been thinking about getting that. Good to see you back.
- 648 replies
-
- 3
-
-
- niagara
- model shipways
- (and 1 more)
-
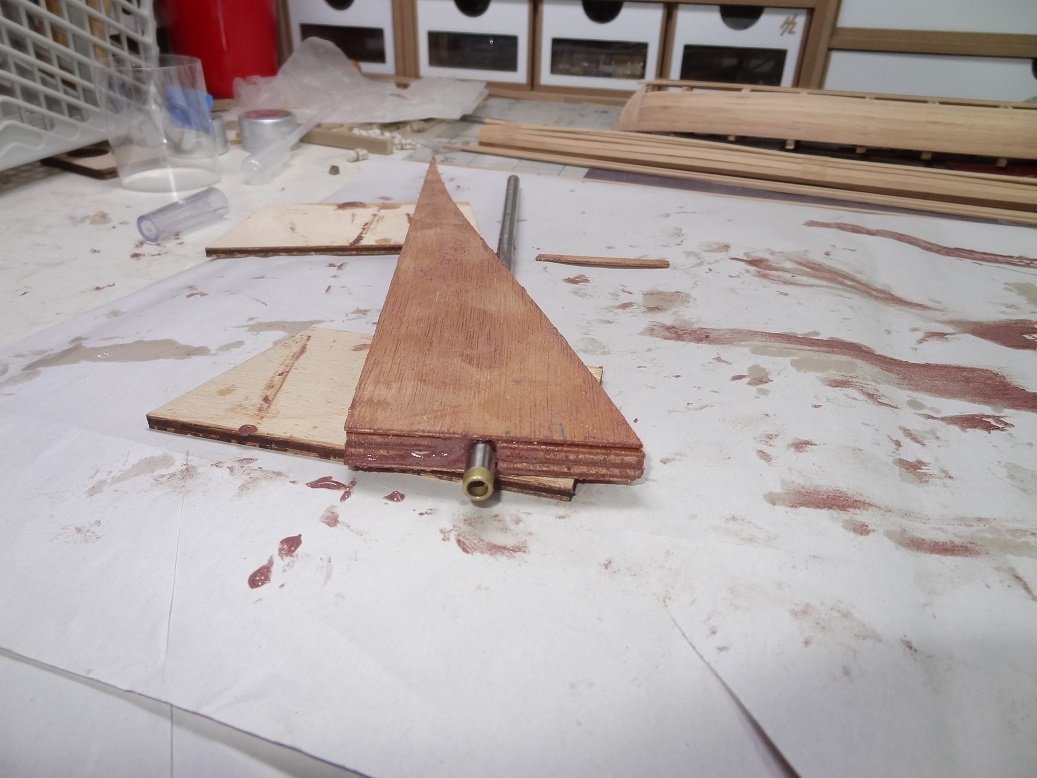
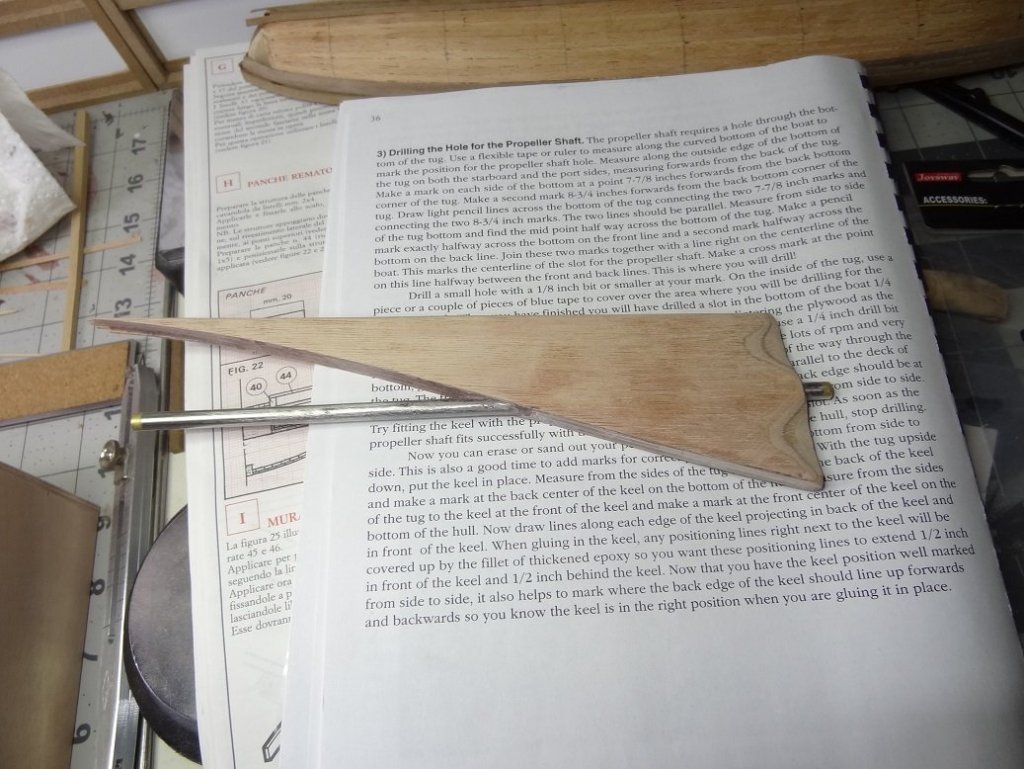
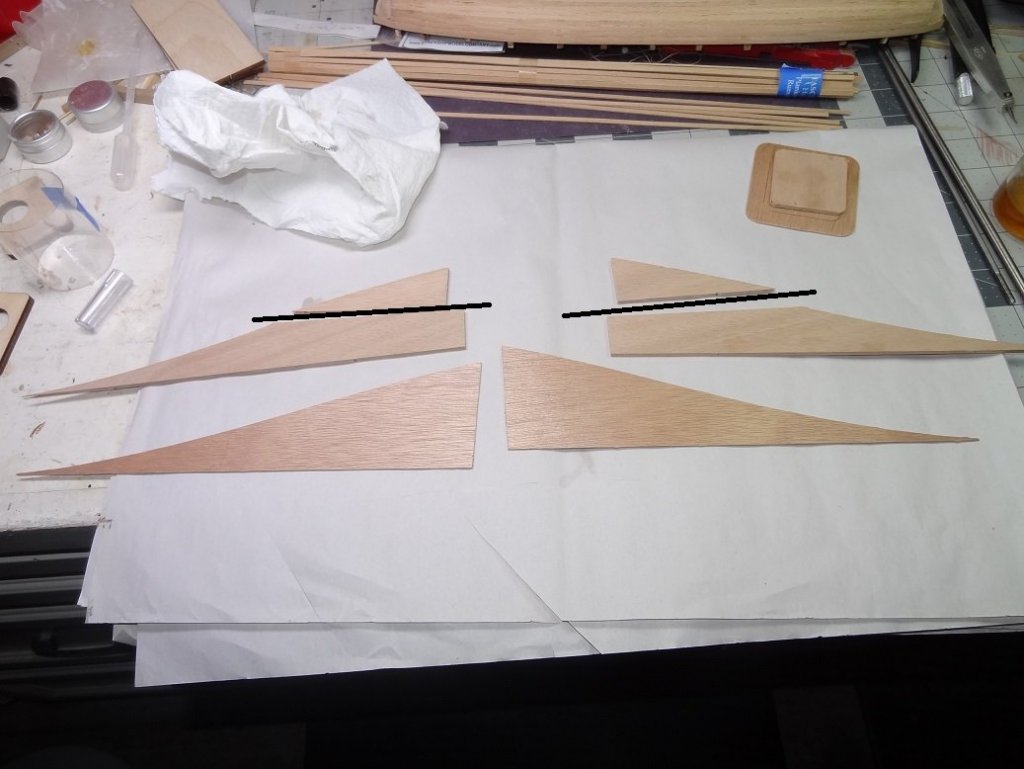
Other than finishing, I'm pretty much done with the deck. Work moves to inside the hull - electronics. First up, assembling a keel with the propeller shaft. The keel is 4 layers of plywood. The 2 inner layers are each made up of 2 pieces. The space in between the 2 pieces leaves a groove for the propeller shaft sleeve. I had really hoped to take pix of a step by step but it quickly became apparent that I would be busy trying to hold and glue all the pieces together and try to keep it all clean. Well I failed on the last part. The process was the usual clearcoat then thick stuff. The problem was in doing layers, excess epoxy is squishing out the edges getting all over my hands and the parts. So I'm trying to wipe that off, which moves the parts around and sliding them back into position squishes more epoxy out. Glad I wore gloves. Finally, I decided to just leave it alone. I was not going to get all the epoxy off. But hey, I've got a cool belt sander that should take it all off and anyways I think I'll paint the keel. You can see the mess. But it's done.


- 96 replies
-
- 5
-
-
- tugboat
- Tippecanoe Boats
- (and 2 more)
-
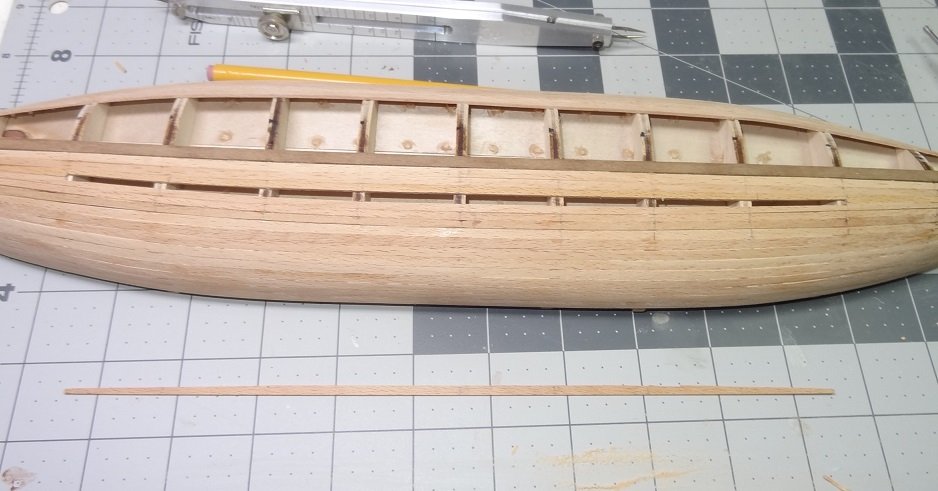
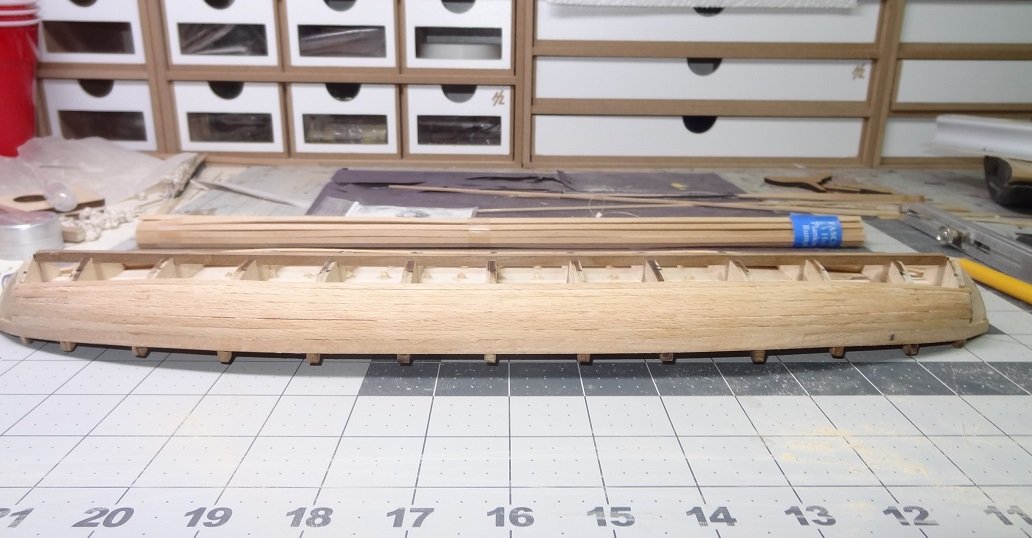
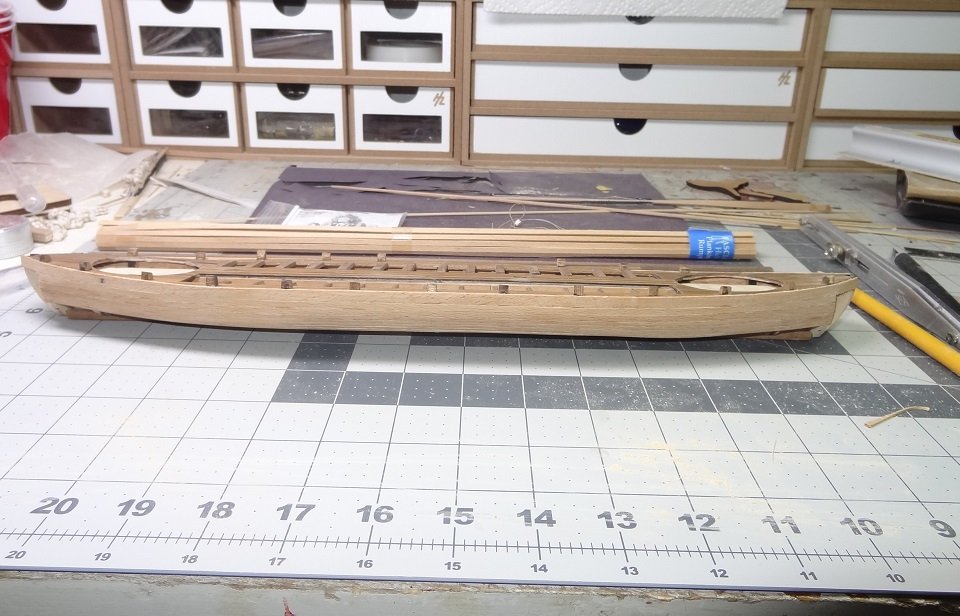
First planking is well under way and looking good. I'm starting to regret that I chose to do 2 plankings. I could be close to finishing now. Good practice I guess. I'm into the middle band and I believe I will stop there and begin from the keel upwards. I still can't decide whether Amati screwed up with the short planks or if there was a reason. The only thing I can think of is maybe they didn't want too much bulk right at the bow & stern. Speaking of bow & stern, the instructions say to complete both plankings and THEN glue the bow cutwater and stern post in place. That seems weird. How will I know where the planks should end? There's also no rabbet, which will make the final planking more difficult. I may go ahead and add the bow & stern pieces and carve out a rabbet before the last planking. NOTE: To anyone building this kit. Wait until the last possible moment to glue the frame tips to the deck. I have knocked most of them off at least once while planking and at this point in the build they serve no purpose.
-
You know Per, I'm starting to learn that. When the sails are trimmed properly, you really can steer somewhat just by sheeting in or out.
- 96 replies
-
- 3
-
-
- tugboat
- Tippecanoe Boats
- (and 2 more)
-
Sure could have used this guy today. RC sailboat mainsail clew came unhooked (that's why they tie it with string dummy). So the boat is 1/4 mile offshore dead ahead, wind blowing left to right and I'm trying to sail the thing in with a jib . I was fortunate. That boat could easily be on the other side of the lake right now.
- 96 replies
-
- 3
-
-
- tugboat
- Tippecanoe Boats
- (and 2 more)
-
As an admittedly boxwood biggoted modeler - welcome to a new world! It will never be the same again Tiller looks great!
- 129 replies
-
- 1
-
-
- finished
- model shipways
- (and 1 more)
-
That's still a lot of strings for such a little boat
- 335 replies
-
- 2
-
-
- 18th century longboat
- Finished
- (and 1 more)
-
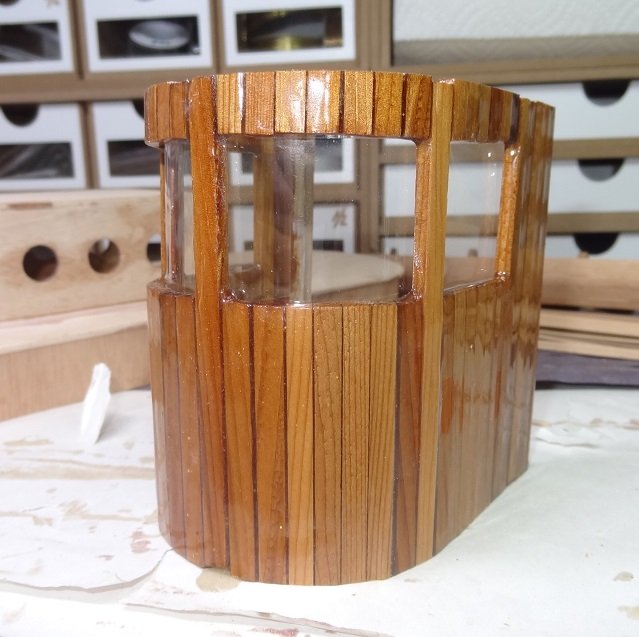
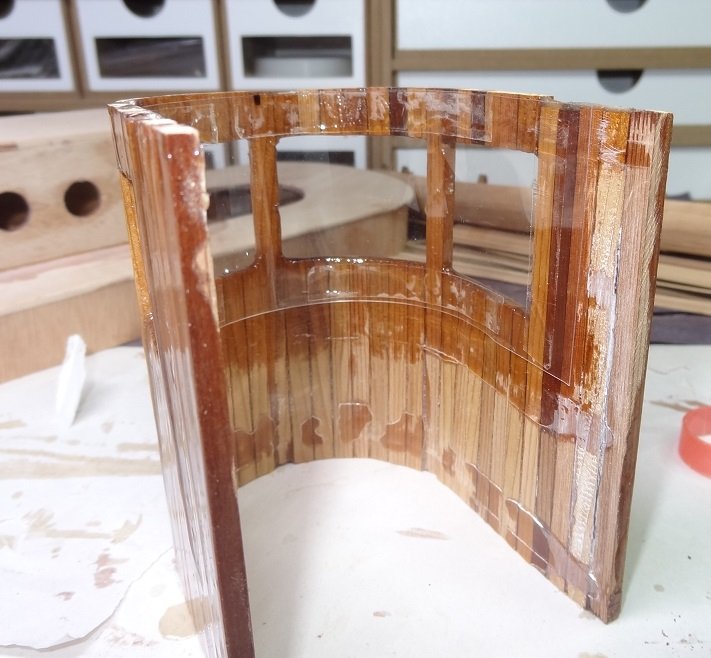
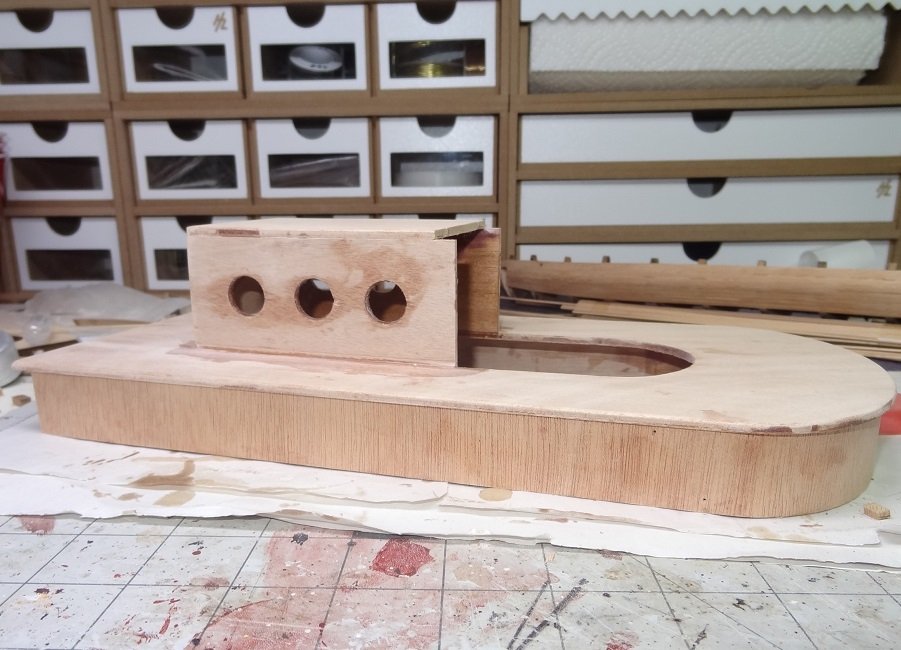
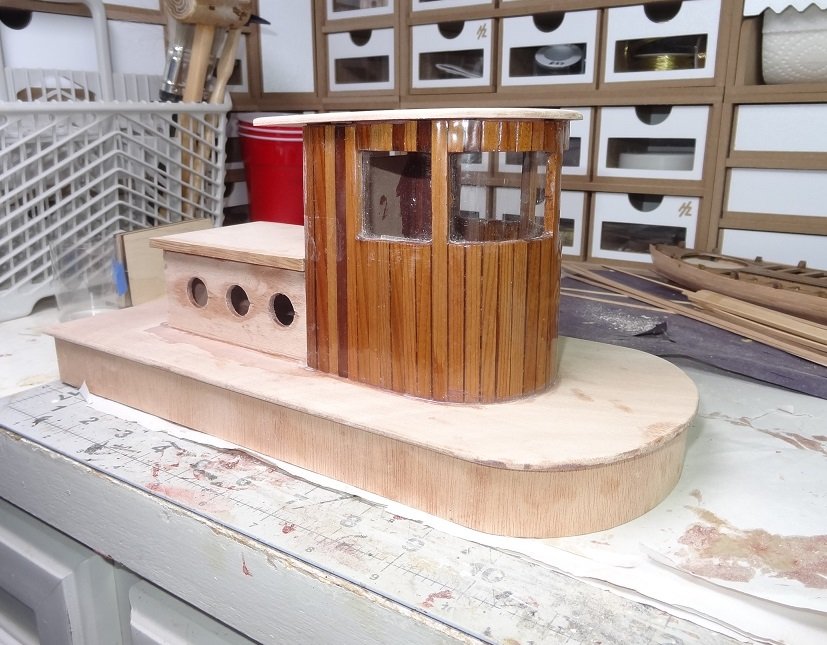
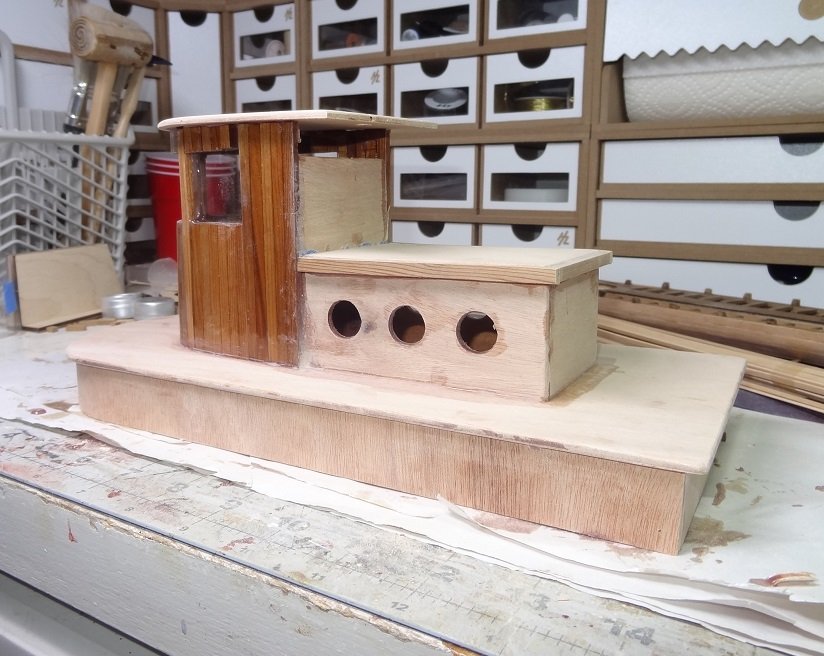
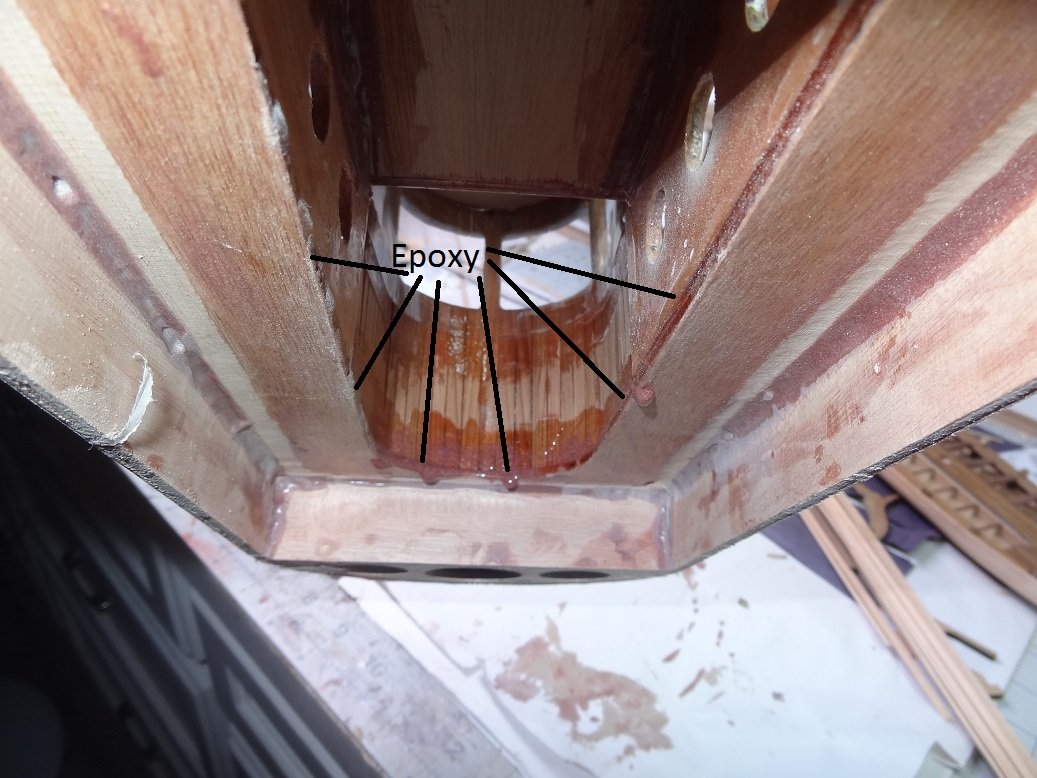
Still rotating projects so after a day of RC'ing on the lake (well before too) I worked on Little Toot. The deck structures came together today - lot's of gluing. Or would that be epoxying? First I put in the wheelhouse windows - a strip of mylar held in place with double sided tape. The rear cabin has some port holes that are supposed to have mylar also but I am going to wait until after I varnish the sides so I don't have to worry about getting anything on the mylar. Next was a thin strip around the lower cabin to dress it up a little. Next it was time to glue the wheelhouse to the deck. This is a cool epoxy trick! The wheelhouse needs to be completely sealed around the bottom where it sits on the deck - the electronics are right underneath. So a epoxy fillet is in order but you don't want it on the exterior. The thickened epoxy has a purplish tinge to it - not very attractive. So the fillet needs to go on the inside of the wheelhouse. The problem is you can't really apply it directly. No worries. I mixed up some thickened epoxy but not near as thick as you have seen in the past. Maybe a little thicker than molasses, so it is still runny. The epoxy is applied thick all around the bottom inside edge of the wheelhouse. Then you position the wheelhouse on the deck and let gravity do it's thing. The epoxy slowly runs downwards onto to deck leaving a nicely made fillet. Then I glued the wheelhouse roof, back and some trim around the rear cabin. I believe I will have to clearcoat the wheelhouse one more time. I got some of the thickened epoxy on it and the only way to remove it now is sanding which will scratch up the surrounding clearcoat.

- 96 replies
-
- 7
-
-
- tugboat
- Tippecanoe Boats
- (and 2 more)
-
Elijah - I had a case made for my gun station build. I'm blown away at how it looks under plexiglass. It starts looking like some sort of museum display. Every time I walk by it I stop, lean down and have a look inside. My point being - get a case! It'll cost ya, but it adds a whole new dimension to the overall look. You might check around your area for a plastics company. I found a local shop and had them make it.
- 701 replies
-
- 2
-
-
- phantom
- model shipways
- (and 1 more)