HOLIDAY DONATION DRIVE - SUPPORT MSW - DO YOUR PART TO KEEP THIS GREAT FORUM GOING! (Only 20 donations so far - C'mon guys!)
×


mikiek
-
Posts
2,276 -
Joined
-
Last visited
Content Type
Profiles
Forums
Gallery
Events
Everything posted by mikiek
-
 Per - I bought the buoys and barge as a combo. The barge looks fairly simple. The buoys are well thought out and very reasonably priced. There is a manual retrieval method explained in the instructions but I am waiting to complete the tug and rescue arm before I float the buoys. I don't know what's on the bottom of the lake I sail and I'm nervous about the land lines getting snagged in something. With the tug, I could use the rescue arm to haul a buoy in.
- 96 replies
-
- 3
-

-
- tugboat
- Tippecanoe Boats
- (and 2 more)
-
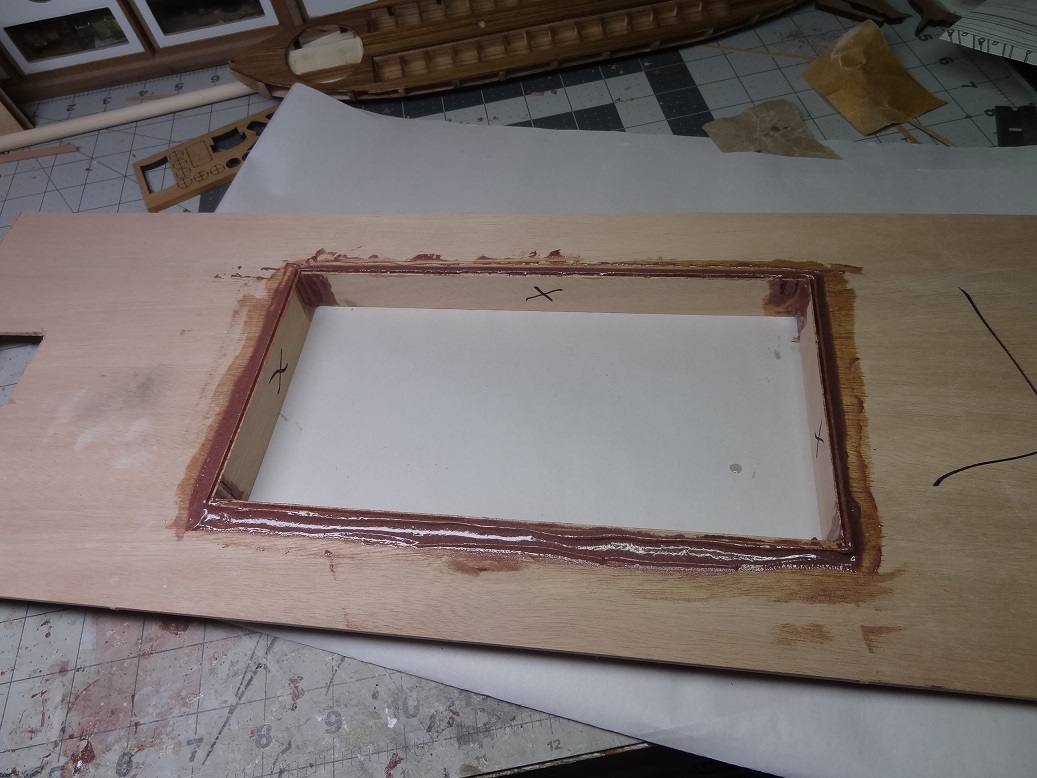
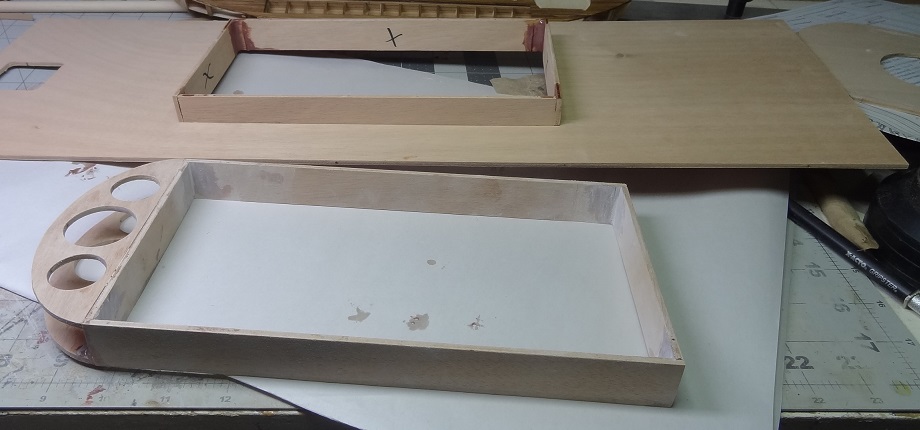
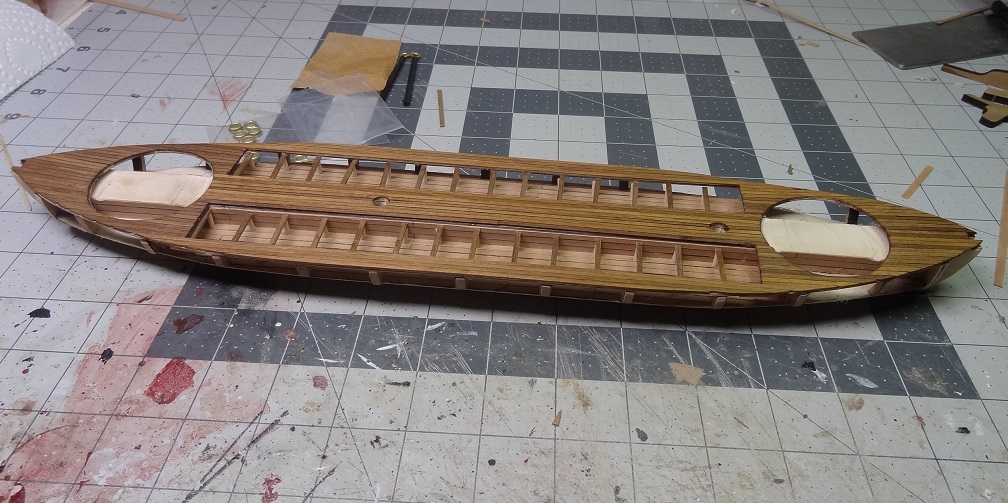
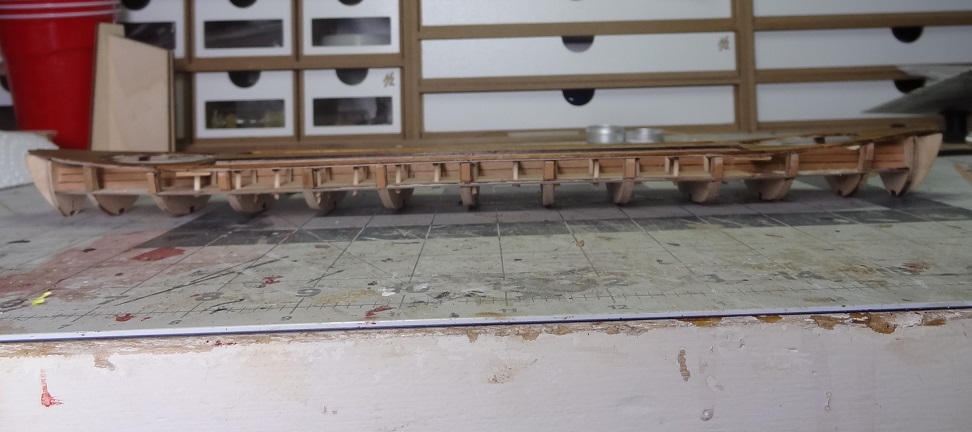
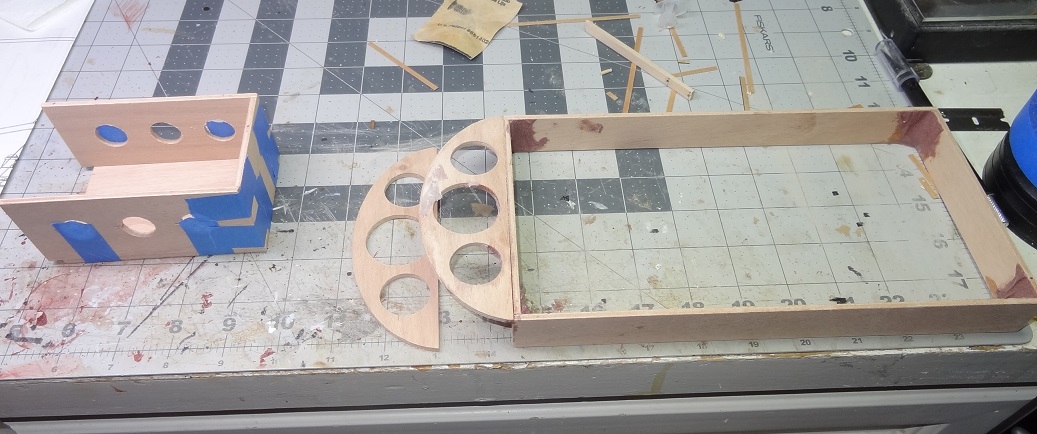
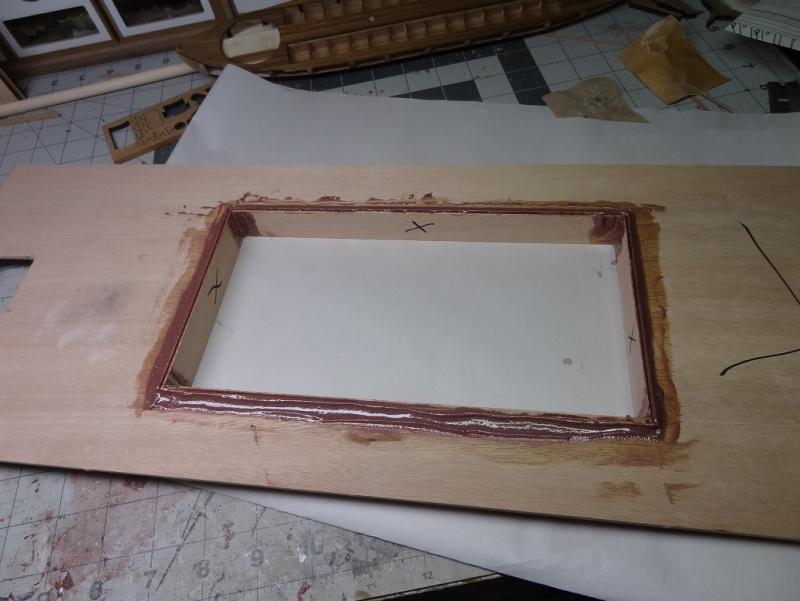
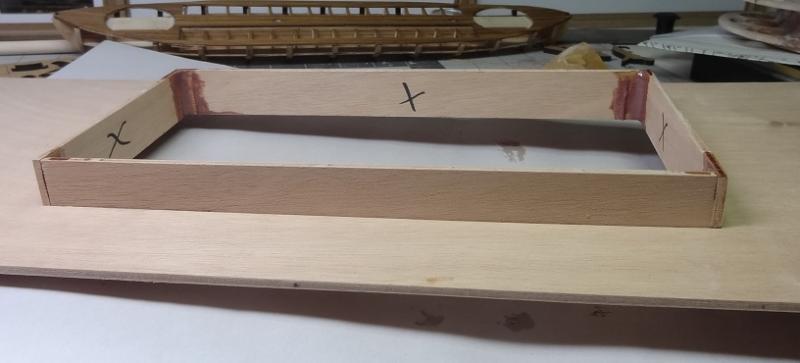
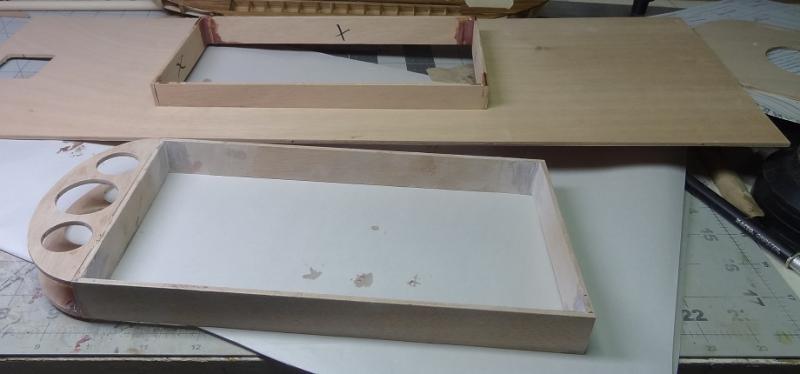
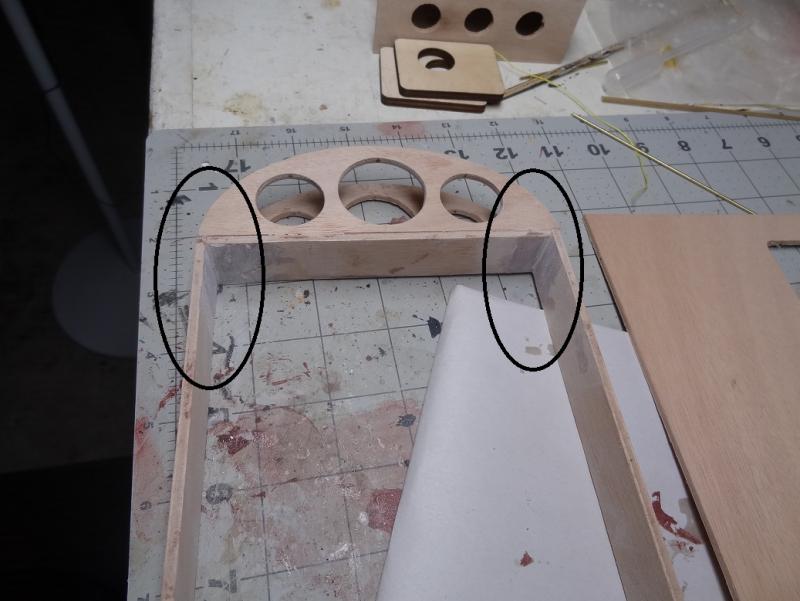
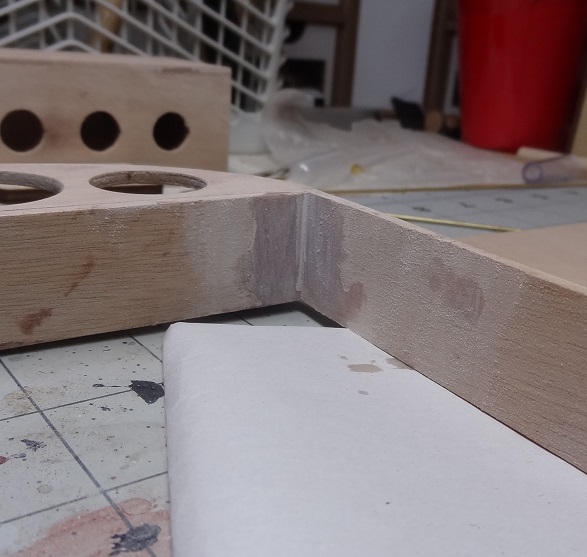
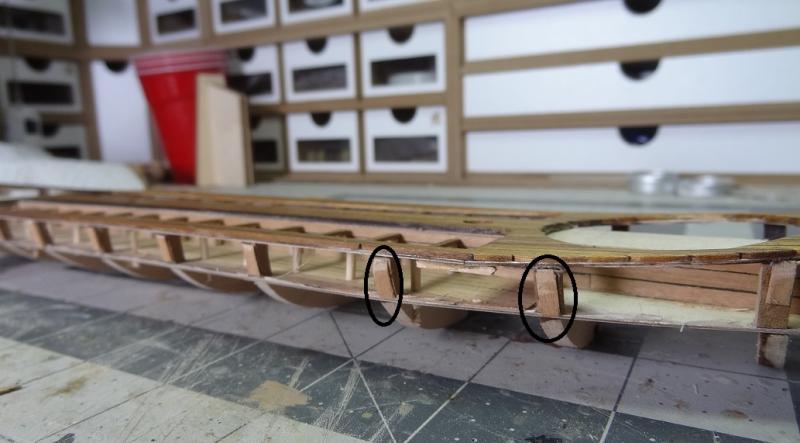
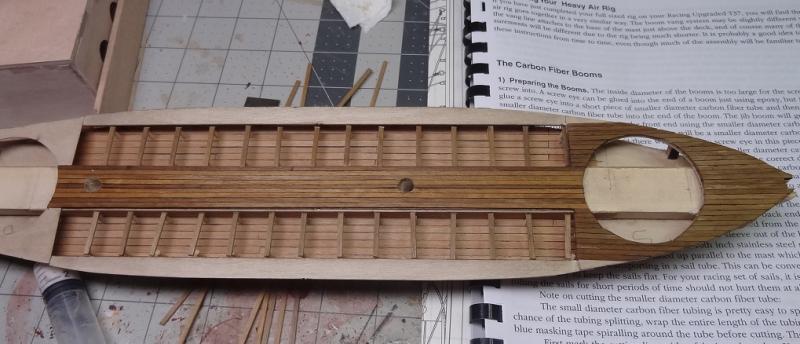
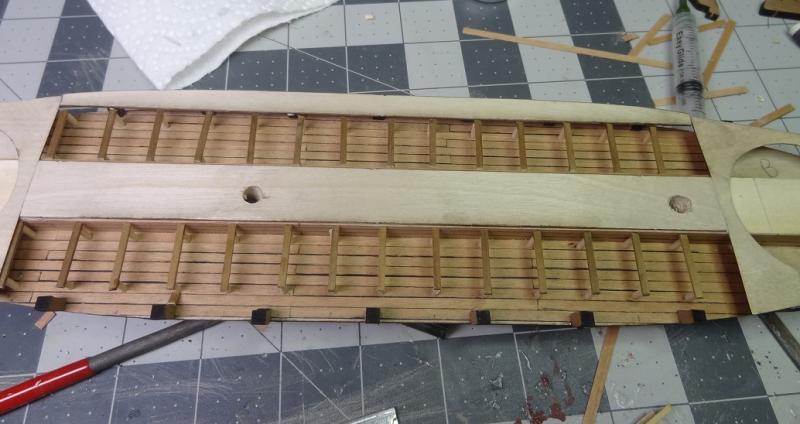
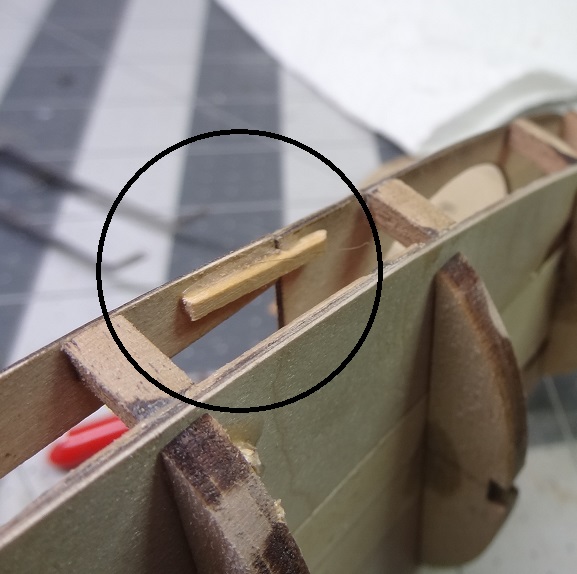
I've been busy with other projects so not much has happened with the tug. I did get a sense of urgency last weekend. Tippiecanoe Boats offers (and I bought) a nice set of racing buoys that you put out on the water and those become the marks that you race around. They have a technique where you sling them underhanded out on the water from shore. They claim you can get them about 30' out - the buoys have a line that comes back to shore so you can retrieve them later. However 30' ain't much really. To do it right you put a marker on top of a barge that is towed by the tug. When the tug gets where you want the marker you tug the land line and the buoy plops in the water. Kinda cool. And yes I will be building the barge after the tug. Tonight I assembled the coaming on the main deck. While it was another clear coat and then thick stuff, it was a little different as the coaming extends partially above the main deck and partially below. The epoxy is applied against the coaming on the underside of the deck. The top side. X's mark the bad side of the plywood which you want facing inward. Not that the bad side is all that bad. The lower cabin assembly will slide down on top of the coaming. Several more decks will be built on top of that. The electronics will be placed on a decking in the hull and accessed through the nice big opening. Just one problem. The inside of the lower cabin has a huge fillet of epoxy in the corners and doesn't come close to sliding down on the coaming. Guess I misread the instructions So a good part of the evening was spent filing & sanding those fillets smooth. I'll tell you what, that epoxy is hard stuff. I ended up using a full size metal file to smooth it out. It's a lot closer to fitting now but I will still have to round off the corners of the coaming. Now off to the hammock factory
- 96 replies
-
- 6
-
-
- tugboat
- Tippecanoe Boats
- (and 2 more)
-
Very nice Simon. You will become an expert quickly. If you haven't already, check out Chucks carving posts on this site.
- 120 replies
-
- 2
-
-
- mercury
- victory models
- (and 1 more)
-
I didn't realize those frames would be hard to sand. The result is very cool. The knock out centers is an interesting idea.
- 129 replies
-
- 3
-
-
- finished
- model shipways
- (and 1 more)
-
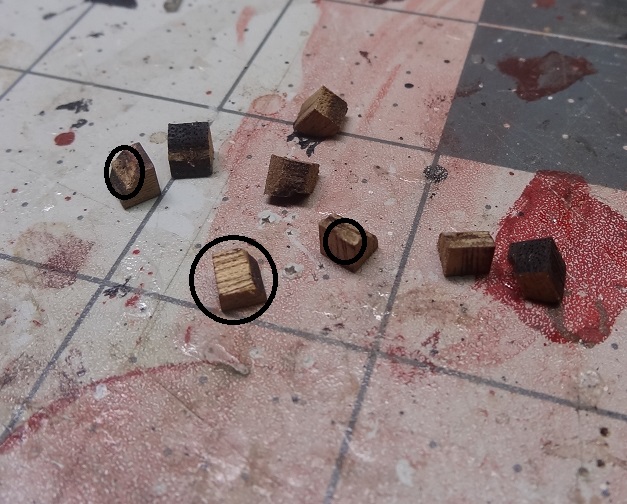
I can give that a try Scott. If I could use a jewelers saw that might work as well. Maybe a good chance to practice. I am going to have to replace 3 pieces somehow as I have already destroyed them.
-
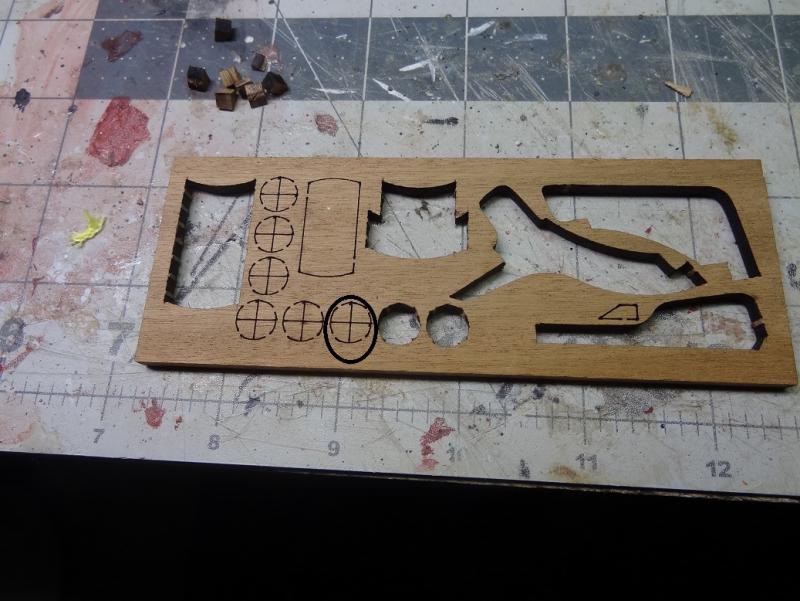
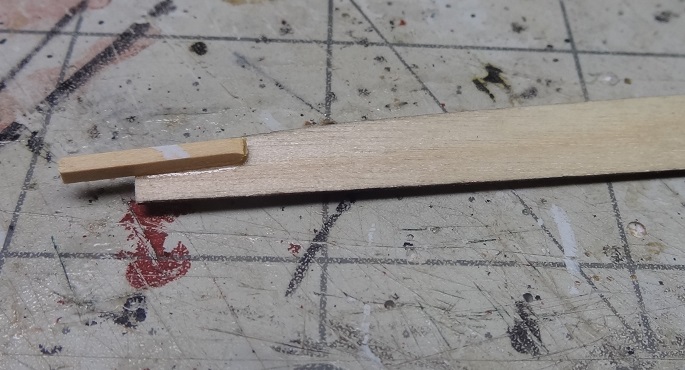
My first real problem with kit materials. Maybe there is a way to do this without mangling the parts. These are the top piece of the frame or fake bulkhead. They will be glued on the upper deck. The parts get splintered when cutting them from the plywood with an exacto. Unlike the other pieces of the frame, I believe these parts may be in view when the build is complete. And being laser cut there is the unsightly char that would have to be sanded off. I'm thinking of replacements. Take a dowel, rip it into quarters, then cross cut. If I can keep the results from flying away from the saw, it might work.
-
Simon - you mentioned early on some original plans you came across. Where did you find them? Your build is looking good. Glad to see you back at it.
- 120 replies
-
- 1
-
-
- mercury
- victory models
- (and 1 more)
-
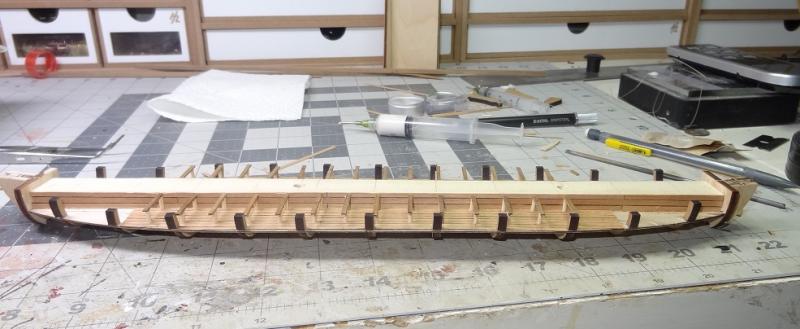
Upper decking is laid. Color is still questionable but I will wait until tomorrow to see what the stain looks like when it is completely dry. Normally for a strake, I like to cut a stick into pieces and lay those as individual planks. At the bow & stern this didn't come into play as those are all short pieces. I did not do it on the central beam either as that will have quite a few covers for what I suppose would be storage. Short planks would have been laid in between them not staggered. I could have cut planks for the rails but I had already put down 2 whole sticks before I realized I should have cut them. The rails will be fairly busy with little items so it probably won't be noticeable. Planking around the big holes was the only real challenge. I forgot I had a set of riffler files, so when I finally pulled them out it was easier to file the round edge. Still have some hull fairing to do. As suggested by Joel, I added some "padding" to the false bulwarks. Now I can sand a little more aggressively. BTW - there is another piece to the bulwarks that will sit on the upper deck. I'll do a better job of lining these up. Hull planking is supposed to come next but I have a bad feeling about the foot rails not being correct - too high - so I will continue on with the upper deck for now.


-
OK guys - Continuing on. Will leave everything as is for now. As Scott mentions I could always stain it some color. What I was using earlier was Natural - no color added. Should be finished in an hour or two.
-
Thanks Joel. I think the variations might look better had I not done the stern with the dark planks. I may try to pop a few of them up and replace with a different shade. Maybe some O.C.D. surfacing?
-
What an interesting way to rail the bow & stern, vertical sticks. Your windlass poles - looks like they might be stained? If yes, what was the wood and stain color? Good to see some progress again!
- 653 replies
-
- 3
-
-
- trabakul
- marisstella
- (and 1 more)
-
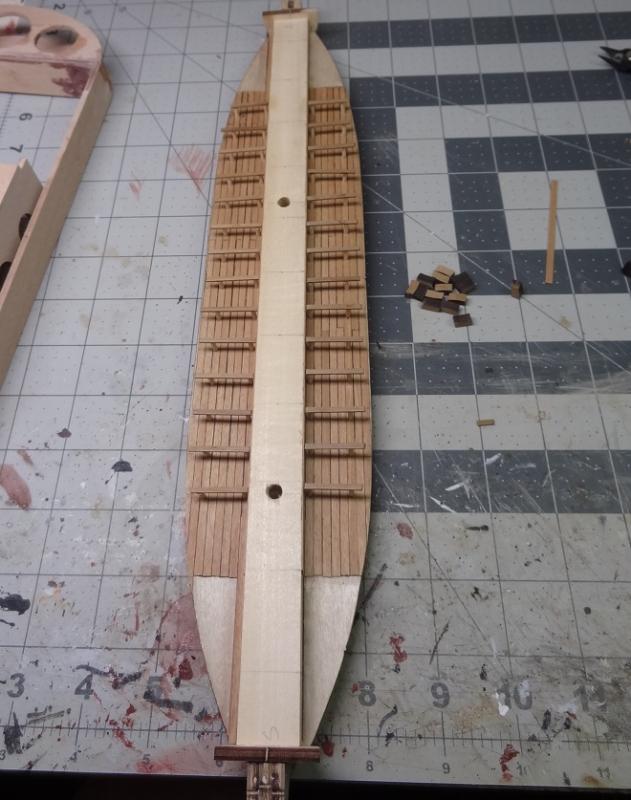
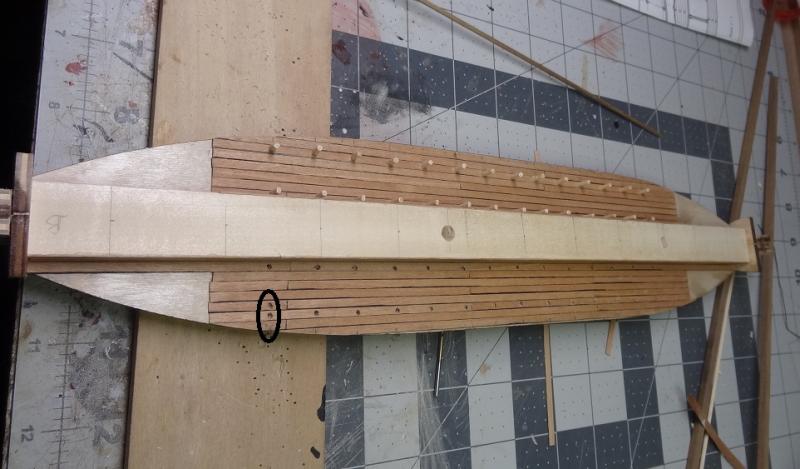
Thank you Scott. It's an interesting build. Some details here that you wouldn't run into on a sailing ship. As a matter of fact, oars is one of those. If I do choose to do them I would consider having them in place sort of like the Roman & Egyptian galley models. The reason being there's 28 of them, I think trying to bundle up that many and place them somewhere in the boat might look funny. Even if I did 2 bundles of 14 - one per side. I have run into an aesthetic quandary. The planks for the upper deck are walnut. I will give Amati an A+ on the cutting work - good clean edges, consistent size. However the color range goes from the dark brown we know & love to something so light it looks like basswood. I did not notice this as I began the deck planking. It took 2 sticks to cover the stern deck and as luck would have it I grabbed 2 of the dark ones for that. So the stern is all dark. Now I'm working down the boat and seeing that the contrast between the darkest & lightest sticks may be too much. Especially since the stern is all dark. Don't get me wrong, I like having planks in varying shades but maybe not in this case. I put some natural stain on to see if that might even it up. Ehhh. The pic sort of shows this but it is more pronounced in person. Would appreciate some opinions before I continue on or tear them off and redo. And no, I will not be outfitting the build with carbon fiber tubes
-
Welcome Joel and a great idea. I was getting concerned that the entire hull was getting smaller. Once again, me trying to make things complicated. Joe - Welcome also. That's interesting. McDonough built a number of galleys - Allen, Burrows and 4 others. They found a galley downstream from Eagle and Linnet and it is believed to be Allen. So they have quite a bit of info. I'd be interested to know where any info (specs or design) on Burrows is. I would imagine since they were built at the same time they would be fairly similar. There was some discussion earlier in this log as to whether the cutwater in the kit is accurate. From what I have read about the Allen excavation the stem was not complete, so we may never know. When they drew up the plans based on the wreckage the stem had no protrusion forward like the kit does.
-
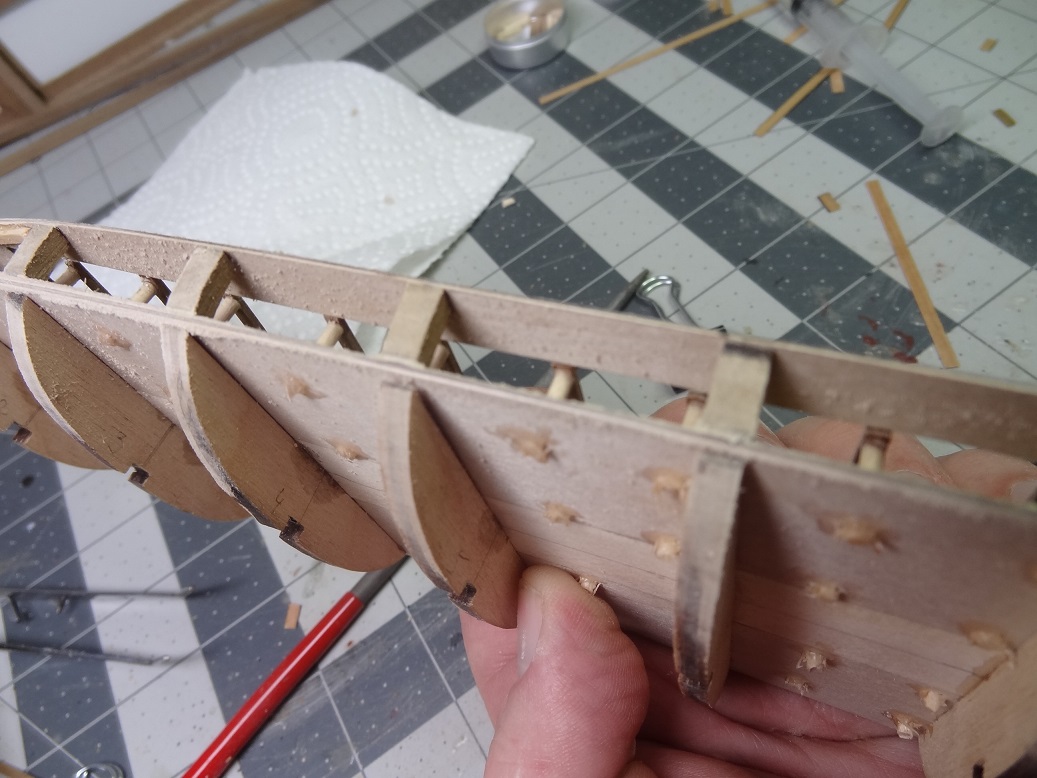
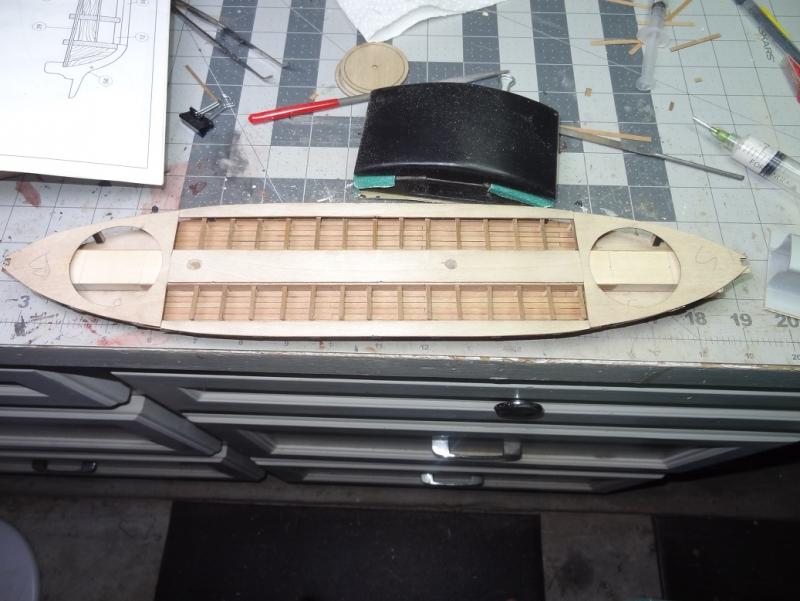
Here's a look at the deck section after "bending" it. However I could not get the edge in line with the edge of the side piece of decking so I cheated. Added a brace to the side piece that will go under the bent corner of the bow piece. They'll be nice and flush that way. A few pix may explain it better. So here's how the decking ended up. All of that will be planked. I guess I did not grasp the concept of those false bulkhead pieces. I glued them down for support of the deck not realizing they are really supposed to be the extension of the frame pieces down below. It's going to take a lot of sanding to round all that out. As you can see some of those bottom frame pieces don't even extend out to the edge of the lower deck. No matter. It all needed some serious fairing up anyway.
- 138 replies
-
- 11
-
-
Don - that was a big part of it. The rigging is relatively simple as well - that's what set the hook. As far as history, while designs varied, this type of boat had some interesting roles from the late 1700's into the 1800's. From bay and coastal duties to lakes and rivers. The English used them quite a bit also. BTW - the trick I tried - wetting the deck with a wedge under it worked. This morning the corners of the piece stayed put. I will be doing that one more time. I need to find slightly thicker wedge to list the corners a little bit more.
-
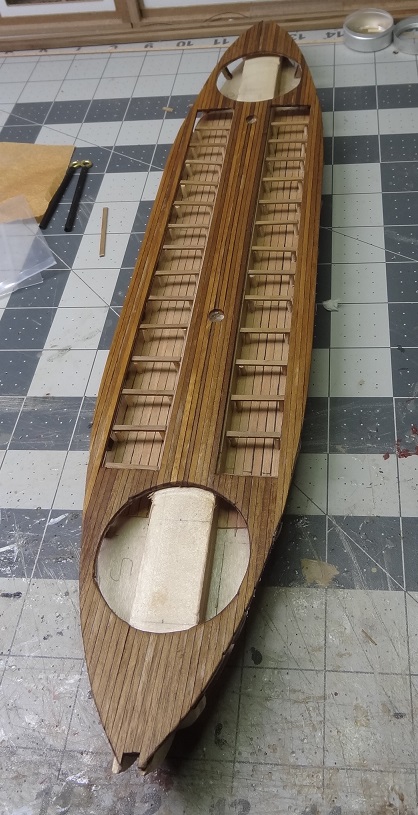
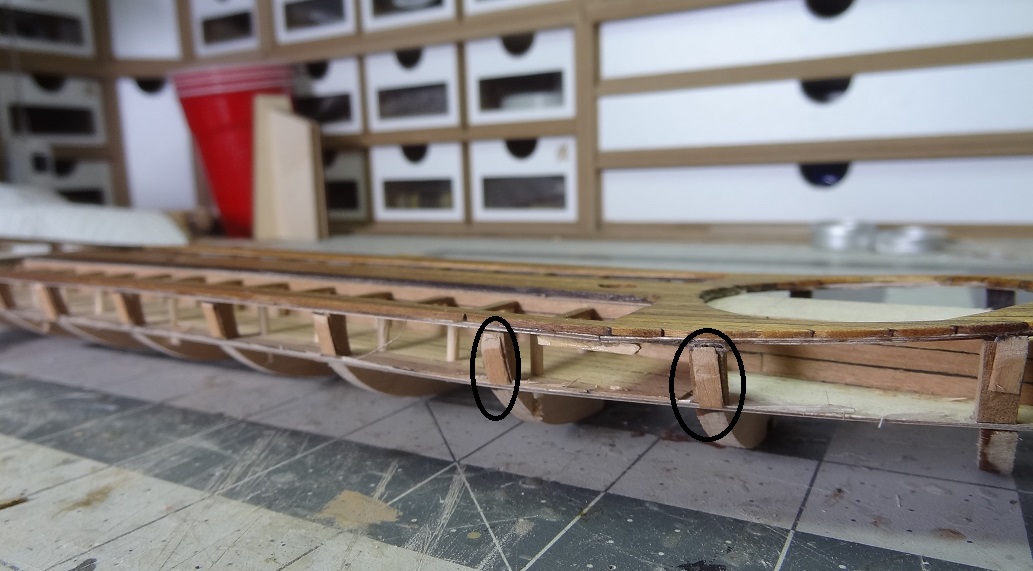
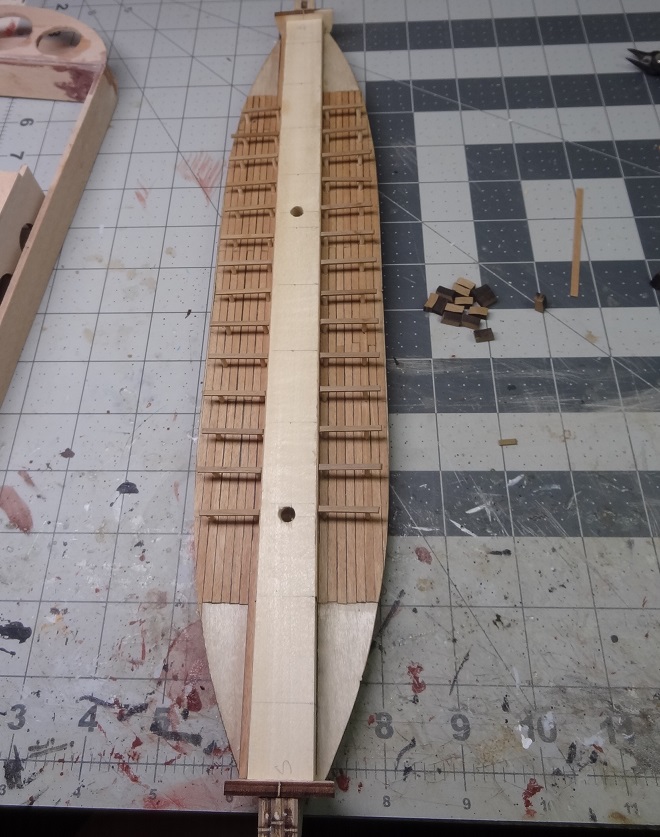
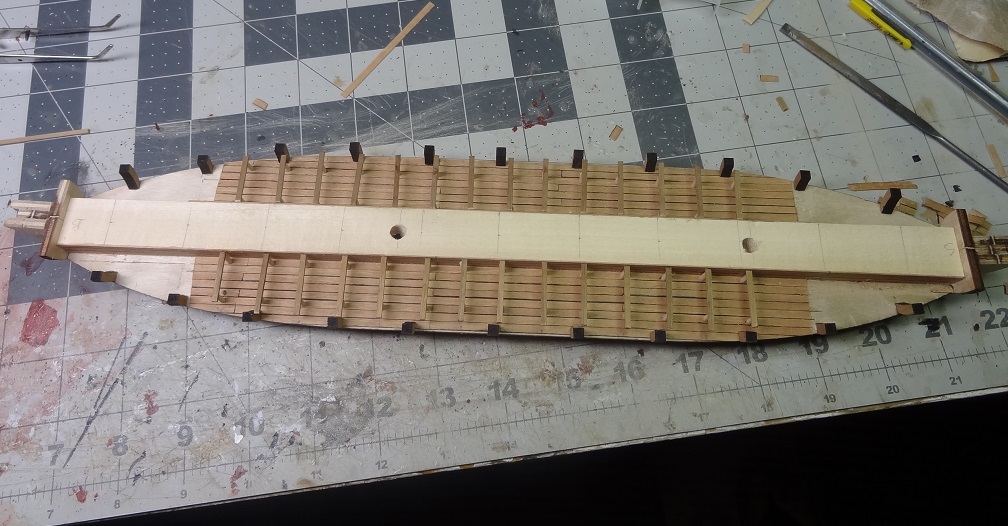
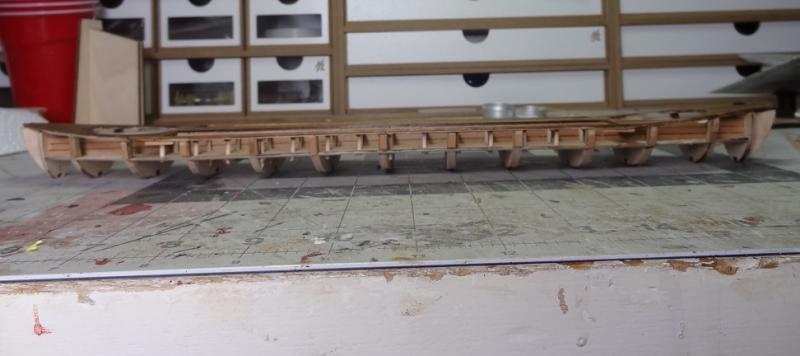
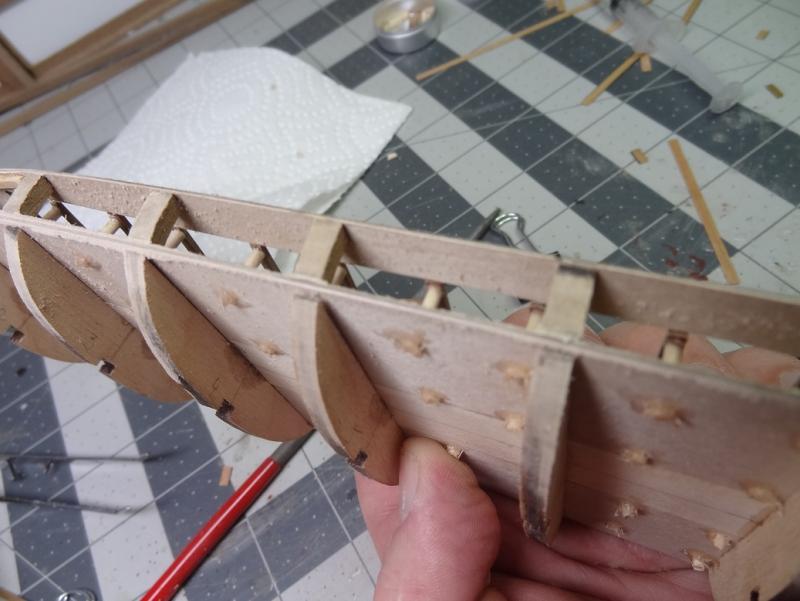
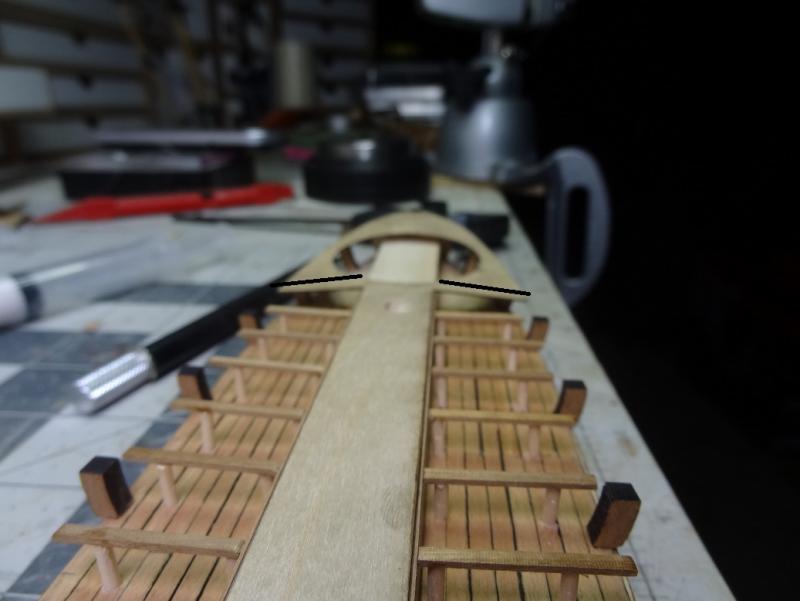
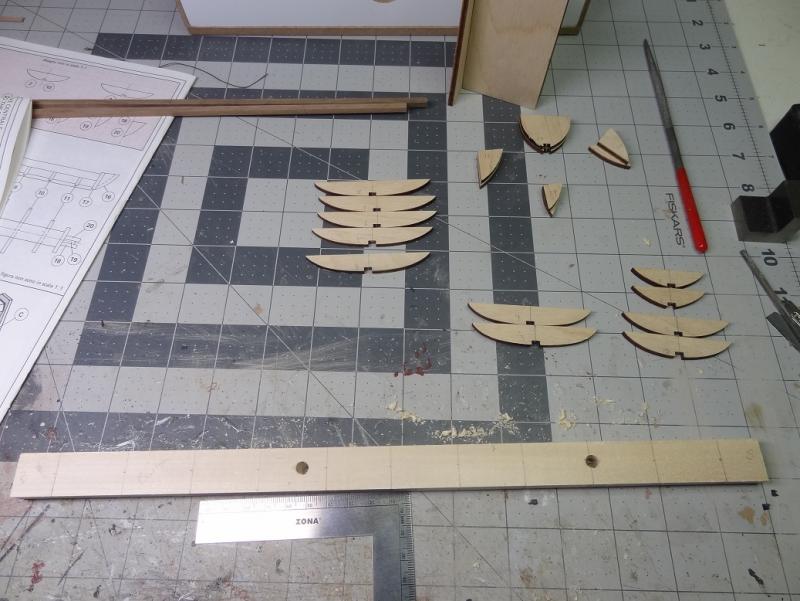
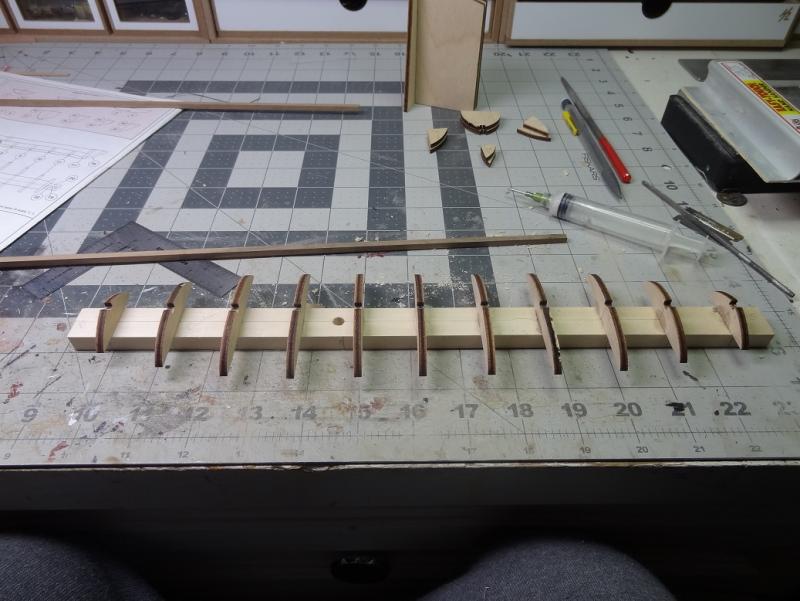
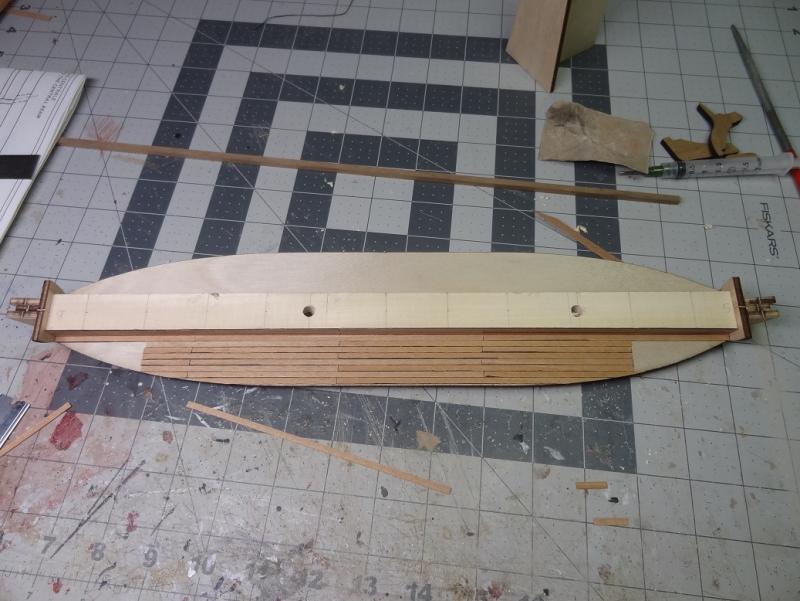
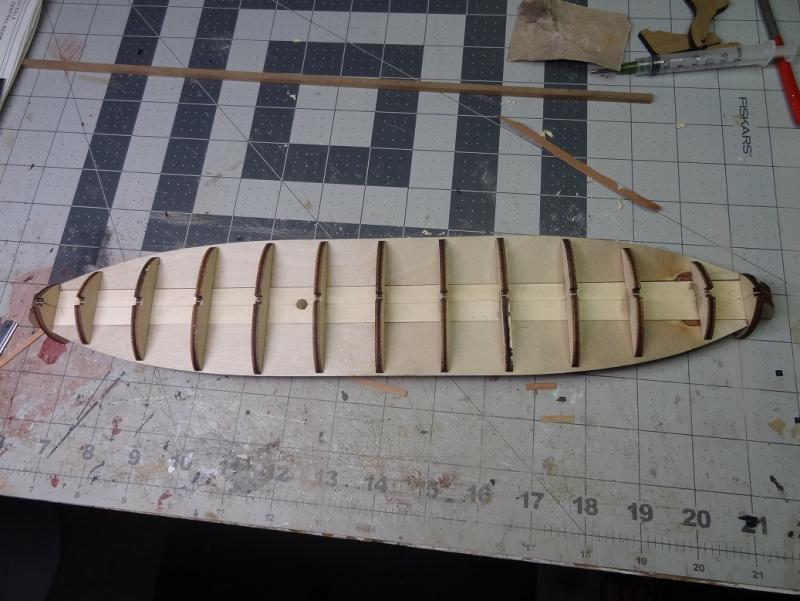
More work on the interior tonite. Finished up the foot rails - 28 total. I still haven't learned how to get consistent placement for repetitive things like this. They're all close but not exact. Next up was the faux bulkheads. These were odd. There were supposed to be 3 different height pieces - 7.5mm, 8mm, 11mm. Well darned near all of them were about 8.2 - 8.4 . The placement was strange too. the tallest ones (4 of them) were placed 1 on each side by the bow & stern. Working towards the center next was the 8mm, then filled in with the small ones. These are supposed to support the upper deck pieces. However the bow and stern decks came out at some funky angles as you can see. This is a problem as there are some side deck pieces that are supposed to meet them but the side pieces are too high (or actually the other pieces are too low). So after the glue dried I found something to wedge under the corners to lift them up. Then I wet down the area and will be hoping that the wood stays in that position when it dries. I did catch one potential disaster before it happened. The masts are stepped at about a 3 degree angle. Given the typical ships we build I assumed they tilted towards the stern. NOT! The lateen rig in this build has the masts leaning towards the bow. That would have been trouble had I begun to add all the deck items.


-
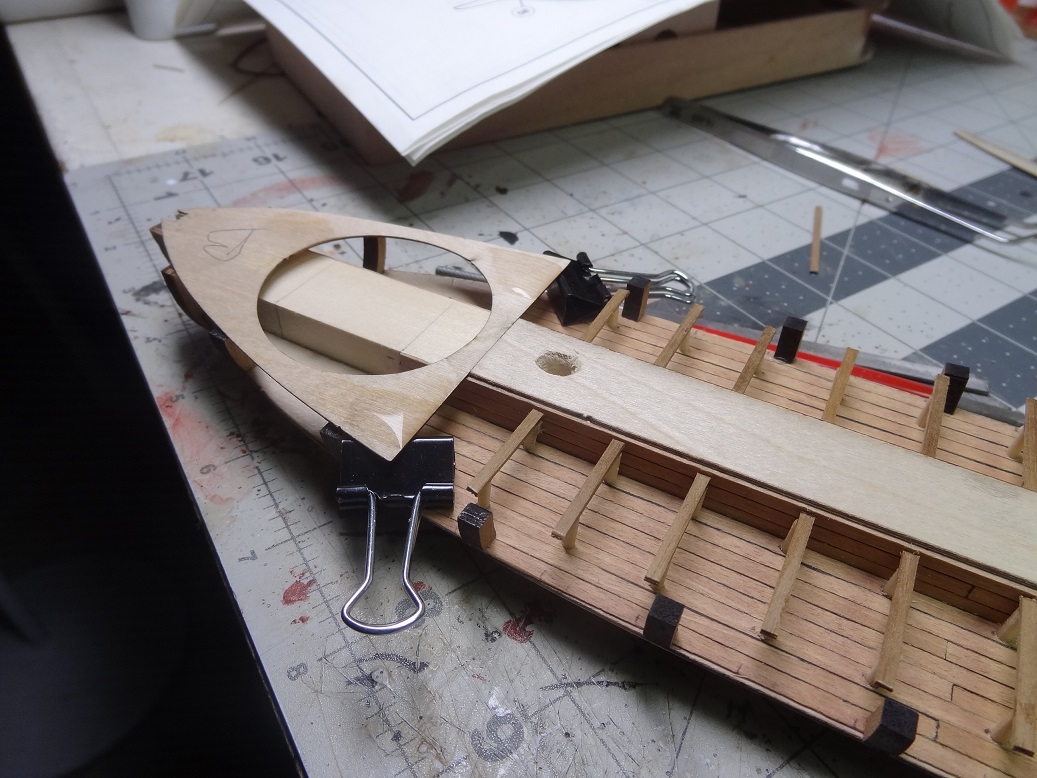
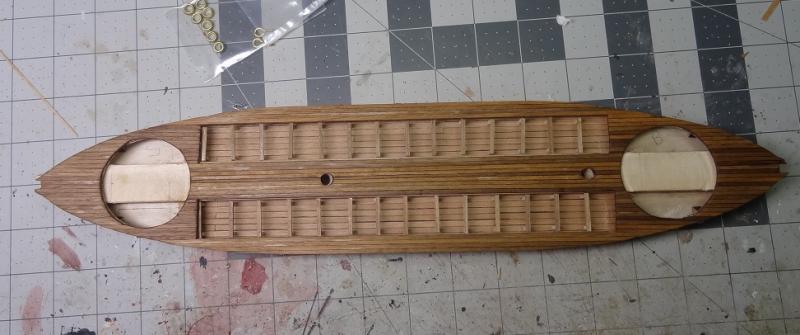
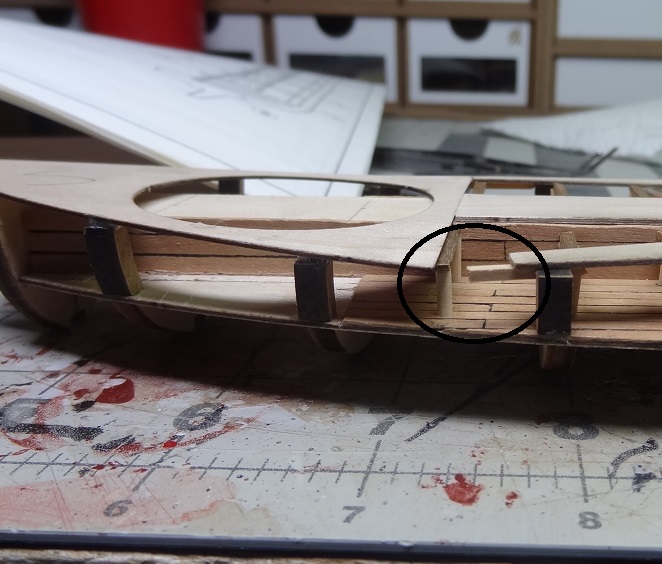
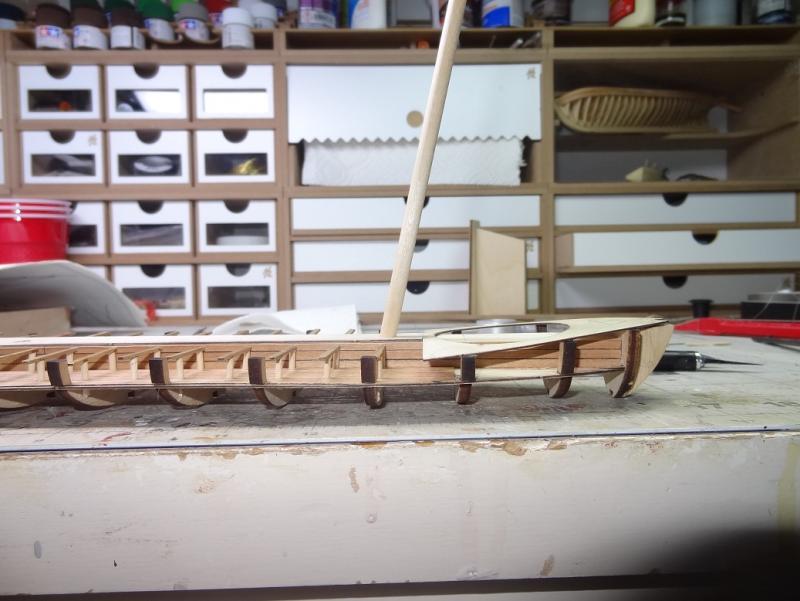
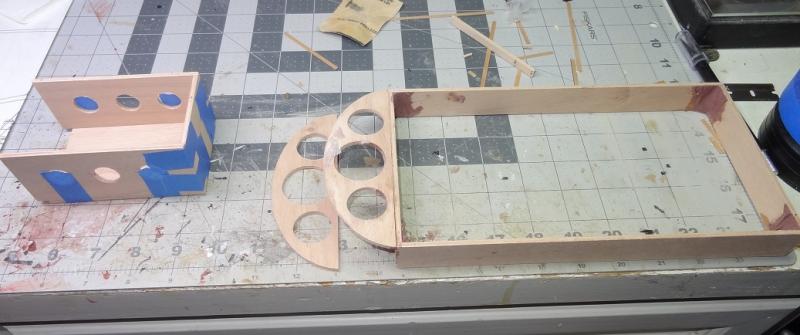
Plugging right along. Glued parts for the rear cabin and the other elliptical piece for the forward cabin. Tape, clear coat, thick stuff. The laser cut piece that will be the deck has a rectangle cut thru it in the center. I will be adding a coaming into that and the rear cabin will be set around it. This will be the access to the electronics. There is actually an epoxy technique to fill in spots like this.


- 96 replies
-
- 6
-
-
- tugboat
- Tippecanoe Boats
- (and 2 more)
-
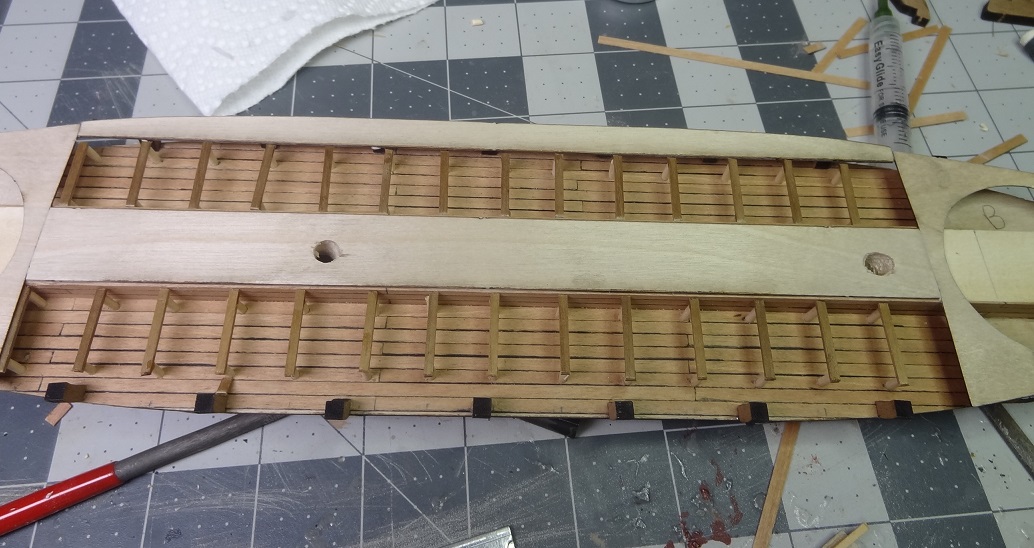
Beginning some work on the interior seating area. The foot braces come first. Nothing too exciting, just a lot of repetition. Cut columns to length, drill holes, insert columns and glue. The only hard part was getting the columns aligned and the same height. Height was easy. I have a stainless straight edge about 12" x 2". I just inserted the columns a little high, set the straight edge on top of them and pressed down. The inset for this step in the plans actually had a measurement! One foul up on the holes EDIT: - 03/02/17 - I'm adding this as I install the benches that go right next to the footrails. As I add the benches which are supposed to be laid right behind every footrail I'm seeing what a bad job I did with these holes. The pairs of holes are off in some places and in other places the starboard holes don't line up with the port holes. This wasn't overly obvious until I began to lay the benches. With the S&P benches inline it really shows when a footrail is not straight. It's not really correctable now. A suggestion to help avoid this would be to drill the holes much earlier. Even before the lower false decks are glued in place. You could tape them together (piece 21 & 22) at the ends and then drill holes thru both at the same time. TAKE YOUR TIME measuring!! Use a square to mark off each pair of holes. If you have a drill press even better. This should make each row of holes line up better.
- 138 replies
-
- 10
-
-
Hello Per - with the epoxy process for the tug there is definately some down time so another build fills in nicely. I like the HobbyZone setup. If I did it again I would keep the same footprint but probably would have gone for more of the larger drawer units, less of the smaller drawer units. The MDF is quite thick so a 2" tall drawer really only fits something 1 1/2" tall. However I imagine it's different for everyone. If you have a lot of small stuff the small drawers might be a good thing. All that being said it is a huge improvement over what I had before.
-
My feelings exactly Bob. The shores I sail of off are almost all windward. If the boat has a problem it will be drifting in the opposite direction.
- 96 replies
-
- 3
-
-
- tugboat
- Tippecanoe Boats
- (and 2 more)
-
Hi Steve - glad to have you along. Scott - yes a chapter on that also Niagara, Eagle, Jefferson as well as a few of the British boats. Roger - I reviewed Coffins again and it appears the drawings they show don't show the extended cutwater as you said. I wasn't looking that close before. However the kit design does seem to be closer to Allen than any other row galley or gunboat drawings I have seen.
-
I knew I had seen something somewhere on the row galleys. In Chrisman's book Coffins of the Brave there's a chapter on the Allen. I would imagine this is where Amati got a lot of their ideas for Arrow. The Texas A&M Nautical Archaeology team excavated it from a river. The starboard side was in fairly good shape and they were able to discern a lot about the design. That book is a good read if you're interested in the Lake history of the War.
-
Scott - welcome and thanks for the additional info. I'll check the MSB log. Chris welcome as well. Yup I know there was never an Arrow, but this design is similar to the type used during the War of 1812.
-
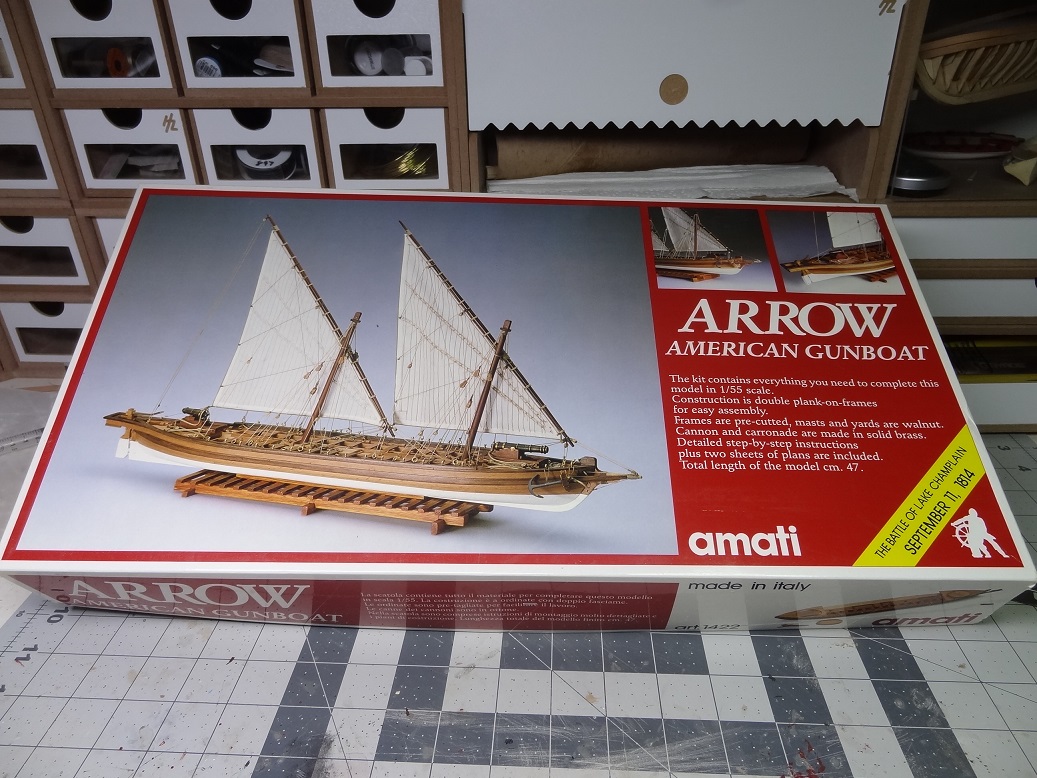
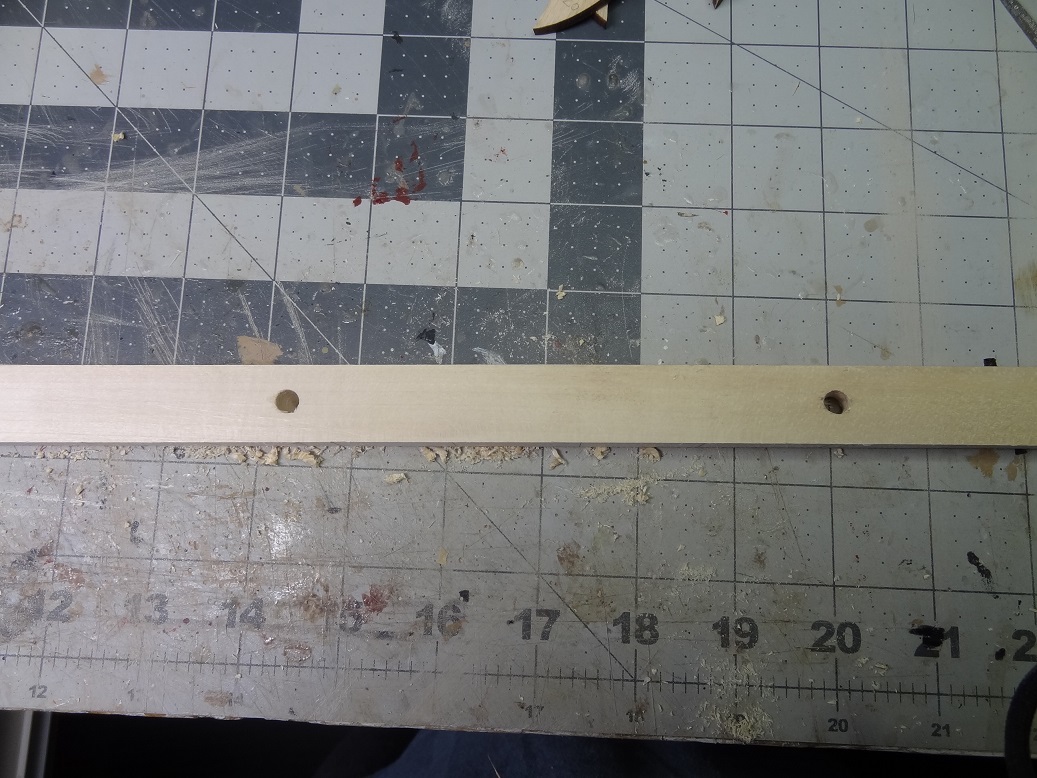
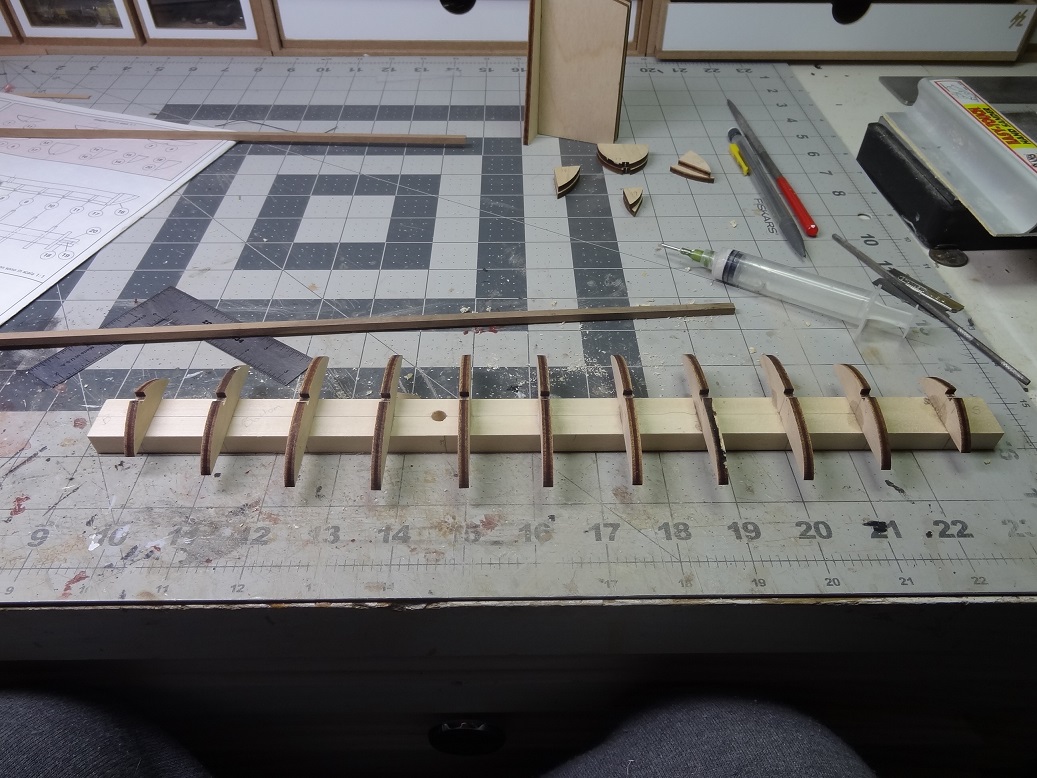
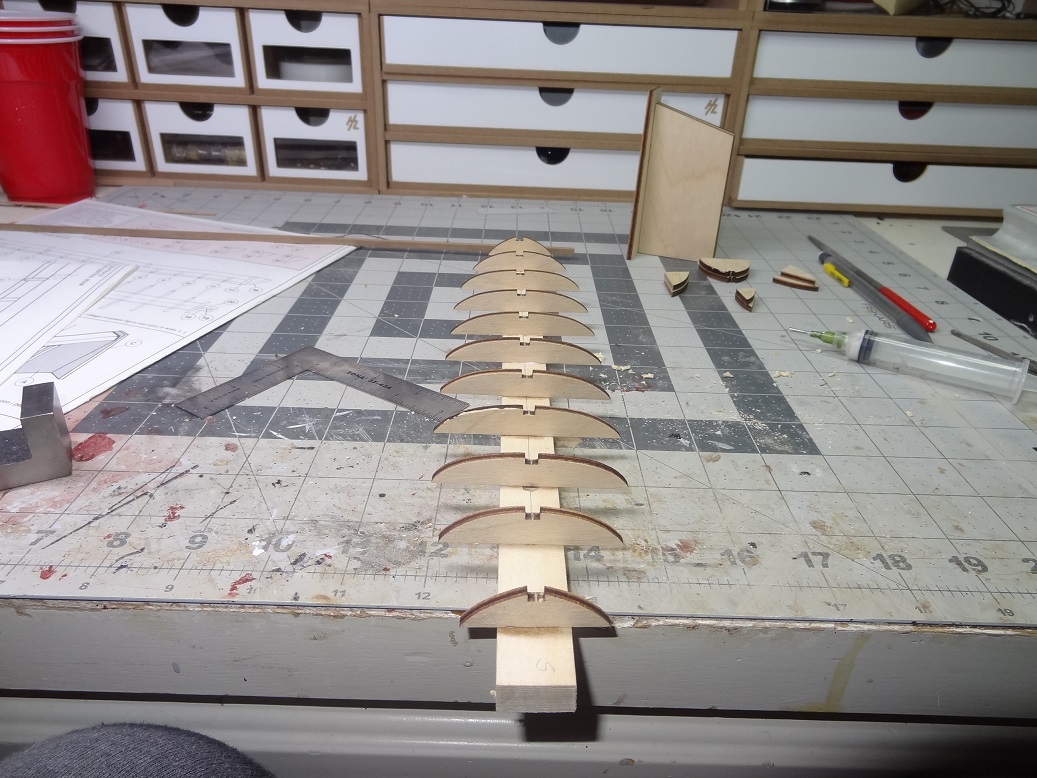
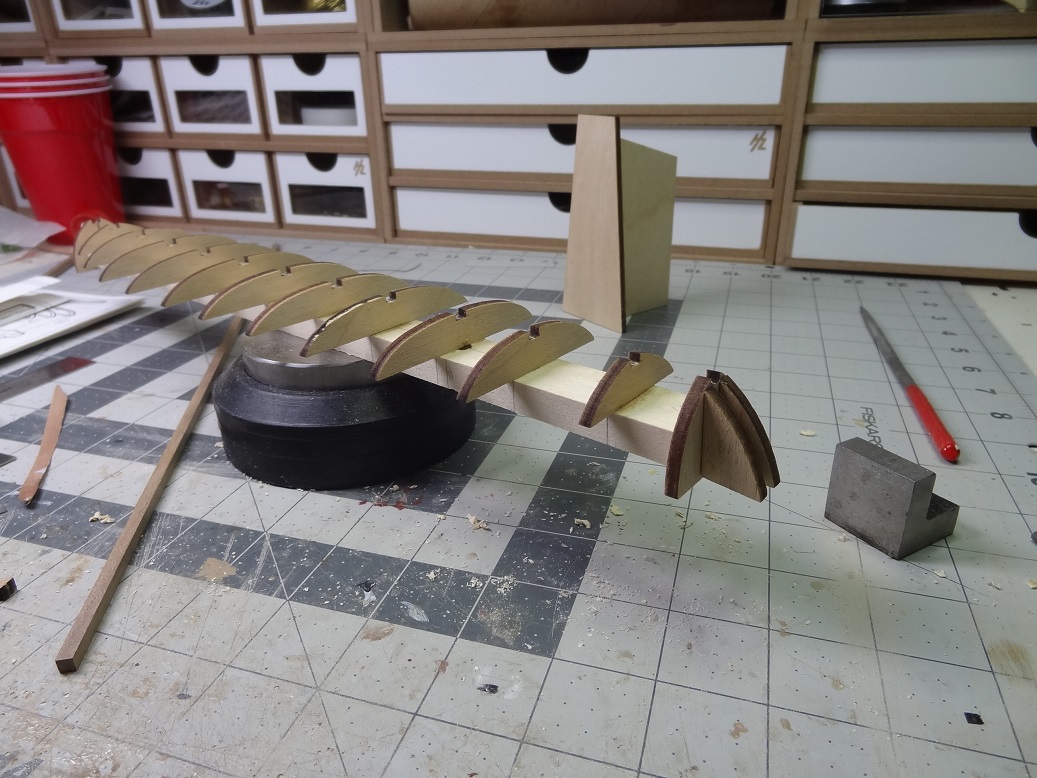
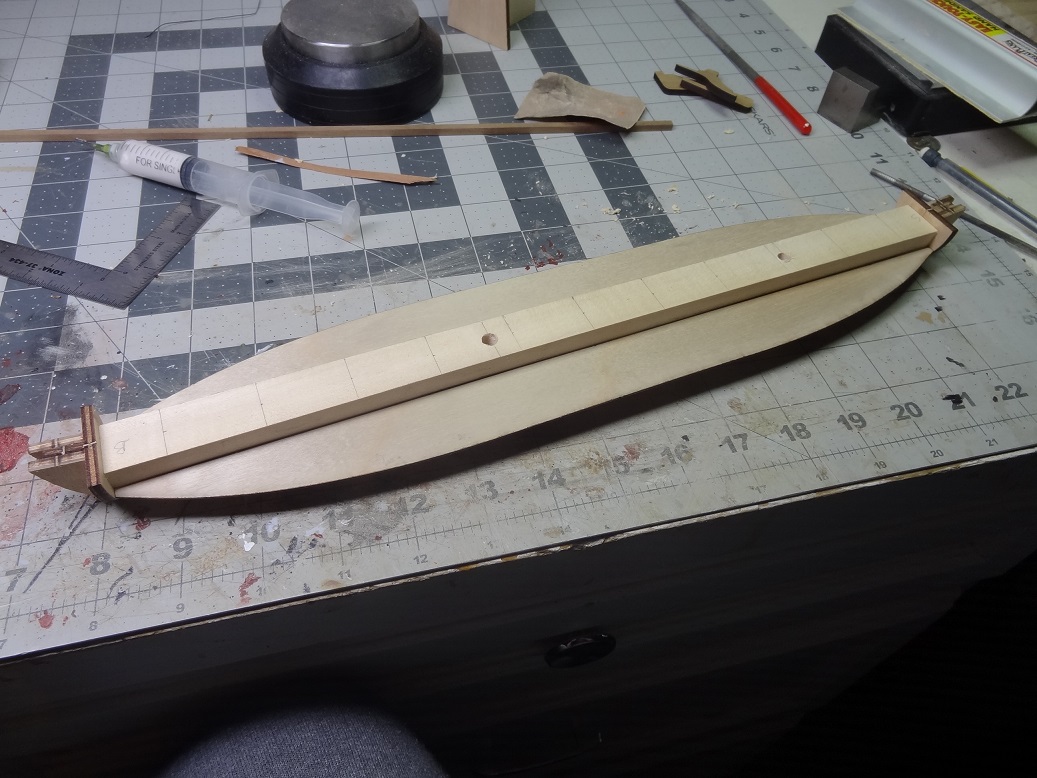
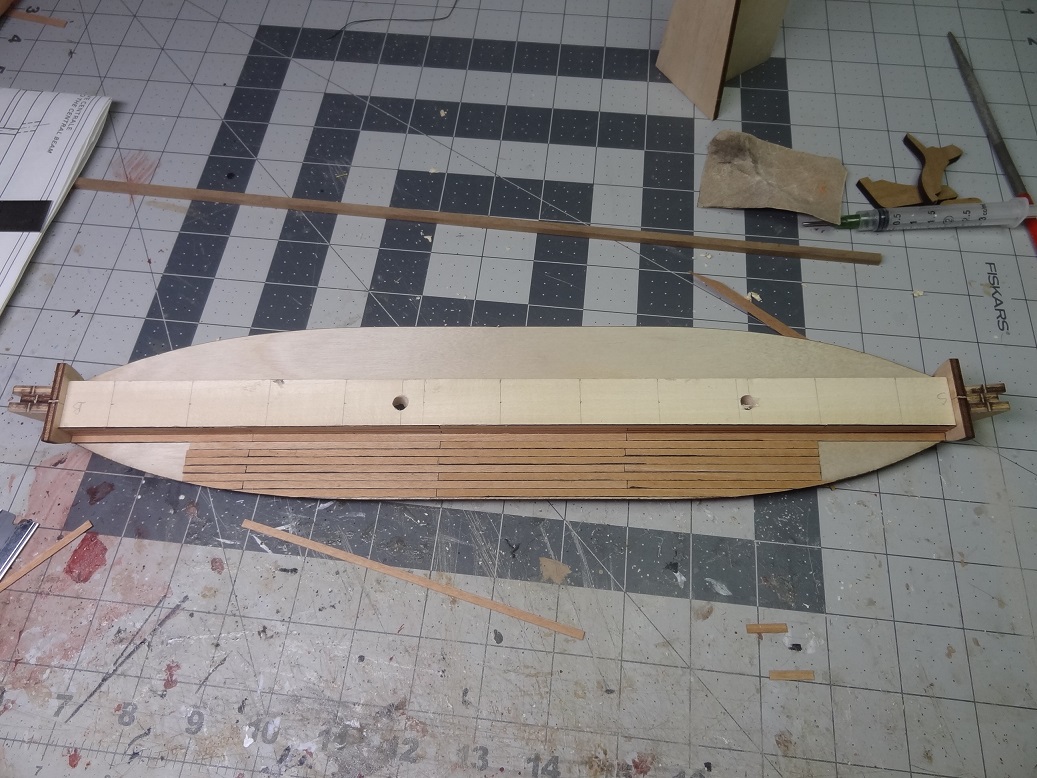
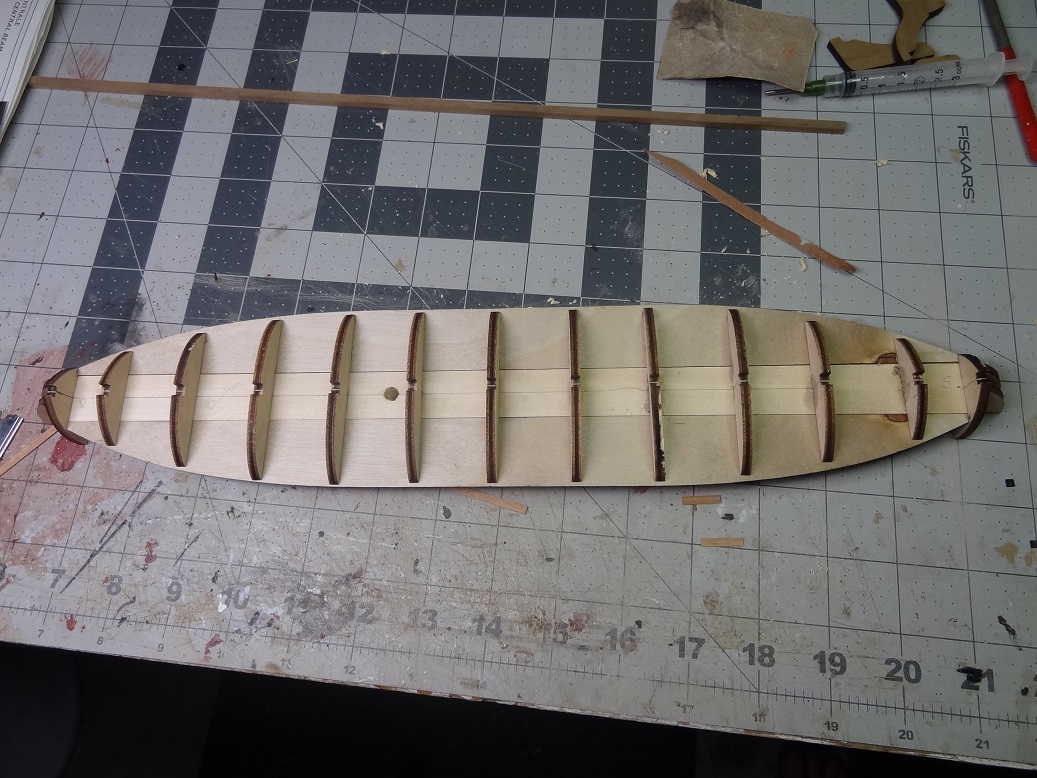
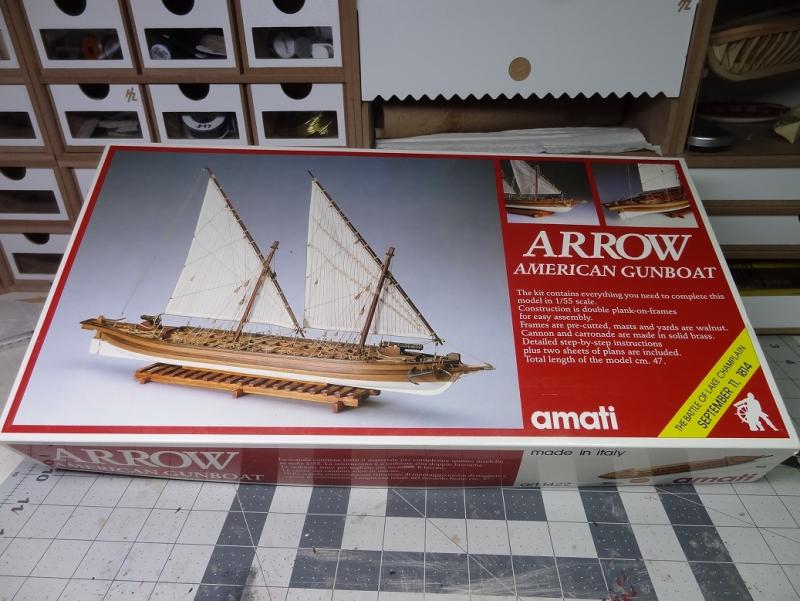
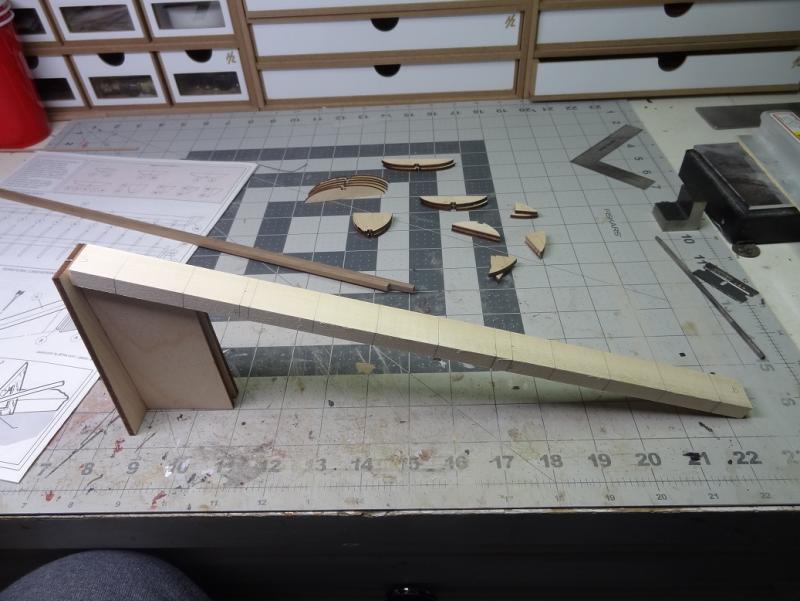
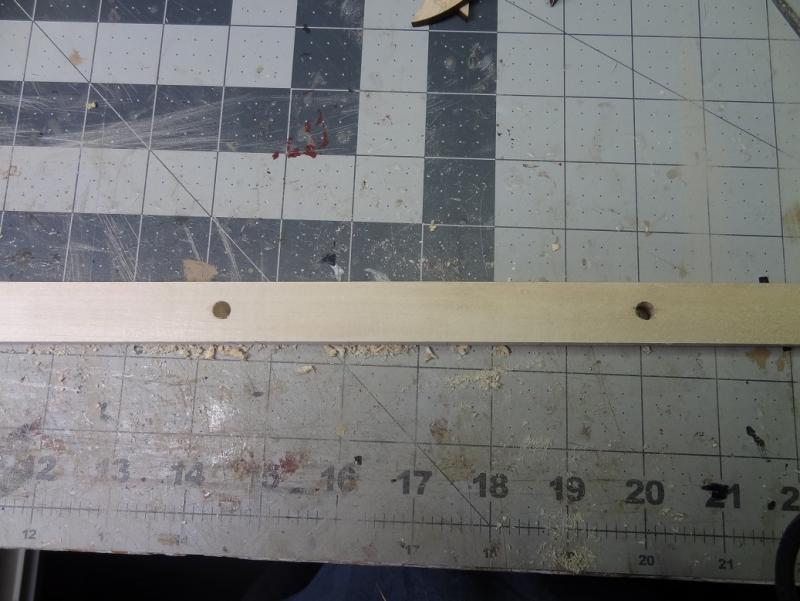
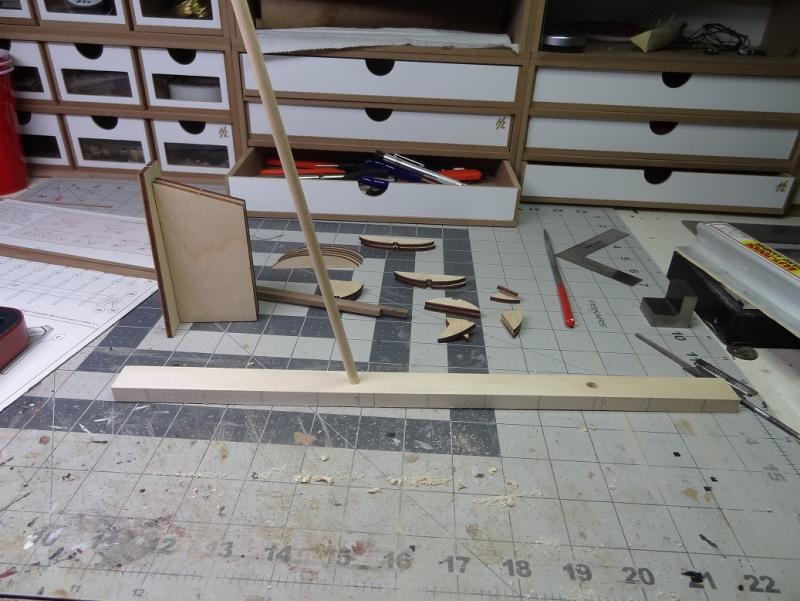
Couldn't wait any longer on this one. It is an odd creature to say the least. I learned about this type of boat while researching Niagara and the goings on at the Great Lakes during the War of 1812. They have an interesting history. The kit is pretty minimal. A lot of wood without much metalwork. From a quick glance things don't look too bad. The main instructions with all the illustrations is in Italian of course. There is an English version but it refers to the figures in the Italian instructions so you really need to have both opened. The plans show decent details about the build but NO MEASUREMENTS. Very odd. The first task at hand is to drill the mast holes in a piece they call the centerboard. They supply a little jig so that you can drill the holes at the proper angles. That's assuming you can drill a hole straight down. Good thing my drill has a bubble level in it. So I got thru that. Now for the frames. Here's a weird one - frames go on the keel right? NOT! The flat side of the frames are glued to the centerboard. You have to center them and make sure they are perpendicular. I marked up the centerboard and that turned out not to be a big deal. So the first 11 frames are on. Next are two end frames glued to the end of the centerboard. The instructions say that the flat side of the frame is supposed to be above the centerboard surface. How much? That's when I noticed there were no measurements.Turned out to be 5/32" Added the undersurface for the lower deck Began planking the lower deck. Odd as it is, I still think this is a cool looking build. As you can see things are moving along well. Just what I needed - a build that won't take years to finish. 03/11/17 - I have decided to add a few notes here regarding things that I have turned up during the build. Hopefully this may make it easier for a future builder. A couple of things today: 1. As you are building out the lower deck - planks, foot rests, benches,etc. - color and finish them at that time. It will get progressively more difficult to access them later. Same thing for the upper deck. 2. The instructions say to plank first then install the stem and stern post. In hindsight I will disagree with this. I would follow a more normal pattern of installing those pieces and the additional step of cutting a rabbet. I've found that the ends of the planks just kinda lay on top of the pieces. They don't integrate like they would with a rabbet cut all around the hull. 3. If you decide to do #2 be sure to make and install the gudgeons and pintles for the stern post and rudder before the stern post is installed. Don't let the gudgeons extend too far back on the stern post else they will keep the stern post from sliding all the way into place.


- 138 replies
-
- 14
-
-
Per - I got my T37 back around October. While I did use the instructions, I probably got more from the videos. Watching it be done then running out to the garage to do it. Especially when it came to the epoxy, I had no idea at first. Watching him mix it and test it made a world of difference. That said, I have no complaints with the instructions. Everything is described in great detail. Too bad we can't get a model ship with instructions like that. Of course that would probably be a book instead of a pamphlet. Although I will say I think Chuck's instructions are right on par.
- 96 replies
-
- 3
-
-
- tugboat
- Tippecanoe Boats
- (and 2 more)