HOLIDAY DONATION DRIVE - SUPPORT MSW - DO YOUR PART TO KEEP THIS GREAT FORUM GOING! (Only 20 donations so far - C'mon guys!)
×


mikiek
-
Posts
2,276 -
Joined
-
Last visited
Content Type
Profiles
Forums
Gallery
Events
Everything posted by mikiek
-
 Hey - Joel re: the lashing, that should be loose right? Somewhere I think I read 7 times around from end to end?
 -
Looks fantastic Darrell! I'll say it again - your perseverance amazes me.
- 648 replies
-
- 3
-

-
- niagara
- model shipways
- (and 1 more)
-
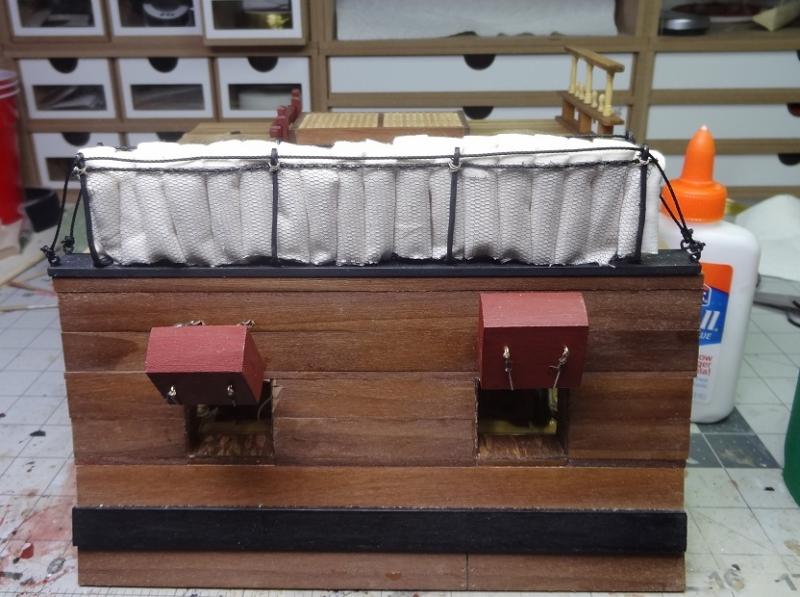
That should look really sharp Joel - and at 1:23 very doable. I have also added a "canvas" siding on the exterior side similar to your pic. After seeing that I decided I will add a siding to the inside as well. That seemed like the easiest way to cover up the raggedy ends of the hammock rolls. So what I will end up with is canvas on both sides but the folded hammocks will stick out on top. Pix to follow soon.
-
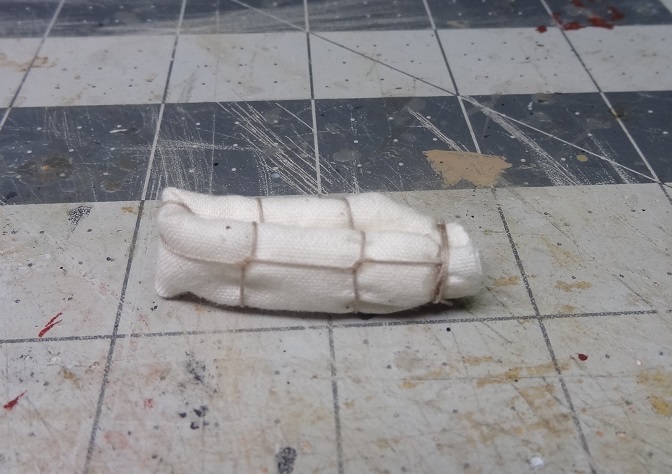
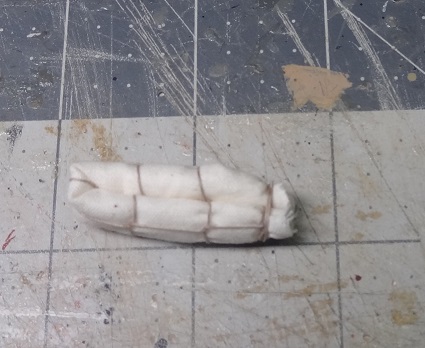
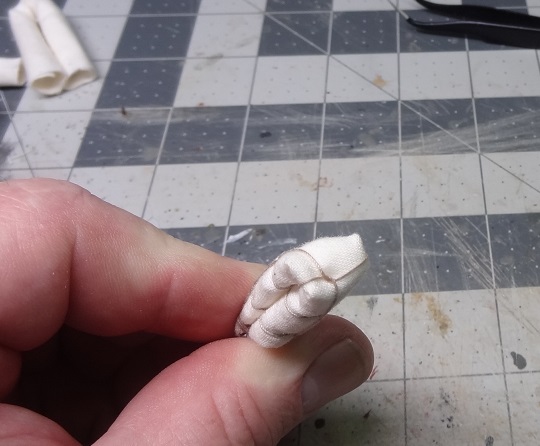
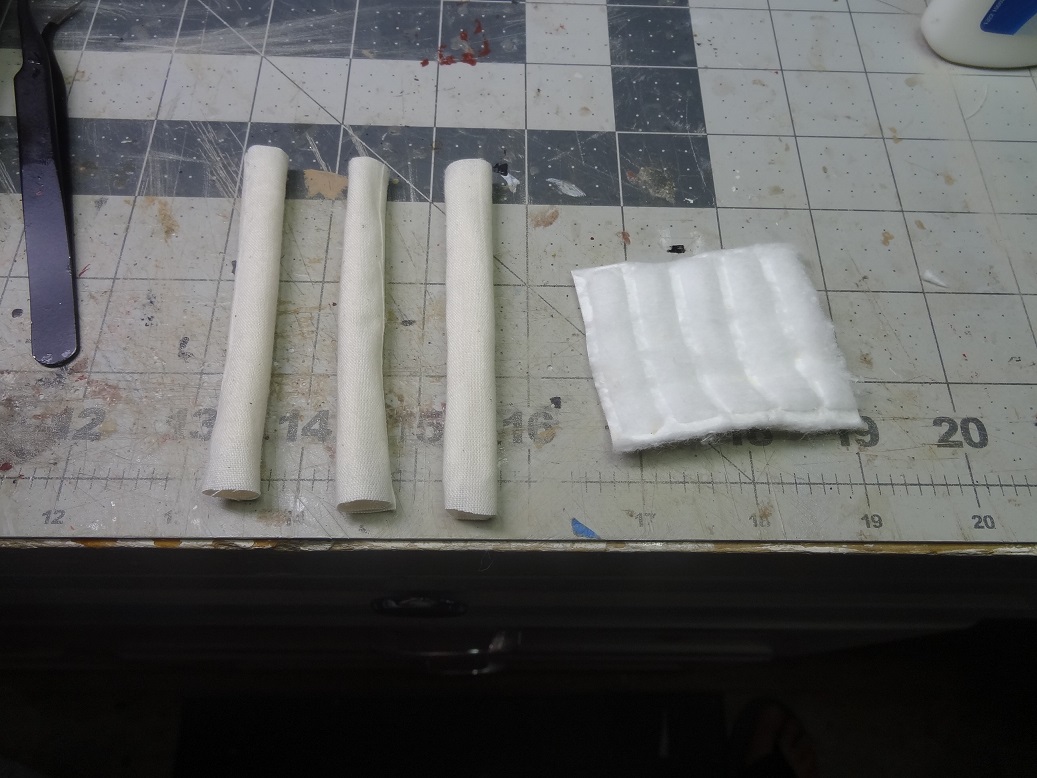
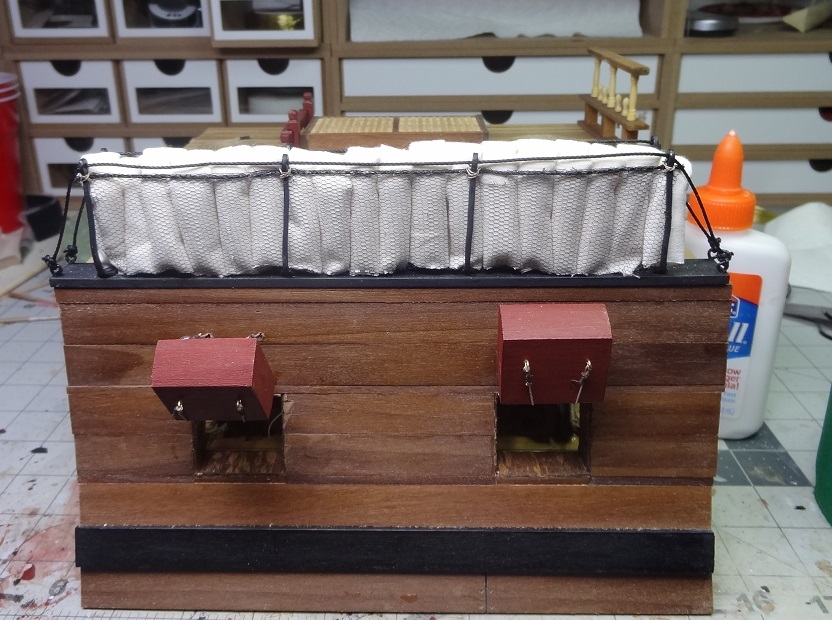
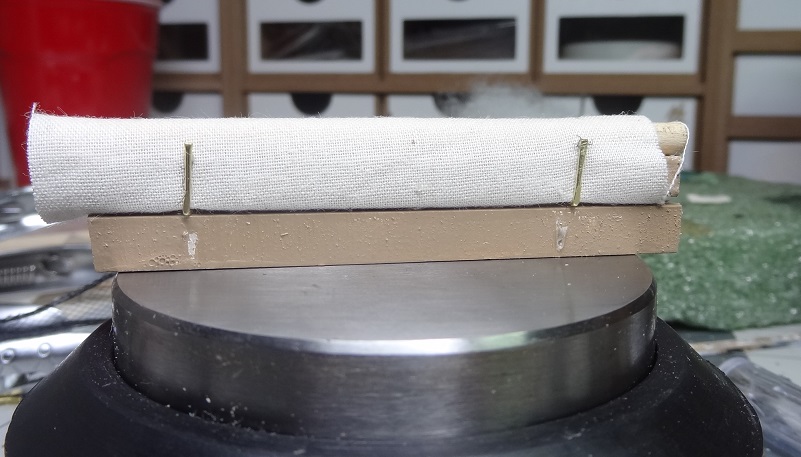
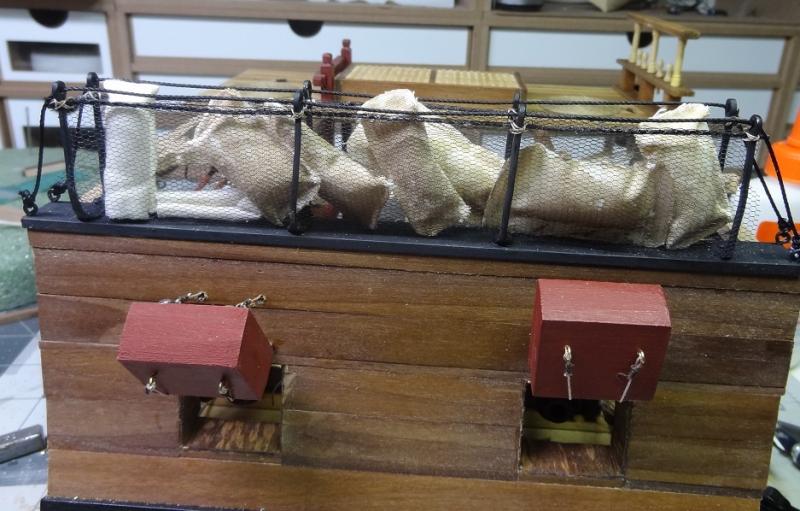
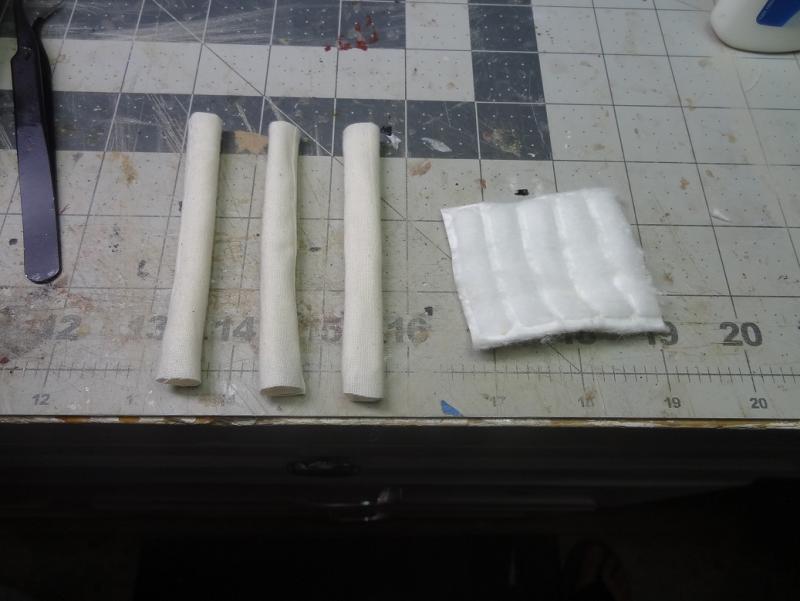
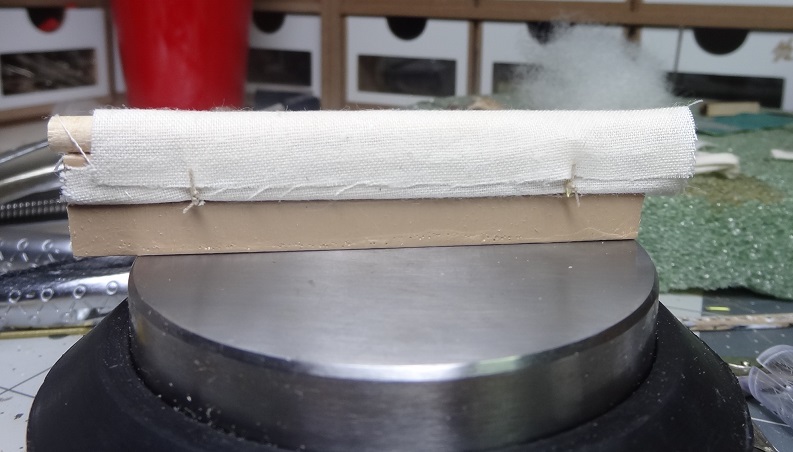
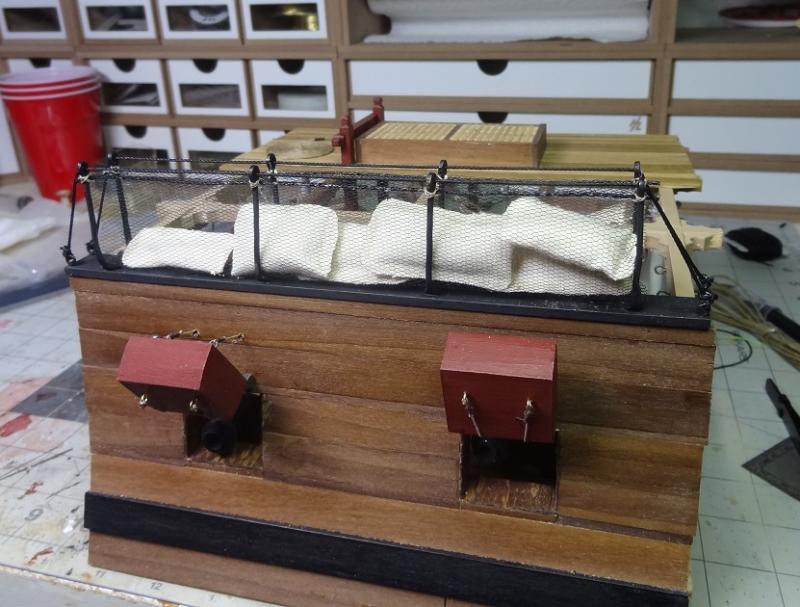
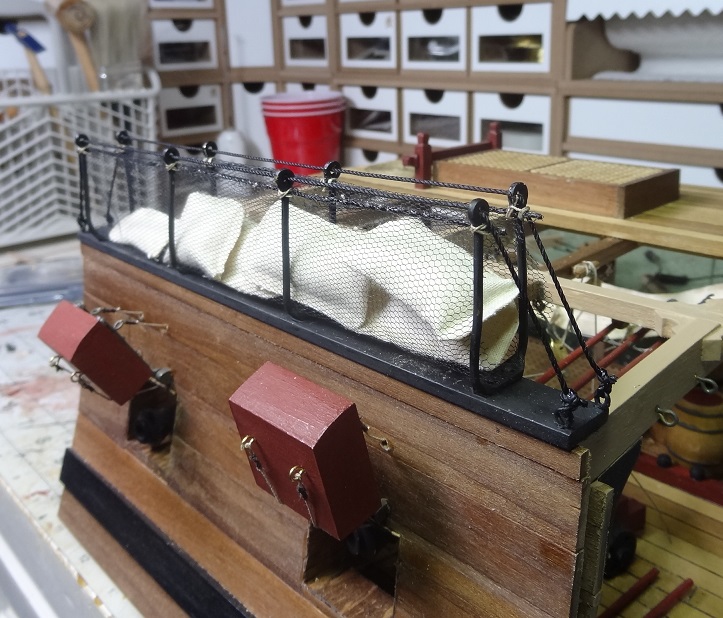
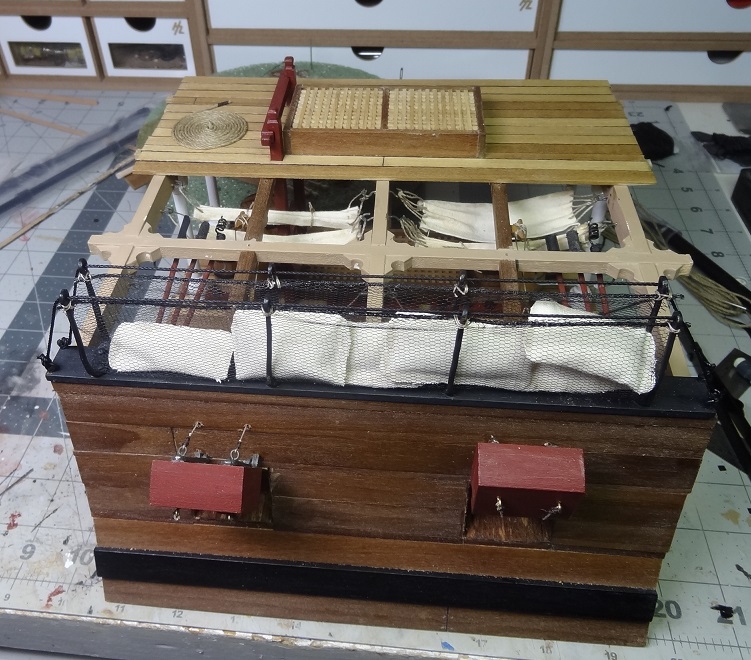
The hammock redeaux is almost complete. What an improvement! I can't believe the plans and instructions both say to essentially just toss them into the netting. Kinda like this I measured out 6' to scale pieces of material then took a cotton pad to give some bulk and rolled that up. When I folded them in half they seemed a little stubby so I increased the size a little. Haven't "rolled my own" in years On this color material, Elmer's ended up being the best glue. For some weird reason CA just didn't want to take to the cotton material. I still have to figure out how to tuck the ends in so you don't see the edge of the material. But overall I think it is a great improvement. For some reason I seem to be avoiding the cartridge containers. That's the last thing to do... This whole hammock exercise has been helpful. I need to do the hammocks on Niagara. Doing it all first at 1:23 has allowed me to work out a good 'look' for the 1:64 work ahead.

-
First off thank you for your service sir! I include a virtual salute. Some great pix, sounds like you guys were slinging a lot of lead. Think what they would have given to have just 1 of those guns on a sailing ship.
-
You're reading my mind Joel. I believe in one of those hammock threads it was mentioned to do one section uncovered and the others wrapped in canvas with faux hammocks. I do think it would look very cool to have the whole thing done similar to the pic you posted. I just redid my gun section build with full size hammocks rolled, folded and placed soldier course and it looks good. Will post pics of that in a bit. As a general rule of thumb - can we assume that the hammocks would be at least partially covered by canvas? The exterior side at least, to shed the water?
- 843 replies
-
- 1
-
-
- niagara
- model shipways
- (and 2 more)
-
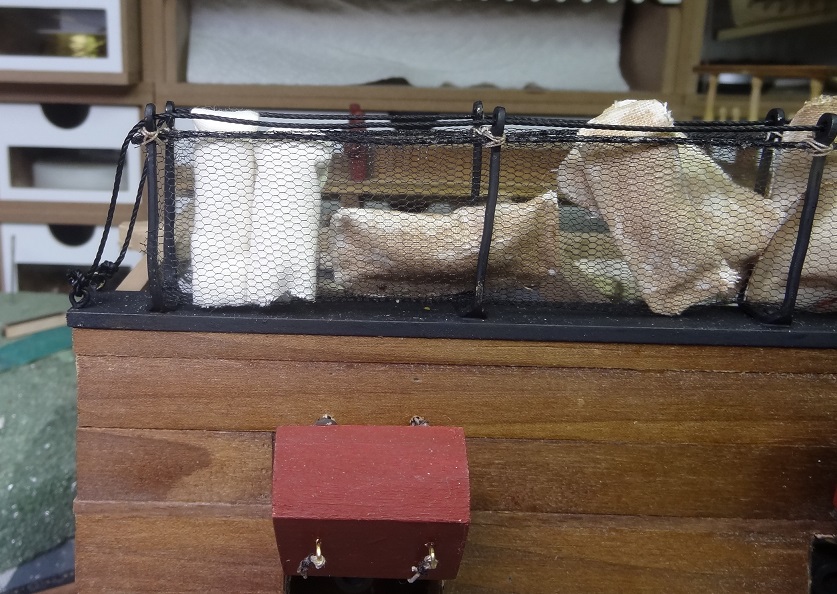
Man I hate it when I start trying to be thorough. Since I just finished hammocks on this build I thought I would take a look back at Niagara since she needs some as well. I Googled a little bit and came across several discussions here along with some pix. And now I'm thinking there's no way I should leave those hammocks piled up in the netting. I didn't even make them the right size. But then there appears to be another inconsistency with the scale. If a real life hammock was 6' that would be about 3" at 1:23 and that gets doubled over, so 3' to 1 1/2". When I make a hammock 3", double it over and put it properly in the netting the stanchions kinda swallow it up. I had to make the hammocks closer to 4" to get the right look. Now I just need about 20 more of them. They do look better lined up.

-
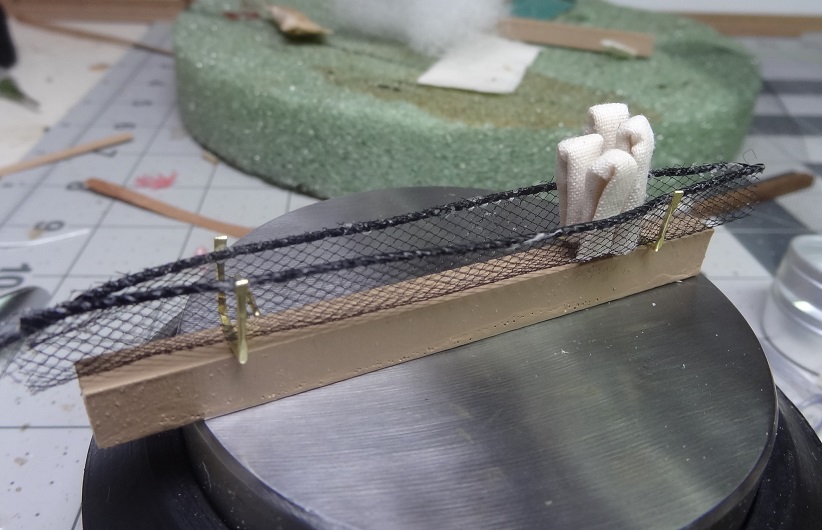
It's funny Joel - I was just reading several threads regarding hammock paraphernalia (you had several replies) and saw this pic along with some others. I am going to have to go back to my gun station build and redo the hammocks there. They were just thrown in between the stanchions haphazardly (per the instructions) - someone would have received 20 lashes for that. For Niagara, I'm torn between trying to stuff itty-bitty hammocks in the rails or go by the instructions that show a canvas apparently wrapped around them. I am trying a trick I saw somewhere for the canvas. I'm not crazy about the canvas idea but I'm also not crazy about making 150+ mini hammocks. At 1:64 there are not many options. Some quick prototypes just to see what might work I get the feeling the plans showing the stanchions may be wrong. The hammocks in the pix should be 6' and doubled over so 3' and they tower over the stanchions. And a made my stanchions a little larger than the plans. I'm leaning towards doing the hammocks rather than the canvas wrapper. And I thought making 120 gun tackles was bad


- 843 replies
-
- 2
-
-
- niagara
- model shipways
- (and 2 more)
-
Paul - was that a mini file on a lathe or by hand?
-
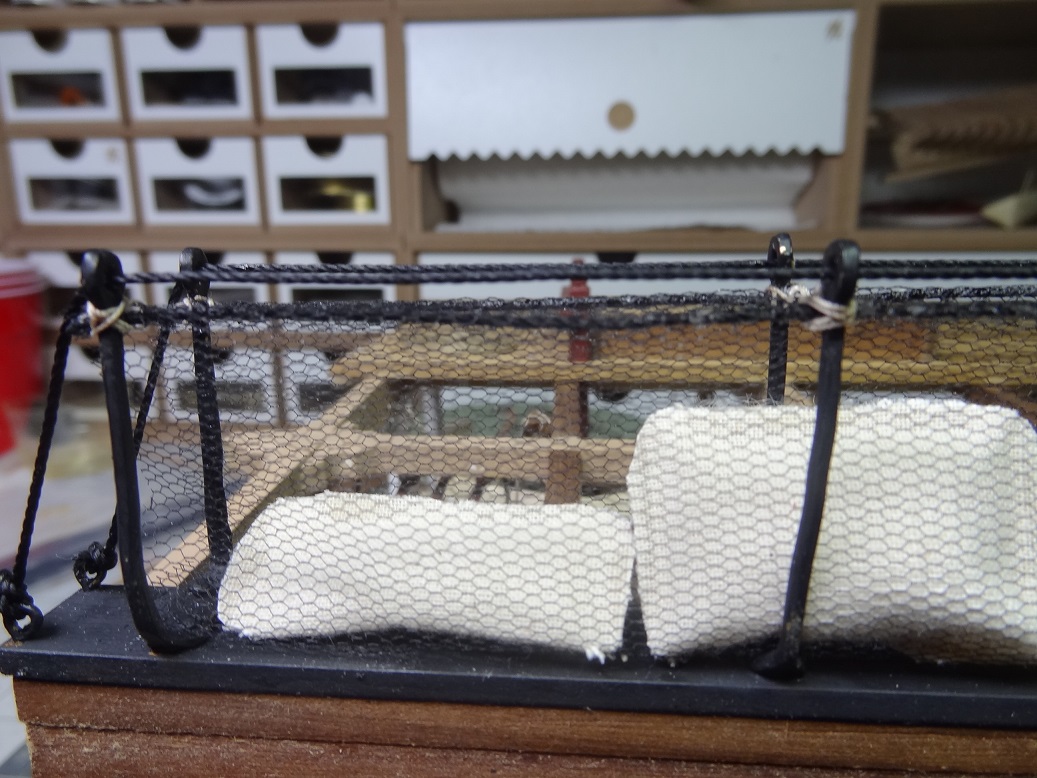
Man I feel bad, I had to brush all the dust and bugs off this gal. She's been sitting in the "storage yard" for quite a few weeks. I just finished the hammock rail for my gun deck section build and decided I should see how to implement something similar for Niagara. The section build used a kind of netting or webbing - the stuff used for wedding veils. I found some at a fabric store today - black and it's a tighter webbing than the gun section. Better for the smaller scale. I've started working on a prototype and will post as soon as I have something. The switch back from 1:23 to 1:64 was kind of a shock
- 843 replies
-
- 3
-
-
- niagara
- model shipways
- (and 2 more)
-
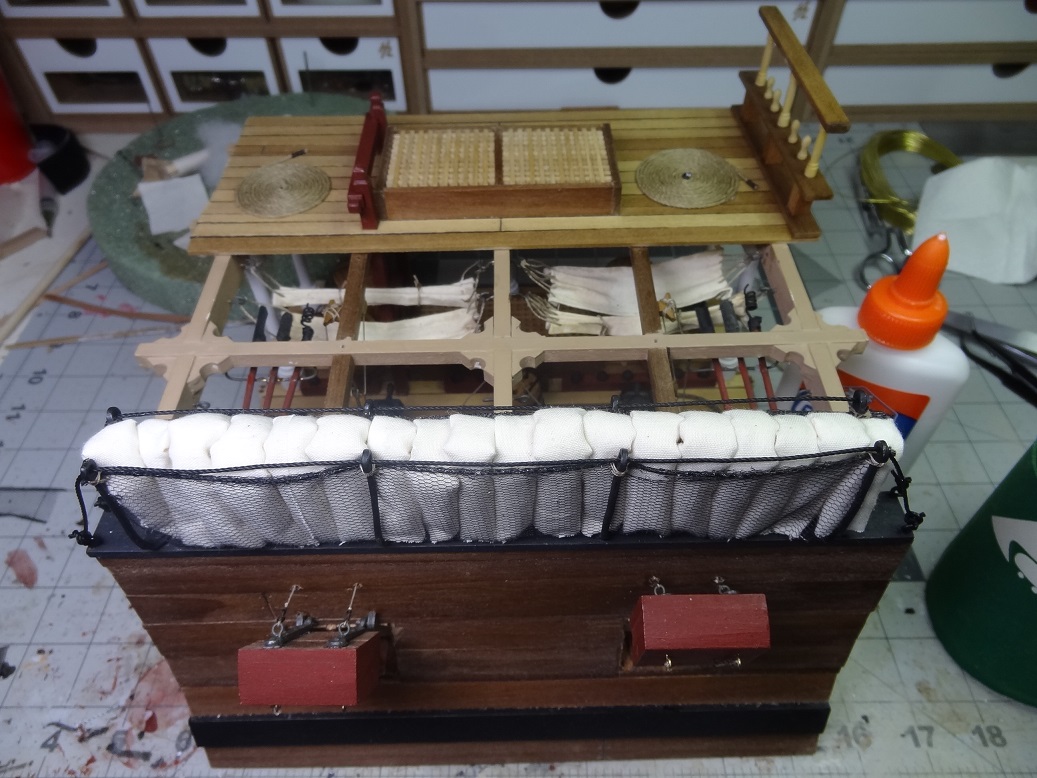
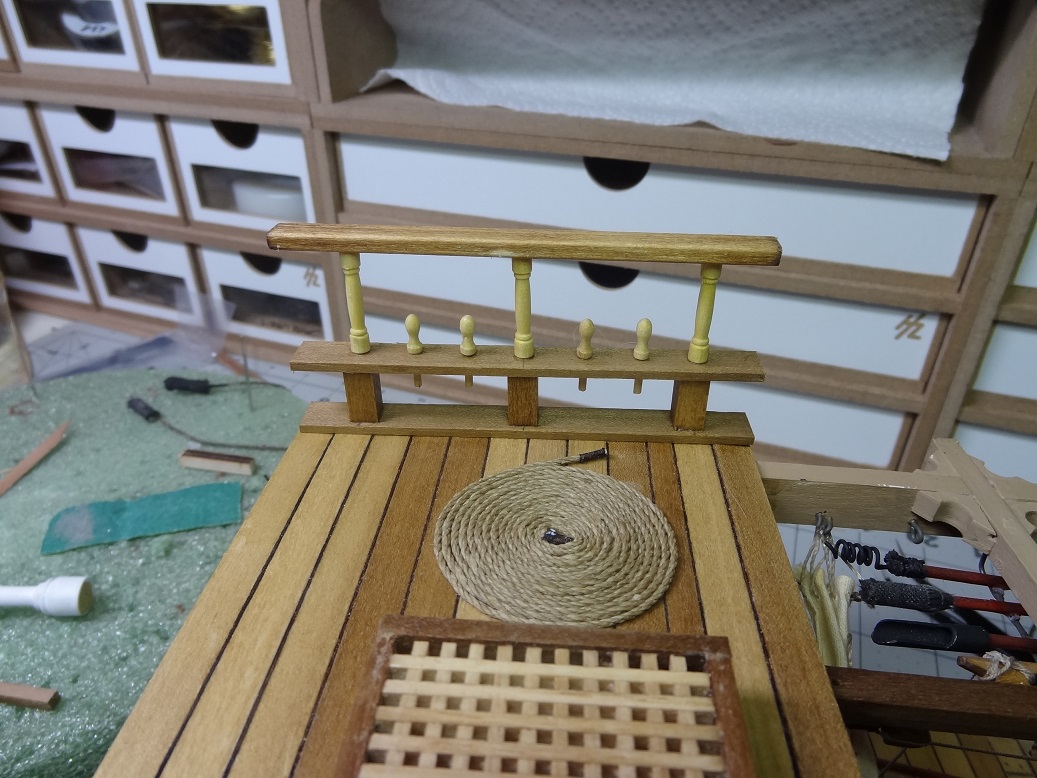
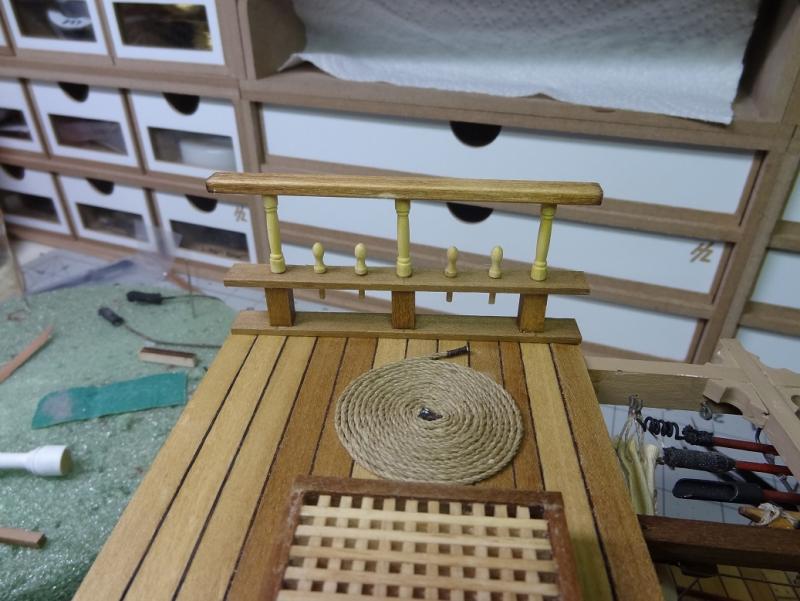
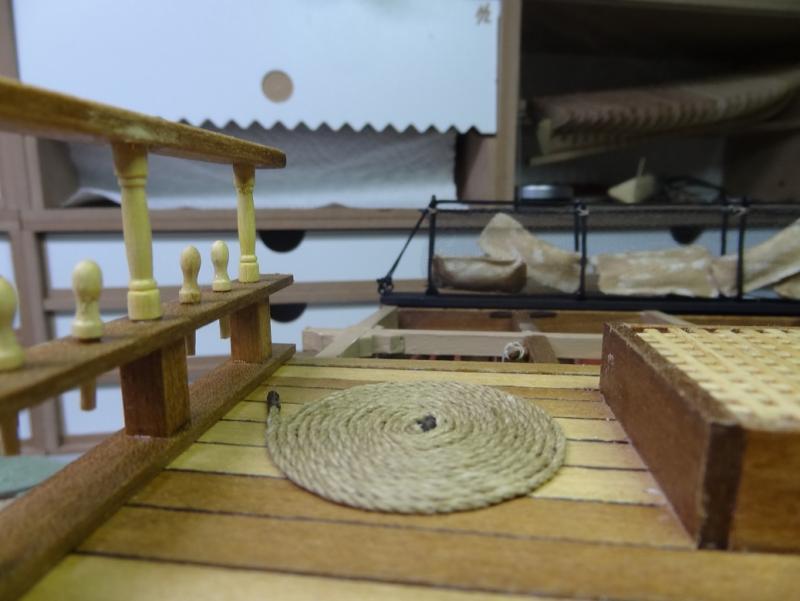
A little closer. The railing is finished and installed. To me it seems way too tall. One more thing that is out of scale. In preparation for the completion, I have been going over everything for a final touchup - lots of small spots that need repainting. I also noticed that while the ropes look OK where they are positioned, there are a lot of lose ends that stick out sideways, one was even pointing up. This obviously needs to be remedied. So I clipped alligator clips at the very end to weigh them down and then painted the ropes with watered down white glue. I'm fairly pleased with the result. It's down to the cartridge canisters now. I need to dust off the lathe for that. Also figure out how to cut a thin groove in the canisters. I know the lathe is perfect for doing that I just don't know what cutting tool to use for something that thin.

-
Good idea with the pinheads for that carriage bolt look. Used strategically, those can add a lot.
- 648 replies
-
- 3
-
-
- niagara
- model shipways
- (and 1 more)
-
JCF - there's a link to the log in my signature. I will post some closeups of the ropes later today.
-
Hey Darrell - I love the stuff I was working with for this this build. I just haven't checked to see if it scales down well or not. I believe it's the webbing used for wedding veils although this stuff is black. OK well maybe a funeral veil.
-
Hey Joel, good to hear from you. I guess that might work better. I have been using lacquer which does stiffen up the rope but it's not helping with the hanging down. And while I'm typing this I just had a thought about using some alligator clips on the very end for weight. Along with the glue that just might be the ticket.
-
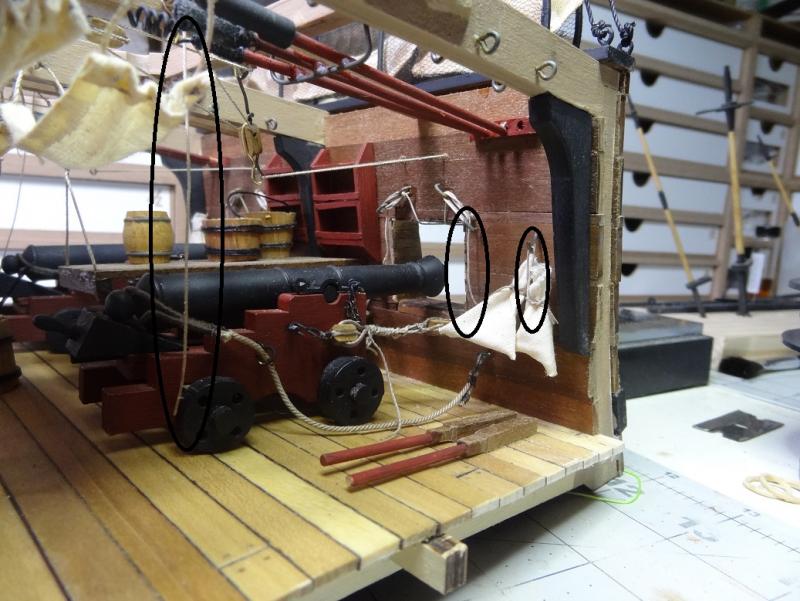
I'm about to wrap up my gundeck section build. At least all the pieces will be in place. There's so much stuff crammed into such a small space that it will take some going over to be sure everything is in order. One thing I'm already seeing - there are a lot of ropes that are tied off or laid over hooks and just left to dangle. In real life I imagine the ropes weigh enough for gravity to kick in and pull them straight down. In our modeling fantasy world it isn't happening. Ropes are sticking out in all directions. So I'm hoping you guys have some tricks to make ropes hang more realistically. Thanks in advance.....
-
Wow that stinks. Sounds like even basswood might be a step up. I guess it's soft so it can mold around the 1st planking? I still haven't figured out the double plank thing. Instead of stressing out twice, why not just do it right the first time?
-
That's a shame Don. Although I imagine you have access to some varieties we might not see in the states.
-
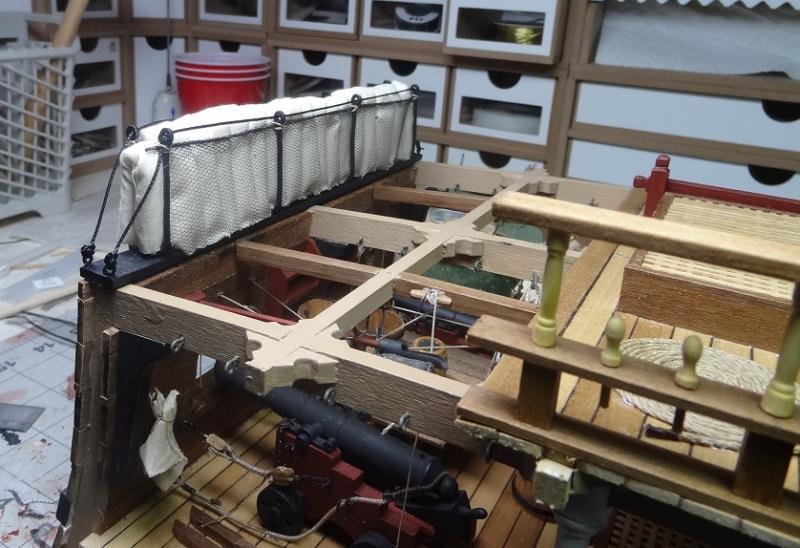
Getting so close I can taste it. I've finished the hammock rail & netting. It was debatable whether to do this or not. I know some have, others didn't. The deciding factor for me was just that the upper deck needed something to balance the clutter below. That netting was not easy to work with. Getting the edge glued around a line really tried my patience. My first attempt at tying the netting off on the rail didn't go well either. What I ended up with is much simplified from the plans. I also found that gluing the netting to the supports first and then tying them off made things a lot easier. I like the look of the netting. I wish I had something like that for my Niagara build. But then again, at 1:64 it might not look right. Still it would be nice to have some to stash away. I could see it being a nice addition for certain applications. I ran out of the kit supplied material for making whatever those bags are. Hammocks? Stuffbag? Still need 3-4 more. So all that's left is the railing and the cartridge buckets. The railing is underway.

-
I painted Niagara after planking with boxwood. Paint even looks better on boxwood IMO. Also it was not just about the wood, you'll get a better cut - straighter and more consistent. However, your point is well taken. I've turned into a boxwood bigot and will preach the benefits anywhere I get a chance. Brian, if you do decide to look into that, send the parts list to Jason at Crown and he can give you an estimate for full replacement (what I do now), just the hull, deck & hull - whatever you want. The only caution I would warn you of is boxwood stains differently than basswood. In other words the same stain will look different on the two woods. So decide what will be painted and what will be stained and use the same wood for stained parts.