
HOLIDAY DONATION DRIVE - SUPPORT MSW - DO YOUR PART TO KEEP THIS GREAT FORUM GOING! (Only 20 donations so far - C'mon guys!)
×


mikiek
-
Posts
2,276 -
Joined
-
Last visited
Content Type
Profiles
Forums
Gallery
Events
Everything posted by mikiek
-
 Perhaps you wait for a near miss to knock a big hole in the hull right next to your gun. More clearance and some ventilation. I think the general idea (and the piece I was missing) was that someone had to stick the tool out thru the port and THEN into the barrel. I'd still like to know how far then gun recoiled inboard before the breech rope stopped it. Doesn't look like the gun even moved after the shot on the video. I would have expected something a little more violent.
 -
Stay warm - it's a miserable 41F here in Texas. The shop was about 50. Not too bad for working but I needed to spray paint and the cans just don't work well at that temp.
- 648 replies
-
- 2
-

-
- niagara
- model shipways
- (and 1 more)
-
OK Allen - you cleared it up for me. I guess they stick the non business end of the tool thru the port as far as needed until they can get the business end into the barrel. Had not thought about the length but you are right. A 9' barrel would require a similarly sized tool. Ahww Mark - you gonna make me go watch my favorite movie again
-
There may be more there than you think. Transom doesn't look too bad. My gun station instructions is mostly in Italian. I haven't had to yet, but a lot of folks here will use Google Translate to pick out details.
-
I'm sure you're glad to get that behind you. Wow, no planking plan?
-
Hey Darrell - I'm wondering - with all the rigging tools available out there - what have you found useful? What did you buy? What did you make?
- 648 replies
-
- 4
-
-
- niagara
- model shipways
- (and 1 more)
-
I'm putting together the Panart Gun Station kit and got to wondering. Most of the tools used to load a gun are something on a stick and maybe about 4'-5' long. Gun crews were counting on the recoil to get the gun into loading position, and the breech rope to stop it at some point. So how far back would a gun be when the reloading begins? Obviously the answer is however long the breech rope is. It seems like it would have to be pretty far in order to be able to use the tools. I've been trying to find a video or Youtube showing the entire process from loading to firing. And I don't mean the little pop-gun loads - those don't even move the gun half the time. Not as easy as it sounds. Thanks for any feedback you can provide.
-
Tamiya has an acrylic color called Dark Iron. I use that a lot instead of blackening.
-
Ya know it's funny (or sad) but I wouldn't trade any of them. They're "The Stuff" - to quote an old favorite flic. However, if I don't get over the rigging thing quite a few may never get built. I will say that the rigging plans in most of the kits are better than Niagara. Model Expo just crammed too much on one page. Several of the other kits - the ones from Victory models for instance - have 7-8 pages of rigging. All shown in manageable chunks. 3-4 pages for running and 3-4 pages for standing.
-
The thing you have to watch is some of those finishes will yellow over time.
-
Don't get like me. My shelf has more kits than I will complete in a lifetime.
-
Didn't realize until just now you were doing the Mamoli kit. It all makes more sense now. I have the Model Expo version. Some of what you have been describing was throwing me because my kit didn't have it.
-
Darrell - Thank you for all you have put into this!
- 648 replies
-
- 3
-
-
- niagara
- model shipways
- (and 1 more)
-
Have you contacted Model Expo about the defective parts?
-
I used Titebond Moulding & Trim glue. It has more tack than regular Titebond. It's thicker so it doesn't run. In most cases it sets very quickly. One good thing about the PVA glues, if you do get some on whatever you are gluing, a damp rag will get it up. You get CA where you don't want it and good luck getting it off. That said, there certainly is a place for CA. I use it like "nails" for decking and hull planking. CA in a few spots to quickly hold the plank, PVA to glue the long edge of a plank to the adjacent plank. As I mentioned if the PVA squirts out between the long edges, just wipe it down with a damp rag or paper towel. One note: do not let the CA and PVA mix. I've found that neither will set well if that happens. Cog may have been referring to the fact that glue doesn't hold as well if the parts have been lacquered, painted, etc.
-
Darrell - are you happy with the order that you chose for the spars? Bowsprit, fore, main. Knowing what you do now, would you do it again?
- 648 replies
-
- 3
-
-
- niagara
- model shipways
- (and 1 more)
-
Don't know how you do it - pics usually make things look bad, not good.
- 648 replies
-
- 4
-
-
- niagara
- model shipways
- (and 1 more)
-
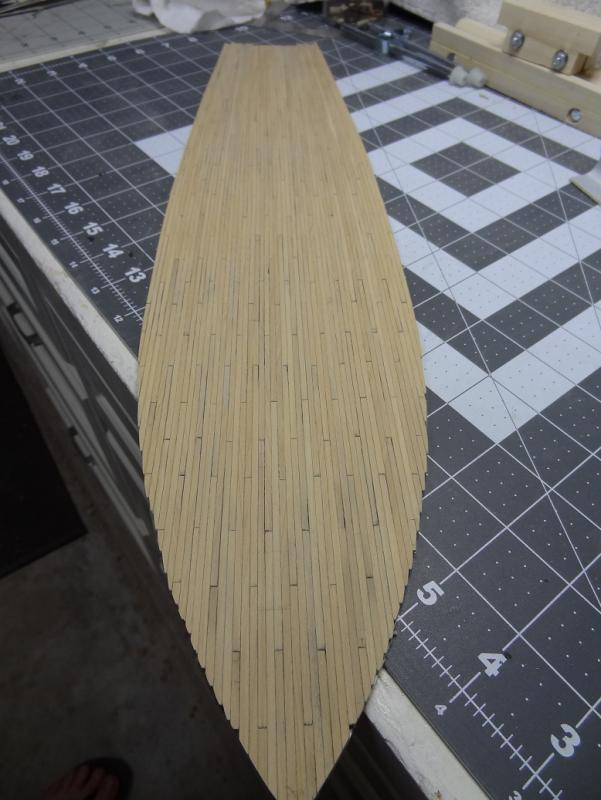
Brian - I believe Rattlesnake is all basswood. Marks-a-lot? You know, magic marker, felt tip pen. You'll hear some argue against them, but with boxwood it worked very well for me. This is marked on all edges for all planks. If you want less do like you did one long edge and one short edge.
-
Satin or matte for your finish Brian. Something to think about for your next kit. I've done this for Niagara, Rattlesnake and a few others. Get one of the custom wood guys to replace the basswood with something like boxwood, pear or holly. The wood is a lot harder. Your edges will be much cleaner. It cuts and shapes much better. If not the whole kit then at least the deck and hull planks. I don't remember exactly, but I think the Rattlesnake replacement for everything was about $100. With boxwood, I was able to use a Marks-a-lot on the plank edges. The wood is not porous so it doesn't run or sink in like basswood. Just beware, if you do the replacement for one kit you may never want to go back to basswood.
-
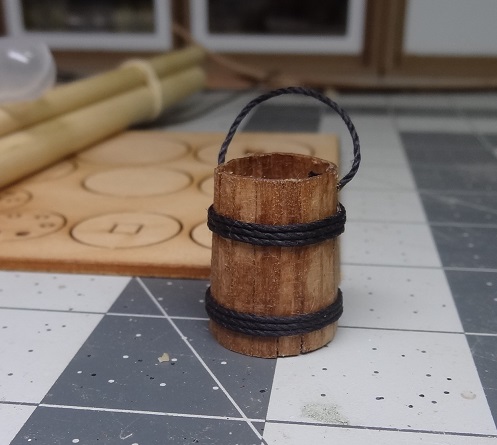
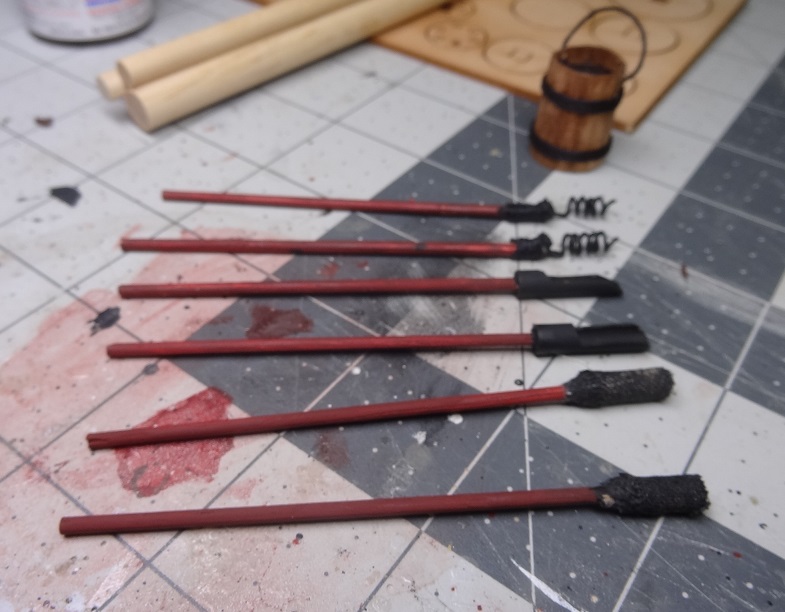
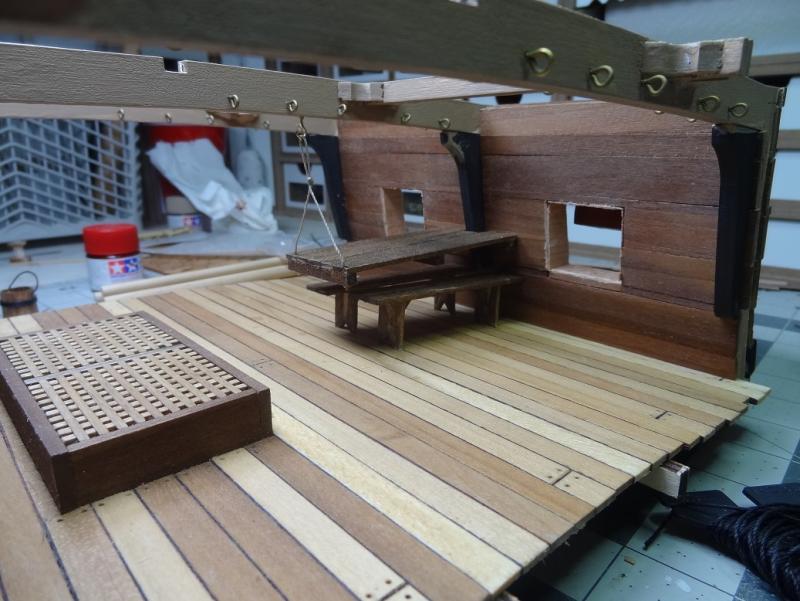
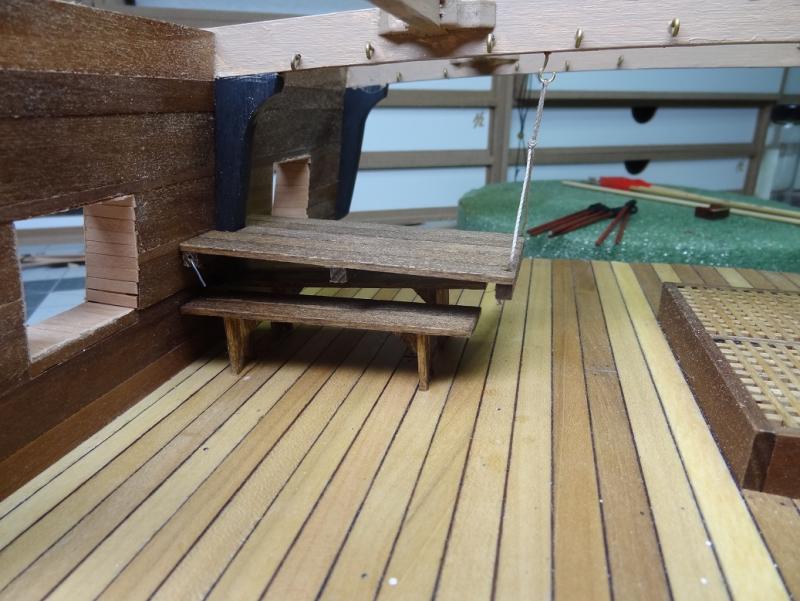
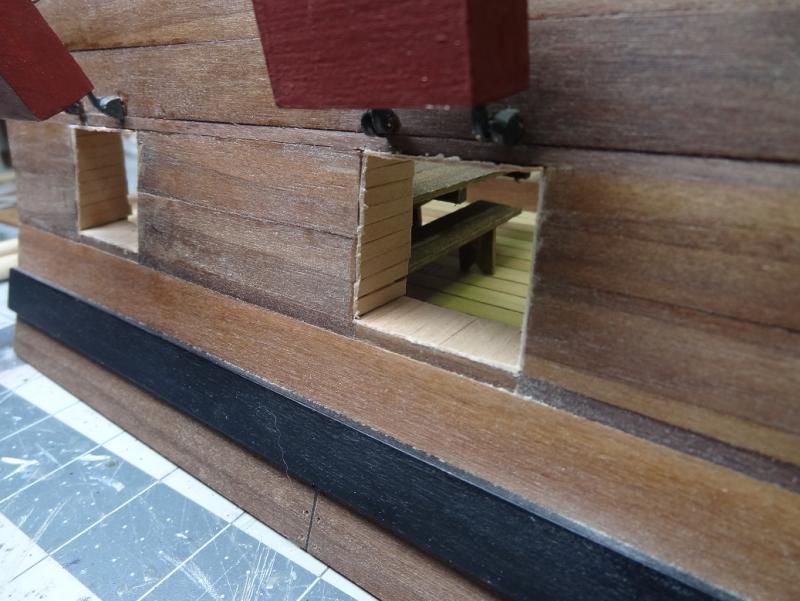
Onwards thru the fog. Still haven't figured out all the mis-numbering of the bucket disks. Thanks to Paul's log I did see that a bucket bottom has 2 disks. One is solid. The other has a square cutout in the center for the support beam. Both are the same size. I assume that is the same pattern for the upper disks, although I see no need for the solid disk. The upper disk will be painted black and that provides enough cover for the support beam. The first bucket I made is stained rather than painted red. I think I prefer that look. Finished a few of the gun tools. I've hung the table and glued down the benches. However after seeing the pic, I will have to shorten the loop a little. Thanks to Joel's notes, I decided to go back and add the lining to the gun ports. I was going to just paint it all red, now I will probably stain it some dirty wood color. I do like the lining - it adds a bit of detail.
-
OK - I'm stumped. I was going to start making the buckets in between other things. There's a wood sheet with a bunch of disks on it - the tops & bottoms. The sheet parts are not numbered, but there is a page in the back of the instructions that shows the sheet with disks numbered. One big problem - the disk numbers called for in the plans do not match the numbers in the instructions.
-
Here's another thought. Cannons will be behind bulwarks right? Not completely in plain view? What if you shimmed any cannons that you think point too low?


