HOLIDAY DONATION DRIVE - SUPPORT MSW - DO YOUR PART TO KEEP THIS GREAT FORUM GOING! (Only 13 donations so far - C'mon guys!)
×


mikiek
-
Posts
2,276 -
Joined
-
Last visited
Content Type
Profiles
Forums
Gallery
Events
Everything posted by mikiek
-
 Brian - I have this one on the shelf. Going from 2 masts to 3? Easier? I wasn't clear on your deck issue. Is the false deck still glued down or did you tear it out? If it's just a dip in one place you could smooth out some filler over it? I had an issue with my Enterprise build - the bulkheads had a slope from the center outwards as would be expected. The false deck had none so it didn't sit flush. I ended up gluing the deck down - with CA - bulkhead by bulkhead and holding in place until the CA set. My point is you can use the CA almost like nails. Eventually any 2 pieces will stick together. Then reinforce with PVA along the joints.
 -
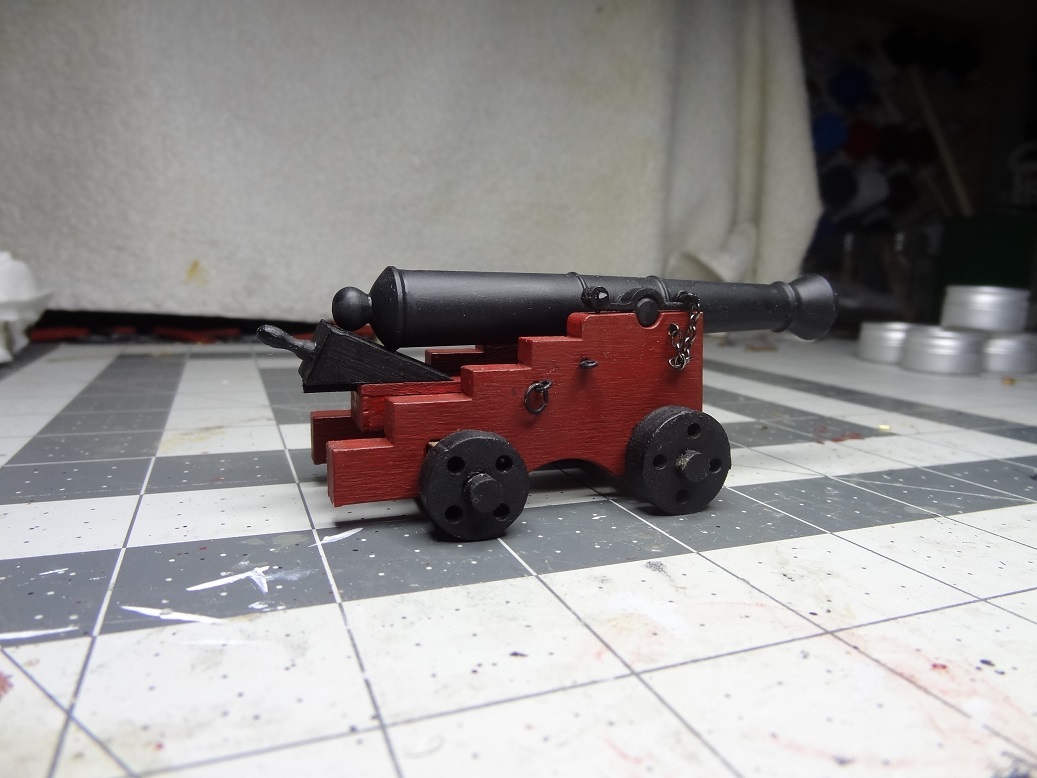
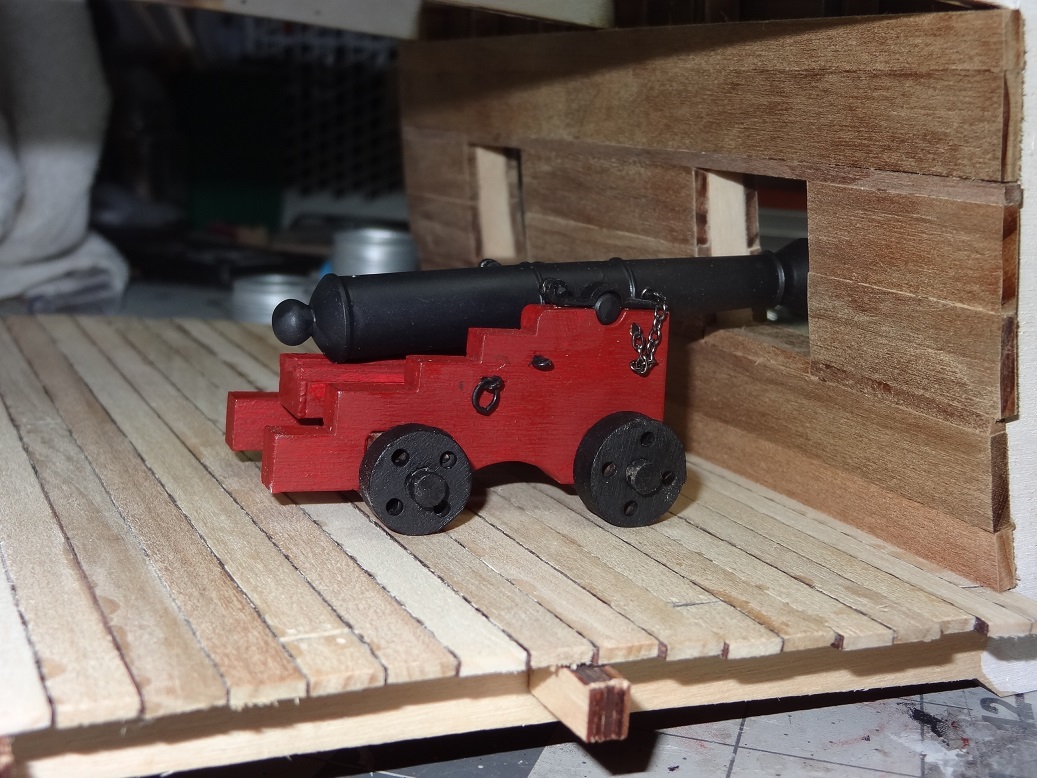
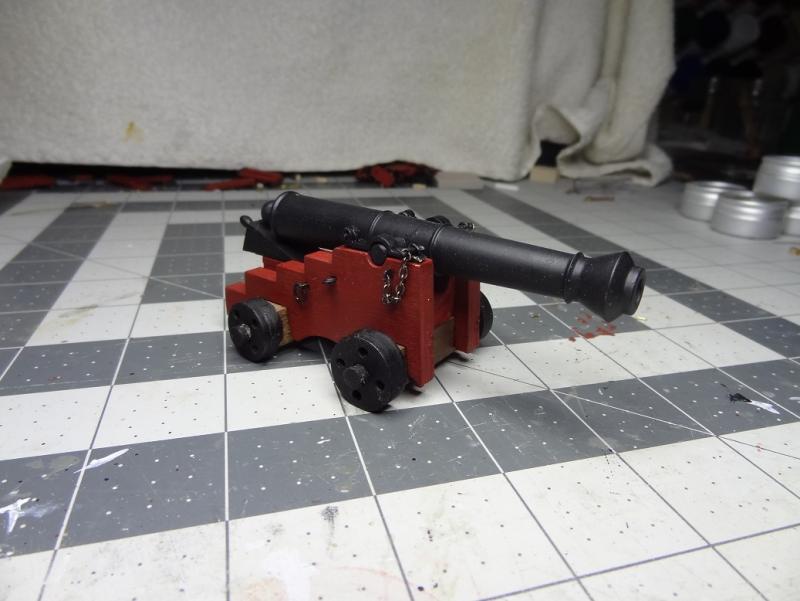
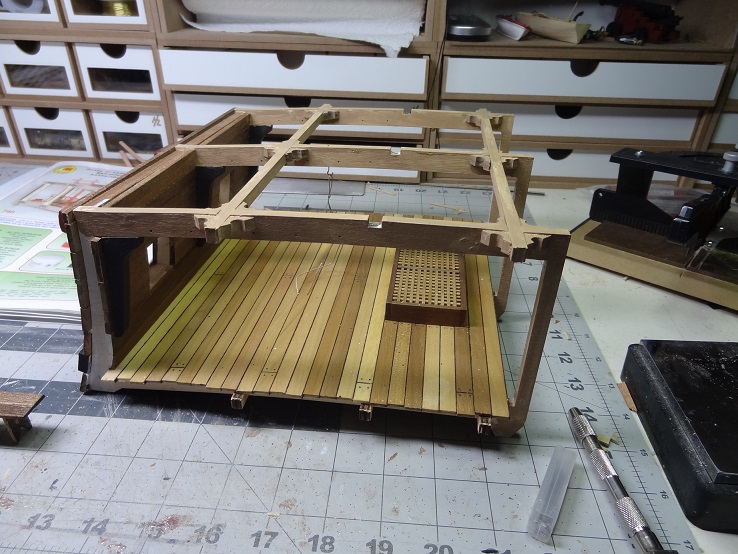
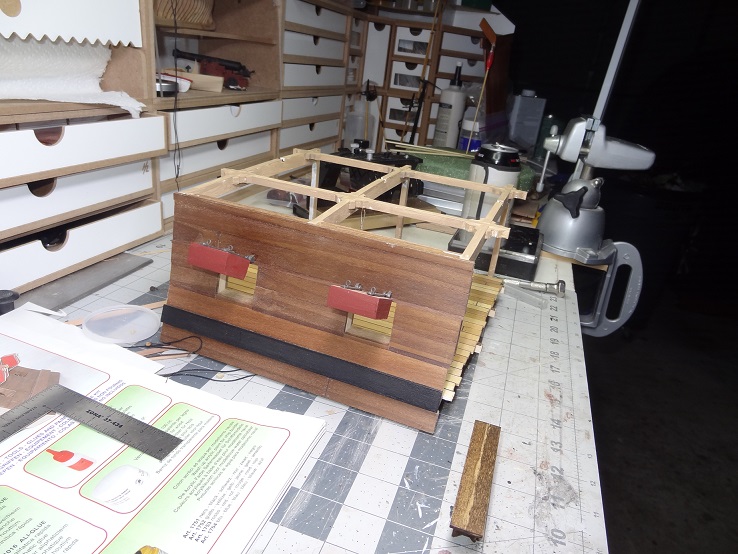
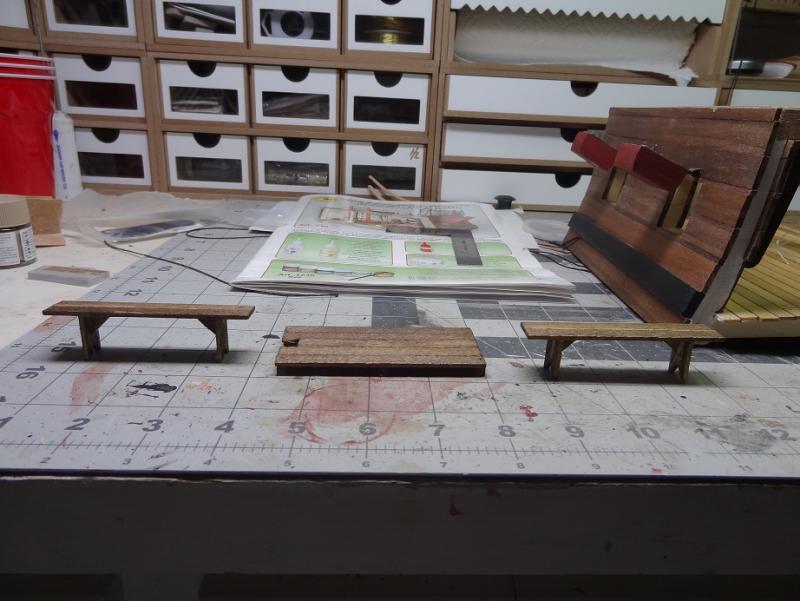
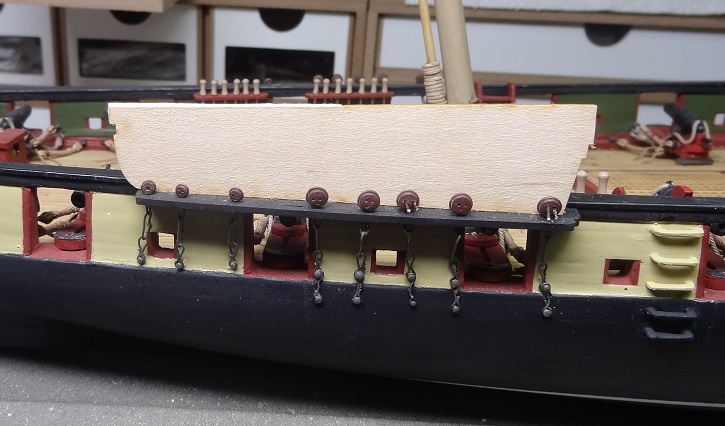
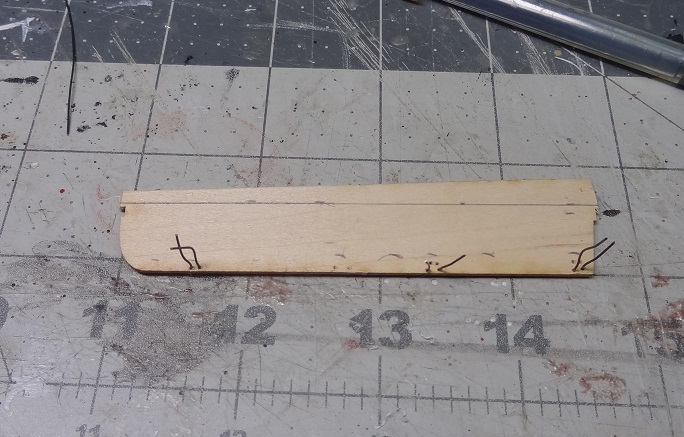
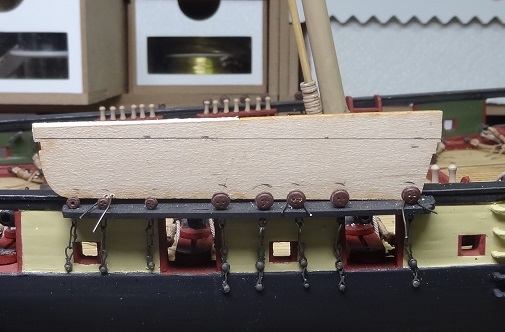
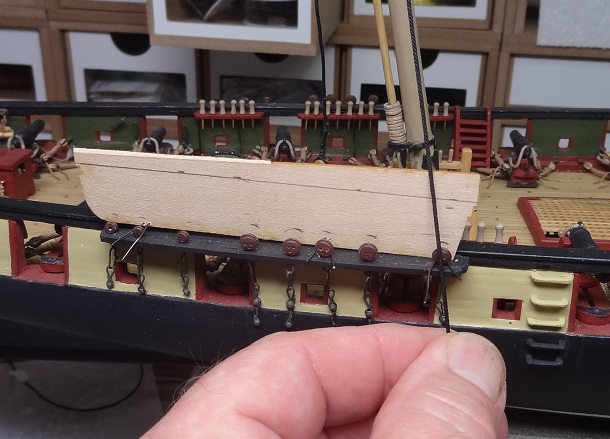
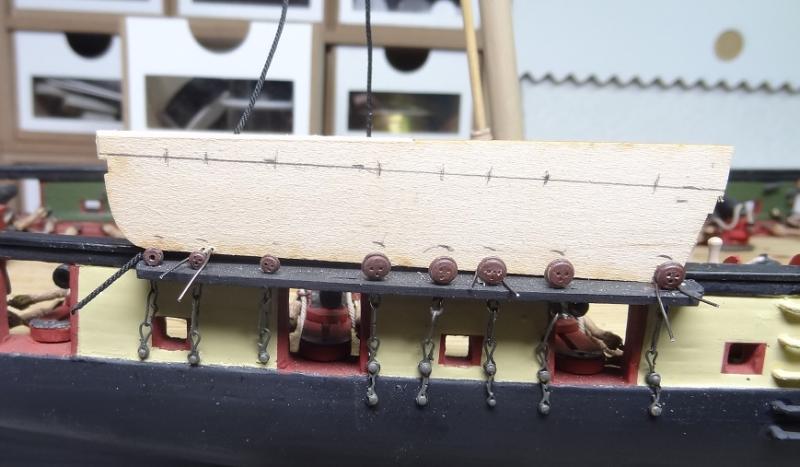
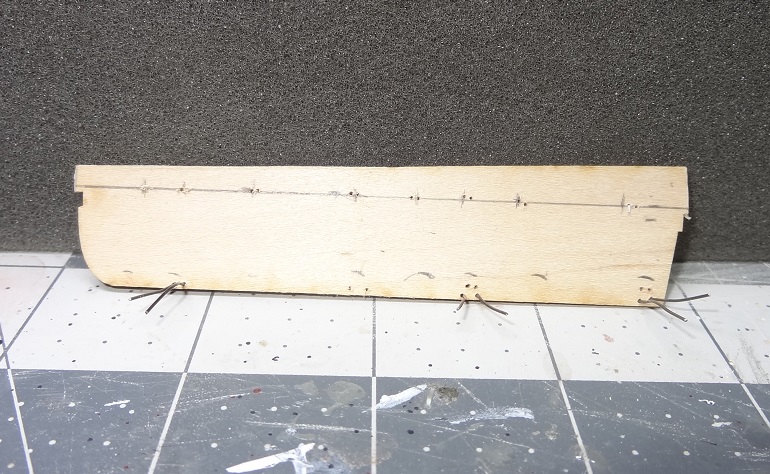
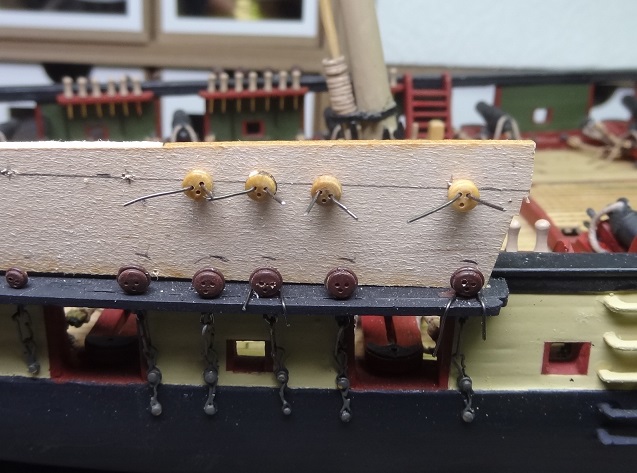
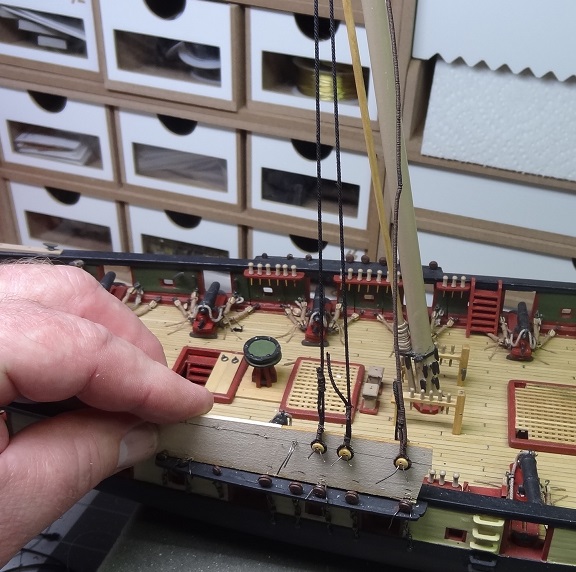
Time to resurrect this project!!! While I am debating with myself over rigging Niagara, I hate losing build time. No rigging here so no excuses. It's been so long I forgot where I was. In our last episode, I was building a gun so that I could get the ports positioned properly. Finished one gun, I think it came out pretty nice although the quion looks a little big. I've also finished the ports and doors. As Bob said, when made per the instructions those doors are quite thick. I went ahead and did them that way. The problem becomes how they fit into the port when they are hinged. I ended up sanding a lot off the bottom of the doors and angled that surface a bit as well. They look a little funky when closed, but I plan to leave them open for display. The overall color scheme appears uncertain in the kit. Different pics show different colors for the same items. I needed to paint the supports so I made an executive decision to go with what Tamiya calls Wooden Deck Tan. Here's the first pass, it'll need a second coat. Ever since the start of this build I've been paranoid about trying to get big fat hands inside and under the support pieces. And now that is coming into play. The instructions seem rather hodge-podge in the order of things - placing some items near the outside and then telling you to do something inside of that.. Instead, I've taken the approach of working from the inside out. So dead center inside is the hanging table and benches. I put those together this evening. Instructions call for 2mm x 8mm walnut planks for this. I couldn't find any in the kit but there were some limewood of that size. I believe those will be used for the upper deck but I used a few for the table and benches. Then stained them a dirty brown. I'll need to finish painting the supports before installing them. I made one mistake and glued the support knees in place before drilling a hole in the center knee. The hole is for a pin that is inserted into the back edge of the table and on into the knee. Trying to get a pin vise with bit in there now will be a challenge and the hole will not be square to the knee but no one but me and you will ever know It was really fun getting back to this kit. Working with the wood and solving those type of problems is what I enjoy most in this hobby!


-
Well I have a start on Constructo Enterprise but I expect the same rigging issues there. I am also building a PanArt Gunnery Station Cross Section (no rigging required). But for a serious build I have 2 kits that have the lateen sails. The triangular fore to aft type. The rigging is very simple - Amati Galley Arrow or Occre Cazador. Both are interesting departures from the square rigged builds. Ya know some times I feel like I'm wimping out by not rigging Niagara. Other times I really like the look with no strings on it. I've been trying to figure out how to turn it into the Admiralty style look.
- 287 replies
-
- 2
-

-
- niagara
- Model Shipways
- (and 1 more)
-
Don't blame you regarding the rigging Brian. I'm probably going to do the same thing.
- 287 replies
-
- 1
-
-
- niagara
- Model Shipways
- (and 1 more)
-
It's funny how shapes and angles can distort things. Looking at the second pic, I was trying to think of a way to tell you the transom was off kilter . Then I looked at the first pic again .
-
There's a lot of interesting (and not so interesting ) reads on the TAMU site.
-
Hey Darrell - re: sewing up the lanyards - did you find that your deadeyes ended up fairly horizontal to each other? Curious if you had to tighten some & loosen others to get them to line up. I'm not at that point, but I can already see that some of the upper deadeyes will not be all be on the same plane without some trickery.
- 648 replies
-
- 3
-
-
- niagara
- model shipways
- (and 1 more)
-
Your color scheme is gorgeous - the copper with that darkened wood. This guy is going to display so well. Do you know where you will put it?
- 701 replies
-
- 5
-
-
- phantom
- model shipways
- (and 1 more)
-
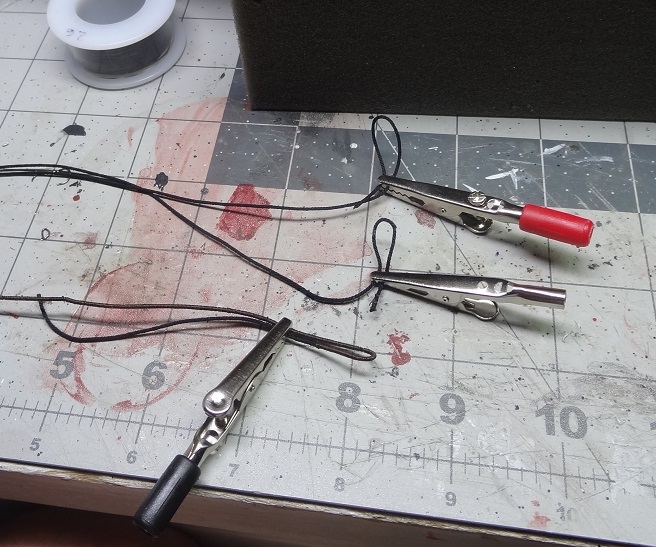
Those bow spars are your best work to date Darrell. Looks great! Your vise and clamp for a third hand is a great idea. Very stable. I have one of those things with 2 alligator clips that can bend all over the place and it never stays put. Plus you can't stick it right in the middle of things.
- 648 replies
-
- 3
-
-
- niagara
- model shipways
- (and 1 more)
-
Thank you Darrell. I like the idea of the vise and clamps extending all the way to the boat. That's one thing my workbench is lacking. I have just a small area where I can securely clamp my vise and it's way down at the end. Actually on the far side of the new storage modules. I need to see what I can do to get the vise back on the playing field.
- 843 replies
-
- 4
-
-
- niagara
- model shipways
- (and 2 more)
-
Always a scary thing - cutting holes in your boat. Would not have thought to use an end mill with a hand tool. Of course at the stage you are at, what else are you going to do? I'll have to try that.
- 653 replies
-
- 6
-
-
- trabakul
- marisstella
- (and 1 more)
-
Either that or too much wasted material. Somewhere I did see a tutorial on making an eyesplice (modeling sized) The guy unraveled the last 2" of a piece of rope (3 stranded) and then proceeded to thread a needle with a strand and run the needle back thru the rope to make the loop. He did that with each strand. The result was very nice, and I believe almost like a real eyesplice, but I would like to finish my build in the next year or so. He also cut off the strands after they came thru the rope so for a 1/16 eyesplice you throw away 2" of rope. For my pendants, I did use the same styrene tubing I used for the bullseyes - it's in one of my pix. It's probably a little oversized but I'll live with it.
- 843 replies
-
- 3
-
-
- niagara
- model shipways
- (and 2 more)
-
At least as good as you are going to get at 1:64 . Have you seen how they do a real eye splice? Not even going there.
- 843 replies
-
- 4
-
-
- niagara
- model shipways
- (and 2 more)
-
OK - that makes things look a little easier! Was trying to picture myself doing that and it seemed a bit awkward. I'll reverse your images from now on
- 648 replies
-
- 2
-
-
- niagara
- model shipways
- (and 1 more)
-
That's what I had in mind. Nice pendants. Did you seize a thimble or bullseye or just do an eyesplice?
- 843 replies
-
- 2
-
-
- niagara
- model shipways
- (and 2 more)
-
If you don't mind, I would appreciate a pic when you get a chance. For the second seizing, do you just pull the deadeye further out from the black clamp?
- 648 replies
-
- 2
-
-
- niagara
- model shipways
- (and 1 more)
-
From what I have read, real shrouds would be strung on alternating sides. For our models it probably doesn't matter structurally but I suspect visually it does. All the starboard shrouds looped around the mast head then all the port loops on top of that might look odd.
- 843 replies
-
- 2
-
-
- niagara
- model shipways
- (and 2 more)
-
Good advice Darrell. At the moment nothing is permanent. It's a good thing too. After doing the last shroud on the starboard main channel, I got one of those sick in your stomach moments when I remembered I should be alternating starboard - port. But given that I can still take it all off, I don't think it matters
- 843 replies
-
- 3
-
-
- niagara
- model shipways
- (and 2 more)
-
That's exciting Darrell What are the 2 tools (clamps) in your pix?
- 648 replies
-
- 2
-
-
- niagara
- model shipways
- (and 1 more)
-
Thank you gentlemen. Like I said, it may or may not be what you want. It was somewhat time consuming, but for me it was a good option. Another thing to put in your bag of tricks.
- 843 replies
-
- 1
-
-
- niagara
- model shipways
- (and 2 more)
-
First off make sure you're sitting down You know it's funny how something that works for me may suck for you. Materials, techniques, whatever. I realized that I was putting off rigging because I had no idea how I was going to hold multiple ropes, thread on a block or deadeye, tie a knot all at the same time. Especially with these fat fingers. And I thought I had a reasonable amount of dexterity. I've been thru tutorials, build logs and the like but never found something that seemed right for me. I finally came across Ed Tosti's Victory build and the lightbulb went off when I saw his rigging chapter. At least for some of the standing rigging. I'm going to repeat some of it here as I am sure to lose the link. So I started out with scrap of sheet 1/32 thick. This is basswood and it began to crack after use. Next channel I will either go to 1/16 or use boxwood. Drill some holes right at the bottom. Stick some wire thru those to help fasten the piece to the channel Draw a line parallel to the channel. Looks crooked I know but actually it's the scrap. It's not a rectangle. Wrap some rope around the mast head, take the other end and hold it on a deadeye in the channel. Mark where the rope crosses the line on the scrap. This is where the upper deadeyes will go. Drill a couple of holes at each intersection Stick some wire in the holes similar to earlier. Slide a deadeye on the wire. Life just got a lot easier. Take the rope to be used for your shrouds. Serve the middle 2 1/2 - 3 inches (the first shroud is completely served and one end is a Burton Pendant). Loop the middle around the mast head - this assumes you have not glued all the mast spars yet. Leaving an adequate sized loop, lash the rope. Hang rope around the mast head. Tighten one end and wrap around the next deadeye. Remove the rope from the mast. Use alligator clips to keep the loop There are any number of ways to seize the deadeye and the rope end. I used my serving machine. After all, the seizing is just serving 2 pieces of rope instead of 1. Here's a few back on the mast. And OMG he has some rigging!


- 843 replies
-
- 6
-
-
- niagara
- model shipways
- (and 2 more)
-
SShhh - don't tell the Admiral - kit(s). Trajta and the Ragusian Cog. The response time to my emails was impressive. Two to three hours max, any time of day. I also didn't know they had a Canadian distributor.
- 653 replies
-
- 6
-
-
- trabakul
- marisstella
- (and 1 more)
-
Looking great Don. Zoran must thank you - because of your log I picked up a Maristella kit today.
- 653 replies
-
- 8
-
-
- trabakul
- marisstella
- (and 1 more)