HOLIDAY DONATION DRIVE - SUPPORT MSW - DO YOUR PART TO KEEP THIS GREAT FORUM GOING! (Only 13 donations so far - C'mon guys!)
×


mikiek
-
Posts
2,276 -
Joined
-
Last visited
Content Type
Profiles
Forums
Gallery
Events
Everything posted by mikiek
-
 Beautiful work Bob. Looks smooth as can be.
 -
I hear ya Bob. But I can usually find a machine or at least a tool for sanding.
- 843 replies
-
- 3
-

-
- niagara
- model shipways
- (and 2 more)
-
I concur, planking this guy is a real bear. Good thing there's not many
- 129 replies
-
- 2
-
-
- finished
- model shipways
- (and 1 more)
-
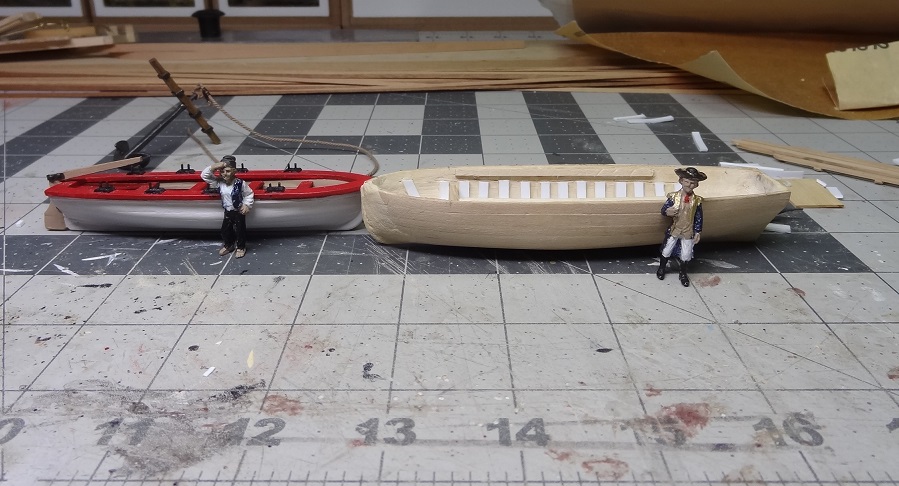
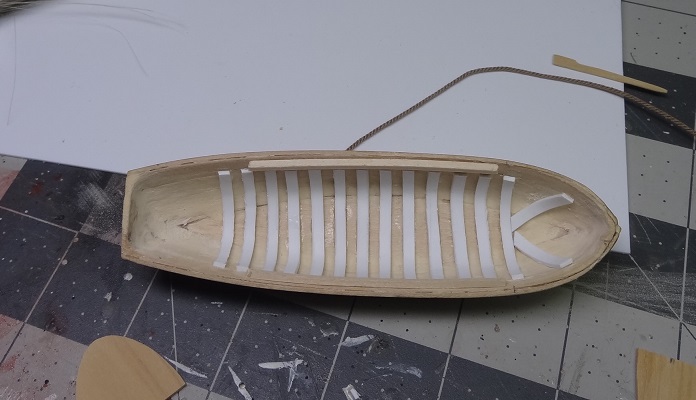
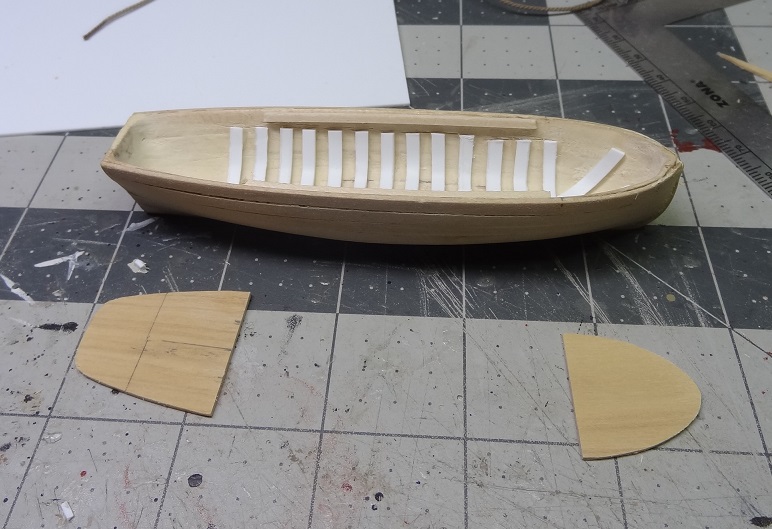
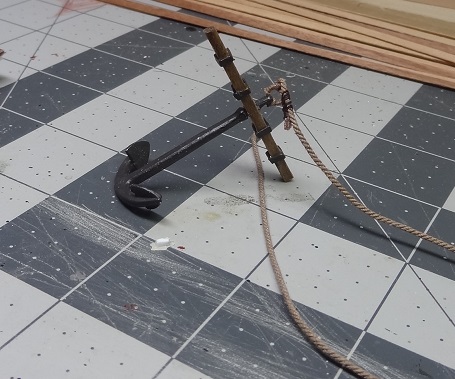
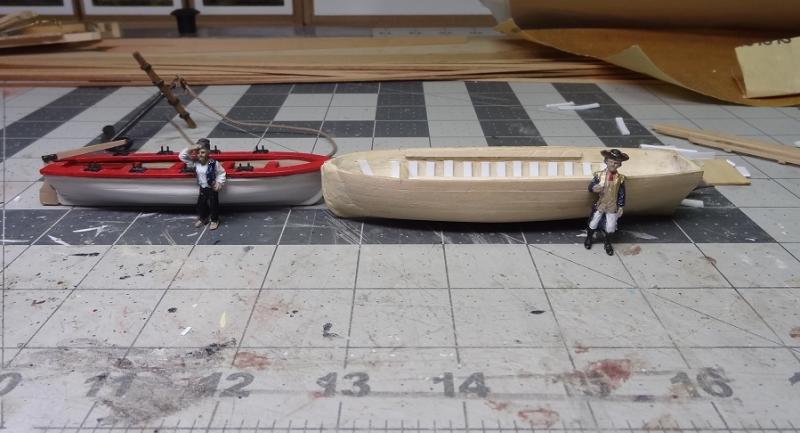
I'm starting to see a trend here. Start to work on rigging, instead dress out a new workbench. Start to work on rigging, instead fix a broken anchor Start to work on rigging, instead build another ships boat Well the cutter is coming along. I am using styrene again for the frame pieces. I did the same on the yawl when I built that. It looks a bit odd by itself but after its painted and partially hidden by floorboards and seat benches I think its acceptable. Never realized they were so big
- 843 replies
-
- 4
-
-
- niagara
- model shipways
- (and 2 more)
-
Now you have me feeling like a gearhead. Can't finish a build, but the workbench looks cool
- 843 replies
-
- 4
-
-
- niagara
- model shipways
- (and 2 more)
-
Darrell - come on down. Yup it's all HobbyZone. Joel - you could do something like that. The modules have small but super strong magnets in the top, bottom & sides. So rearranging for tasks would be possible. Move what you want and they snap into place. I'm not that sophisticated yet. Right now it's more like files in one drawer, tweezers in another, measuring stuff in another, etc.
- 843 replies
-
- 3
-
-
- niagara
- model shipways
- (and 2 more)
-
I like the label idea Joel. I just didn't want to write on the drawers. They're faced with vinyl so even something like a mailing label would do. Maybe your color coding as well. At the moment I am trying to identify the stuff I use everyday vs once a week or once a month. That's what I want to get within reach. Sadly I'm already seeing that I probably will not be able to completely eliminate the big tackle boxes that I used before.
- 843 replies
-
- 3
-
-
- niagara
- model shipways
- (and 2 more)
-
Looks like you have it. When you flip the boat right side up does the deck go to the top edge of the transom? A rail?
-
Julie - I'd be embarrassed to show a picture of it today. Already a mess. The nice thing was that I worked on 3 different builds today - 2 at the same time - and was able to just move things down or move myself between builds. Bob - the heap is growing already
- 843 replies
-
- 3
-
-
- niagara
- model shipways
- (and 2 more)
-
You're right Bob. It is very well made. There were no bad cuts, all the pieces fit exactly as described. The first 2 modules I pieced together in a dry run first, expecting to have to make 'adjustments'. Those went together nicely and after that I had enough confidence to start right in with the glue. After working with it for a few days, my only regret is I should have bought less 3 drawer modules and more 2 drawer. The usable height of the 3 drawer is slightly over an inch. There were a number of tools that would not fit in those. And I really wasn't joking, at the moment I am lost trying to find anything. Probably several reorgs over the next few weeks.
- 843 replies
-
- 3
-
-
- niagara
- model shipways
- (and 2 more)
-
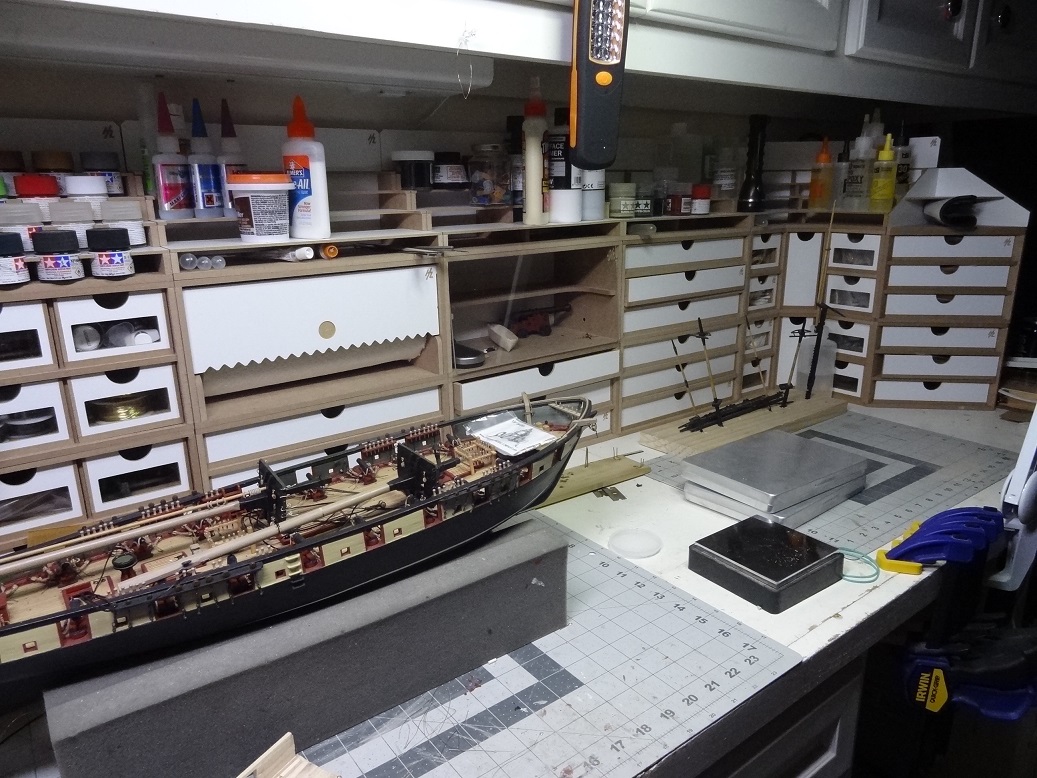
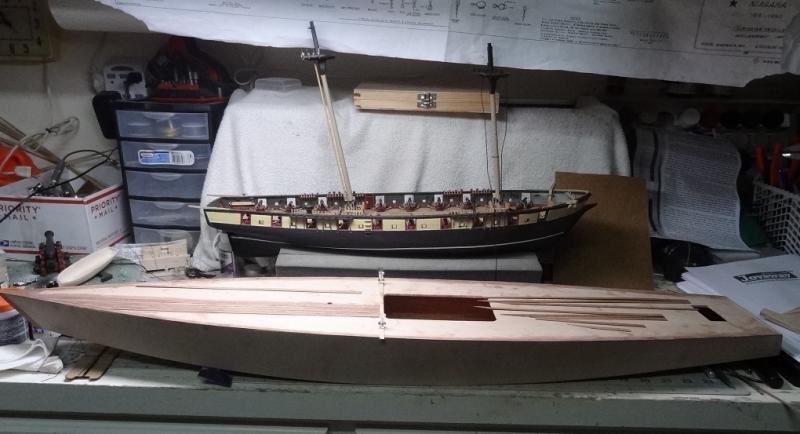
The new boatyard. It even makes Niagara look a little small. The HobbyZone setup is well made. Took about a day to assemble it all. Now I can't find anything Was trying to get started with rigging some shrouds - just something to get motivated. I ended up noticing that the mast tops were still needing quite a few blocks. Better to do that now while I can still take the spars out. It didn't help my attitude though - 2 hours to strop 8 blocks
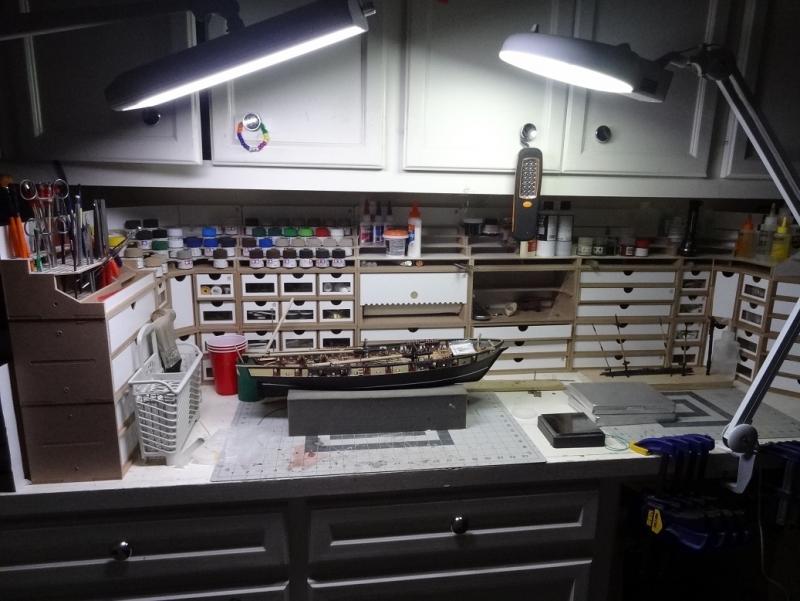
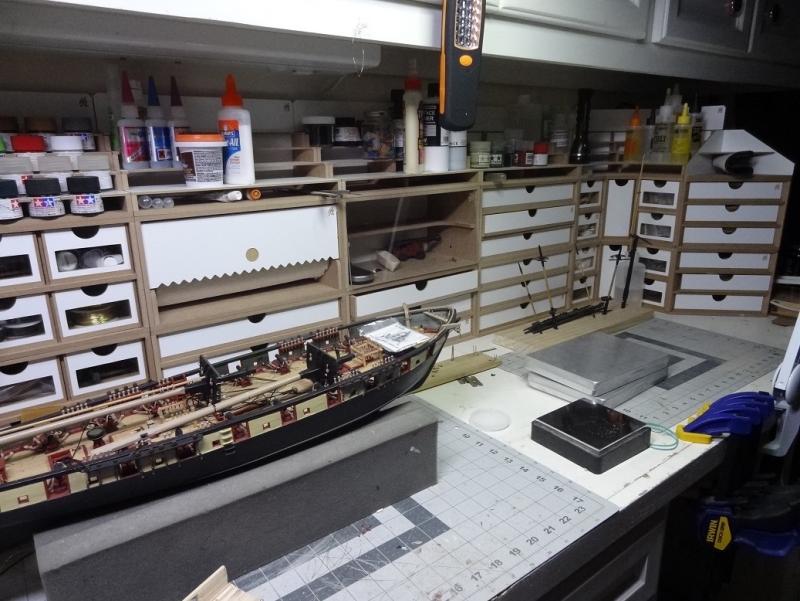

- 843 replies
-
- 4
-
-
- niagara
- model shipways
- (and 2 more)
-
Glad to have you along Darrell. That goes for for the rest of you too.
- 648 replies
-
- 2
-
-
- niagara
- model shipways
- (and 1 more)
-
Man I must have really misread the plans. So there is an upper crosspiece that sits on top of the two posts and then another crosspiece 'hinged' between the posts below that?
- 648 replies
-
- 2
-
-
- niagara
- model shipways
- (and 1 more)
-
Great description! Thank you. I'm going to try twisting a plank one more time and if not successful I may have to follow your footsteps.
- 129 replies
-
- 2
-
-
- finished
- model shipways
- (and 1 more)
-
Don't know this for a fact but kit supplied dowels are notorious for not being straight. The grain can run any which way, so even if they appear straight now down the road could be different. I had a jig to file the octagons. It would even do them on a tapered stick. Made it very easy. It's somewhere in my log.
- 648 replies
-
- 2
-
-
- niagara
- model shipways
- (and 1 more)
-
Wow Joel - sounds interesting. Scratch build I presume? Wondering how you make mast quarters? Take a square stick and round off a corner? The single mast sounds good too. That's one reason, in the back of my mind, I have been thinking about starting my Occre Cazador or Amati Arrow kit. The lateen rig is much simpler. Or finish my ME Pinnace - no mast at all
- 648 replies
-
- 2
-
-
- niagara
- model shipways
- (and 1 more)
-
You guys are both right. And I apologize to you for my whining in your log.
- 648 replies
-
- 2
-
-
- niagara
- model shipways
- (and 1 more)
-
Thank you Darrell - it's too bad we can't get our builds to float. Might be an incentive to add sails. The company that makes my kit does have one they call a schooner. Not sure if they terminology is correct but it is interesting.
- 843 replies
-
- 3
-
-
- niagara
- model shipways
- (and 2 more)
-
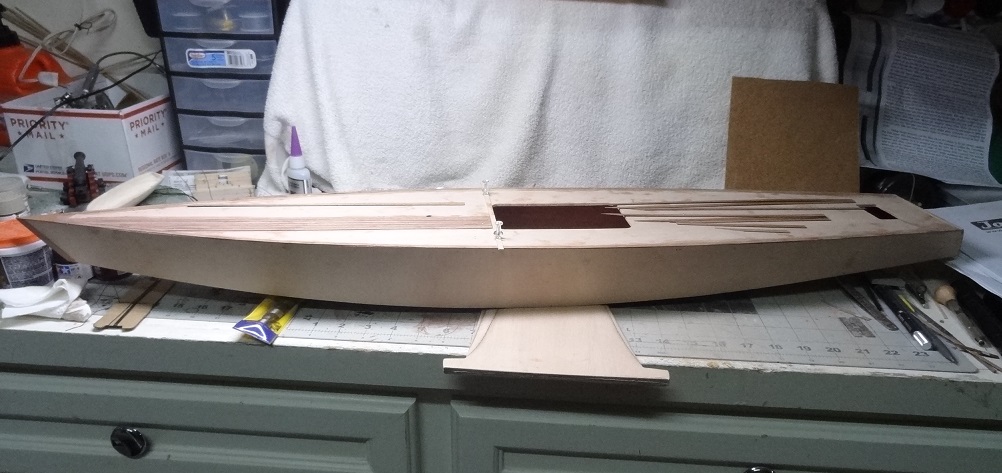
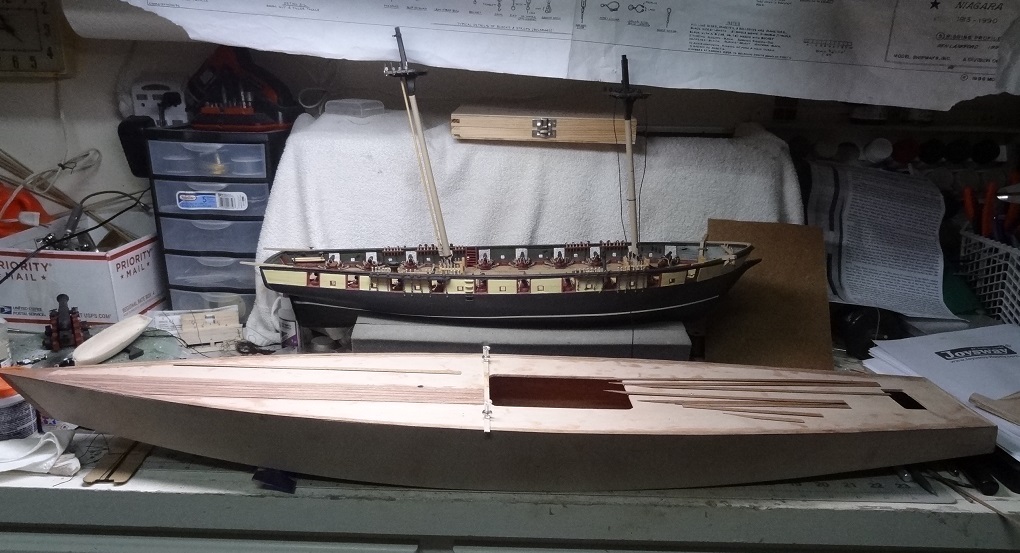
Not a lot of progress lately. I have been working on 2 other projects. Both RC models. One is finished (took it out today) it was pretty much ready to run out of the box. The other is a kit and will take some time. Interestingly, I am having to deck this one and it is quite similar to what we do. The big difference is the strips are a veneer rather than what we know as planks. I have found that my build experience and tools have been a big help. The designer is very big into using marine epoxy to glue everything. The instructions and video are quite detailed in the usage so that's a valuable bit of knowledge to pick up. Really I think I am procrastinating. Putting off the rigging that I know is coming. Here's a few pix of my distractions: This guy is quite manuverable! Hull is 37" and it will stand about 5' tall with mast. Niagara takes it out with a broadside.
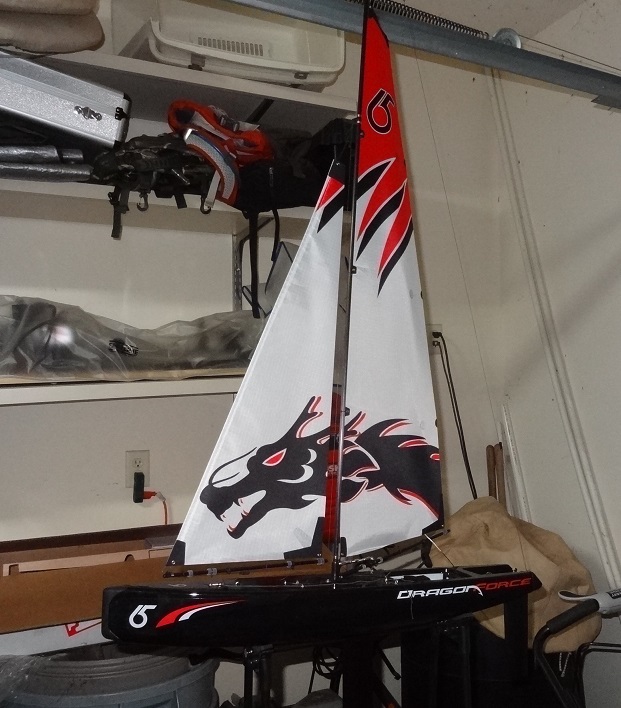
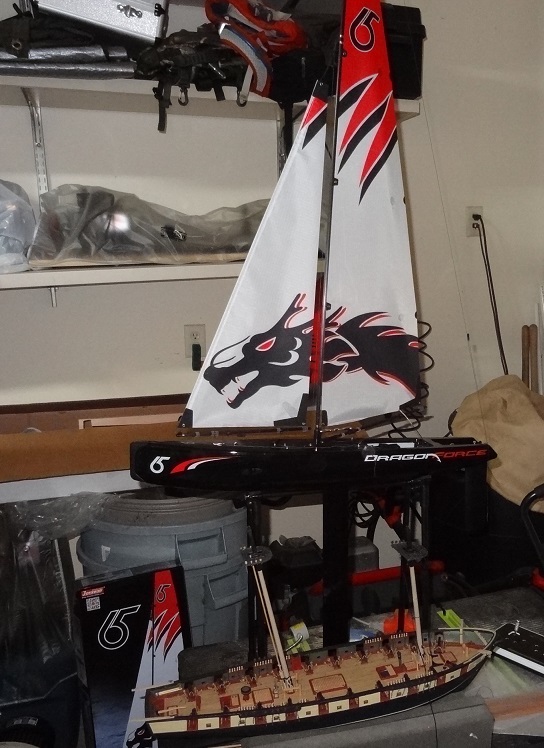


- 843 replies
-
- 2
-
-
- niagara
- model shipways
- (and 2 more)
-
One more reason. I will get around to it. I was just tired and whiny last night.
- 648 replies
-
- 2
-
-
- niagara
- model shipways
- (and 1 more)
-
I admire your dedication Darrell. I may still leave my build in a 'Admiralty' state. I just don't have any interest in doing the rigging. Keep it up!
- 648 replies
-
- 2
-
-
- niagara
- model shipways
- (and 1 more)
-
Elijah - are you using the Syren deadeyes? If so, my hat is off to you. I glued them together then put them in a tumbler and about half of them broke. Most of the remaining ones needed to be drilled out as the glue had plugged up the wholes. The ones in the kit are not too bad, I just hope there is enough
- 843 replies
-
- 3
-
-
- niagara
- model shipways
- (and 2 more)
-
Pat - the pieces are so thin I doused them with the runny CA in hopes of strengthening them. My problem is I have been using one of those foam stands so that I can easiliy roll the hull to one side. Of course that is almost instant death for the steps. I have an Amati stand I need to start using again. That should make for less opportunity to beat up the steps.