mikiek
-
Posts
2,276 -
Joined
-
Last visited
Content Type
Profiles
Forums
Gallery
Events
Everything posted by mikiek
-

Mill Column for Sherline Lathe
mikiek replied to mikiek's topic in Modeling tools and Workshop Equipment
Al, thanks for the input. Your having both items is helpful. The complete mill, DRO along with an accessory pack, is about $1200 more. That could pay for a lot of clamps, bits, etc. On the other hand, your point about the column size is well taken. For some reason I wasn't thinking it was that big. If you have a chance, would you mind measuring your complete unit? Please include the motor hanging off the column -
Painting a Waterline
mikiek replied to mikiek's topic in Painting, finishing and weathering products and techniques
I like the idea of not having to cut the tape. That was one of the more difficult steps in the effort. -
Mill Column for Sherline Lathe
mikiek replied to mikiek's topic in Modeling tools and Workshop Equipment
So far I have used the lathe when making all the yards for my build. That's it. So it has seen a lot of shelf time, and a pretty big spot of real estate at that. Separate mill has a smaller footprint but will require a shelf with a lot of height. All of that would push me towards the column. What I don't know is how well a column works compared to a separate unit. I trust Sherline, I don't think they would be selling something that didn't perform - but who knows? -
Painting a Waterline
mikiek replied to mikiek's topic in Painting, finishing and weathering products and techniques
Thanks for the feed back everyone. I sort of combined what everyone said. I spelled out my process in my build log. I'm about half way thru - ready to paint the hull. -
Brian - just curious, did you have to mix that color or did you find some pre-made?
- 843 replies
-
- 2
-

-
- niagara
- model shipways
- (and 2 more)
-
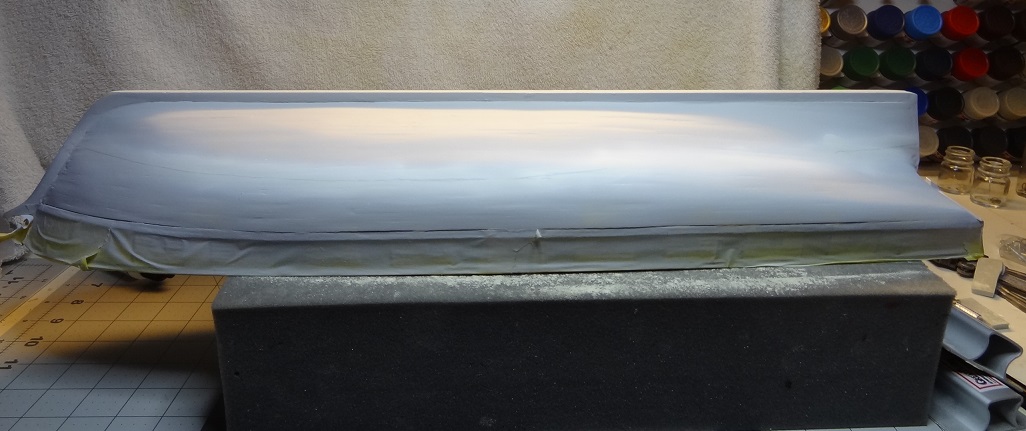
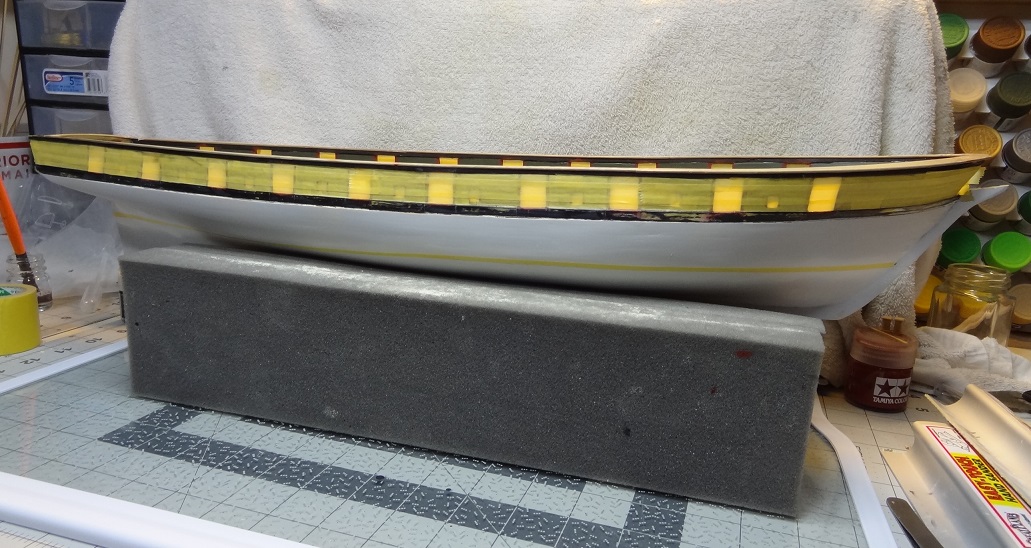
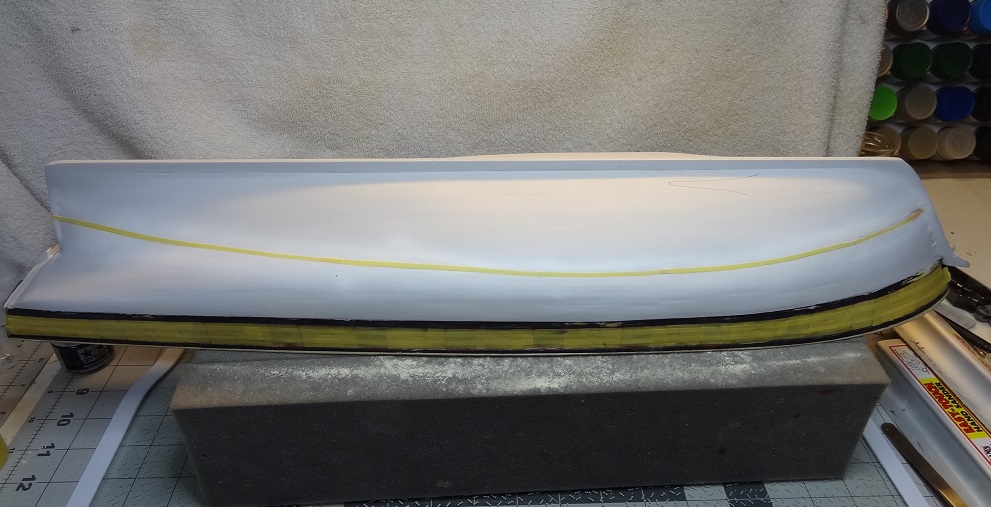
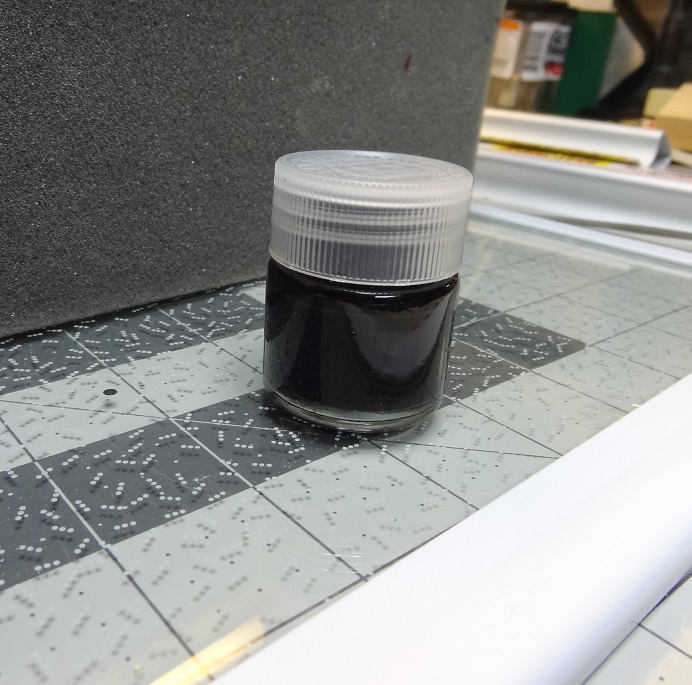
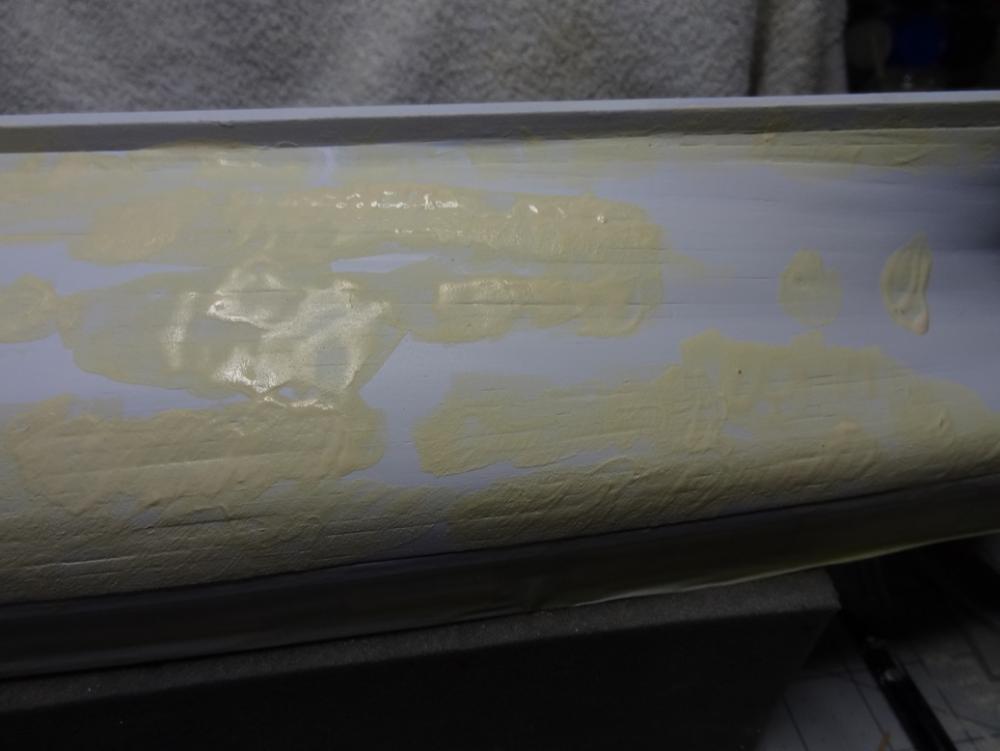
Moving right along. I've been thru several iterations of filling, sanding and priming. The painting method for applying filler (earlier post) has worked very well. One tough decision was when to stop. Like a broken record I keep saying I want to see the wood, the edges, the butts and maybe even a few minor screw ups. So I stopped after the 3rd iteration. What's left will have to add to the rusticness of the build. So next was marking a waterline. Nothing revolutionary there - just a block and pencil strapped to it. The only problem was the pencil didn't want to mark on the primer. Ended up using a fine tip marks-a-lot - that may come back to haunt me. The hull color question is resolved. All black hull - white water line. Trying to learn from past mistakes with painting light and dark colors next to each other, the plan was as follows: 1. Mark the hull. 2. Spray a wide band of white over the watermark. Remember my comment about the marks-a-lot? Couldn't cover it with the white paint. 3. Cut long strips of masking tape the width of the actual painted waterline. Apply over the white paint band following the marks. Ended up using the marks-a-lot marks as the edge of my painted watermark rather than the center. 4. Paint masking tape with clear acrylic to seal edges. 5. Spray hull with black. 6. Remove masking tape - hopefully there will be a nice clean white line underneath. I've finished thru step 4 and am waiting for the clear paint to dry. Since I'm spraying black I decided to go ahead and spray the gunwale again - I roughed that up during the sanding. I will also spray the rail. So I had to mask off the rest of the bulwark. I got a bad feeling I will end up having to repaint the bulwarks before this is over. You know I just love the lines on this boat. That last pic really shows them off. So I have mixed up a pot of Evil Black The next time you see Niagara she will be one Evil Black Mamba...........


- 843 replies
-
- 4
-
-
- niagara
- model shipways
- (and 2 more)
-
Painting a Waterline
mikiek replied to mikiek's topic in Painting, finishing and weathering products and techniques
OK - the light is starting to come on. I have some thin Tamiya masking tape - I think it is 1/8" wide. That's still wider than the waterline so would I cut the tape to width before putting it on the hull? Note: I always paint over the edge of the mask with clear paint to seal it up before painting. -
I have the MIll Bug once again. Have been almost ready to click the Send Order button on a Sherline mill but have been able to resist. Background: I do have a Sherline 17" lathe already. Now I'm see this and wondering if it is a viable alternative. I use the lathe and would use the mill for modelling. This means mostly small parts from wood or brass. I have no intention of moving to harder metals or big items. And I also don't use the lathe that much, so something like this column might help get more use out of the base parts rather than having another base, another motor etc. So I wonder if anyone has experience or knowledge of this column accessory. It would sure be a lot less $$$ than getting a complete mill.
-
As the title says, this is about painting not marking. It's time to paint the hull, at the moment I'm considering all black with a white waterline. I will be airbrushing. The hull is already filled and primed. The waterline is marked on the hull. This seems a little like the chicken and egg thing. What to mask first? Was considering first spraying a wide white line over the waterline mark. Apply masking tape over that, redraw the line on the tape then trimming the tape with an Exacto to leave the actual 1/16" waterline covered. My biggest problem with this is trying to cut tape on the wood surface. I always leave gouges from the knife when I do that. There's always painting the hull first, then the waterline but I don't know about white over black. Surely, I am completely missing something easier?
-
Elijah - I came across this a few weeks back. Might be worth looking into.
- 701 replies
-
- 2
-
-
- phantom
- model shipways
- (and 1 more)
-
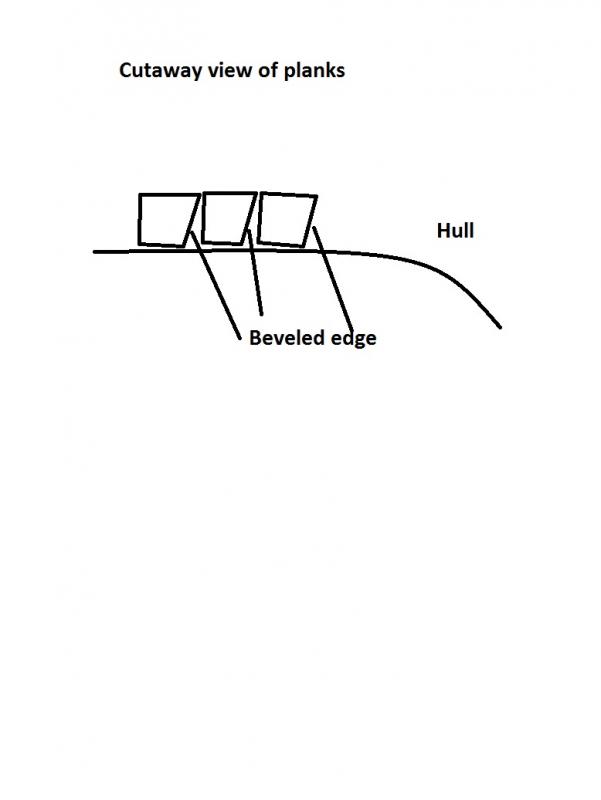
You could go as short as 15'-20' . The trick is to be consistent with whatever length you choose. As Bill said, you can get away with more on a solid hull. If you were dealing with real frames or bulkheads, the planks would need to start and end on one. No reason why you shouldn't follow suit. If you have a few planks to spare, you might lay out 6-7 strakes (strips) and then mark them with your proposed length and butt pattern. You don't even need to shape them. Then put your hull up to what you have laid out and see what you think. You want to avoid too few planks per strake. I would suggest a minimum of 3-4 per strake, 4-5 would probably look even better. Also avoid a pattern where planks come out too short. Your shortest plank should at least go from one bulkhead mark to the next and that would likely be only at the bow or stern. Lastly, don't forget to bevel one of the long edges. Decide on the top or bottom edge and be consistent. You should find that you get a much better strake to strake fit by doing this. Hope this crude drawing helps clarify.
- 701 replies
-
- 7
-
-
- phantom
- model shipways
- (and 1 more)
-
I've started keeping a damp cotton pad in the Elmer's. It really helps moisten up the contents and it turns a lovely shade of purple. Good thought on pinging the Niagara Museum. The problem is there is no concrete answer. Some paintings show black to the waterline. There seem to be a few more paintings of the sister ship Lawrence. Some of those look all black, a few have the yellow/beige band at the bulwark (common for the period). But who's to say they were painted the same? Given the supply/materials situation (or lack of), the no paint theory is a valid argument. The build truly was a "one battle" mindset and given the seasonal weather (can't do anything in the winter) and the need to coordinate with an upcoming Army offensive, I'm thinking the durability requirement was extremely low on the list. A few months afloat was all they needed.
- 843 replies
-
- 3
-
-
- niagara
- model shipways
- (and 2 more)
-
BTW - I am glad you're back! I was afraid I may have hammered you to hard the other nite. That was not my intention. Just wanted to keep a bud from stepping on a bear trap.
- 701 replies
-
- 3
-
-
- phantom
- model shipways
- (and 1 more)
-
The only clear tape that wide I have seen is packing tape - but I don't know about writing on it. Some masking tape is semi-translucent - writing on it would be no problem.
- 701 replies
-
- 2
-
-
- phantom
- model shipways
- (and 1 more)
-
I see some of that now John. However, there is a part of me that will not let go. I have and am still doing a lot of reading on the historical boat. I've also received some excellent feedback regarding the history aspect from here. And I have been leaning towards a more historically accurate presentation. Unfortunately, I wasn't thinking that way when I started. Regarding your copper question - when I said "built out in the sticks" it was for real. There was nothing in Erie except a lot of trees. Everything was shipped in - materials, people, supplies, etc. Copper would have been a luxury. I can't find the exact quote at the moment, but the shipmaster overseeing the build even told his guys something like "good is good enough". In other words don't bust a nut on this job. The 2 sister ships were built for one battle. If we won, we wouldn't need them any more. If they won why give them a good ship?
- 843 replies
-
- 2
-
-
- niagara
- model shipways
- (and 2 more)
-
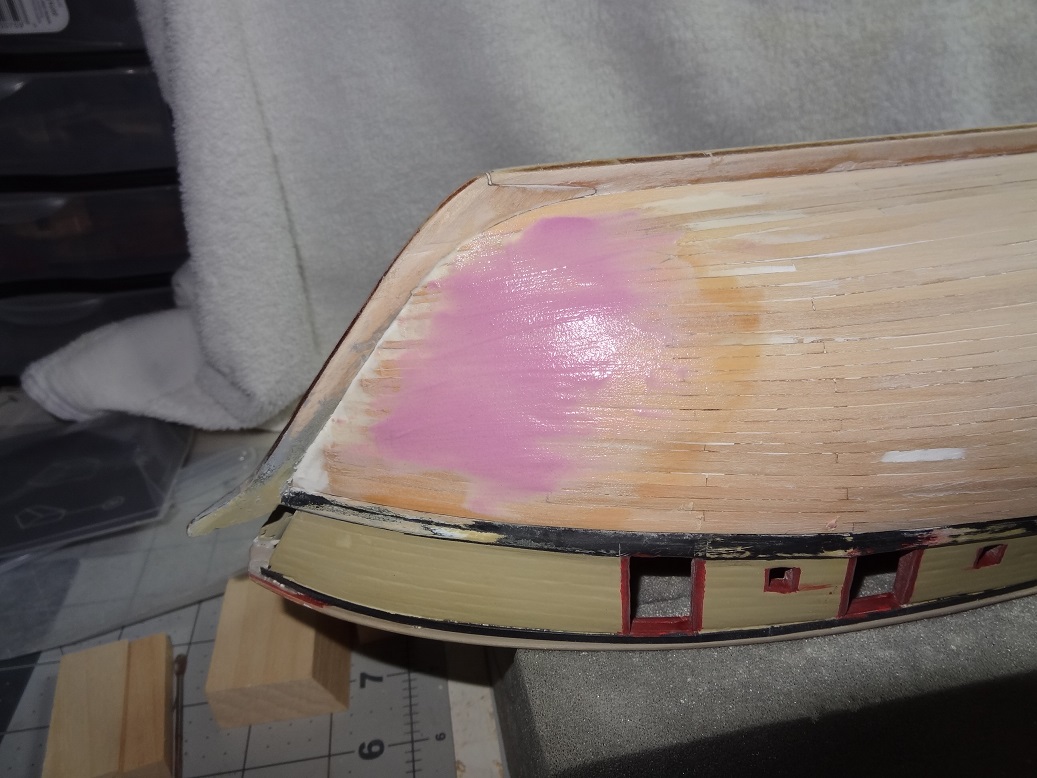
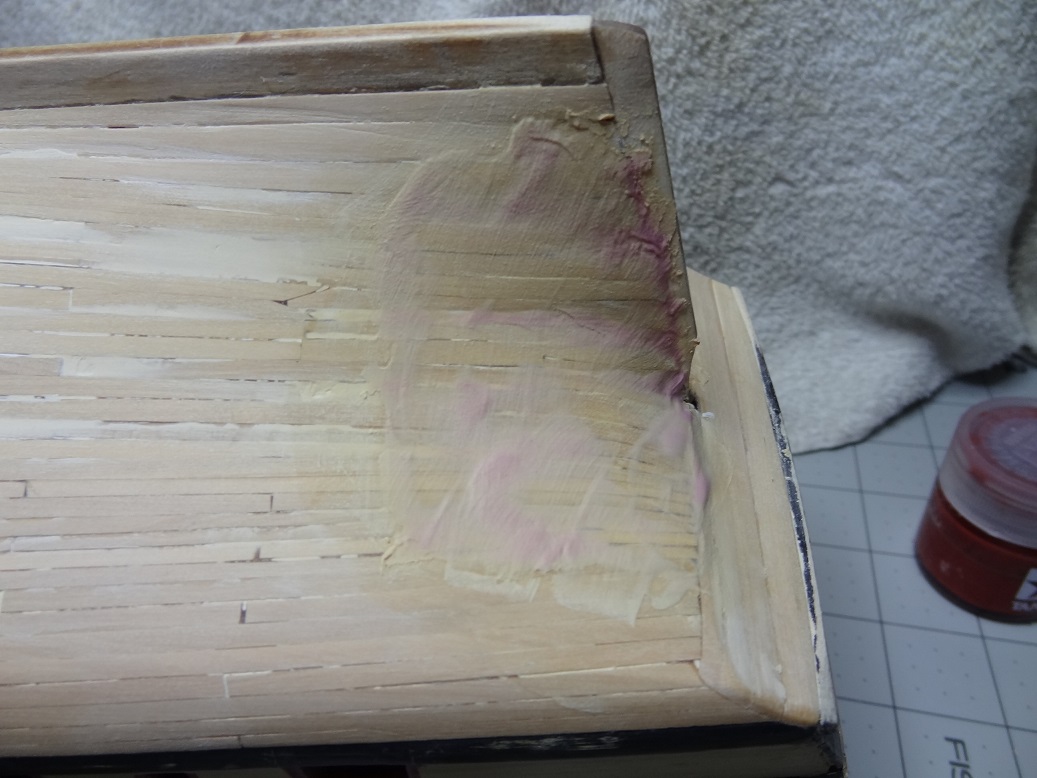
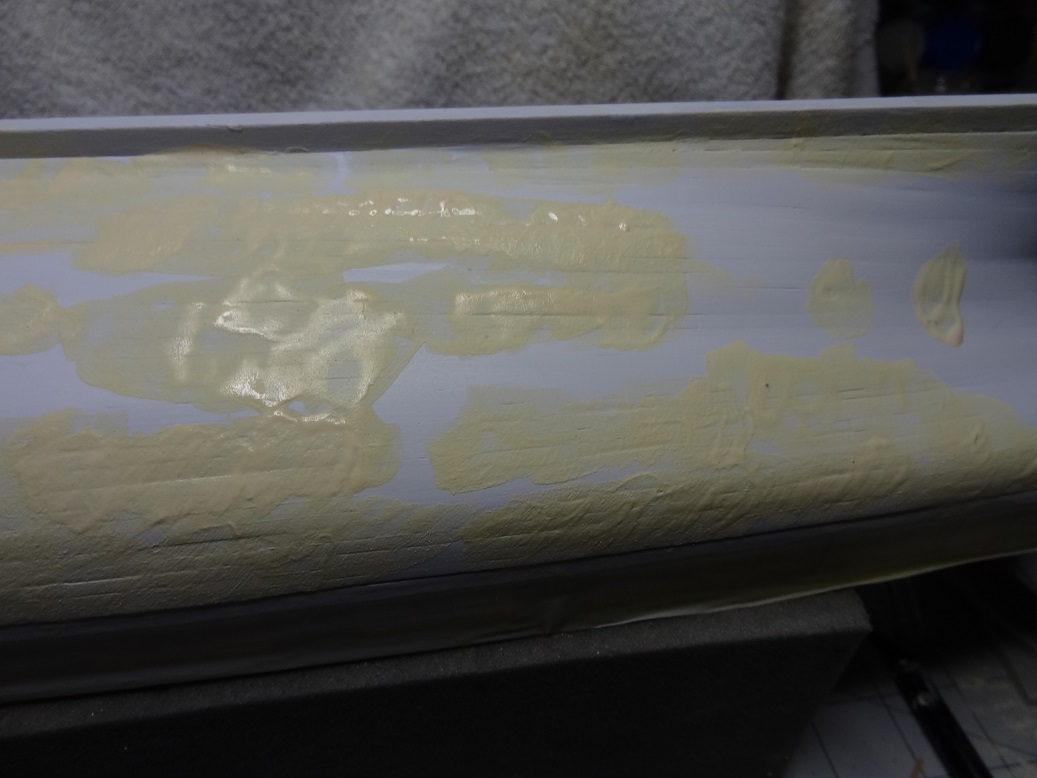
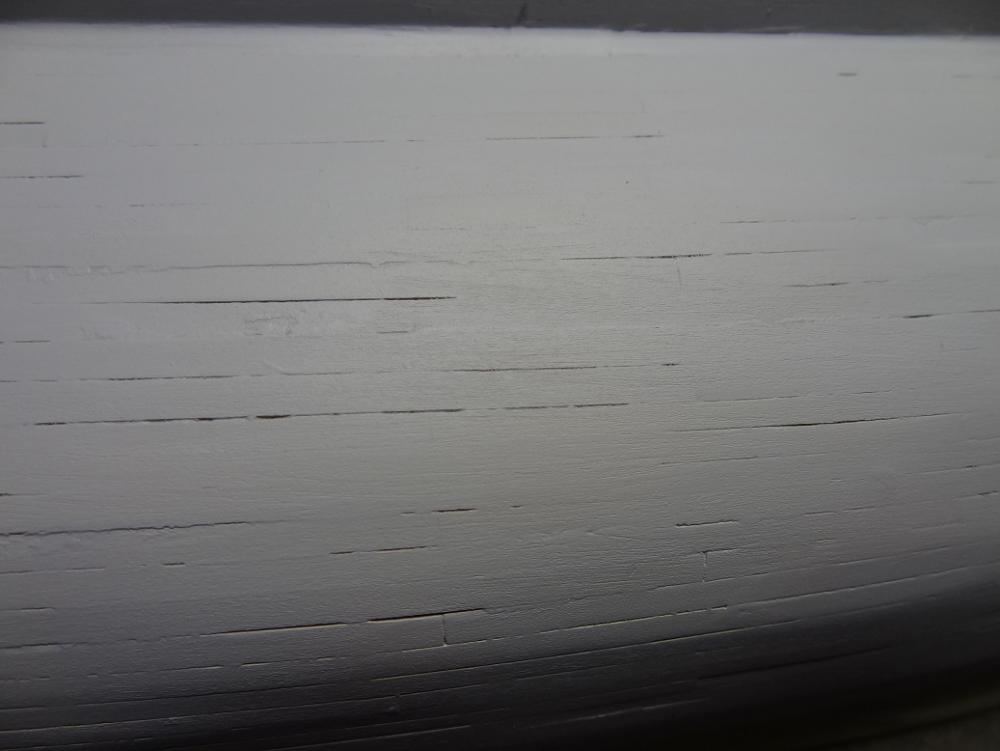
Back to Niagara - sanding and sanding and sanding. Almost forgot to mention - I've been sanding. The hull is pretty smooth. No horrible gaps or holes. But I did see the need to break out the filler. In the past I have used Tamiya putty and it has worked OK but I wanted to try some of the other options. So I did a few spots with various products - spackle, PVA & saw dust, Elmer's filler (purple). I was having problems with all, they didn't want to spread, so I started a thread about that. Turns out I think most of the products were a little dry and then trying to smear them on a dry surface.... I ended up first wetting the hull surface, then using Elmer's and applying with a wet paint brush. The big globs smoothed right out and it spread very nicely. What I didn't like is that it took 2-3 hours for it to really dry out. I did one application yesterday - hitting what looked like the worst spots - then spent the entire evening sanding. I'll say here, just like in the thread - I do not want a show car finish on my build. I want to know it is a wood surface. I want to see planks and the butt pattern and all that stuff. I had really hoped that simply airbrushing multiple coats of primer would do enough filling on it's own. Sadly it appears that it will not. This is after 2 coats. At least the primer shows me the trouble spots. So I hit them with the brush on filler. This may be dry enough to sand later tonite. One more big decision to make in the near future on a related topic. Hull color. If you have followed this thread for long you will know what I think about the yellow and red colors suggested in the kit. You'll also know I've replaced both of them with my own mixes. Honestly, I have to say that blue or green or whatever hull color that is just might be even worse. So the decision is what to do instead? I have it on good authority that the first Niagara hull - if it was painted at all - may have been black. I've also read they used a sort of tar paint on hulls, which has a very dark brown look to it. Given the construction situation for Niagara - way out in the sticks - I don't know if it would have been available. They were having problems enough finding pitch for the caulking, so I suspect not. At this point I'm thinking my Evil Black with maybe a white waterline mark. Just don't know yet. One last item, I'm back to building deck toys again. The grates and hatch covers were done but I still have items like the pump, capstan and stove pipe to do. I started on the pump and am really struggling. It's coming from a 3/16" square strip - 2 pieces each 3/8" long. Plans call for chamfered corners - yeah right! Times like this I wish I had bought that mill. This is going to be a test of will. Let me know when you need a good laugh - I'll post pics.


- 843 replies
-
- 4
-
-
- niagara
- model shipways
- (and 2 more)
-
OK - don't keep me wondering any more! What do the french curves and planking have to do with each other?
- 701 replies
-
- 2
-
-
- phantom
- model shipways
- (and 1 more)
-
Filling - How do you do it?
mikiek replied to mikiek's topic in Painting, finishing and weathering products and techniques
It was your idea Bob. Spreading with a brush (painting) sounded like exactly how I wanted to apply it. I was just too lazy to make paint out of the filler, so I gave the brush a try. I imagine the result is about the same. -
Filling - How do you do it?
mikiek replied to mikiek's topic in Painting, finishing and weathering products and techniques
I get that. Painting fills in a multitude of evils. I suspect the primer/paint even acts as a filler to a degree. My planking came out reasonably well for a first build. There are no 'holes' to fill. Just some spots where I probably could have pushed plank edges closer together. Sanding got 90% of what I wanted to clean up. As I said in the OP, I'm not trying to fix a dent in a show car. I don't care for the glassy finish. The wet paint brush thing I mentioned earlier is working out just fine for my needs. -
Filling - How do you do it?
mikiek replied to mikiek's topic in Painting, finishing and weathering products and techniques
I may have found the ticket - at least for me. Wet down the surface to be smoothed. Using my putty applicator tool (it's not a putty knife) I spread Elmer's purple filler as best I can. I don't worry too much about an even application at this point. Then I stick a paint brush in water and with the wet brush, 'paint' the filler over the surface. All the lumps smooth out and depending on how long I brush an area I can get a thick or almost veneer-like layer. It's very even and smooth and sands out nicely. The only downside is it takes several hours to dry out. This is kind of a combination of several suggestions from this thread so thanks to all for teaching! -
Filling - How do you do it?
mikiek replied to mikiek's topic in Painting, finishing and weathering products and techniques
Joel, the balling up is when I was applying it. I have a tool that looks like a tiny knife blade. I take small dabs of filler and start spreading it like butter. Starts out OK but after about 20 seconds if I'm still spreading it starts wanting to roll up instead of spread out. I did try Bill's suggestion of wetting the surface first and that does seem to help. Have not yet tried Bob's idea of getting it to a 'paintable' consistency. Either way it is starting to look like the filler needs some thinning - not wet enough. Given the look I am shooting for, I'm still thinking I can let the primer do some of the filling. I will be airbrushing that, so a few coats should help. It's not like the hull would leak like a sieve if I put it in water. Most of what I am filling are hairline gaps that are seen if I hold the hull up to a light. -
Filling - How do you do it?
mikiek replied to mikiek's topic in Painting, finishing and weathering products and techniques
Some great thoughts there! Bob, I would love to get the filler thin enough to brush on. If the Elmer's purple is water based that should be easy enough. Bill, wetting down the surface makes a lot of sense. That seems to be one of my problems. The Elmer's just doesn't want to stay put. Jaager, it is a POB kit but only 1 planking. I like the idea of adding a veneer to low spots. I've done that for other parts, why not the hull? I've cut paper thin strips with my table saw so that would not be difficult. -
Filling - How do you do it?
mikiek replied to mikiek's topic in Painting, finishing and weathering products and techniques
The glue/dust paste that I made dried so hard that it is not sanding off well - a good testament to it's adhesive qualities, but not what I am looking for in a filler. I went back and tried the Elmer's filler (the purple to clear) again. Although it still wants to dry out (and then ball up) that seems to be what is working best. I need to get my spreading technique down. I would like to try to thin it out a little but I can't tell from the label if the stuff is water or solvent based. -
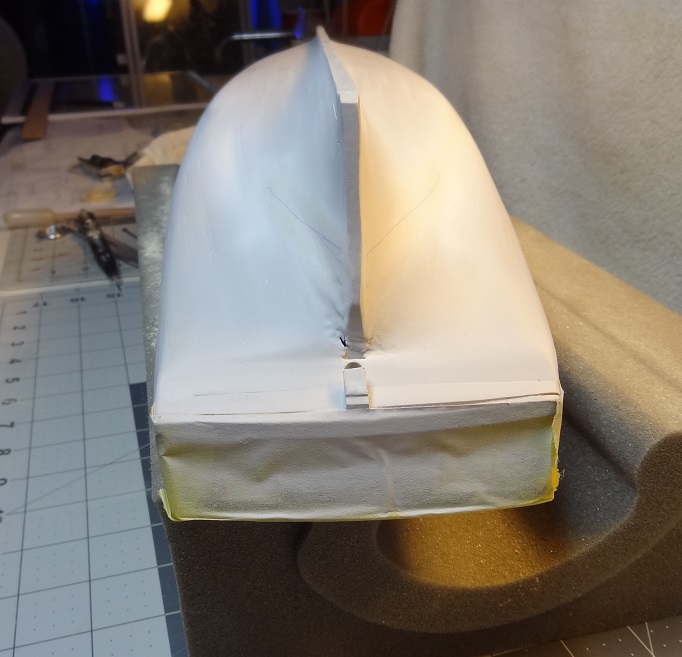
You're getting there. I will throw out a bit of hard love though - in the stern view pic, it looks like the 3rd string(s) up are not symetrical where they meet the sternpost. At the bow the bands get pretty narrow. You may likely end up having to make some drop planks. If you don't know what those are do a little research. There's nothing wrong with that. But you might want to get ready for it. I don't know what the scale of your build is, but have you calculated to determine if your proposed plank width is to scale? For instance, my build is 1:64 or approx 3/16" = 1'. Planks for a brig at that time varied from about 6" to 12" or 3/32" to 3/16" wide in my scale. My plans called for mostly 5/32" which would have been about 10". That may be a little too wide for your type of boat. Also consider whether your boat had a garboard - I would assume yes. Those are typically wider than most other planks on your hull. They can also have a dramatic effect on how the rest of the planks lay, particularly at the bow. Installation of a garboard usually requires a rabbet be cut into the keel. If you need more details on general planking for models - try this. Go to the Model Expo site. Go to web pages for several Model Shipways kits. You can download the instruction PDF's for free. Pride of Baltimore may help. Also Niagara wasn't that bad. I realize these are nothing like your boat, but a lot of the construction concepts are the same. I don't want to sound like I am preaching at you - just trying to help someone who has helped me.
- 701 replies
-
- 5
-
-
- phantom
- model shipways
- (and 1 more)
-
First off, I'm cleaning up the hull planking on my Niagara build. Mostly sanding at this point but I can see I may need to level out a few spots and fill a couple of places where planks don't lay square. The hull will be painted. Secondly, I have no desire to get the hull "smooth as a babies behind". Wood is imperfect. The shipwright (me) is imperfect. To me some imperfection adds to the realism of the model. To a point..... There's a number of posts here on WHAT to use for filling our woodwork - hulls, decks,etc. I've tried a few and am not overly impressed with any of them - spackle, glue & sawdust, Elmers. They don't spread well - seem to want to dry out before I'm done applying. Then I got to thinking probably that imperfect shipwright may not know what he is doing. So this is a long winded intro to the question - HOW do you work your filler? How do you apply it? How much do you apply? What do you use to sand it? How much do you leave? As a sidebar, since I don't want to fill every nook & cranny, what about just using 4 or 5 coats of primer for filling? Seems like it would level out in the low spots and fill enough of the plank edge spaces to give me the look I want.