mikiek
-
Posts
2,276 -
Joined
-
Last visited
Content Type
Profiles
Forums
Gallery
Events
Everything posted by mikiek
-
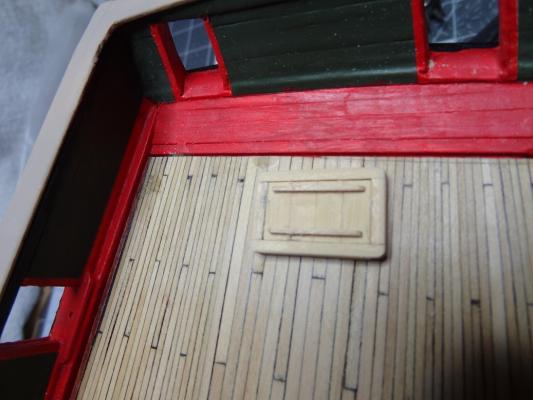
 Thank you S.Coleman. I'm glad to have you following us. Maybe like this Joel? You're reading my mind this morning. I was going to experiment with adding a handle to each end of the lid. Maybe using some thin brass rod. The lid idea might also work for the ladderway. A couple of planks running fore to aft on the port side of the opening with a ladder coming up on the starboard. Any feedback on the color of the grates/frames. Did your research turn up anything regarding the use of red paint?
- 843 replies
-
- 2
-

-
- niagara
- model shipways
- (and 2 more)
-
Nice work! I'm always complaining about that red as well - Niagara's trim has it. We're not building fire engines.
-
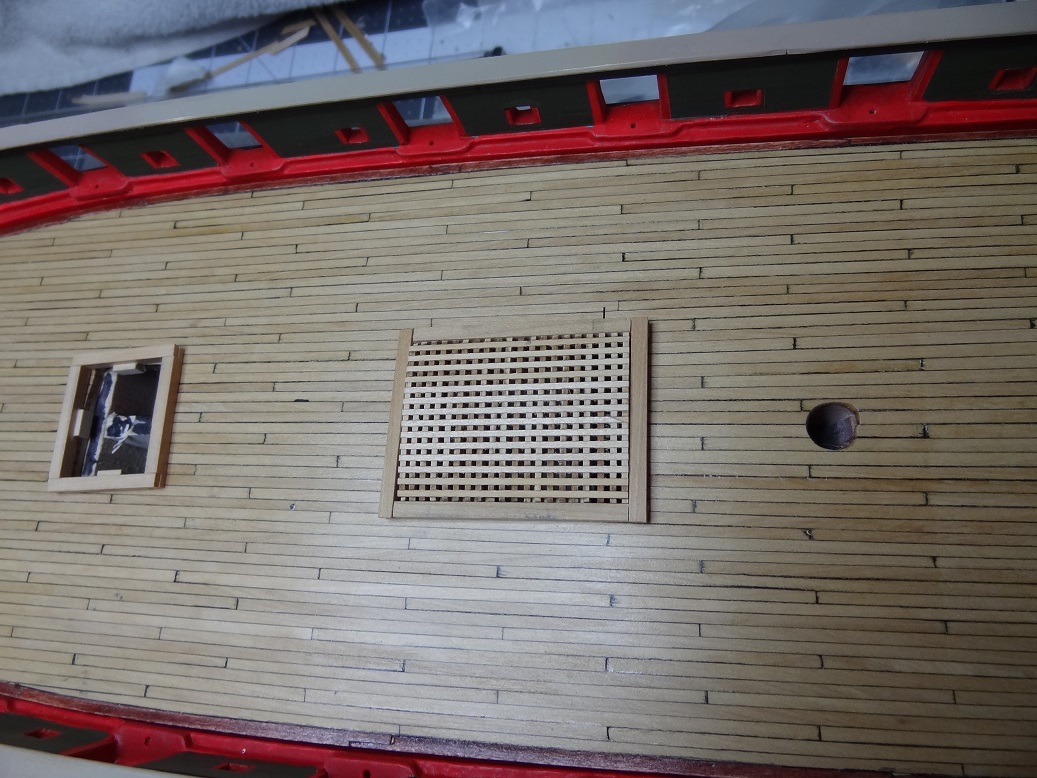
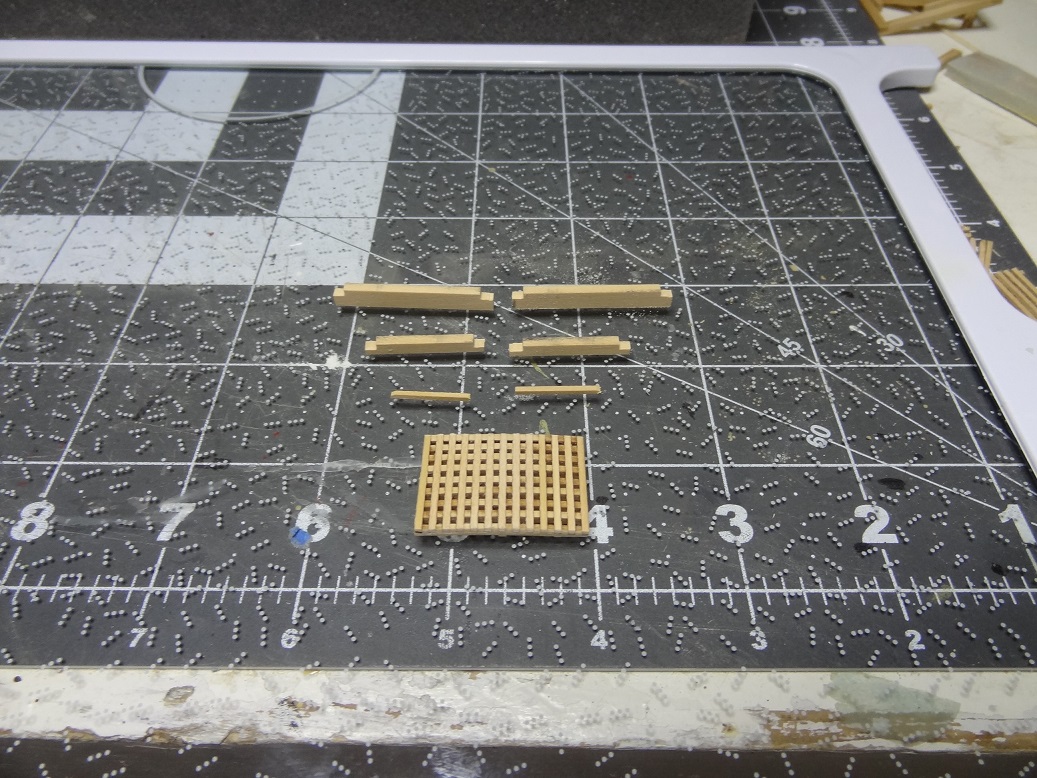
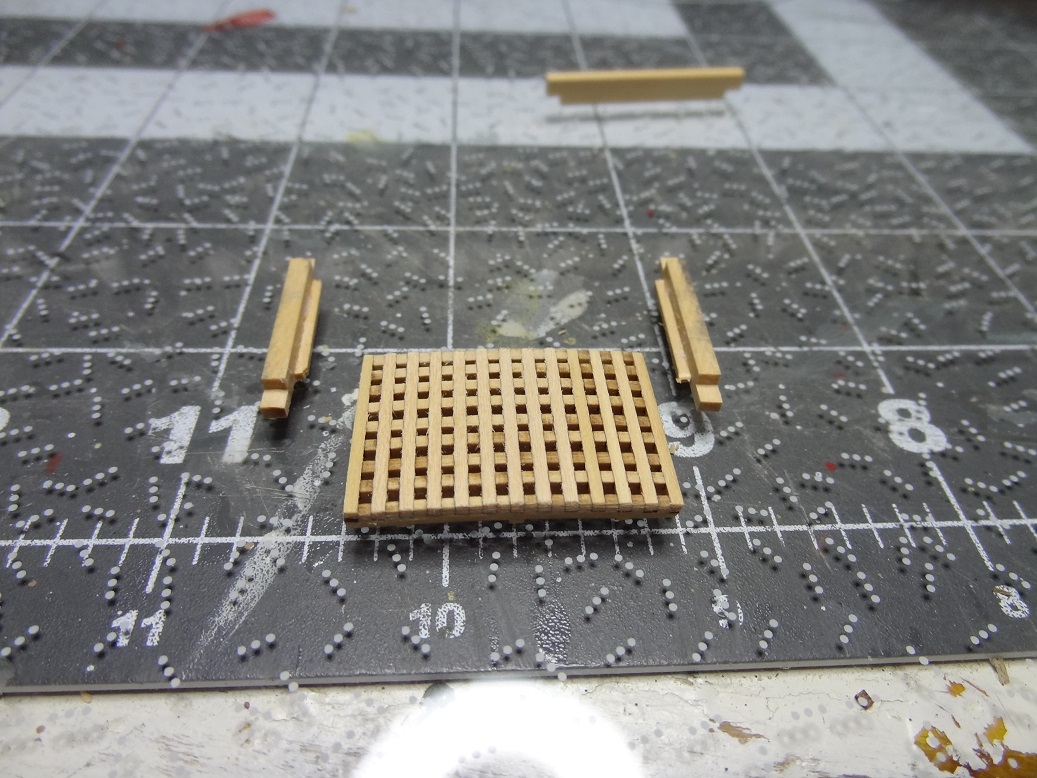
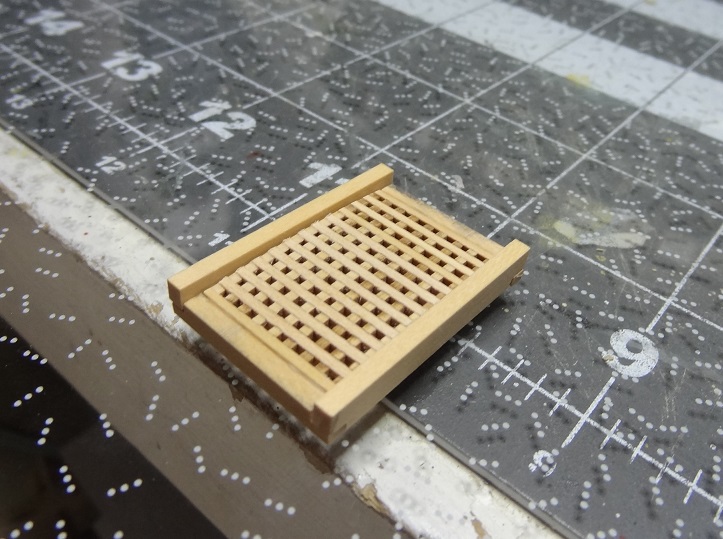
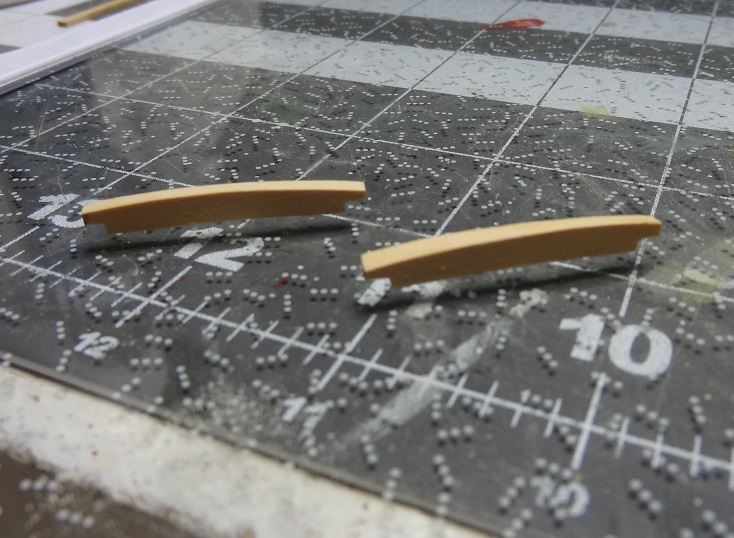
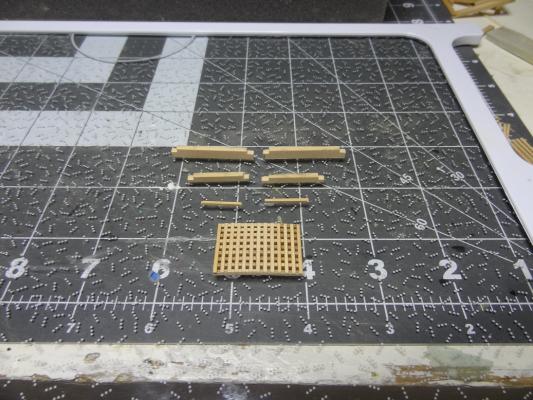
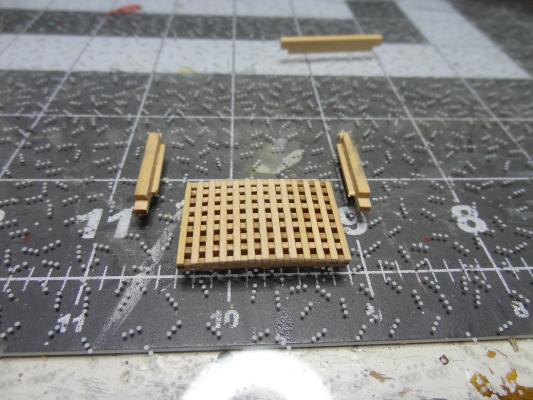
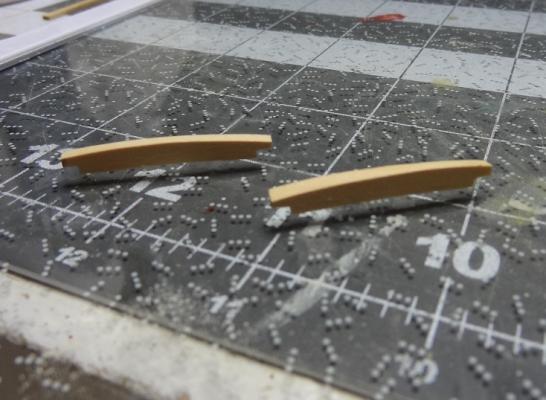
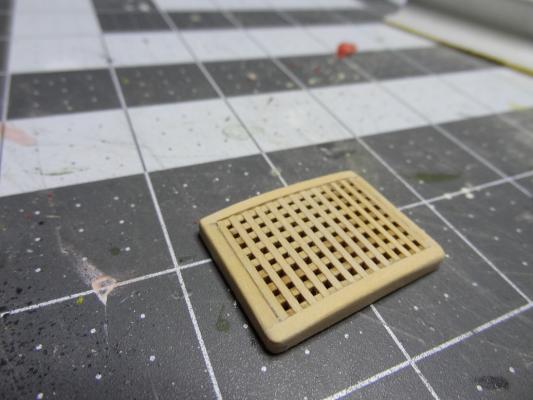
The grates are off to a good start I believe. Here's where I was last nite on the first pass. The frames were boxwood 1/8" squares. This had come down from a 3/16" prototype but it still seemed a little over sized. Fair, but lot's of room for improvement. This was an attempt to fit grate to frame. It fits nicely, but the grate is not positioned properly and any attempt to reduce the sides so it would sit right would have left a gap. Soooo, rework. The side pieces are 1/8" (tall)x3/32"(thick). The fore and aft are 3/16"x3/32". I like this thickness better. The skinny pieces will be glued to the side pieces for support of the grate. The fore and aft parts are taller because of the camber in the grate - higher in the middle (fore & aft) and lower on the sides. I am really loving the Byrne's table saw for doing things like the lap joints. The precision is remarkable. Side pieces with grate support Test fit. The camber is obvious now. First pass at shaping the fore and aft pieces. A little rounding of the edges and - ta-da! Sitting on the deck but not glued. I'm trying to decide the finish. The plans call for the obnoxious fire engine red for the frames. I didn't see any notes regarding the grates. Personally I would like to use the Bright Cherry stain I used on the nibbing strake but I doubt that was the original color. All the openings in the deck will be grates rather structures. I do have to decide on the Lazeret Hatch. The location on the deck is too close to the aft edge for me to cut it without risking collateral damage to the deck. I imagine I'll just glue a frame to the deck. I'll need to decide whether to cover it with a grate or a very low roof or sliding top. I'm all out of grates for the moment but more is on the way from Syren. Maybe I'll work on fastening the deck down in the meantime. Glad to get these parts underway.


- 843 replies
-
- 6
-
-
- niagara
- model shipways
- (and 2 more)
-
Joel - have you been holding out on us? You are turning up more and more great write ups. It would be interesting to peruse the Sanborn Nautical Library. Lot's of good stuff I'm sure. The MS grates you show from your Niagara kit don't look much like mine. On mine, the corners of the nubs are not squared well. Neither are the indentations. My instructions shows to either fit the strips in egg crate fashion or glue them edge to edge (this is the preferred method). I did the latter, and the result looks like a bunch of strips glued together - even with a lot of sanding the 'unsquareness' shows thru. It's good to see some write ups on Lexington and I would love to see any other material you have regarding her. The 'Lex' is on my shelf.
- 843 replies
-
- 2
-
-
- niagara
- model shipways
- (and 2 more)
-
Going thru this routine last night I completed a grate and the coaming to go with it. It looks quite nice! I have some pix of the result, but also wanted to show a few pix of the steps I took. Will be making another tonite so I'll take a few more pix and post in my build log. I'm glad to get these grates working, as I have a number of holes to cover on Niagara's deck.
-
After seeing Chuck's pix, I see the error in my ways. I have a grate dropped into one of my coamings, but it was not possible to get the grate battens flush to the coaming pieces. The flush look is much better. This can't be accomplished by fitting a grate to a coaming (well maybe by blind luck). As much as I am resisting the idea, I will start over. Even though what I have done is not overly noticeable. To me, things like grates and other deck pieces are where my eyes are drawn first when I observe a model ship. Even more so than rigging. Those features really need to "pop" at you. So they should be the best I can turn out. Now if I can just hurry the Postal Service up with more grates.
- 843 replies
-
- 4
-
-
- niagara
- model shipways
- (and 2 more)
-
Just to set the record straight, Chuck and I exchanged a few emails today and I understand now the difficulty I was having with the Syren grate kits. I was having problems both getting the grate strips into the jig and getting the battens into the grate strips. I guess I was expecting everything to just drop into place and when it didn't I resort to the brute force solution - which didn't work either. Chuck explained that you just have to sand some of those strips to shave off enough to get them in the jig. Same deal with the battens. Doing that this afternoon, everything fit nicely. Thanks Chuck!
-
Speaking of grates. I have buggered up the ones with the kit - not sure they were that great anyway. I have a few of Chuck P's gate kits but am really struggling with them. I have seen some on the web but am not overly impressed. Can anyone recommend a source for grates? Or tell me a good way to make them.
-
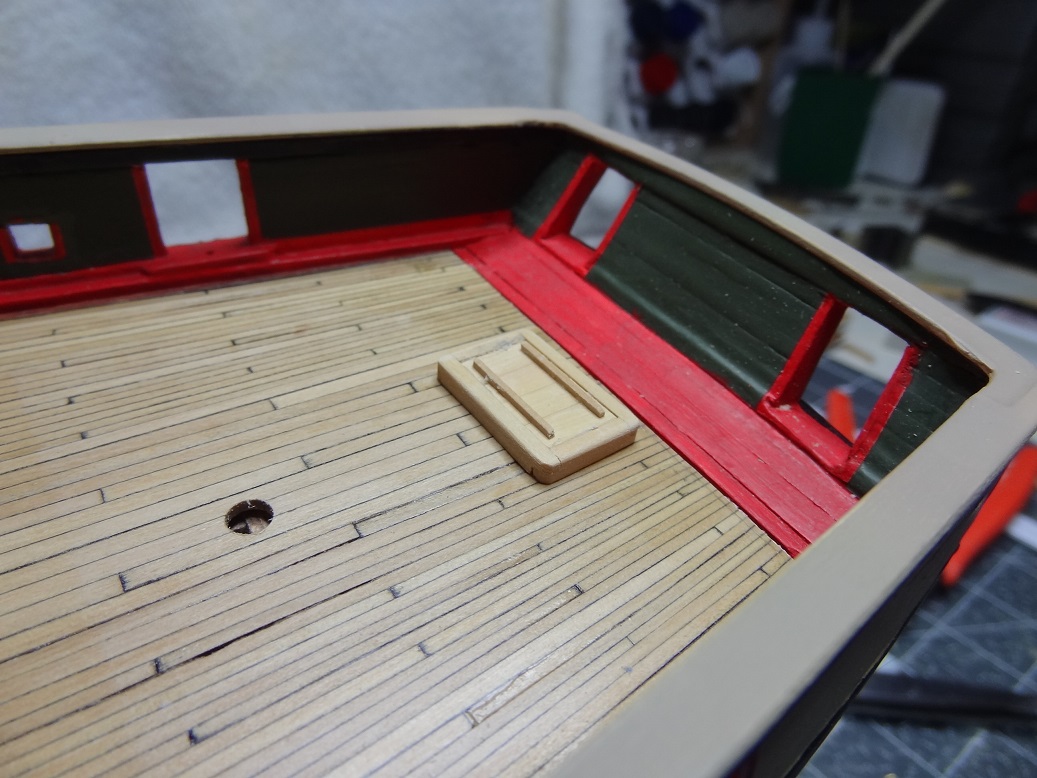
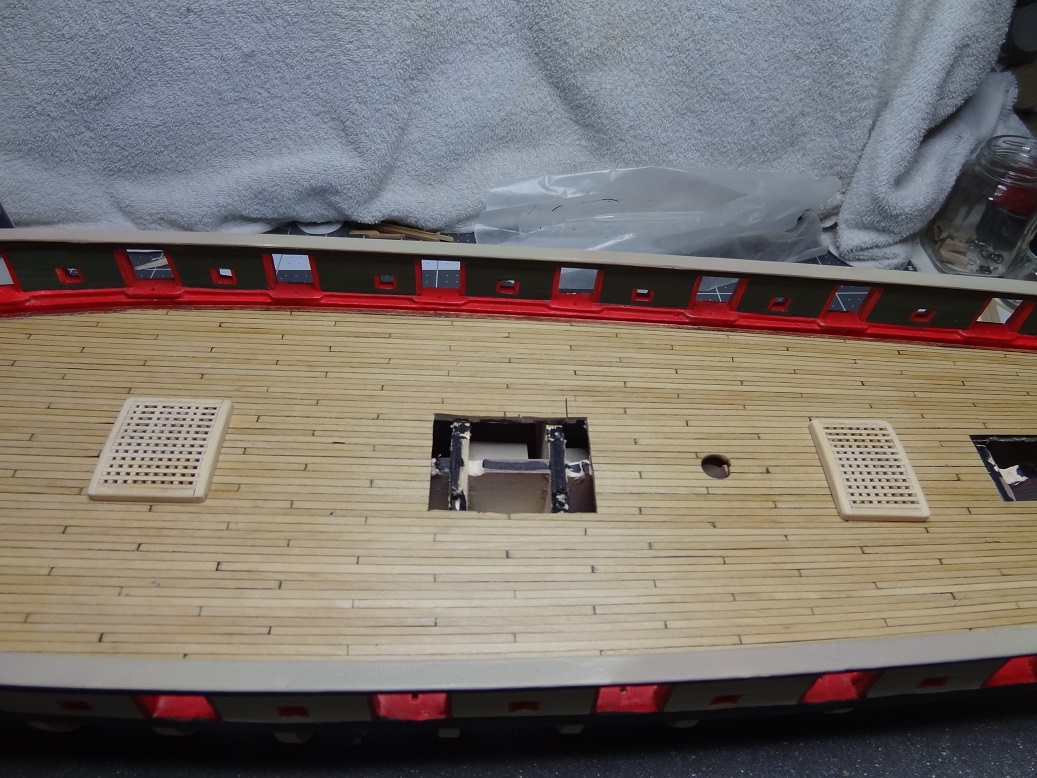
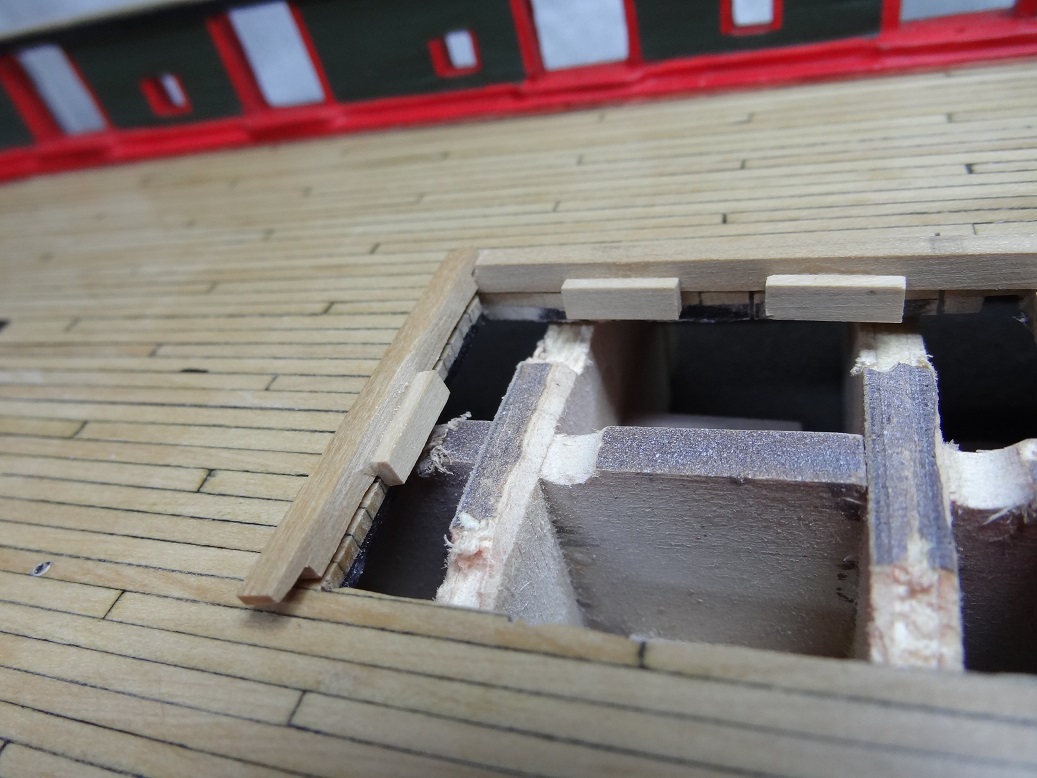
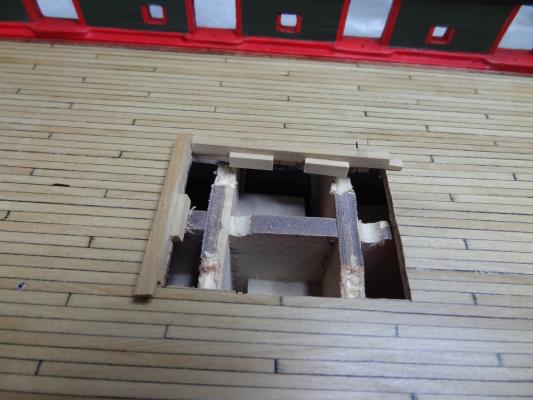
Smart guy Elijah - I would not thought of handling it that way. As Joel mentioned I have hand sanded the underside of the frame pieces to fit. Joel - there are holes (really squares) cut in the deck but I had not planned on mounting structures to the underlying bulwarks/keel. You can see I took another approach. The frames sit on the deck with a strip glued to them to keep it snug against the deck edge. The strip is also at the right height to act as the lip to lay the grating on. Of course this method did require me to sand a curve into the bottom of the pieces that run athwartship. I can see now, if the structures were mounted on the bulwark/keel inside the holes, then the deck curvature becomes irrelevant.


- 843 replies
-
- 2
-
-
- niagara
- model shipways
- (and 2 more)
-
I will have to look into how to arrange a tour.
-
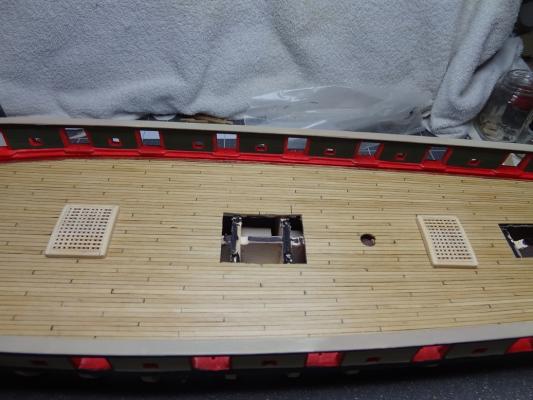
Well, already found one thing to do prior - one more hatch hole to cut. Man that would have been ugly to do once installed. I've been staring at that spot for the last hour and didn't realize it needed to be cut.
- 843 replies
-
- 2
-
-
- niagara
- model shipways
- (and 2 more)
-
Elijah - I built a frame shaped like the deck and planked that outside of the hull. It was a good step for me but not all boat designs allow for this. The idea is to then glue the frame (with the deck) to the top of the bulkheads, which is where you would normally lay down your deck planks. I believe there are a some pix a few posts back. There is a slope in the deck - think centerline from the bow to stern as the peak. The deck slopes slightly downward on each side as it moves out to the bulwarks. So if you were to glue anything flat on the centerline, it would teeter like a seesaw. Right now the deck (uninstalled) is flat. After I glue it in, it will not be flat any more. The coaming pieces I am talking about are just frames around the deck hatches. But they are flat pieces that cross the centerline.
- 843 replies
-
- 2
-
-
- niagara
- model shipways
- (and 2 more)
-
Can your fingers reach it? Will plain old sandpaper work? I use Tamiya sanding sponges. They have grit from 180 to 1500. The sponge backing makes them a little less abrasive. Amazon has them and sometimes MegaHobby. They are a little pricey, so I don't use them for everything. But they do have their place.
-
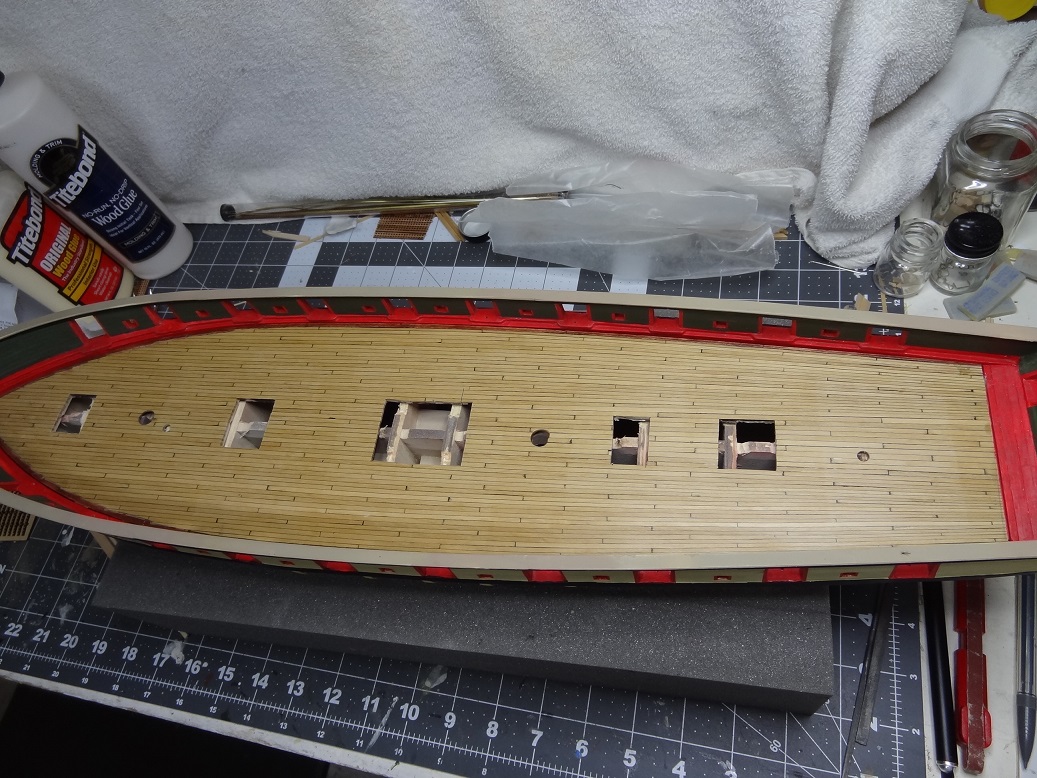
Have been having a really good thread regarding grates & coamings. I've fabricated several "versions" of the coaming pieces and made my decision but have also come to a realization (and a big step). The pieces will be crossing the centerline of the deck, which as of this moment is still separate from the hull and lays flat on my workbench. When the deck is installed, the centerline will be at a peak and and the deck slopes outward from there. If I start gluing things to the deck now, a lot of it may pop up when the deck is suddenly not flat any more. So, time to install the deck? I think so. I am trying to think if there is anything else I need to do before I glue the deck down. I do have the mast chocks glued to the keel, but beyond that I can't think of anything else. I would appreciate your thoughts on this.
- 843 replies
-
- 2
-
-
- niagara
- model shipways
- (and 2 more)
-
Would love to see their shop. I am only 30 minutes away from A&M.
-
Helpful as always Joel. Your drawing made me realize I have been looking at this with the deck on my workbench. I haven't really taken into account the beams (bulwarks) directly under the cutout - except I know some will be visible. Bill, I will look into your recommendations. The books sound helpful. A few pictures or sketches can go a long way. While I am not planning a scratch build in the near future, I don't have a problem with adding "my take" to the build. Especially with the wealth of knowledge here at MSW. That said, I do have the "semi-kit" Lexington on the shelf. A step in that direction. I did finally get a repeatable process for making the coaming pieces with a half lap joint. Sometimes I just struggle with the table saw. I like to think I'm a smart guy, but it can be very humbling some times.
-
Elijah - one of our Golden Rules - never throw anything away. That even goes for sawdust you may generate from cutting and filing. I have several jars full of it. I say this because a good filler can be made of white glue and sawdust. Mix to the consistency of soft clay, then you can press it into any gaps. If the gaps are thin, you can add a bit of water to your filler. Allow to dry and then sand. Maybe you can get some sawdust at the shop.
- 701 replies
-
- 3
-
-
- phantom
- model shipways
- (and 1 more)
-
I've seen that link Bill, although I haven't read it yet. It appears that A&M has a model shop at some level. What a great class! I did just recently buy Crisman's book on Eagle. I'm about half way thru it. He is a good historical writer IMO. I have found the book interesting and easy to read. A good part of it describes a reconstruction, which should help me out some. To change the topic slightly, I'm struggling with the coamings right now. There needs to be a bit of a lip that keeps the coaming at the edge of the cutout and also a notch that runs lengthwise to set the grating into. For the notch to work best, the coaming pieces should have the ends mitered which I have done. While this looks very nice from a woodworking perspective, I'm having doubts as to the historical accuracy. Keith's pic (see above) shows what looks like squared ends with overlapping notches (sorry, I don't know the correct term for this) cut into the ends.
-
That's a good point Joel. I had not considered the British big boats to have been similarly constructed. I figured the lesser grade materials was due mainly to the hurried construction. No time to find nice big oaks and more time to dry the wood. But as you point out, had they done so, they may have never got out of the harbor. It's all so interesting!
-
Great idea Bill! Will order this evening. Well I bet Dr. Parsons didn't have a light problem. Just curious, if there had been time to cure the proper wood if the situation would have been any better?
-
Gaetan - I am not thinking out of the box yet. You obviously are. I have 1/8" sheet that could be sanded then cut. grsjax - I do have a good thumb plane. However the corner edge that will be removed will be face up on the deck (the strip is used for coamings) . I'm afraid the slightest inconsistency will be quite obvious. Not sure I trust myself to get it perfect for about 36" of strip. Thanks everyone, I'm going to give Gaetan's idea a try this evening.
-
I think the deck will be OK Mark. It was built outside the hull and has it's own frame which includes frame around the cutouts. I was more concerned with the hull framing - bulkhead and keel pieces. It did just occur to me that if I cut a small section out of one of those pieces I could add so reinforcement right under the cut.
-
Hi Everyone - I'm not real experienced with my Byrnes Table Saw yet. I imagine there is probably an easy trick for what I need to do. First off the table saw does not have the angled deck option. I have a 1/8"x1/8" strip that I need to take off one of the corner edges for the length of the strip. Obviously the angled deck would have solved my problem, but I'm guessing there are other ways to do this. If the piece was larger, I would probably just use my disk sander. But I don't feel comfortable sanding a smooth even surface on a 1/8" stick. How would you do it?
-
Cool! - Hope you like it. It spoiled me very quickly. Now your kit wood can be used for experimenting.
-
Henry - the pic is helpful although it confirms my fear about the coamings I am making. The height in the pic looks maybe ankle high - 4"-5" inches. I'm using 1/8" square strips which would make them closer to 8" at scale. Joel - I like your ladderway idea, although the aft deck opening may not be wide enough for side by side grates. However, it is a good direction to head for. If you are referring to the lower deck being at water level, I can confirm that Eagle was that way. There were comments made that the Surgeon was in as much danger working below deck as the gunners on the top deck, due to this fact. On larger boats that area was below the water line which made the area a little more protected from a direct hit to the hull. E.J. - good suggestions for "darkening" below deck. This kit has nothing below the main deck so that leaves options. Does anyone think I would do harm to the structural integrity of the model if I removed some of the bulkhead that crosses under the ladderway? I believe this is the only opening that I would have to do this. The others should be fine with something black covering the bulkhead under the grates.