mikiek
-
Posts
2,276 -
Joined
-
Last visited
Content Type
Profiles
Forums
Gallery
Events
Everything posted by mikiek
-
I've found several videos on "how to" but my questions are more "with what". In real life I'm assuming all rope starts out a similar color - none of it is black. I would think that this is also true for the yarn/twine used for seizing. For certain purposes, some ropes are then tarred. Would seizing on a tarred rope be tarred after it is lashed? Then there is the marlin question. Google that and there are many different colors - most seem to be a variation of chocolate brown. Back in the 1812 period, would marlin have been used most of the time? If so I'm guessing that on any particular ship, it probably all came from the same source and would be the same color? JC Frankie, I hear ya on the oversized thing. With some of the experimenting I have done, the seizing thread was so thin it didn't really add to the visual thickness at all and if it was the same color most people would never know it's there. While this is probably closer to real life, it's tough because I think most of us want people to see all the hard work we went thru. It's kinda like serving ropes at 1:64 . A lot of people say why bother? If you do it right you'll never see it. But at the end of the day, I know it, and that's good enough for me.....[step down from soapbox]
-

Masking Problem
mikiek replied to mikiek's topic in Painting, finishing and weathering products and techniques
That makes sense Kurt. I can see now how even a paint job requires some strategy. It required a lot of extra coats of primer and paint to get the buff over the red, whereas red over buff probably could have been 1 coat with little or no edge from the tape. Before this is over I still may have to go back and do just that. Is there such a thing as too much paint on a surface? -
Masking Problem
mikiek replied to mikiek's topic in Painting, finishing and weathering products and techniques
Allen - I am not following you. I painted all the ports red first. Then laid the tape down over those. I painted the tape edges red. After that dried I sprayed on the primer and then the buff. The primer was necessary to cover up the overage from the red - buff by itself will not cover red without a lot of coats. Whether I use red or clear, I think the idea is the same, fill up any areas of tape that might wick up additional paint layers. Ray may be on to something. Not sure if there is a rule of thumb about this, but perhaps I should have started painting the bulwark areas that have the lightest color (buff in my case) first. Then mask the lite color and move to an area that needs a darker color. It might not take so many layers of the dark color over the lighter color. In dealing with this as it is, I tried a 1500 sand sponge on a few of the edges. While it smoothed out the edge a little, it also took off some paint, which will require more hand painting to touch up. I'm slowly losing the nice airbrush finish. -
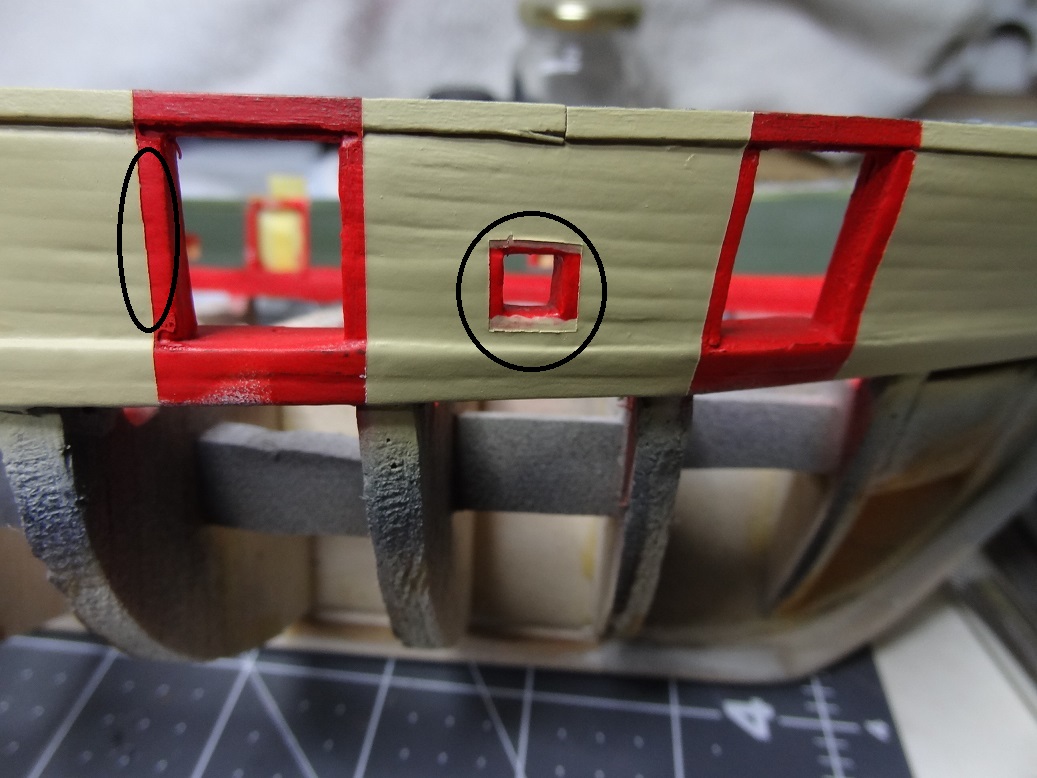
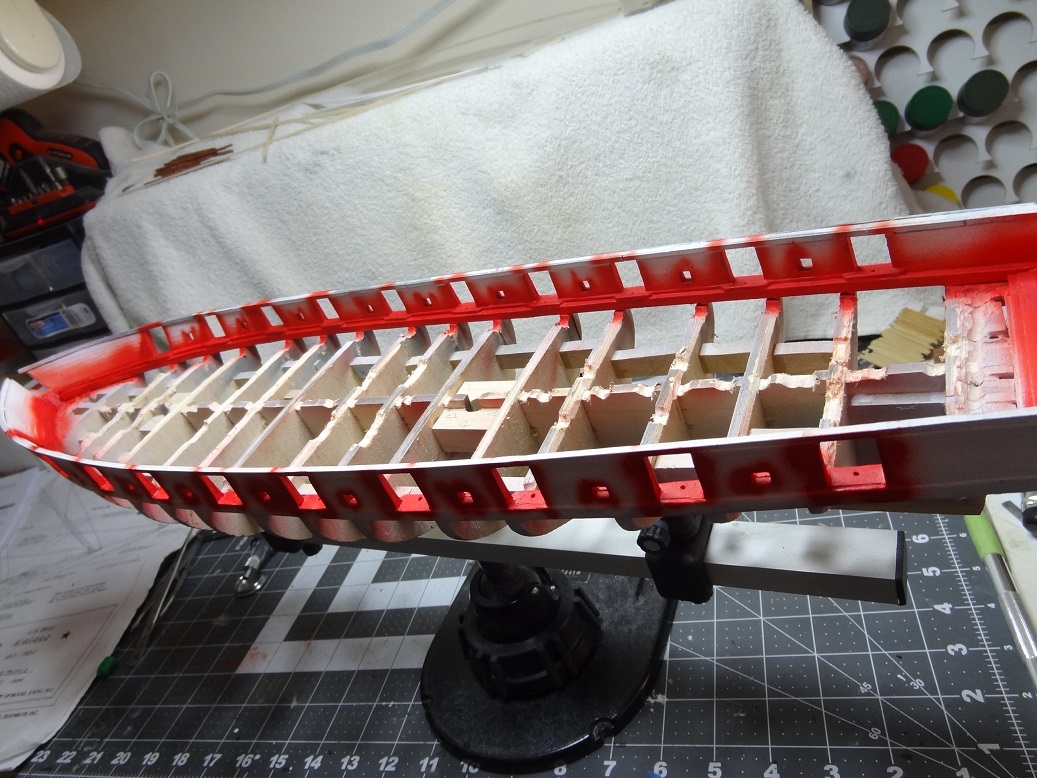
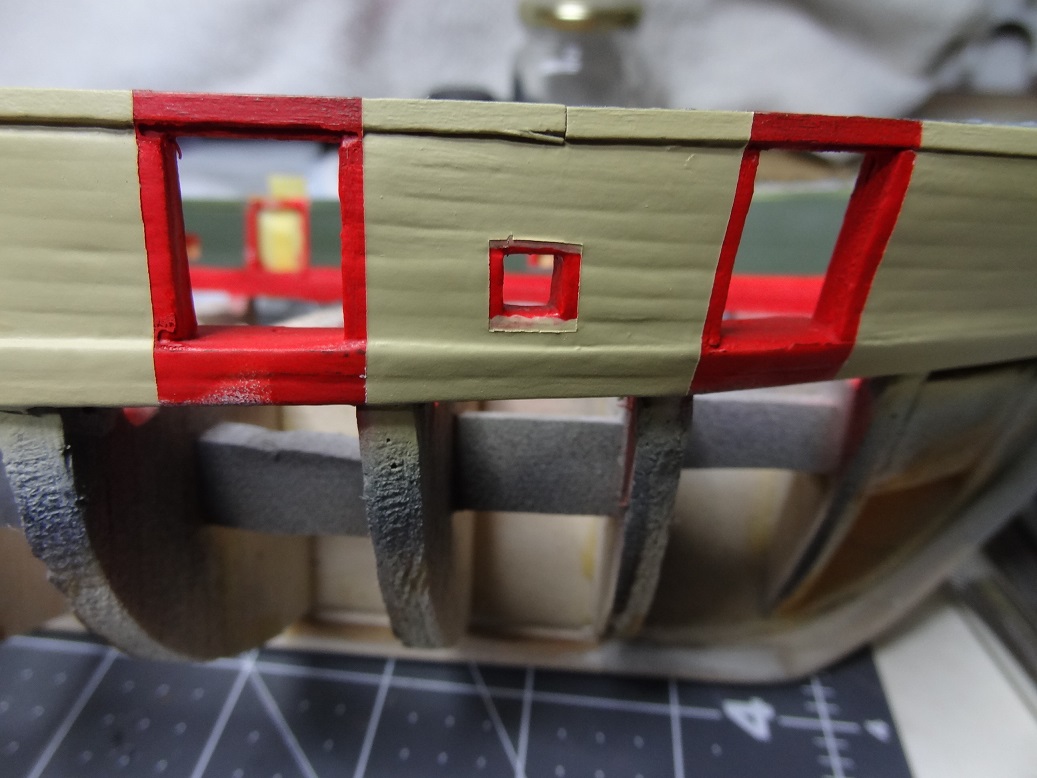
It was time to paint the bulwarks on Niagara. I had painted the port side once before and had a nightmare of a time with paint seeping under my masking tape (Tamiya). Given that the paint I had saved had dried up and matching colors would be tough, I decided to repaint the port side with newly mixed acrylic paint so it would match up with the starboard. I also learned here about painting over the tape edges with the color you are trying to protect and I did that this time. Then on with the airbrush painting. The masking did a pretty good job this time, although it created a new problem. With 3 coats of primer and 2 coats of color the tape left a raised edge when I pulled it off. So 2 questions. 1. Is this preventable? 2. How to deal with the problem. I'm trying to hand paint those spots, building up more paint inside the edges - this doesn't seem to be helping. Next, do I consider sanding the edge?

-
Hi Everyone - before I get too far into seizing for my build I wanted to get a few things straight. I apologize as some of these questions are answered in bits and pieces elsewhere, but it would help me now to see it all in one place. The build is 1813 Niagara at 1:64. The thread sizes supplied in the kit are (or at least claim to be) .008", .021", .028" and .051" . 1. Is there a rule regarding seizing thread size compared to what is being seized? I'm thinking at this scale, just use the smallest stuff I have? 2. Color. I've read twine or marlin (marline?) was used for real. But a quick search for marlin turns up all sorts of colors. 3. Do I use matching colors for seizing thread and the rope to be seized? Or use 1 consistent color for everything? 4. Number of turns? This seems all over the board. 5. What book would get me closest to rigging done in that period? Thanks.....
-
Thank you Elijah - there is a lot of good history regarding the Great Lakes portion of the War of 1812. Completely unknown to a lot of folks. Until I started Niagara, I would fall in that group.
- 843 replies
-
- 2
-

-
- niagara
- model shipways
- (and 2 more)
-
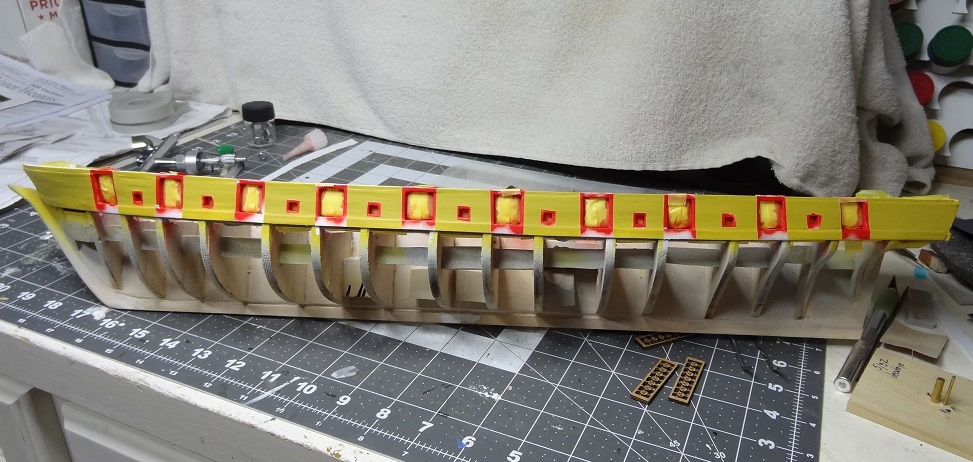
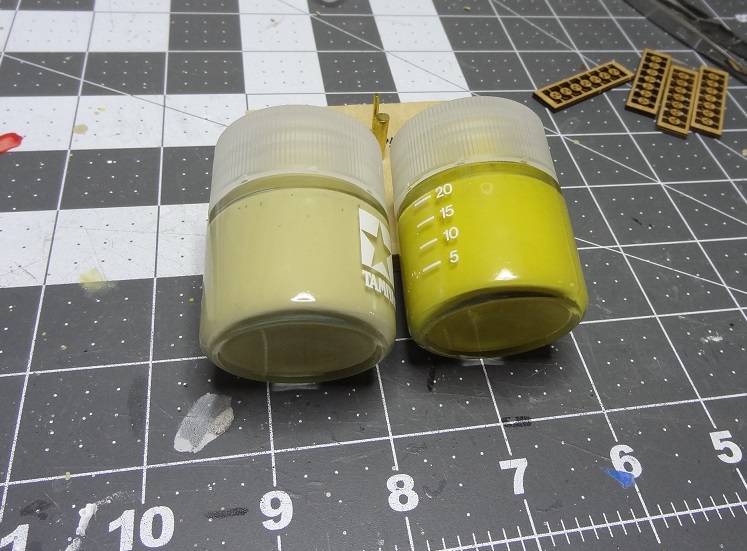
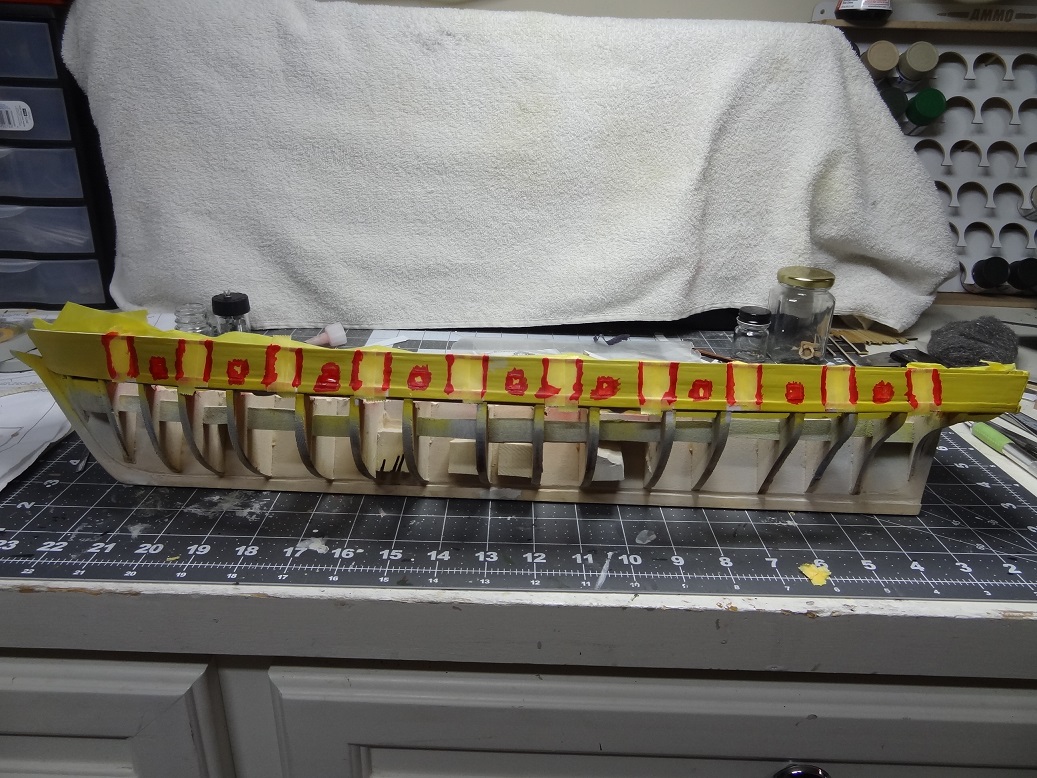
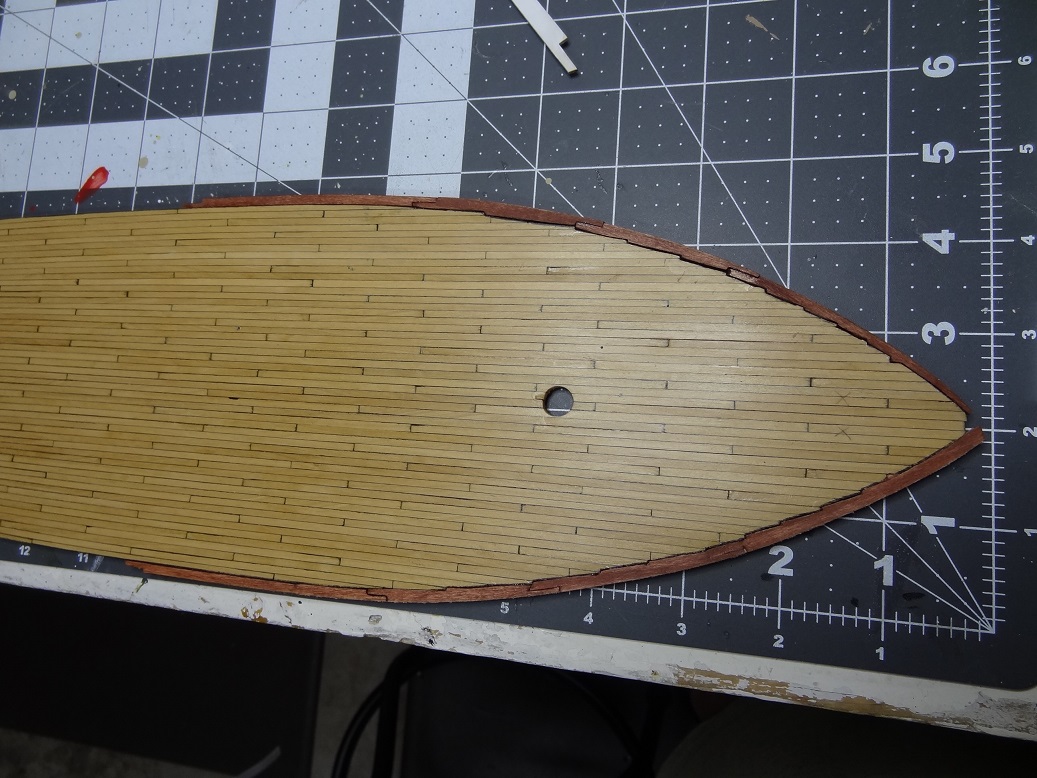
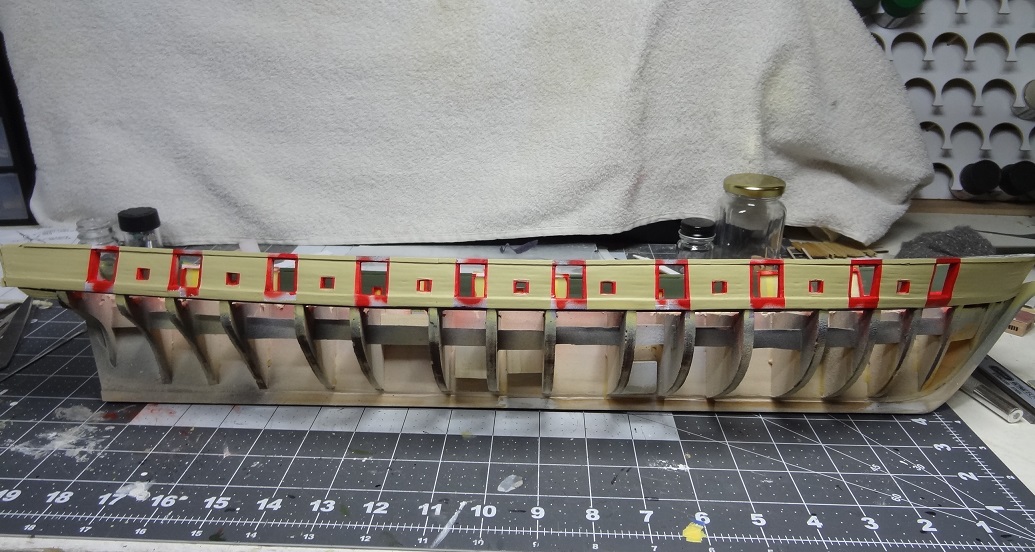
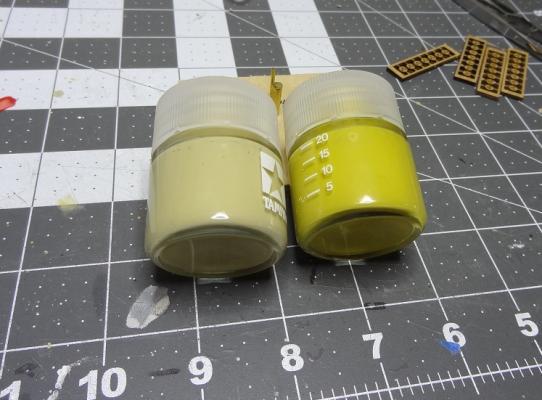
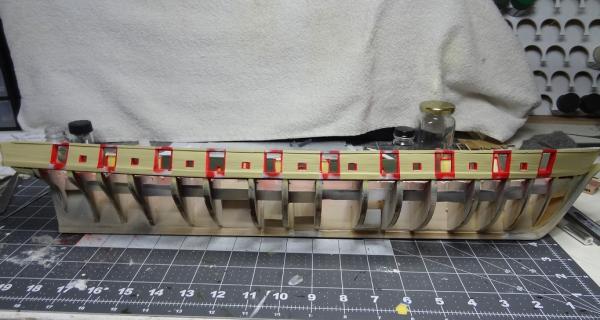
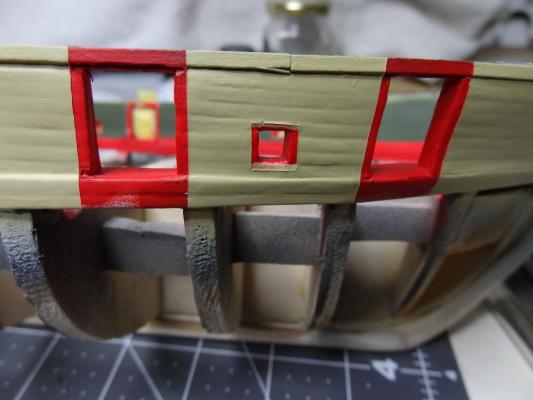
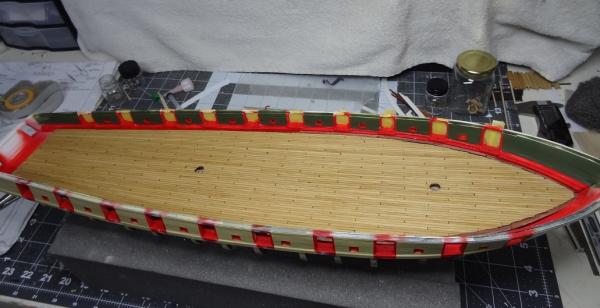
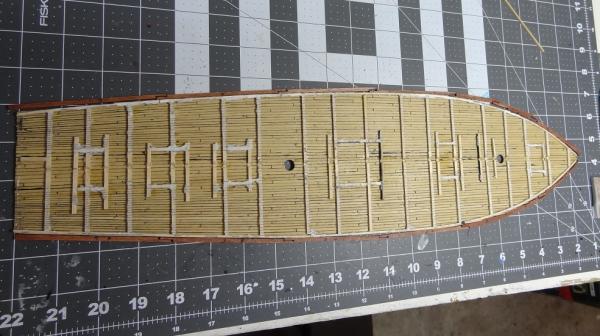
Lots to log this evening. I wish every weekend was this productive. I'm still painting the bulwarks. To backtrack a little, here's the waterways and port trim started out. As mentioned earlier, I started the outward with a modified yellow. The Tamiya Flat Yellow is just too bright, even after I "browned" it up some. French's Mustard comes to mind. I've taken Joel's suggestion, rather than a yellow base and adding Buff, I took a Buff base and started adding Flat Yellow and Flat White. It was sort of a "season to taste" excercise. I didn't make notes but I made a pretty big bottle of it. Here's the comparison. The result below. The gunwale will be painted back - a nice contrast. There will be a black shoulder above the gun port ceiling and then the handrail. Prepping the Yellow side for the recolor. For all the masking, I painted the tape edges with Red to keep the other colors from wicking under - 2 coats. This worked out much better than my first painting episode. The one problem with masking, after 3 coats of primer (to cover the Red overage) and 3 coats of color, there is actually an edge when I pulled the tape off. There's always some hand touch-up after removing the masking, but it looks like I am going to have to touch-up with several coats to build up the the edge. You can see here. I have also completed the strapped deadeyes for the fore top. As I mentioned before, I had to notch the top edges to make a spot for the strap (see pic in previous post). I used a dot of CA to hold the deadeyes in the notches, and then re-glued the reinforcement strap (my own addition) back to the top edge. And I have finally taken the plunge and begun gluing the nibbing strake to the deck. After seeing a few pix of Joel's Niagara build, particularly the deck, I had an idea. Rather than making some sort of black filler to fill in the space between the strake and the deck - I have struggled with this for weeks - why not eliminate the space? One of those "duh, moments". So between coats of paint, this afternoon I did a lot more shaping on the strake pieces. There's still some gaps, but it's much better. The outer edge of the strakes still need to be sanded down to fit in between the waterways, but here is the deck just dropped in. Kind of nice looking. With the weekend gone, the painting will go a lot slower, 1 maybe 2 coats per day, instead of 4 or 5. I've still got the inward starboard bulwark to paint and the outward port to recolor. The touch-up around the masked areas is going to be pretty time consuming. I can only do so much of that before the hand starts shaking. Then it's on to the deck. After reading Joel's write-ups, I will be considering using just grating were several structures are called for in the plans. And finally I can get the deck on the boat permanently.


- 843 replies
-
- 4
-
-
- niagara
- model shipways
- (and 2 more)
-
Ahhh, the illusion of smallness. While the look of the kit deadeyes is not bad (except for some of the hole spacings) I like Chuck's better. I got to thinking maybe I can just run them in the block tumbler a bit longer. That might reduce the size a little more.
-
What a wonderful read Joel !!! All of them. And I feel like I got to know you a little better. Your research is truly amazing. Interestingly, you and I had many of the same requirements when choosing kits. I didn't know much at the time, but Niagara seemed like an obvious choice. I am now feeling quite guilty over a number of build choices I made. The paint, the deck for starters. Your conclusions regarding them seem so obvious. It's very tempting to backtrack and redo them. Fortunately, some of your other points, the deck structures for instance, I have not yet started and will reconsider their necessity based on the facts you point out. And yes even I - the newbie - wondered how the capstan would be turned with all the clutter on deck! As for my yellow, I just finished painting the port outer bulwark this afternoon and tore off all the masking. Then I came in and found your links. Even with my last adjustments to the paint it still looks like a Coney with lots of mustard or 'a circus wagon'. Your idea of a buff base colorized with a sprinkling of other colors is more appealing. Honestly I like the black outside white inside idea, but as a display I think it needs a bit more than that. Sad but true.... Thanks for all your input to my log. I've learned a lot from you. Not just facts, but how to think about this hobby.
- 843 replies
-
- 2
-
-
- niagara
- model shipways
- (and 2 more)
-
If I had a few builds under my belt I probably wouldn't have to ask this, but right now I have nothing to compare to. I am building Niagara - scale 1:64. The parts list states 2 sizes of deadeyes 1/8" and 3/32" . In actuality, the 1/8" are really 5/32" and the 3/32" are 7/64" . So right off the bat I am starting with deadeyes that are a bit over sized. Why does this matter? I was hoping to use Chuck P's deadeyes as a replacement but I am running into a size difference there too. Chuck offers 3mm, 4mm, 5mm sizes. The 3mm would be quite a bit larger than a 3/32" (the stated size) but not much larger than the actual size 7/64" . Same story with the 4mm and 5/32" . The raw numbers: 3/32" = 2.4mm but the actual 7/64 = 2.8mm 1/8" = 3.2mm but the actual 5/32" = 3.9mm What I am trying to determine is if I could go with Chuck's 3mm and 4mm sizes? They are a little bigger than the kit supplied and I don't know if that would be noticeable. What do you think?
-
I agree with Dee_Dee - could well be the color. I did buy some linen thread recently to experiment with a ropewalk. As mentioned it is often sized as something like 18/3 or 30/3. When I was searching for thread I noticed a lot of sites related to antique books sell it. I believe it it used in the binding. Of the 3 threads I ended up with, 2 were manufactured in Germany, 1 in Ireland. One interesting side note, virtually all thread you buy is a right lay. The 2 German threads were left lay.
-
MIxed up some yellow for the outward bulwarks. That Tamiya Flat Yellow is BRIGHT - even with some darkening colors. The first coat looked like mustard on a hot dog. I've added a fair amount of flat white, buff and even black to tone it down some.
- 843 replies
-
- 2
-
-
- niagara
- model shipways
- (and 2 more)
-
I forgot one big task. Before getting the deck in I have to repaint all the bulwarks. Started that last nite. I also forgot how tedious the masking is. I believe I said this before - 90 minutes of taping for a 2 minute paint job and then you rip it all off. Due to the cheap paint jars I used, what little paint I had leftover from the first painting attempt is no good so I'll be mixing all new colors. It could be a blessing in disguise. There wasn't enough leftovers to do the entire job (both bulwarks) so at least I don't have to do any color matching. I made a new red for this try. The Tamiya Flat Red looked a little off to me. I think the flat finish made it look a little darker than it is. This time I added some white and a touch of clear semi-gloss. It looks a lot better. I'm hoping I learned a few things from the first time I did this.....and man, how sweet is the airbrush!
- 843 replies
-
- 2
-
-
- niagara
- model shipways
- (and 2 more)
-
That's so weird. I've tried Golden Oak on boxwood and it looks awful. On basswood like yours, it looks great!
-
Hey - a follow up for this. Given I will be building kits for a while and I like 1:64 and we are saying that 1:100 is too small, where do you draw the line? I've seen a 1:85 kit that I like - Corel Eagle - which I guess is close to in between. There's also a 1:89 that I like. Are these scales going to get weird like the 1:100 or are they manageable?
-
Looking good! What kind of wood is that?
-
Elijah - I am avoiding hull planking like the plague. Anyway I want to get the deck fastened down first. For that to happen I have to fit the deck with nibbing strake - lot's of sanding. I also want to get a handle on the deck structures - probably cut out the openings for them and get some coamings installed. Thinking about it, hull planking will probably be one of the last things I do. If it weren't for rigging it would be the last thing, but it would be pretty tough to plank a fully rigged build
- 843 replies
-
- 2
-
-
- niagara
- model shipways
- (and 2 more)
-
Nibbing Strake
mikiek replied to mikiek's topic in Building, Framing, Planking and plating a ships hull and deck
For posterity I will finish off my solution. There are more details in my build log along with pix. The bow of the deck had a nib on every plank. I finally decided it would be problematic to try to carve this many nibs into a plank or sheet, so I sanded down every other nib. This made things more manageable but still leaves the nibbed look. Then I traced out the deck outline on some styrene. I also drew an arc about 1/4" beyond the tracing. I cut this out so I ended up with a strip the length of the deck with the nibs on one edge and the straight edge about 1/4" further out. This would be my template for cutting the wood pieces. As the deck edge is curved at the bow area, I had to decide how wide a wood plank to use and how those would lay on the template. Then I decided where I would have room for scarph joints and marked that on the styrene strip. After that it was just a matter of cutting the wood strips. I used 1/4"x1/16" strips at the bow where all the nibs are. As the deck profile becomes straight towards the aft end I switched to 1/8"x1/16" . There was a fair amount of filing to do to get a nice flush fit with the deck. I plan to glue the nib strakes to the deck and then sand the outer edge so that the deck + strakes fit between the waterways. -
achuck40 - I was speaking of wood sheets. They might have been helpful in my situation because they come in all widths and thicknesses. Some are solid wood and some a mini ply-wood. They can be had at most hobby places where you buy wood str
-
Thanks John - yeah we're having some fun. Doing this kind of little stuff I find intriguing, but it's a painful reminder how fat my fingers are Hey on a side note - I was revisiting the Niagara pix on your site, looking at the deadeyes both in the tops and chainplates. They look dark in color. Are those painted? Stained? Just weathered? Just wondering, as the photo on the front of the kit box appears to show them untouched. The deadeyes in the kit are kind of a gray/brown color. I need to decide whether to paint them or leave them. Thanks again for your site. It has been the ultimate reference guide for me.....
- 843 replies
-
- 2
-
-
- niagara
- model shipways
- (and 2 more)
-
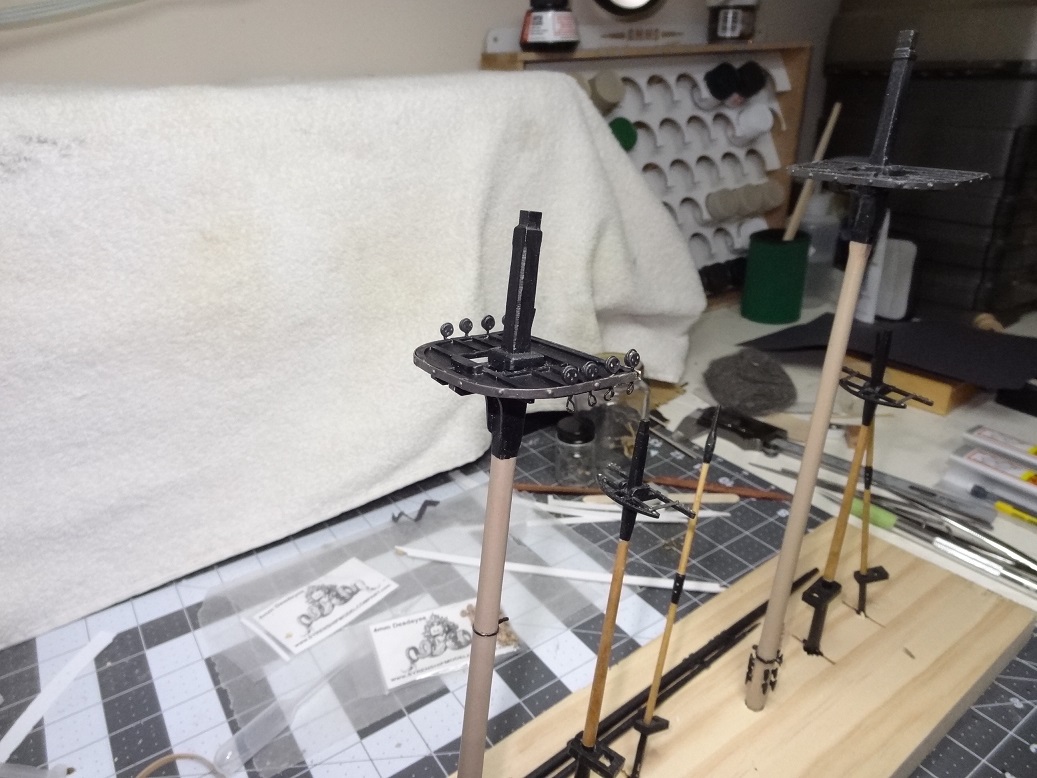
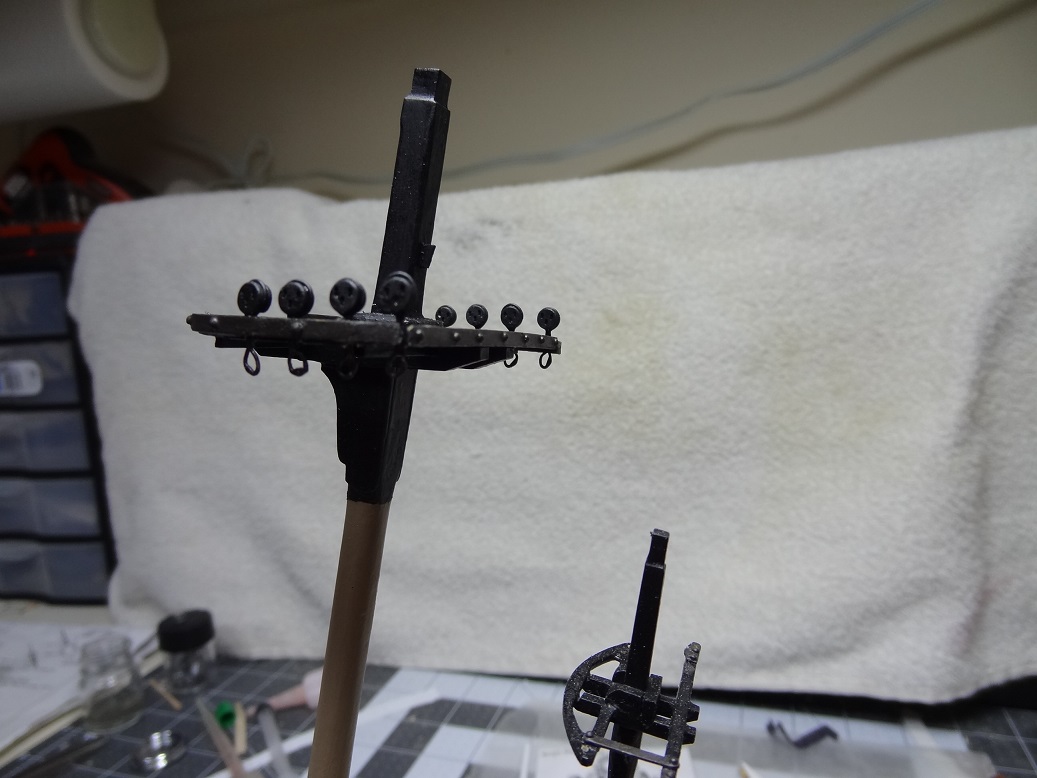
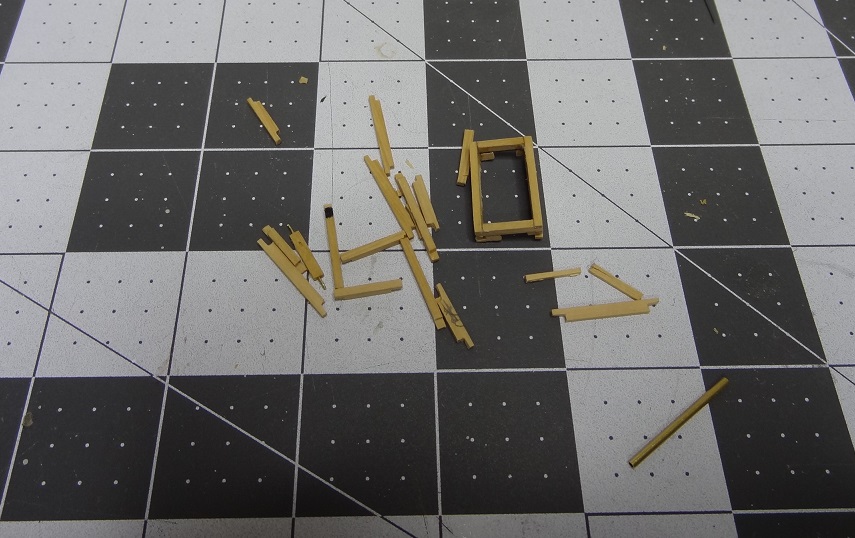
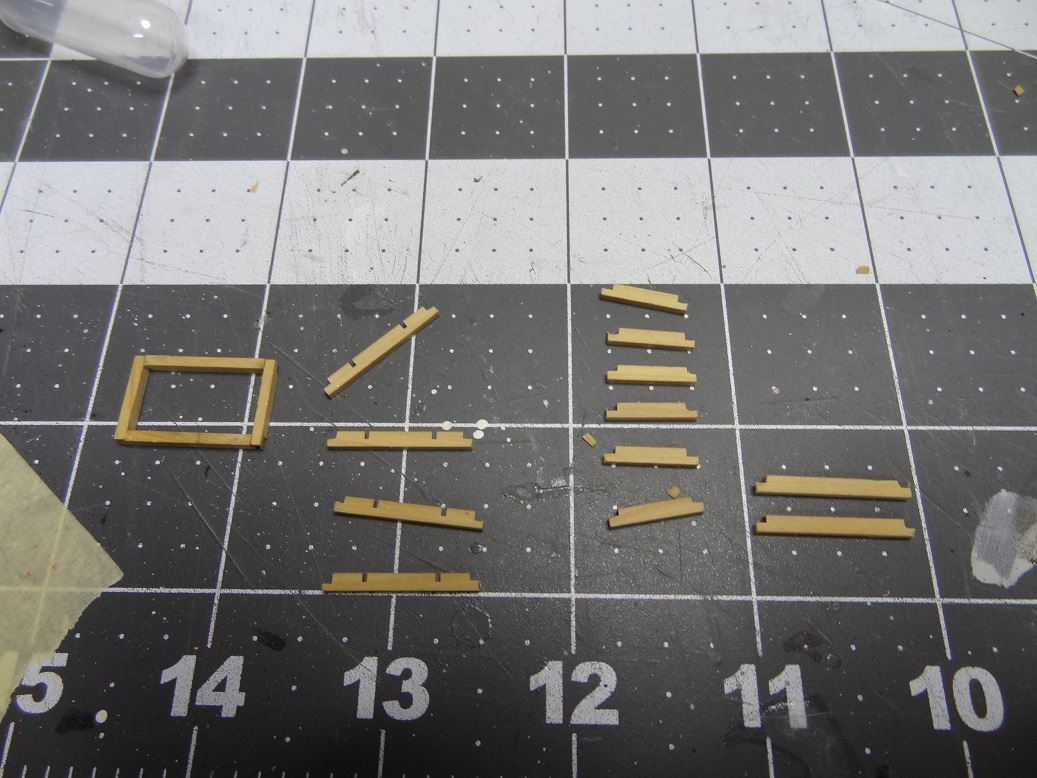
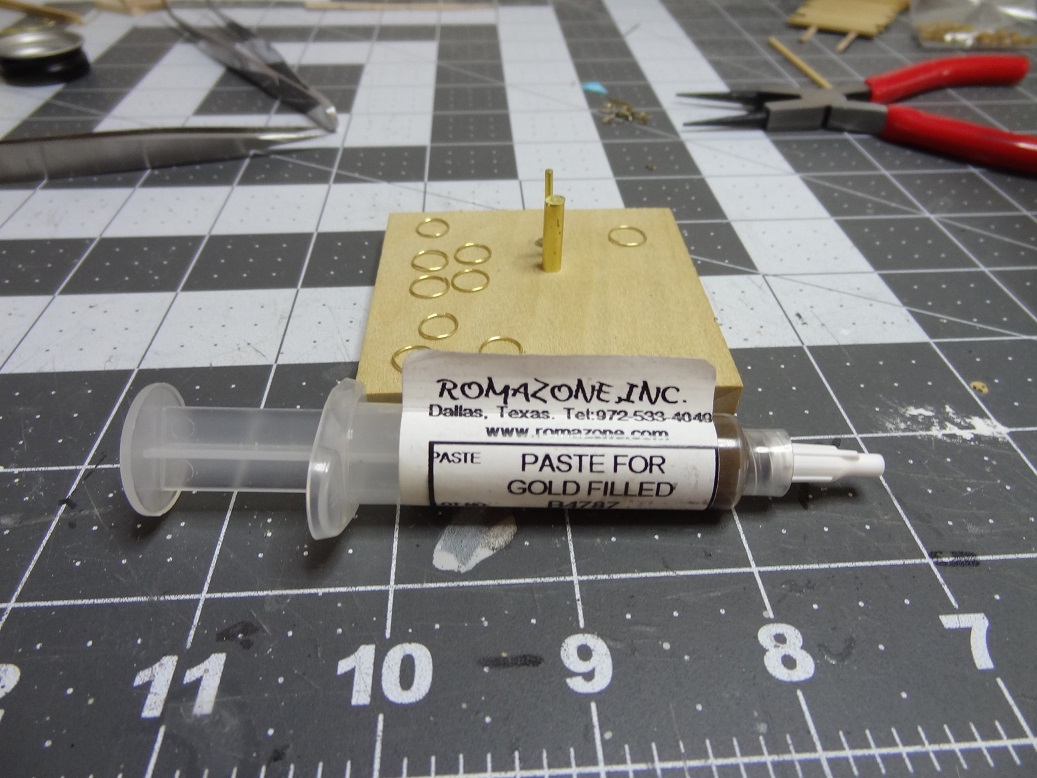
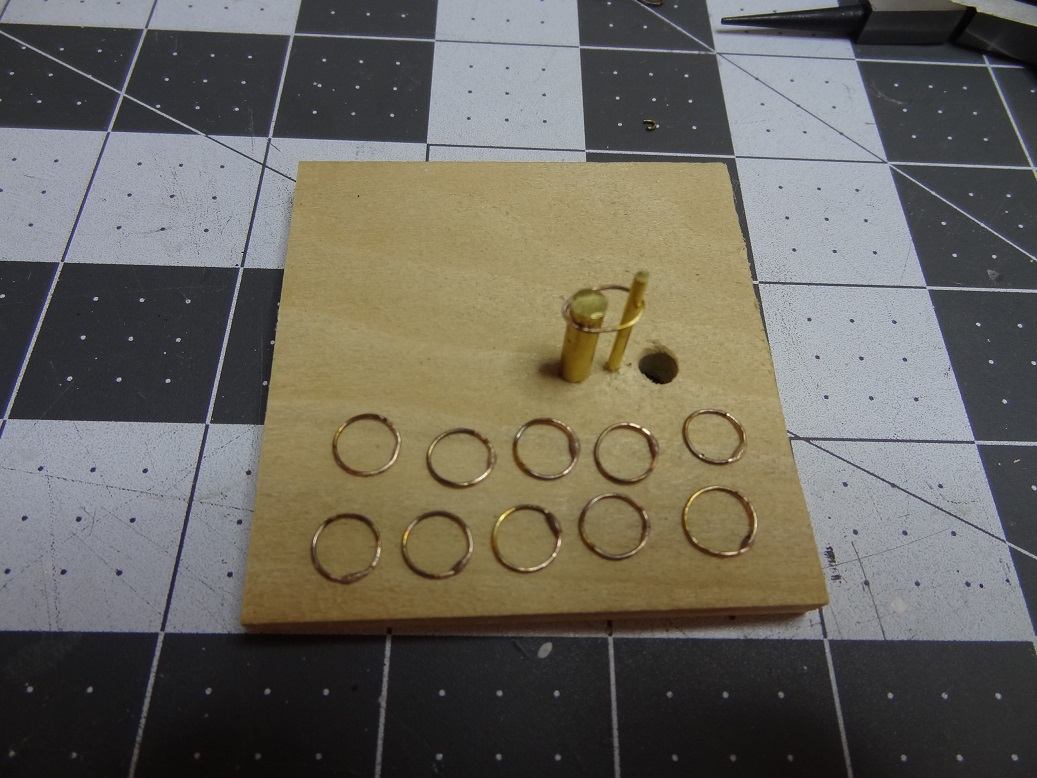
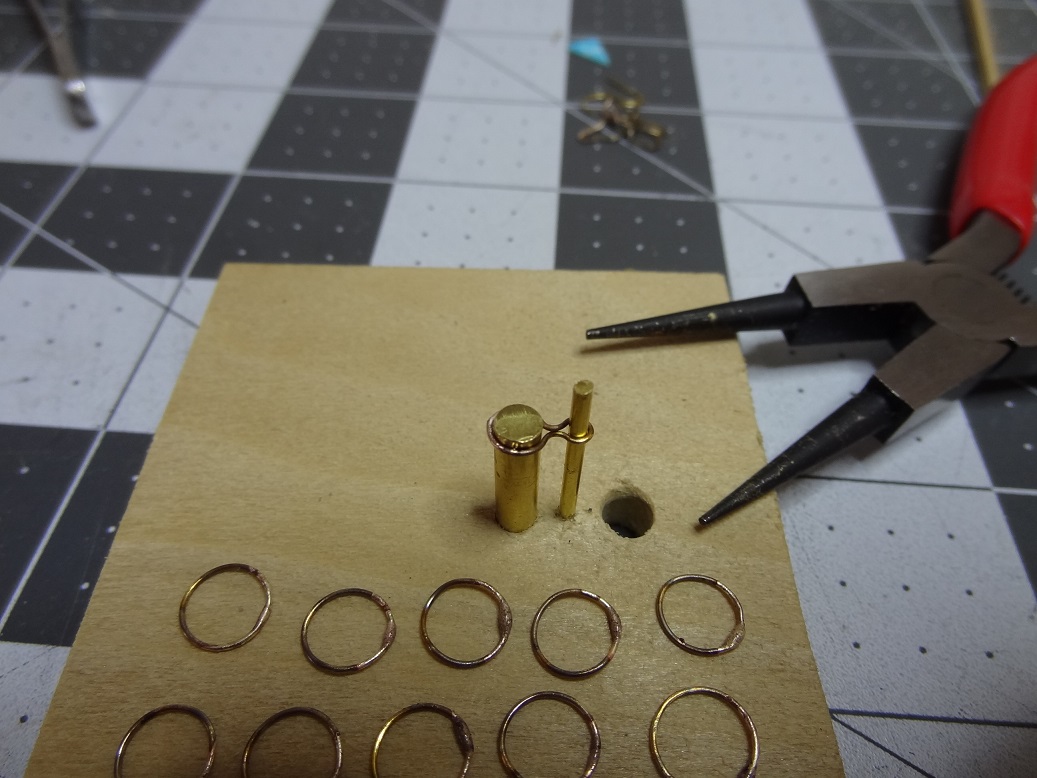
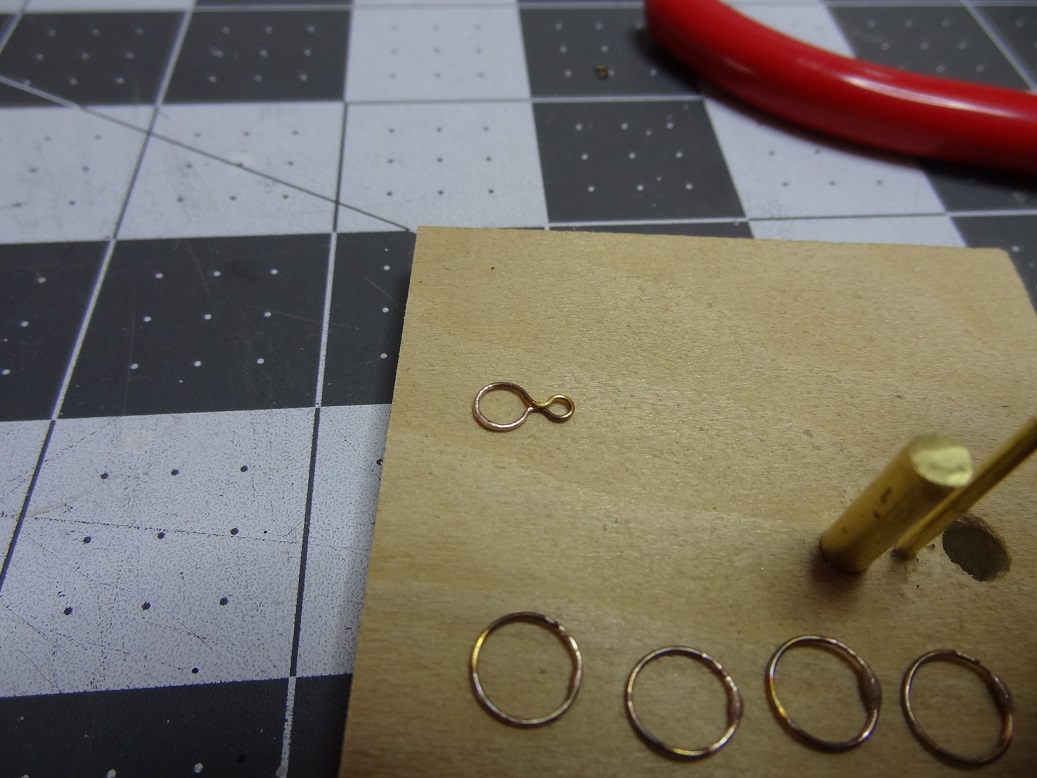
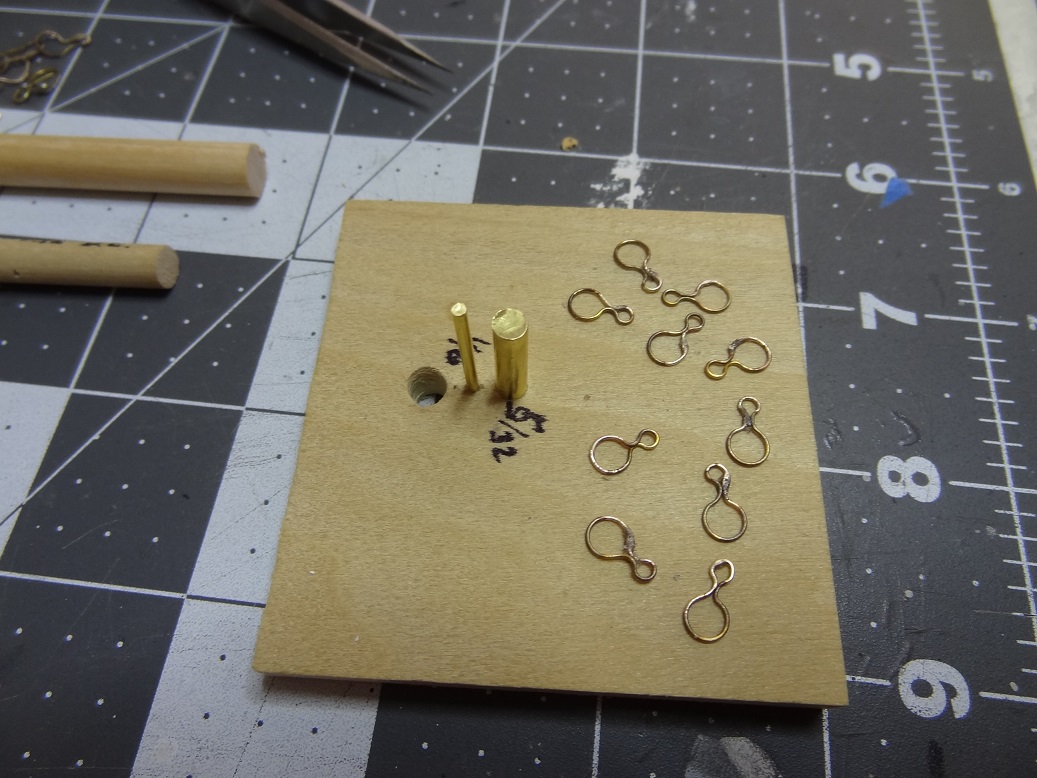
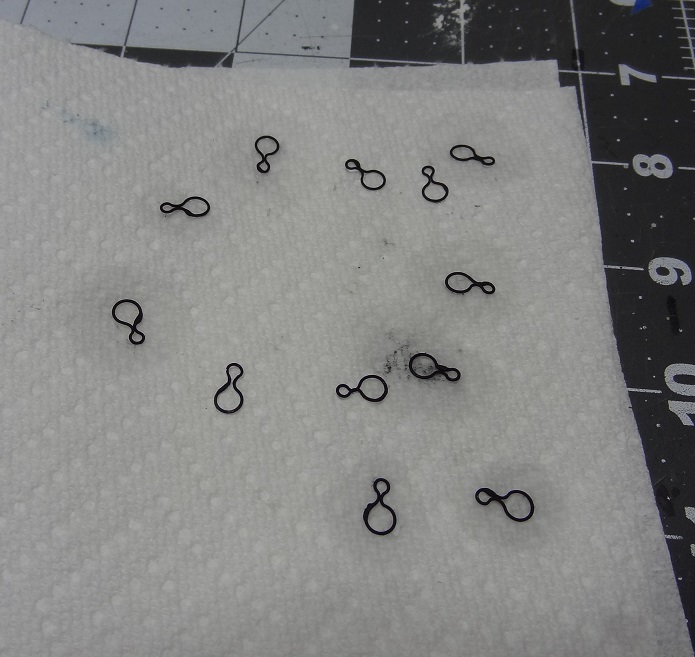
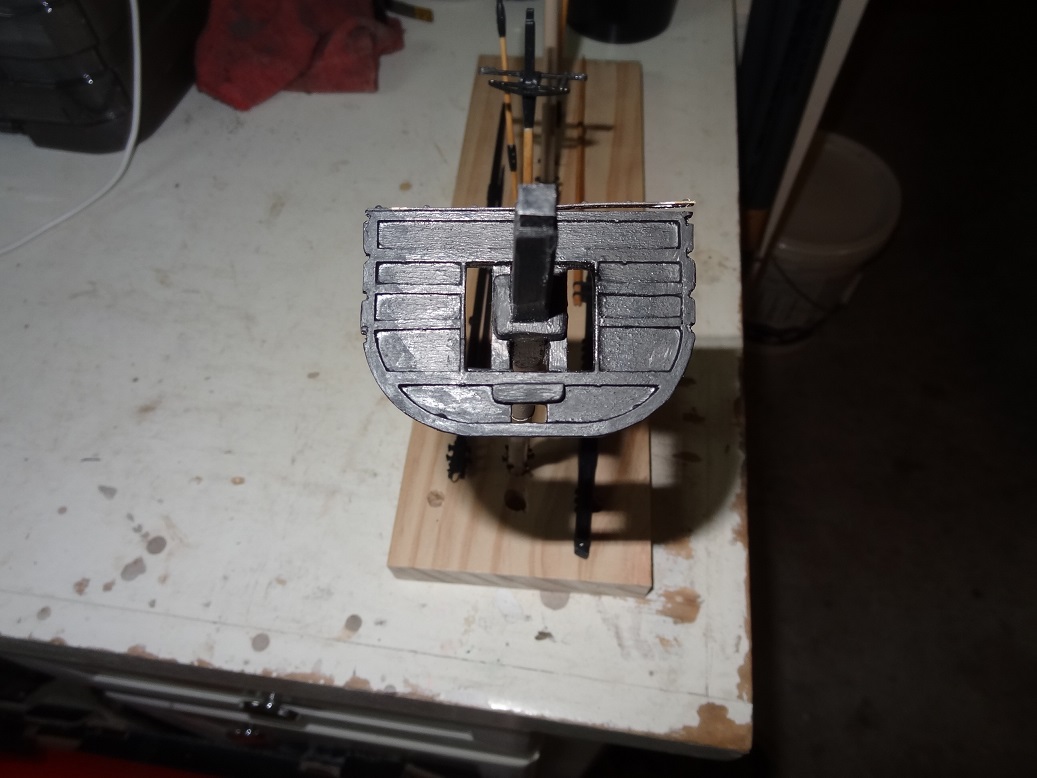
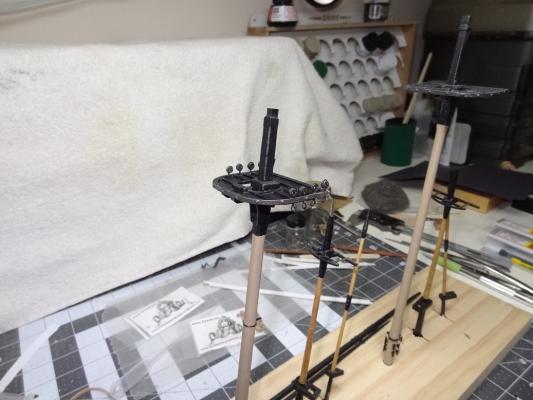
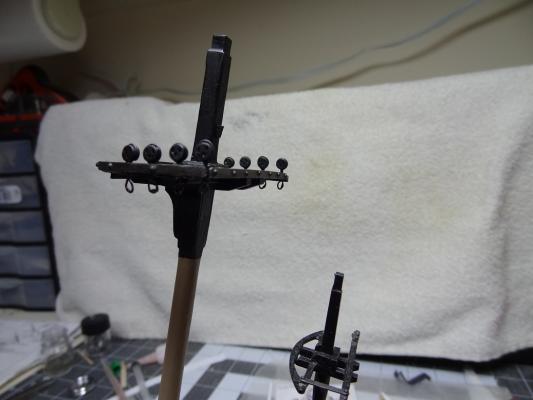
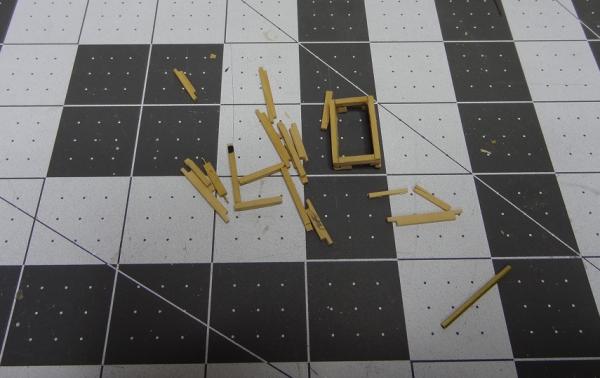
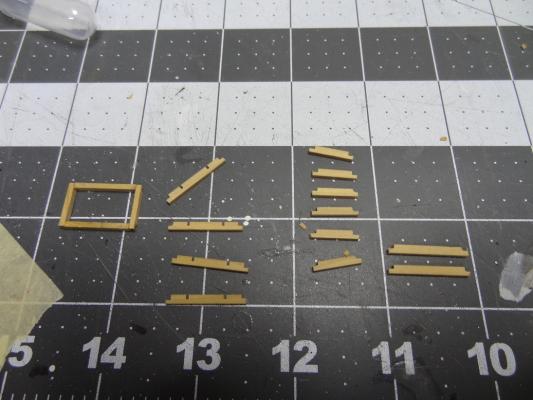
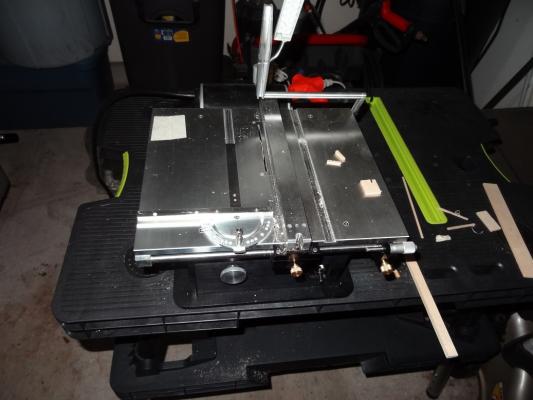
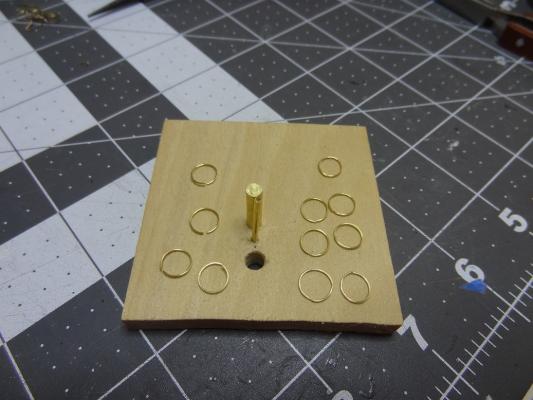
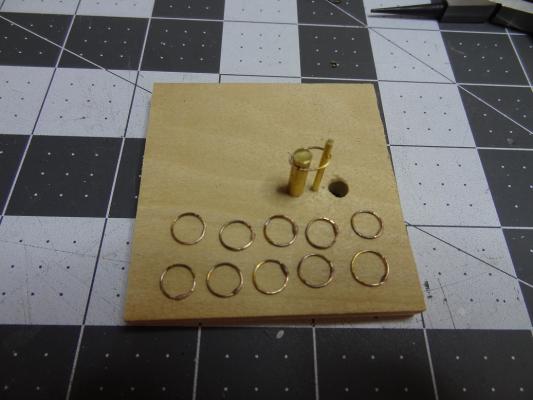
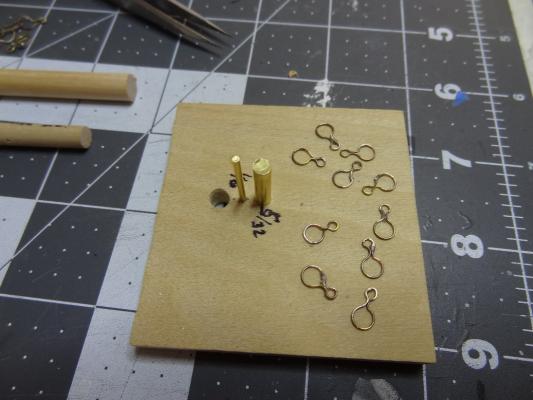
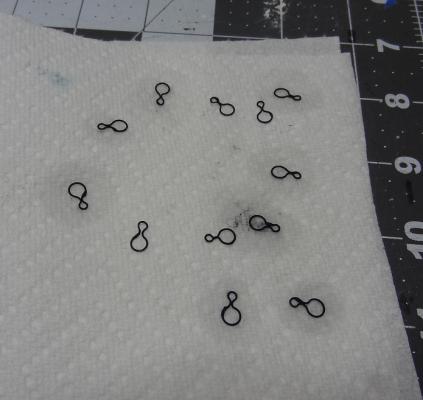
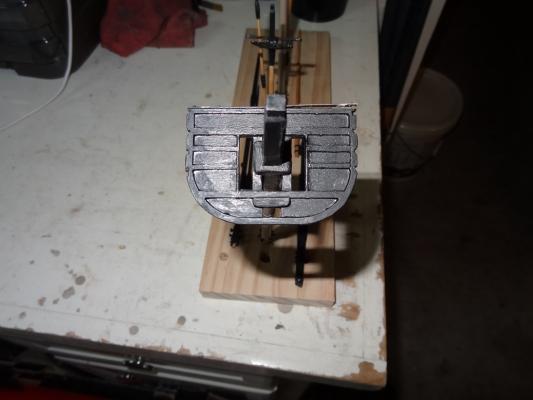
Happy DST everyone! Hope you survived your first night. Personally I hate this, but I would take it if they just keep one or the other. Enough said. Been busy on several fronts. I've wanted to get to work on the deck structures, so Friday night. I started the Captains Skylight. Not much fun. I really wanted to make the joints at the plank ends, but trying to put a dovetail in a 1/16"x3/32" stick - not likely. So I ended up compromising, by notching the ends. I was trying to hand cut/shape the side planks and going nowhere. No two planks the same length. Same with the notches. By the time I got to the second row the rectangular footprint was starting to look more like a rhombus. A pretty big scrap pile was forming. Frustration set in so I called it a night. Next morning the kid starts thinking. Time for the secret weapon. Shoulda gone here first. Things start taking shape nicely after that. I've finished a first attempt, including the barred windows and a moveable flap (I thought that was a joke at first). Did not include pix as I am in the middle of painting. Next up, given that I have the masts assembled, I have been wanting to start some rigging. Not necessarily running line yet but things like adding all the tackle to the mast tops. Deadeyes for the edge of the fore & main tops were first. These are iron strapped with a small loop at the other end. It was funny (or maybe not) - I looked thru all the books I have trying to find a "how-to". There were tons of pix of the finished product, but I couldn't find a single tutorial in my library. I did find one here at MSW and used that as a starting point. The kit deadeyes are 1/8" and 3/32". The larger ones are used in the tops. I have been struggling with the deadeye kits from Chuck P. The first batch I made I lost 50% of them in the block tumbler. I have since improved on that but for the deadeyes described here I used the ones in the kit. They don't look that bad, much better than the blocks. So as the tutorial describes, I wrapped some .01 brass wire around a 1/4" dowel. The 1/4" came after some trial an error, trying to find the correct length of the wire and then a matching diameter dowel. I slid the coil off the dowel and cut them making rings. Below you can see a sample. Some are still open, some are close fit at then ends. Now time to solder the rings. I struggled with this same exercise a few months back, trying to make rings for the spanker mast. They did not come out well. At the time I was using a low heat silver paste which may have had something to do with it. I've switched to a gold paste now. I did that mainly for the color, but I have found this mixture just works better for me. For one thing, the joints come out much smoother with less residual. The stuff is VERY forgiving! I did not clean the pieces first and some of the joint ends were not butted together well. All usually bad things for a hard solder. I found that when heated the solder did not ball up at the joint, instead it seemed to fill and the rest just ran out along the wire. Very little cleanup to do afterwards. The paste cost more than a silver, but in my mind it is worth every penny. Your mileage may vary. Soldered rings - no touch up So after the soldering is where I broke away from the tutorial. I found I was struggling to take the ring and squeeze a deadeye sized loop on one side then trying to make an additional loop on the other. I made a jig to help me out and it worked quite well. Pardon me if someone else has already done this. I am not trying to plagiarize. The loop for the deadeye actually has to be larger than the deadeye so the deadeye can be squeezed in afterwards. For the 1/8" deadeye I found a loop of 5/32" works well. The loop on the other end I wanted to be 1/16" So I found 2 short brass rods, one for each dimension. Drilled a couple of holes in some scrap wood and inserted the rods. The distance between the holes being how much iron between the deadeye loop and the small loop on the actual strap. The ring is then squeezed a little bit to a shape that will fit around both rods. You can see this on the previous pic. I found that it is actually easiest if the shape doesn't quite fit around the rods. I can then stretch an end slightly to get it over the rod and this way the tension keeps the ring from sliding down the rods. Then you take some rounded long nose pliers (probably a better name for these) and quickly squeeze in between the rods. This starts the final shaping. A few more touch up squeezes finishes the shaping. I then took each piece and gave it a good squeeze in some parallel jaw pliers to flatten them out. Blackened Finally the deadeye is placed in the loop and a few more squeezes lock it in place. This has worked very well for me considering the first one I made by hand took over an hour and was quite ugly. I finished up 12 of these in under an hour and I think there is still room for improvement. Last note on this, the plans show holes apparently drilled into the wooden edge of the tops for these deadeyes. Well that just doesn't fly -at least not at my skill level. I ended up notching the edges. I will put the deadeyes in place, possibly with a dot of CA. Then I have a darkened brass strip to place around the entire edge of the top. Actually the strip was already there, I had to tear it off to make the notches. And if all that wasn't enough, I managed to make the starboard side nibbing plankset so the pieces for both sides are finished. I've stained these parts so the color scheme ends up decking - boxwood natural, nibbing - redwood, waterway - red. I'm trying to decide what to use as caulking here. I want a fairly thick stripe between the planks and the deck so just marking the edges with a marker will not be sufficient. I would show the top side of the deck but it sits on the frame (seen here) so it is slightly elevated and I can't fit the nibbing strakes up against it. And with that I will say good night!


- 843 replies
-
- 6
-
-
- niagara
- model shipways
- (and 2 more)
-
Wow, wish I had known about that. I used the standard type stain (the stuff you have to clean up with turpentine) and was concerned about applying acrylic varnish on top. I couldn't find anything saying "DON'T" so I did. There doesn't appear to be any problems.
- 843 replies
-
- 3
-
-
- niagara
- model shipways
- (and 2 more)