mikiek
-
Posts
2,276 -
Joined
-
Last visited
Content Type
Profiles
Forums
Gallery
Events
Everything posted by mikiek
-
 John - reviewing your pix again, I'm wondering about the colors of the unpainted wood. You may have seen my complaints about the Golden Oak stain - even though a lot of folks use it. The wood for many of the fixtures on the real boat looks like it has more of a red/orange tint to it. Even the decking in a few pix looks to have a rather dark color. I like the color in your pix a lot better than what I have tried. So 2 questions for you: 1. Have you come across any stains that are similar to the wood colors in your pix? 2. Were the unpainted fixtures all the same color? Were they the same color as the deck? Thanks.....
- 843 replies
-
- 2
-

-
- niagara
- model shipways
- (and 2 more)
-
Well I thought I would get a few strakes of the bulwark planking laid tonight. Ain't gonna happen. All the outer port frames and timberheads are going to have to be sanded back some. When I held a plank up to the framing it was flush with the gunwale. It needs to be recessed a little. I'm not sure what happened. It's not like I just hosed up a couple of them. They all need work. Have not even looked at the frame from the inside yet. Don't ya just love sanding?
- 843 replies
-
- 2
-
-
- niagara
- model shipways
- (and 2 more)
-
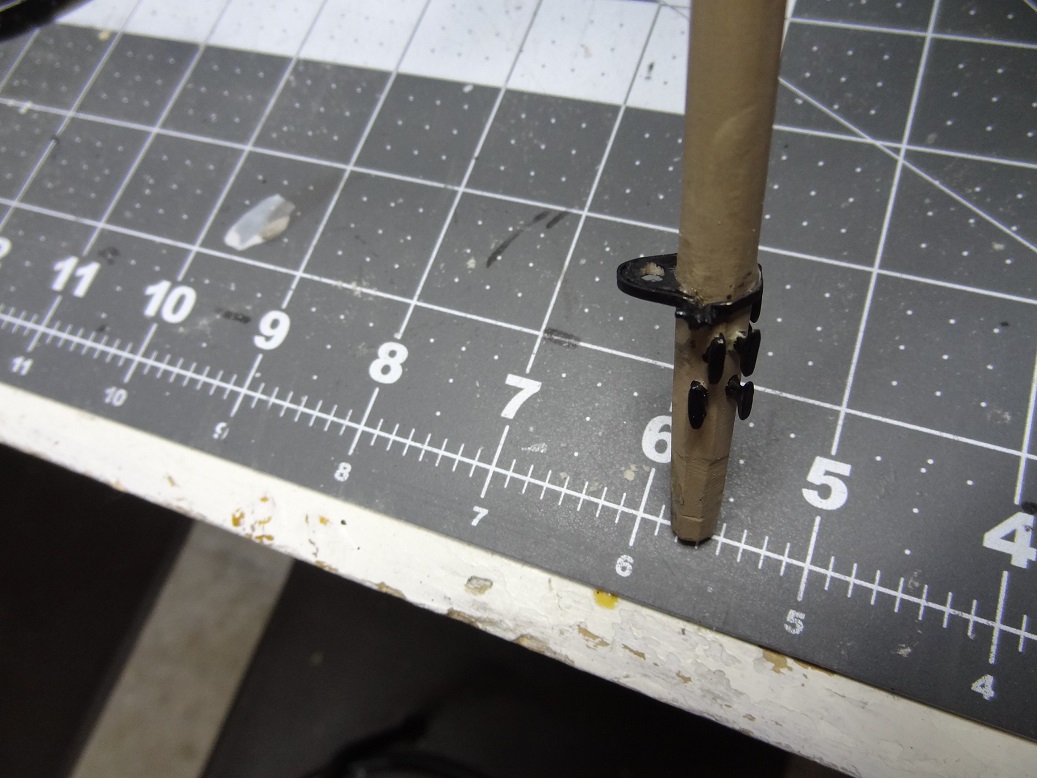
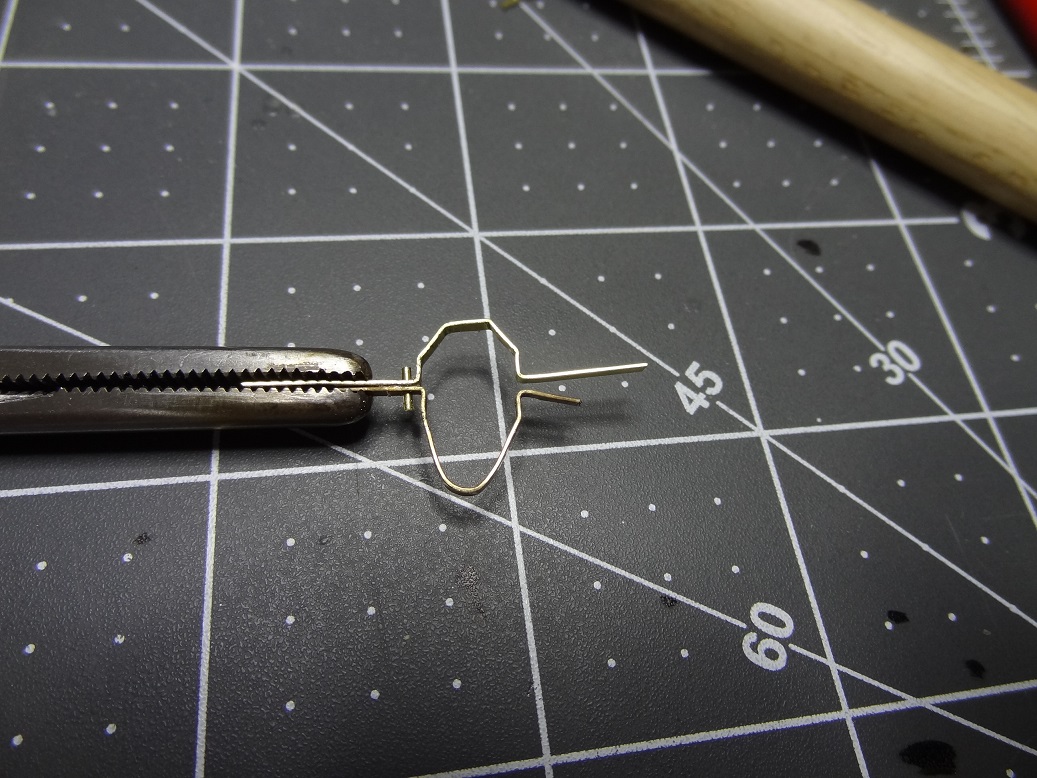
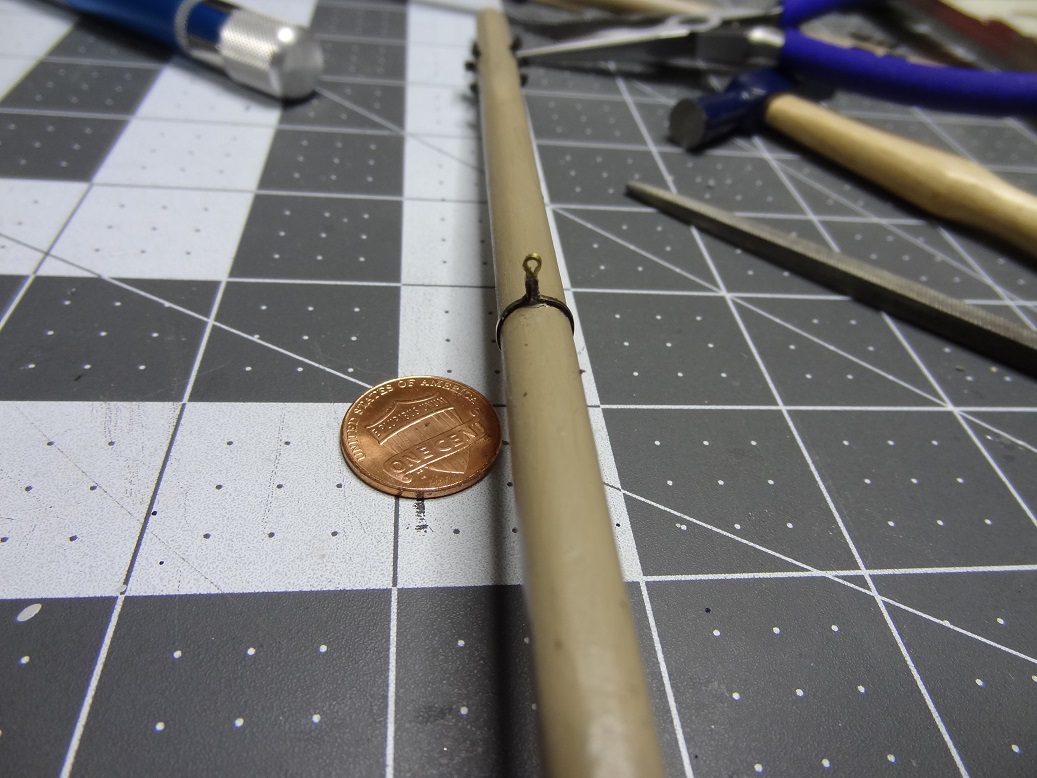
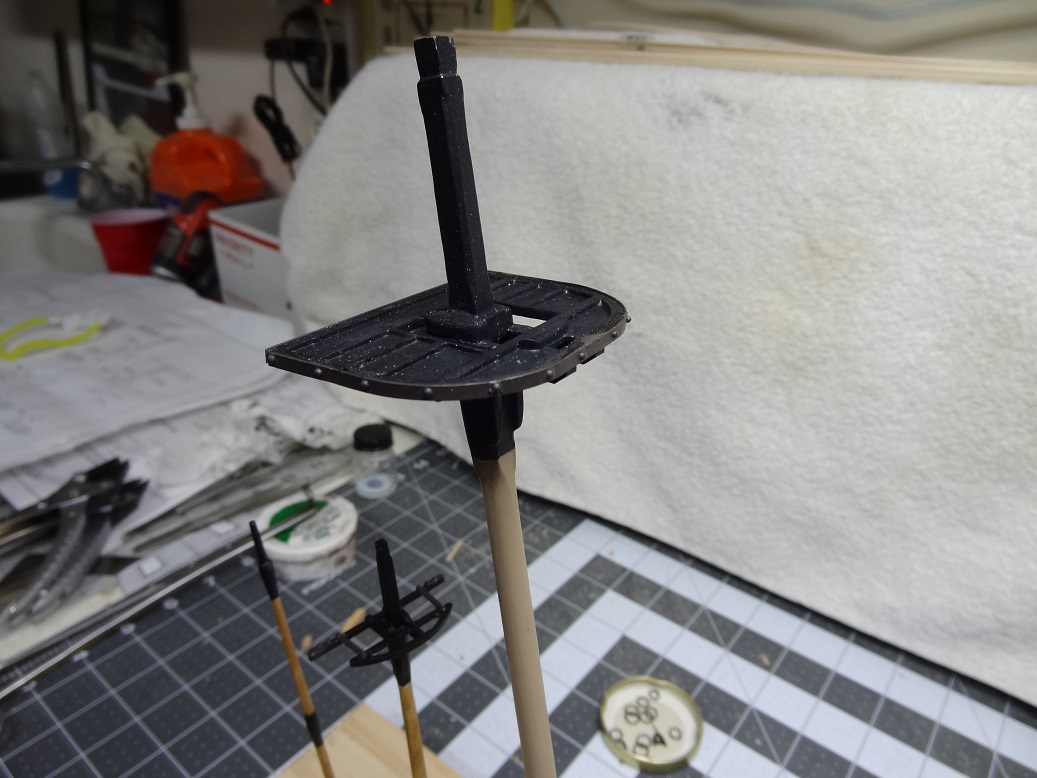
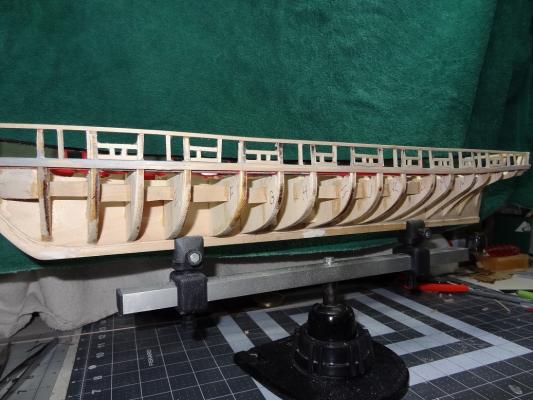
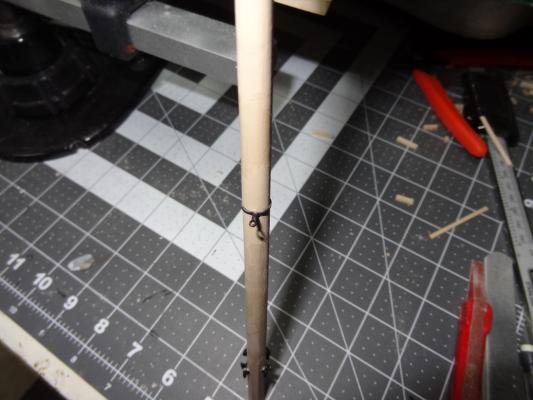
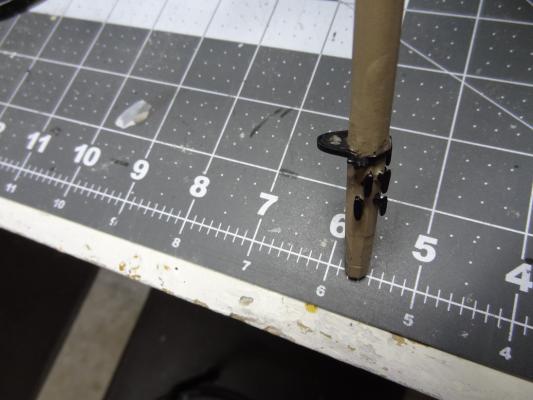
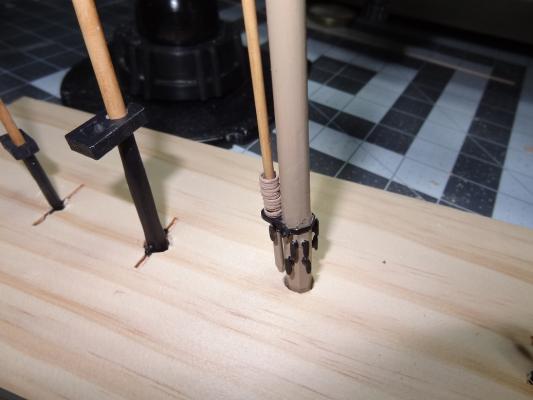
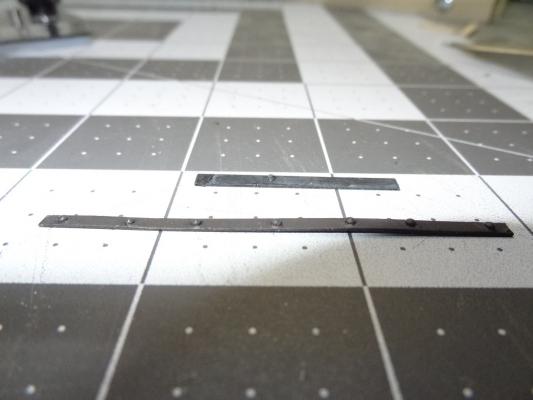
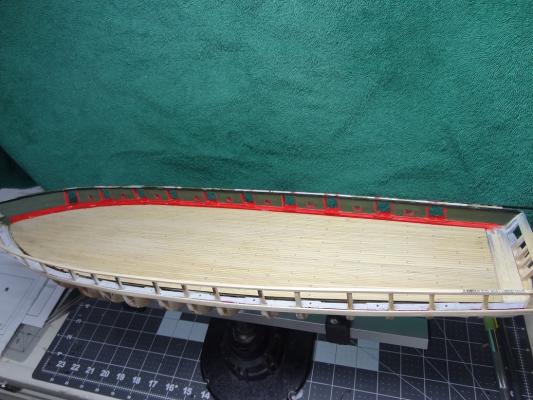
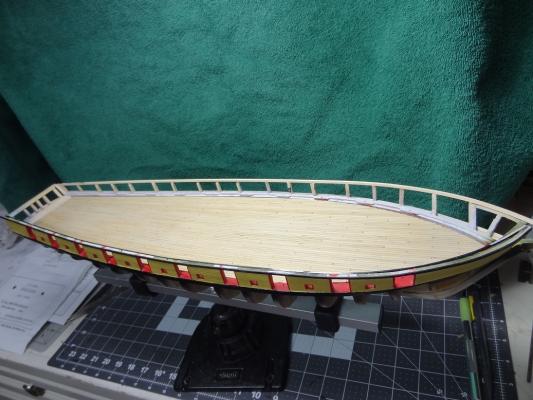
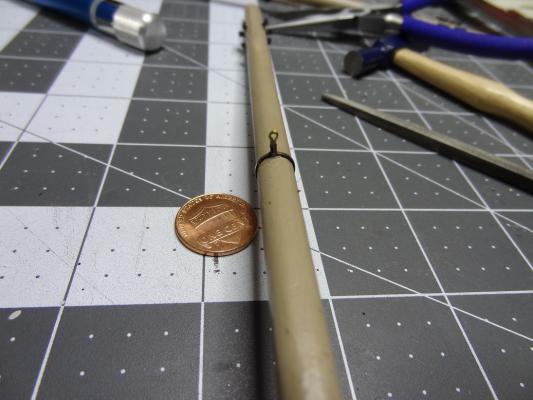
Progress to this point - I have finished the metal mast pieces I overlooked the first time. The spanker step and brace came out pretty nice. The square collar for the spanker halyard not as well. After wrapping it around the mast I had to use epoxy to close it and the joint is a little messy. Epoxy does seem to file OK so I was able to clean up the joint a little. I was also able to drill out the eyehole that got covered up. For such a simple piece it sure seemed like a lot of work. All that gluing was on bits maybe 1/16" in length. The epoxy was applied with a pin, but I still made a mess of it. The good thing is the part is painted black and goes on a part of the mast that is also black. The spanker mast is temporarily installed on the main. My original intent was to make the sail rings from brass rod - thinking that the laser cut wood rings were just an easy thing for the manufacturer. Plus I couldn't see how a small piece of wood could handle the stress. However, on another post towards the end, Brian posted some great pix showing actual wood rings from various ships. That was enough to convince me to use the wood rings from the kit. The port side gun/oar ports are framed. I've been fairing that out and am about ready to plank the bulwark. I need to be smarter with the painting this time. The planksheer/waterway and inner port frames need to be red. Airbrushing that before planking would be easiest. But that makes spray priming the planks a little harder - I'll have to mask everything painted red. I better check my stock of masking tape. Speaking of masking I plan to paint all masked edges with Tamiya Clear in the hopes of reducing the bleed over that I experienced on the starboard. That side still needs some help. The problem is that the bulwark paint colors - black, yellow, red, green - are high contrast colors. So ANY little overlap sticks out like a sore thumb. I still have some time to think this one through. A few recent pix........

- 843 replies
-
- 4
-
-
- niagara
- model shipways
- (and 2 more)
-
Tool for Shaping Brass Strip
mikiek replied to mikiek's topic in Metal Work, Soldering and Metal Fittings
That does make sense John and is probably the direction I need to go. As Bill said, you don't want to beat 'em silly with a hammer. Just a few taps with a jewelers hammer. -
jbshan - Sorry, my geography gets a little confused up in the New England area. After re-reading your post I got to wondering - if you don't use CA is there a quick drying alternative? At least from a rookie's perspective, that's where I find CA to be helpful. I do try to use wood glue more than I did at first. I've switched from regular TiteBond to TiteBond - Molding & Trim. It doesn't run, is much thicker and gets tacky very quickly. But even with that, I still find the need for that instant holding power of the runny CA.
- 843 replies
-
- 2
-
-
- niagara
- model shipways
- (and 2 more)
-
Tool for Shaping Brass Strip
mikiek replied to mikiek's topic in Metal Work, Soldering and Metal Fittings
Bill - I suspect I am being a bit anal about the corners. Like we always say - the average person looking at my build would never notice. I guess it's the ship-o-holic in me. Heaven help me if I took your last suggestion and started soldering flat parts for all my metal work. -
jbshan - I have heard the paper idea a few times. For sure it is a workable material. Do you lacquer it or use some other type of finish for long term protection? It's pretty humid around here. I would think it would need to be sealed. But then I see you are on the coast as well. BTW - the anchors look good!
- 843 replies
-
- 2
-
-
- niagara
- model shipways
- (and 2 more)
-
Tool for Shaping Brass Strip
mikiek replied to mikiek's topic in Metal Work, Soldering and Metal Fittings
That raises the same question. Whether the material is gripped in a vise, anvil or parallel pliers - what do you use to bend/push the part that is sticking out? When I just push with my finger the corner has some roundness to it. I suppose with an anvil you could hammer it? -
Tool for Shaping Brass Strip
mikiek replied to mikiek's topic in Metal Work, Soldering and Metal Fittings
John or nayone - hope you might still be following this. I have one more technique question for you . Let's say I have a strip in the parallel pliers coming out the side and I want to bend it 90 degrees. If I just push the strip with a finger, that bend/corner comes out a little rounded. How do you get a nice sharp corner? -
Long Term Paint Storage
mikiek replied to mikiek's topic in Painting, finishing and weathering products and techniques
I never seem to have problems with the jars that Tamiya paint comes in, no matter how long they have been open. I found a site that sells those jars. I've ordered some and will report back if they are identical to the paint filled jars. Would be a nice solution. -
Soldering dangerously close to the hull
mikiek replied to popeye2sea's topic in Metal Work, Soldering and Metal Fittings
Hey guys - you have my interest up regarding the resistance soldering. I have a similar problem like the OP - I need to connect/attach metal parts (brass strip) around wooden masts. It's mainly 1/16" or 3/32" strip. I have a regular soldering iron and a small torch for hard soldering. I've been nervous about using either in close proximity - maybe 1/8" to 1/4" - to the finished mast for fear of leaving a char mark or burning the paint. Would resistance soldering be an option? If yes, or maybe just in general, what size unit would be good for modeling? I've seen as low powered as 30W to well over 500W. I have no intention of using this for anything other than scale modeling. Also is the probe hand piece or the tweezer unit more practical? Could see wanting both but for a first purchase? -
Tool for Shaping Brass Strip
mikiek replied to mikiek's topic in Metal Work, Soldering and Metal Fittings
Ordered this morning...... -
My first mate and I just about completed the port side bulwark port framing yesterday. The process was fairly uneventful - although it was like doing it for the first time. Man, my memory has not been helpful during this build. I started out this framing using wood glue and couldn't figure out why it was taking so long. Then remembered that on the starboard side I did a lot of the gluing with the runny CA. The problem is earlier last week I ruined this CA trying to get the top off. Had to take some pliers to it and that ended up ripping off the nozzle as well as the top. I suppose CA (all flavors) is something you should have a backup for. Interestingly, I found a site that sells replacement BSI caps and the screw on nozzles so I ordered a few along with more CA. Speaking of glue, 2 of the brass strips that I glued to wood using the medium CA started to come off. I've re-glued them but I am wondering if there is a better choice for metal to wood. Please let me know if you have a better method. Reviewing the mast plans, I discovered one more metal piece that was overlooked. It's a square bracket that goes right at the top of the main, apparently to hold the halyard for a spanker sail. Got that cranked out but I keep running into a problem with these metal mast parts. If I make a loop or square or whatever that is supposed to wrap around a mast, I am scared to solder it together. Several of these pieces could not be slid down the mast so I had to connect them after they were on the mast. I suspect soldering would put a nice char mark on the wood. Having to use epoxy instead, but that makes it difficult (at least for me) to work with small pieces. For instance, the square I made yesterday has an eyehole on it. Even applying the epoxy with a pin, I managed to cover the eyehole. Plus epoxy is not really pliable afterwards. Again, I'd be interested to know how you guys do this.
- 843 replies
-
- 3
-
-
- niagara
- model shipways
- (and 2 more)
-
Brian - I'm glad you chimed in when you did. I didn't realize something that small - in real life - could be made from wood and still withstand the stress. I did make hoops from brass rod. Had them all painted, but decided to use the laser cut wood parts from the kit, based on your pix.
-
Don, Elija and John - thank you for your kind words. As I mentioned, it is really nice to begin to see some of the fruits of all my labor. This build began on 10/1/15 so I am 4 months in now. I knew there would be some ups and downs. Yesterday was a real high! John - we are practically neighbors. I am just off 1097 near the big bridge. Your site is quite helpful. Most of this build has gone on based on pix and build logs. I use the plans mostly just to make sure I didn't forget something. I've tagged your site for future reference.
- 843 replies
-
- 4
-
-
- niagara
- model shipways
- (and 2 more)
-
Brian - thank you for the pix. I would not have considered that the hoops were actually wood. I figured that was just a quick way out for the kit manufacturer. Good timing too. I'll probably be installing the spanker mast tomorrow. I made some brass hoops, but now I will consider using the laser cut version from the kit.
-
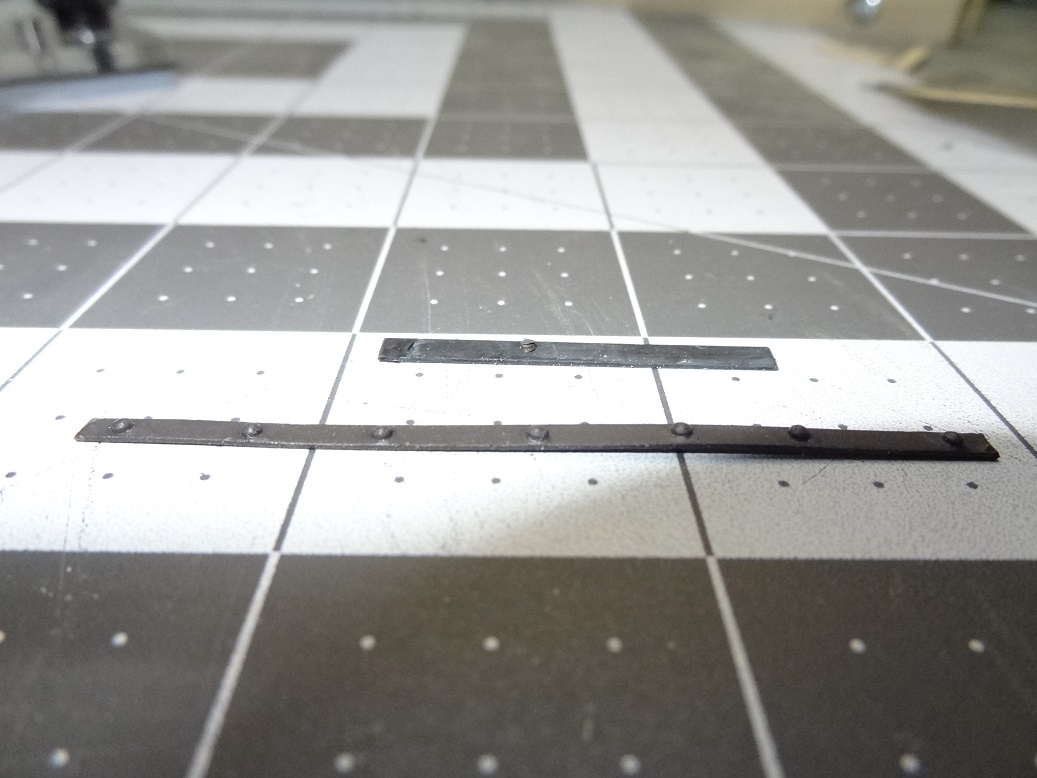
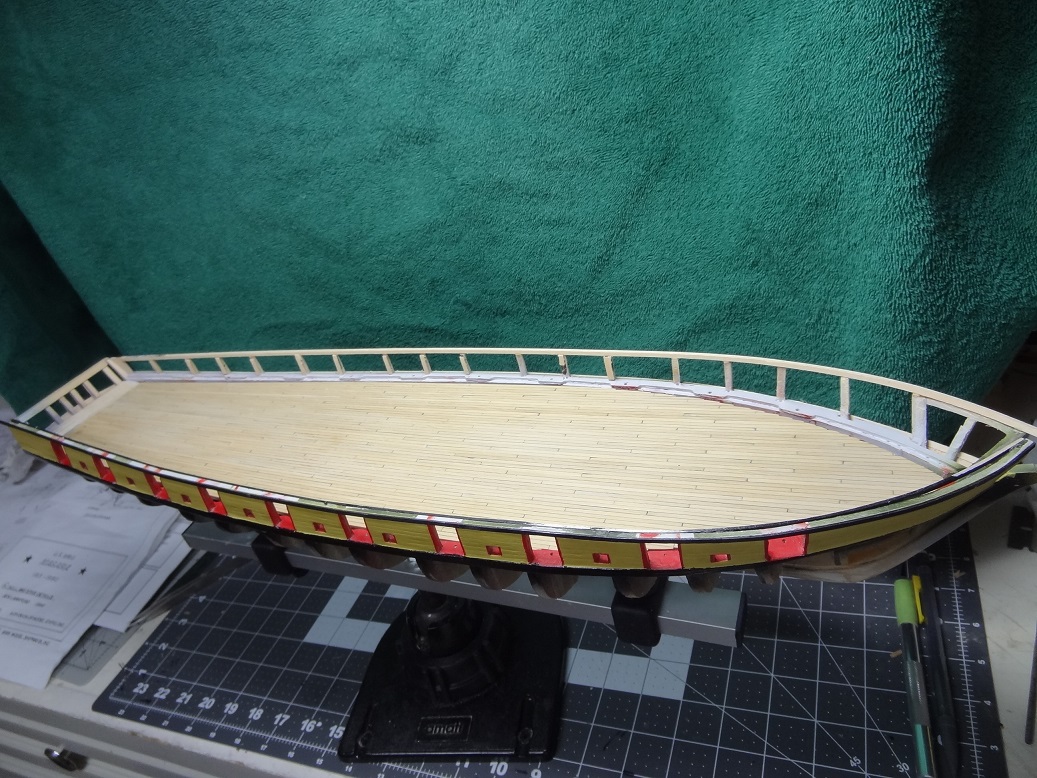
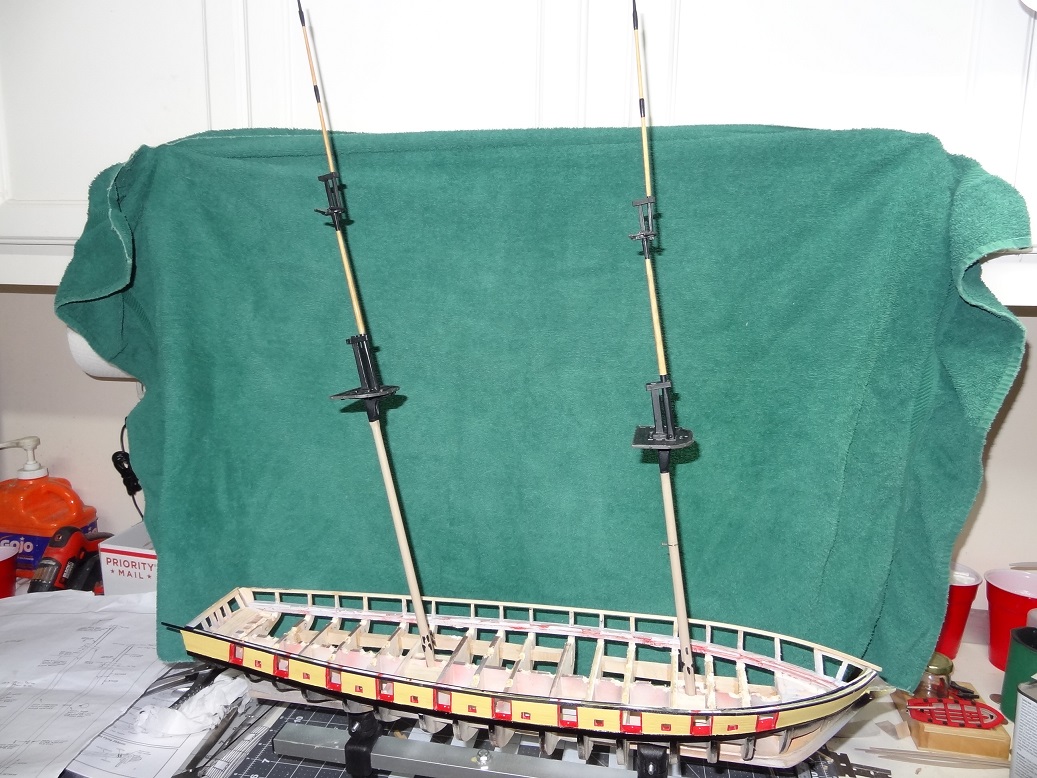
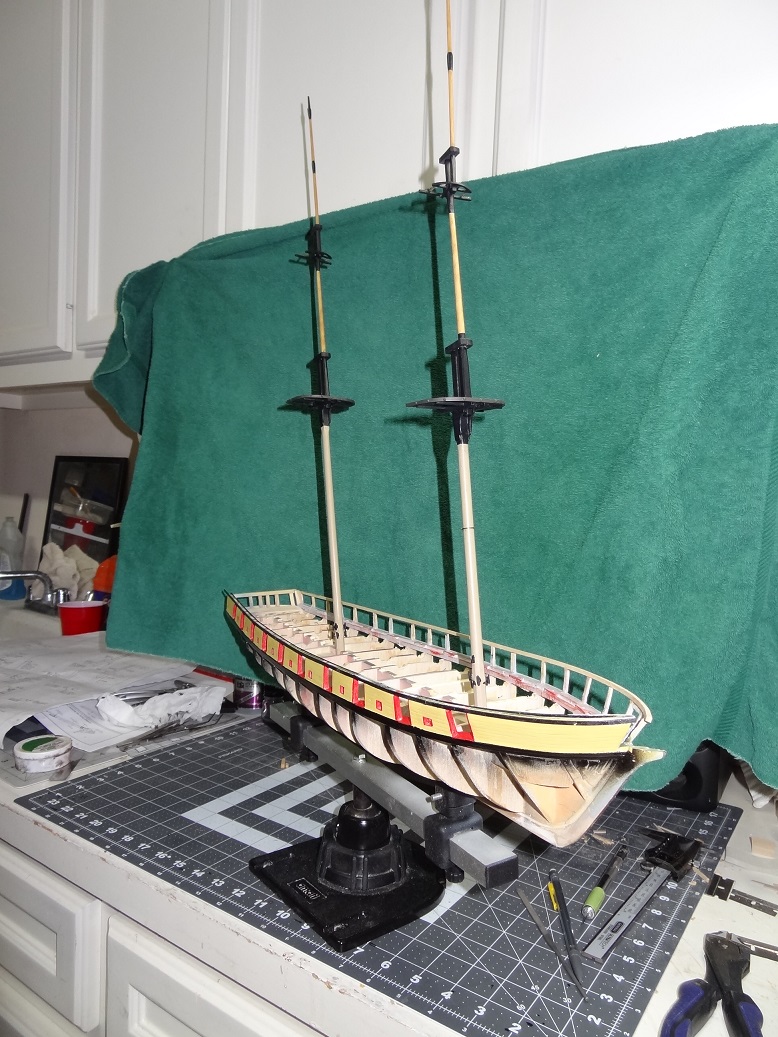
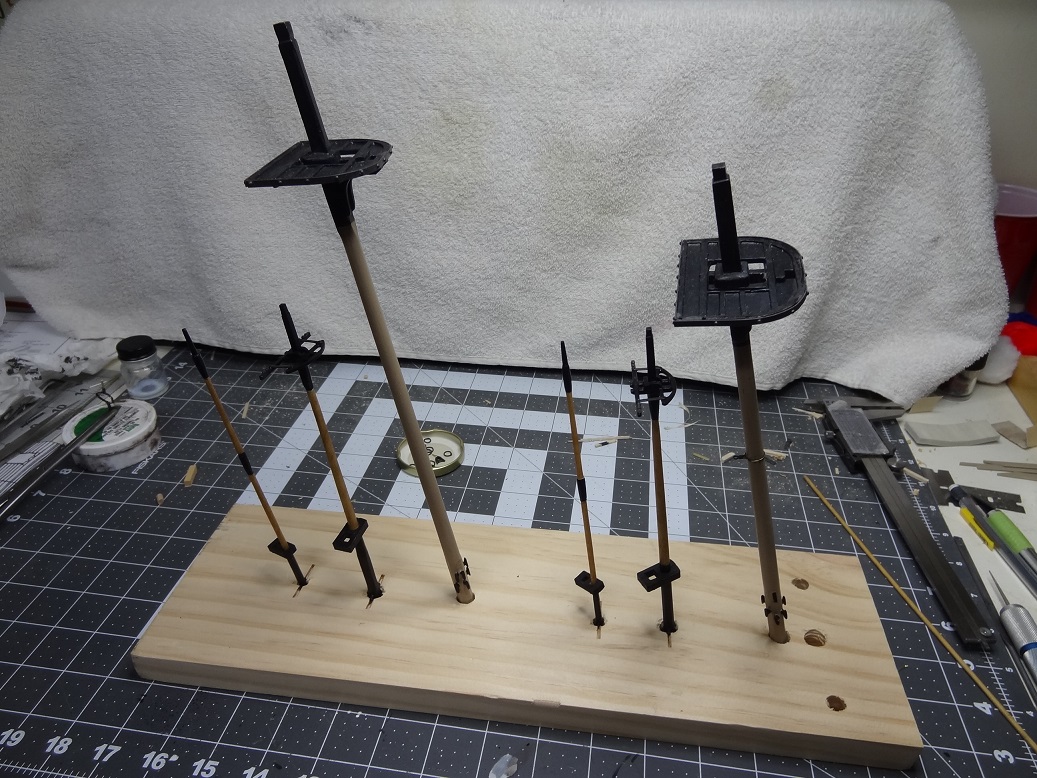
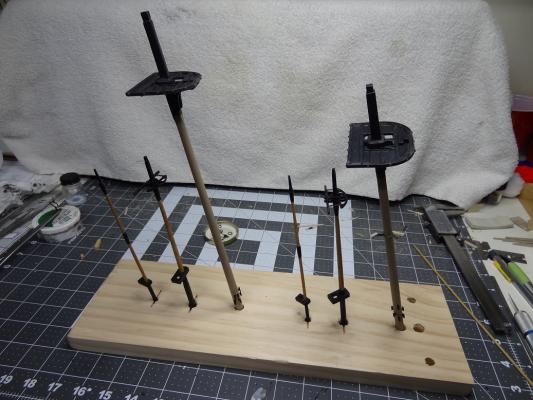
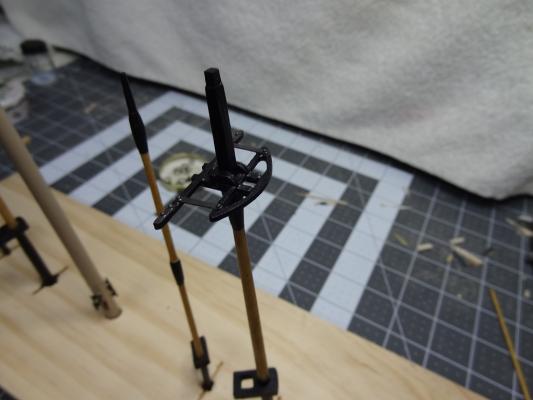
Now on to the log. I'm getting ready to do the port bulwark - ports, planking, etc. I forgot how much prep work there is. First the leveling the timberheads. Then adding the top strip from bow to stern. Some of the timberheads were a little wimpy looking so I glued strips to quite a few of them. Of course then you have to sand them to size. Then I applied some putty in the gaps around the waterway. I believe that's all ready to go. I've had a lot of small parts lying around for some time - mostly mast related. I'm tired of seeing them so I decided to get all that put together before moving to the bulwarks. So the masts, tops, etc. are assembled and painted now. The plans call for the tops and sections of the masts to be black so I mixed up something I now call "Evil Black". It's a combination of Tamiya flat back and something they call Rubber Black. It is the blackest color I've ever seen. There is no sheen to it at all - like it just absorbs the light. Of course the pix don't do it justice. I switched out all the mast dowels for Costello Boxwood. All the masts were made from square strips as was the decking. I did a few samples of stain and finish on a fake deck and I wasn't overly happy with the Golden Oak stain I was using. But I'm also sick of fooling around with it, so the parts of the masts that should be stained got a light rub of Golden Oak. And I still don't like it. It just makes the boxwood look dirty. Not sure what I will do when it comes time to color the deck. Speaking of the deck, there's a few pix with it dropped in the hull. Not glued in yet, but it looks pretty nice. The masts called for two items of metal work - the hardest parts I've made yet. One was a ring to go around the fore mast with an eye hole on it. The other is the step for the spanker mast - 1/16" strip that called for some pins to go through it to hold it together. Thank goodness for the drill press! If I had been paying attention, I could have soldered the parts early on and just slid them down the masts. I had to assemble them on them and epoxy them instead. Lesson learned. Speaking of metalwork, I am still going crazy with the rivet punch. I've put them on brass strips and used them in places to look like reinforcing. There's a few on the mast tops. I've kind of given up blackening those parts as any spot with CA glue doesn't blacken. However I am pretty happy with the look of the Tamiya Dark Iron paint. See what you think. After all that I gave myself a treat. I'm not ready to do a permanent assembly on the masts yet, but they do all fit together and stand in the hull so I fitted them together and dropped them in place - not perfectly aligned. Wow! Very nice seeing that! Quite a feeling of accomplishment. Niagara is really tall! Enjoy the pix....


- 843 replies
-
- 5
-
-
- niagara
- model shipways
- (and 2 more)
-
I've had very good luck with the Tamiya paints I buy. Their jars seem to work well. Paint in opened jars is always in good shape. Those jars have just a plastic top. I came across a place that sells those, so I ordered some. I'm hoping this will help!
- 843 replies
-
- 2
-
-
- niagara
- model shipways
- (and 2 more)
-
Long Term Paint Storage
mikiek replied to mikiek's topic in Painting, finishing and weathering products and techniques
Lionfish - I've never seen that at Home Depot. Where would that be located? -
One more sheave question. Or maybe it's a modeling question. Let's say for a moment that I did want to fully detail the sheaves in the masts, including the wheel and pin. How in the world does someone cut a notch that thin in a mast that's about 1/8" thick ???
-
Sounds like a winner Ken. I've always stored house paint upside down. The problem with those little paint jars is the paint seems to destroy the seals - cardboard or Styrofoam. Using the plastic as a seal would eliminate that.
- 843 replies
-
- 3
-
-
- niagara
- model shipways
- (and 2 more)
-
Long Term Paint Storage
mikiek replied to mikiek's topic in Painting, finishing and weathering products and techniques
I'm kind of mixed about the seals. My experience with the Testor's bottles (cardboard seal) If you get paint on them i.e. shaking the jar or turning upside down, the seals tend to absorb some of the pigment. So I'm hesitant to reuse the seal with another color. Will look into the plastic squirt bottles or syringes. -
A good thought Elijah - thanks for staying around.
- 843 replies
-
- 2
-
-
- niagara
- model shipways
- (and 2 more)
-
I could have sworn there was a thread here on storing mixed paint but I can't seem to find it. I'm a little ticked right now. I have been using those Testor's 1oz paint jars to store leftover acrylic colors that I have mixed. I went to take a look at a couple I had bottled up about 6 weeks ago and both lids were loose - paint was ruined. Sure, it's possible I might have not tightened one of the lids but not both. I wonder if those cardboard seals are really worth anything? Which brings up the bigger question, how do you store your paints? Not the stuff that comes straight from the store but the stuff you have to mix to get a certain color or shade. I've bought 2 different brands of paint jars. One had a cardboard seal (as I mentioned) the other had a styrofoam seal which dissolved after a few weeks. The jars that Tamiya paints come in seem to keep the paint intact. There doesn't seem to be any seal on those just the plastic lid. I'm definitely saving those as I empty them.