EJ_L
-
Posts
2,246 -
Joined
-
Last visited
Content Type
Profiles
Forums
Gallery
Events
Everything posted by EJ_L
-
 I really like those rounded edges on your seat planking. Adds a great little detail. Well done!!
- 228 replies
-
- 2
-

-
- gunboat
- model shipways
- (and 1 more)
-
I'm going to give them a try. I have a friend that does silk screen printing and I am going to ask her to try a few samples to see if they might make something usable. The images themselves are great quality just need to see how to transfer them to cloth. Things to to do when I get home from vacation.
-
Thank you very much and welcome to the build! I look forward to having you along on this journey.
-
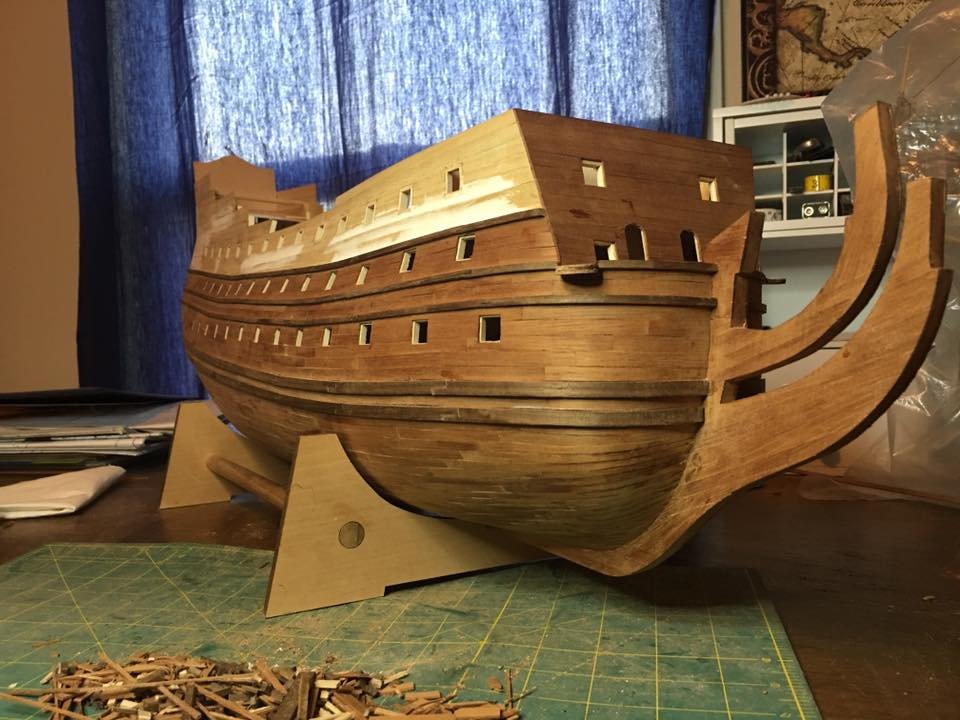
Made a good final push before vacation starts. Doubt I will have much time over the next couple nights before we leave so I figured I would call it good and post the update. When I get back it should not take too long to finish up the lower hull planking. Maybe another 20 hours give or take a few. Then I will resume upward planking to top out the ship and start framing and closing up the stern. Lots of fun work ahead!

-
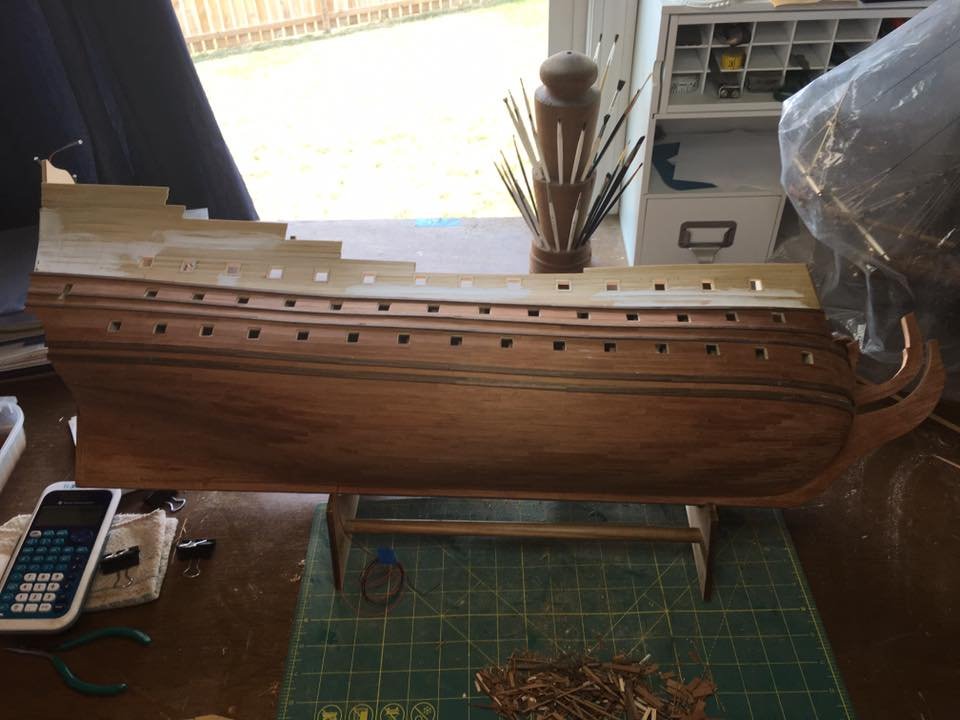
Thanks everyone for the nice comments, likes and visiting! Bill, I notice those slots a while back but still long after everything was too late to disassemble. I will probably end up using my dremel to cut them out. Just have to go slow but they should cut out fine. I plan to do that before I do my final sanding and seal the hull in case I mess up the finished wood, I can more easily replace it. Steve, the hull is 33 inches long, 13 inches tall and 8 inches at the widest. When completed it will be around 41 inches long, 30 inches tall and 18 inches wide at the main mast course yard. She is a big model!
-
It's been a slow build week. Busy at work, not feeling good and the natural slowness of planking. Still, progress has been made! May be slow on updates the next couple of weeks. The Admiral and I leave on vacation for 12 days on next Thursday and I have a lot of stuff to do between now and then. I'm hoping to get in another update before I go.
-
Very nice Chuck. Those will make excellent additions to a lot of people's home displays. Looking forward to building one myself!
- 269 replies
-
- 7
-
-
- Queen Anne Barge
- Syren Ship Model Company
- (and 1 more)
-
Nice touch with the people. I personally like having figures on the models as it helps to put things into perspective. Looking at the outer hull, are you going to copper plate the lower hull? If so, you might want to do that before permanently fixing the mast in place. Looking good!
- 108 replies
-
- 2
-
-
- mamoli
- constitution
- (and 2 more)
-
Another excellent little detail! That is one I do not see many people put on their models and will have to remember it for my next rigging adventure.
-
She is looking good Martyn. I will echo the comment about your scarf joints that they are well made. I also like the paint you have done and agree with you to not go any lower. Looking forward to the next update!
-
She is shaping up nicely! Well done!
-
That diorama would be really cool to see. With technology the way it is you could even include L.E.D.s to simulate fire, simulate smoke, canon fire and even put in speakers to project sounds of battle. Hmm... maybe one day...
- 2,699 replies
-
- 2
-
-
- heller
- soleil royal
- (and 9 more)
-
Be careful what you wish for... If he gets both kits we may end up seeing two versions of S.R. being built side by side.
- 2,699 replies
-
- 2
-
-
- heller
- soleil royal
- (and 9 more)
-
A lot of what I wanted to say has already been said. Excellent repairs! She sure is beautiful! You are on the home stretch now.
-
Welcome to MSW! Good to have you with us. As suggested already, start up a build log and post some pictures of where you are at and of what the finished piece looks like if it is shown well on the box. We have many experienced builders that might have built her or are good with scratch building that might be able to give you some tips to create it.
-
New member ,looking for plans for HMS Vanguard
EJ_L replied to ChrisE's topic in New member Introductions
Welcome to MSW Chris! I would do as Mark has suggested and contact Mantua. Most of the manufacturers are good at providing missing pats and instructions to their kits. Plus then you know you have exactly what is missing. Good luck to you when you start working on her. -
Welcome to MSW Matt! Good to have you with us and I wish you the best starting out. Be sure to start up a build log and I look forward to seeing your work.
-
Zach, welcome to MSW! I hope that you will start up a build log in our 3D/CAD section so we can see your work. There have been some really incredible models done in 3D and I know I would love to see what you do with yours. Best of luck to you!
-
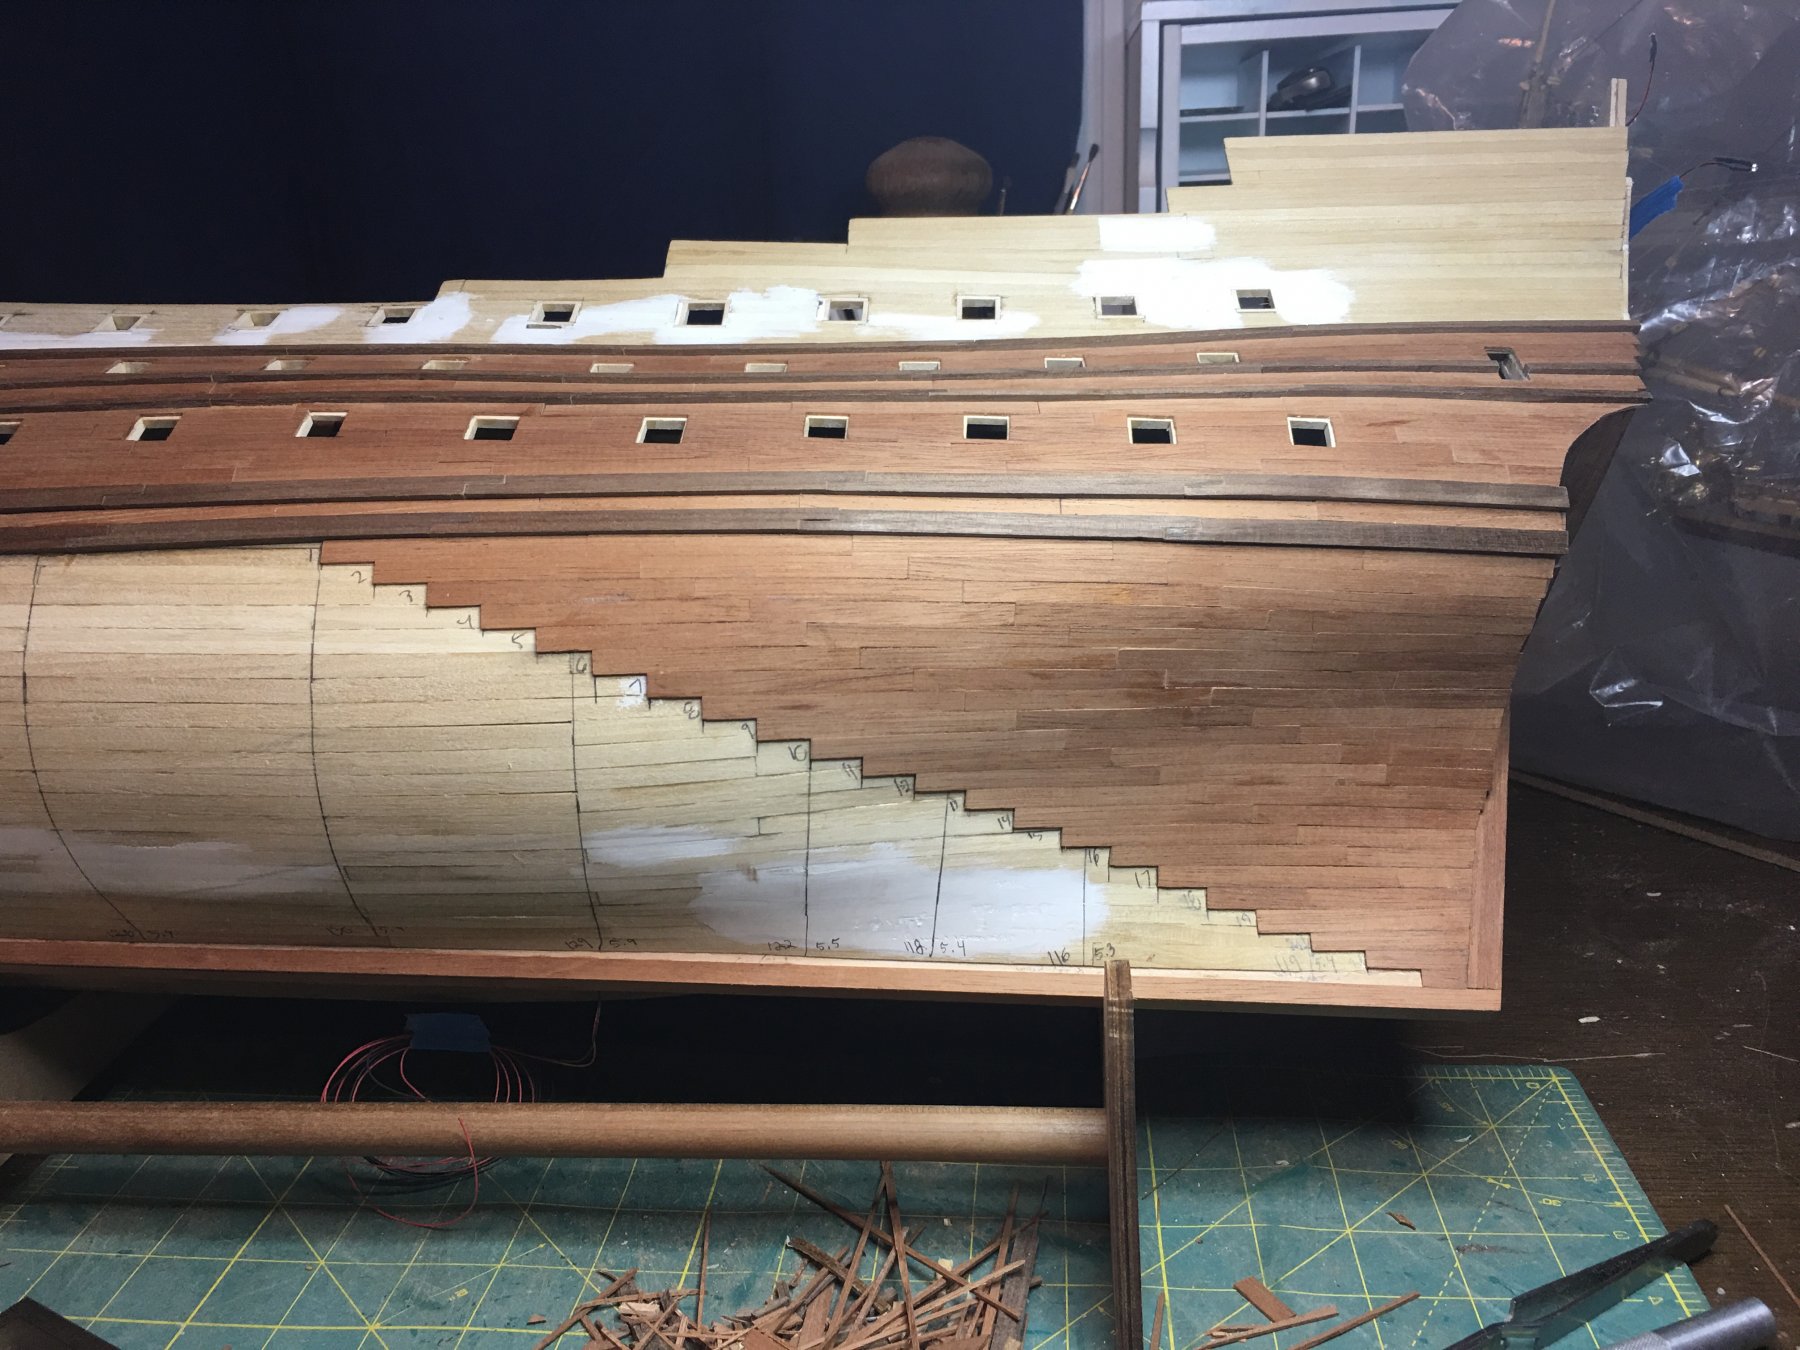
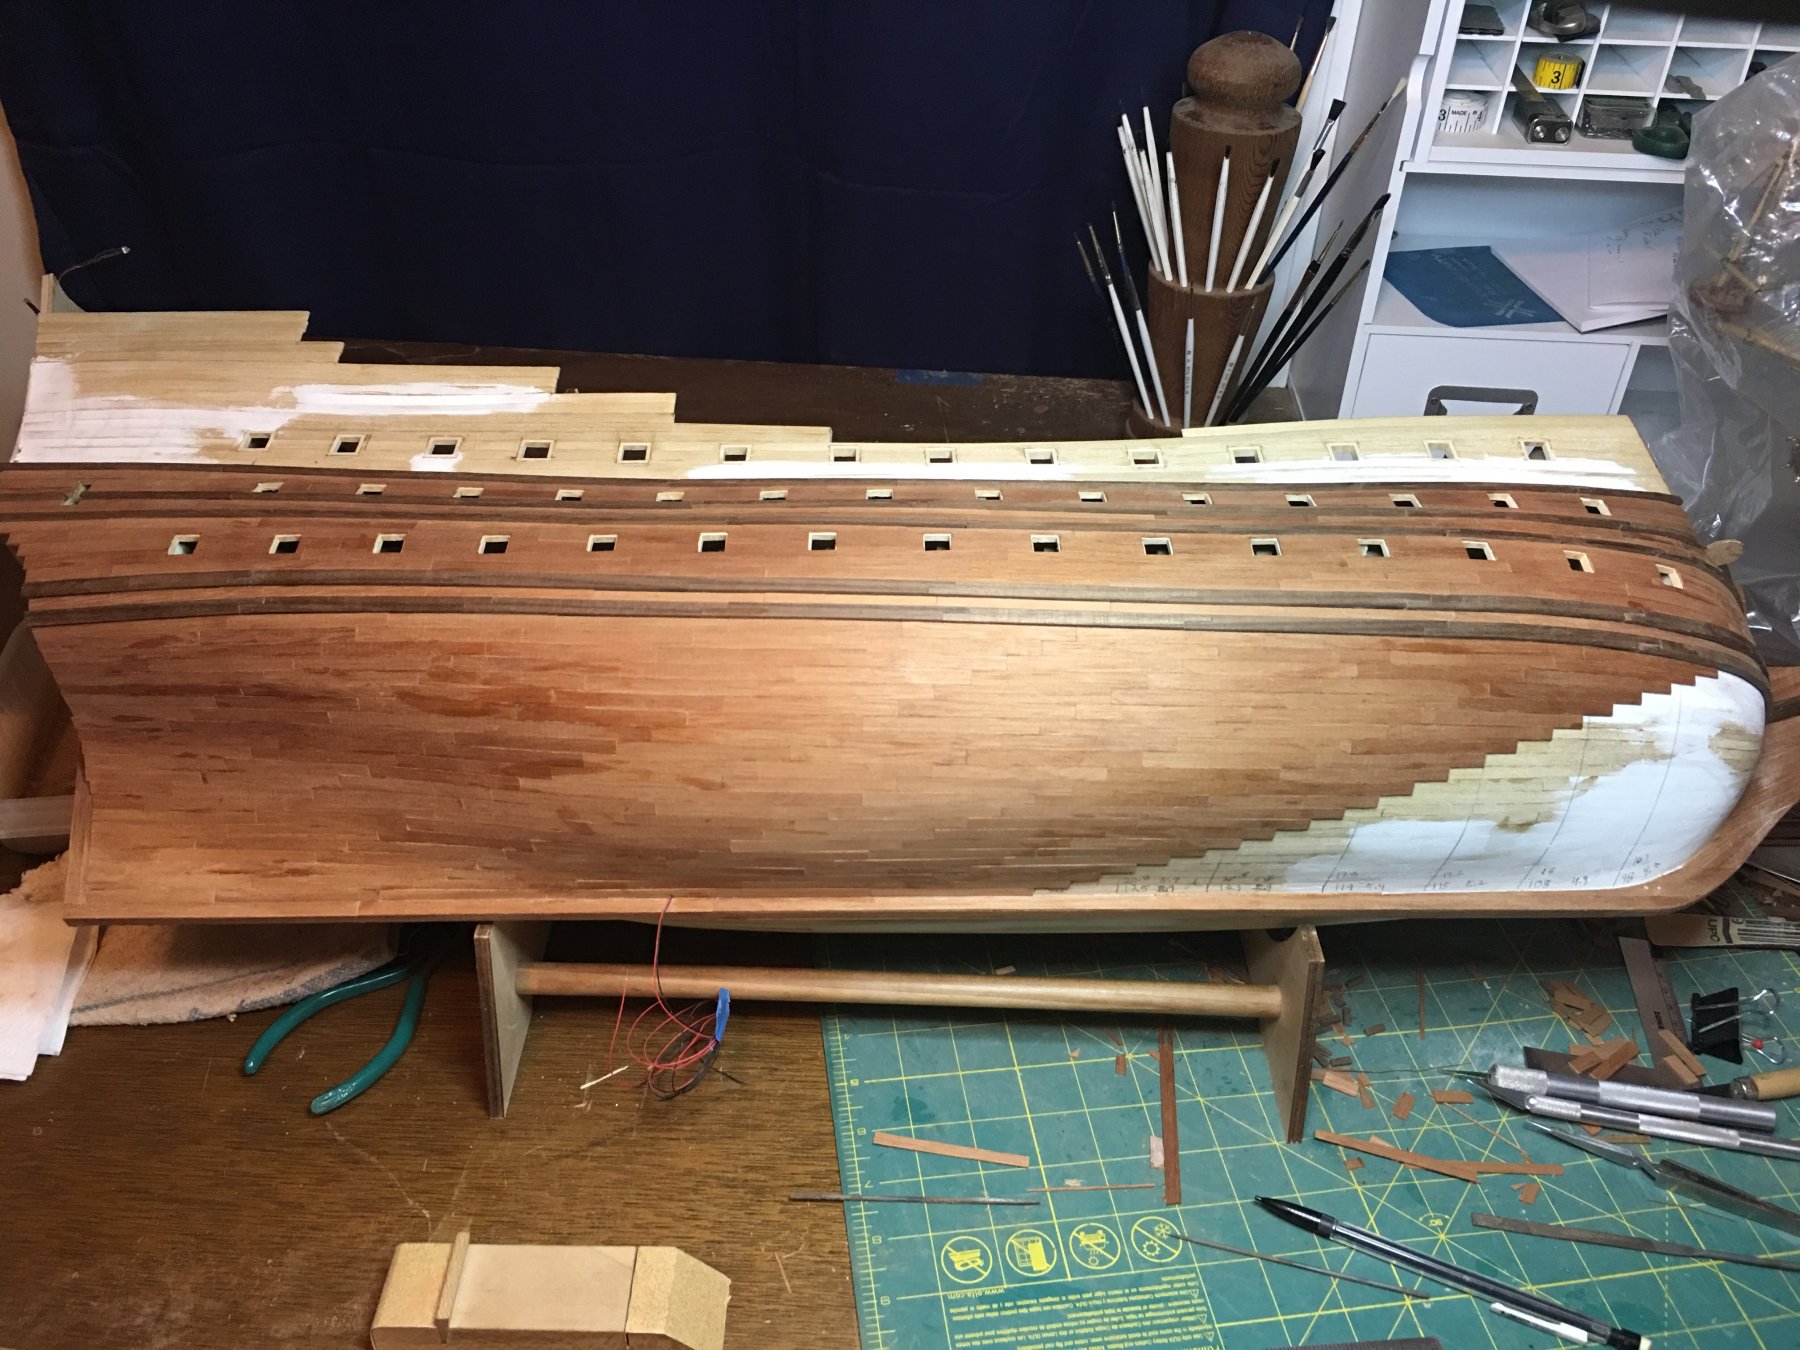
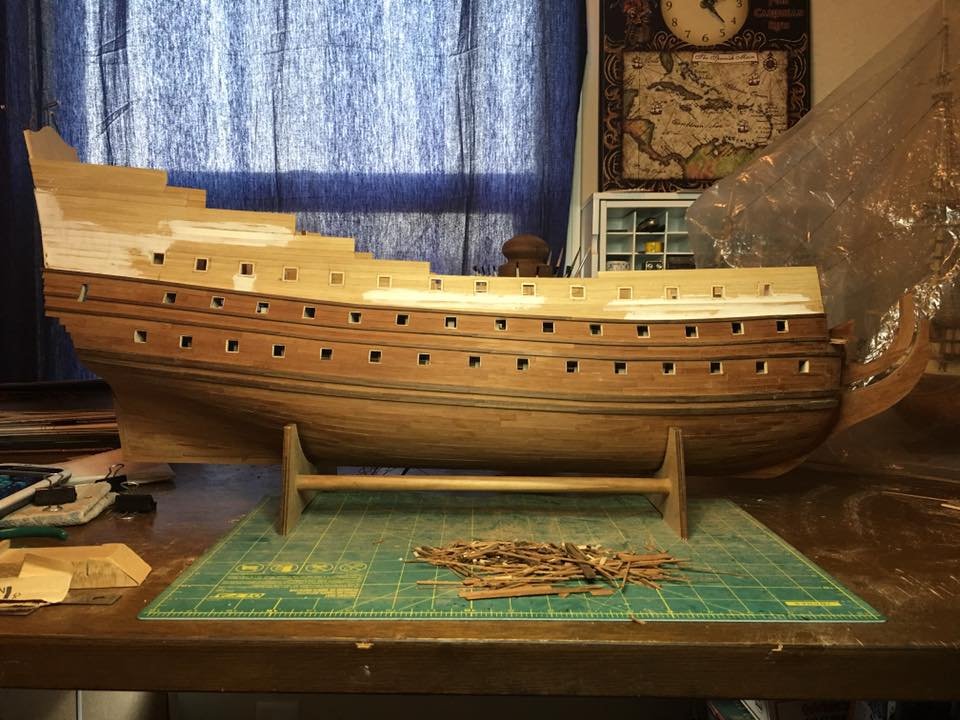
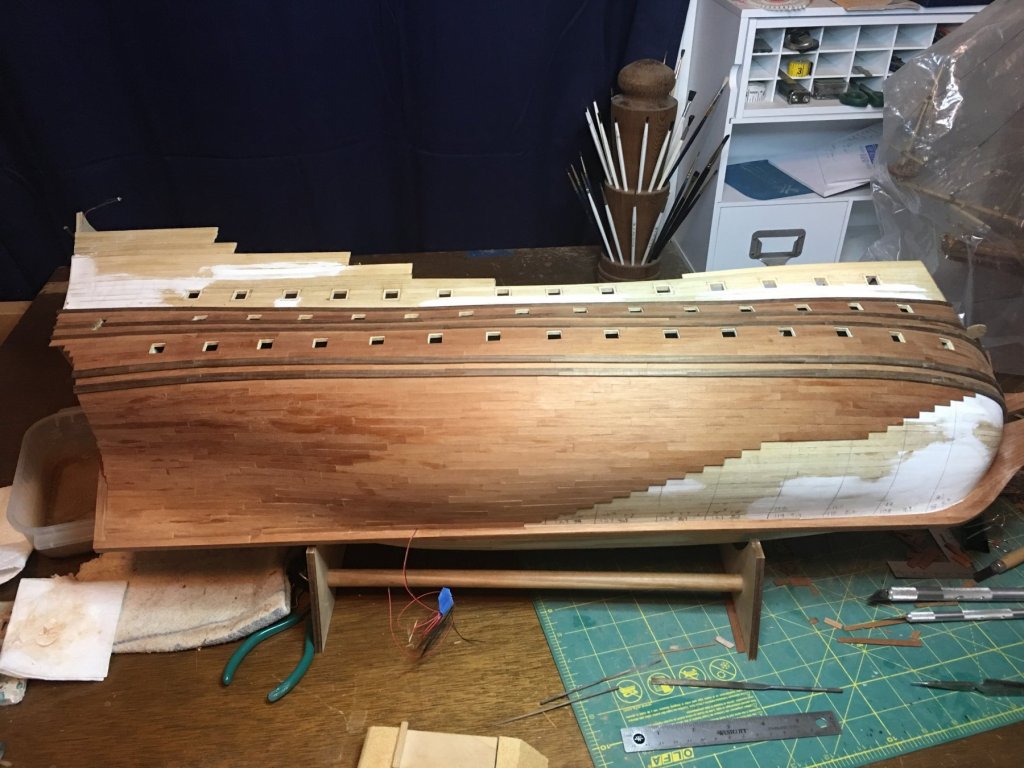
Finished the lower hull planking on the starboard side today! Wow that feels good to say that. Better yet but I did it without drops or stealers. Bow, stern and everywhere in between contain 22 strakes from the lowest wale to the keel. Of course now I have to do it again on the other side but I always feel better with the second half after I know my plan has worked on the first. Hopefully have less waste too as I should have fewer do-overs. More to follow!
- 961 replies
-
- 20
-
-
A few hours into today's building session and the first four planks have reached the stem.

- 961 replies
-
- 13
-
-
Very nice! After seeing your build I'm going to have a hard time arguing reasons why I can't do sails on mine. Guess I better put sewing lessons on my to do list. Loving the results and looking forward to seeing more!
-
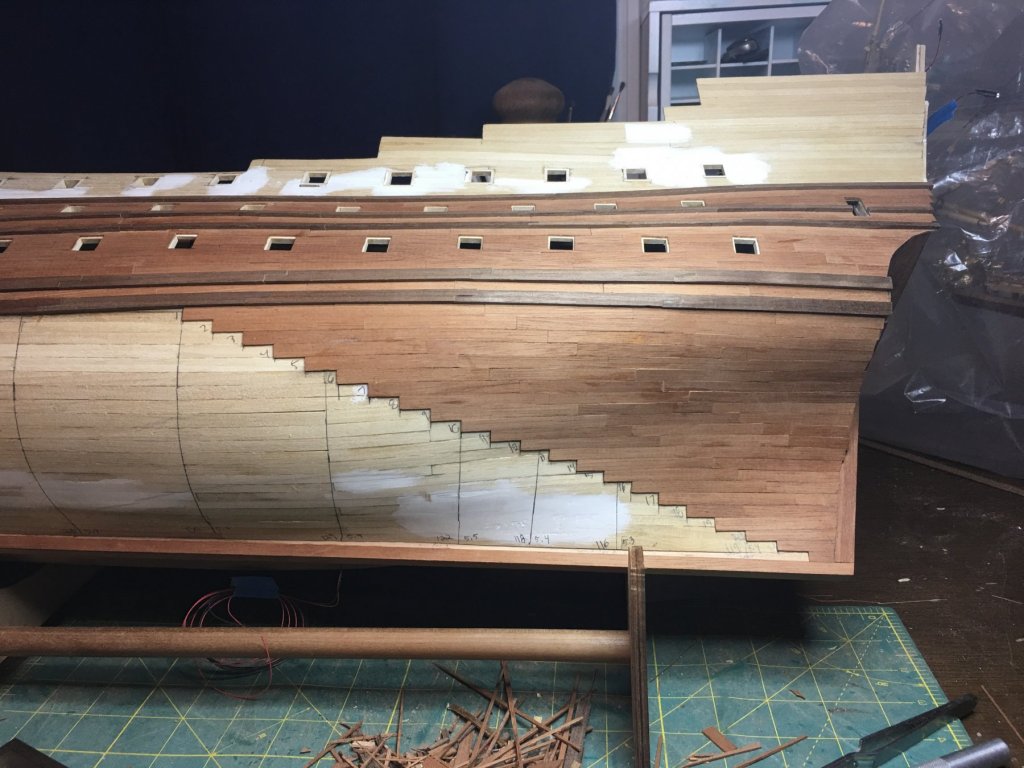
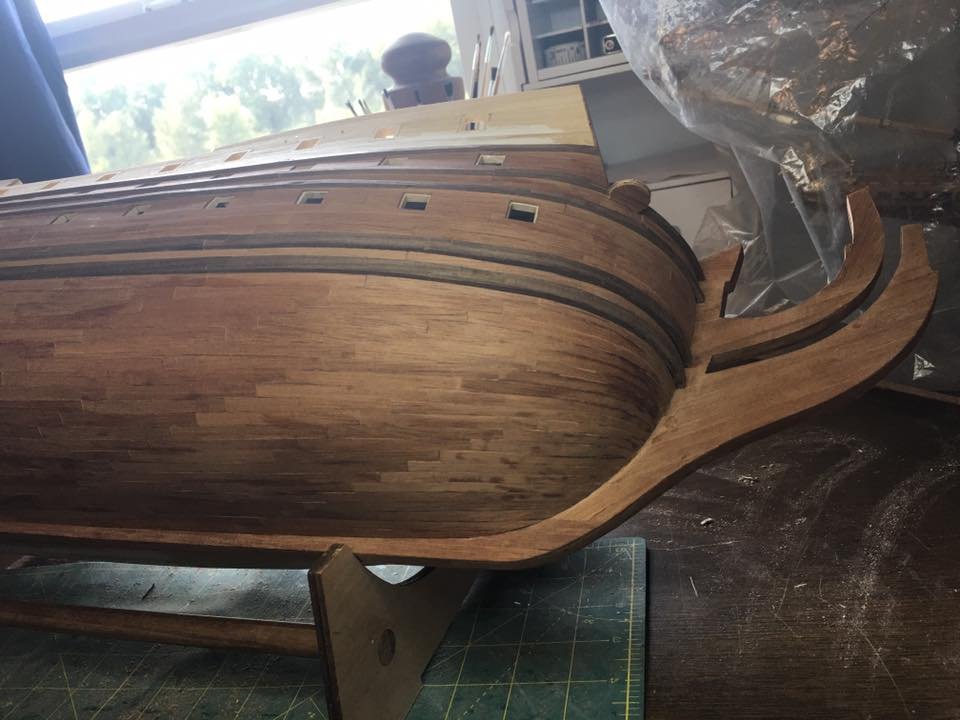
Thanks Martyn. Even though it is the largest area to cover, the middle is the easiest to cover as well. The planks only need minimal sanding for widths and tapers on the edges to line line up. At the stern and especially around the prow, much more care has to be taken to ensure that the planks lay down like they should. Glad this step ended up on a long weekend as it will be nice to have the extra uninterrupted time to think things through.
-
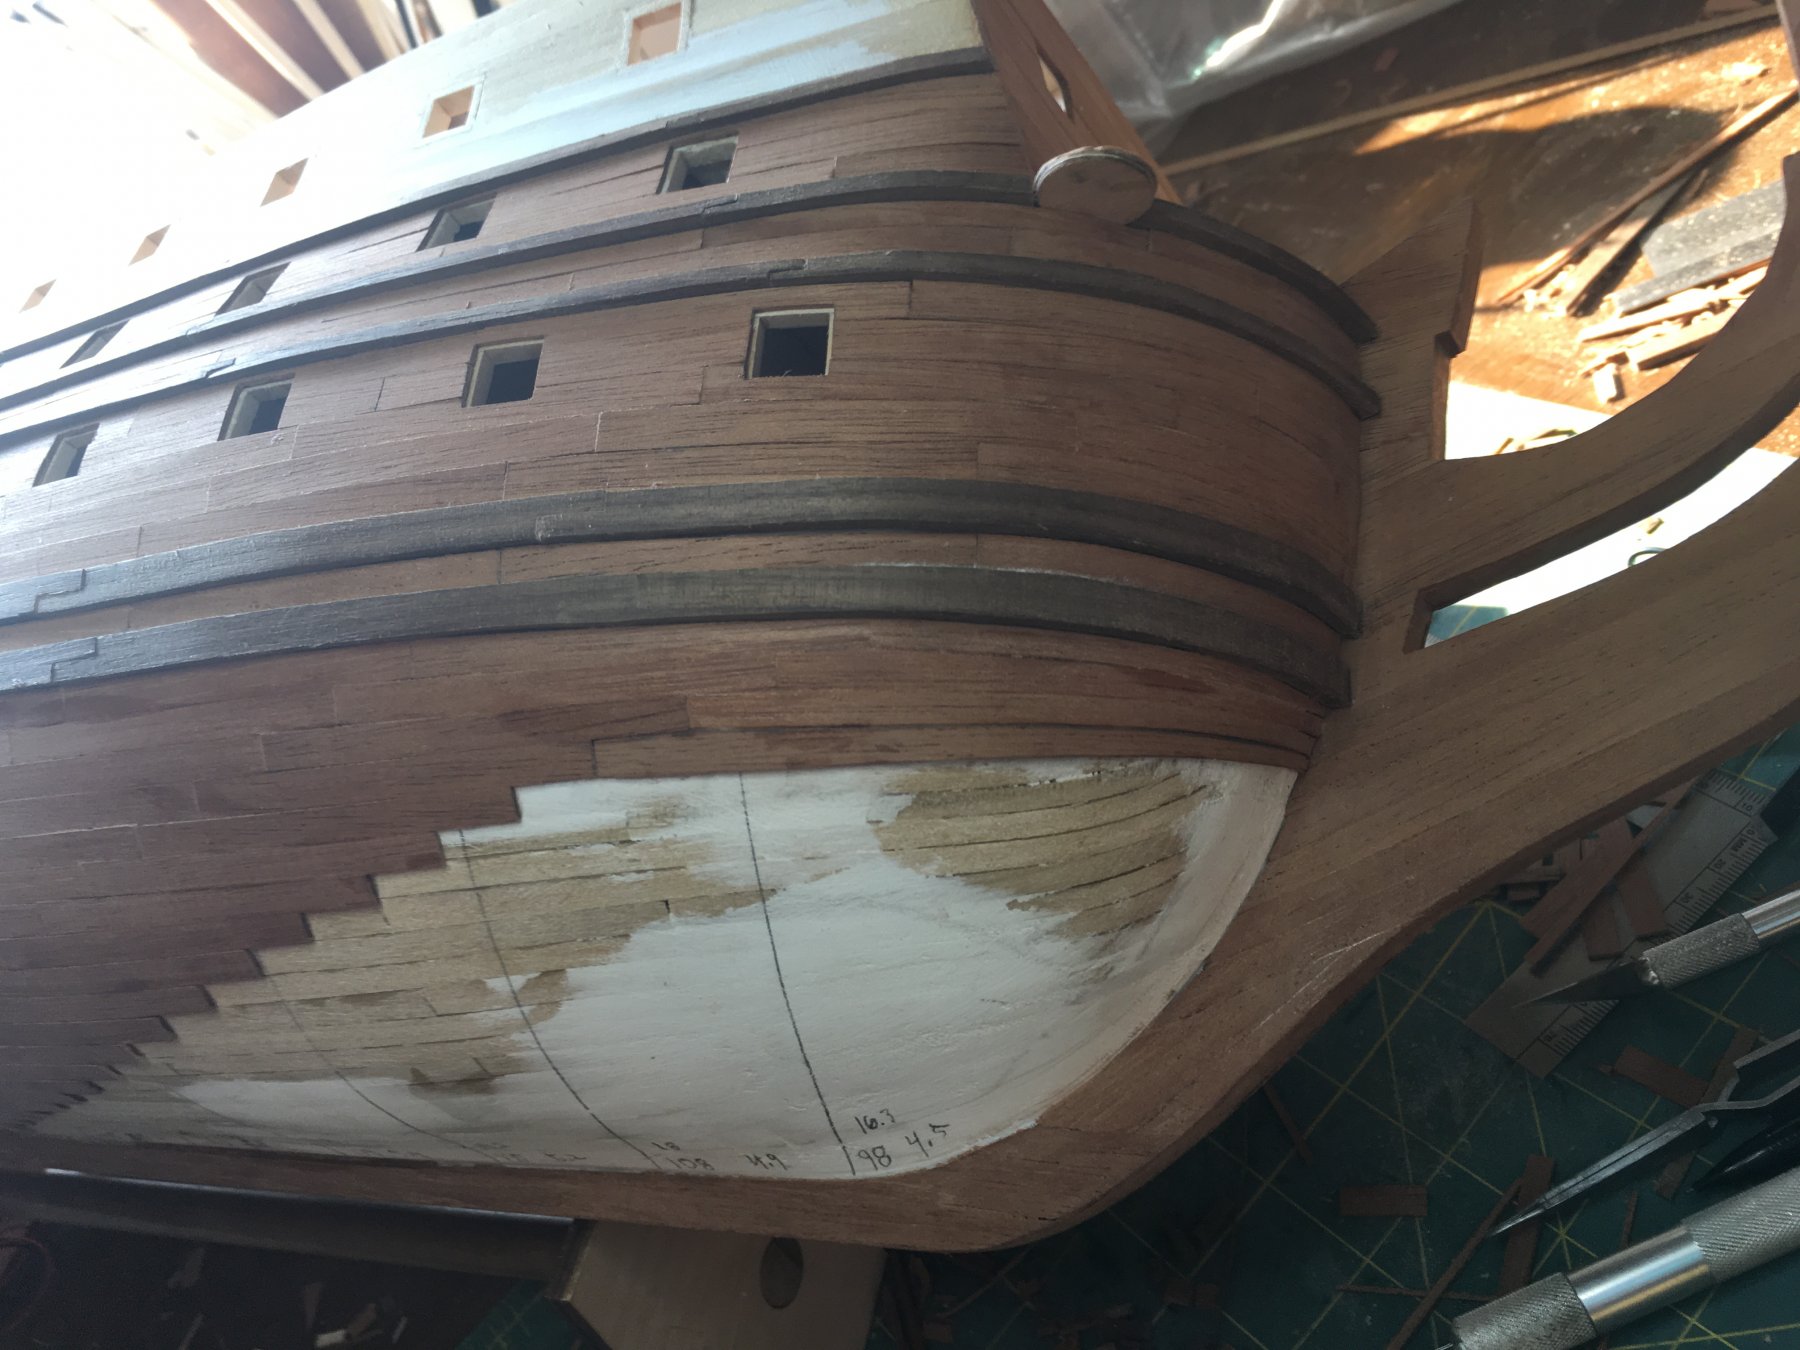
Another update to the hull planking. Started off by doing a little rework at the stern post. Spent some time looking through pictures of museum models and I am happy now with the look. Had to remove a few planks and ended up reworking the garboard strake some and I am glad I did. Too many things were bothering me and I am trying to break those bad habits of ignoring those things that bother me in order to keep moving forward. I've always regretted it so this has been a good opportunity to interrupt that pattern. More planking has also been completed. I start making my way around the prow this weekend. While still a lot of work to do, the starboard lower hull is nearing completion. Starting a three day weekend tomorrow after work so I am hopeful that I will be able to get a bunch more done on her for the next update.

- 961 replies
-
- 15
-
-
I like the hammock and the other details as well. They are really bringing her to life! I'm not too sure about the last picture though. When up is down and down is up you have either drunk too much rum or there is a major problem...
- 108 replies
-
- 2
-
-
- mamoli
- constitution
- (and 2 more)
-
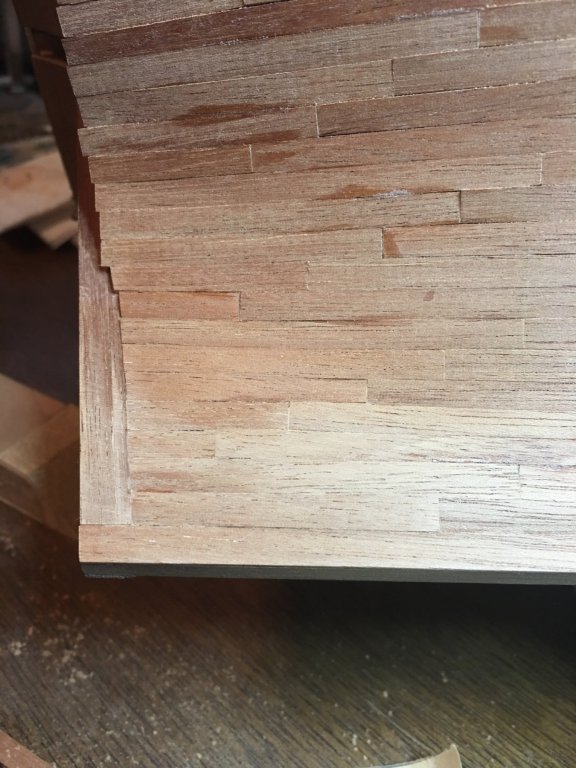
Ah, I did not know that the planking lengths changed amidships. I have been under the impression that they remained the same length or as close to it as possible across the entire hull with the obvious statement of the ends at the bow and stern being shorter. It makes sense from a materials perspective. I guess I have been looking to long at the even, symmetrical patterns that are always stressed in model planking more than actual practices. Looks like I have a lot more reading to do. Good thing the temperatures are starting to slowly drop to make sitting on my deck reading more enjoyable!