EJ_L
-
Posts
2,246 -
Joined
-
Last visited
Content Type
Profiles
Forums
Gallery
Events
Everything posted by EJ_L
-
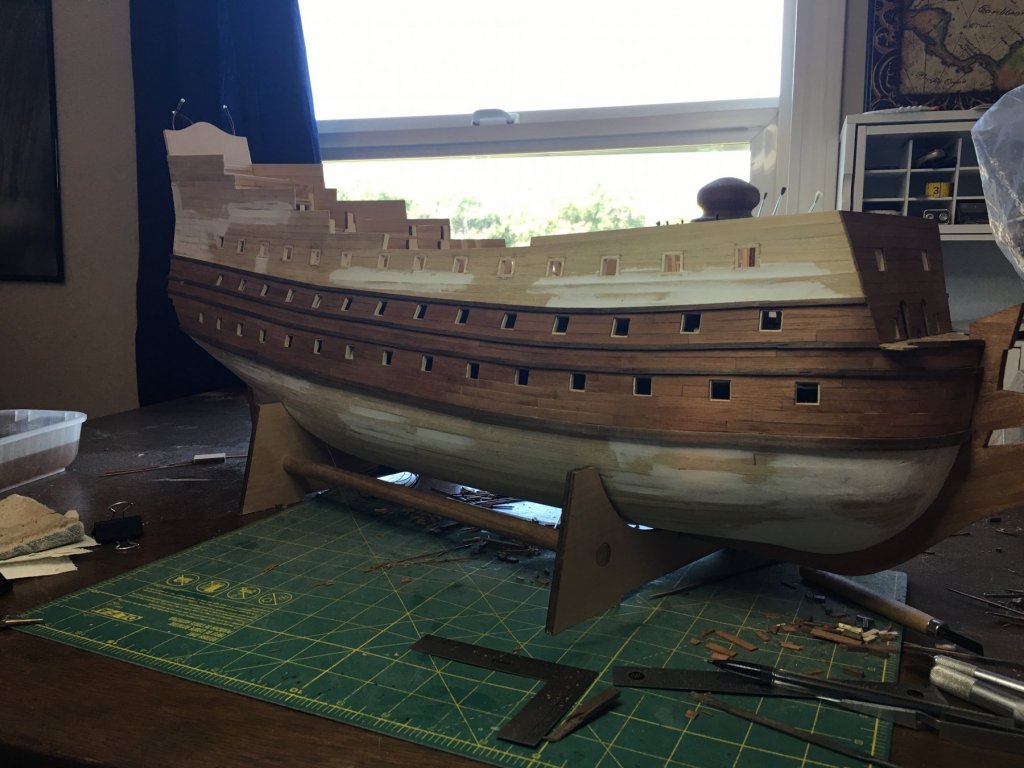
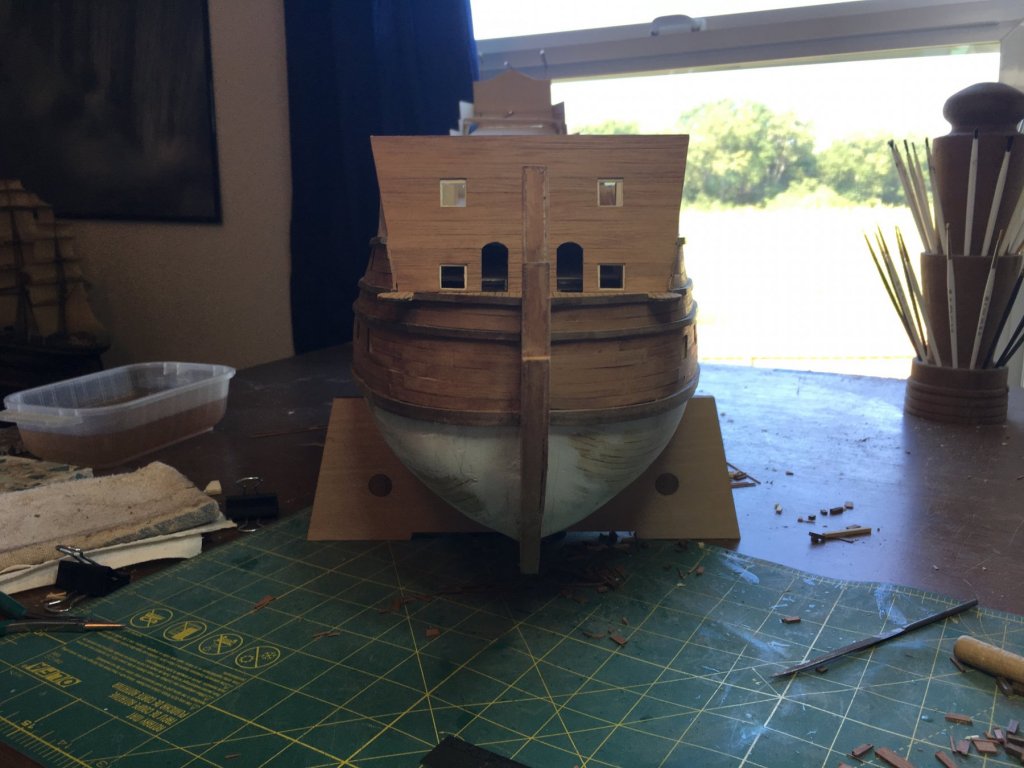
 Tom, I knew that there is a rabbet in the keel which I rarely actually cut but can often be simulated by tucking the planking into the veneer on the keel. I thought there was something similar to that on the stern post which is why I have always stopped my planking at the post and not run over it. If like Cedric has told me the first three strakes run out over the post, (which makes sense as it would help tie it to the ship for added stability and strength) then how far out would they go and again, how does that blend into the post or do they do something different? Do they terminate into a rabbet before the aft most edge of the post? How far into the post would they go then? Please be a purist as I really do want to know if I am building wrong. I don't always correct right away but I always file the information away for future use. In this case, I am likely to fix it as it is an easy enough fix as soon as I understand fully what it should look like. As for the current progress, I have extended the planking a bit further down the hull in the slow march towards the bow. As anyone following the thread has noticed I may be redoing some of the work at the stern but the quest to reach the bow is still moving forward! As always thanks for the comments, likes and following along!
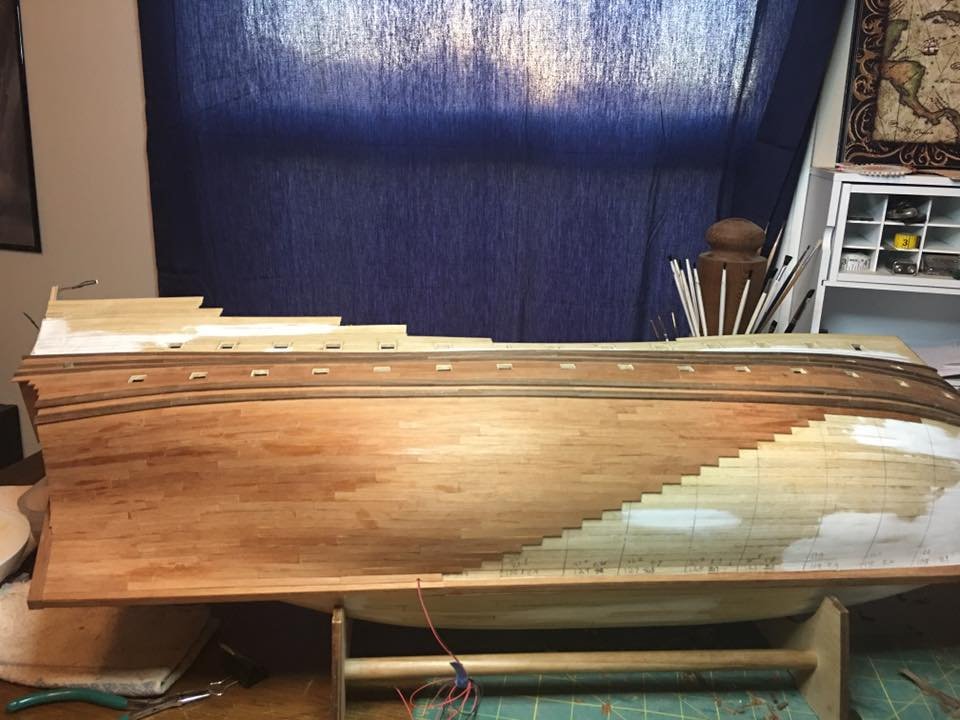
- 961 replies
-
- 11
-

-
Thanks Elijah! i have not had to do any yet but when I get to the bow I anticipate having to do some there. The leading planks should be reaching there towards the end of the week so I should know then.
-
Cedric, No worries on the correction but I do have a follow up question on it. When the planks overlap the stern post do they create a "step" like the below sketch on the left or are they notched into the post so that it is straight like the sketch on the right? I'm not so far as to rule out going back in and changing it I just want to make sure I get the change right! Thanks for the help and suggestions and forgive the rough drawings. I had to do them quickly on my lunch break.

-
Michael, I did this same method on La Couronne and once the final sanding is done I wipe the hull with both an alcohol wipe and then a tack cloth. This pulls up loose sanding dust that fills the joints and then when the finish is applied the joints are clearly visible yet subtle. The hull doesn't look "striped" with lines but they are there to see. Something I did notice though while looking back at those pictures is I need to find a better way of protecting the hull after it is finished. These long builds leave a lot of time for wear and tear on them. I may need to look into lining the cradle with felt or foam. Hmm.... things to think about.
-
Cedric, thanks for the clarifications. I was not sure how many times she had been refitted. I was thinking three but wasn't for certain. Also the information on the wale scarfs is new to me. I tend to go past the 1/4 mark and push closer to half way more often on my build. I will start adjusting to the correct way. I also wonder how often the color was changed during sea repairs. This could be a question for any ship of the era but as its been said, blue was an expensive color and I highly doubt the ship would have carried enough to repaint that much surface while at sea so would she have become spotted with other colors such as the pearl grey you mentioned or more probably the blue was used only around the royal coats? We will probably never know and it seems like more and more questions keep popping up. Makes me want to dive into some more nautical history books. I can see the good ship Visa is going to have to go back out to sea soon!
-
Martyn the Confused, Two things t keep in mind when you are having this debate are: 1. No one knows exactly what she looked like. We only have some artistic renderings of her to go off of and while yes, they are credible and come from notable artists of the time, they are by no means absolute nor do they clarify which version they are of as she underwent many changes of appearance during her career. 2. Ultimately this is your model. Unless you are under contract by a historical society or museum, (in which case congratulations) then this is a model whose purpose is to please your eye and not necessarily be historically accurate. Paint as much blue as you would like on her and be happy in your decision!
-
Welcome back! Sounds like you have gotten yourself set up and better prepared this time around. Good luck to you on your new builds and by all means start up that build log! I look forward to seeing your work.
-
Welcome to MSW! I wish you the best of luck on your builds and hope you enjoy wooden ships as much as plastic.
-
I may be tormenting myself with all the extra work required to use small planks rather than lay a full strip but, I have found that for me, it is easier to keep my layout for the strakes and make those small adjustments when something starts to get off. Also I don't have to com back later and scribe in all the butt joints in the planking. The only downfall that I really run into is that edge bending is harder with short pieces. Not impossible but harder. Spiling techniques get used a bit more with short pieces. Thanks everyone for the comments, likes and following along. I've gone a bit further last night and plan on getting more done today so another update will be coming soon!
-
Martyn, I have been told by a couple of people with far more knowledge than myself on Soleil Royal that the blue would have only extended down to the top of the 6th wale from the bottom. I had the same question on my build as my plans show it going to the 5th wale but paintings that I have seen only show it to the 6th. Your planking does indeed look very good and you are smart to switch from butt joints to scarfs as that is the correct practice and forms a much stronger joint.
-
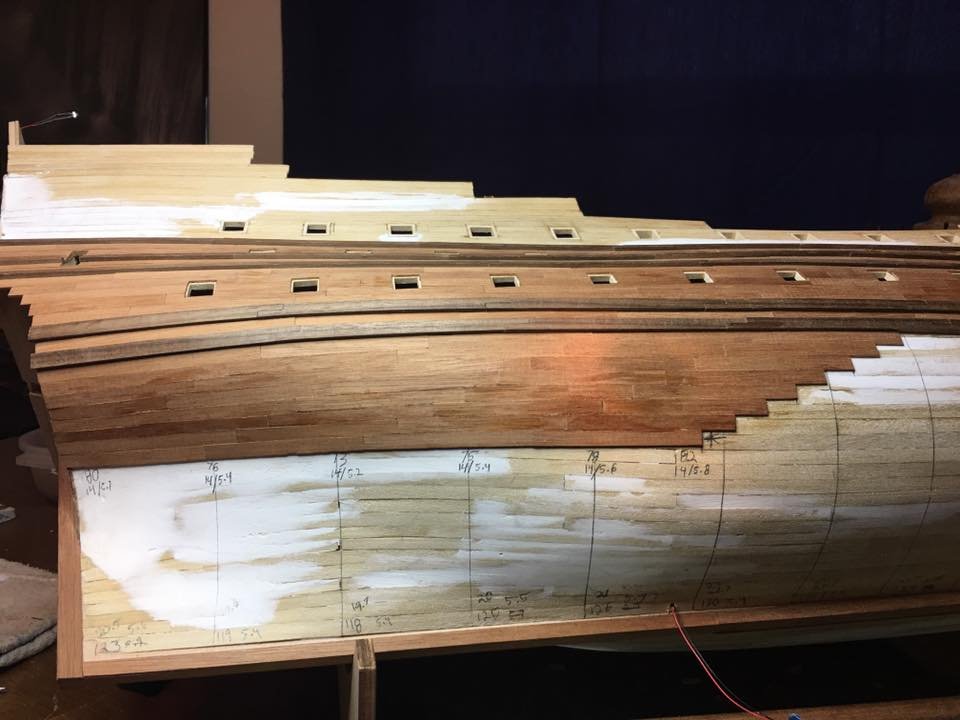
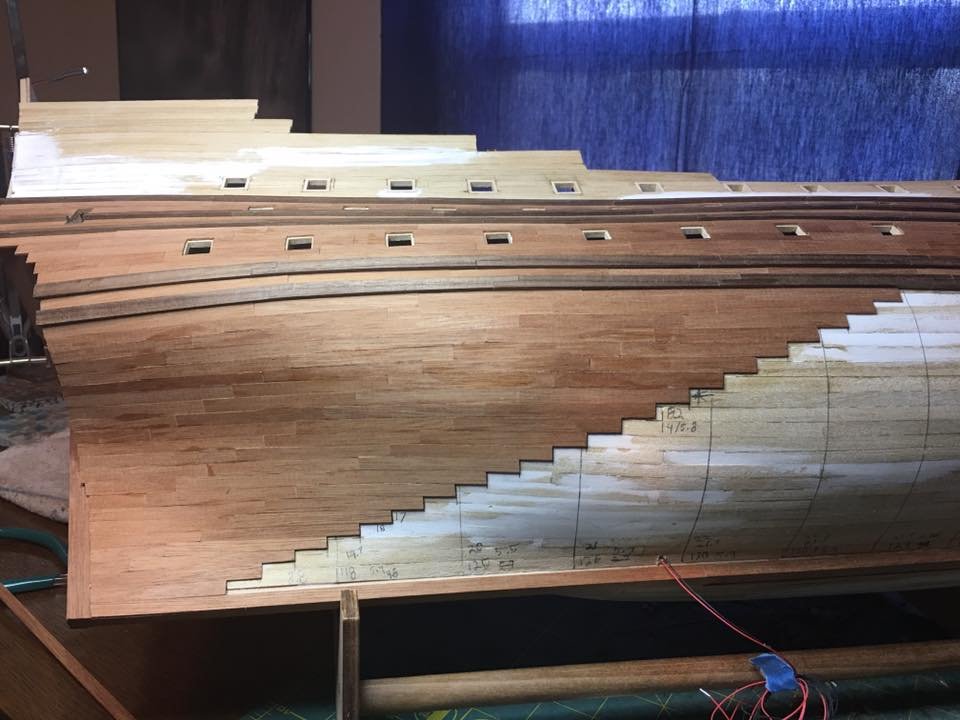
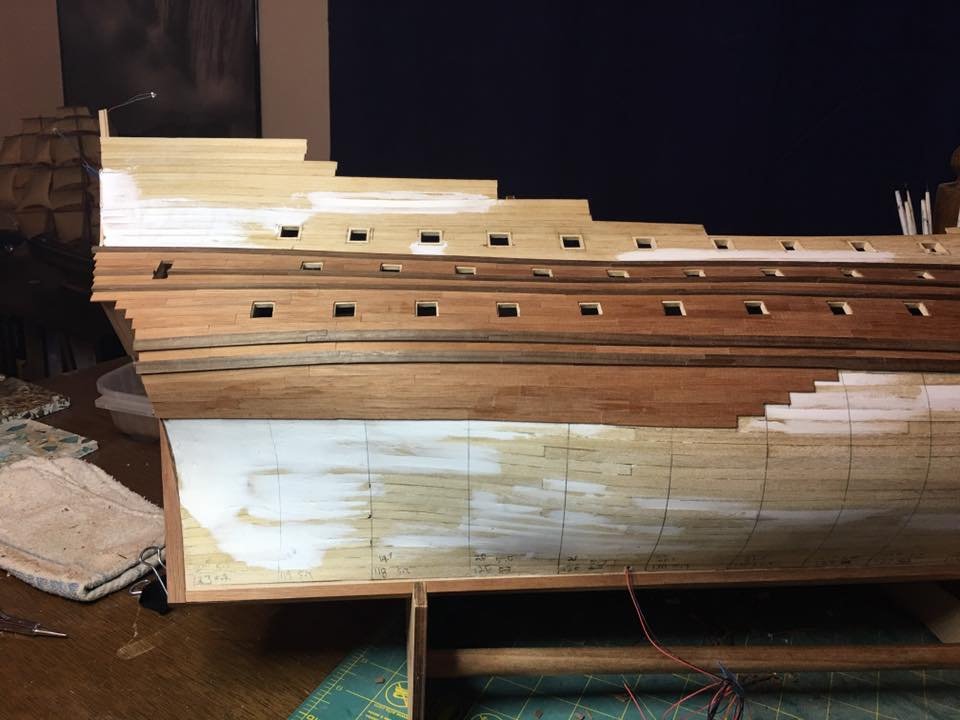
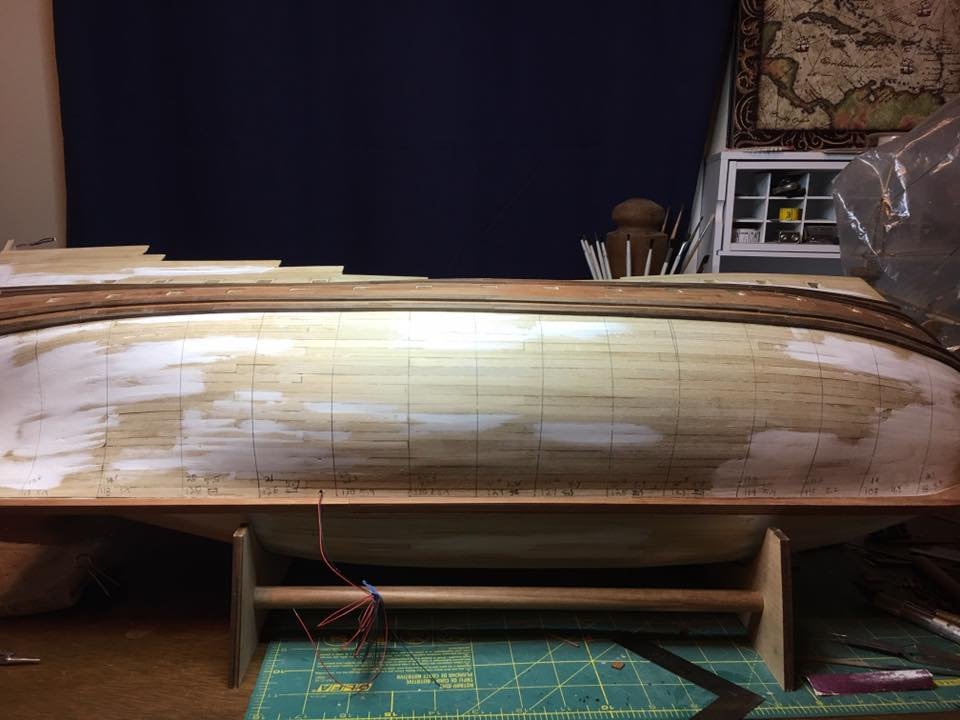
I've reached the keel! 22 strakes is what it takes to go from lowest wale to the keel. Now carry that across the hull. Double, triple and quadruple checking measurements as I go. It is easier to make minor adjustments over the entire hull than have to have drops, stealers or planks that are extremely different in widths. Now that the keel has been reached I know for certain how many strakes it will take and can keep them in line as I progress to the bow. The bow will require very careful attention as each strake will narrow considerably as they make the curve in order to not need stealers or drop planks.
- 961 replies
-
- 11
-
-
Addicted to card modeling and historical evidence :)
EJ_L replied to AmonFinn's topic in New member Introductions
Welcome to MSW Alex! Great to have you with us and of course we would love to see pictures of your work both past and current build. -
Hello all from Staffordshire England
EJ_L replied to Smudger2501's topic in New member Introductions
Welcome to MSW! I don't have any tips for that particular model other than take your time and read ahead on the instructions but I do wish you the best of luck on your build. -
Welcome to MSW Doc! I have no doubt that you will find plenty of help and great people to help you along your way.
-
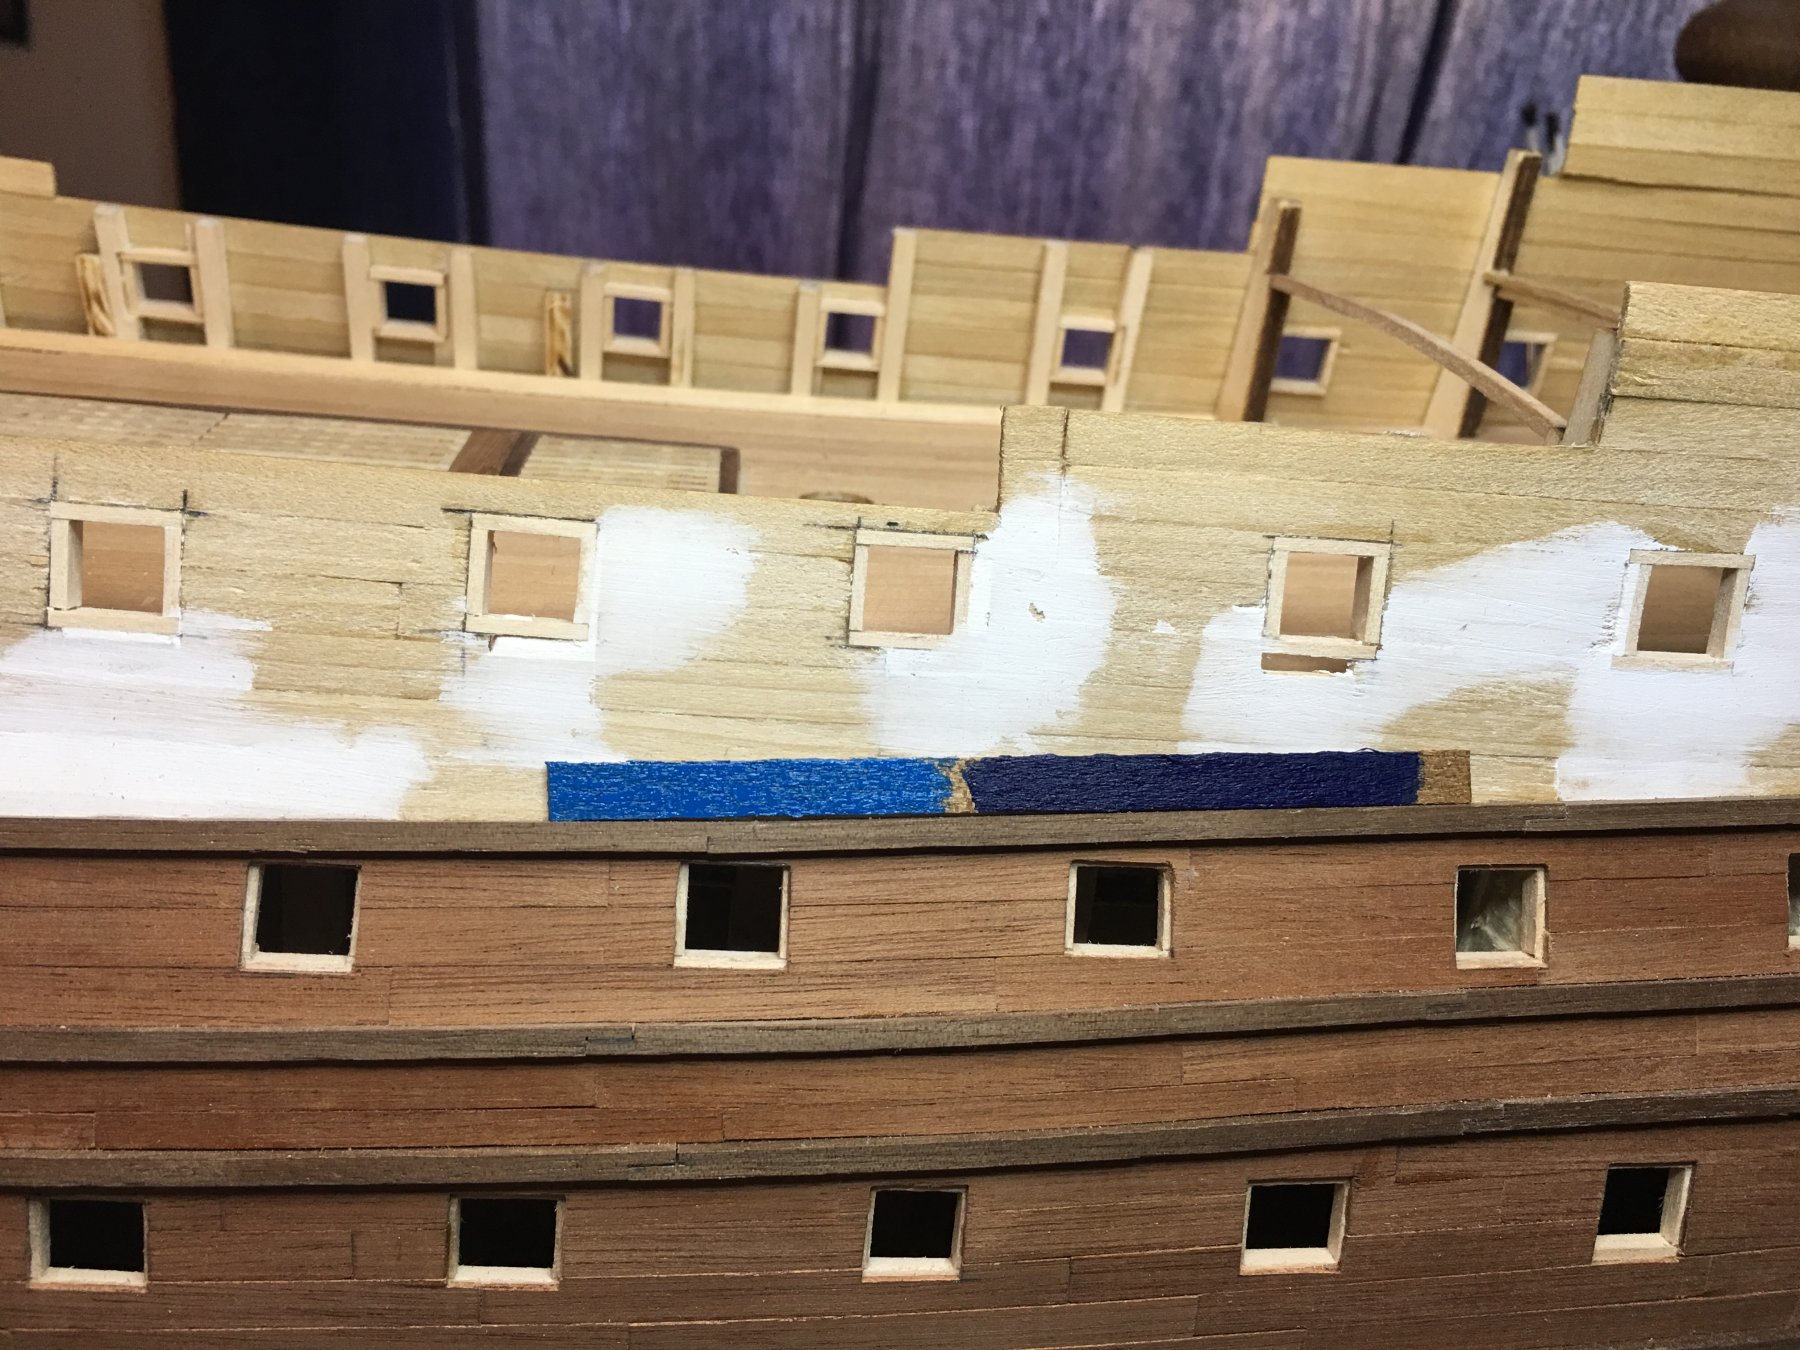
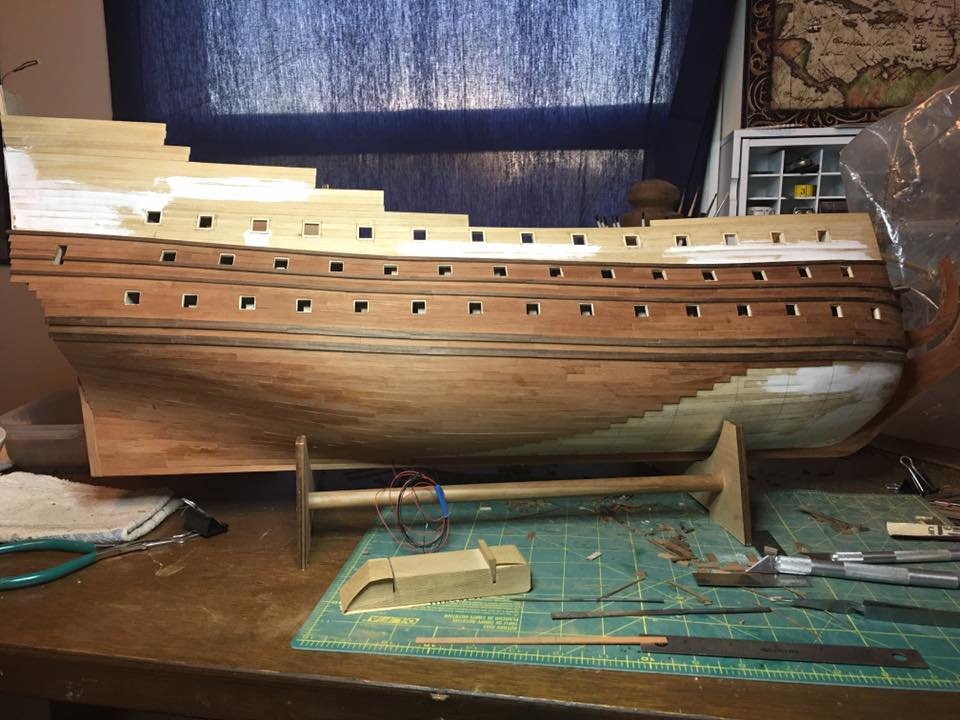
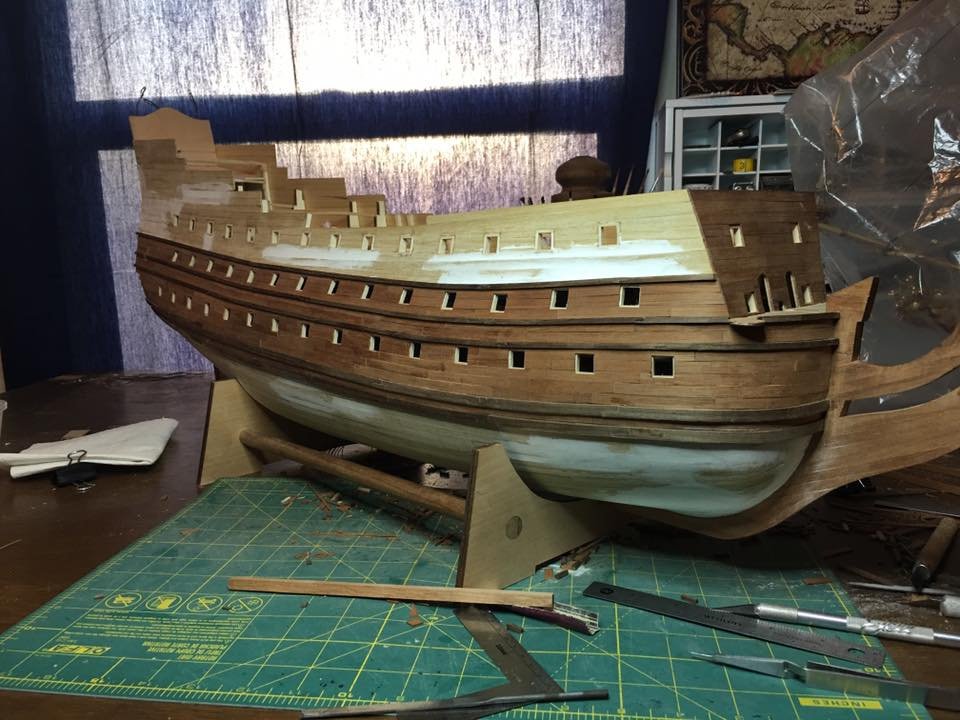
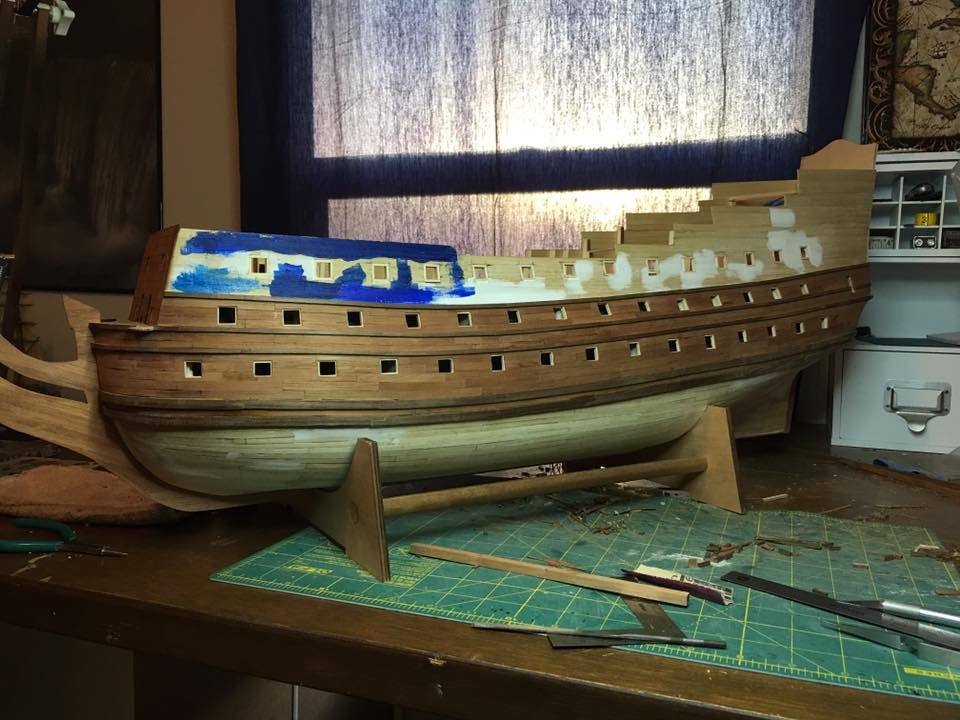
I will plank the entire hull twice. Starting where I did was the easiest point for me as the ports gave me the best references to dimension the wales and it now provides two fixed locations for a more accurate measurement and layout of the lower planking and the tapers I will need there. Where the blue is smeared on the upper bulwarks now is just some extra paint from my test samples. That area will get covered up with the veneer planking. I wanted to get an idea of what the blue would look like on the actual ship spread out over a bigger area. It is not painted well nor evenly since it was just extra but it showed me what I wanted to see when comparing the two colors I was debating between. My plan is to paint the wood prior to installing it on the ship so that the only painting that will need to be done will be touch ups where I make cuts for ports and butt joints.
-
Done looking at the sun and I'm back to work on planking. Moving along fairly smoothly so far this week. I managed to get a small section done but I have not been able to work on her to many hours the past few days. Hoping to get a little more build time in the back half of the week and with some luck, I will be back with a more impressive update!

- 961 replies
-
- 10
-
-
Not related to the build but here are a couple pictures from today's eclipse from my house. Sorry for the brown haze, that is not air pollution just he make shift filter I used for my camera as all of the solar filters sold out around here before I could buy one and I didn't want to pay to have one shipped overnight. I've included a picture of the unfiltered sky for proof! Haha!


-
Cedric, Thanks, for that information of the blue not being under the sixth wale. That was going to be one of my upcoming questions as I have contradicting pictures of that and was not certain which was correct. As to the wales being parallel or not, yes and no would be the answers. While the spacing is measured out the same and the planks are the same widths and count there is probably some slight variance to the wales themselves as they wrap around the bow. Those are some fairly thick pieces of walnut that I was bending and those bends are not the smoothest, plus there is some tilt to them as they lay on the hull. Combine all of that and the image distortion of the picture plus the gun ports that do not follow a straight line and the hull curvature and it is easy to see unevenness. In fact it has been driving me nuts trying to decide if what I am seeing is correct or not. I will measure time and again and then lay a wale or some planks and have to stop and completely remeasure everything as I begin to doubt and second guess myself. I will admit that this has been by far the hardest hull I have ever tried to lay out. Redo has been the word of the build so far. I still enjoy every bit of it which I guess makes me a little crazy!
-
Good build weekend. Added the lowest wale to both sides and have started the process of laying out dimensions and strake widths. I'm planning on starting the lower hull planking tomorrow if all goes good. Still have a lot to do but I'm gaining ground bit by bit! I also started did some more test painting and I am liking the ultramarine more and more. I think the dark blue will look a lot better and since it is almost certain that it was used on S.R., just not for sure how much was used on her, I figure I cannot be too far wrong with the choice.
-
Good luck with your parrels! It looks like you are off to a good start or at least have a good plan. They were tricky enough for me and with those sails taking up valuable work room.... that will be a challenge. It will be worth the effort in the end and I'm sure like the other details you have done, they will look great!
-
Cedric, It will be soon! I did not have it on yet when I took these pictures. As of typing this I have one side in place and should have the other done by tonight if my day goes as planned. I've been working wale to wale and even though there is only 1 strake between these two wales I left it off to be a separate step just to give myself an "easy" step in the middle of this beast.
-
Vic, they are one of our sponsors on the front page. I've ordered from them a few times now and their quality is excellent. I don't really know how they compare price wise to others and shipping overseas will raise the price but I believe he is reasonable. I typically buy large amounts so it's always expensive when I order! I have started to expirament with some paint. Right now I'm down to these two. The blue on the right is Ultramarine Blue and the blue on the left is French Blue. These are both straight out of the bottle so I can lighten or darken if I want or need to. Personally I am thinking of sticking with the ultramarine as I feel it will make the best background for the decorations to "pop" off of. In other news, I have finished the latest band of planking so now both sides are even again. Starting on the next band down which is a short one to the lowest wale. This is allowing me to move a bit faster so hopefully this band won't take as long.

- 961 replies
-
- 11
-
-
Thanks for that Marc. If you can do that at 1:100 then I should be fine. Now it's just a matter of deciding on method and materials. I see a trip to the hobby store in the near future! I know I've told several people on here about this but I don't remember if you are one of them. If you have a smart phone Woodland Scenics has a great app for figuring scale. Its Model Scaler and I have used it a lot for converting back and forth between scales. Since it is made by a supplier for model train scenery the programmed scales are set for the common railroading scales however it has an option to enter in any custom scale you want. You can then go back and forth between that scale and 1:1 in any numerical units you want. For example in 1:77 scale that I am currently using, 100 actual Feet is equal to 395.844mm in scale or 50mm in on my model is the equivalent of 3.85m in actual size. Another example would be these through bolts. Lets say the heads are 4 inches diameter, for my scale my bolt head would only be 1.3mm. Some days you have to love technology, others, well not so much.
- 2,699 replies
-
- 3
-
-
- heller
- soleil royal
- (and 9 more)
-
Marc your skids are a nice addition to the ship. they also gave me some guidance for how my own steps were going to look. My plan drawings show switch back style ladder going up under a gun port then shifting over to the next empty space between ports. This has always bothered me in both design and function on such a large ship that would be entertaining dignitaries. The skids provide that handhold that is otherwise lacking to assist those VIPs who may not be used to scaling a ship this large. By the way, what scale is this model in? I love the look of the bolts on the wales and have been debating if I want to tackle them myself when the planking is done. Curious what scale you are working in to judge if my own 1:77 would look good with them or if they would be oversized like what happens with most tree nails.
- 2,699 replies
-
- 2
-
-
- heller
- soleil royal
- (and 9 more)
-
Water looks good! I would suggest making sure it is covered though when you go to work on the ship and just in general. Something tells me that paint and/or glue dripping on it and the natural accumulation of dust will be a pain to clean off that textured surface.