HOLIDAY DONATION DRIVE - SUPPORT MSW - DO YOUR PART TO KEEP THIS GREAT FORUM GOING! (Only 69 donations so far out of 49,000 members - Can we at least get 100? C'mon guys!)
×


EJ_L
-
Posts
2,246 -
Joined
-
Last visited
Content Type
Profiles
Forums
Gallery
Events
Everything posted by EJ_L
-
Welcome to MSW Steve! Great to have you with us. I wish you all the best on your repairs and future builds and look forward to seeing your work!
-
 I like watered down white glue for gluing rope, cloth etc. and I use it extensively on my model railroad scenery but, for rigging I like to have that instant hold CA provides a lot of times. Using the tip of a pin I can usually apply just a tiny amount that does not make the rope as shiny. I say sometimes as we all know how quickly CA glue can get out of control, especially thin CA and get where you didn't want it to go.
- 608 replies
-
- 2
-

-
- la couronne
- corel
- (and 1 more)
-
I've been using very small amounts of CA also. It can come out shiny but not always. I like the CA for the quickness in drying but, I'm always open to better suggestions. I am probably going to start buying small amounts of various glues to start testing them to see which ones I prefer and for what material/uses.
- 608 replies
-
- 2
-
-
- la couronne
- corel
- (and 1 more)
-
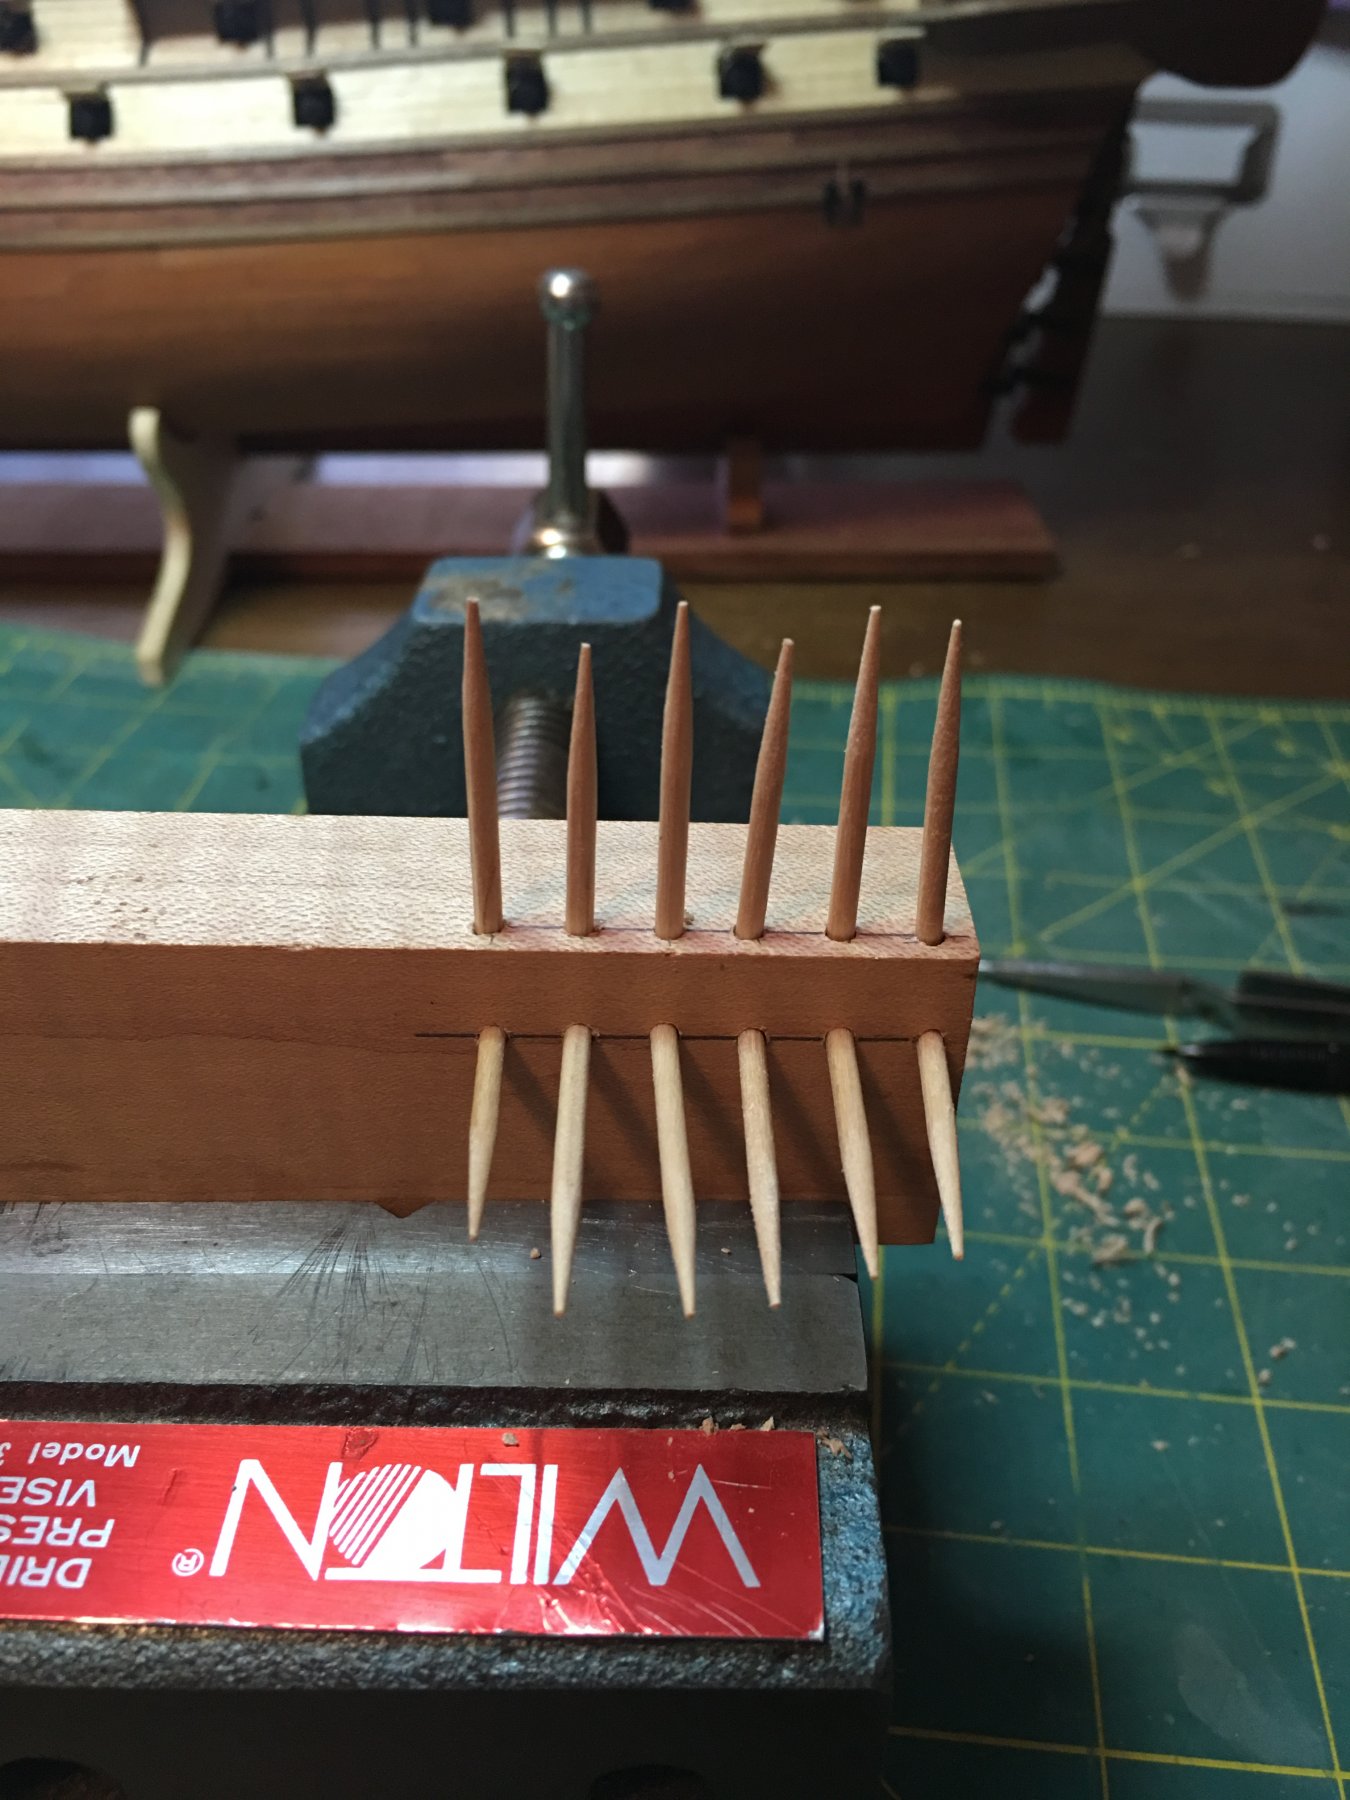
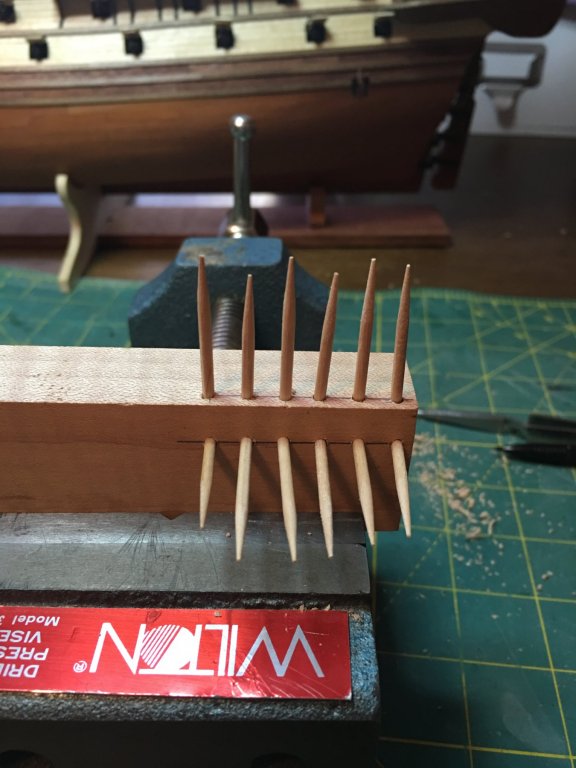
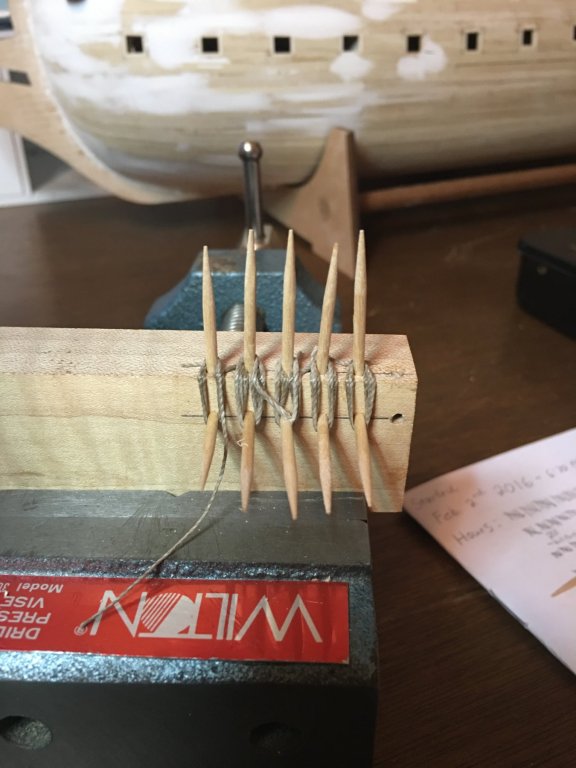
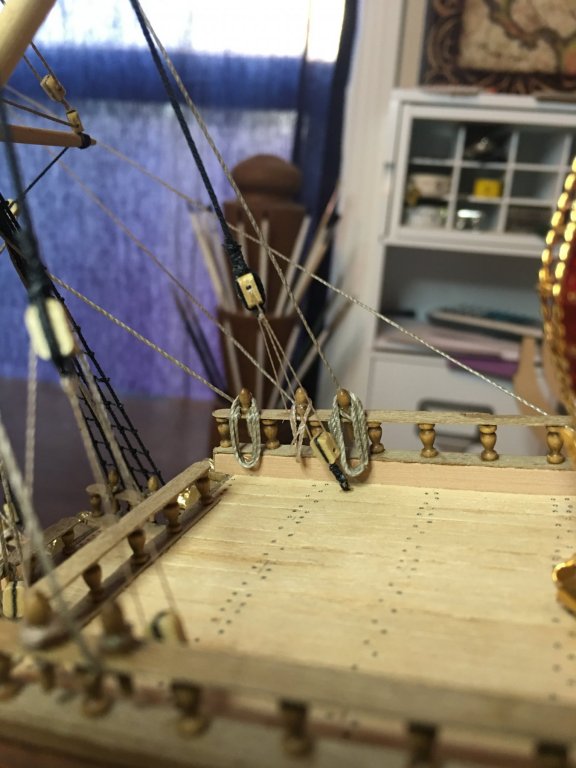
Rope cool process is fairly simple. I took a scrap piece of wood and drilled a couple rows of holes on two sides. Snipped a few toothpicks in have and inserted them into the holes and then I simply wrap the ropes around the toothpicks and glue them in place. Once glued I pull the toothpick out of the holes and free the rope coil. The coil is then placed over the line that is tied off to a bollard and done. Fairly fast and easy.
- 608 replies
-
- 6
-
-
- la couronne
- corel
- (and 1 more)
-
New here...re-entering the hobby...seeking sage advice
EJ_L replied to Techsan's topic in New member Introductions
Welcome to MSW Bryan and welcome back to the hobby! Best of luck to you on your future builds and I look forward to seeing your work! -
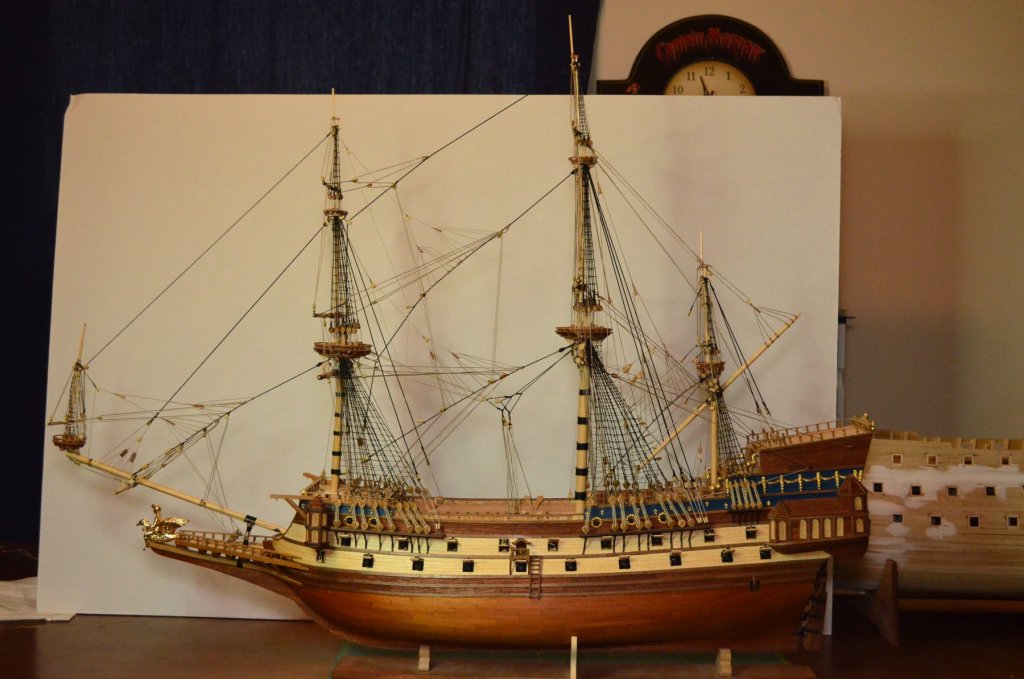
Thank you to everyone for all the nice compliments and the likes! This has truly been a great build for me in it being both my largest and most complicated to date, (soon to be passed by Soleil Royal) and most importantly, the first to have been started and completed on this site. Like most of us I have been building models for a very long time but to be apart of such a great community to learn, grow and share with, has made it all the better. All of the encouragement, tips and just knowing that there are people who are interested in what is being built enriches the model to a point where it is not just a model, it has become a journey that plays out in these logs like a story for everyone to read and enjoy. I am currently working on the rope coils and hope to have them done either tonight or tomorrow. Once they are all in place, I am hoping to take her outside where I can use the natural light to take some finished photos. Those pictures will be the last of the build updates on here. Koen, please do use what you can to help your build! Let me know if you need any pictures or information and if I can, I will gladly help you out. Also, let me know when you get a log started as I would love to see another Couronne come together. Don, thanks for the tip to clear the cache. Worked like a charm and I'm posting away again from my home computer.
- 608 replies
-
- 2
-
-
- la couronne
- corel
- (and 1 more)
-
I have the exact same issue right now. Home computer doesn't allow me to post on this website but others work and I can post on here using other sources, phone work computer etc. Weird. Glad your able to talk to us again and thanks for stopping in!
- 608 replies
-
- 1
-
-
- la couronne
- corel
- (and 1 more)
-
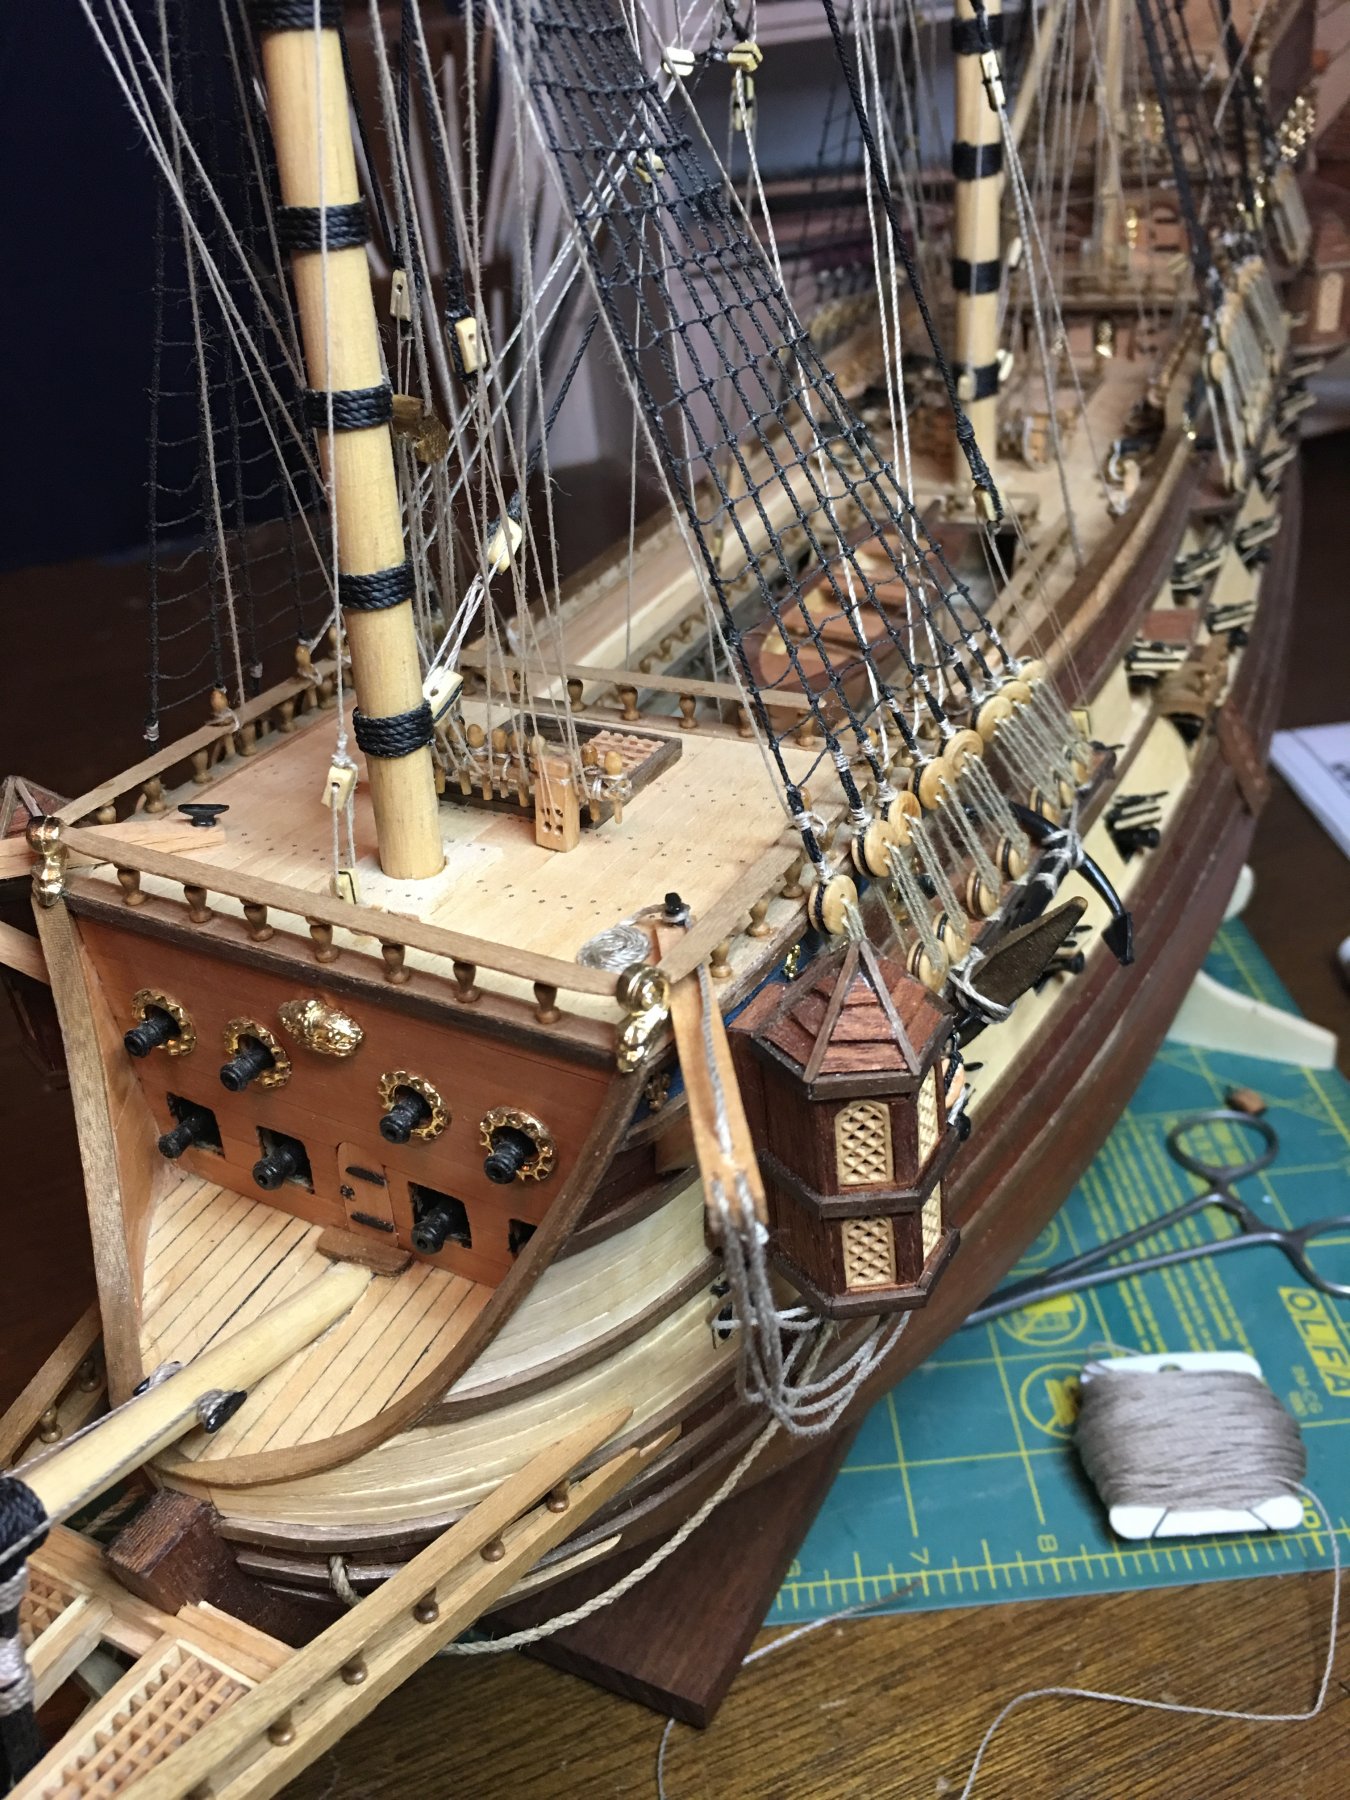
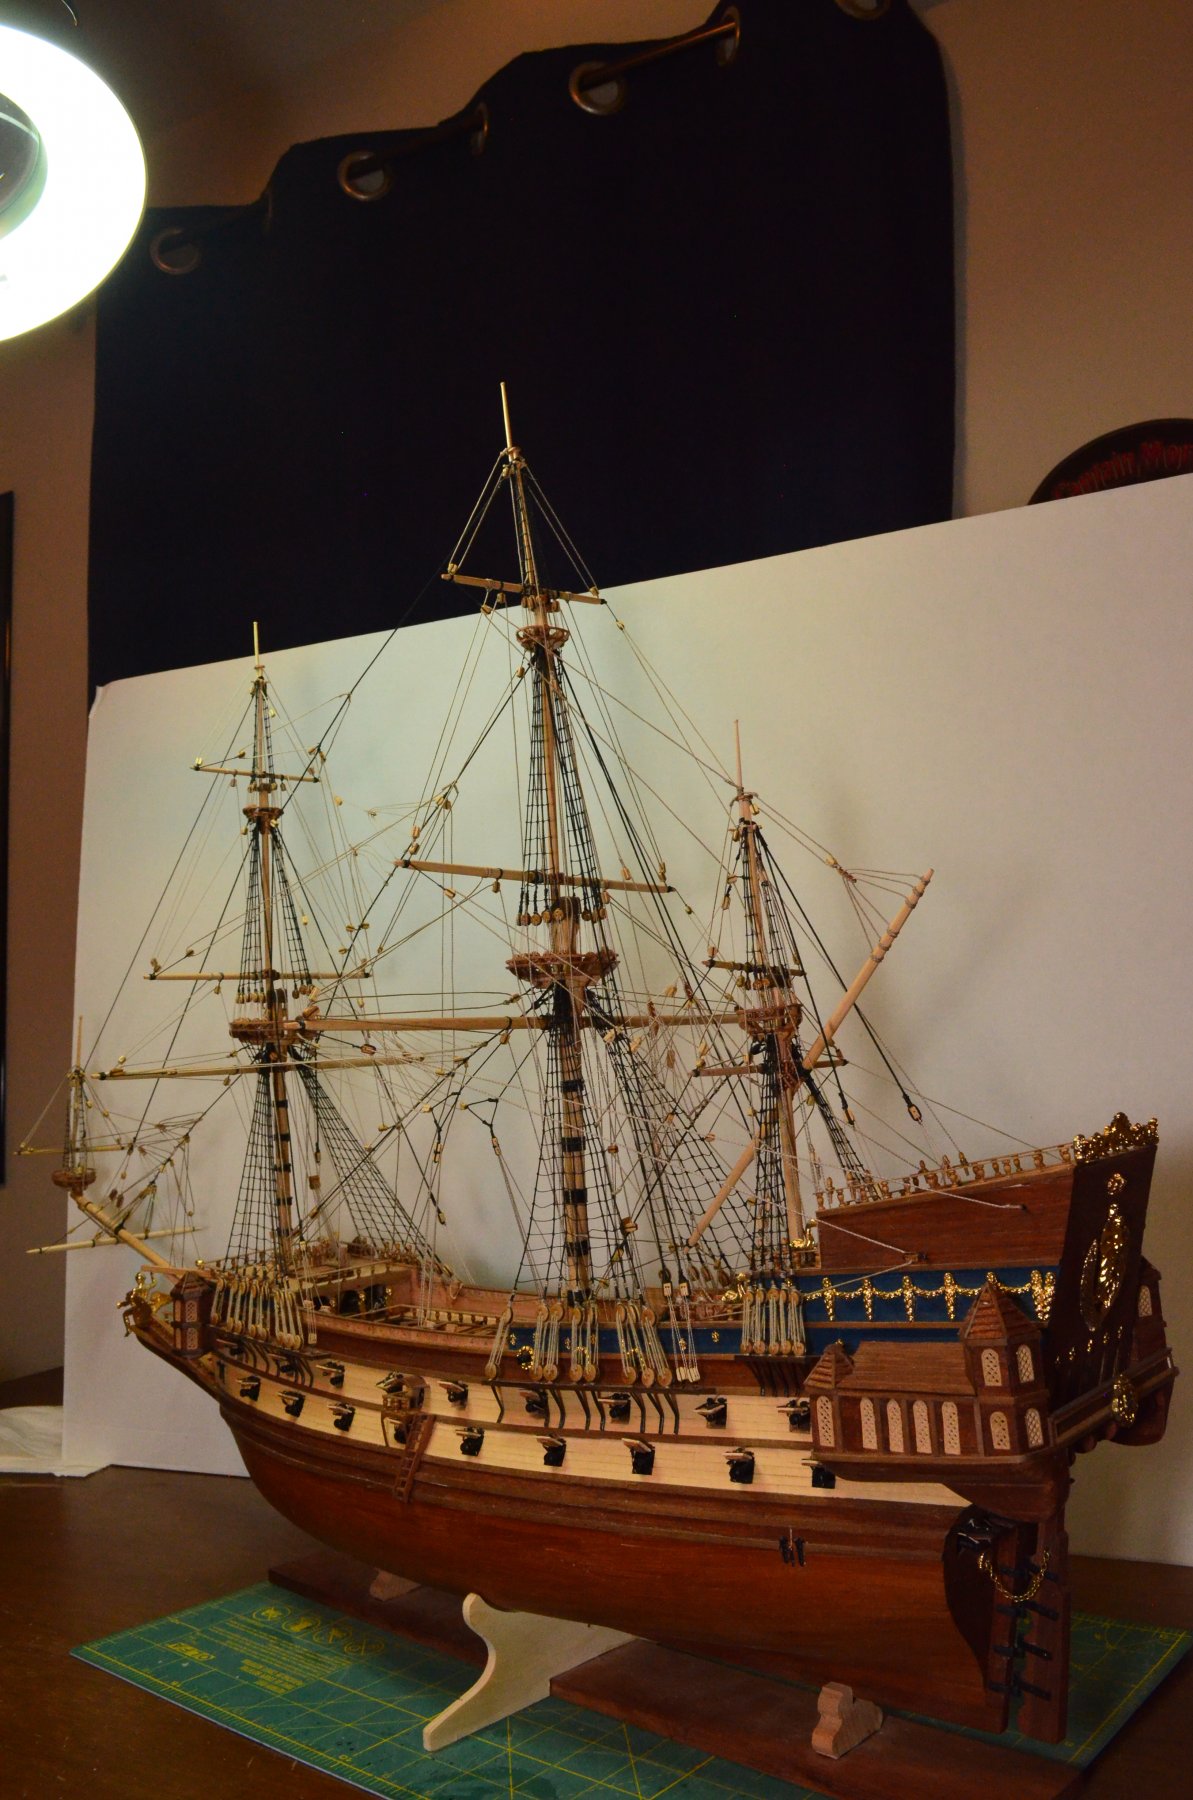
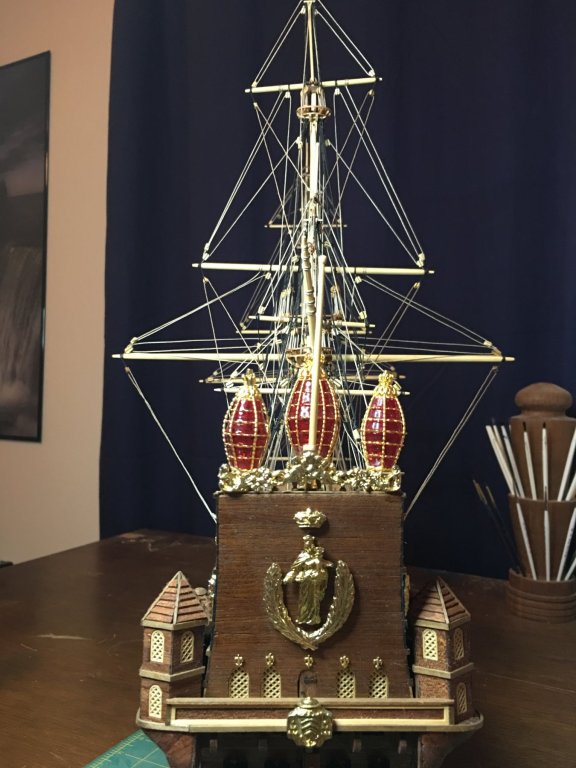
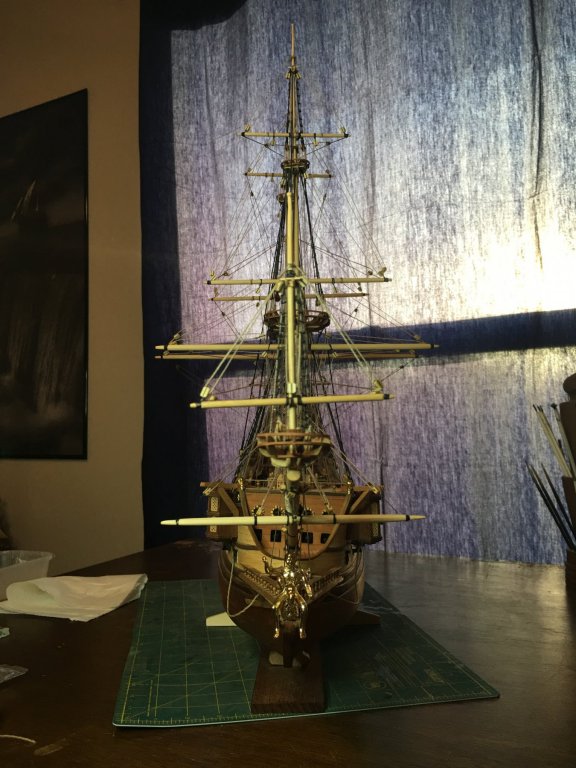
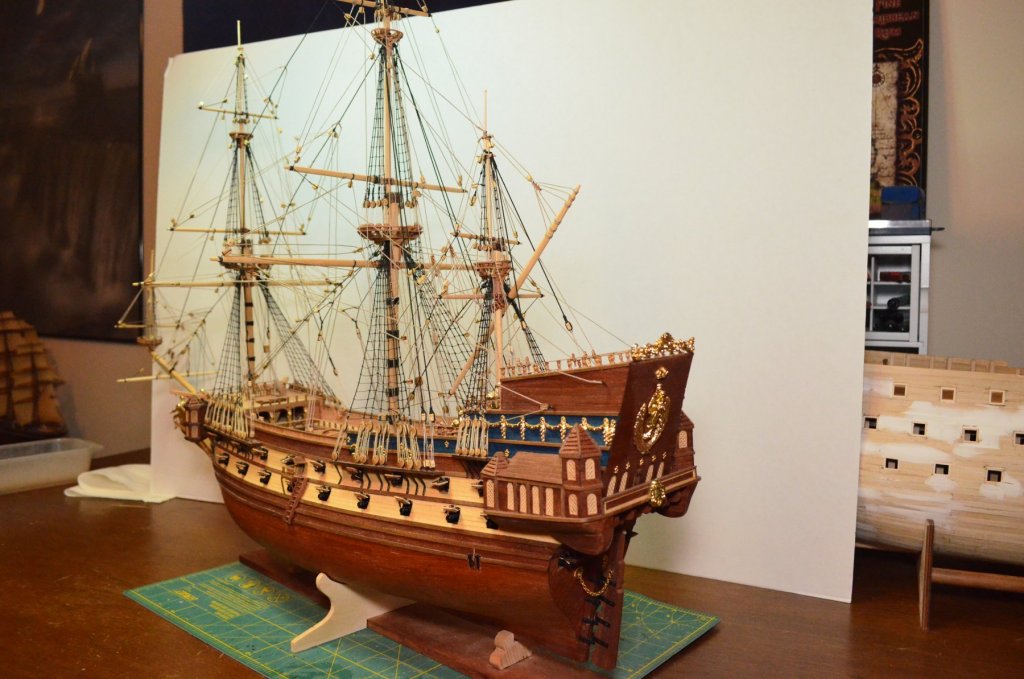
Tonight I got the stern lanterns and flag staff installed. With that, the ship is complete! I'm still going to install rope coils this weekend and touch up a couple things but it looks like by the end of the weekend this build may be 100% complete!

- 608 replies
-
- 13
-
-
- la couronne
- corel
- (and 1 more)
-
Welcome to MSW Victor! You are in the right place for getting help and suggestions. Starting a build log is a great way to get some of that help, plus it is fun to watch the progress of the builds. Best of luck to you on your next build and I look forward to seeing your work!
-
It probably took a few of them snapping off before someone figured out that attaching it to the stem would be a good idea. The way things worked back then, it would not surprise me if a ship returned to port with their bowsprit tied off to the stem in a rudimentary bobstay only to have the master shipwright order them to remove it as it was not his design or even to receive a royal order to remove it as it was not approved by the crown. Good ideas can take a long time to penetrate a stubborn mindset.
- 608 replies
-
- 1
-
-
- la couronne
- corel
- (and 1 more)
-
Masts are looking excellent! Those are great books! Been reading them myself though I am still a long way from finishing the series as I read one then read something else in between each book. They do make understanding the ships rigging easier just as the models give a clearer picture of what is happening in the book. They go hand in hand a make an enjoyable experience.
- 74 replies
-
- 1
-
-
- Marine Model Company
- Joe Lane
- (and 2 more)
-
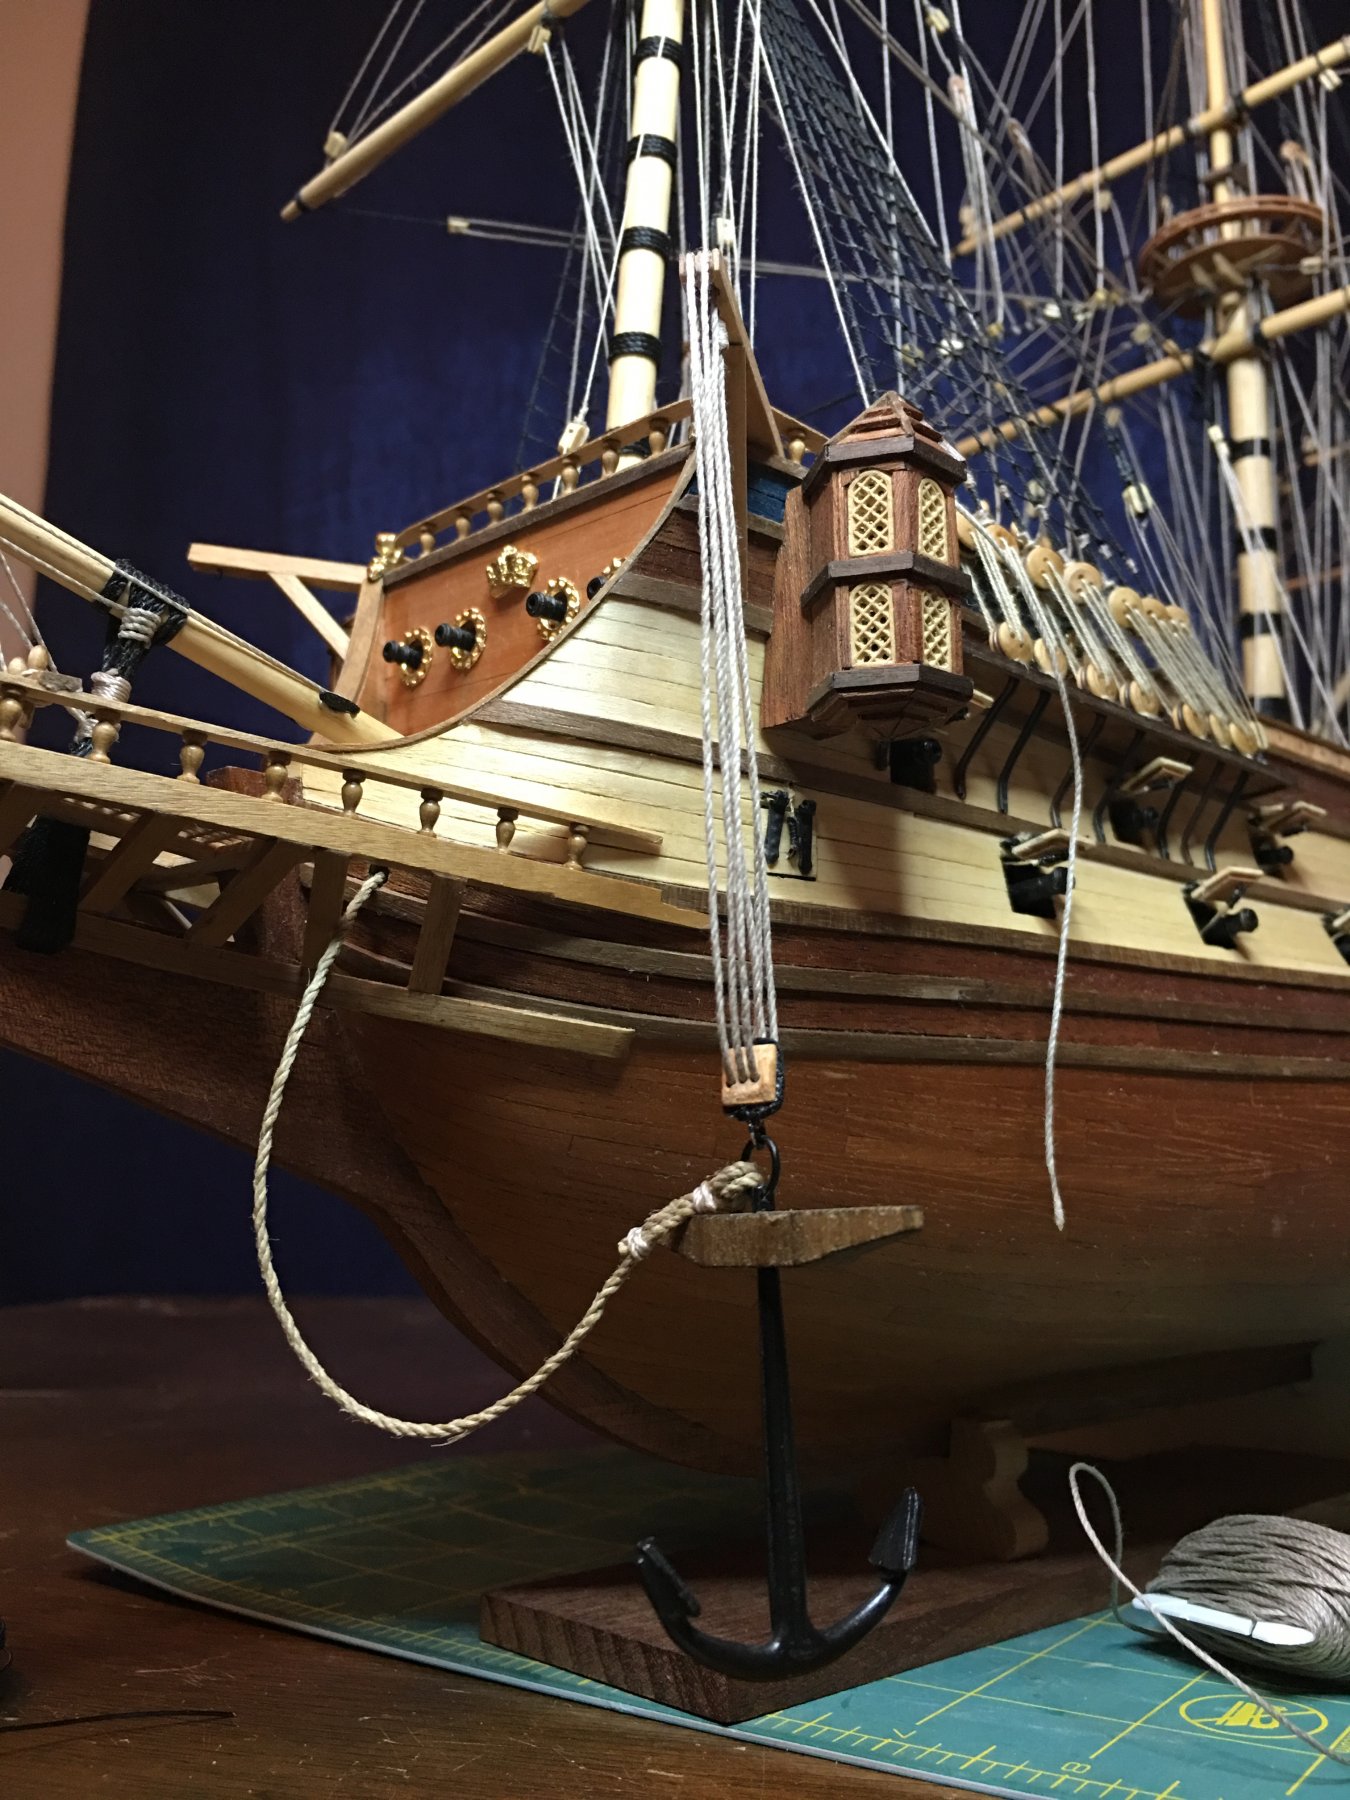
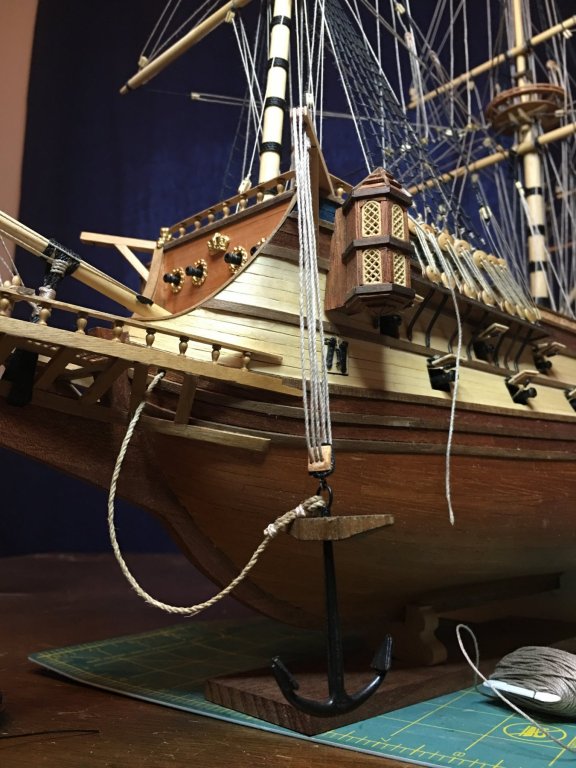
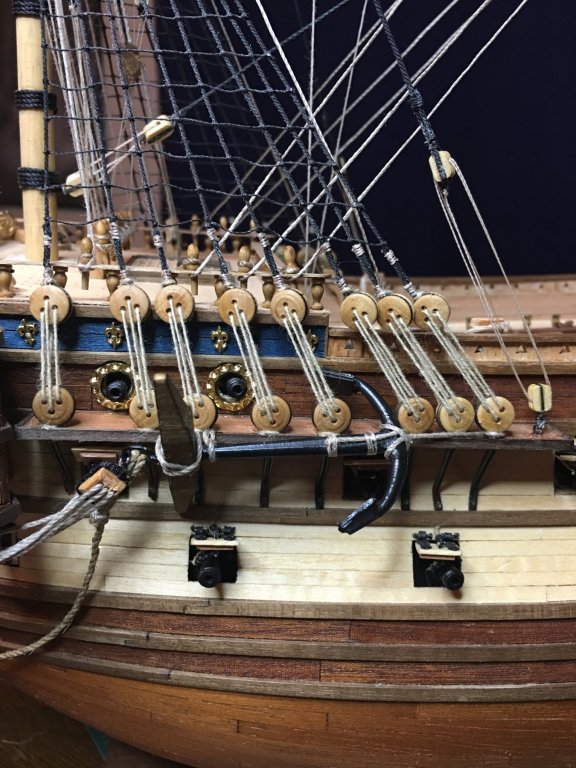
Got one anchor in place tonight. I already had a lot of it ready to go already and sitting in the drawer so that helped make the process a bit faster.

- 608 replies
-
- 9
-
-
- la couronne
- corel
- (and 1 more)
-
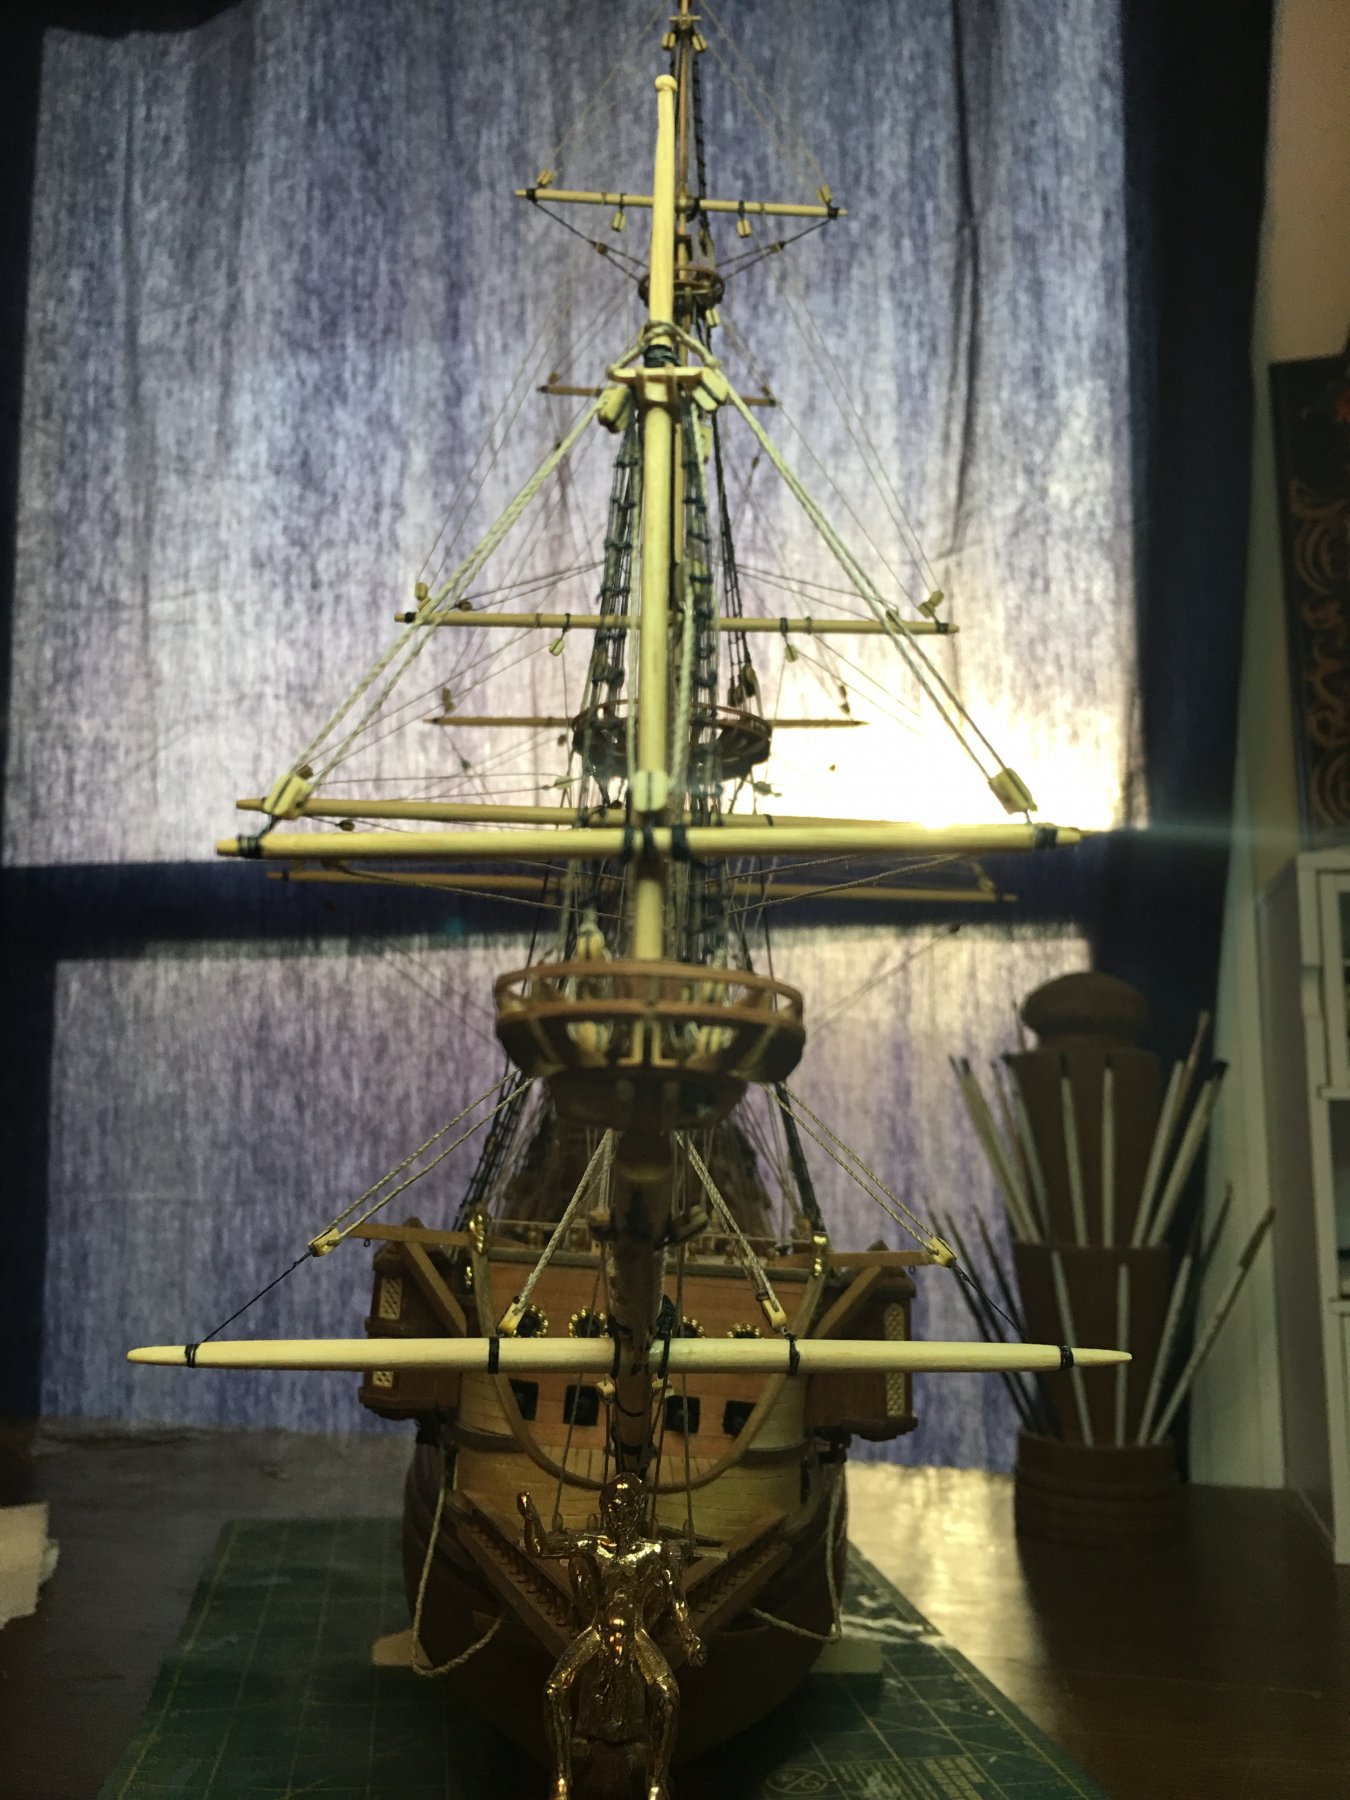
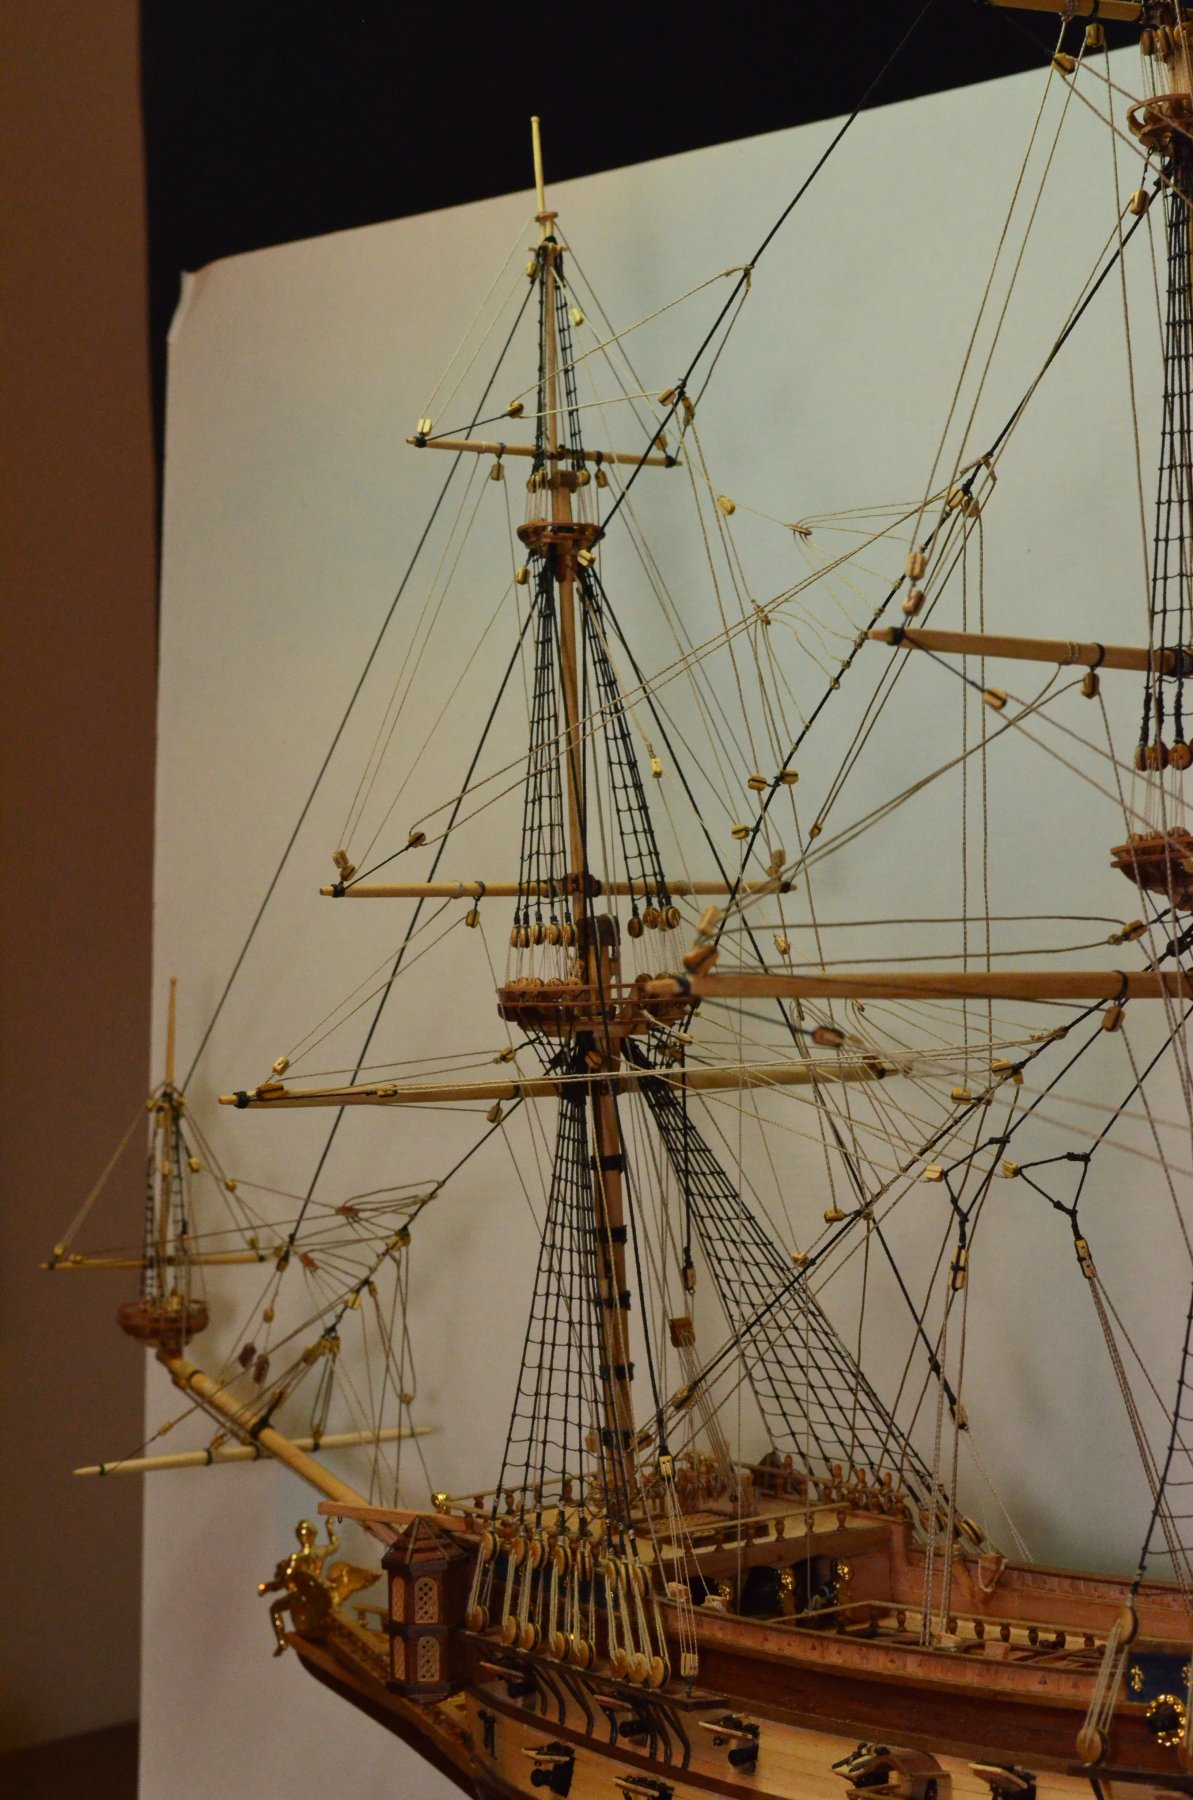
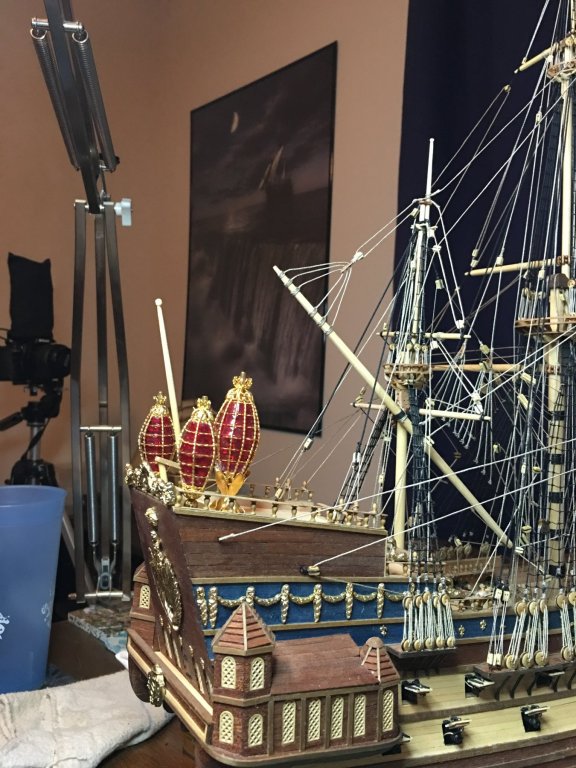
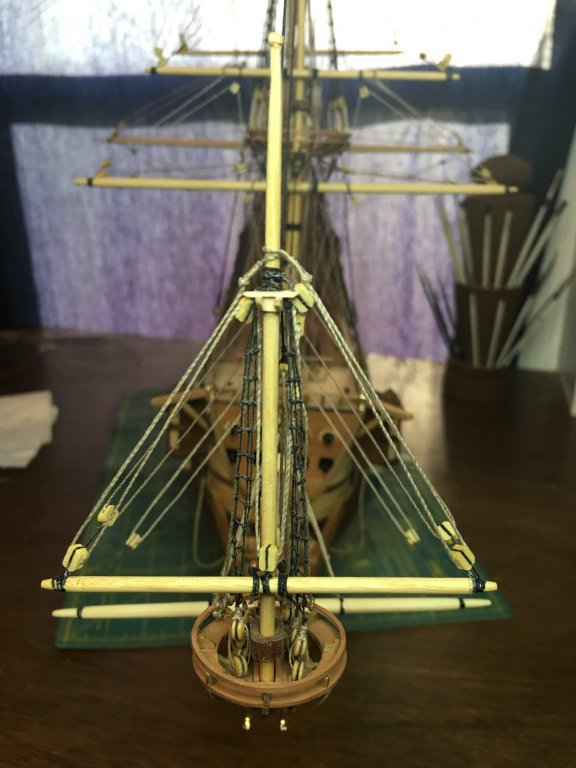
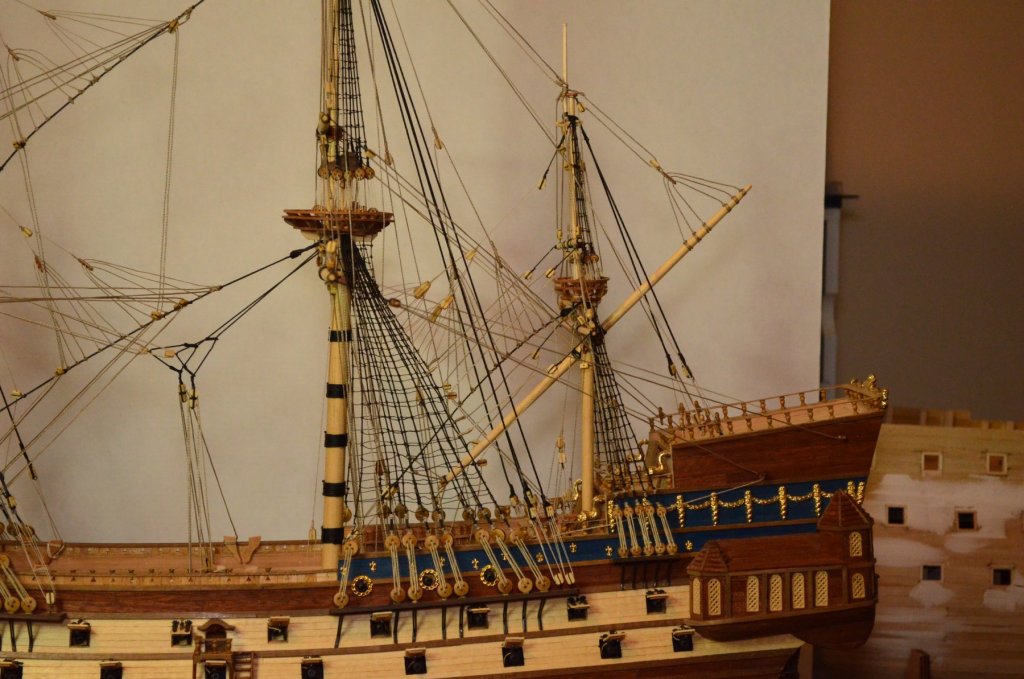
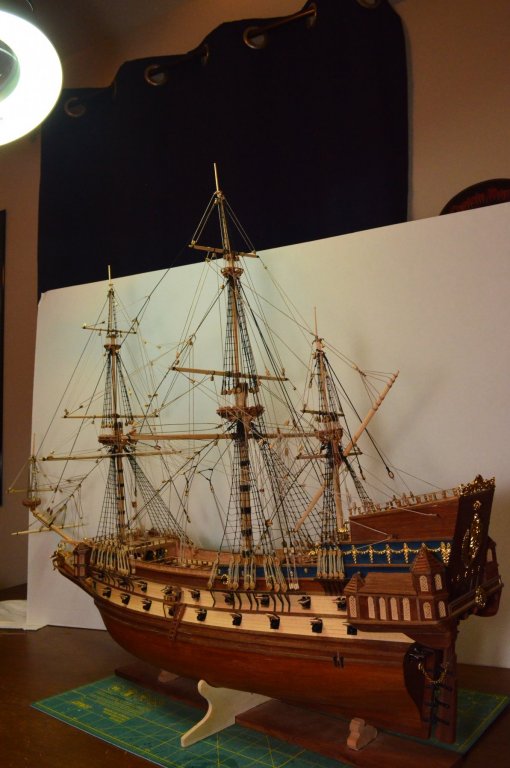
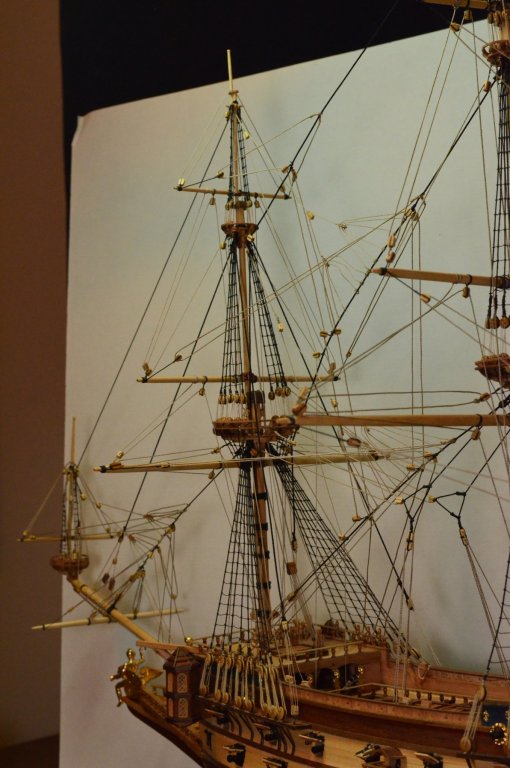
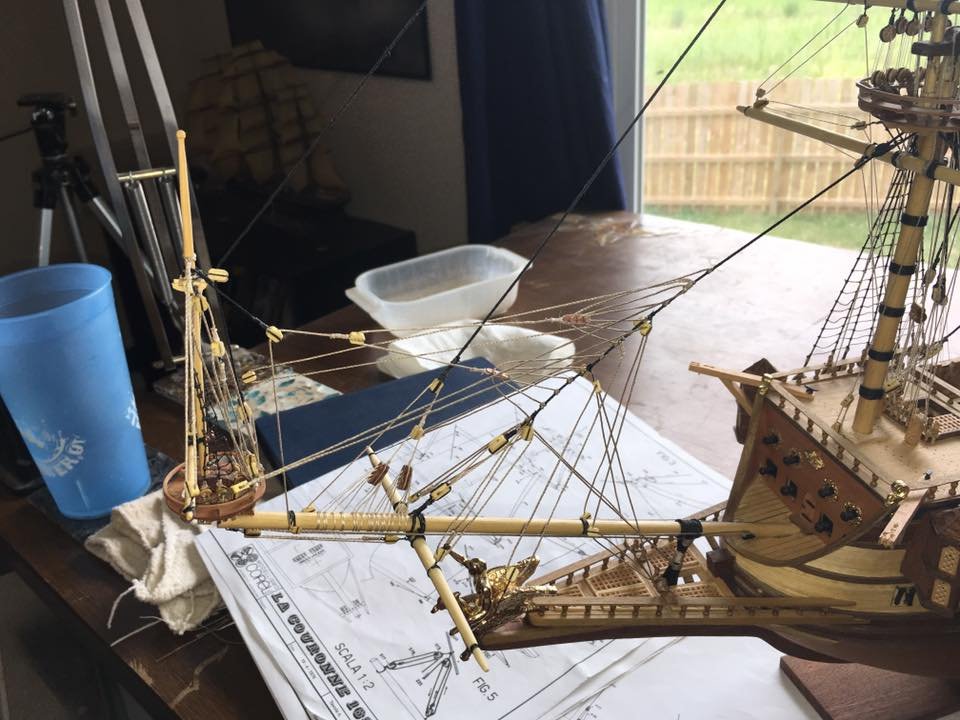
Don, here are some pictures from the front. Let me know if there is something specific you want to see. It is no problem to take more pictures if I need to.

- 608 replies
-
- 5
-
-
- la couronne
- corel
- (and 1 more)
-
Thanks Kevin and welcome back! You showed up just in time to see the end so not all is lost.
-
Excellent planking Elijah! More knowledge and practice certainly does make these jobs much more enjoyable. Your skills have grown by leaps and bounds over the course of your last build and into this one. I see a lot of great builds in your future!!
- 228 replies
-
- 5
-
-
- gunboat
- model shipways
- (and 1 more)
-
I was having the same problems last night. I could not respond on my computer but I could on my phone. I could add attachments which is how I got the pictures posted but then I had to log into my account on my phone and edit my response into the post. I'm on my work computer now and everything seems to be working fine. Hopefully it is just a glitch that will resolve itself soon.
-
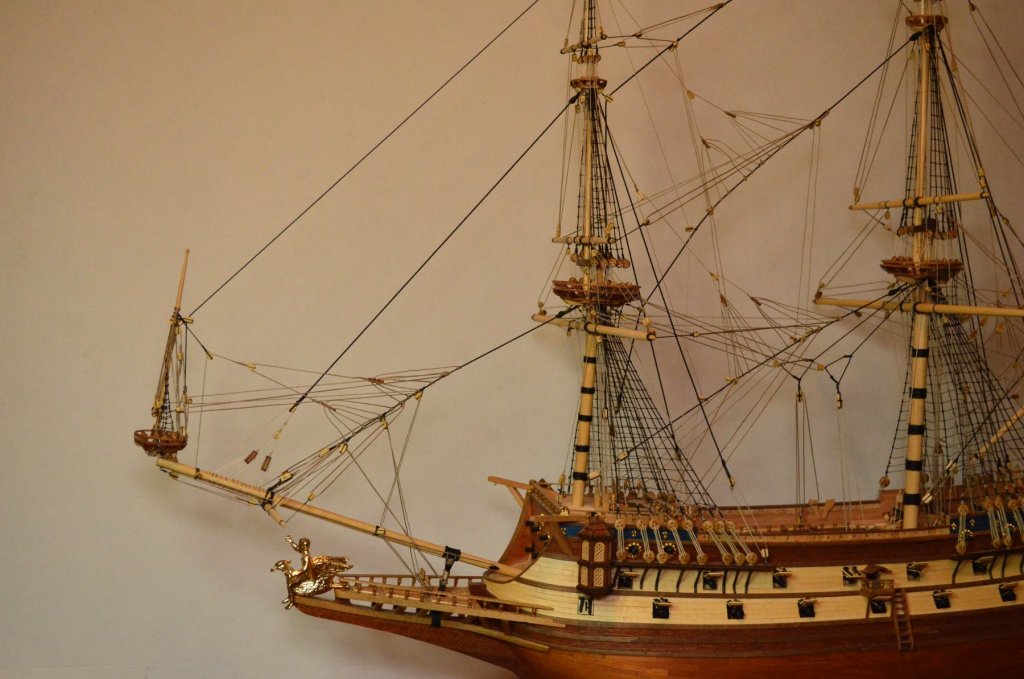
Thanks everyone for the comments and likes! I have not seen any indication there were bobstays on La Couronne. I have also not seen them on other similar ships of the era, Vasa, S.o.t.S.. They do show them on Soleil Royal though so I am thinking that sometime late in the first half of the 17th century this rigging was added to the bowsprit. Till then the gammoning appears to be the only ropes that actually held the bowsprit down. While this seems at first glance to be a common sense item to add, in reality this was still early on in warship development and the need for a bobstay probably had not been thought of yet.
- 608 replies
-
- 1
-
-
- la couronne
- corel
- (and 1 more)
-
Ships boat is coming along nicely and that is a great idea for the oars. I will have to use that on my next set of ship's boats.
- 653 replies
-
- 5
-
-
- trabakul
- marisstella
- (and 1 more)
-
Thanks Don! I did take some pictures from the front and I'm surprised I did not upload them last night. I will post them when I get home tonight. When I'm 100% done I am hoping to be able to take her out on the deck or driveway to take some pictures using natural light. Trick will be finding a day when it is not windy but in Kansas, I'm not sure if those days exist.
- 608 replies
-
- 1
-
-
- la couronne
- corel
- (and 1 more)
-
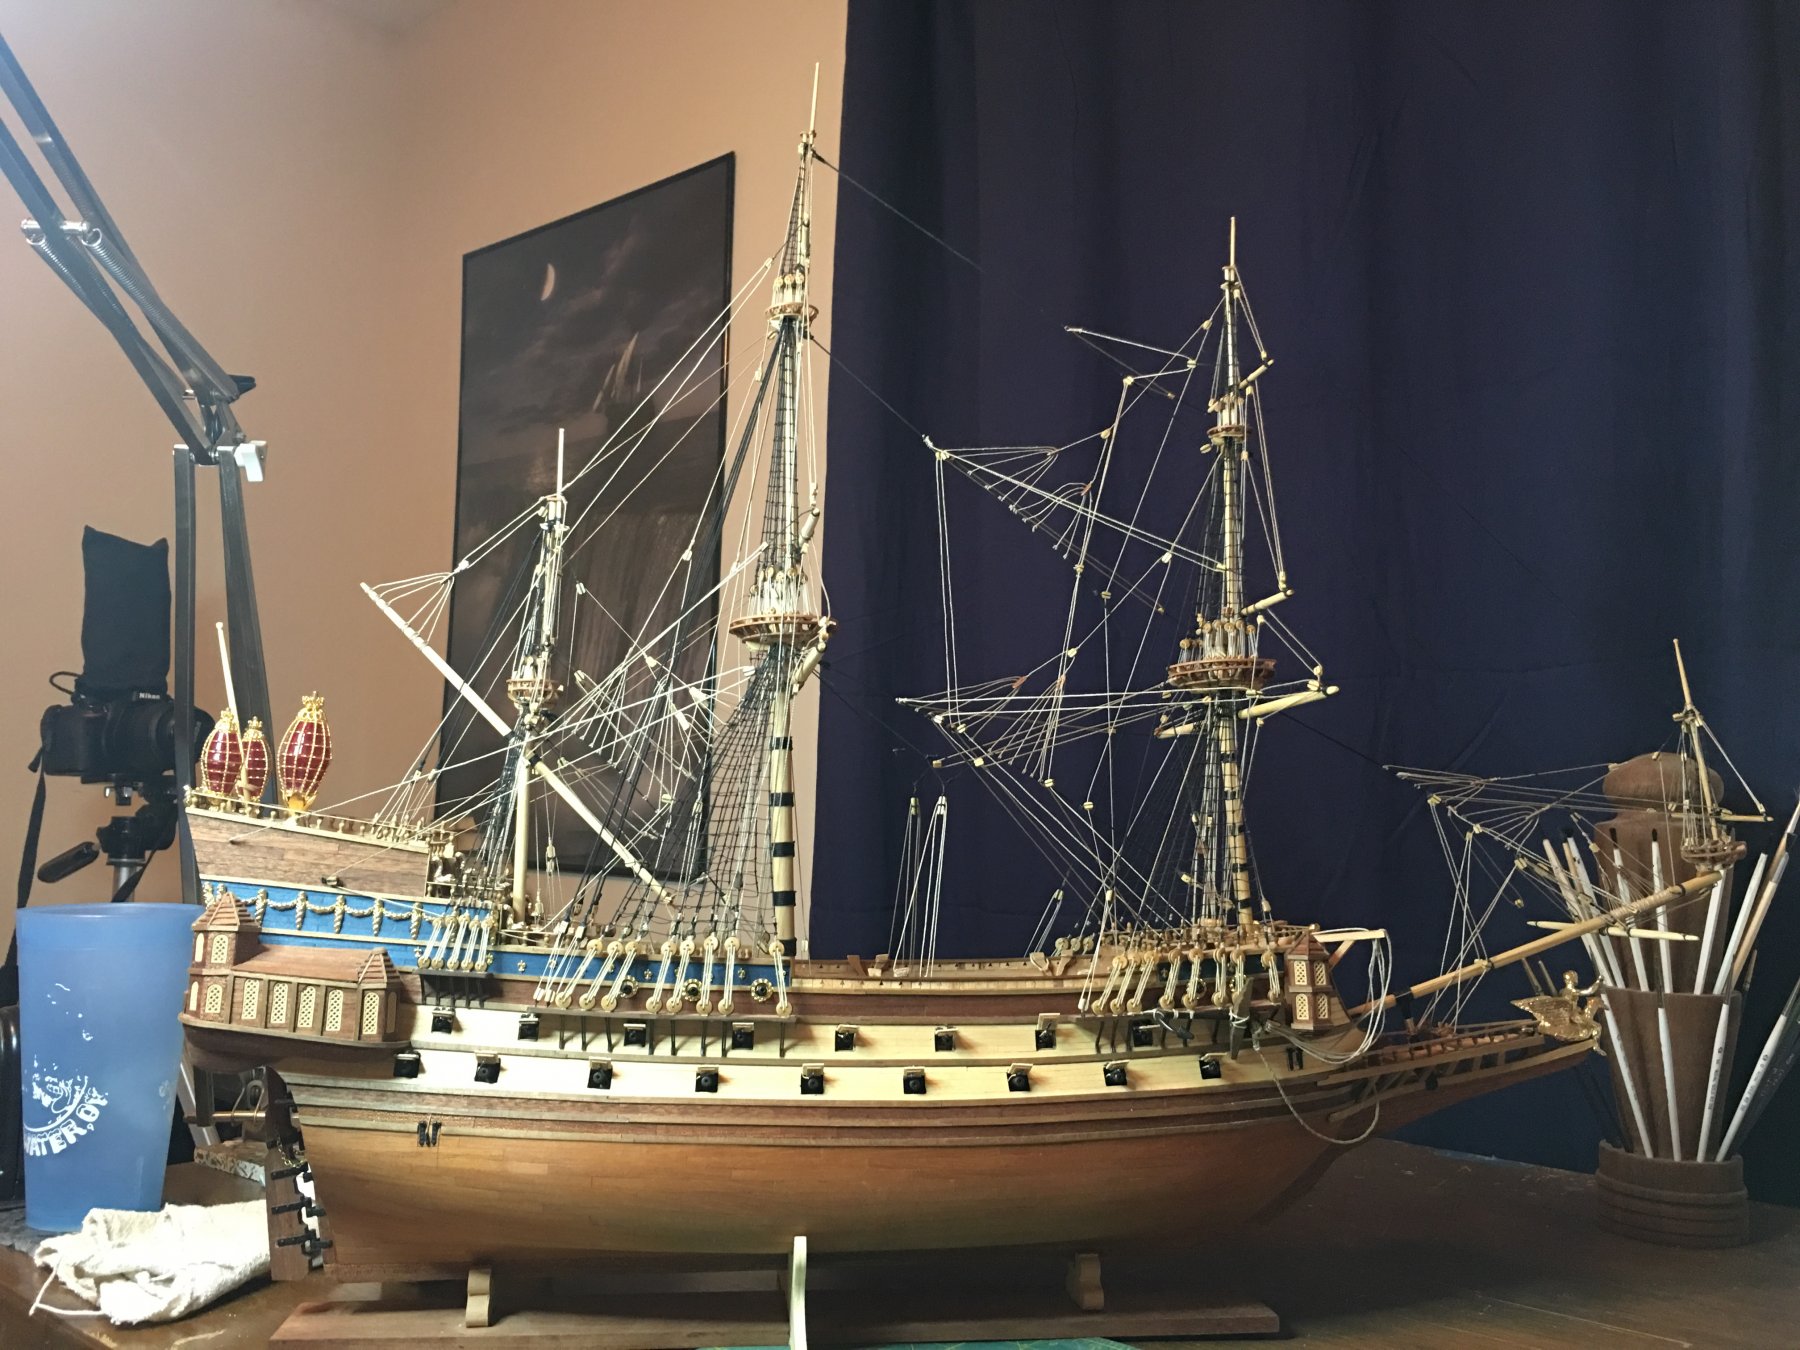
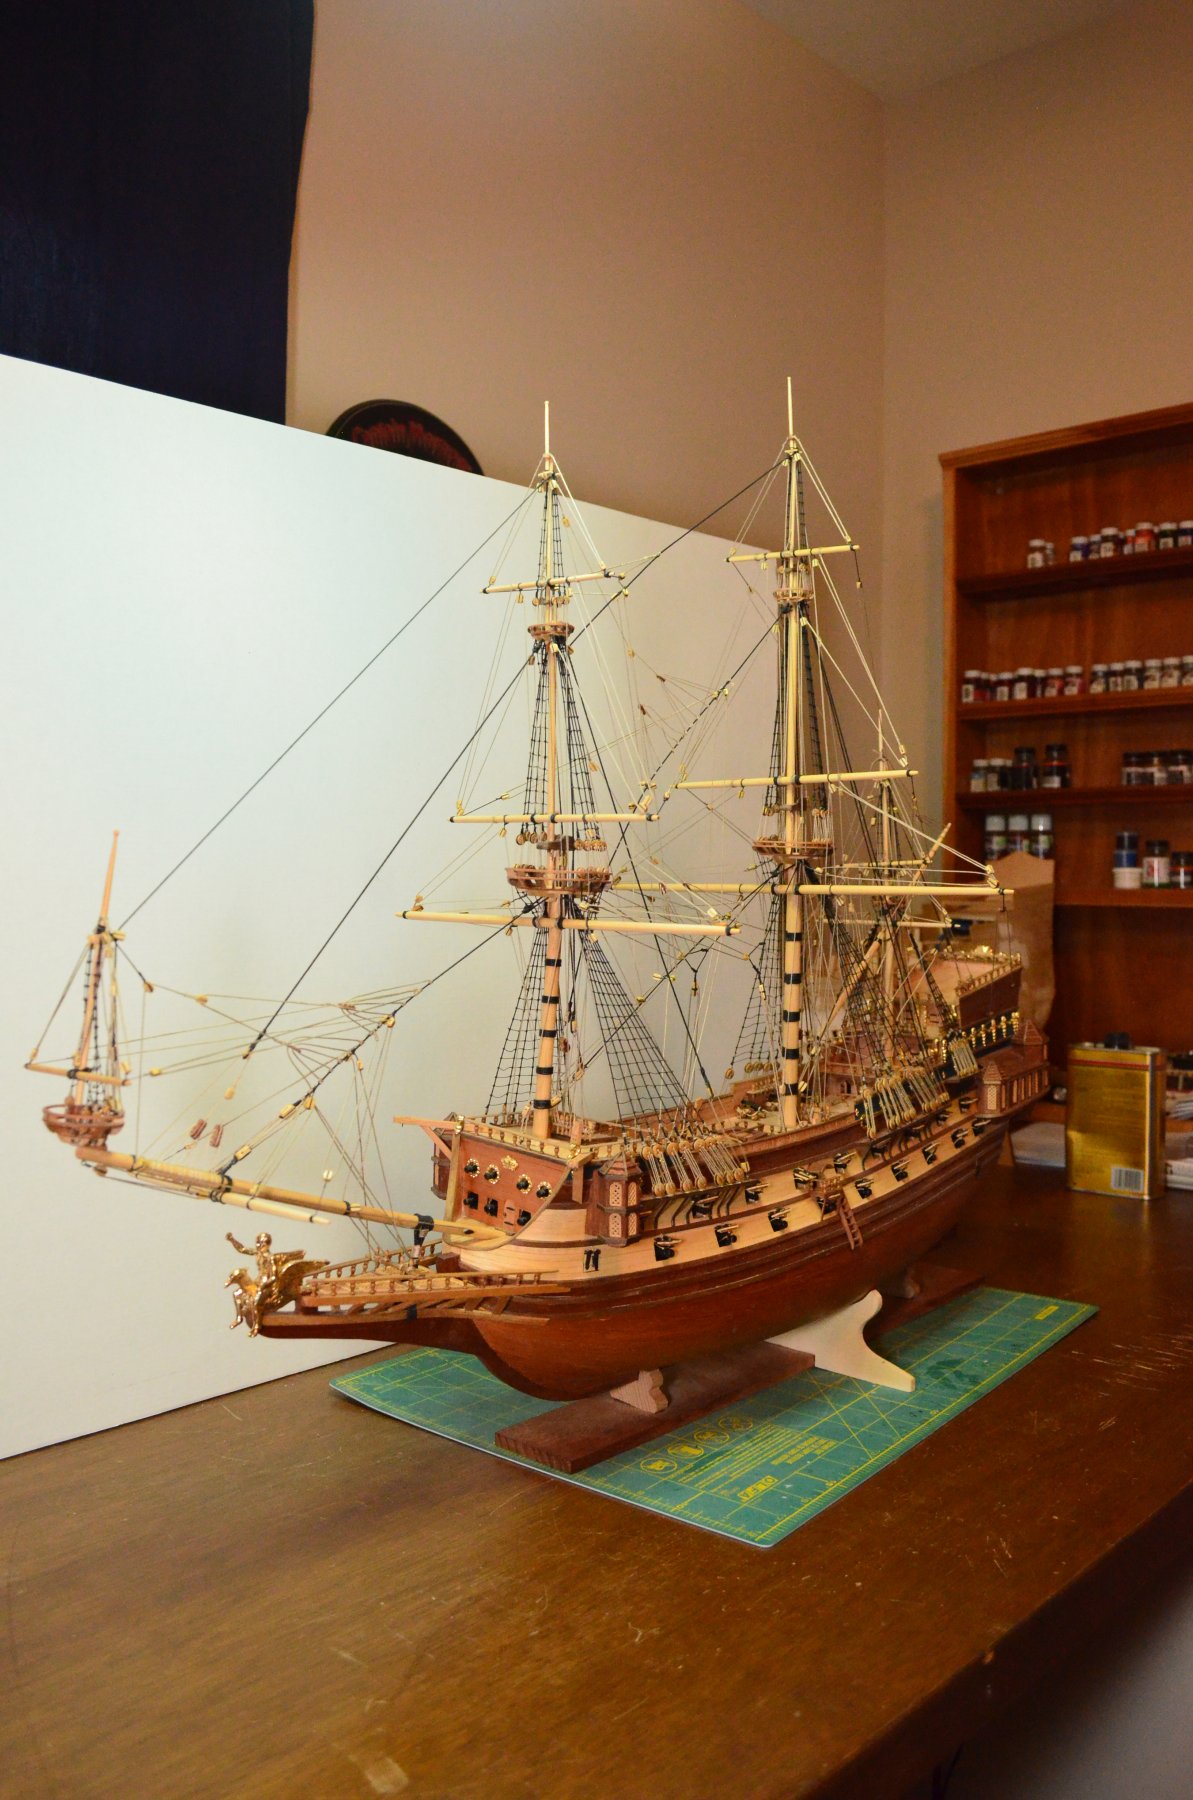
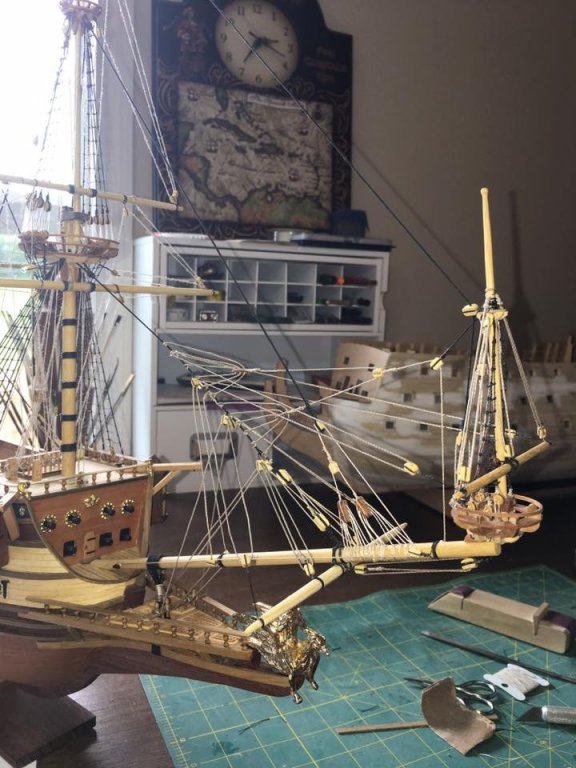
Rigging is complete!!! Wow what a relief to say those words!! I still have a few things to do such as the anchors and stern lights plus some misc. details like the rope coils but the huge mountain that is rigging is over. Took 297 hours out of the 897 hours on the build to date. A couple things bug me but overall I am happy with it. wont be long now and she will be complete! Then on to the next project! More to come one as I put the finishing touches on her! Enjoy and thanks for looking in!

- 608 replies
-
- 11
-
-
- la couronne
- corel
- (and 1 more)
-
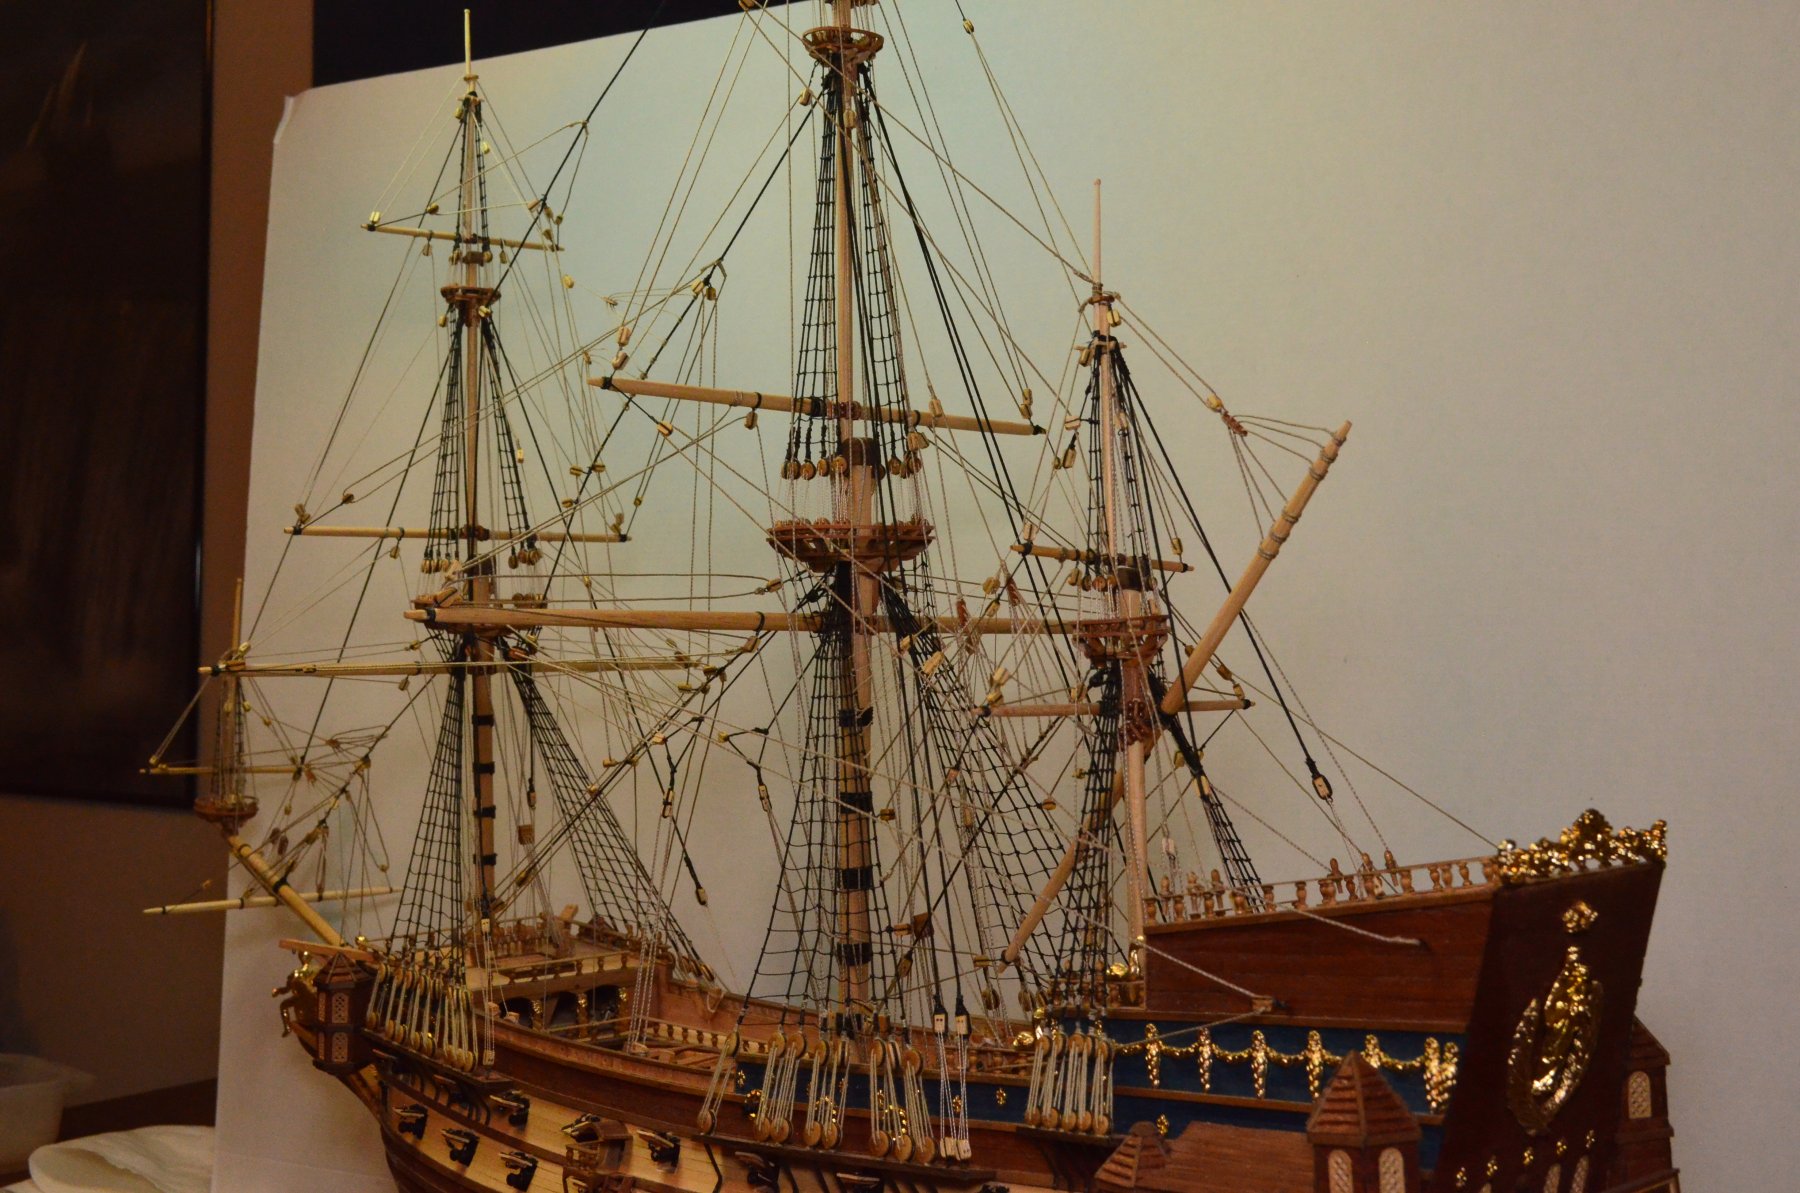
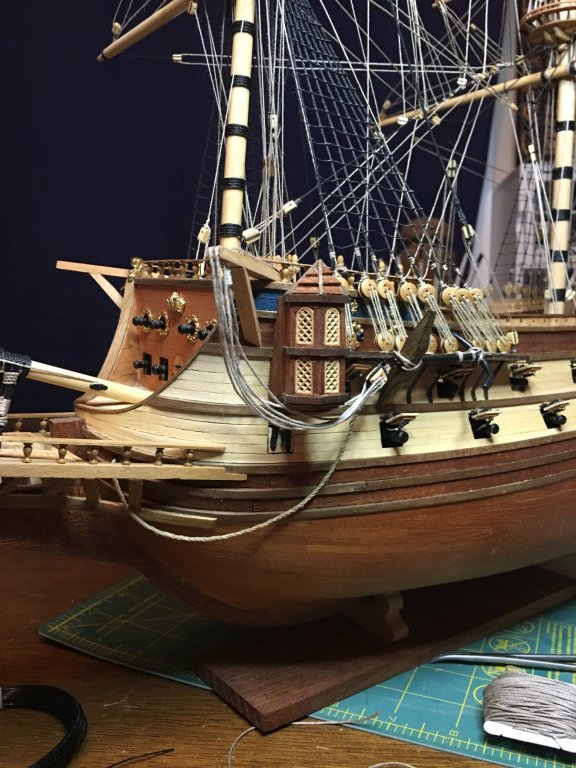
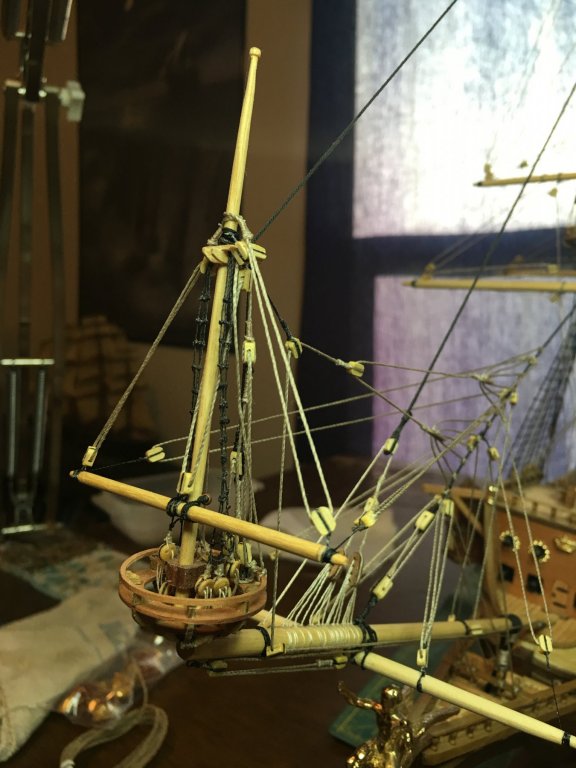
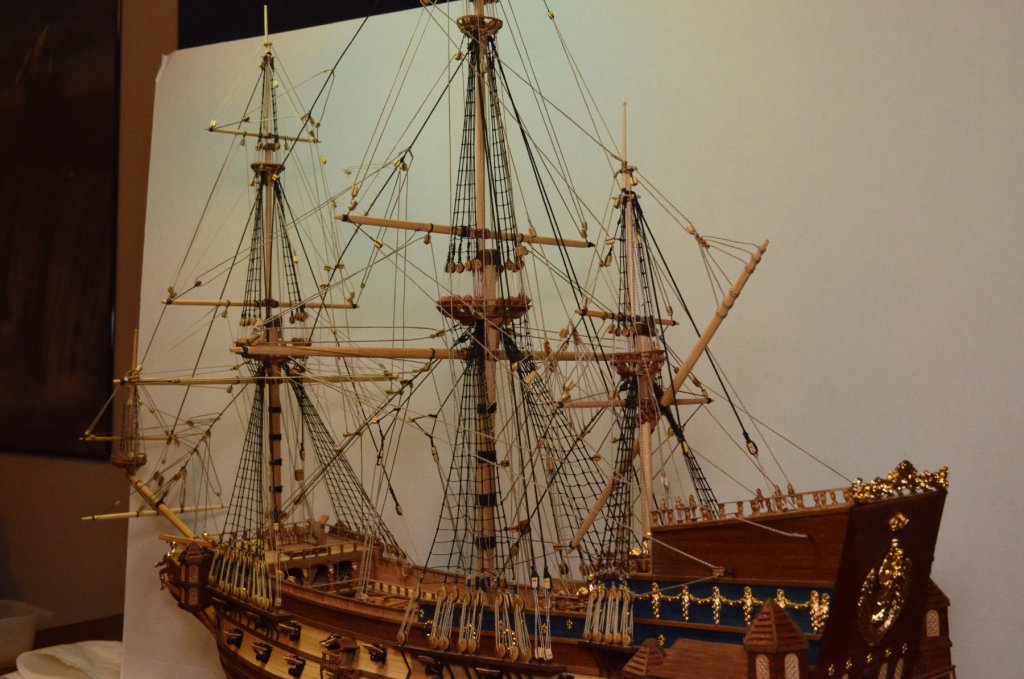
Bowsprit rigging is complete! Sprtisail yard was added as well as the braces and now an area of the ship is complete. I've moved on to rigging the braces on the foremast yards now. They are fairly simple to rig just a lot of blocks to place first which brings me to a possible annoyance; I may be running short on blocks. I'm going to get a count on how many I still need and see how many I actually have left but as the drawer with the blocks for this ship is looking rather bare, I fear I may be short. At this point though I will probably see if I can rob some off of another kit or I may get lucky and have some of the right size in the extras cabinet. Worse case I can always make a few as I don't think I am going to be missing that many, maybe 6 or so. Casualties of the build as several were split or otherwise damaged beyond use, some were ate by the carpet monster, I'm sure some were lost during the move and who knows what else. Not the worst thing to happen just annoying at this point. Enough of all that, enjoy the pictures and I will probably have some more soon!
- 608 replies
-
- 13
-
-
- la couronne
- corel
- (and 1 more)
-
Cross sections can be a good starting point to judge if you will enjoy building a fully framed ship. Of course they still do not prepare you for all the trickier spots nor the overall scale of an entire ship but, they do begin to teach you the skills and patience needed. That is how I am introducing myself to full framed models is with a cross section of ship that I am finishing now. Passion for your project is very important so finding a ship that interests you is good to maintaining interest throughout the build. Another option is you could get a plank on bulkhead ship and replace the false keel and bulkheads with proper framing. Doing that you get all the materials you need for planking and decorations and only have to scratch the frames. With the plans and bulkhead pieces you will have guides for the hull shape which will guide you in making the frames. Worse case, you can always simply build the P.o.B. ship and still have a nice model.
-
Welcome to MSW Cliff! I do not know if there are any kits that would meet all of your expectations. I'm thinking it might be best to pick a ship you like and acquire the plans and any other drawings, pictures etc., that you can find on it and just go for a complete scratch build. The people on here will be better guides and instructions than what are found in most kits and that gives you more freedom to make sure you are getting the quality materials that you want to use. In any case, best of luck to you on whatever you decide to do and I look forward to seeing your build!
-
I always wait to drill the holes for the dummy cannons till after the ports are opened up and I can verify the position but before the lids are set. It is easy to reach in with a drill bit and make a hole where needed and then you know the alignment is right. Just make sure the blocks are positioned right! Bulkheads look nice and it can be easier to install them before planking the outside. I also like to plank my decks as much as possible before planking the outside. Makes it easier to work and gives a cleaner look along the edges.
-
Cheers Don! That rudder work alone is deserving of a drink or two in my book! Another excellent addition to you build.
- 653 replies
-
- 5
-
-
- trabakul
- marisstella
- (and 1 more)