EJ_L
-
Posts
2,246 -
Joined
-
Last visited
Content Type
Profiles
Forums
Gallery
Events
Everything posted by EJ_L
-
 I guess that will come down to how fast you think the Dutch caught on to English ideas. The English were by far better at record keeping during this time period and therefore, a lot of building and rigging for models has been based on their work regardless of nation being modeled. Also as almost all the seafaring nations eventually put into practice the same methods it then comes down to not if they used them but when. The next issue is some ships adapted new practices faster than others based on the shipwright, captain and refit schedules. Many shipwrights were set in there ways and would not change unless the Crown ordered them too. Captains could often be the of the same mind of if it's not broke don't fix it. Ships could remain the same for many years even through rebuilds with out improvements just replacements. This made changes come slowly and sporadically and could make 3 ships within the same 10 year span have practices dating from the past hundred to the past 6 months with no rhyme or reason as to why one has the upgrades and the other does not. In regards to the Vasa though, I would think that there would not have been too many English improvements. Both master shipwrights were long entrenched in their own practices of building ships. Also, with all the delays and problems that came about I would guess that there was a pressure to complete her and get her launched and so the tried and true practices would most likely have been implemented as they would save time by not adding new and unfamiliar elements to an already difficult build. The final thing I would say is while they may have been implemented later, she did not last long enough to have a beginning much less a later for improvements. On the 1/10th model, I would guess was built off of common practices of the time. Many things were changed and put into standard practice after Vasa and so while Vasa herself probably did not have many of the rigging features learned from the English, following ships did and were considered the standard which is what much early research was based off of. Or I could be completely wrong and you need to make lots of changes! I think I will join you in that drink though as I have a lot of studying and planning on my own builds to do!
 -
Lookin great and I love all those little extras you have been putting in. Very inspiring as my next project which will be a cross section of my La Couronne model. This is giving me a lot of excellent ideas for things to add. Keep up the fine work!
- 108 replies
-
- 1
-

-
- mamoli
- constitution
- (and 2 more)
-
I like the rope! Anchor ropes are rather large diameter so I think your choice looks good. Most ships stored their anchor ropes below decks. They would have had enough rope to get the anchor down to the sea bed with in reason. They anchored in harbor not open ocean but would have still had a very long rope. My model of the Bounty, (granted is a cheap, very basic model) has holes in the deck behind the windlass that the ropes were led through then up and over the windlass a few turns and then out. You may check out some other Bounty builds for sure as I know there are a lot on mine that are not accurate but in short, yes, there should be more rope for the anchors running below deck somewhere.
- 291 replies
-
- 4
-
-
- bounty
- billing boats
- (and 1 more)
-
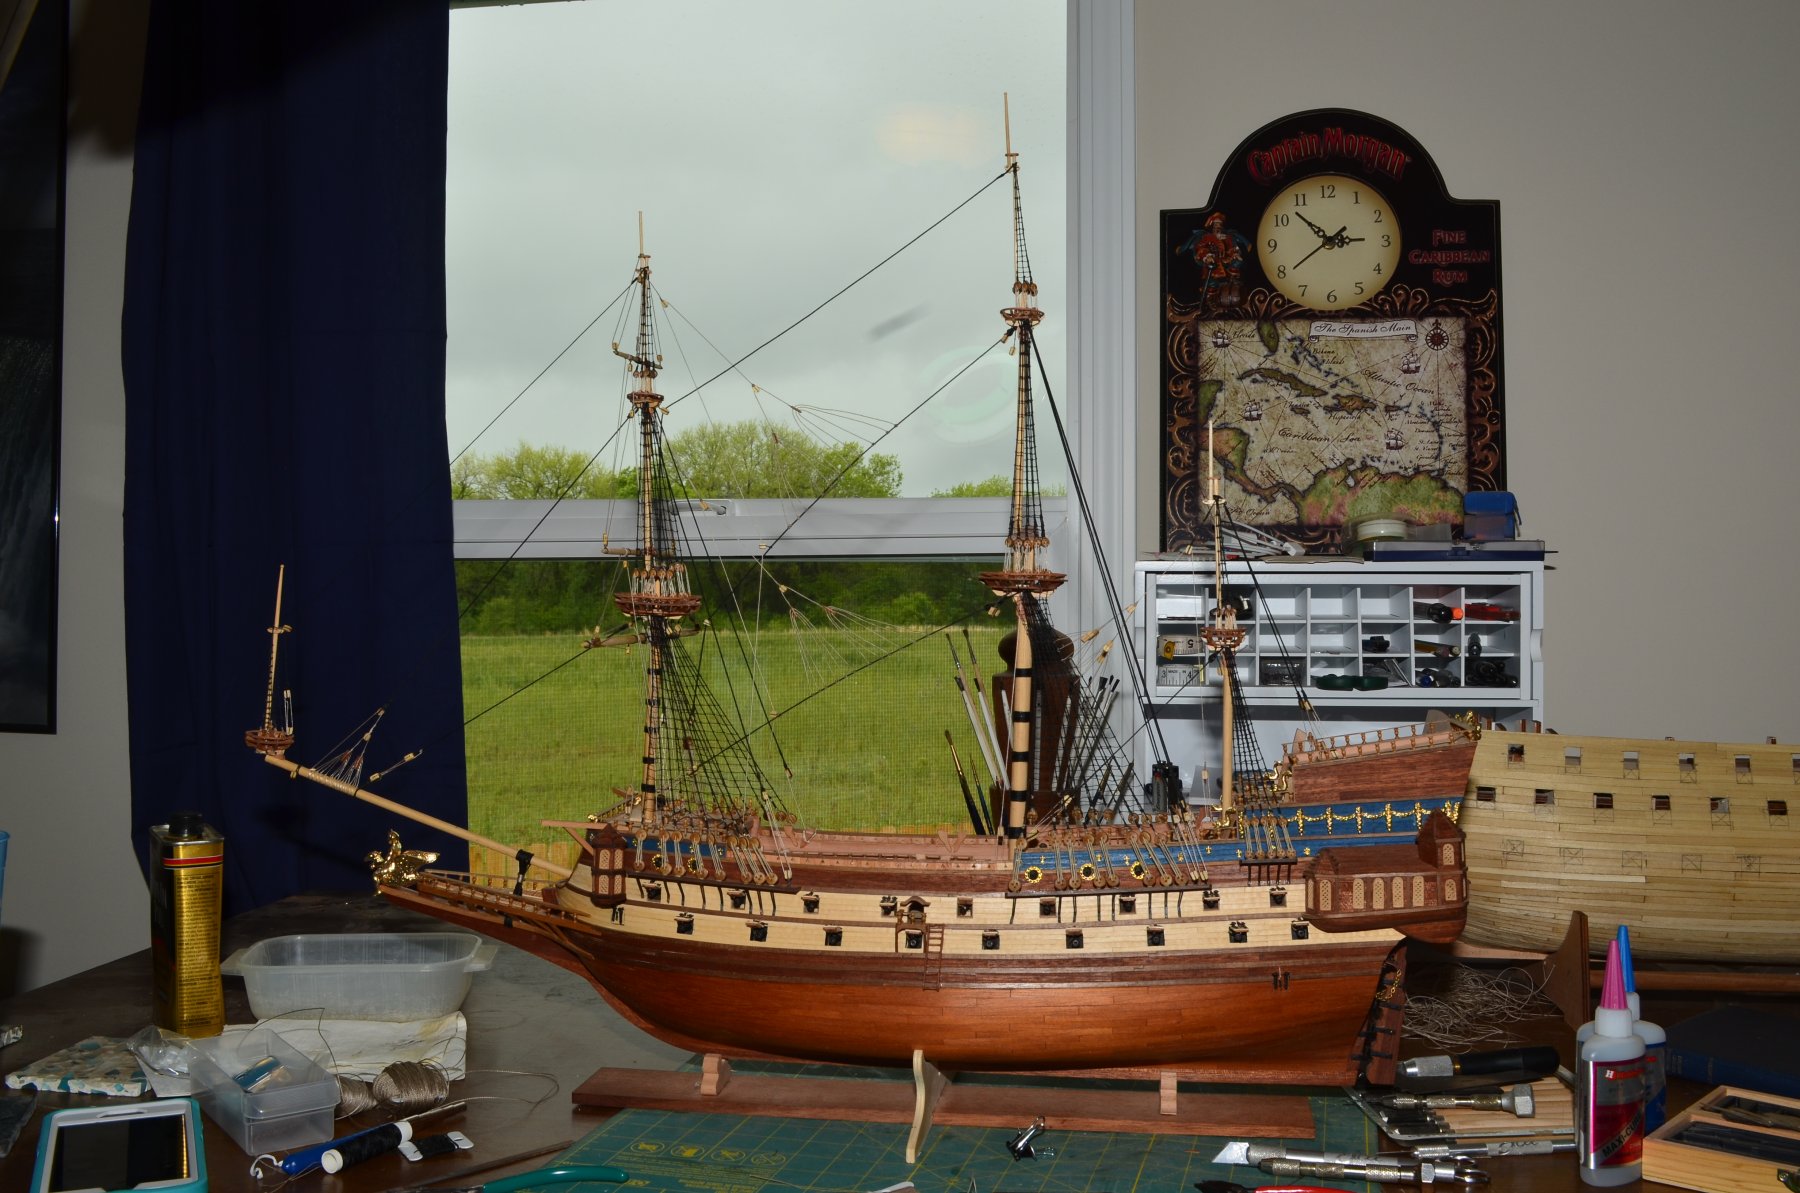
I'm not looking forward to the sanding on this one either. La Couronne was bad enough at her size and S.R. is even bigger! I can already feel the sore elbows. Plus side is she is big enough that I should be able to use the power sander for some of the initial knock down sanding. Correcting, improving or just general bashing model ship kits I have decided is just part of the hobby and what sets this type of modeling apart from others. This is not a follow the instructions step by step connecting part "A" which paints red to part "B" which paints black and adding that assembly to hull "C" and truthfully, I don't think I would like it if it was. When I buy kits I buy them mostly for the materials and a starting point with the hull. I know after building a few now that they will have problems and I will need to and want to change and add more to them. My goal is to be able to scratch a fully framed ship and so I want to have to push myself far beyond written instructions. I need to be able to think through the design and building processes and by being forced into bashing kits, I can learn a lot while still having a good starting point and guidance towards the completed ship. With each build I do a little more. Add in missing frames, furniture and interiors and all the while I cut out more and more of the pre-cut, and molded pieces. While I am still a kit or two away from that full scratch build, I am gaining that confidence to ate least try a cross section scratch build. That much I owe to having to improve kits. Thanks for the nice words and all the likes! More soon!
-
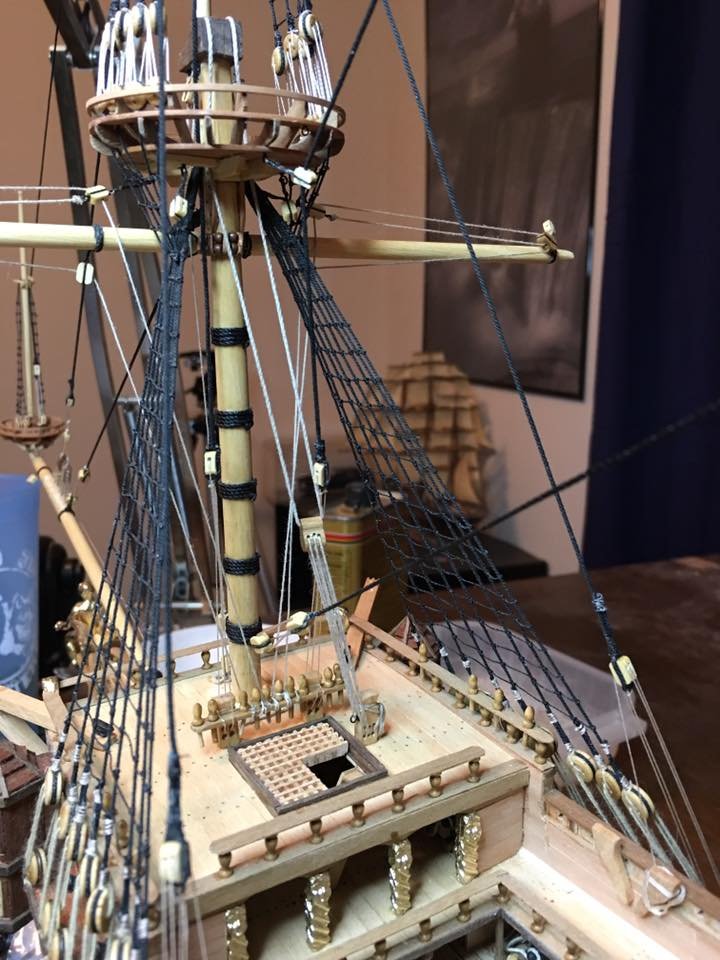
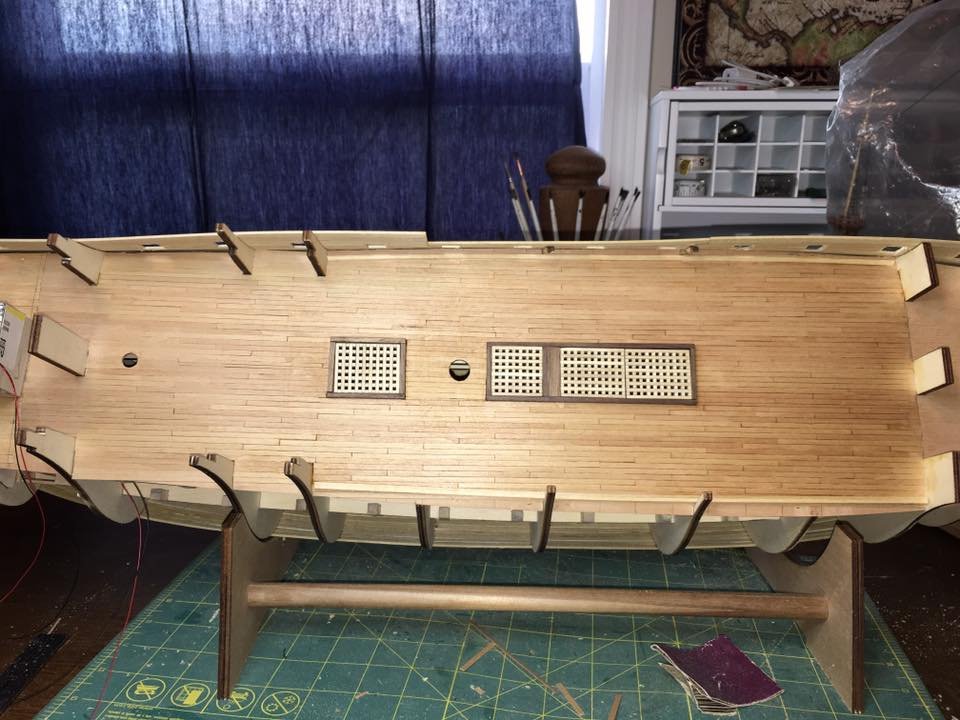
S.R.'s shipyard has been back in production this week and the main deck has been planked. Very little of this deck is visible once the forecastle and quarter decks go on. Mostly just the area around the large cargo hatches will be easily seen. I needed to get this deck planked though so I can continue upward with the framing so I can continue planking the hull. The framing needs to be in so I can place the upper decks (temporarily for now) so I can make sure my elevations are correct and where to terminate the hull planking as it does not run the full length of the ship the higher it goes. I have also started to clean up the port side gun ports and set the frames in them. This doesn't have to be done right now but I was just looking for something simple to start working on last night. I will be starting the last Captain's cabin build out soon as well. When that one is done, I will be able to finish up the wiring for the lights and close up the starboard side. Then the fun job of smoothing the hull can begin...

-
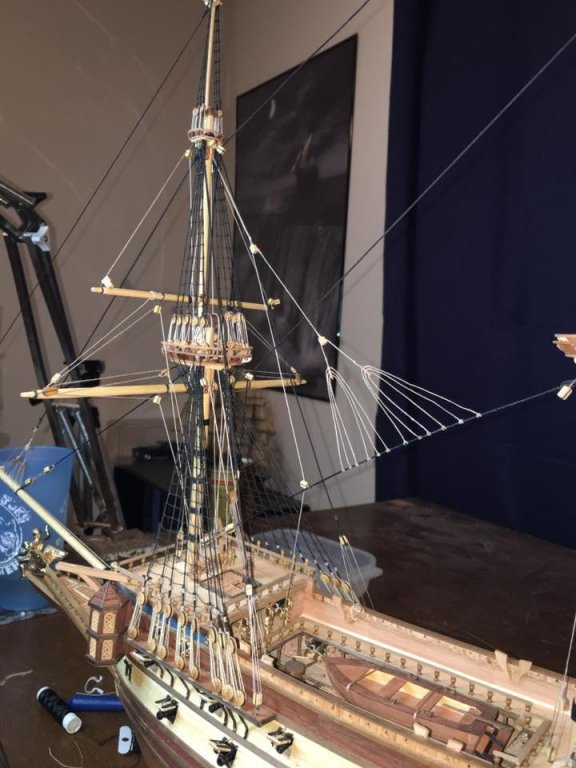
Thank you to all the kind words, likes and simply following along! I have a feeling there will be some rework done on the top gallant crows foot, if not both of them, when I switch back to this build. I have a couple of ideas that may work for straightening the ropes out and taking care of the tension problems. It will involve reworking parts of the rig but, the work will be worth it. I think this is just one of those situations where I need to take a step back from the project for a little while to clear my head. I know I start getting impatient when I get frustrated and just want it done which leads me to settle on a less than my best result. It's a bad habit I am trying to put behind me and working on two ships at the same time is helping. When I hit those times I can simply switch over to the other build while my head clears to allow for the fix it ideas to come in.
- 608 replies
-
- 7
-
-
- la couronne
- corel
- (and 1 more)
-
Welcome to MSW!! Great to have you with us and best of luck to you on your build!
-
I would have to agree that seeing her in the water would be a great display. Ships take on a whole new look when you can see how they look in water. Sometimes it is hard for people to see how close those gun ports are to the water line and it also helps to see just how tall these ships are. I think the the idea of building up a base with styrofoam is a good idea. I would also recommend running a piece of tape around the hull at the water line to act as a bond breaker. Doing that will make removing the ship from the scene easier if you ever change your mind or do not like the finish.
- 322 replies
-
- 3
-
-
- sergal
- sovereign of the seas
- (and 5 more)
-
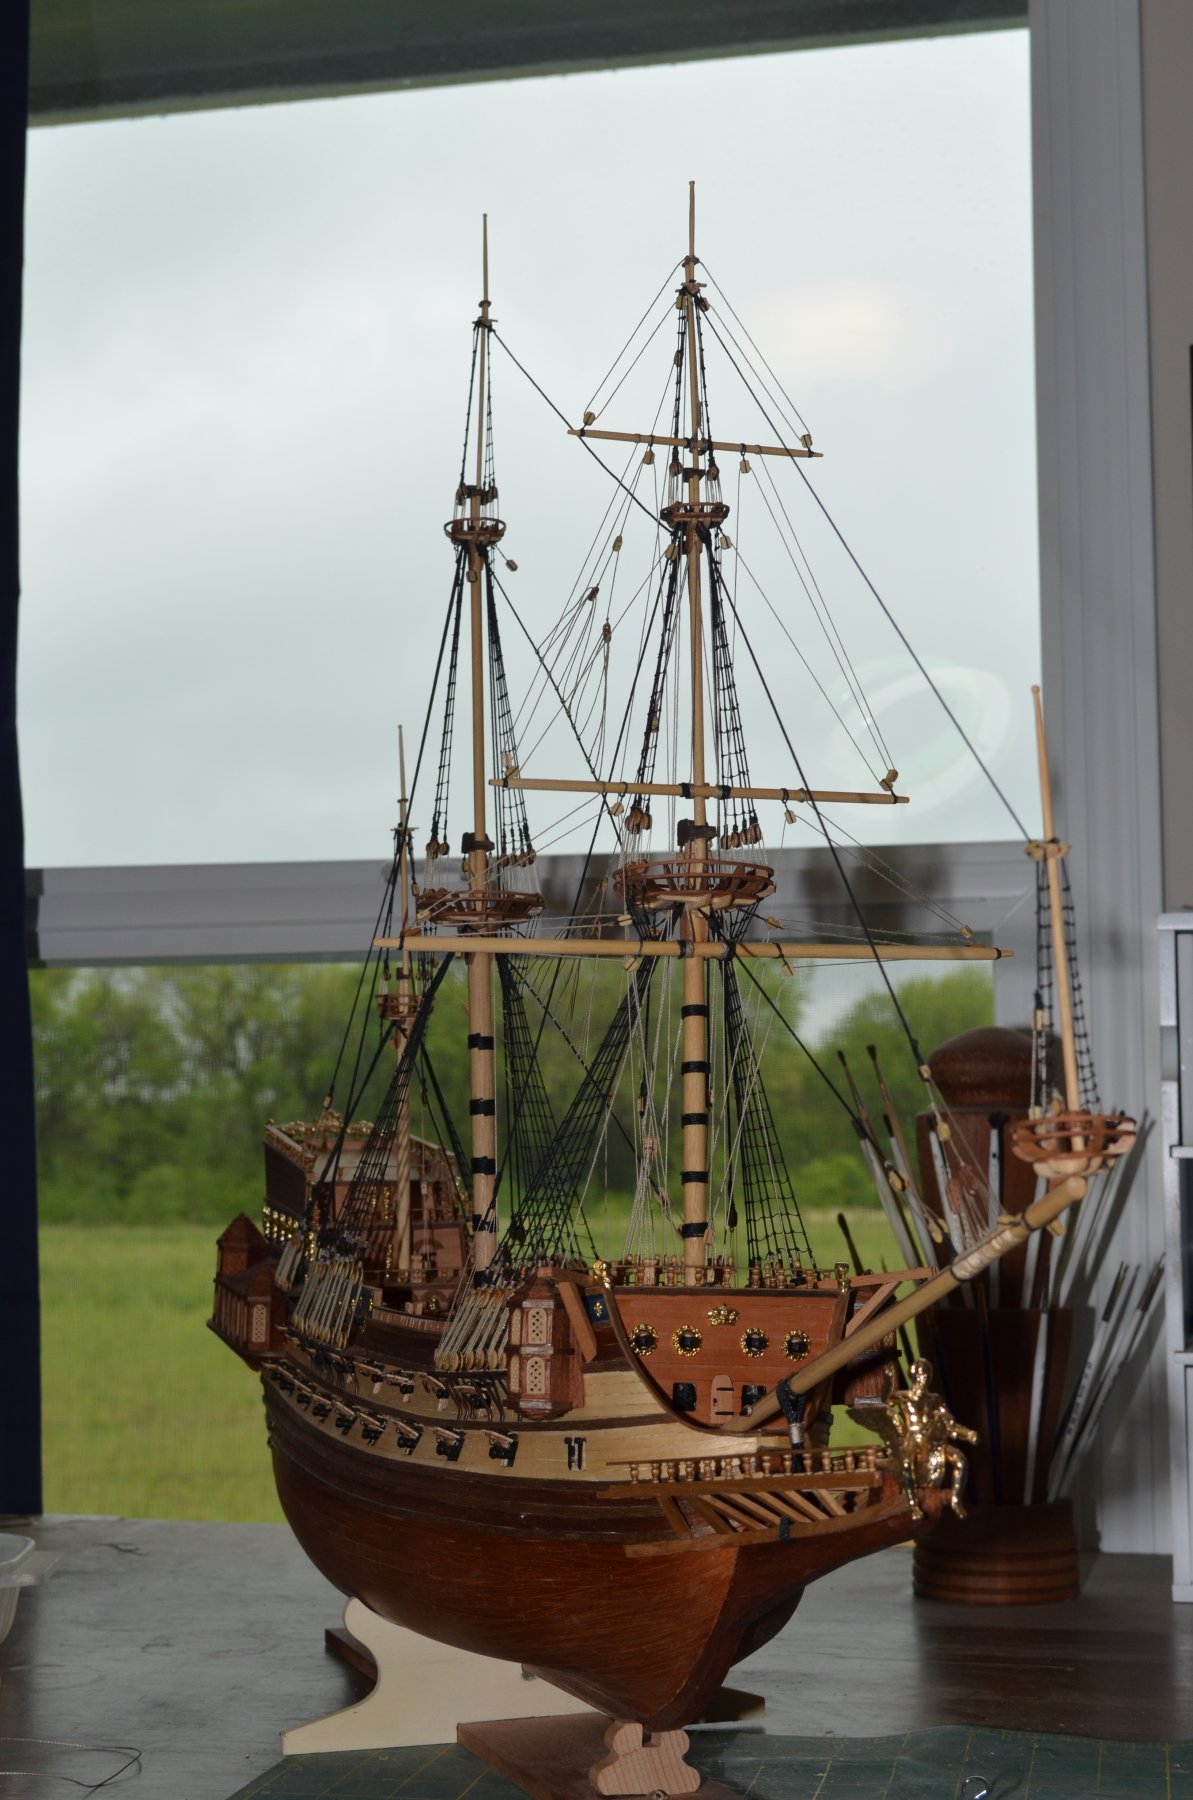
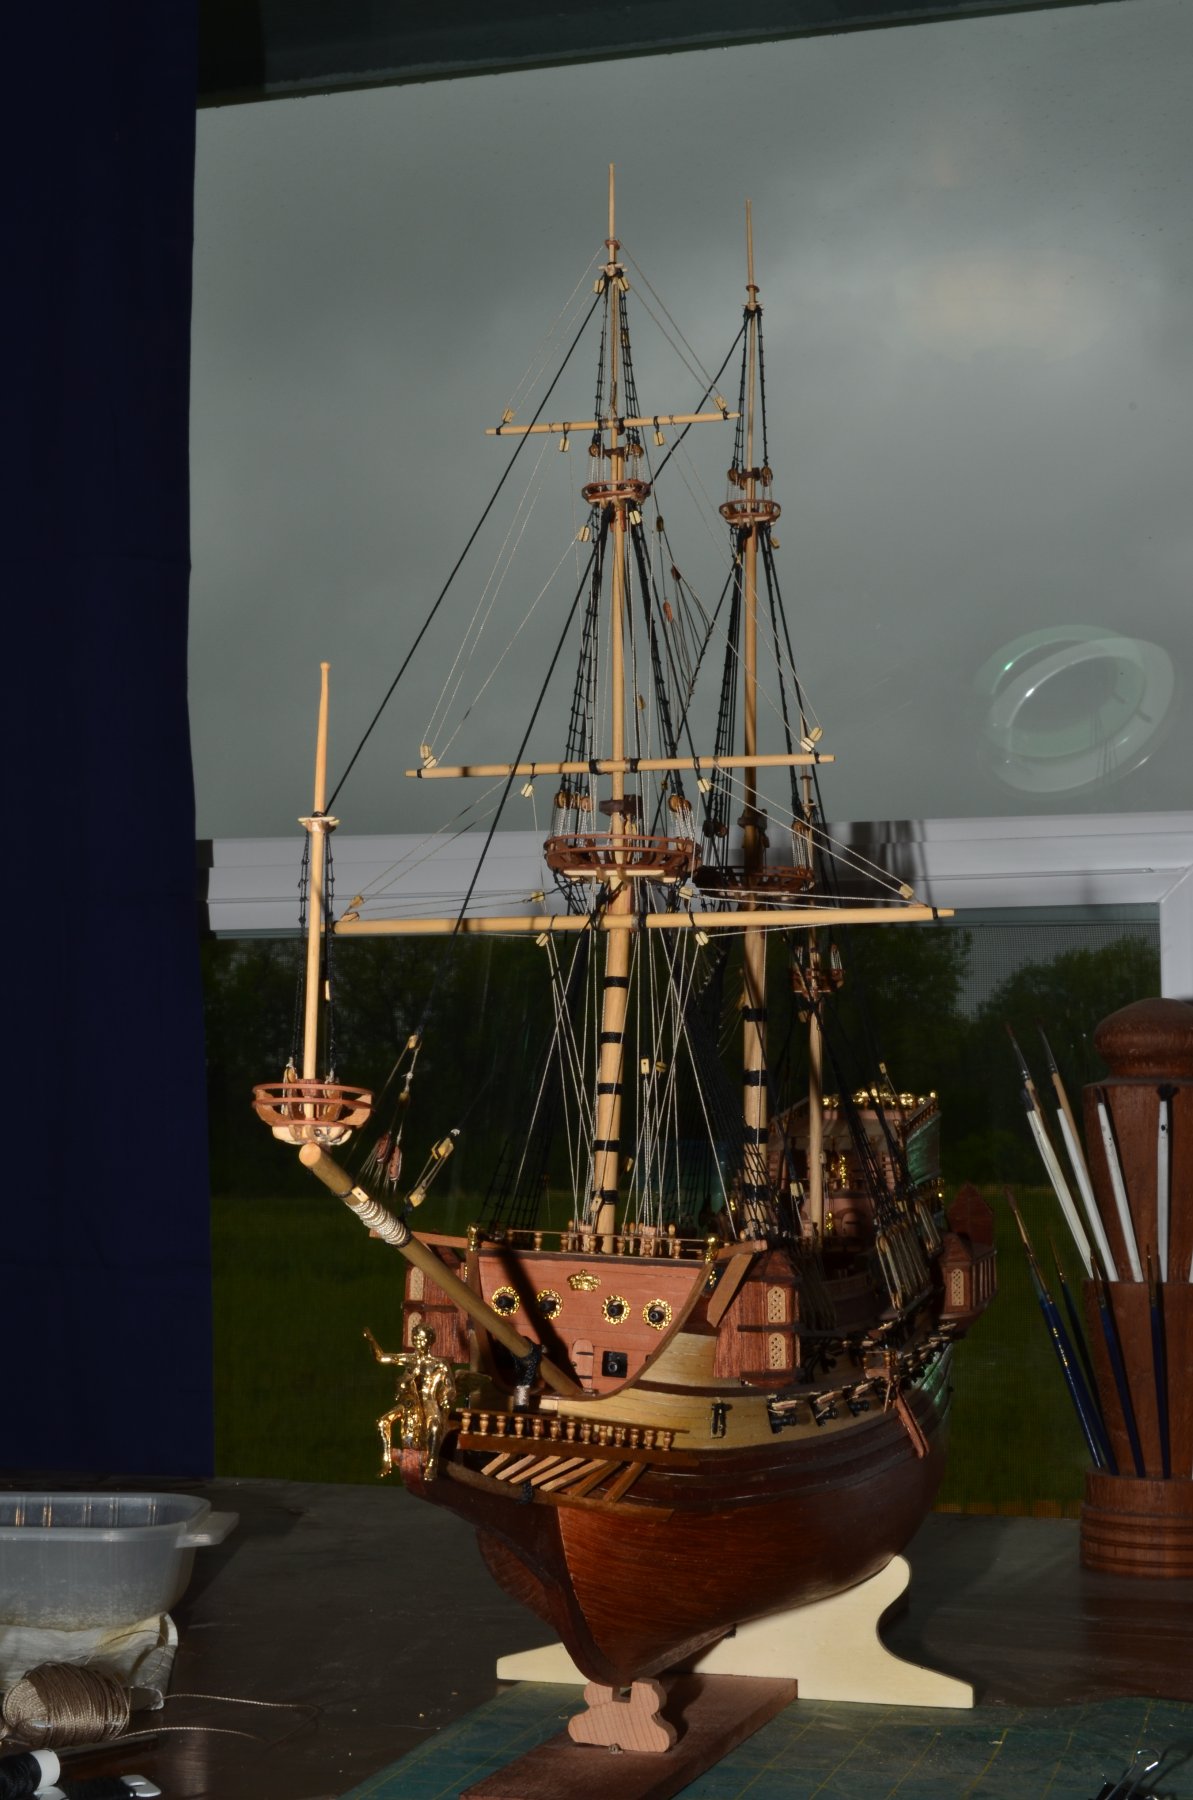
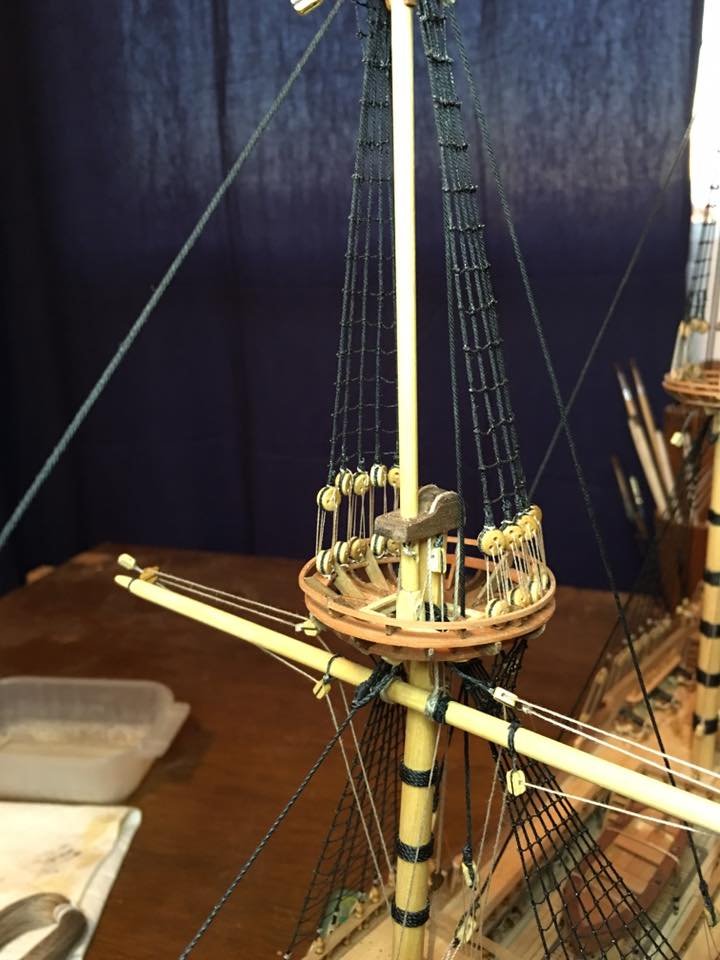
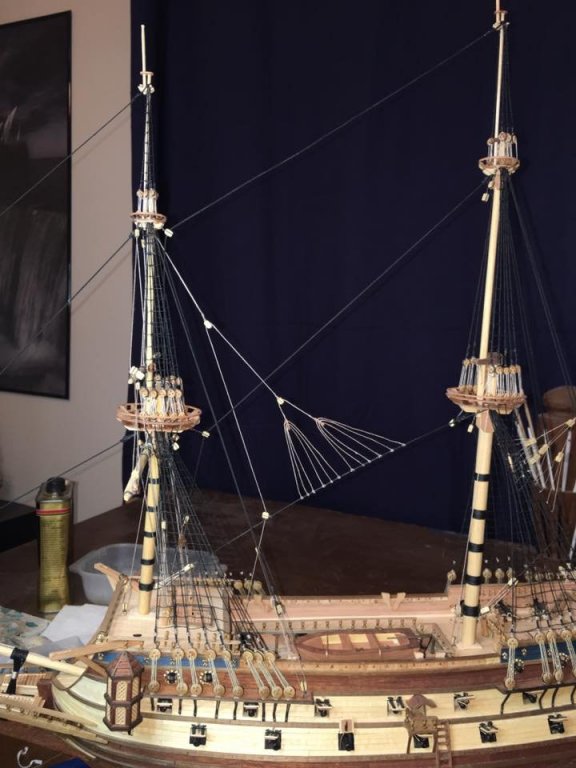
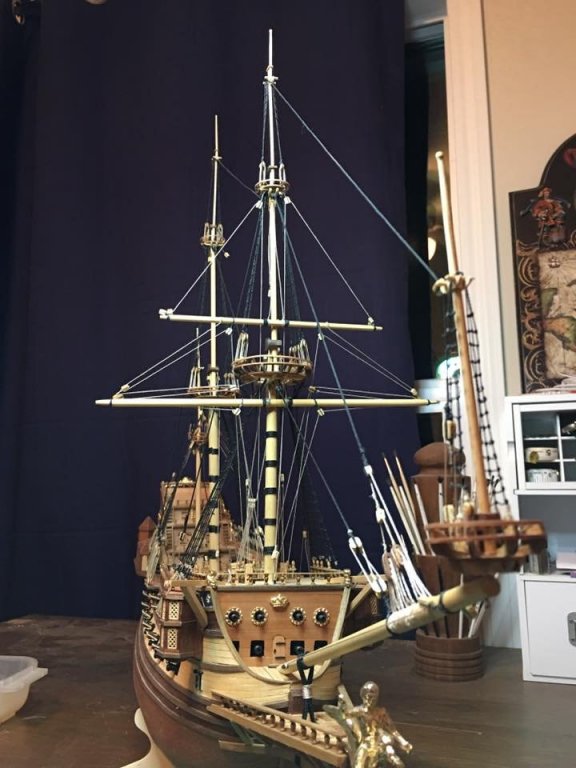
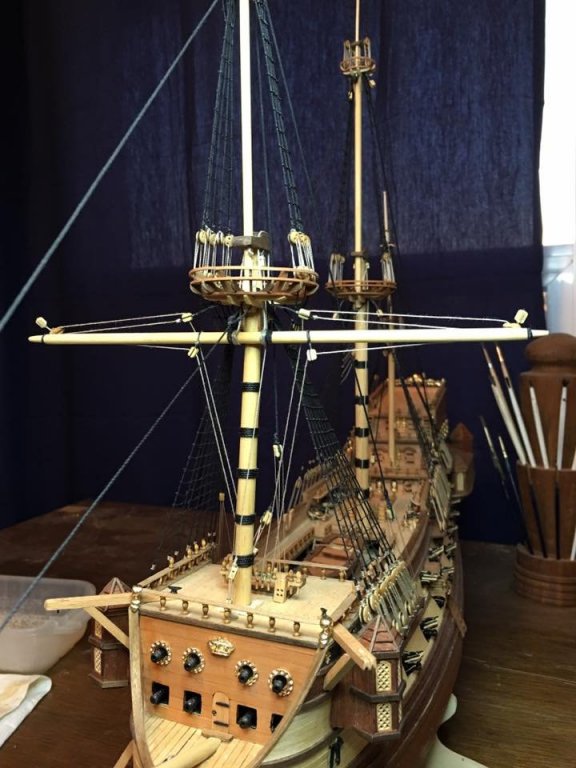
Well the fore top gallant yard has been bent in place and the rigging done. Admittedly I've been struggling with getting the crows feet tensioned properly. I just do not have enough downward pull on the stay to keep them tight. I think when I rig the braces I will be able to get the proper pull then as all of the lines run through blocks attached to the stays at the feet of the crows feet. I have a feeling I will be adjusting them till the end. I will finally either find that magic pull or give up and case her. I left a few ropes loose so I can keep making adjustments as more rigging goes up. In the meantime, with all of the foremast yards in place, she will be going back under the bag as the ship yard crew switches over to S.R. for a little while. This is actually fighting against my desire to keep pushing to finish her up. I'm surprisingly not tired of rigging but, with so much work still to be done on S.R., I figured I had better leave some work on Couronne to give me relief from that build. So I will go work on S.R. for a while but when I return it will be time for the main mast yards to go on. Another milestone will be reached then as once the main yard is in place, she will have reached her widest dimension.


- 608 replies
-
- 13
-
-
- la couronne
- corel
- (and 1 more)
-
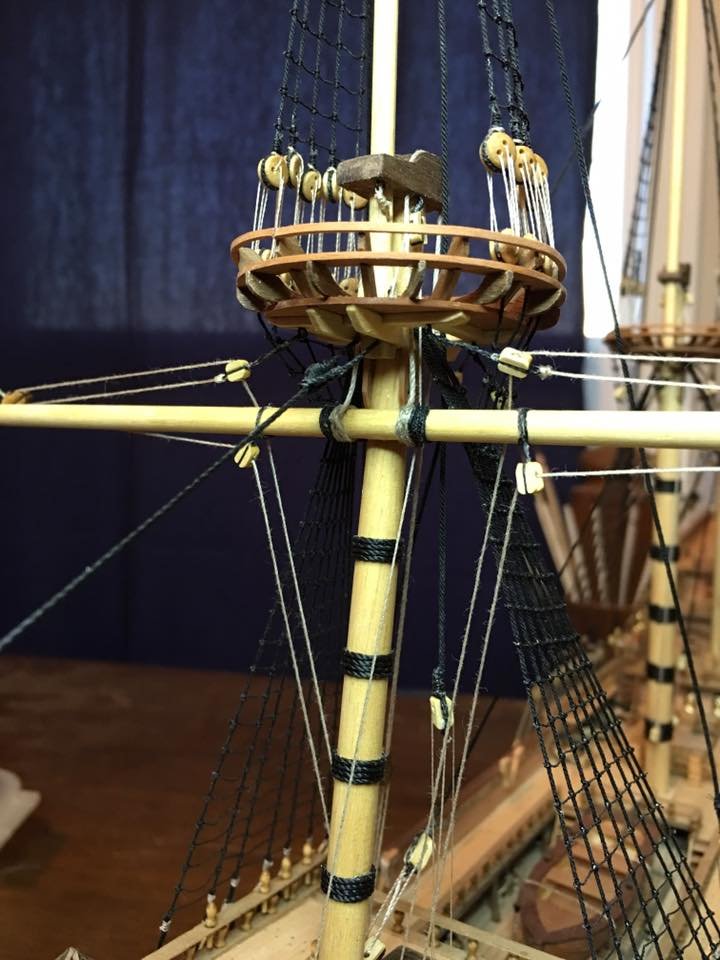
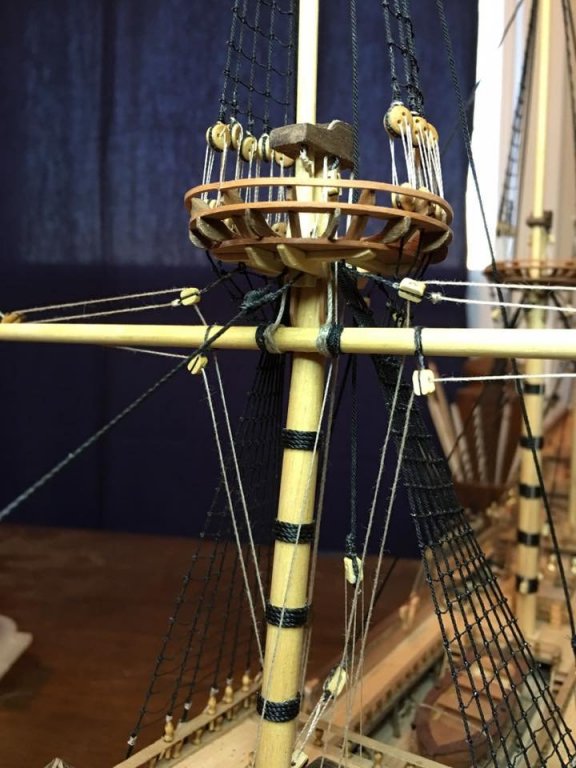
Well here she is with top yard crows feet rigged. I'm not fully happy with it as I wish the ropes were a little tighter but I have no way of providing any more downward tension until I rig the braces as they have blocks that attach to the stay along side the crows feet before running to the deck and their belaying points. I may play with it some more tomorrow and see what I can do as I may be able to stretch and pull some here and there to take out a little more slack. I just have to be careful to not apply too much tension as it can move the masts and loosen other lines. Rigging is definitely a balancing act between many different forces. It is kind of fun seeing how it all works but frustrating when you just want to get something done after several hours.
- 608 replies
-
- 6
-
-
- la couronne
- corel
- (and 1 more)
-
Thanks Popeye! I know the feeling of trying to keep up with all the builds on here and how it is easy to fall a few updates behind. There are just so many great builds that keep grabbing my attention and adding to my list of logs I follow. The best part is the logs are always here for when we finally get the time to catch up.
- 608 replies
-
- 2
-
-
- la couronne
- corel
- (and 1 more)
-
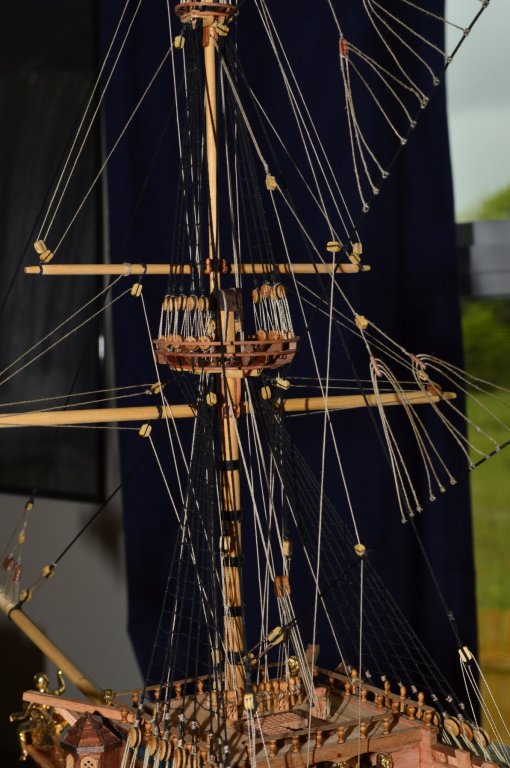
Small update of the top yard with the lifts in place. Tonight I start working on the halyard and crows foot rigging.
- 608 replies
-
- 8
-
-
- la couronne
- corel
- (and 1 more)
-
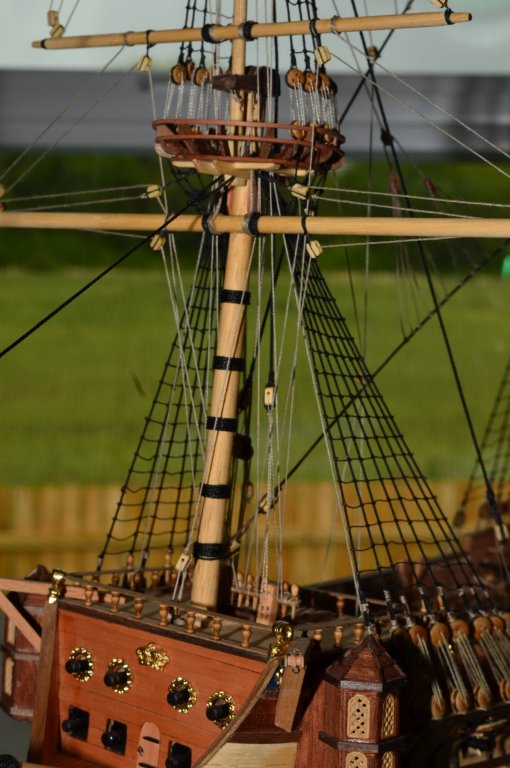
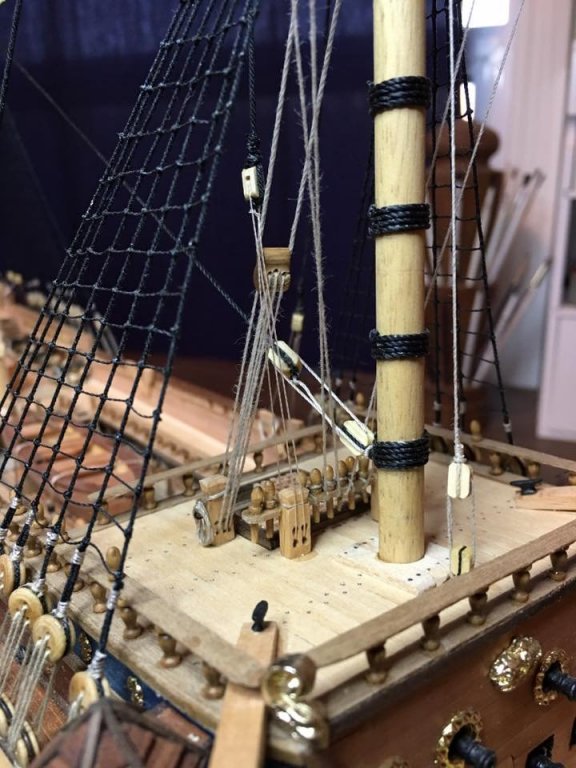
Yes. All three of my Couronne's masts have plates. That was a detail I picked up from looking at the Vasa and while I cannot confirm that Couronne had them, it makes sense that she would based on her size and size of the masts. I have used a lot of details from Vasa on this build as she is the best example of ship building practices of that time period. While I know there were many differences between Dutch and French practices, I feel safe to say that those plates were probably a common item.
- 608 replies
-
- 4
-
-
- la couronne
- corel
- (and 1 more)
-
I had not thought of wallpaper paste. I was thinking of adding a stiffener of some kind so I will have to look into that. Thanks!
- 608 replies
-
- 1
-
-
- la couronne
- corel
- (and 1 more)
-
Thanks Don! I'm both scared of and excited for that complicated rigging. Those crows feet are difficult to build although, now that I have done a couple I have a better idea of how to do them. What is worrying me about these next ones though is that they attach to the stays which, while tight, when I go to tension the crows feet are going to want to pull upwards. The first one I did attached to the bowsprit which was solidly fixed and the last pulled on the shrouds and while they had some play, they were a lot stiffer than the forestays are. To help with this I am going to have to put more tension on the yard and mast and create downward pressure on the stay to counter the upward pull of the crows feet. I know I can make it happen but it will be a slow process with continual adjusting until it is right. I start working on it tonight so we shall see what develops....
- 608 replies
-
- 2
-
-
- la couronne
- corel
- (and 1 more)
-
Welcome to MSW! Great to have you with us. Please do start up a build log as that looks like a fun and interesting build to follow along with and with the RC components it will be good to see her in action when done. I wish you the best of luck on your Smit Rotterdam!
-
Well I managed to get the fore course yard bent and rigged. That one was by far the easiest of the three yards to rig as the top and top gallant both use crows feet on their halyards... so that will be fun... Also I will add rope coils on the belaying pins once all the rigging is secure. I don't want to clutter up the places I need to work any more than they already are till the end. It is nice to finally see the yards going on though. These are the last major components before completion. I still have other work to do with the lanterns and anchors, not to mention the miles of rigging just to get the yards up but, still it is another big step closer. Now to the pictures because, that's what we are really here for anyway...


- 608 replies
-
- 10
-
-
- la couronne
- corel
- (and 1 more)
-
Rigging definitely became simpler towards the end of the 17th century and into the 18th. Doing away with the crows feet and relocating the vast majority of the blocks on the running rigging to working areas of the yards instead of out in the open spaces between the masts made a much cleaner and simpler system for operating the yards and sails. During battle this would have been a huge benefit as now instead of having the complicated rigging of a crows foot shattered, only one rope would need splicing or replacing. What is sometimes hard to imagine is why it took so long for these things to gt figured out. Most of us have grown up with information mostly readily available. Even before the internet there were libraries and mail through which knowledge could be gained and shared. Record keeping has been fairly standard for most of the past 2 centuries and so to think back to a time where things changed so slowly due to the amount of time it took a new idea to travel is hard to imagine.
- 608 replies
-
- 4
-
-
- la couronne
- corel
- (and 1 more)
-
This is an incredibly interesting place!
EJ_L replied to Dilbert55's topic in New member Introductions
Welcome to MSW! Good to have you with us and I wish you the best of luck on your Hermoine build. -
That sure sounds like a fun time driving! I got my Mustang up to 110mph on an abandoned air strip when I was stationed in Monterey in the Navy. That was good for me with out some professional assistance! Your rigging is coming along great even with the mistakes, which while I know they are frustrating, I am learning a lot about proper rigging techniques, knots, blocks and bits by watching you make them. So thank you for showing us and admitting your whoops moments! As for speed I wouldn't worry about that. You may be slower than many others on her but, the end results of all this time you are taking is truly remarkable. Keep it up and as always I am looking forward tot he next update!
-
I agree that is probably what those are. Makes more sense than antlers though I wasn't sure as my moldings are rather blurry so I wasn't sure.
- 2,699 replies
-
- 2
-
-
- heller
- soleil royal
- (and 9 more)
-
Looking great and those scarf joints are very nicely done.
- 322 replies
-
- 4
-
-
- sergal
- sovereign of the seas
- (and 5 more)
-
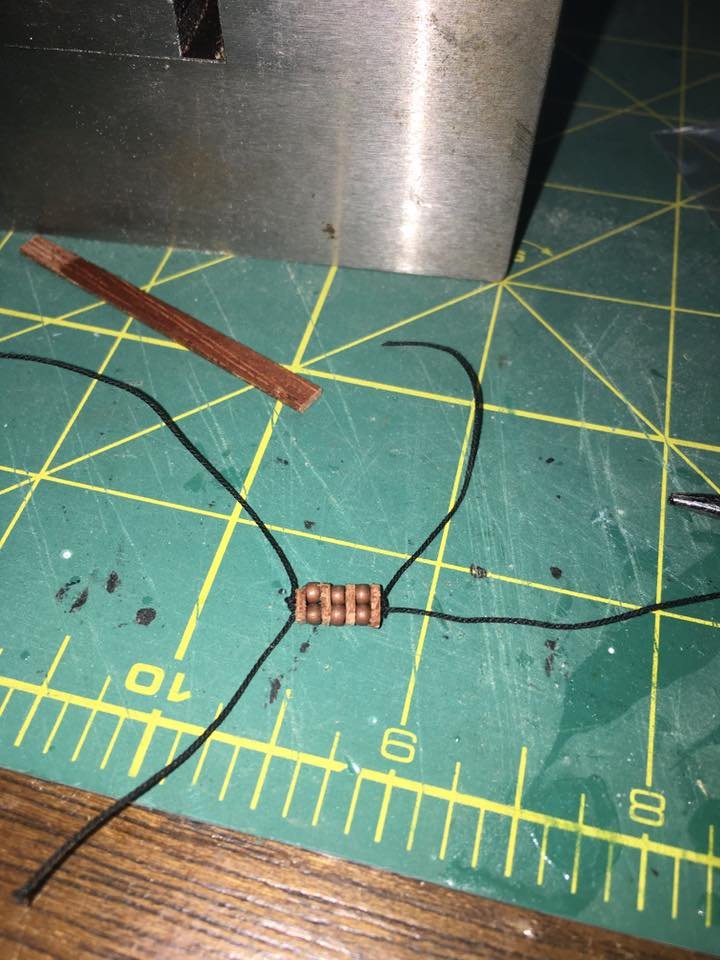
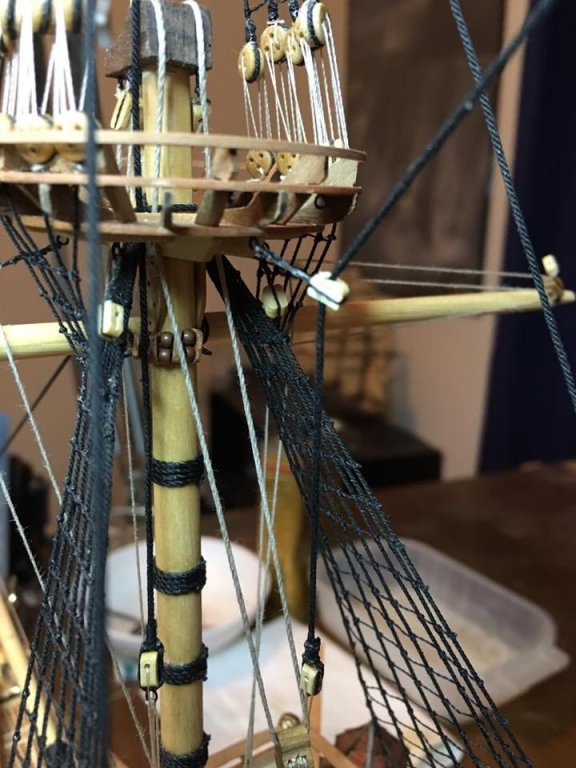
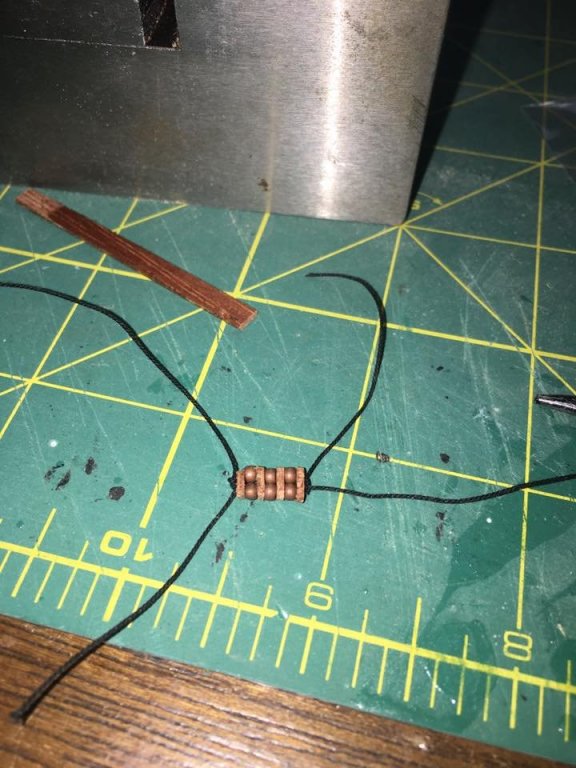
First of the parrels have been made. I also started working on the halyards which are not pictured. Should have the course yard bent to the mast tonight if all goes well.
- 608 replies
-
- 5
-
-
- la couronne
- corel
- (and 1 more)
-
WOW! Great start and I am comforted to see that I am not the only one having trouble with the port layouts on this ship. There is indeed a huge amount of decoration which makes the spacing difficult to get everything to fit. That brings me to wonder if the thinking that all the decorations would have been the same size and evenly spaced or if there would have been changes made to them to fit as space allows. Obviously they would not have moved the ports, wales, or any other structural components to accommodate the decorations and so I would think that the carvers would have had to measure each individual space and modify their work to fit. Much like you had to do for the filigree between the knees, you may need to change the sizing on the "antler" carvings.
- 2,699 replies
-
- 3
-
-
- heller
- soleil royal
- (and 9 more)
-
Very cool! I hope you do get the chance to model that ship as it will be a great family heirloom for you to pass down along with that story.
- 322 replies
-
- 4
-
-
- sergal
- sovereign of the seas
- (and 5 more)