-
Posts
543 -
Joined
-
Last visited
Content Type
Profiles
Forums
Gallery
Events
Everything posted by 6ohiocav
-
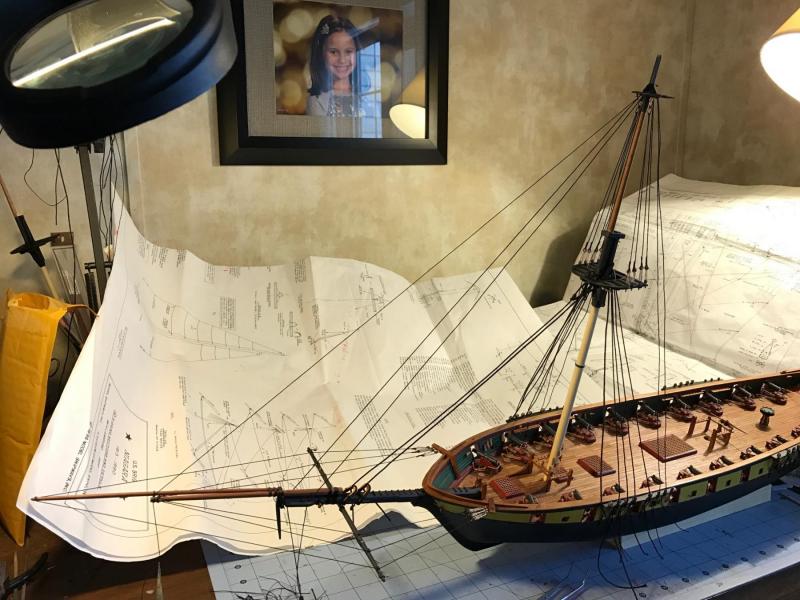
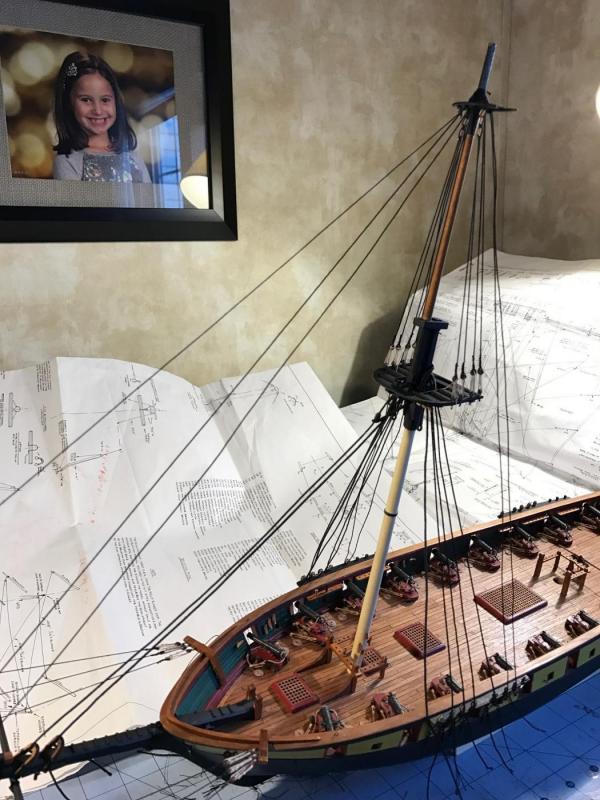
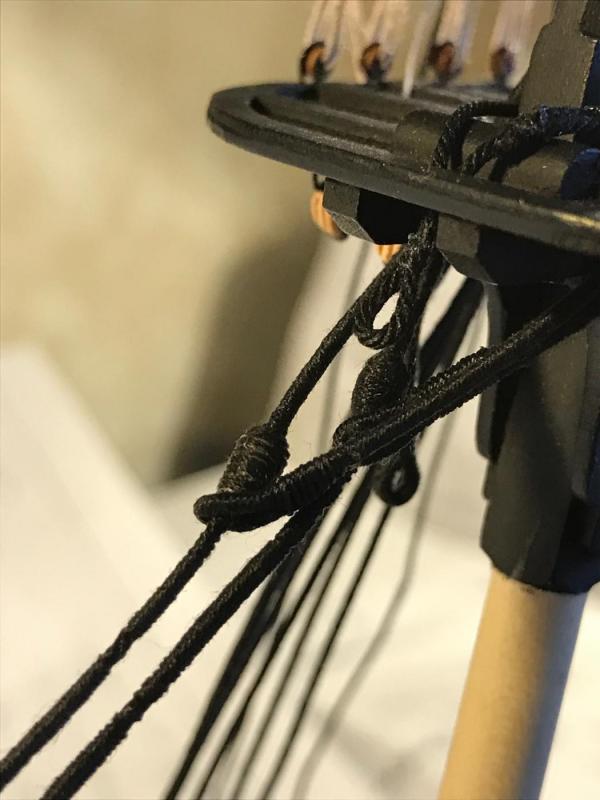
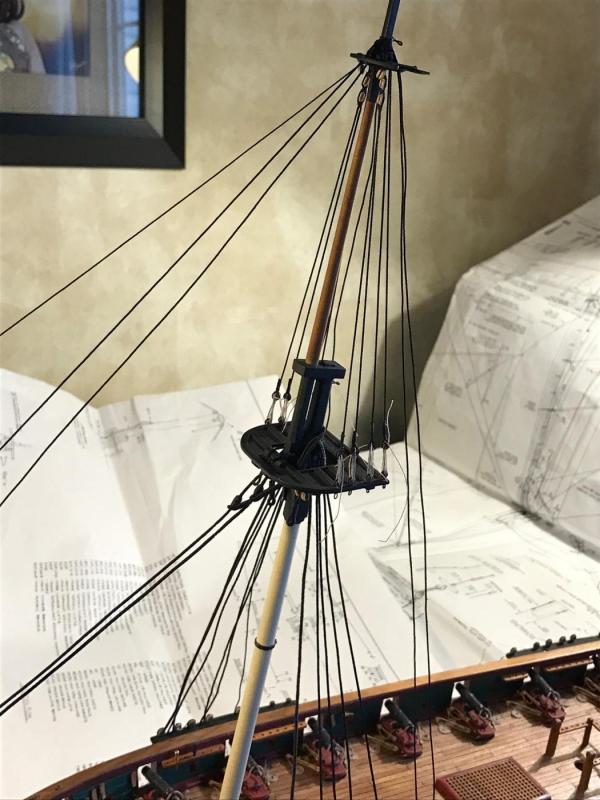
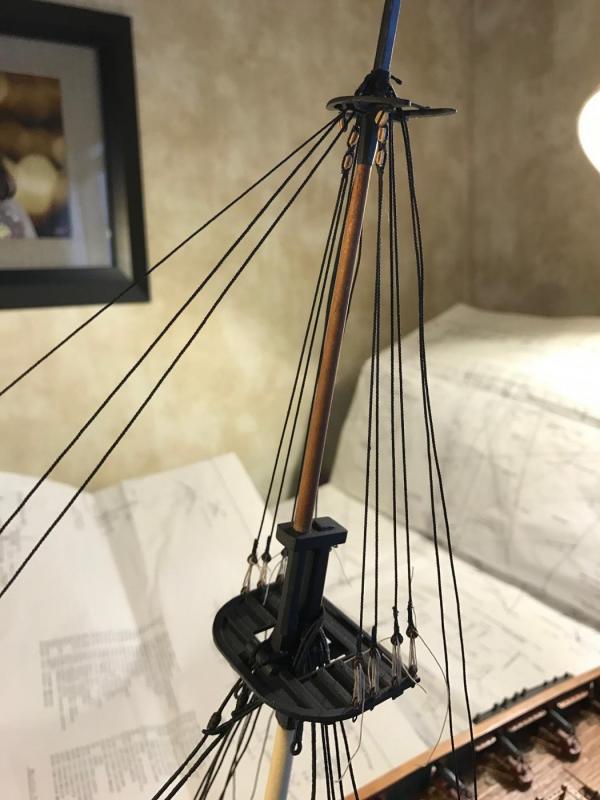
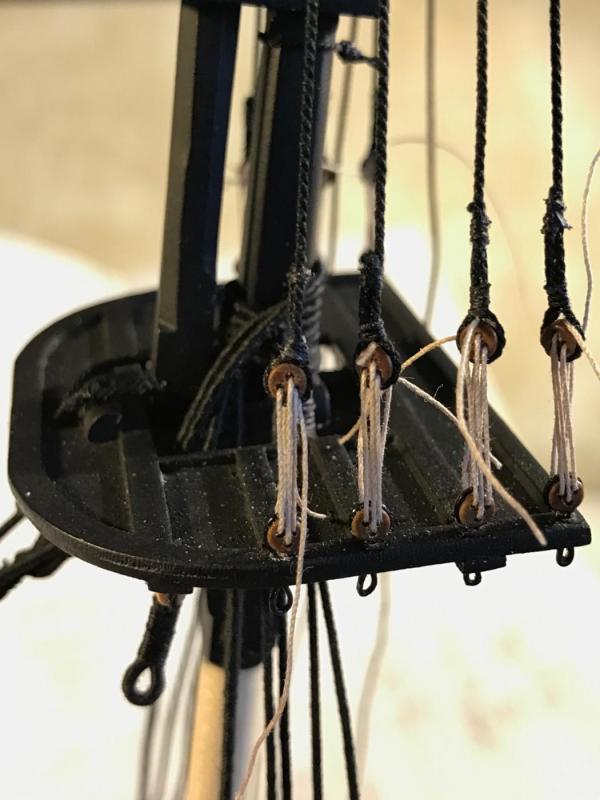
By the way, I have not tied any of the lower strouds or back stays to the hull. They are just hanging there for the photos.I wont do that until i finally afix the mast to the ship. Still have some work to do before I take that plunge.
- 648 replies
-
- niagara
- model shipways
-
(and 1 more)
Tagged with:
-
John, That is a great tip. I won't tie the back stays down until I conquer the rat-lines. By the way, the plan is to tie the rat-lines on the upper shrouds before I glue the mast to the ship.
- 648 replies
-
- niagara
- model shipways
-
(and 1 more)
Tagged with:
-
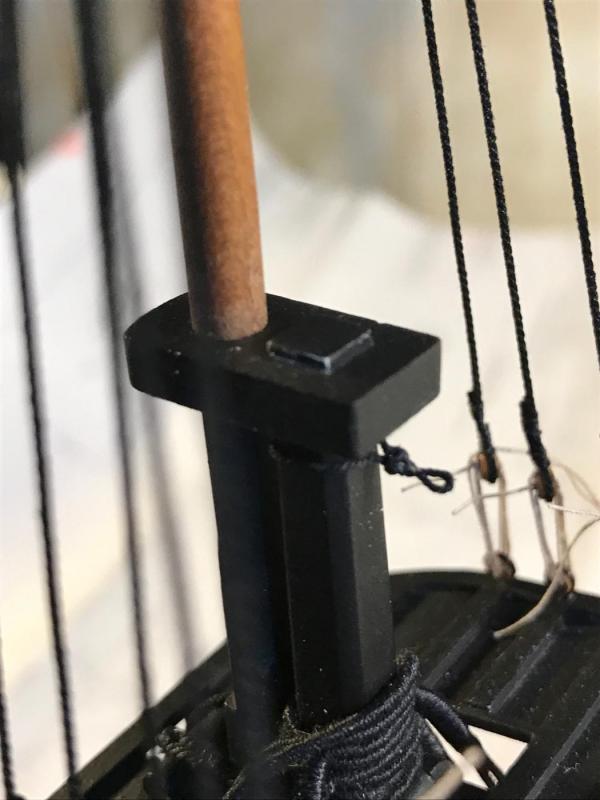
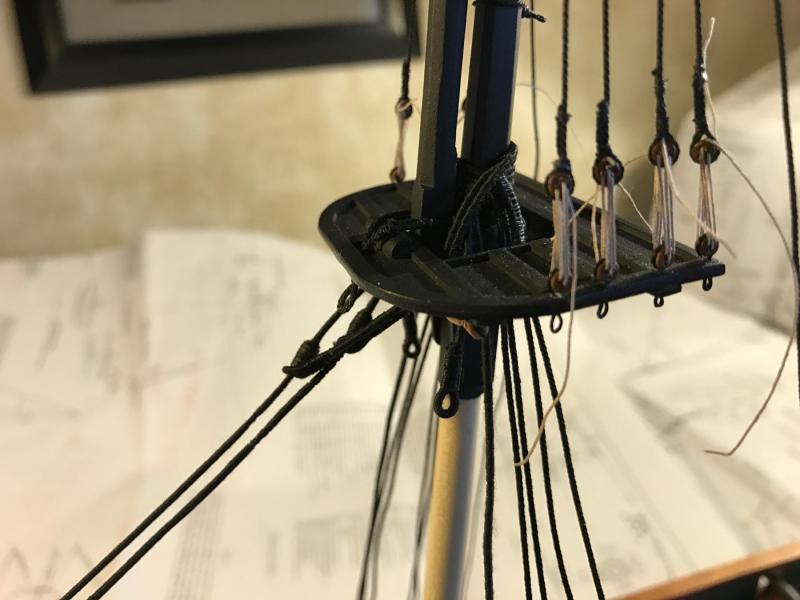
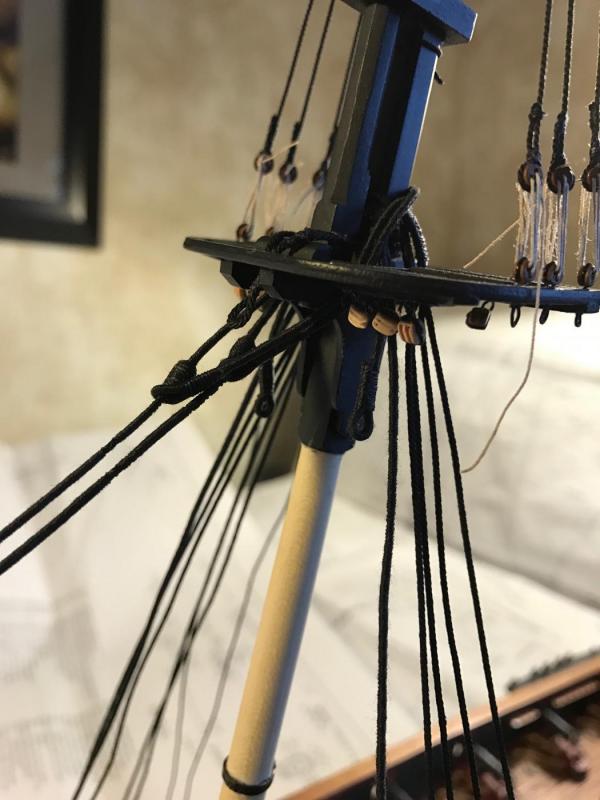
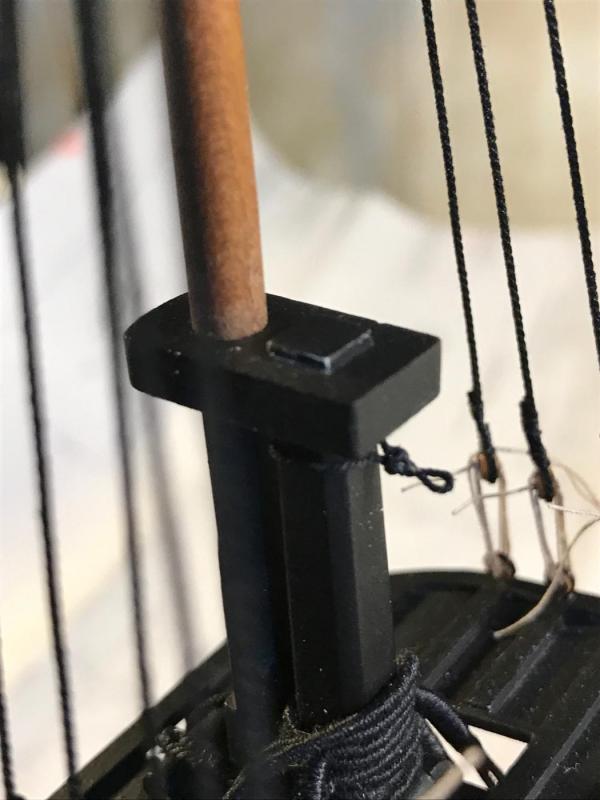
Brian, That same principle applies to the topmast cap as well. I tied all of the upper shrouds, back stays, jib stays and topmast stays and the thimble for the top gallant stay coming from the main mast before placing the upper cap on. I will be posting all of those steps later today. Getting the masts to slip through the cap holes was a challenge I faced when I built them, and if I recall, it was you that warned me back then to make sure they fit so that I did not have to feed them through the bottom. I have not glued anything on my foremast yet, and perhaps may not do so until the very last minute, if at all. The assembly fits pretty snug now. Mike, Brian hit the nail on the head on the upper gear of the serving machine. Ken and Elijah, Thanks for stopping in.
- 648 replies
-
- niagara
- model shipways
-
(and 1 more)
Tagged with:
-
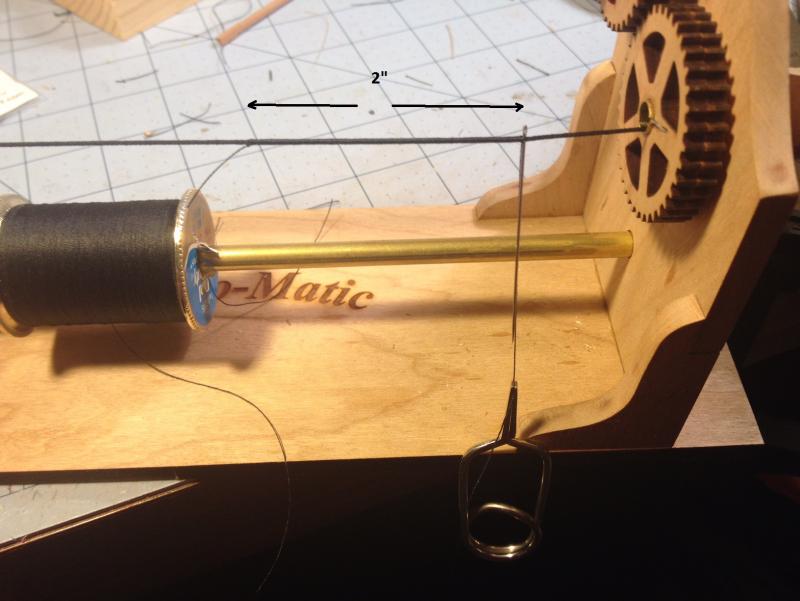
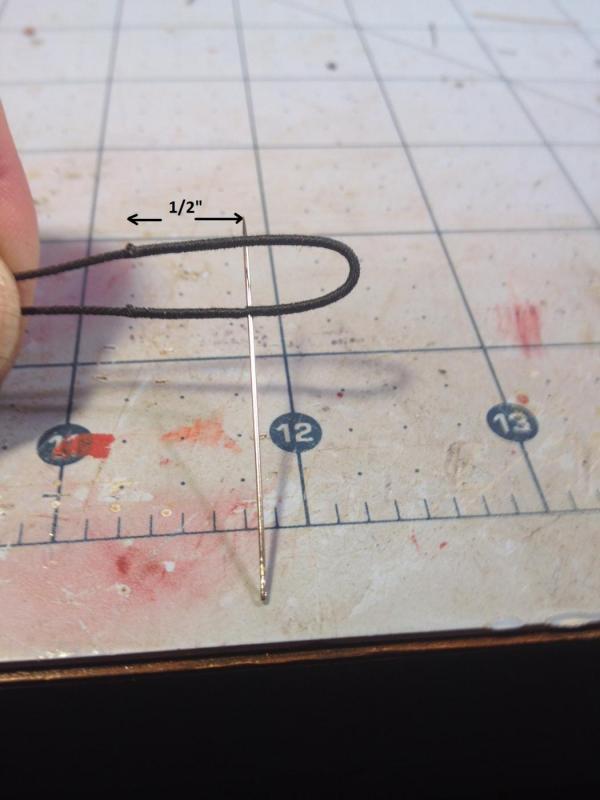
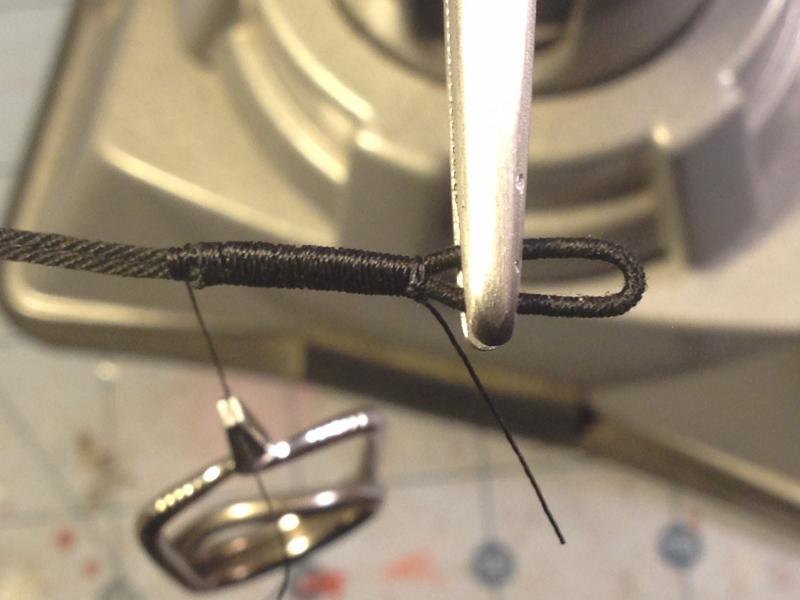
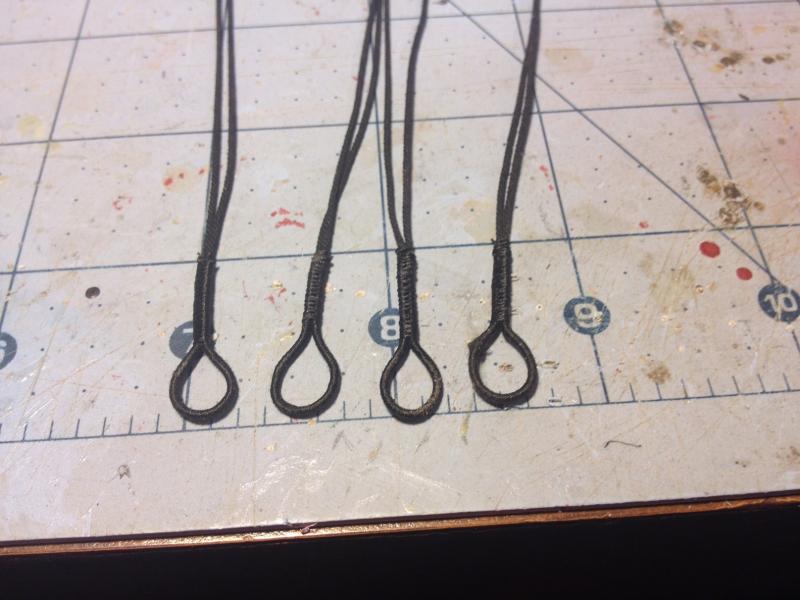
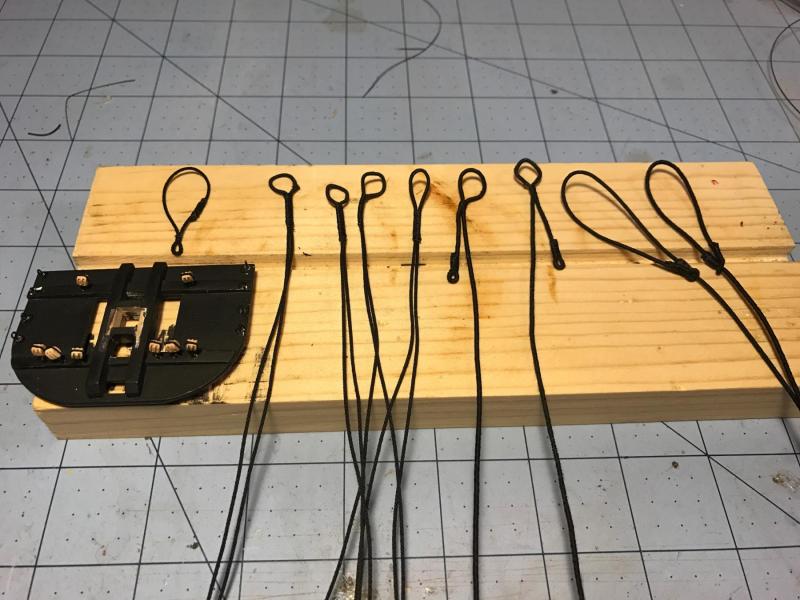
REMAINING LOWER SHROUDS The remaining shrouds, done in pairs, were done with .035" inch rope from Syren. [As an aside, I tried to use the kit supplied rope. Two complaints. I wish the supplier would mark the diameter on the spools, so that we would not have to guess what the size is. Also, the plans call for at least 8 different sizes that I have noted so far. I only received 5 unmarked sizes. Also, the nylon rope is too stiff, and even when stretched and soaked in hot water, sometimes shows the kinks. Unless I serve it, I have abandoned the kit supplied rope.] I decided to serve the section of rope that wrapped around the mast. After some trial and error, that ended up to be exactly 2 inches of the rope. I then folded over the served section and measured over ½ inches to start my throat wrap. I used my black sewing thread, and started it by running the end through with a sewing needle. A small drop of CA, and then began wrapping back to the end of the served sections.
- 648 replies
-
- niagara
- model shipways
-
(and 1 more)
Tagged with:
-
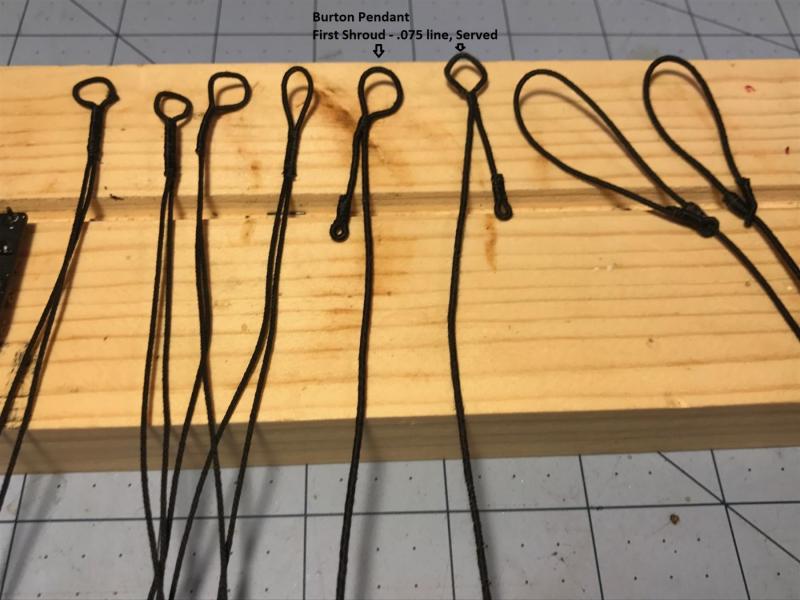
LOWER SHROUDS I decided to serve the forward mounted shroud. That would be the line that the course yard would rub against at times, and based on my research, would likely be served for added strength and wear protection. On the Niagara, the forward mounted shroud is a single line with a burton pendant. It took me a couple of days to figure this one out. I decided to use the kit provided .075mm (.035 inch) line and covered it with a basic black sewing thread on the Syren Serve-o-matic. A pretty good machine. I then tied an eye hole and tied the throat collar. I did two of them.
- 648 replies
-
- niagara
- model shipways
-
(and 1 more)
Tagged with:
-
LOWER FOREMAST STANDING RIGGING. Before you attach the cap and topmast to the lower foremast, it would be advisable to create the following: 1. Course yard sling 2. Lower shrouds 3. Fore Stay 4. Fore Preventer Stay. 5. Thimble for the Spring Stay. Doing these on the bench before you attach the cap means that you can simply slip them over the top of the lower foremast. I can’t imagine tying these onto the mast. I would also suggest that you mount the 6 1/8 inch double blocks with eye bolts to the bottom of the tree (used for spritsail yard braces, course yard sling, and course buntlines). Here is a photo of the final products.
- 648 replies
-
- niagara
- model shipways
-
(and 1 more)
Tagged with:
-
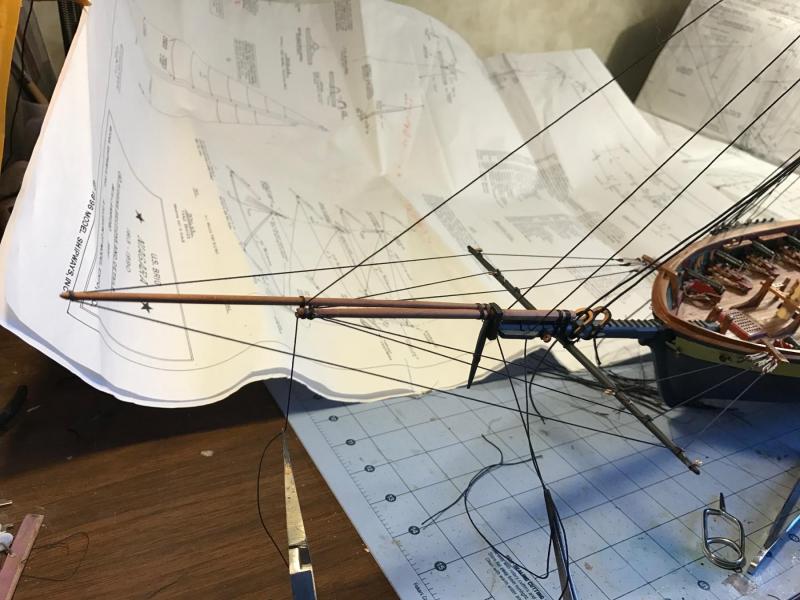
STANDING RIGGING – FORE MAST AND JIB I have been working on the standing rigging of the fore mast and jib for the last 20 days. Here is where I am so far. The fore mast is just sitting in its mast hole. Most of this time has been spent thinking, planning, and too often, interpreting the difficult rigging plans. It became obvious to me that I had to create a plan of attack, keeping in mind that serving, seizing, whipping and tying collars will always be EASIER if done on the bench rather than on the ship. All of the standing rigging lines in the photos below were prepared on the bench and then systematically added to the masts in a planned order. Having created this plan in my head, I thought I would share this with my fellow Niagara builders so that we all could wonder why the kit designer failed to do so. A few caveats. I don’t know if I am doing this correctly. It is my best interpretation of the plans and the written instructions. I have also gone back to my library of Niagara photos. I therefore stand behind this, at least until someone says otherwise. Take your best shots.
- 648 replies
-
- niagara
- model shipways
-
(and 1 more)
Tagged with:
-
Hey Mike, I have been working hard on the foremast and Jib rigging and am getting ready to post all of my work with rope sizes, serving choices, lengths, and as best I can figure, how it all came together. Quite a chore. I glued my channels under and up against the bottom of the rail. It provided support. Thanks for the site. Good info.
- 843 replies
-
- niagara
- model shipways
-
(and 2 more)
Tagged with:
-
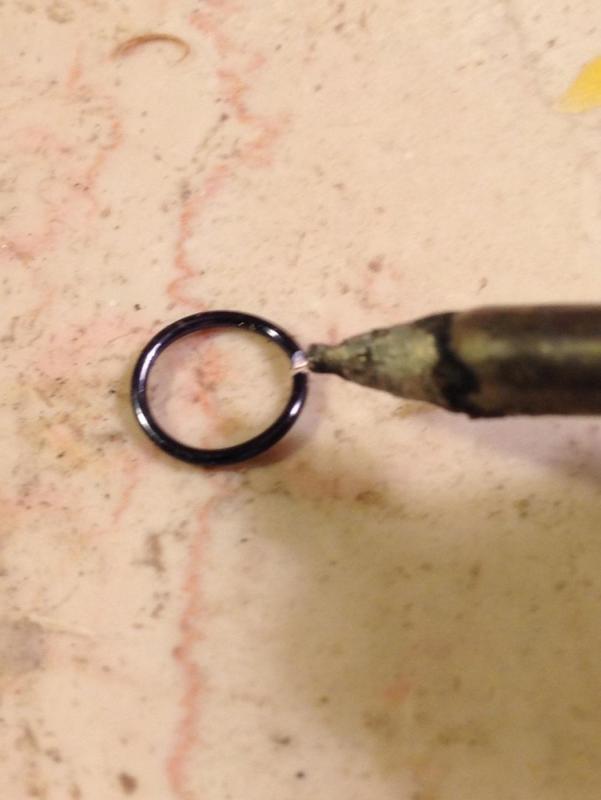
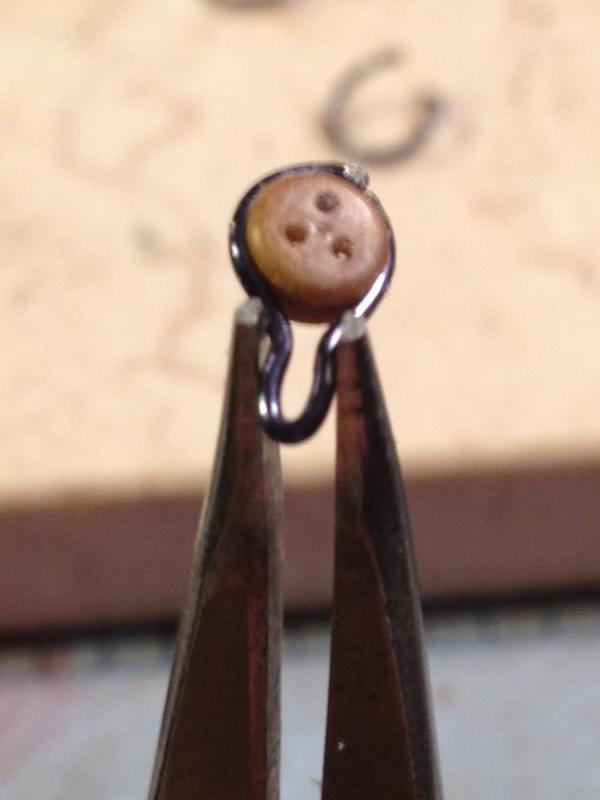
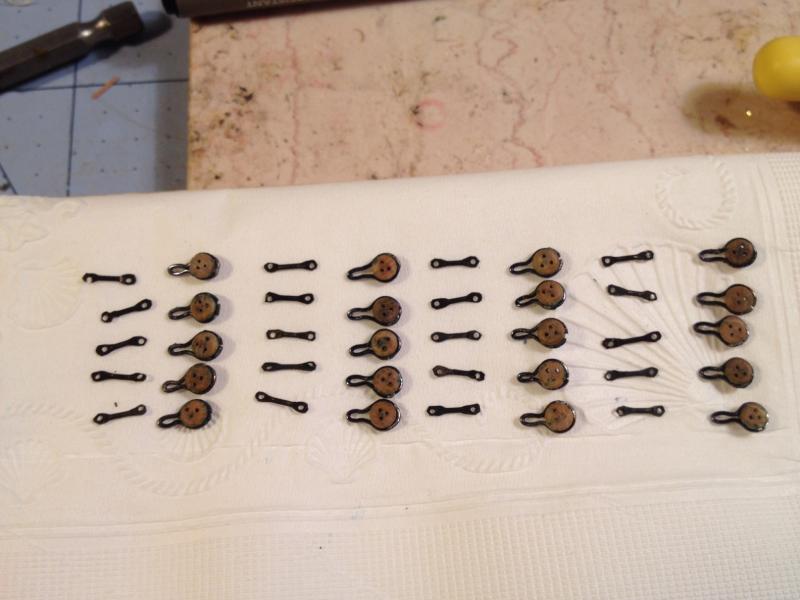
Mike, You can check my log, but I chose to solder rings of 26 gauge wire, and then bend them around the deadeyes. I kept the soldered end on top of the deadeye. If I were to do it again, I would put the soldered end at the bottom of the deadeye since it would be hidden by the wood rail. that would have eliminated the need to touch up the silver solder with black paint. The straps that bolt to the hull were created with round brass wire that I flattened on the each end with a small punch. I then drilled holes. Those look great on the ship and were very easy to make. I blackened them when completed. Here is a photo of the completed parts. They have held up very nicely. I have been working hard on standing rigging. I am going to post a practicum when I complete the fore mast and jib boom rigging. I am solving all kinds of challenges that I will be able to share with you. Good luck friend.
-
All of the Brown's ships were built in short order. I too read about the 40 day builds. Unbelievable and very humbling. can you send me the site for the figurines. They are real cool. Still waiting my rope order to start rigging.
- 843 replies
-
- niagara
- model shipways
-
(and 2 more)
Tagged with:
-
The Lake Erie Fleet is beginning to take shape. And not a moment too soon... the Royal Navy is are lurking over the sand bar. Looking great. I have the same problem with pins, and have two sizes. I will be following your lead once again. Thanks partner.
- 843 replies
-
- niagara
- model shipways
-
(and 2 more)
Tagged with:
-
Frank, I came across your build by searching "Burton Pendants." I am trying to figure out how to make mine. Your pictures were a real help. Thanks. And wow, I am glad I came across this when I did. If I had waited any longer, you would have been done. This is a beautiful build, and I applaud your decision to turn this kit into a fine sloop. I am going to follow along, I just hope that I can keep up with the pace.
-
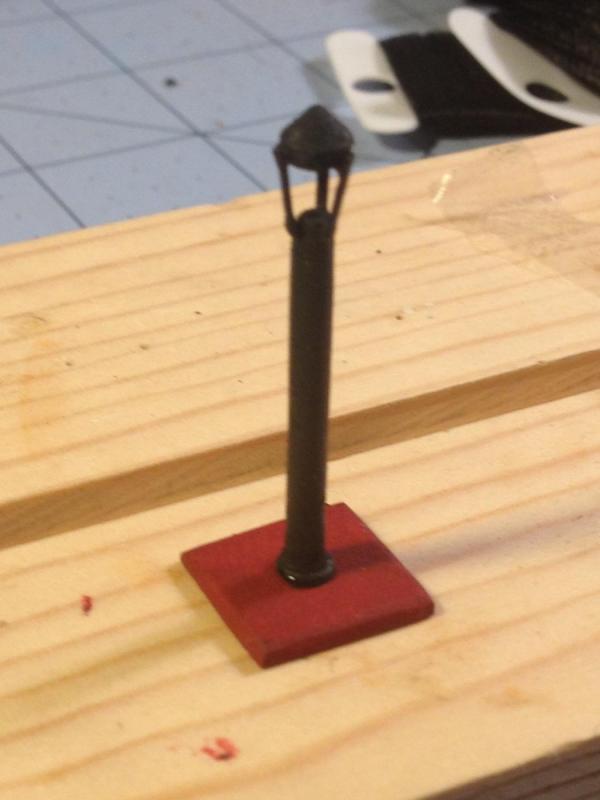
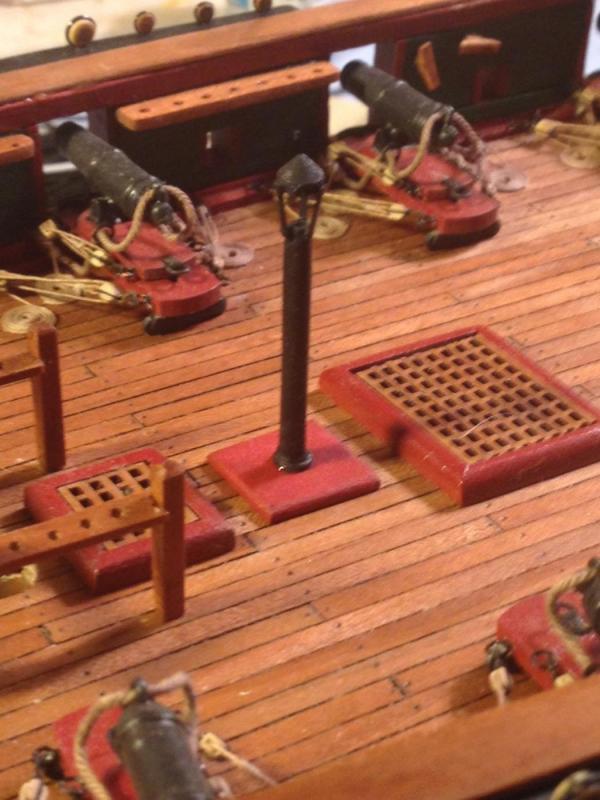
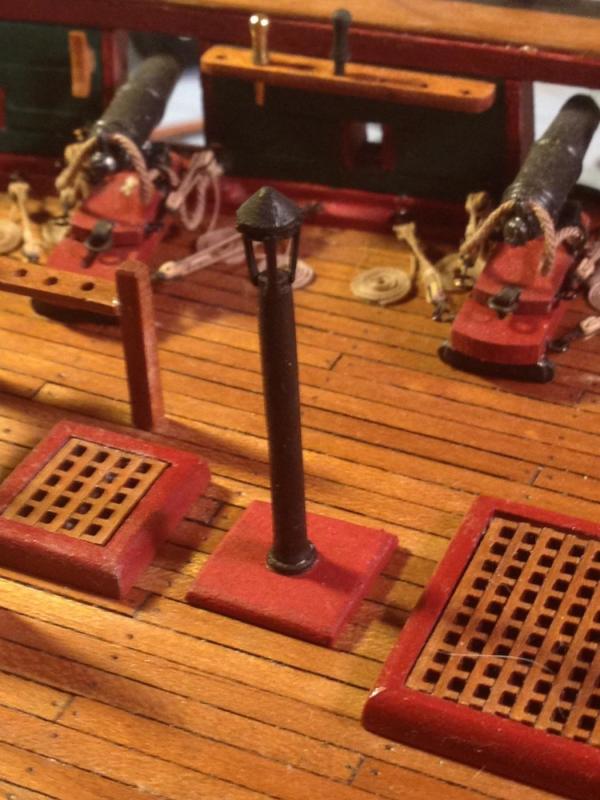
Thanks Mike and Mike, The admiral took a look at this stack and complimented me on making a great looking gas lamp.
- 648 replies
-
- niagara
- model shipways
-
(and 1 more)
Tagged with:
-
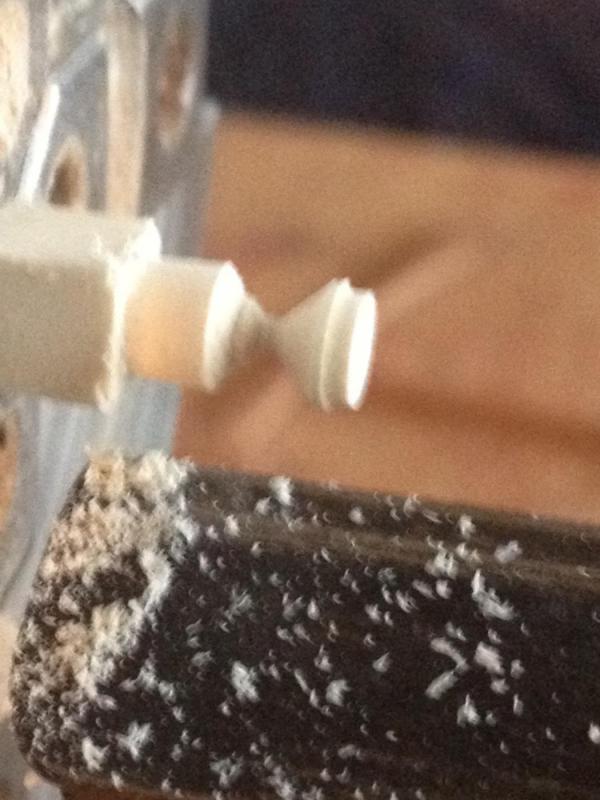
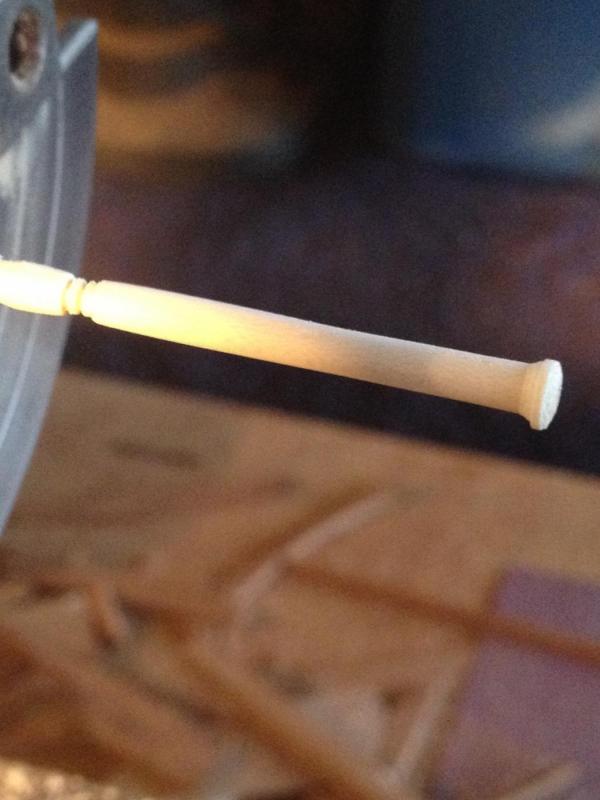
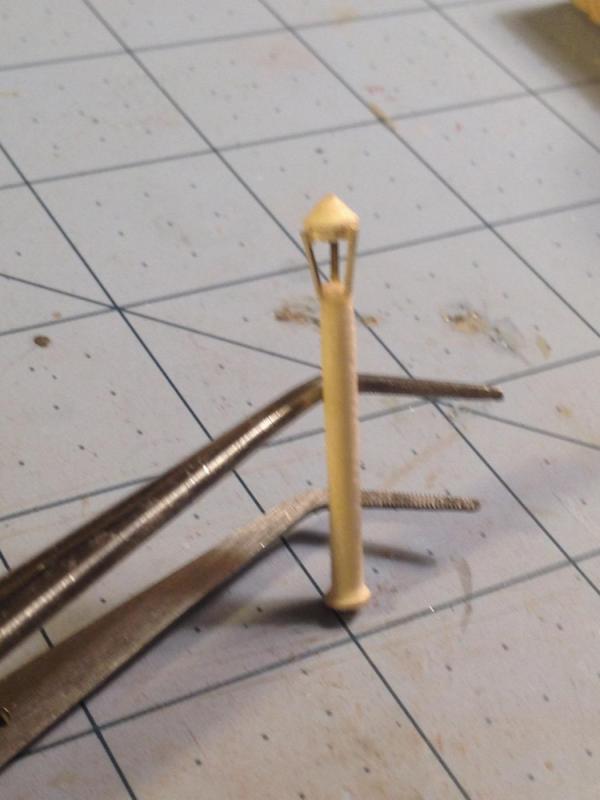
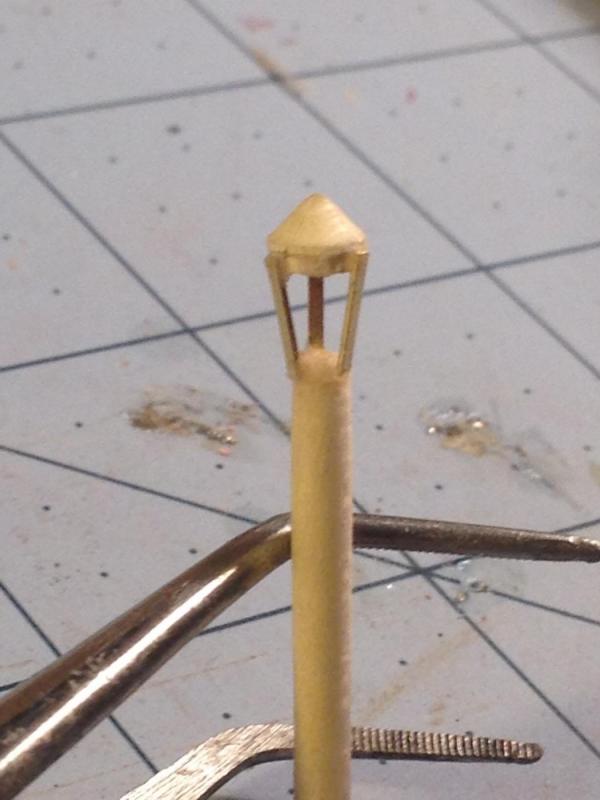
Galley Pipe I decided to scrap the Brittania galley pipe and make my own. I decided to turn the cone and pipe on the mini lathe out of holly. I then cut brass straps from the kit supplied inventory to act as brackets for the top. Using a drop of medium CA and with a lot of patience, I was able to position the three brackets in good enough position to square up the top. Some flat black paint and a wooden base with my red paint mix and I can scratch this one off the list. Took all night - one little part. Sorry about the poor quality of the photos. The pipe is so delicate that I will attach it to the ship at the very end of the build. It is only setting on the deck. I can see myself knocking that over
- 648 replies
-
- niagara
- model shipways
-
(and 1 more)
Tagged with:
-
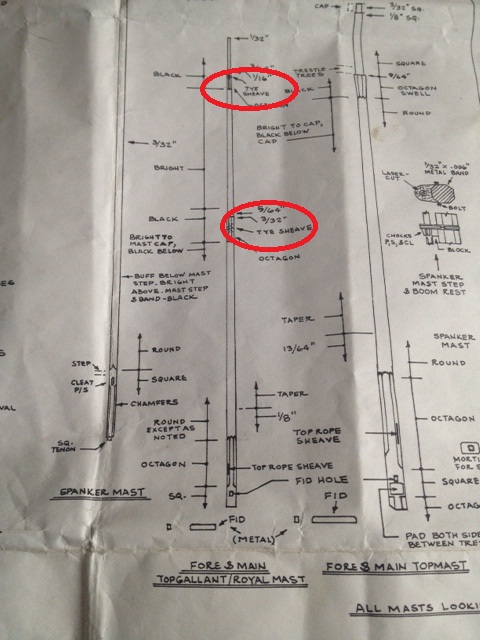
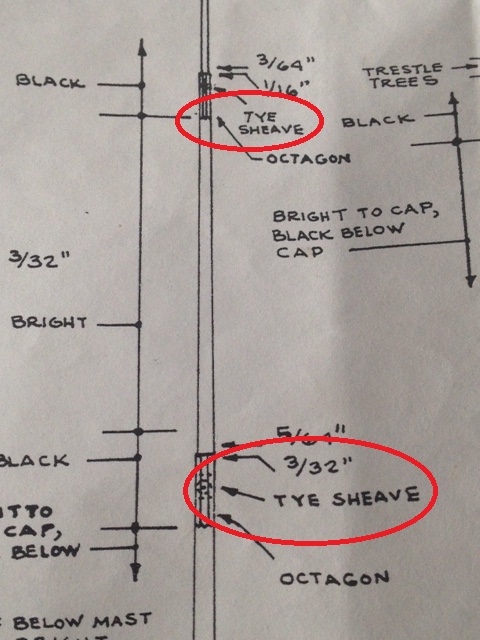
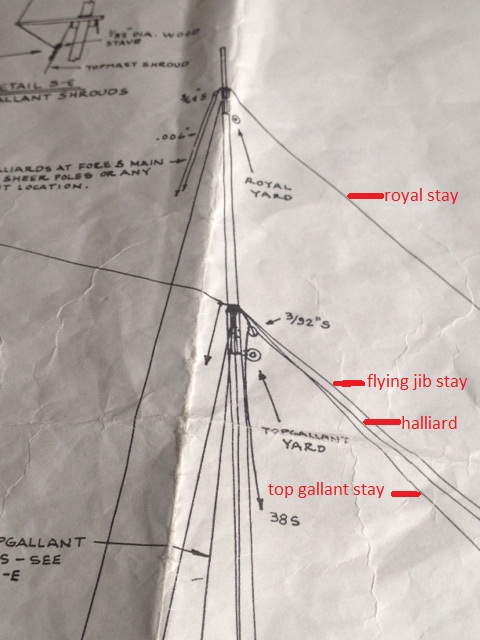
And after further reading of the plans, (gee why would I be smart enough to do that) I may have perhaps answered my first question. Seems that the tye sheaves are for the royal and topgallant yard lifts - duhhh. And yes, it would appear that an elongated hole will suffice. Still looking for advice on belaying the stays though.
- 648 replies
-
- niagara
- model shipways
-
(and 1 more)
Tagged with:
-
"TYE" Sheaves??? While I work on the galley pipe, here is a question that I simply can't answer, despite some research. What on earth is a "tye" sheave. My plans call on for them on the fore and main topgallant/royal masts. I have attached a photo of the plans. I understand what a sheave is, and I especially get what a "dumb" sheave is (I am good at dumb). Is this a special type of sheave/pulley system? Can it be accomplished by simply drilling a hole. The small diameter of these masts do not present a great platform for a true pulley sheave. AND that begs another question. Focusing soley on the Foremast for this one, I note that the topgallant and Flying Jib Stay belay somehow to the fore topallant/royal mast near or at one of these "tye" sheaves. DO THEY? and if so, how do you actually tie it off. IF NOT, how do I tie it off to the mast, and if they don't, what does tie into the tye sheave. The back Stays? The same question for the royal stay? Finally, I also note that the halliard runs through a block near the lower tye sheave. Since I am not attaching sales, should I (does anyone) rig the halliard? Am i making any sense?
- 648 replies
-
- niagara
- model shipways
-
(and 1 more)
Tagged with:
-
Jerry, Seeing your beautiful ship take the water was going to rid me of the urge to put my Niagara in the bath tub to see if it actually floats. I hope you get another chance soon, and I can't wait to see the results. Garryowen!
- 553 replies
-
- sloop of war
- constellation
-
(and 3 more)
Tagged with:
-
Thanks Ken, wood top and brass tube is the plan. I hope it turns out half as good as yours did.
- 648 replies
-
- niagara
- model shipways
-
(and 1 more)
Tagged with:
-
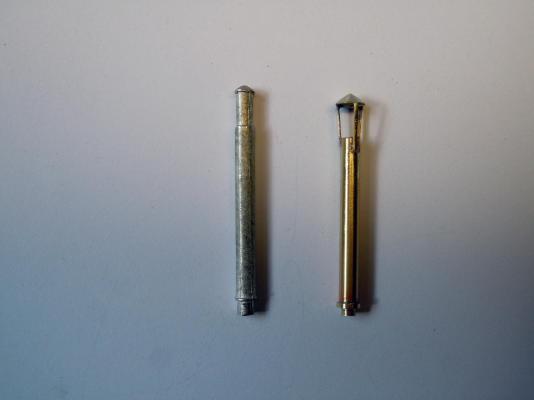
Guys, Borrowing a photo from XKen's Niagara build, this is what Mike and I are trying to accomplish. Ken was able to turn a brass conical top to his stack with his engine lathe. I don't have that capacity, so I will try and build one of these out of Holly and paint it. The figure on the left is the kit supplied stack. Not very authentic in my view (and in the view of nearly every other Niagara builder).
- 648 replies
-
- niagara
- model shipways
-
(and 1 more)
Tagged with:
-
I could turn a small cone with out much problem. Interestingly enough, when turned and sanded, holly looks a lot like styrene. No grain at all. I will give it a try tonight and post some pictures.
- 648 replies
-
- niagara
- model shipways
-
(and 1 more)
Tagged with:
-
Mike, You did give me an idea. I could make this out of wood on my mini lathe. My supply of Holly would turn out a pretty smooth surface that when painted, would look like metal (I think). I am going to give that a try and get back to you with photos. Any turning of metal or brass stock would require the use of an engine lathe. My equipment is only for wood, although I have access to large metal turning engine lathes. IF we were to do this in brass, we might be better off if we stamped the conical top, although finding a proper die (which we may be able to create with the very tip of a large drill bit bored into metal stock) would be required. I think I will try that too. DOES ANYONE OUT THERE HAVE ANY OTHER SUGGESTIONS???
- 648 replies
-
- niagara
- model shipways
-
(and 1 more)
Tagged with:
-
Glenn, I totally understand your pain. Whenever you think that you are only writing letters to yourself, always remember that there are many silent admirers of Sailing Warships out there, and your Vanguard will always be on top of my list of gotta see logs.
- 101 replies
-
- victory models
- amati
-
(and 2 more)
Tagged with:
-
Mike, Once again, we think a like. The Galley Pipe is going to be a challenge. We are going to need XKen's advice on how to create that cone shaped top. I have looked at his log, and he made one from brass, but i can't figure out how he did it. It looks great. I have been avoiding that project. I am still trying to decide how to tie off the lanyards for the bullseyes. I have also pretty much decided to abandon the kit supplied rope for the standing rigging. The black spools are all way out of size, and is so stiff that when it is stretched, you can still see the folds. I have tried to soak it in hot water, and it really does not help. I am going to order new rope and will start rigging as soon as it arrives.
- 648 replies
-
- niagara
- model shipways
-
(and 1 more)
Tagged with:
About us
Modelshipworld - Advancing Ship Modeling through Research
SSL Secured
Your security is important for us so this Website is SSL-Secured
NRG Mailing Address
Nautical Research Guild
237 South Lincoln Street
Westmont IL, 60559-1917
Model Ship World ® and the MSW logo are Registered Trademarks, and belong to the Nautical Research Guild (United States Patent and Trademark Office: No. 6,929,264 & No. 6,929,274, registered Dec. 20, 2022)
Helpful Links
About the NRG
If you enjoy building ship models that are historically accurate as well as beautiful, then The Nautical Research Guild (NRG) is just right for you.
The Guild is a non-profit educational organization whose mission is to “Advance Ship Modeling Through Research”. We provide support to our members in their efforts to raise the quality of their model ships.
The Nautical Research Guild has published our world-renowned quarterly magazine, The Nautical Research Journal, since 1955. The pages of the Journal are full of articles by accomplished ship modelers who show you how they create those exquisite details on their models, and by maritime historians who show you the correct details to build. The Journal is available in both print and digital editions. Go to the NRG web site (www.thenrg.org) to download a complimentary digital copy of the Journal. The NRG also publishes plan sets, books and compilations of back issues of the Journal and the former Ships in Scale and Model Ship Builder magazines.


