mbp521
-
Posts
1,003 -
Joined
-
Last visited
Content Type
Profiles
Forums
Gallery
Events
Everything posted by mbp521
-

USS Cairo by Zetec - FINISHED - 1/50 scale
mbp521 replied to Zetec's topic in - Build logs for subjects built 1851 - 1900
Zetec, great start! Nice work on cutting all those bulkheads and keels by hand. -Brian -
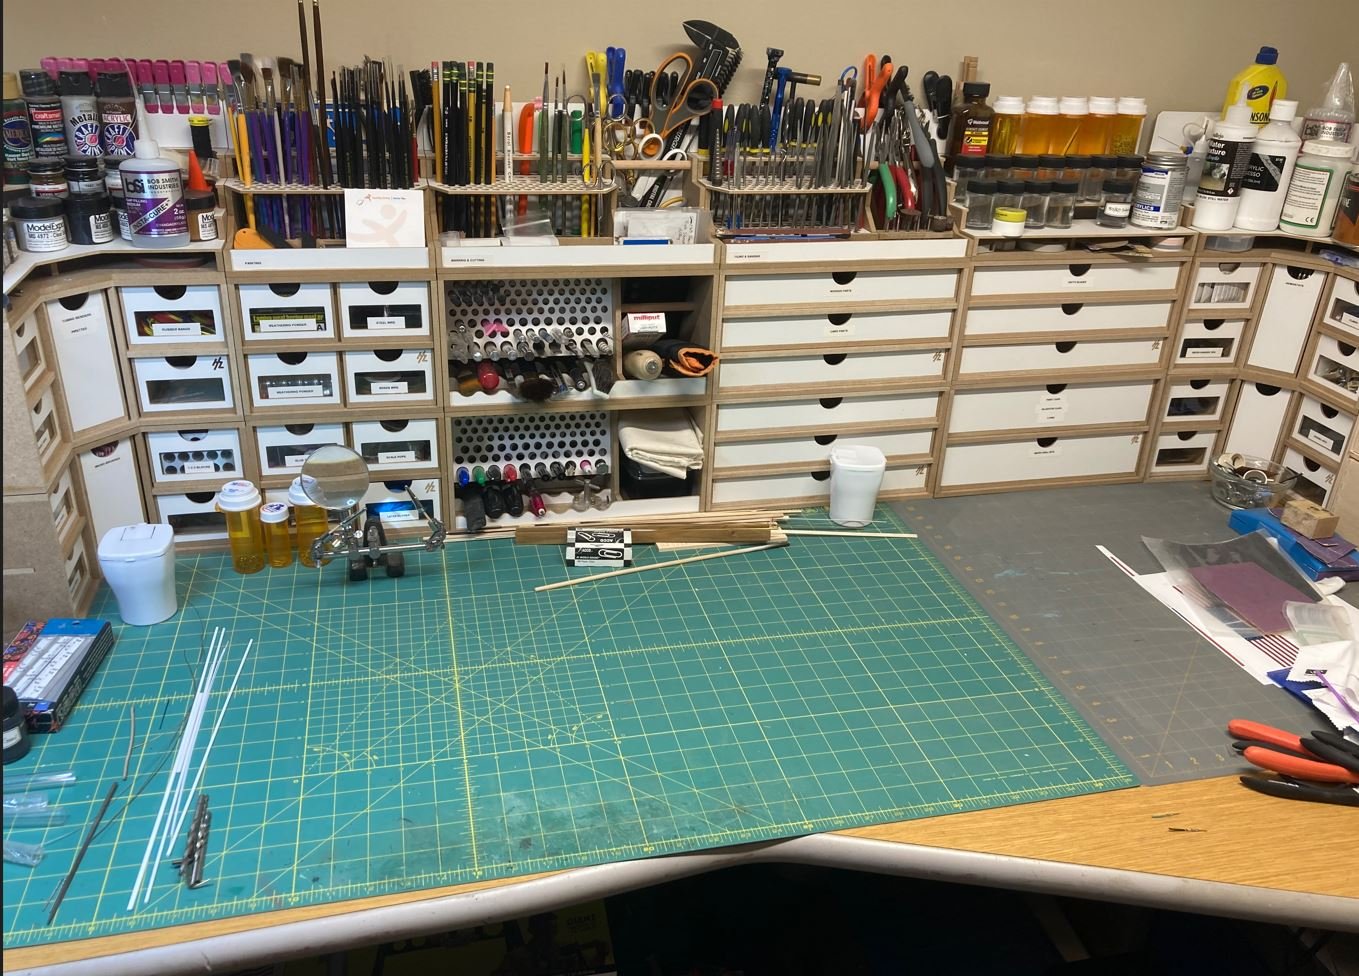
Thank you Eric. My workspace isn't a whole lot to brag about. I just have a yard sale geek desk in the corner of one of our spare bedrooms with the Hobby Zone storage units. I share the room with my other desk I use for my home office. My plan is still to build out one corner of our barn to incorporate my office, shipyard and reloading room, some day (hopefully soon). I have been taking up the spare bedroom for the past few years and I am surprised the Admiral has not told me to pack it up and remove myself from the premises. I have a feeling it will be coming soon. Thankfully we have not had any company that would require the use of the room during this time. -Brian
-
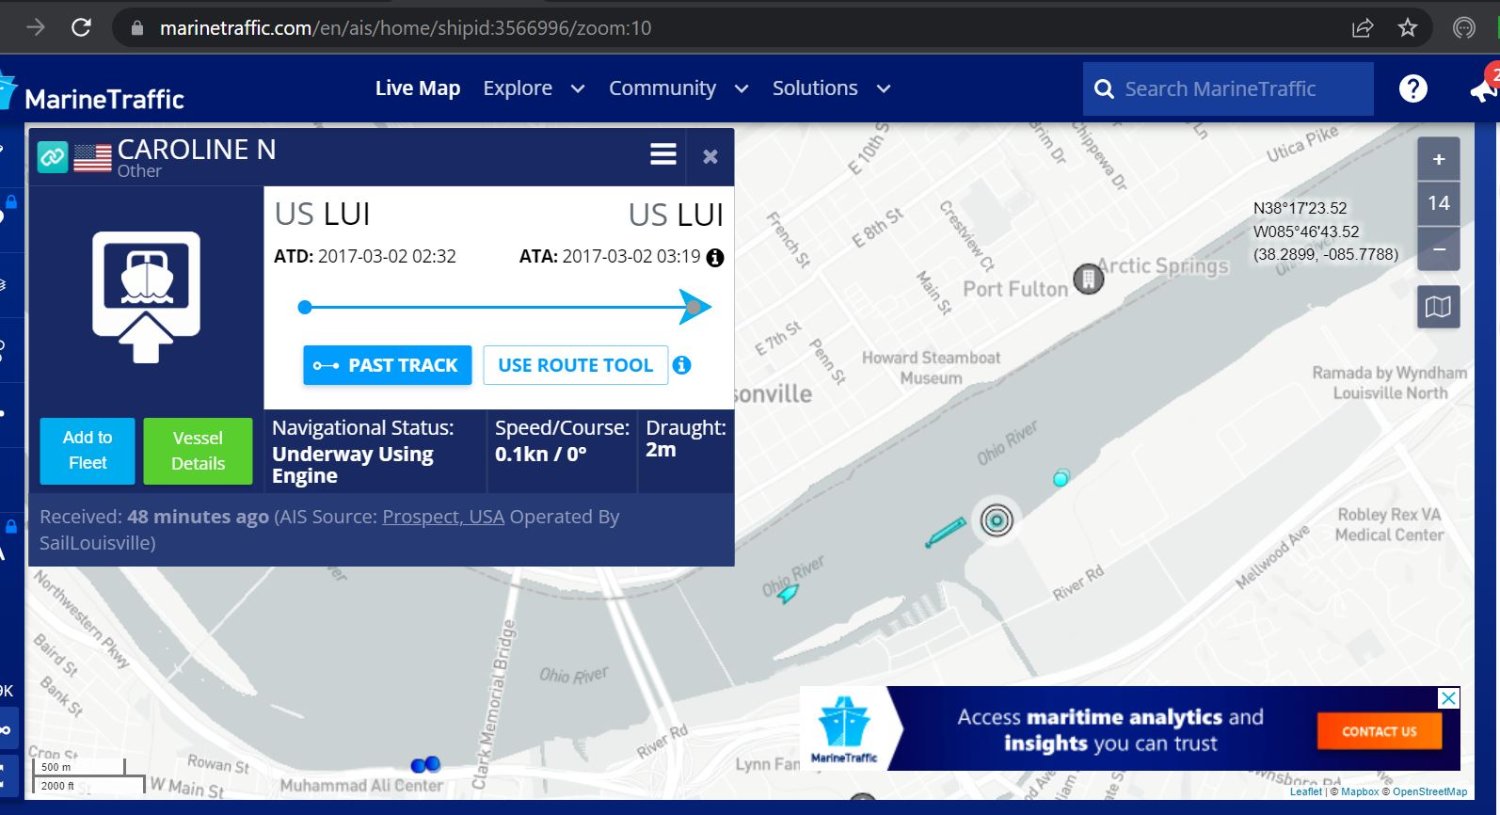
Something just for fun. I ran across this website while researching the Caroline N. It shows and tracks marine vessels by their ship ID. In this case, the Caroline N is currently on the Ohio River in Louisville, KY. https://www.marinetraffic.com/en/ais/home/shipid:3566996/zoom:10 -Brian

-
Give me a couple of days, I'll take care of that. 😁 One of the reasons I joined the Air Force was the main areas of industry back home were either work at the refineries or work the port docks. Neither sounded very appealing to me. Looking back though, it might have been interesting to work on these boats. Just the scenery alone would have been worth the hard work. -Brian
-
Thank you Roger for the vote of confidence. You bring up a good point and I might just have to give it a try. What's the worse that can happen, I have to rebuild the piece if I mess it up? Been there before and managed to muddle my way through it. -Brian
-
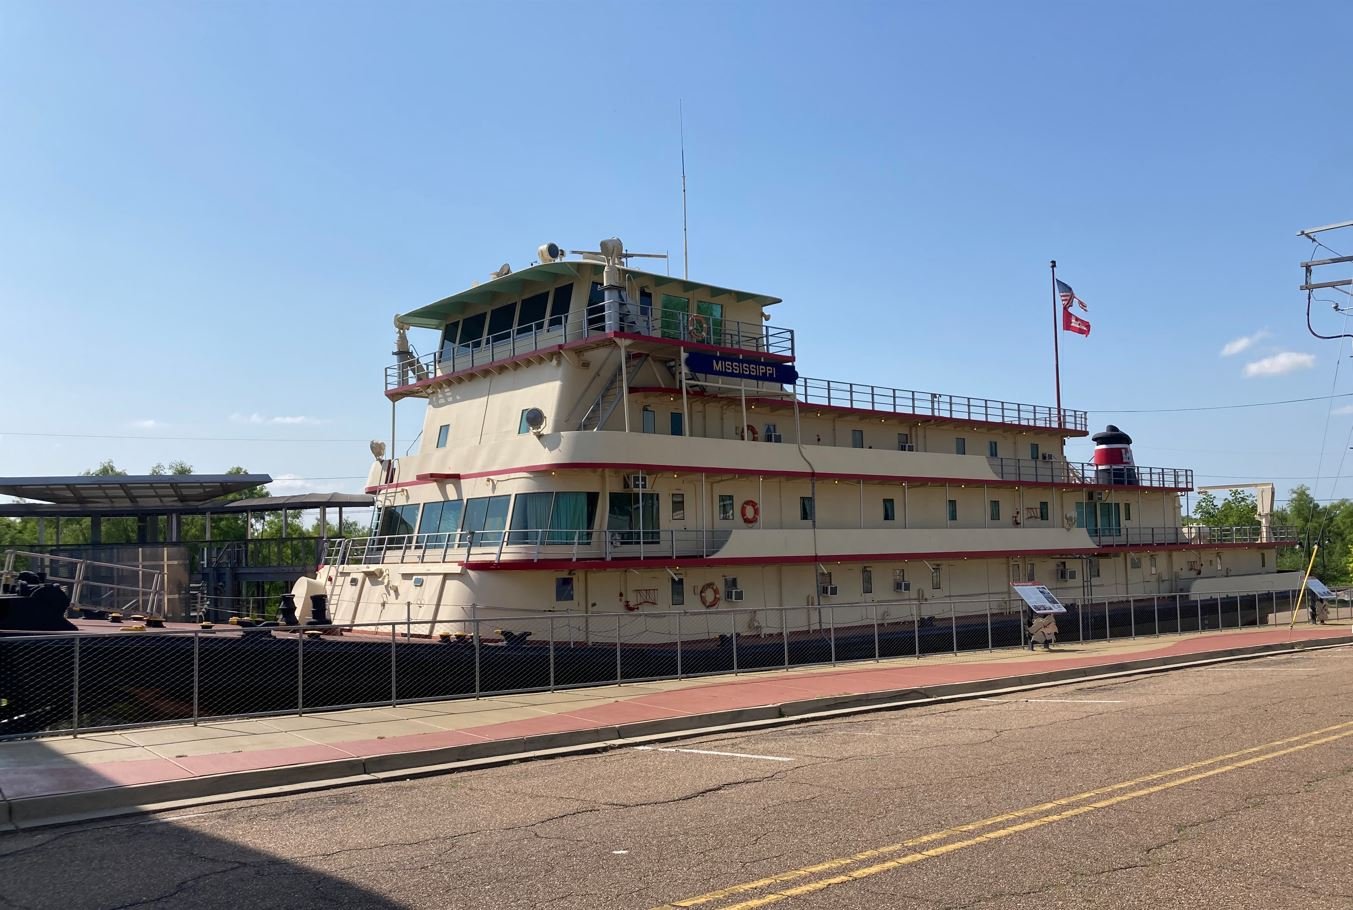
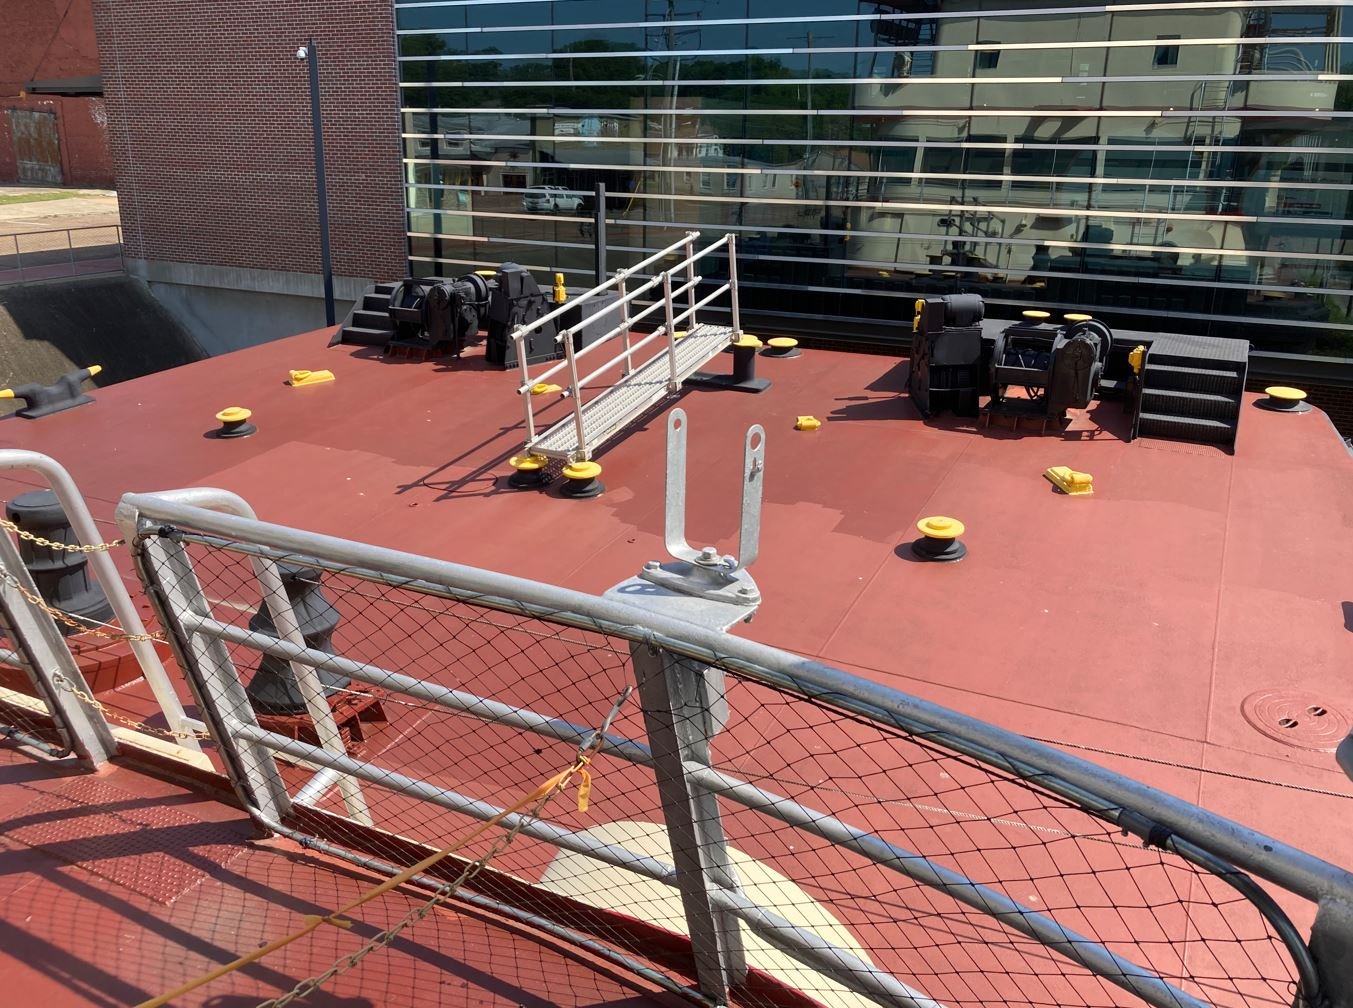
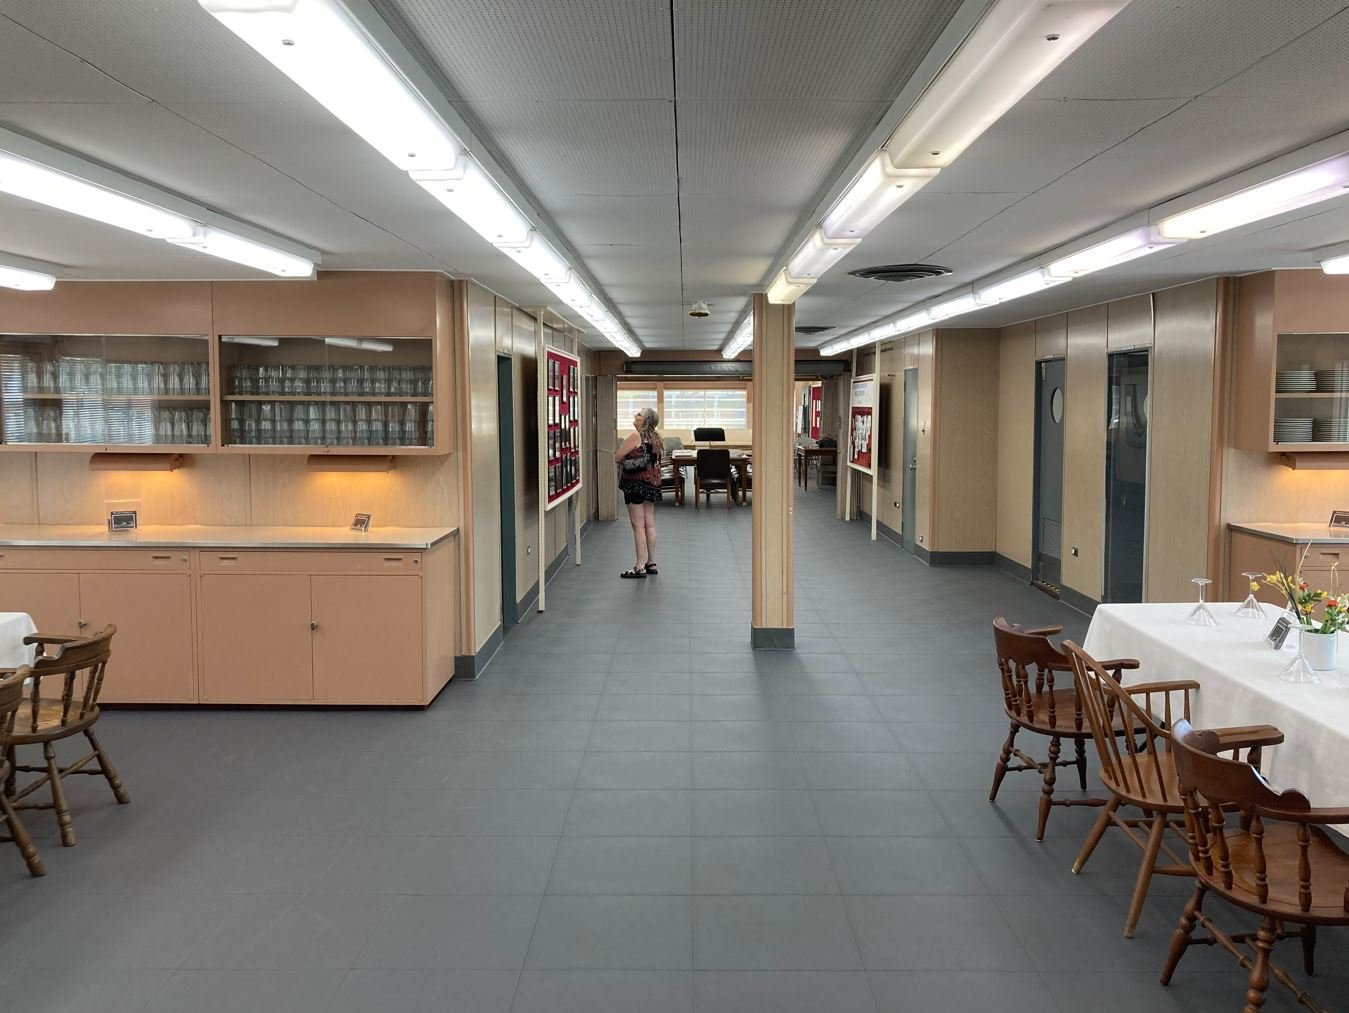
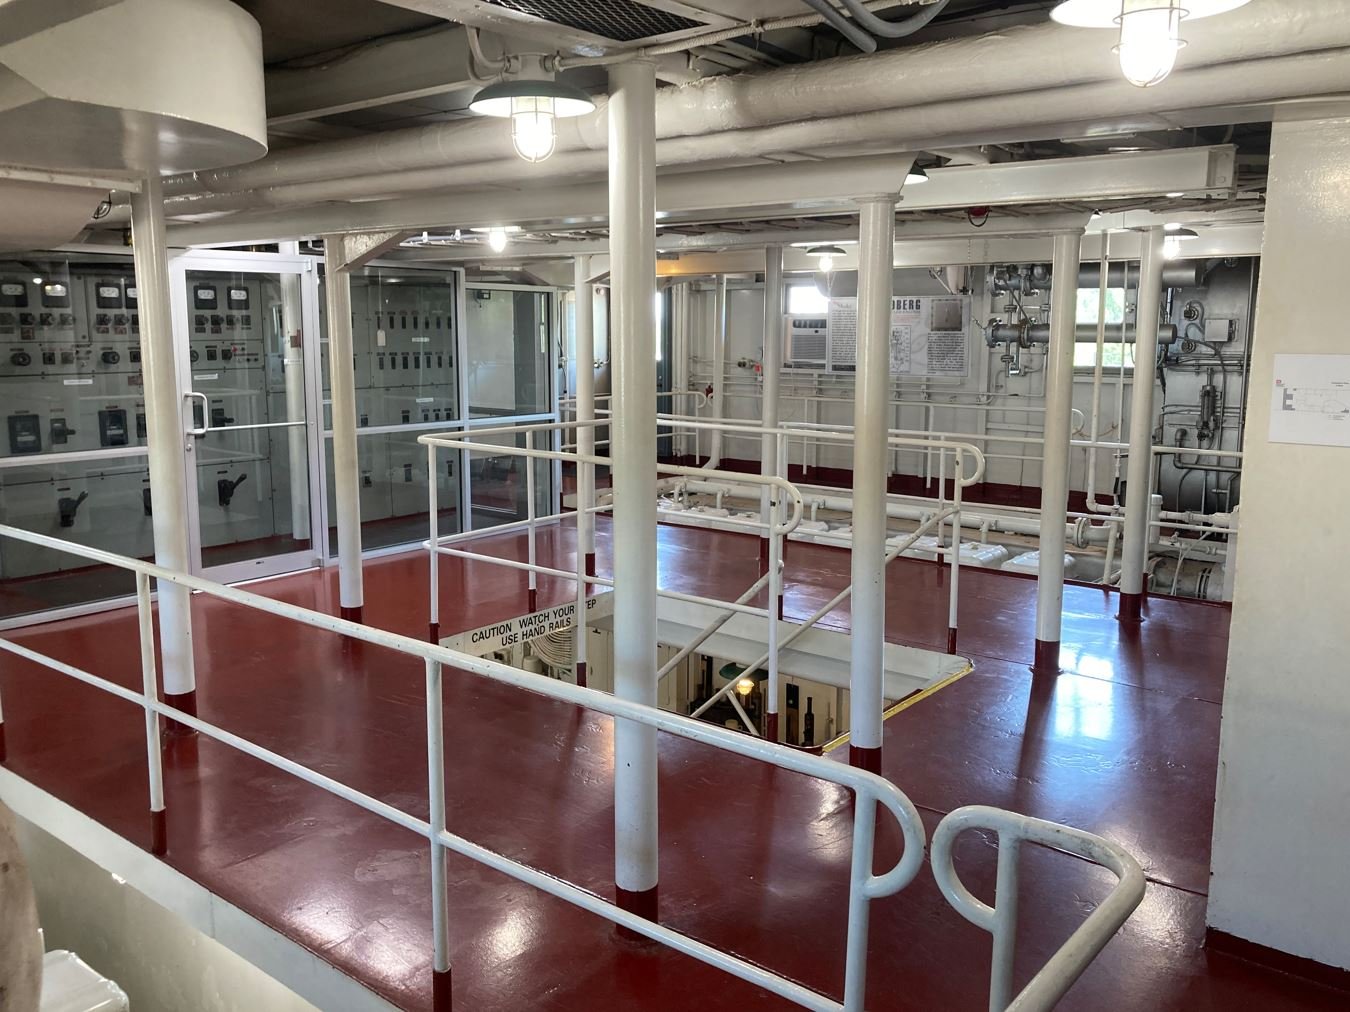
Excellent info Keith, thank you. While I was reading the article I noticed that they discussed the M/V Mississippi and all of the previous boats to carry the name. When the Admiral and I took our trip to Vicksburg last year, we visited the Lower Mississippi River Museum. They have on display the fourth M/V Mississippi (the first diesel powered vessel to carry the name) and of course, we took a tour of it. Beautiful museum boat. These guys had very nice accommodations. -Brian
-
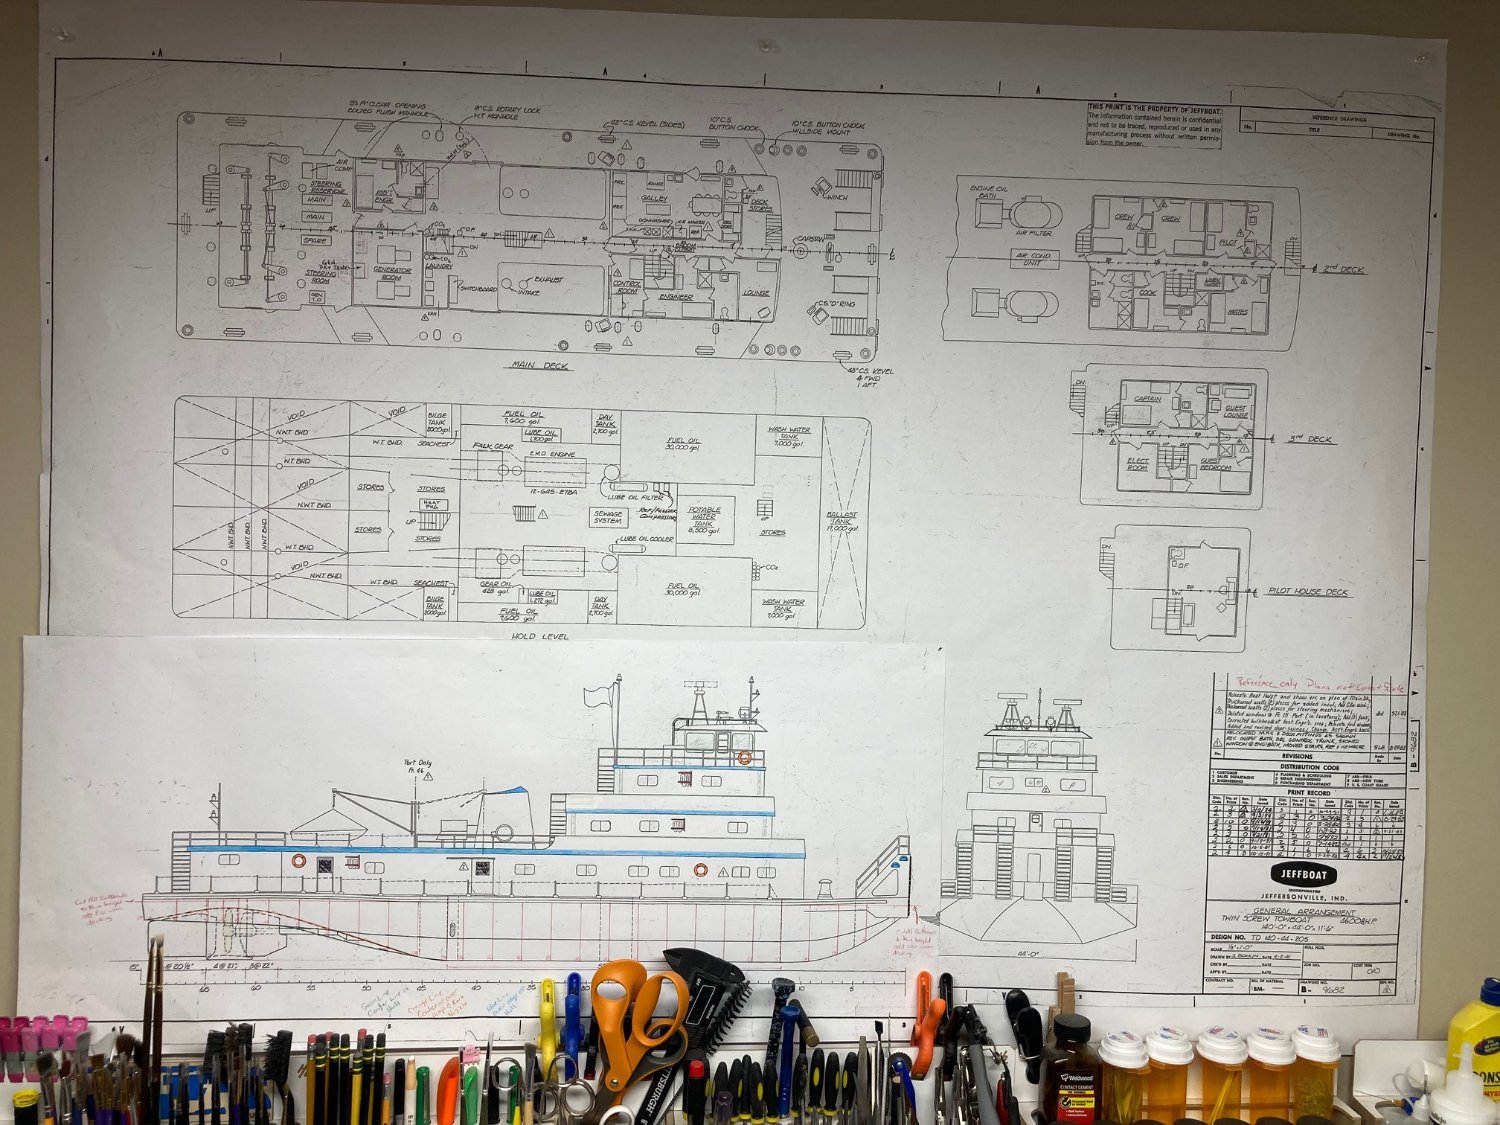
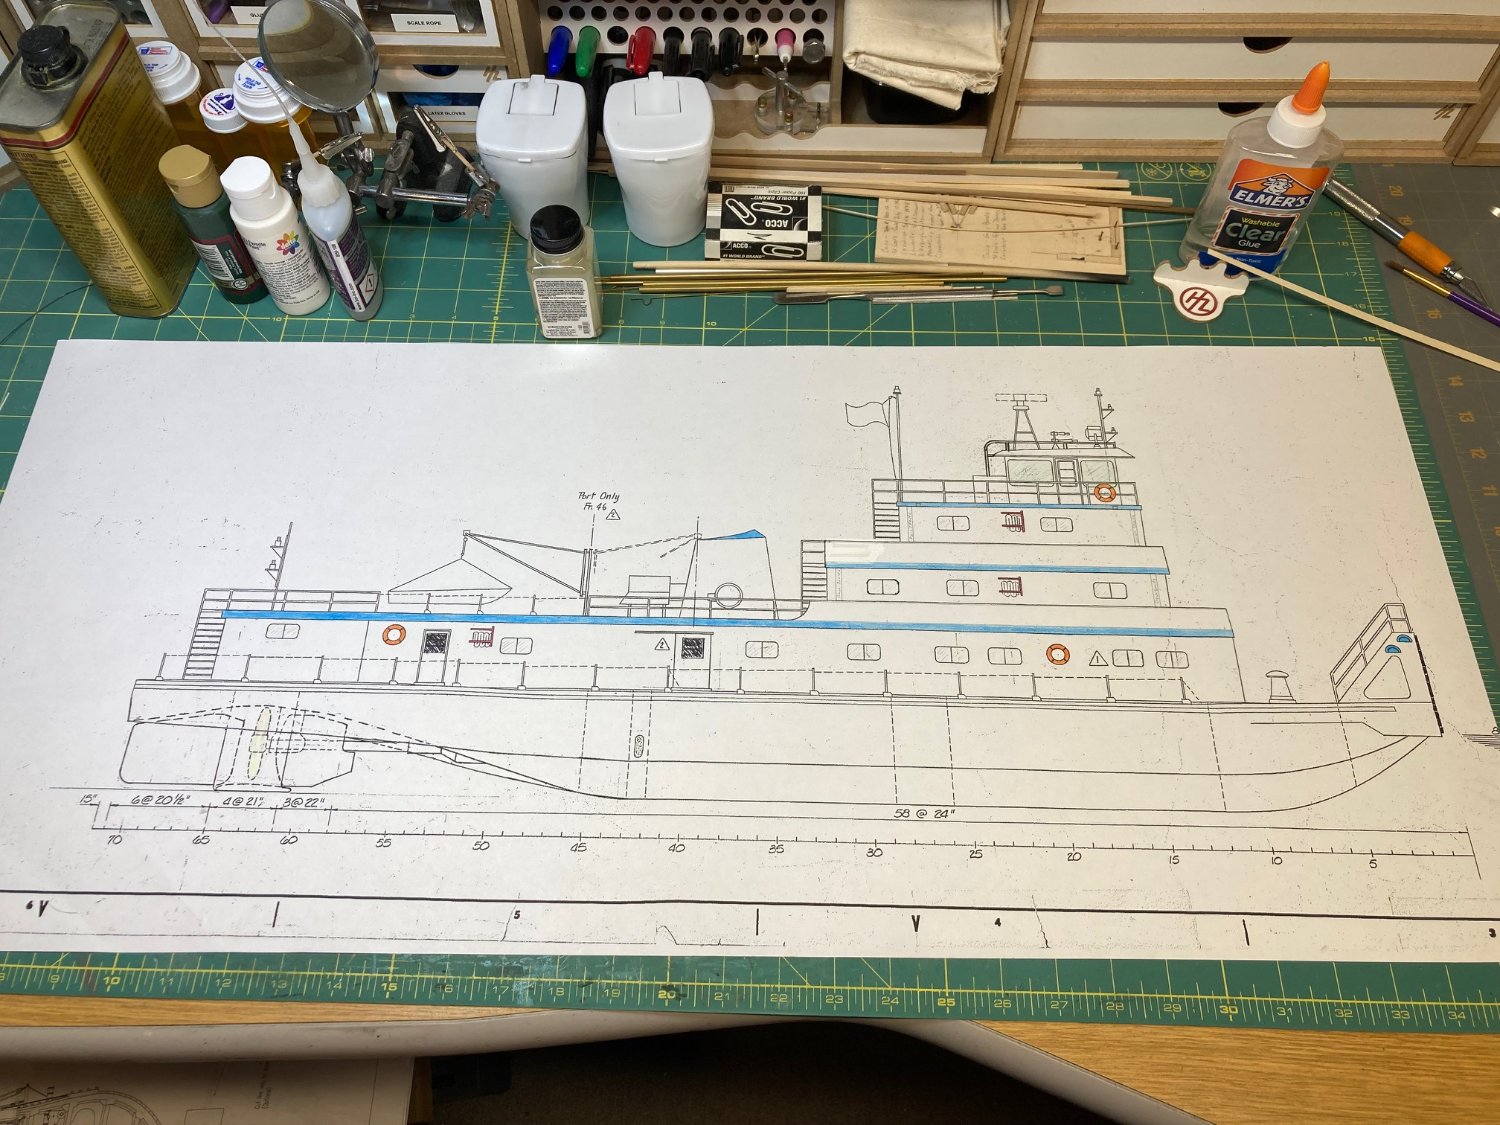
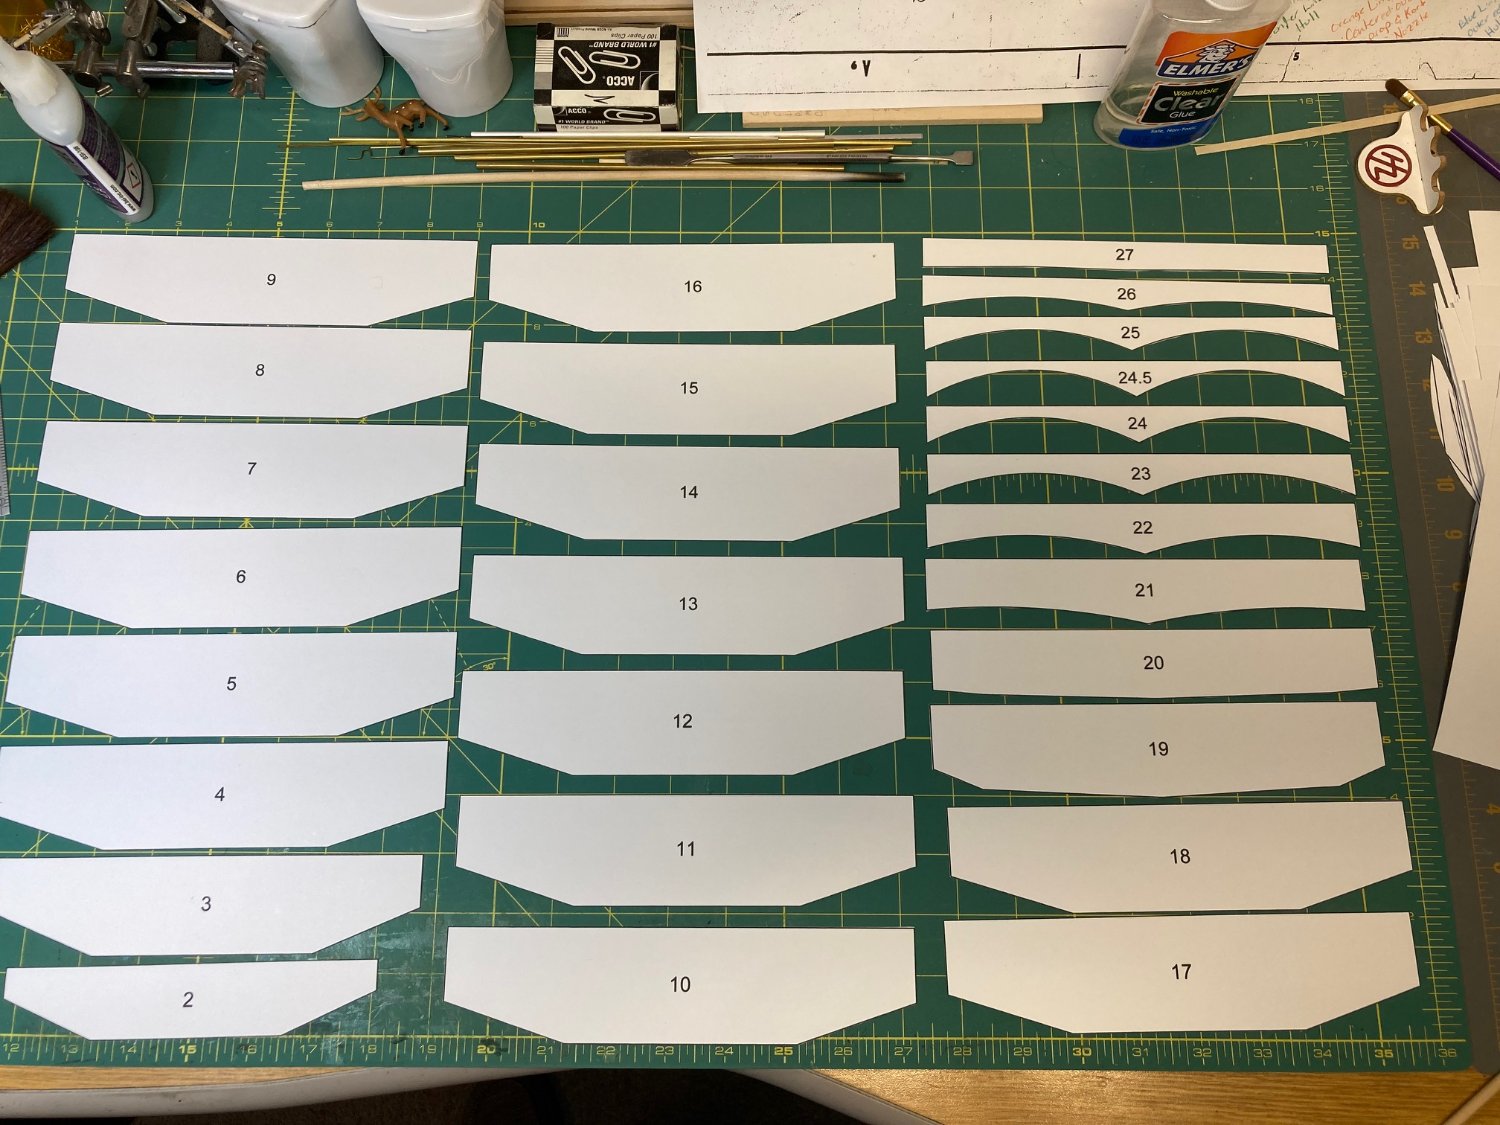
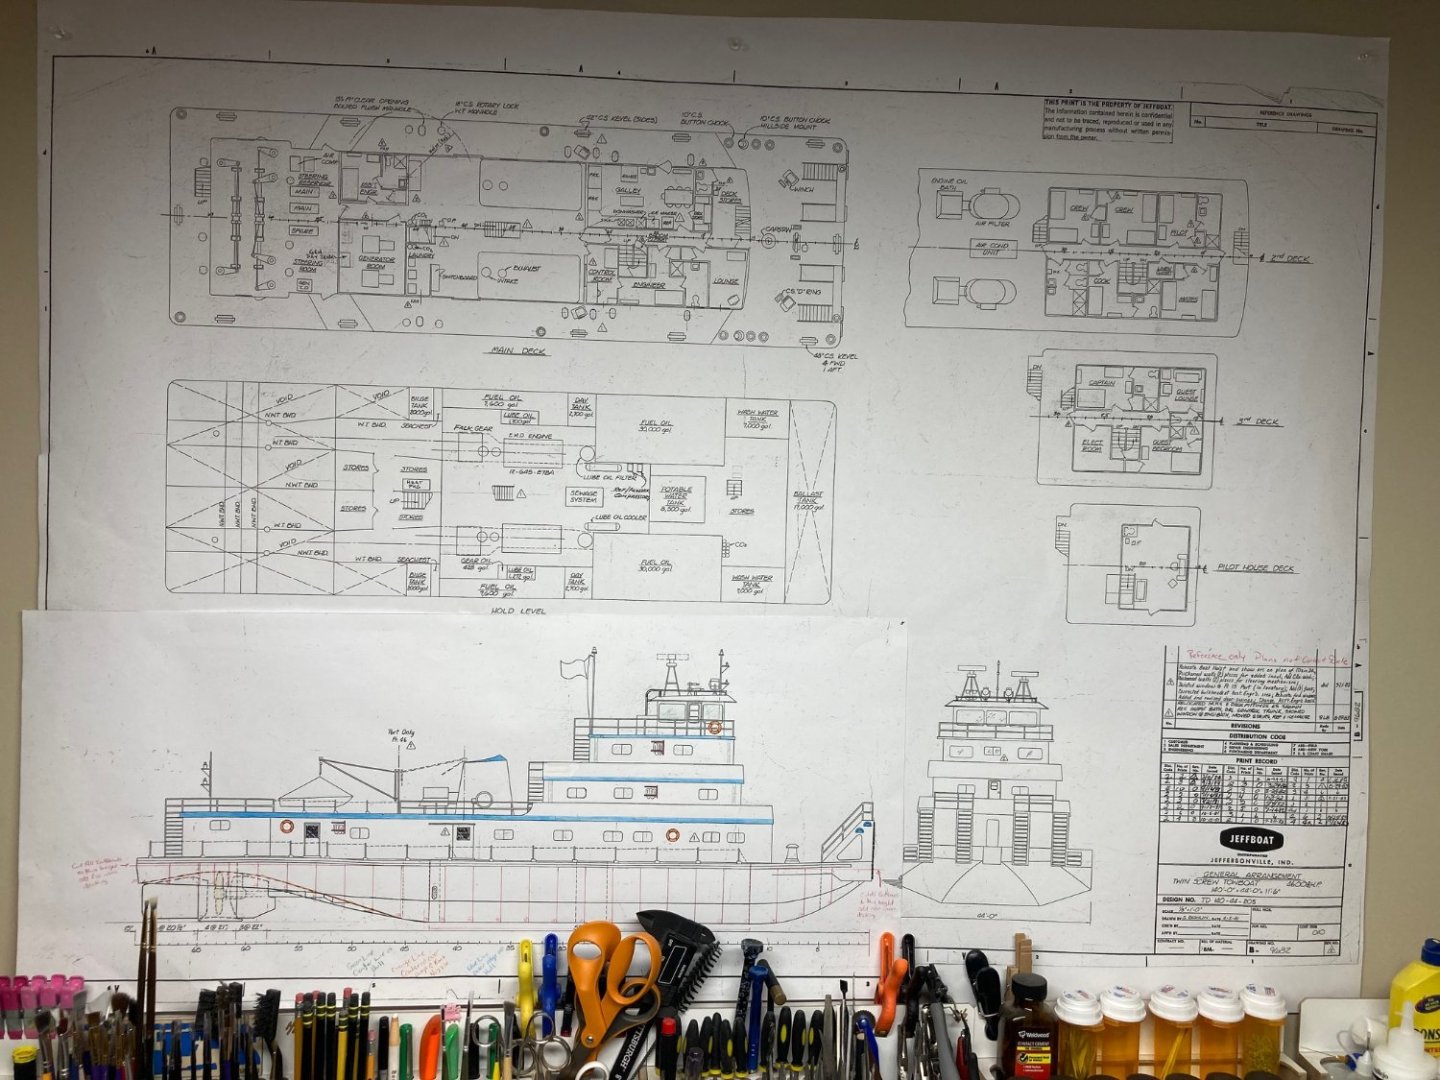
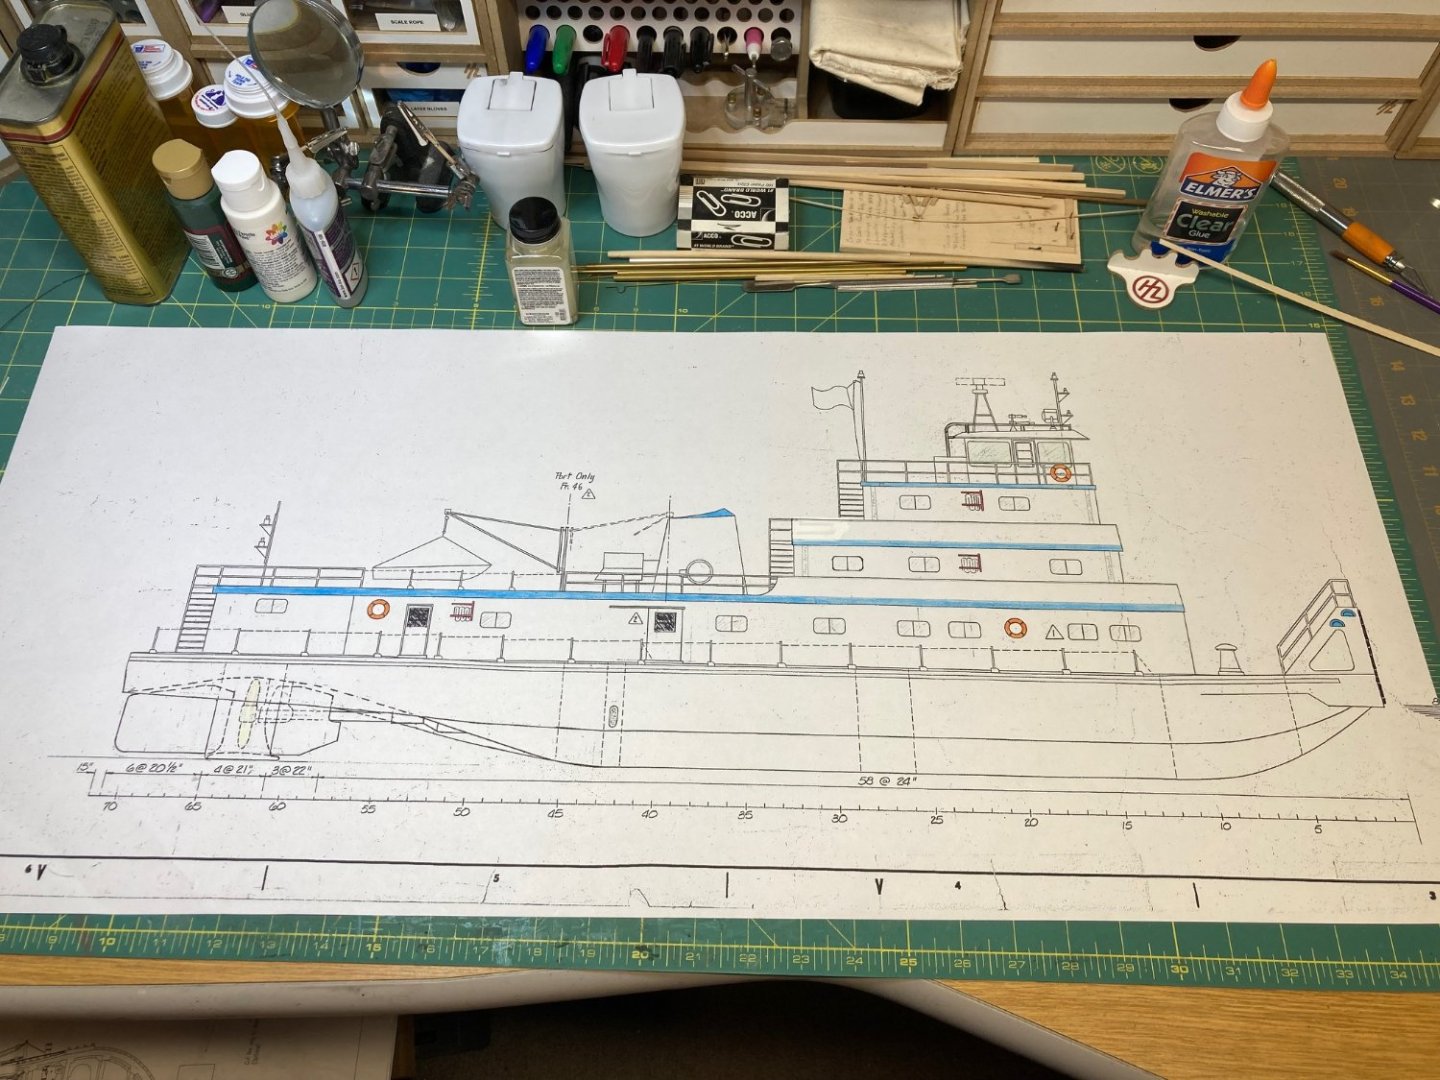
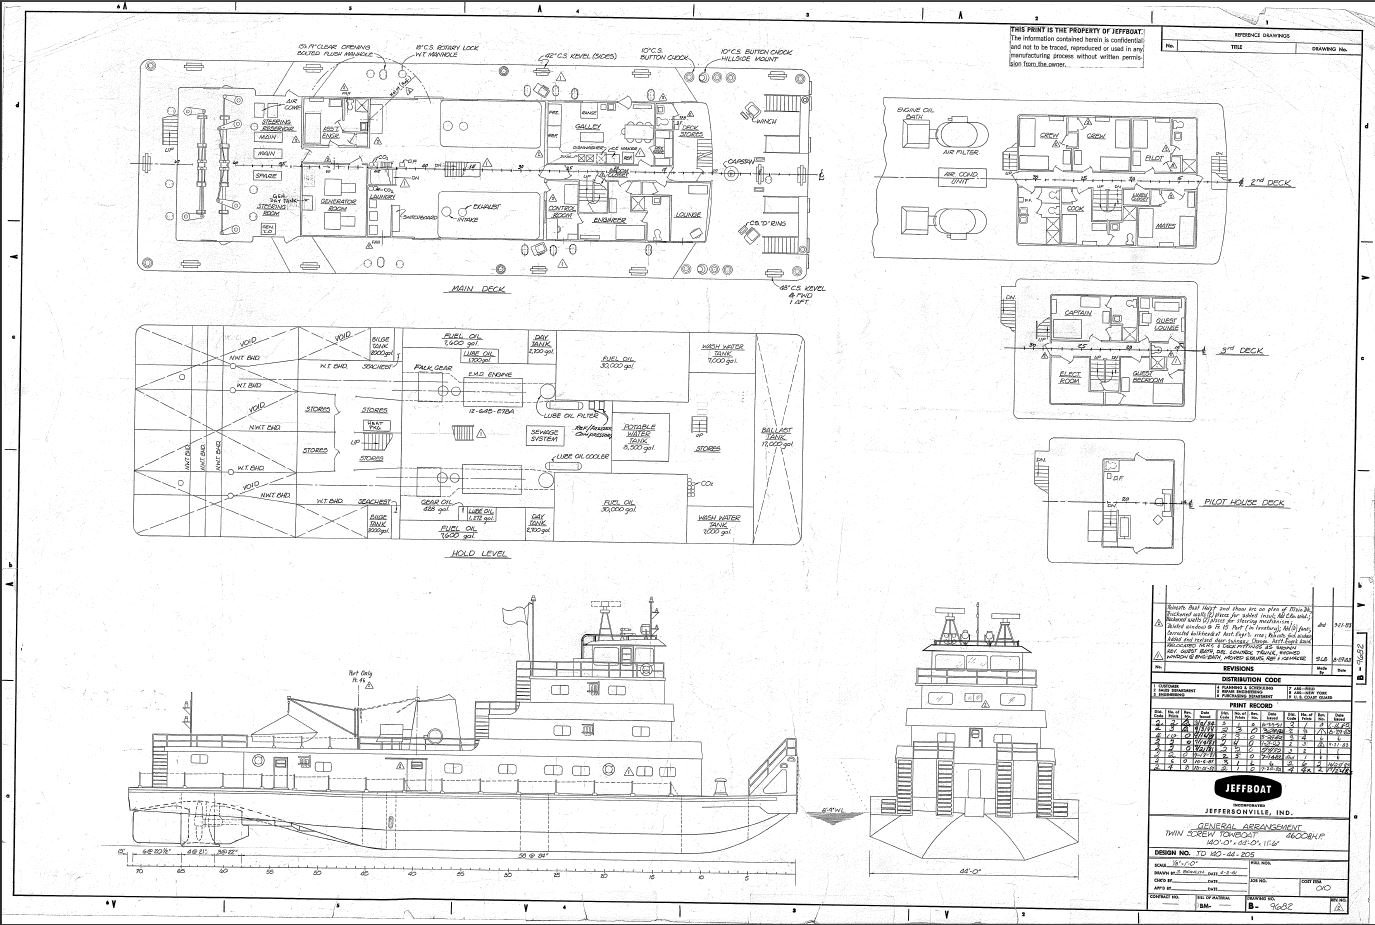
Alrighty, I figure it's time to get this thing started. So I managed to get the bench cleaned off and ready to go. The plans have been scaled and marked up. I went through and got my measurements, divided up the hull bulkheads and made a few adjustments to the plans to reflect the differences between the actual boat and the drawings. Not too many adjustments were needed, just a few structure details that didn't match up. The plans are on the wall. When I was at the printshop the first attempt at printing didn't come out to the right scale (they came out a bit too small). The clerk was nice enough to give me those drawings free of charge, so I will be using those as my wall reference and I can use the correct scale ones for my templates and other measurements. This worked out better since the smaller scaled ones fit better on the wall. I got as far as printing out most of the bulkhead templates. These will be glued to some 1/4" MDF then cut out and shaped. No hold details will be done on this build, so the hull will be the basic POB. Still trying to decide on if I will plank the hull with basswood strips, then smooth out the lines with body filler, or just go ahead and cut out the hull shapes from 1/16" basswood boards and shape it from there. I would like to try and simulate some of the steel plates on the hull If possible, to give it a little more detail. I've got some time to figure it out. Not too much more to report on this update. I have the main deck printout cut and ready to build, just need to make a run to the lumber yard for supplies. I thought I had enough MDF to get a good start, but I seem to have come up a bit short. In the mean time I am going to get the bulkhead templated glued down and cut out and hopefully next time I will have more progress. Thanks for stopping by. -Brian

-
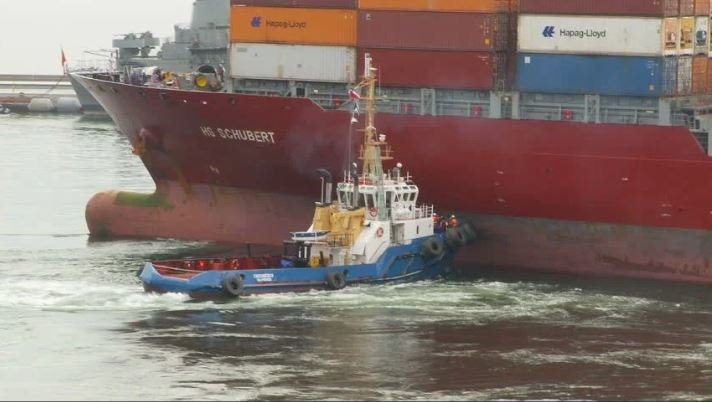
Kurt, that makes perfect sense. There are many twists and turns along the rivers and some of them fairly sharp. I can see where a long line of barges could be difficult to navigate as well as current speed being factored into the equation. I can't speak for other rivers, but I know for a fact that the Mississippi runs a whole lot swifter when the water levels are higher than when its low, and I'm sure it is a struggle to get those barges upriver fighting that swift current, or controlling the turns going downriver. Keith I totally agree. Too many barges can be a disaster waiting to happen, that may be what is going to transpire in that photo. From the looks of it the pilot does have the starboard engines running full speed or all rudders are hard to starboard. He definitely looks like he is trying to turn it around.😁 Eric, in my Cairo research I ran across many instances where the ironclads would have their coal barges lashed to the sides of the ship. This could be one of the transition periods where riverboat pilots were getting away from "towing" then and migrating towards "pushing" them. Although pushing the coal barges with the ironclads would not be the most safest thing to do, especially with an 8" and two 42lb cannons pointed in that direction. 😁 Also, Great point with the phone example. I hadn't thought about the transitioning from towing to pushing and just having the name remaining out of habit. -Brian
-
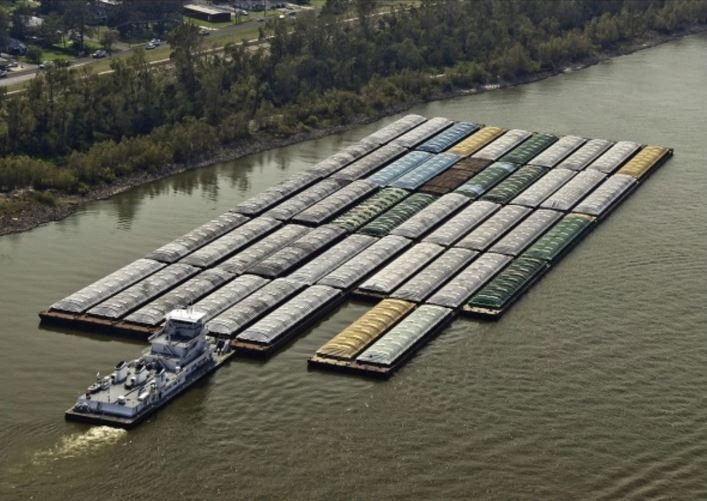
Beautiful pictures Keith. The bridge in the top photo reminds me of the John James Audubon Bridge connecting New Roads, LA to St. Francisville, LA not too far upriver from where I grew up. The bridge wasn't built until 2011, but it is a beautiful example of a modern suspension bridge. I often wondered (especially as a kid) who came up with the naming convention for these boats and what they were thinking. Just some of my random thoughts running around in my little pea brain. 😁 Tugboat: somewhat makes sense, generally they tug on the lines of the larger ships. However, they also push on the big ships as well. Towboat, on the other hand, just pushes. That is just my presumption, since I have never seen them actually tow anything, just push. Also, this was not an uncommon sight in Baton Rouge. 50+ barges going up/down the river. I would guess (without researching it) that the amount of barges lashed together would only be limited to the pushing capacity of the boat, the narrowness of the river or locks, or the width of the bridge pilings. I would assume that there are maritime laws governing how many can be moved at one time for safety reasons. -Brian

-
@kurtvd19 @Keith Black Fascinating information! When it gets broken down that way, it doesn't seem so expensive to transport goods via barge. Too bad barges are limited to the rivers and the trucks and rail cars are still needed to distribute to the other areas not accessible by river. Otherwise, prices of said goods would be considerably cheaper. -Brian
-
Roger, I know I am somewhat late to the party, but I ran across this and just finished reading through this beautiful build. I envy you guys that have the talent to work with metal and get the nice crisp, clean results. Most of the time I try to steer clear of metal work, only because it's a medium that I have little experience with, as well as the tools. Maybe one day. -Brian
-
Keith, by no means do I feel that way. I love the conversation and information. These details are something that I hadn’t really given much thought to, I have been more focused on the structure itself. I’m alway happy to learn and discuss more of the intricacies of the boats I’m building. Funny you mention that. As soon as Keith Black threw those fuel costs out there, my first thought was they had the right idea back in the day, sail power was so much cheaper. A lot slower, but considerably cheaper. -Brian.
-
Nice job on the alterations. Glad to see that you were able to locate your missing block assembly. Nothing more frustrating than having to re-do work. How right you are, finishing up a build is a lot harder than it seems. I still look back at my previous ones and think, I need add a little bit of this and that, or a tweak here and an adjustment there. -Brian
-
Keith, they are 30,000 gallon tanks. So 60,000 gallons of fuel oil on board. At $3.959 per gallon that’s quite pricey. No wonder prices to ship goods has gone up. I can only imagine how far two full tanks will get them, I’m sure the mpg on those twin diesels is not the most fuel efficient. 😁 -Brian
-
Growing up on the Mississippi River as a kid I used to love going to the old ferry landing and watching the ships go by. Baton Rouge was the final stop for some of the really big cargo ships and there were always towboats headed upriver with their cargos. I would sit in amazement that one tiny boat could push so many barges, sometimes with 50 or more strung together. As I grew up my buddies and I would always see how high we could jump our flat bottom boat on the wake of the barges in the Intracoastal Canal. This was a lock controlled tributary off the Mississippi that we frequently fished, swam and knee boarded in. These boats sure could churn up the waters in their wake. Bob you should definitely give it a go. I have a keen interest in some of the more obscure builds, and would love to follow along on that voyage. I’m also right there with you, I have seven kits that I’ve purchased over the years that need to be built. Hopefully some day I’ll get to them. Right now I’m having too much fun with the scratch builds though. -Brian
-
I’m sure glad the Admiral doesn’t have access to this forum. She’d swear that I posted this under a different name. …as I type this nervously looking over my shoulder. -Brian
-
All of those battens were indeed a tedious process, but it looks like you managed your way through it very nicely while keeping your sanity. 😁 Sure look like someone was having an off day when they cut the hurricane deck piece out. It was probably a Friday and they were ready to go take in the South Florida night life, or maybe it was Monday after too much of the South Florida night life. 🙃 Either way ME is usually pretty good about getting replacement parts out quick. Looking good! -Brian
- 158 replies
-
- 2
-

-
- chaperon
- Model Shipways
- (and 1 more)
-
USS Cairo by Zetec - FINISHED - 1/50 scale
mbp521 replied to Zetec's topic in - Build logs for subjects built 1851 - 1900
Glad to see that I was able to spark an interest in this magnificent boat. I will be following along intently! Best of luck. -Brian -
Alrighty folks, the brace is finally off and the new build has begun. Come on over and take a look. -Brian
-
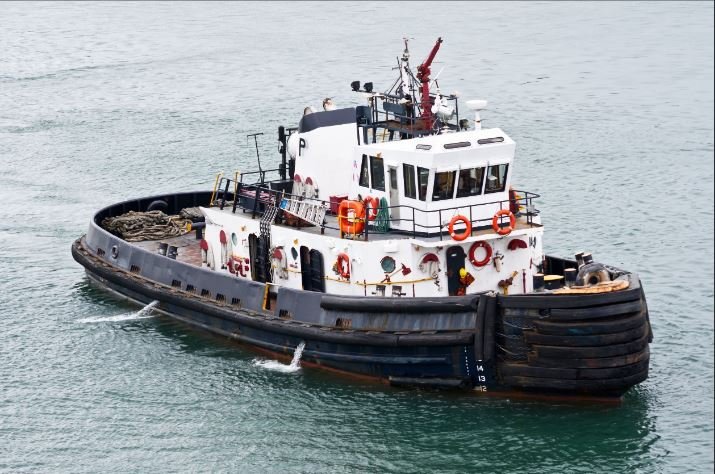
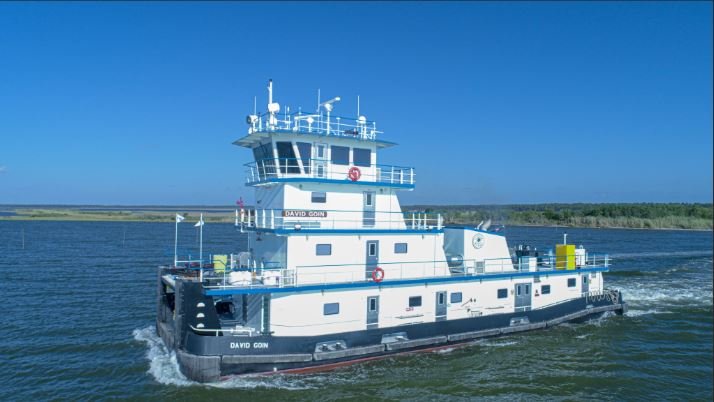
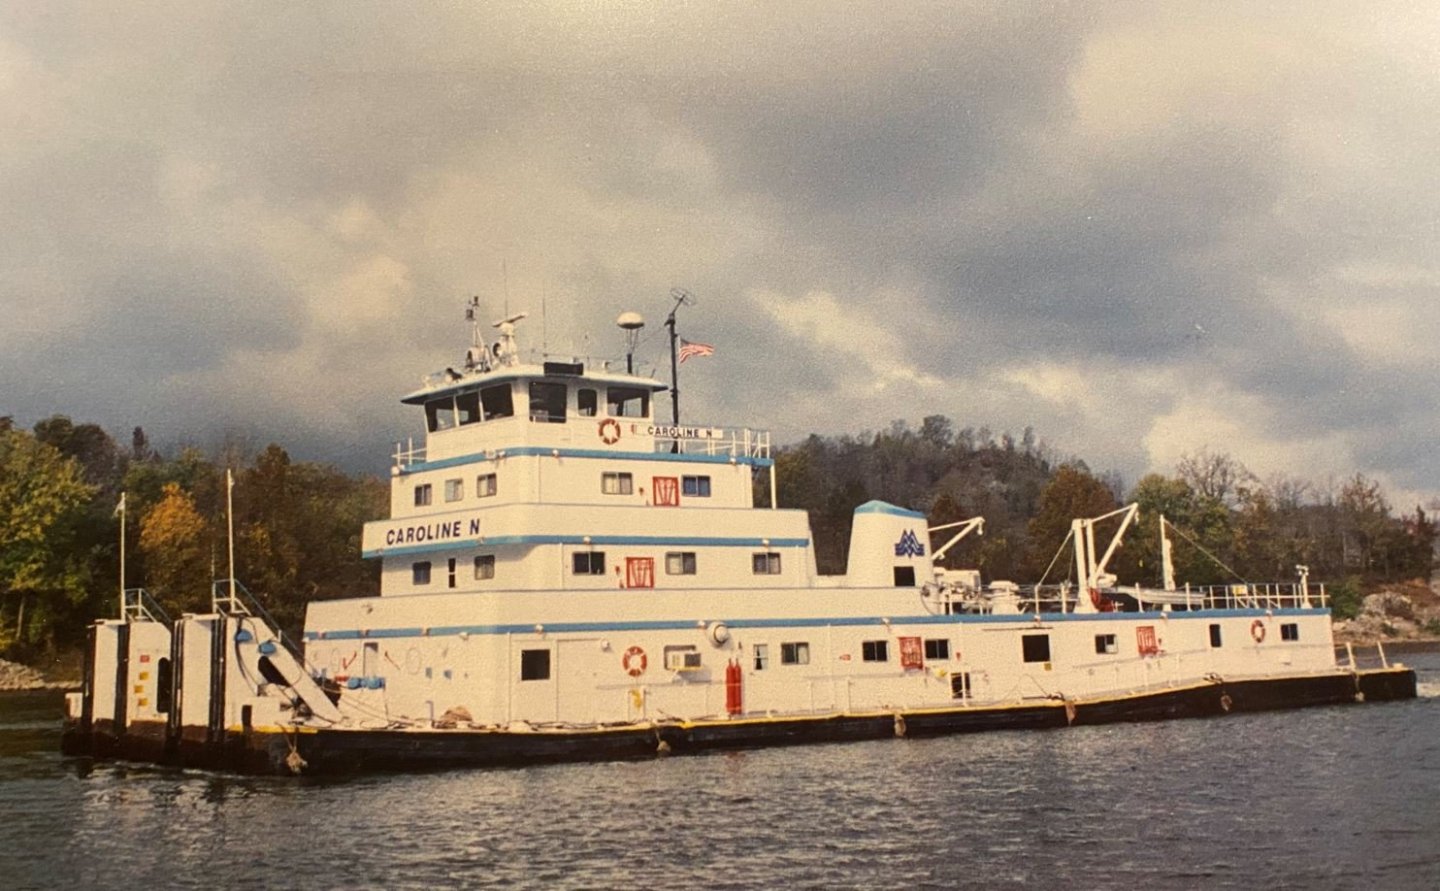
Greetings everyone, I am finally ready to get going on my next build. This time I am going a bit more modern and taking a step into the 20th Century. A friend of mine asked if I minded building him a model of the Caroline N, a Mississippi River Towboat that his father-in-law named after his daughter. This sounded like nice challenge, and an excellent chance to hone my scratch building skills, not to mention I have never built any boat newer than the late 19th Century, so I accepted. The Caroline N was built by the Jeffboat Company out of Jefferson, IN. She is 134' long with a weight of 946gt. She was originally laid down in 1973 as the Louis H. Meece for the American Commercial Barge Line. She was later purchased by the Triple M Transportation Company and renamed the Caroline N in 2004. She was sold to SCF Marine in 2012 and in 2018 she was leased by Marquette Transportation and renamed Titletown USA. As of the start of this build, she is still being operated by Marquette Transportation. She is powered by two GM Diesel engines, a 4.192:1 reduction gear box, turning two fixed pitch screws in kort nozzles and rated at 6,140hp. I will be building this model at 1:64 scale which will put the model at just over 25" long. The hull will be POB and most of the construction will be basswood & MDF. I'm sure there will be other materials thrown in for good measure as I go along. Her paint scheme will be the blue and white from her Triple M Transportation days, as pictured below. I am currently working on getting the plans scaled to size and will be using reference photos from the actual Caroline N, as well as her sister boats the Charles Lehman (now Limestone Lady) and Richard C. Young (now Miss. Kris) for additional details. The plans that I will be using are the original Jeffboat General Arrangement plans of her configuration in 1981 for sizing. These match up best with the photos as far as placement of critical features such as windows, doors, stacks and other details. With all that being said, it's about time to get this build started. I'll hopefully be back shortly with the scaled plans and ready to start making some sawdust. So pull up a chair and stay tuned. -Brian
-
I am still around, just a couple of more days and I should get this contraption off my arm and start physical therapy (torture). With the brace gone I should be able to at least get things ramped up on my next build, At the very least I can get the build log started. Stay tuned. 😁 -Brian
-
I’m not really surprised that these would have gotten lost, at the small scale I would’ve had a hard time keeping up with those as well. Nice job on the scratch built ones though. Yours are probably better than the kit provided ones anyway. These were the races that the tiller rollers rolled along. I can just imagine the fits you would have if the rollers were included with this kit. They would probably be the size of a pin point. 😁 One of the issues that I had in research was trying to find if the hull was red or black. There is no information available that I was able to dig up that showed either way. When I was discussing this with Ray Hamel at Vicksburg NMP he said that tests had been run on pieces of the wood fabric but the results of paint color were inconclusive. So I just went with personal preference to break up the coloring a bit. To be honest though, the all black scheme looks pretty good too. -Brian
- 113 replies
-
- 4
-
-
- Cairo
- BlueJacket Shipcrafters
- (and 1 more)
-
Just squeaked that one in there! Beautiful mount, I love the idea of using reclaimed drawer pulls. One thing of concern that comes to mind, would the sulphur in the rubber o-rings cause a reaction with the poly coating of the hull? Just curious. I’d hate for something to damage the beautiful work you’ve done. -Brian
-
Eric, I admire your tenacity with sticking with this build. I for one would have shelved (or trashed) it a long time ago given your frustrations with it. I have a couple of builds that have been shelved for years, due to frustrations with the instructions and the kit itself. I, like you, didn’t just pitch them due to the fact that I have a few hundred dollars tied up in the kits and felt it was a waste of my hard earned money to just toss them. I figure one day that I will dust them off, and give them another go, but for now I have plenty of other projects in the works to keep me busy for a while. Stay strong my friend, you will persevere! -Brian
- 113 replies
-
- 5
-
-
- Cairo
- BlueJacket Shipcrafters
- (and 1 more)
-
I wrestled with the black color of the boat and went through several versions before I settled on the dark gray that I used on my Cairo. It was just seeing the boat in the different lighting and dependent on the time of day that would frazzle my brain. -Brian
- 113 replies
-
- 4
-
-
- Cairo
- BlueJacket Shipcrafters
- (and 1 more)