mbp521
-
Posts
1,003 -
Joined
-
Last visited
Content Type
Profiles
Forums
Gallery
Events
Everything posted by mbp521
-
 Eric, It’s good to see that you managed to get this build done and keep most of your sanity while doing it. Sometimes persistence pays off (or dare I say stubbornness in this case). I may have mentioned this before that it’s a shame that there are not any other kit builders out there that offer this fine ship in a bigger scale. Personally I believe that 1:192 scale is just too small for all the details that go along with the City-Class ironclads, and one of the reasons I passed on building this kit. Now after watching your build, there are so many more reasons that I am glad I went the direction I did. Somehow I believe it would have gotten boxed up and stashed in a far away dark corner of the closet, forever to be forgotten, or simply chucked if it was me struggling with it. I do have to hand it to you though, you took what you had to work with, stuck with it, and made the best of it. For all your troubles and trials you still produced a fine model worthy of your display case. Speaking of display cases, with her diminutive size in comparison to your Bertrand, she almost looks like a coal scow. 😁 Seriously though, great job on soldiering through with this build. I always enjoy the details and honesty you provide during your builds and I anxiously await to see what hits your bench next. Save me a seat on the front row. -Brian
- 113 replies
-
- 8
-

-
- Cairo
- BlueJacket Shipcrafters
- (and 1 more)
-
Welcome aboard Denis, glad to have you. -Brian
-
Looking good Keith. I’ve run into the same issue with placing the rope coils and not enough room on the fife rials. In this case I have used my own method of cheating and just made up enough coils to cover the rails for effect, and leaving the counting of lines vs coils to the viewer. 😁 -Brian
-
Keith, I can’t think of anything else to say that I, or anyone else hasn’t said already, so I’ll just keep it short and sweet. You are a master. WOW!!! -Brian
-
Thanks for the clarification on the rigging. If I wasn’t impressed with your work before, I truly am now Keith. With these “physical limitations” you speak of, seems to in no way hinder your ability to turn out a beautiful product! I am taking notes on your rigging methods for when I do my next fully rigged ship build. However, I don’t think I’ll be able to “cheat” on it since I’ll have to keep my scale a bit larger than 1:120. I’m just not ready for something that small, and with my sausage fingers I’d just make a mess of things. -Brian
-
Just catching up Keith. Everything is looking top notch. I’ve never used the off ship method of rigging the masts but it sure looks like a more efficient way of doing it. I’ve always started by stepping the masts then rigging back stays and ratlines from there. Then on to the yards and final rigging. I’m just curious as to how much work it is to install the lower ratlines with the lower yards in the way. I’ll be watching and learning as you go along and see if I need to change my methods. By the way, just last month I picked up a B&D Workmate (with all the parts) at a yard sale. Best $5 I ever spent. Now I have two. 😁 -Brian
-
USS Cairo by Zetec - FINISHED - 1/50 scale
mbp521 replied to Zetec's topic in - Build logs for subjects built 1851 - 1900
Looking good Zetec, brings back fond memories. -Brian -
Keith, in my opinion lining up the deadeyes and getting them to stay even is one of the most difficult tasks in the rigging process. Looks like you nailed it though. Beautiful work! -Brian
-
The miniature details of this build just keep getting better and better Eberhard. -Brian
-
I am my own worst critic when it comes to pictures of my builds. My only saving grace is that I see other builders with the same concerns about their photos as well. So I trudge diligently on. Beautiful work Roger, I’m taking it all in to help learn the metalwork craft. -Brian
-
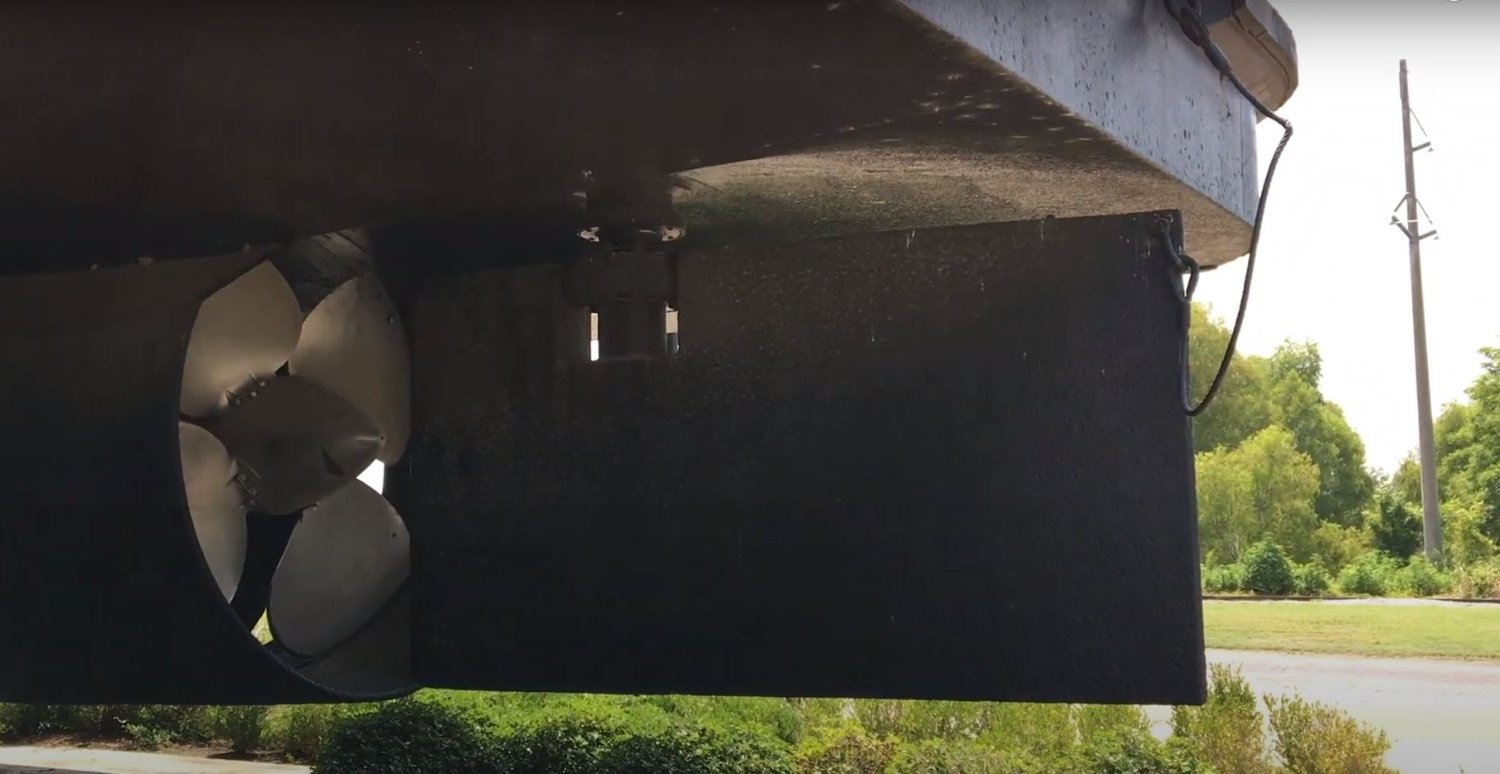
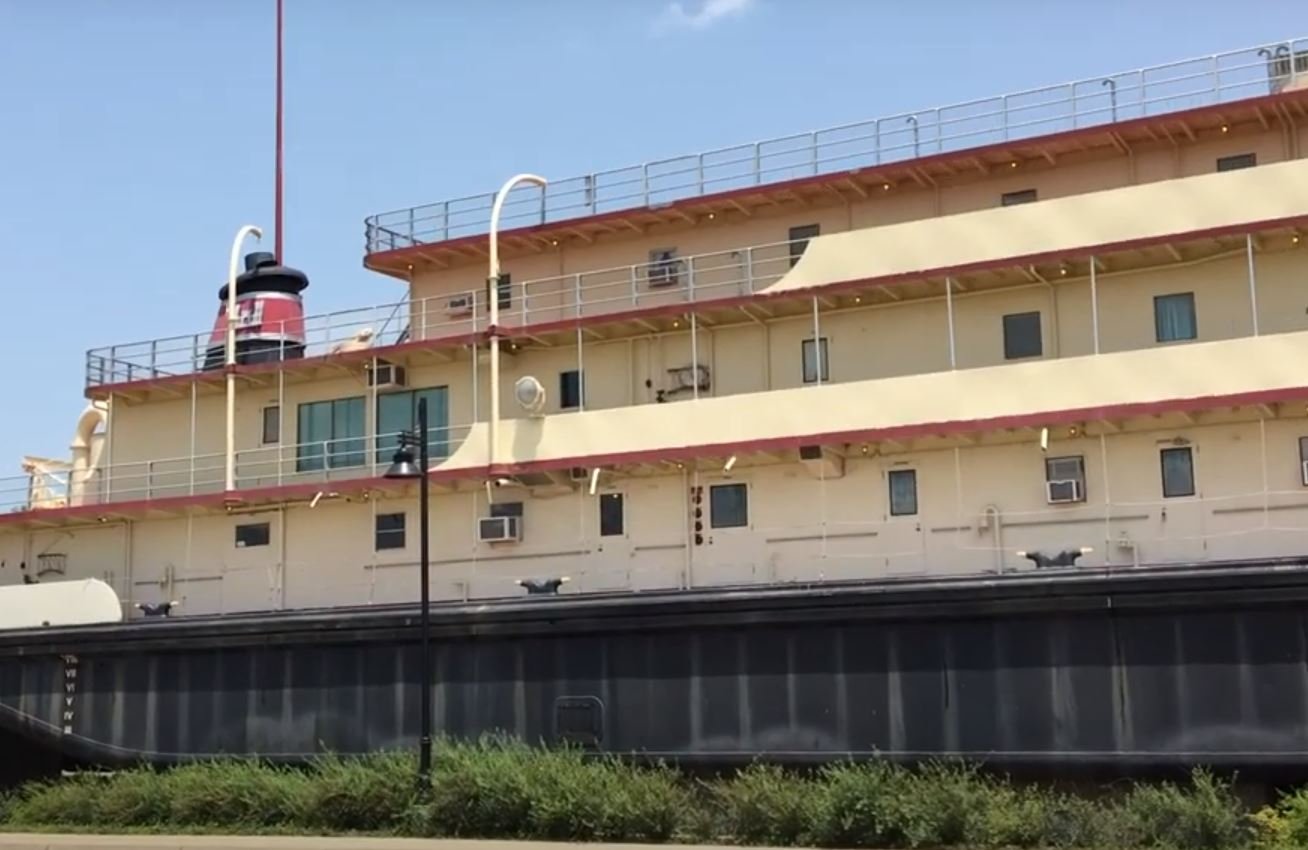
Roger, that is actually what I have been doing to research this subject. I found a nice video on YouTube that shows a walk thru of the MV Mississippi IV and then a walk around of the hull. The video does show some good detail. In some of the shots you can see the weld lines, especially where the bottom of the hull meets the side of the hull. There are also some shots that show the sides of the hull and you can make out the welded panels, but they are fairly flat to avoid drag. I do take this walk thru with a grain of salt since this vessel was built in 1961 and the Caroline N was built in 1973, so the building methods might have been different. -Brian


-
Now that is impressive, thank you for the link. What is even more impressive is that there is a building big enough to house a 345m (1132ft) cruise ship! The Admiral and I are going on a cruise in a couple of weeks so I will definitely be looking to see how the ship was put together and taking notes. 😁 -Brian
-
Thank you Eberhard & Roger for the useful information. I have seen videos of some of the modern day military ships going together, i.e. the Aircraft Carriers Gerald Ford & John F. Kennedy where the hulls are assembled with the modular concept. It is very impressive to watch and even more impressive that they can get all these modules lined up perfectly. I was a welder for several years, 25+ years ago, albeit on semi trailers and not ships, and I am all too familiar with the skip welding technique. This method is a prime example of less is more, where as at certain areas a solid line weld can actually cause more stress and breakage on the steel where the skip method allows for some flex removing the stress and minimizing breakage. I am not much on up on the engineering of ship hulls, but I would guess that even with the stiffening bulkheads there is always some flex. But I could be wrong. -Brian
-
I’m going to have to experiment with this method as well. Thank you. Roger, so do I understand this correctly, through this process there were no welded seams on the outside of the hull. The plates were butted up against each other and welded from the inside? Just curious, and want to get this right and if this was the case, what prevents water from entering the seams? I can see the benefit of the welds being on the inside of the hull, in that it would make it more streamline with no drag on the welds. -Brian
-
Keith, MDF is a fairly stable wood for forming the frame. It is a tad bit heavier than plywood, but makes a nice solid, sturdy base. As Eberhard stated above, as long as it’s is kept dry there should be no issues with it. Eberhard, I have a couple of experiments I am working on to simulate the welded hull. One of them uses aluminum foil tape over fine tread to show the weld lines. I am currently working on covering the bulkheads with basswood panels. Once the basswood is in place I’ll see which experiment works best. I hope to have some pictures posted soon of the progress. Work has been crazy busy, so my time at the bench has been limited. -Brian
-
Eric, apologies for missing your last update (#96), not sure how I didn’t see the post, but thank you for the mention. The ridge beam looks great! To help ease some the pain on the vent funnels, these were used to direct fresh air down to the gun deck for cooling and clearing smoke from the boilers. They could be rotated 360 degrees and could also be raised and lowered, or completely removed from their positions if needed. So in reality, there really is no right or wrong way to face them. As for the davits, I think you got this. I say go for it. -Brian
- 113 replies
-
- 3
-
-
- Cairo
- BlueJacket Shipcrafters
- (and 1 more)
-
Happy to help out John, glad to see that you were able to find some local and avoid that international shipping. It definitely can get pricey. If you are looking for my construction of the paddlewheel, take a look at post #129 on page 5 of this build. That is where it starts and runs for a few posts. As for the dimension of the paddlewheel, in 1:48 scale the outer (larger) rings have an outside diameter of 139mm while the inside (smaller) rings have an outside diameter of 91mm. If you also take a look at post #490 on page 17 of this build,, I have some close up pictures of the paddlewheel frame on the Cairo display that I took last year, you can use for a reference of it's construction. -Brian
-
I will definitely following along on that beauty! Looks like fun, can't wait. 1:24 *cough *cough....😁 -Brian
-
Absolutely amazing details Keith! What a fantastic journey it has been following along. Can’t wait to see what the future holds for your next project. -Brian
-
Glad to see you were able to avoid a major disaster with that decking. I’d be lying if I said I didn’t shed a tear or two while narrowly avoiding disaster on any of my builds. But you learn from experience. Fantastic recovery though, deck is looking great. -Brian
- 158 replies
-
- 2
-
-
- chaperon
- Model Shipways
- (and 1 more)
-
Hi John, glad to finally be back at it and that you like the lights and led's. I used 4mm double sheaved blocks for the gun carriages, and for the ropes I used .025 (.63mm) rope for the training tackle and .045 (1.14mm) rope for the breaching ropes. I ordered these from Chuck at syrenshipmodelcompany.com and I do believe he ships to the UK, but you may be able to find somewhere more local, like Cornwall Model Boats to avoid international shipping fees. Hope this helps you out. -Brian
-
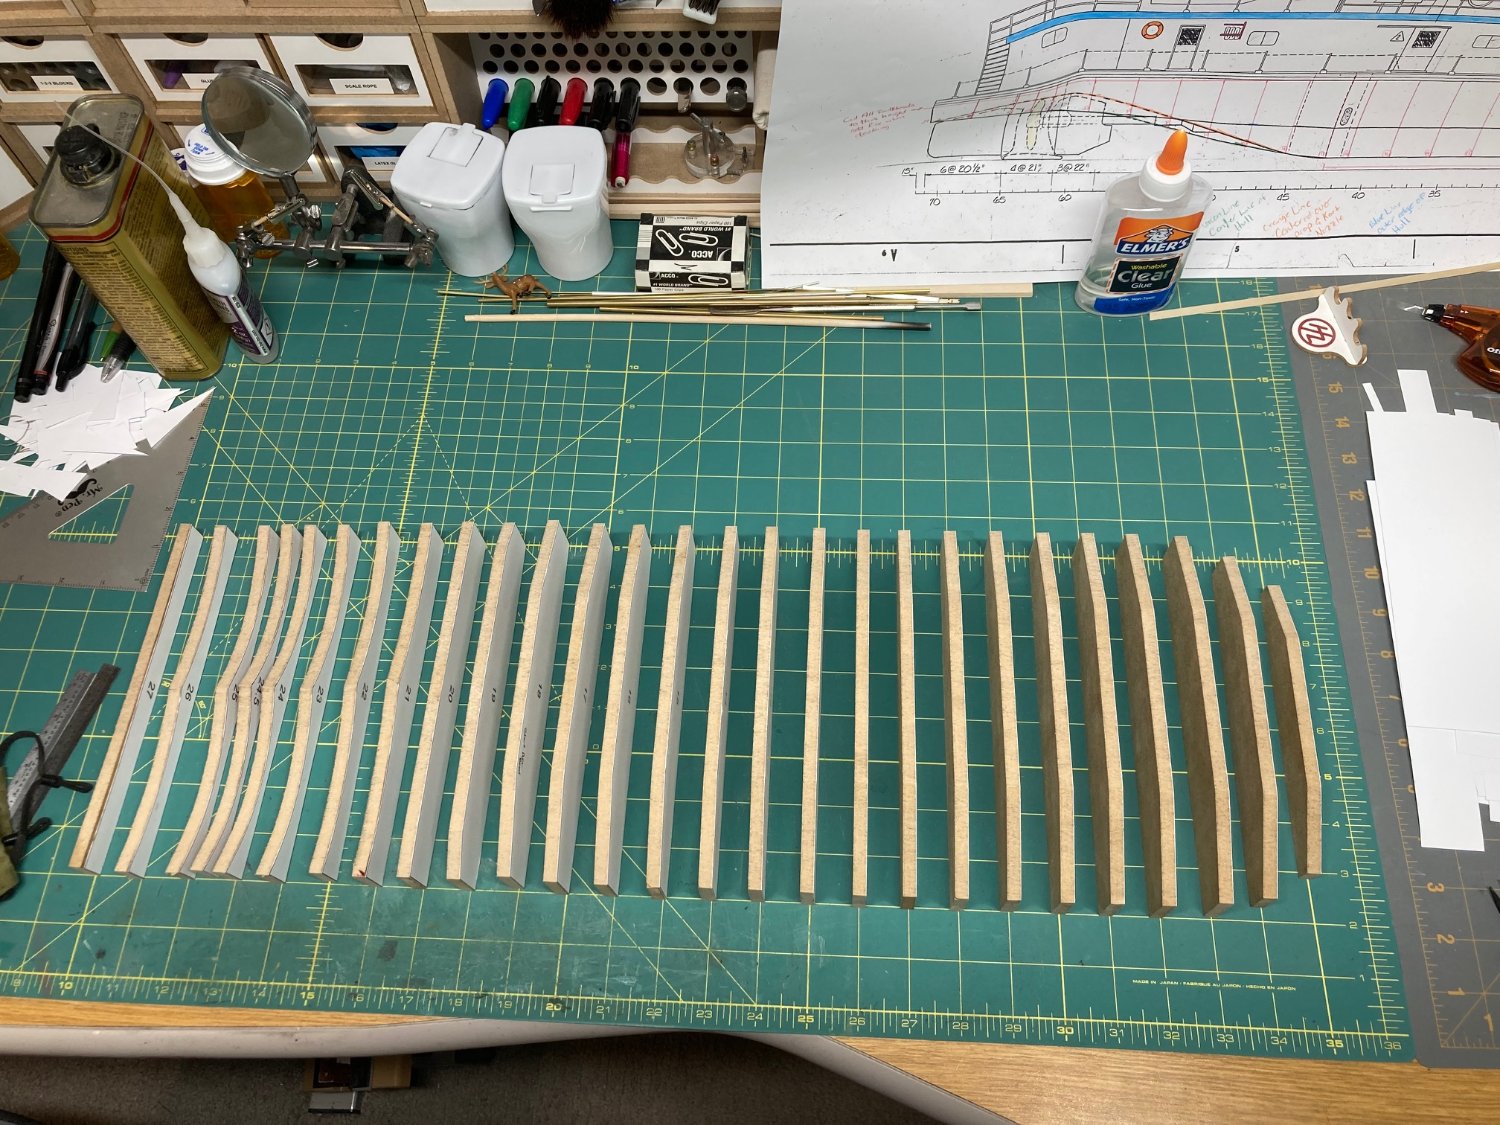
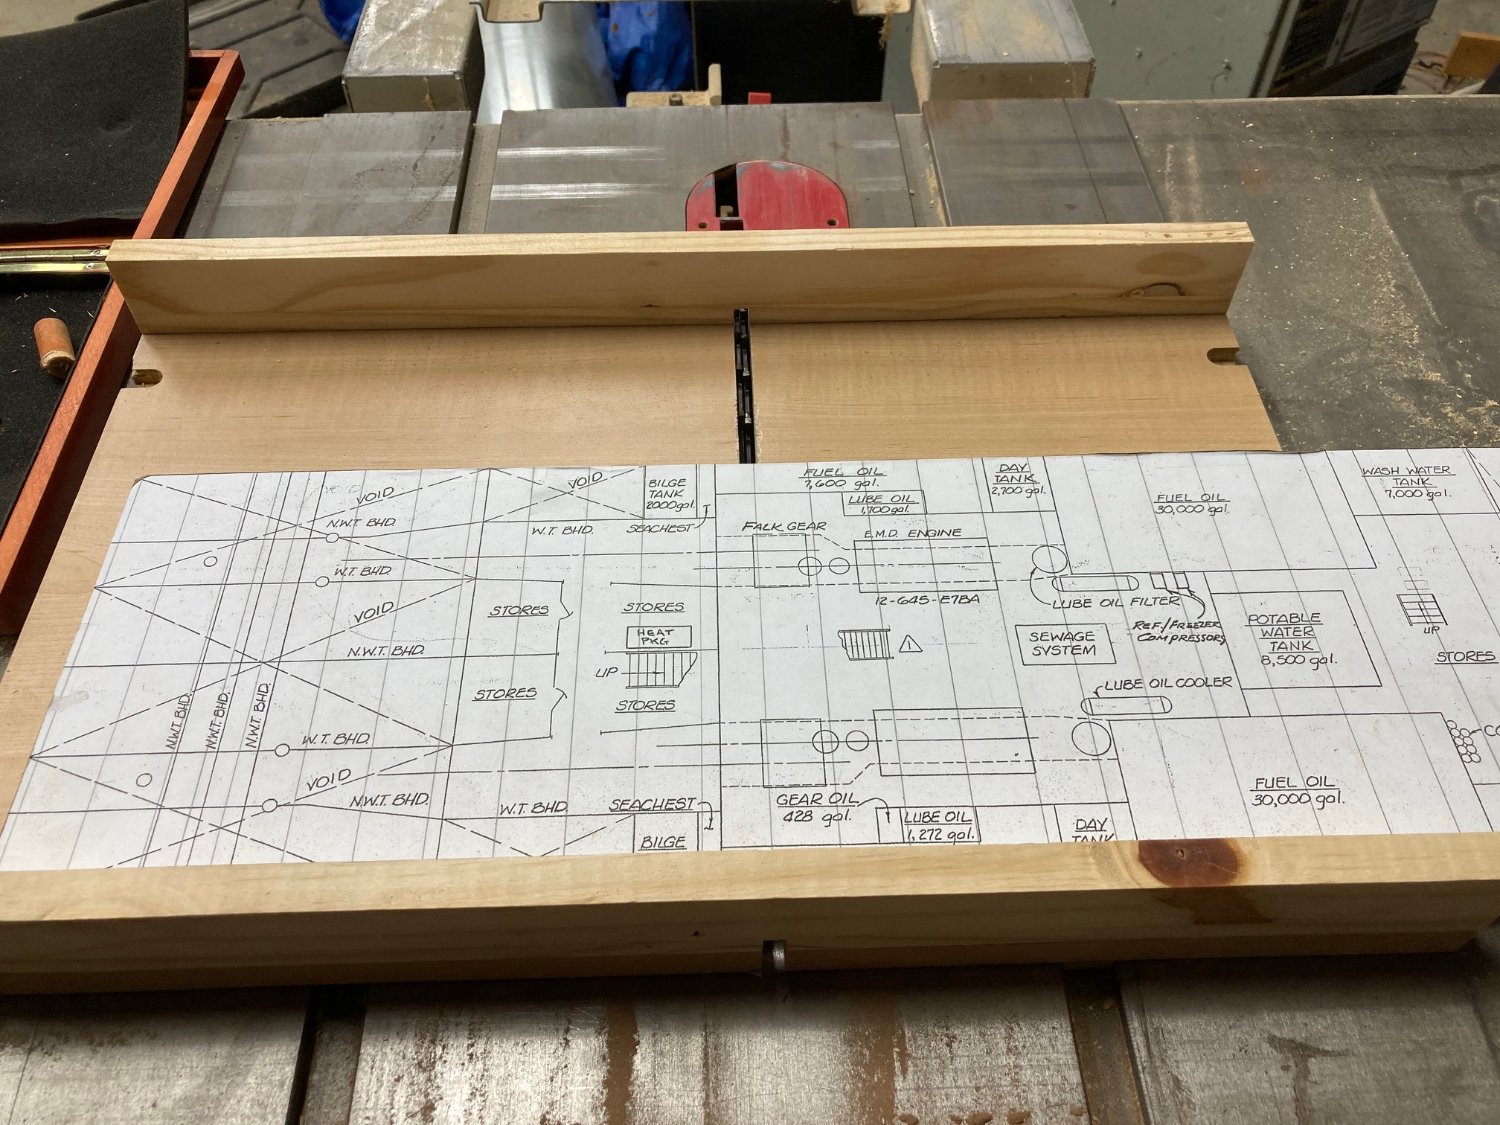
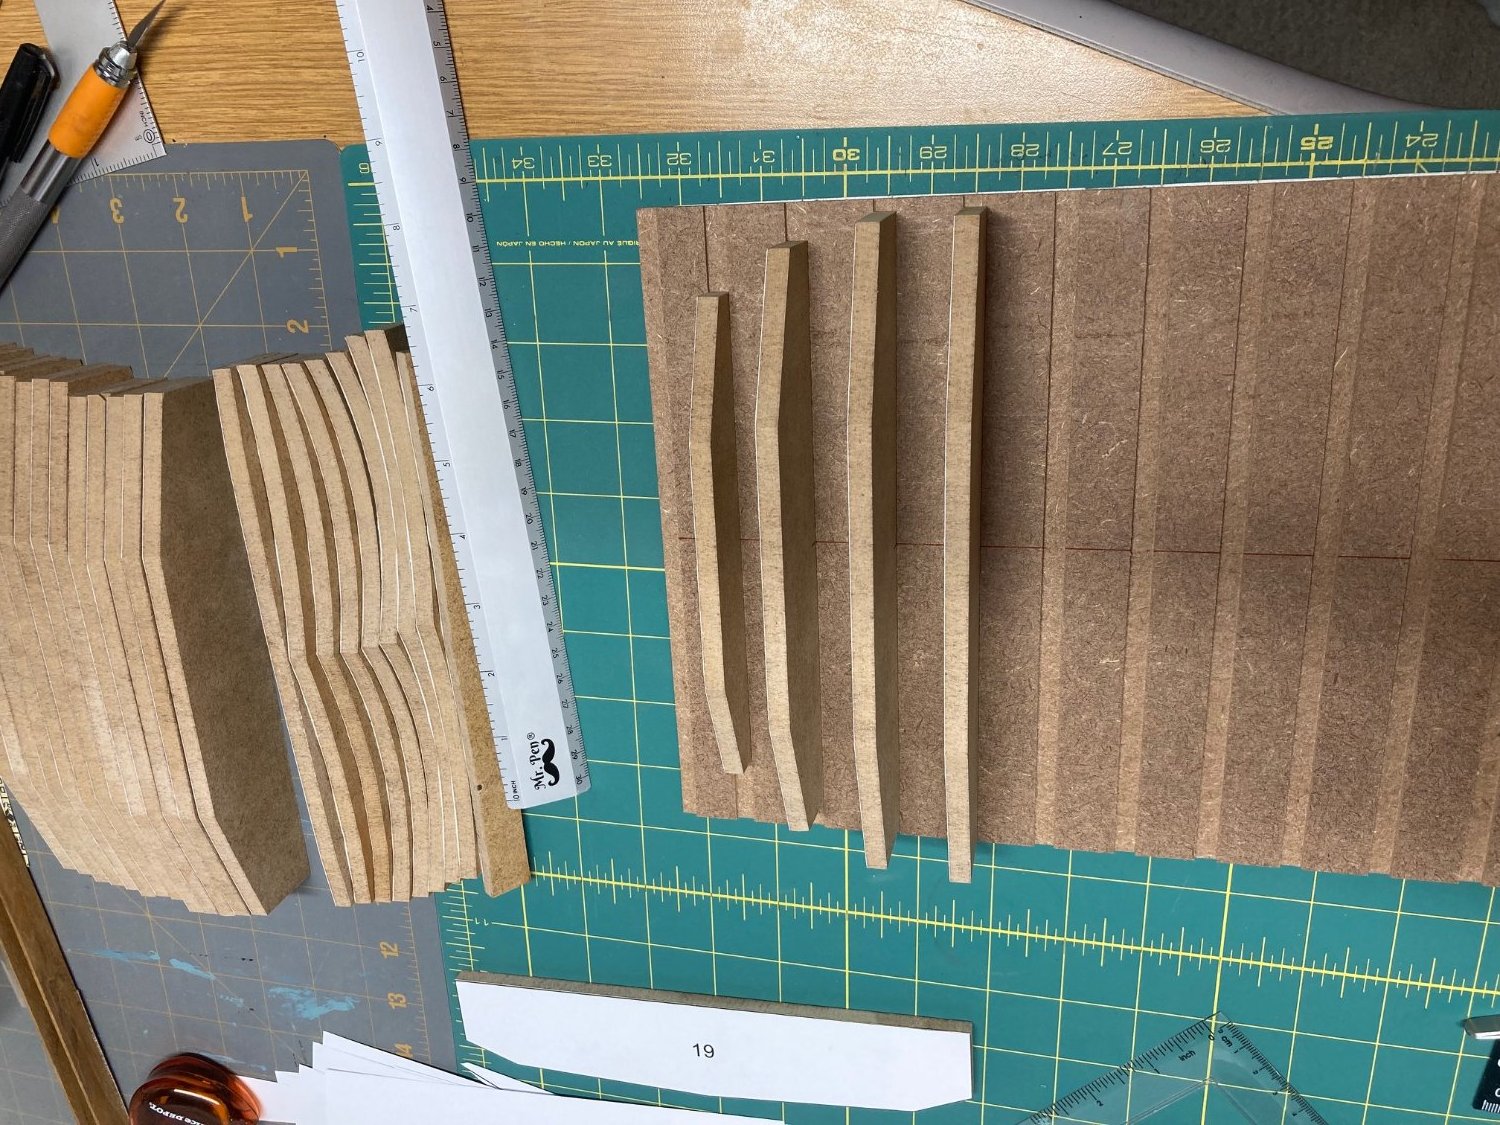
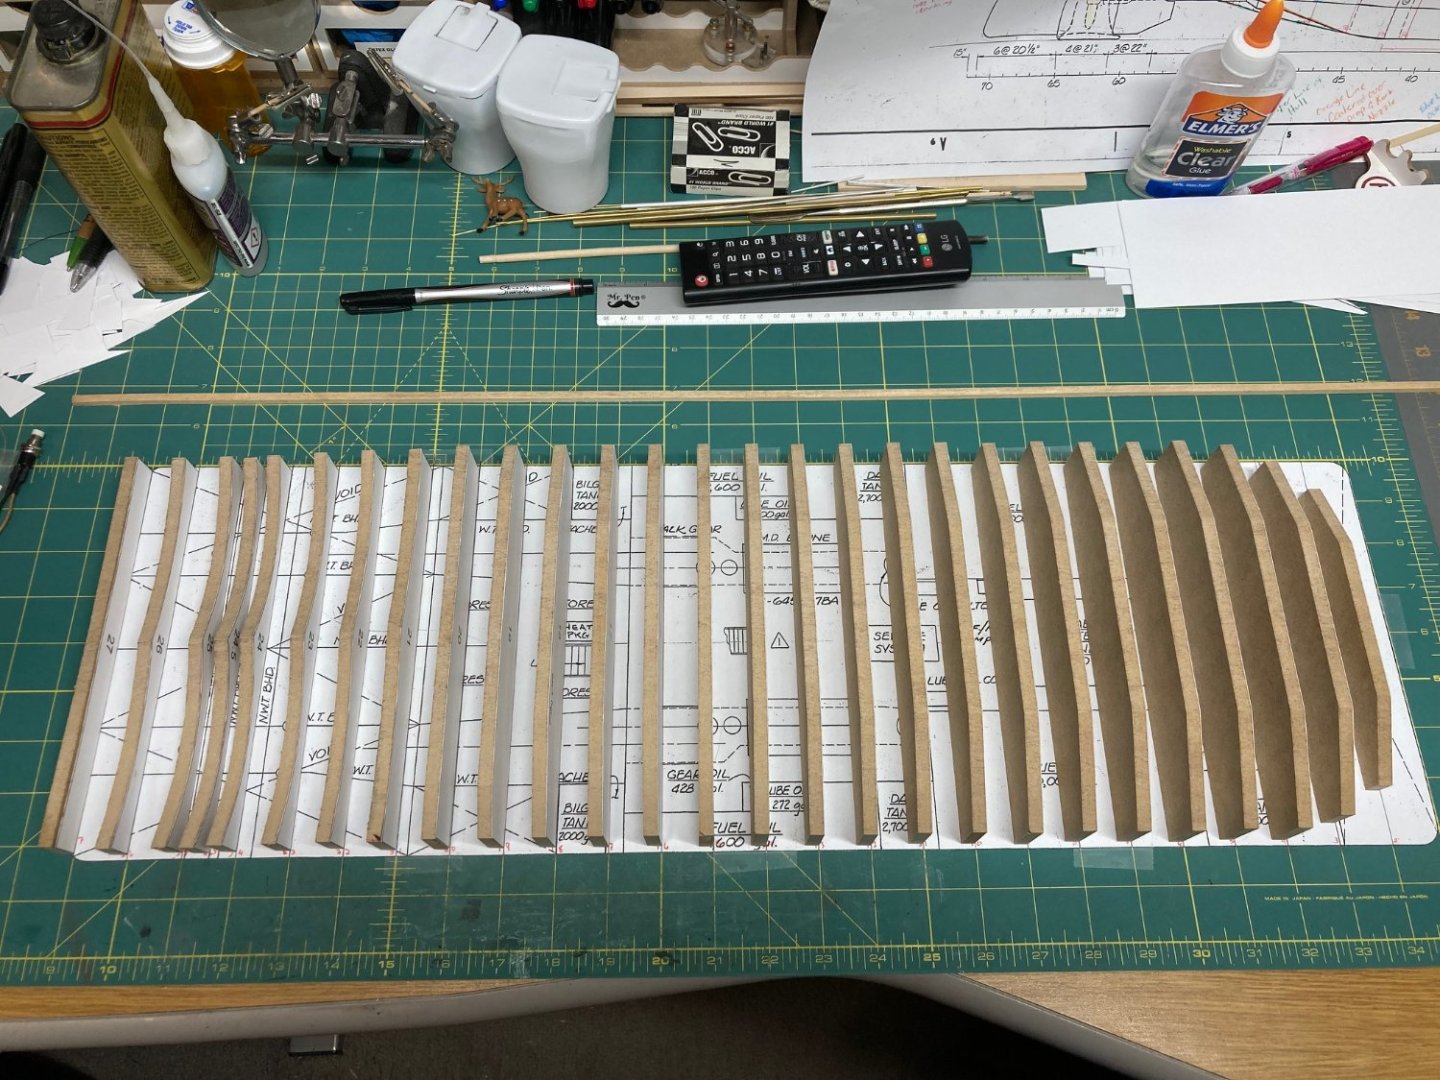
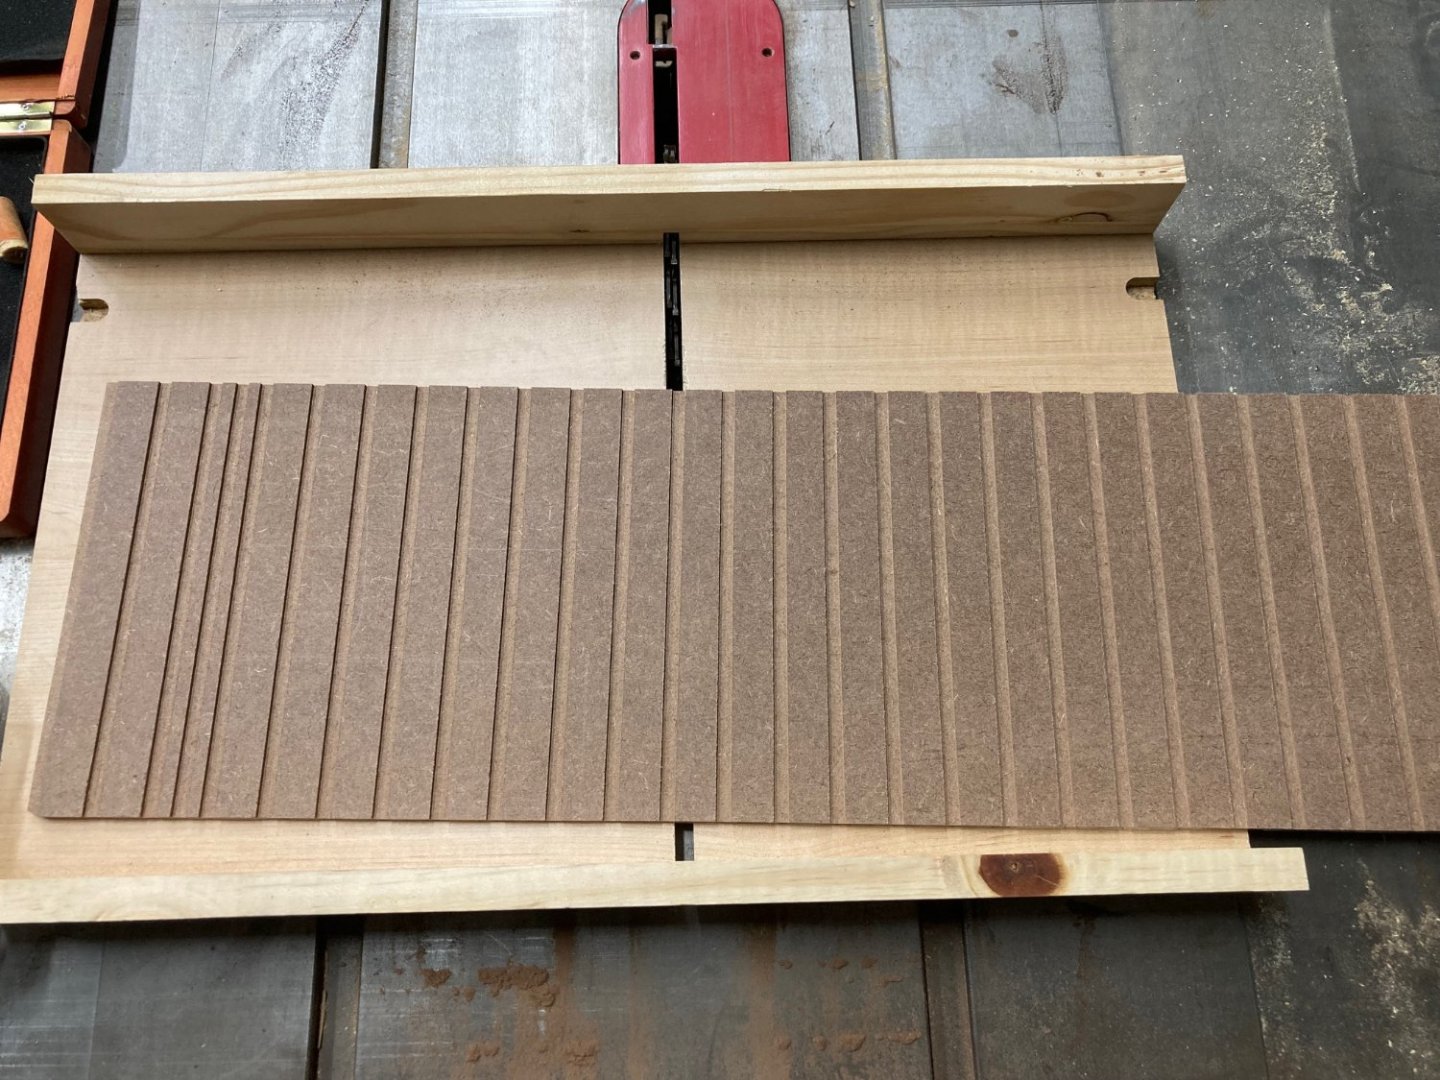
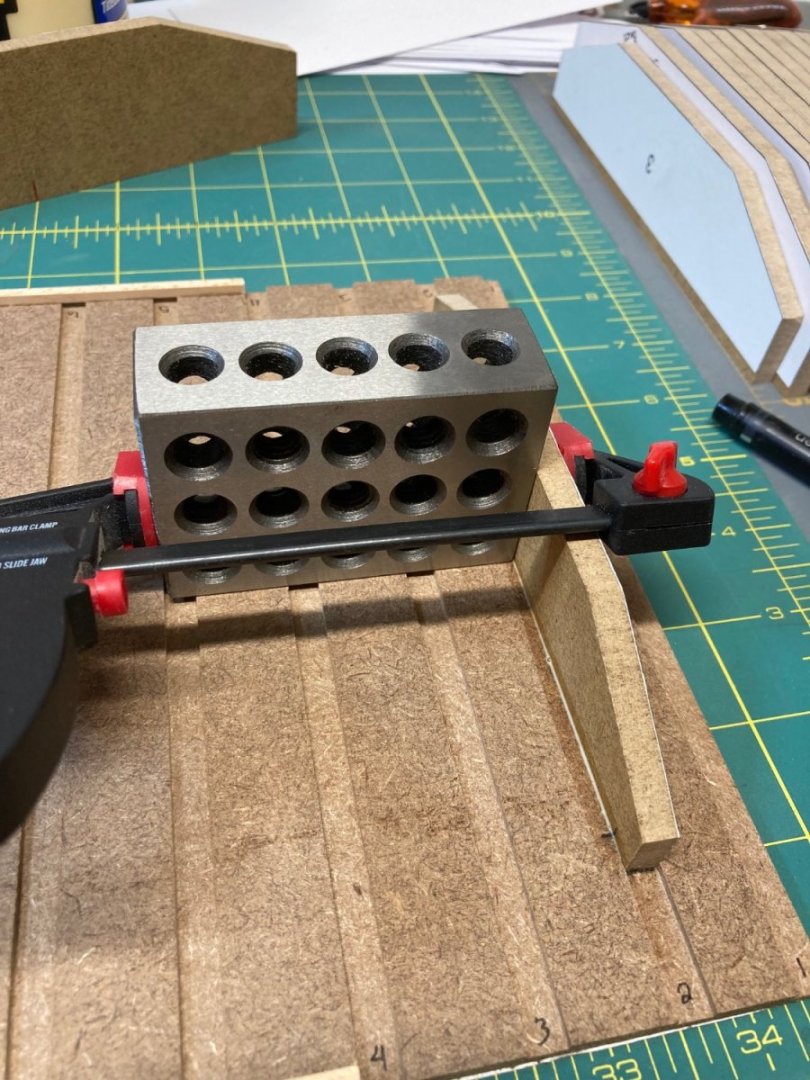
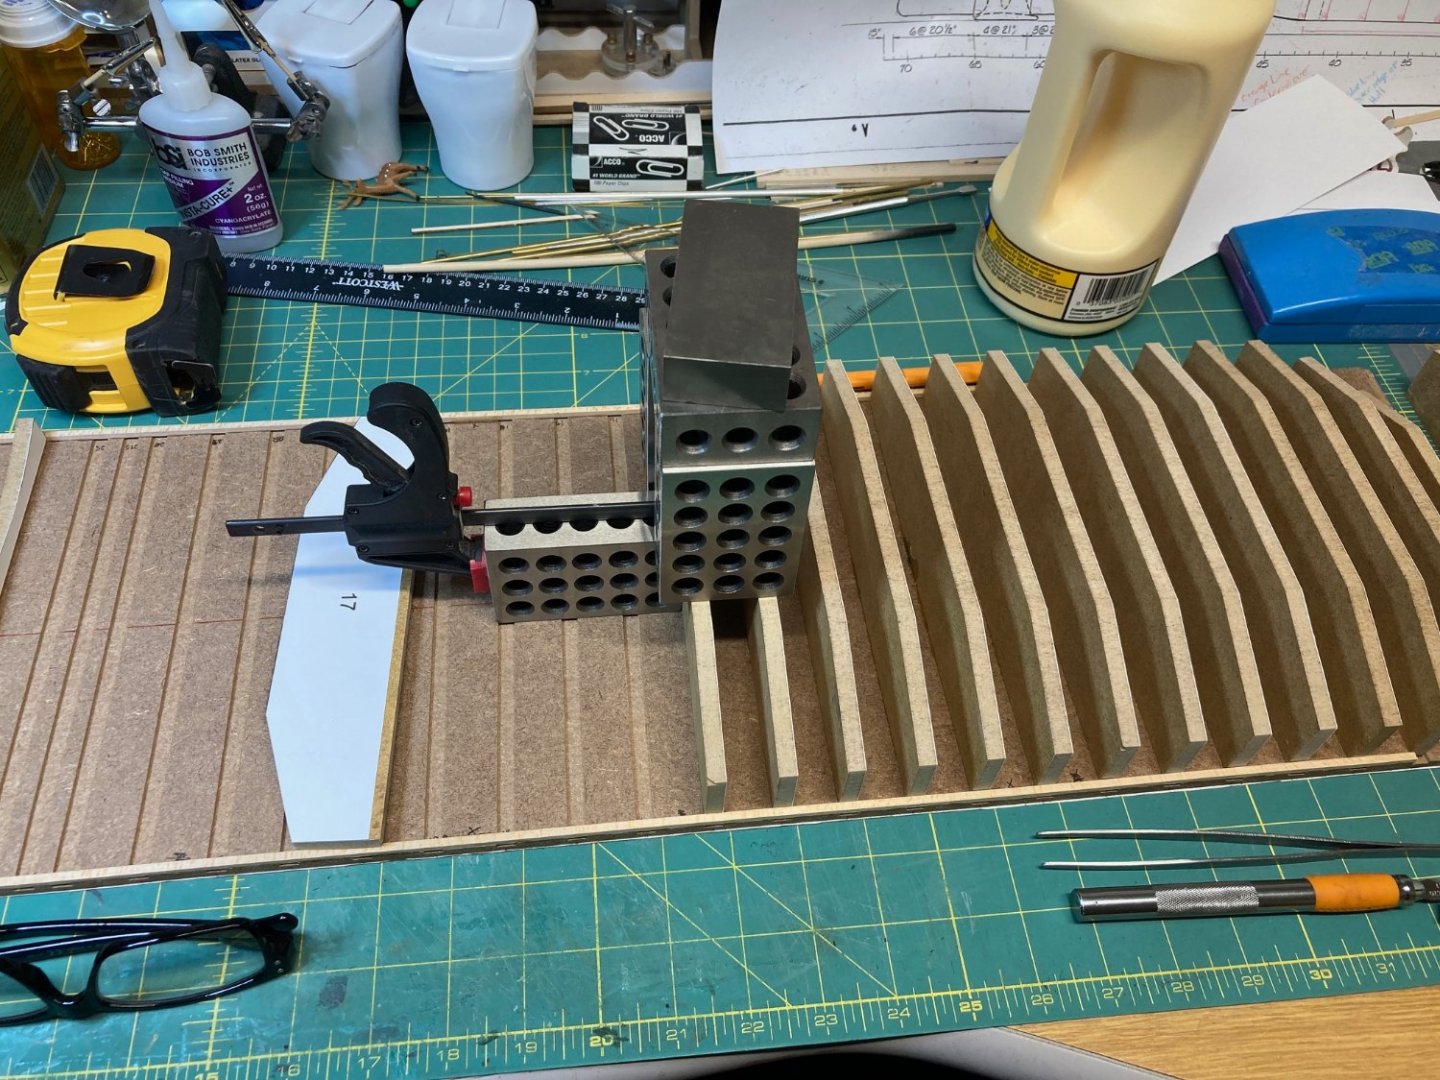
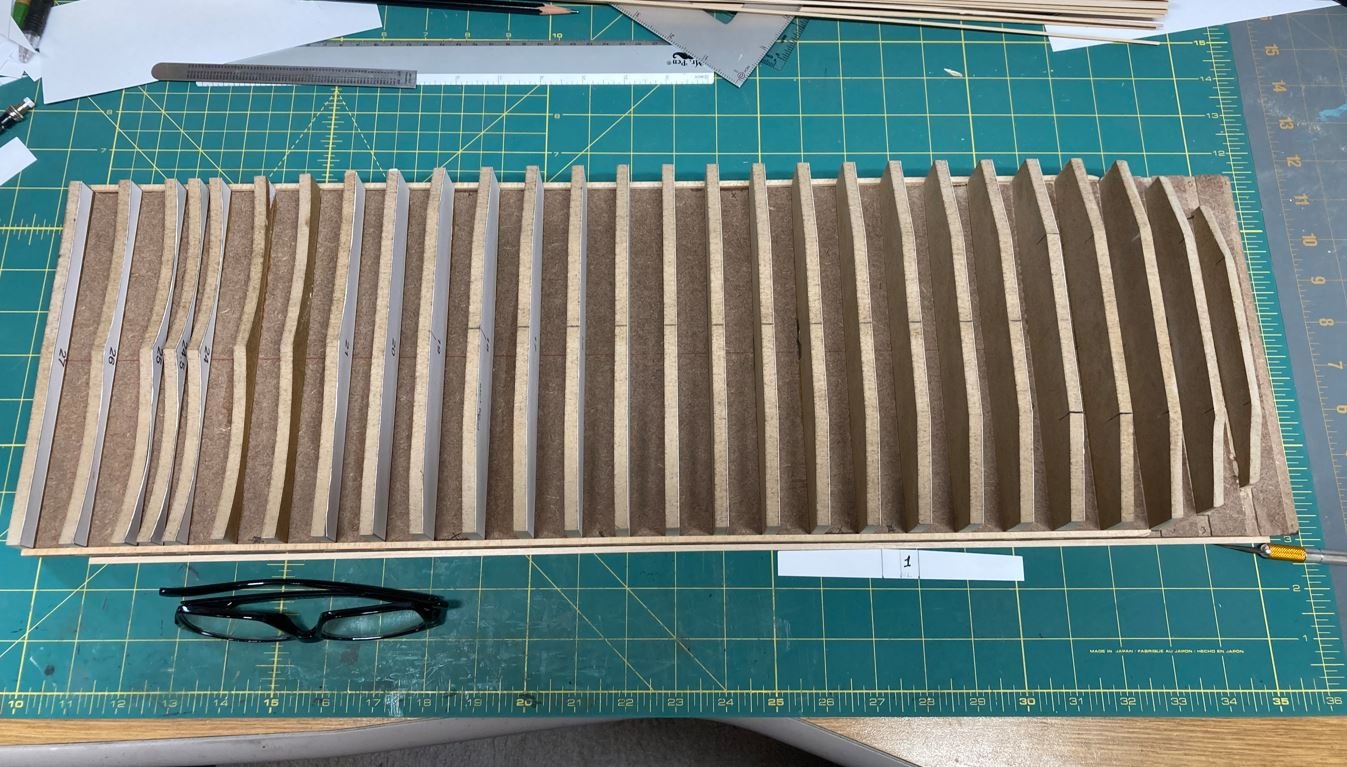
Hello again everyone. Made some progress this past weekend, not a lot, but some. I managed to get the main deck cut out and sized to the plans. I built up a table saw slide to cut the rabbets for the bulkheads. Next, I glued all the bulkhead templates to the 1/4" MDF and got them all cut out. Here are all the bulkheads lined up on the deck template. First bulkhead getting glued in place. More bulkheads going in. Not sure why, but I couldn't get this particular picture to insert right side up. And more bulkheads getting glued down. Slow tedious process. And all of the bulkheads in place. That is as far as I have been able to get this week. Hopefully more progress next time. I'm going to work finish up with the #1 bulkhead then on to getting the bulkheads shaped and faired, then start working on the hull plate templates. Thank you all for the like and stopping by. -Brian


-
Not a bad idea. We’ve had some company before that belonged in a barn. 😁 That is somewhat the role of the current MV Mississippi V. Going off the stats, she is the biggest towboat on the Mississippi and is use by the Corps of Engineers as their flagship. I wouldn’t mind touring that one as well. Too funny Keith. We’ve been together for 34 years, I’ve got a feeling if she hasn’t got rid of me by now I’m in good shape. Either she a glutton for punishment or she’s just keeping me to protect other women from having to deal with me. 😁 -Brian