


Overworked724
-
Posts
1,263 -
Joined
-
Last visited
Content Type
Profiles
Forums
Gallery
Events
Everything posted by Overworked724
-
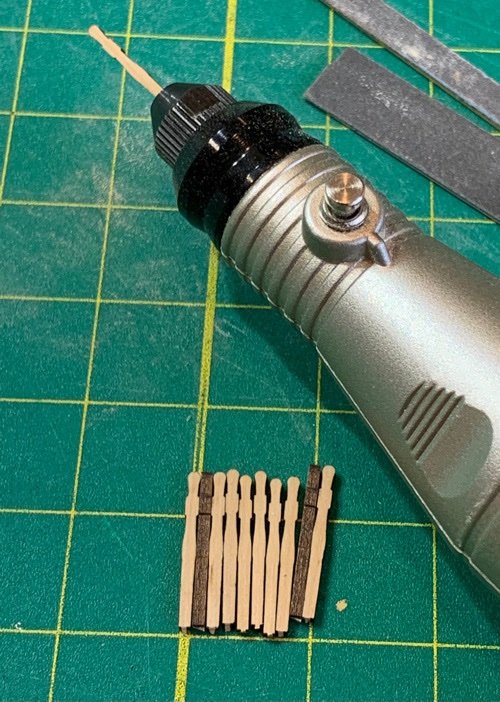
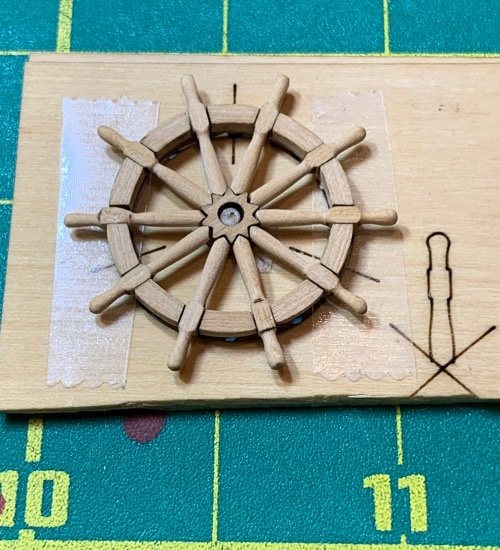
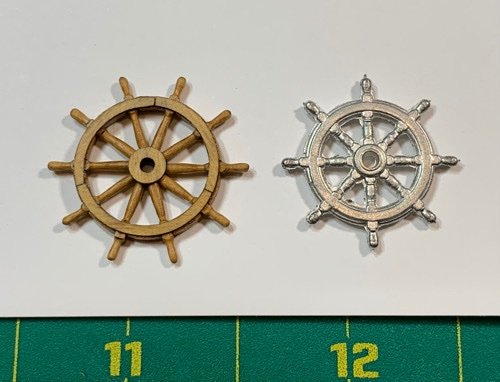
 Small detour to bash the other metal pieces. Ship’s wheel was certainly not something I planned on using from the kit. I opted for one of the boxwood ship wheel kits made by Chuck’s company (Syren). I got the 15/16” boxwood ship wheel pack which was actually a lot of fun to put together. It also had a lot of extra parts in case I screwed up! Here are a few pics… Template worked great to manage the little bits. My rotary tool made the creation of the wheel spokes a fairly quick job. And a quick coat of Golden Oak on the final product made it obvious why I went with a wood wheel. 😁 Wouldn't even know how to make the metal piece look realistic!! Moving on…
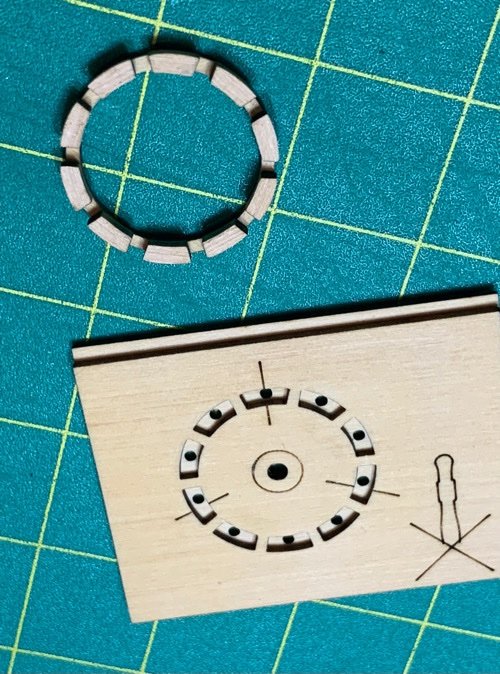
-
The redo of the deck is paying dividends, Ken. The difference is night and day. I’m sure the sanding will polish it nicely. 👍🏽
- 100 replies
-
- 1
-

-
- Syren
- Model Shipways
- (and 1 more)
-
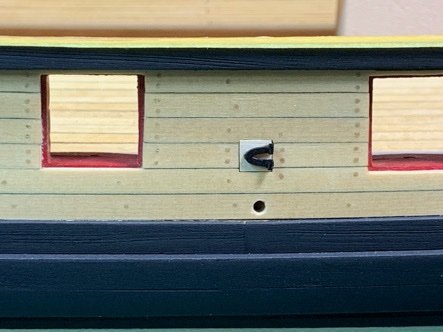
The sweep doors are done. Not certain if the hinges look ok or not…seem to be passable. I painted the interior side red and stained after the pics below were taken. I’ll glue them in once the coppering is done. That’s next on the agenda..,once I finally figure out my pintles and gudgeons. Here are a couple pics. Interested in feedback if anyone has any. Moving on…
-
Hey Cisco! Thanks for the kinds words! Much appreciated. I actually agree with your recommendation not to use the sharpie. I did decide to use paint instead. 👍🏽
-
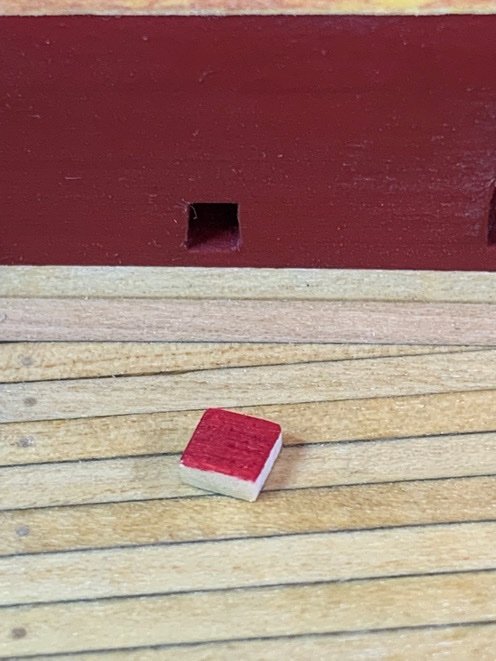
Ok. Not sure how everyone else did their sweep port doors, but I’m approaching this like the galleries. I’ll get them set for gluing on then put them off to the side until later. I sanded them flush so they aren’t proud of the side of the ship. I’ve decided I’ll put a single coat of ship’s bulkhead red on the interior sides. Then I’ll pencil the edges, glue on the hinges, test fit…then set them off to the side until I’m ready to glue them in…which will take only a few minutes. Im a bit afraid of snapping off the little hinges or worse…and once those things are in they aren’t coming out. 🤔
-
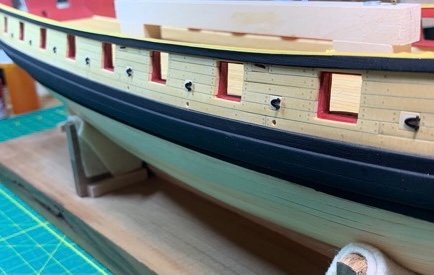
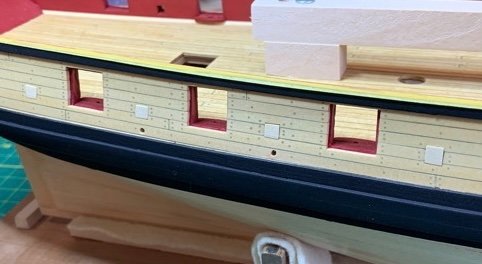
Got the sweep port doors made for both sides. Took a while as some of the openings were more trapezoidal than rectangular! 😖 Unstained, they do pop out. I checked the fit/look of the hinges on one of the doors. I’m satisfied that I can align the hinges cleanly. I also tried using a simple red sharpie to ‘color’ the shipboard side. Since the sweep ports are so small, you can’t really see any details for the sweep port doors. So I figured a quick slap with a red sharpie would be fine. Moving on…
-
Ken, every model has warts. Kind of like houses. My Syren does not follow the typical symmetrical butt shift pattern, because I butted the sections at the points where a frame was located. Actual ship framing would make this job fairly simple. So, my Syren is not ‘historically accurate’. Just saying…no model is perfect. 😁 But I love doing stuff in my shiproom…the hobby is filled with great people/historians/shipwrights which make this a great forum. Enjoy the day!!! I think your perseverance is inspiring. 👍🏽 I continue to watch your build with great interest and I am learning from your challenges as well. 🦃🍁🍽
-
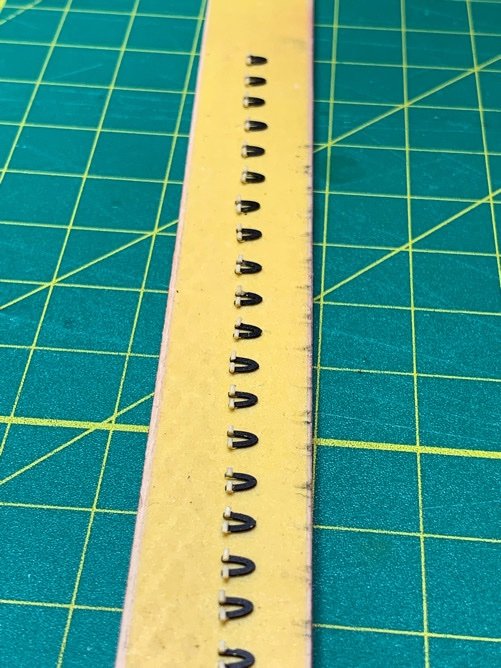
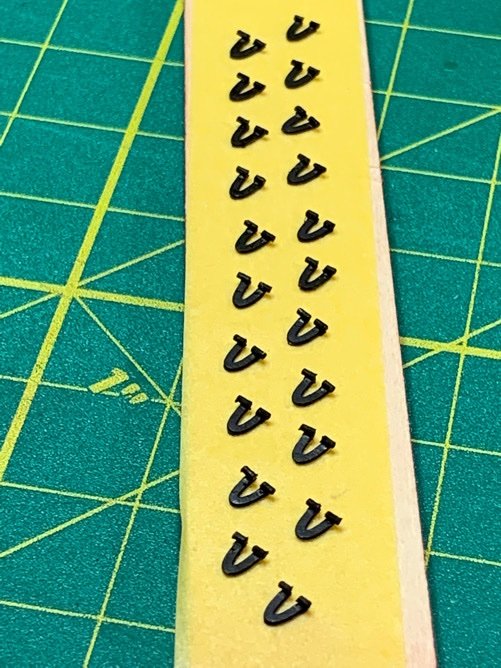
The little wooden hinges for the sweep port doors actually turned out looking ok. They weren’t that hard to put them on, just finicky work. We’ll see if I can do justice to making the doors. 🙏🏻 Moving on….
-
Ken, we all run into these types of setbacks. Pics help (and embarrassing as it might seem…my screw ups brought a lot of brilliant feedback from experienced modelers). Don’t be afraid to post them. This forum’s value really comes from the helpful feedback. Gun port doors closed is one way to fix the cosmetics. Remember, it’s your model, and as long as your learning and having fun (marathon…not sprint) then that’s all that counts. 👍🏽
- 100 replies
-
- 1
-
-
- Syren
- Model Shipways
- (and 1 more)
-
Great way to plan those plates, Dave!
-
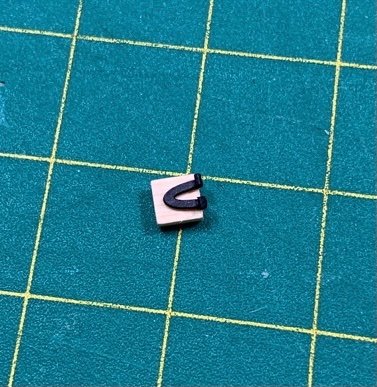
Sweep port doors. I’ll be doing these before the hull coppering…because I’m a procrastinating chicken. One problem I found was making the little hinges consistently. Tried nylon, wire and wood. Finally decided to take a swing at these using wood. The glue sets up quick and I can easily shave the two sides evenly. No pics yet…but I have a plan using the tiny wooden tree nails I made which I used for the deck/bulkheads. Have tons left over, and they are almost the perfect width. So…we’ll see if the results bear fruit. Also while I’m at it, I need to remake the gun port doors…because I made the originals too narrow! 😖
-
Looking sweet, Will! Nice work on the chains. Do you use a solder iron or a torch?
-
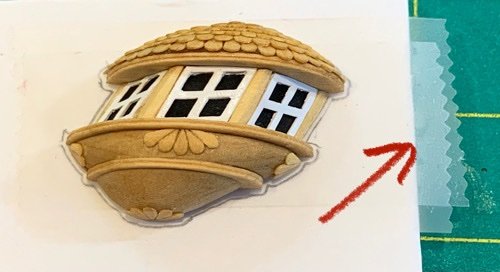
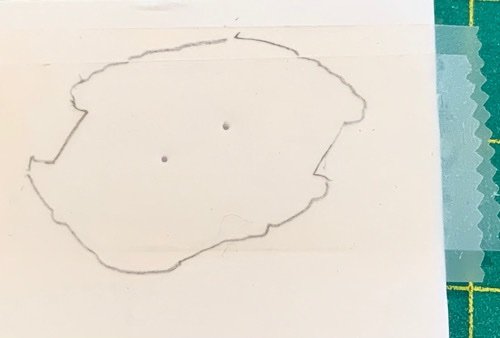
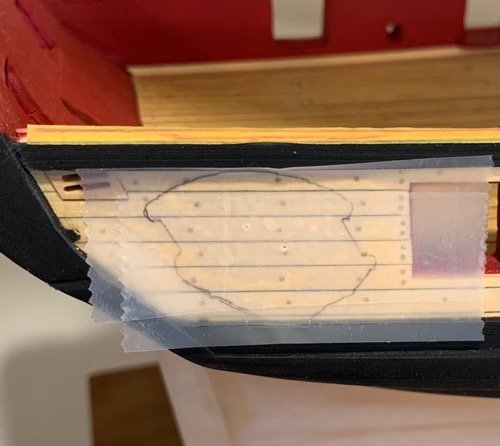
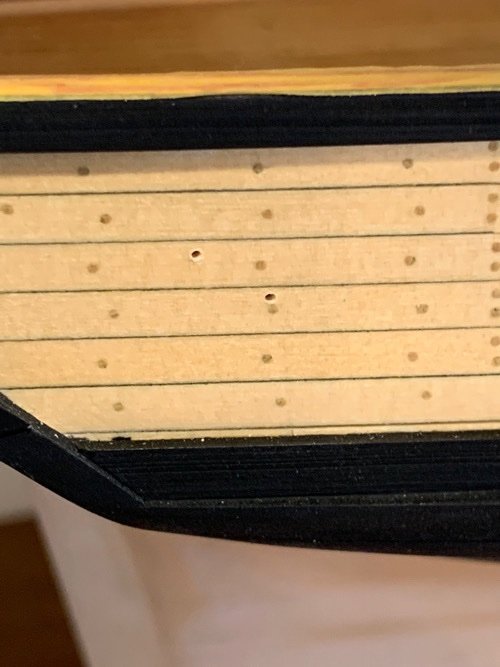
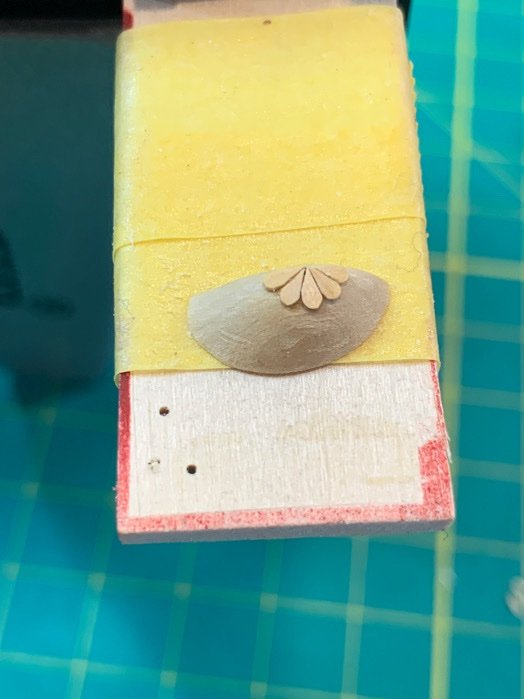
Just because I knew these custom galleries were going to be a tight fit, I decided to button up my train of thought and make certain the guide holes were in and the positioning was good…since I didn’t want to mess with it later…especially if I mucked it up. Here’s how I did it. The pins in each gallery were created as a mirror of the other…so I couldn’t accidentally glue them in onto the wrong side of the ship. I got some foam display board from Walgreens. Cut a section out and layered it with Scotch tape. Pressed in my gallery, and traced out the outline in pencil. Note how I left some tape hanging… Remove the gallery and you get your image trace with pin locations. Pull up the tape and position it on the ship at the correct location (I have to eyeball a bit since my double blocks don’t sit flush against the stern). Then used a T-pin to scribe in the pin hole locations. Removed the tape. And drilled in the guide holes. Test fit the little monsters and if you did a good job tracing, they should fall right in place. Now I am settled, and the galleries are put away…to be glued in when I feel like it. But ready for that day. 👍🏽. (I still can't believe how friggin nice these things came out...it was worth the journey...and makes me remember the ship model is 1000+ projects which all come together to create something wonderful). I can safely say that I am NOW officially moving on. 🧐
-
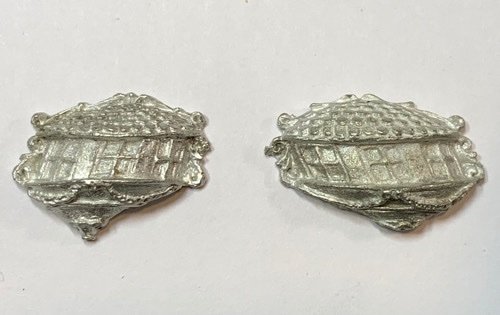
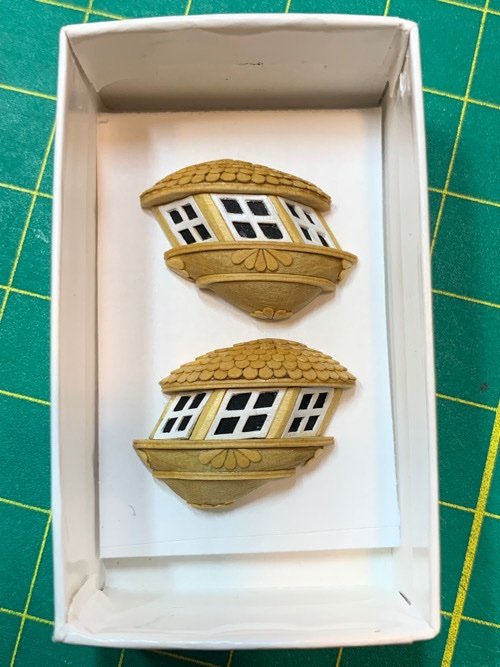
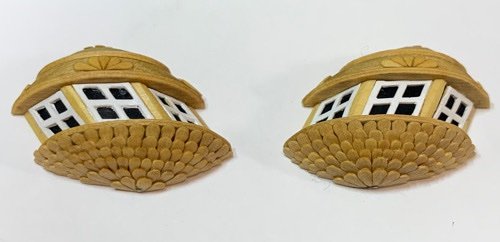
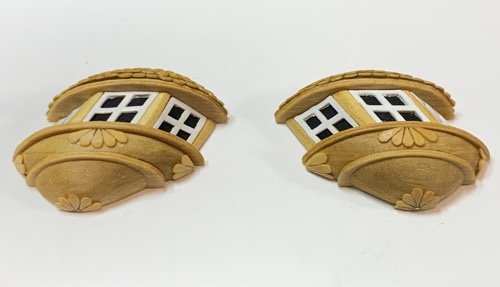
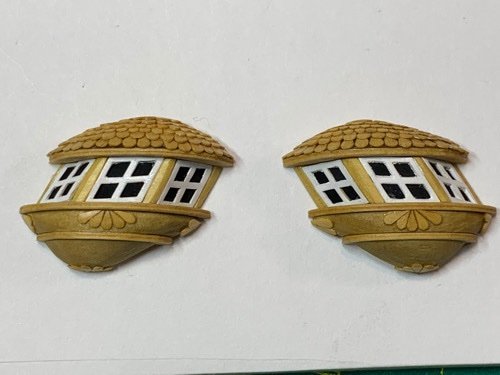
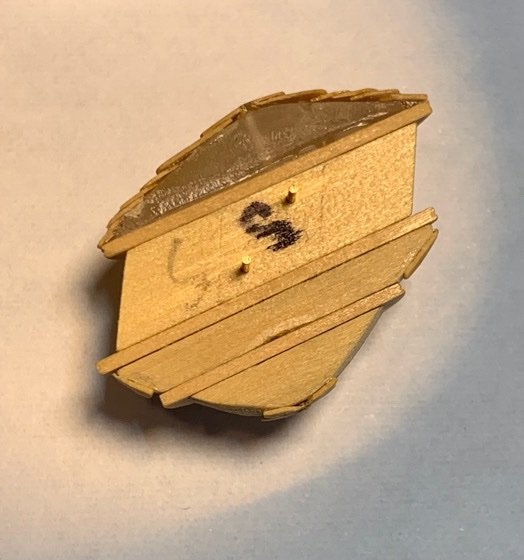
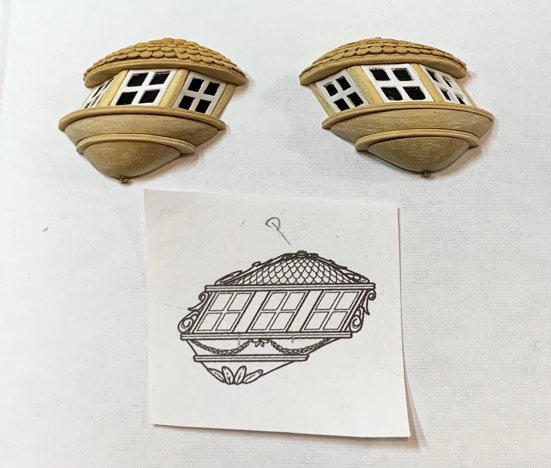
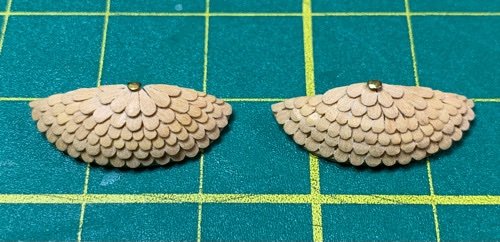
Ok. I’ll call this long winded side project done. I’ll put these in the ‘glue on last’ box of goodies. I’ll put in the guide holes later. Here are the baby pics!! They aren’t perfect, but they are pretty. I’m not unsatisfied with my efforts. 👍🏽 Here are the mismatched kit pieces: Here is the front view of mine: Bottom view: Top view: Here they are all tucked in! 🤣 Moving on….
-
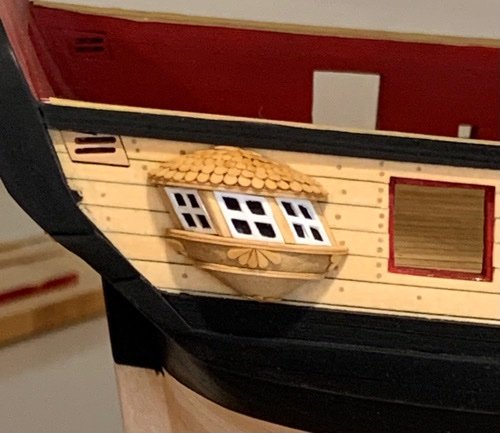
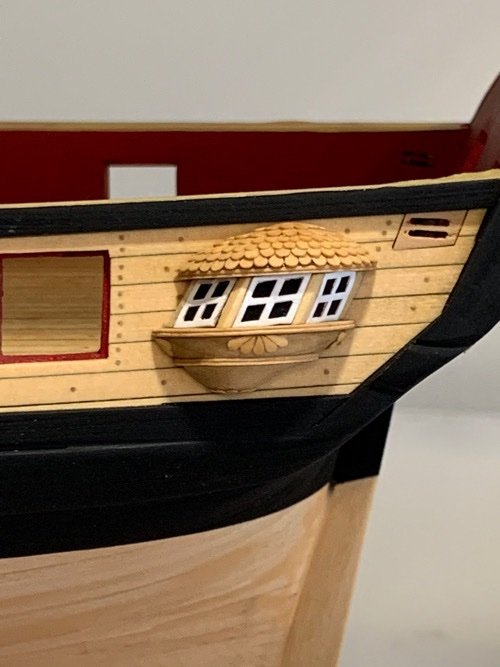
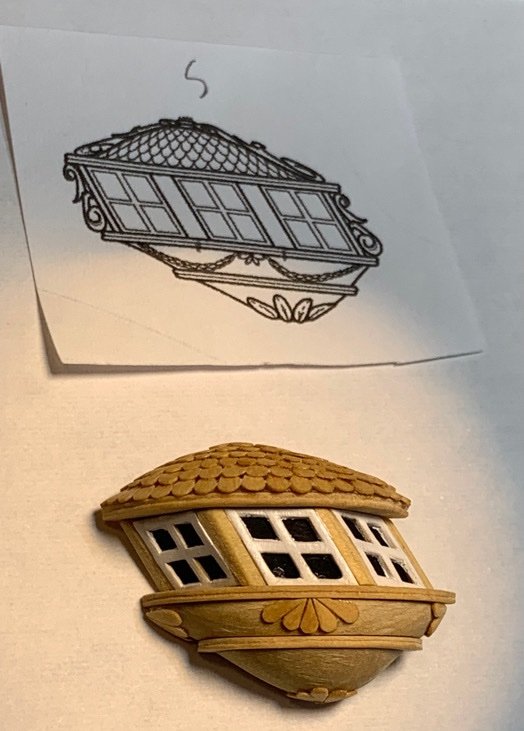
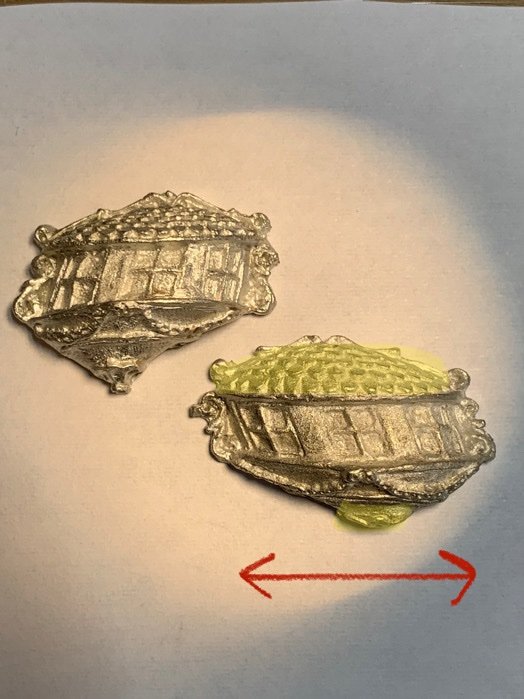
Finished (at least as best I can manage) with the galleries. The bottom portion was easy. I can make a tear drop shingle in 2 seconds. So making the lotus pattern at the curved apex of the base was simple. Sanded a bit and waalaa! The flower pattern in the middle section was a bit cleaner and easier than trying to create the wreath. So opted for that simple decoration in the front and sides. Threw it together and here is the result. I may or may not try the volutes again later…I can always add them if I can make them cleanly enough. t And again compared with the metal cast piece from the kit (starboard side). One thing I did before putting the windows in was ensuring I had predrilled my pins. The back shows the sandwich sections quite nicely. It is certainly worth the extra time to make these. The lack of consistency between the two metal cast pieces from the kit are comical. They have different lengths and patterns between the two…Shame on Model Shipways! But in truth, I’m a crappy painter and there was no way I’d be able to make a realistic looking product from the metal kit pieces. Another minor hiccup…my handmade galleries just barely fit between the upper shear strake and wales. So I needed to trim the needle heads and sand down…can’t even tell I did that. 😎 Next pic will be the final product after some tung oil and test fit on the sides of the ship. Moving on…

-
Work in progress…windows in but didn’t turn out as clean as I’d hoped. Still…much better than the metal kit pieces. Moving on to the bottom halves. Going to go simple here…just because. 😁
-
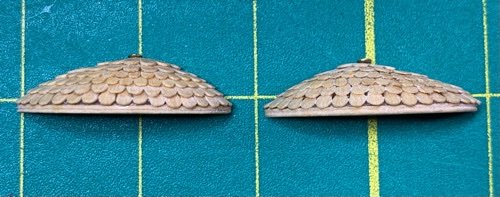
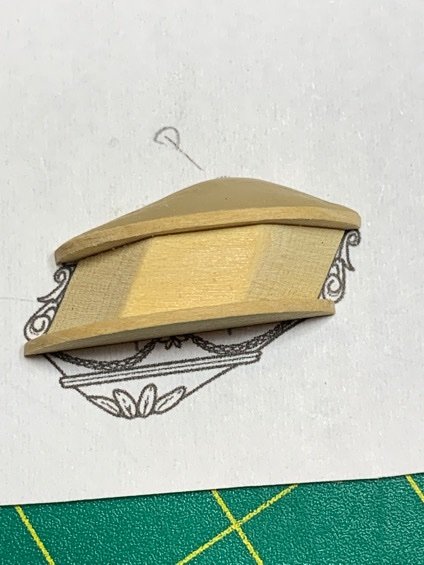
So, I can say the roof sections turned out pretty nice. My second attempt (left) gave moderately better results as my technique improved. Took a while to complete, but hopefully worth the time. Call it practice for the arduous task of coppering soon to come. 🤣 Moving on…
-
Second time around was much better. I got the shingles much more symmetrical and aligned…not finished, but the roofs are done. Hard part’s over. Cant wait to see what they look like when finished. Right arm is holding up well. 👍🏽

-
Yeah. The roof was the bug bear. More ‘art and eyeball’ than ‘exacting measurement’. Now noodling over the scrollwork.
-
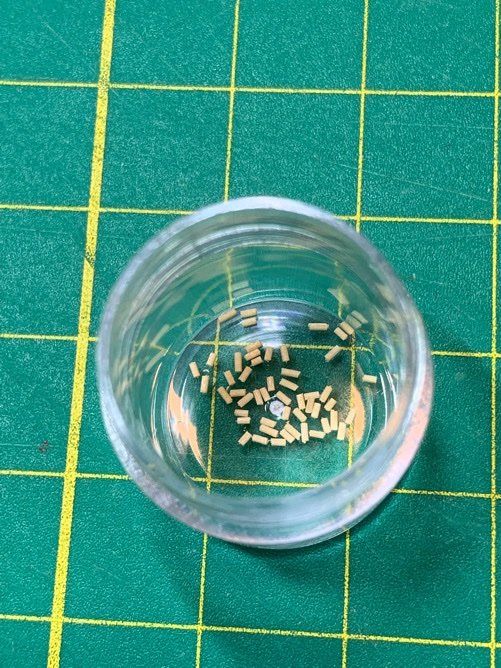
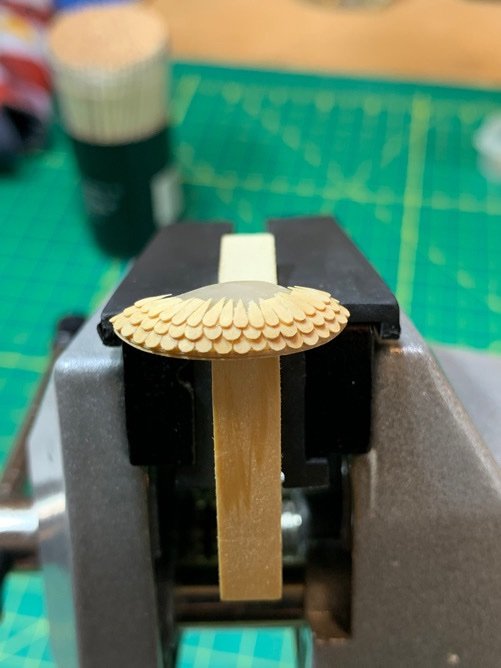
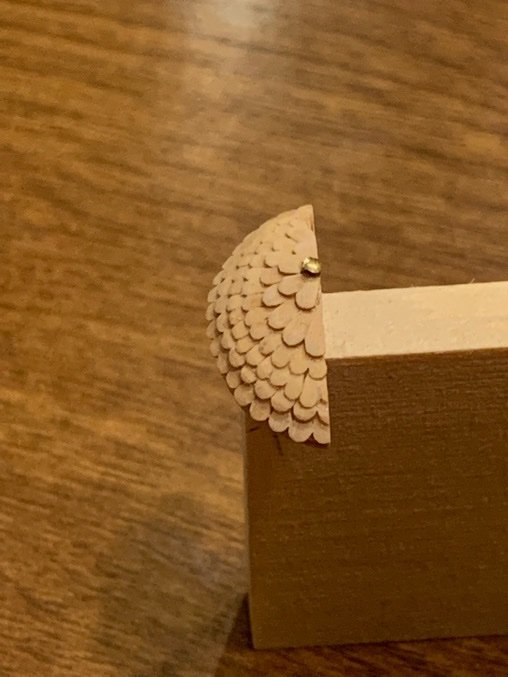
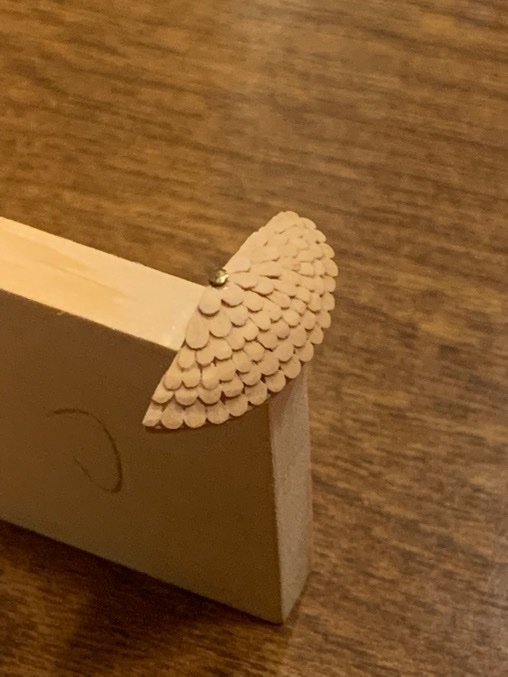
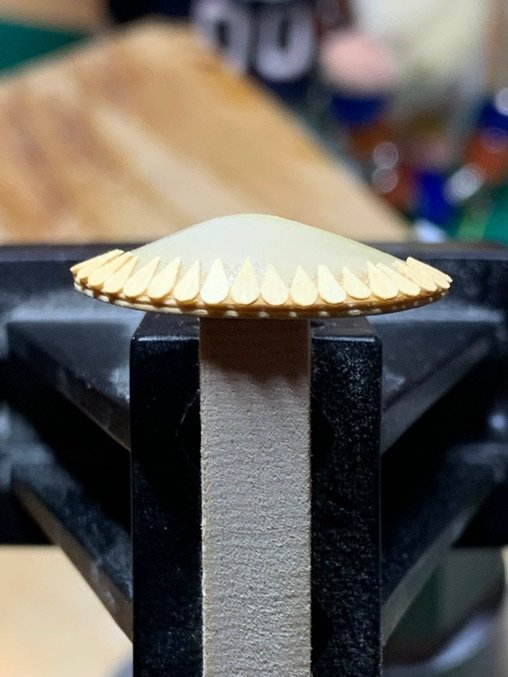
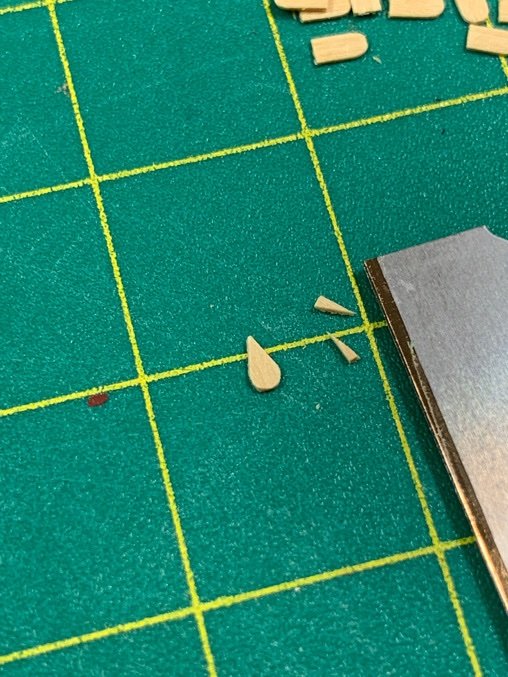
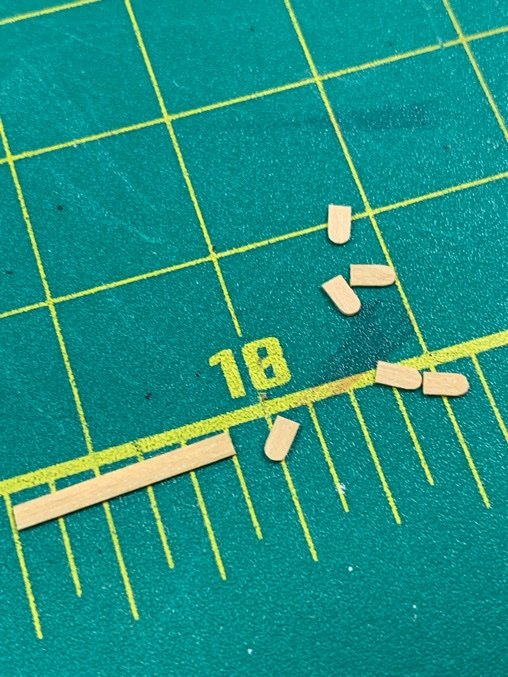
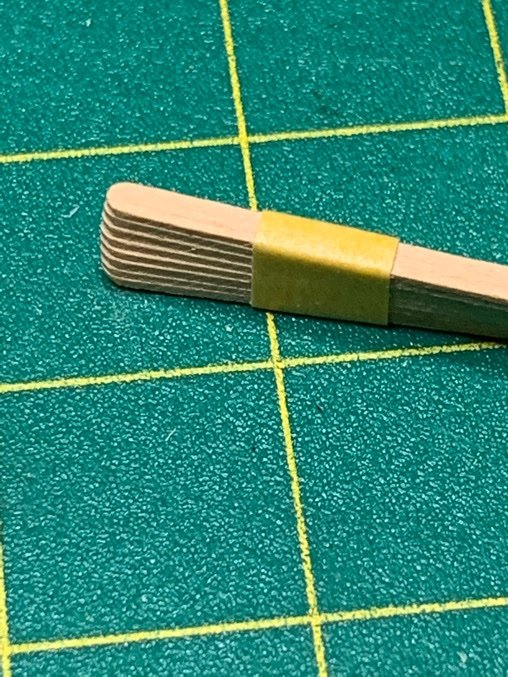
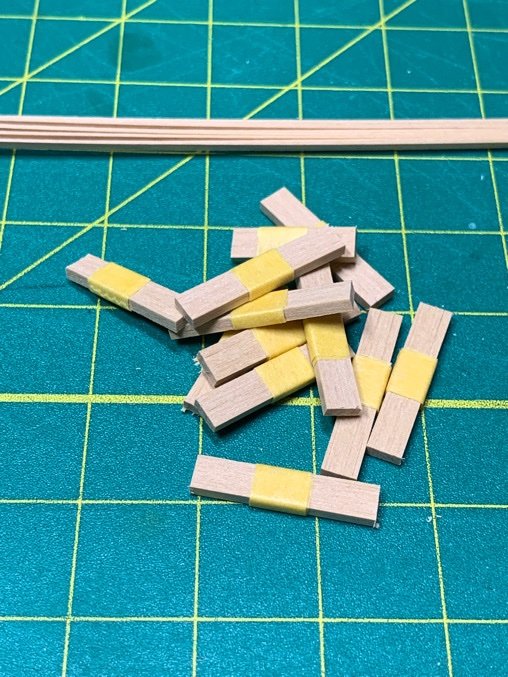
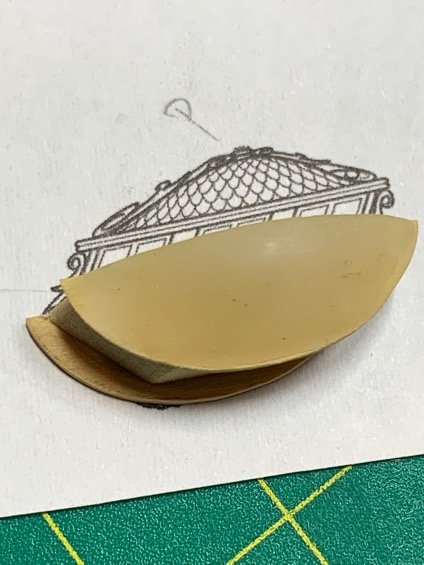
Ok. So decided to jump back into the ship yard. Attacked the first gallery roof. if you recall, I’d made the shape of the roof using sculpy because…what the hell. Then cut thin strips of boxwood for my shingles. Bundled them and cut them in manageable sizes enmasse. Shaped the ends before trimming. Then individually chopped off the ends and clipped the edges with a straight razor into a teardrop shape. I wasn’t going for perfect fit here. Then put them on one by one using a touch of gel CA. After the layers were on, I sanded a bit to smooth out the rough spots. And used a simple brass nail to finish. I’ll follow a similar approach for the bottom. The shingles are frigging TINY!! Moving on the roof #2 for the port side.

-
One last thought. When I’d completed my deck I had some ‘low’ areas, specifically between the frames which were further apart. You can’t see them, but I know they are there. If I was to repeat this part of the build, I would try laying the false deck in longer strips lengthwise (like planking). The 0.4mm birch I used bends easily so the deck camber wouldn’t be a problem. I keep going back to that part of the build trying to think what I’d do differently…but there really is no substitute for preparing filler blocks which create the false deck. It’s a bit of a pain…but this the hobby we love! 🤣
-
Amazon does show the 1/32” birch plywood sheets as available. I went as thin as possible in thickness (false deck plus decking) to be thin enough to allow placement of the swivel brackets along the interior bulkhead at the gun port sills. The thicker plywood may also be more resistant to laying down across the curvature (camber) from port to starboard. This may be a good reason to lay down individual sections between each set of frames. Just a thought. If you’ve taken that into account, that’s great. I’m sure your redo will be worth the time. 👍🏽 Watching with interest!
-
Just a quick note…if you look on my build starting from post #365, you can see exactly what I did and why. The false deck was made from birch plywood sheets (0.4mm) which is cut to fit cleanly between each set of frames. Doesn’t have to be perfect…and it gave a very solid base. However, I milled my own planks slightly thinner to compensate for the added width of the false deck. Hope that helps!
-
Howdy! Back to my build and just catching up. Yes, what I did was install some simple sections of plywood sheeting between each set of frames. Not one single piece…much easier to install that way and deck curvature is maintained in both directions. Having a surface beneath your planks will make a universe of difference and you will also be able to even out the surface (sand/scrape) for much better results if it is needed. Damned good efforts thus far though! And I also love the boxes….some crazy grain! 👍🏽
- 100 replies
-
- 2
-
-
- Syren
- Model Shipways
- (and 1 more)

