HOLIDAY DONATION DRIVE - SUPPORT MSW - DO YOUR PART TO KEEP THIS GREAT FORUM GOING! (Only 20 donations so far - C'mon guys!)
×


Keith Simmons
-
Posts
195 -
Joined
-
Last visited
Content Type
Profiles
Forums
Gallery
Events
Everything posted by Keith Simmons
-
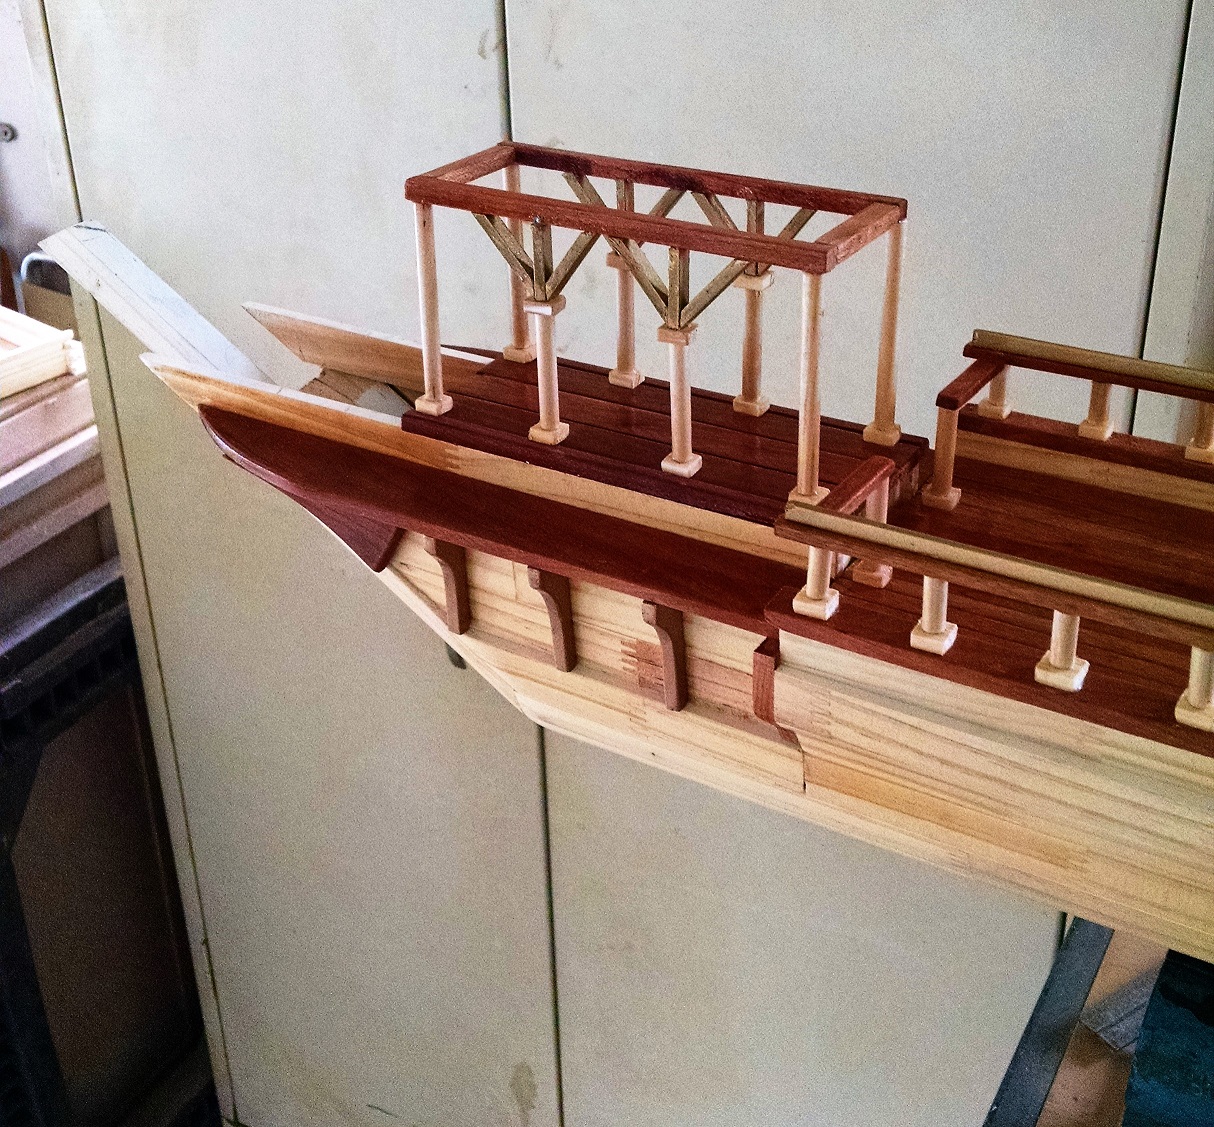
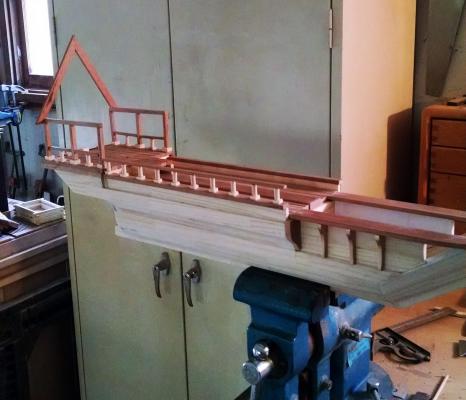
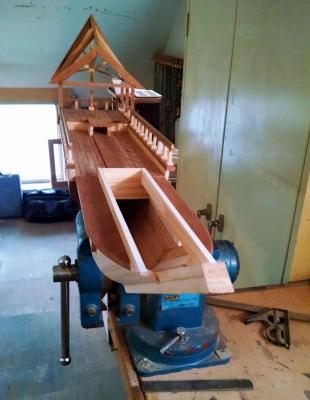
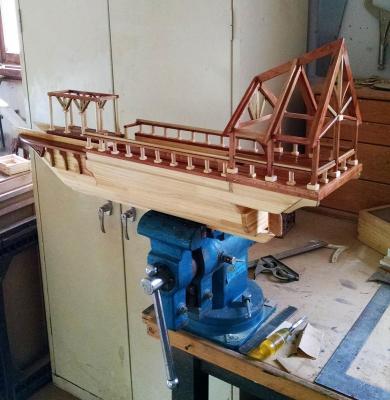
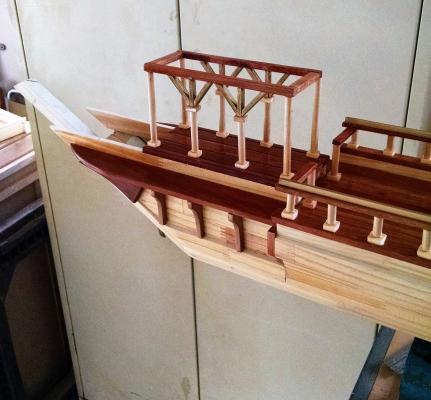
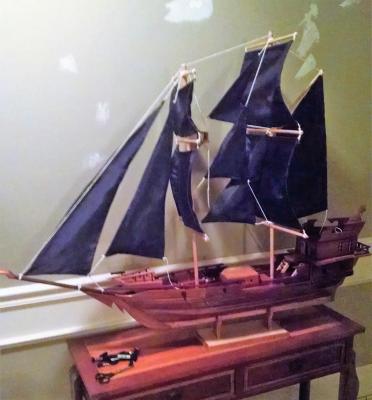
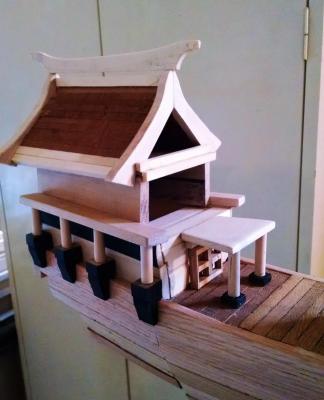
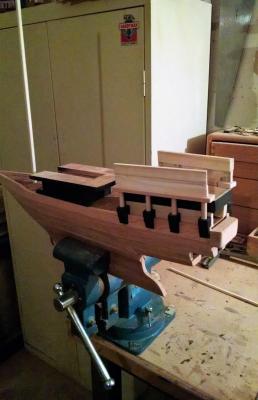
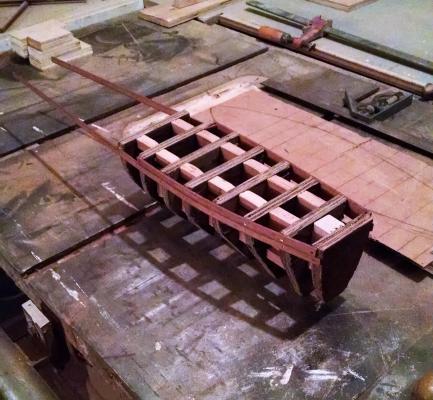
I decided to try a more advanced style of a hollow hull and as usual with no specific theme in mind..lol. I started with some scrap pine and ran it through my table saw at a 22.5 bevel. Then just started to to glue them up to a 33.5 degree keel. At the water line I reversed the angle and extended the hull to a desired deck width. Once that was done I added cross members for the decking and strength, ran the Cherry decking and sat back looking for a theme. Then it came to me, a Timber Framed sterncastle and of I went creating an Elven Prayer Ship. Silly I know, this stuff just comes to me...lol. The ship is made of just Pine and Cherry, and the final design is still evolving, hope you like the end result and the " hollow hull " evolution. Thanks for looking...


- 10 replies
-
- 10
-

-
- kalavente
- prayer ship
- (and 2 more)
-
Thanks Patrick, had a bit of a problem with the sail configuration and I am in the process of rethinking rigging. The real problem of design on the fly is when it doesn't look right , it doesn't look right ..lol. Hopefully I get it right this time...
-
Thanks Jolley, appreciate the input, Since I was using African woods or this build I looked up Lightning Bolt and saw the current spelling. I actually like the correct spelling better so I will use that on name plate.... thanks again....
-
Howdy Popeye, seems as though you are a man after my own heart. Three builds at once is just about the max, any more than that and YES the butterfly nets will be flying...
-
Thanks Popeye, still have quite a bit to do on her yet. Just have to keep fiddling with it till done...
-
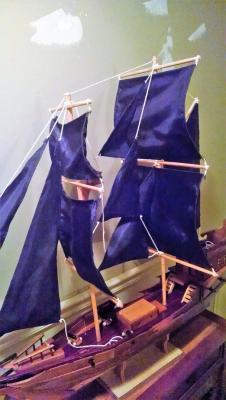
Finally have 80% of sails made and mocked up on ship. Time to take it all apart and start final rigging, my fingers are sore just thinking about it...lol. With ships this size, once I decide it's new home I have to patch and paint walls. The work never ends...
-
Finally came up with an idea for this ships theme. It can be a problem to name the ship before completely figuring out what you are doing...lol
-
Thanks Patrick, I had seen the bread and butter method but was looking for a way which used a lot less wood and would be much closer to the finished hull. Minimal sanding is my goal..lol
-
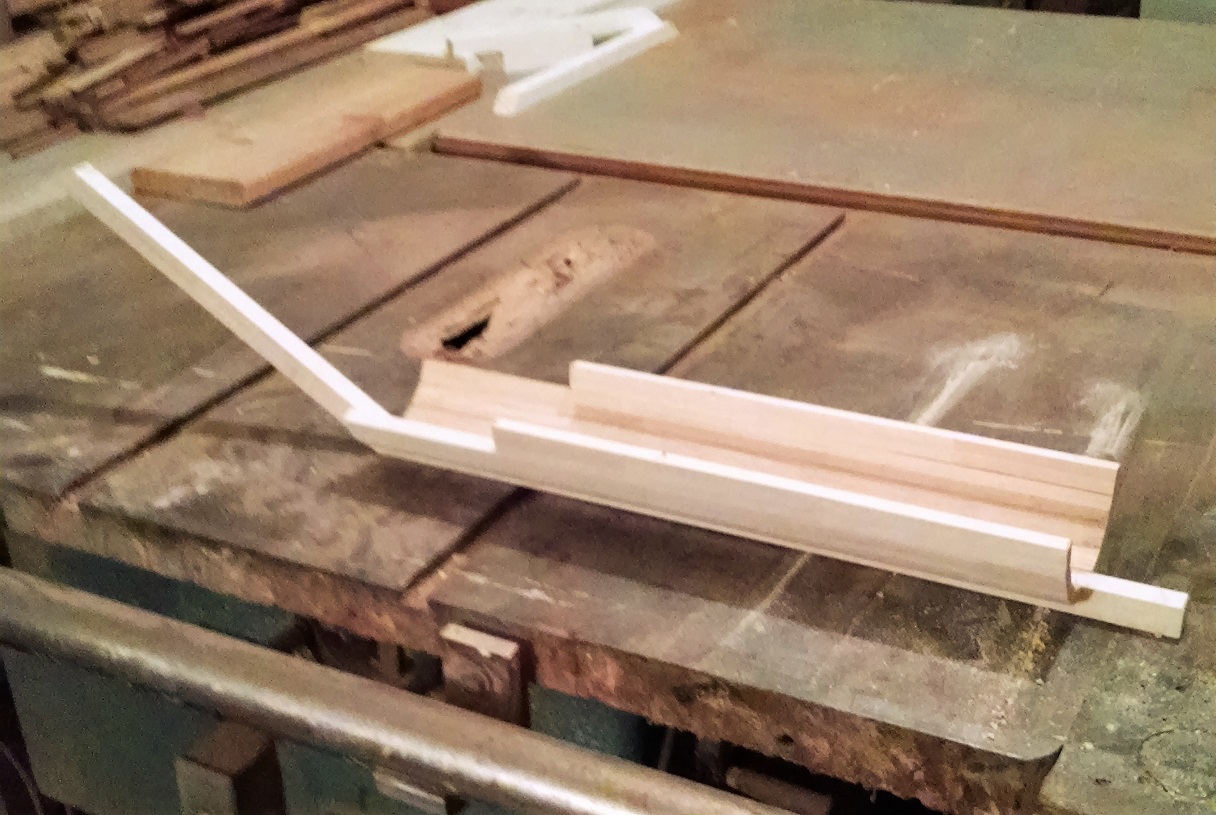
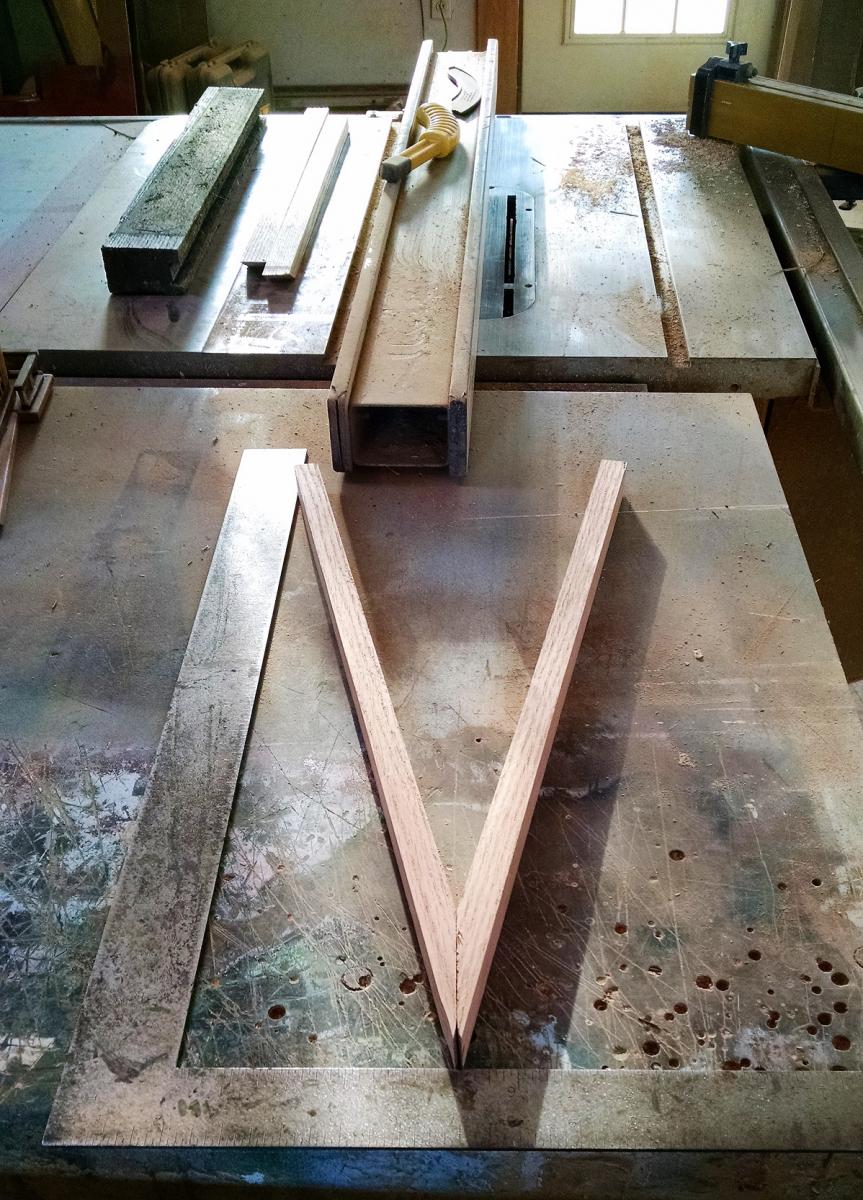
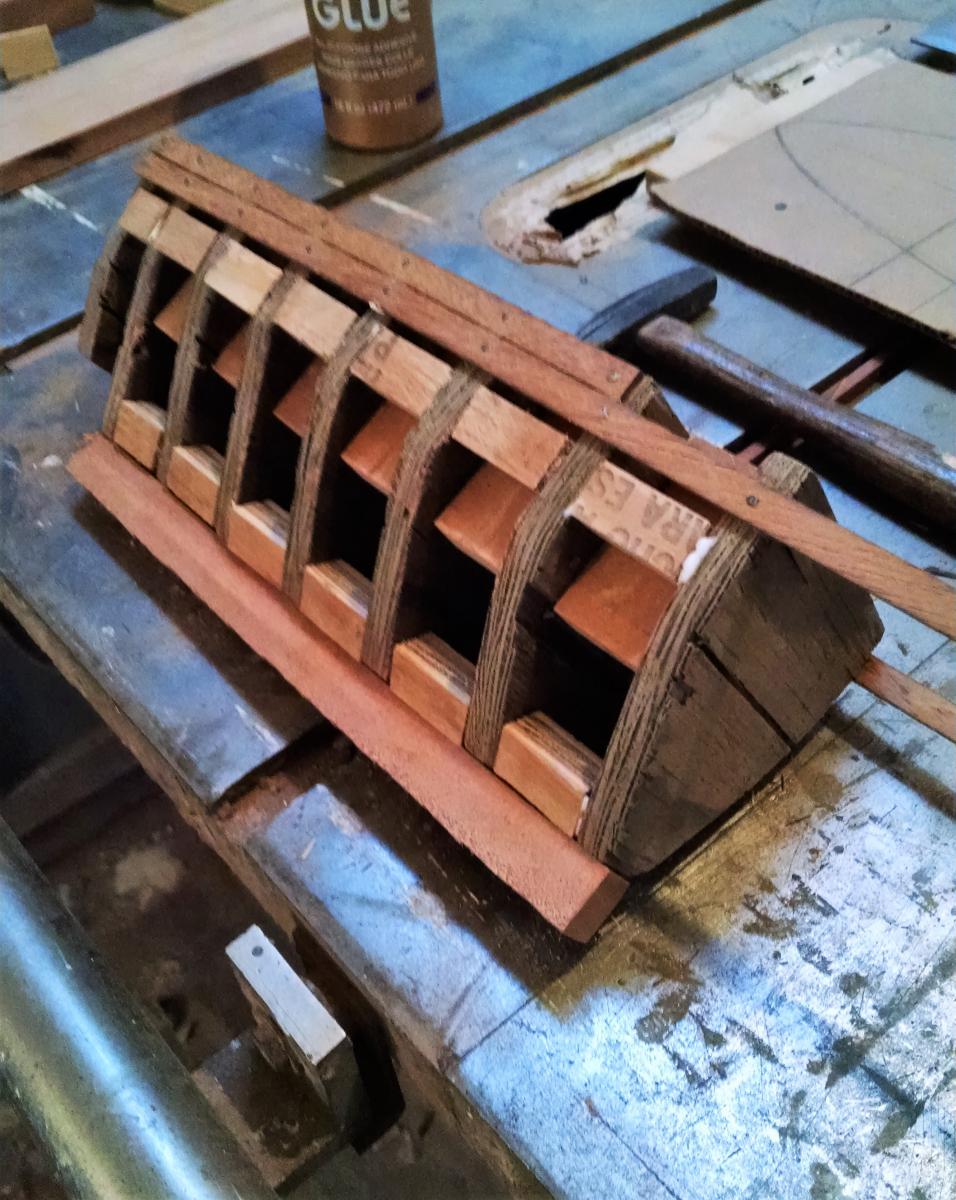
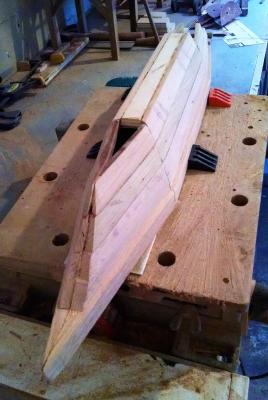
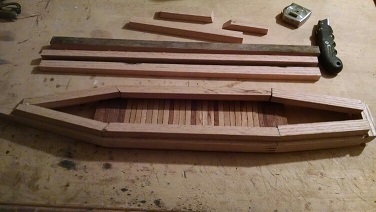
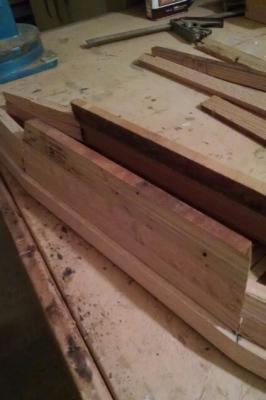
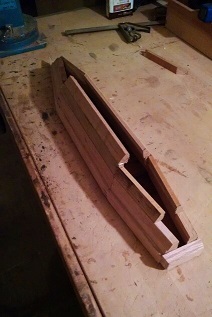
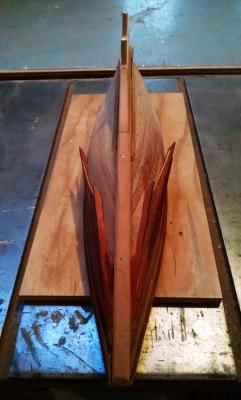
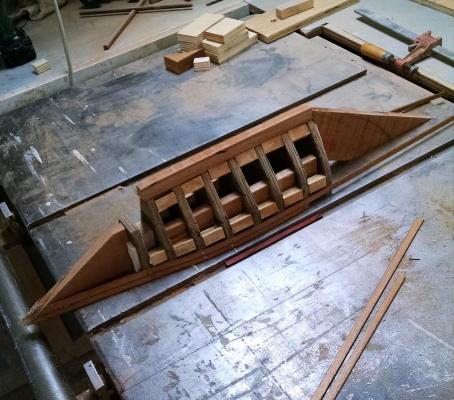
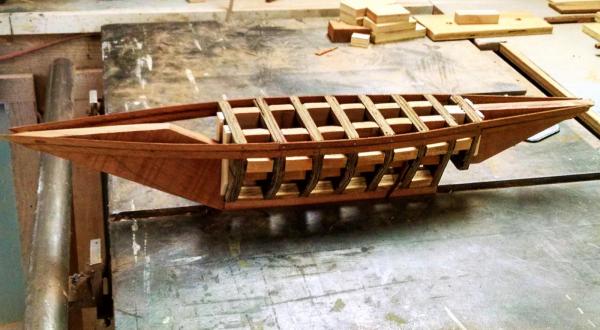
By stacking my "planks" from 15 degrees to 22.5 degrees I start to create the hull shape. Once I get close enough to determine my keel width, I block off the bottom to accept the rabbeted keel block. At this point it is just a matter of sanding for shape. As I said before, I believe you can create any shape using this method just by placement of angles along the hull. Add a keel, clamp in vise and you are ready to start building sterncastle and the rest of the ship. We will see how this one turns out...Thanks for the look, hope this was helpful to those that might want an easier and faster way to make a hull.


-
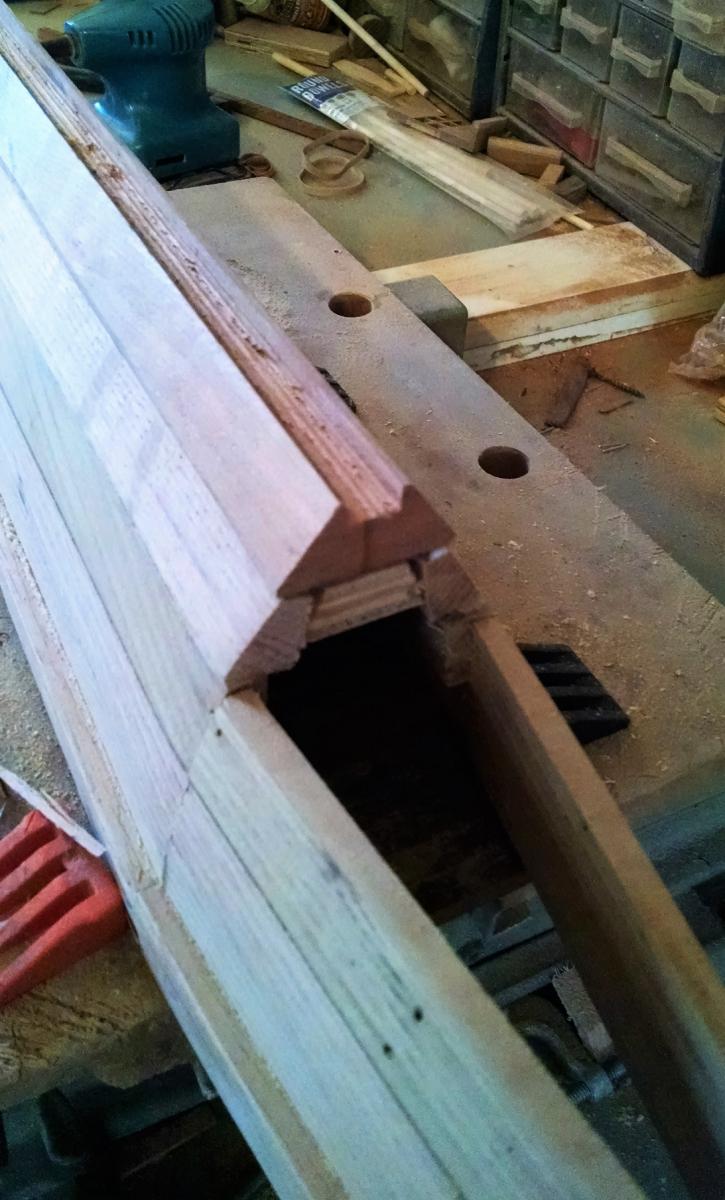
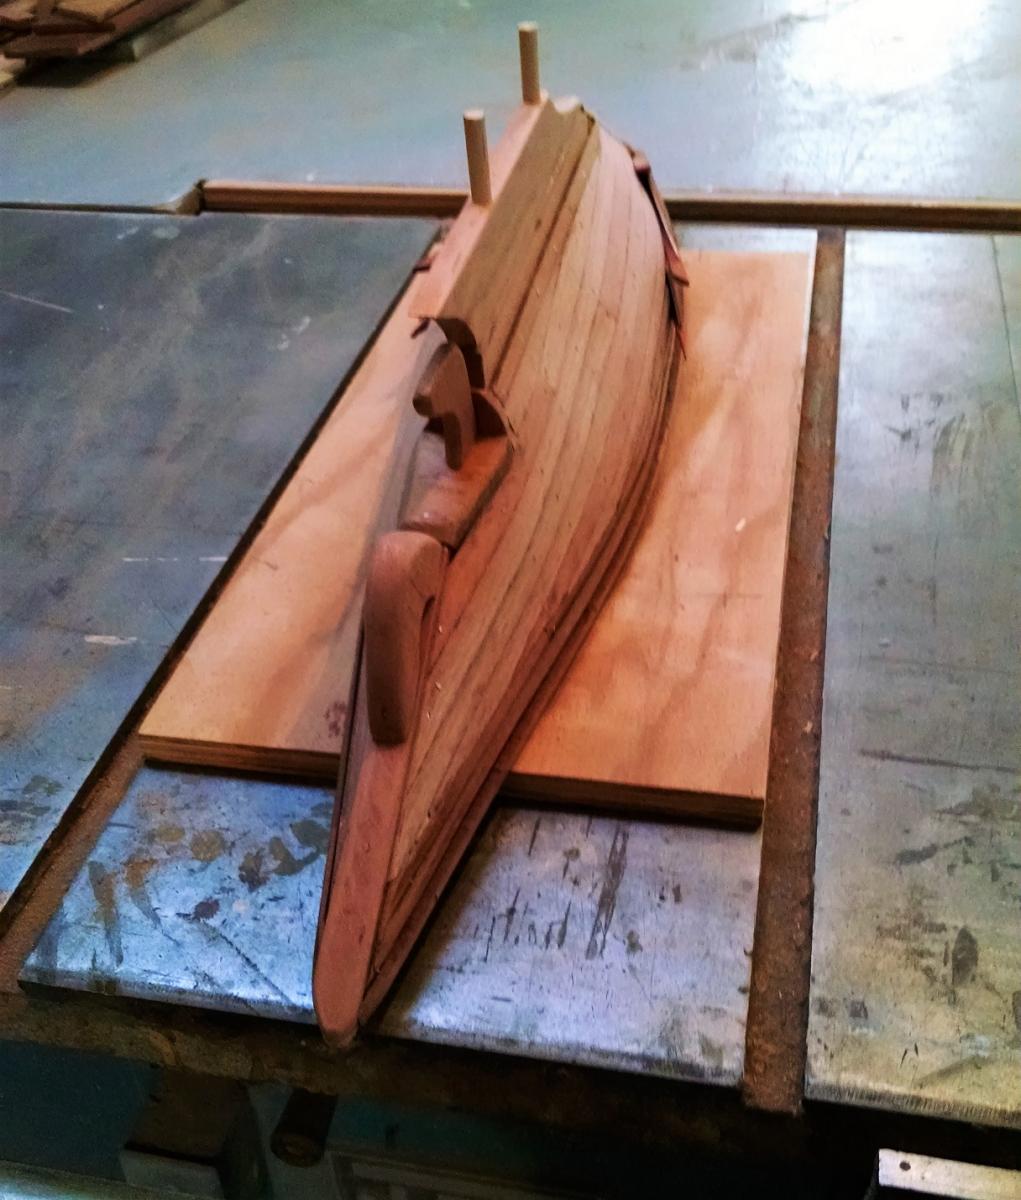
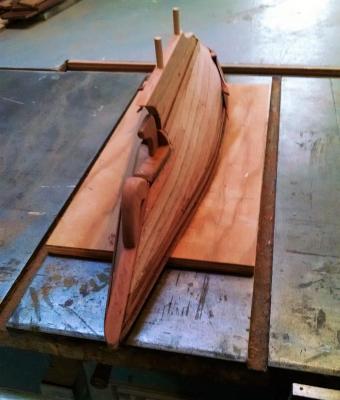
Hi all, considering that I do fantasy ships , I have been experimenting with ways to make a hollow hull without using the usual method of a frame and planking. I found a couple of old pallet skids in my garage that turned out to be Red Oak .This hull was built using my table saw and chop saw. I dressed out the oak to 1 1/2" W x 5/8" thick on my table saw and began cutting angles . First, I eyeball the bow angle and cut them with a handsaw, this is where I decide the width of my hull, then I start cutting angles on the chop saw. Once I have the basic deck layout I run the "planks" through the table saw at 15 and 22.5 degrees and then rabbet them to accept the vertical decking.Then it is just a matter of build up the hull. For this hull I used only 2 dominate angles 35 and 22.5 degrees, in theory i should be able to place any angle anywhere along the hull do create the desired shape.
-
Hi Jesse, looks like a good start, plan to keep an eye on this build.....
- 1,306 replies
-
- 6
-
-
- syren
- model shipways
- (and 1 more)
-
Thanks Popeye, turned out pretty good ...
-
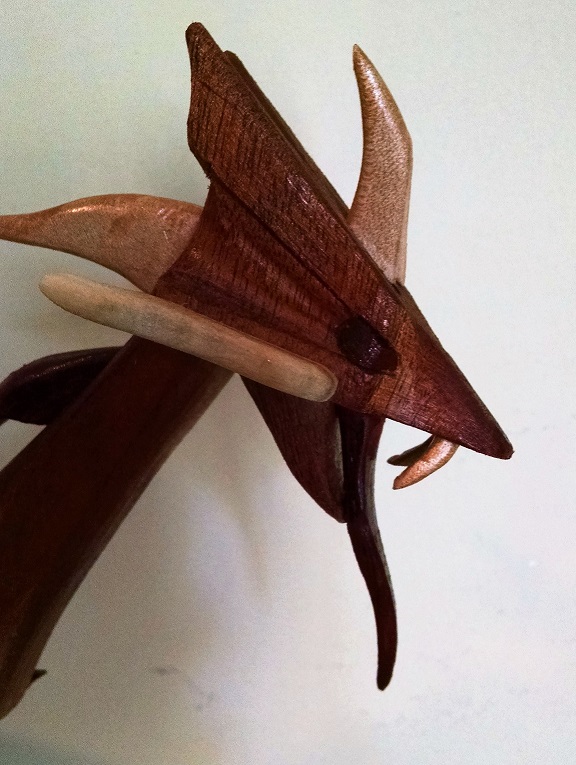
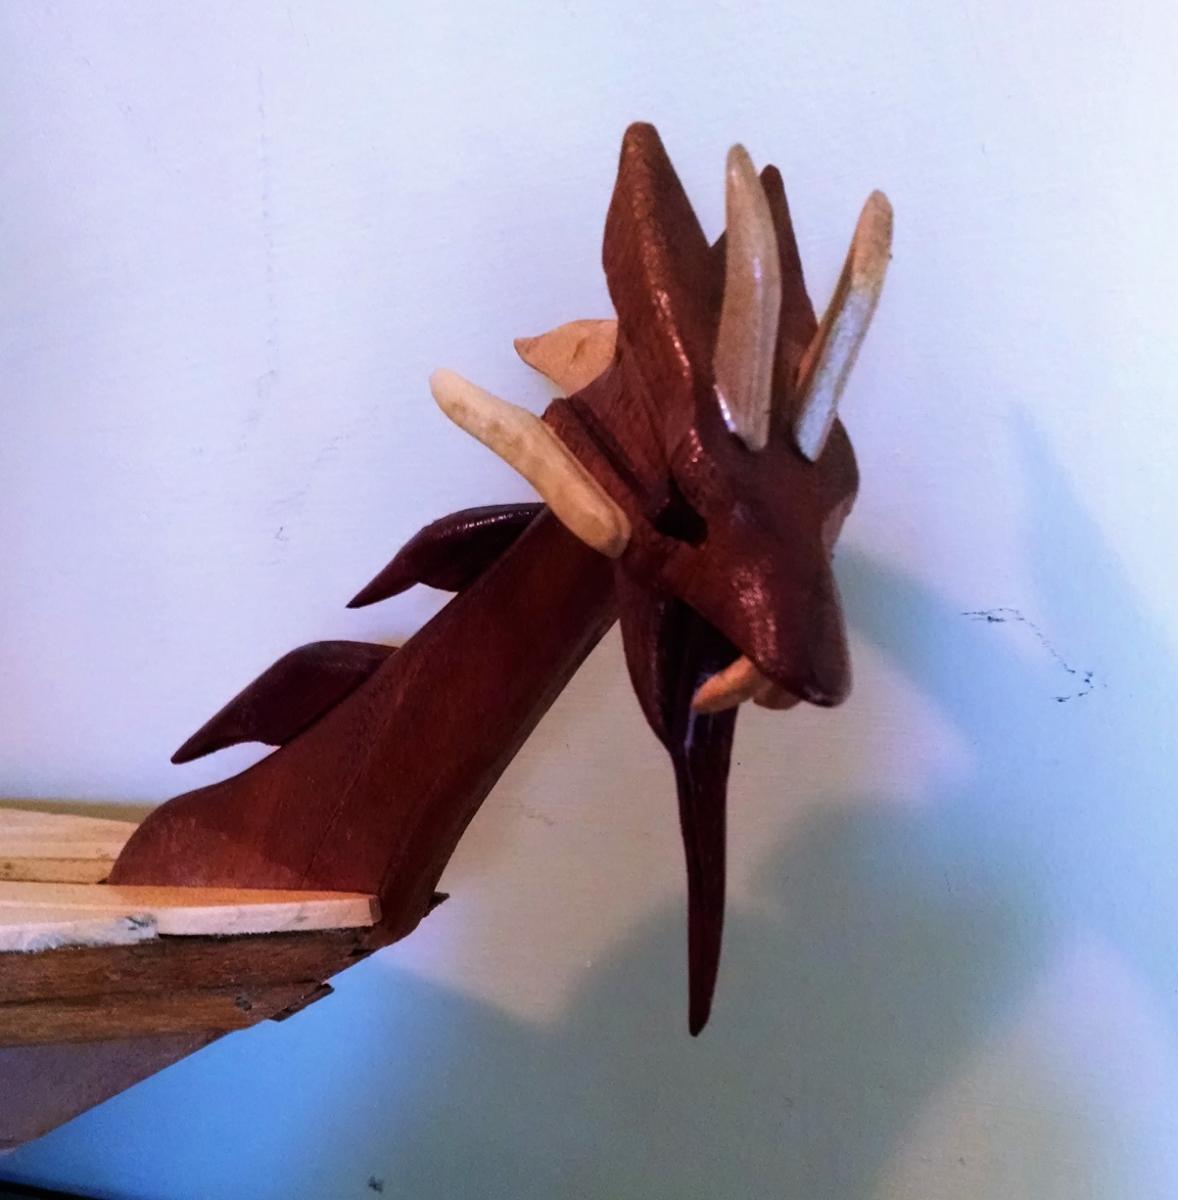
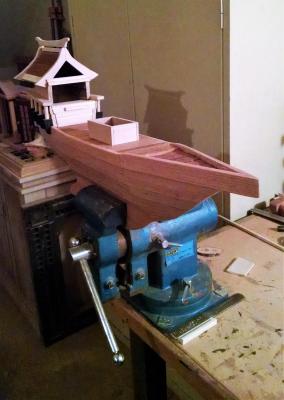
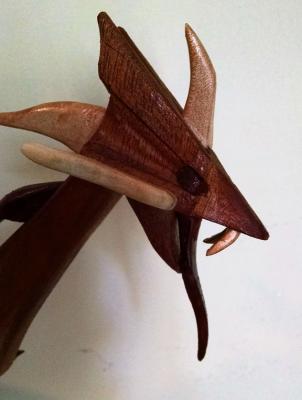
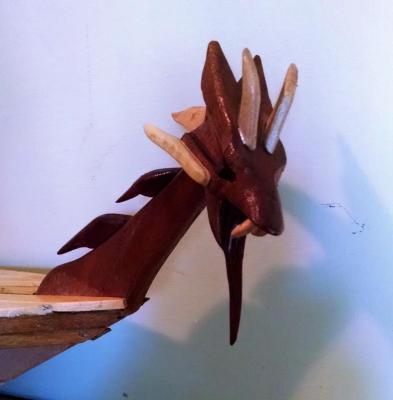
I have never carved anything but a turkey before, but considering Lindworm is Viking for dragon thought I would try a figurehead for this build. Made out of Mahogany, Maple and Bubinga. Not sure if it will work but I may have found a new dimension to my ship building... Now the wings on the hull make some sense.
-
Hi Popeye If I was ever able to make a frame like that I would stop right there and display it by my front door..lol. Looks great ! very nice job.
-
Hi Patrick, Thanks a lot, I really like to start a ship and see where the process takes me, kinda fun that way. I believe I have come up with an idea for the finished ship, I hope it turns out as cool as I see it in my head....lol
-
Thanks Patrick, as soon as I get The Lindworm ready for rigging I will rig all three ships at the same time. I sometimes get distracted by another design..lol
-
ThanksPopeye, have to get my girlfriend to fir up the sewing machine before I can rig it..lol
-
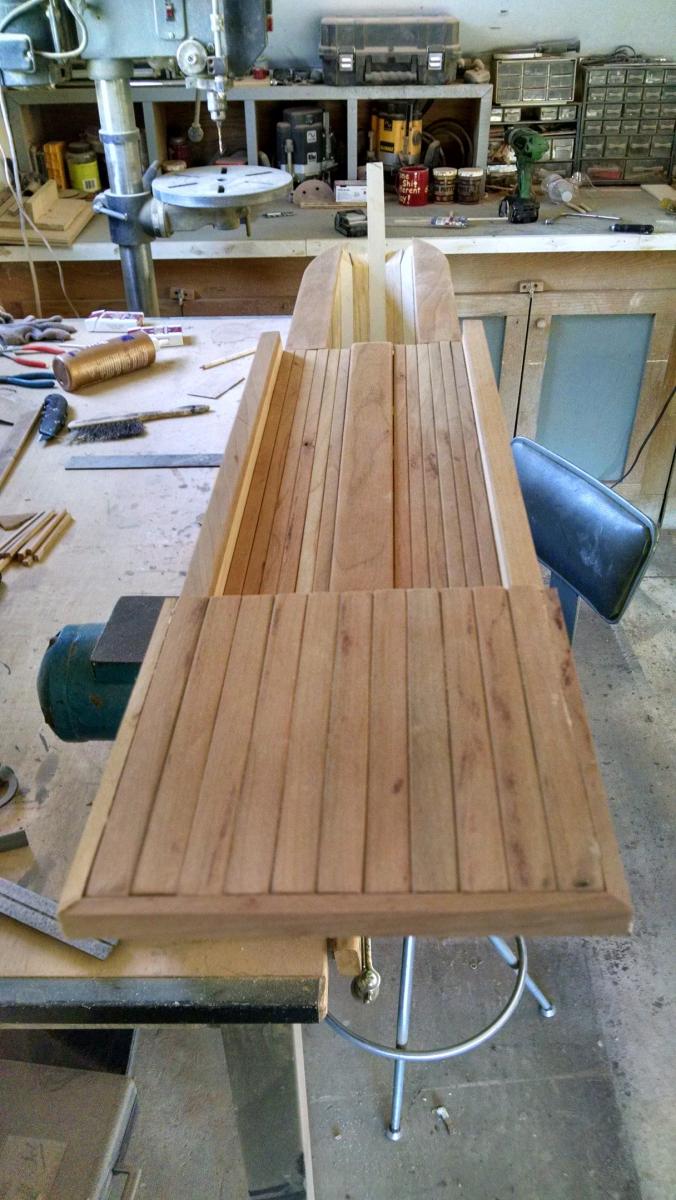
Well, finally have the hull and deck planked, time for a little thought as to where I go from here. Guess I can do that while I'm sanding ... The bulk of the hull is planked with quarter sawed African Mahogany ( which I call Bubble Wood ) , the transom was made with rough sawed African mahogany as well.. The lines of the hull are broken up a bit by the Bubinga wings but still has the sleek look I was going for. The deck is planked in Maple, forgot to take a picture of that. Back to the drawing board... Thanks for taking a look....

-
Hey Popeye, very clean looking build, everything thing nice and straight. I'm jealous..lol
-
Very cool way to build a hull, Leo. Will keep an eye out for future posts.....
- 5 replies
-
- 4
-
-
- le coureur
- lugger
- (and 1 more)
-
Thanks Patrick, I am looking forward to see how it comes out, have a couple of ideas. Now just have to see if they fit..lol
-
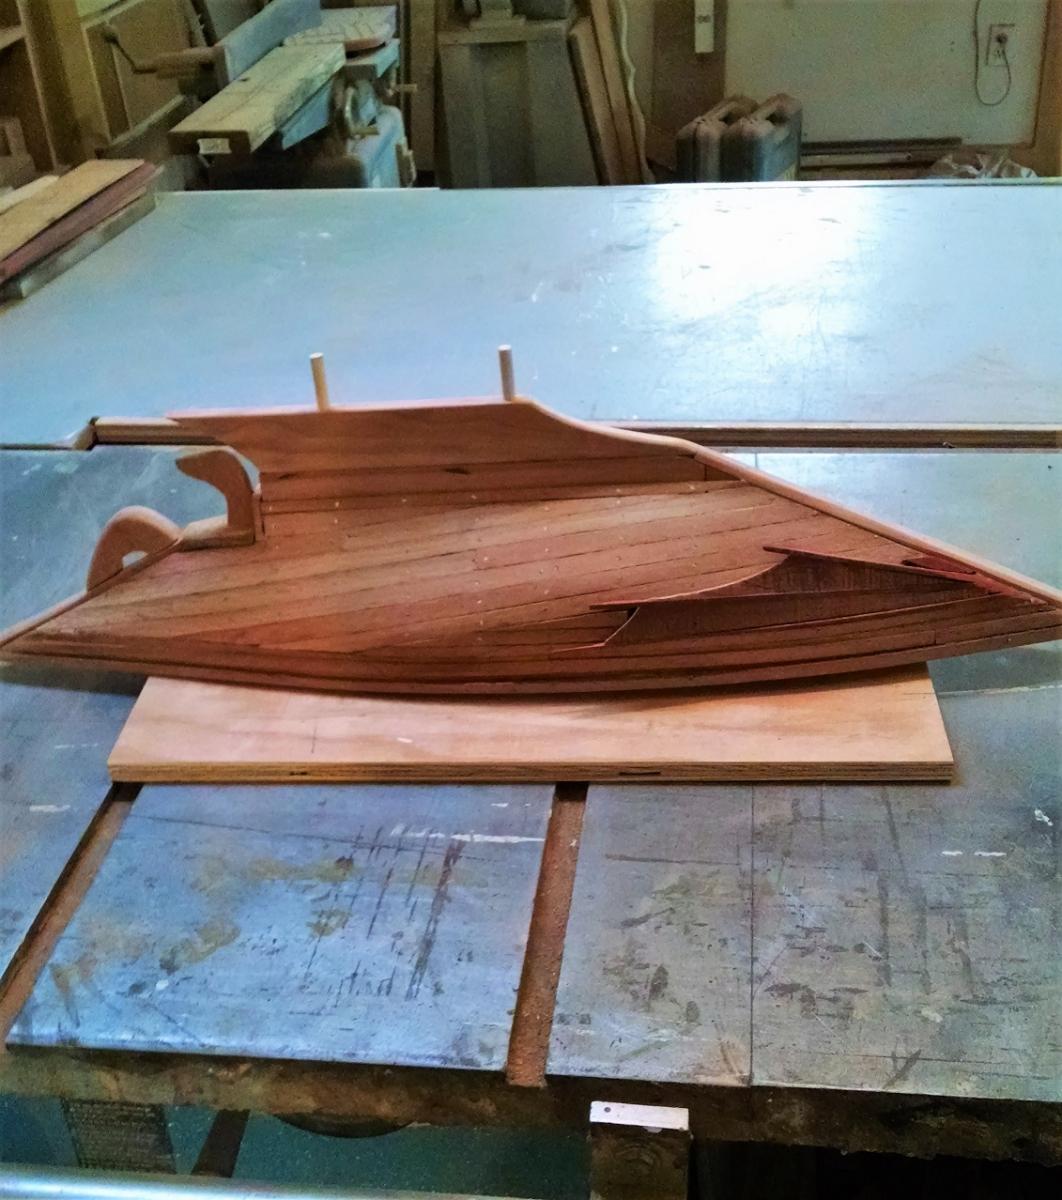
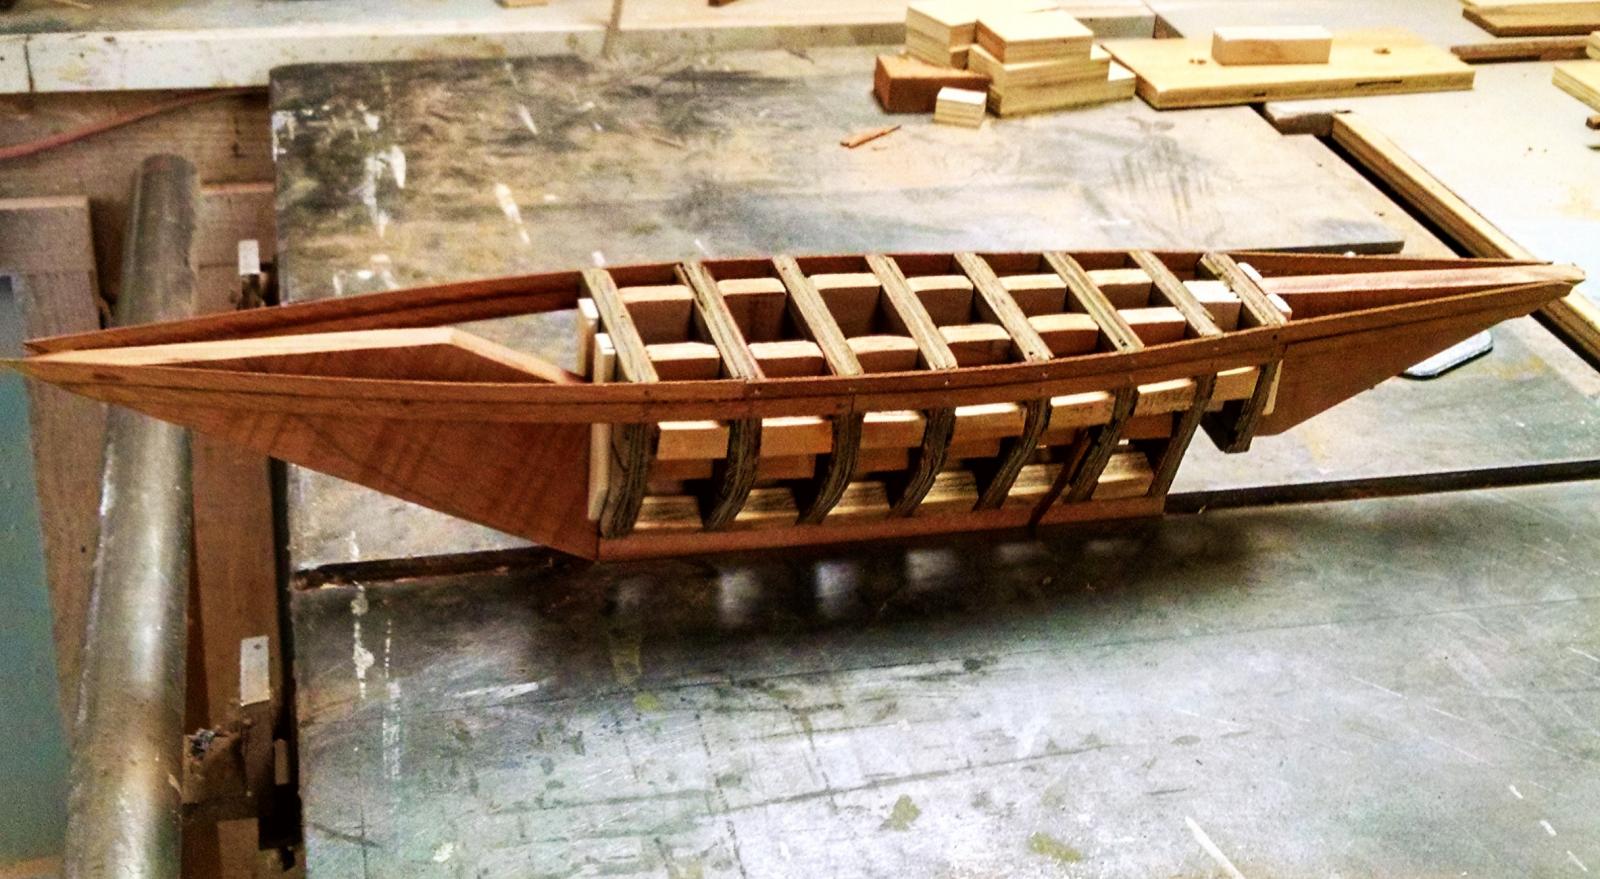
Once I had a basic shape I decided to run some African Mahogany planking so I could figure out how to fill in the bow and stern with solid blocks.I then added a Mahogany keel strip to help me eyeball the bow rise. Not sure what happened but I saw something and went off in a whole other direction. By adding Mahogany bow and stern sections I elongated the hull by several inches and that is when it became a dragon ship. The middle section looked like a belly of a beast and changed my plan, so I added blocks at the keel and transom lines to allow for diagonal planking. From here on anything is possible as the ideas are racing around in my head...


-
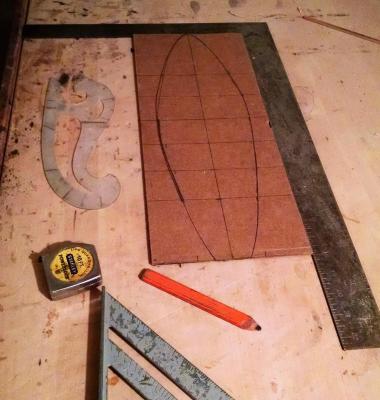
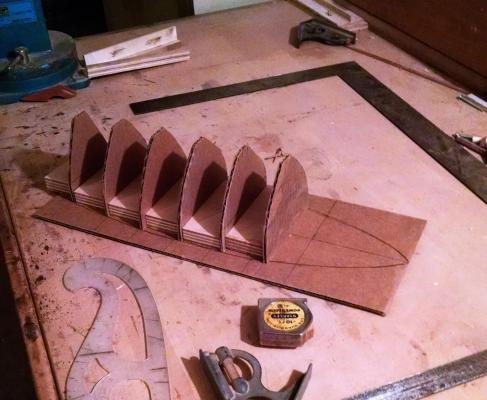
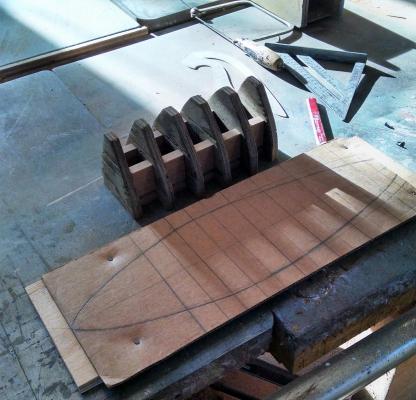
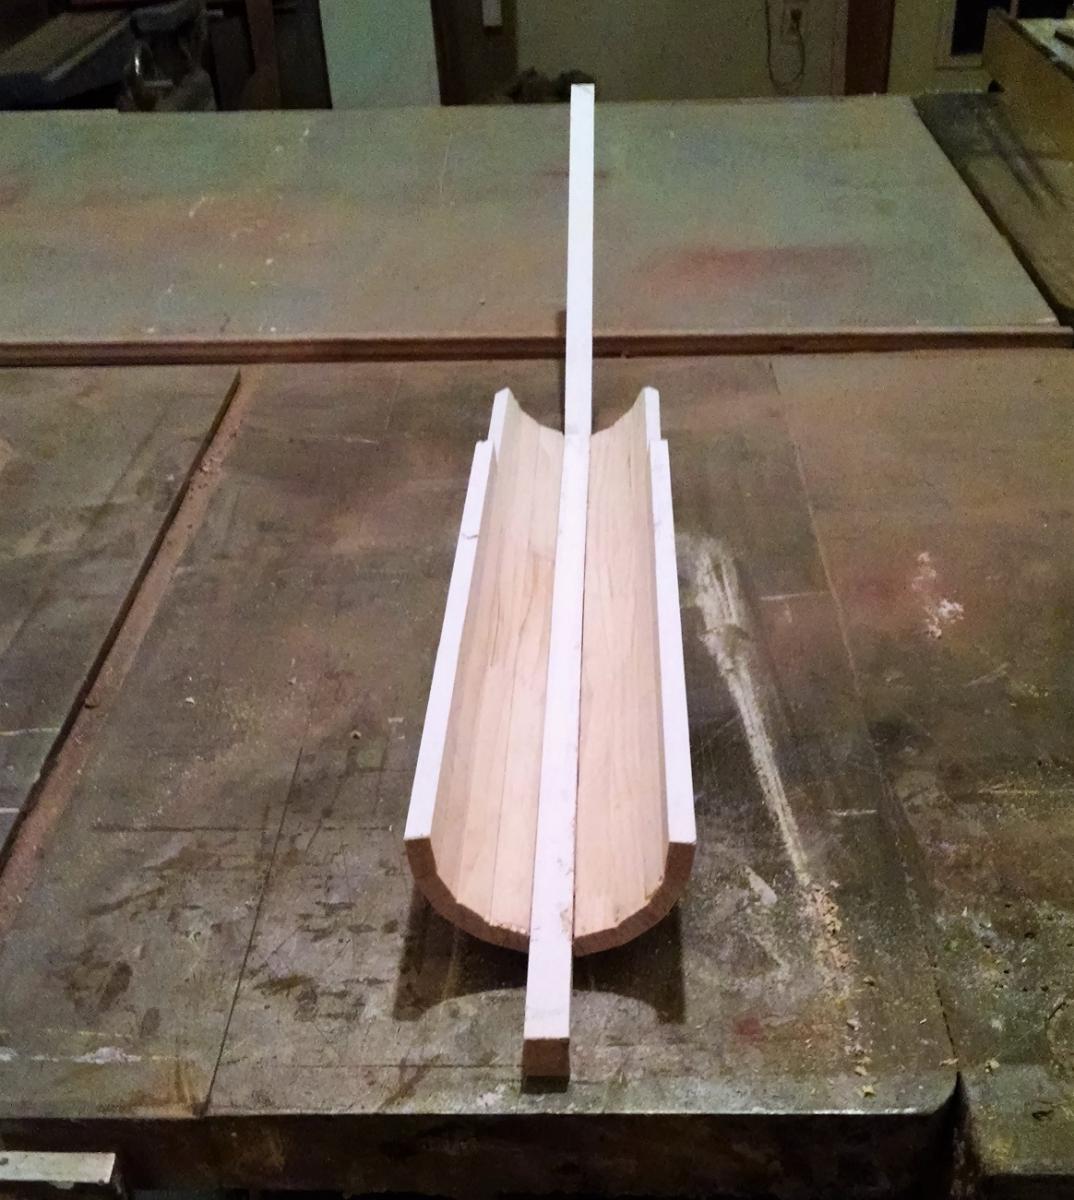
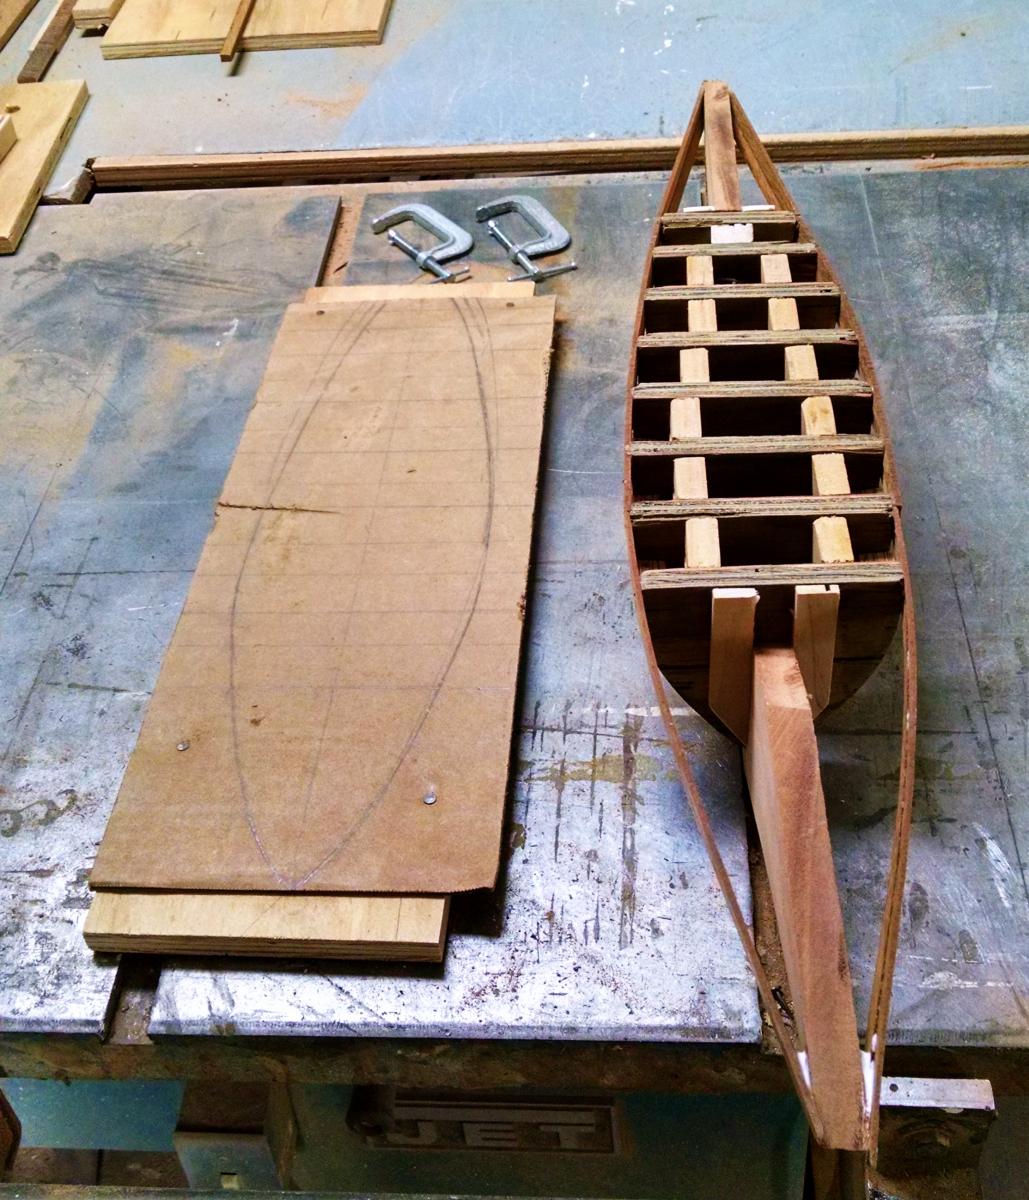
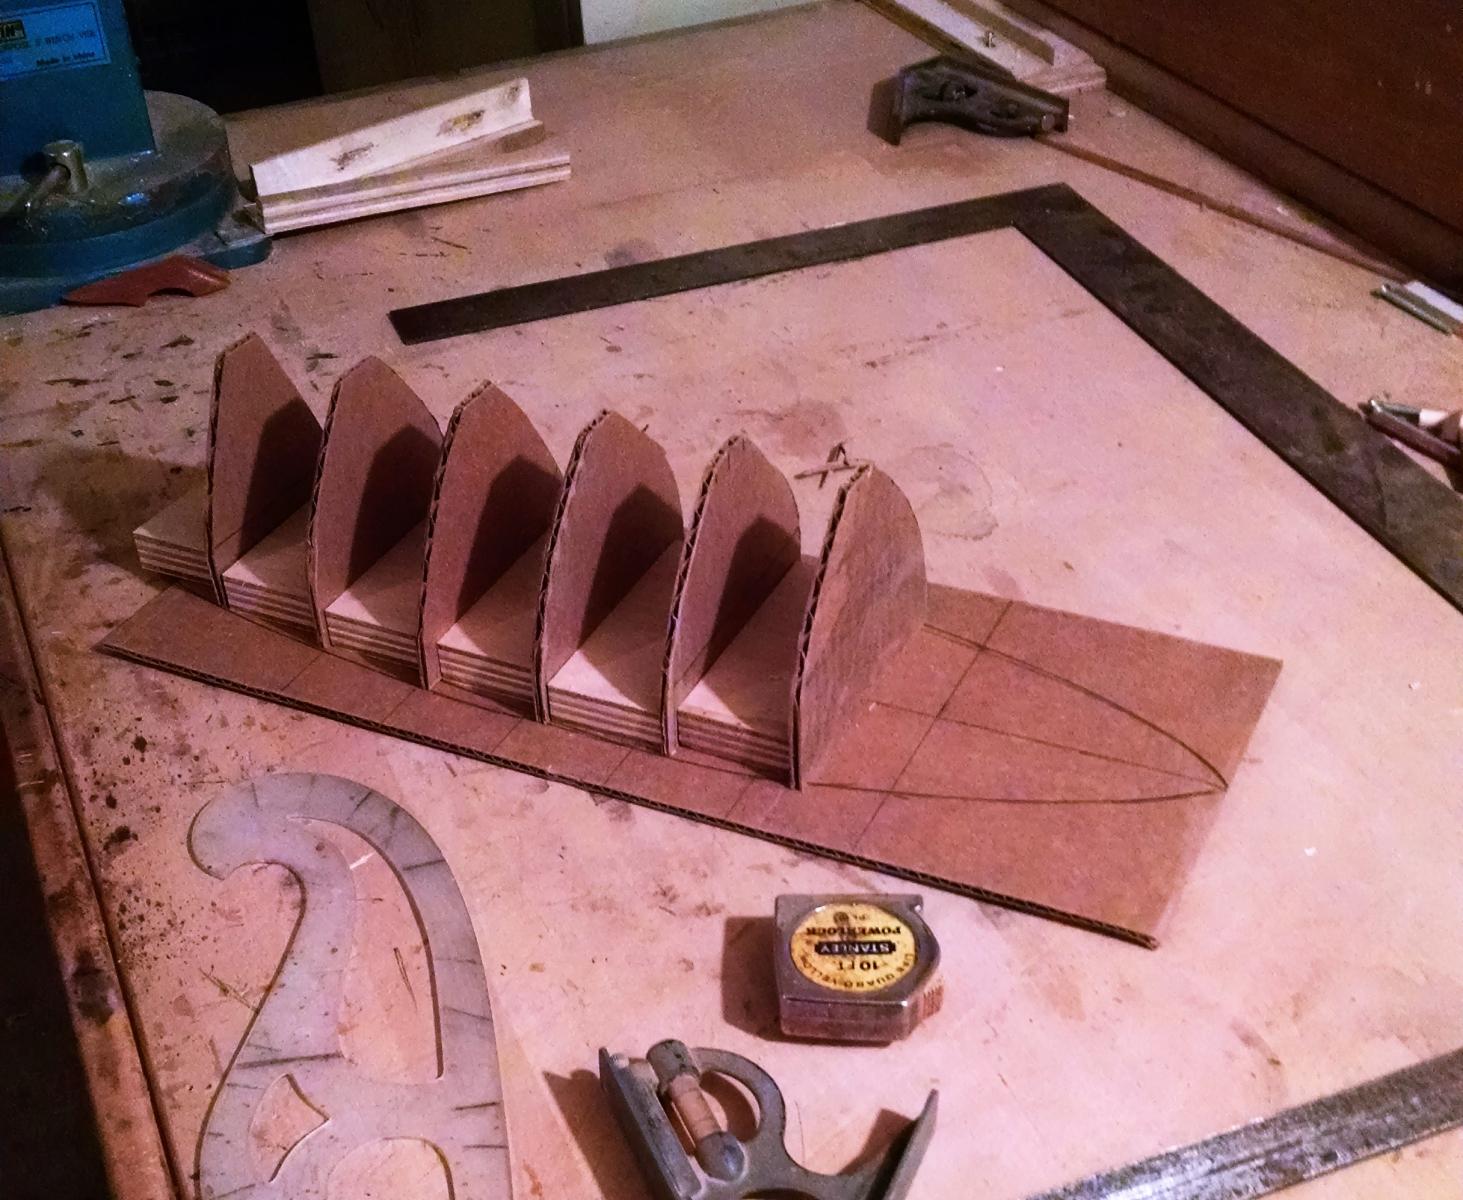
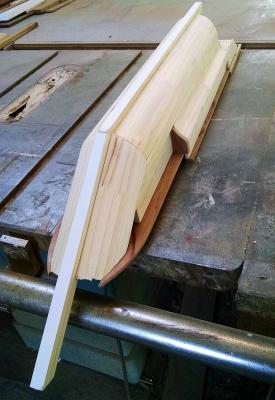
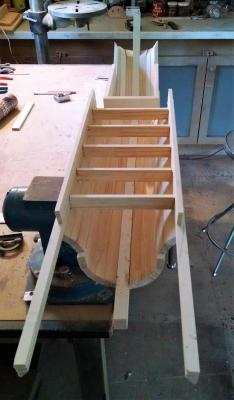
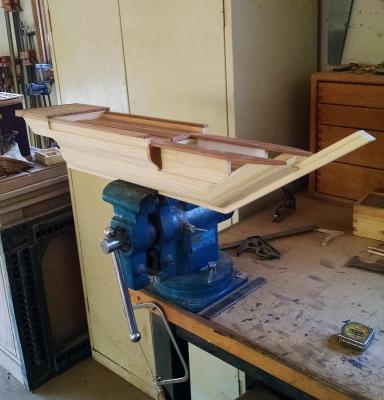
Hi all, this is my first attempt at mapping out a hull design.With no particular ship in mind I started out by making a grid on a piece of cardboard and drew a basic deck outline.With that done I cut out some cardboard ribs to form the middle section, then using spacer blocks to stand the ribs up I adjusted the shape of the hull by eye with sandpaper and a utility knife. At this point it looked like I was going to end up with some sort of cabin cruiser. Looking around the shop I found some old scrap squares of 1/2" plywood to use and started jigsawing out some ribs.After getting what I thought was the bulk of the middle section cut out I assembled them with 1 1/4" spacers. I then clamped the whole section in my small work table and proceeded to shape the frame with an orbital sander. Here is where my mind starts to race..lol