


Modeler12
-
Posts
1,716 -
Joined
-
Last visited
Content Type
Profiles
Forums
Gallery
Events
Posts posted by Modeler12
-
-
Hammocks are tough.
I made six full size and 13 folded and they all look terrible.
But here they are installed on the bottom of the gun deck beams, hanging up-side down.
They will look better when horizontal, so I will let this pass for now.
BTW I did use a flash for this picture (something I never do otherwise).
And there are some threads that need trimming (if not all of them).

- Geoff Matson, GLakie, Jack12477 and 6 others
-
 9
9
-
Interesting side note: there were two hammocks for each pair of hooks. Every crewman had his own hammock but there were two men assigned to each "space". So when one man got up he unhooked one side of his hammock to hang "folded" from a single hook while the man coming off watch "unfolded" his into the same spot.
Hope that makes sense. Hard to describe, easier to show.
Regards,
Perfect Henry. That explains why there are more than one hammock on the same hook.
When you look at the pictures they are arranged just like you said.
- GLakie, mtaylor, CaptainSteve and 2 others
-
5
-
-
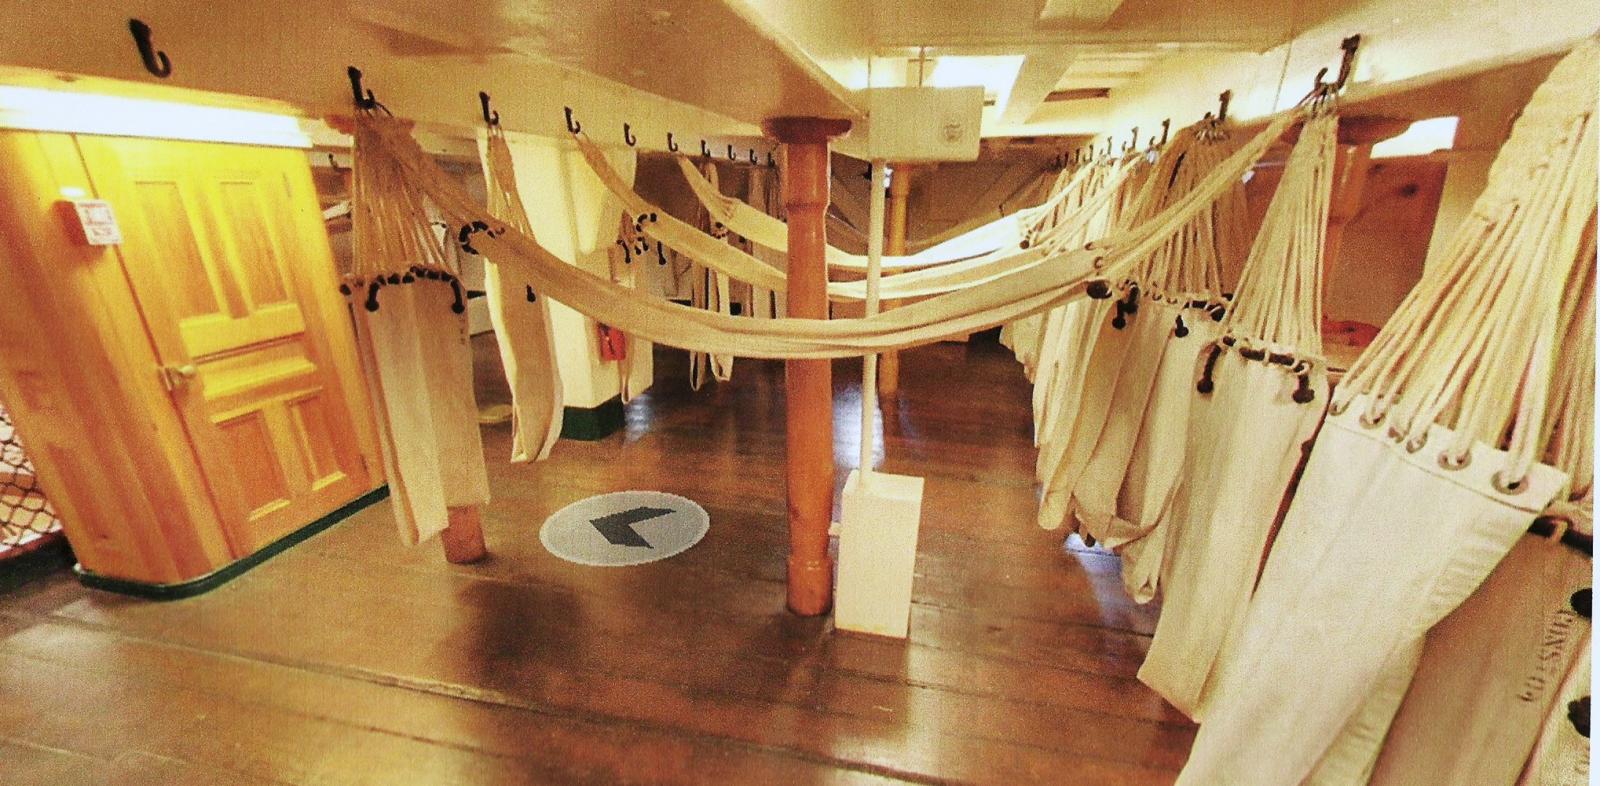
Sorry, one more point about the view above and Mark's comment when I mentioned that the hanging knees I made were too thick and too wide.
The picture below is the view taking from the same spot as above but looking toward the starboard side (the one that will be not there on my model)

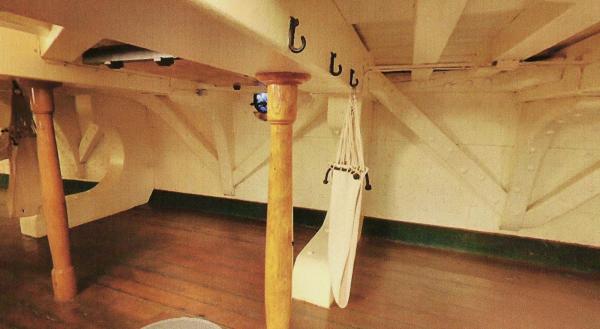
Notice that the hanging and standard knees are indeed a lot thinner and narrower than I made them for my model.
- mtaylor, CaptainSteve, Bobstrake and 2 others
-
5
-
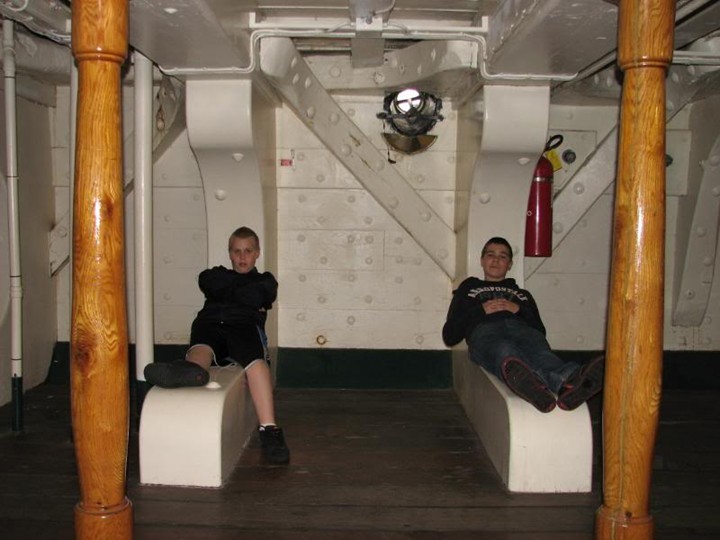
By way of explanation about the hammocks, here is what the berth deck looks like on the Connie.
The ensign cabin is to the left.
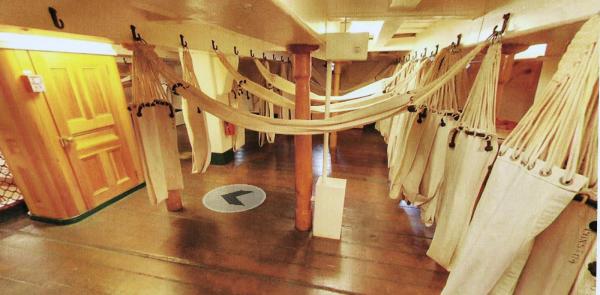
PS This will be the point of view when I cut part of the deck and frames away on my model. The fore mast is barely visible at the top right side.
- GLakie, Bobstrake, CaptainSteve and 3 others
-
6
-
I need to take a step back in time.
Before I can glue the gun deck in place, I need to finish the 'decor' on the berth deck. That means installing hammocks.
Earlier I had put in eye bolts underneath the gun deck beams and made a few hammocks. Now I needed more.
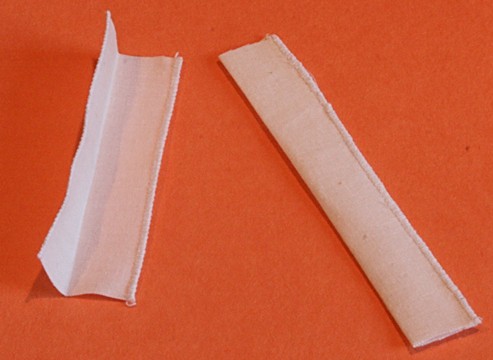
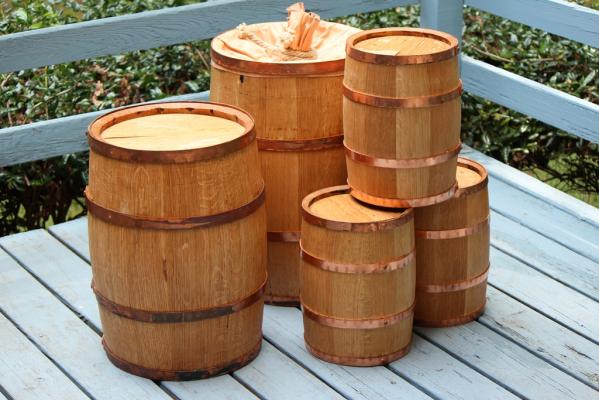
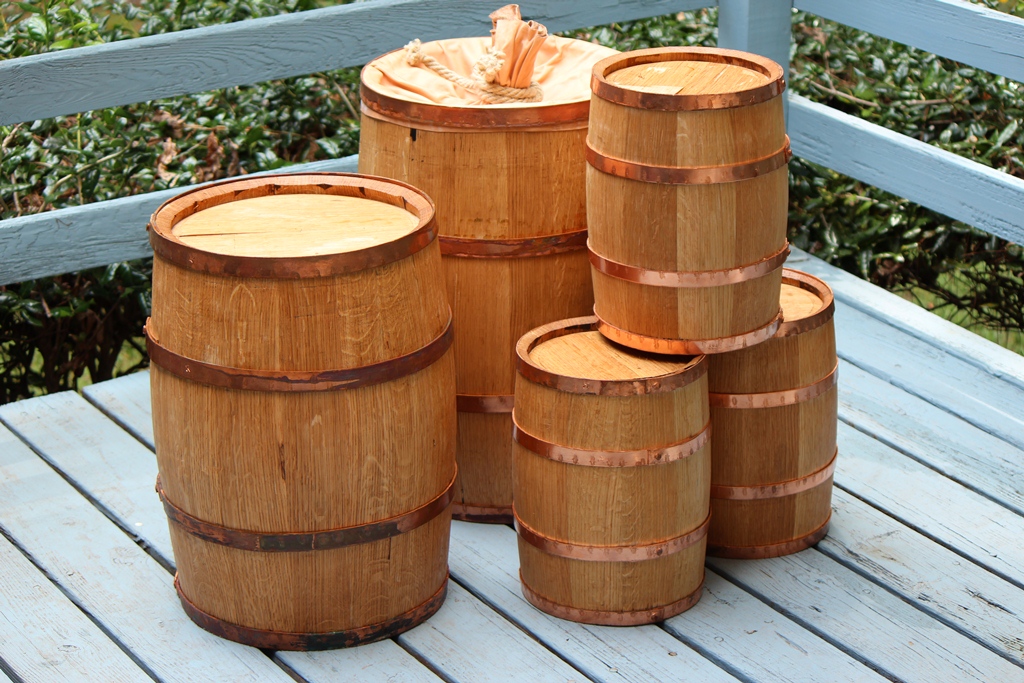
However, most of the hammocks on the USS Constitution (as she is now in Boston) are hanging folded in half.
The first picture below shows six full size and the new folded version.
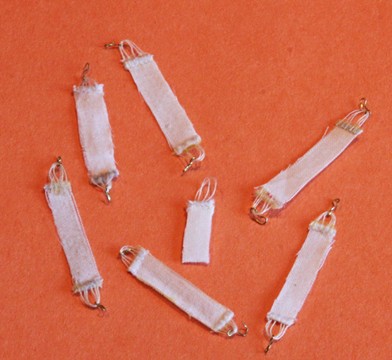
Let me outline how I made the latter.
I started with some light weight cloth (same as what I used for the sails on the full scale Connie) and cut one inch wide strips.
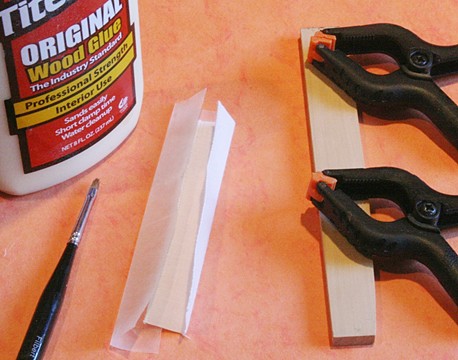
Those were then overedge stitched on my wife's sewing machine.
They were folded in half and the edges glued together with some PVA.
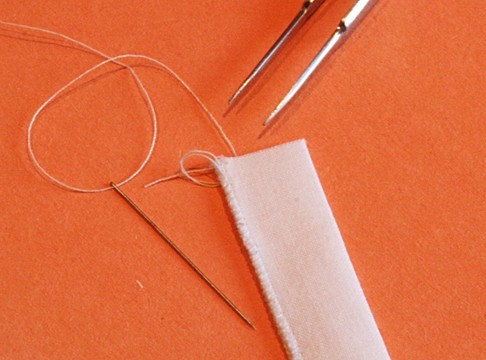
I made some loops with white thread (the ends of the thread were glued to the back side with some CA glue).
And then the piece was cut off.
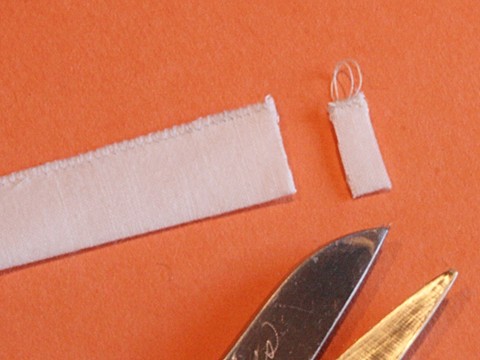
All I need are about twenty more

- bhermann, _SalD_, CaptainSteve and 7 others
-
10
-
"A bit too thick and wide". ????? I'm with the others Jay. Looks good from here. Would some touch up sanding in situ fix it?
It is the story of my life, Mark.
But it will take a lot more than a 'touch up sanding' for me to be where I was a few years ago.
I finally decided to smooth the outside of the frames a bit and cut those ugly tops off the port side.
I needed to do that in order to locate and fix the gun ports, but it also looks a bit better.
The top cut is well above the final rail, so there is room to maneuver.
Likewise there is a lot more sanding/filing to get the hull smooth enough for planking.
I'll concentrate on this side before doing the starboard side.
-
Might I add one bit of advise about your choice.
Is there anything special about these ships that attracts you attention?
Are you at all interested in the history of them, be it the battles they were involved in, etc.
Being that you have built WWII ships (albeit out of plastic) I am sure you know a bit about their service in the Pacific.
-
Thank you guys, but there are a few 'happenings' or plain screw-ups.
I am sure some of you may have noticed, and I really know where and why.
But, again, this is below decks and barely visible in the final show (I hope).
Just now I started to sand the outside of the frames and that is going pretty smoothly.
I need to do this before the gun port openings can be located and cut.
More later.
-
This may sound strange, but while doing the simulated caulking of the deck on my Harley almost a Harvey, I started wondering if the eye-liner products (for women) could do the same job as a graphite pen.
I have found that both the products are smearing if not being careful, but the eye-liner will do a better covering in one stroke.
Will update later with pictures. But this truly works!

And considering all the Admirals in our Forum it's time for you to open up the make-up boxes. You have a great tool nearby!
We never heard about Nirvana's experiment that I am aware of.
So I tried it with one of my admiral's eye liner and compared it to a marking pen on two pieces of the same planking wood.
Revlon does not excite me. The results are hardly any different in application and results. I didn't even take a picture.
There have been numerous suggestions here (and I won't go into what I use), so I will leave it up to 'what ever works for you'.
- Canute, CaptainSteve and mtaylor
-
3
-
Just one more, George.
This one is for Euclidean, our new member.
It was on November 11, 1675 when Gottfried Leibniz demonstrates integral calculus for the first time by finding the area under the graph of y = ƒ(x).
- ScottRC, mtaylor, CaptainSteve and 3 others
-
6
-
-
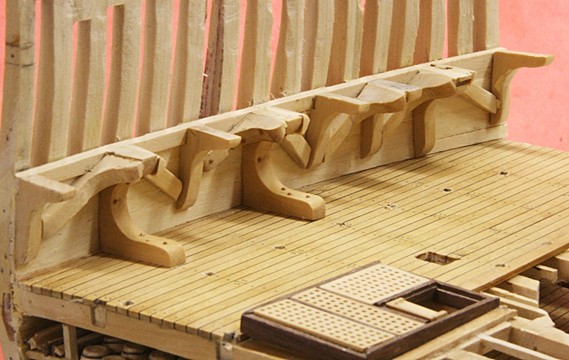
Making the knees
Let me (for this record) show how I go about making the knees. The example is for one of the hanging knees on the berth deck level, but the method also applies to all of the knees on the other decks (except for dimensions and shape)
I start with a piece of 3/16 inch thick boxwood, lay-out the sizes and cut the round part of the shape using a Forester drill at 1/2 inch.
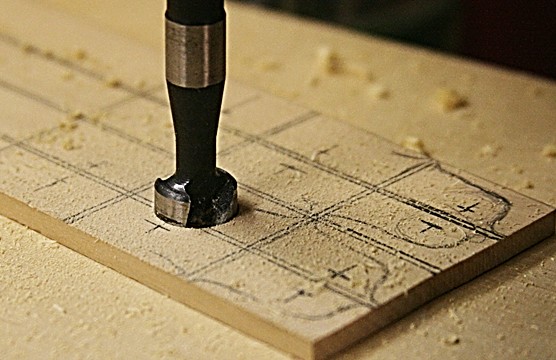
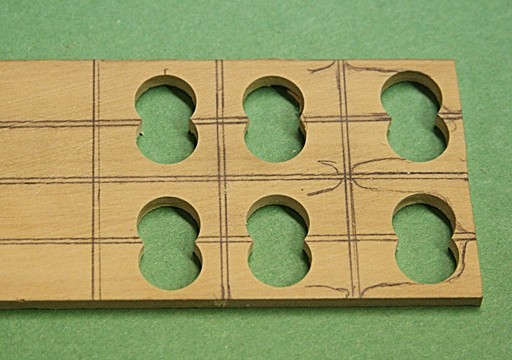
Then I cut each piece from that to rough shape using my small band-saw.
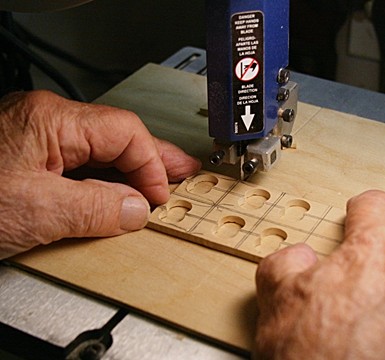

A disk sander is used to shape the part, fitting it to the spot I want.
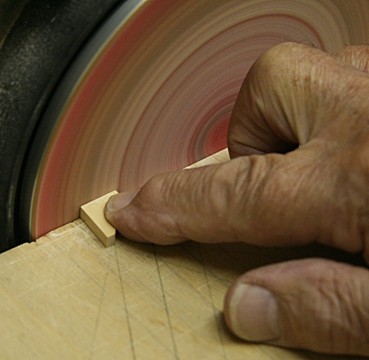
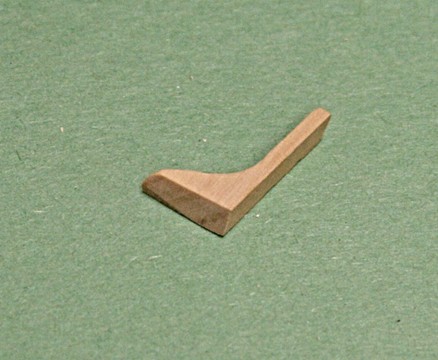
After it fits pretty well, I glue it in place.
Some touch up work will be necessary, because these pieces are difficult to get right the first time.
-
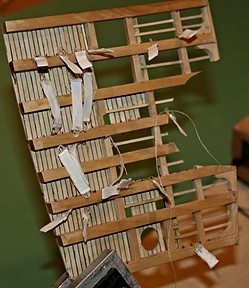
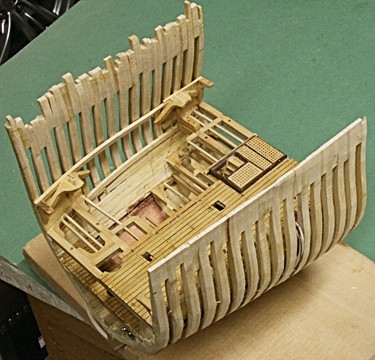
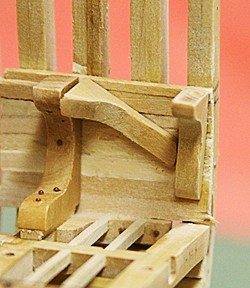
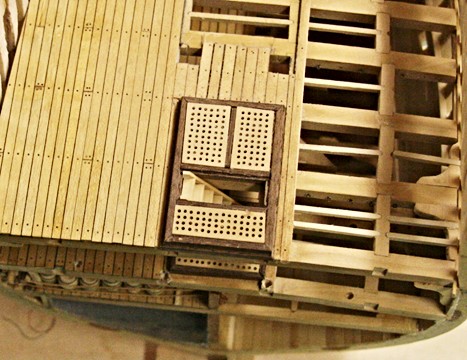
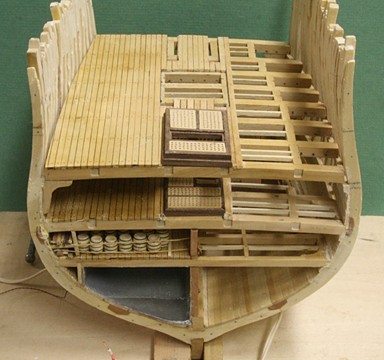
Looking down on the gun deck.
The berth deck is glued in place but all (or most) pieces associated with the gun deck are still loose.
I just finished making the stairs that go down to the berth deck, and as you can see, the posts are not yet cut to length.
I still need to make the 'hanging knees' which are going to be tricky because of the compound angles.
Again the right hand side of the gun deck will have parts of the beams, carlings and joist cut away.
I am getting closer to do that, but I decided to make all the parts you see so they line up before I 'destroy' them.
-
Keep up the great work Cap't, I am learning quite a bit from your build.
David B
I'll go along with learning a bit from the build, but indeed a lot more about the way the Aussies talk Down Under.
What I mean is that your King's English is a bit dated. Are you perhaps from the Perth area?
Yes, Stevy-boy, your are on the right path to stardom with a stern like that.
- mtaylor, dgbot, CaptainSteve and 2 others
-
5
-
Your Connie is looking good. How are you going to finish it?
David B
There still will be little or no paint and the port side will have the outside planking and copper plates.
Both sides will have the channels and deadeyes while the starboard side will have a few outside planks but no copper.
So the top rails will be in place, but the spar deck will still have part of the structure shown.
A foreshortened mast will be there but no rigging to speak of.
I hope that all makes sense, David.
-
-
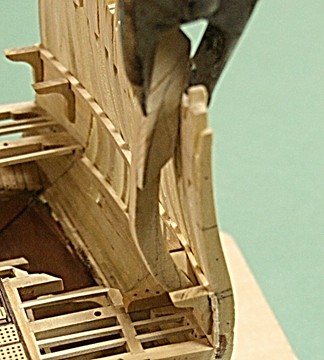
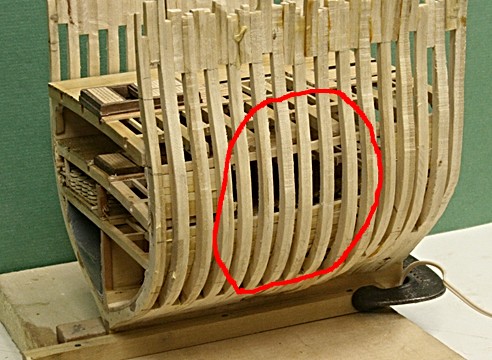
Let me expand on this a bit.
The outside of the hull (frames) is extremely rough right now and I will start working that soon.
However, what I wanted to show is where the frames (and other parts of the deck beams, carlings and joists) will be removed.
There will be two cannon openings on the gun deck. One towards the left which happens to be only partly there (which is good so I can show the details of the construction).
The top of the cut out will be just underneath the channel so I can still include that and the deadeyes, but only a few of the chain plates.
- CaptainSteve, dgbot, Canute and 5 others
-
8
-
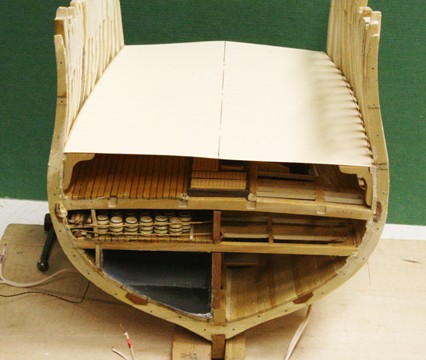
Right from the beginning I had in mind to make the various decks on the bench and then use a template to cut and fit them between the frames. The pictures below gives you the idea and it seems to work.
There are some minor flaws that I have to correct. The standing knees are in place but the top edges don't match the curvature of the beams. So I have to do some work there.
In fact the knee in the starboard front needs to be replaced all together.
Then I will cut the deck part way to show the lower decks along the starboard side.
-
Lunch, anyone?
Have a blast!!
- Jack12477, avsjerome2003, mtaylor and 2 others
-
5
-
-
-
-
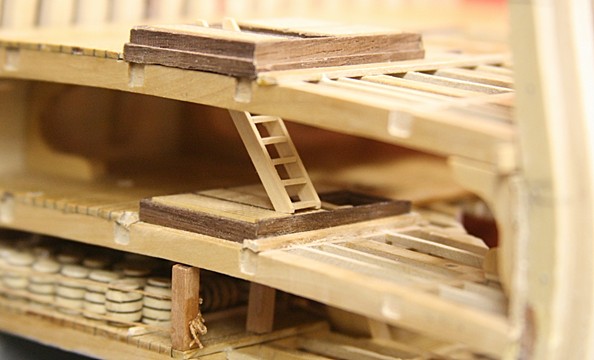
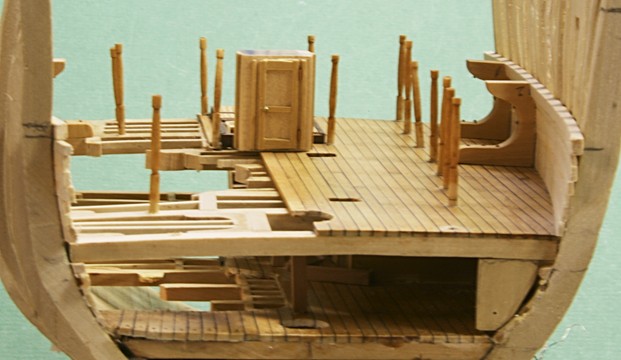
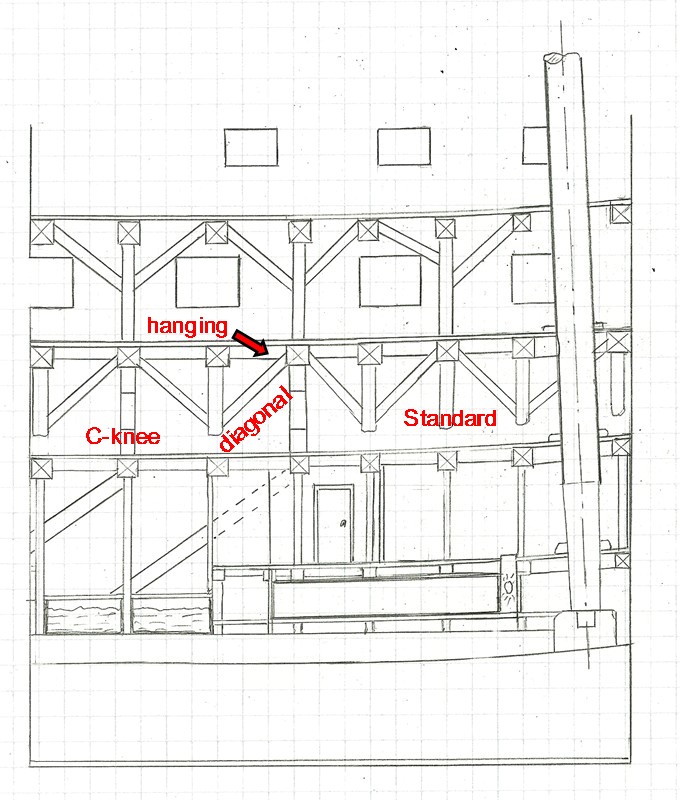
Looking aft
There will be a forest of posts (three more down the center to be made and two along the front). Again, I don't want to cut them to length and glue them in place until I know how high.
I juggled and carved the C-knees to fit the bulwark above the beams. It turned out that towards the bow there are fewer than I expected.
I also show the ensign cabin with the door on this side. Although private, this must have been cramped quarters.
What will make a difference is when I make and install the other knees:
1. the standard knees that stand vertical against the bulwark but don't go all the way to the deck.
2. the hanging knees that go diagonally from the bulwark to the deck beam above.
3. the lodging knees that go horizontally between the beams and against the bulwark (some of these I have installed on the orlop deck).
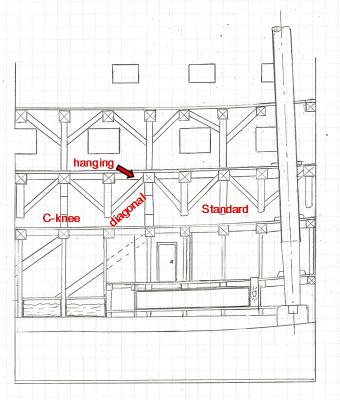
The diagram above is an older version with the water tanks too small. But it does show where the various knees go on the berth deck to support the heavy guns above.
I think the berth deck will be mundane but lots of hammocks should help.
- Canute, GLakie and CaptainSteve
-
3

Constitution by Geoff Matson - Model Shipways 2040 - 1/76 scale
in - Kit build logs for subjects built from 1751 - 1800
Posted
This is great work, Geoff.
It looks like you are doing part of the bow rigging on the bench. Good idea.
It is a bit easier to get to those tiny blocks for the jib sheets, etc.
Keep it up.