HOLIDAY DONATION DRIVE - SUPPORT MSW - DO YOUR PART TO KEEP THIS GREAT FORUM GOING! (Only 20 donations so far - C'mon guys!)
×


Baker
-
Posts
4,234 -
Joined
-
Last visited
Content Type
Profiles
Forums
Gallery
Events
Everything posted by Baker
-
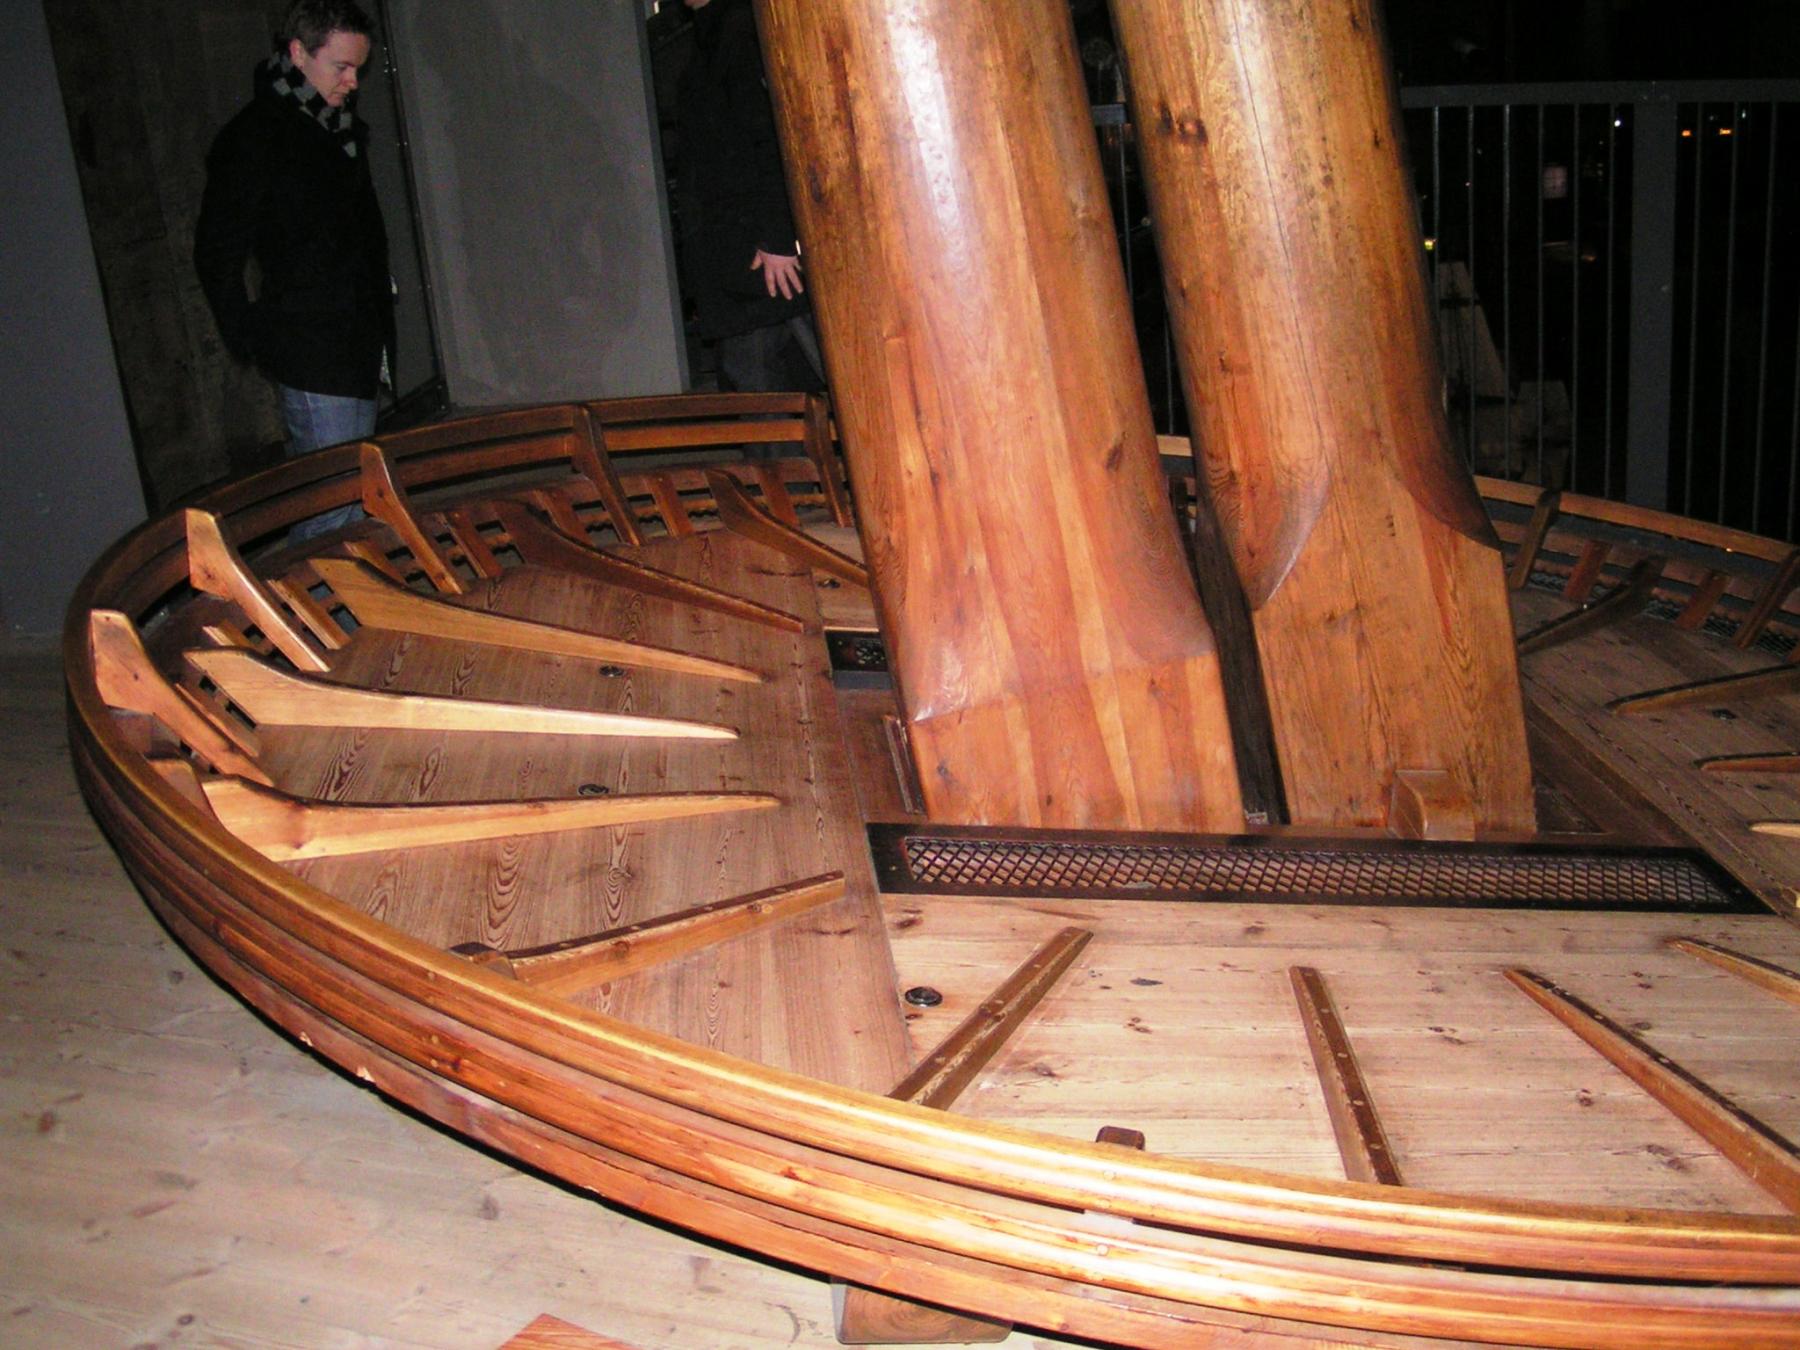
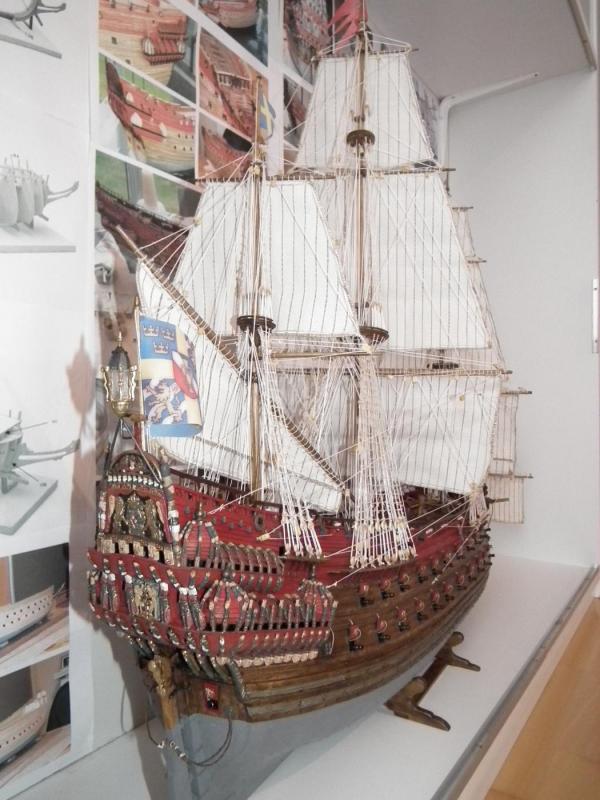
 Hey Michael Nicely done as always Here you have a picture of the other side Taken in the museum. Take a look at the Wasa plans from Billings. Who also use a "fid" BB490 Wasa_Instruction-2-min.pdf Groetjes Greetings Patrick
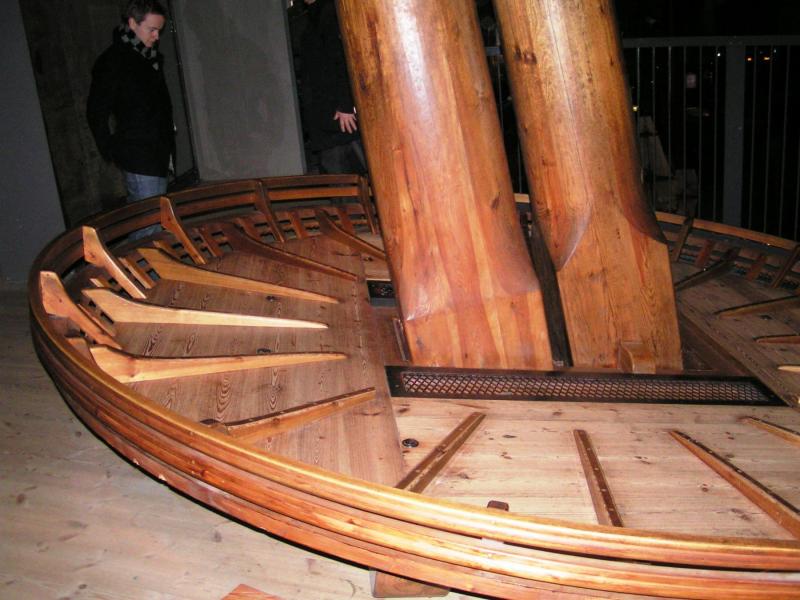
-
Nice work Funny, We use the same tool to cut round circels from styrene sheet. A simple tool which cuts always nice round shapes. Groetjes Greetings Patrick
- 473 replies
-
- 7
-

-
- greek bireme
- dusek
- (and 1 more)
-
Thanks, Visiting the Batavia is on my wish list. Maybe next year. Index : see post 1 Groetjes Greetings Patrick
- 756 replies
-
- 1
-
-
- galleon
- golden hind
- (and 2 more)
-
Well done Robin !! A very highly detailed model, to be proud of. This has nothing to do with ships but is very interesting for you (and me) . You should try it. 1 bottle of cheap cognac, NOT brandy 1 orange (prick with a knife in it) 40 lumps (klontjes in dutch) of sugar 40 coffee beans Do this in a pot and wait 40 days, but shake it every 10 days yummy ... Groetjes Greetings Patrick
- 473 replies
-
- 4
-
-
- greek bireme
- dusek
- (and 1 more)
-
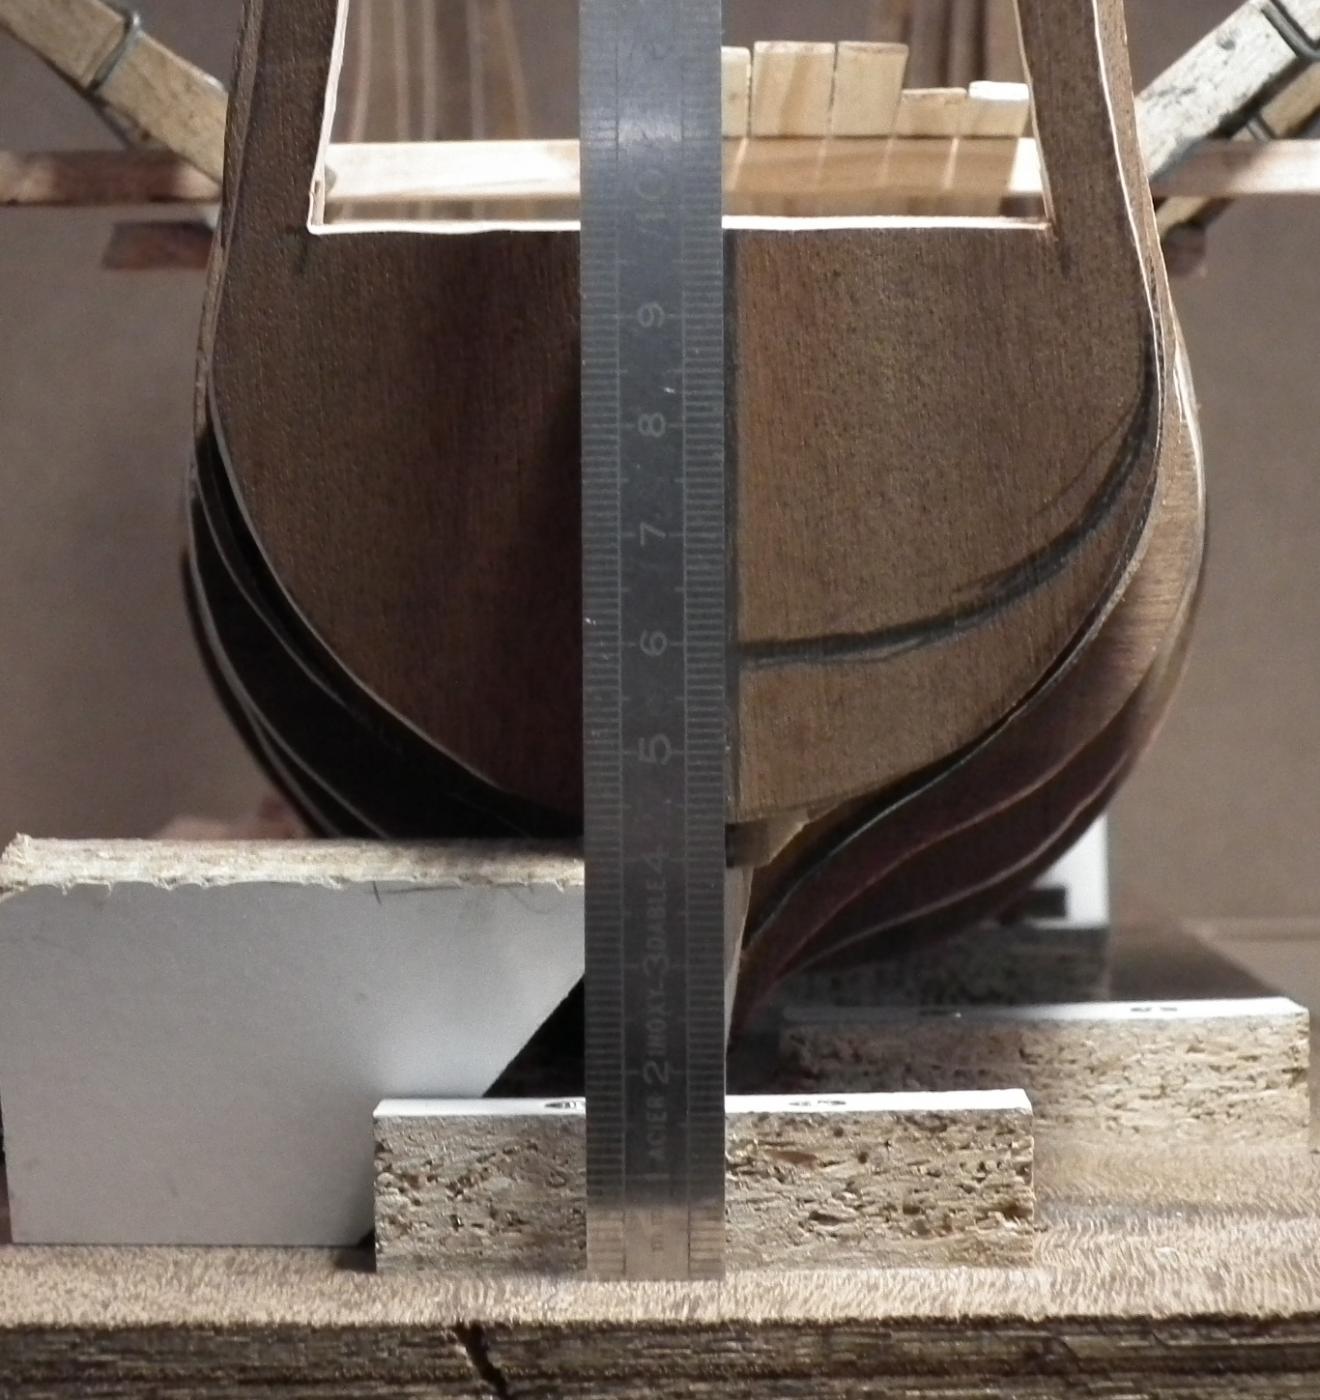
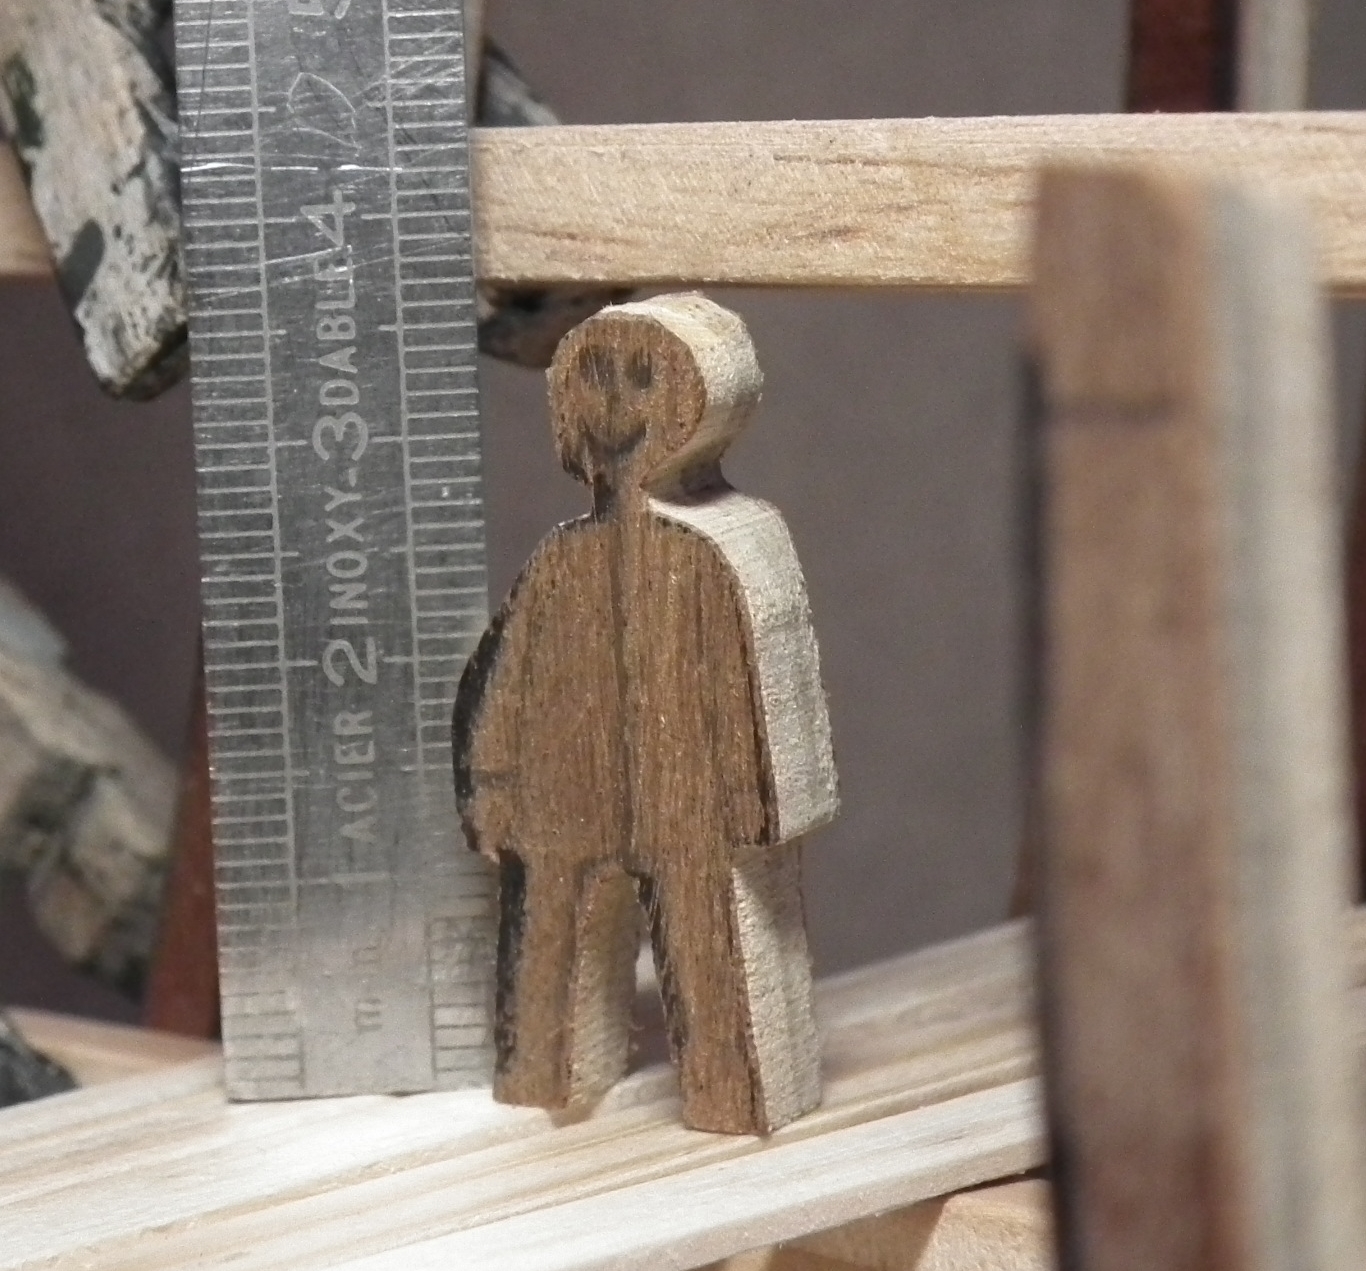
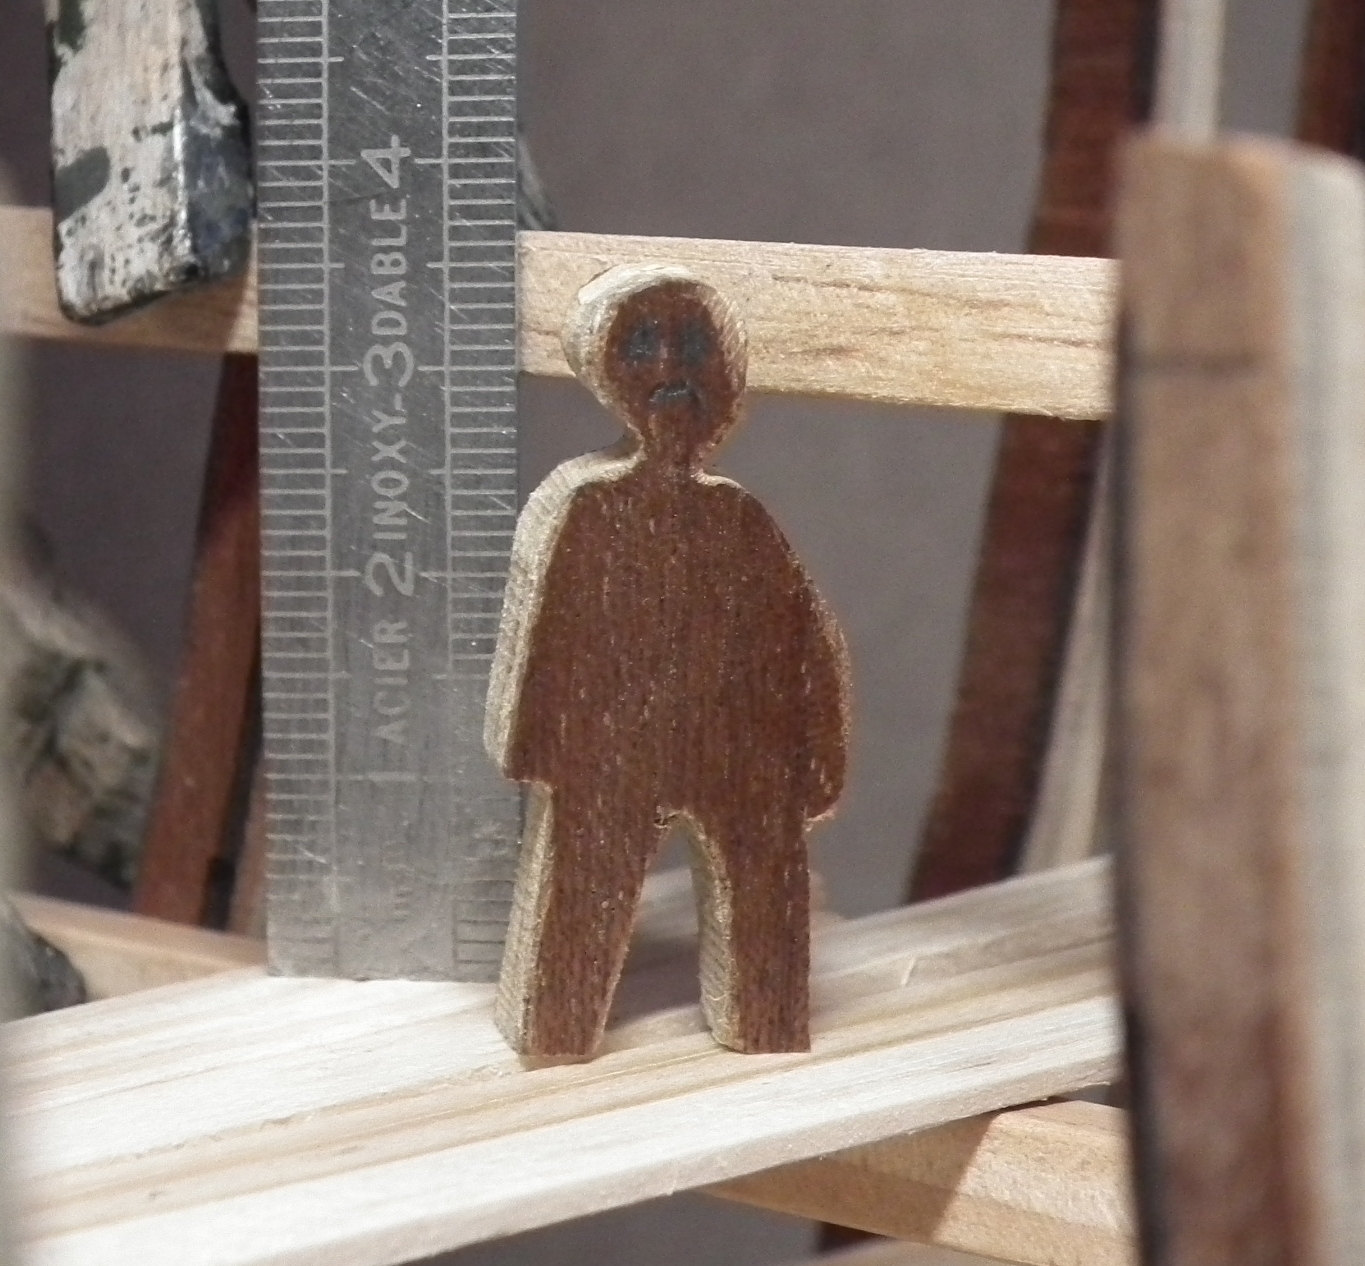
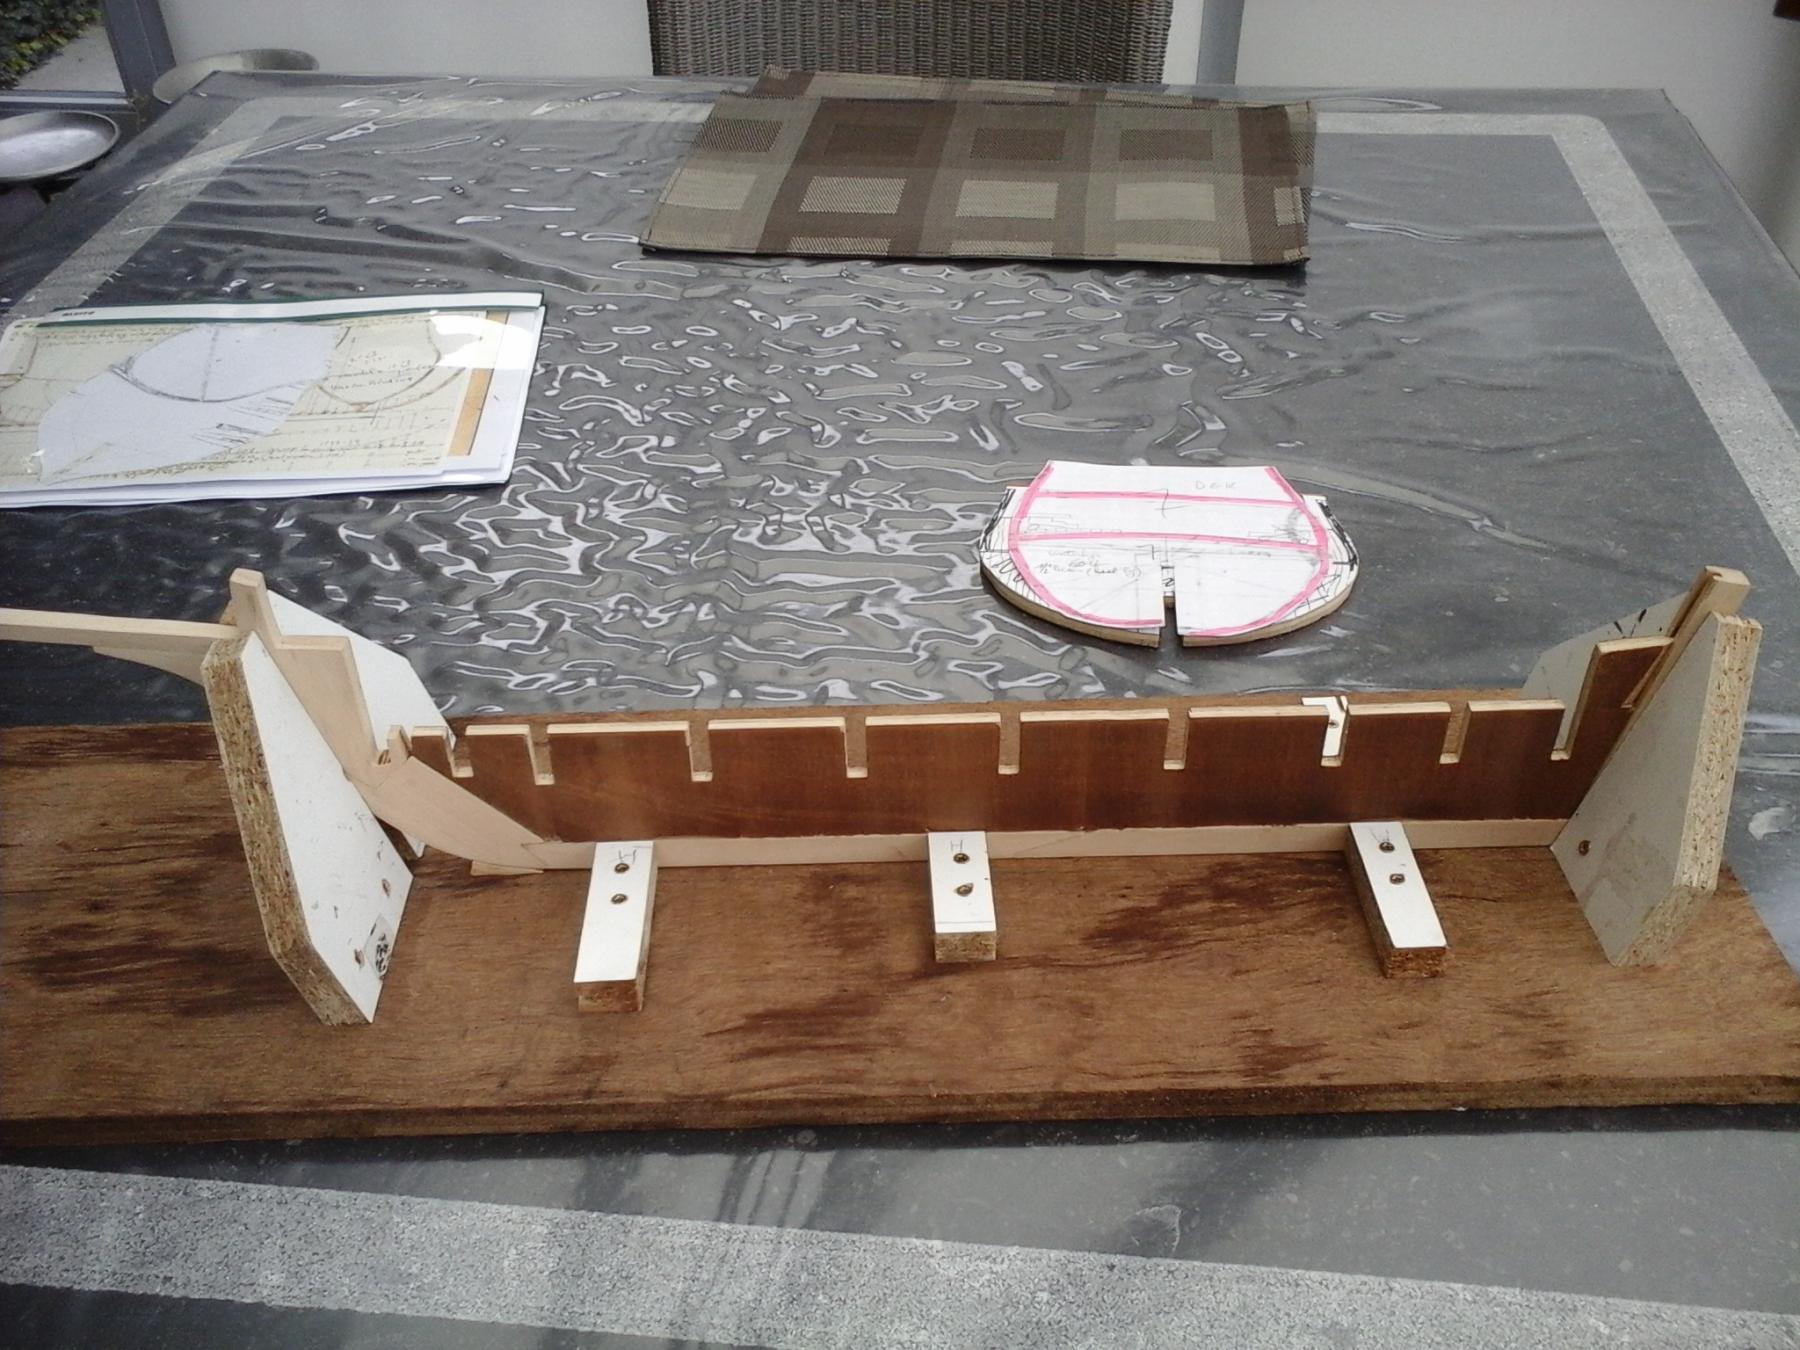
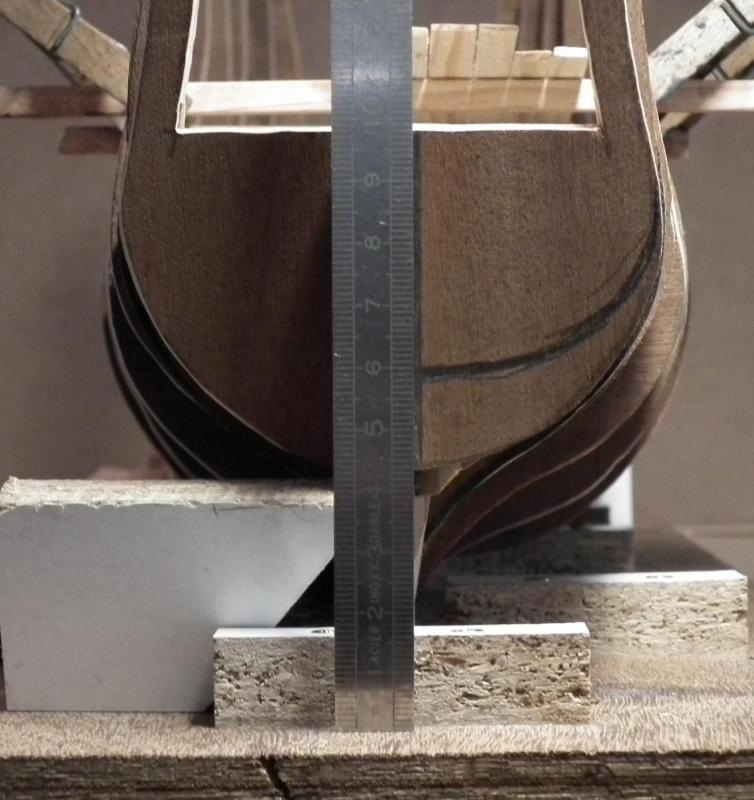
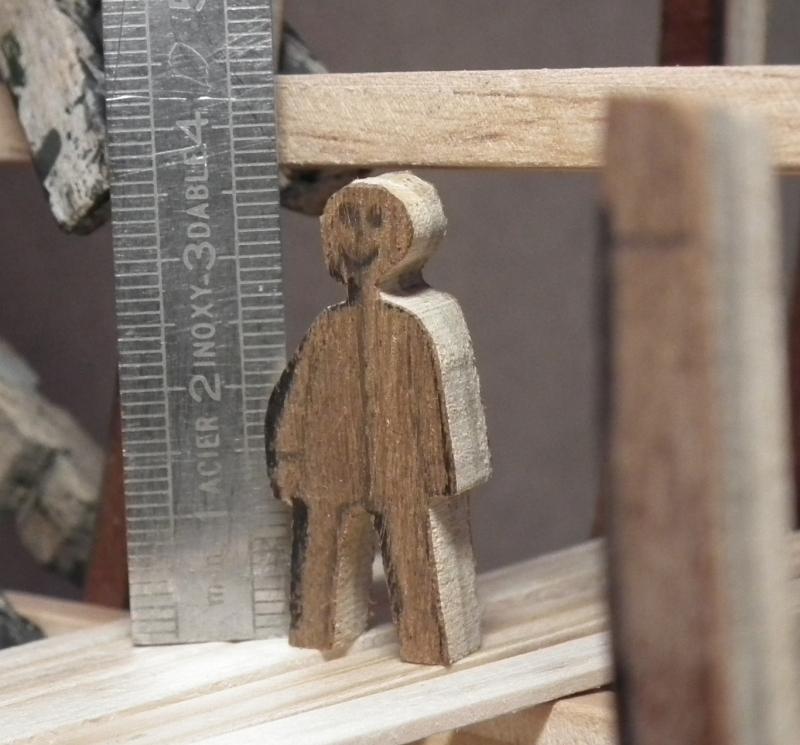
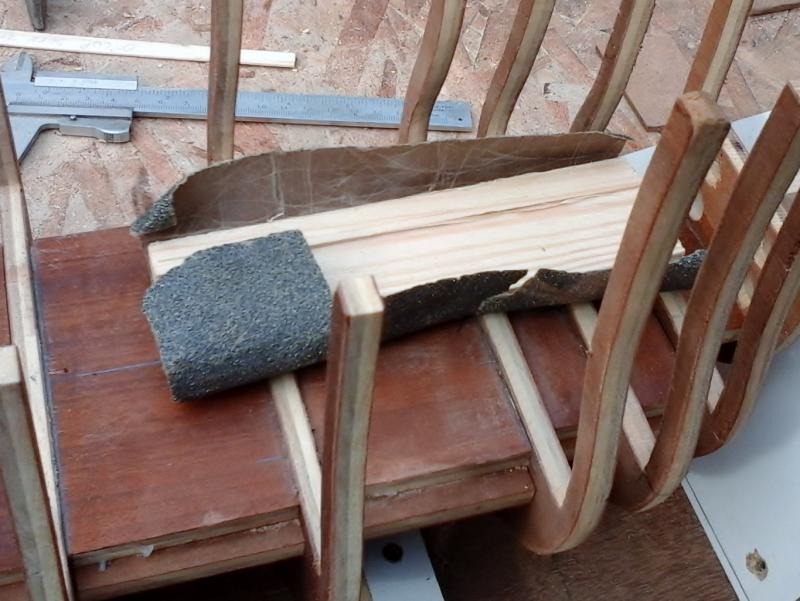
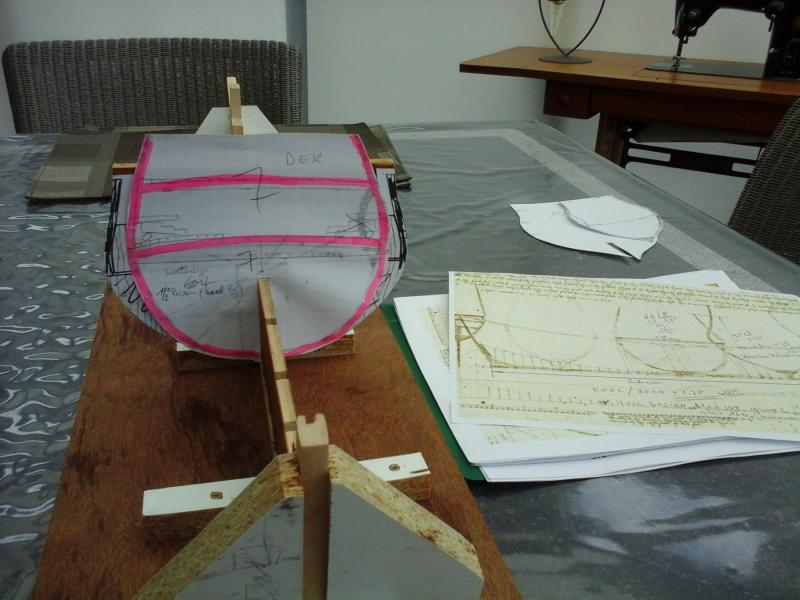
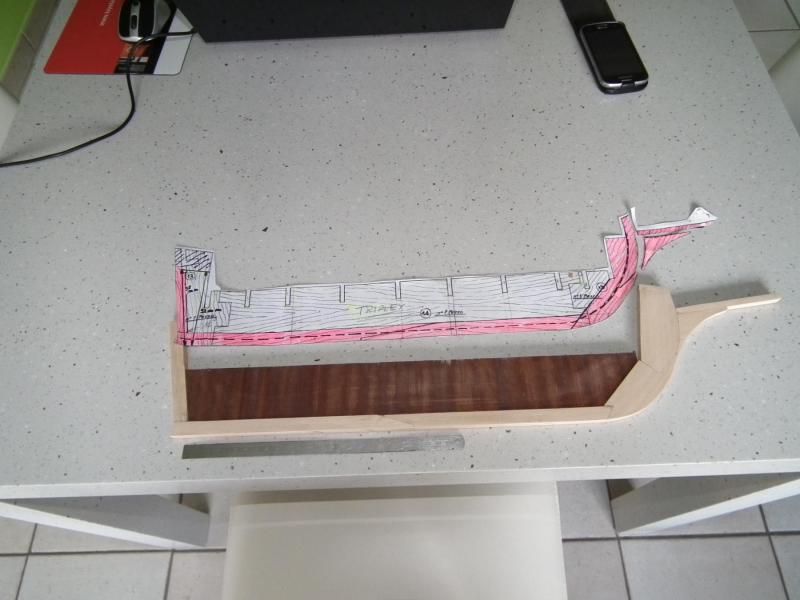
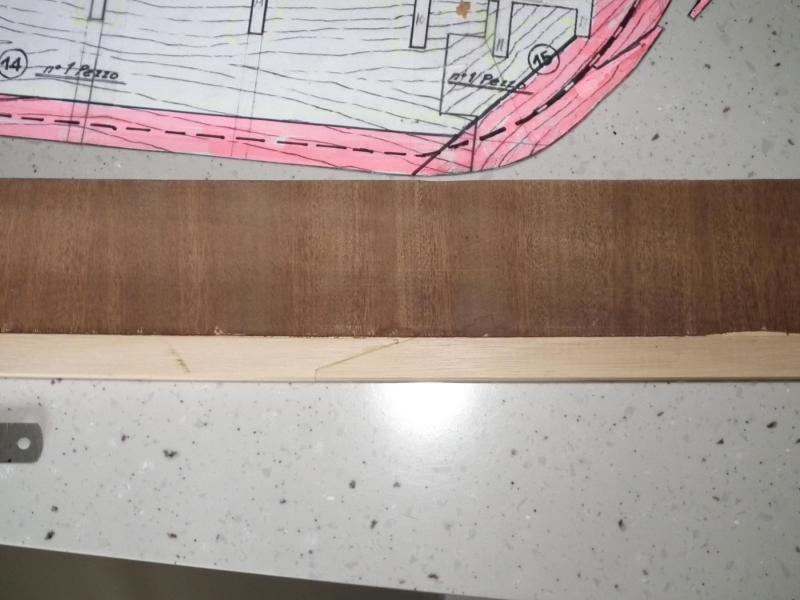
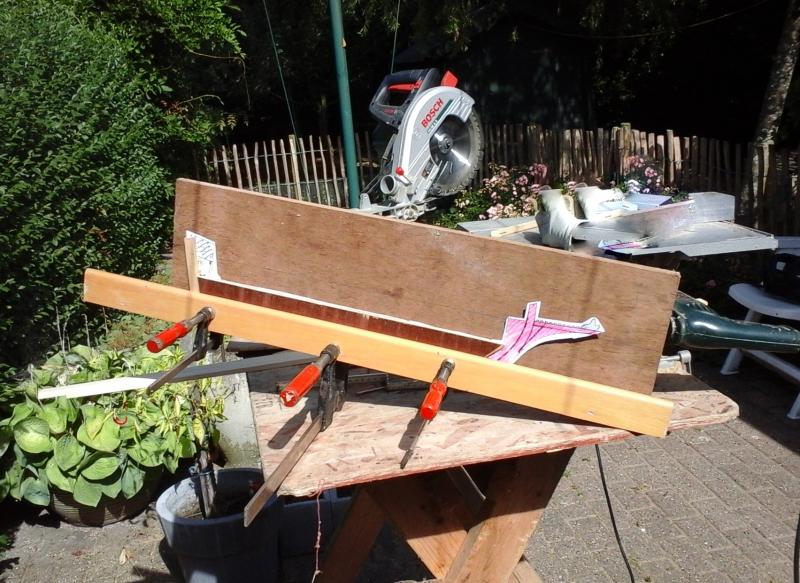
Thanks for the info about the stern. have checked this and will certainly change this later the book looks interesting. I ask it for my Christmas at the Admiral. Now, The whole idea behind my question about the height of the deck I want open cannon ports And I don’t like the building method as in my Wasa (black holes with semi cannons). That's why I want a deck with enough detail. So, that if you look through a porthole. You do not see black hole with a part of a cannon. But a real cannon and a deck. I hired an assistant. He is 1m60 tall, very cheap and is satisfied with no room and no food. But. A deck of only 1m60, is too low he thinks . but there is still plenty of time to think about this And good news Yesterday we had beautiful weather and no family visits or jobs So, there was wood sawed and the part where te deck is too be attached is sanded to So that I can start with my deck in my hobby room. Without having to make a lot of dust... so Mrs. Backer stays happy also Groetjes Greetings Backer


- 756 replies
-
- 7
-
-
- galleon
- golden hind
- (and 2 more)
-
Thanks everyone for following my build log. And thanks Steven to match with my vision on the dimensions. Well, now I need some help. I can not find what the height of the cannon deck (orlop deck) should by. Does anyone know the height between 2 decks I think it is 1m60 (The average length of a man in the 16th century) Groetjes Greetings Patrick
- 756 replies
-
- 3
-
-
- galleon
- golden hind
- (and 2 more)
-
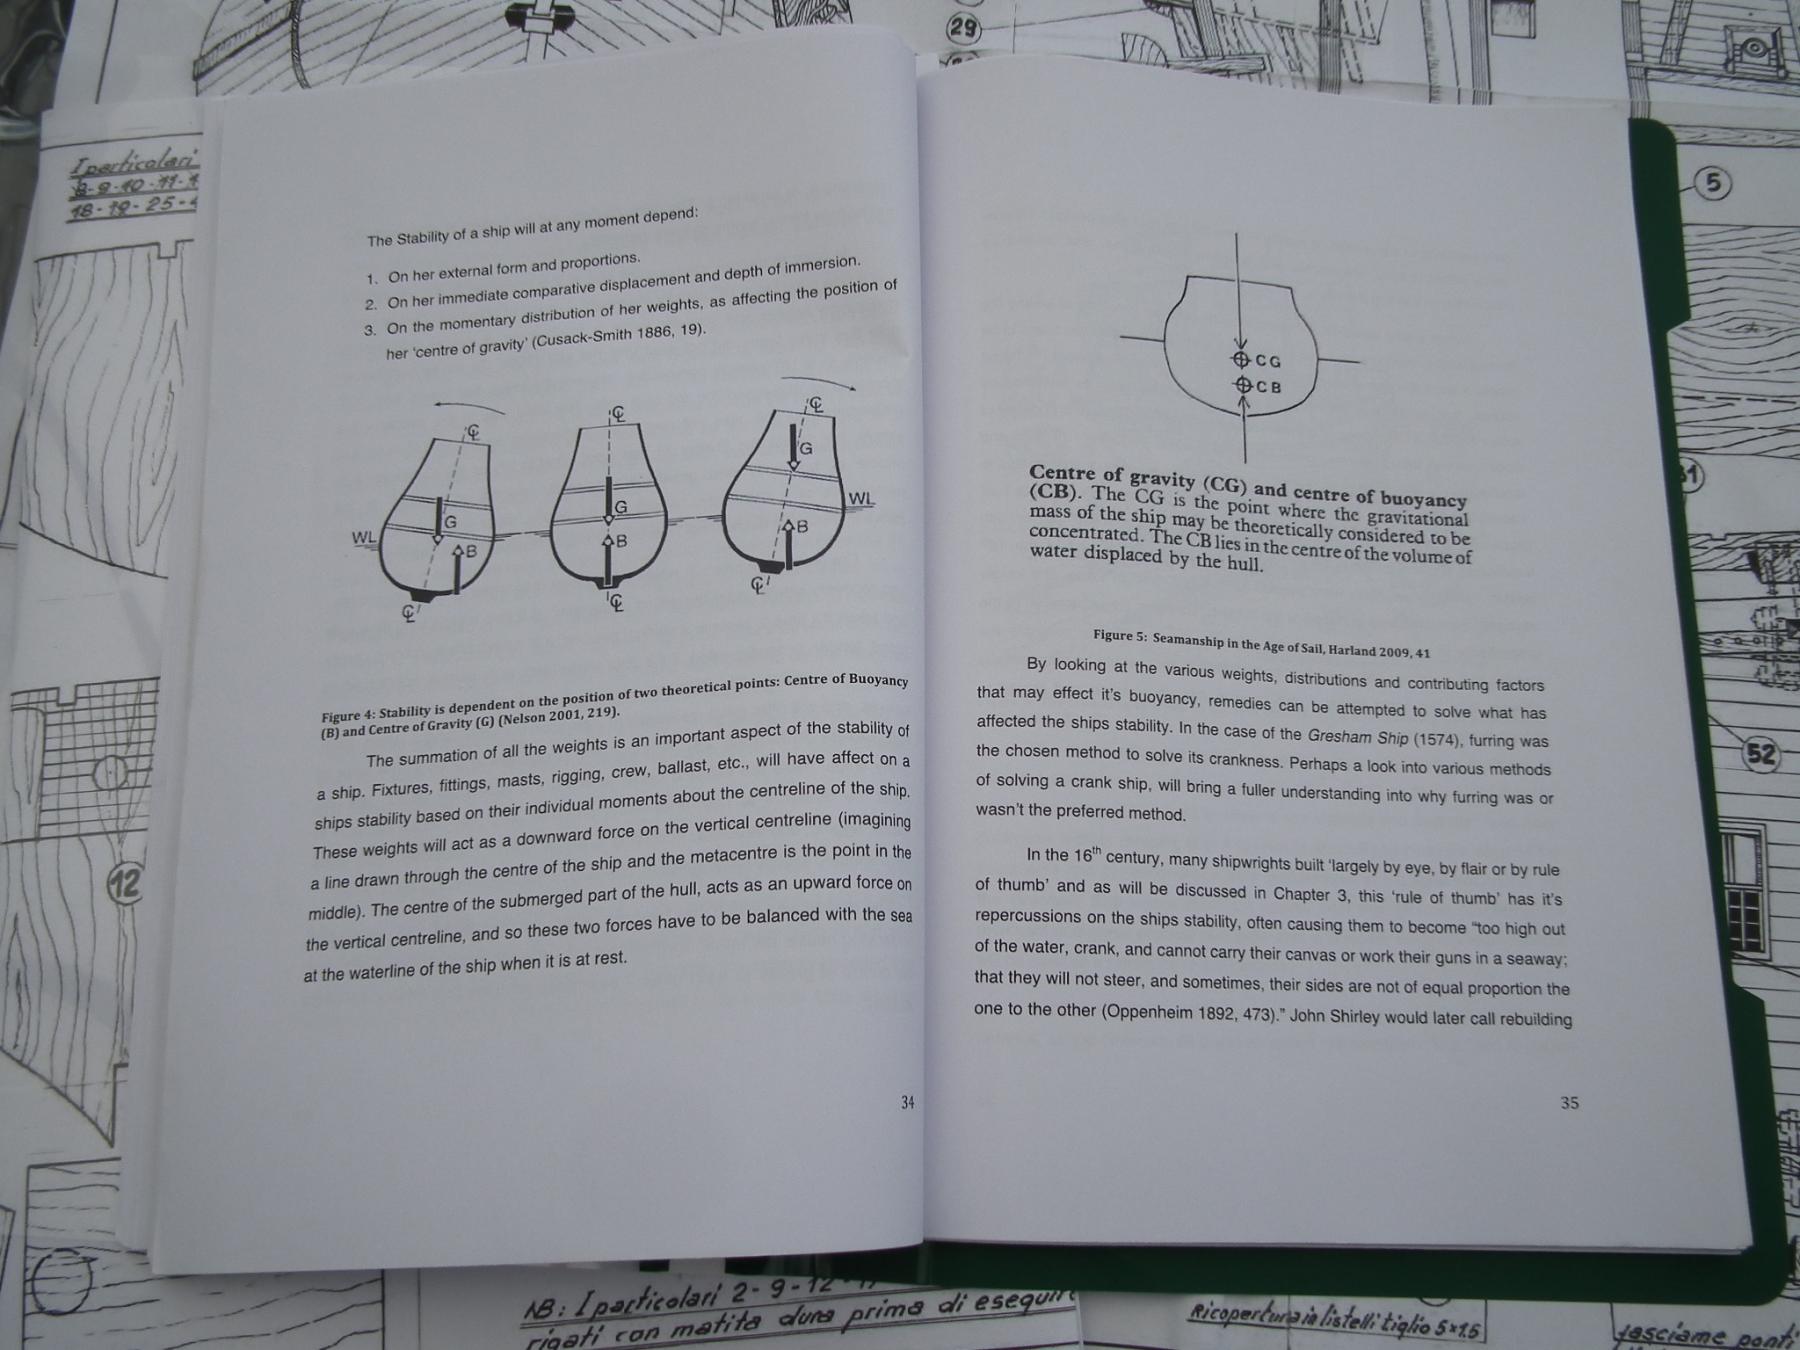
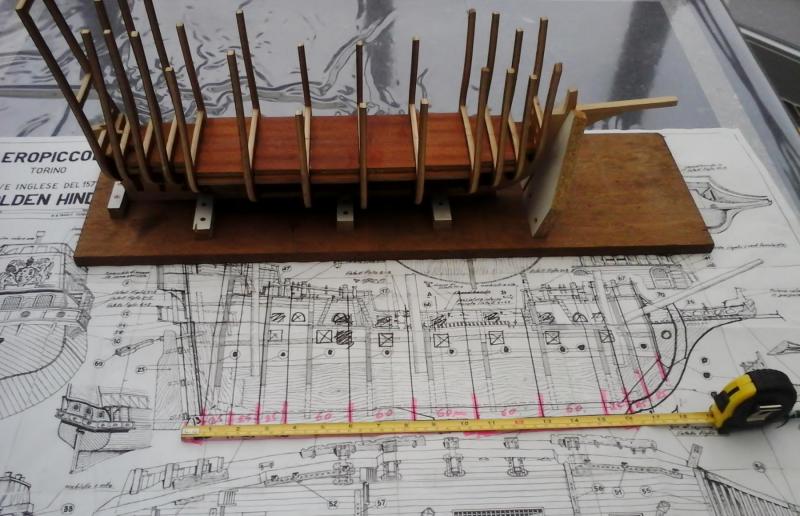
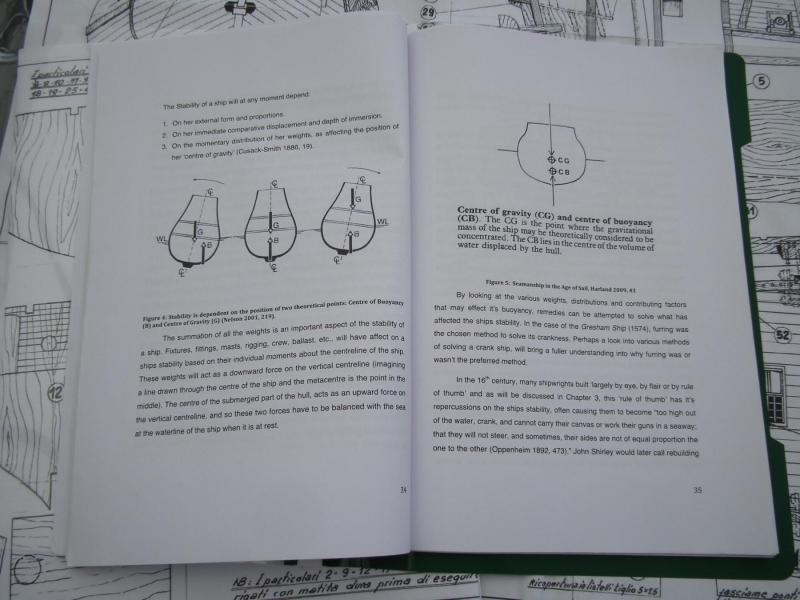
Well, the shipyard is on hold. But here is something to disscus about. Before drawing the frames i had 2 difficult questions : 1 . What are the dimensions and tonnage of the Golden Hind? Well, even Wikipedia does not match wikipedia (in english): length (deck) 31m, beam : 6.1m, tonnage 100 - 150 ton wikipedia (in german): length 37m, beam : 5.5m, tonnage ,? ton Most sources say 100 and 120 tons. Occasionally 150tons, and somewhereone I found one that says 180 tons. The length is between 31 and 37 m.Length on deck 25m. So no one really knows the right answer. 2. What is the scale that I'm going to build? And what will be the dimensions and tonnage of the Golden Hind compared too the scale i am building After some calculations. The scale of my model will be 1/45. Too calculate the scale and dimensions i used the help from a formula. Keel x Beam x Depth Keel x Beam x Depth ----------------------------- = Tonnage or (the easy way) --------------------------- Keel + Beam + Depth 100 And 1m = 3.28 feet. My model is : Keel 0.42m - Beam 0.15m - Depth 0.075m - scale 1/45 Keel = 0.42x45x3.28 = 61.99 feet Beam = 0.15x45x3.28 = 22.14 feet Depth = .075x45x3.28 = 11.07 feet This gives following dimensions Tonnage : 161 tons or 154 tons with the easy formula. Length on deck will be : 22.95m = 75.27 feet Length of the hull will be 32.6 m = 106,92 feet Overall length will be : 37 m = 121.36 feet width of the hull will be : 6.75 m = 22.14 feet Depth will be : 3.37m = 11.07 feet ratio keel / beam : 2.8 How to get between the 100 to 120 tons and retaining the length of 31 to 37m (like mentioned in most sources). By reducing the beam and - or depth. Suppose : Keel = 0.42x45x3.28 = 61.99 feet Beam = 0.13x45x3.28 = 19.19feet Depth = .065x45x3.28 = 9.6 feet This gives 113 tons or 114 tons with the easy formula. But in doing so, the ratio keel / beam changes to 3.23 If you compare the studies about the Gresham ship, furring and ship building in the 16th century. Than a keel/beam ratio of 3.23 leads almost to a “crank ship” A logical consequence is that a ship of that length with 100 to 120 tons is quite narrow and maybe not stable. Especially if you then put all the guns on the upper deck. As on some ship models. Unless one increases the depth drastically. in order to increase the stability. I was never a highly educated student (now also not). But : A ship that could sail around the world and could conquer a bigger Spanish galleon. Must be seaworthy and should by a stable platform to fire his guns. If anyone thinks that I am completely wrong about this Please let me know. I have all winter to think about it used links for this study http://www.maritimearchaeology.dk/downloads/Furring%20in%20light%20of%2016th%20century%20ship%20design_web.pdf http://www.maritimearchaeology.dk/downloads/Full%20thesis%20bates.pdf http://www.wessexarch.co.uk/files/PMA41.2Auer-Firth.pdf http://nautarch.tamu.edu/pdf-files/Myers-MA%201987.pdf http://www.patrimoniocultural.pt/media/uploads/trabalhosdearqueologia/18/22.pdf http://www.bricksite.com/uf/40000_49999/48372/7e570040536647340b5566f37c70ca11.pdf Groetjes Greetings Patrick
- 756 replies
-
- 5
-
-
- galleon
- golden hind
- (and 2 more)
-
My opinion A kit. so old. The decals will probably fall apart if you put them in water. The plastic looks ok. But if it is from a "short run" manufacturing. then The quality will be very low. You will want, or need to replace many parts (Extra cost). And You will, after much work, end up with a model which costs almost as much as a new model kit. But with less work. I would not do it Groetjes Greetings Patrick
-
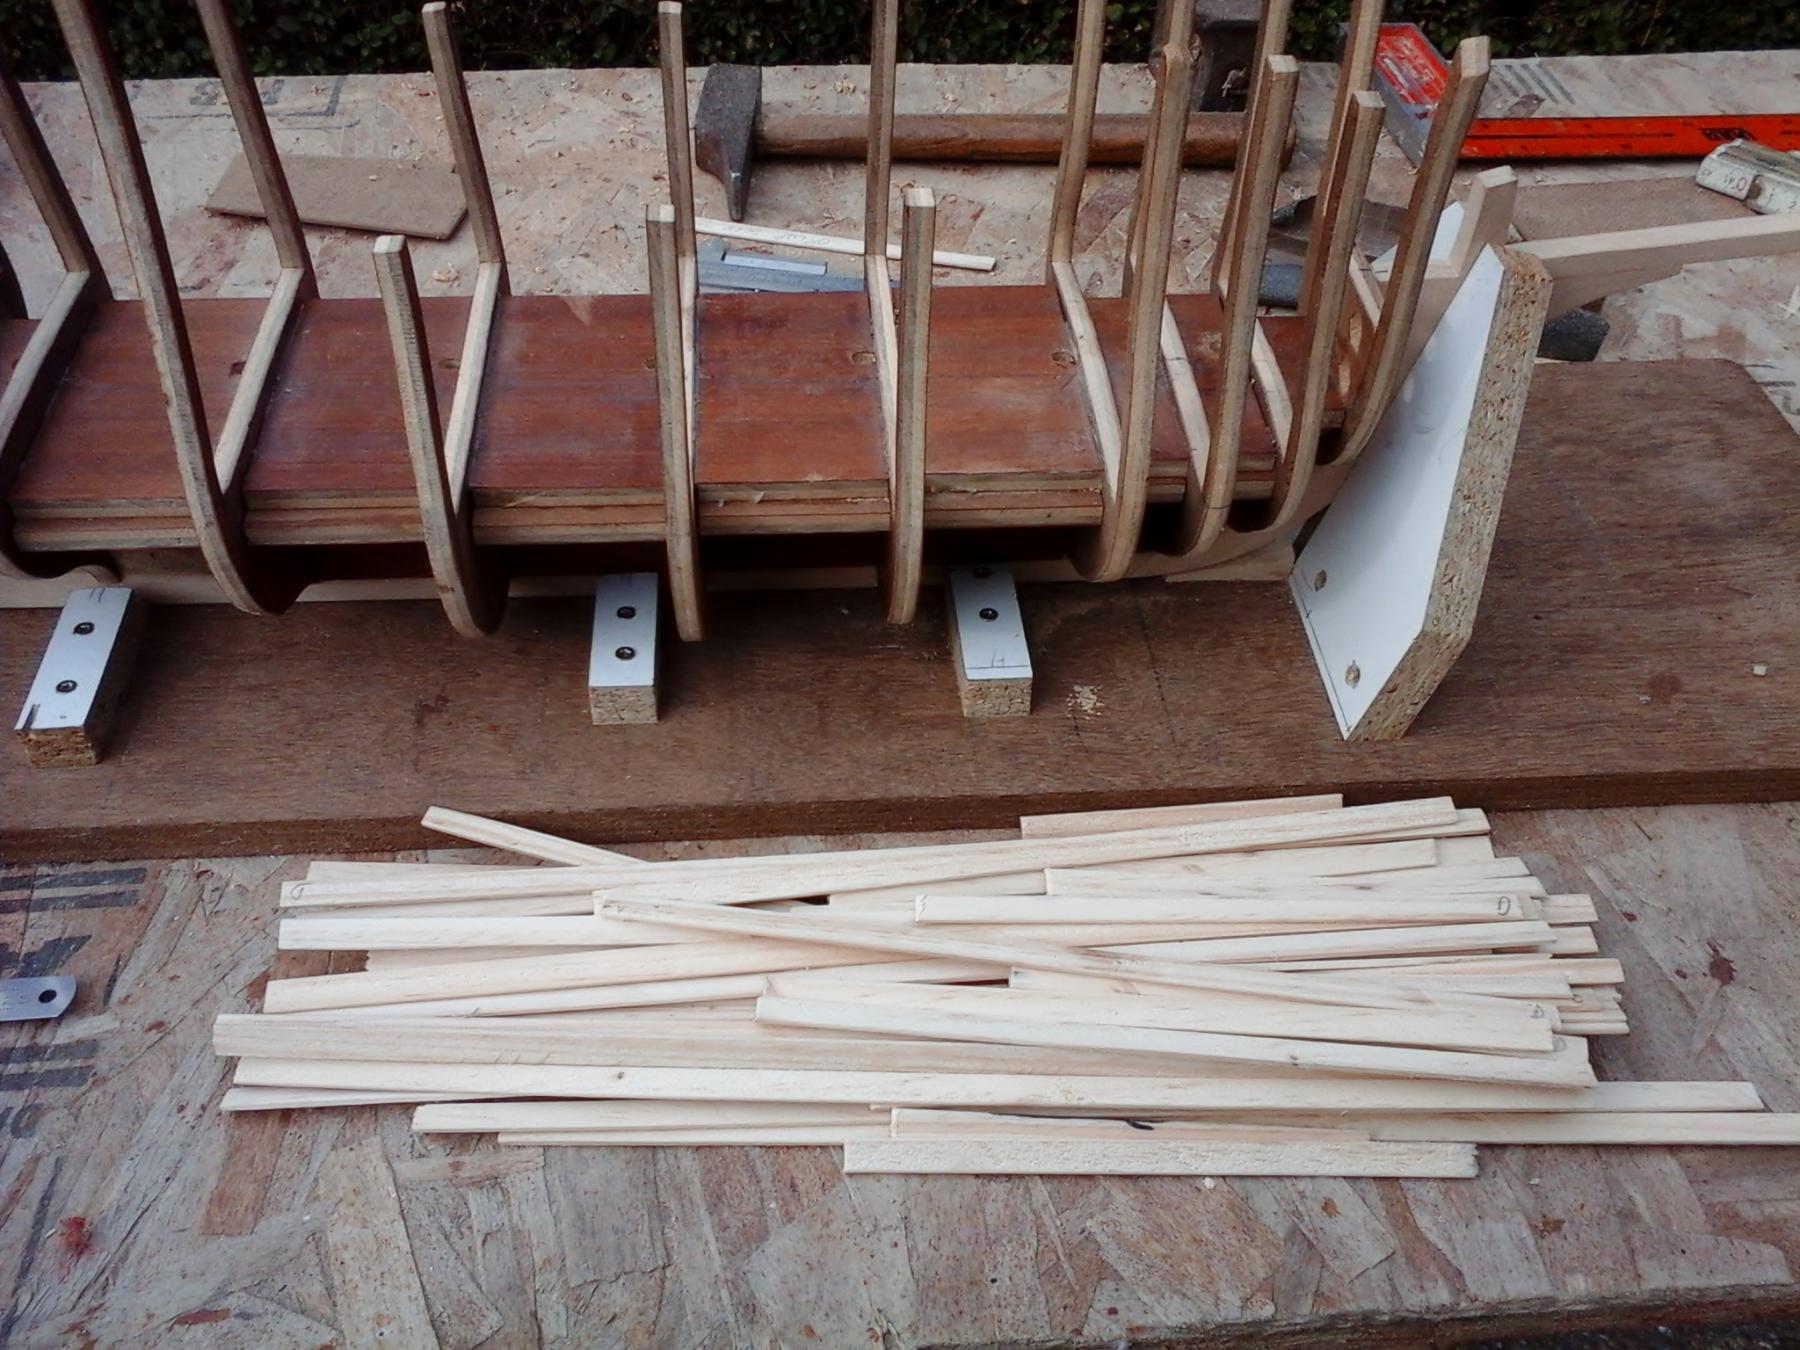
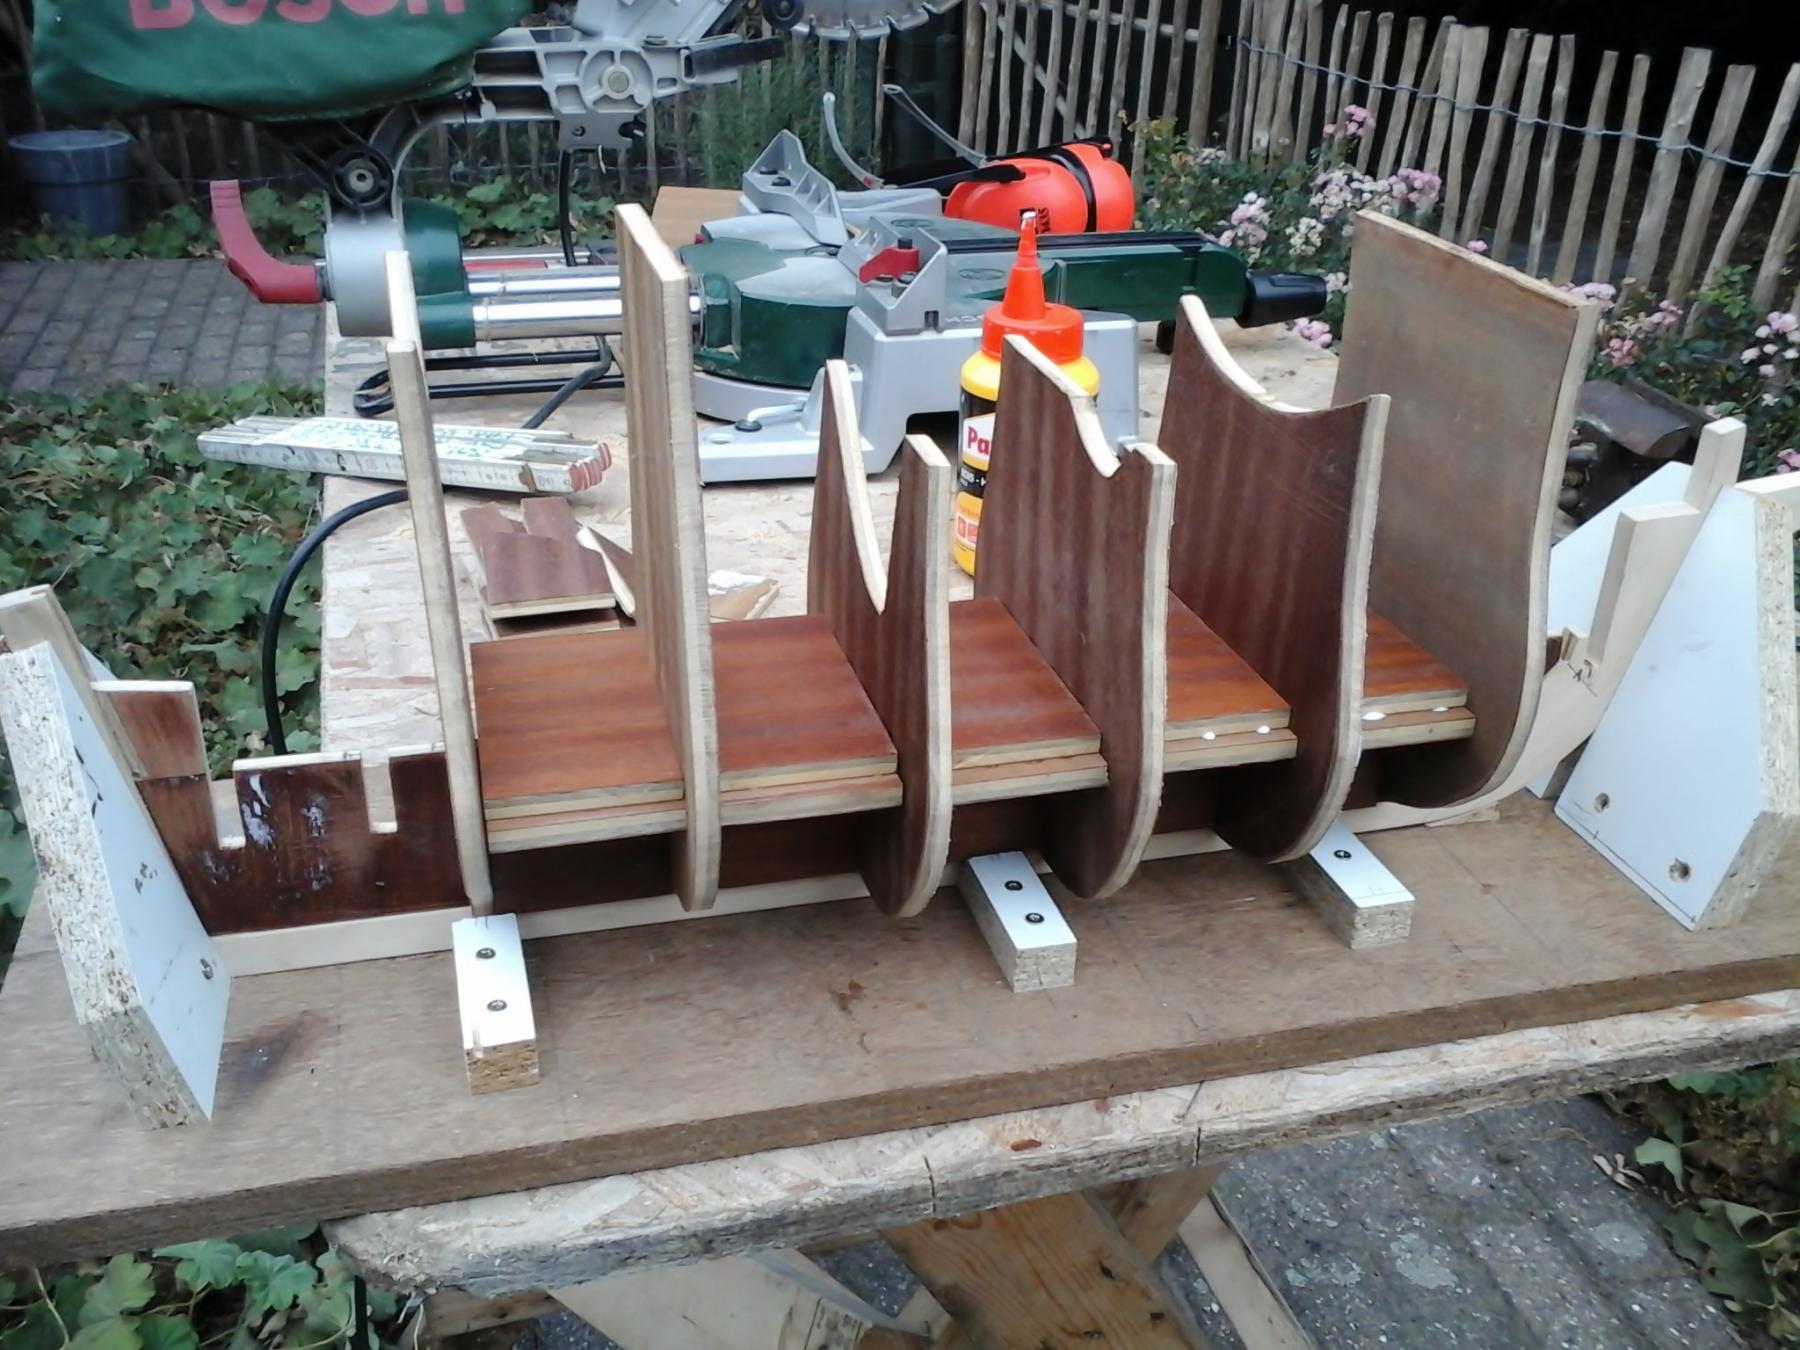
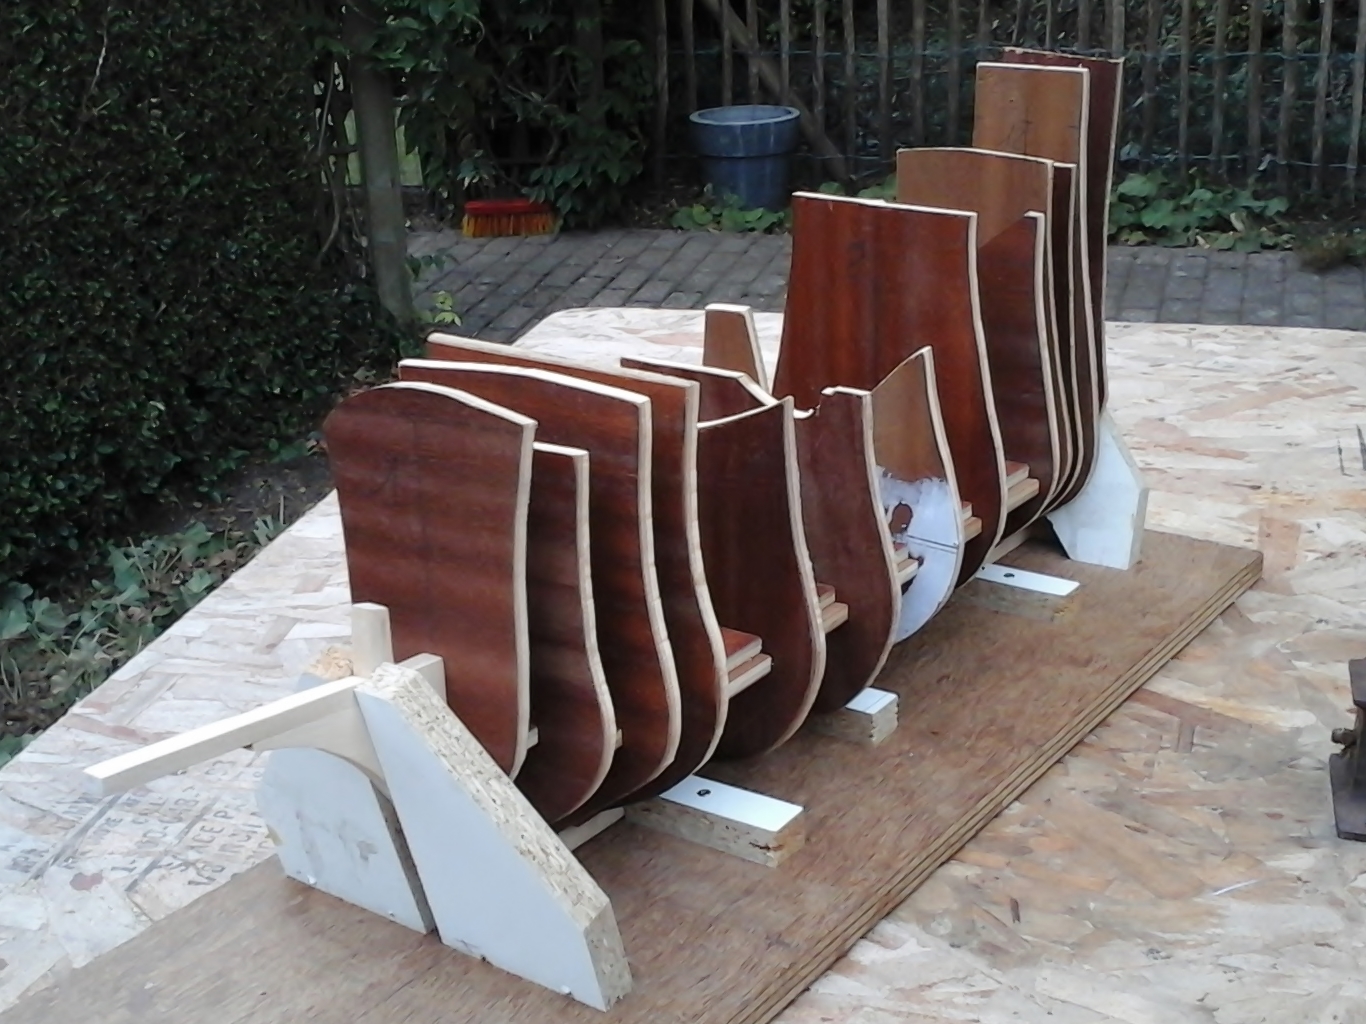
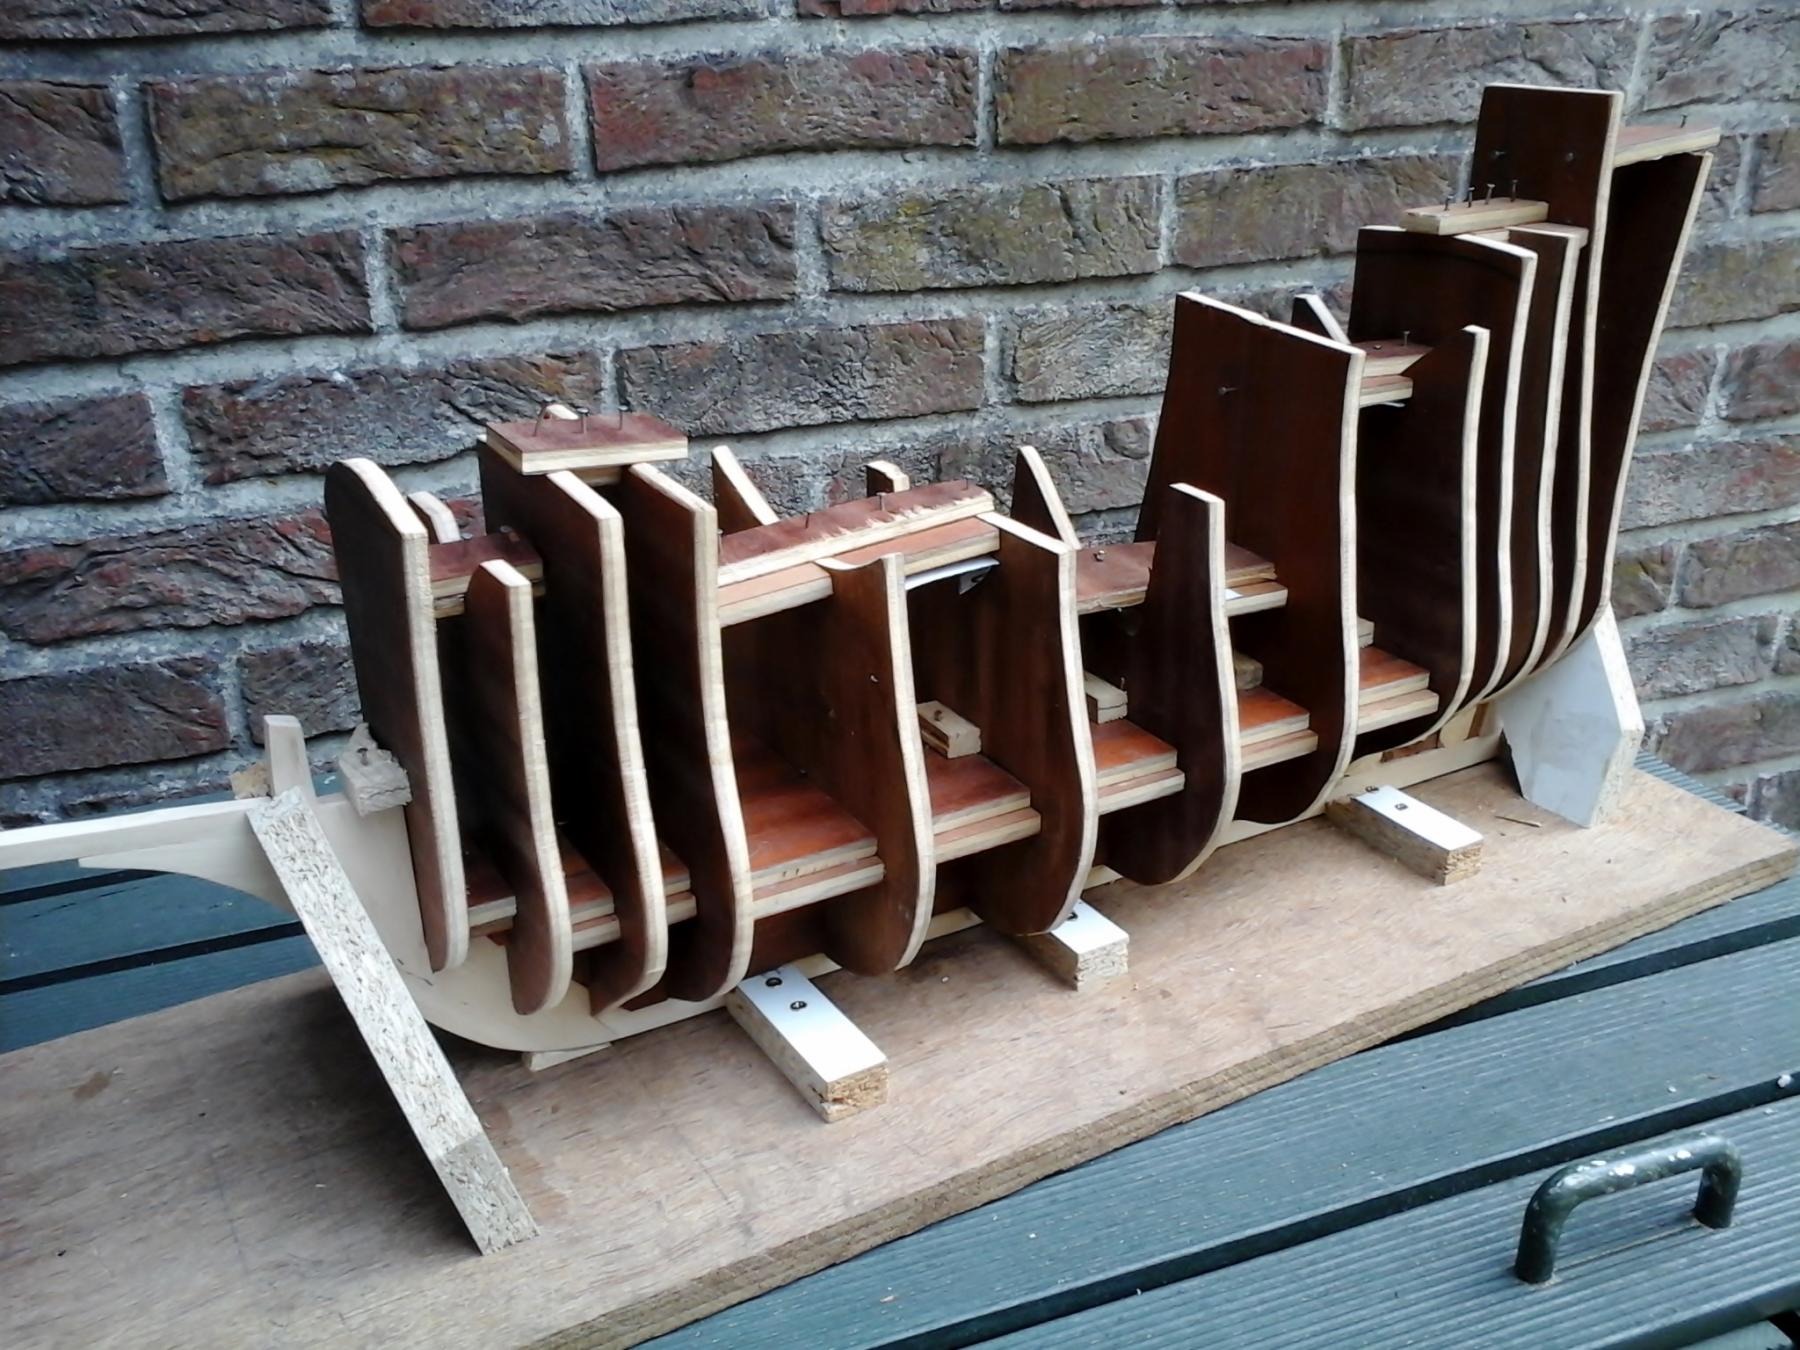
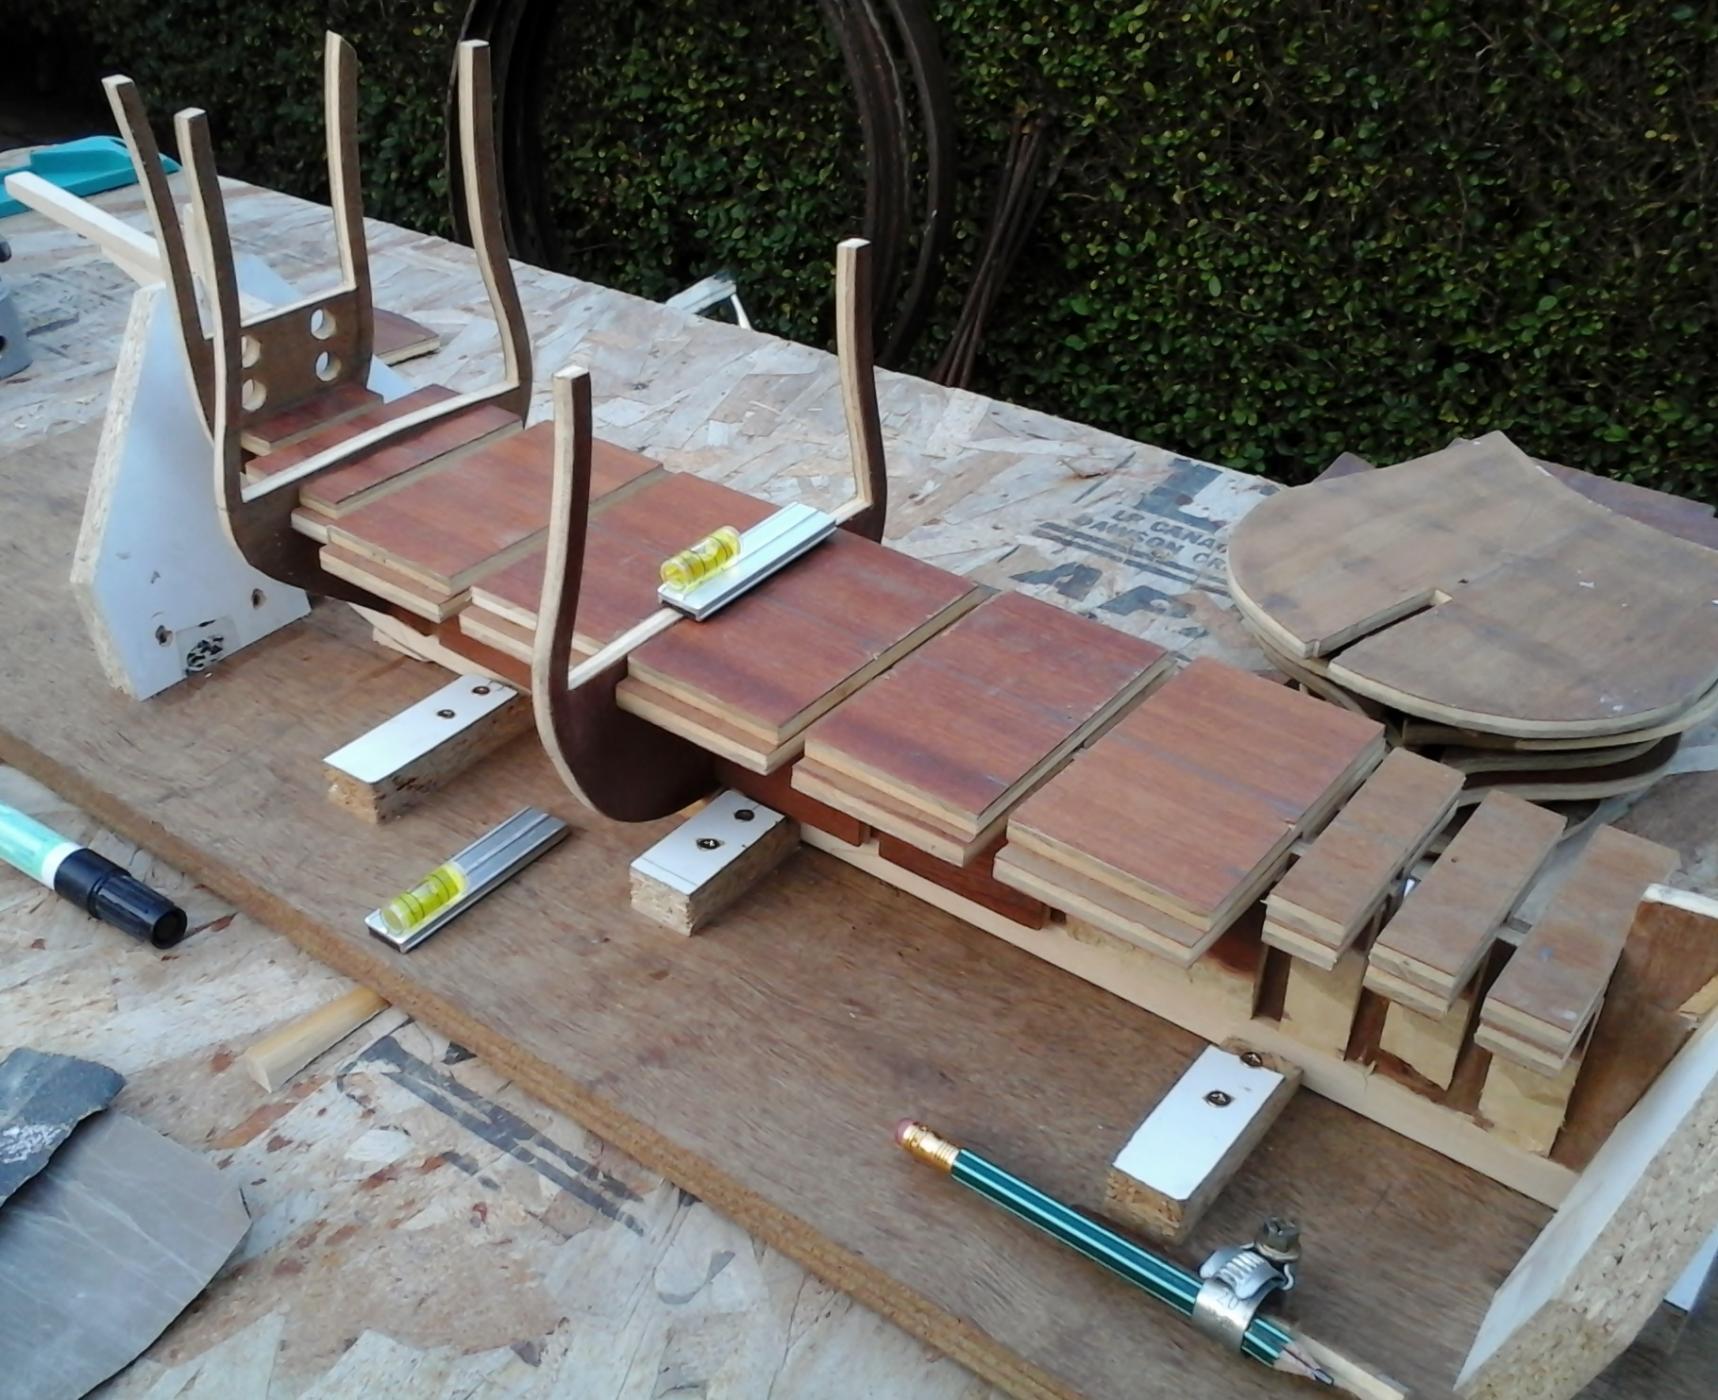
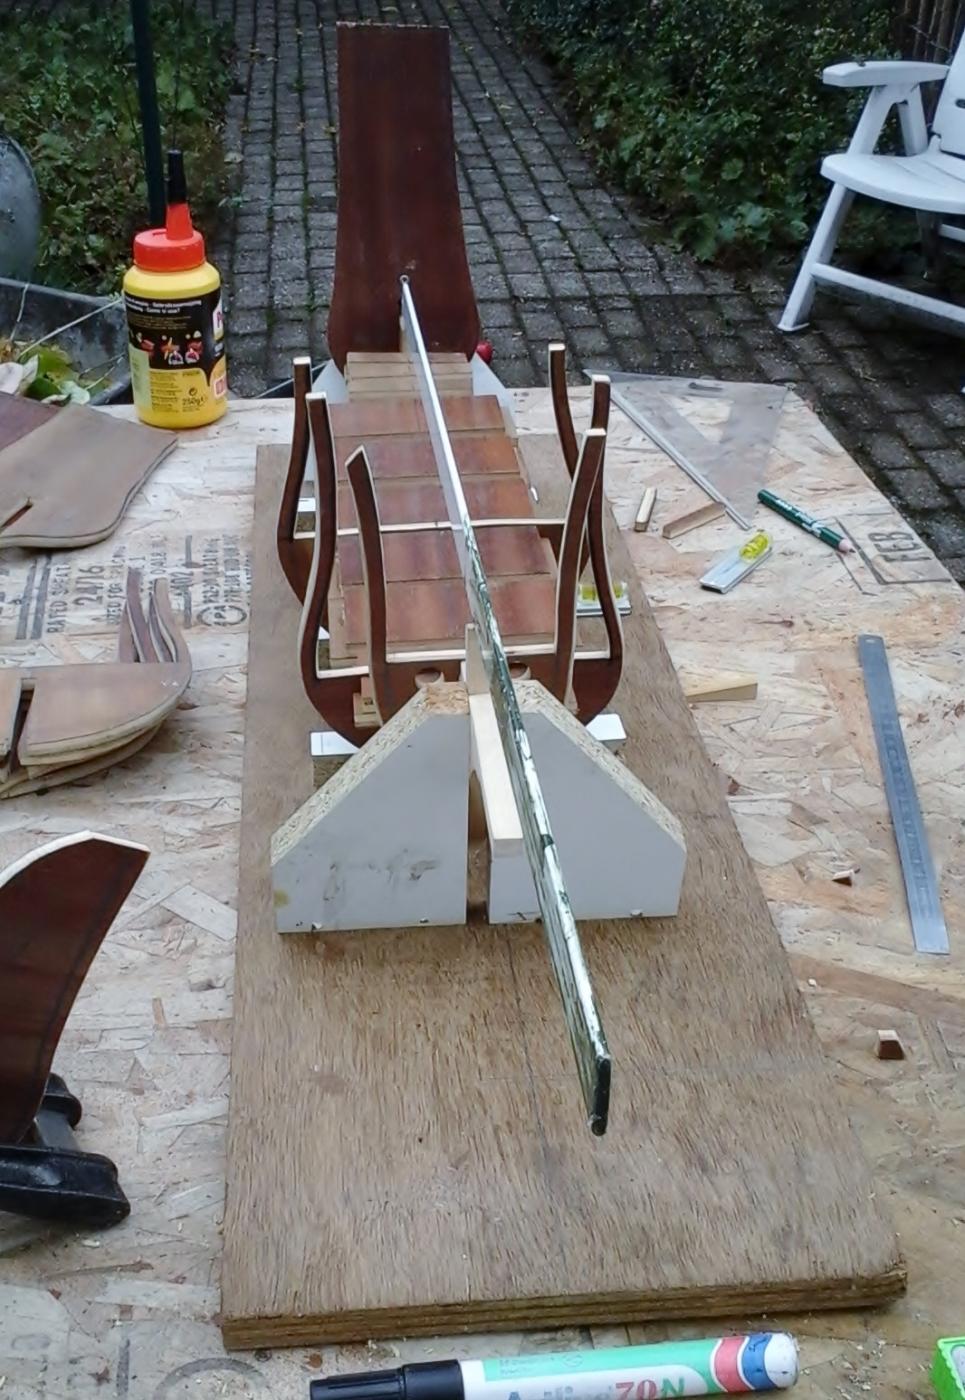
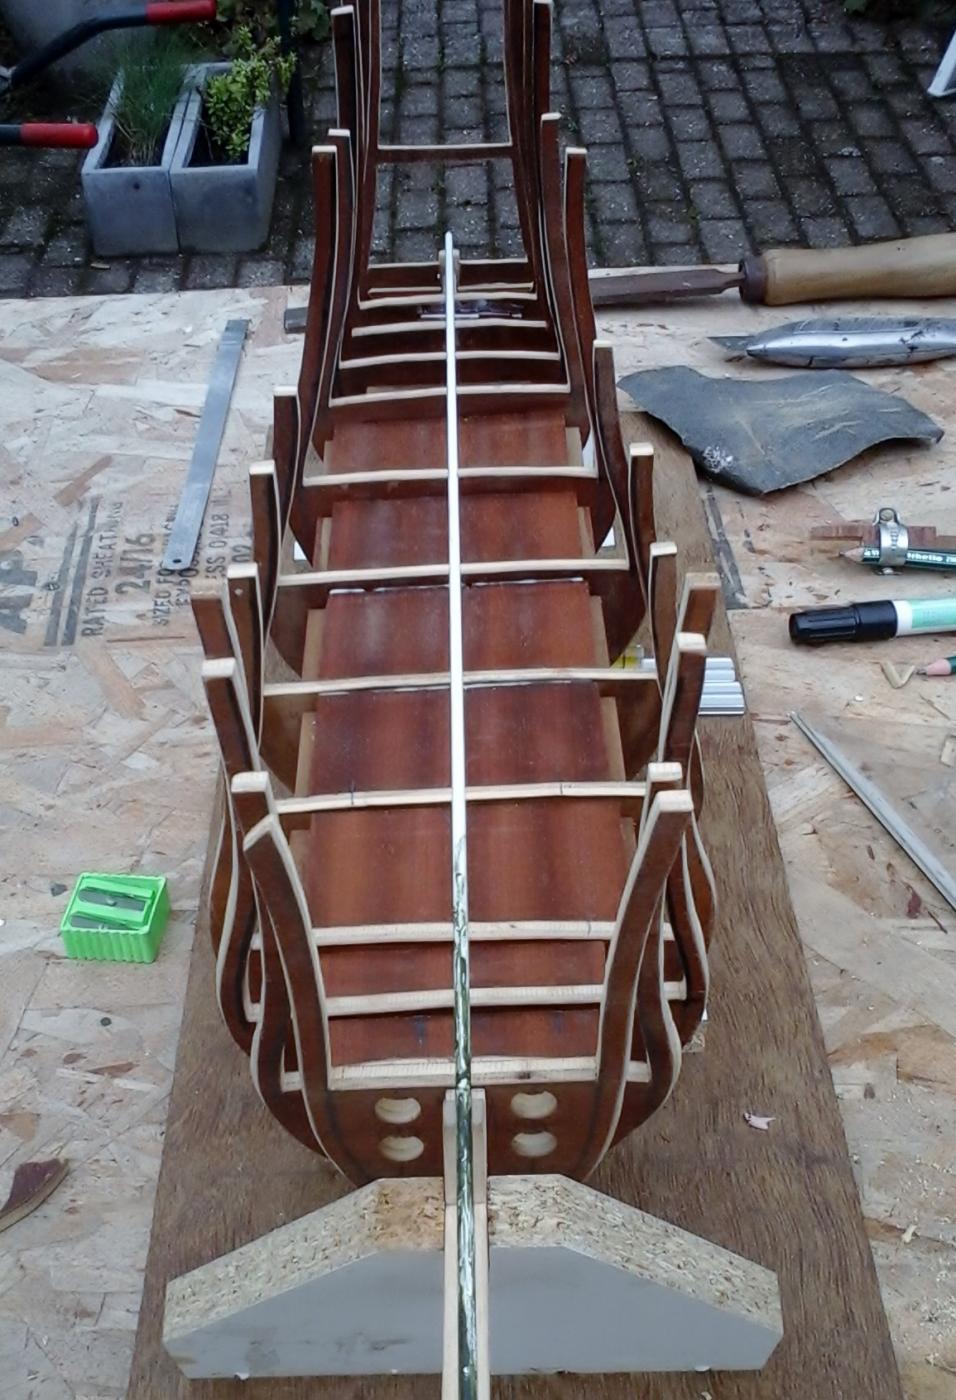
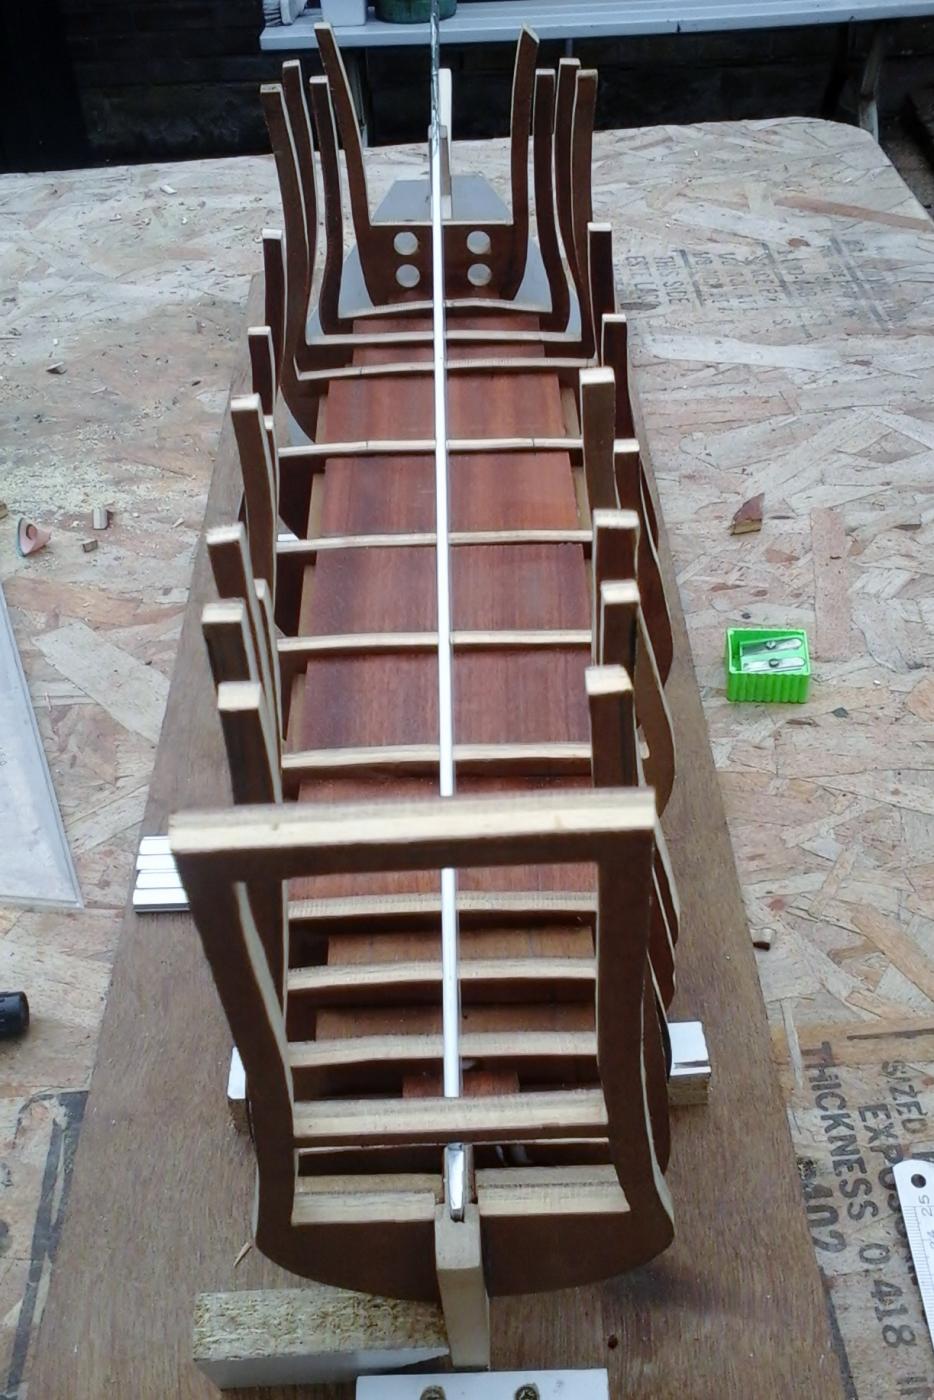
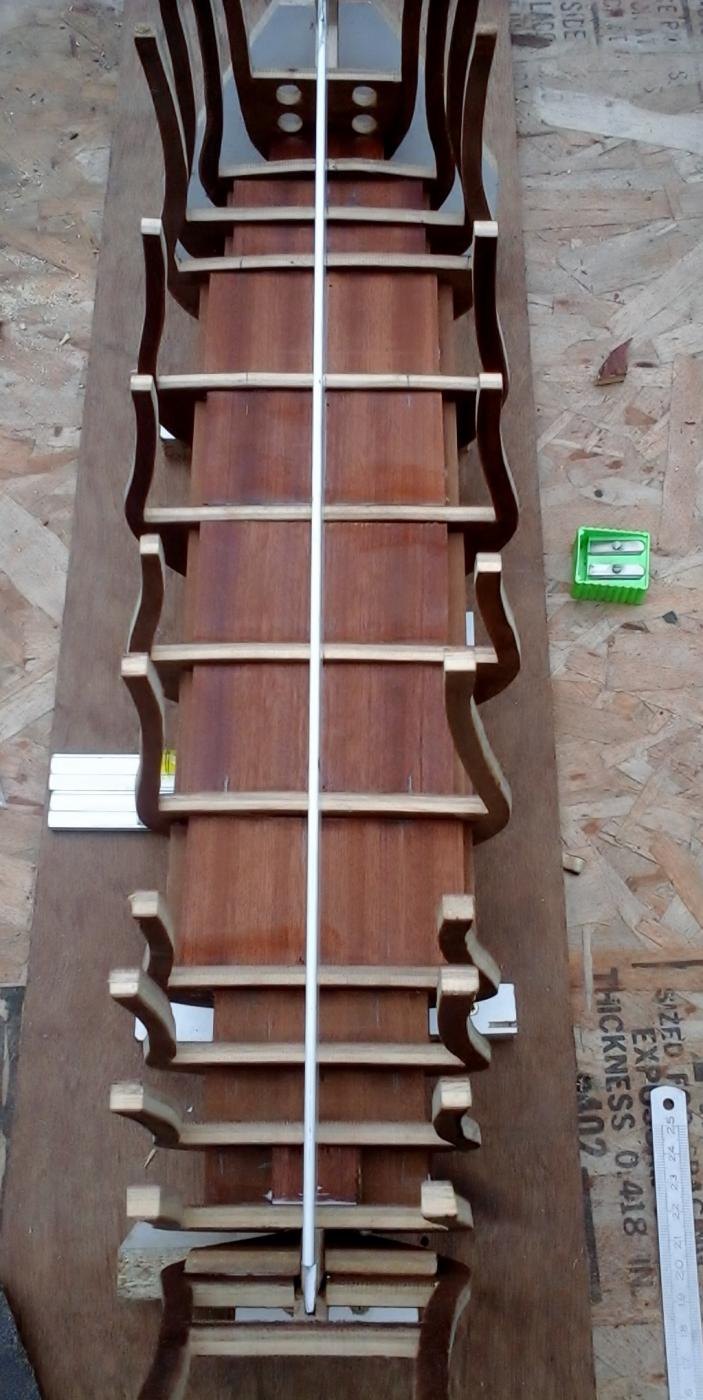
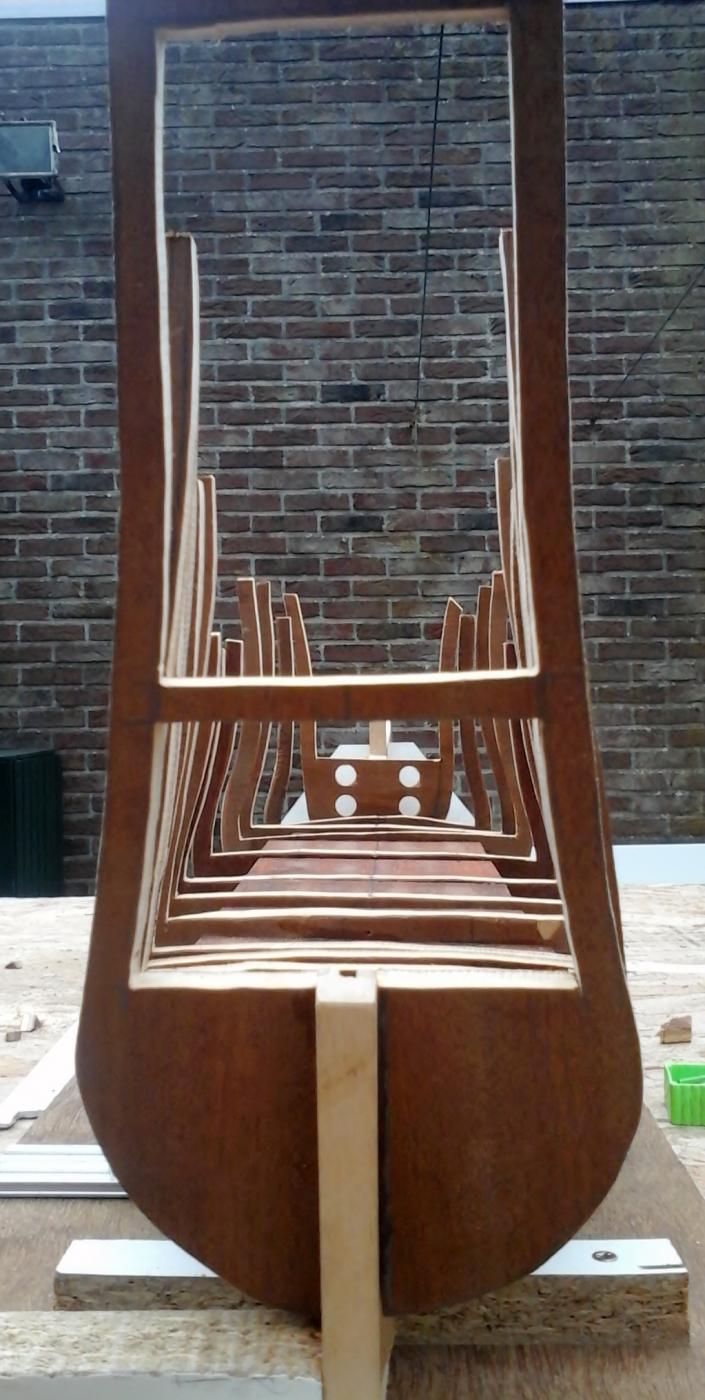
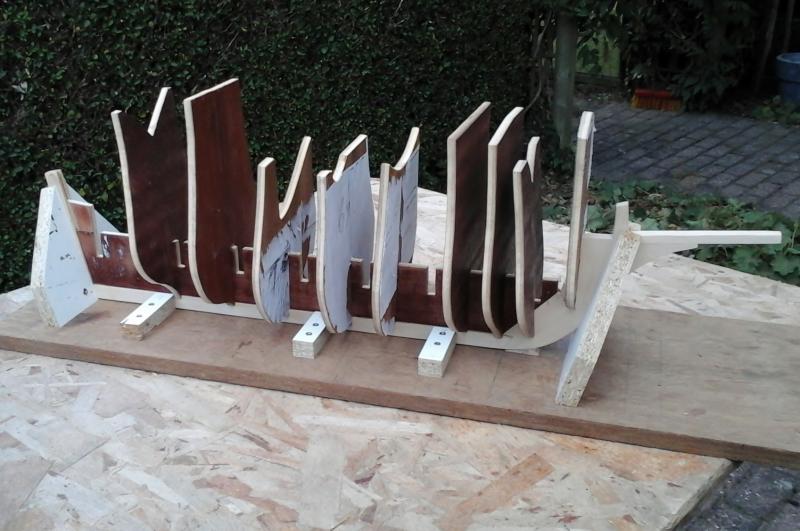
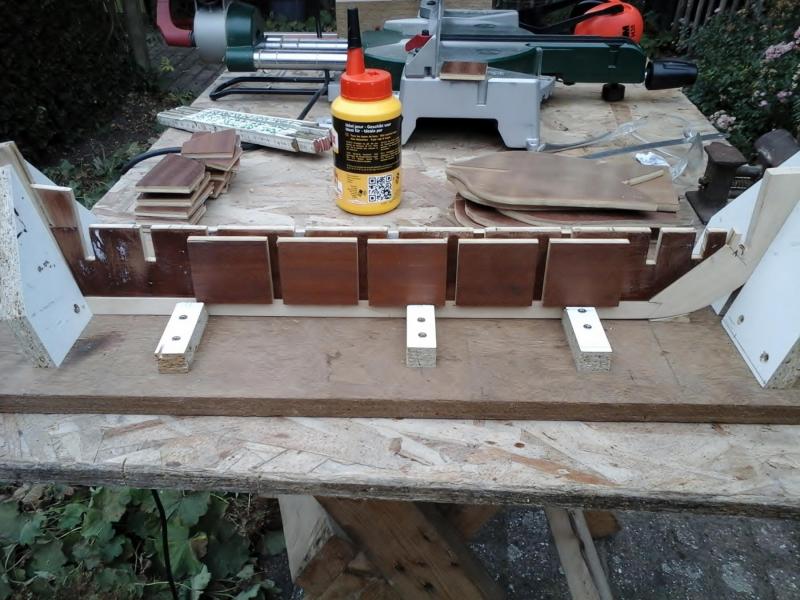
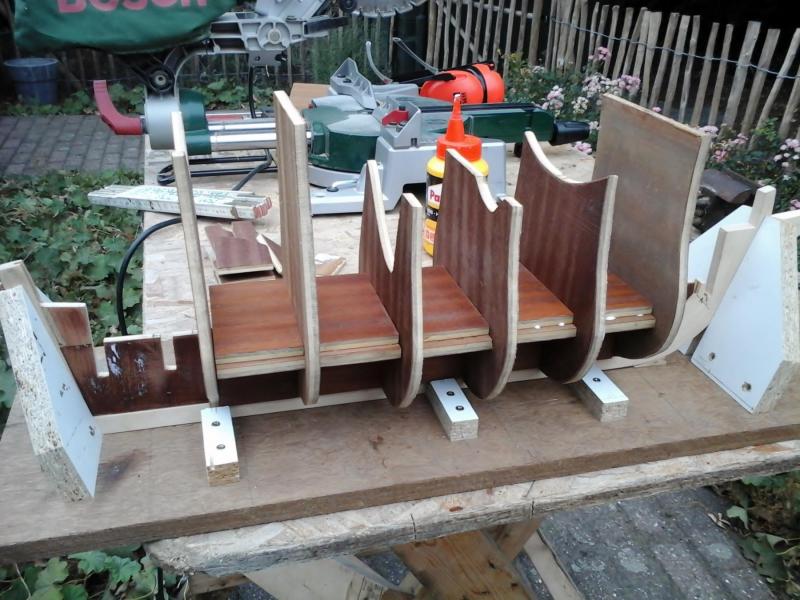
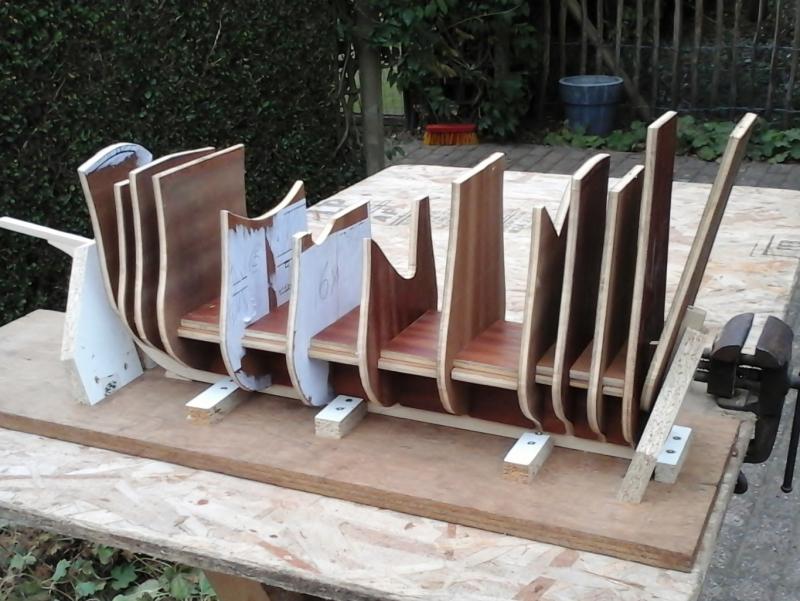
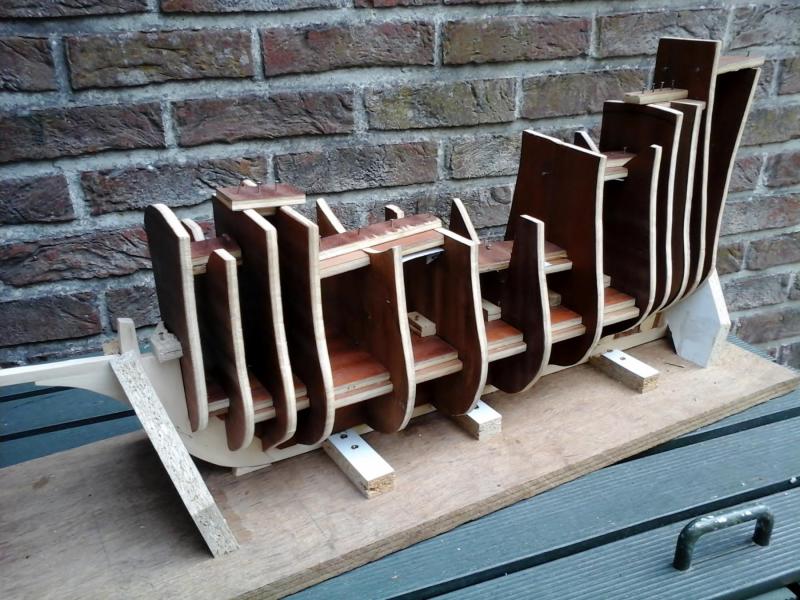
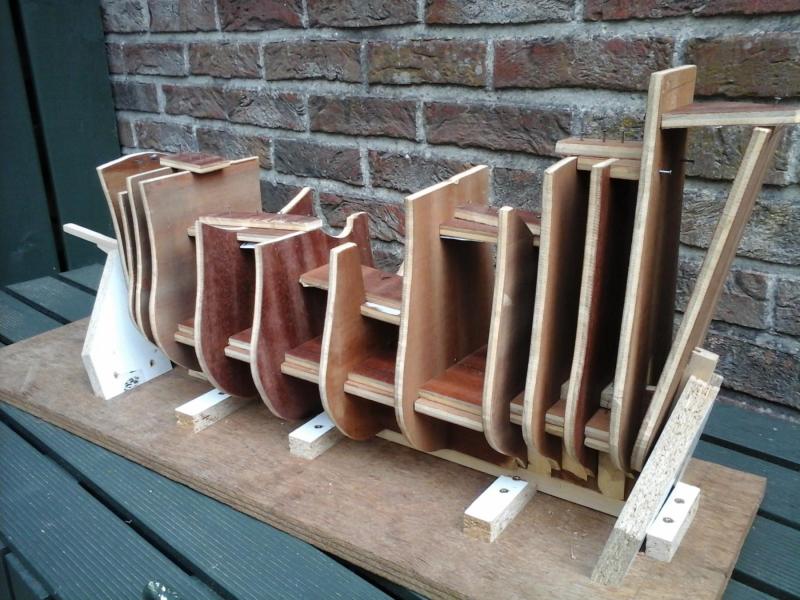
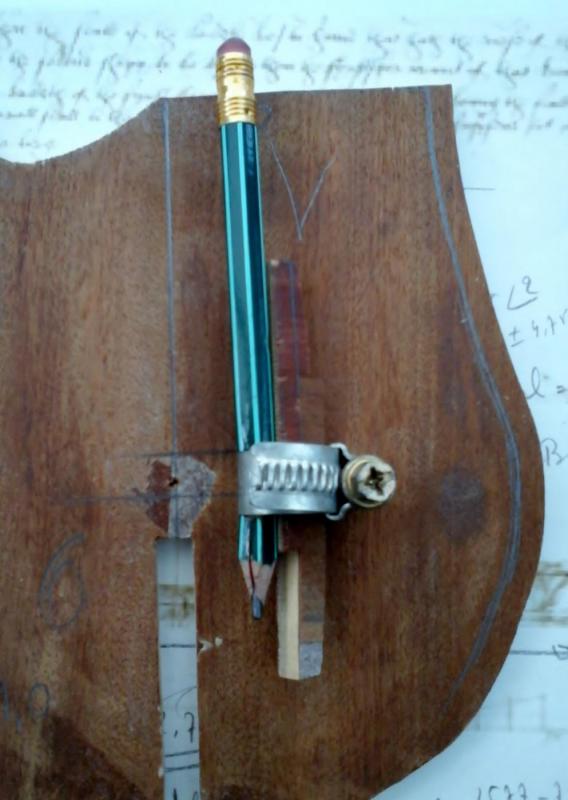
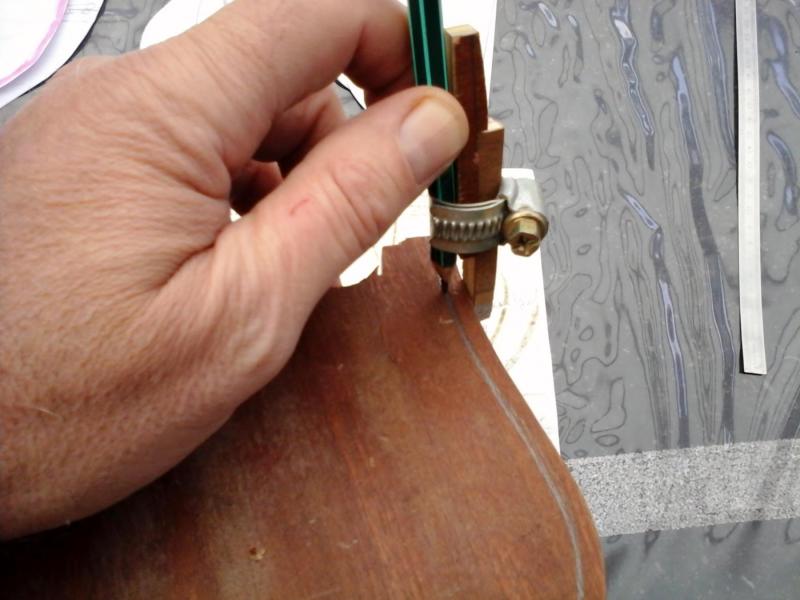
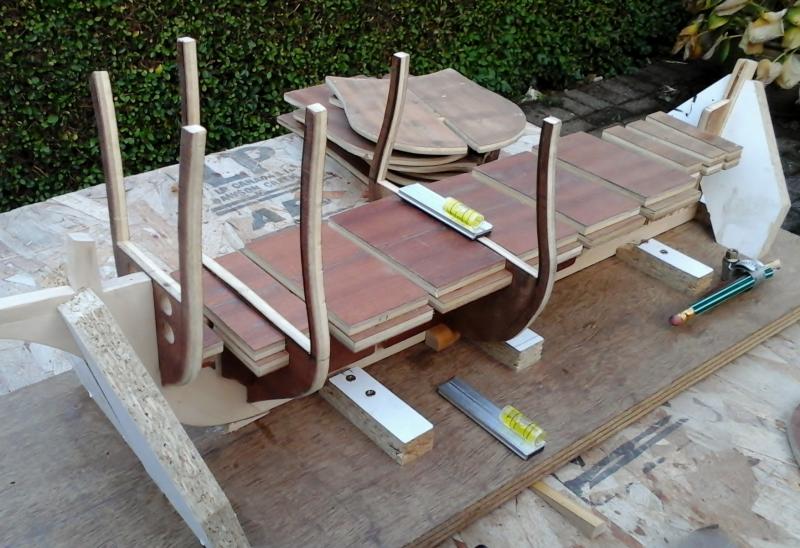
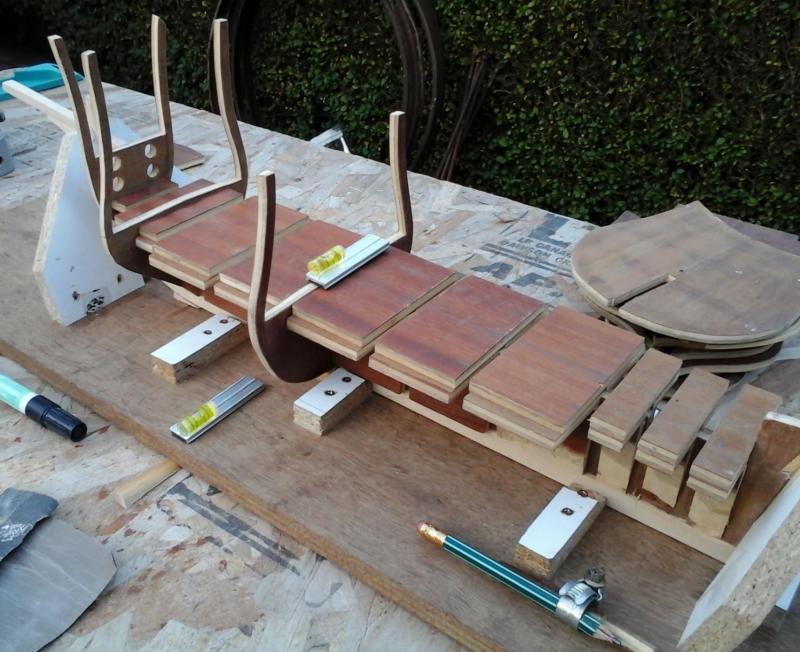
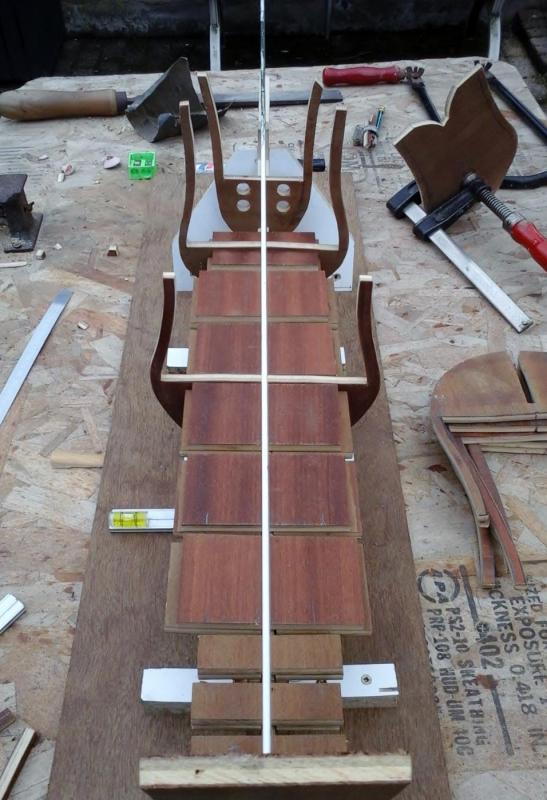
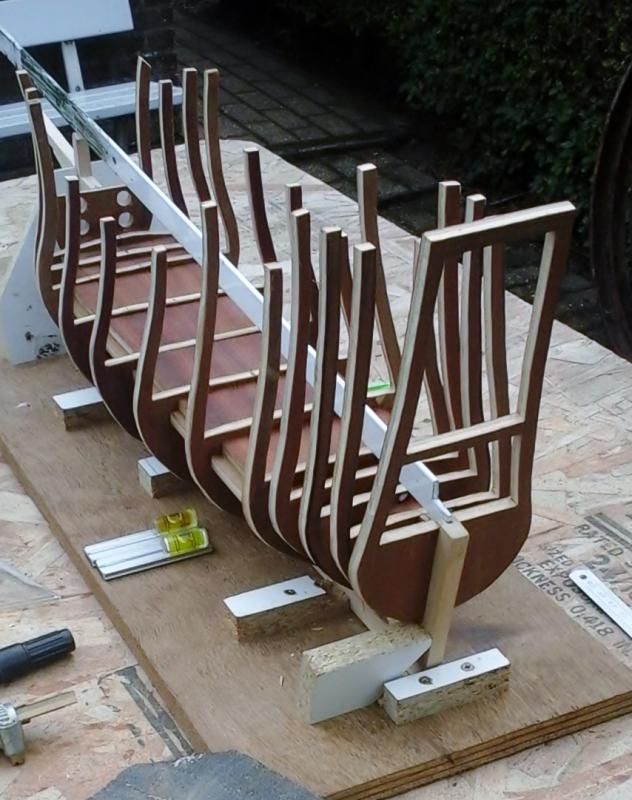
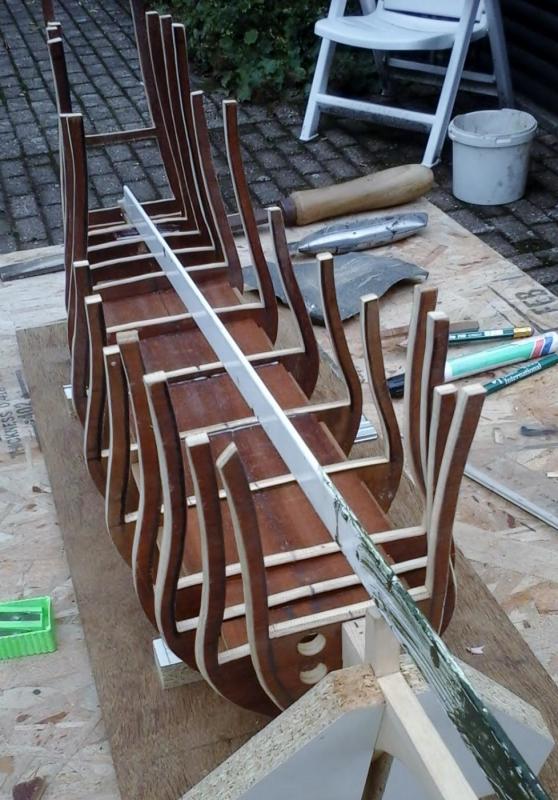
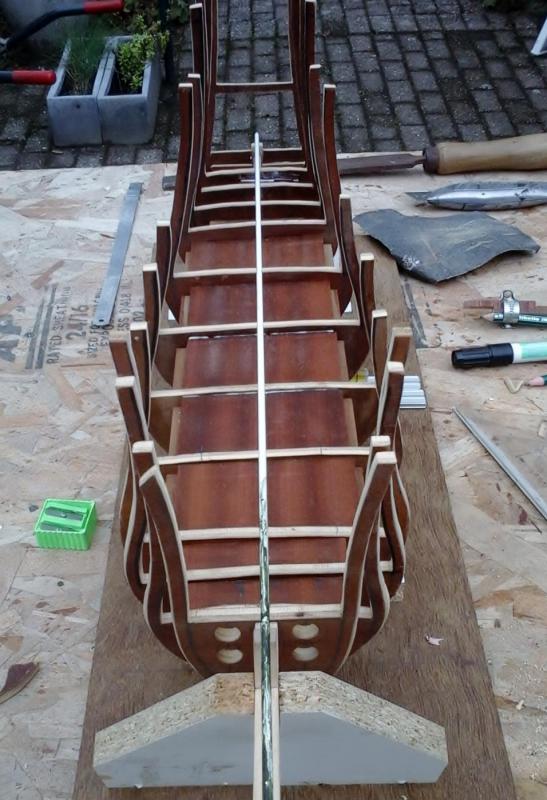
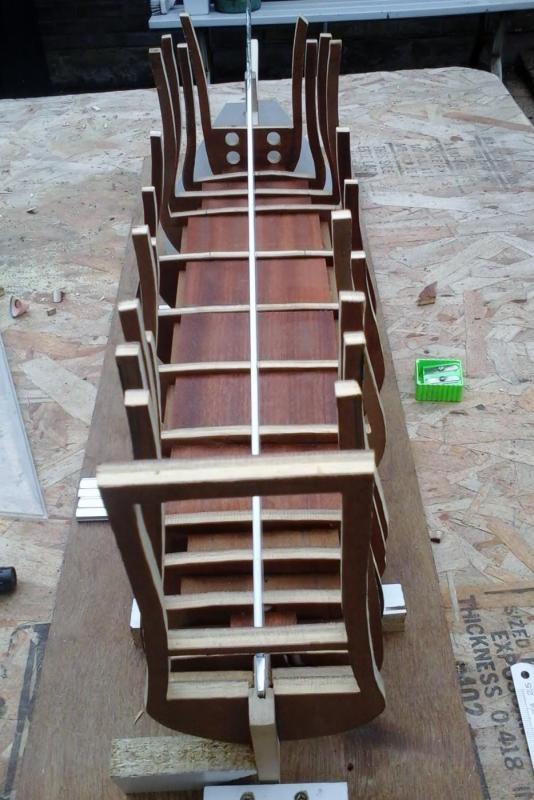
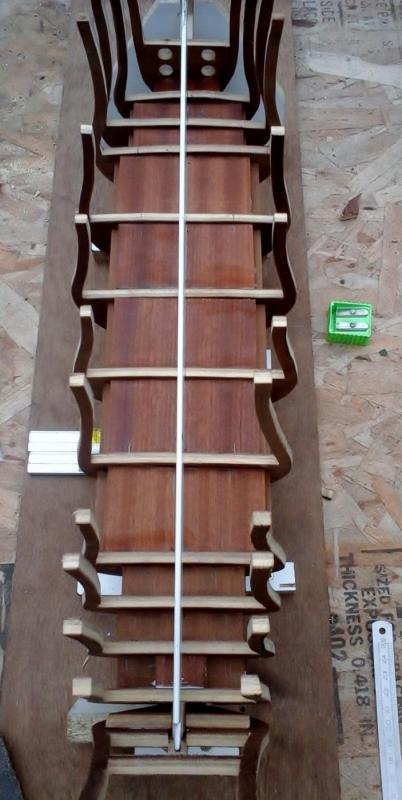
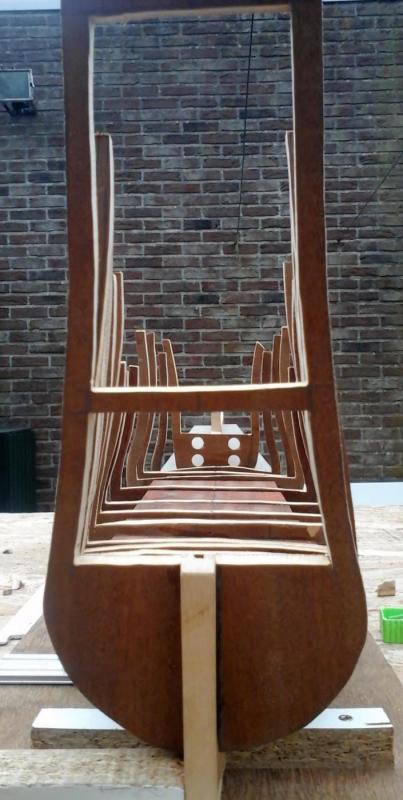
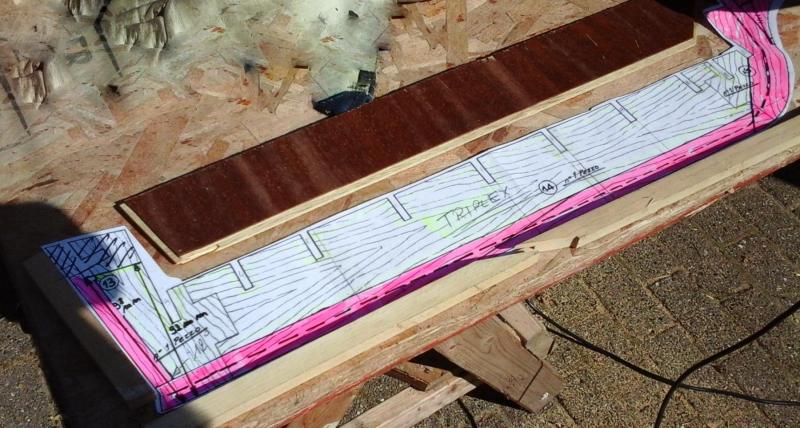
Hello, First. I changed the name of my build log in too “Golden Hind : A English galleon late 16th century” (Seems more appropriate) New frames are drawn on paper and cut out. There are now more frames used on the bow and the stern than first planned Then the frames are drawn on plywood and sawed. The beam is 4 cm narrower than the one on the plans. The hull proportions are KEEL / BEAM : 2.80 DEPTH / BEAM : 0.50 All the frames are made too high ( sawing off a piece of is easier than to glueing on) Reinforcements are sawn from plywood and glued to the keel. The frames are not glued yet. But are now temporarily attached to the keel. So i can see if they fit and that outside can be sanded where needed. When the outside is sanded, the frames are removed again so that the inside of the frames can be sawed out. The sawing of the inside of the frames can begin. I made myself a simple tool for this . The first frames are aligned and glued. All the frames are now aligned and glued. Visible parts of the frames on the upper decks will later be replaced by solid wood. It looks like I go in the right direction I think. The shipyard is now temporarily "on hold" Autumn and winter period is for me : military modeling. But I remain of course to follow MSW. Groetjes Greetings Patrick


- 756 replies
-
- 11
-
-
- galleon
- golden hind
- (and 2 more)
-
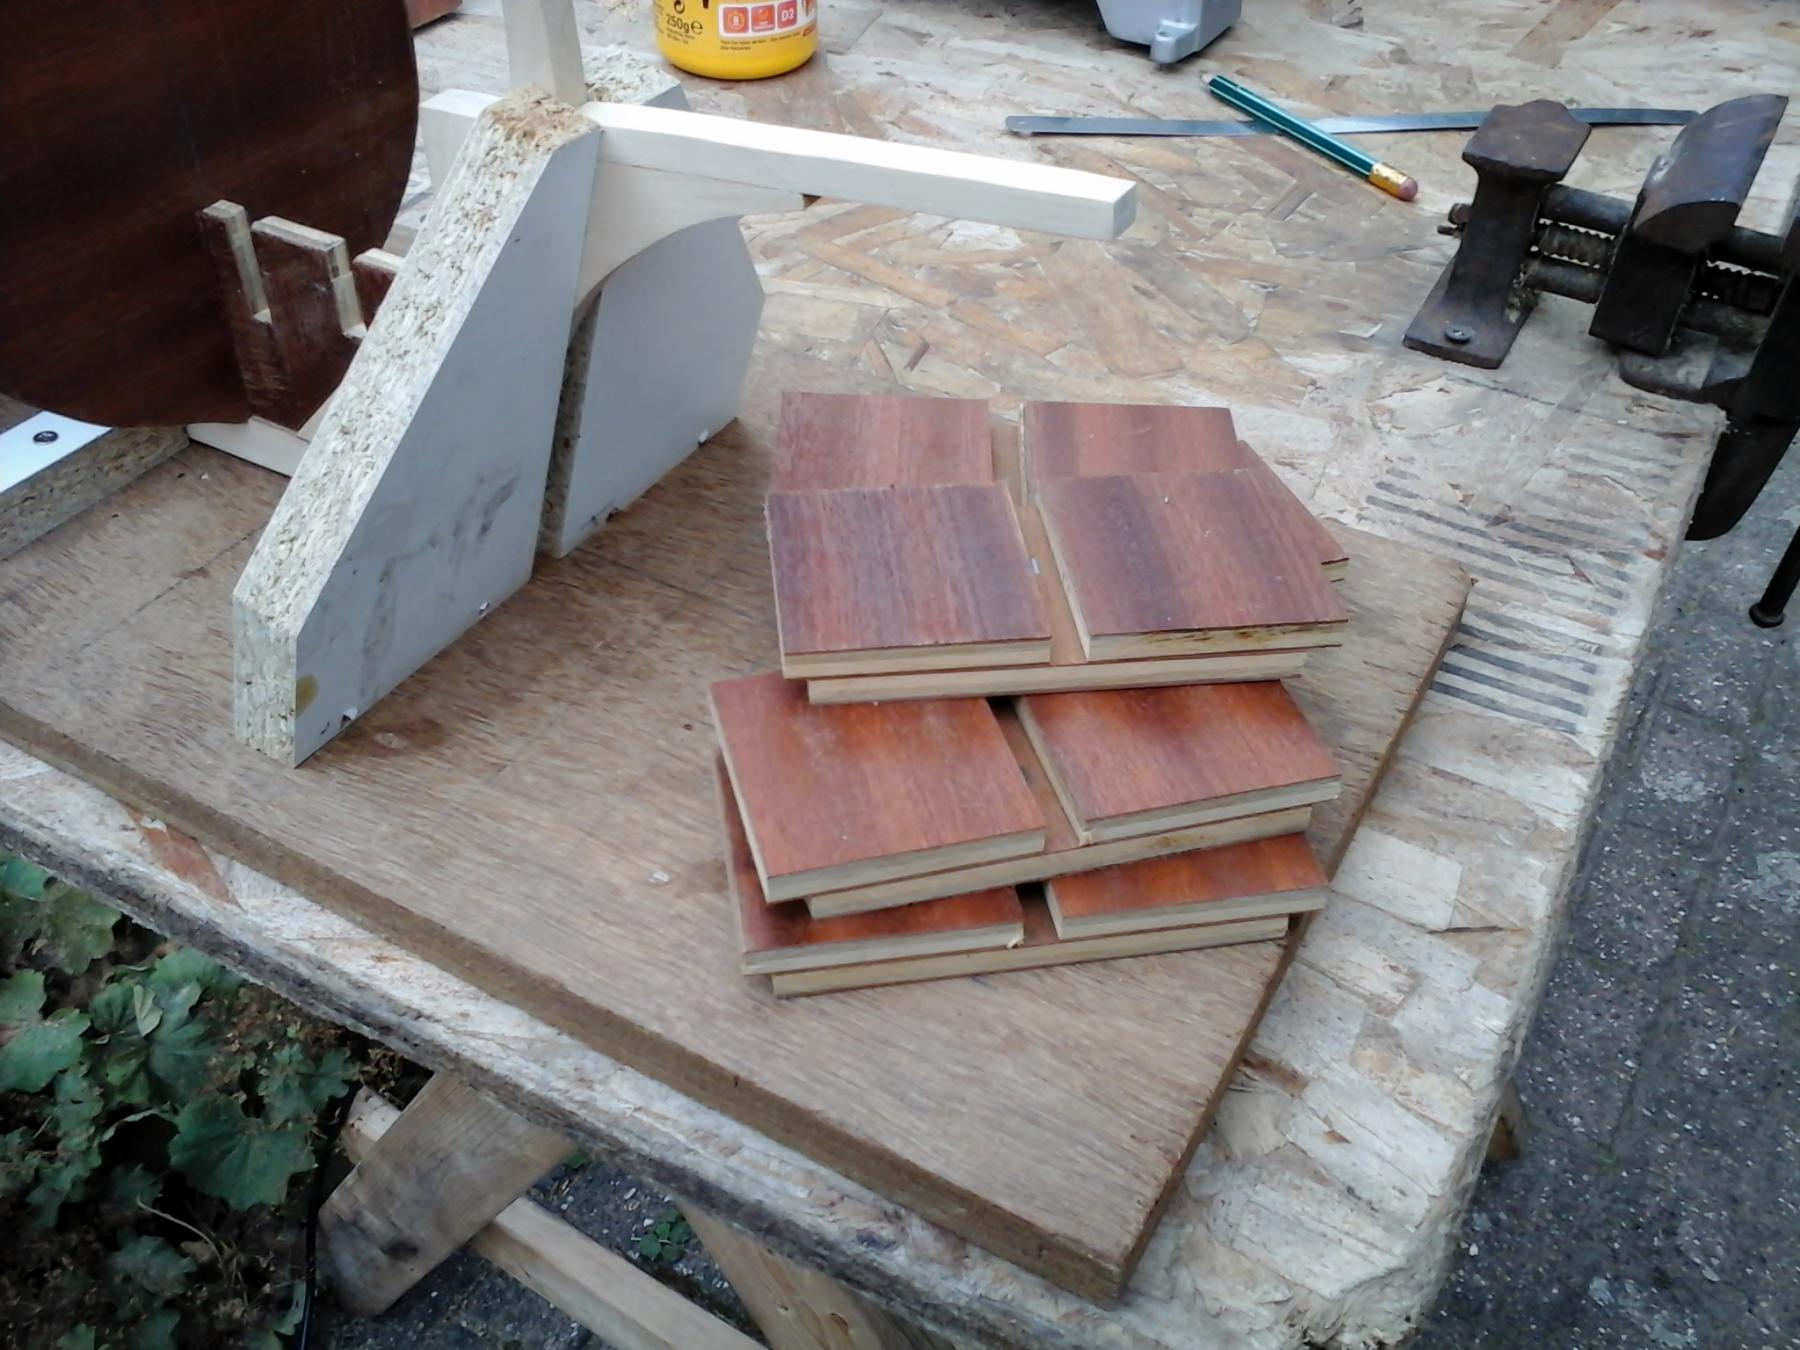
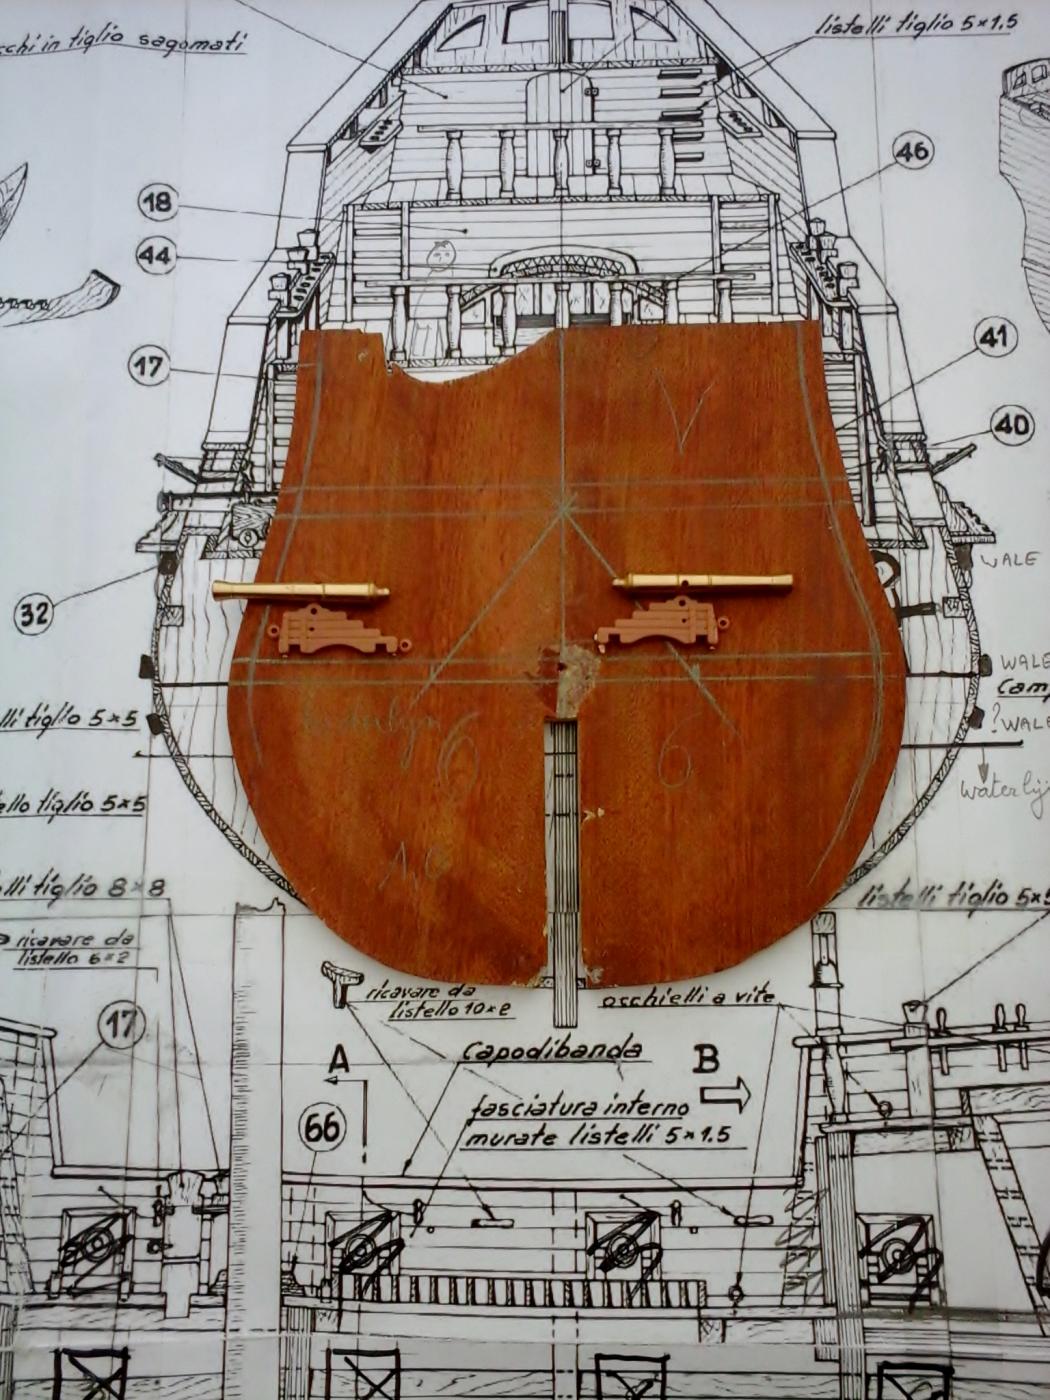
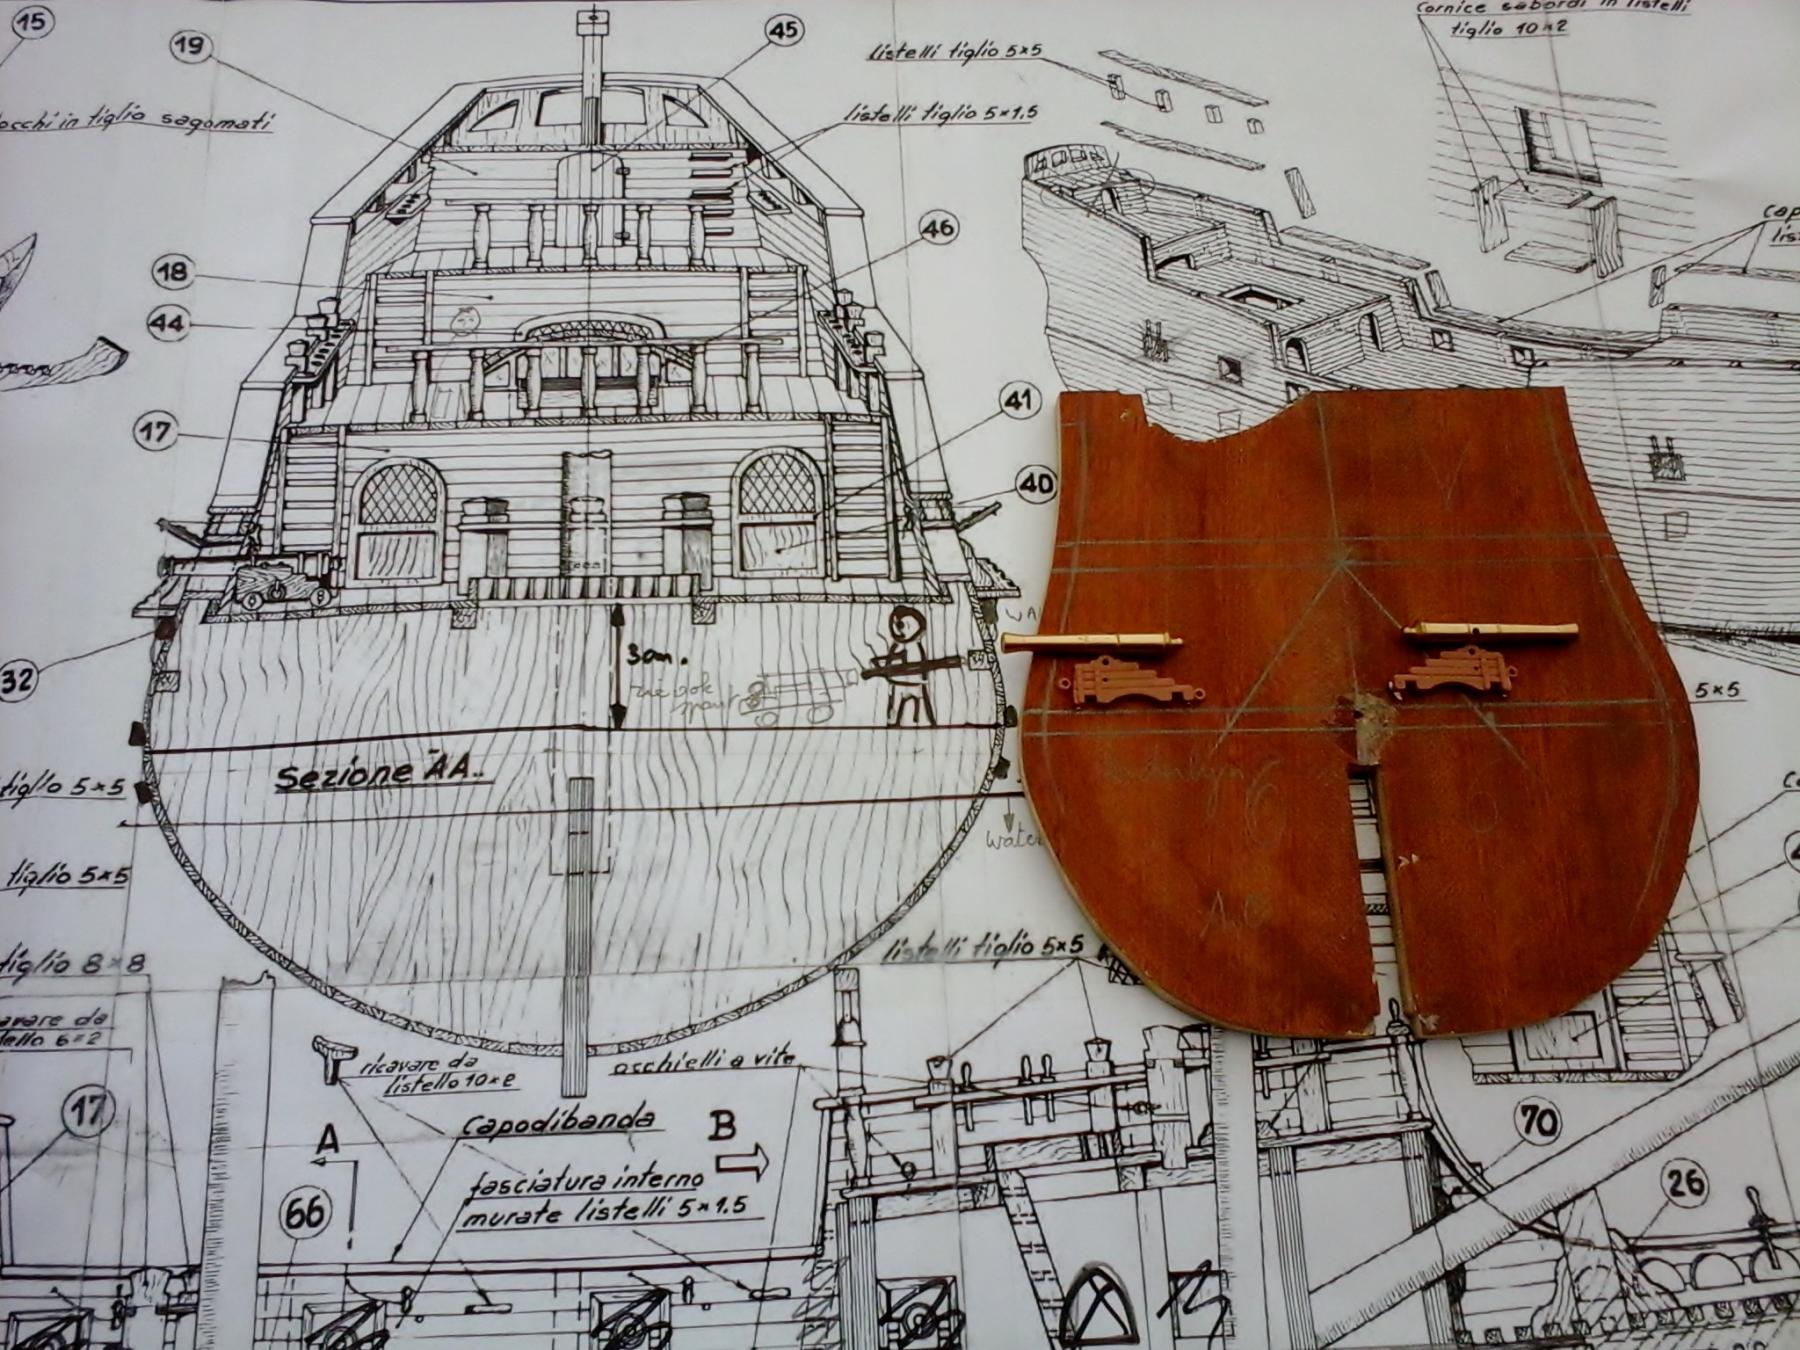
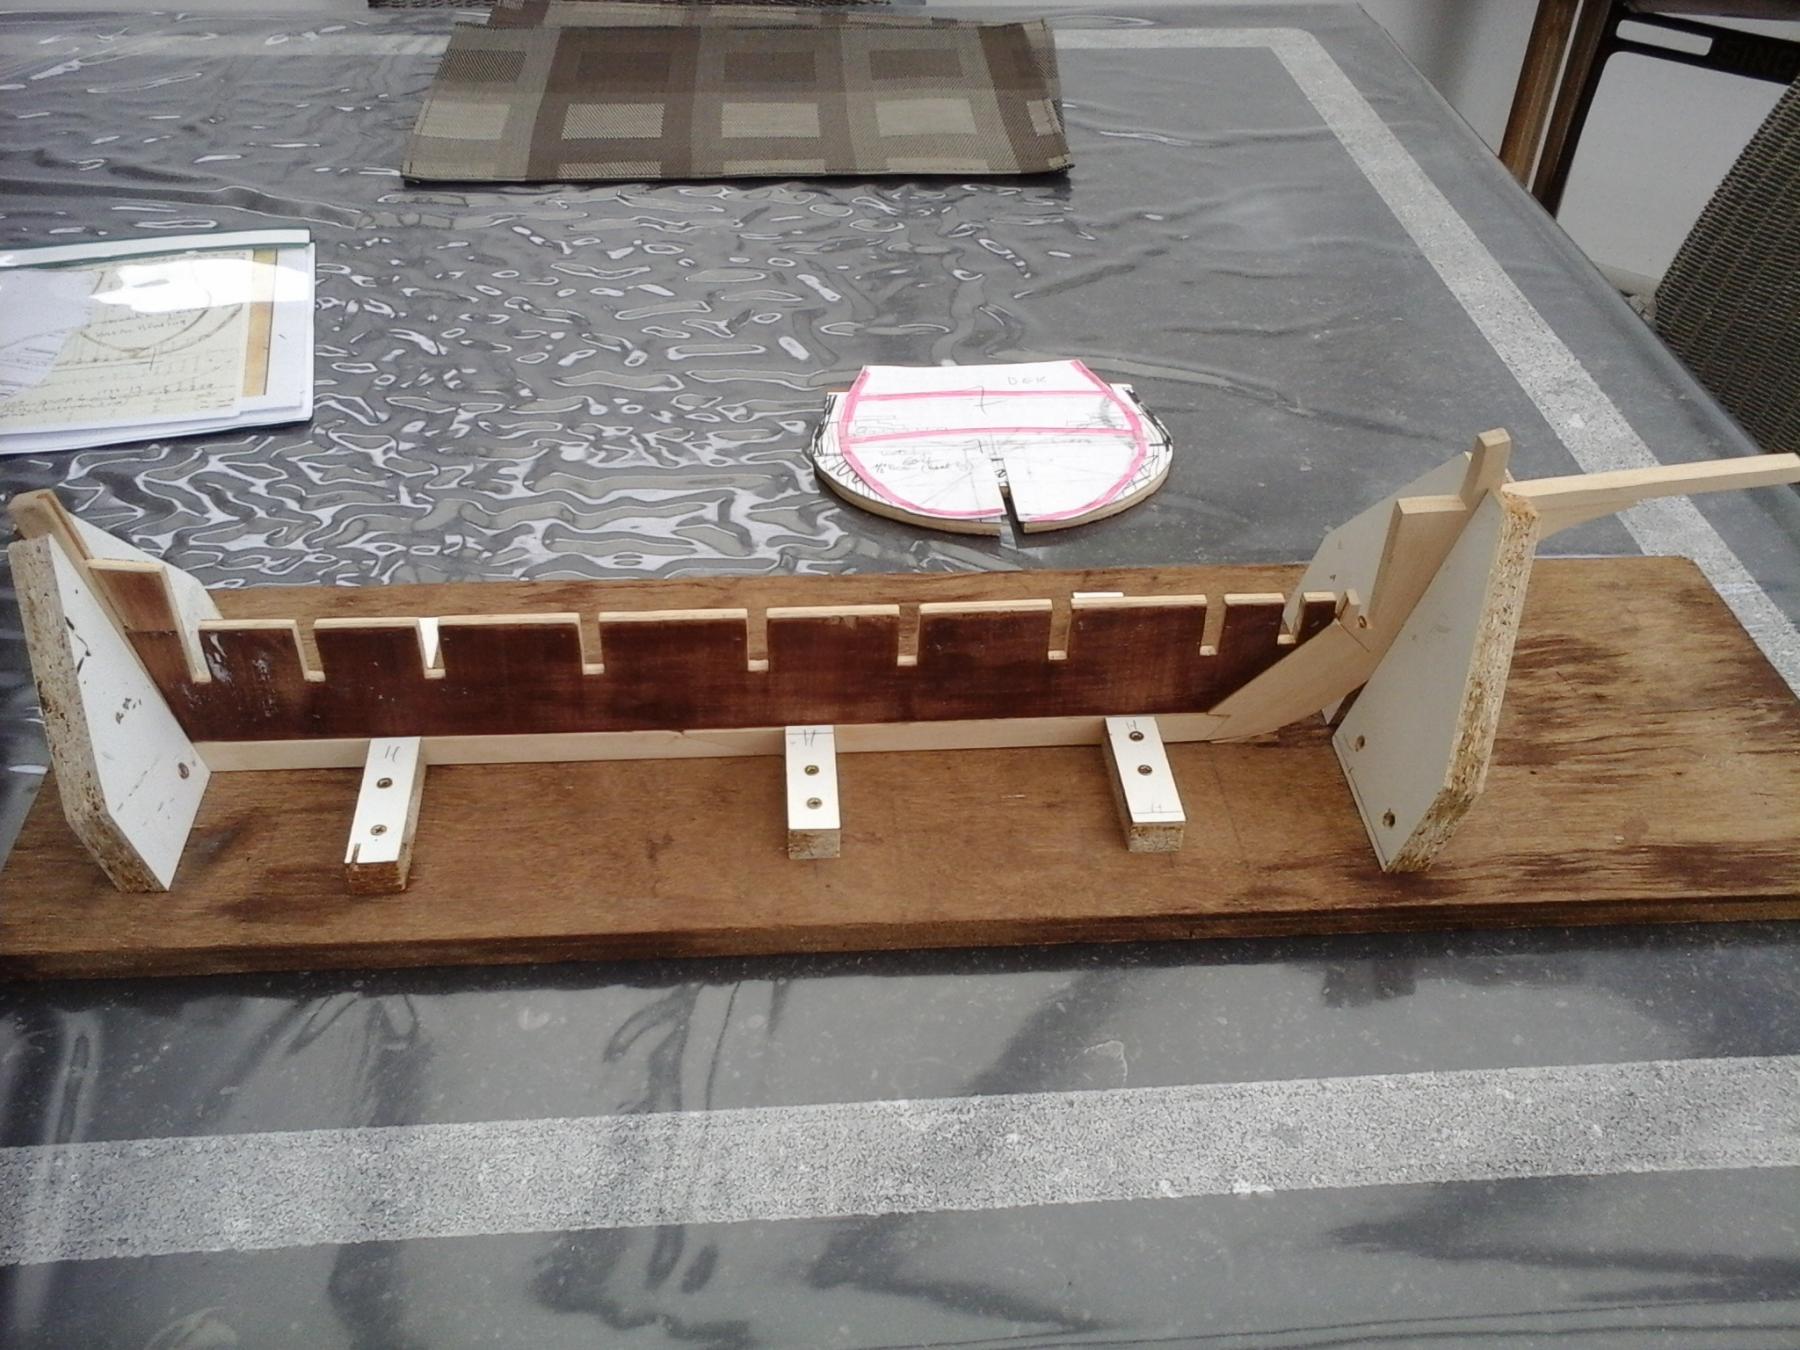
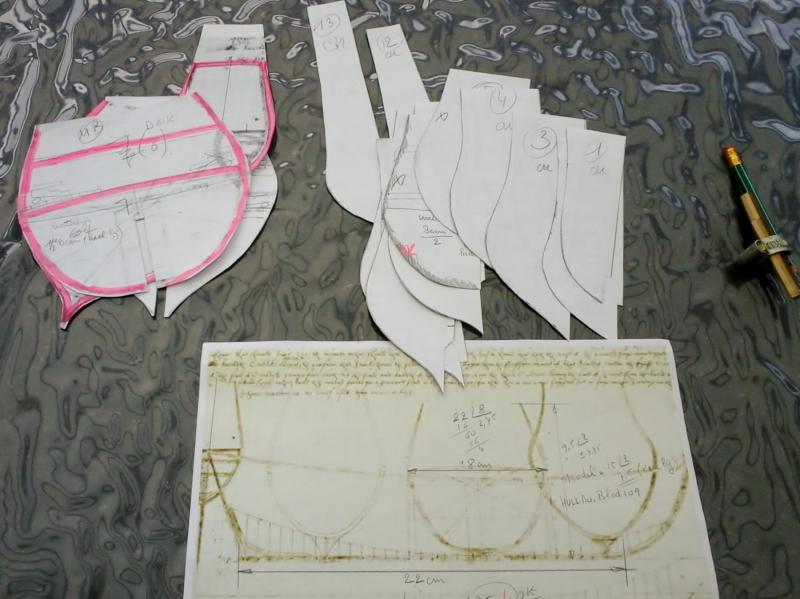
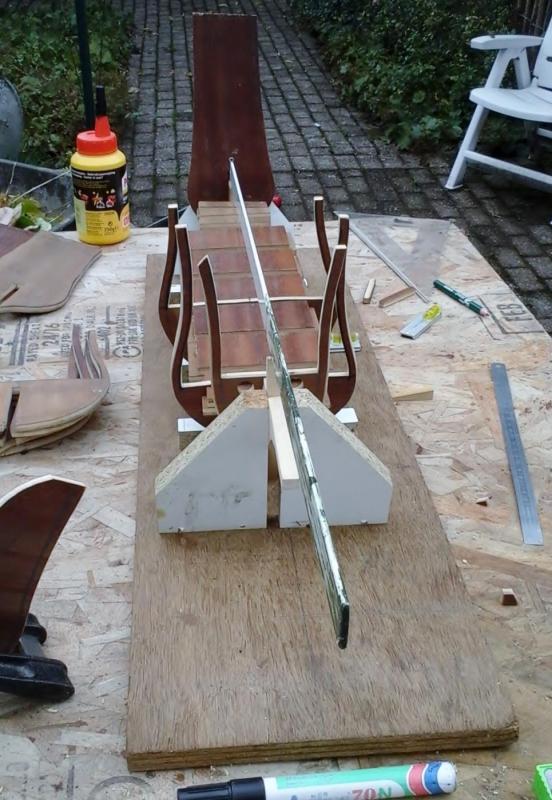
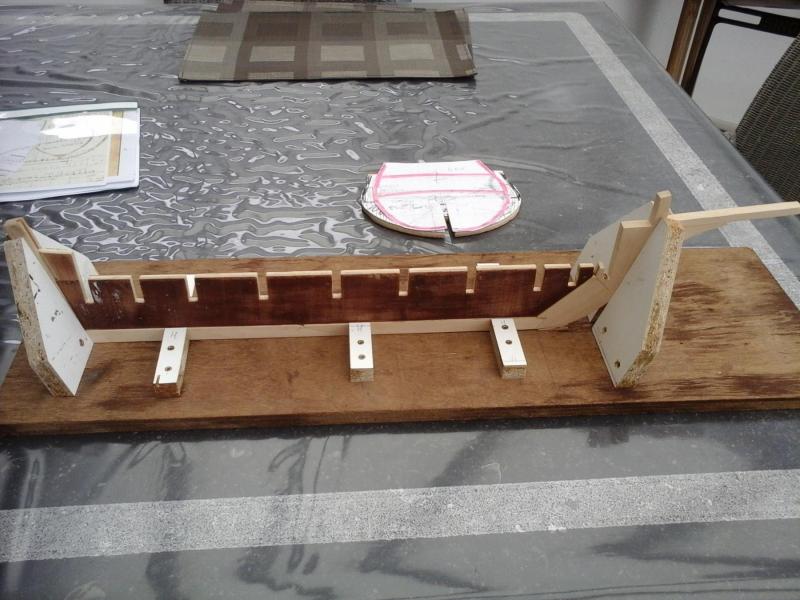
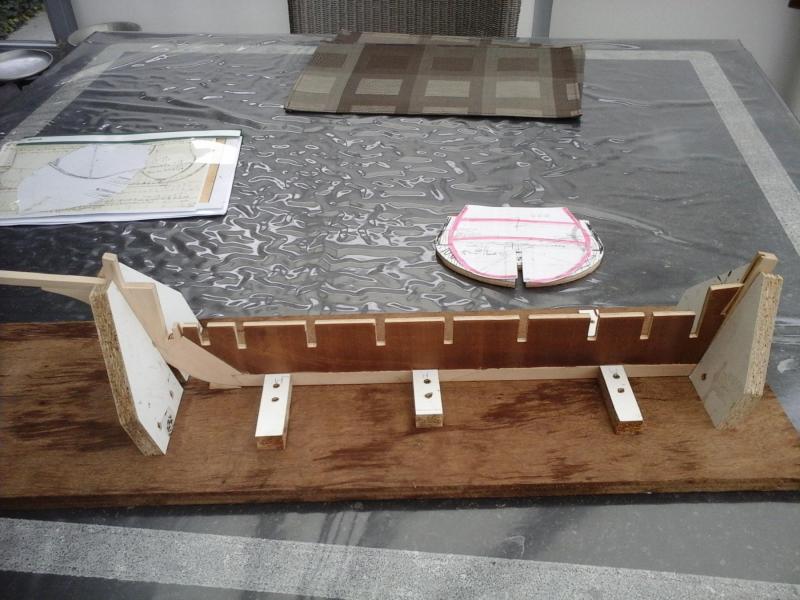
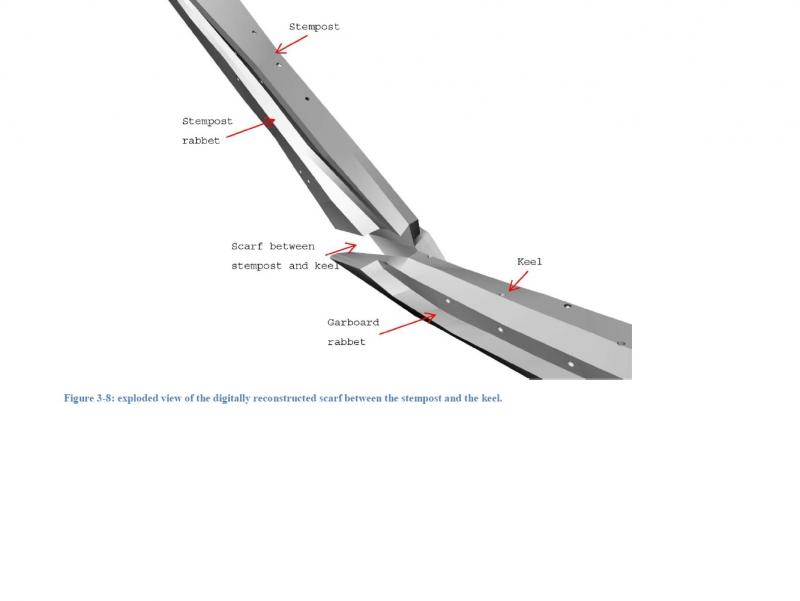
The keel is finished and sanded a second time. The scarf joint between the keel and stempost and the two parts of the keel are simplified versions. The hull under the water line will be painted later and they will be hardly visible. This is how a real scarf joint looks like on an 16th century English ship A building slip is made Now we can begin with the frames. The original frames of the drawings will not be used. The length and width dimensions between keel, beam and waterline are( fore me) wrong. They have already been sawed. But shall end as firewood for the stove. New frames will be made A new (paper) frame has approximately the right shape and proportions. But first Now it's time to study, to think, to draw and to make new frames. Groetjes Greetings Patrick


- 756 replies
-
- 12
-
-
- galleon
- golden hind
- (and 2 more)
-
Looks great! Do you have enough magnums ?? Greetings Patrick
- 473 replies
-
- 2
-
-
- greek bireme
- dusek
- (and 1 more)
-
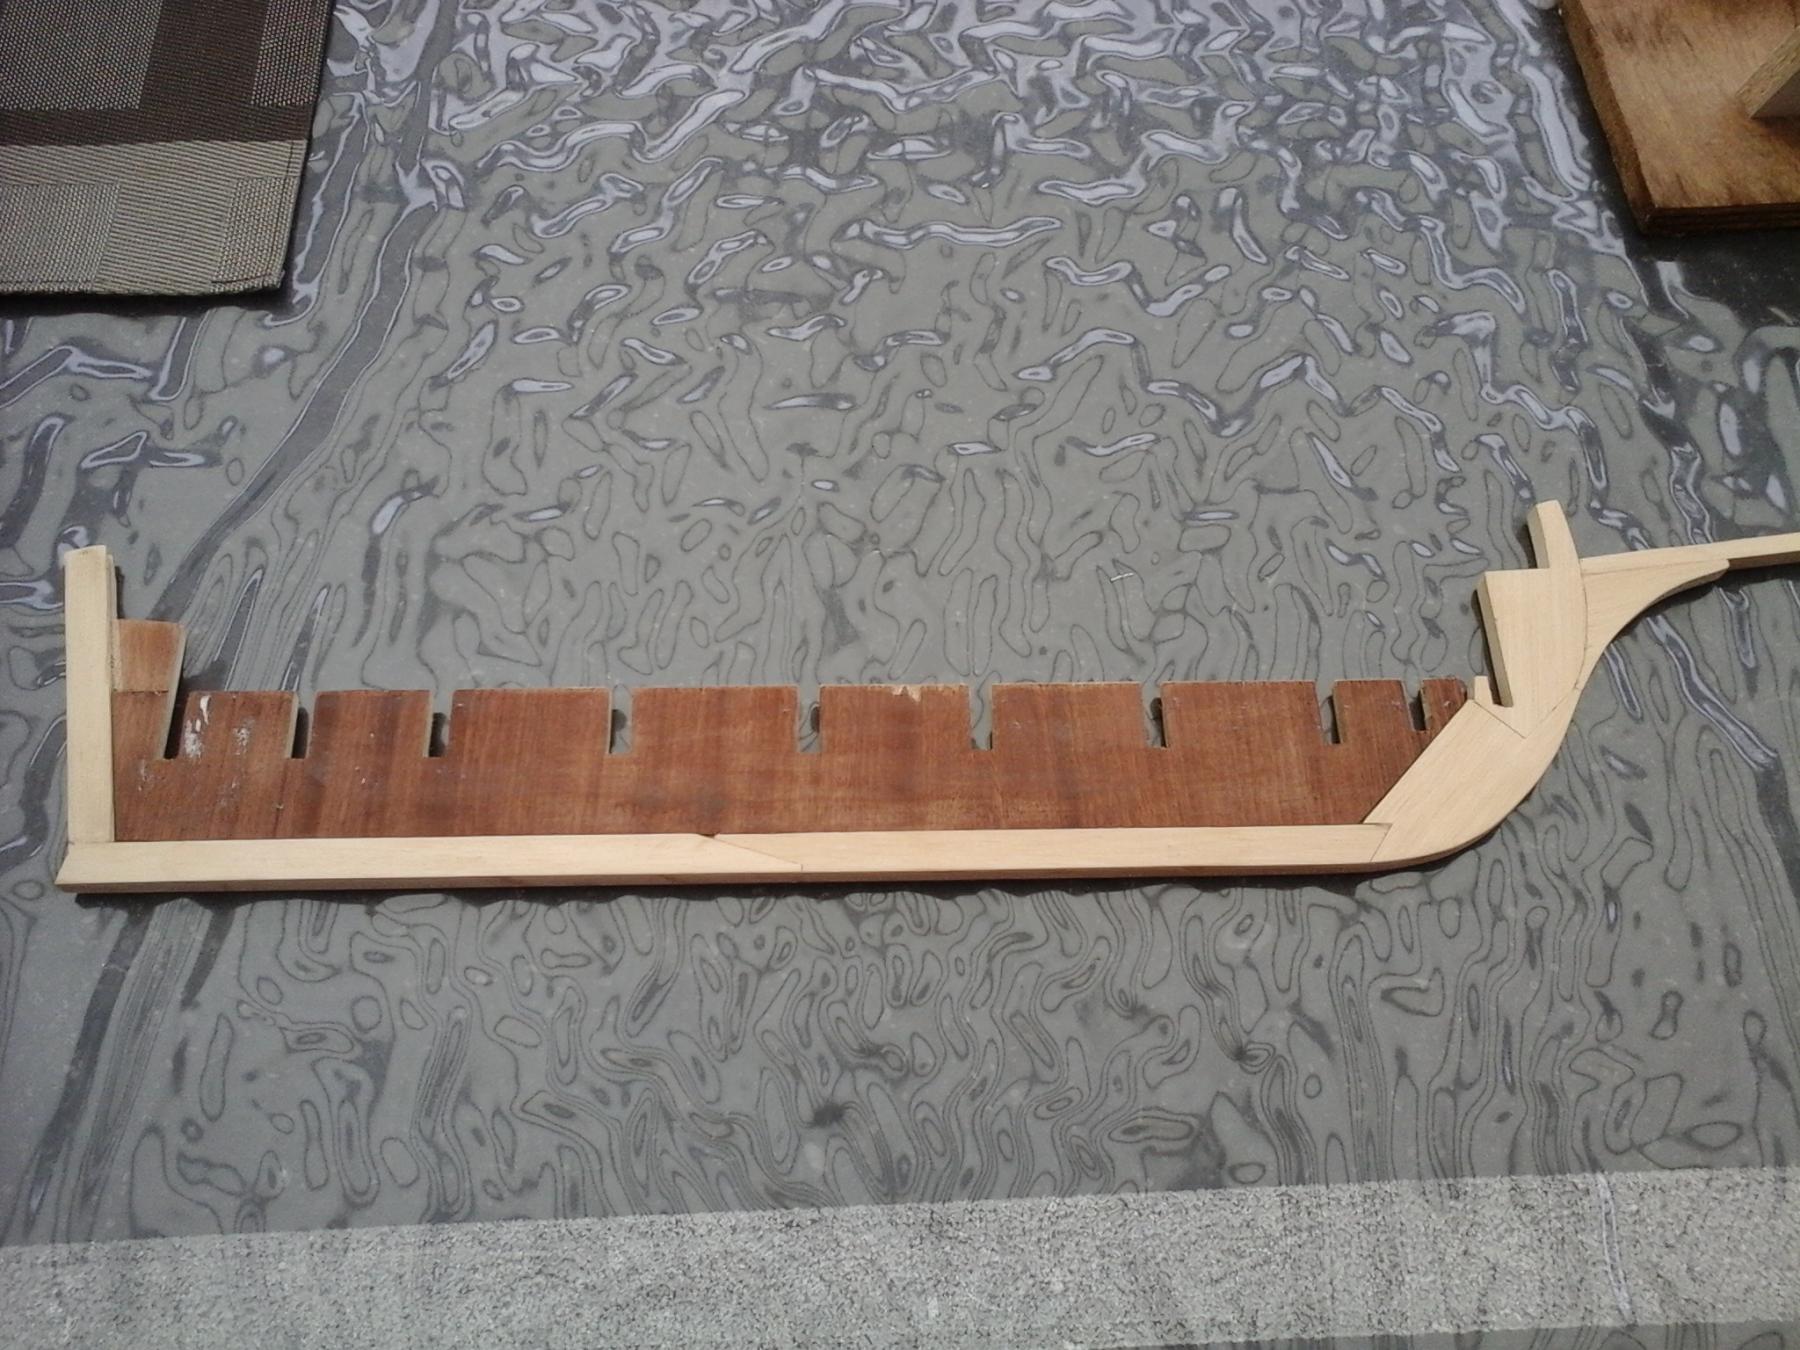
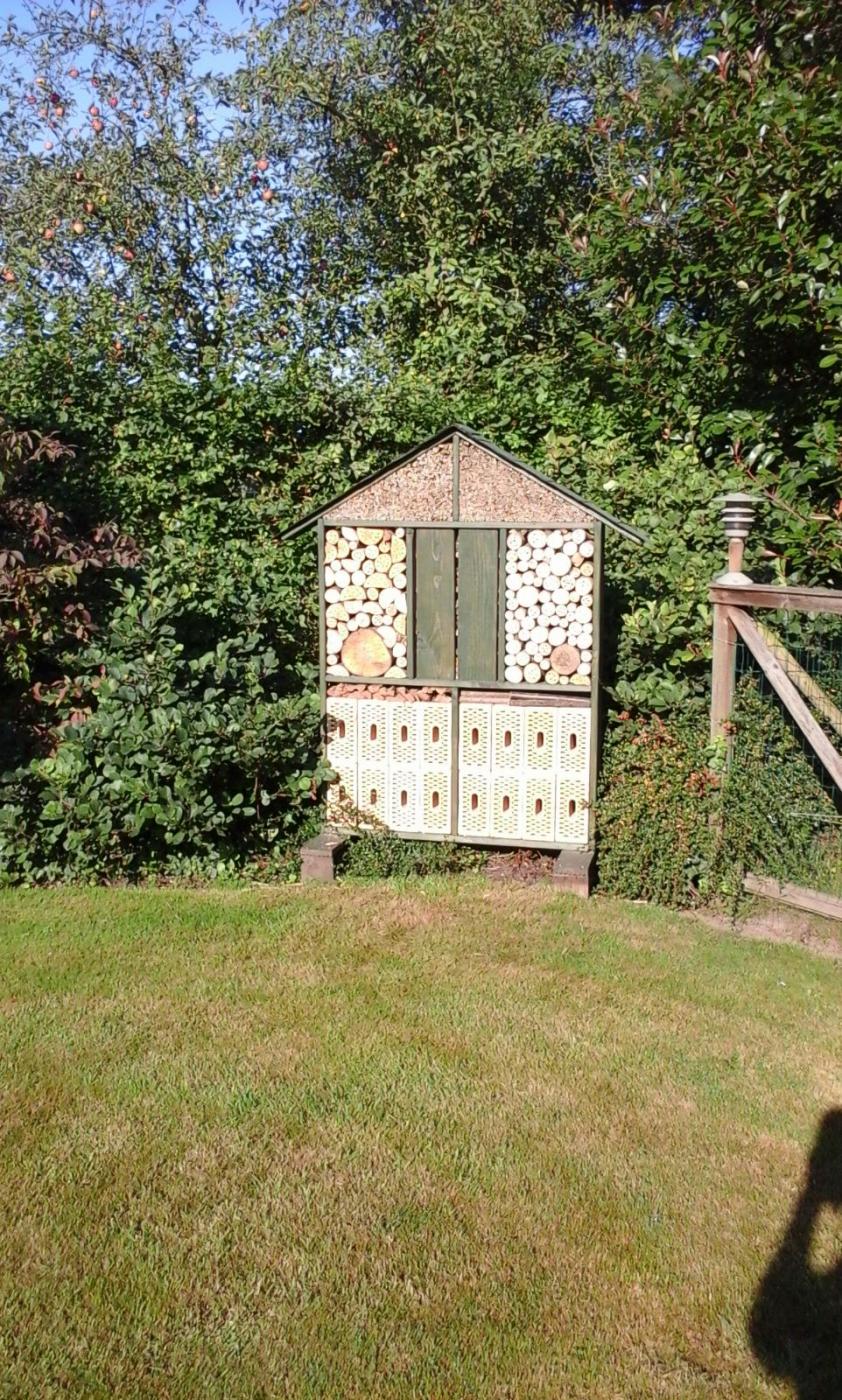
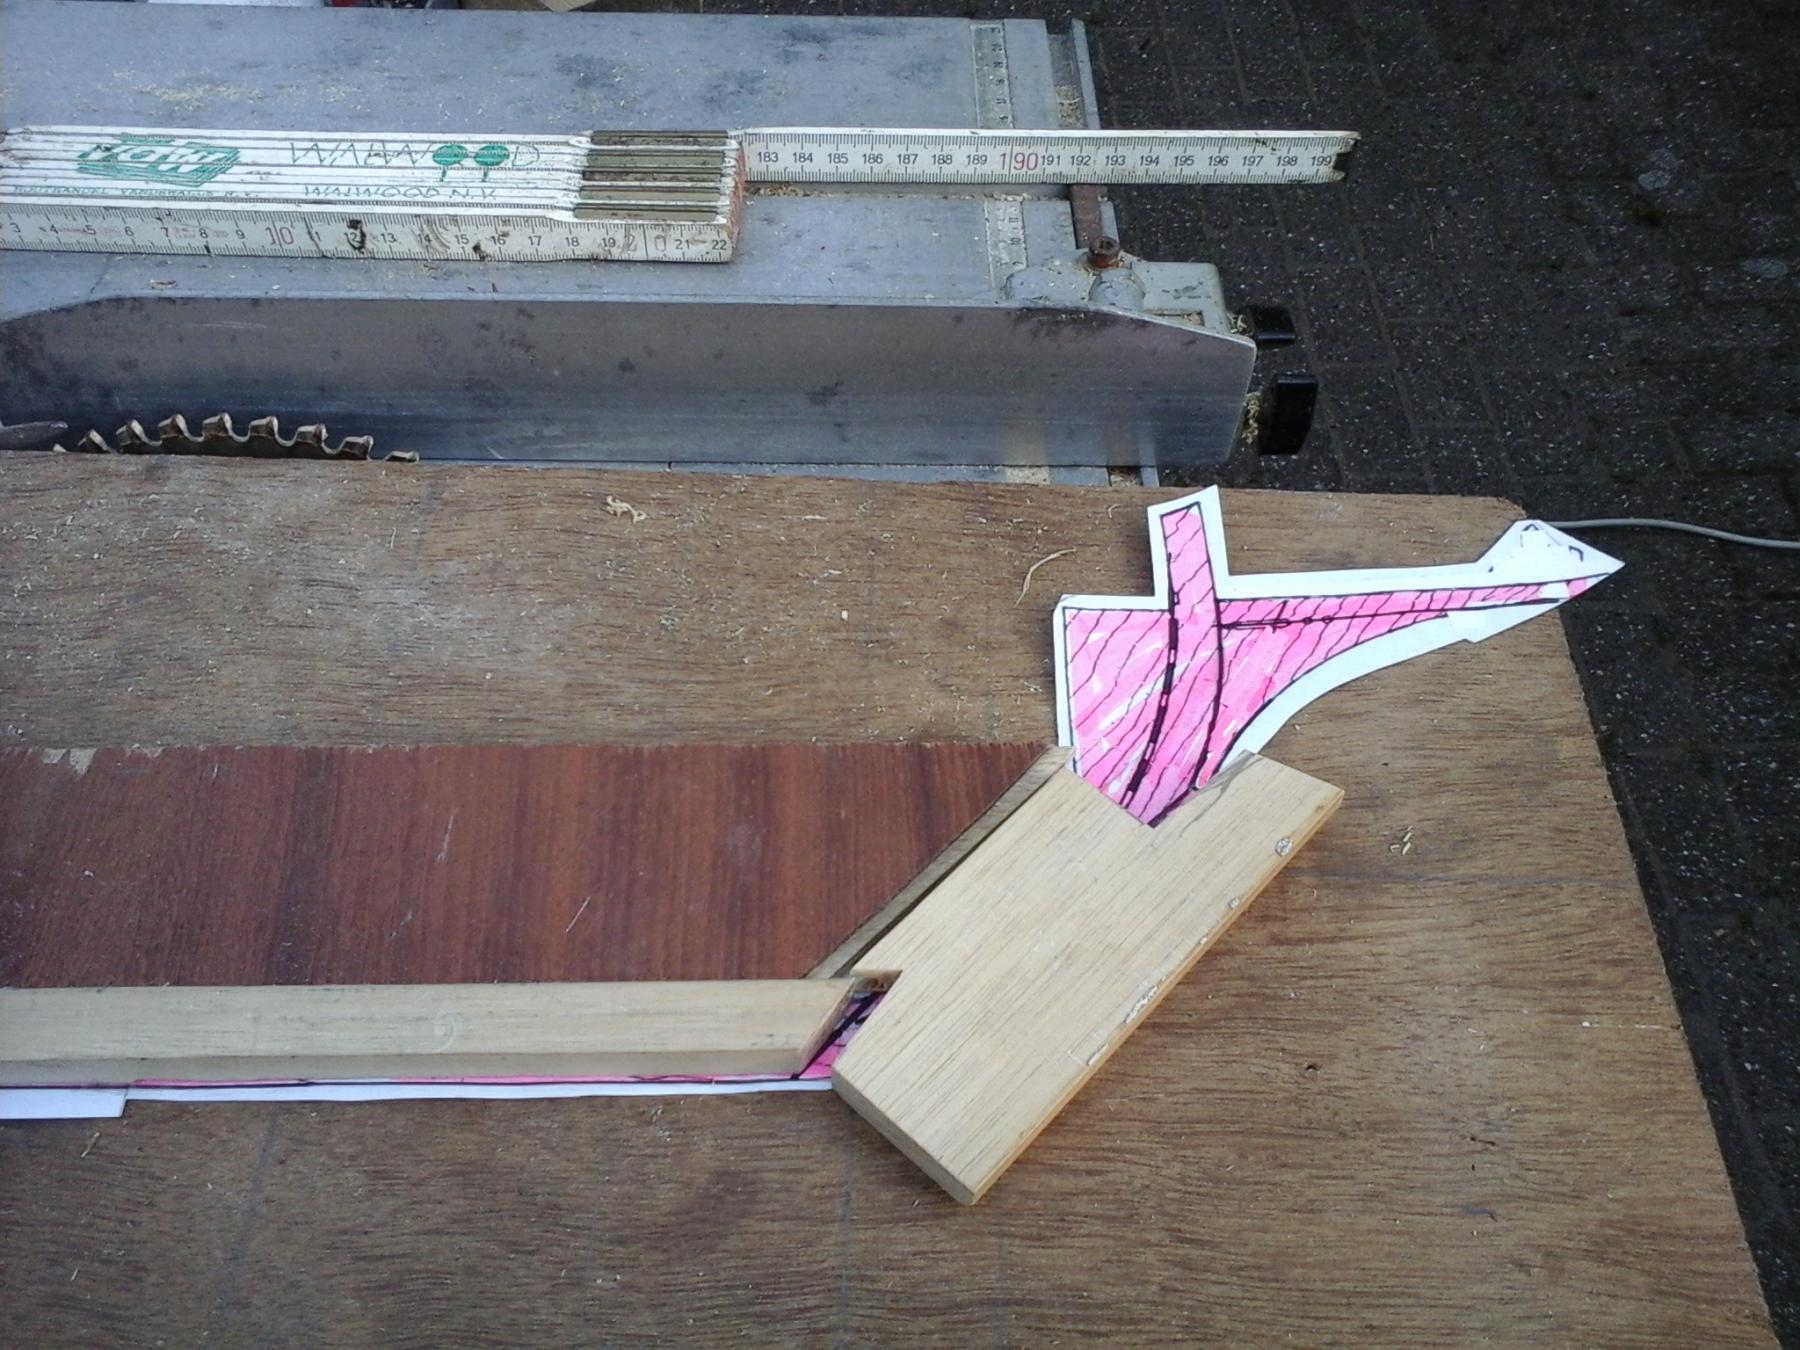
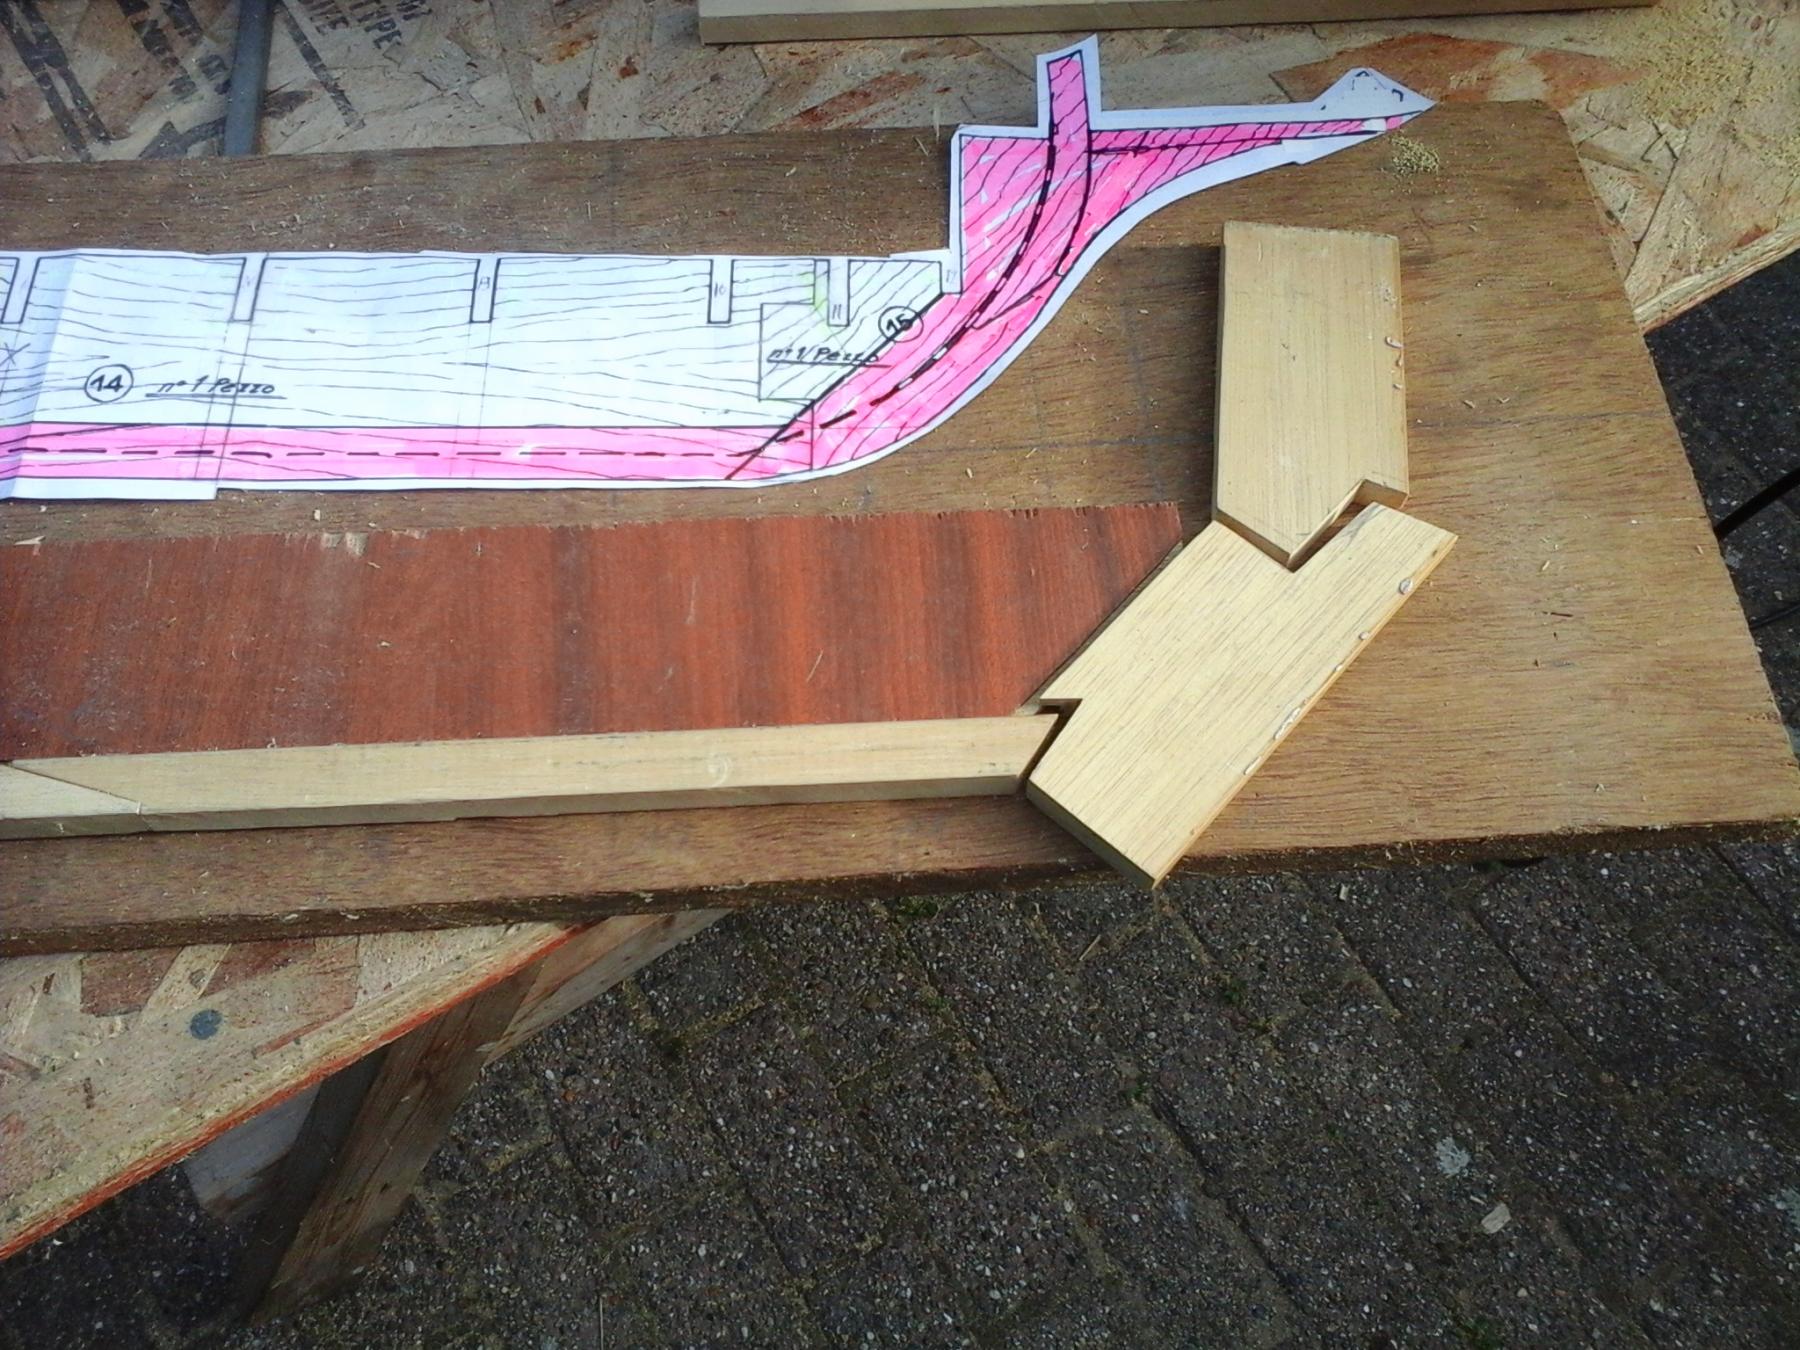
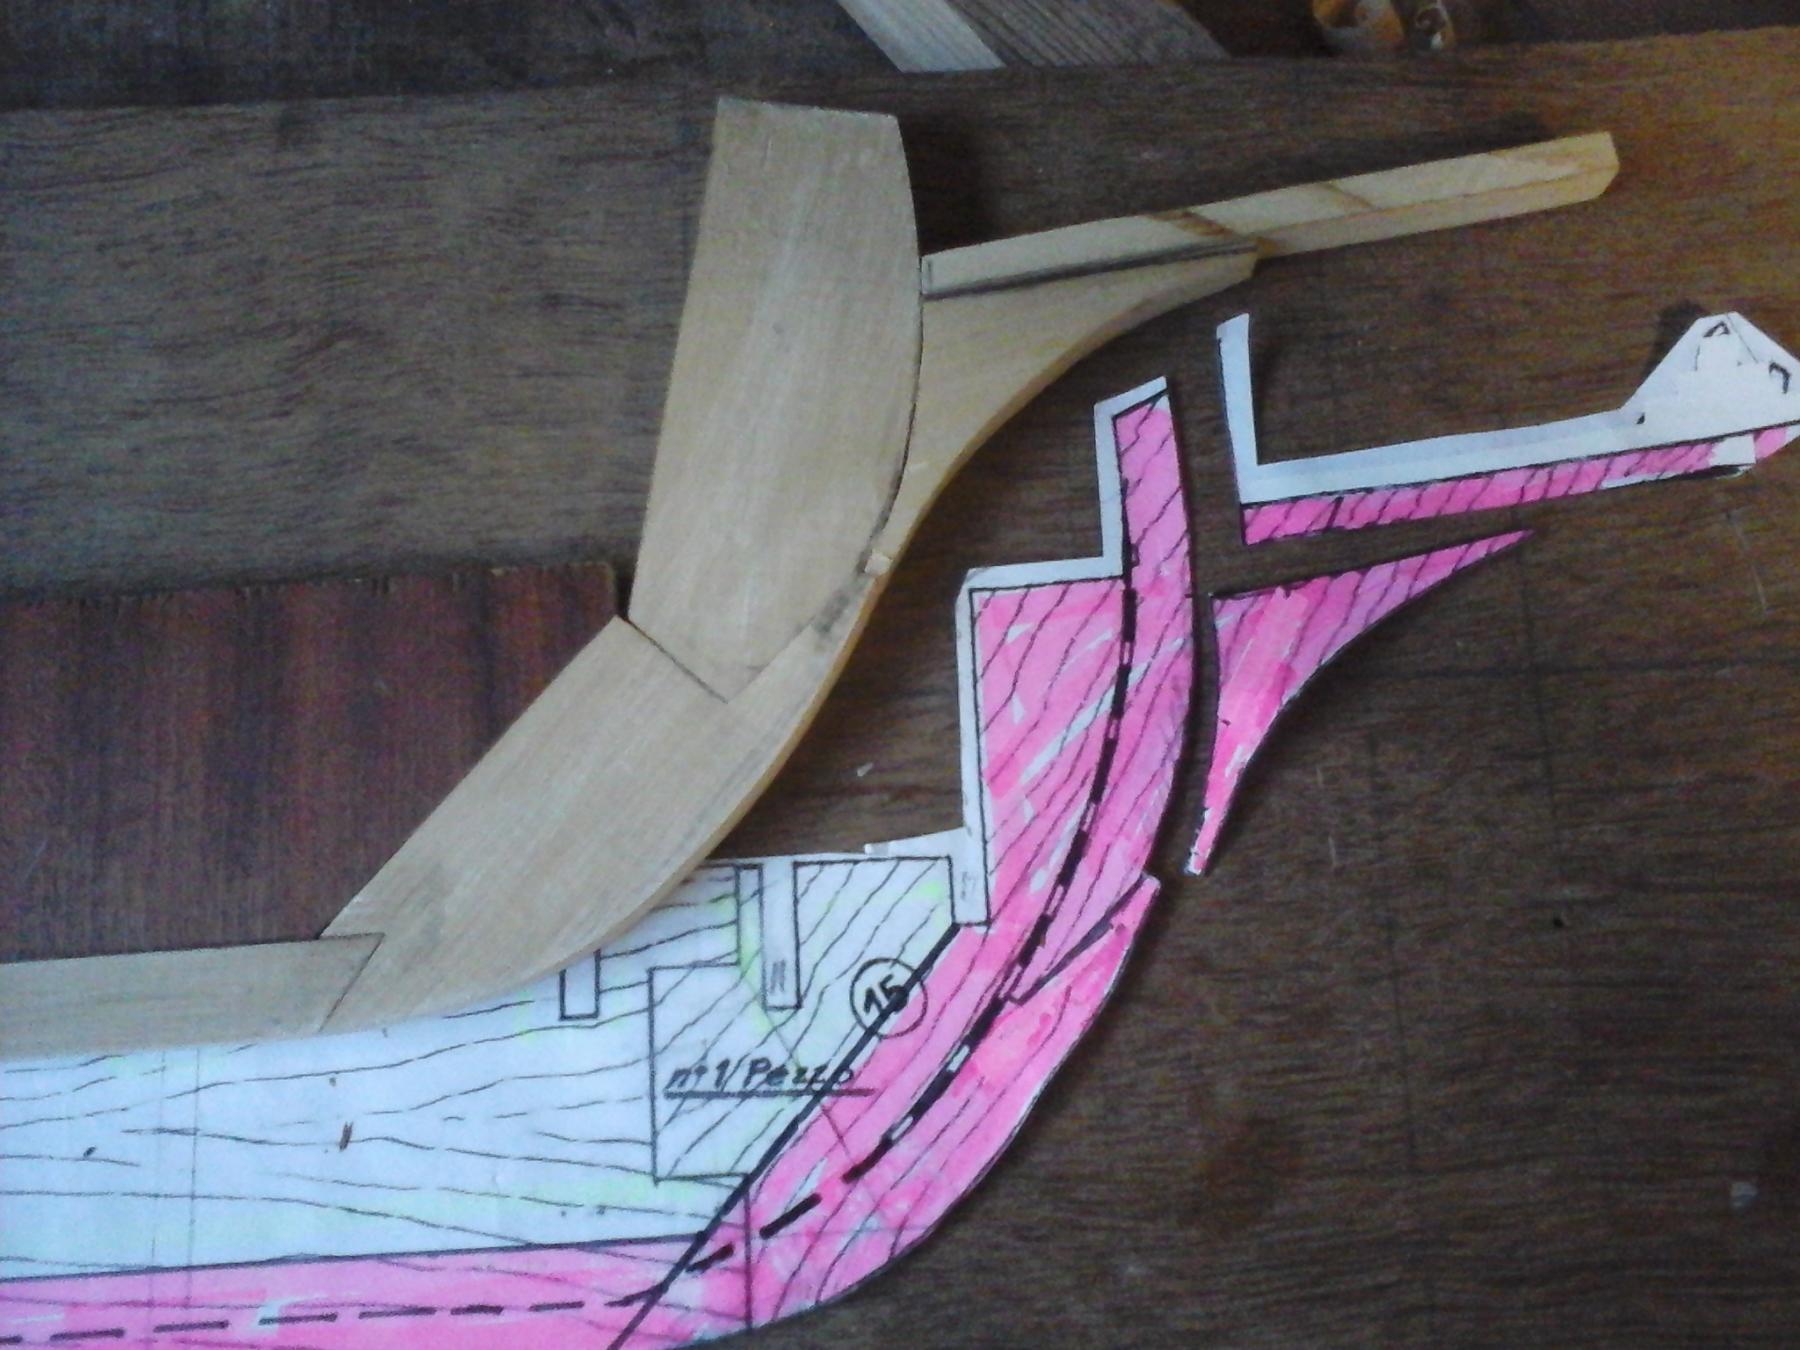
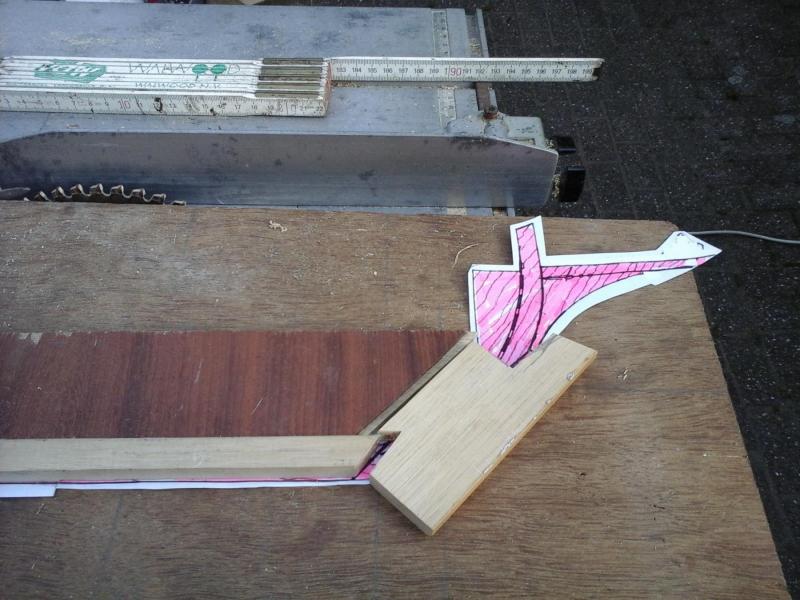
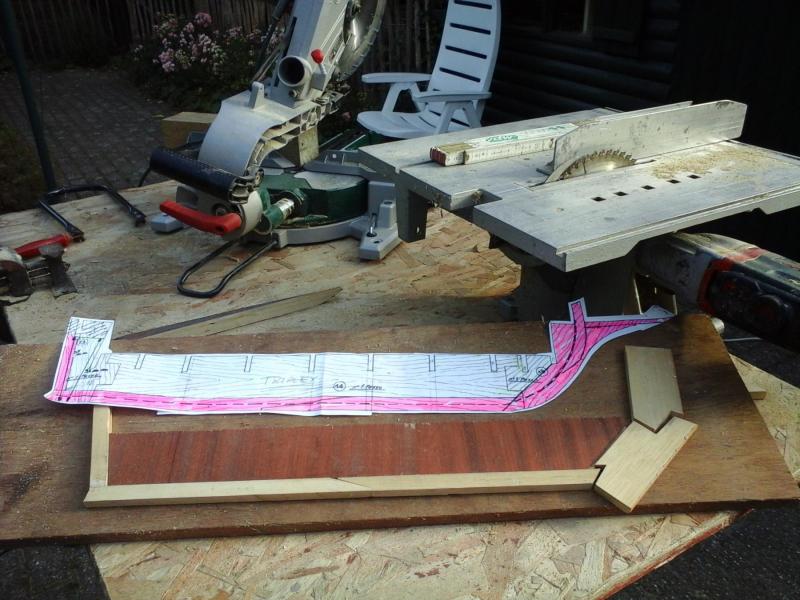
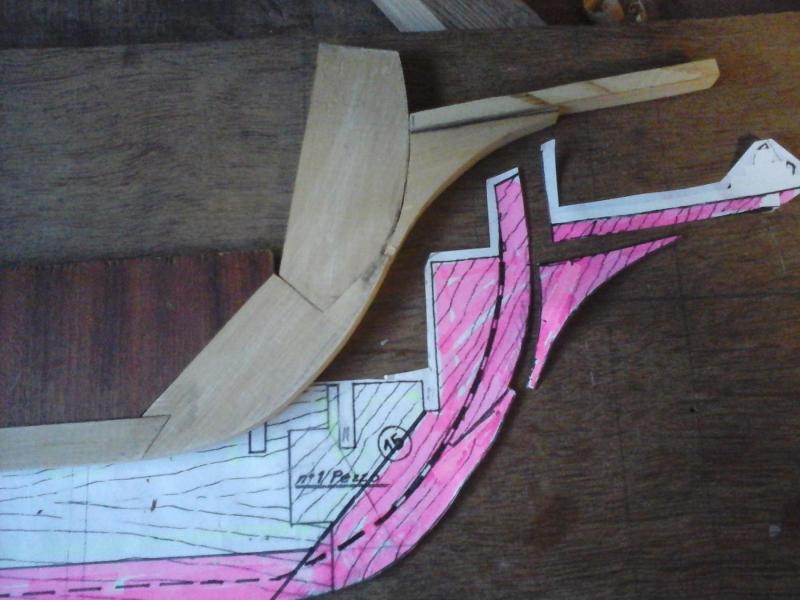
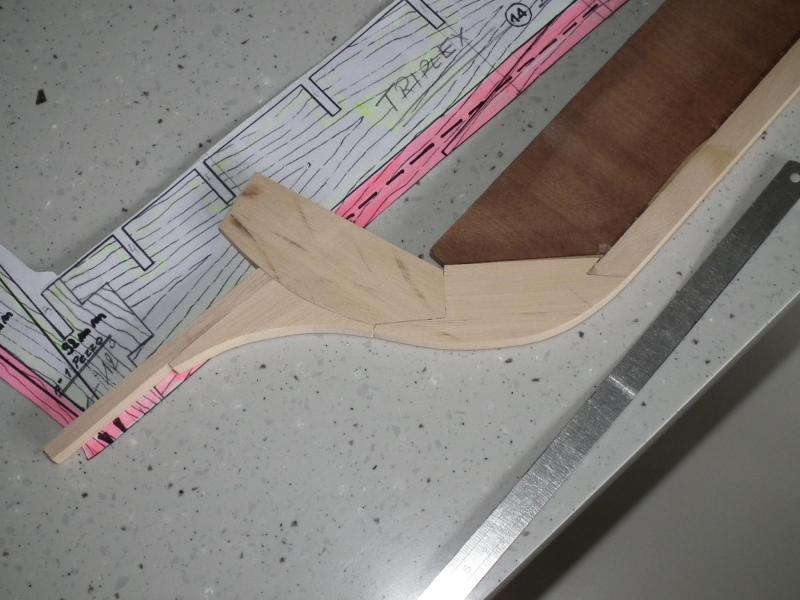
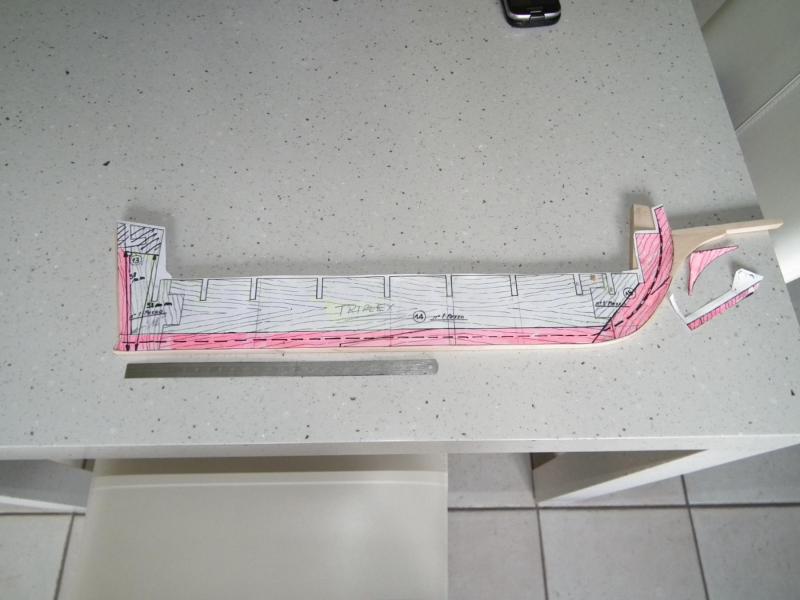
Thank you all, Cristian i bought the Bosch saw recently to make a "bee hotel". I saw a similar in-store, price: 995 euros. Now I have a Bosch saw and a bee hotel, price: 213 euro .... Steven and Duff Thanks for the info. I found already the thesis on the evoloution of hull design. But not the other sites. By viewing this thesis there is little chance that my model will get a stern gallery. Chris Always welcome Now, on with the stem. More pieces are sawed and glued. After drying, the whole piece is sanded a first time. Now the paper keel is glued to wooden keel And after this , the grooves for the frames can be sawed out


- 756 replies
-
- 9
-
-
- galleon
- golden hind
- (and 2 more)
-
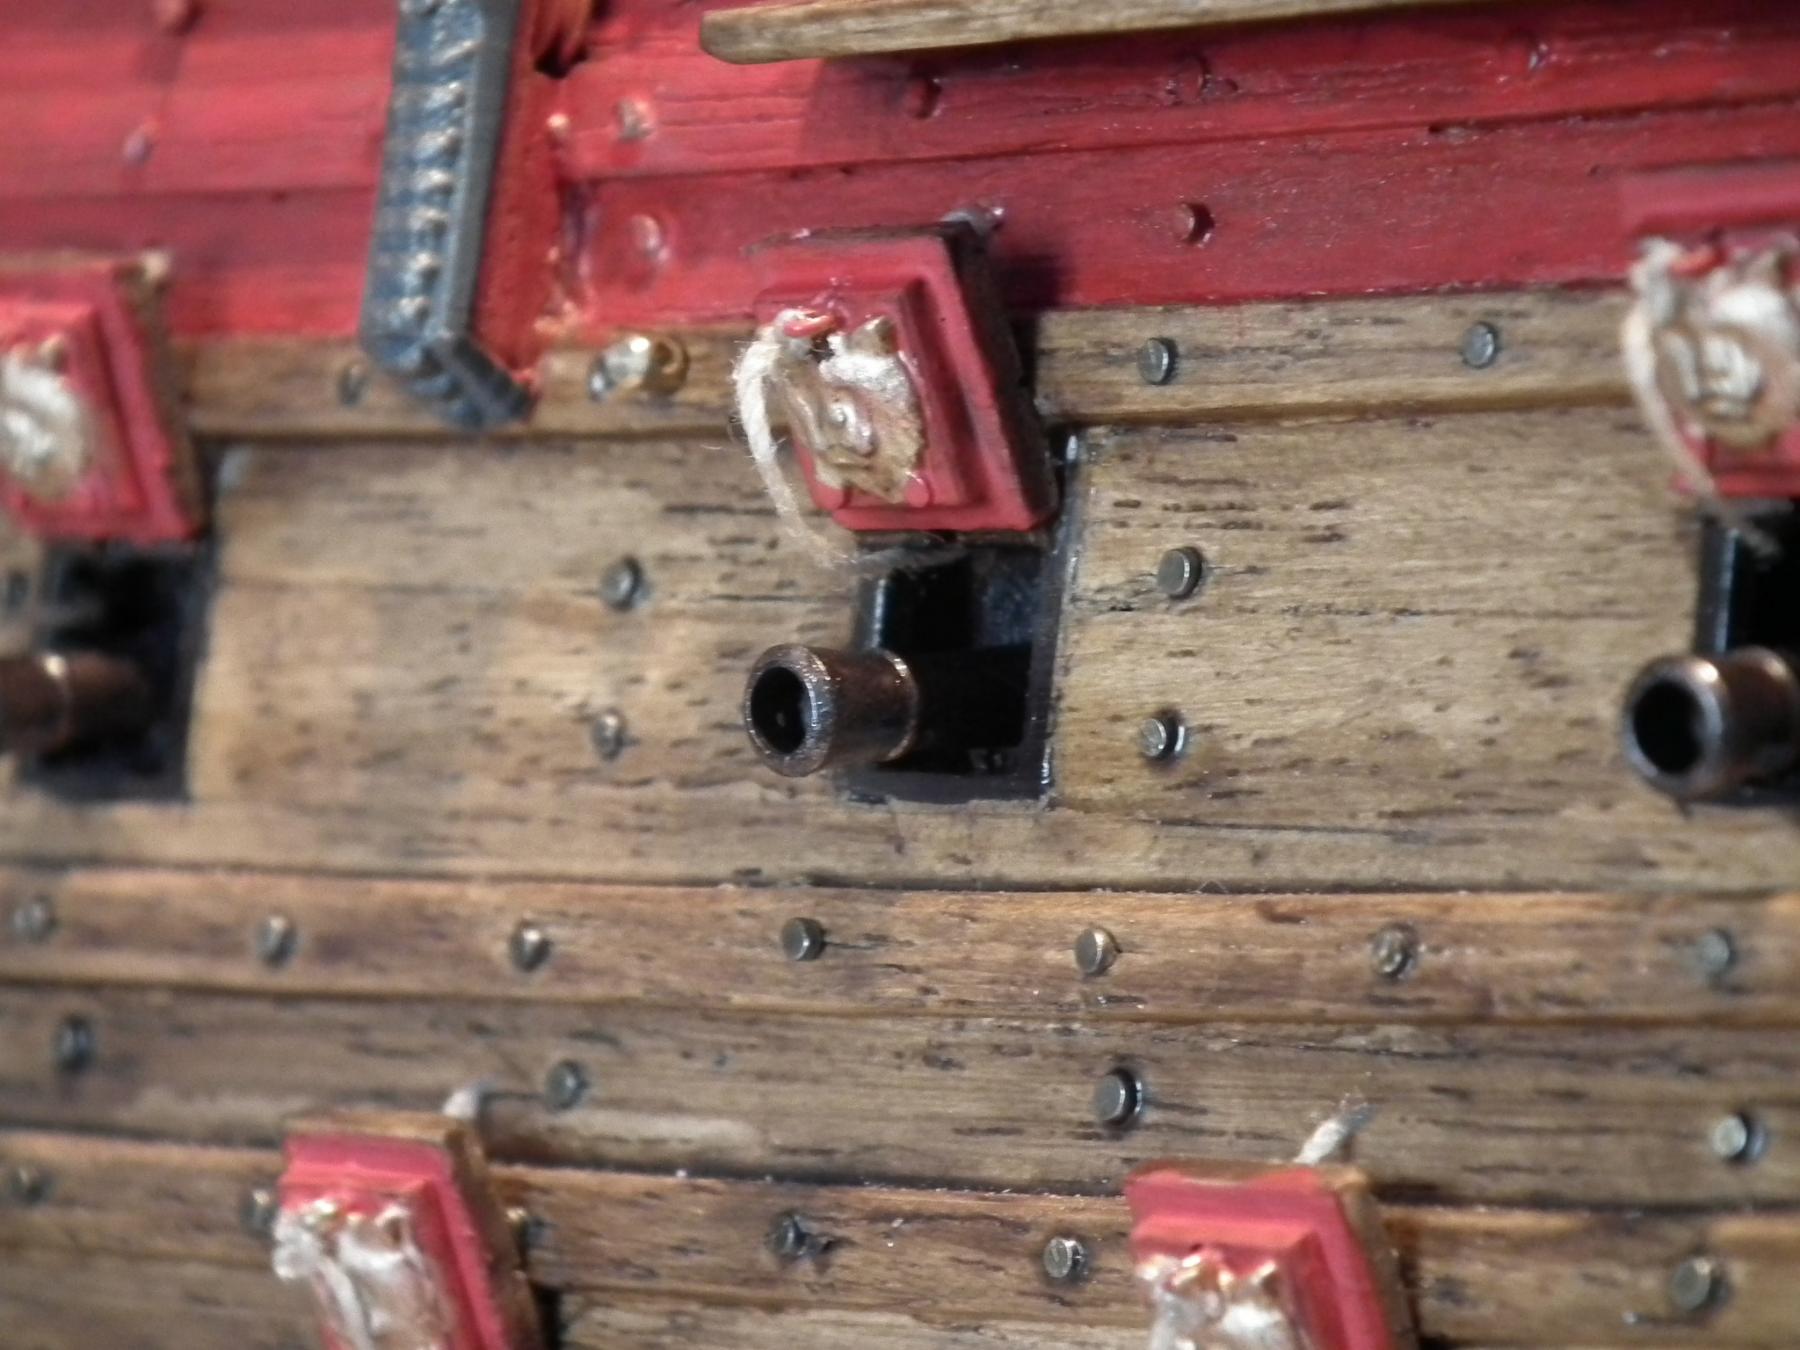
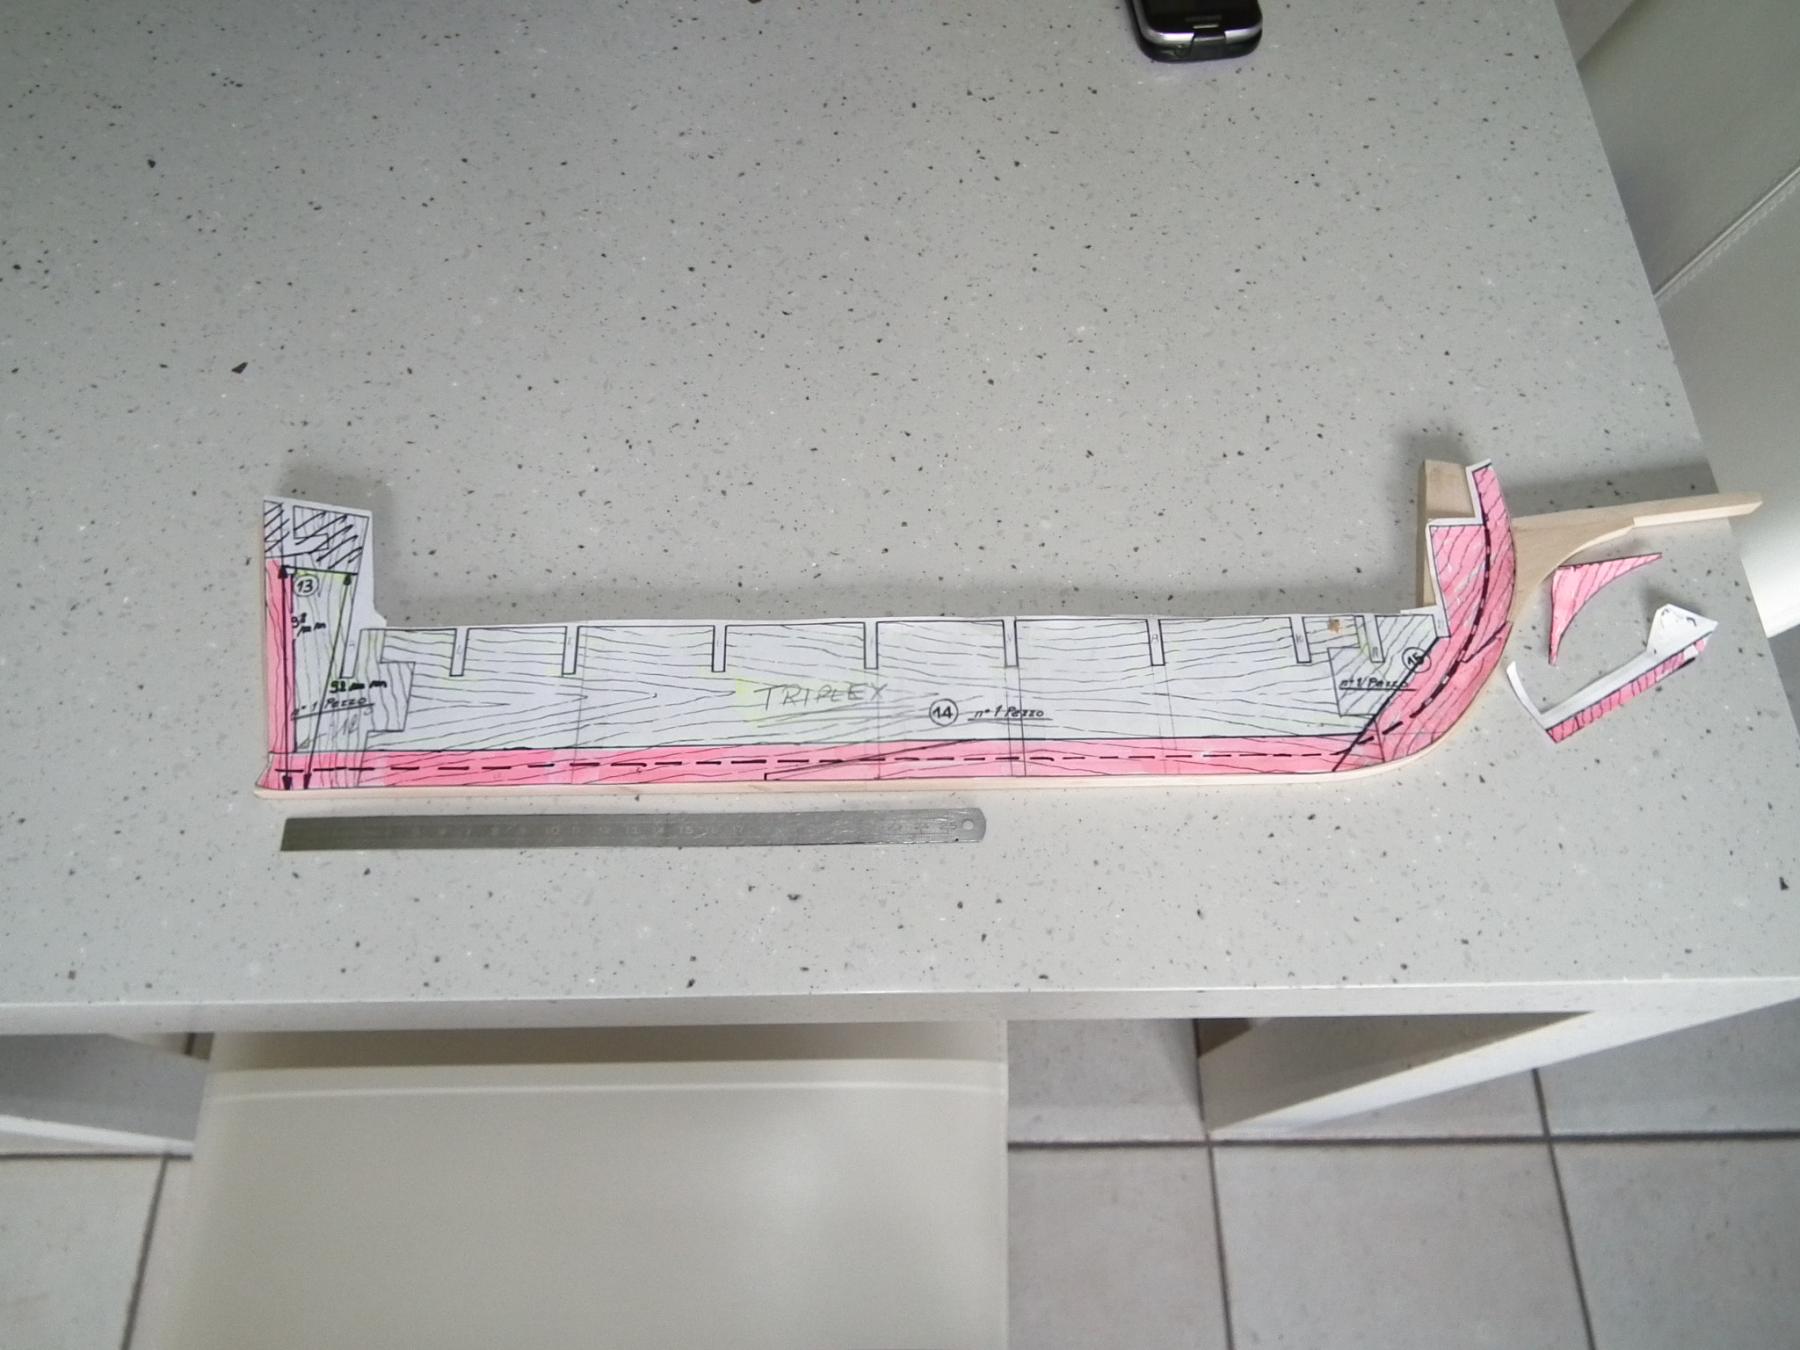
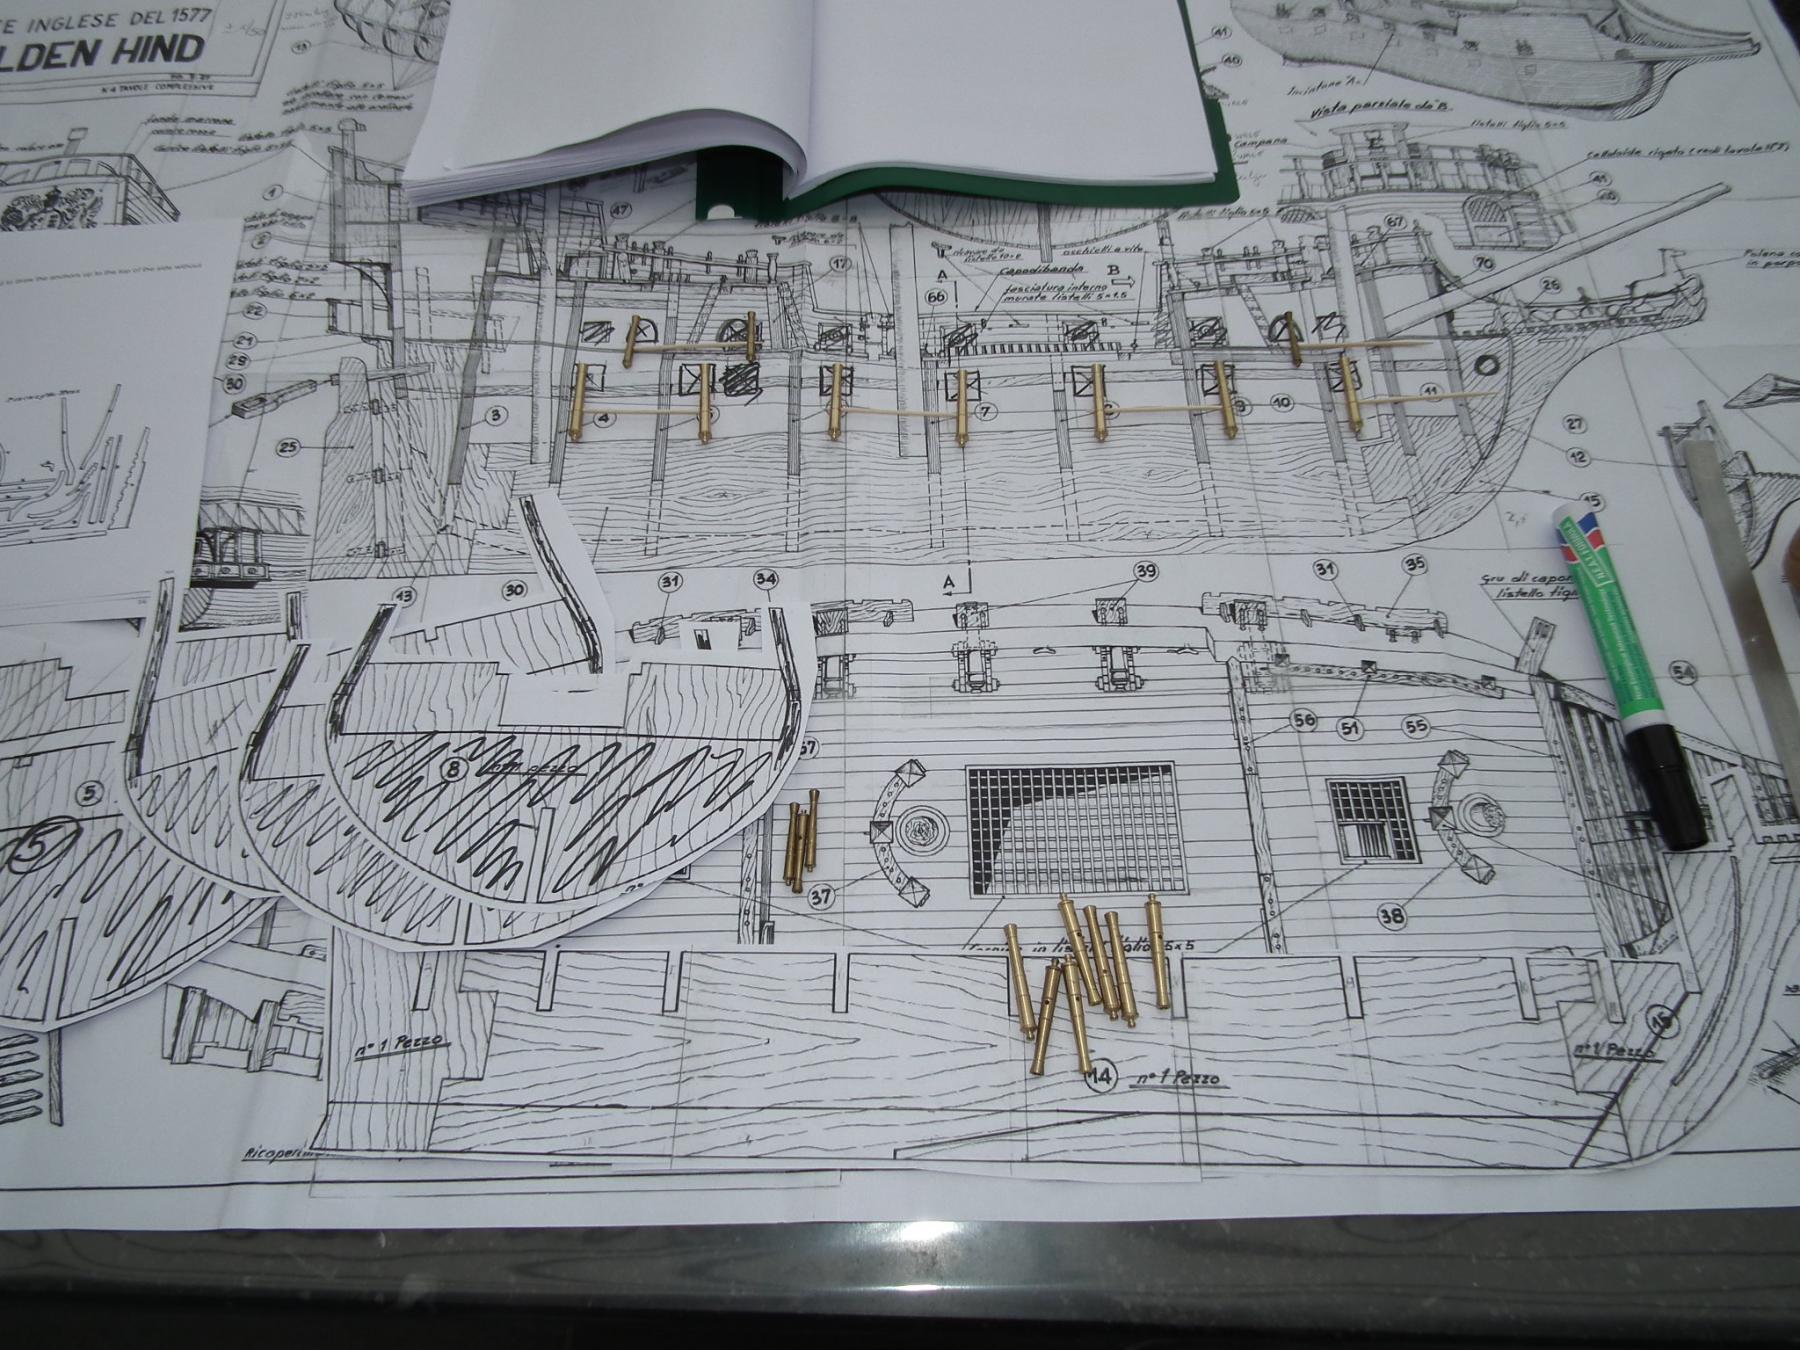
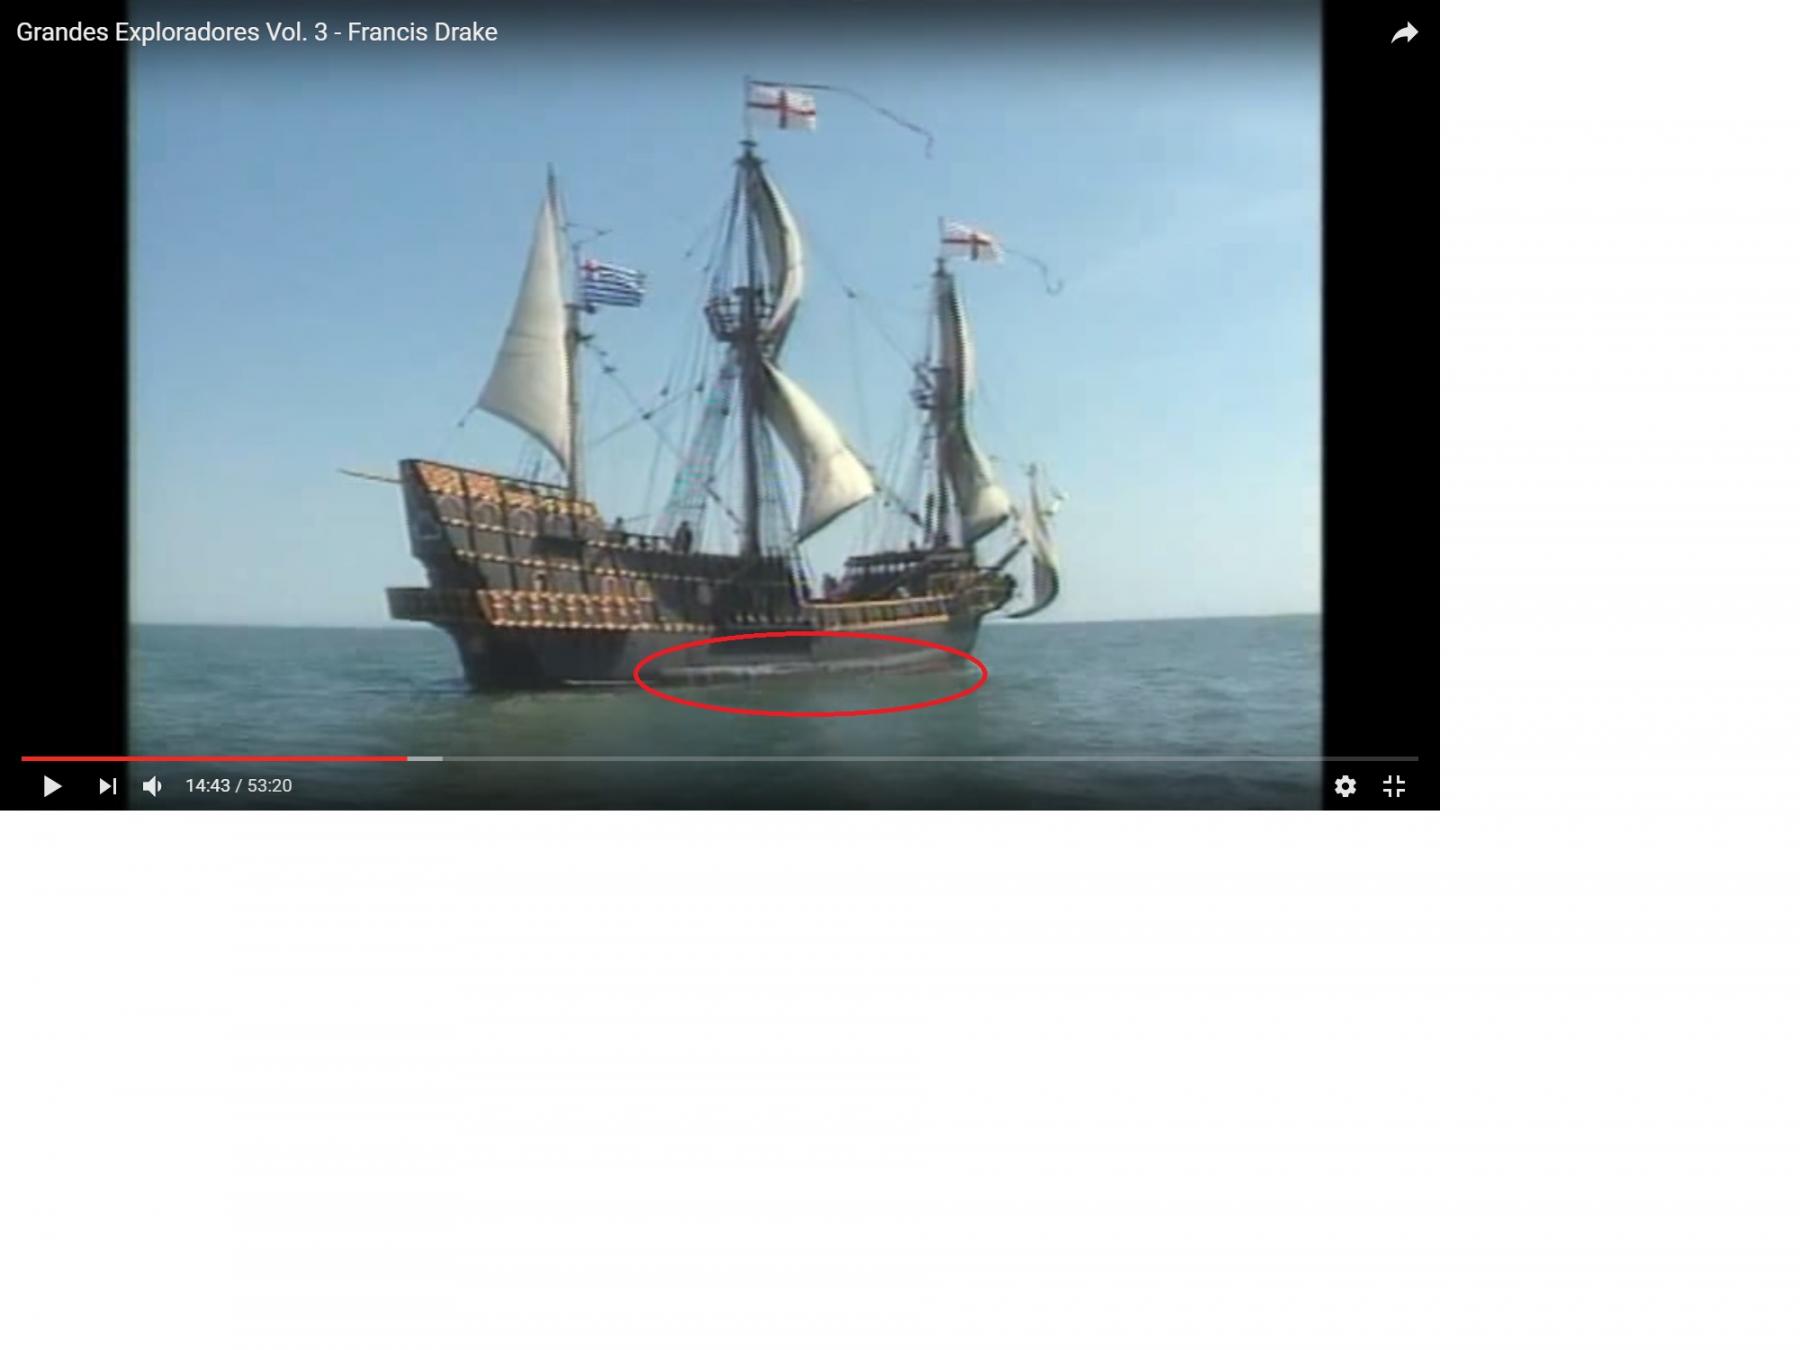
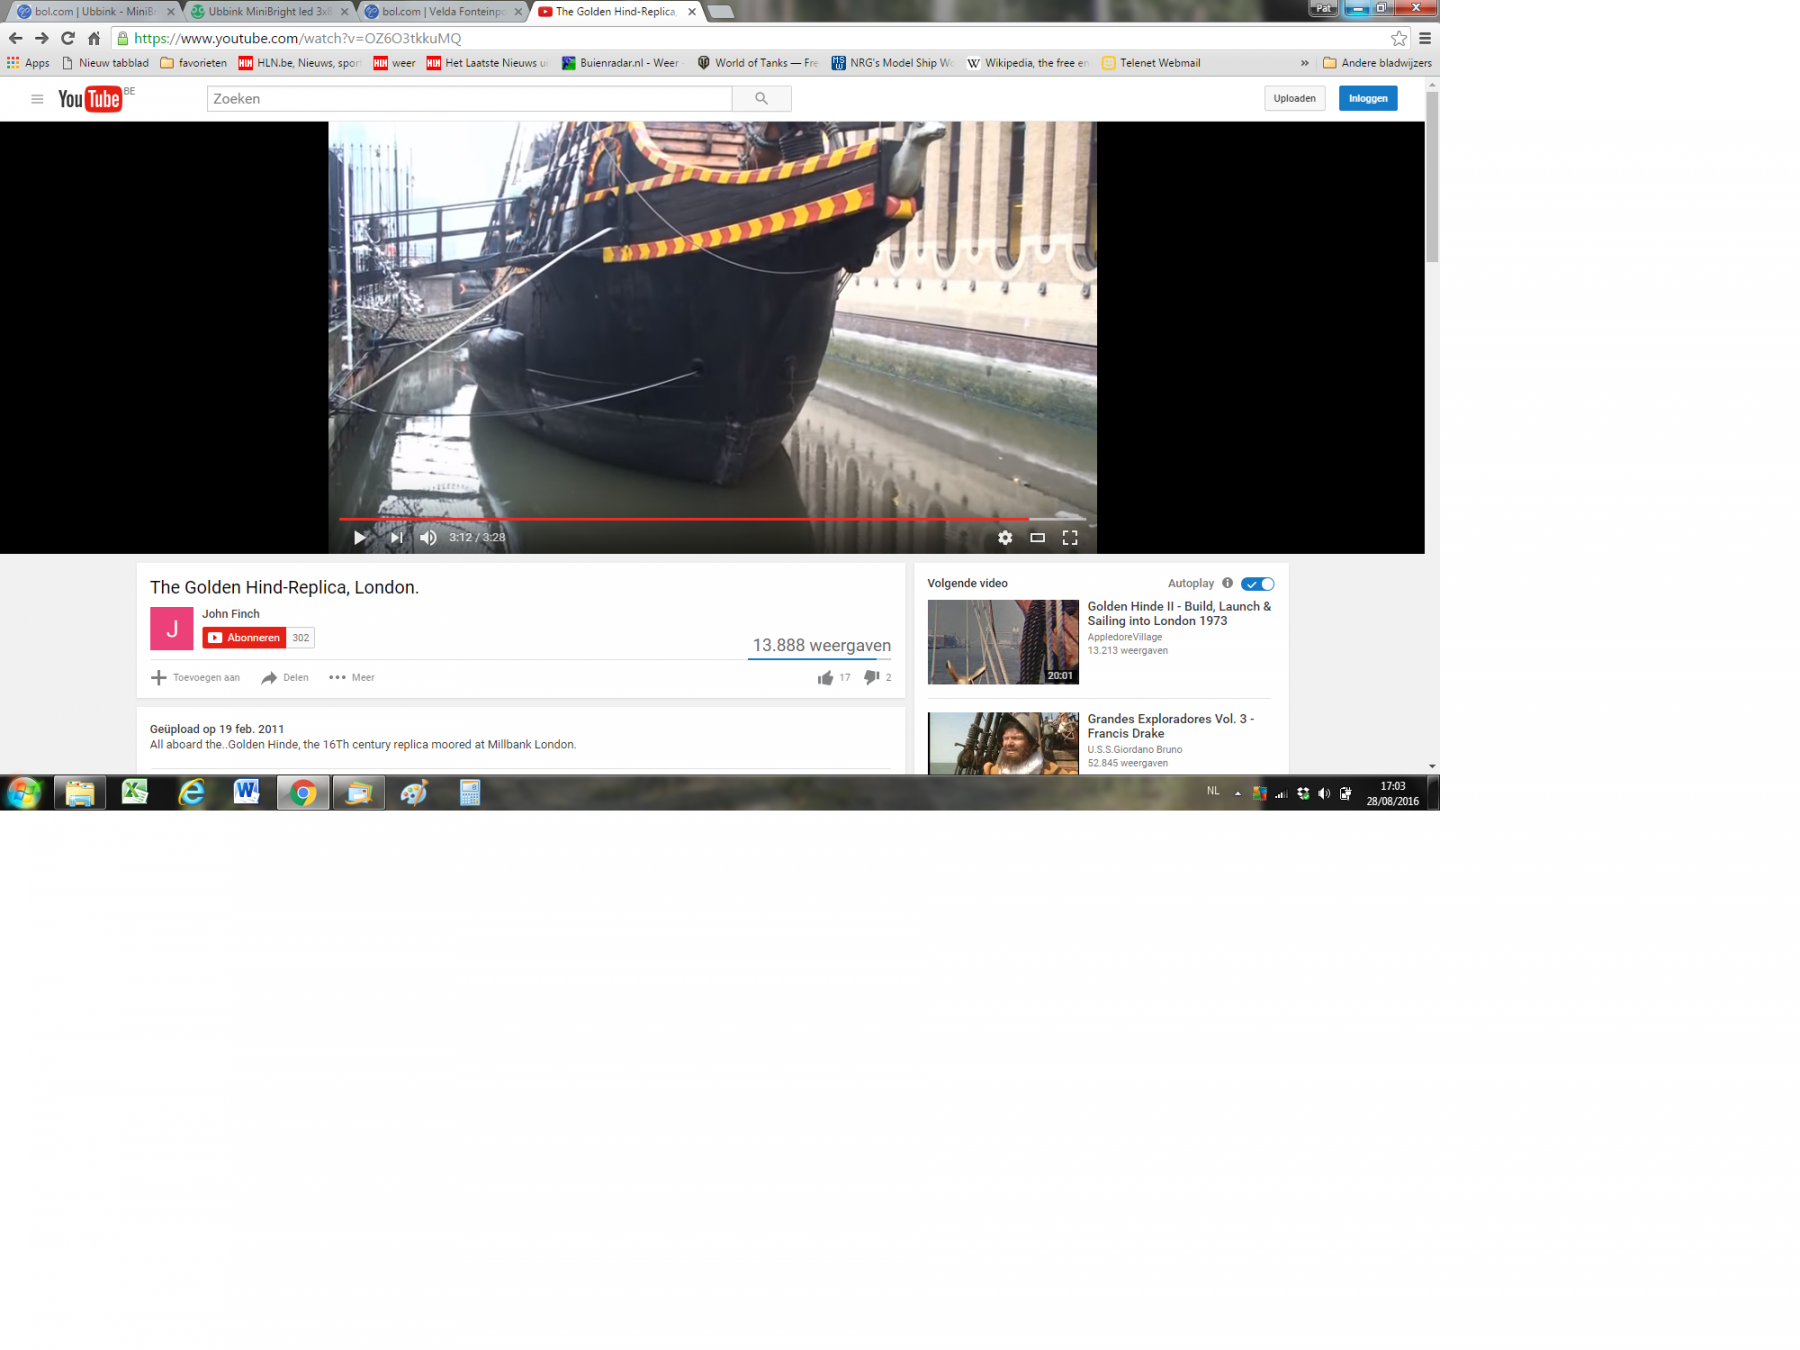
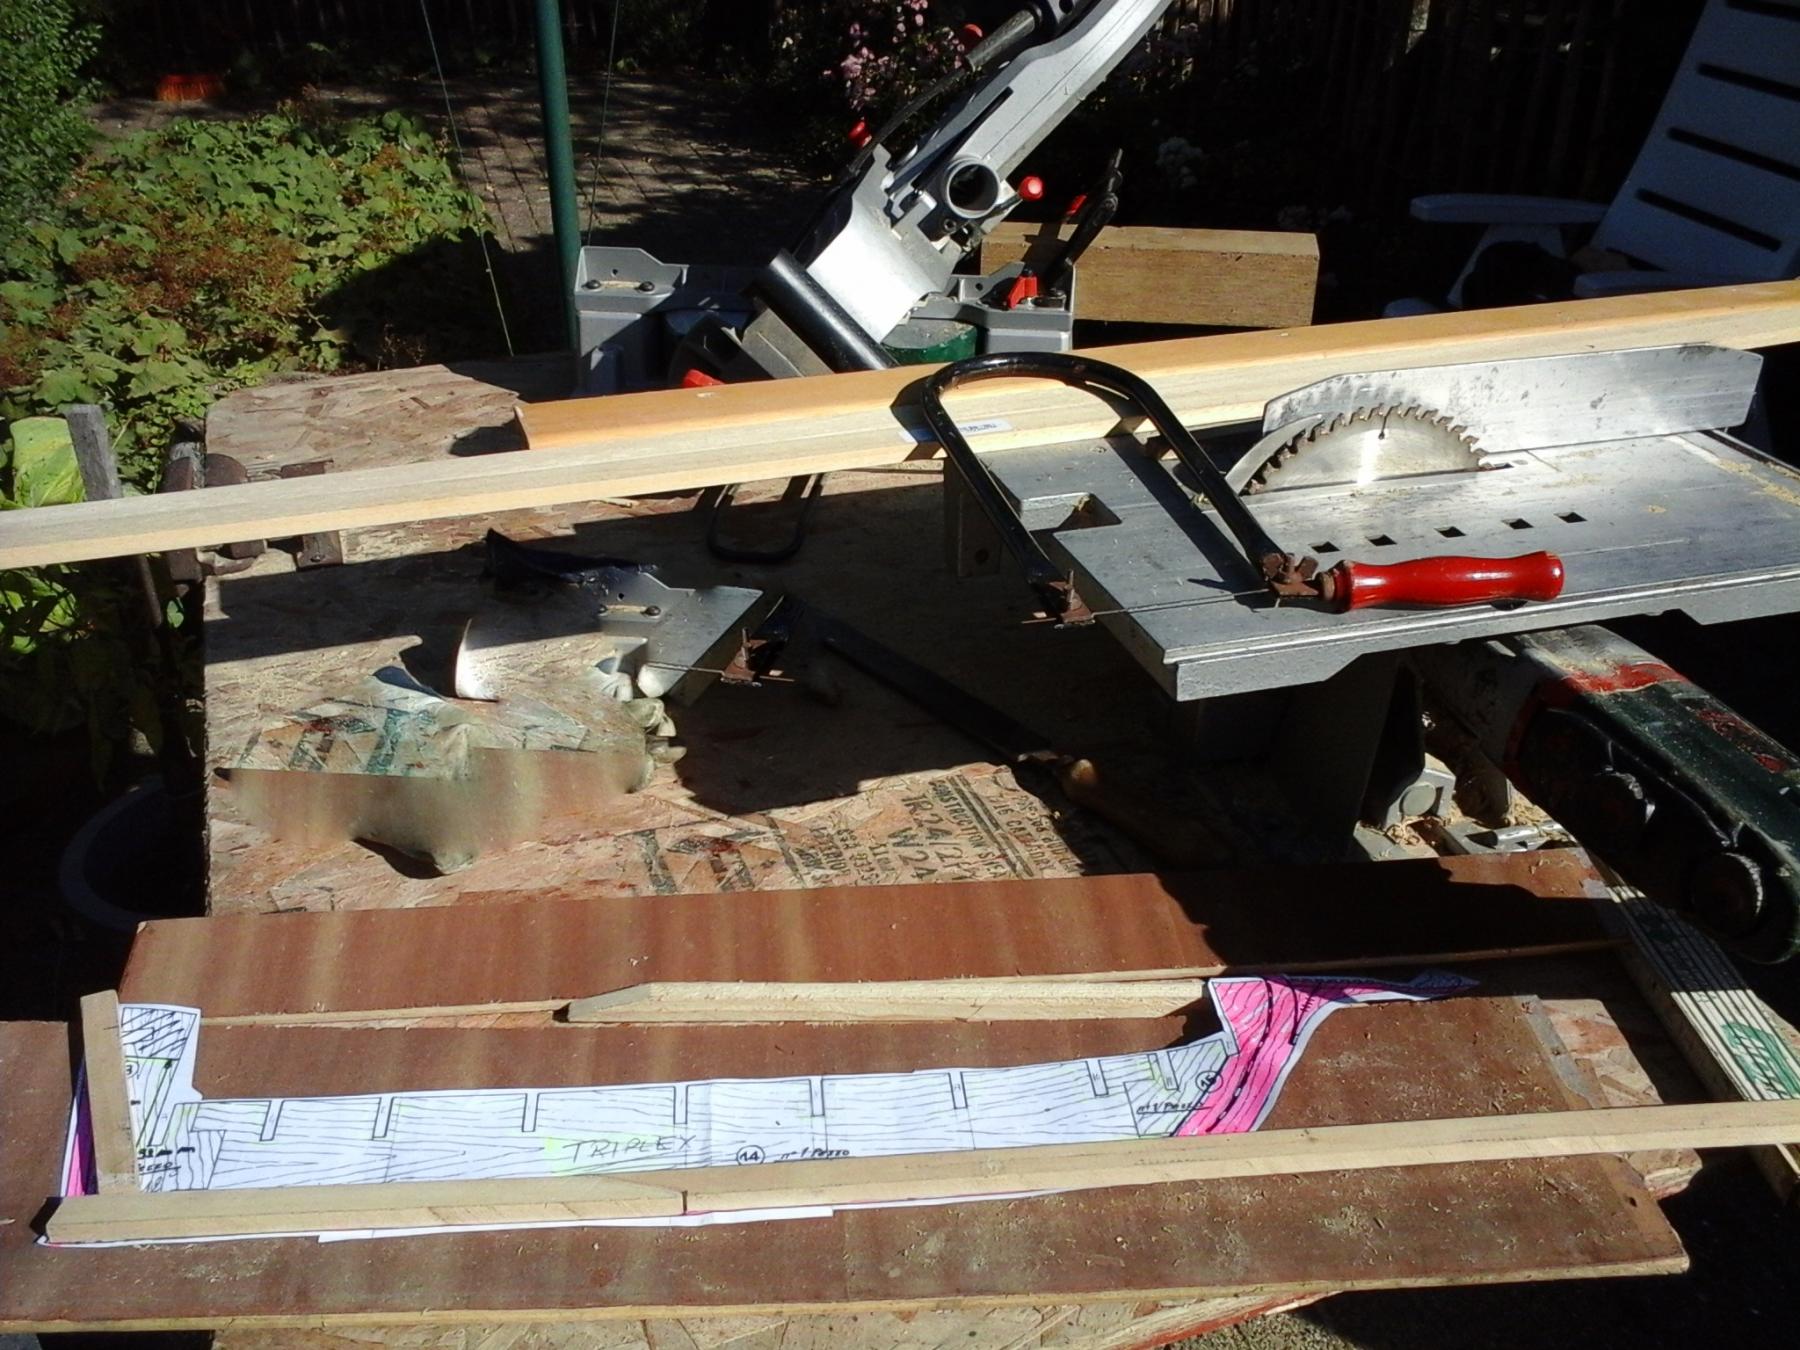
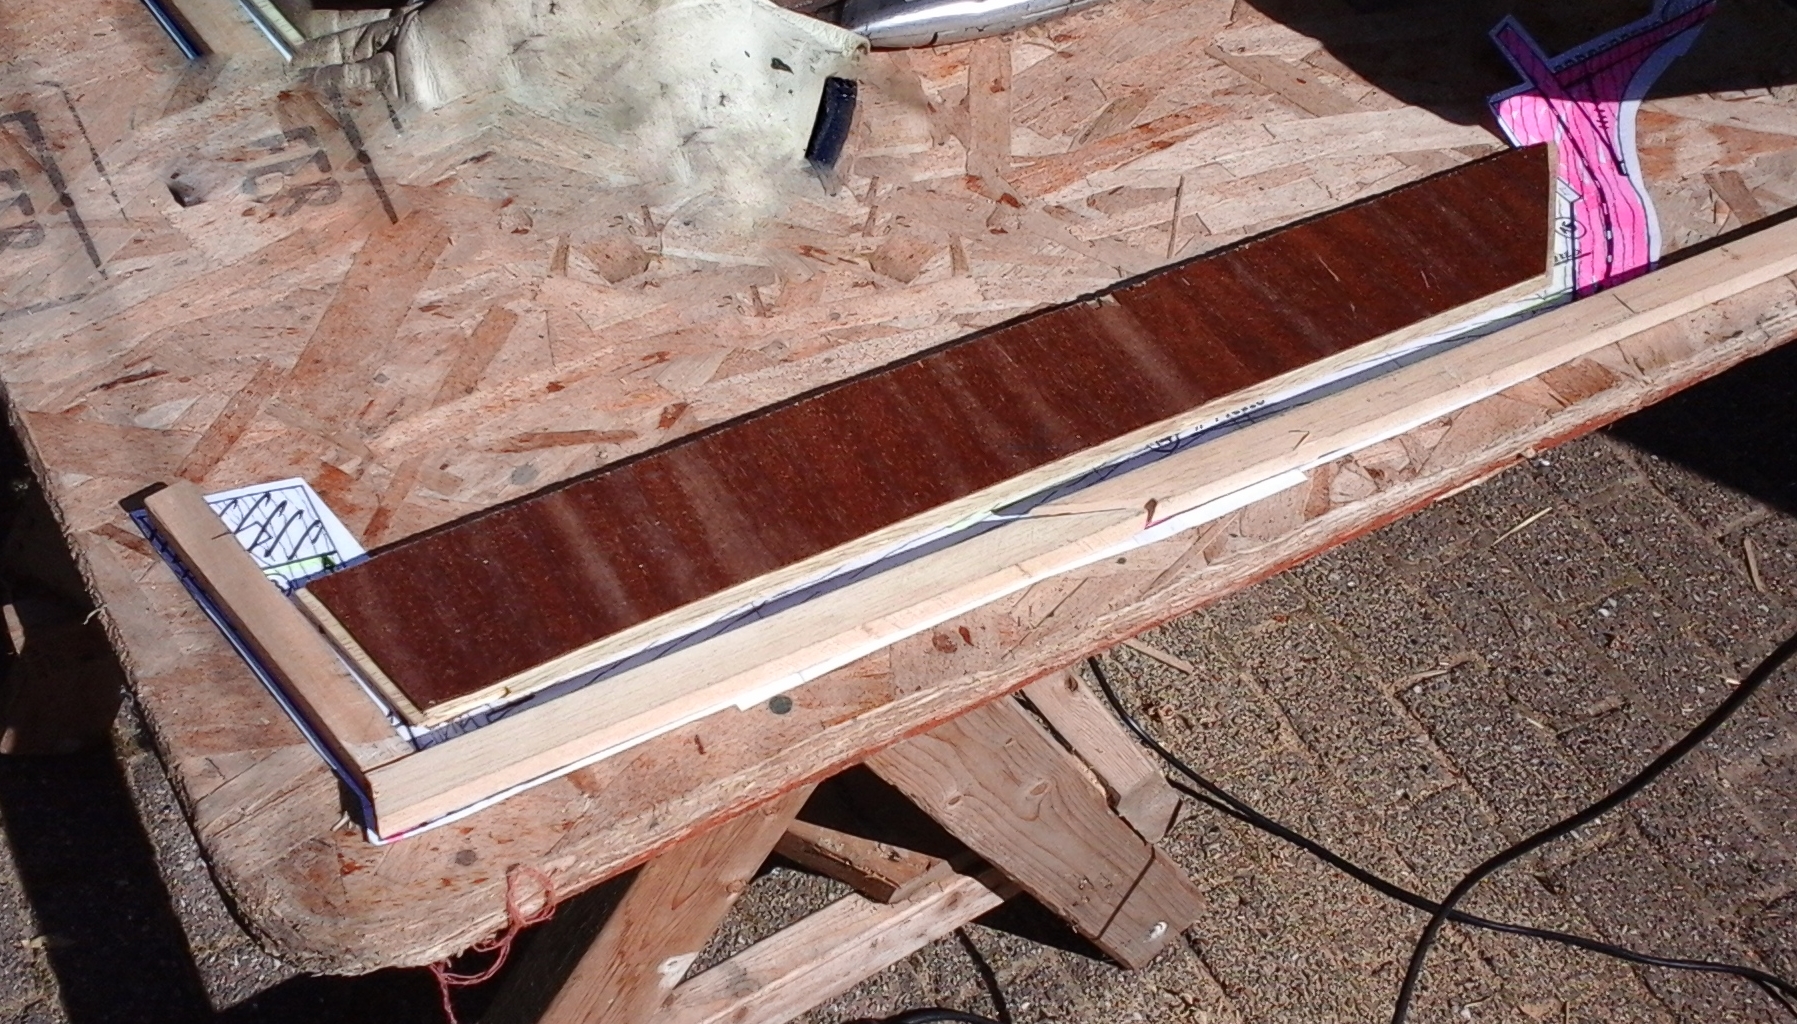
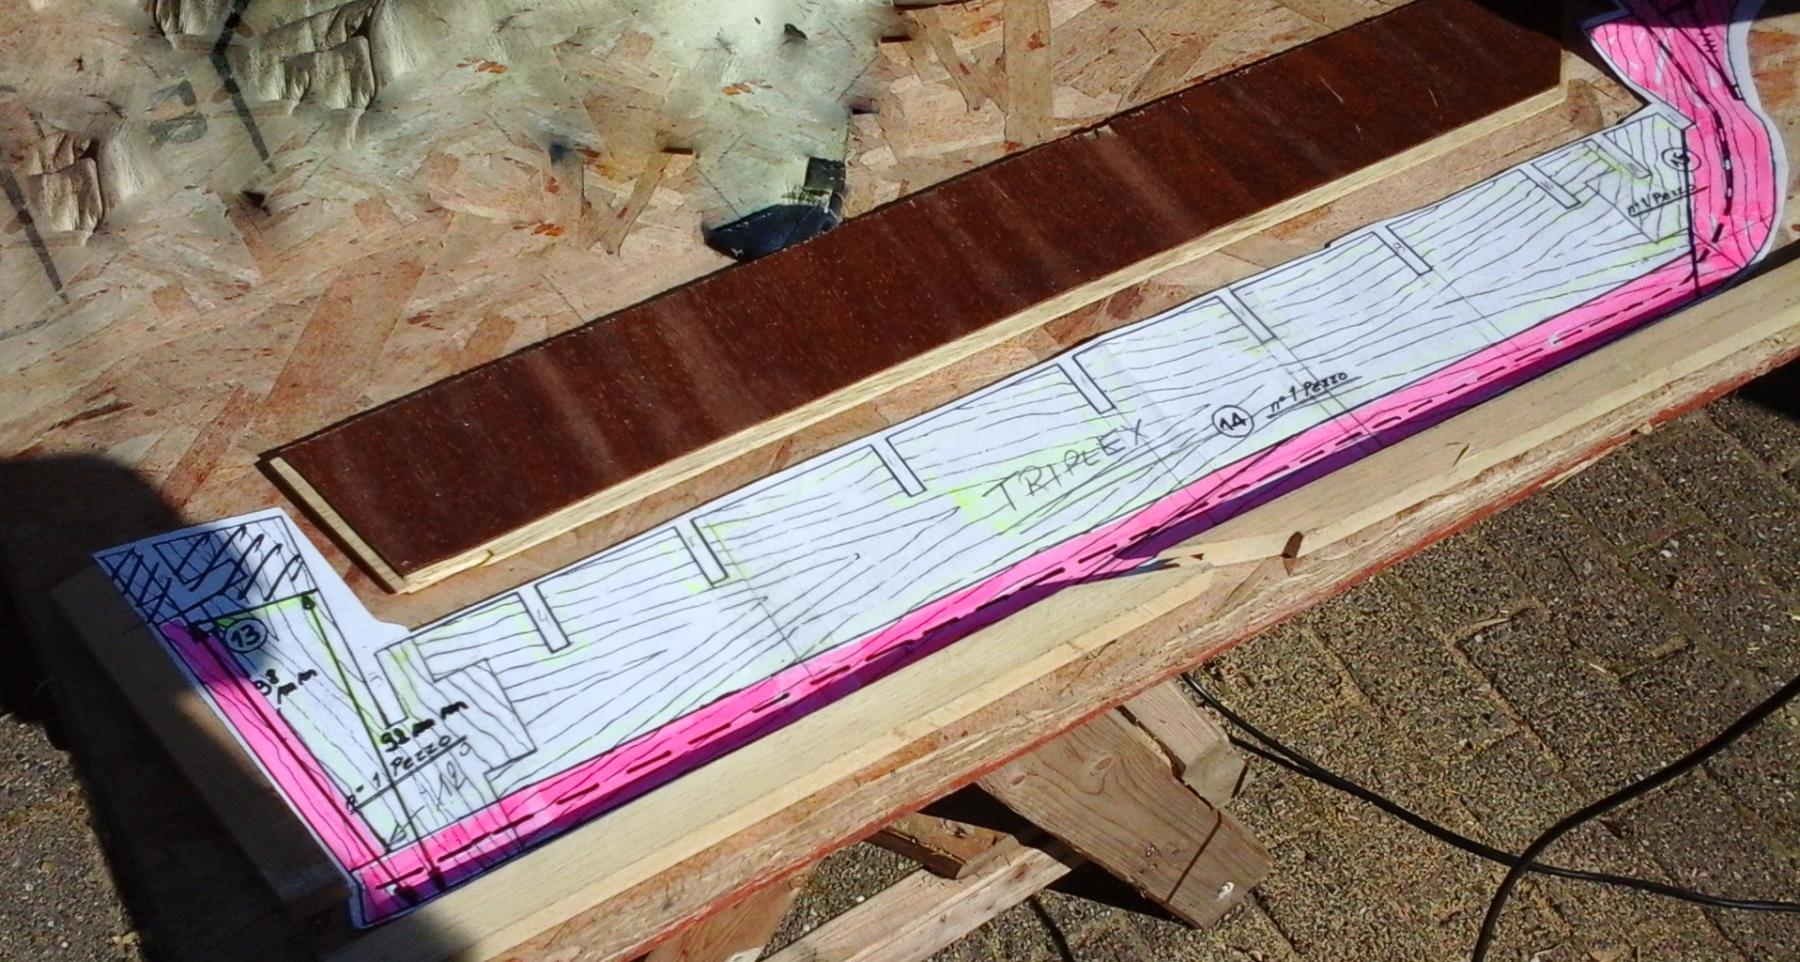
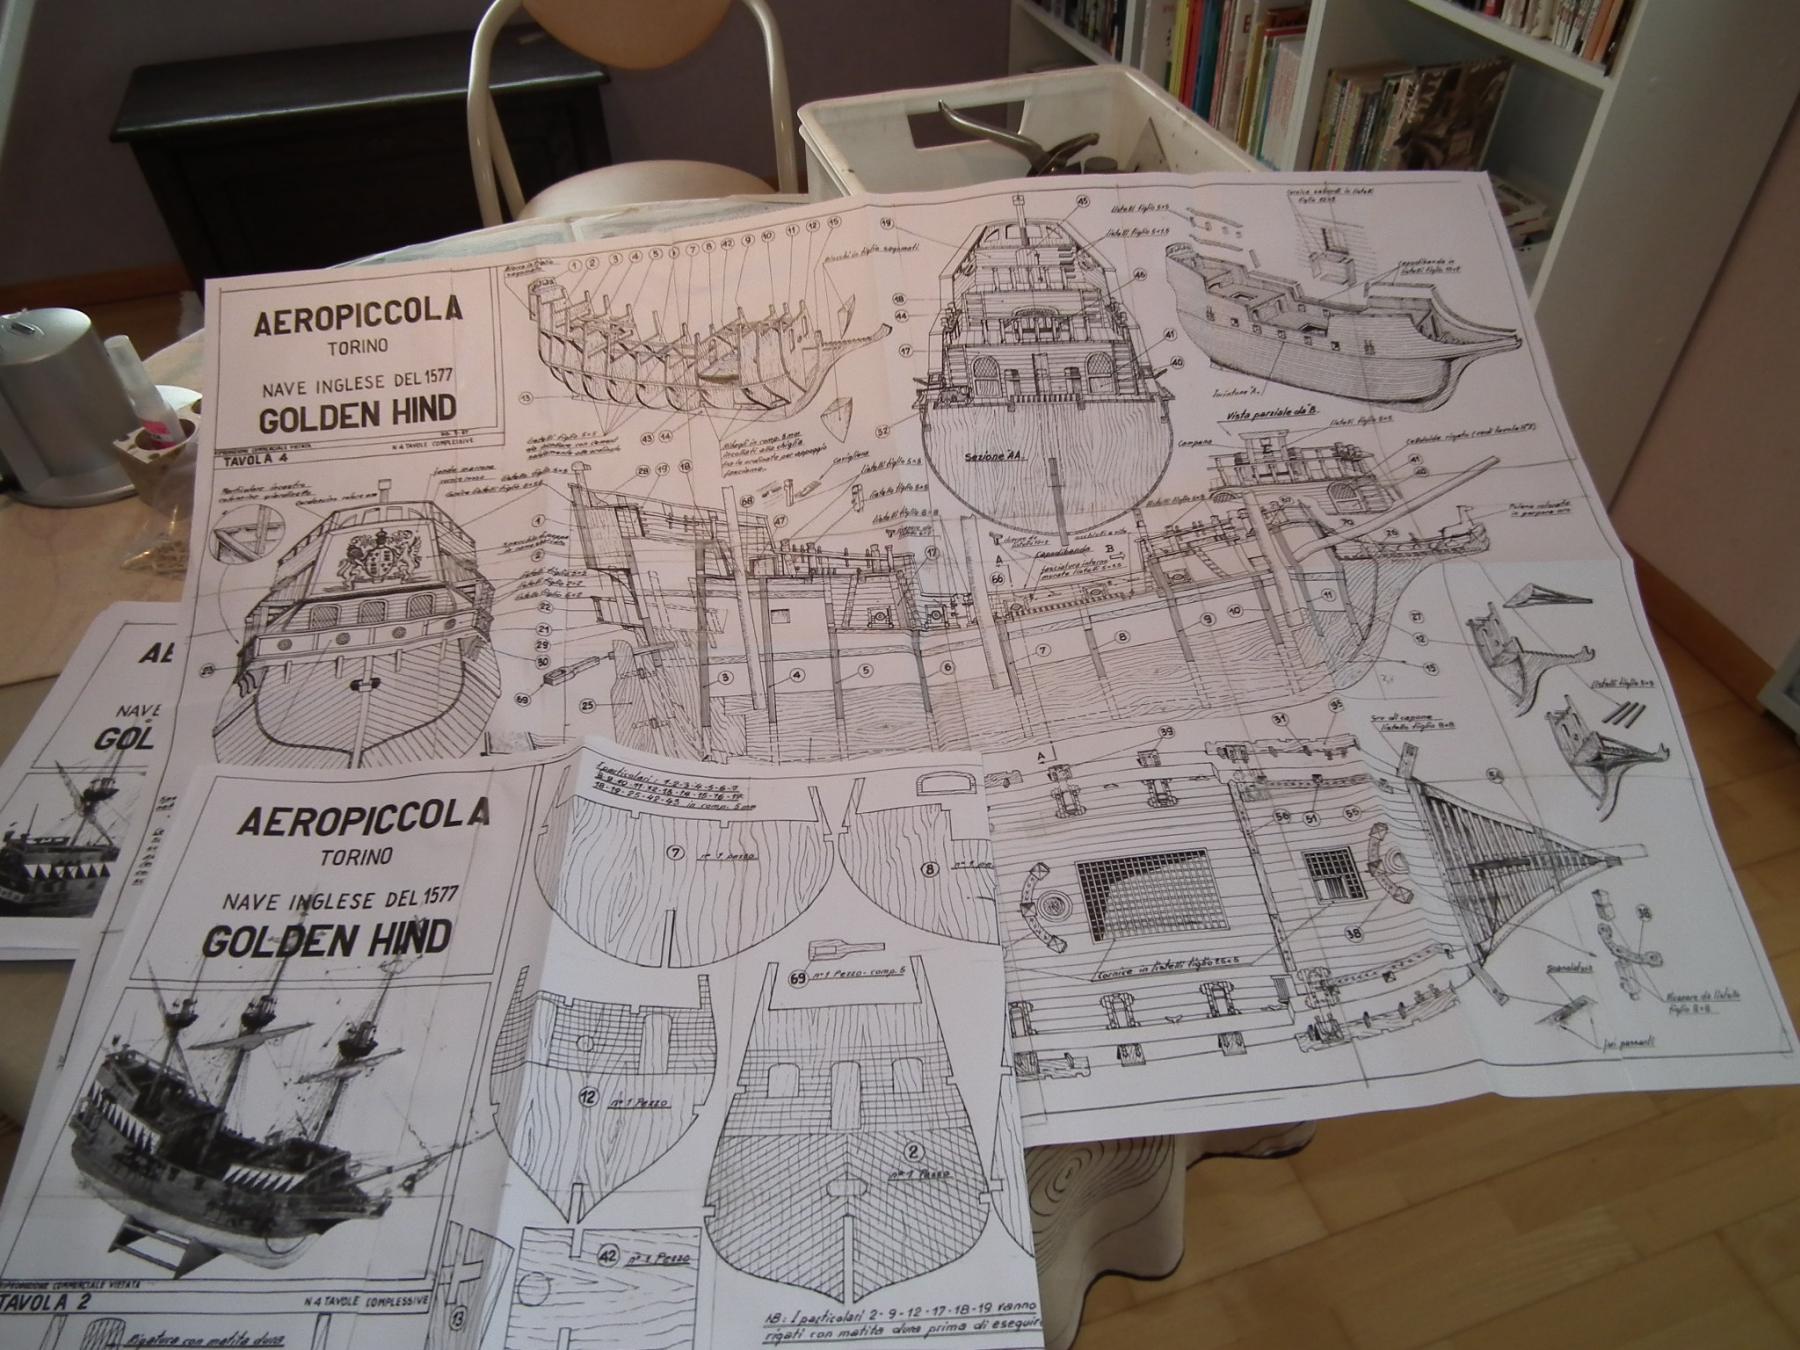
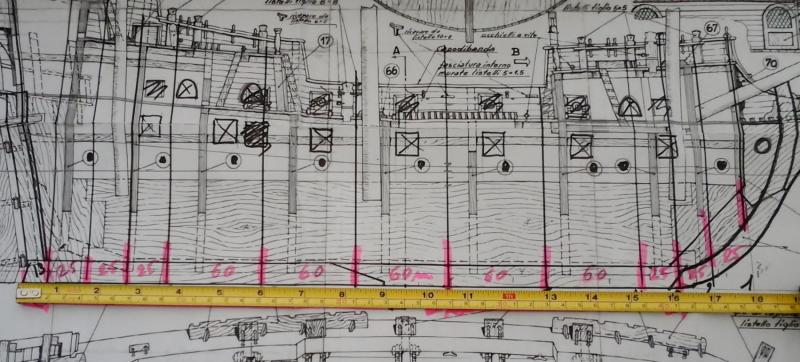
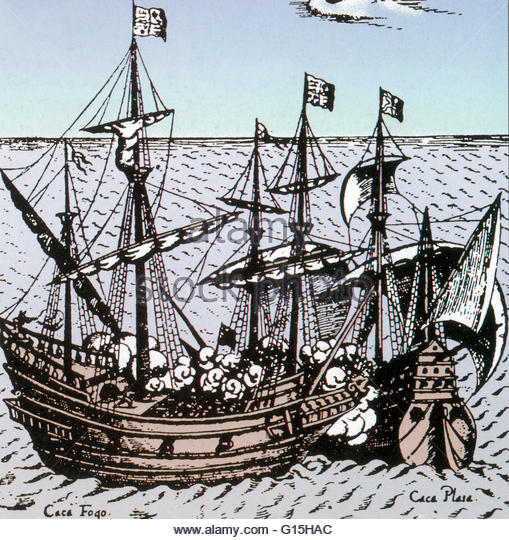
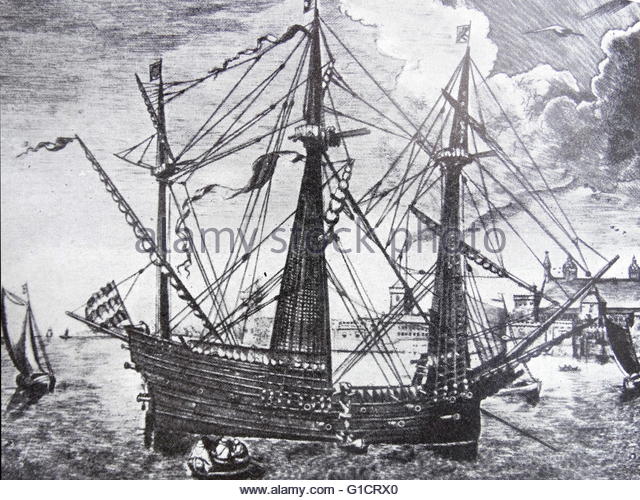
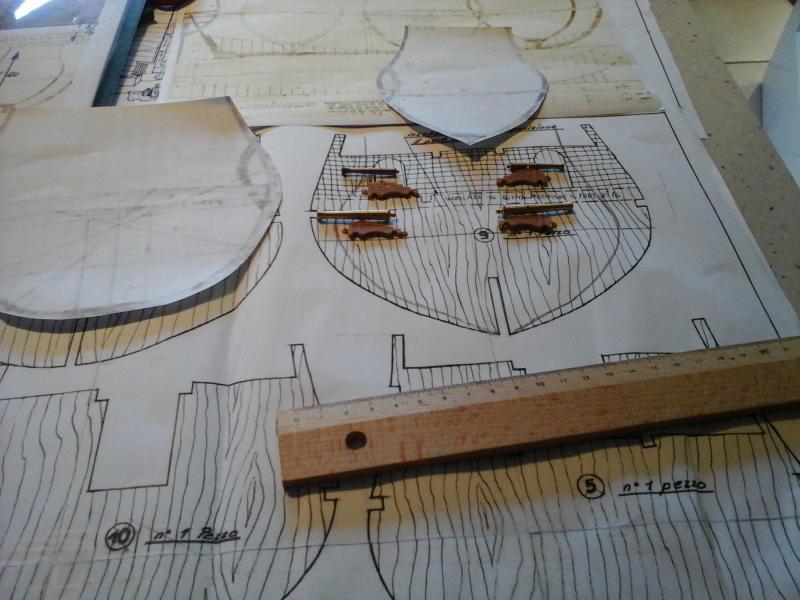
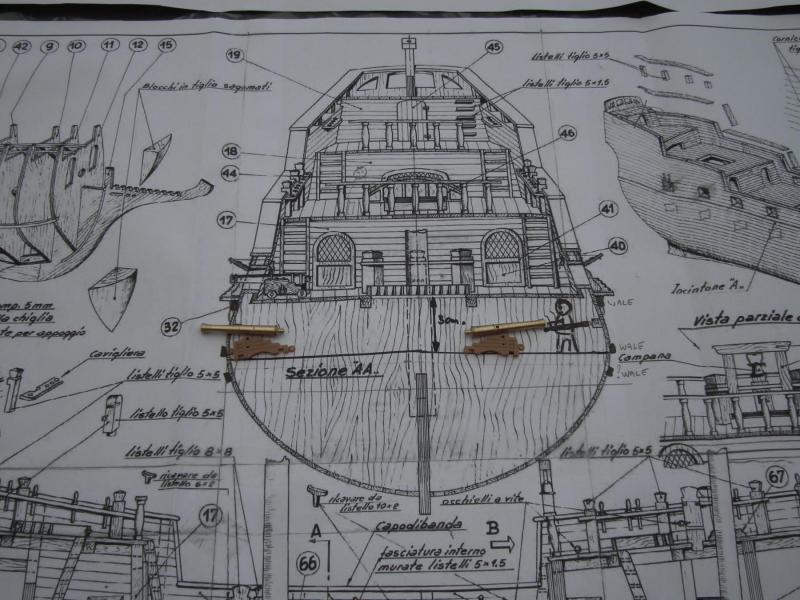
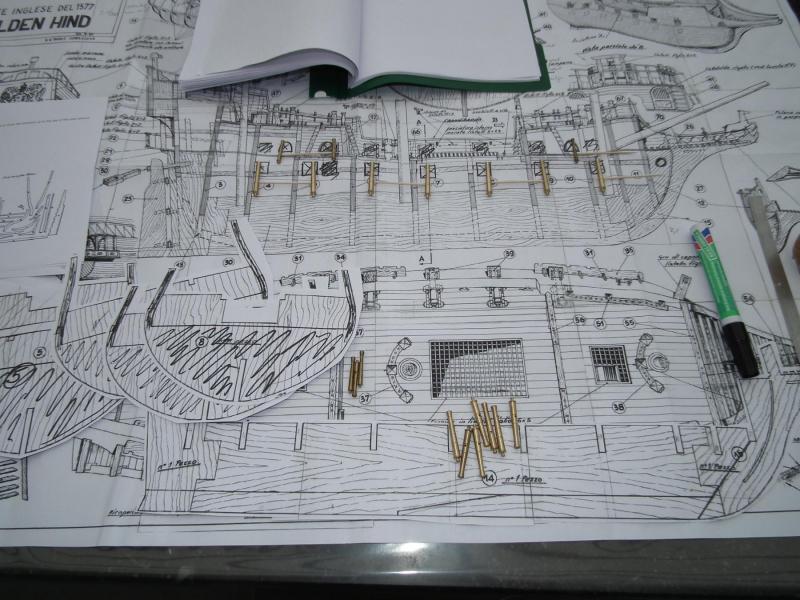
info Scale of the model and probable dimensions of the ship Internet Links ship building 16th century http://www.maritimearchaeology.dk/downloads/MA Thesis_Alexiou.pdf http://www.maritimearchaeology.dk/downloads/Furring in light of 16th century ship design_web.pdf http://www.maritimearchaeology.dk/downloads/Full thesis bates.pdf http://nautarch.tamu.edu/Theses/pdf-files/Steere-MA2004.pdf http://www.patrimoniocultural.gov.pt/media/uploads/trabalhosdearqueologia/18/22.pdf http://nautarch.tamu.edu/pdf-files/Myers-MA 1987.pdf ttp://www.theonrust.com/building-the-onrust1.html https://core.ac.uk/download/pdf/144580044.pdf Hull Keel keel tapered Stempost Frames Replace the plywood frames Fillerbloks Balcony, doors and windows Beakhead Channels and installing cannons Fore and rearcastle Rearcastle interior Forecastle interior + stove Capstan Anchors Planking transom Transom upper part Lower hull cannon deck Upper hull Forcastle Treenails Treenails 2 Painting Hull Decks cannon deck (orlop deck) cannon deck (orlop deck planking and lay out canon deck (frames and gunports) canon deck finishing cannons, cannon deck finish, rudder swivel guns main deck waist, grating,staghorns, pump and figurehead Masts, blocks, deadeyes chaines deadeyes, chaines, masts Yards Standing rigging lower masts upper masts Running rigging and sails Spritsail Fore sail Fore topsail main and main topsail mizzen sail Sail making stitching sewing Flags Base plate Finished History of the ship Captain : Francis Drake (after 1580 Sir Francis Drake) 1577 Build or rebuild and launched as the Pelican 1577 Set sail with 4 other ships for an expedition intended to pass around South America 1578 Renamed as the Golden Hind(e) 1579 Captured the Spanish galleon Nuestra Senora de la conception 1580 Arrived back in England after a trip around the world First English ship to sail around the world And after this journey stored in dry dock on public display until she was finally scrapped. about the trip and sir Francis Drake http://www.winepi.com/DNG.htm http://www.indrakeswake.co.uk/index.htm Dimensions (depending on the source) Length : somewhere in between 31m to 37 m Tonnage : somewhere in between 100 to 150 tons Armament : 18 to 22 cannons Crew : start of the journey 80 to 85 men, Back on arrival in England 56 men Modern day replicas build : · One in Essex ,build between 1947 and 1949 (demolished in 2013) · One in Brixham in Devon build in 1963? Sunk in 1987 and scrapped (Now rebuild based on the hull of a steel barge) · One in Appledore North Devon, launched in 1973, sailed more than 140,000 miles all over the seas and now on display in London. Source : wikipedia The model More then 45 years ago, the Airfix Golden Hind on 1/144 scale was the very first scale model I ever built. This model now wil by a plank on frame model. And I can only do my best to make it as realistic as possible. There are no plans, no drawings and no paintings of the real ship. I just find a few etchings of about 1600 - 1620 on the internet and they are both different. On the internet there are plans . They are of Aeropiccola, an Italian company that no longer exists. I think the scale is abouth 1/50 http://www.john-tom.com/SailBoatPlans/GoldenHind/golden_hindSm.pdf They looked great in the beginning.But the more I look at them, the less good they begin look ... It seems as if the hull is too wide and the shape of the frames dont match the shape from those of Matthew Baker (A well-known shipbuilder from this period) But : It looks like nobody knows If this ship was a real "race galleon" or just an armed merchantman (privateer). Before we start Were the guns placed below dek or on the dek? I believe that all the guns were lined up below deck. And not on the deck like with most Golden Hind models. Guns on the deck may cause an unstable ship . And on the models there is not enough room to absorb the recoil of the guns and too reload them. So Mi first step is to try to build a hull with: A shape that has enough space to absorb the recoil of guns. But is not too wide Has place for 14 cannons below deck Has 2 light guns in the forecastle. Has 4 light cannons in the rear castle. Apparently it looks if there is only one ship wreck from this period is found. Called "the Princess Channel wreck” or “the Gresham ship” In this period many newly built ships were so unstable that the hull had to be adjusted immediately. With the aid of Girdling: (making the hull wider at the water line). Or furring ( make the hull below the waterline wider). Actual evidence of this was found in the Gresham ship. http://www.maritimearchaeology.dk/downloads/Furring%20in%20light%20of%2016th%20century%20ship%20design_web.pdf http://www.maritimearchaeology.dk/downloads/Full%20thesis%20bates.pdf Even on the replica of the Golden Hind the hull is widened at the waterline. I use plywood, ramin ( the pieces of ramin wood are old leftovers from construction works in our house 20 years ago) an cherry wood (from a tree that came from the garden) And the keel of the Golden Hind was laid on a sunny day the 10th of september.


- 756 replies
-
- 13
-
-
- galleon
- golden hind
- (and 2 more)
-
Thanks for the positive comments The next build is still in preparation. It is too early to start a build log. Ps, All reservations are free of charge
- 63 replies
-
- 2
-
-
- vasa
- billing boats
- (and 1 more)
-
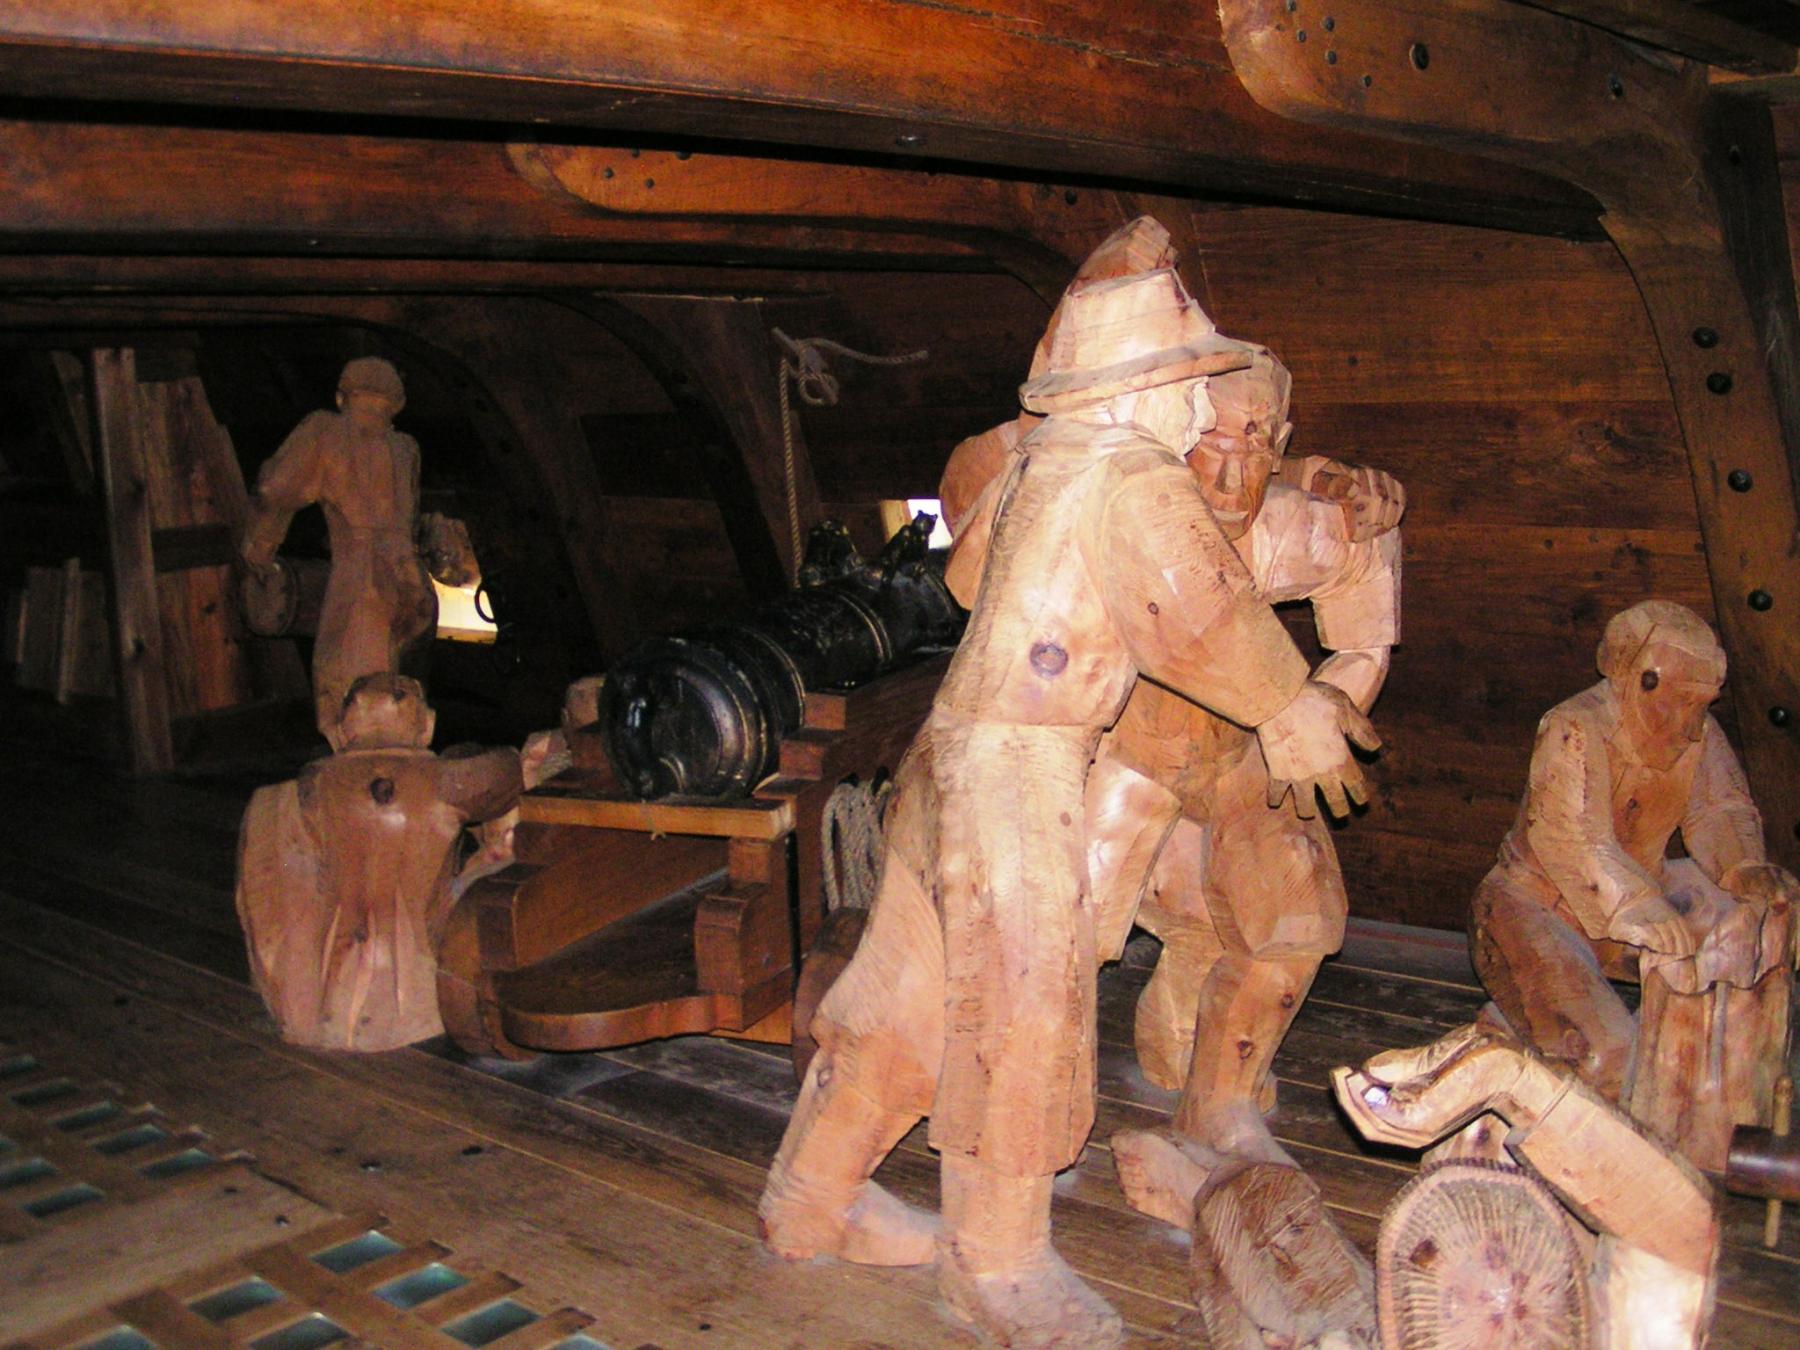
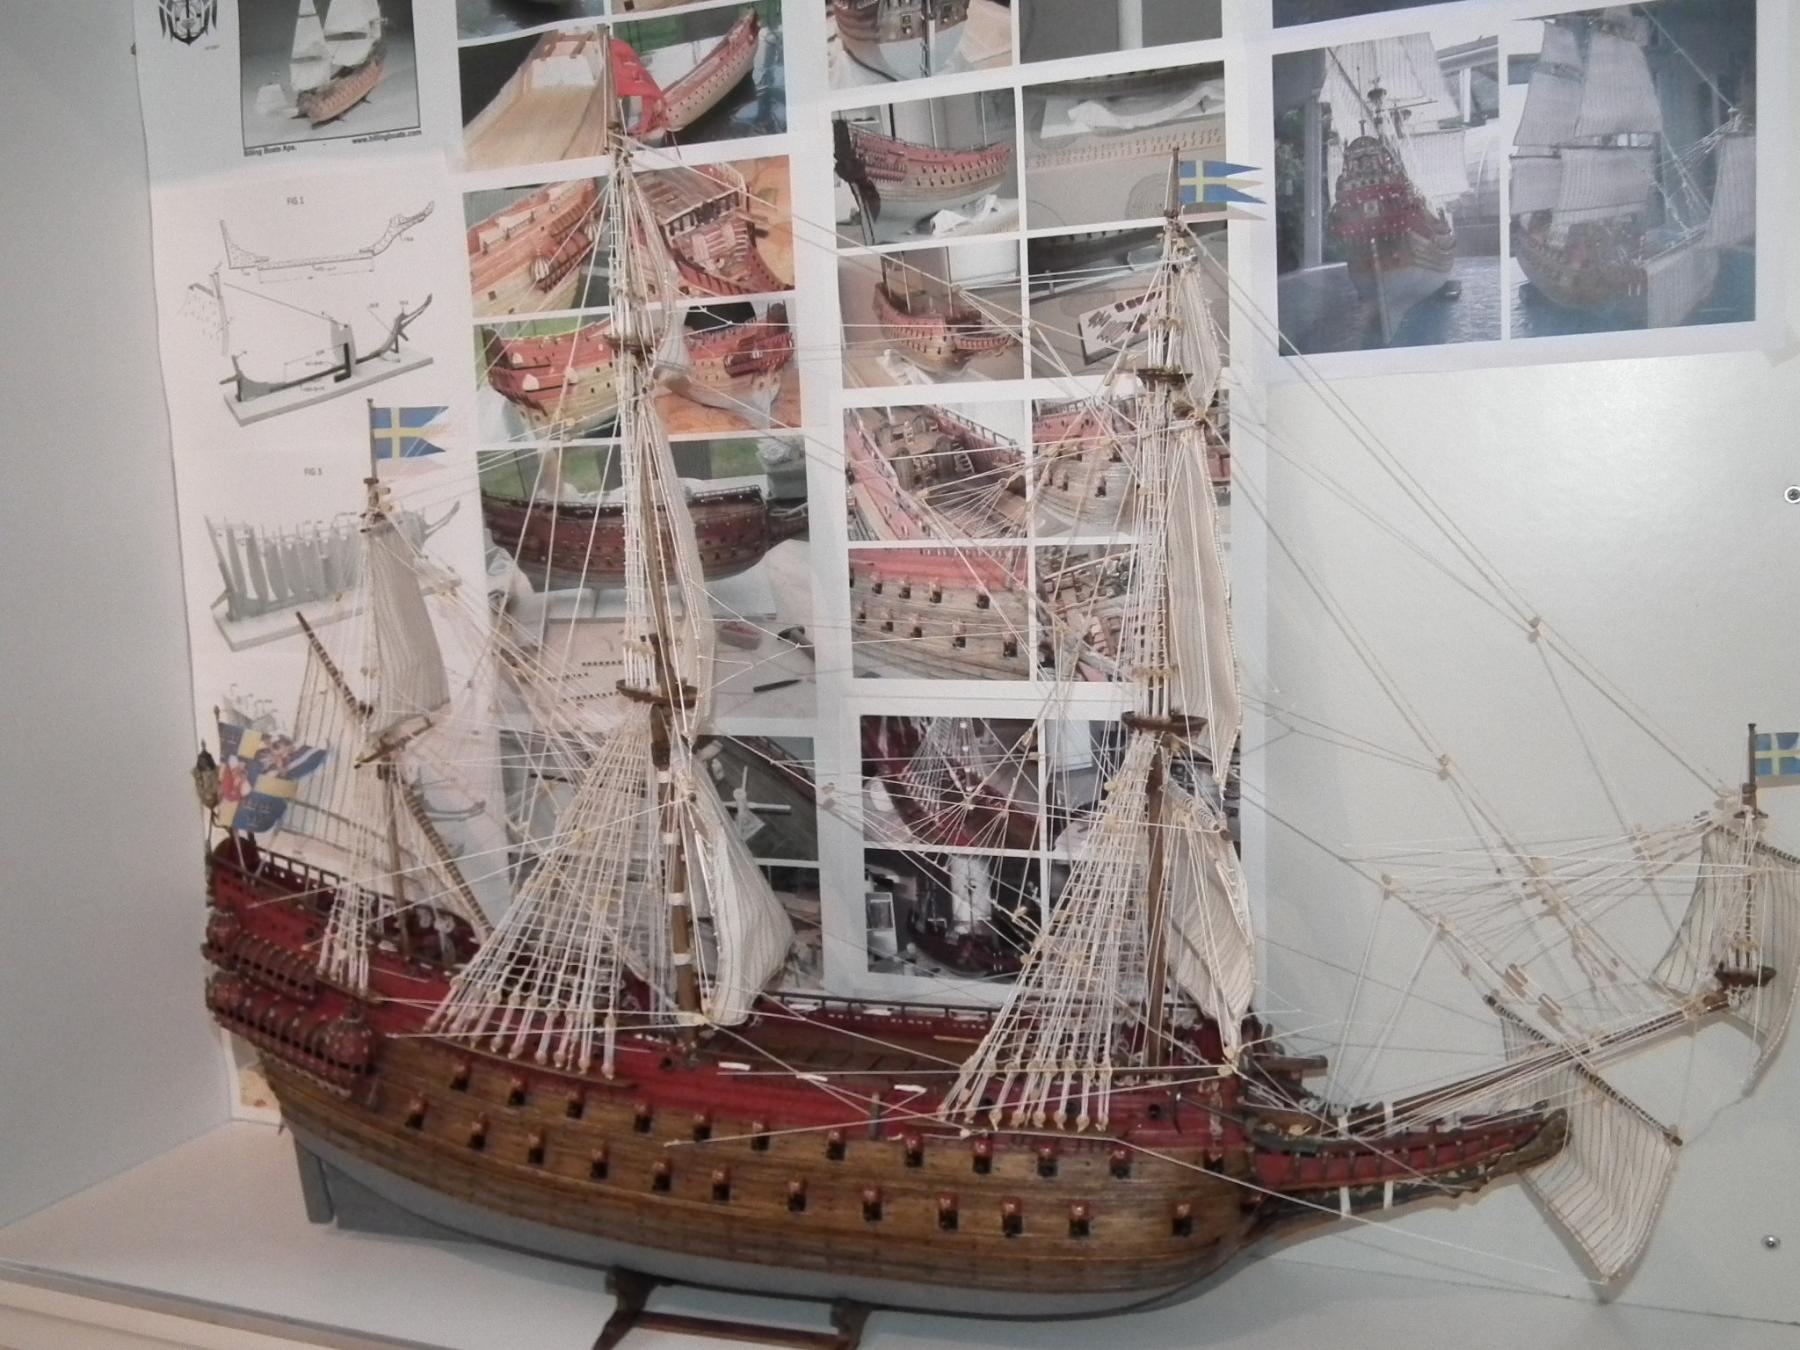
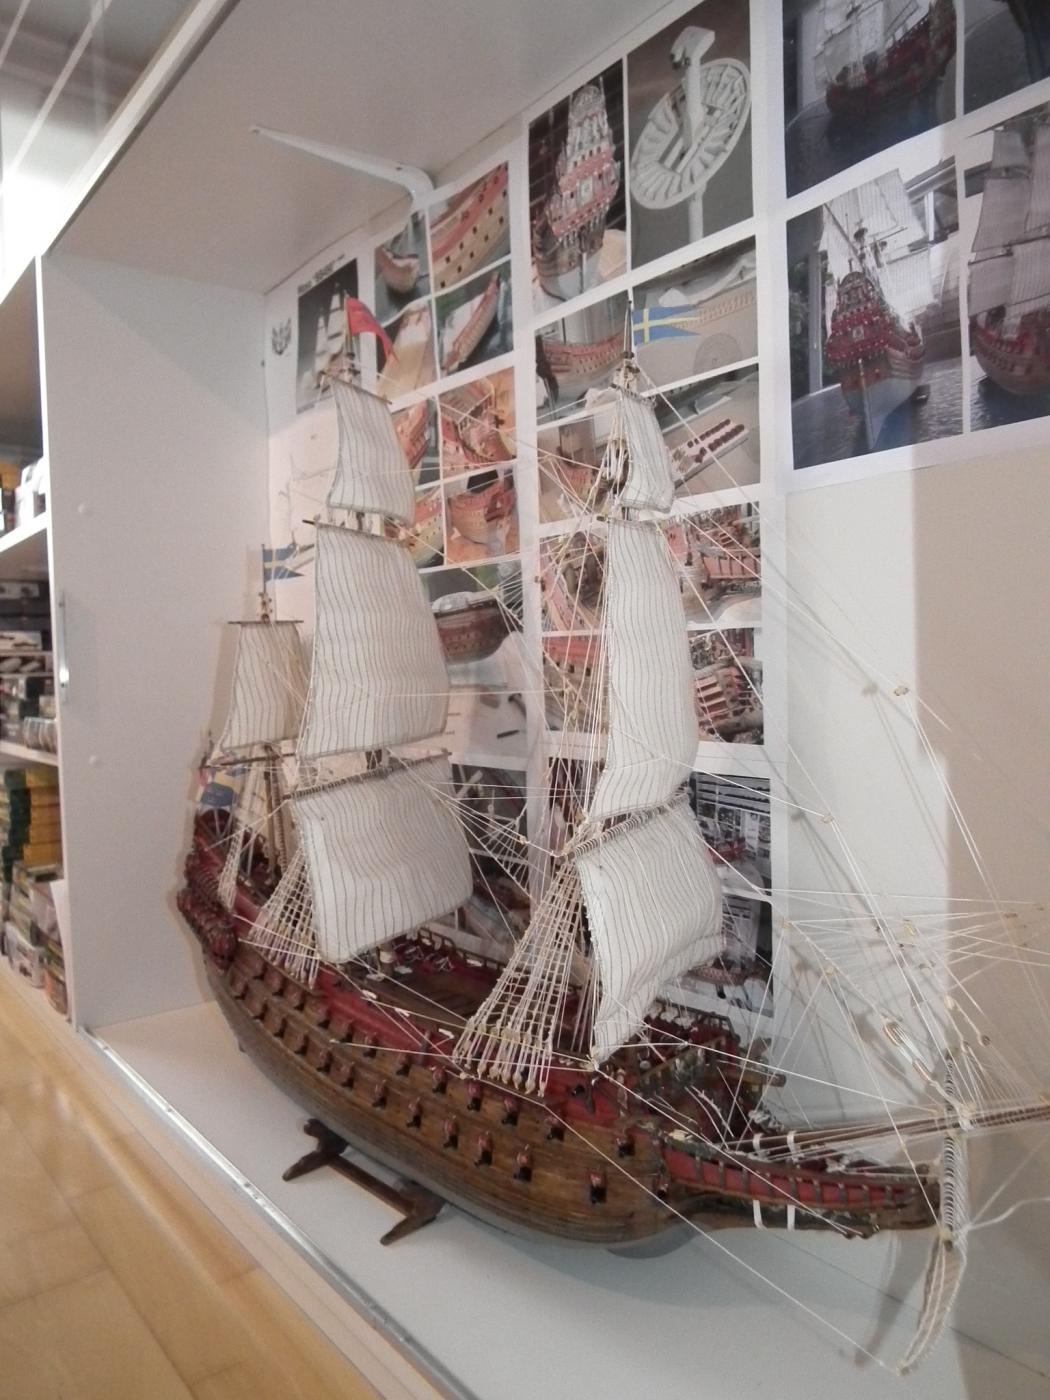
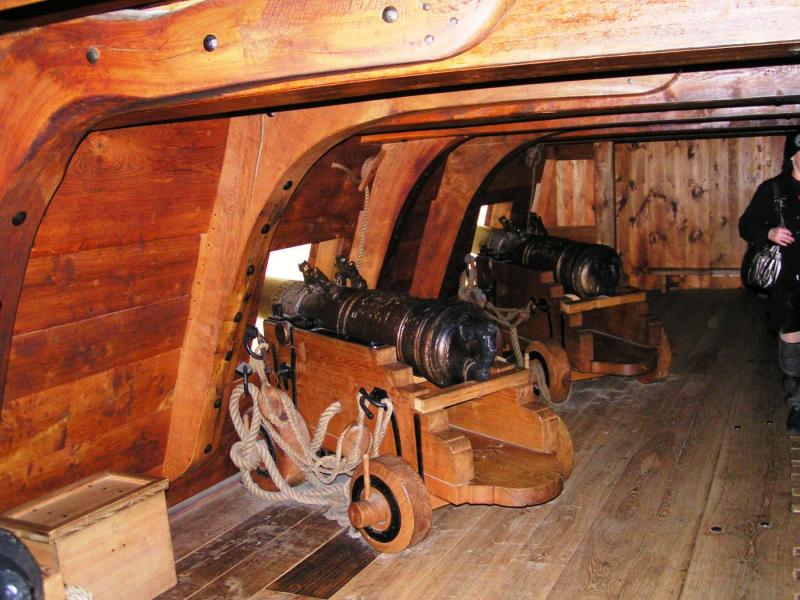
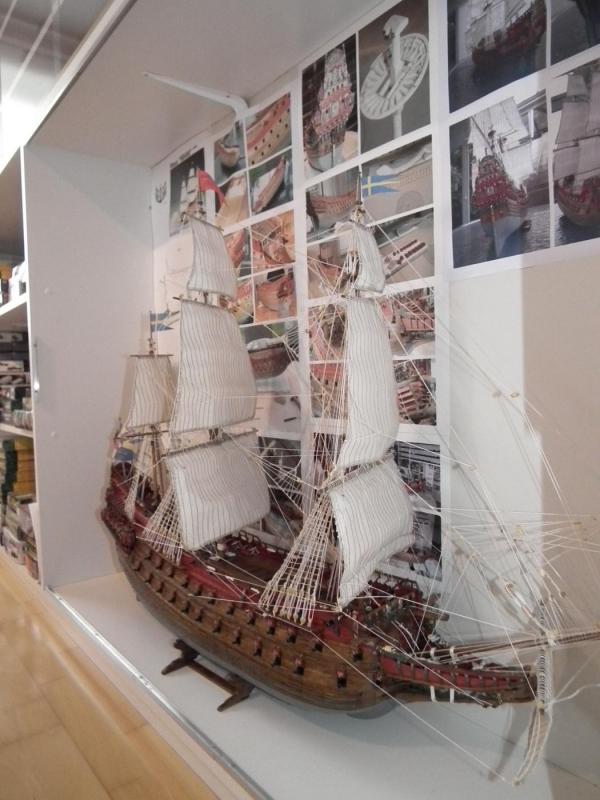
Maybe something like this. in the museum there is a reconstructed part of the hull Some of the guns are arranged inclined (angled). ps, You might get in trouble when the door must be opened . Greetings Patrick

-
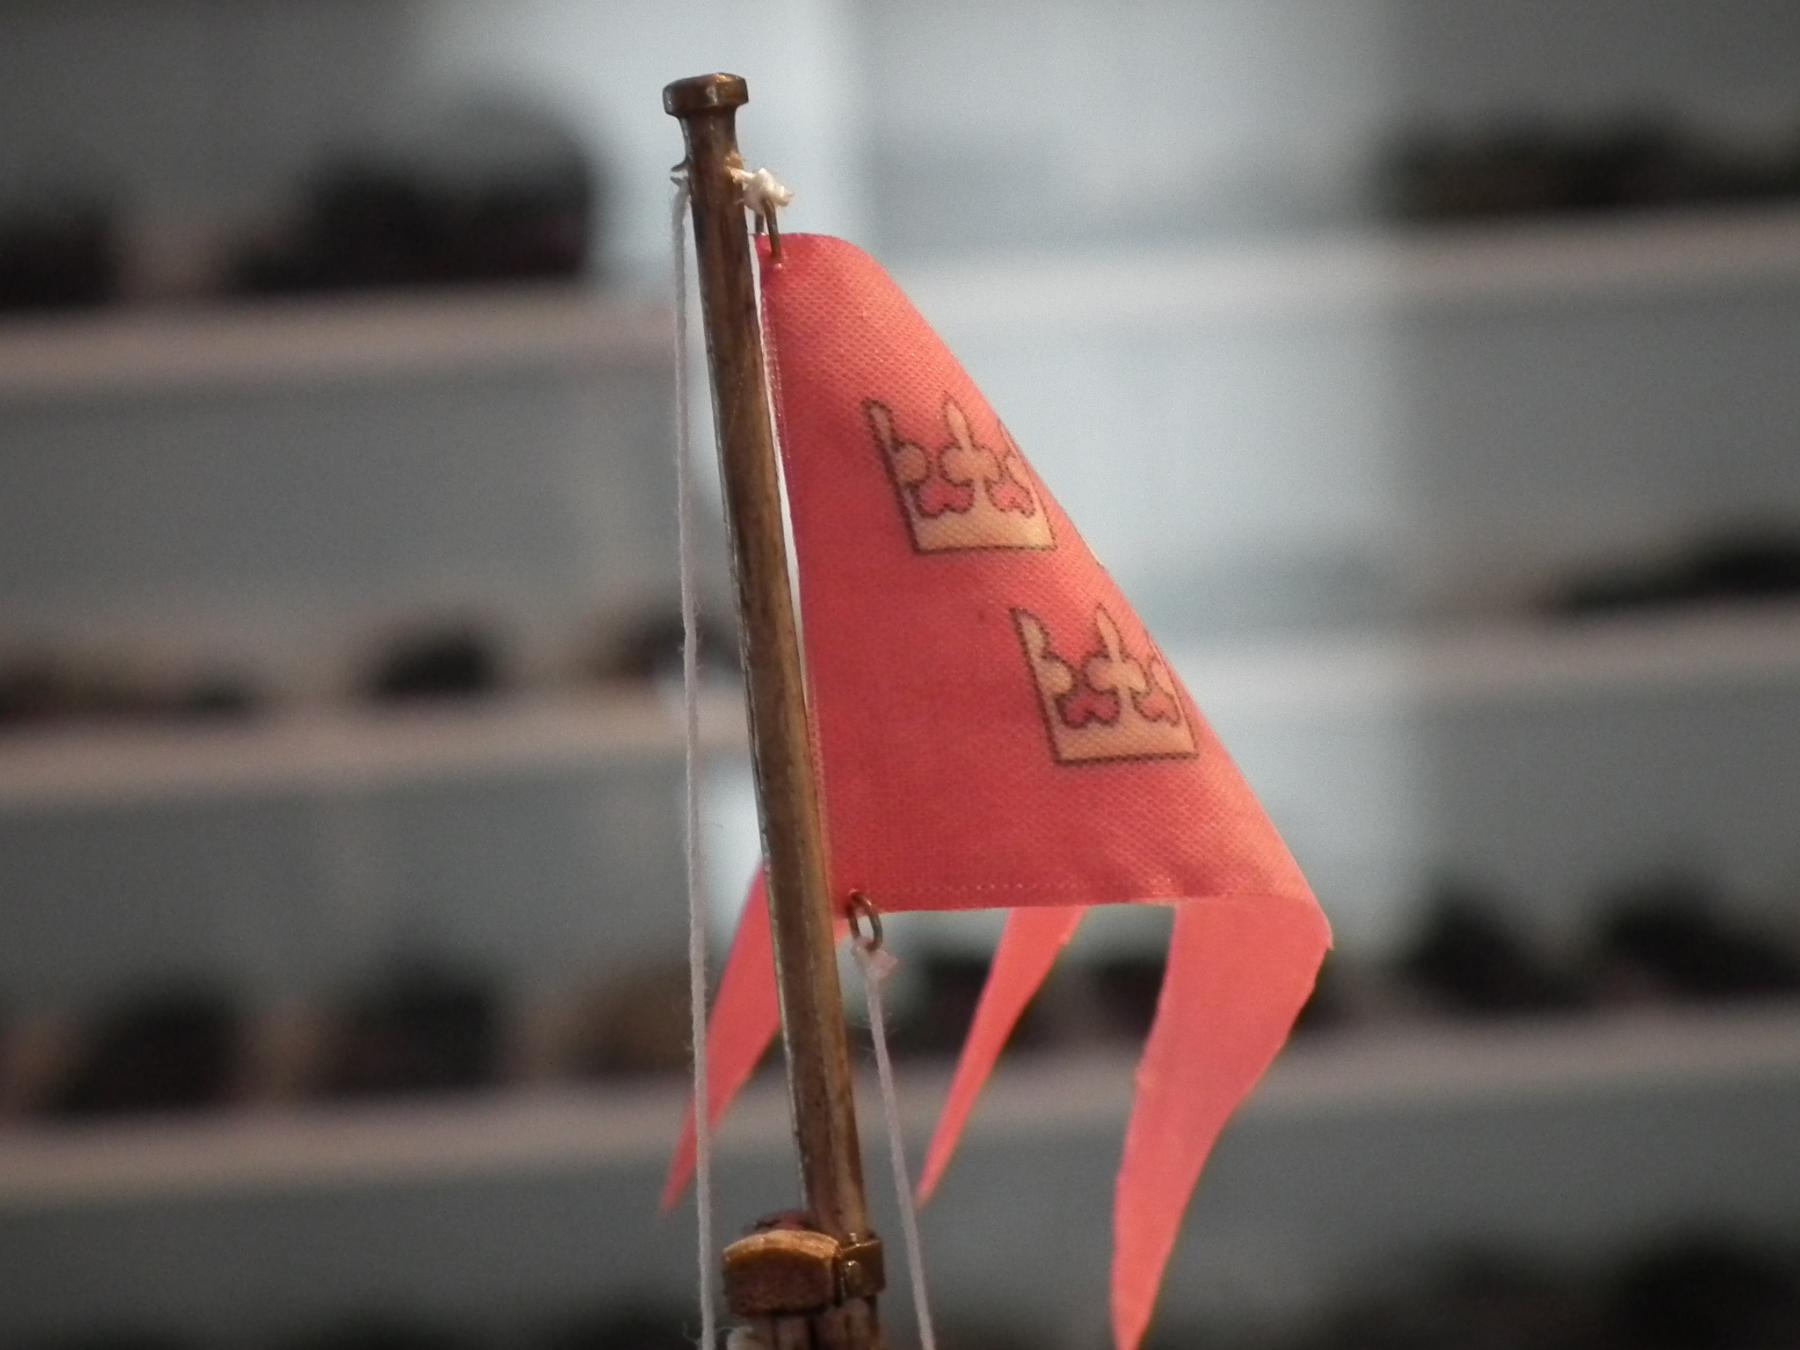
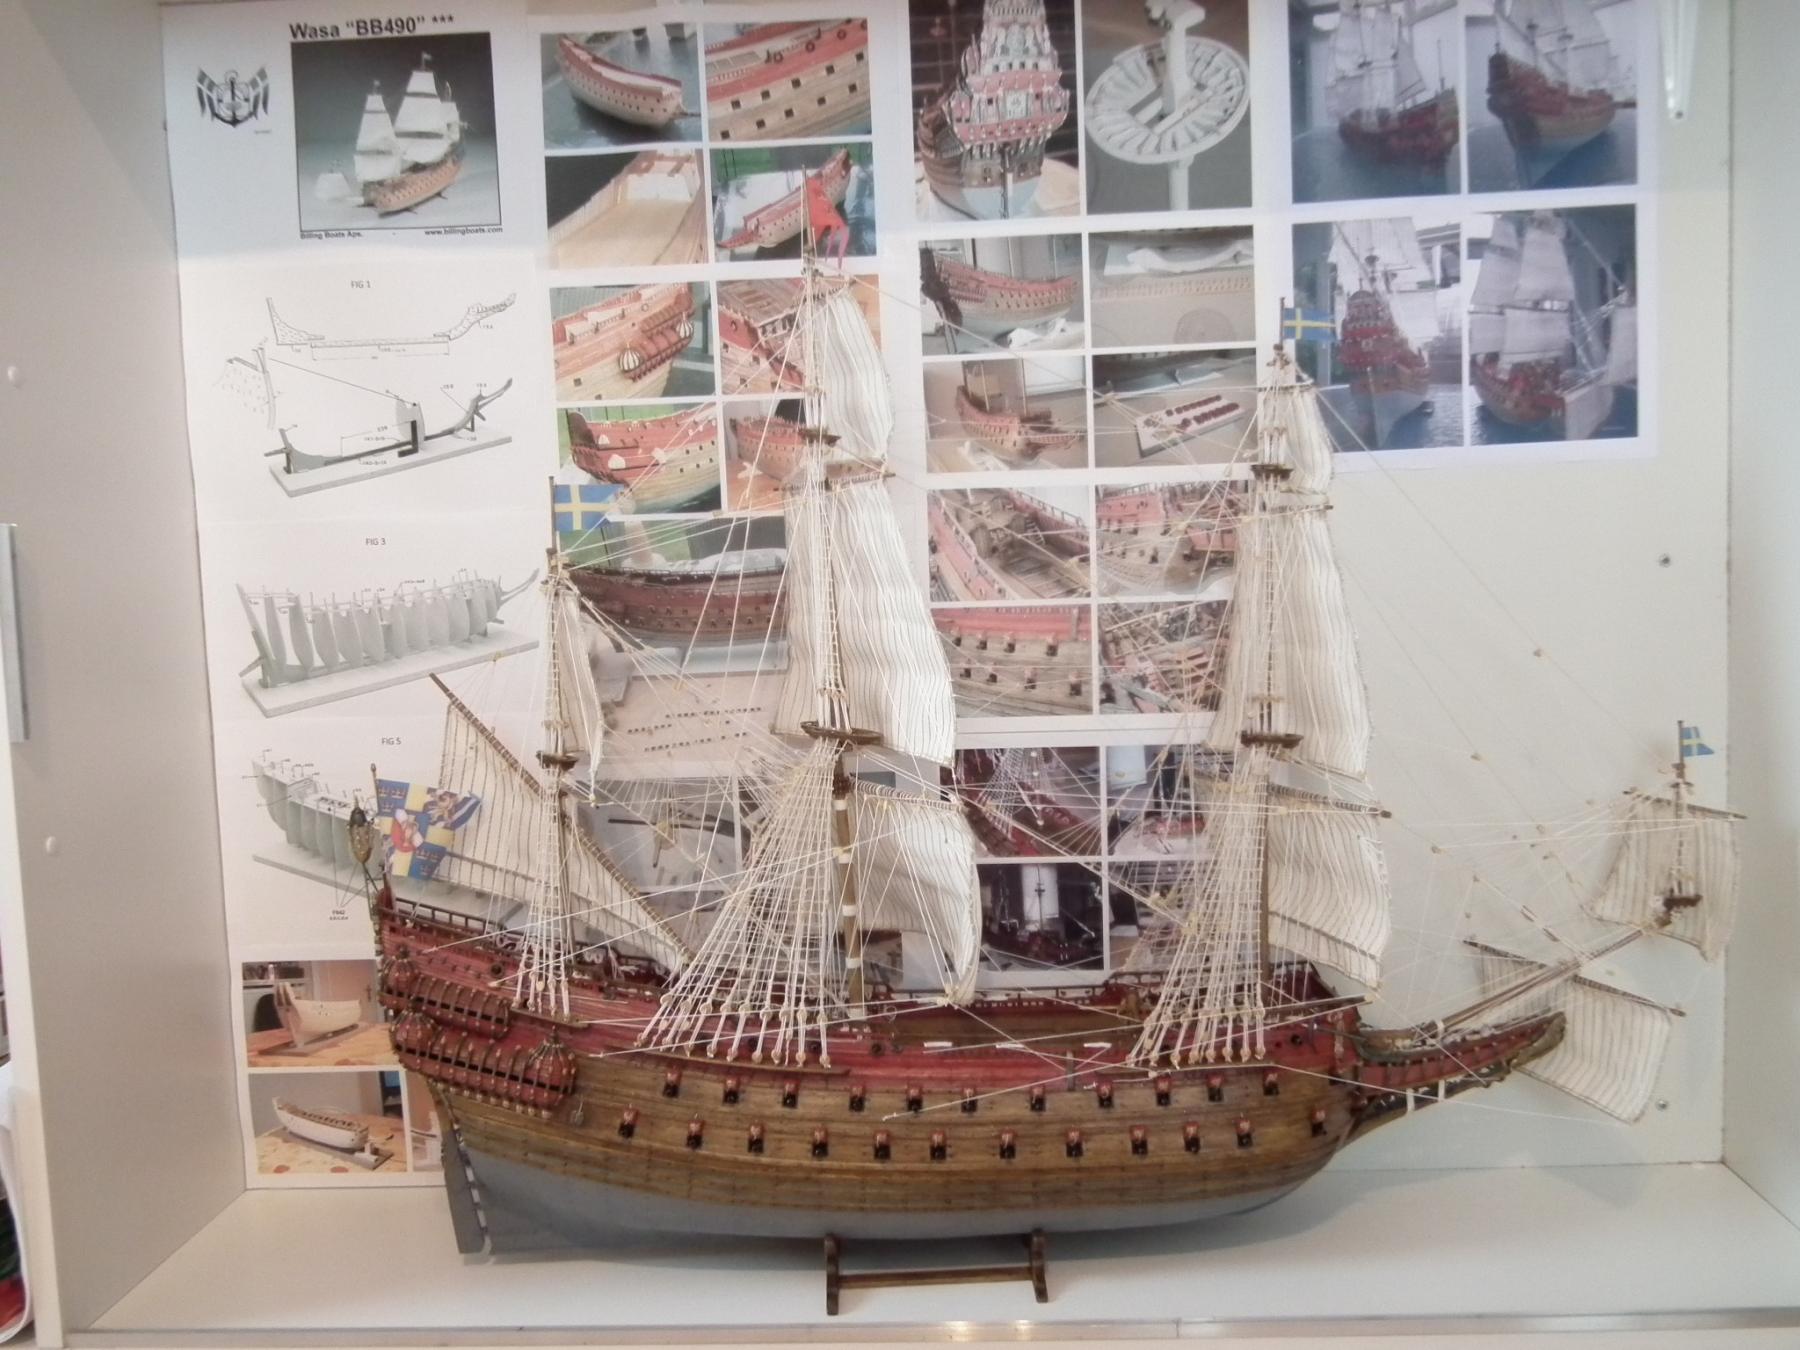
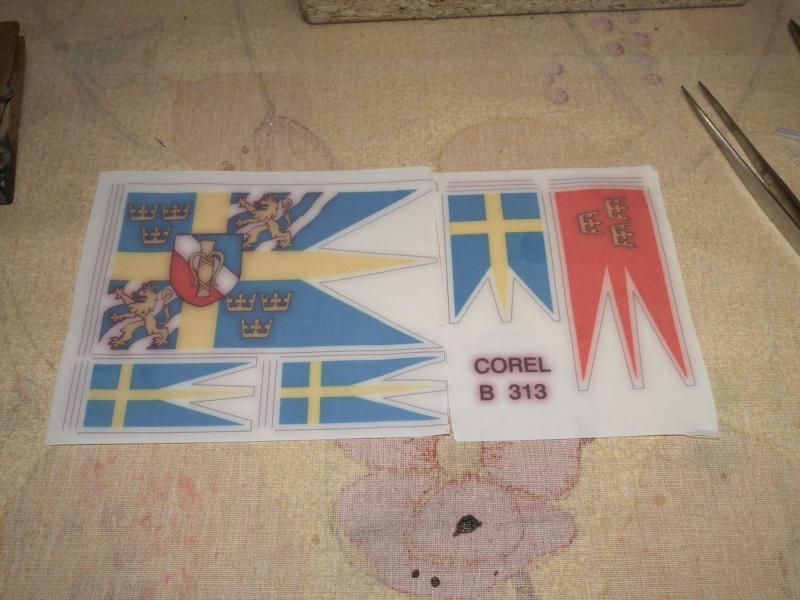
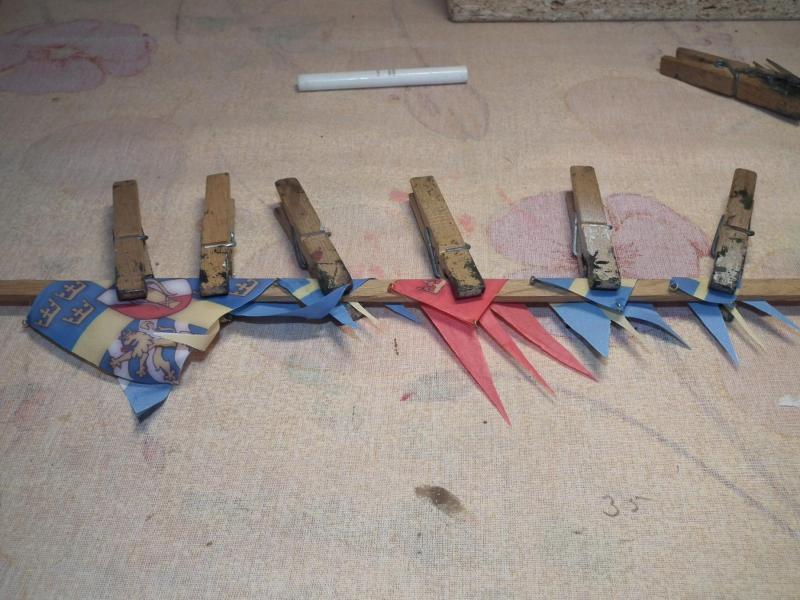
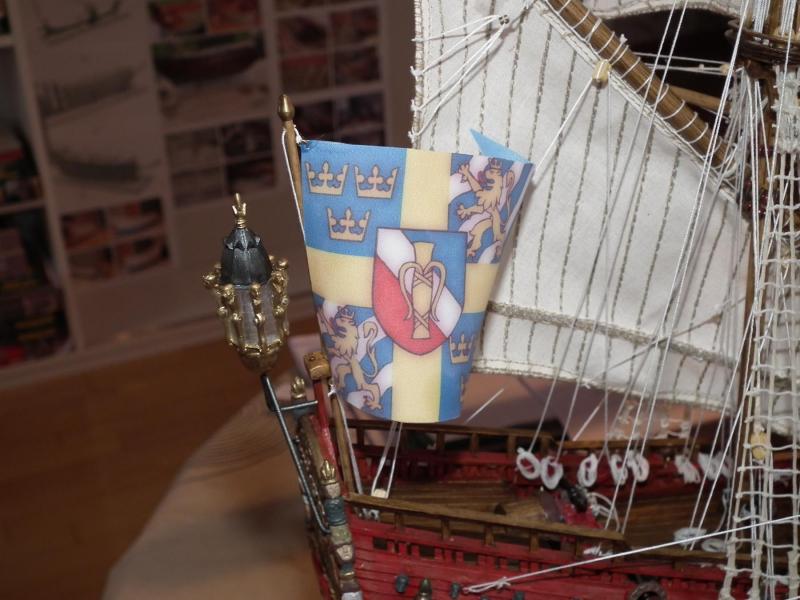
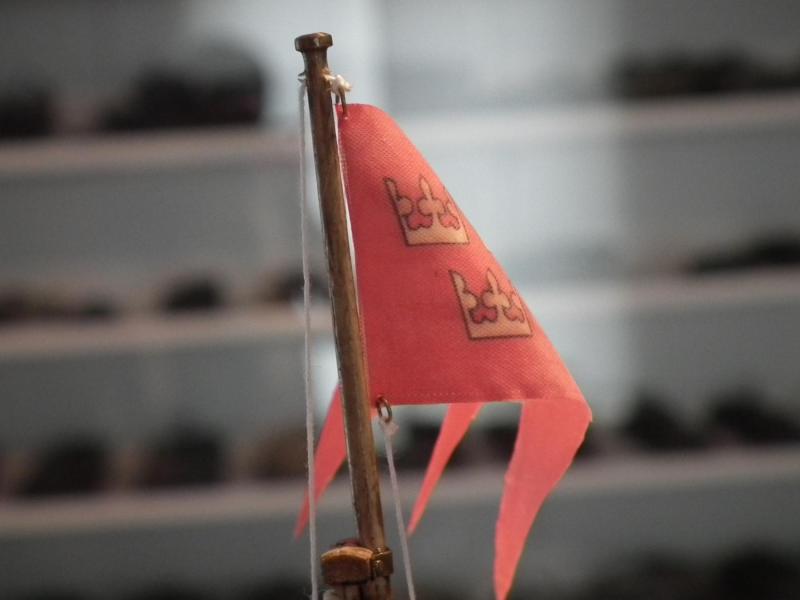
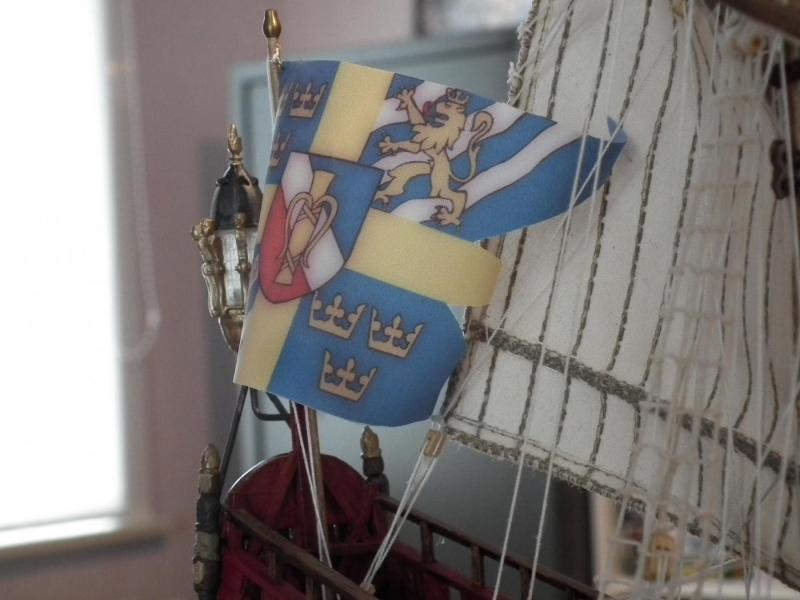
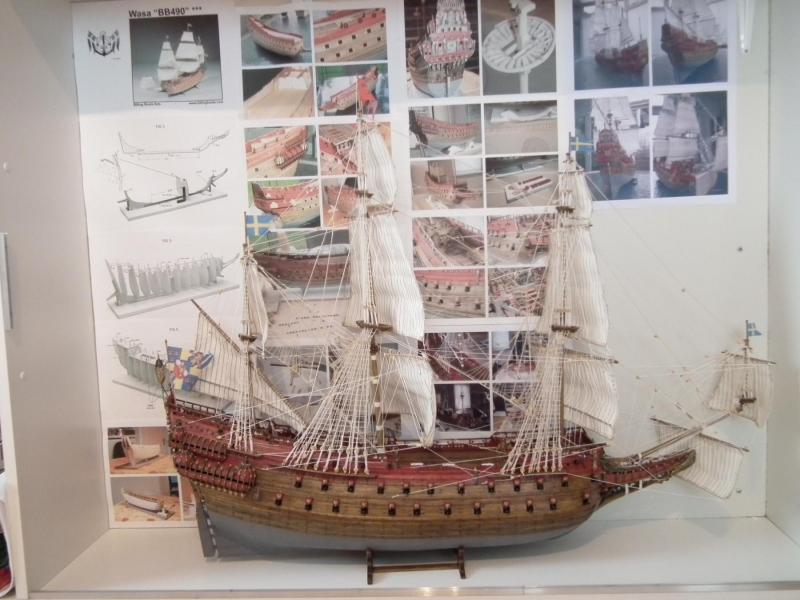
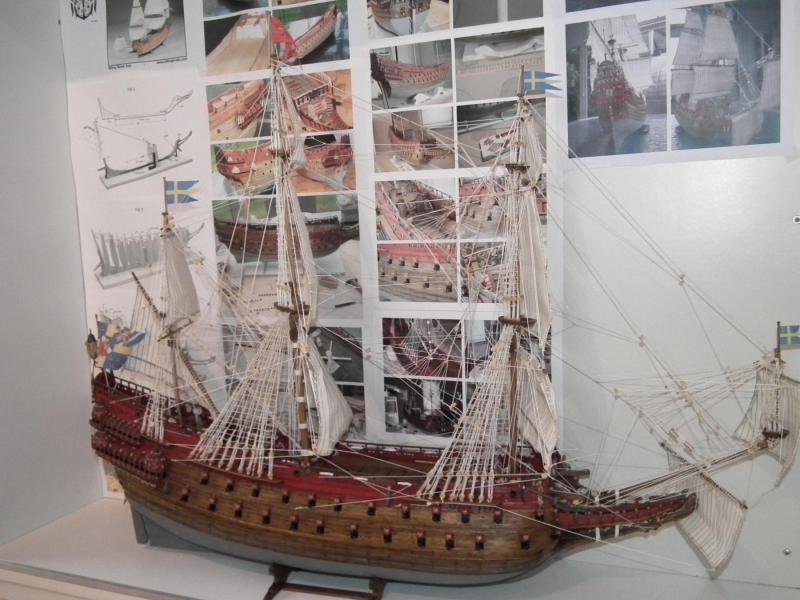
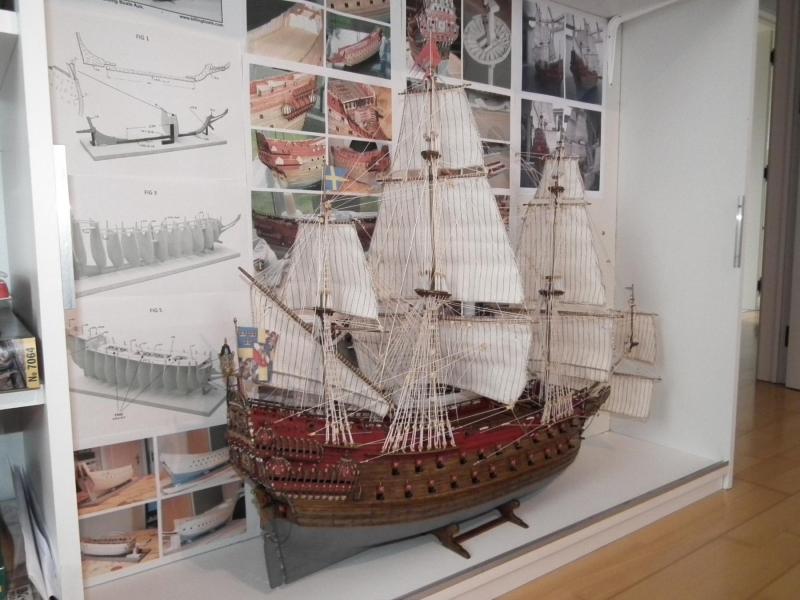
I found flags on the internet of the Wasa from Corel. For some reason they sent me two sets for the price of one The flags are cut out and fitted with brass rings and then mounted on the masts. Maybe there are more appropriate methods but I find its ok in this way. My model is now finished When I started in 2006 I wanted from the beginning to build a model as accurate as possible. For my. This was not completely successful. But I'm happy with the result !! ( Apparently, the success rate to finnish your first wooden ship model is about 19%. So, happy my!! ) When I started to build i had just the pictures of my visit to the museum. The drawings from Billing, a keel with frames that were partially built wrong and a box with wood and parts. Then, there were no correct color schemes available. So there is too mutch red paint on the hull. And the figures do not have the correct color. And, I did too many nails into the hull ..... Conclusion The model from Billing is a good model for a reasonable price. But there is a lot of extra work on it. Thanks to everyone who has followed my build log. Now it is first study time for my next project Greetings Patrick

- 63 replies
-
- 15
-
-
- vasa
- billing boats
- (and 1 more)
-
Try to degrease the figures with some acetone before you apply the base color. (The mold in which the figures in cast is probably first injected with a type of oil) This is what I do when i paint military models that are made in epoxy resin. But be careful not too much and not too long brushing on the figures !! Greetings Patrick
- 305 replies
-
- 4
-
-
- deagostini
- vasa
- (and 1 more)
-
I have attached the plans from Billing Boats on my build log. If you can use them, feel free to download them. Patrick
- 305 replies
-
- 1
-
-
- deagostini
- vasa
- (and 1 more)
-
I have attached the plans from Billing Boats. The PDF is reduced to get below 2 mb but is still from good quality Normally they can by downloaded from the site from Billing Boats. But apparently they are no longer available on their site. After the holiday period I'm going to order the flags. Patrick BB490 Wasa_Instruction-2-min.pdf BB490%20Wasa_Instruction-min.pdf
- 63 replies
-
- 1
-
-
- vasa
- billing boats
- (and 1 more)
-
The anchor looks also great. I would not start painting it before you have the two anchors in your possession. Then they are painted in the same way. I painted my anchors in a gun metal base color. (See my build log of Wasa) Compared with the Billings Wasa this woodwork looks very neat and easy to build, I think Ps You really do need a bigger letterbox Greetings Patrick
- 305 replies
-
- 2
-
-
- deagostini
- vasa
- (and 1 more)
-
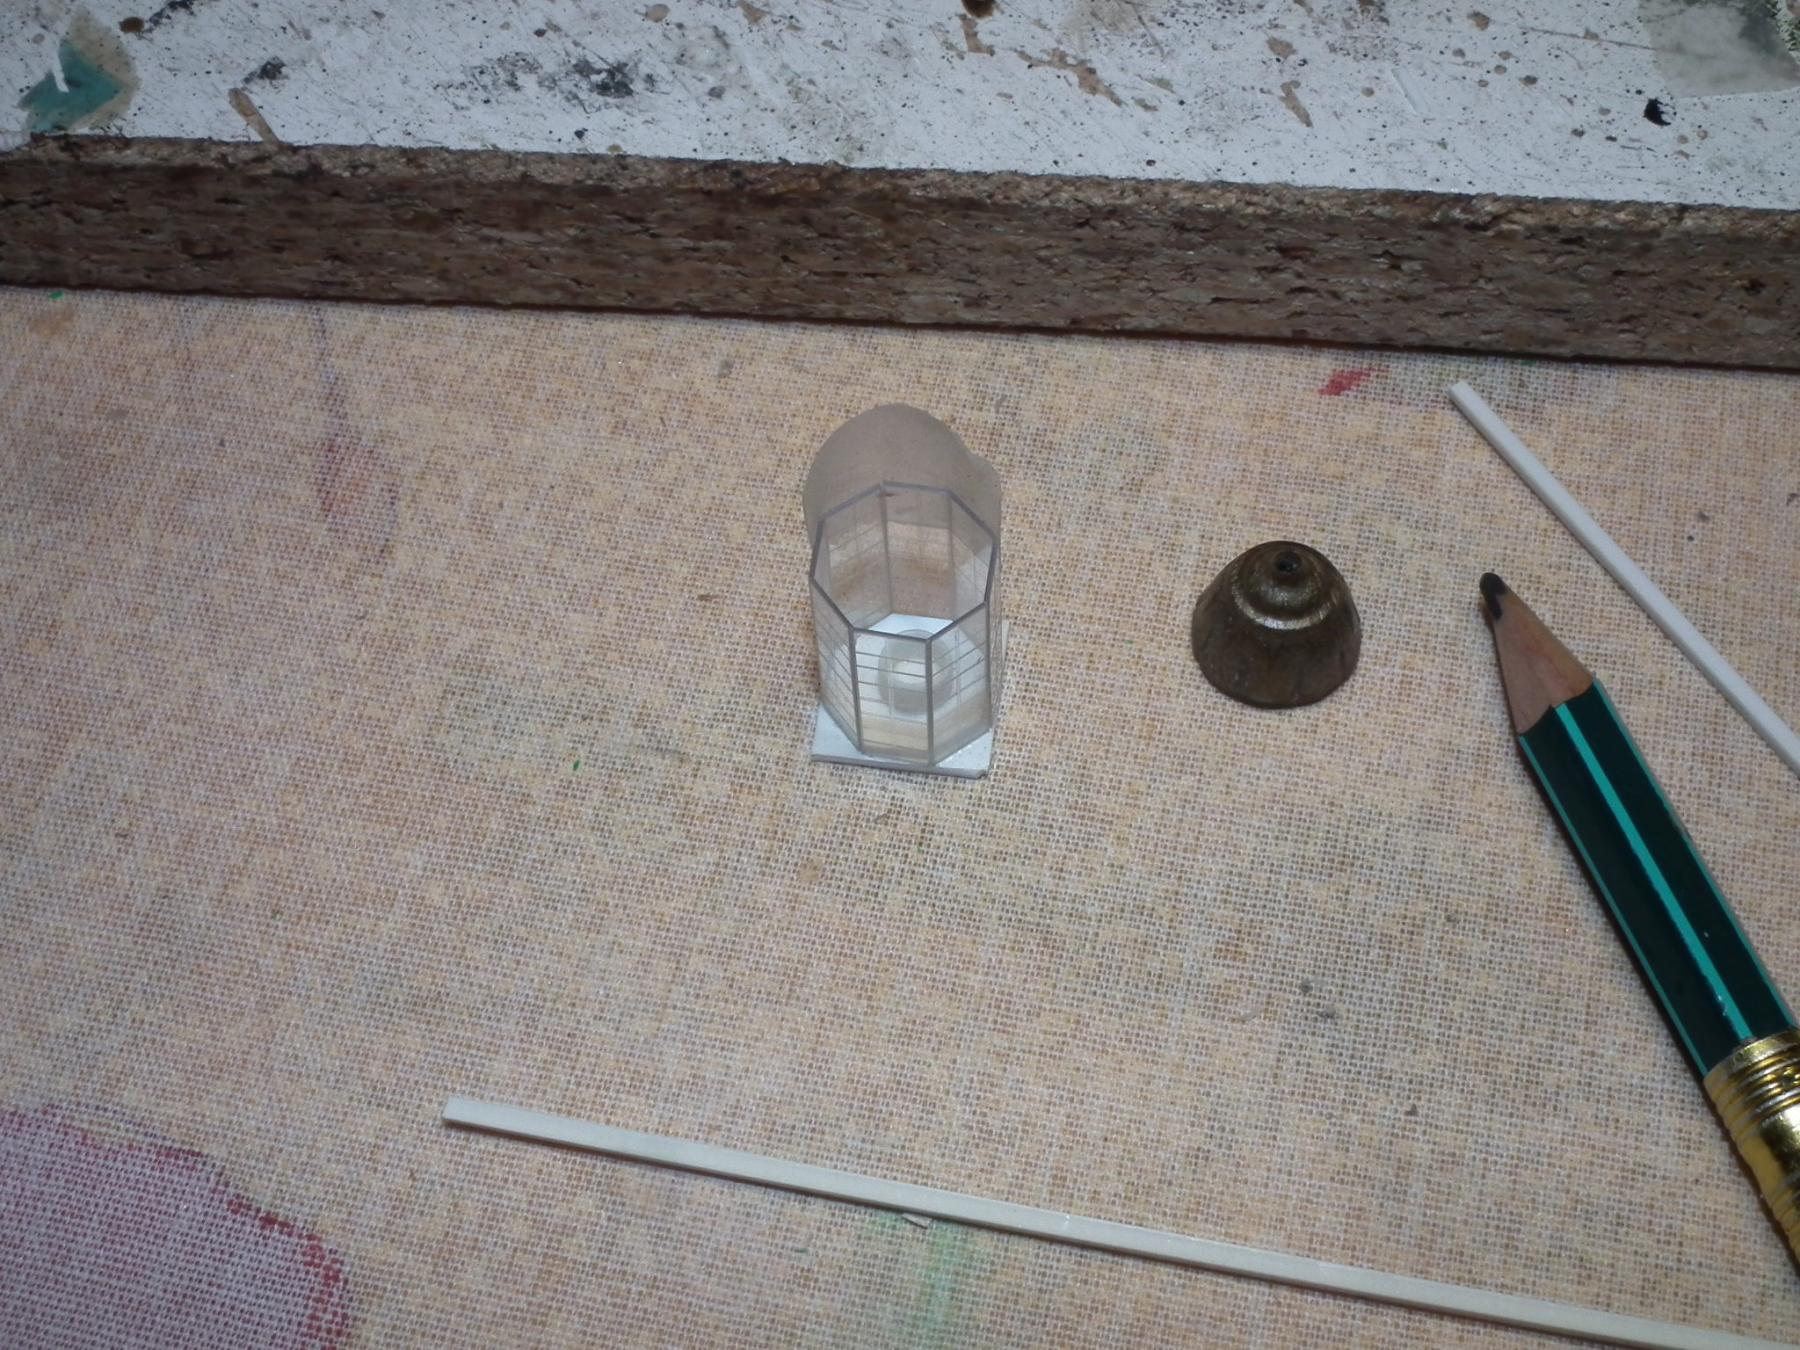
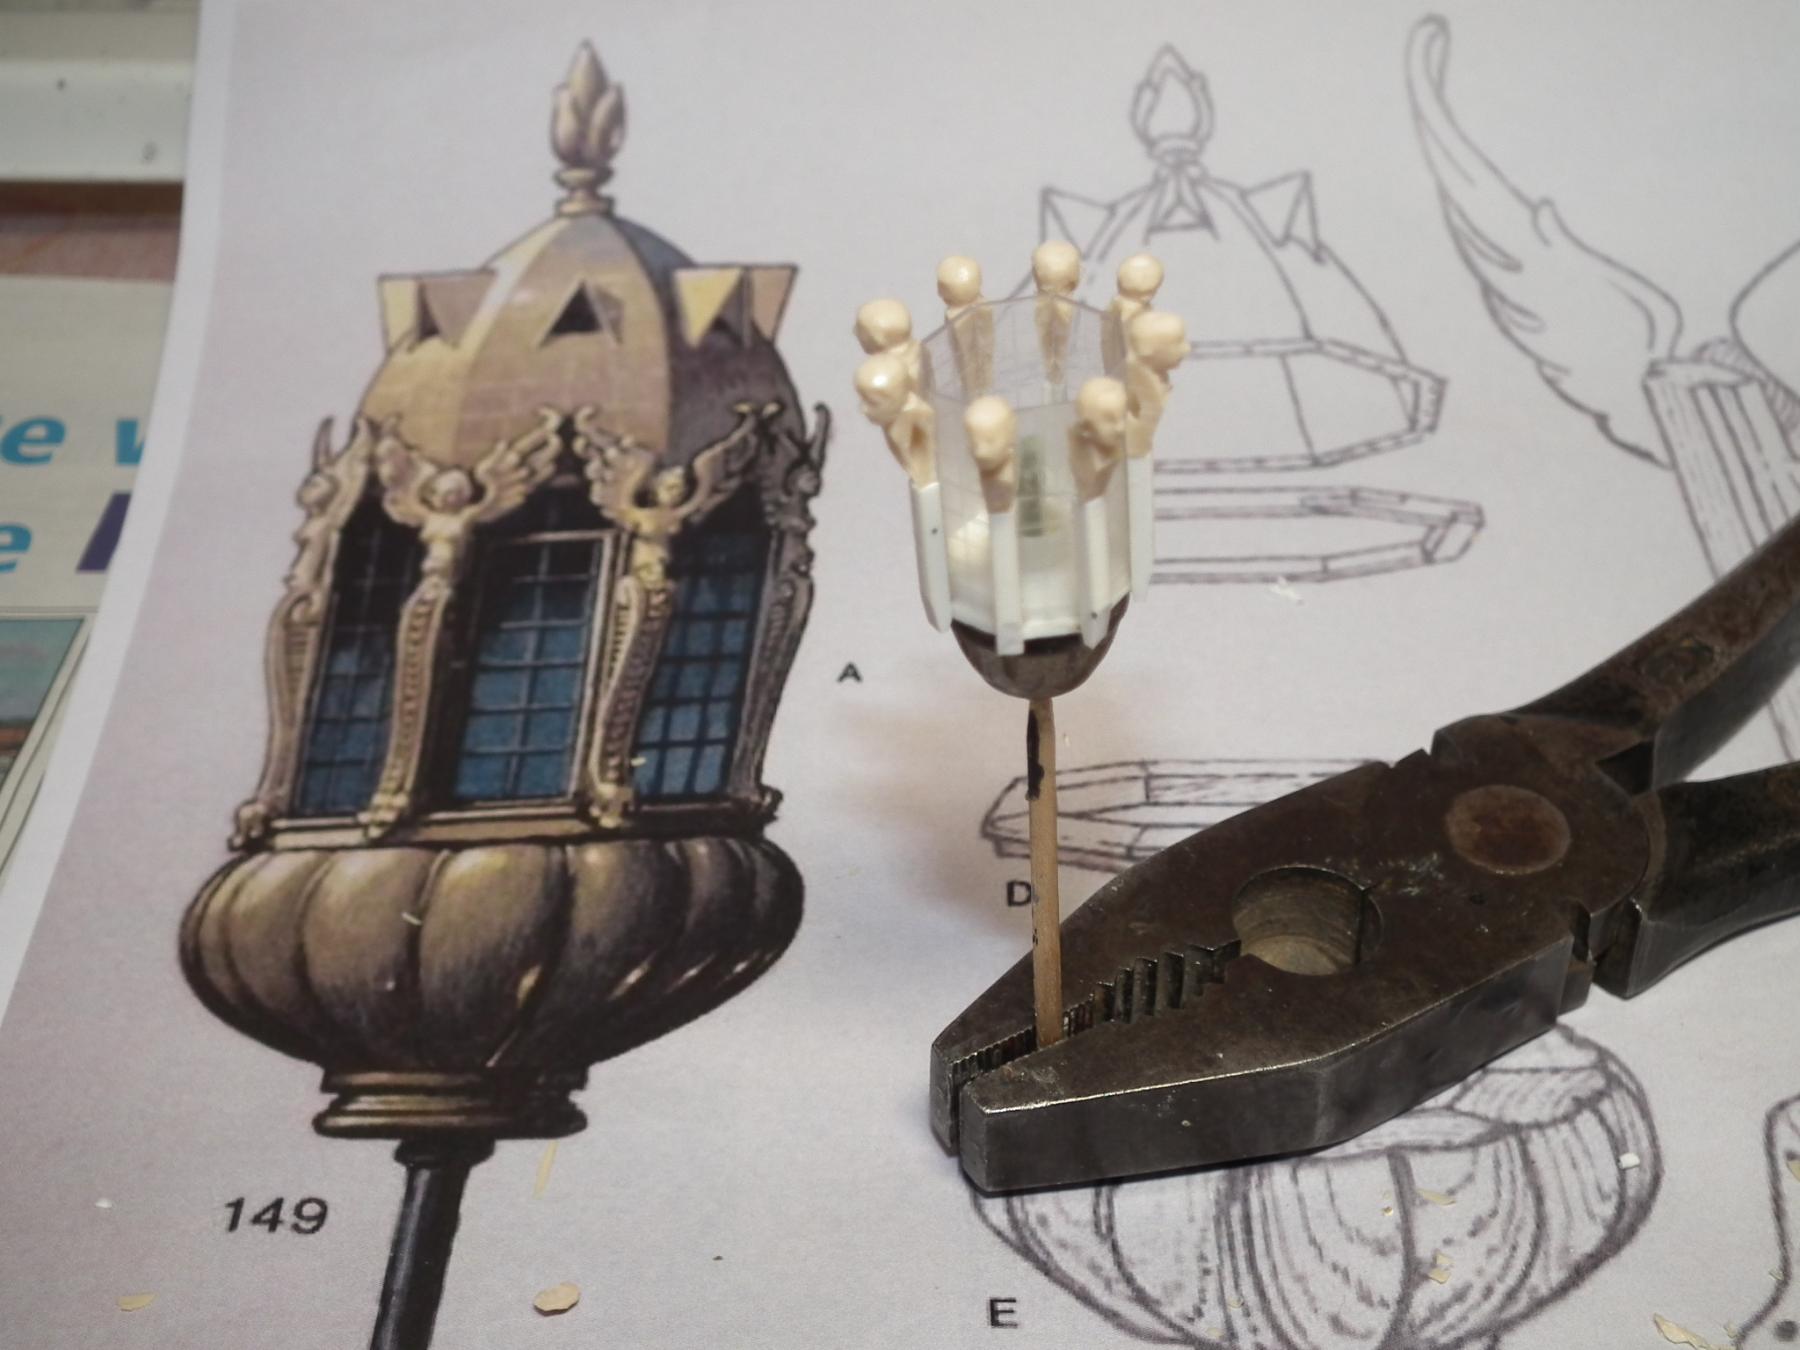
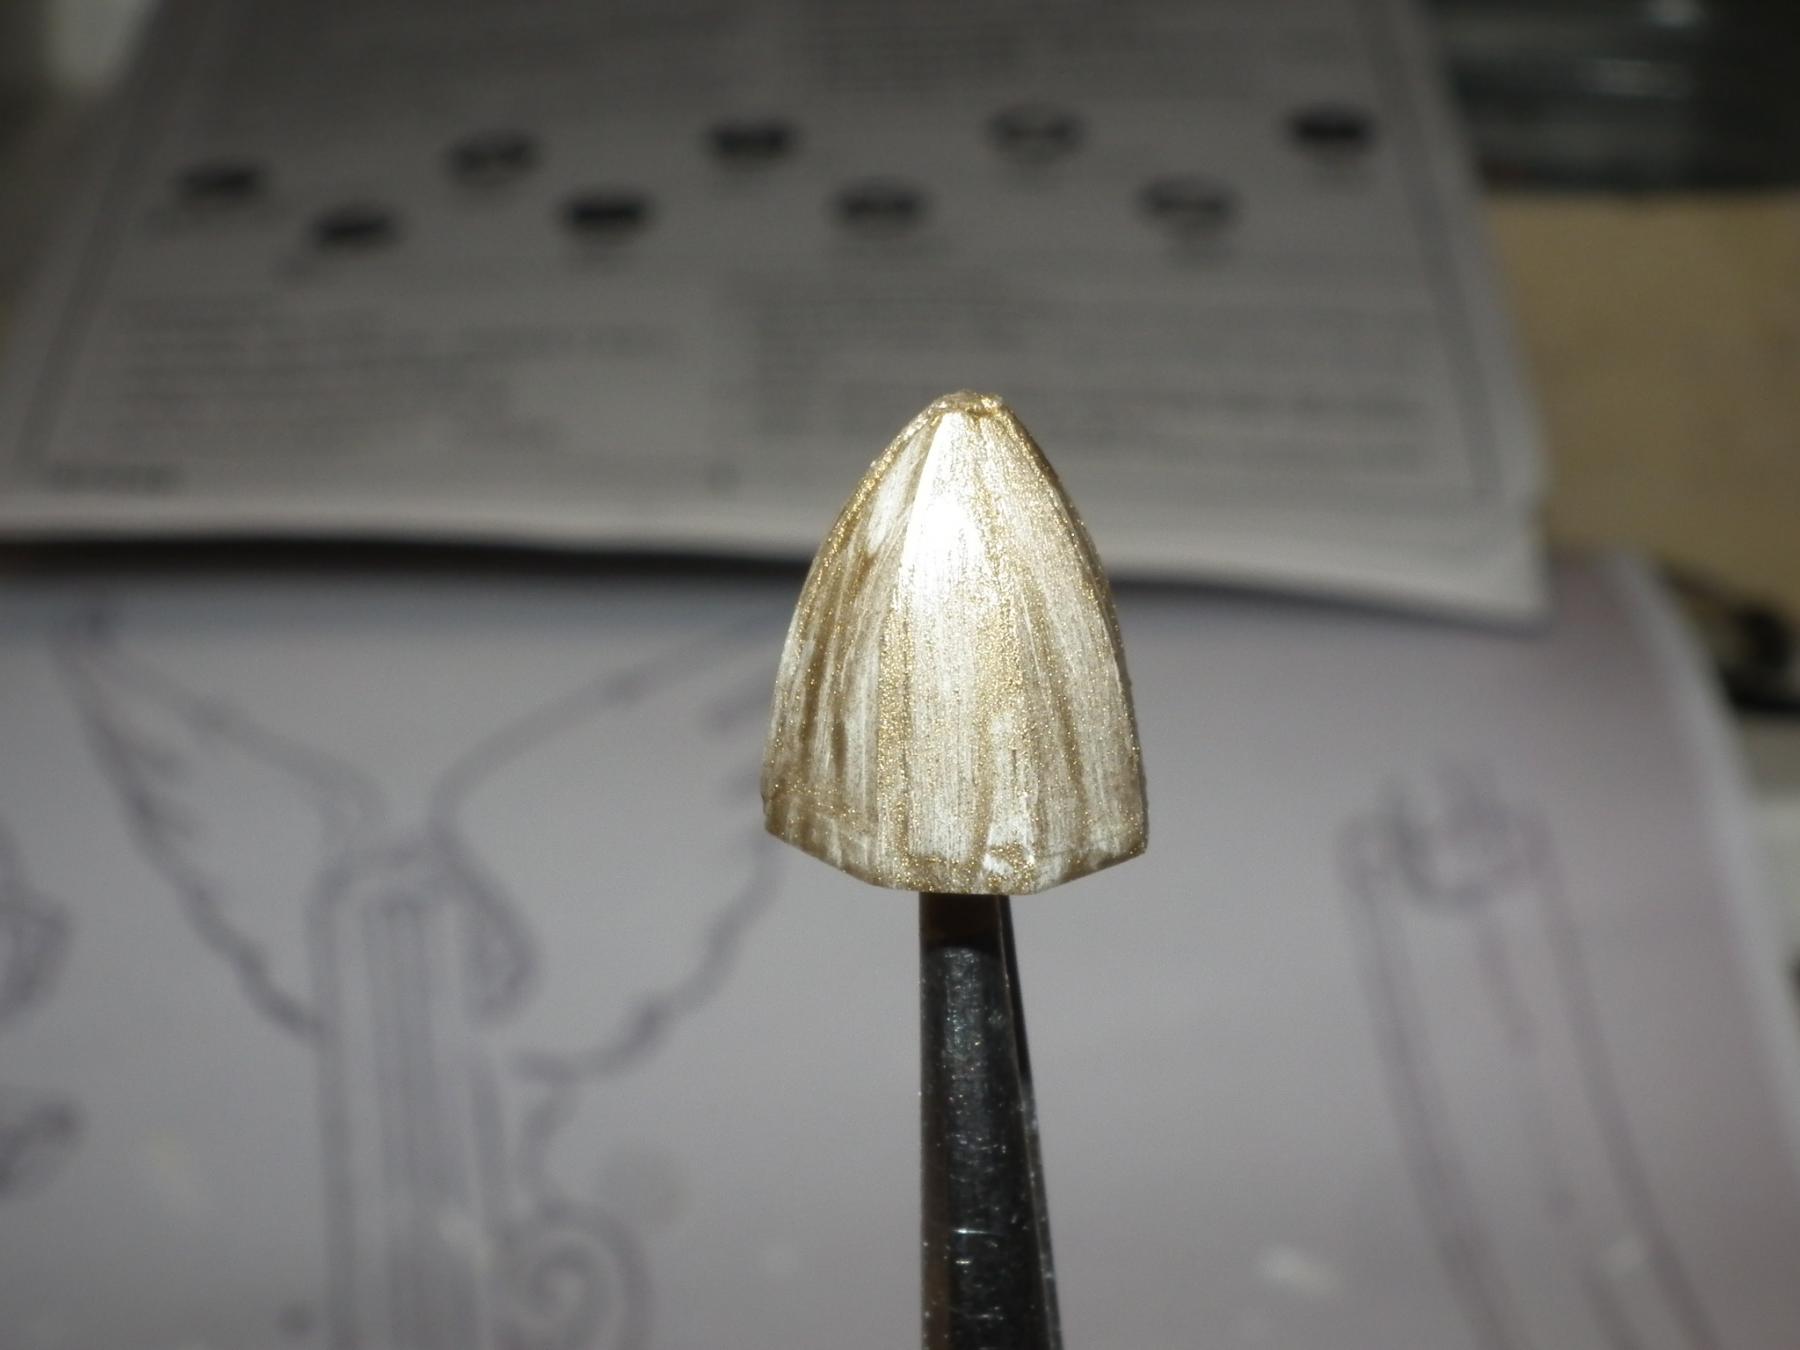
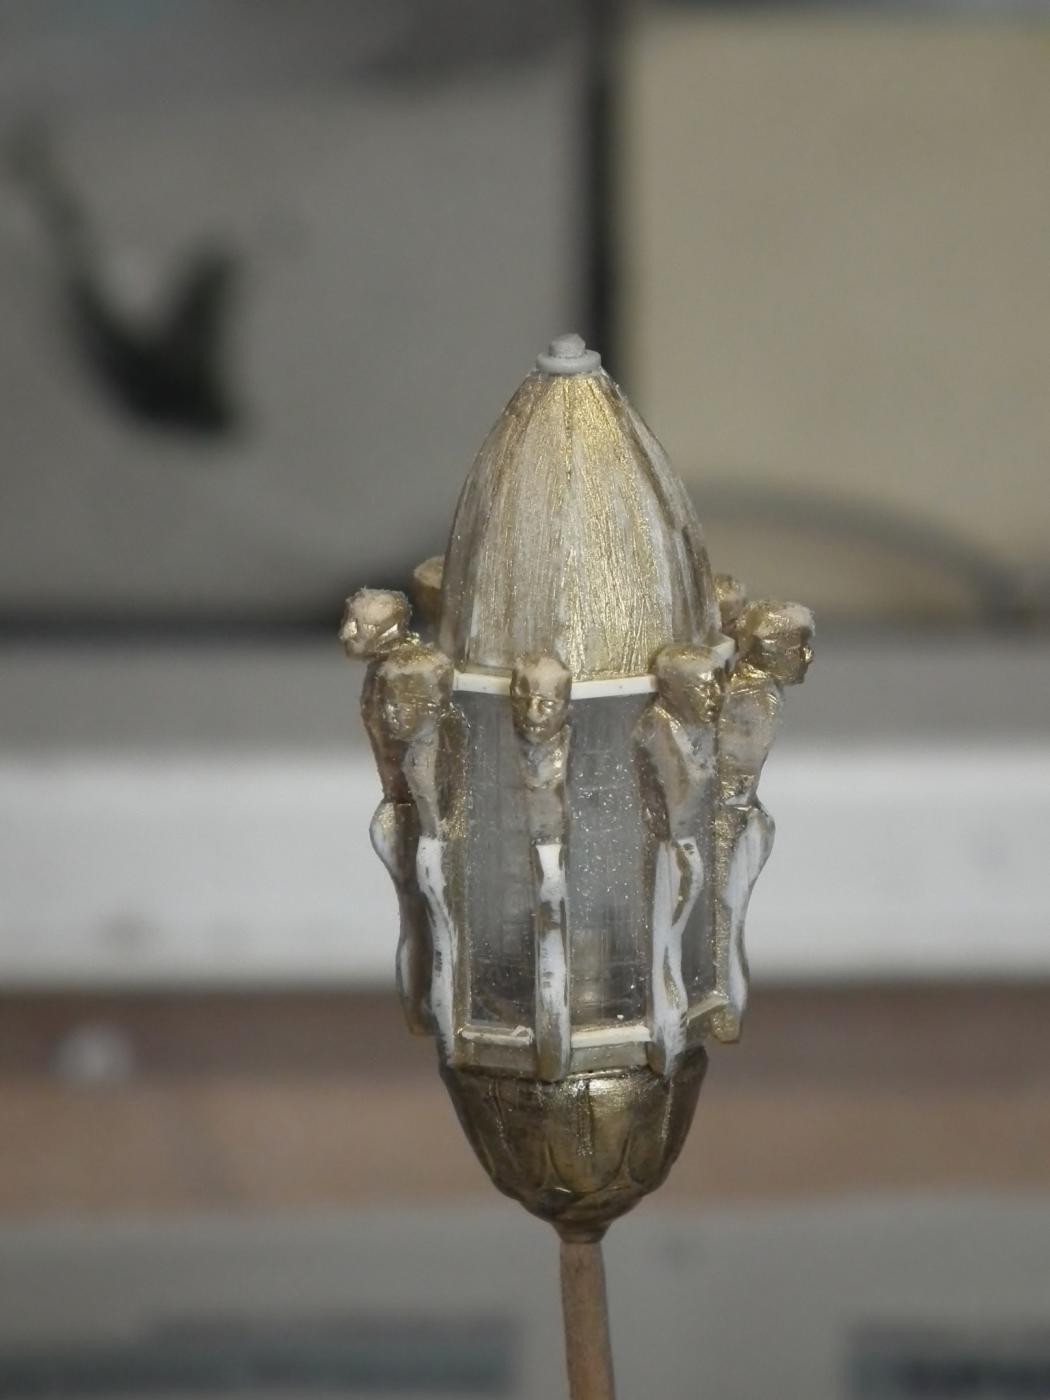
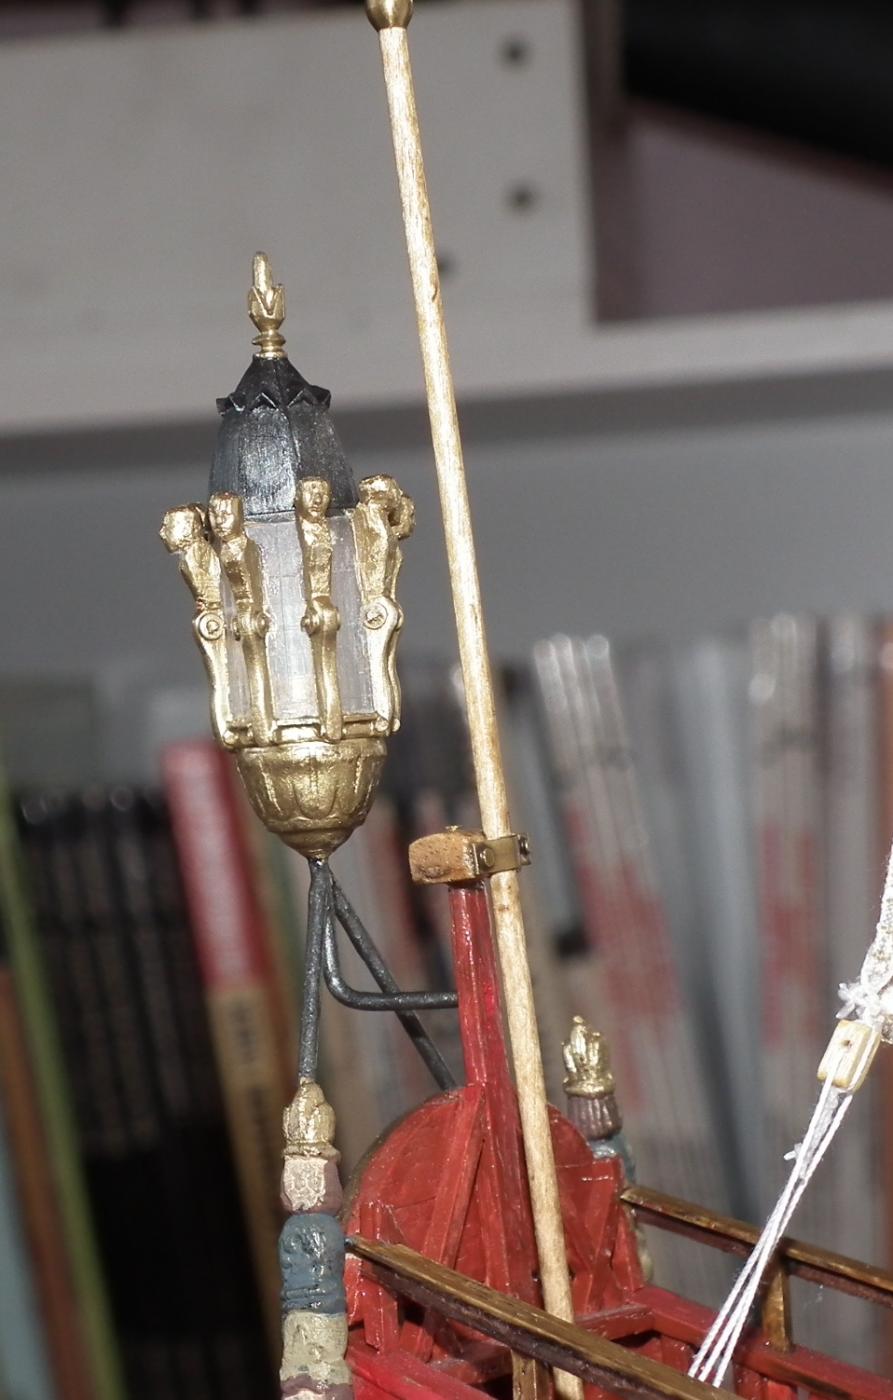
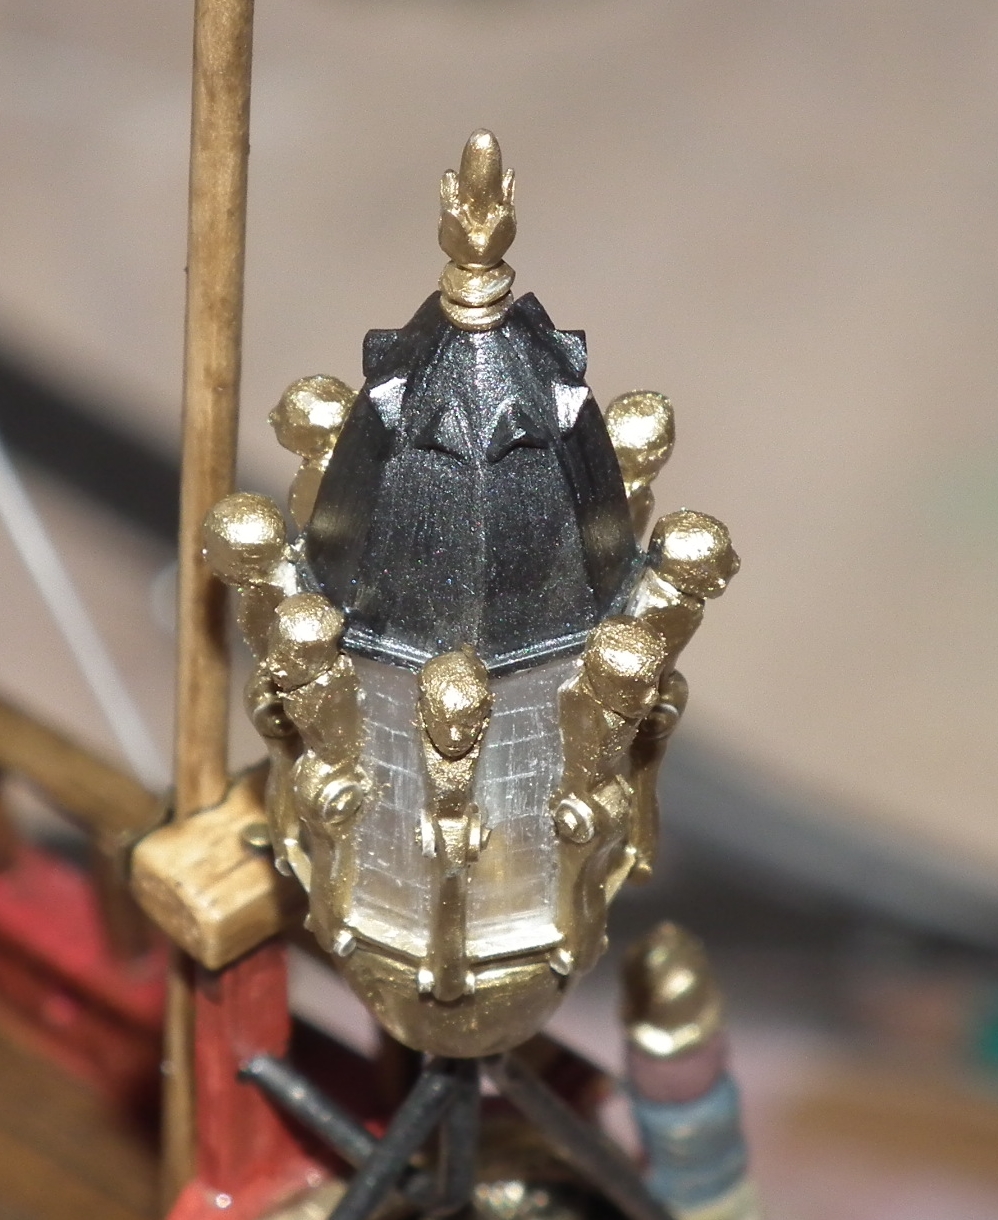
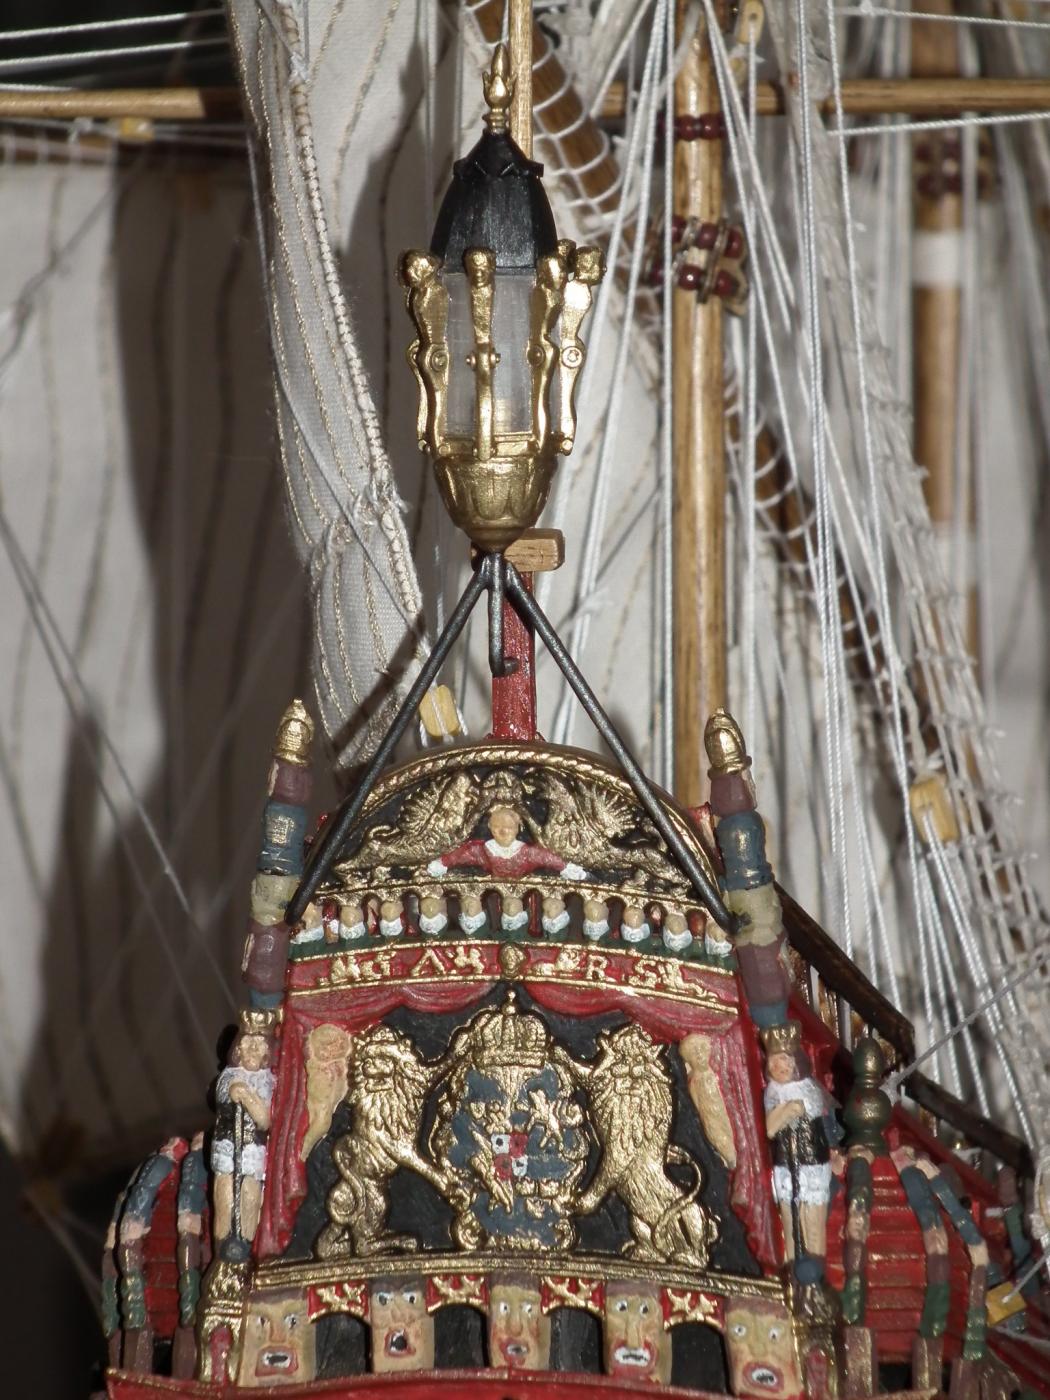
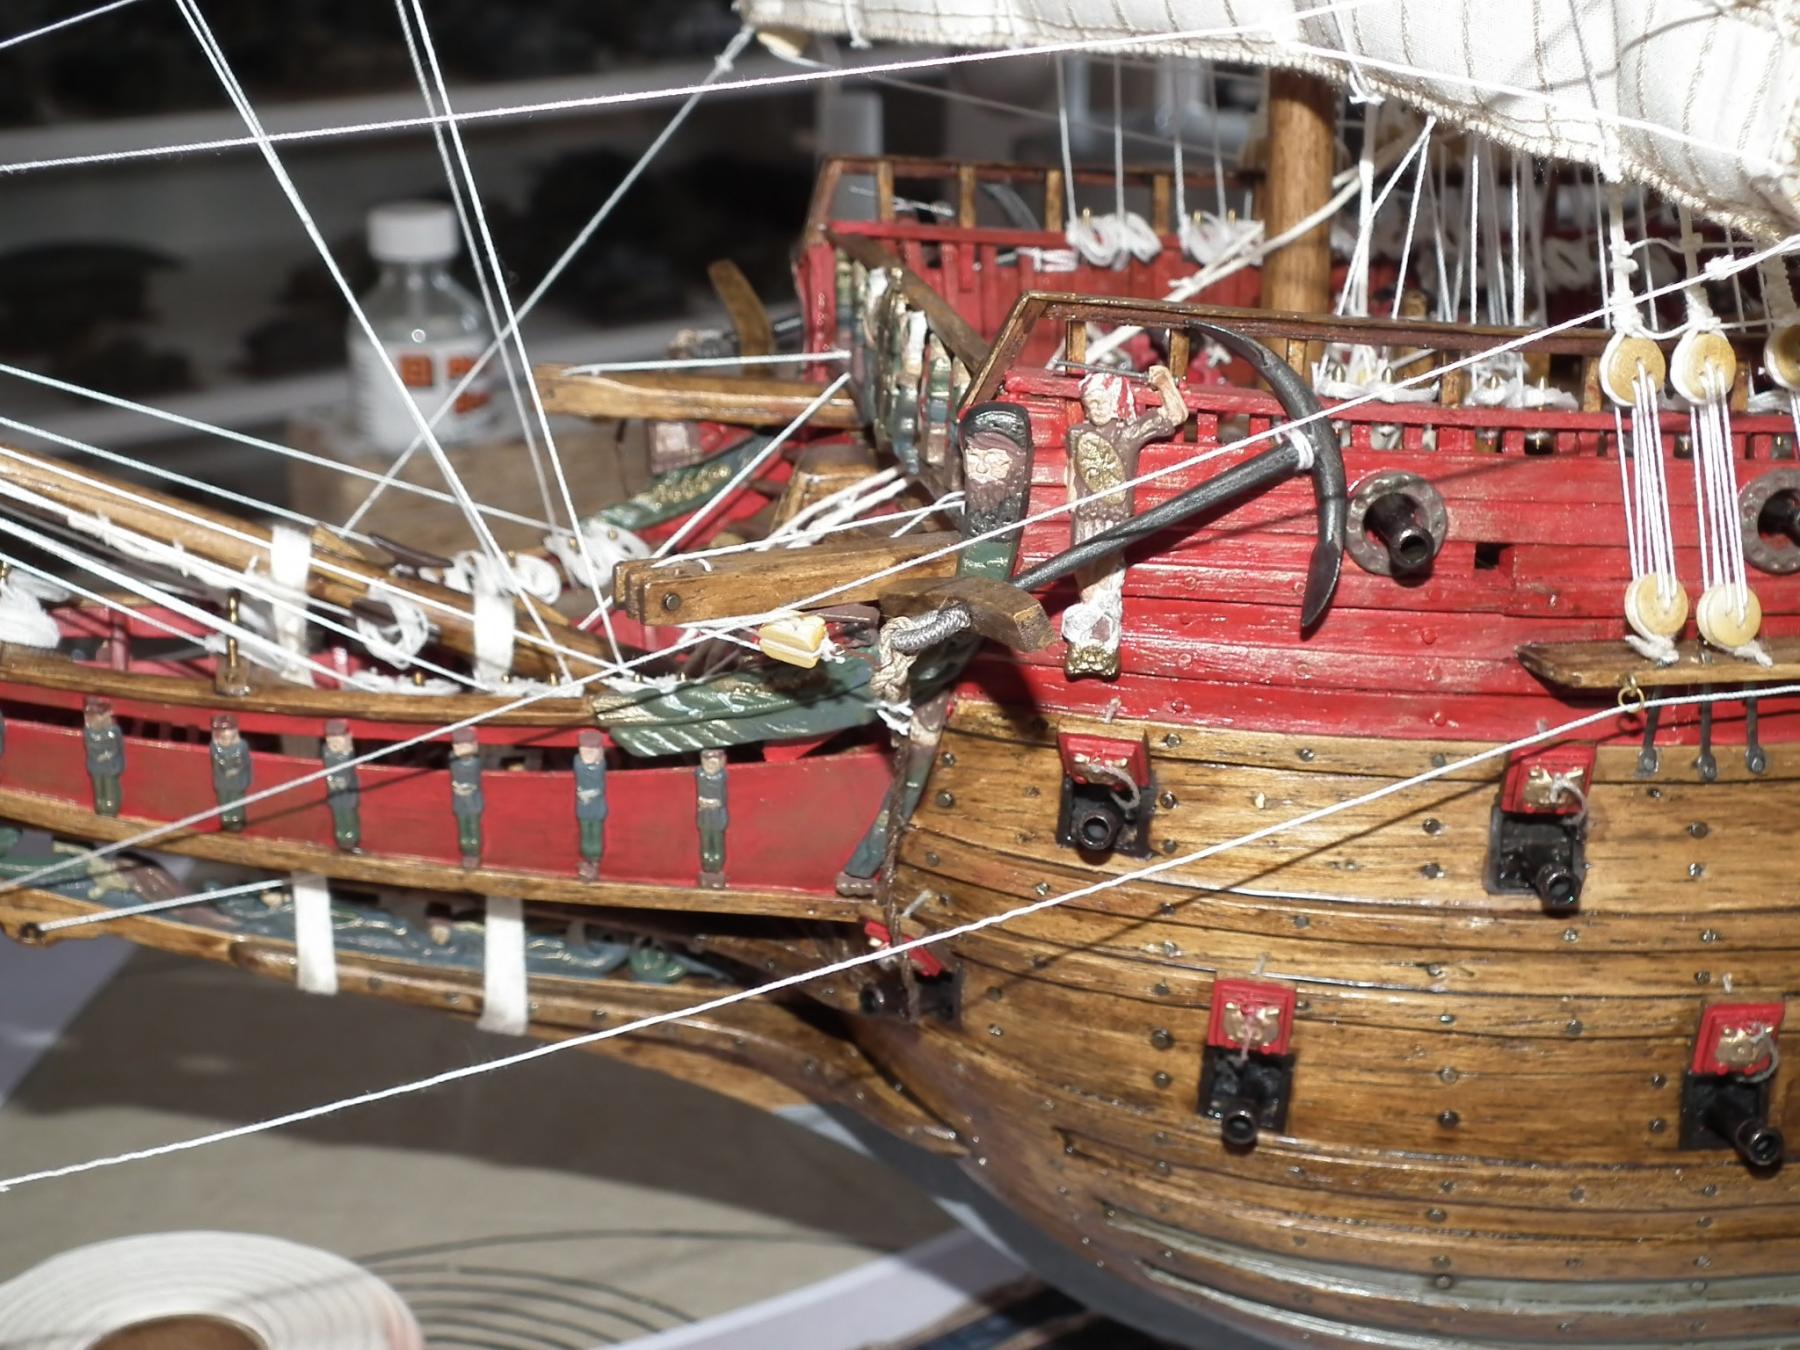
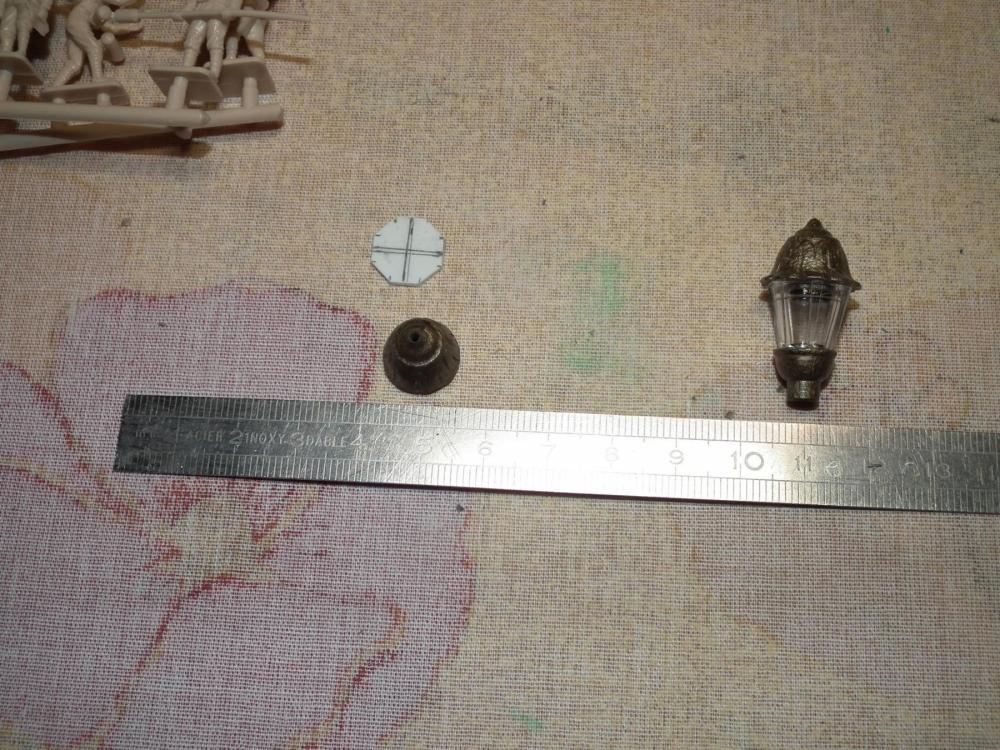
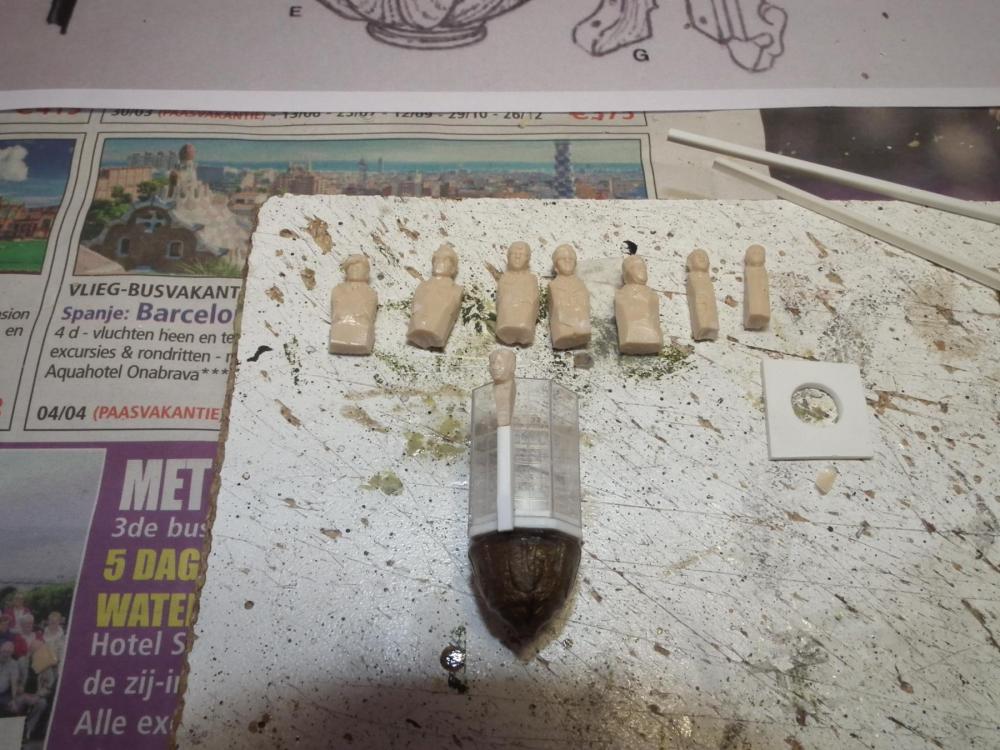
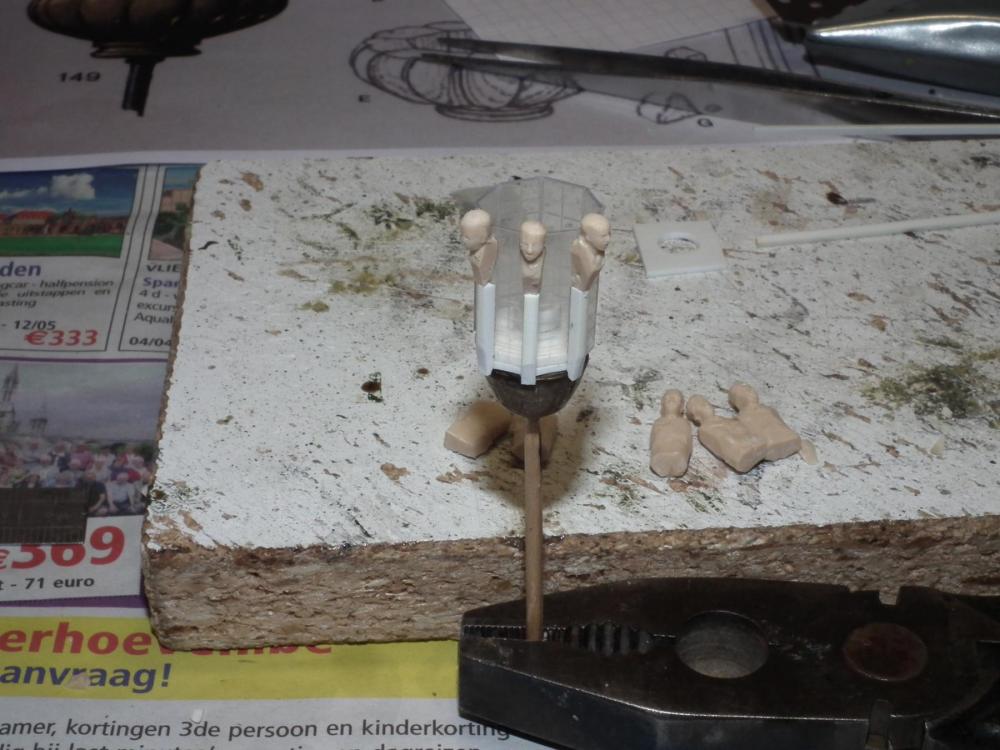
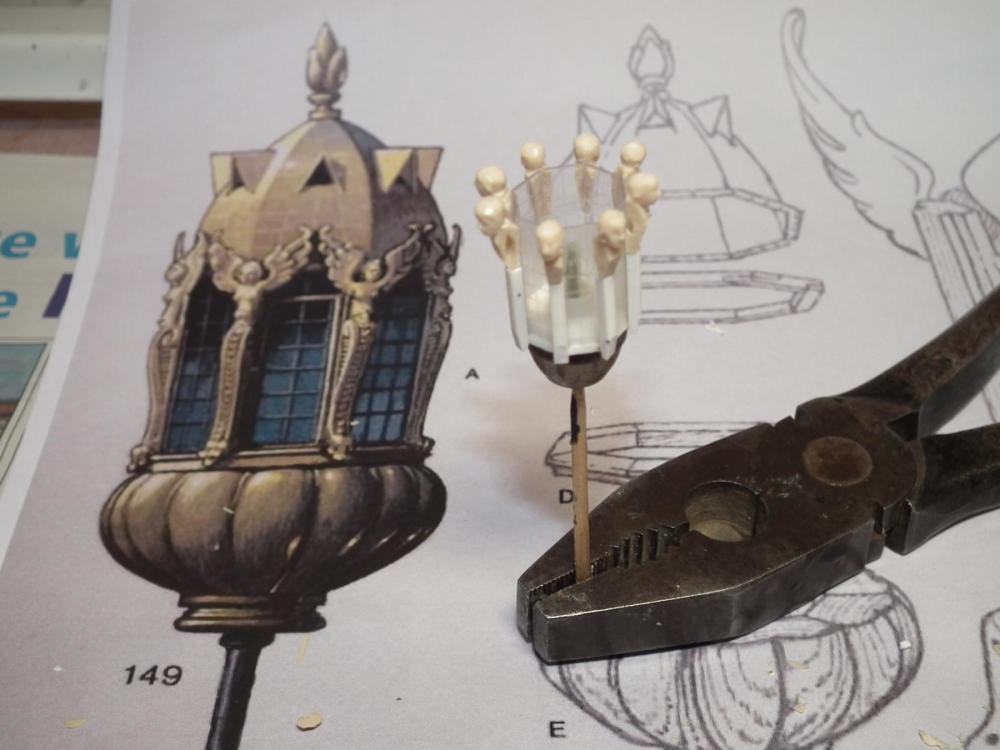
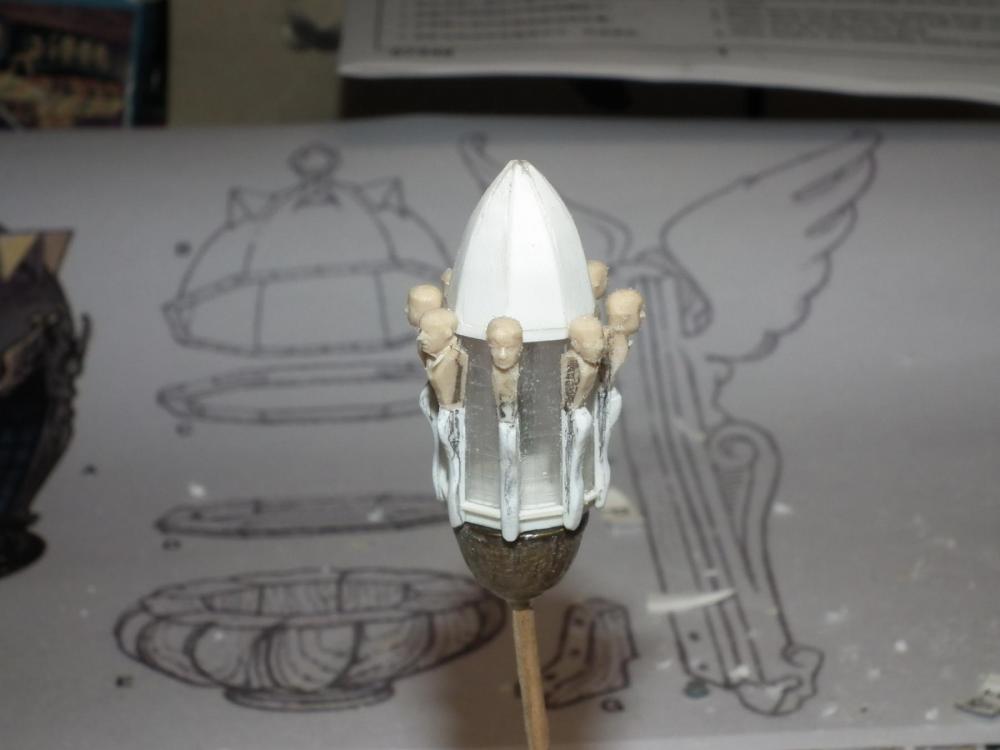
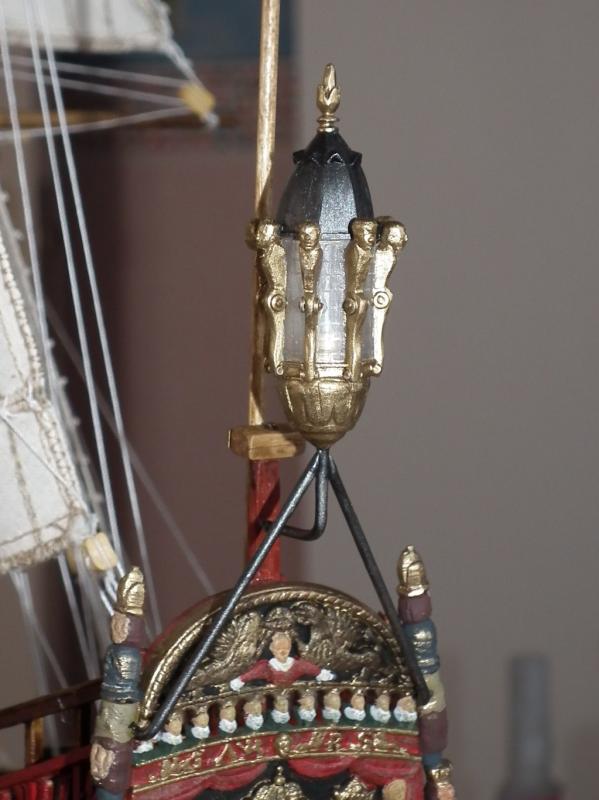
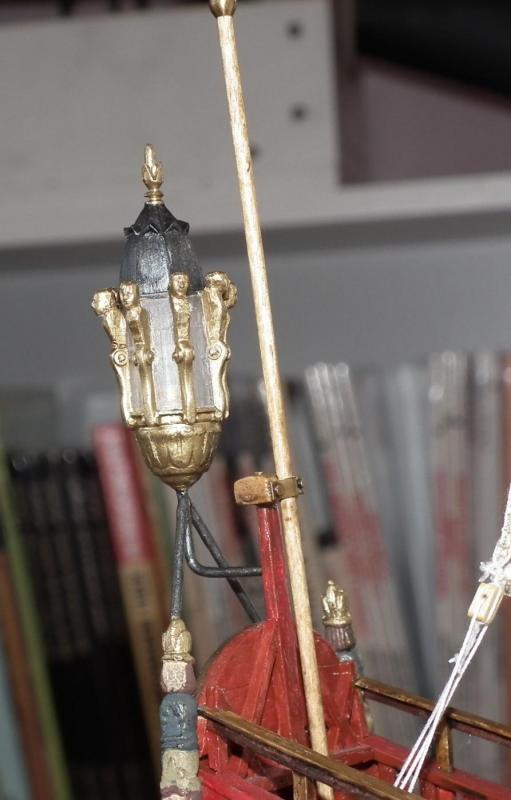
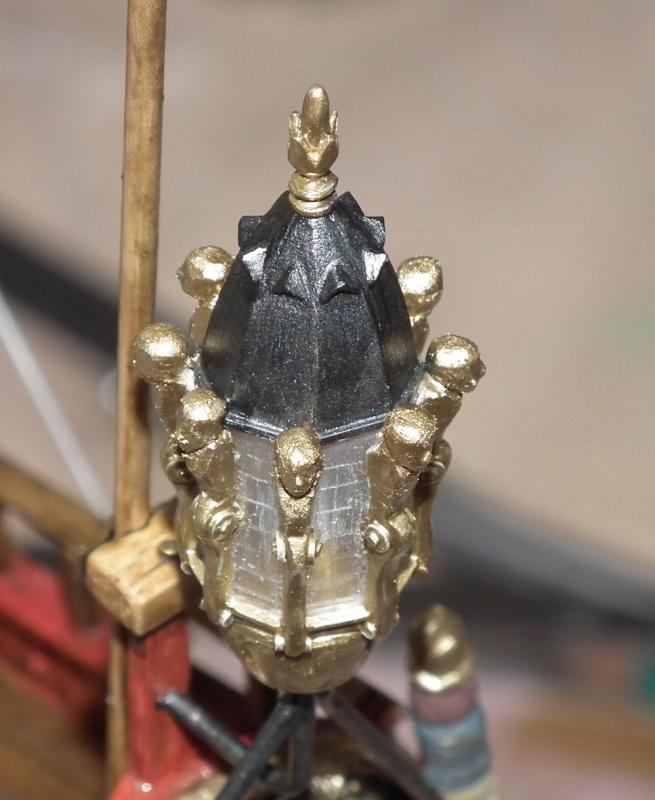
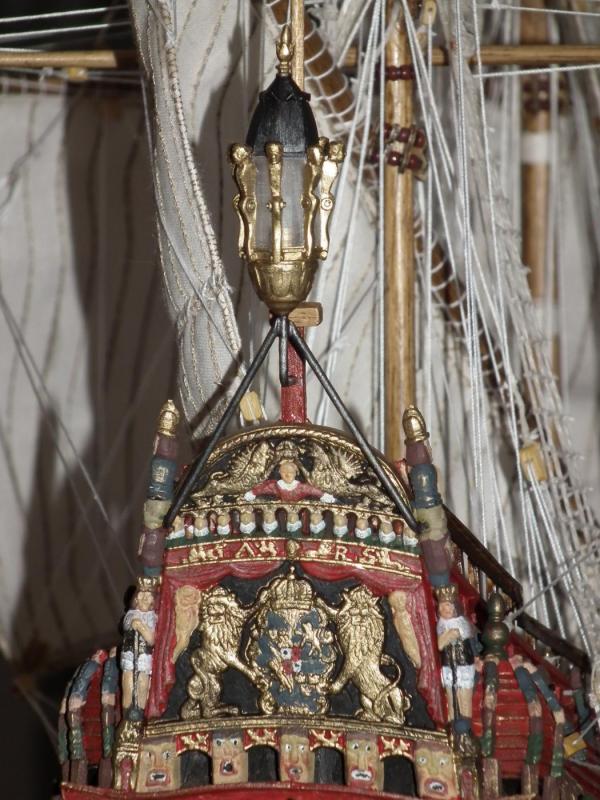
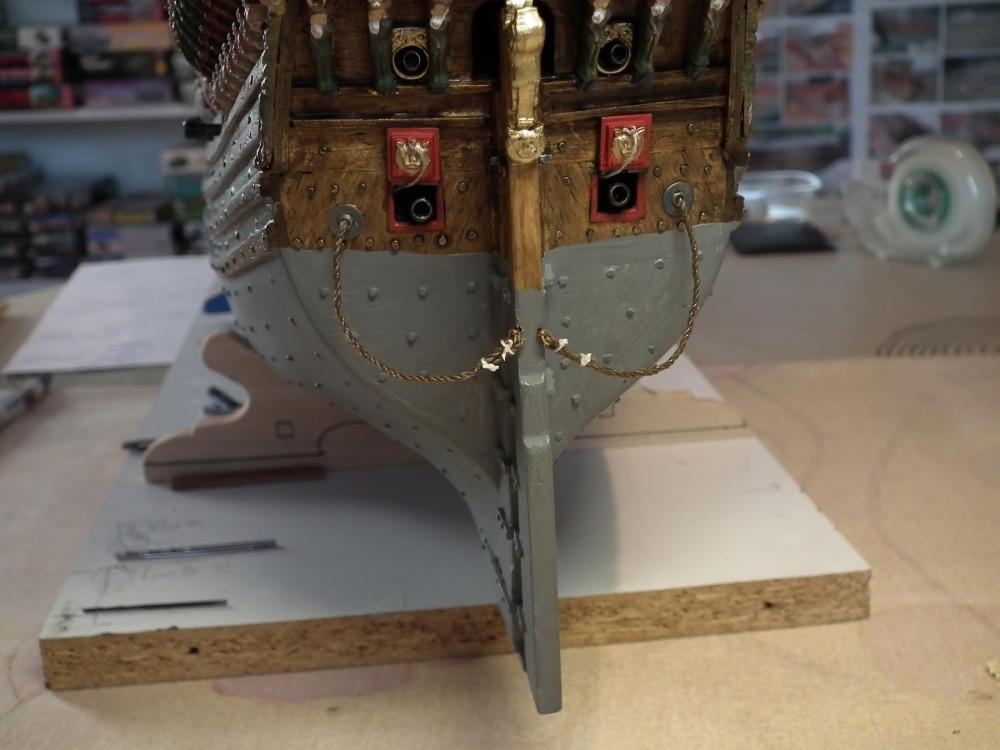
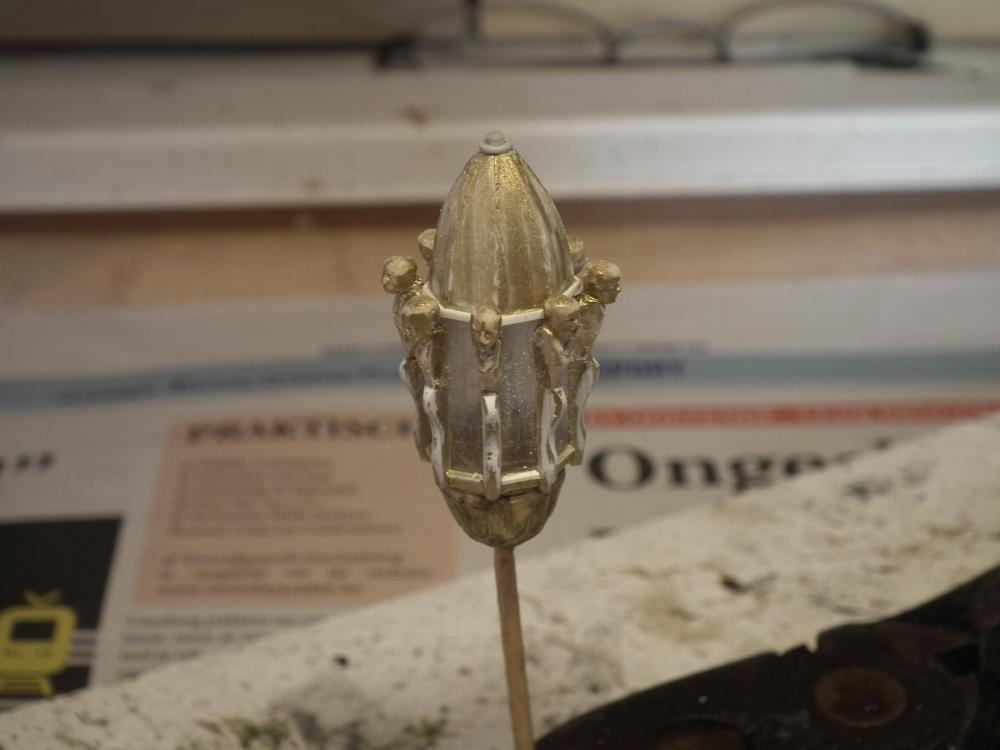
Hello everyone Jan, I Hope you find our Belgian beers delicious I stick to maximum two beers. Otherwise I have always a hangover the morning well, The lantern is fixed on the ship It is not a plan or a plan b But something in the middle. After three unsuccessful attempts to make wings for my angels. I decided that my angels will remain wingless. I had reached my limits in scratch building. On my lantern I have used figures in 1/72 scale. Therefore, there is not enough space between two figures to put wings on them. But, I found pictures of a lantern on the Duth VOC ship The Batavia (build in 1627-1628). Here is shown a lantern with approximately the same figures, but without the wings. Wasa and Batavia are both build by a dutch master So why not go further with this example, I decided. So if someone wants to build my lantern with angels and wings. Make the lantern wider or use figures in scale 1/87 Any figures that you want to use, use figures without helmet. Saves a lot of work!! I have attached a pdf with a drawing Dimensions are in mm (1 millimeter = 0.0393700787 inches) (Extra small details in plastic strip are applied on the lantern) Painting is gold and gun metal) schets lantaarn.pdf The rudder is fixed with rope and the anchors are in place Now it is searching for flags and attach them. And then the model should be finished. For now it's back to military modeling. And in the meanwhile think what model ship I'm going to build hereafter. Patrick


- 63 replies
-
- 13
-
-
- vasa
- billing boats
- (and 1 more)
-
nice work I agree with Jan. Cost of labour was very low compared with our time. But if every sailor on board the real ship could paint sufficient enough to maintain an artwork like it is presented on the 1/10 model in the museum. That is an open question. Patrick
-
A few drinks a day, keeps the heat away New Belgian way of life ..... And I might have luck with the lantern Patrick

- 63 replies
-
- 8
-
-
- vasa
- billing boats
- (and 1 more)
-
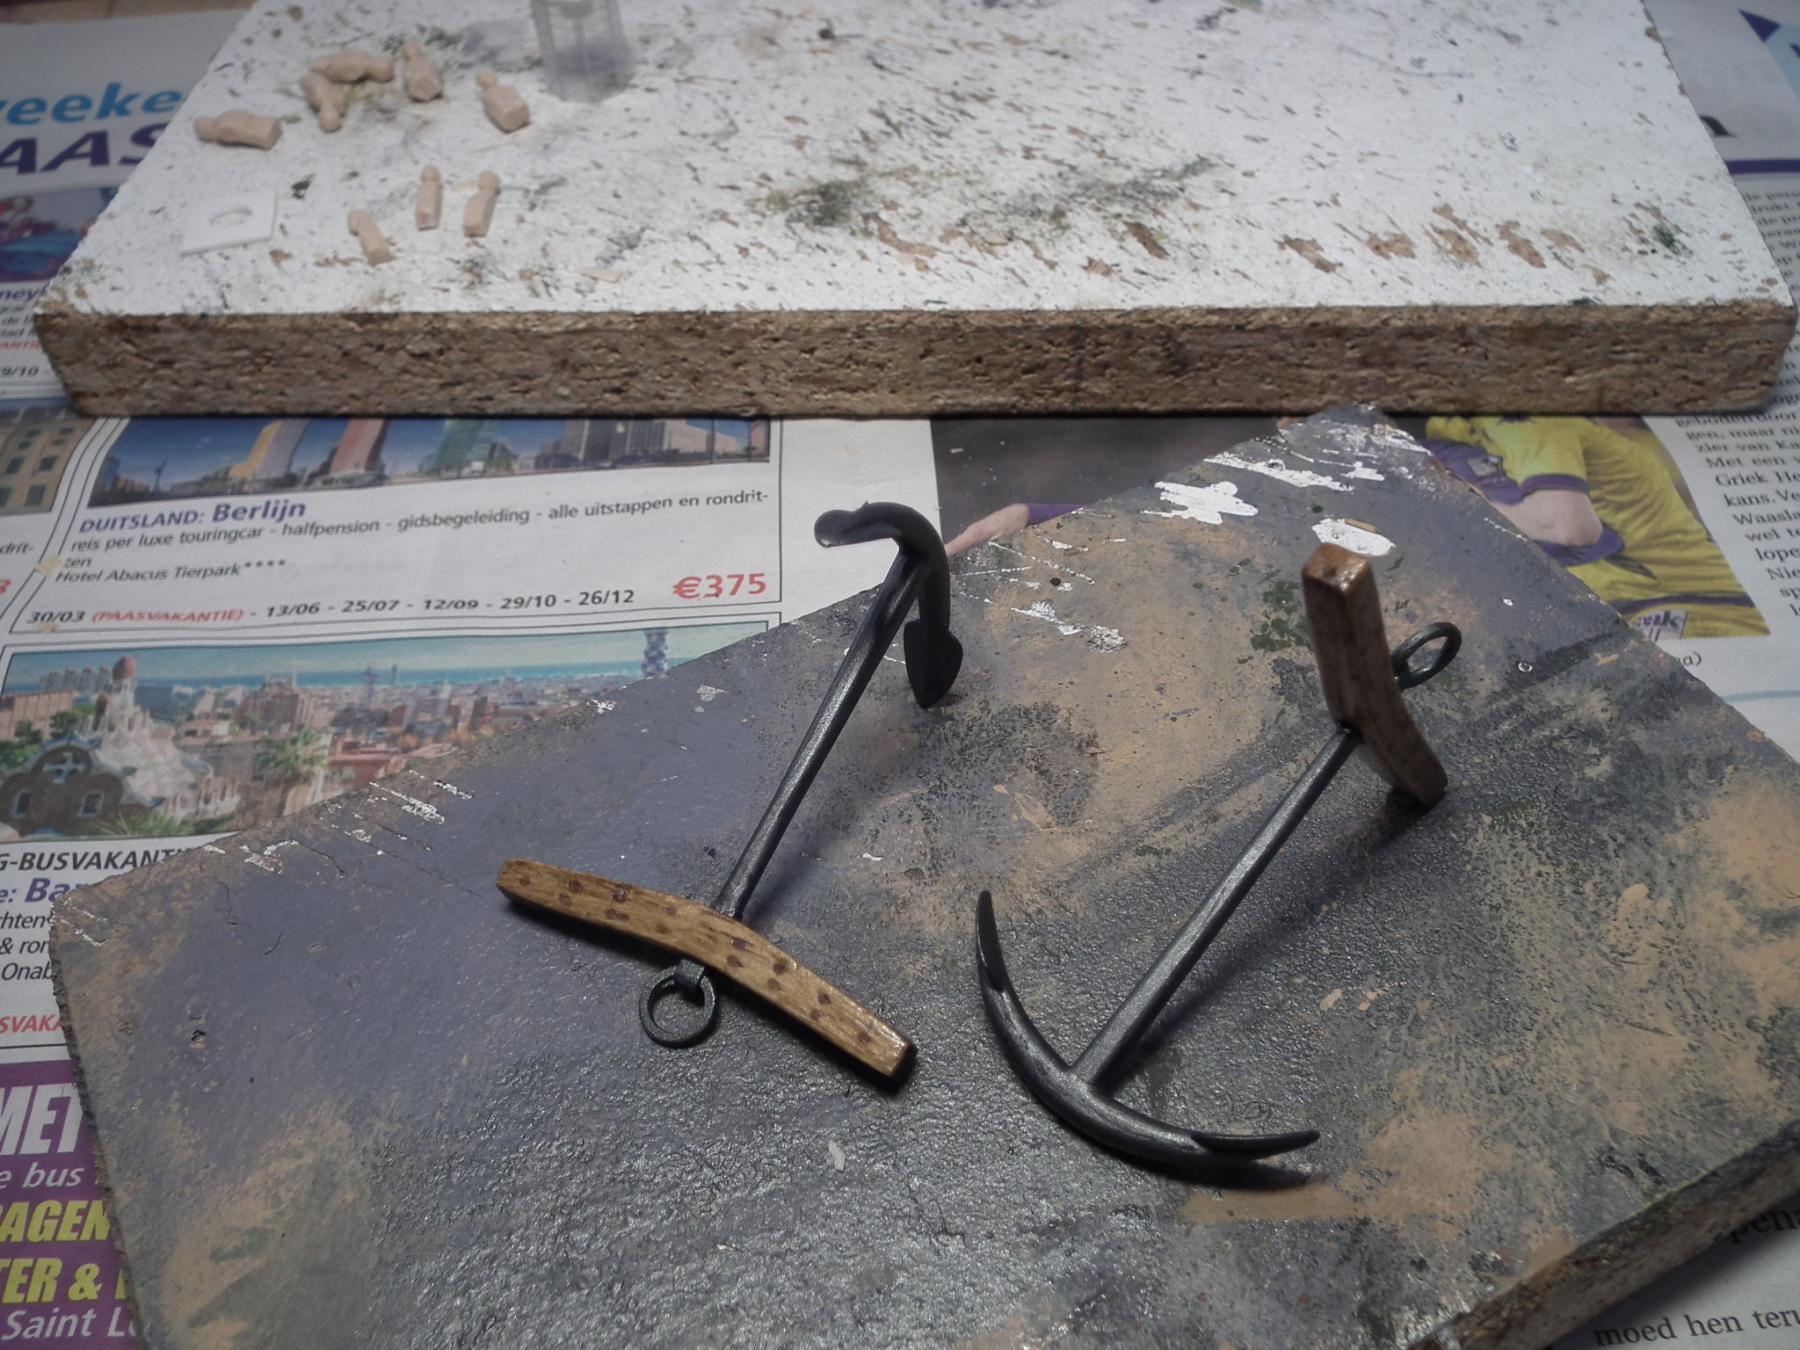
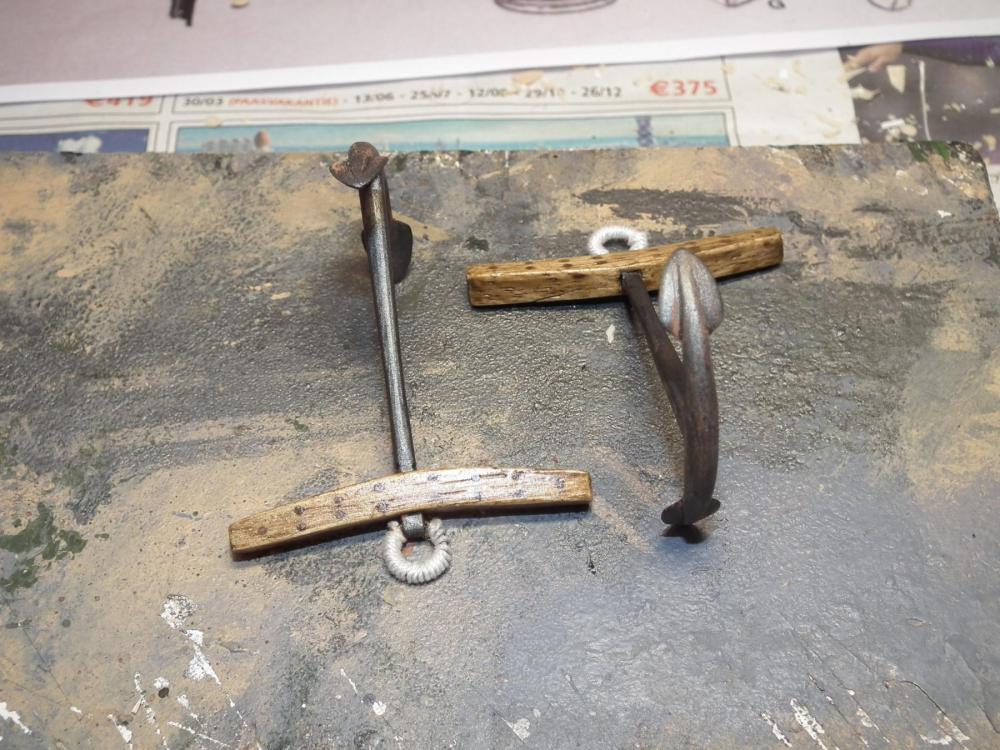
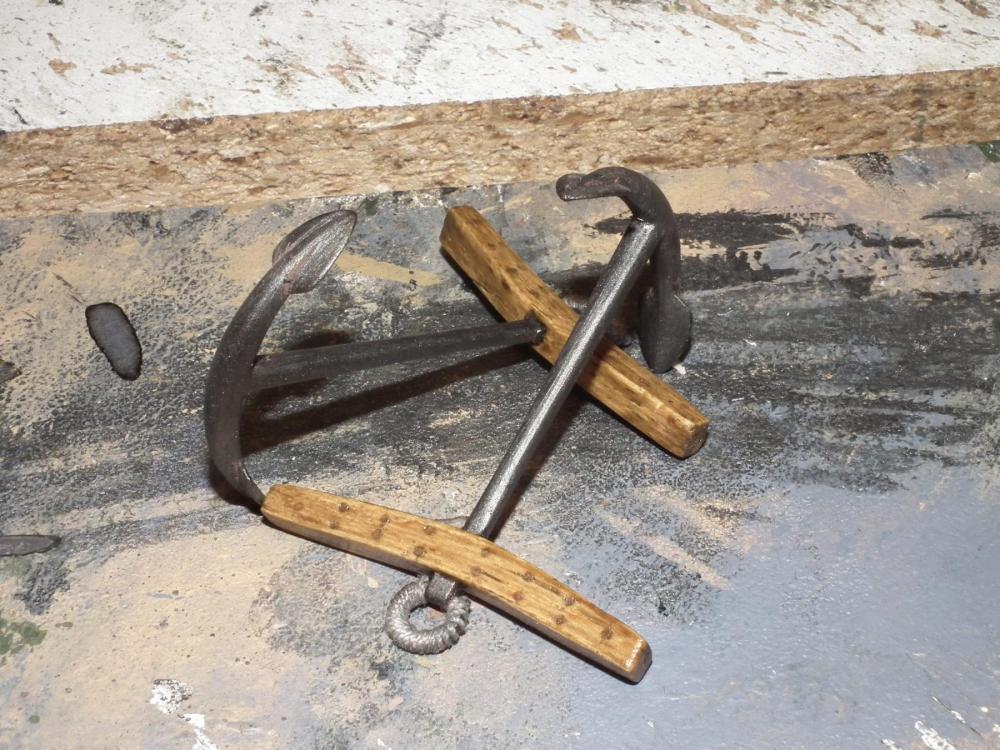
The anchors are finished. The wood parts are painted with oak varnish. The metal parts are painted with Tamiya acrylic paint Base coat :Gun Metal X10 + Flat base X21 Let dry for 24h Apply a wash with a mixture of "home made" rust paint : Desert sand XF59 + Red Brown XF64 + thinner + water Let dry for 24h Attach the wire around the ring of the anchor Applay a wash with a mixture of Flat black XF1 + thinner + water Let dry for 24h and ready They will be attached later on the model. Patrick

- 63 replies
-
- 9
-
-
- vasa
- billing boats
- (and 1 more)