HOLIDAY DONATION DRIVE - SUPPORT MSW - DO YOUR PART TO KEEP THIS GREAT FORUM GOING! (Only 20 donations so far - C'mon guys!)
×


Baker
-
Posts
4,234 -
Joined
-
Last visited
Content Type
Profiles
Forums
Gallery
Events
Everything posted by Baker
-
And greetings from Belgium
-
 Looks beautiful !! I am already curious about your solution for the "lack of foresight". But beware for battle damage . Always pleasure to follow your build
 -
Roter Löwe 1597 by Ondras71
Baker replied to Ondras71's topic in - Build logs for subjects built 1501 - 1750
Hello Ondras Your ship looks a lot like my Golden Hind. I'm following your building log. The book "Risse von schiffen des 16. und 17 jahrhunderts" is very helpful to me. -
Welcome from Belgium. And good luck with the the build
-
Welcome from Belgium
-
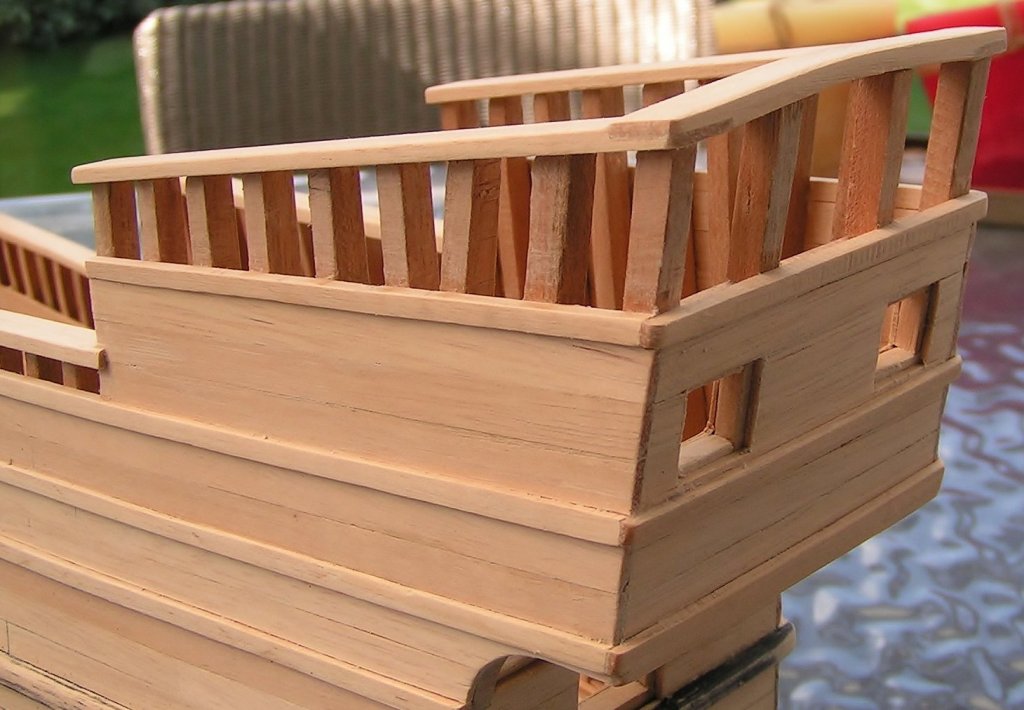
G.L. , Michael , Roger and Steve. Thank you for following and the compliments @ G.L. In autumn and winter I build plastic models on the kitchen table because of better lighting above this table (My sight is not so good with bad lighting). And the admiral says : You do not have permission to make dust (from sanding wood) in the kitchen So it's plastic model building or nothing. @ Roger The high open railing is indeed high. For the time being, this will remain. We see what the future brings, making this rail lower is still possible. Thank you all for following and likes
- 756 replies
-
- 3
-

-
- galleon
- golden hind
- (and 2 more)
-
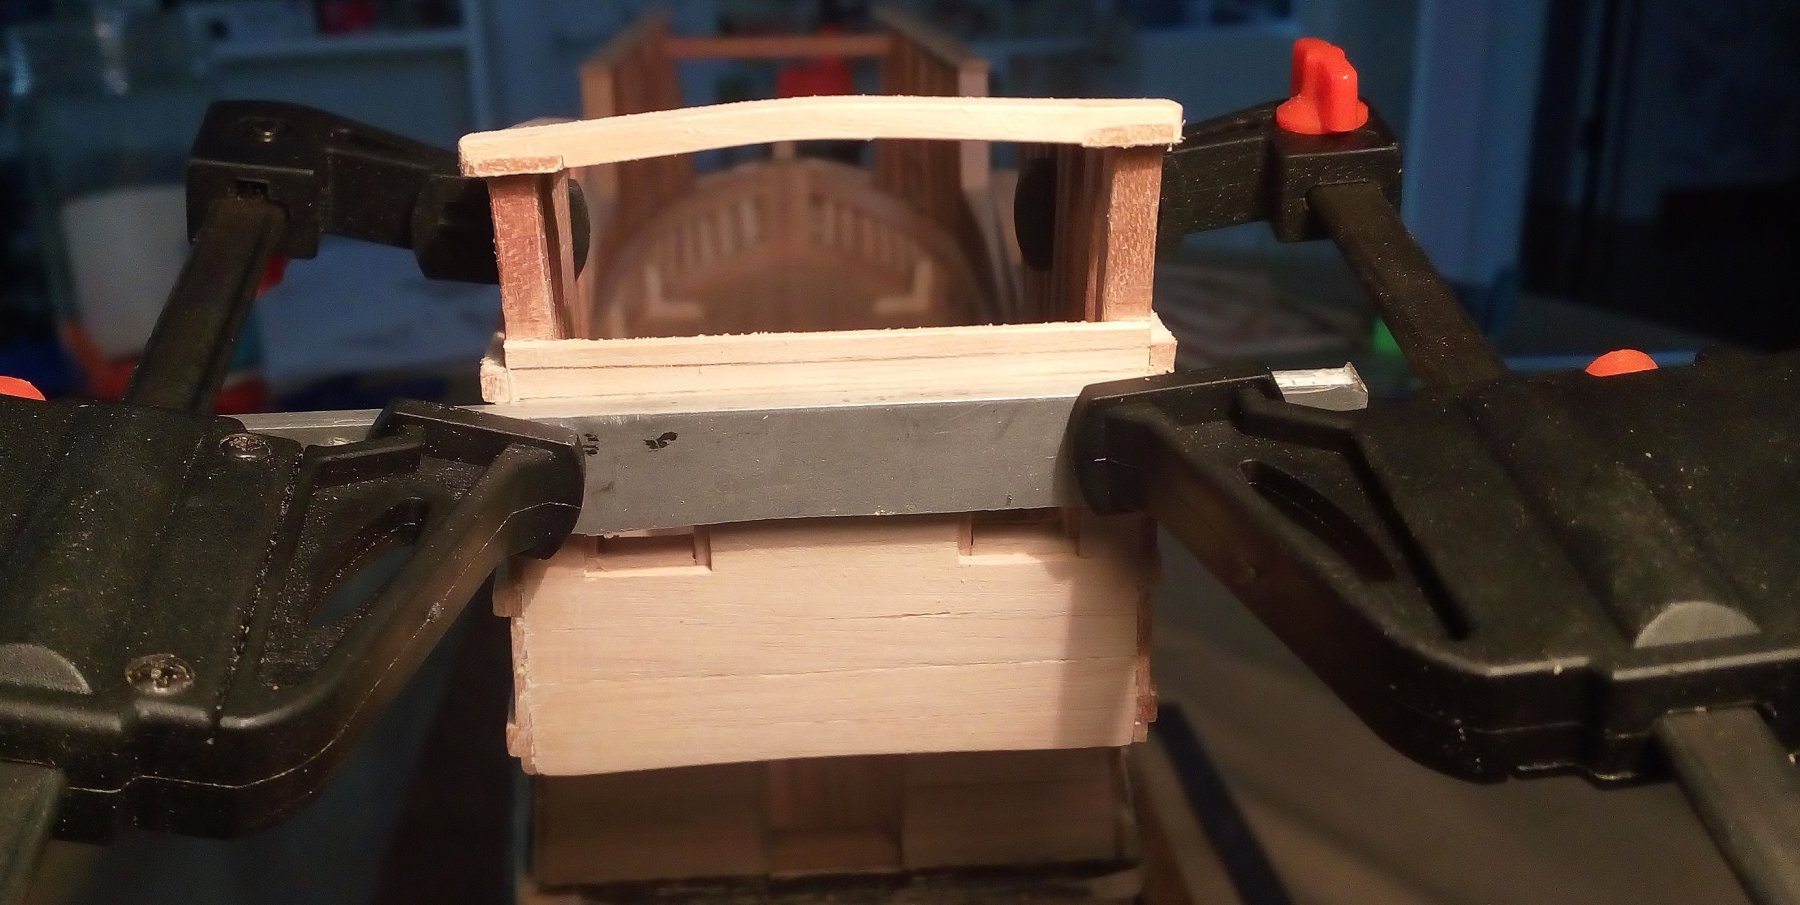
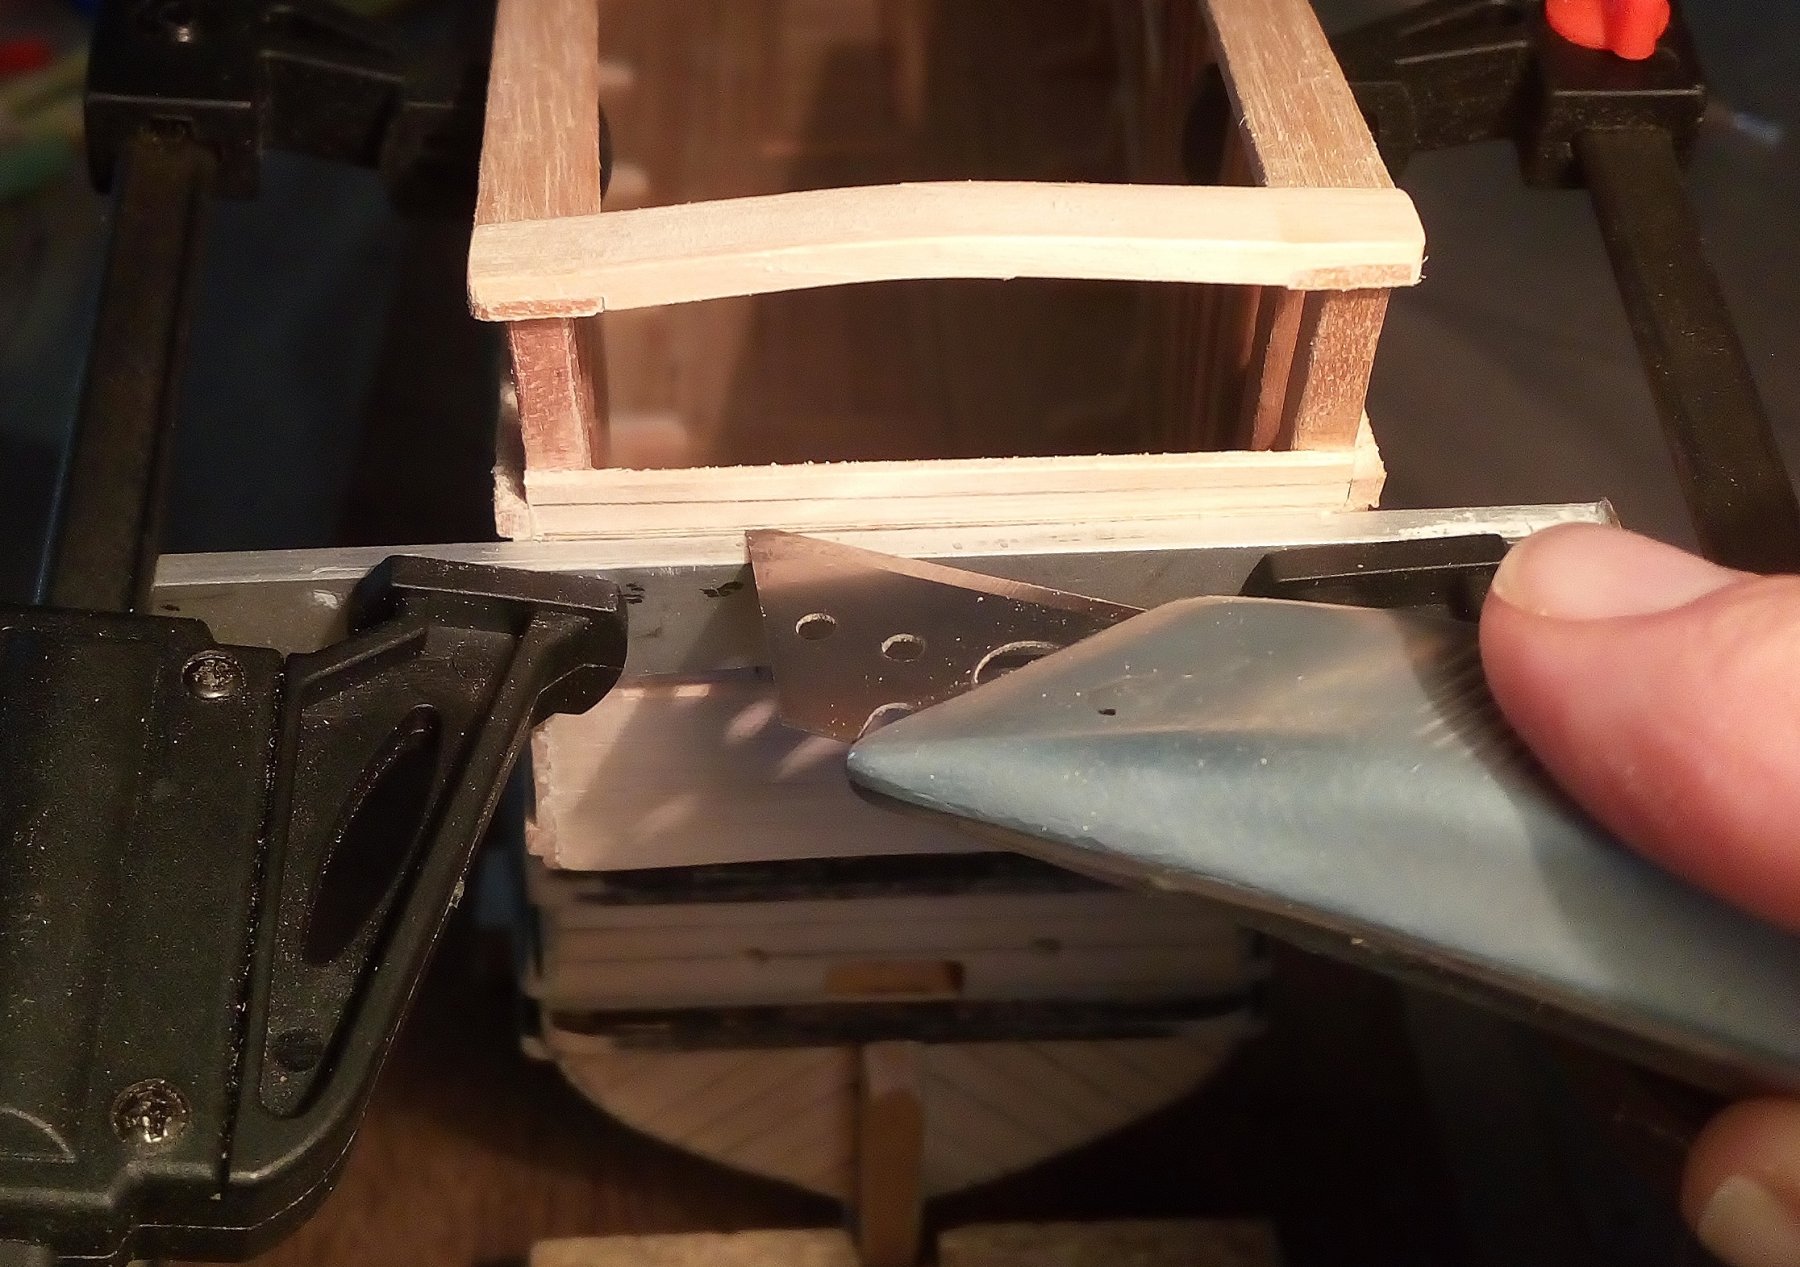
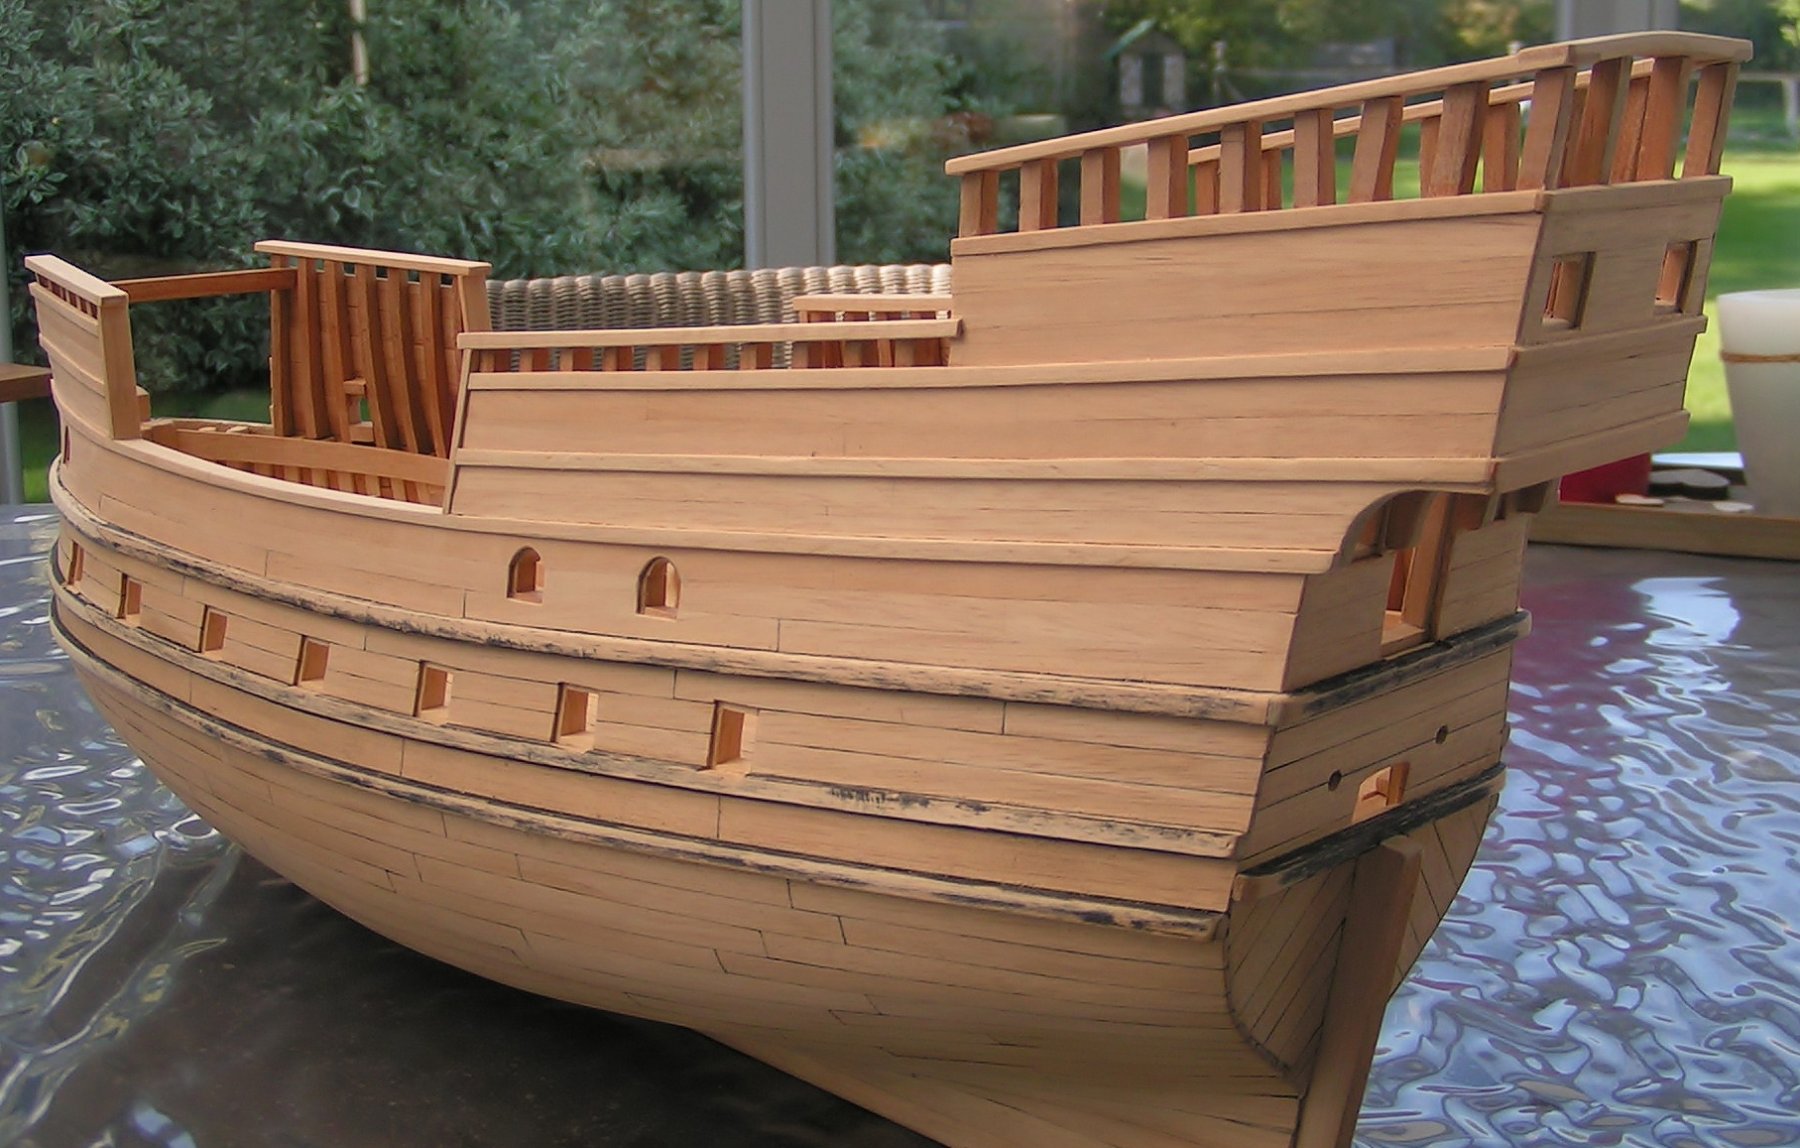
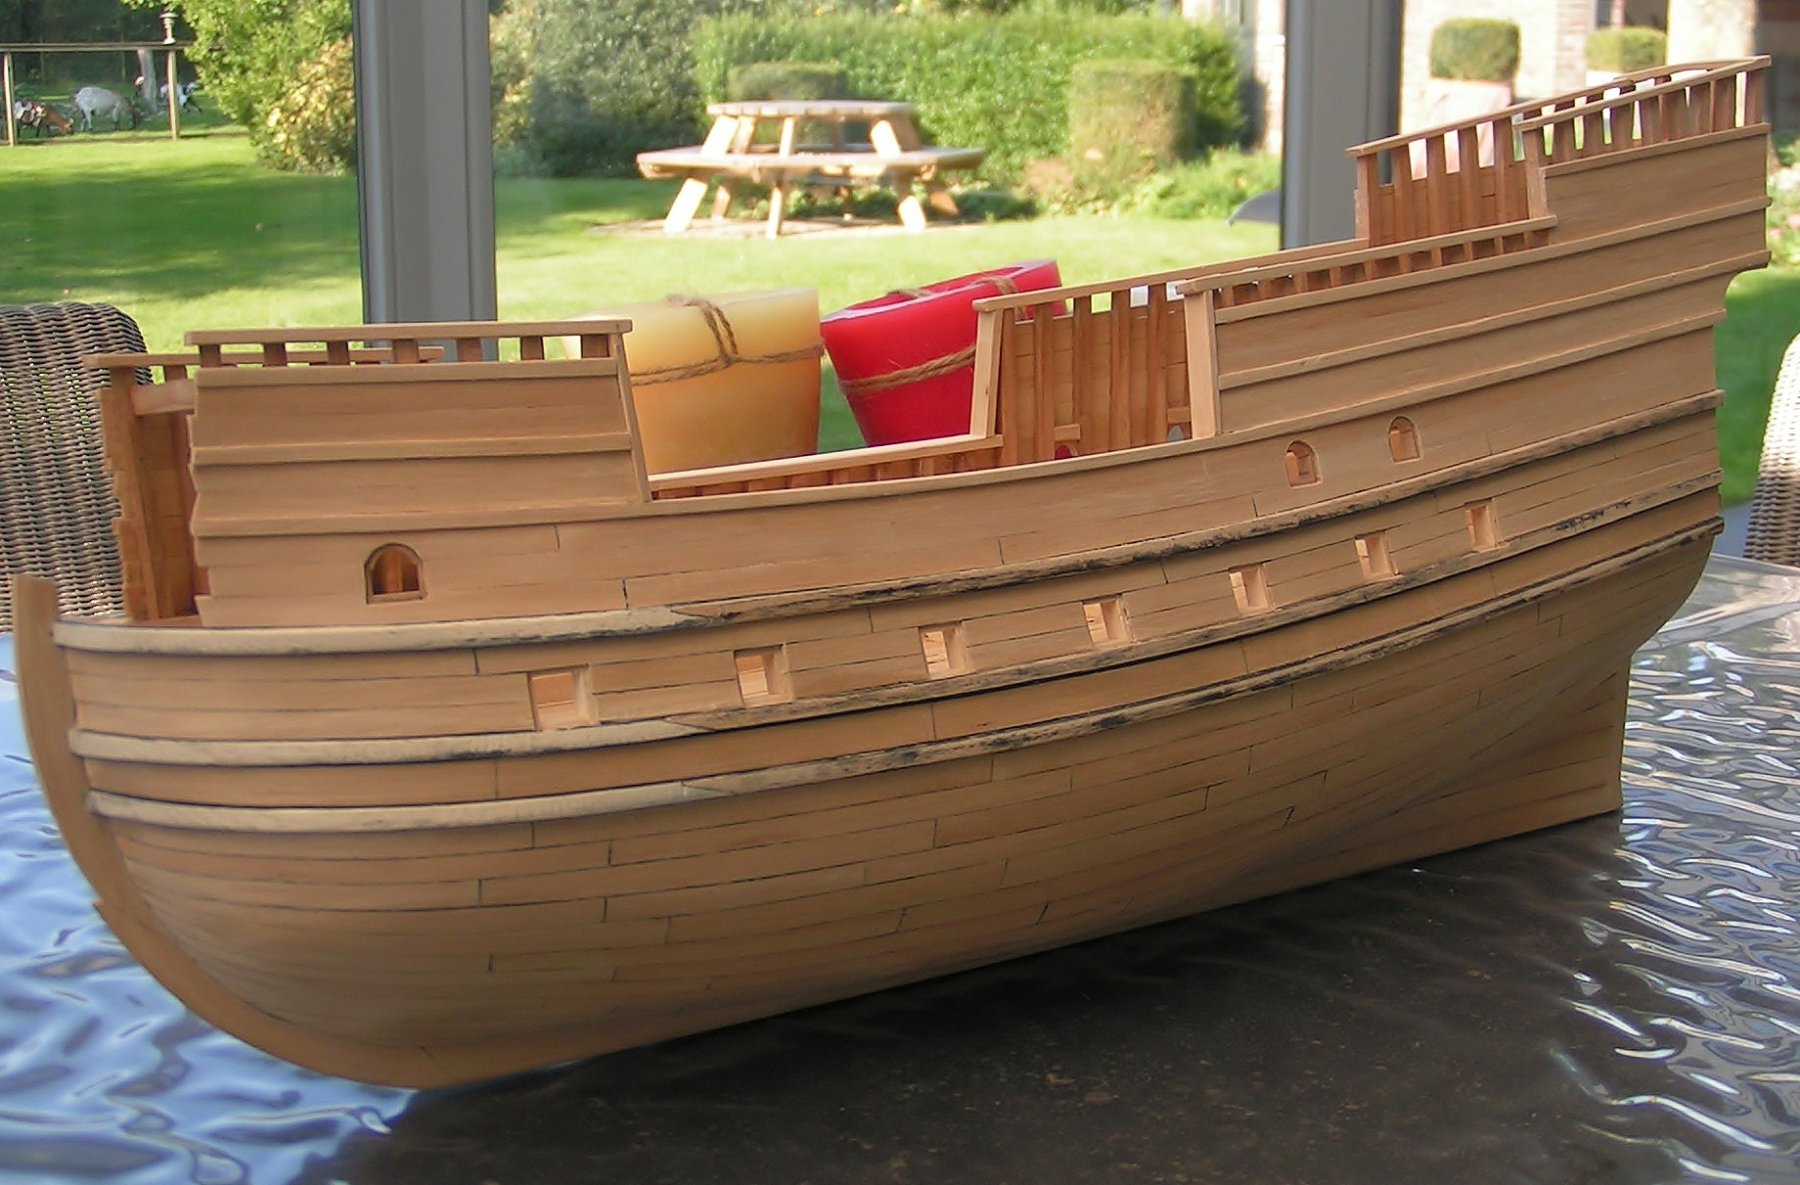
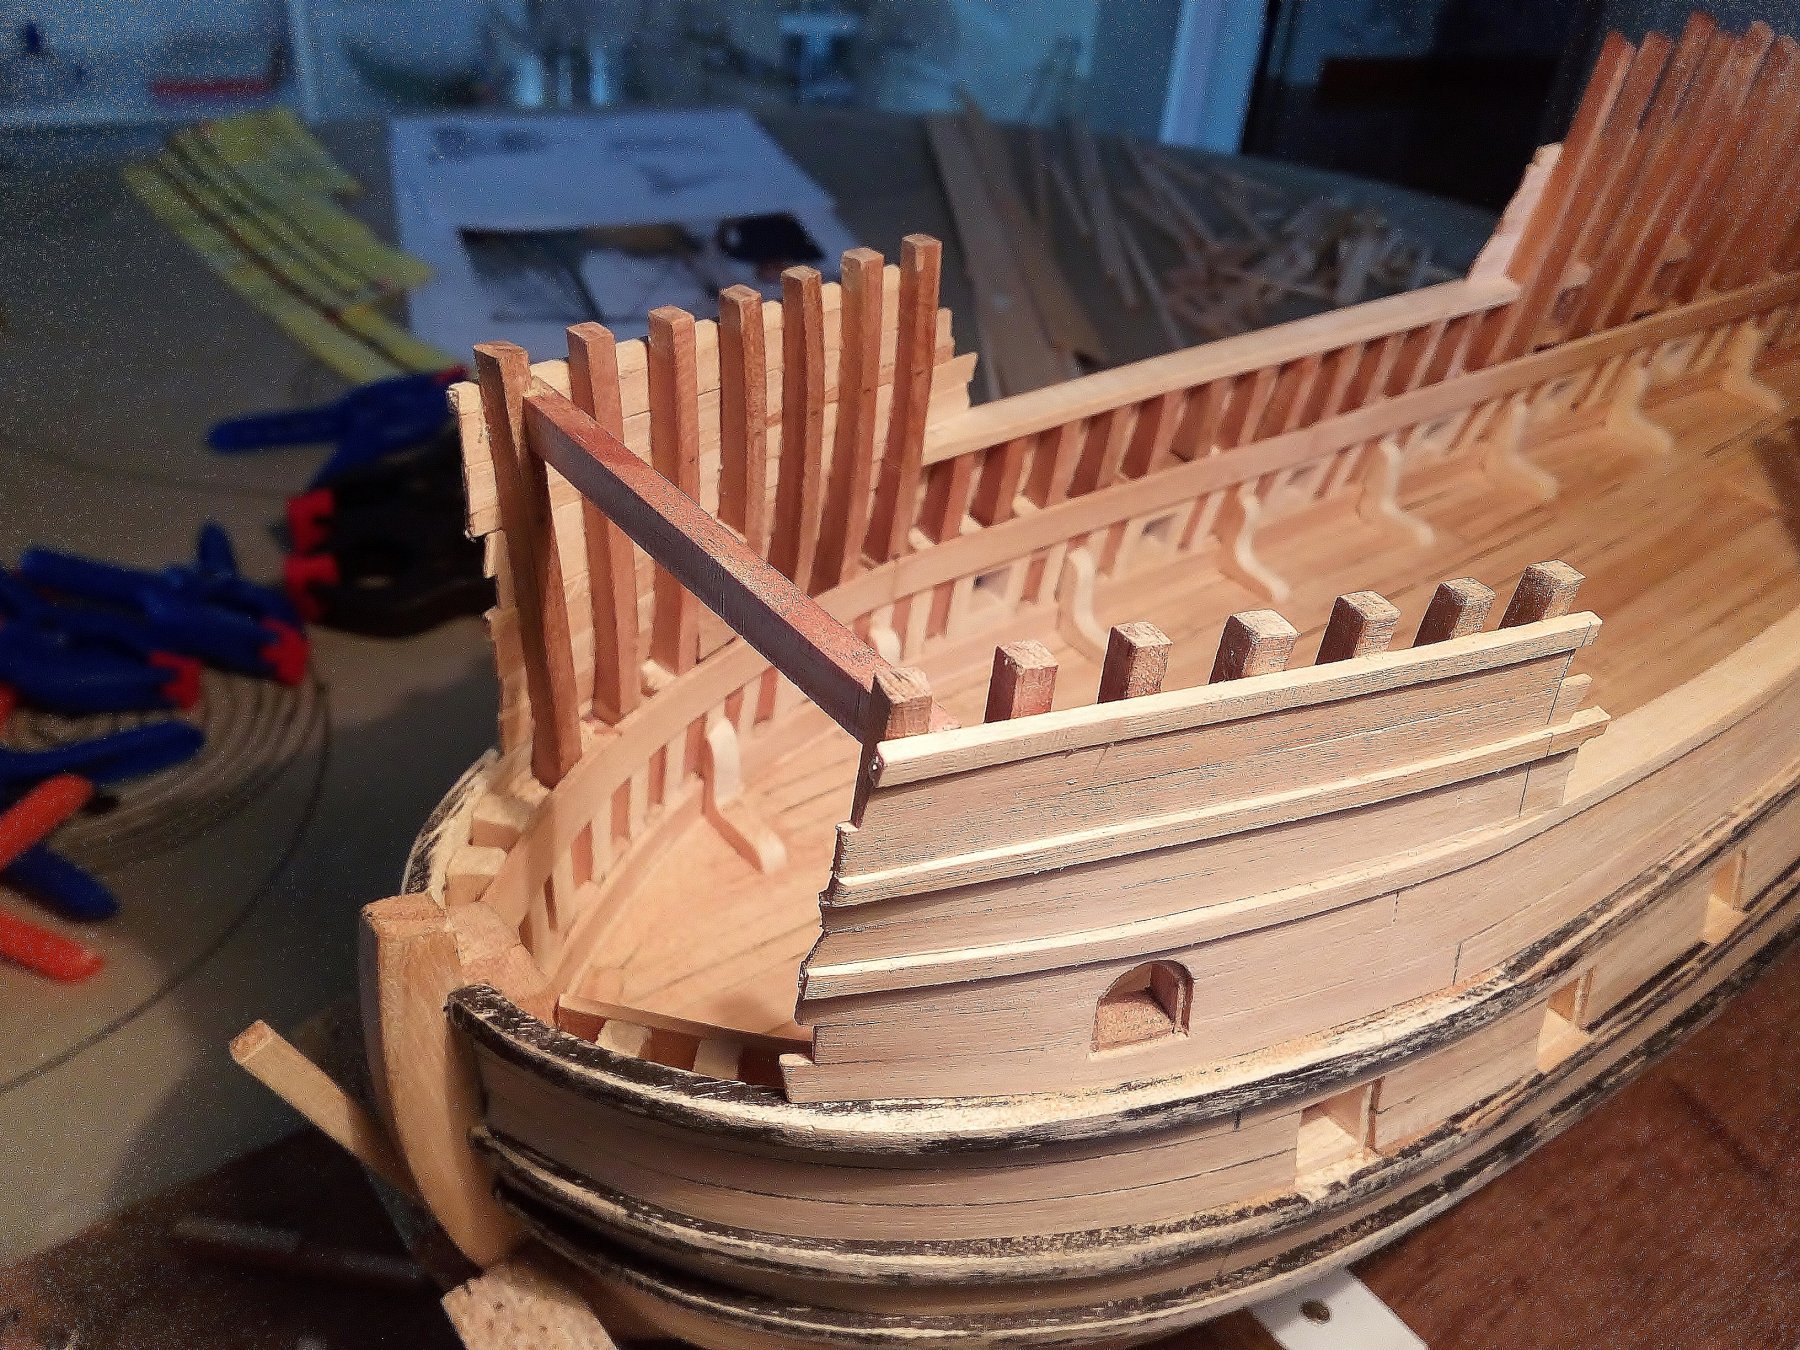
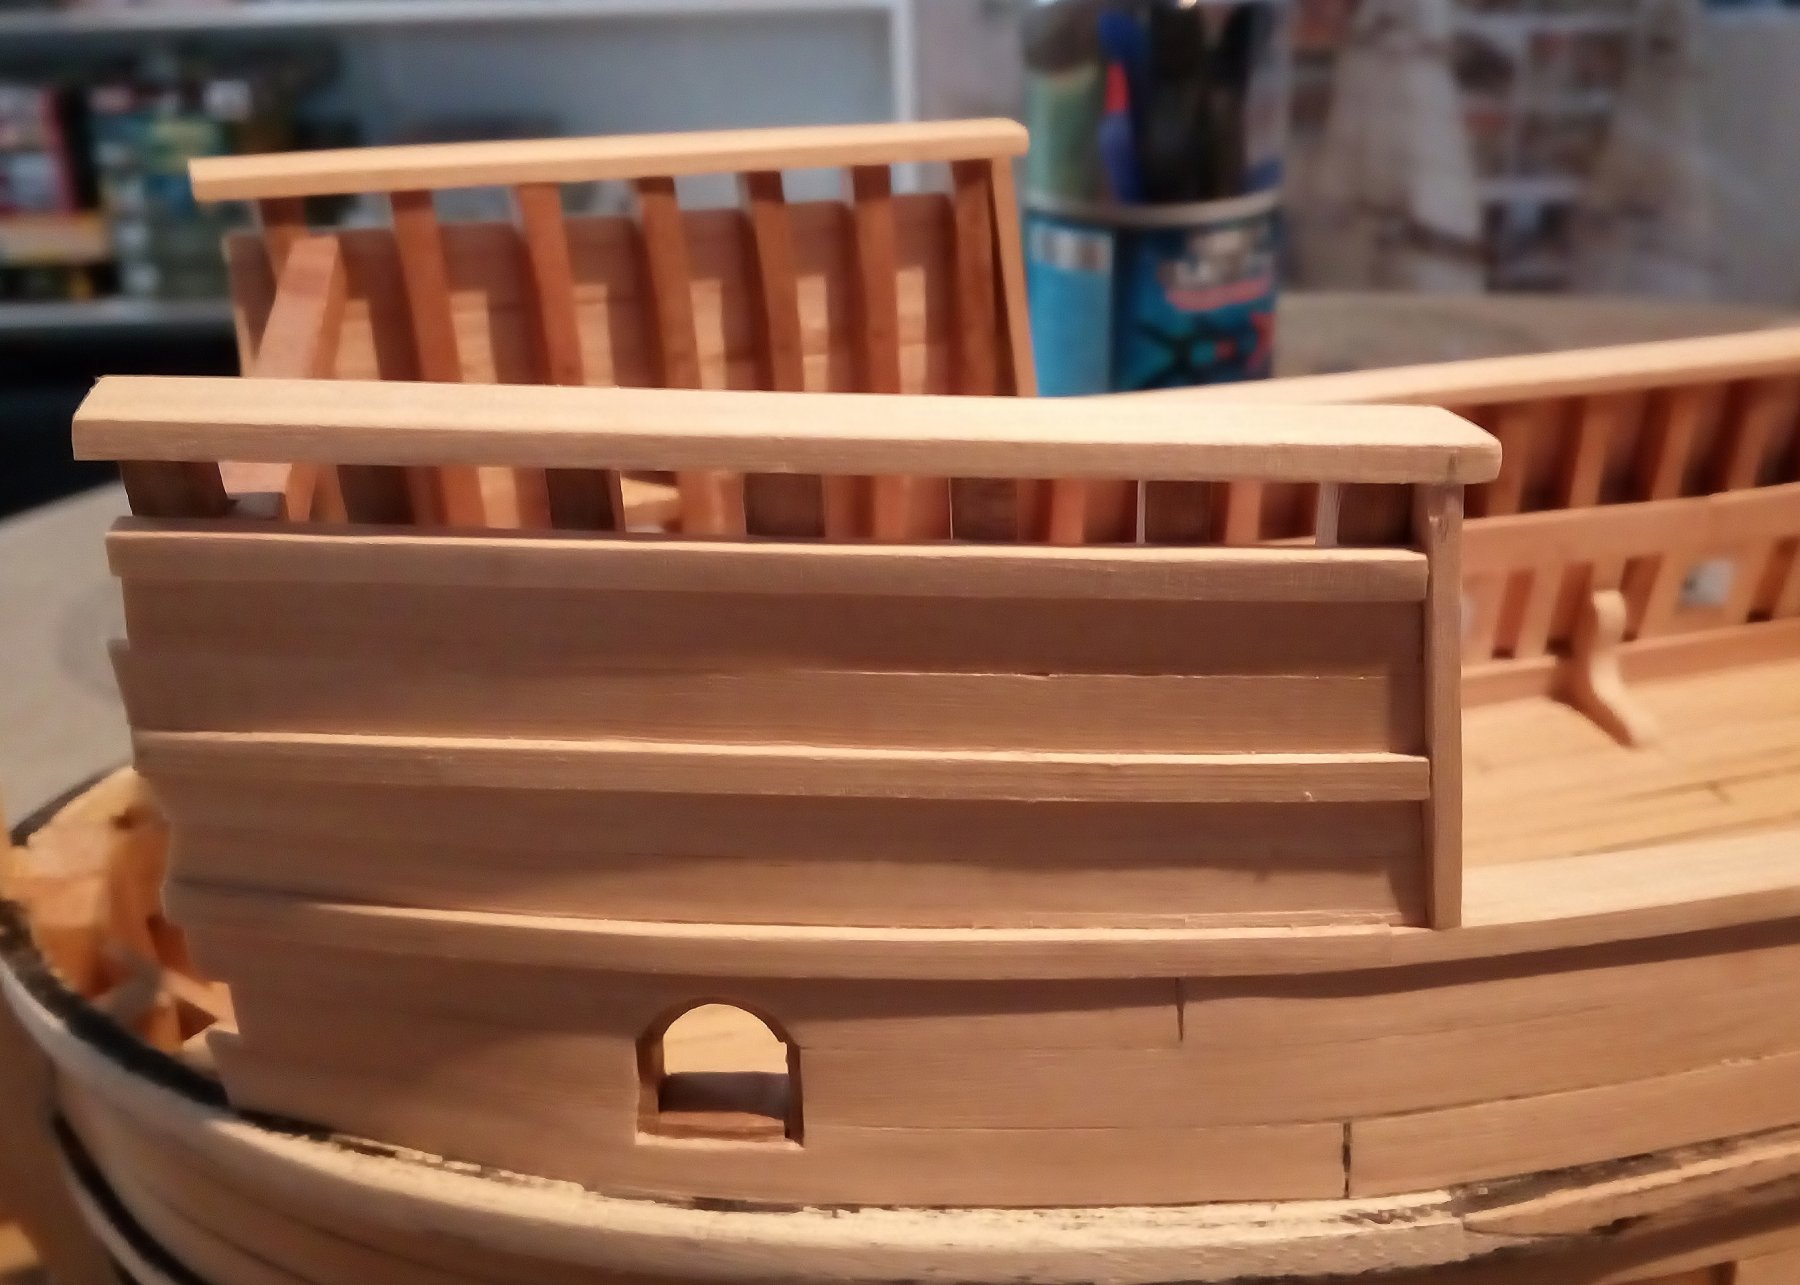
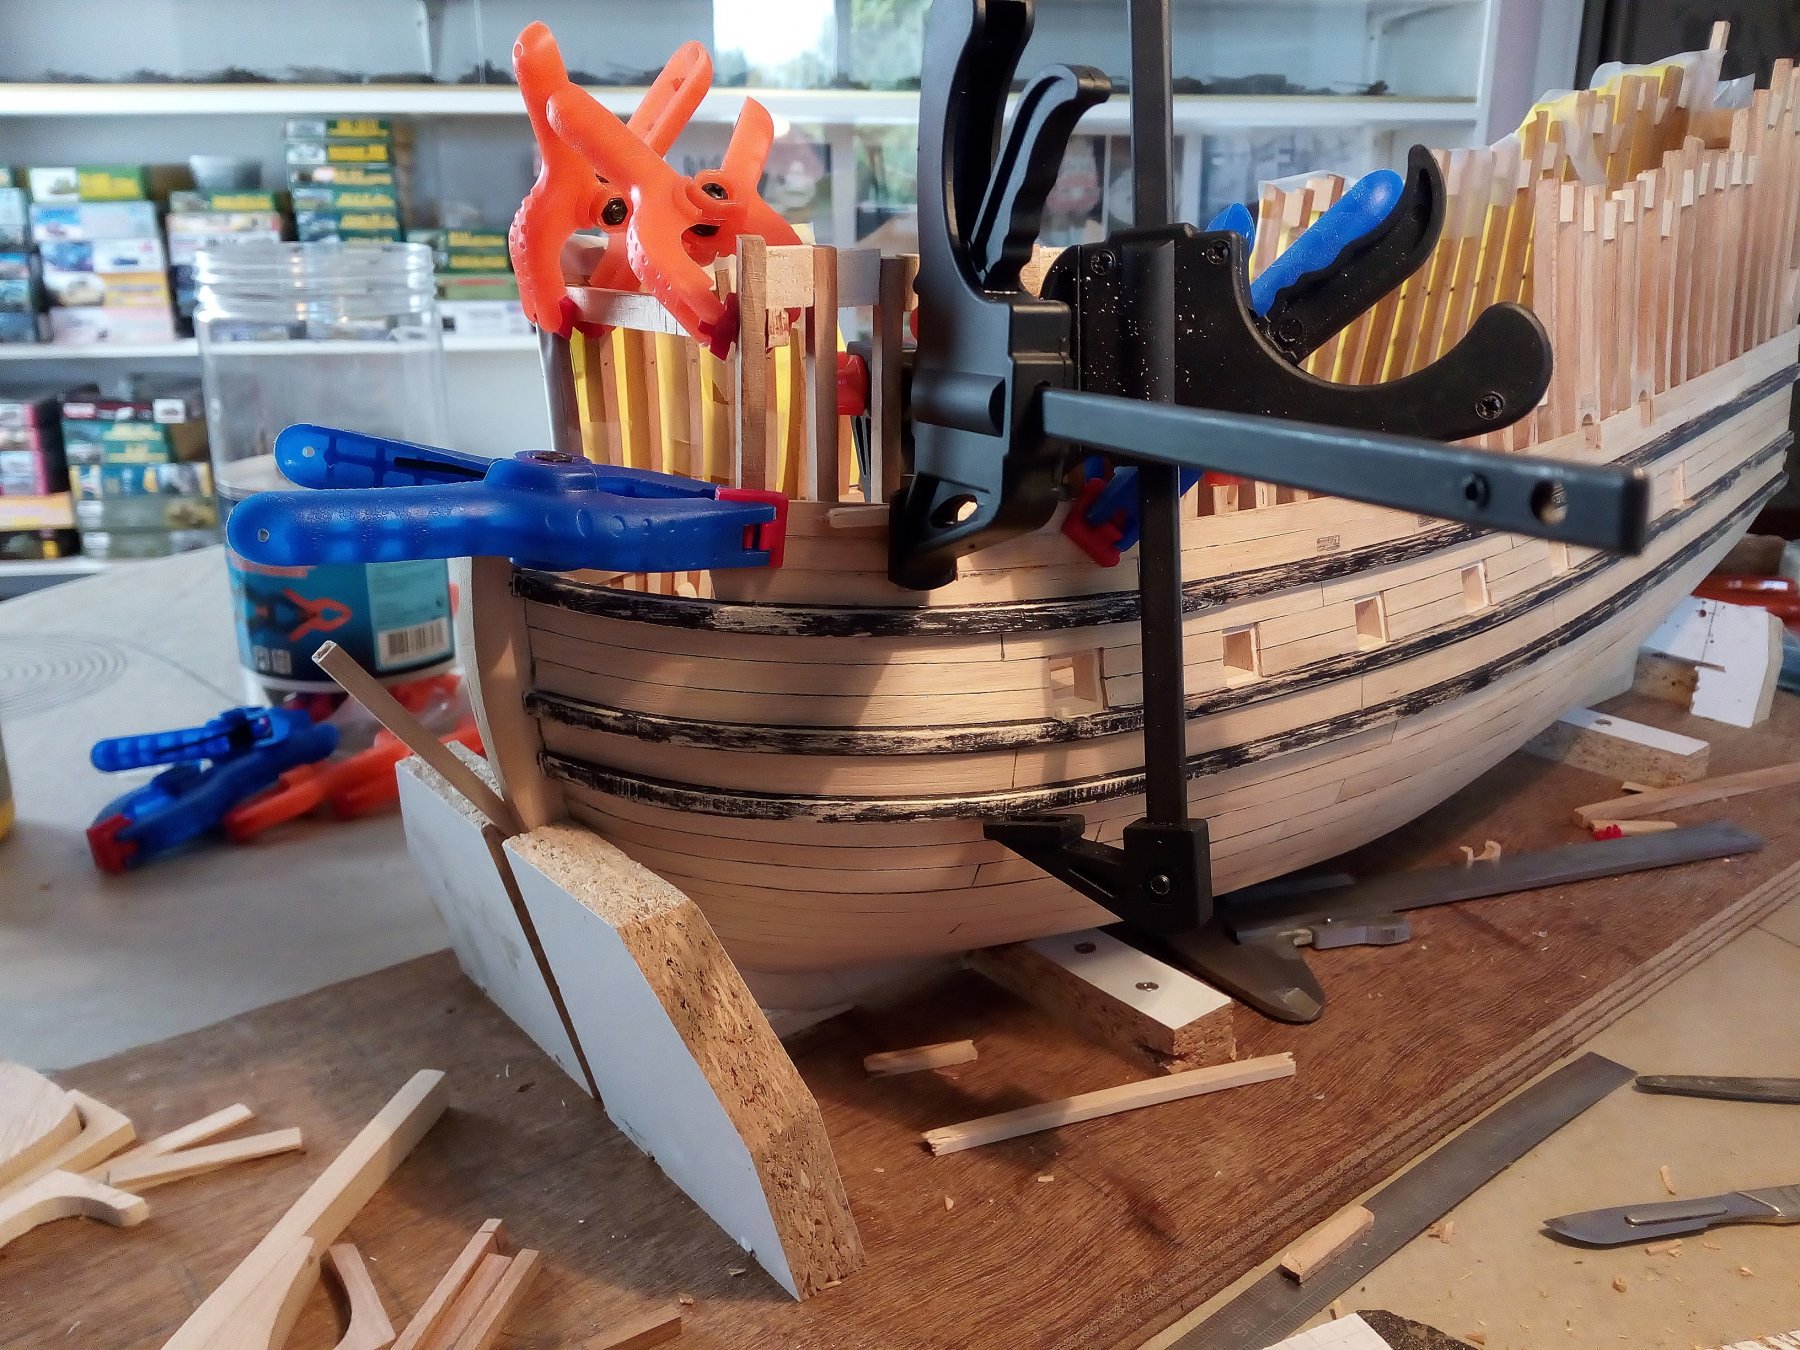
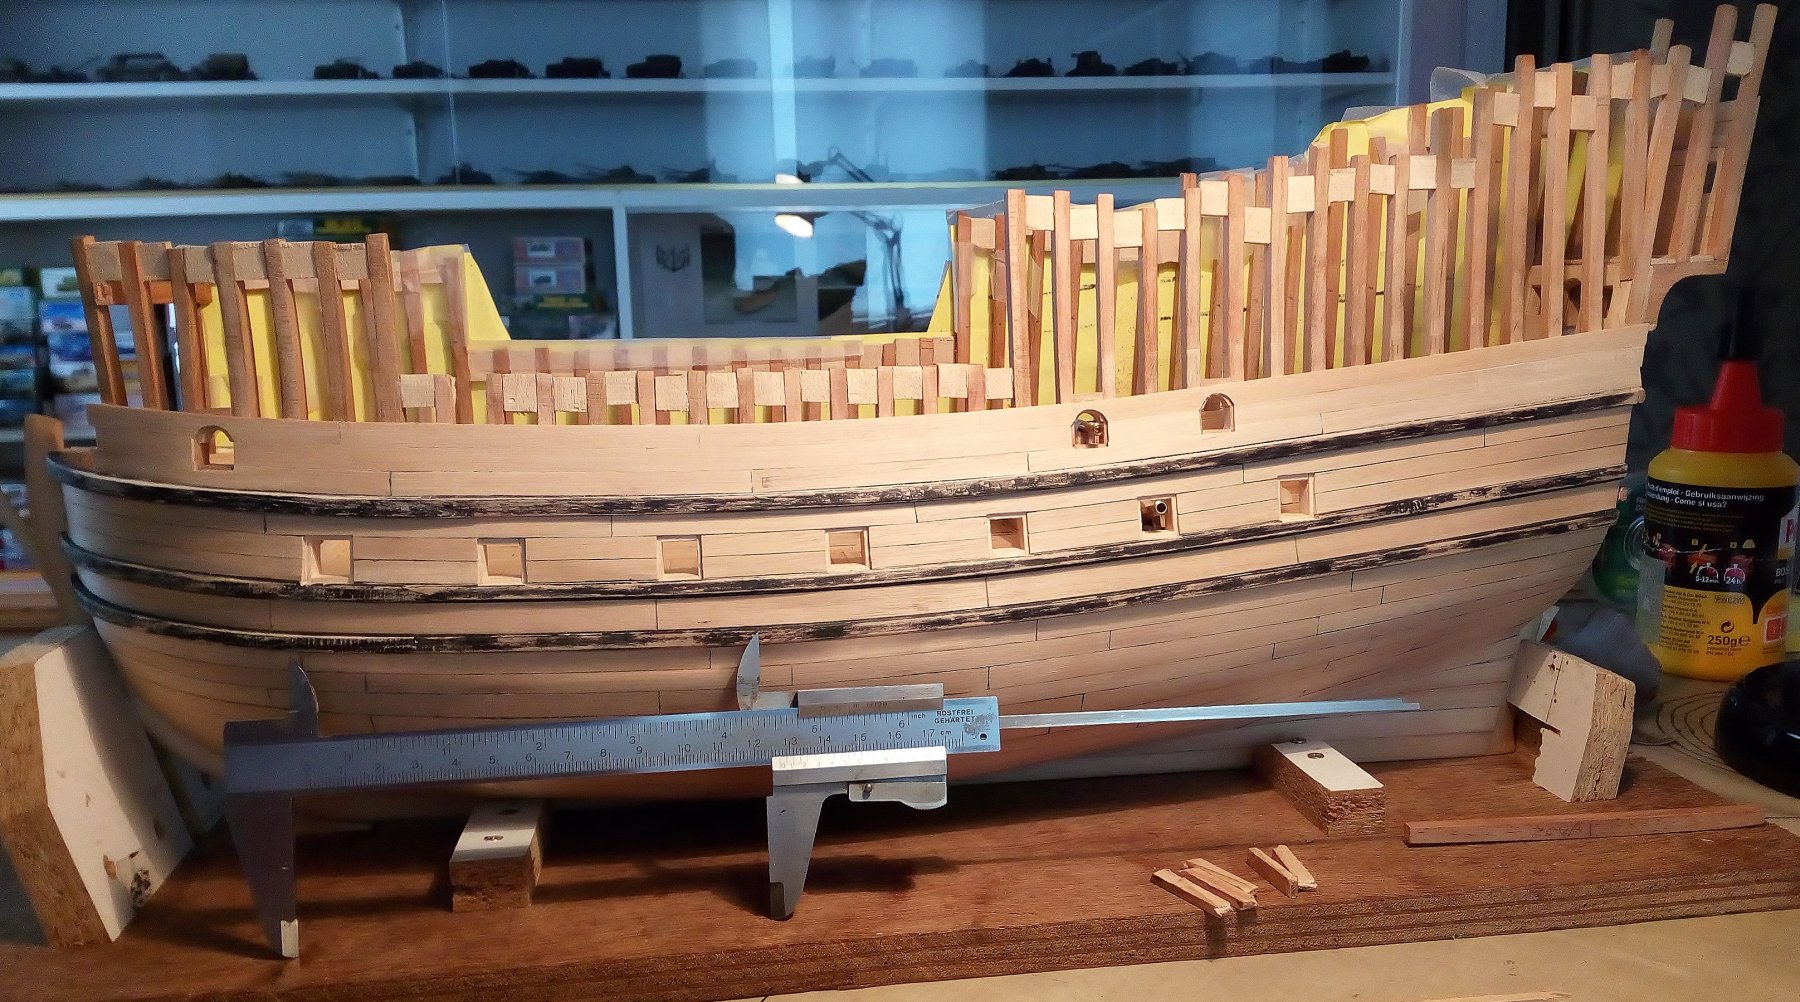
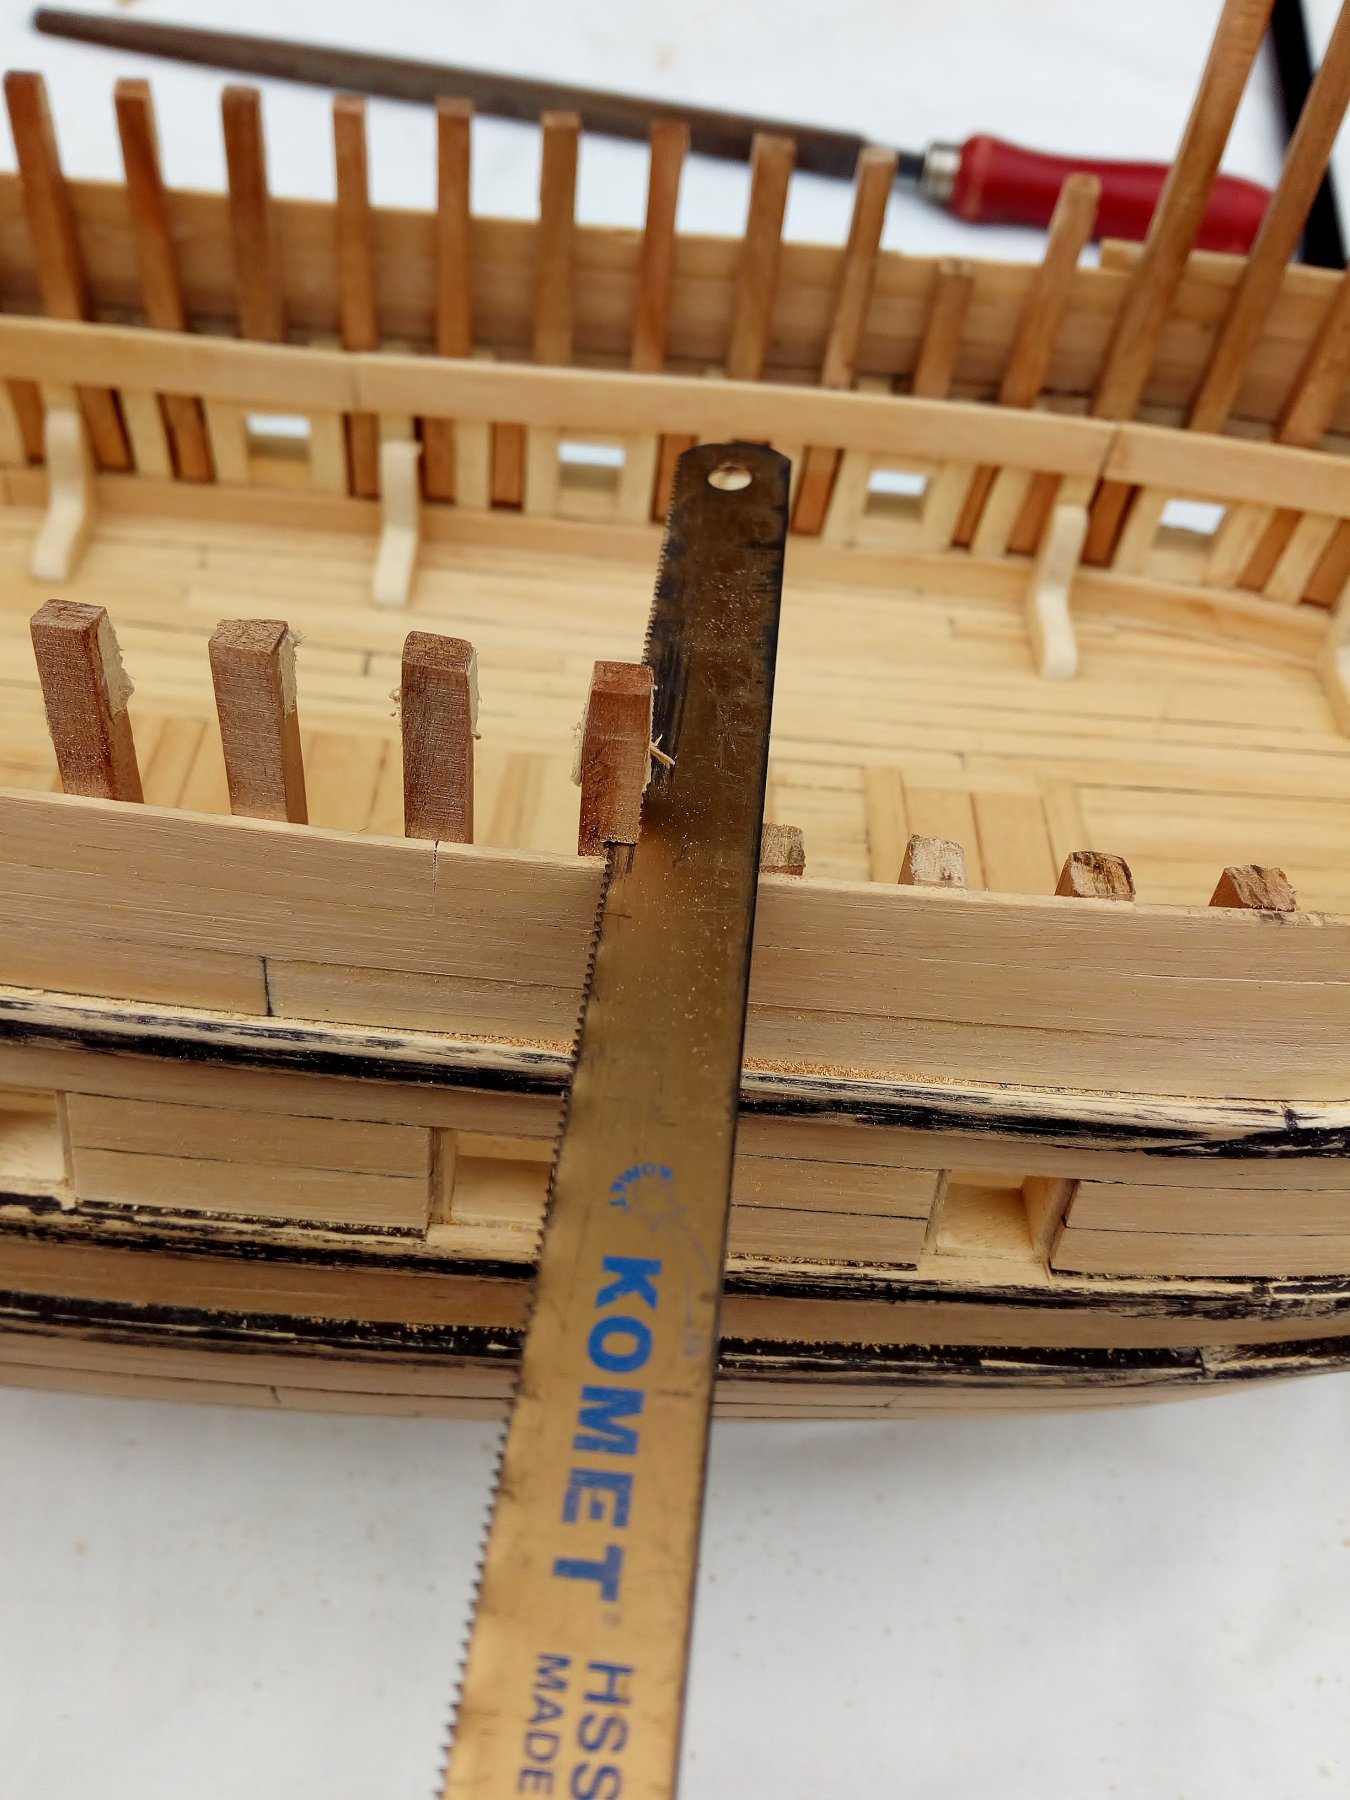
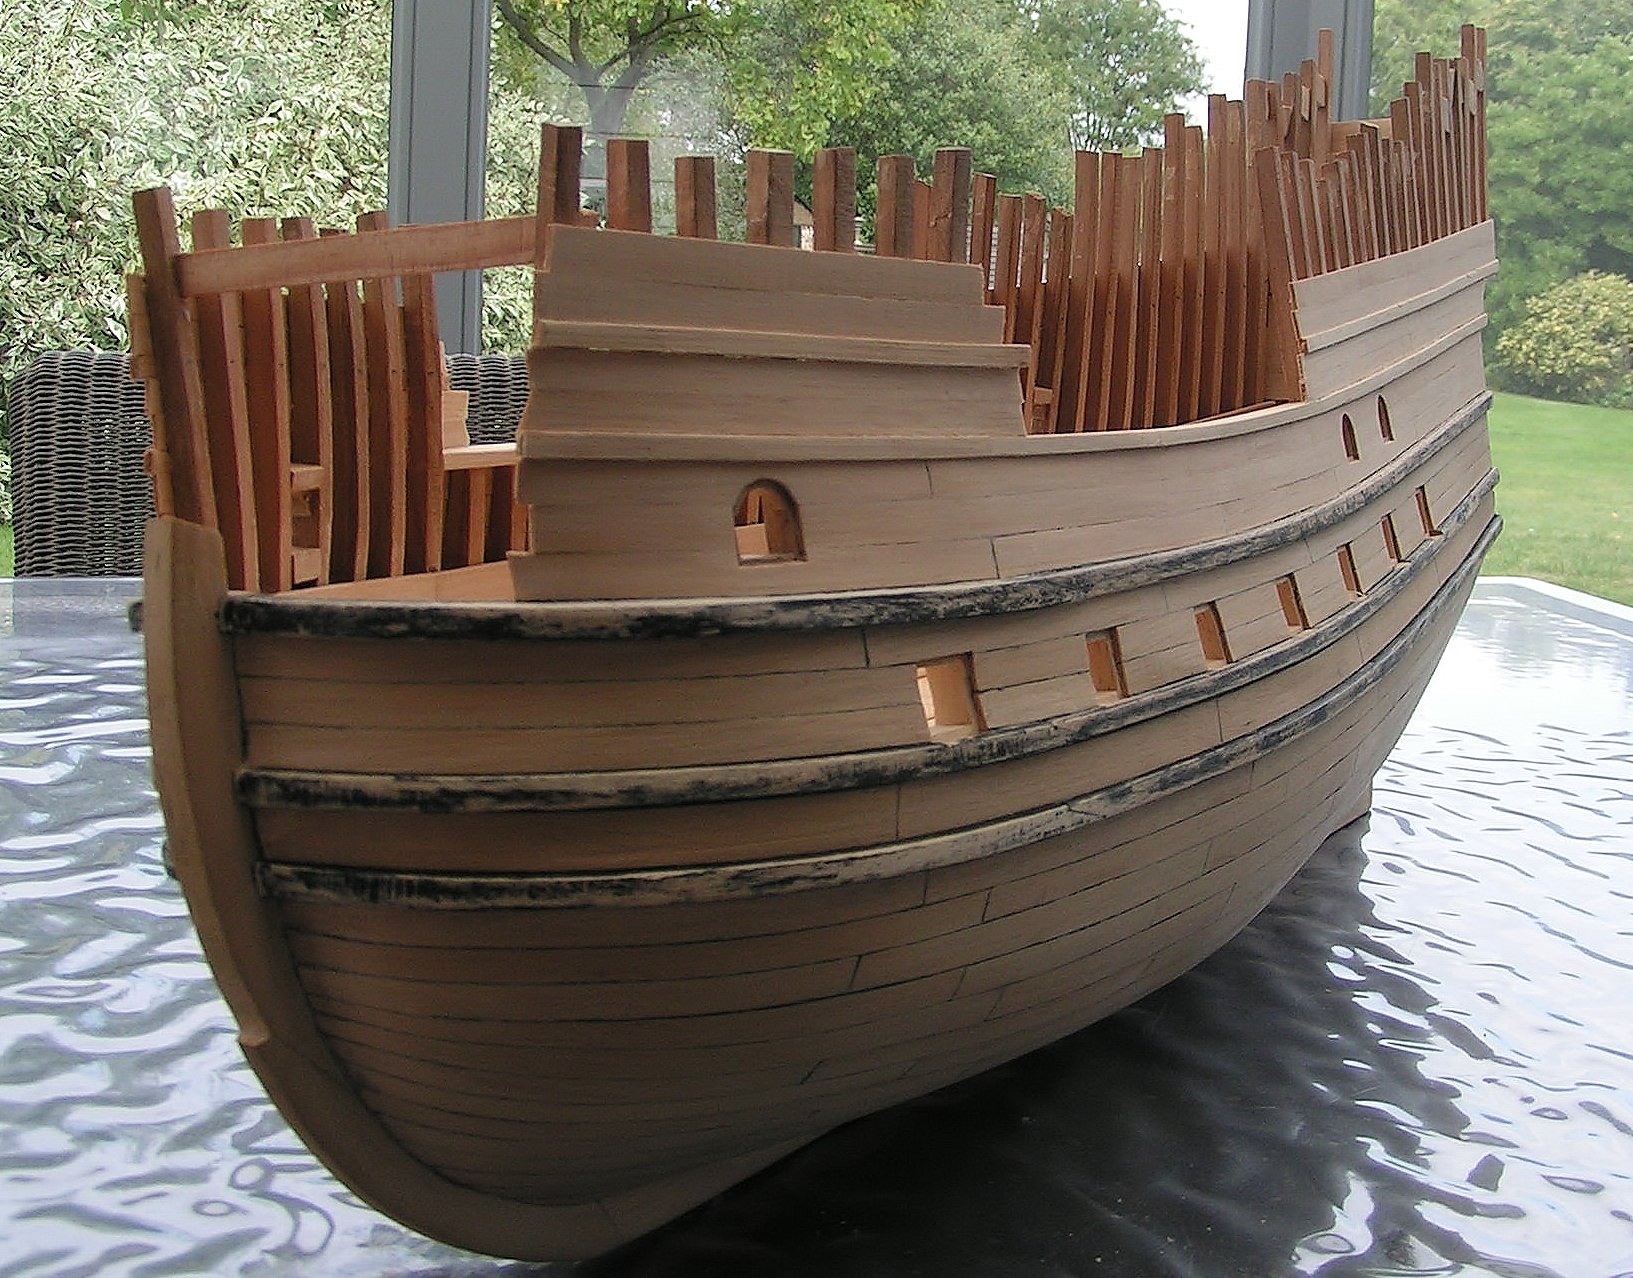
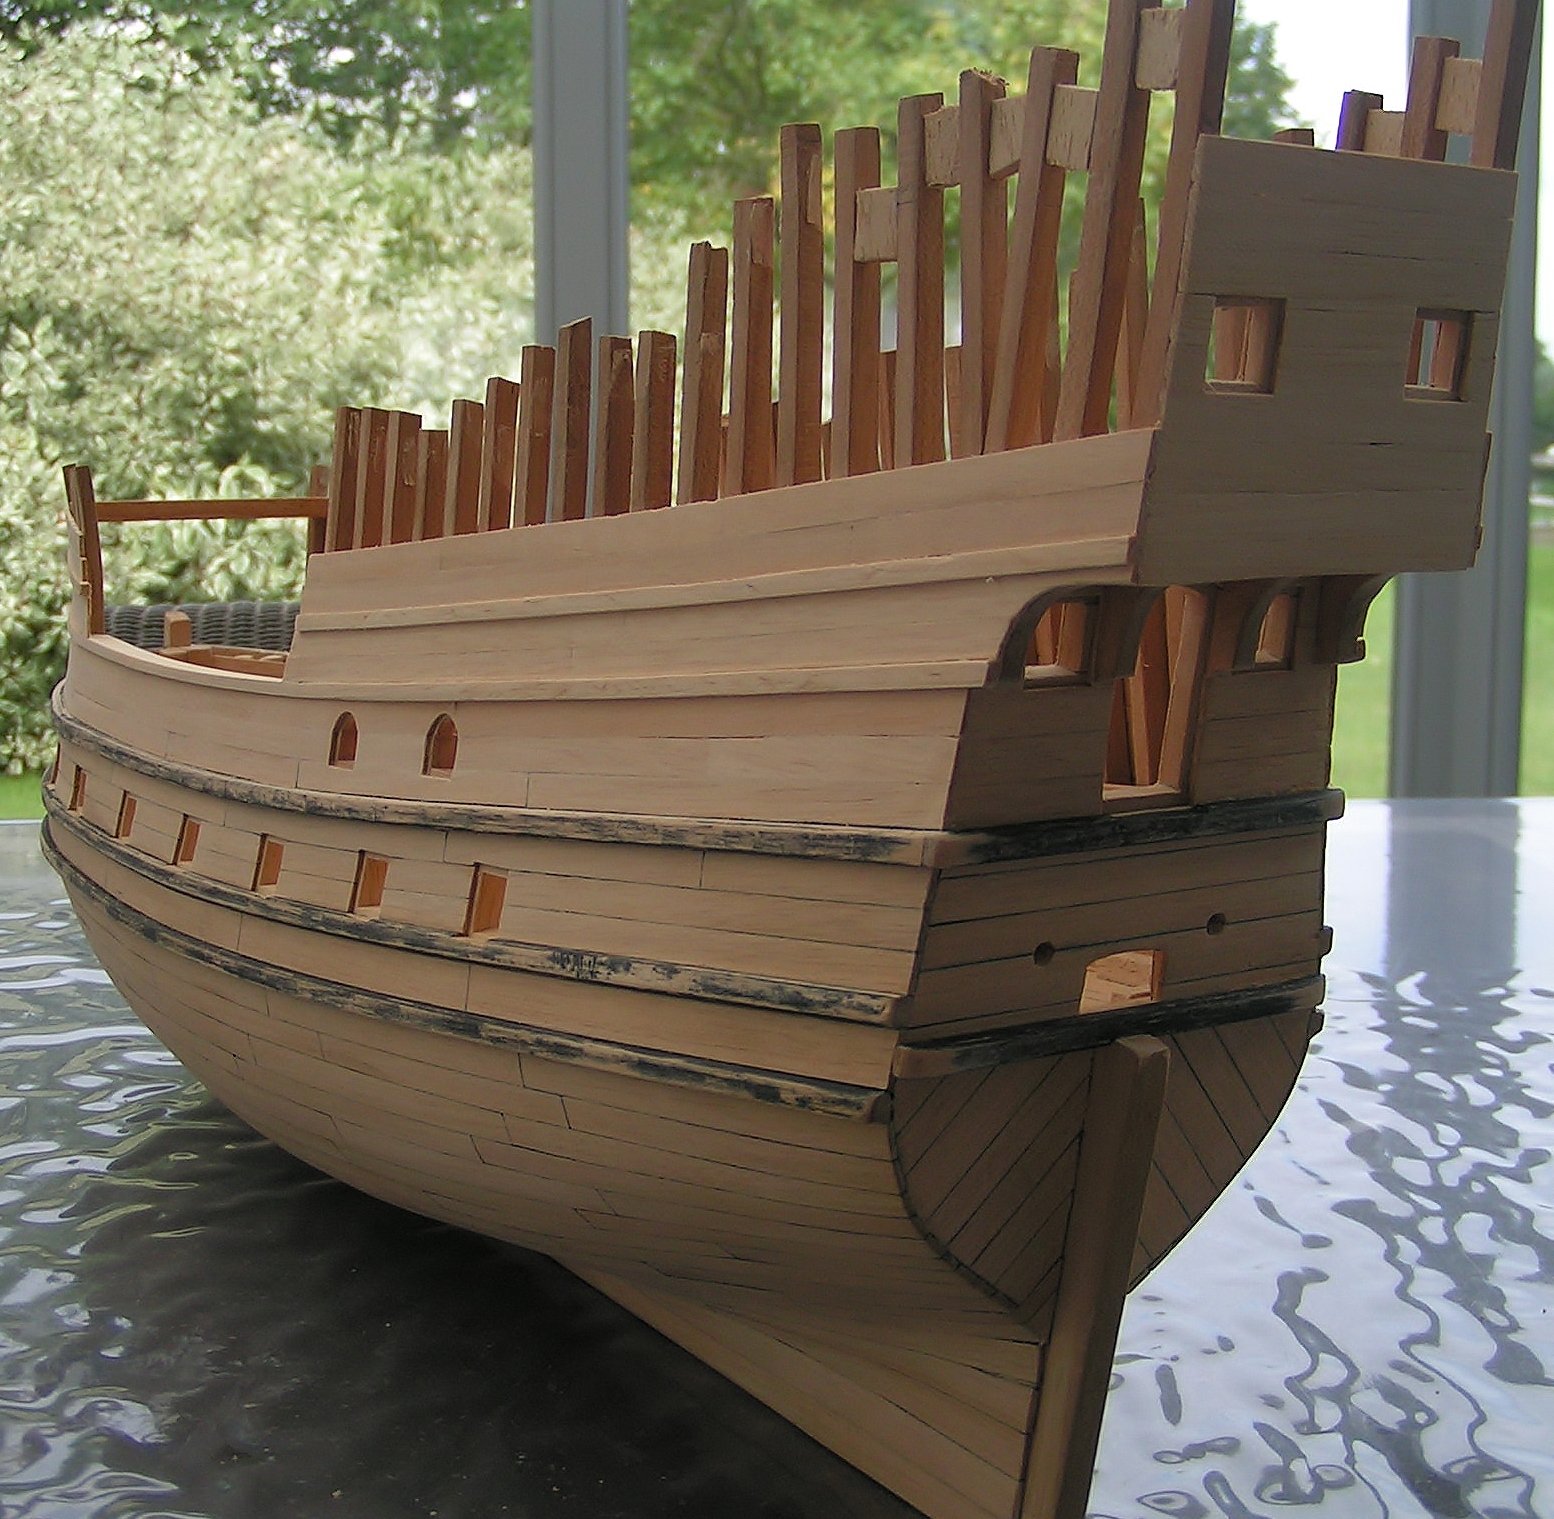
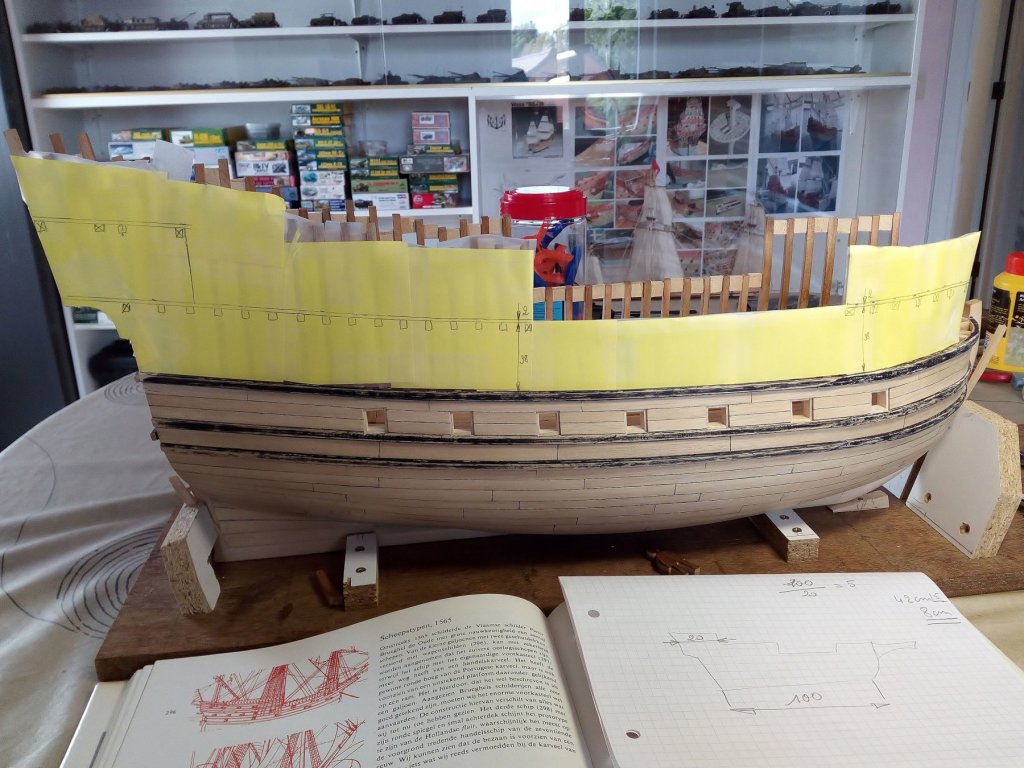
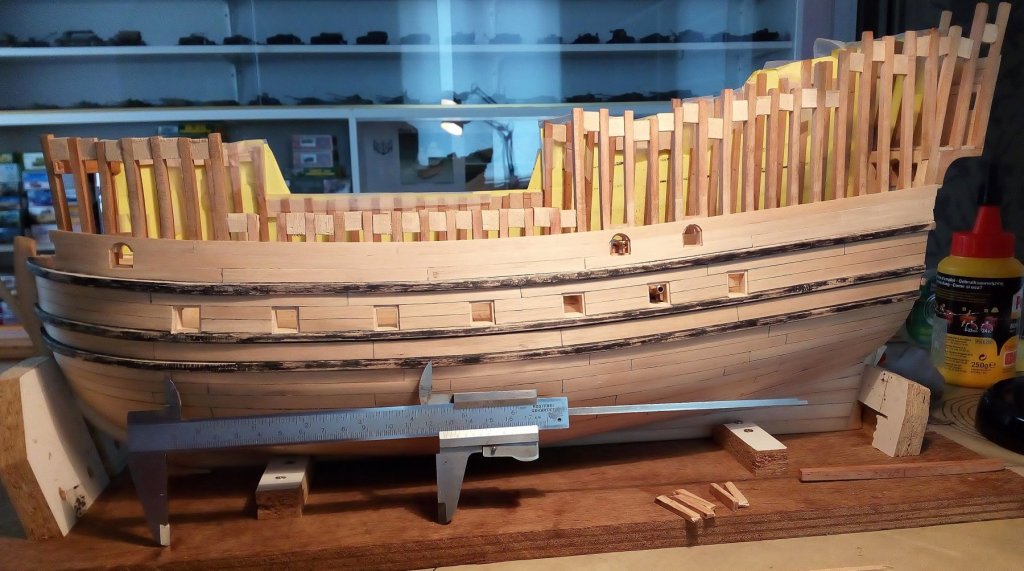
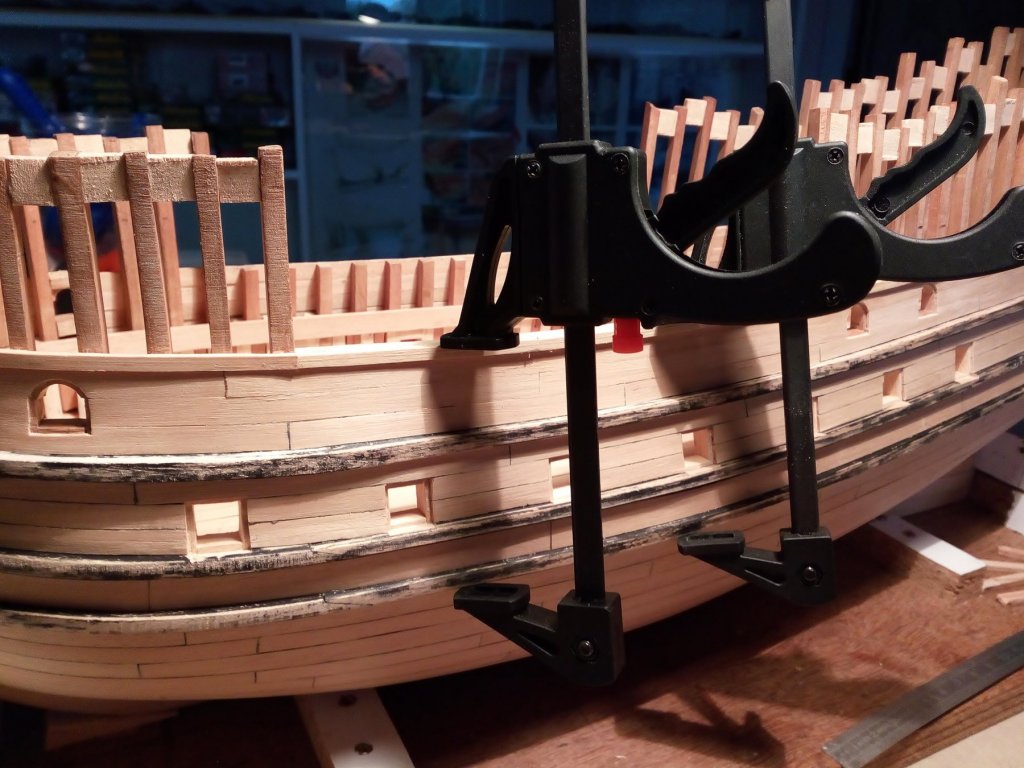
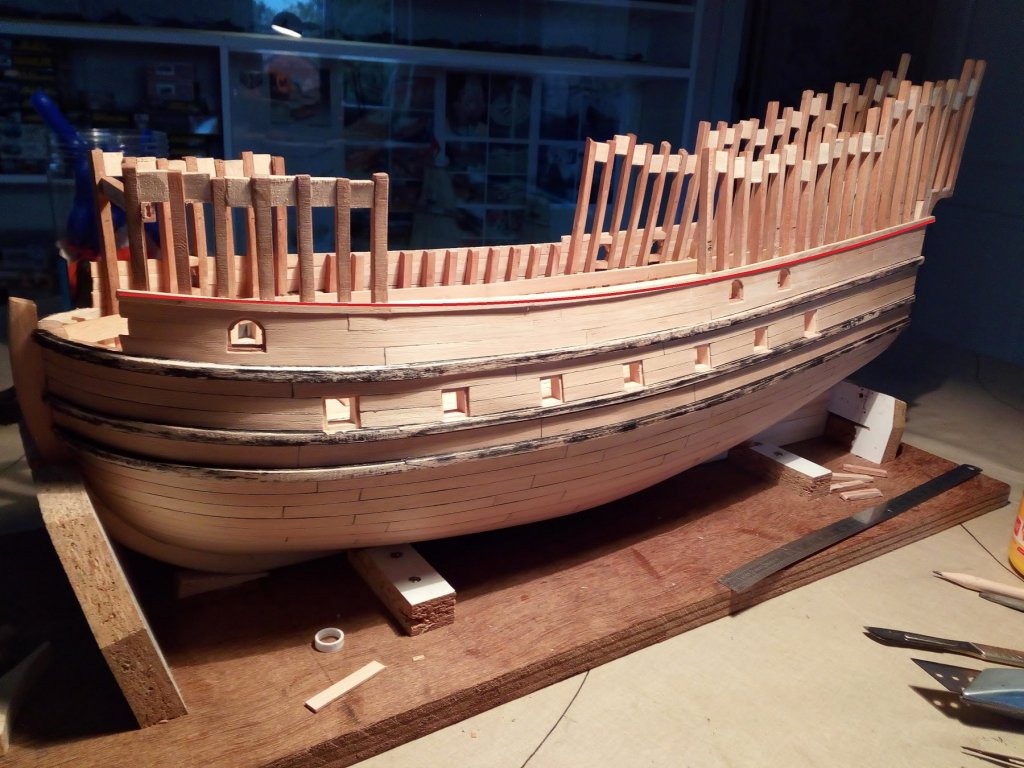
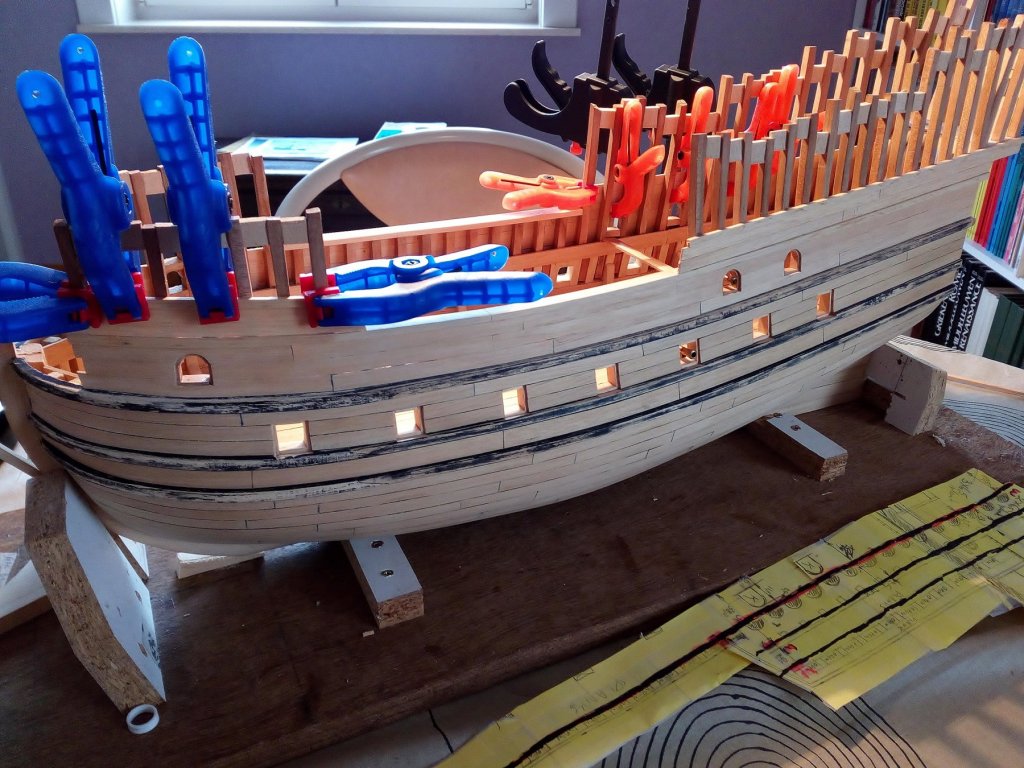
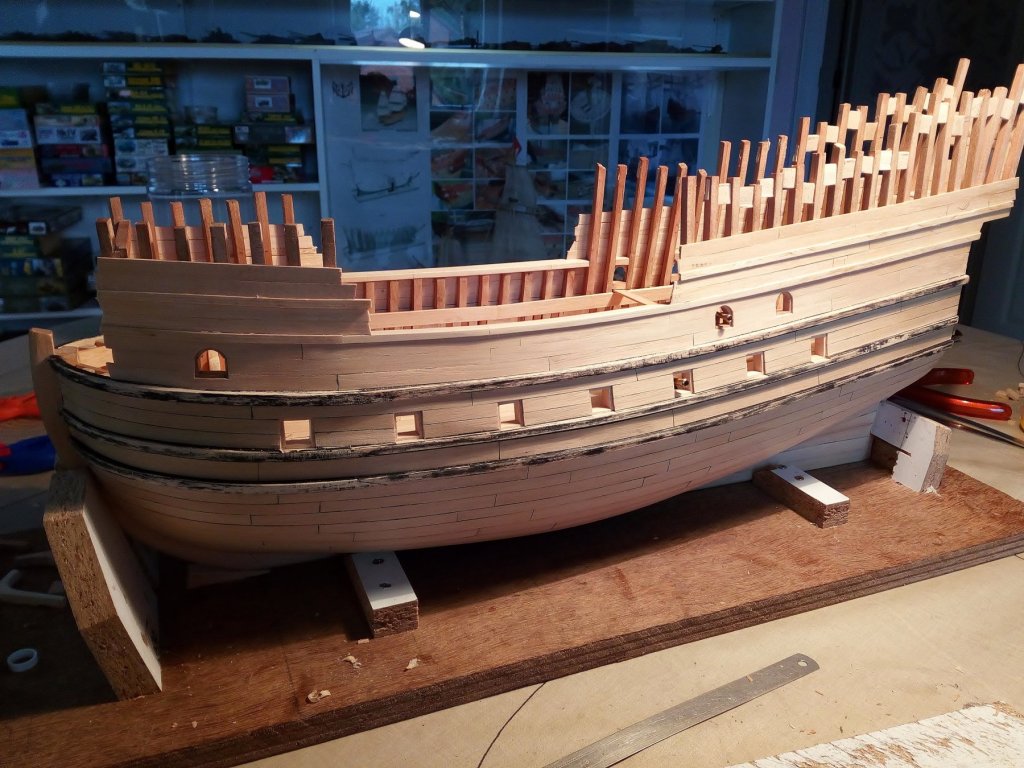
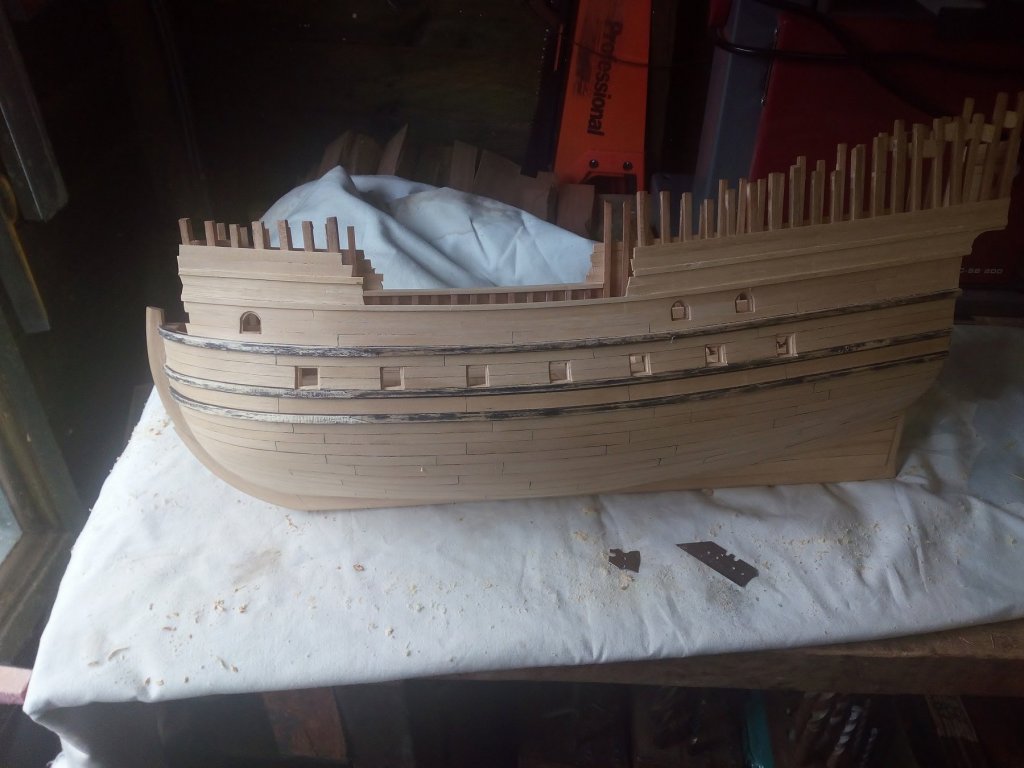
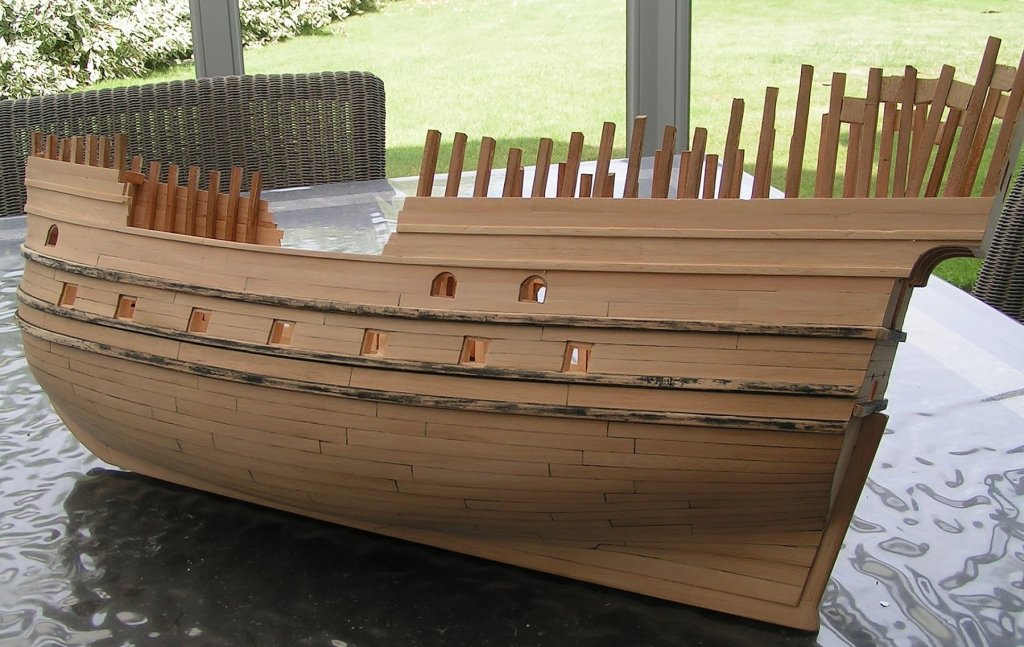
On the poop there are no planks on the hull. Only the frames are visible. It seems that this was a widely used way. Determining the height of the frames. And finishing. I already had a suspicion that the planking on stern came too high. So, I partly removed the planking. The wales on the stern are at the same height as on the hull. As seen on some images of that time. So no big images on the stern. There is no room for this. And they are rarely seen on ships from this period. probably just a picture of a pelican or a hind. The way of building this hull was not always according to the rules of modeling a wooden ship (due to lack of experience ) The balcony (still to be built) and the stern can both be wrong and are open for discussion. But there are sudies who say that even some merchant ships had a cabin for the captain under the poopdeck. And in the second half of the 16th century the balcony on the stern began to appear. So why not add them to this model. After about 1 year my first goal has been achieved. Build a hull that looks, for me, as good as possible. Construction is now on a lower priority. In autumn and winter, small models of military modeling are my number 1 For the Golden Hind I have to do first further research about decks, armour…. The hull still needs more sanding. And I have to do some testing on scrapwood with treenails, painting etc. Before starting with this on the model. Future updates will therefore be small and it may take a while before they arive. Index in post 1


- 756 replies
-
- 9
-
-
- galleon
- golden hind
- (and 2 more)
-
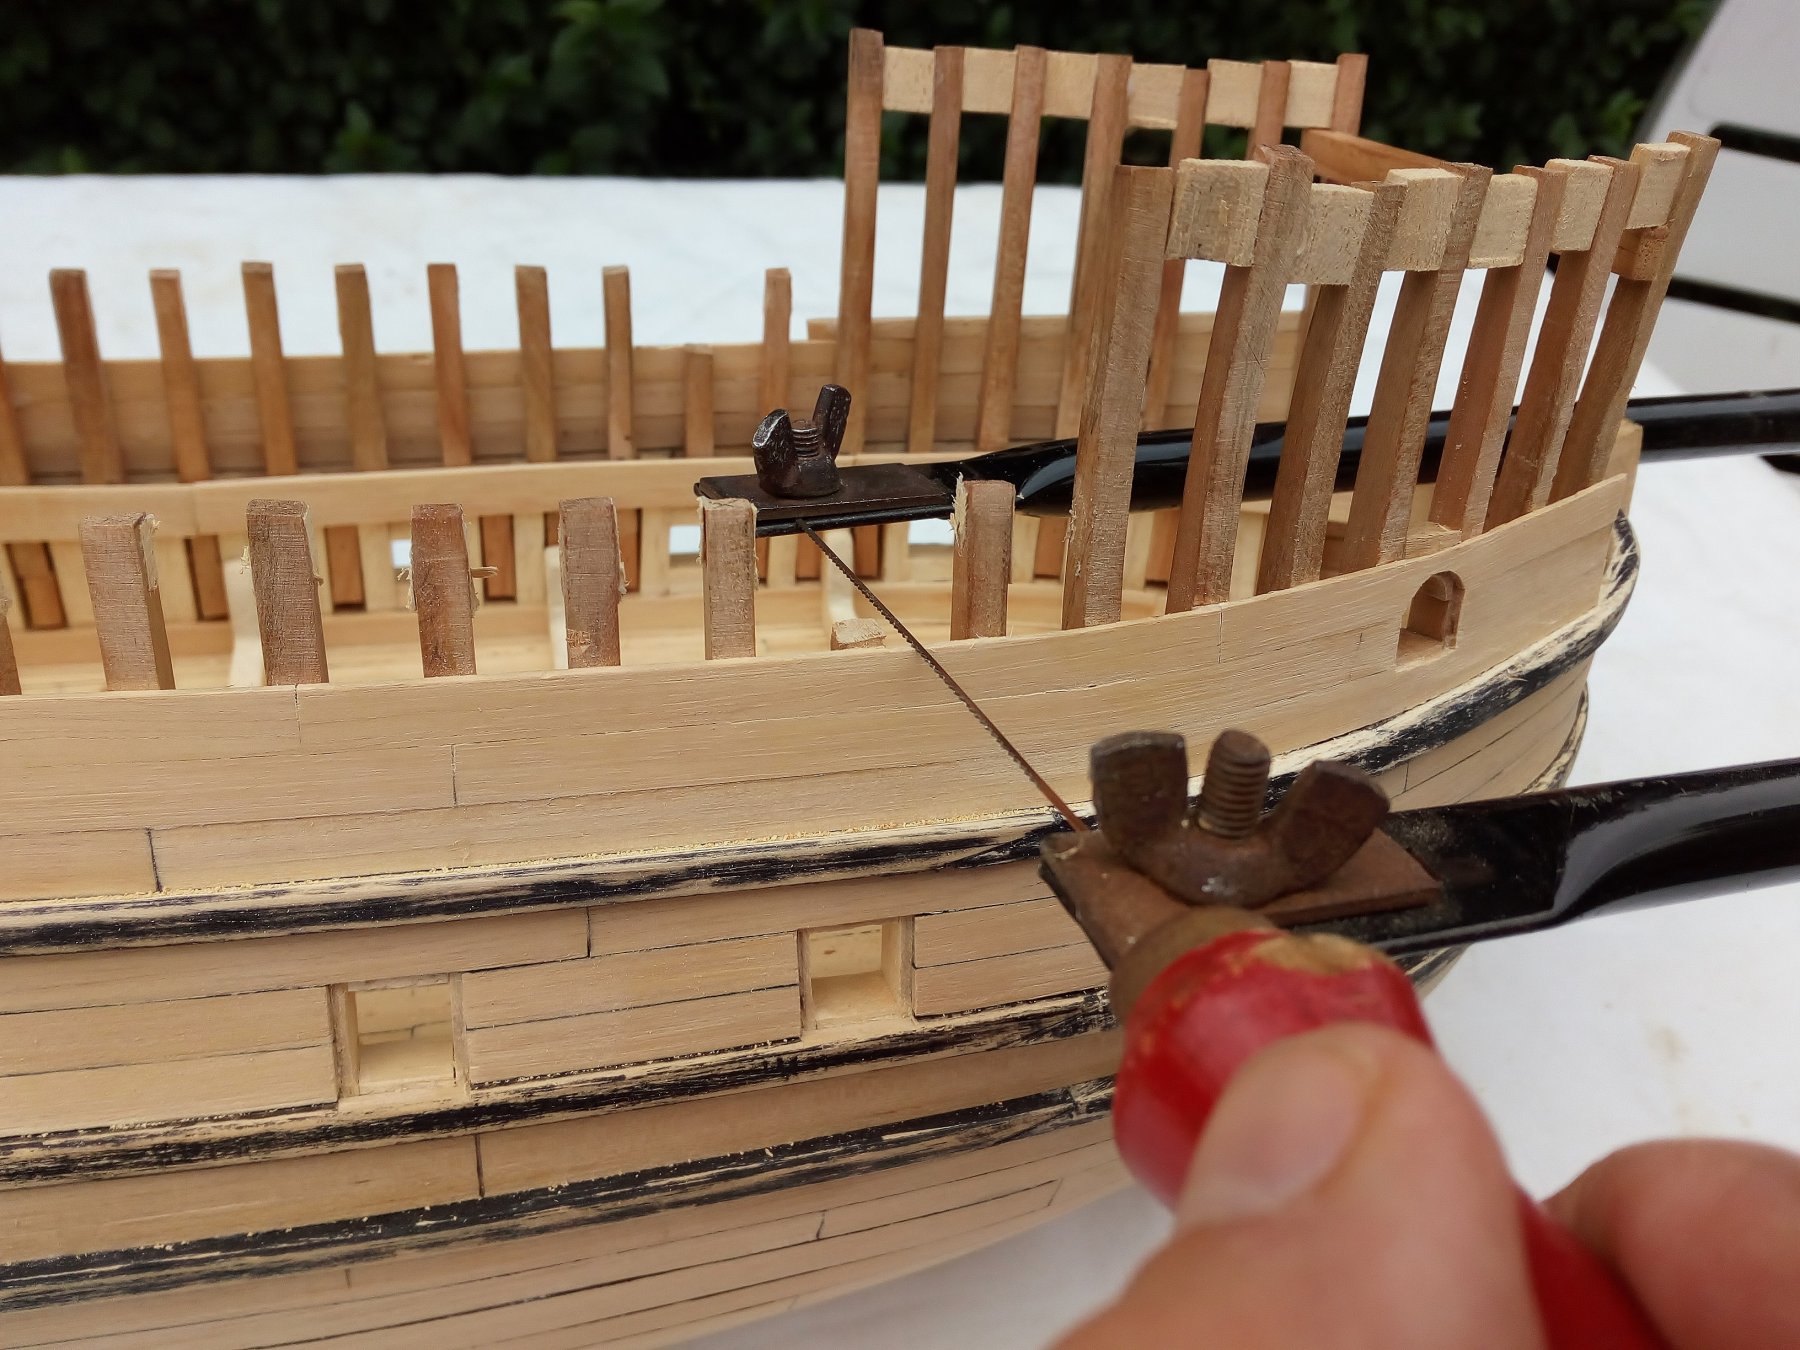
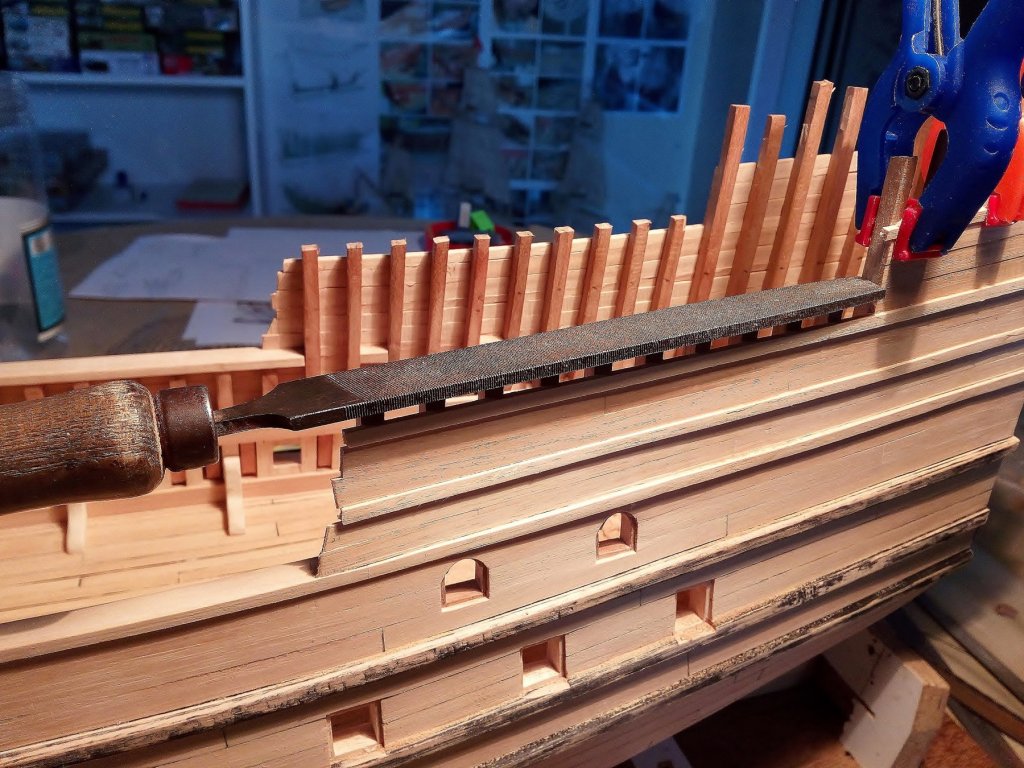
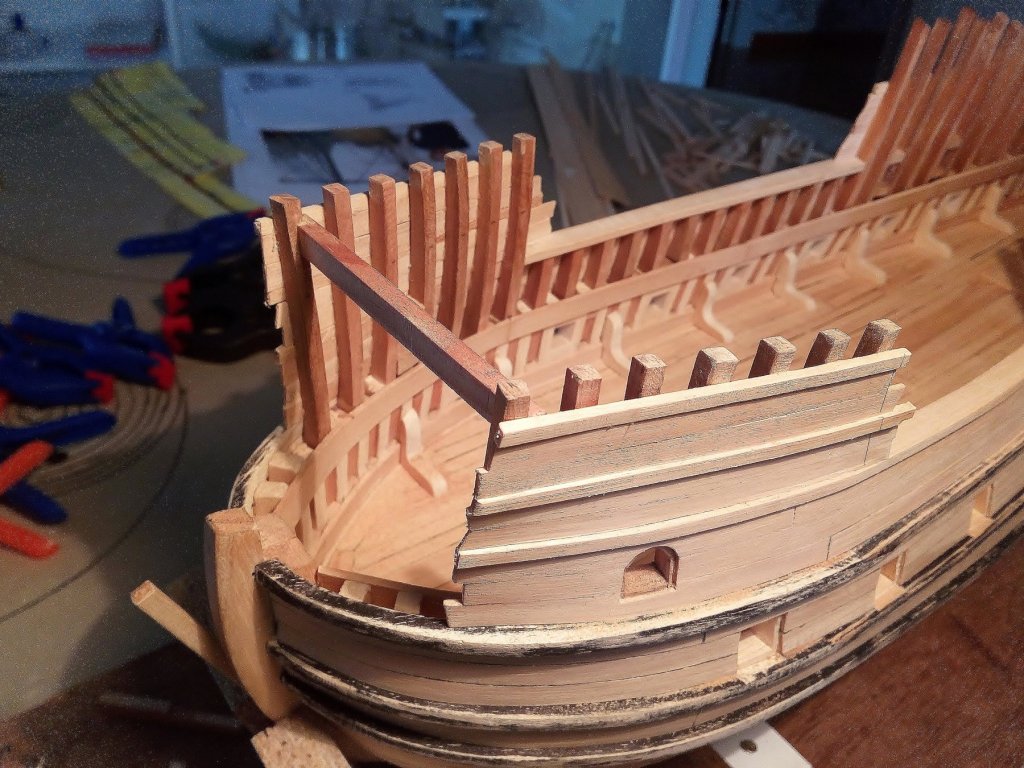
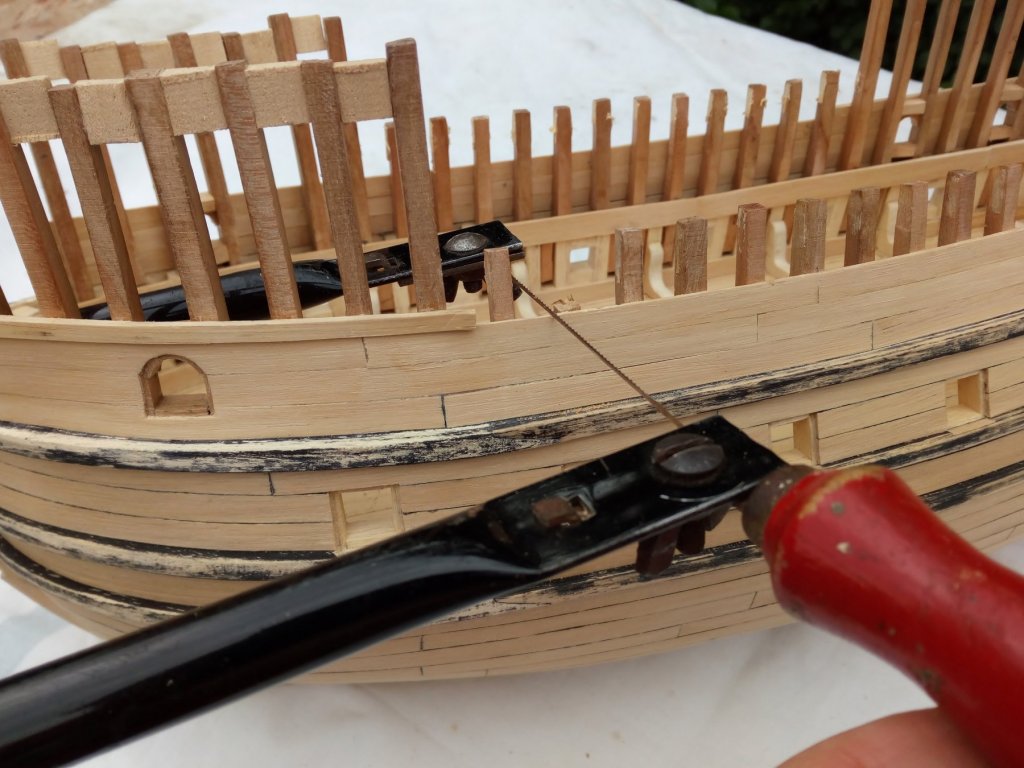
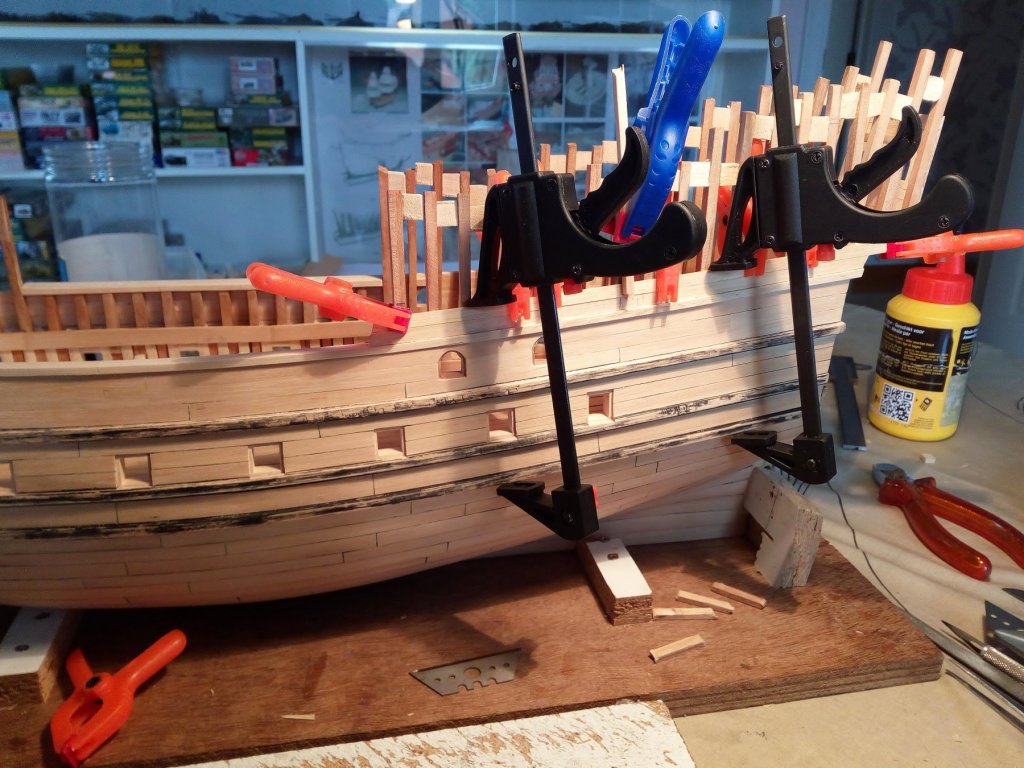
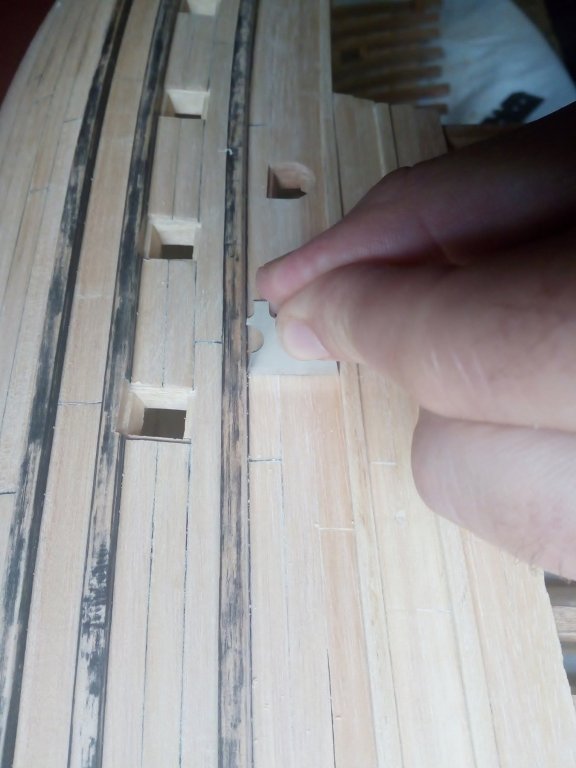
Rear castle same method The frames are sawn at the correct height. And made equal. Finishing side and Finishing top
- 756 replies
-
- 9
-
-
- galleon
- golden hind
- (and 2 more)
-
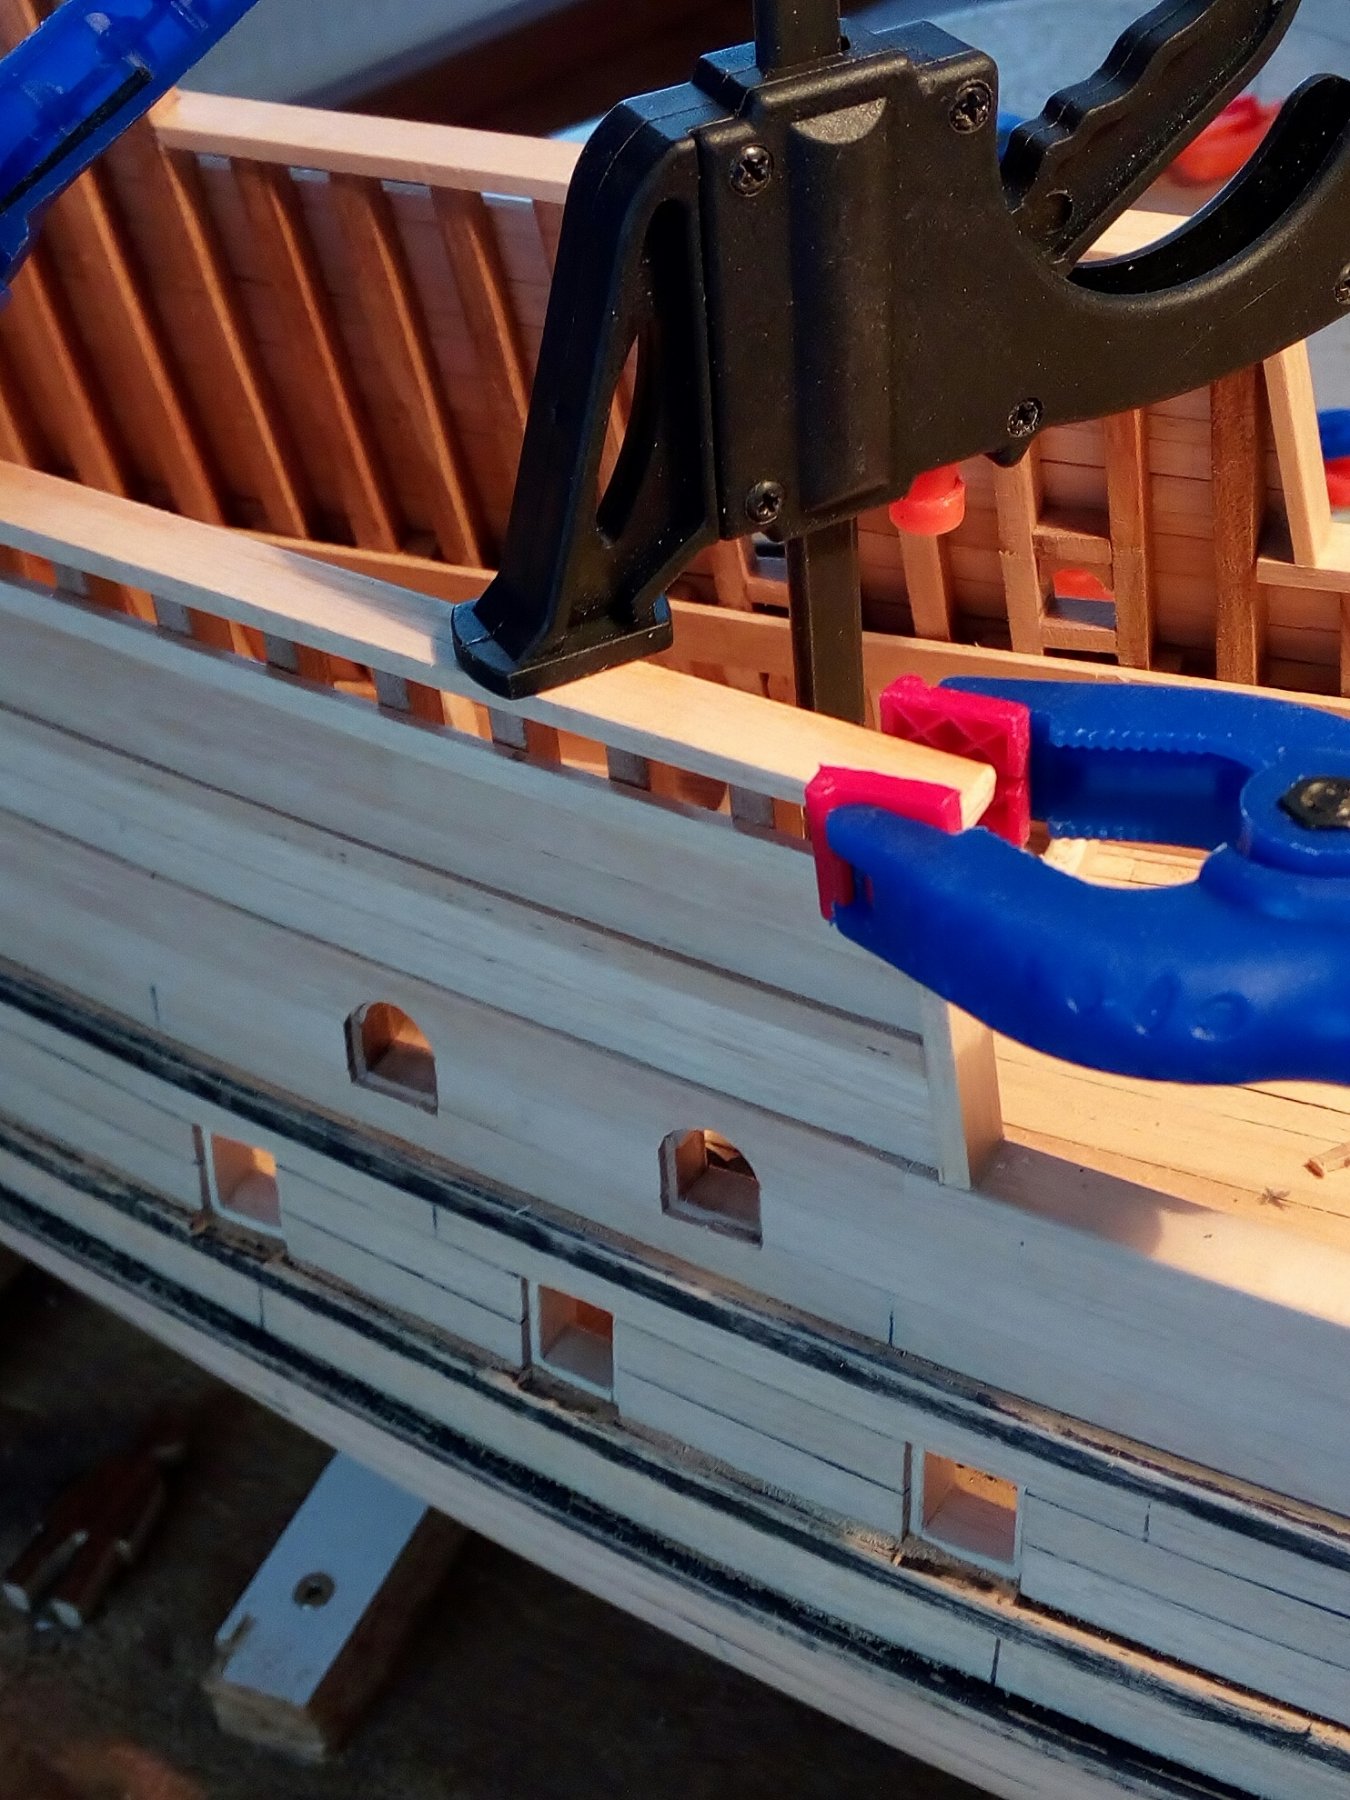
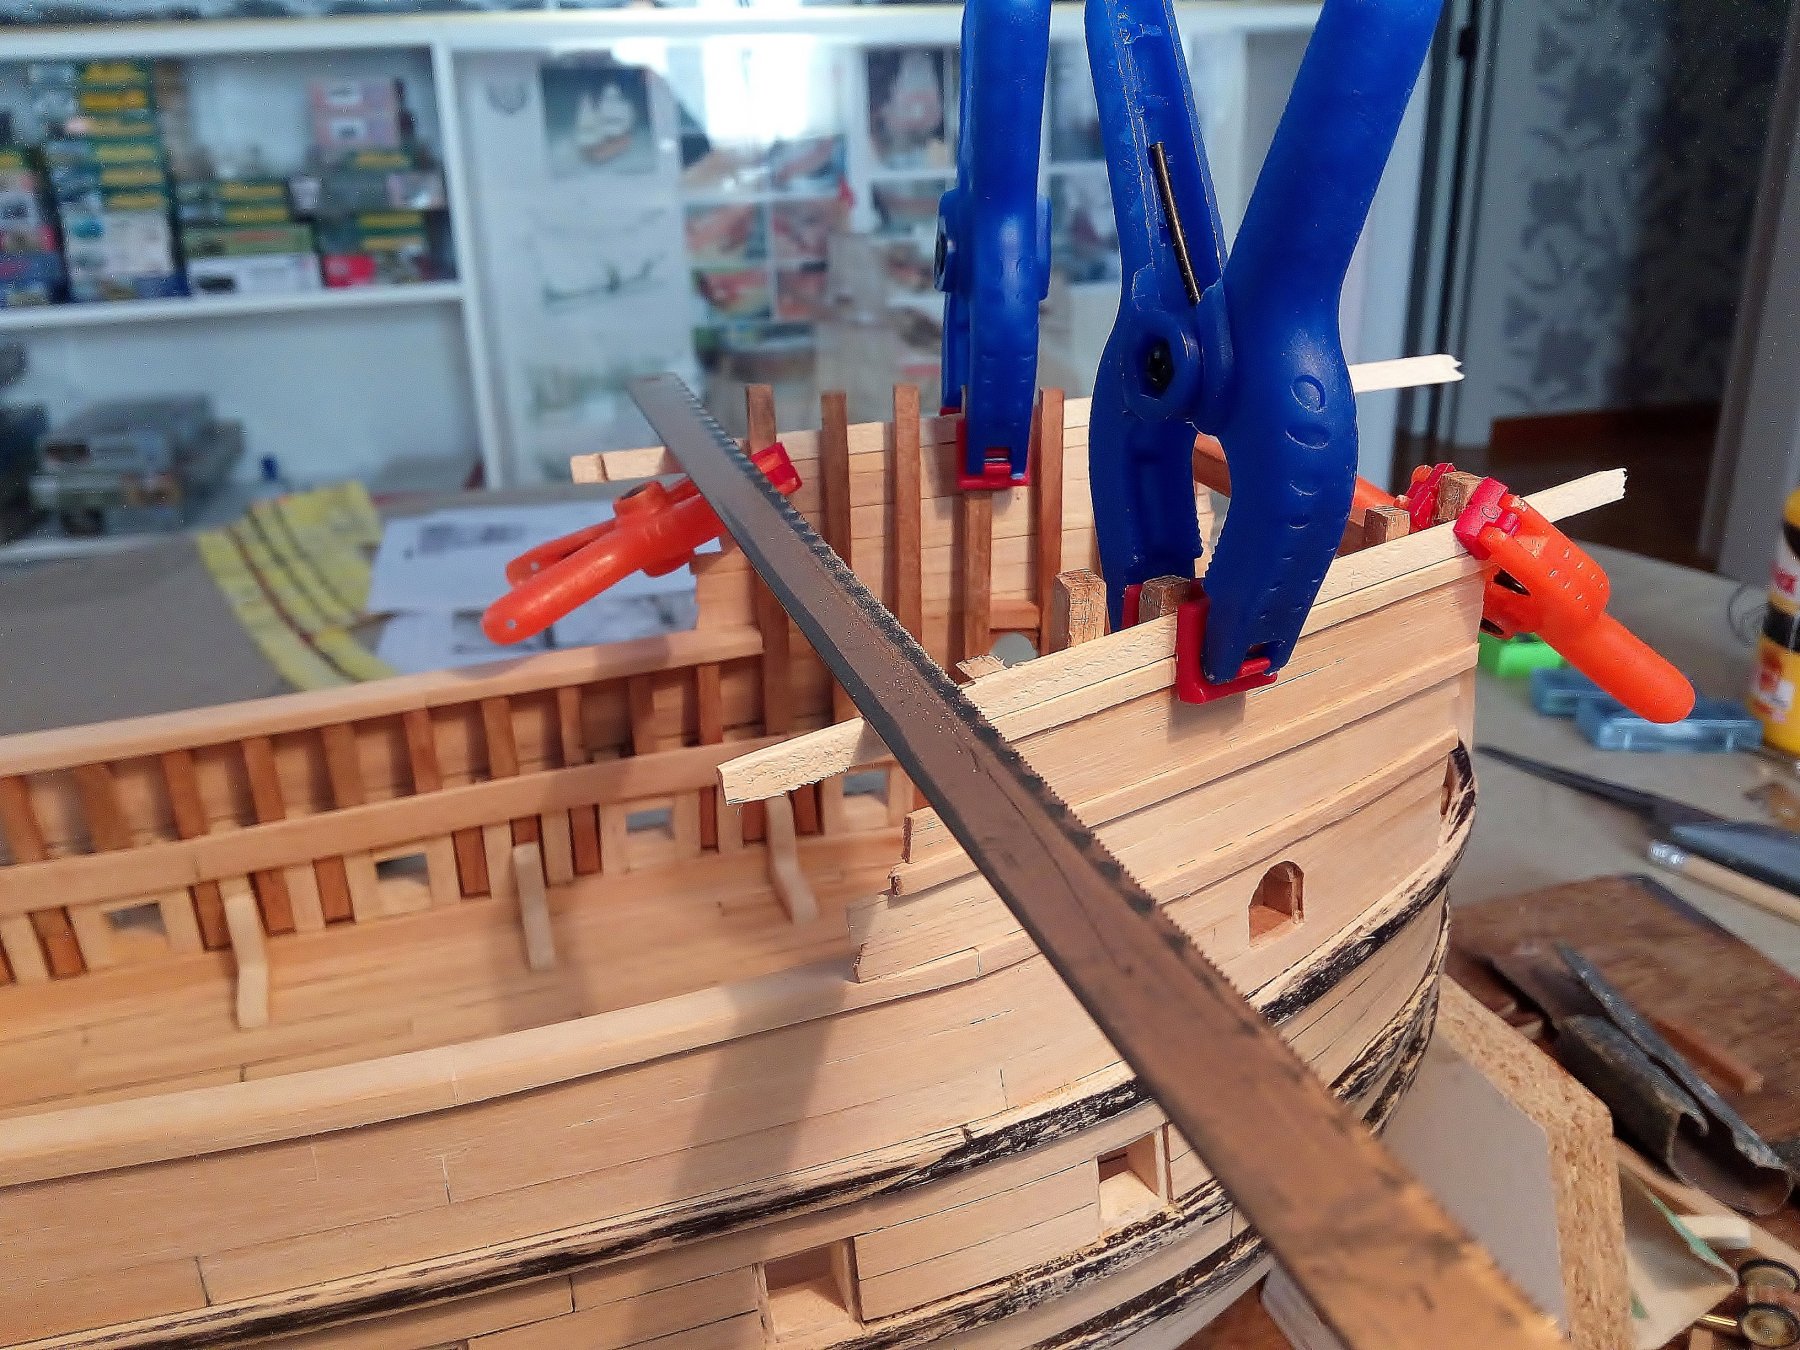
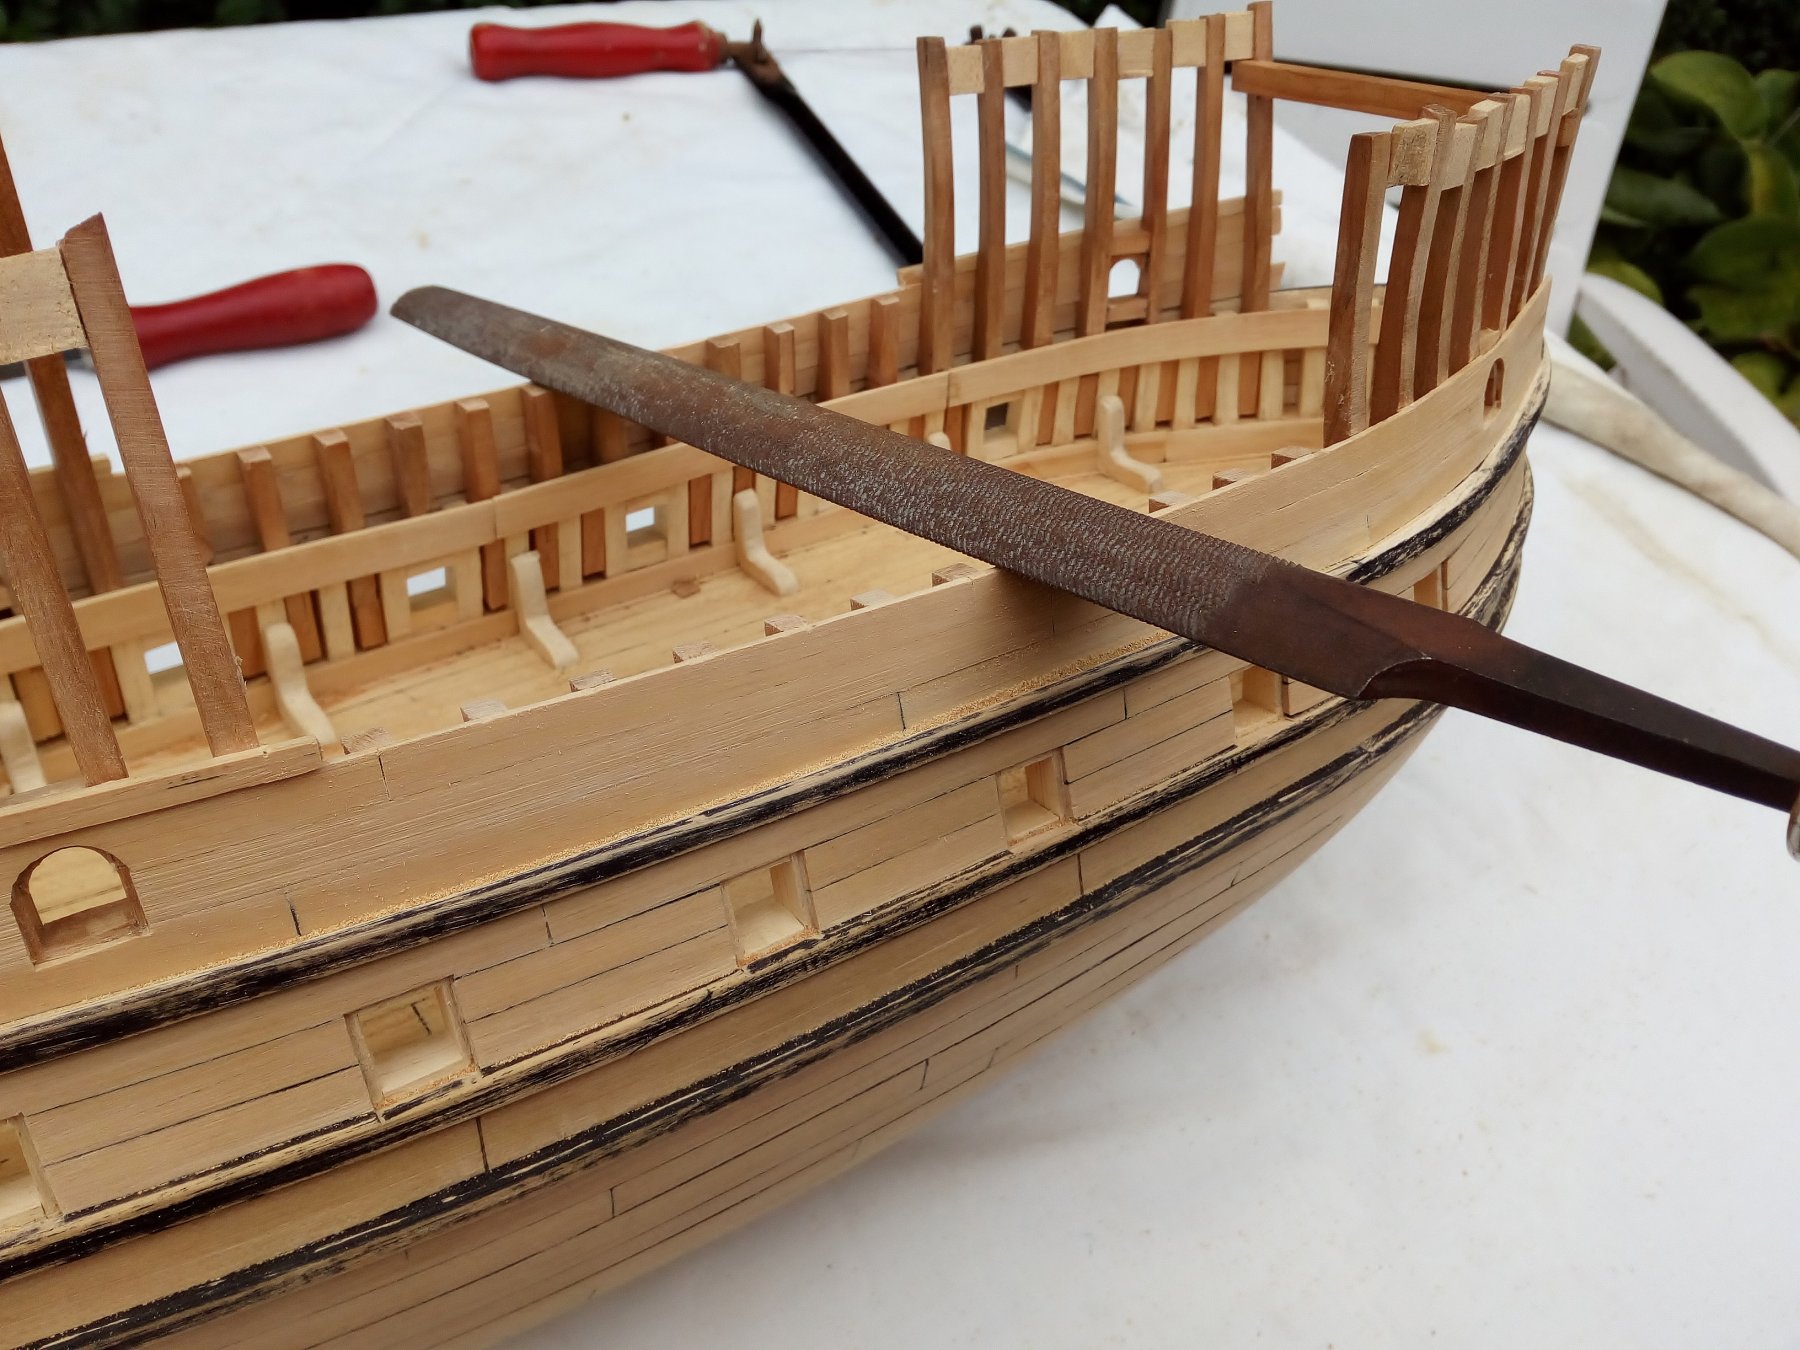
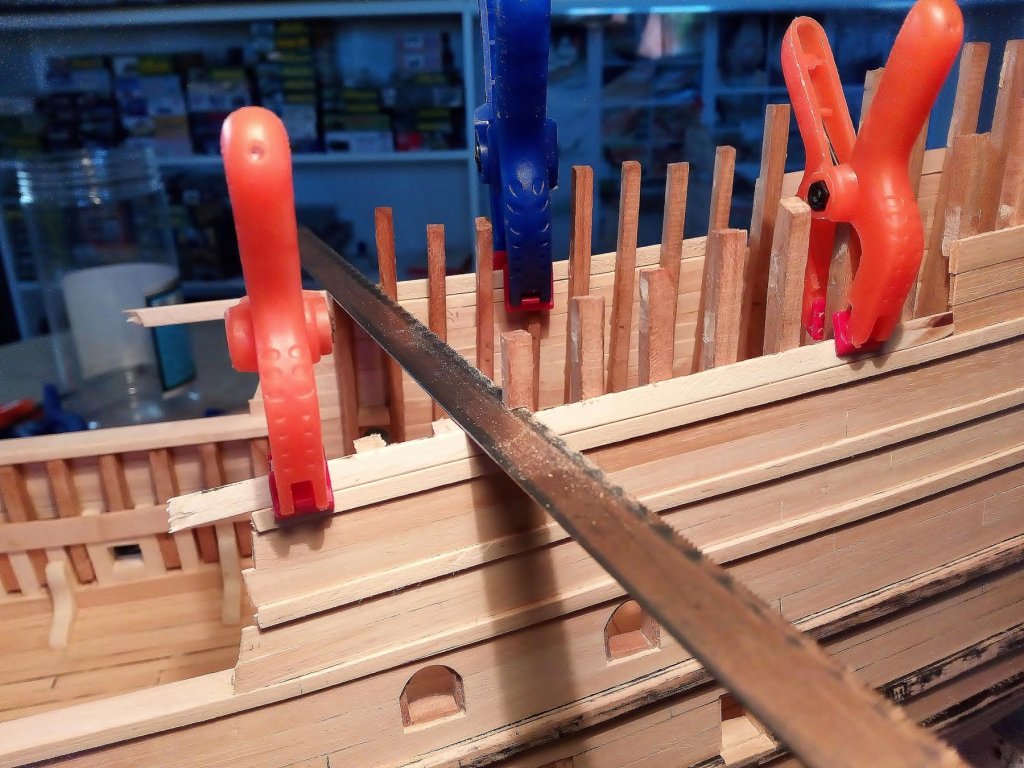
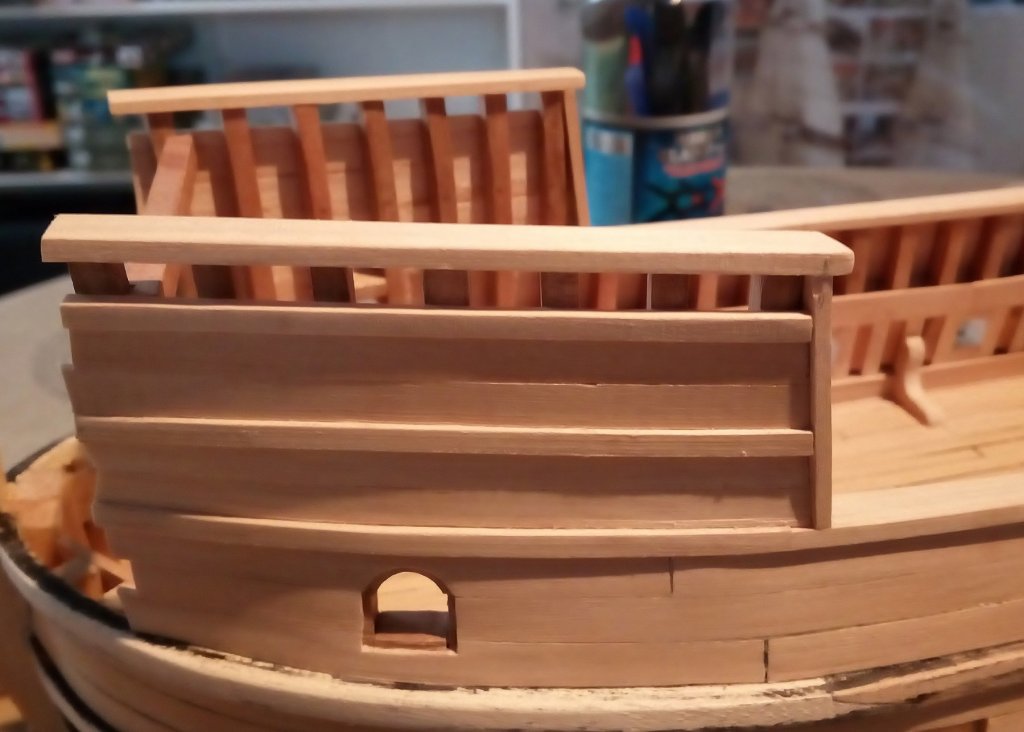
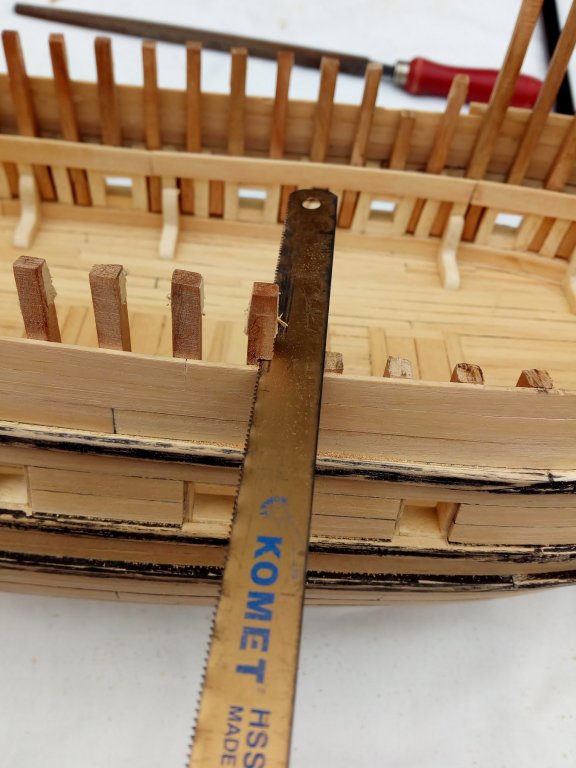
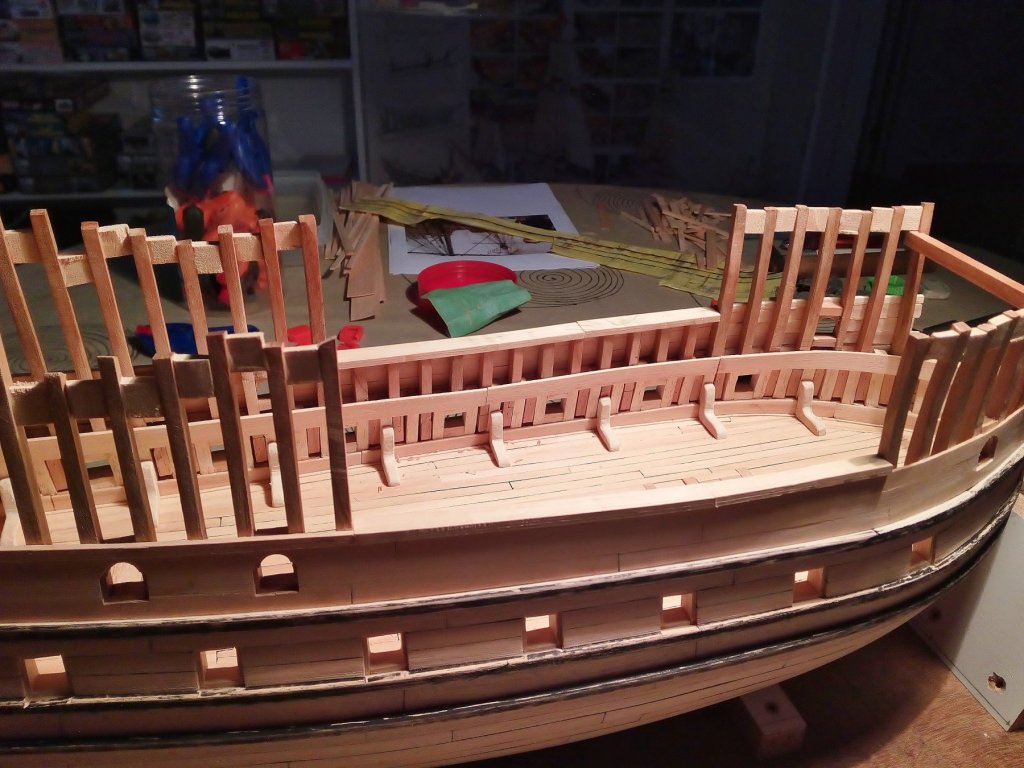
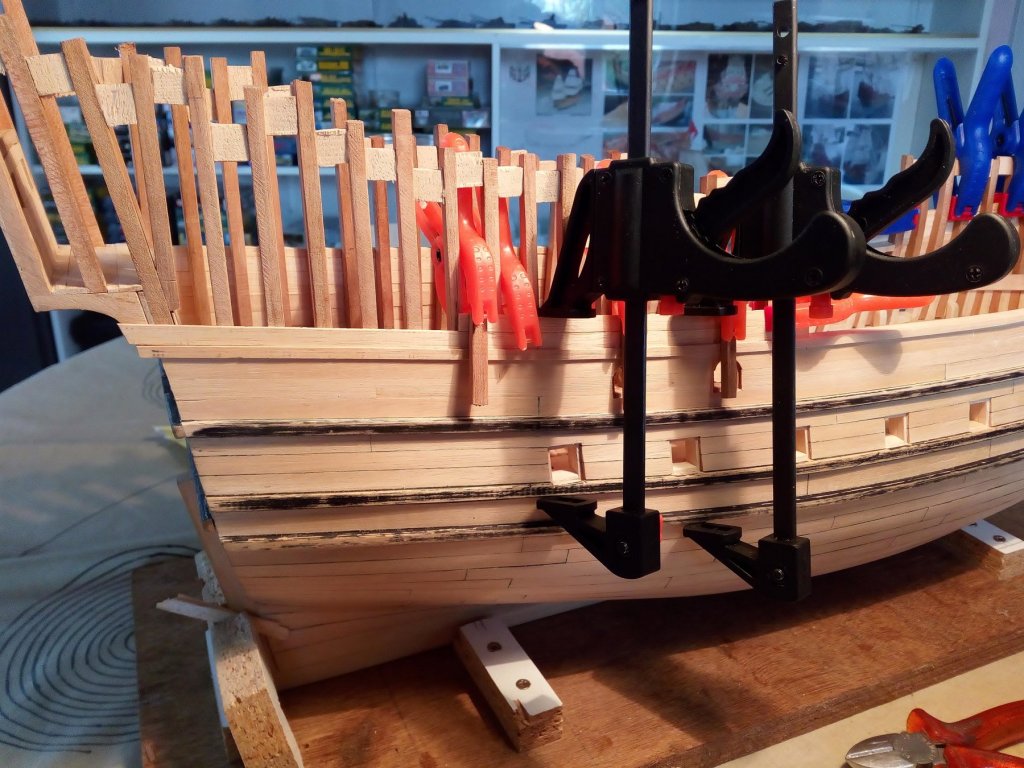
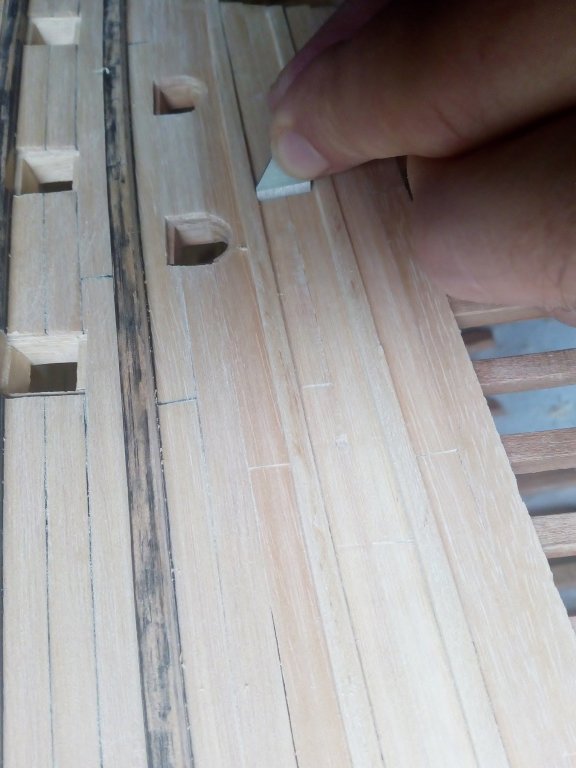
planking continues planking of the forecastle. I found 3 different ways to do this. Which is right ?? Who knows. That's why I've searched which method was most likely used. Method 1 seems to be most English but apparently came into use later. Method 2 is the most common in this period. Method 3 is the least common in this period So method 2 will be used. The frames are sawn at the correct height. And made equal. Saw planking of the front castle Finishing side Finishing top


- 756 replies
-
- 9
-
-
- galleon
- golden hind
- (and 2 more)
-
Le Soleil Royal by Nek0 - 1/72 - Marc Yeu
Baker replied to Nek0's topic in - Build logs for subjects built 1501 - 1750
Nice work In the early 80's I also built the Soleil Royal from Heller. And she is also still on display in our house. I will follow. I have a feeling that I'm going to learn a lot here.- 208 replies
-
- 1
-
-
- le soleil royal
- 104 guns
- (and 2 more)
-
Welcome to MSW. Greetings from Belgium
-
For builders of Roman, Byzantine and Ottoman ships : This looks very interesting Dozens of perfectly preserved ancient shipwrecks have been found at the bottom of the Black Sea. A total of 60 wrecks were discovered dating back as far as 2,500 years, including galleys from the Roman, Byzantine and Ottoman empires. English http://www.dailymail.co.uk/sciencetech/article-4898204/Experts-graveyard-60-preserved-ancient-shipwrecks.html?ito=social-twitter_mailonline Dutch http://www.hln.be/hln/nl/961/Wetenschap/article/detail/3263928/2017/09/20/Zestig-oude-schepen-ontdekt-in-Zwarte-Zee-enkele-wrakken-dateren-uit-Romeinse-tijd-en-zijn-2-500-jaar-oud.dhtml
-
size of people
Baker replied to Snow's topic in Discussion for a Ship's Deck Furniture, Guns, boats and other Fittings
People were indeed smaller 200 a 500 years ago. See the link to the Vasamuseum https://www.vasamuseet.se/en/collections--research/skeletons But, there were exceptions : The average height of the crewmen is 167 cm, with the tallest 179 cm and the shortest only 160 cm. This is much shorter than today, which is a result of a poor diet as children. For my Golden Hind I use an length of 160 cm (about 5 foot) hopefully this helps. -
Greetings from belgium. (Google translate is very helpful)
-
Thanks everyone for the nice comments and likes. Painting schemes : I've already thought about it. But painting will not be done in the near future. The Golden Hind is probably re-painted a few times on her journey. So I can choose from a few options. - A brand new Pelican as she left England. - A repainted Pelican renamed as Golden Hind - A worn out Golden Hind on her trip home. So, i do not know this yet, but probably i go for the repainted Golden Hind. Painting Below the water line: definitely white or cream (the white stuff) Unpainted wood: presumably a dark brown wood color Thanks for following
- 756 replies
-
- 3
-
-
- galleon
- golden hind
- (and 2 more)
-
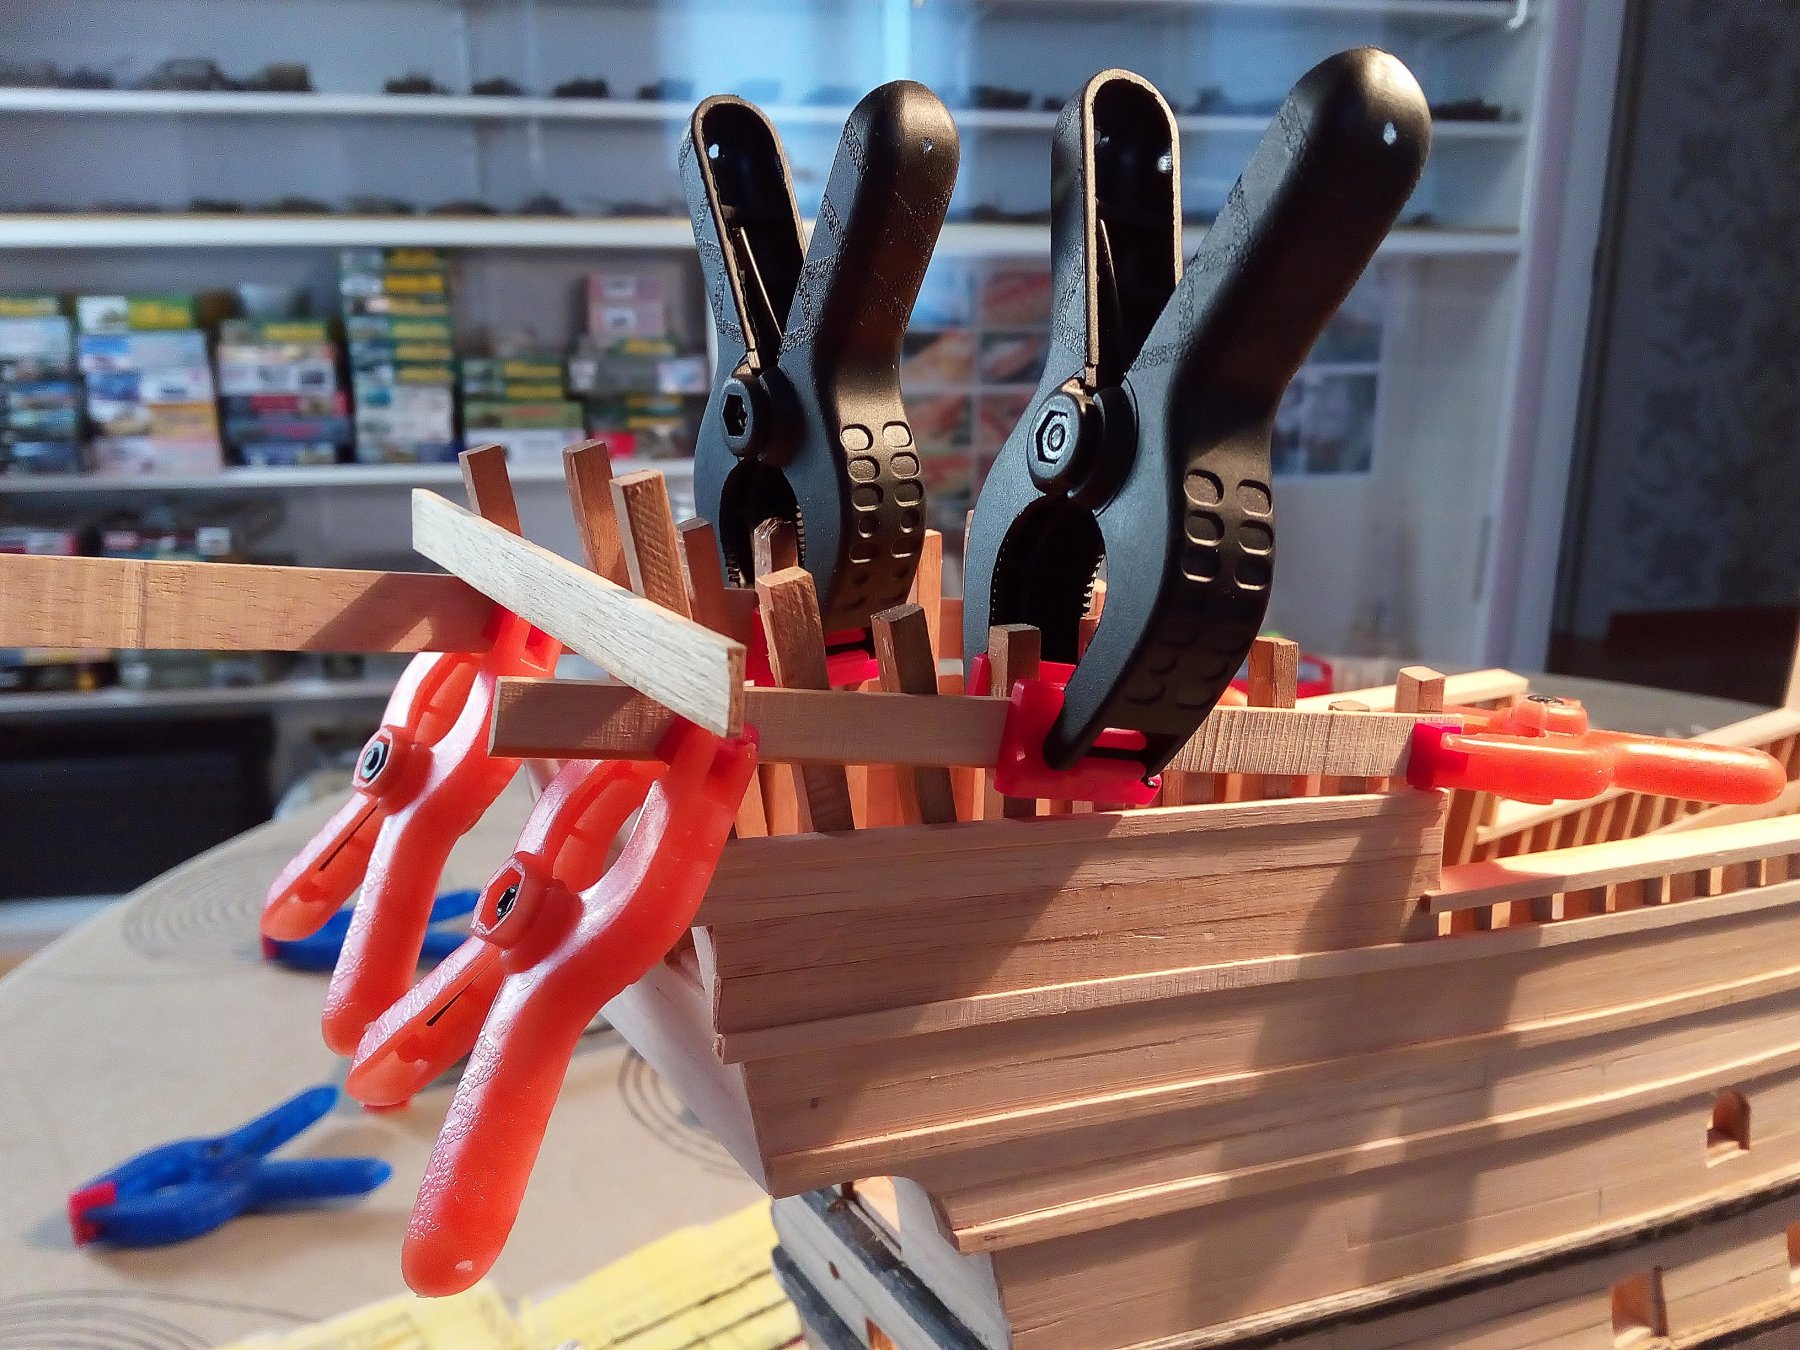
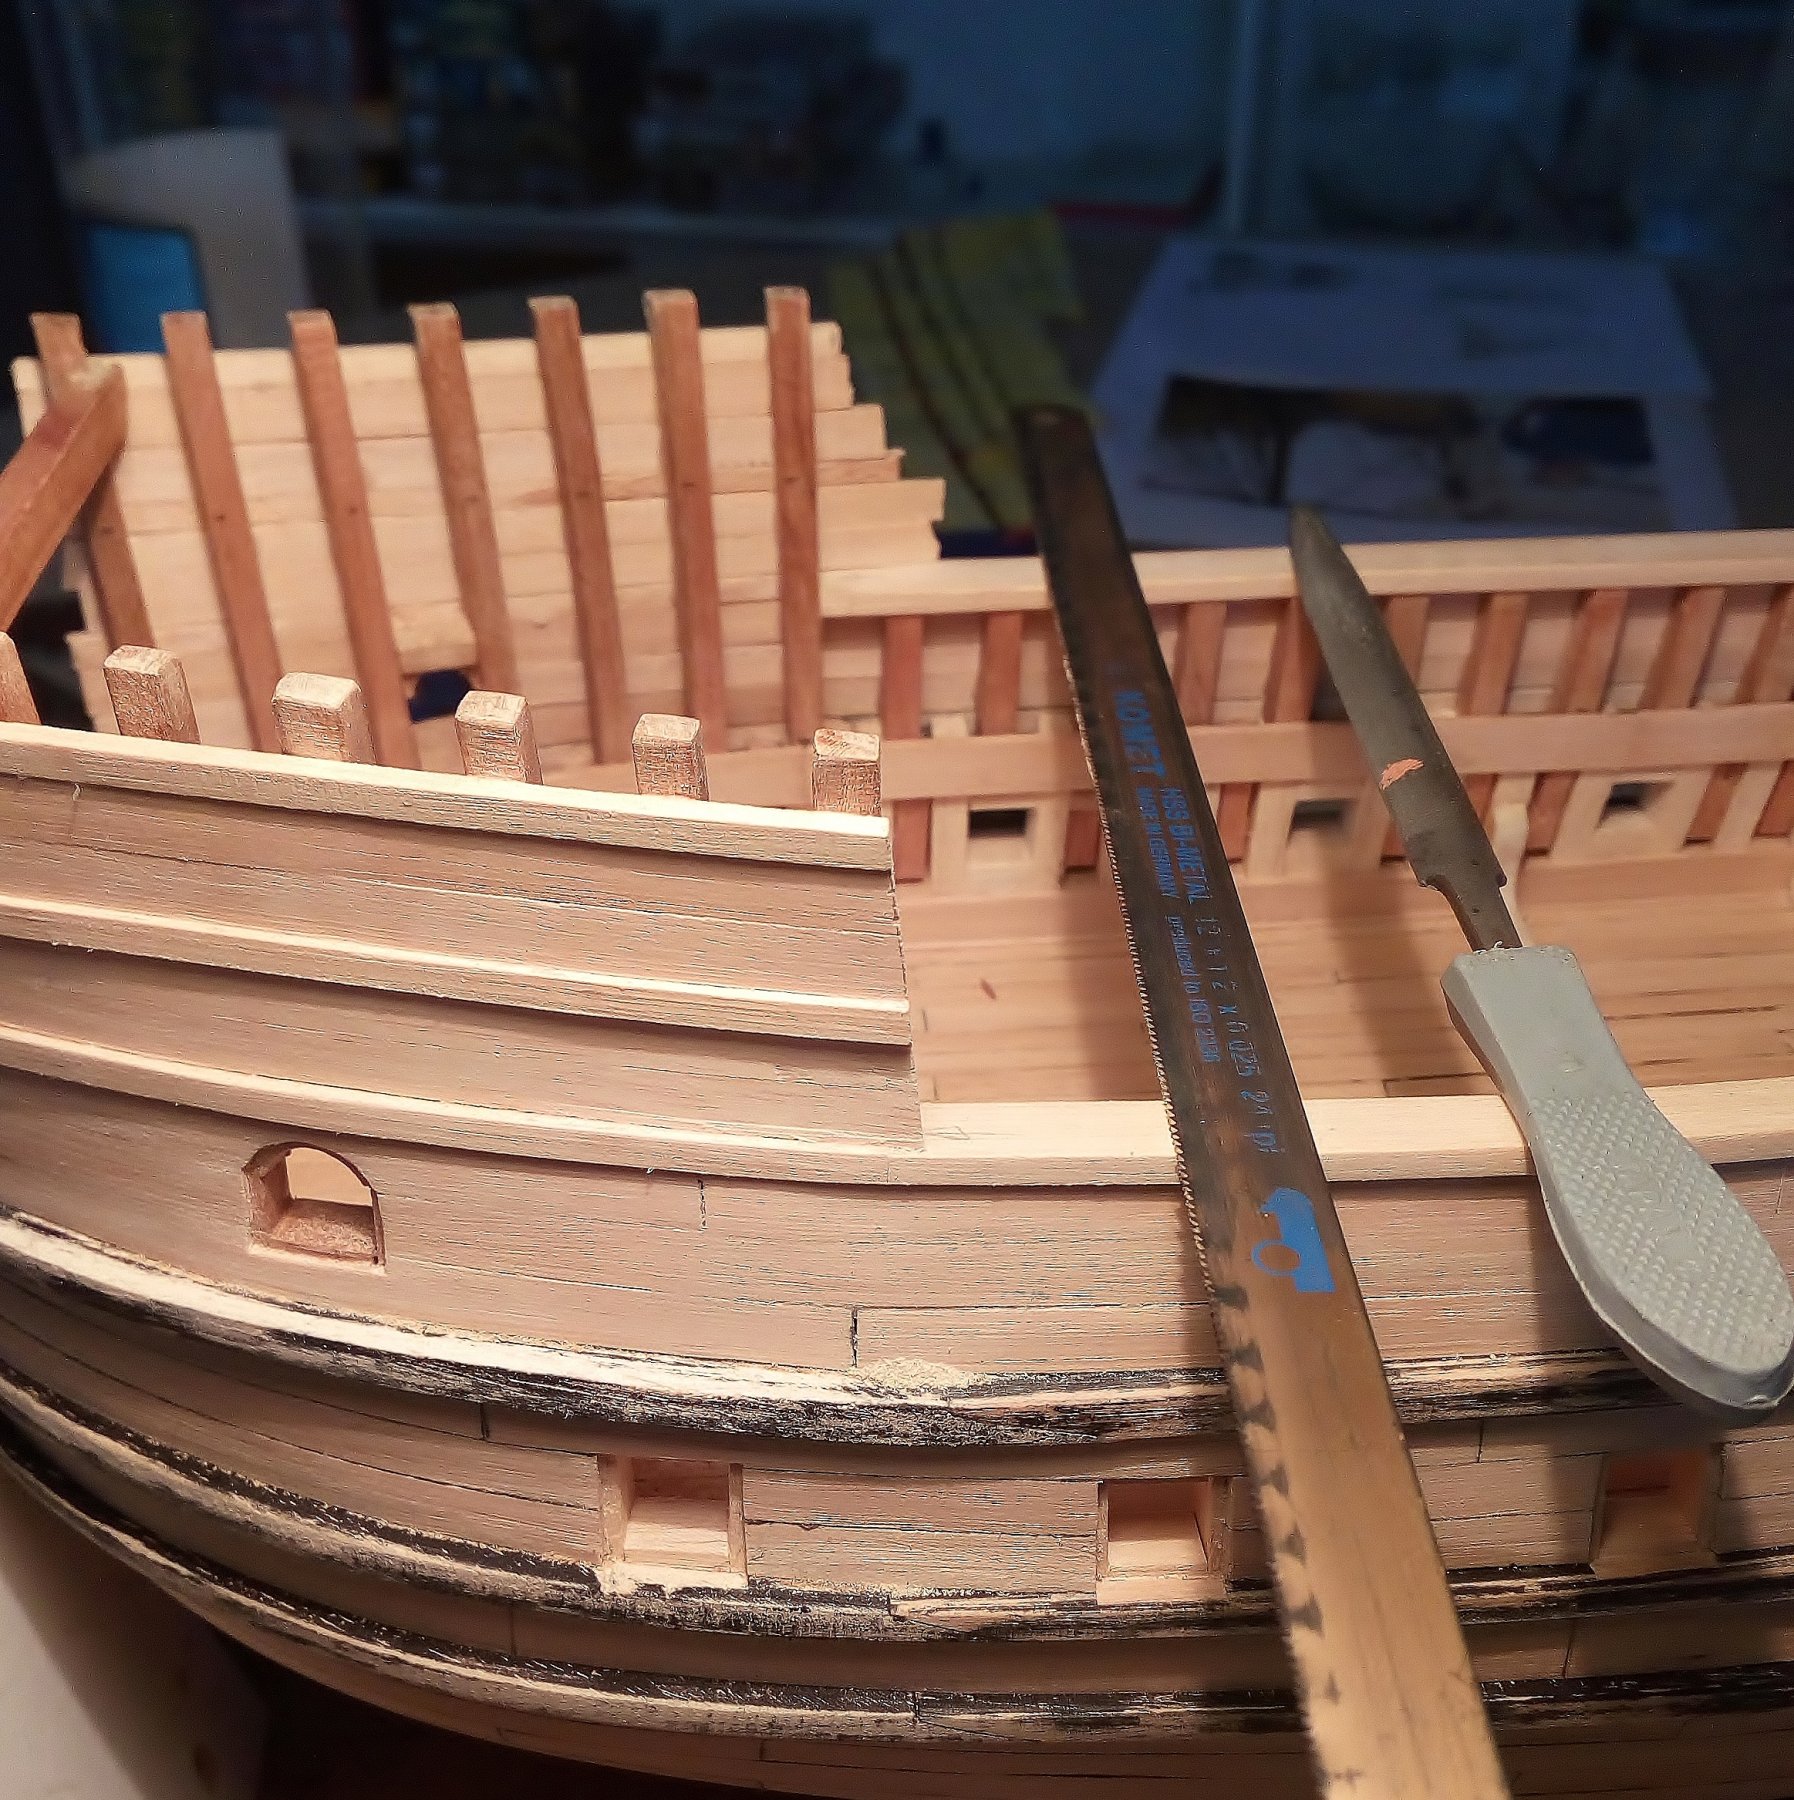
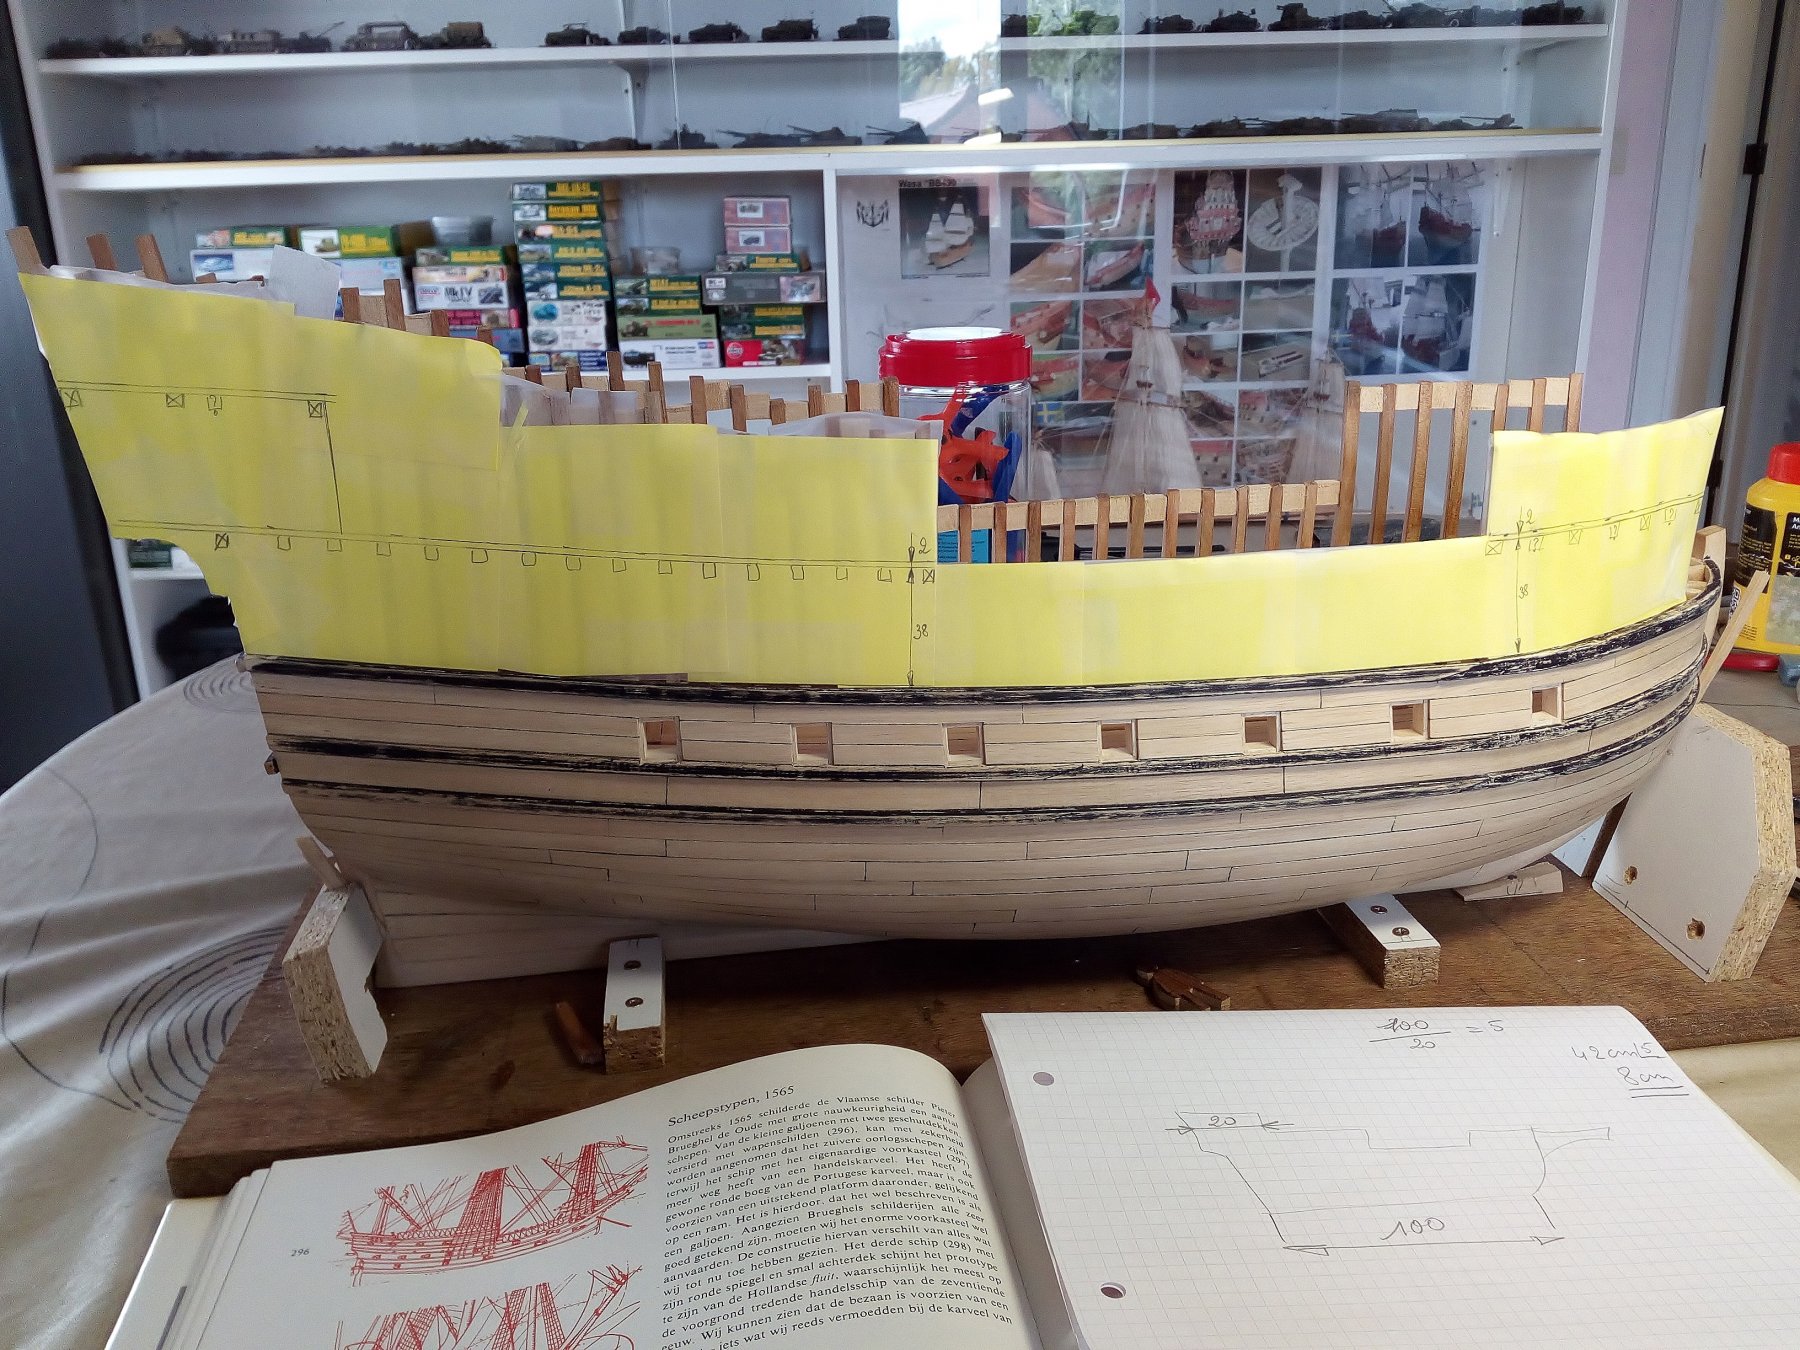
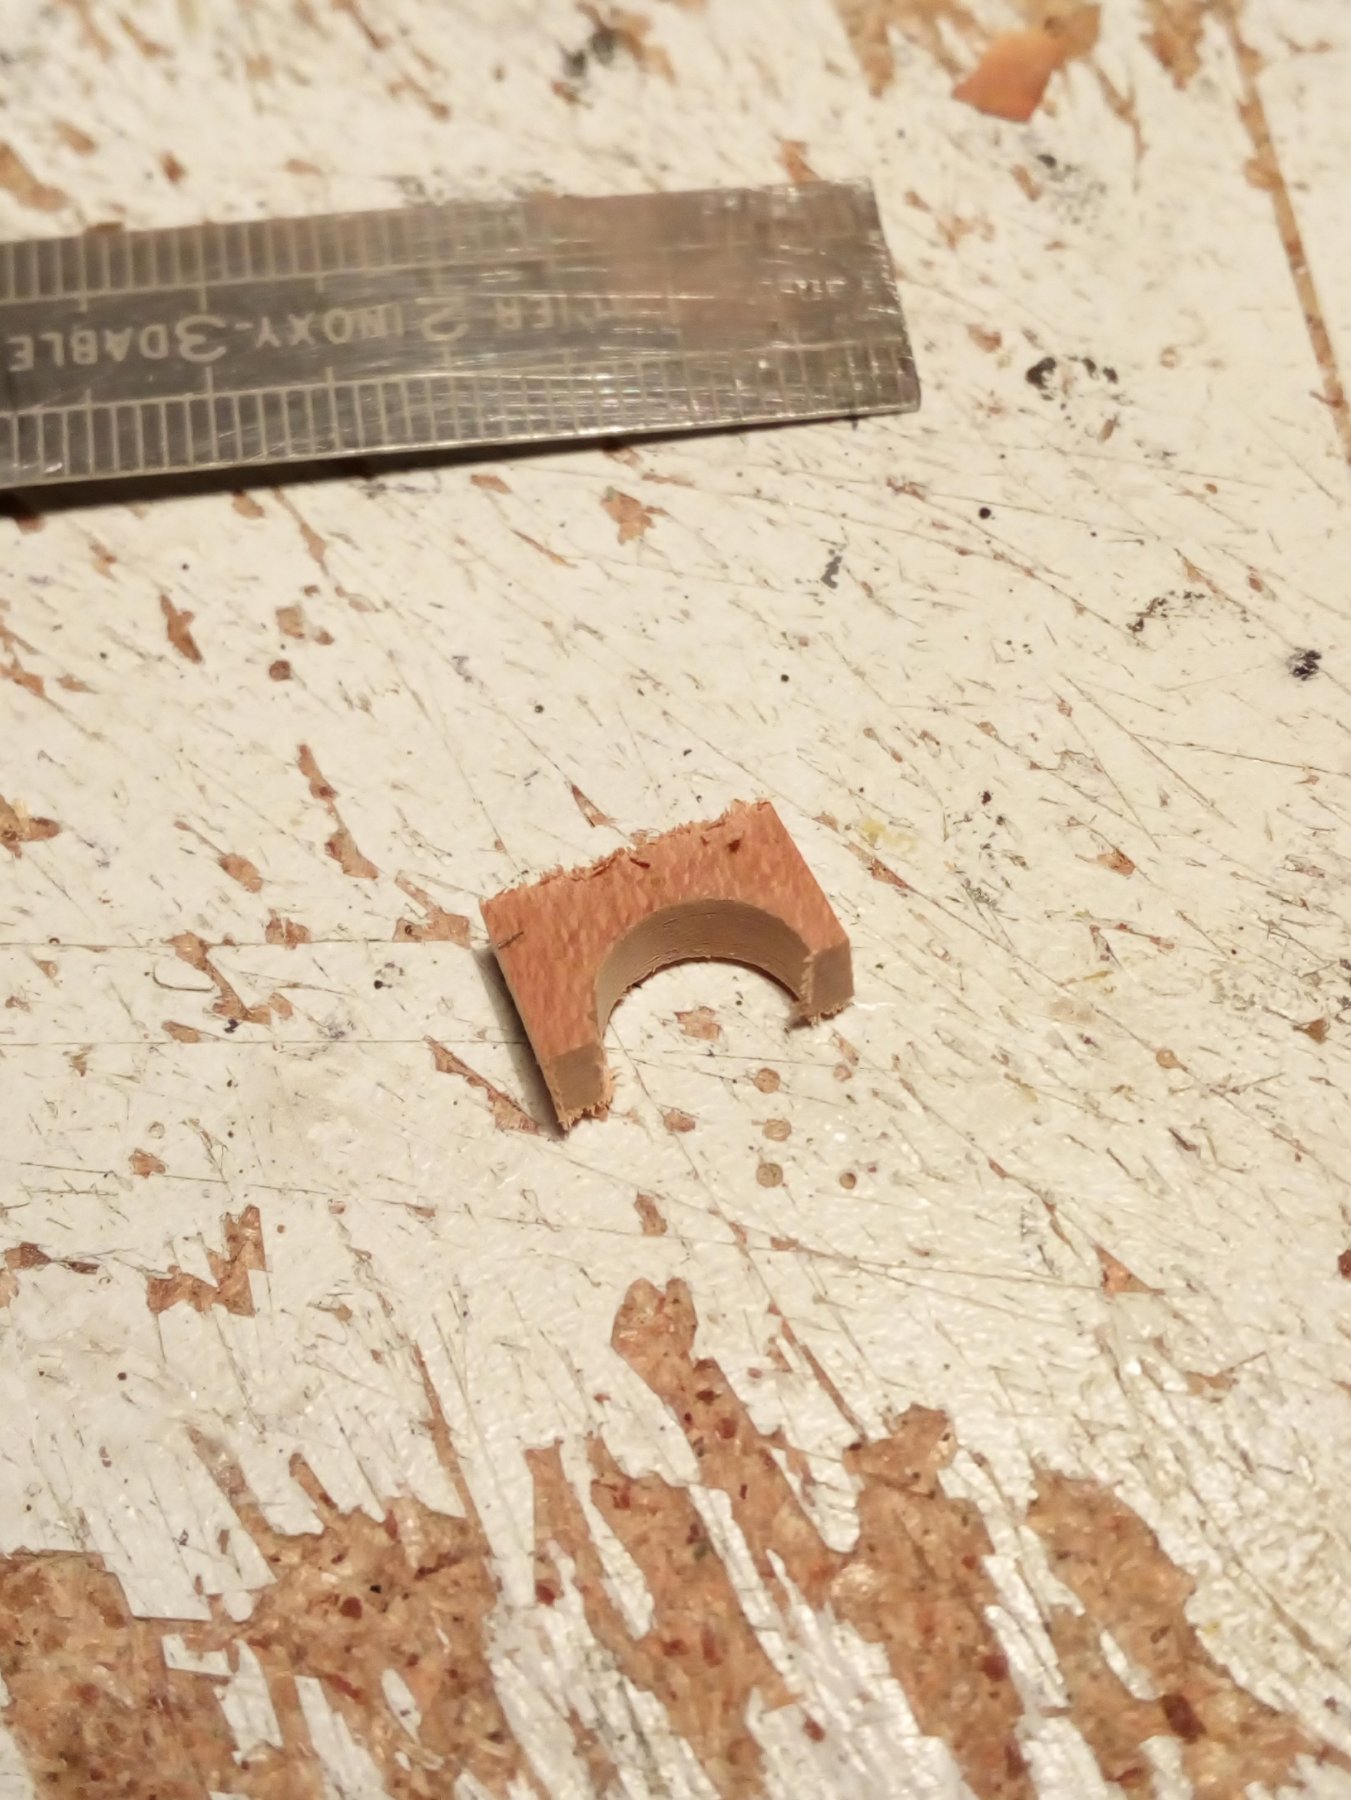
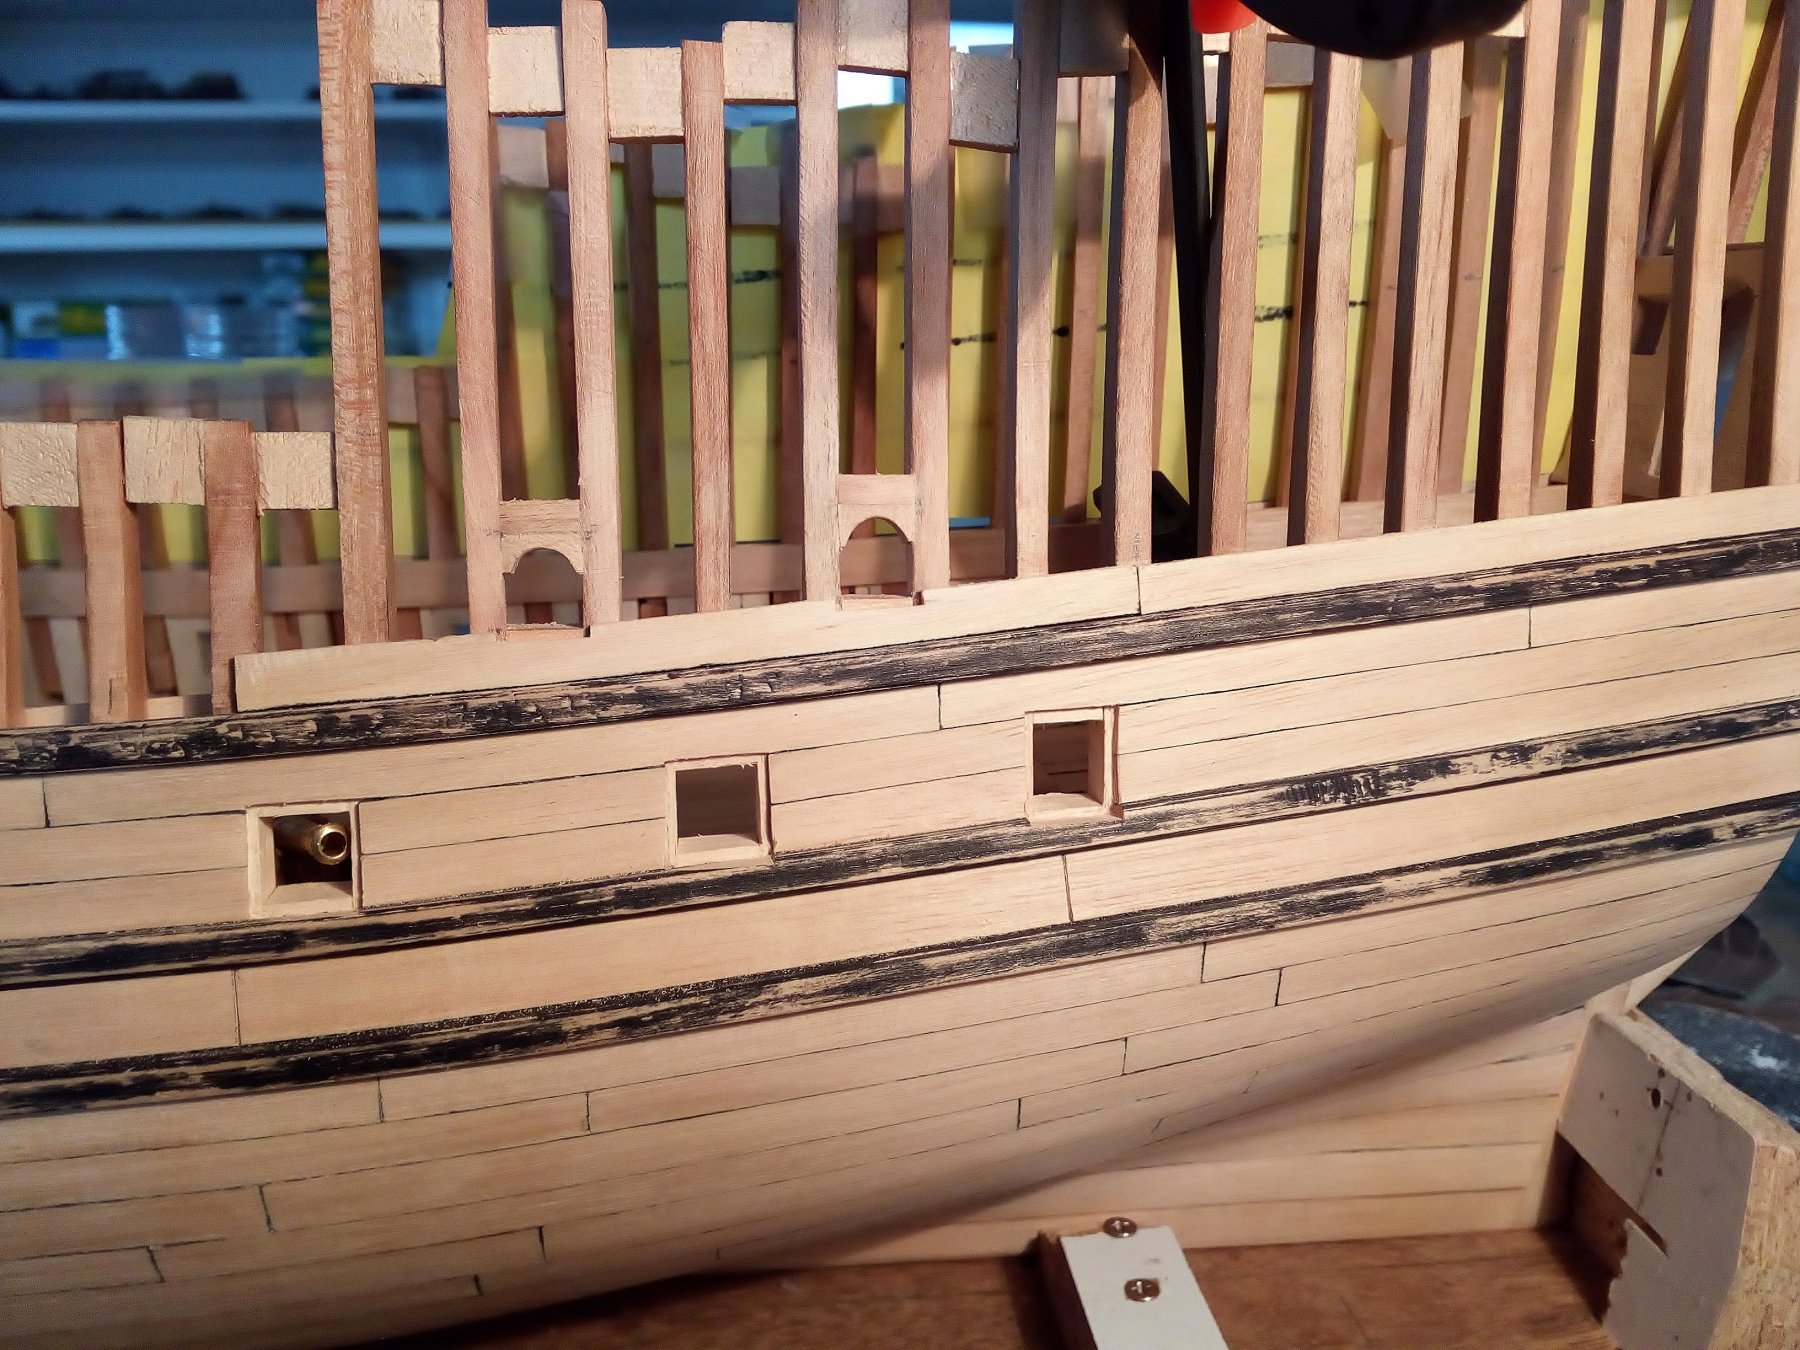
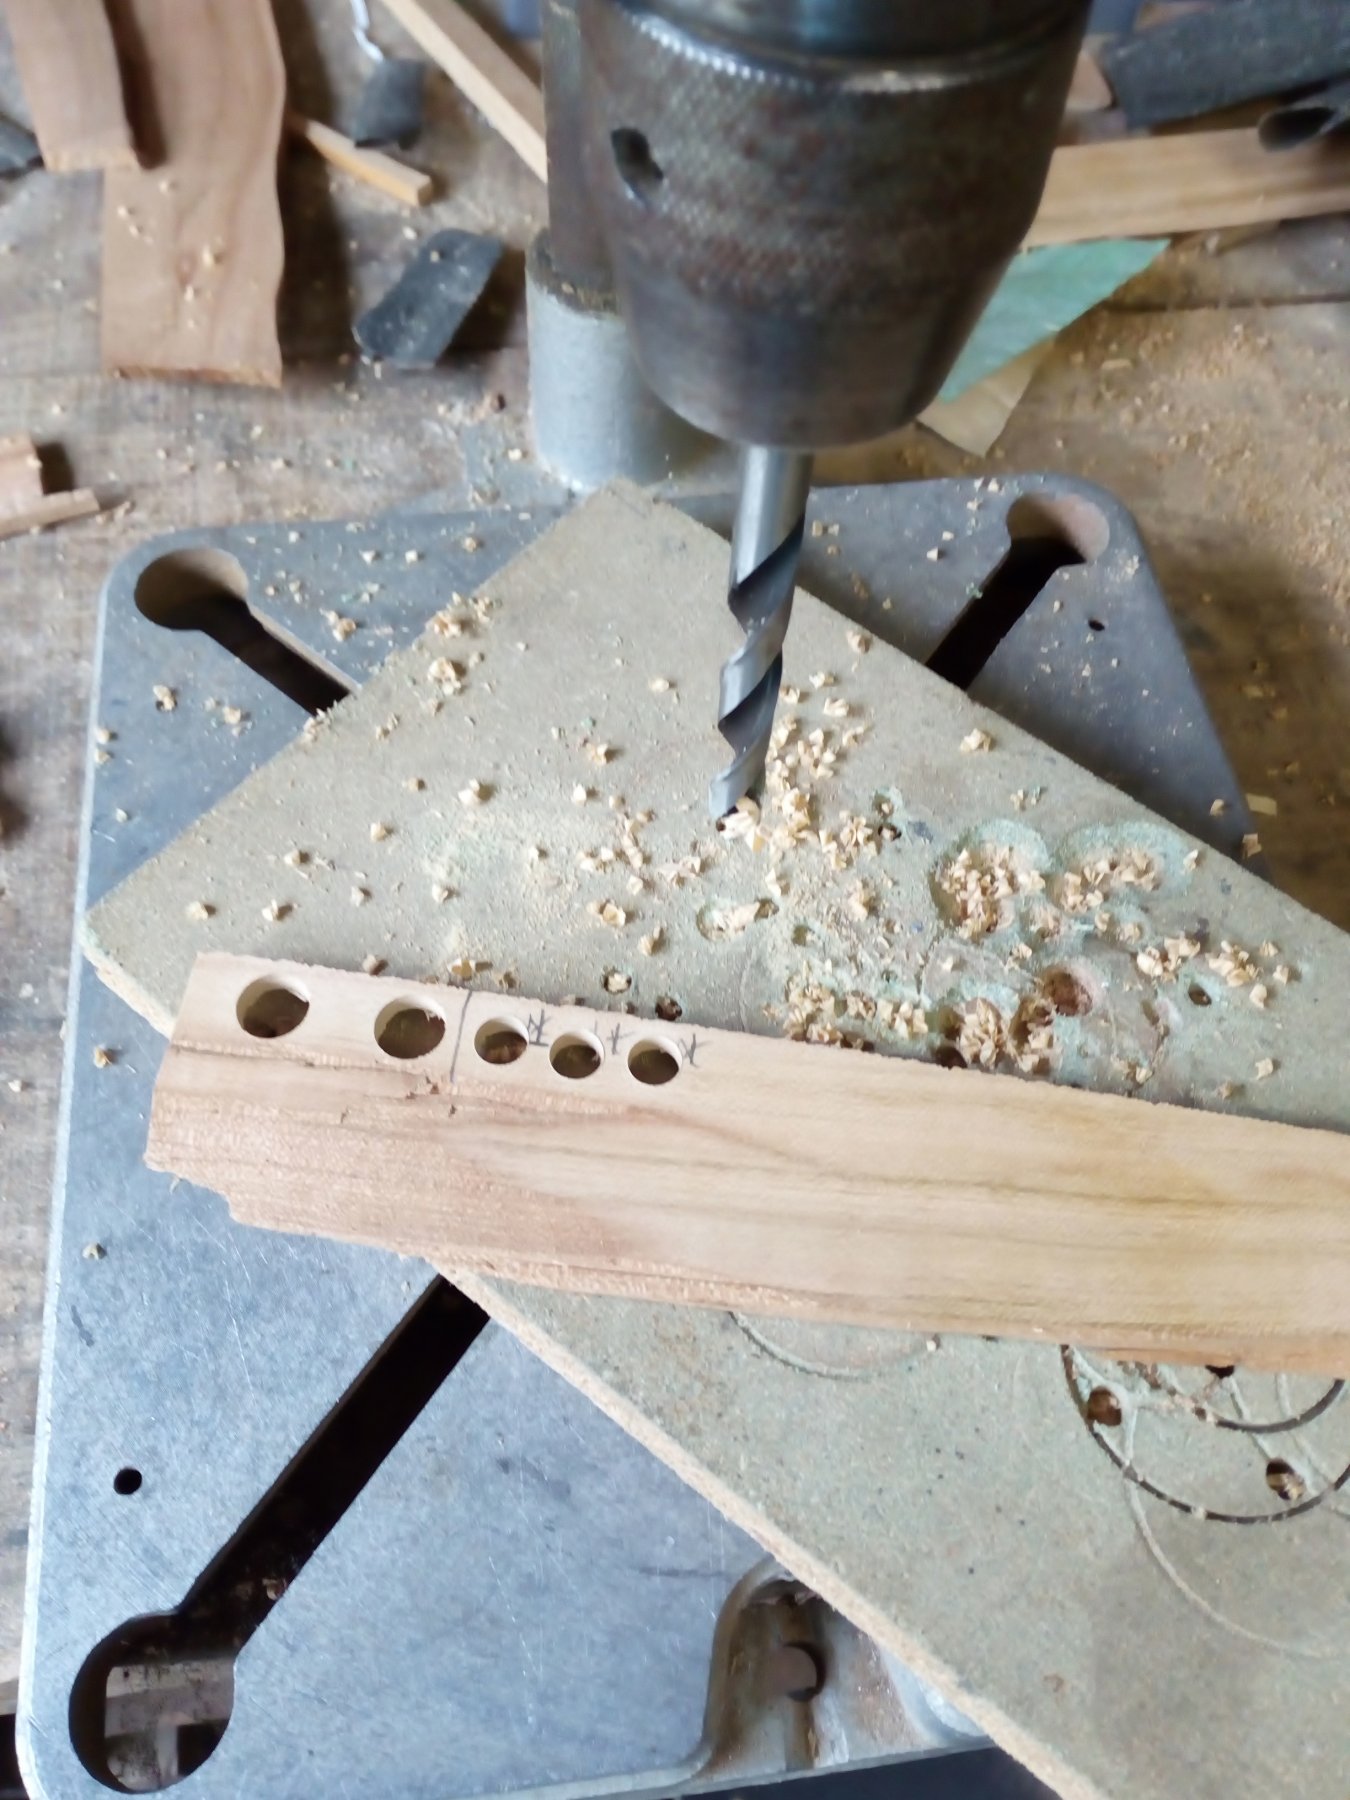
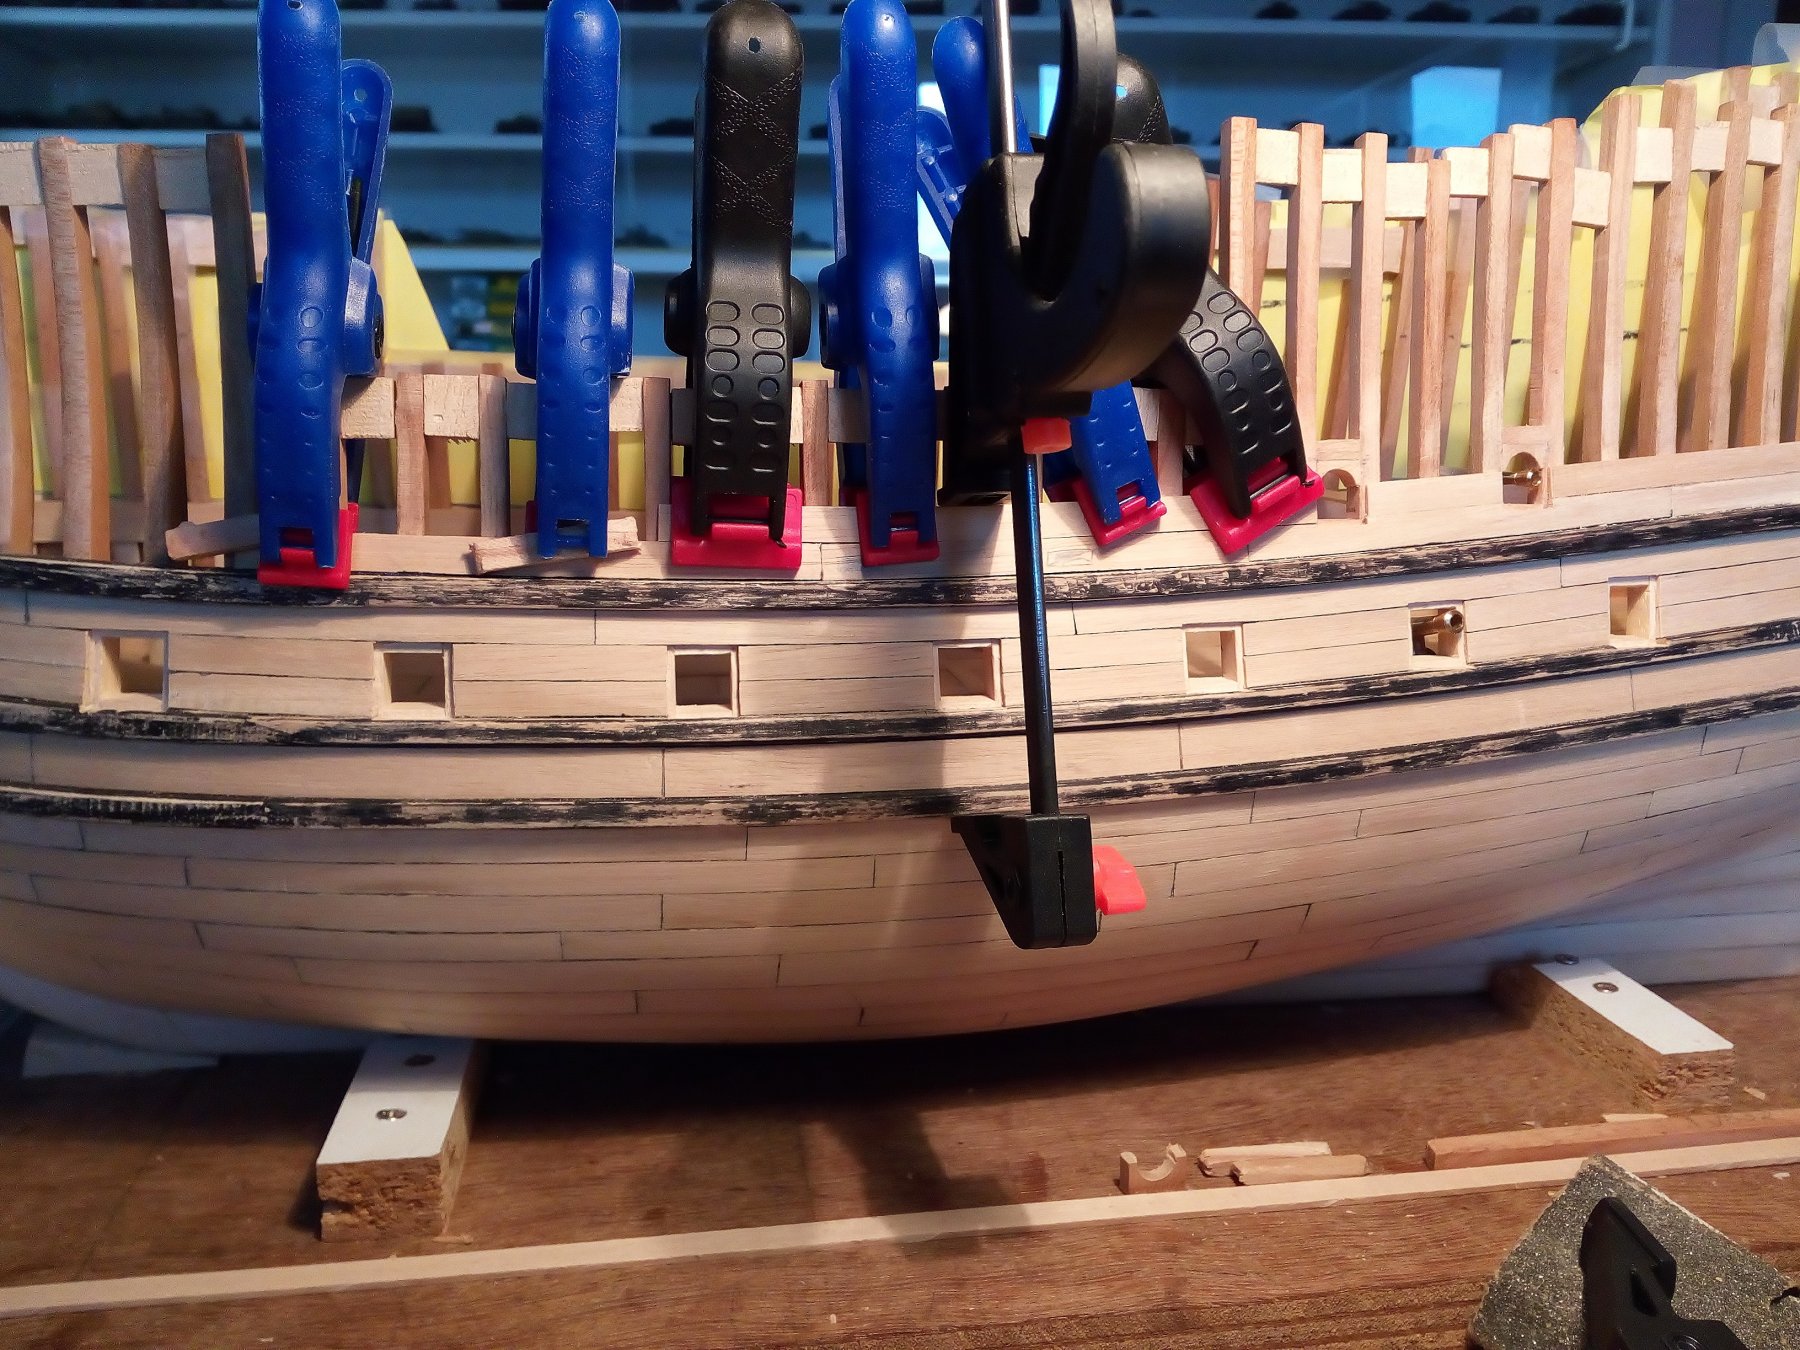
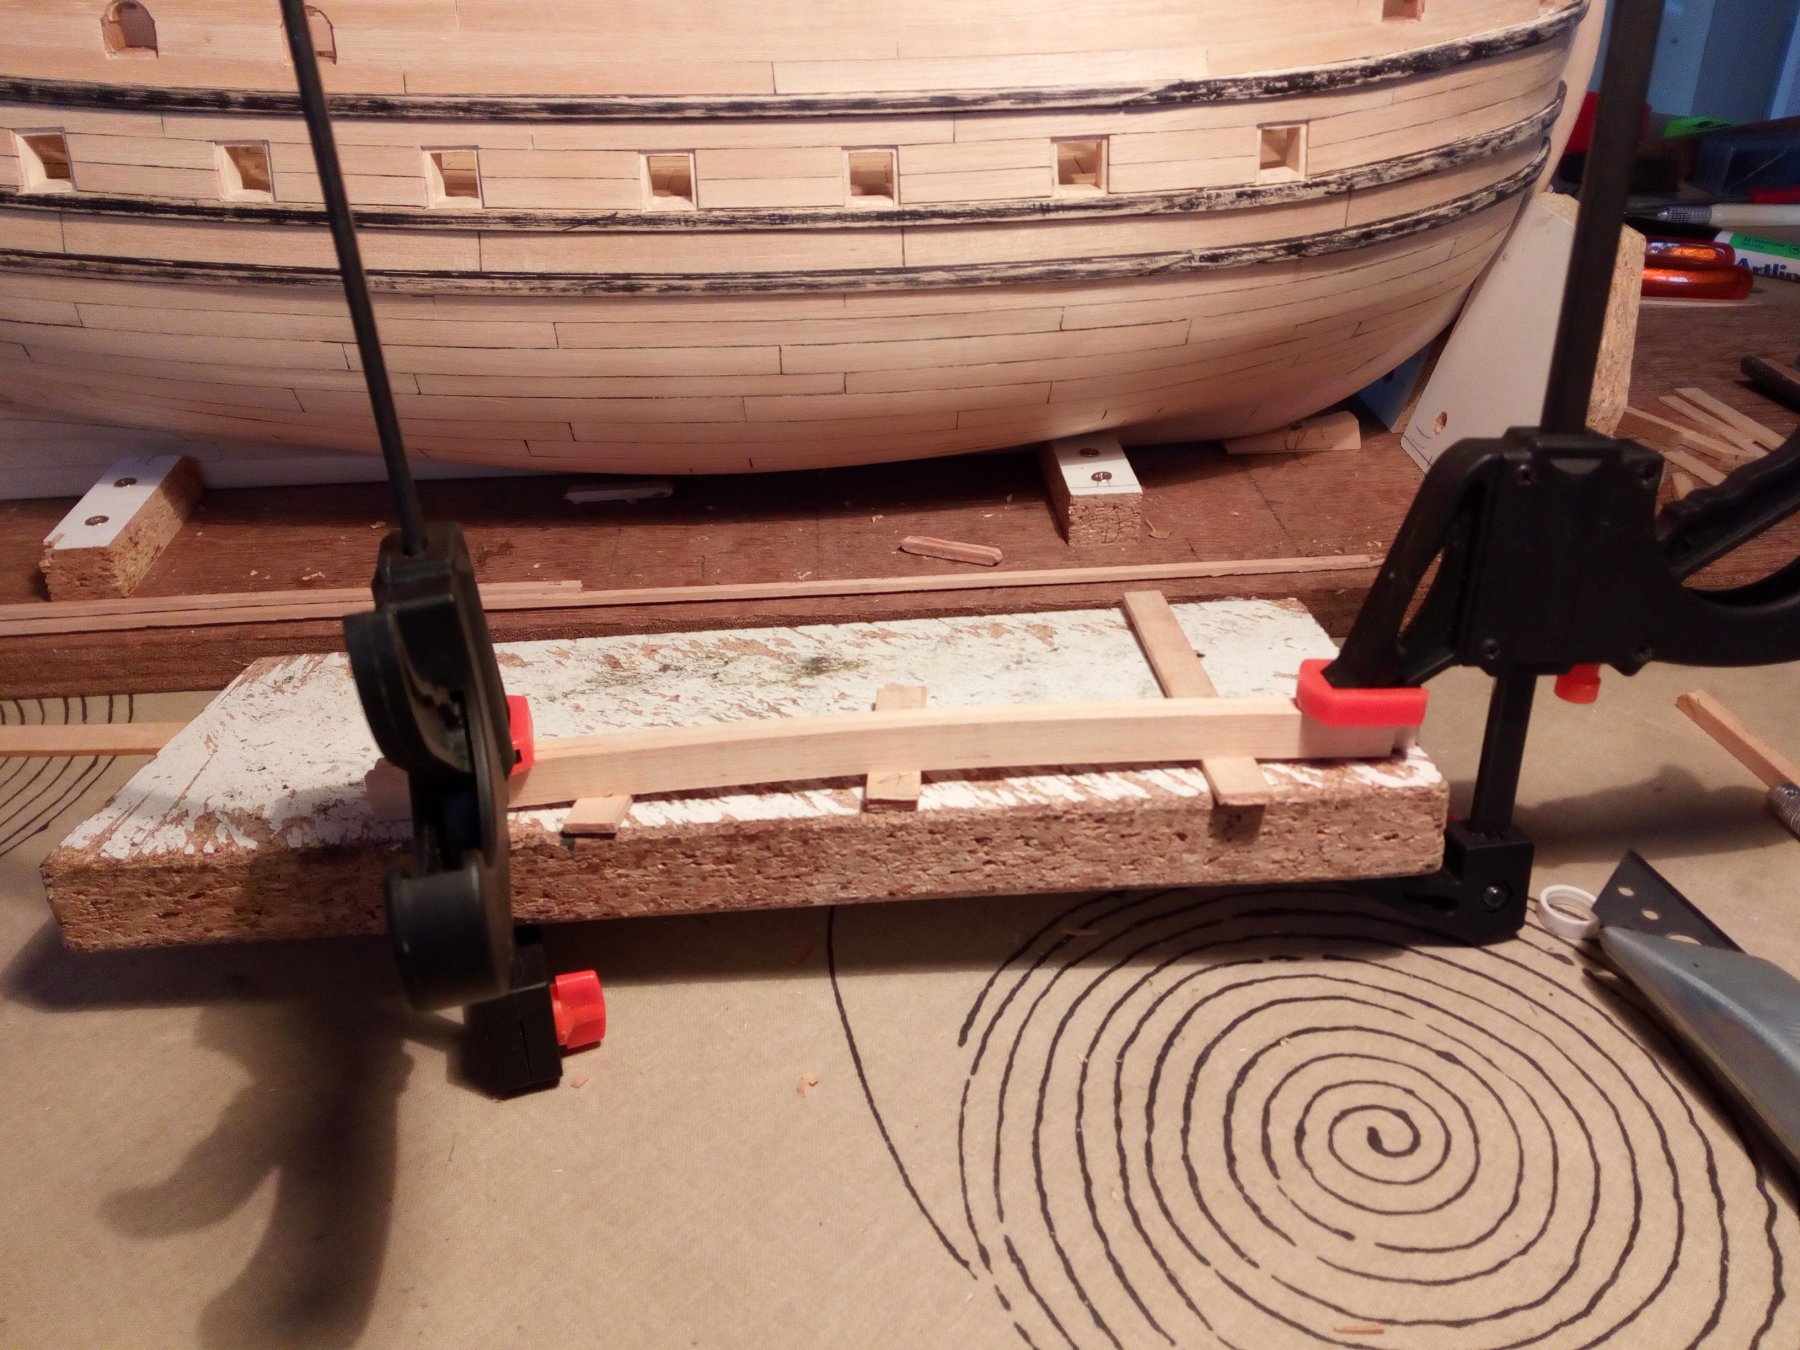
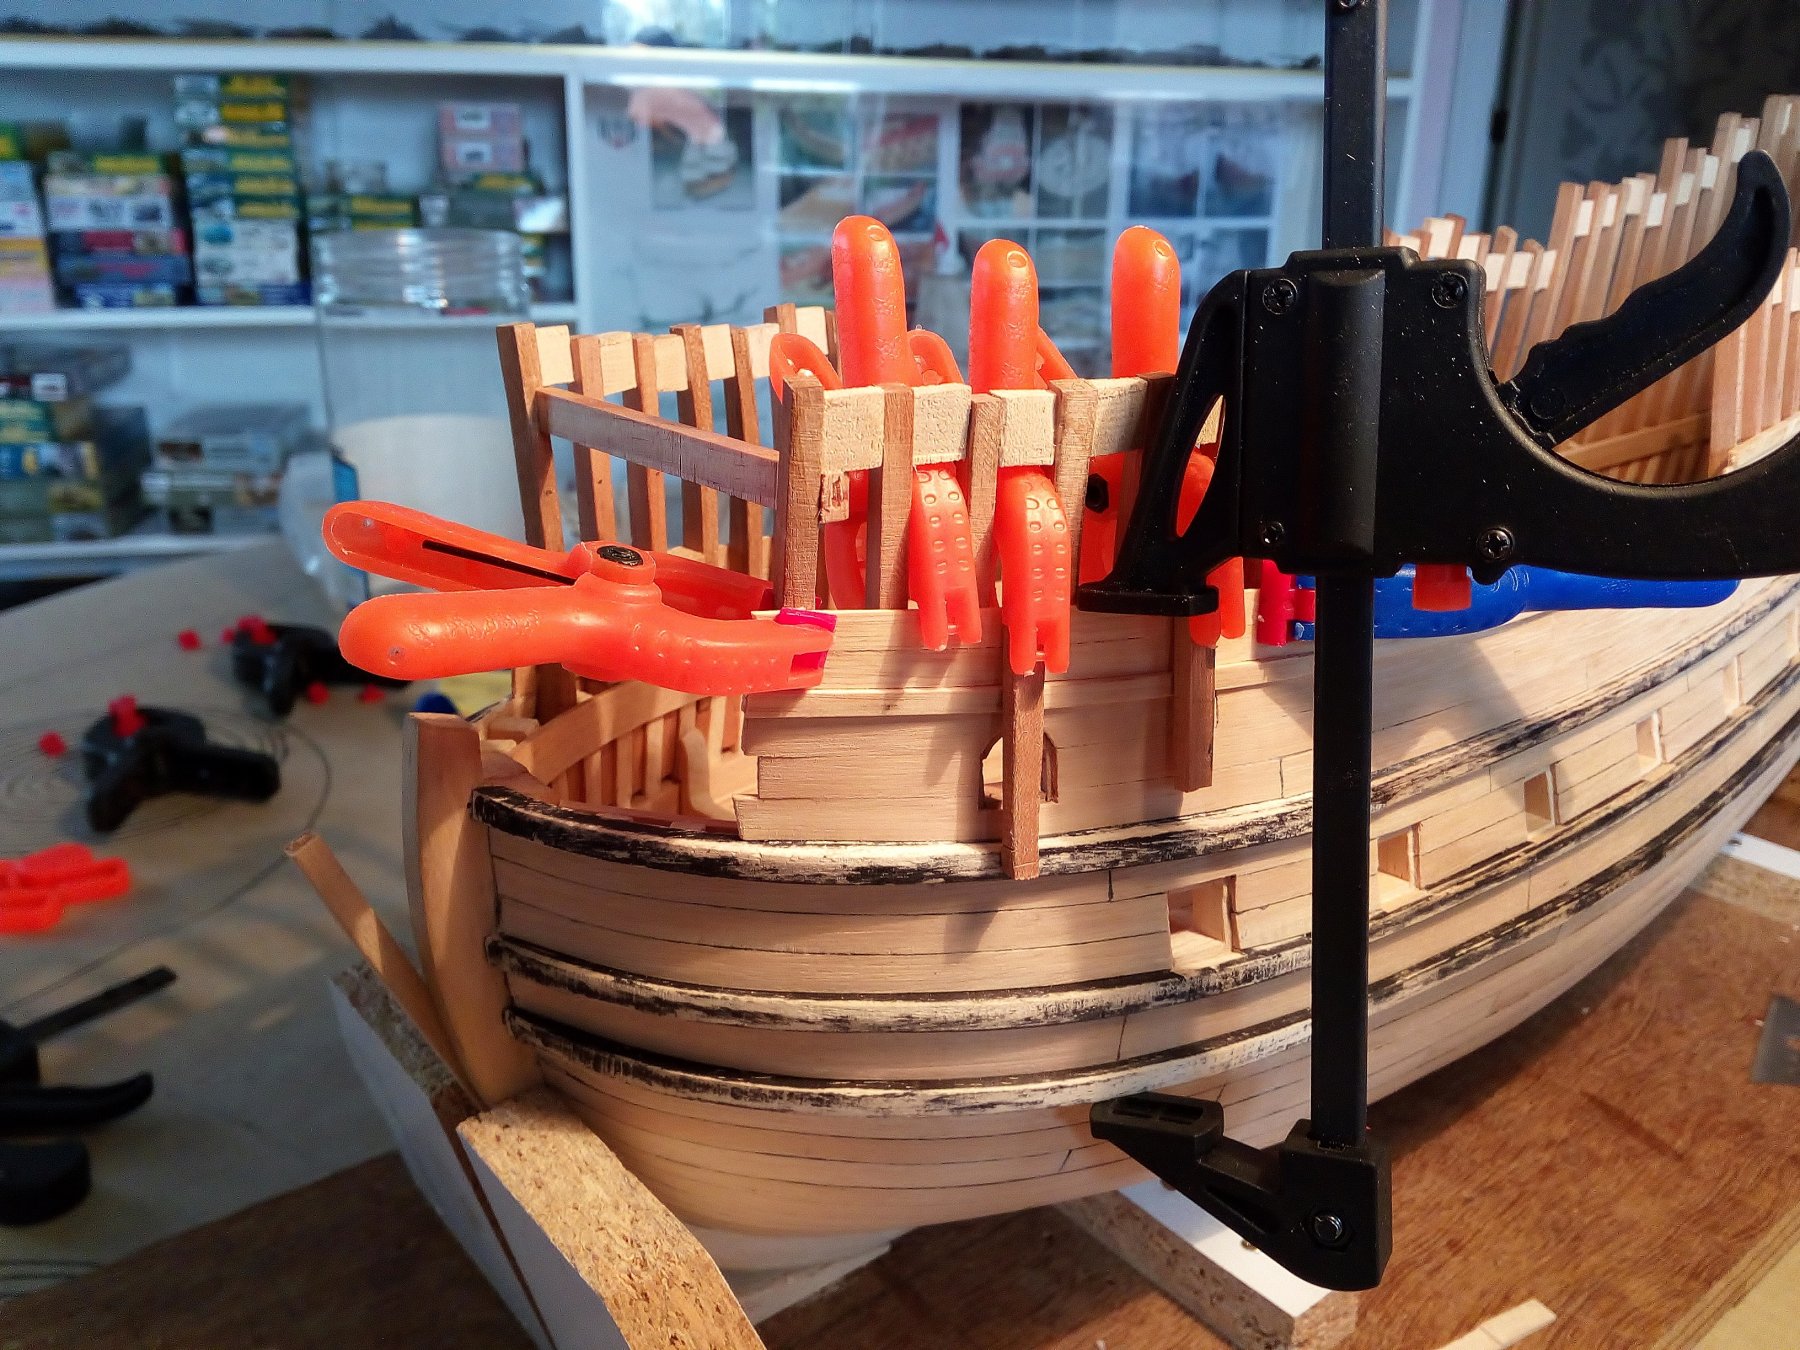
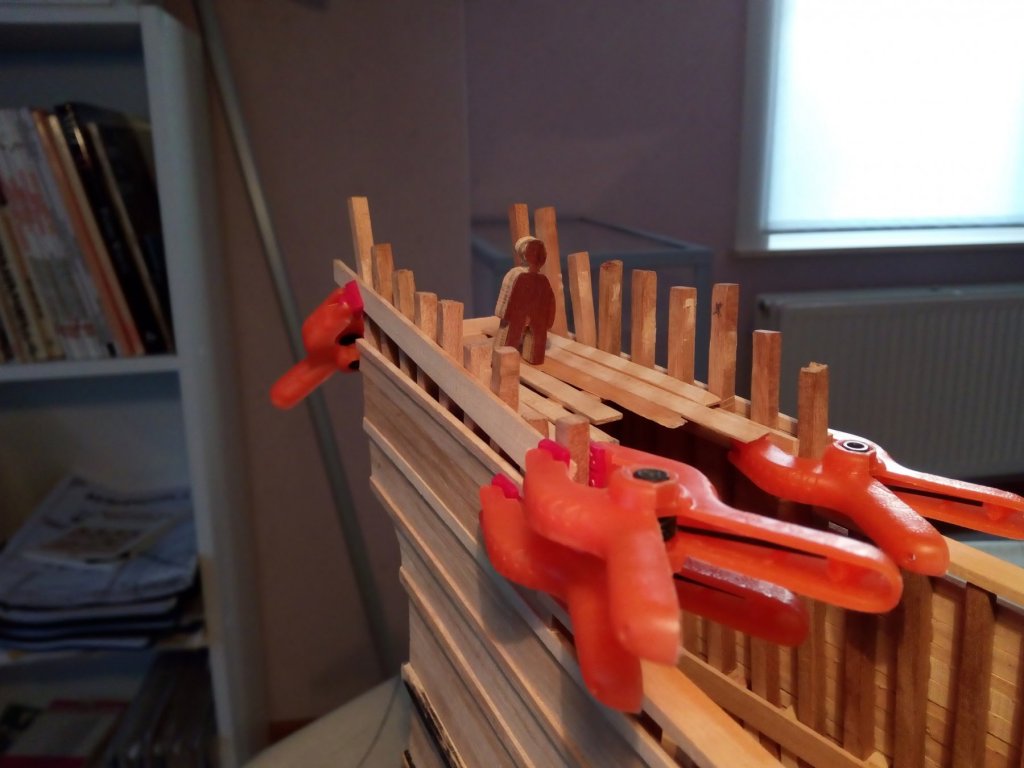
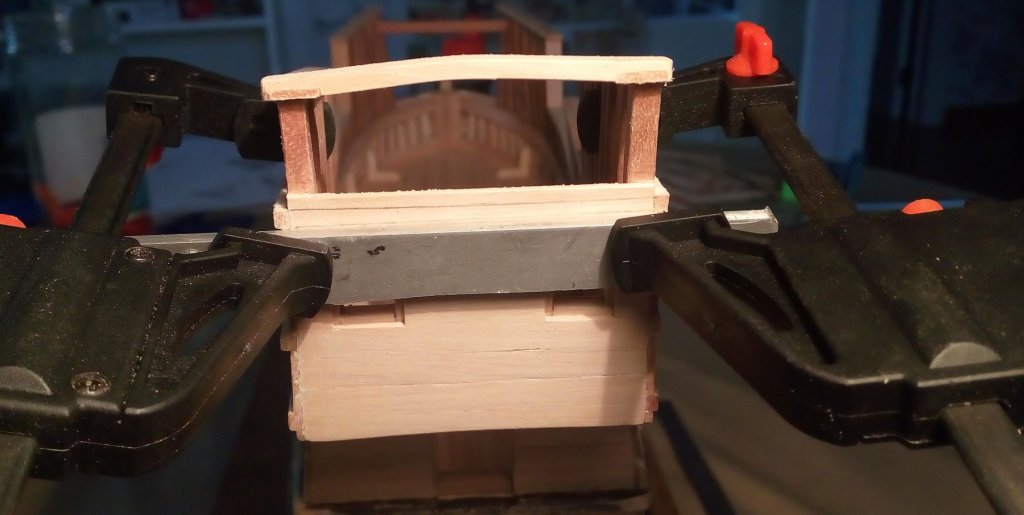
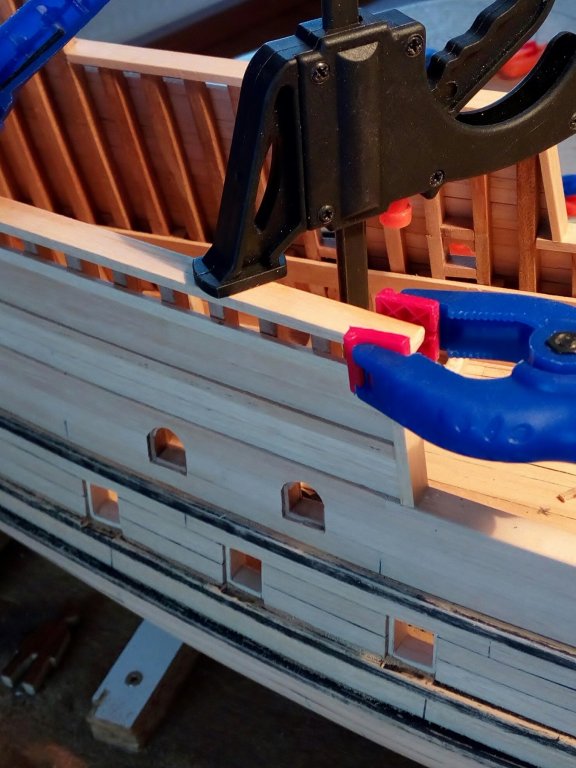
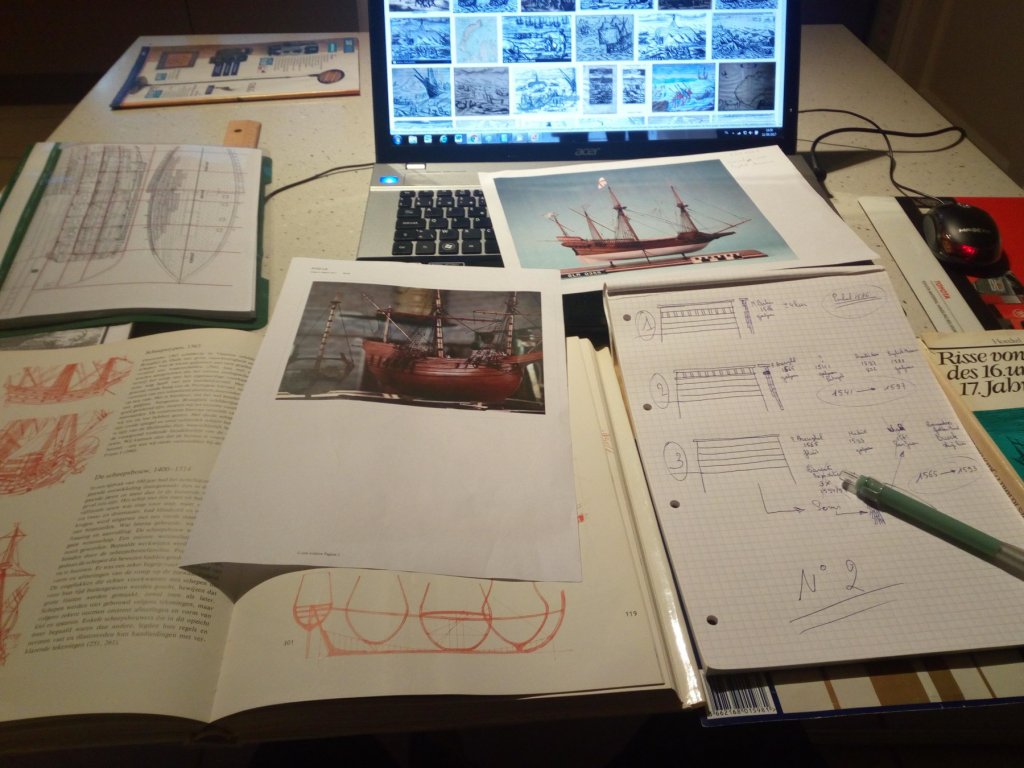
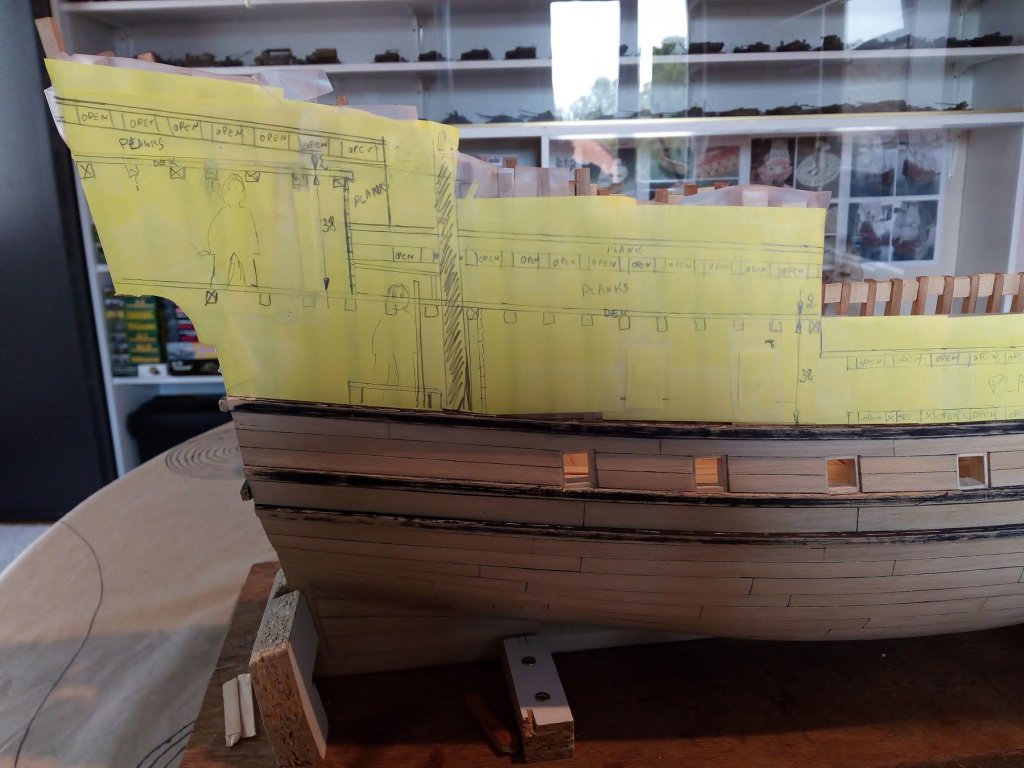
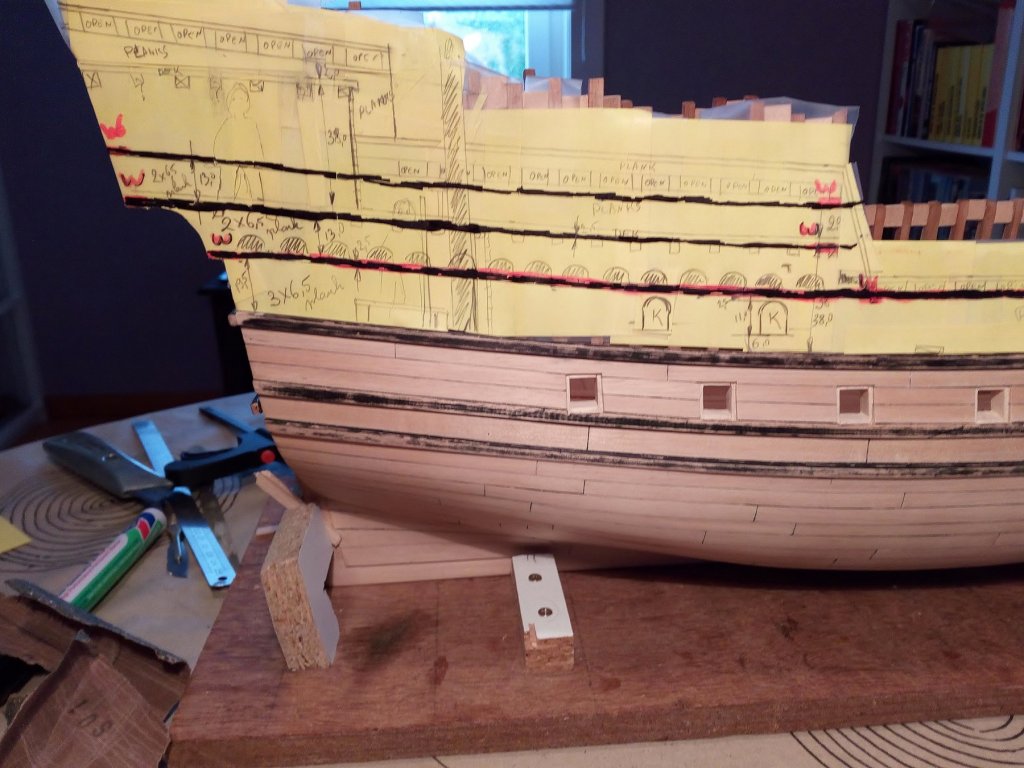
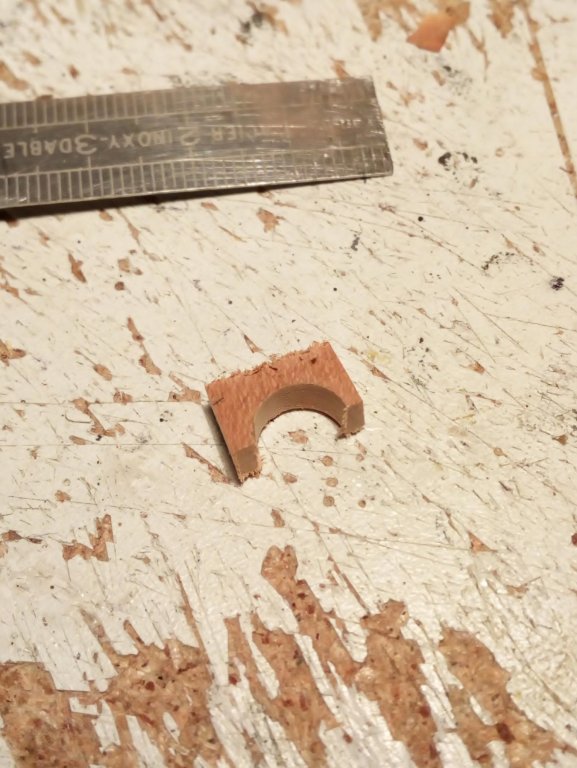
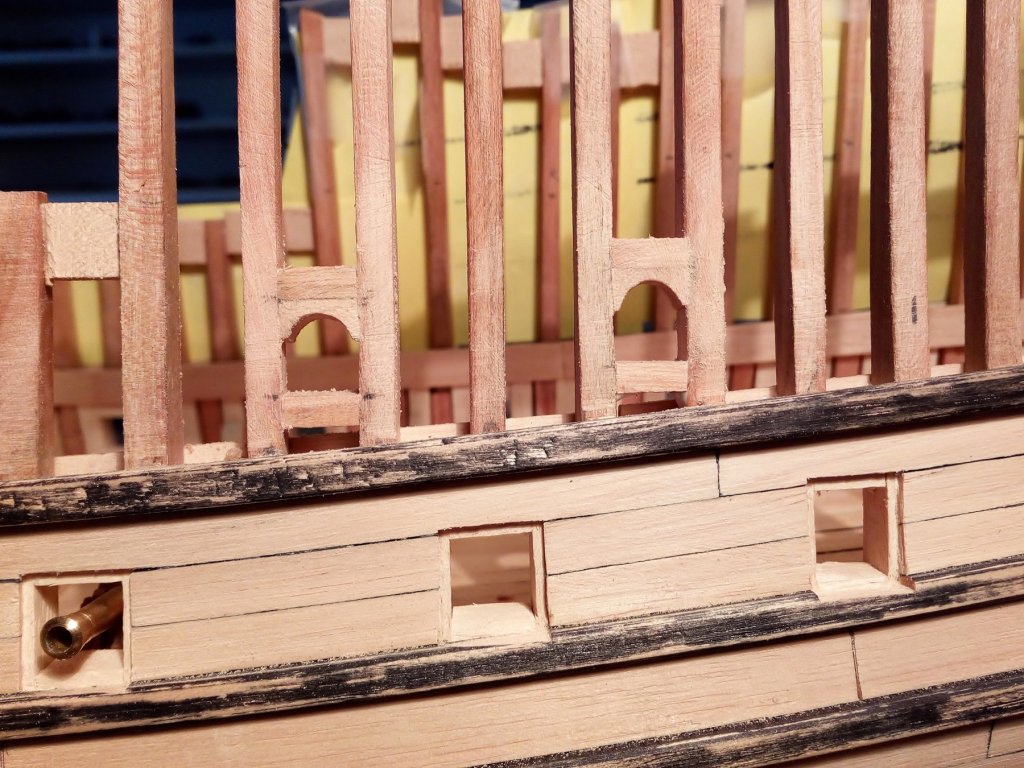
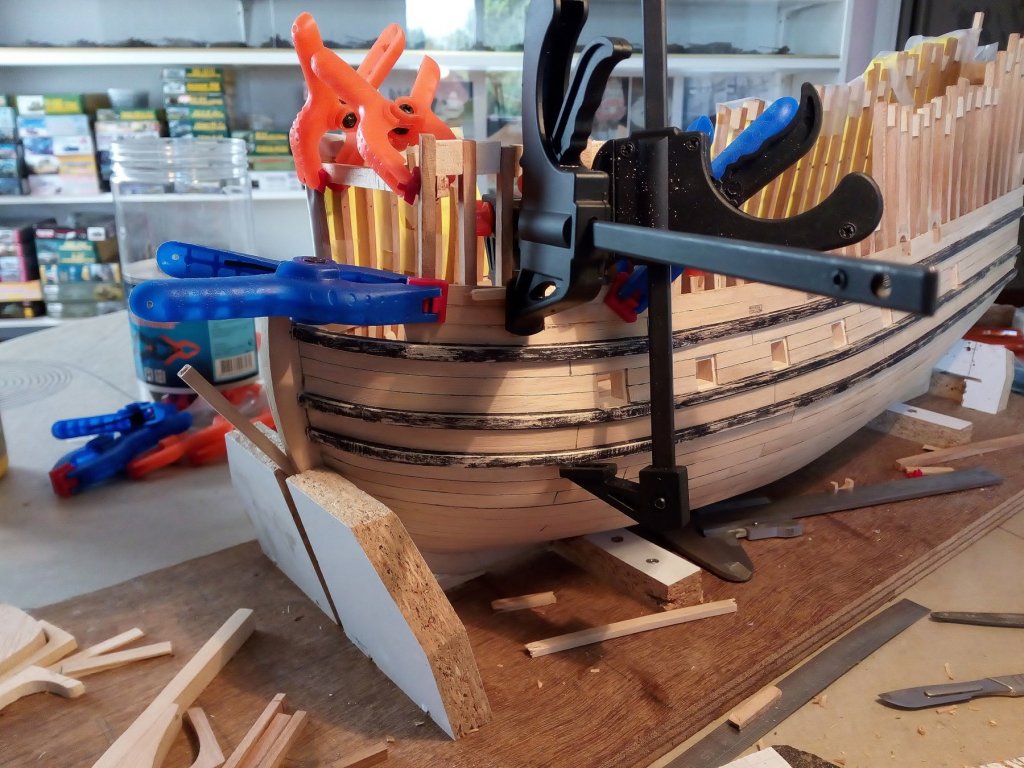
After completing planking of the stern. I had the problem of how do I now continue No good plans or drawings and no remains of a shipwreck to look at. Only some ideas in my head that I could not transfer on my model. So, why do not make drawings on the model. How? Using Post-it , magic tape, pencil and paper. very easy. If it turns out that the dimensions are not correct. A new post-it on the model and I just start drawing again. I have never seen this method . But for me this way is very helpful. Gun ports are made. The front frame is first reinforced before further planking. This is to avoid warping. And planking is started. The wales on this part of the hull are narrower then the one on the lower hull. The lowest frames are made to the proper hight. Don’t now the proper name for this part. But the idea was that is has to look if the wale is going from front to back in one line. Further planking. Scraping and sanding. The planking of the hull is almost done. But first I have to saw more planks and wales Thanks for following Index in post 1


- 756 replies
-
- 9
-
-
- galleon
- golden hind
- (and 2 more)
-
Thanks Lawrence, I do my best to build the model as good as possible. A larger scale indeed has more possibilities. Meanwhile, the planking of the upper part of the hull continues. But because I do not use plans or drawings. This requires a lot of thinking and fitting (trial and error method) I see that the build of your Golden Hind has good progress and looks very good. Meanwhile we have been on holiday and there was a lot of extra work in the garden. So, there was not much time for shipbuilding in the last month. I hope to do an update soon.
-
Nice work Enjoying an Omer on a terrace. Lekker (Yummy)
-
Thanks Steven. I fully agree with you. In the early 80's I built a M113 APC model and gave it a rusty look. Only to discover later that an M113 is made of aluminum... a stupid beginner mistake . Since then, i do research as much as possible. For now, have a good idea of how to proceed with the Golden Hind. The final shape is already in my head. Now I just have to transfer it to the model. Ps, Beautiful dromon you are building
- 756 replies
-
- 3
-
-
- galleon
- golden hind
- (and 2 more)
-
looks great! Smart thinking. Reduce the sails before they are furled. I have to remember that.
-
Thanks Michael, Since I started this model. I only realized how spoiled I was with the information i can find about military material from the 20th century. And how hard it is to find something about a ship about 500 years ago. This obviously has pros and cons. I can not give a Tiger or a Sherman tank a wrong color, number etc. Because ... there's always a picture that proves i'm wrong. Give a Golden Hind or any other ship out of that period a higher or lower deck. Nobody can say you're wrong, or right. That's just the fun of this project. First the reaserch Then the building Then Post on Msw (and in the meantime I learn more English) And then receive comments and help if needed from others Be sure to visit the Vasa again.
- 756 replies
-
- 4
-
-
- galleon
- golden hind
- (and 2 more)
-
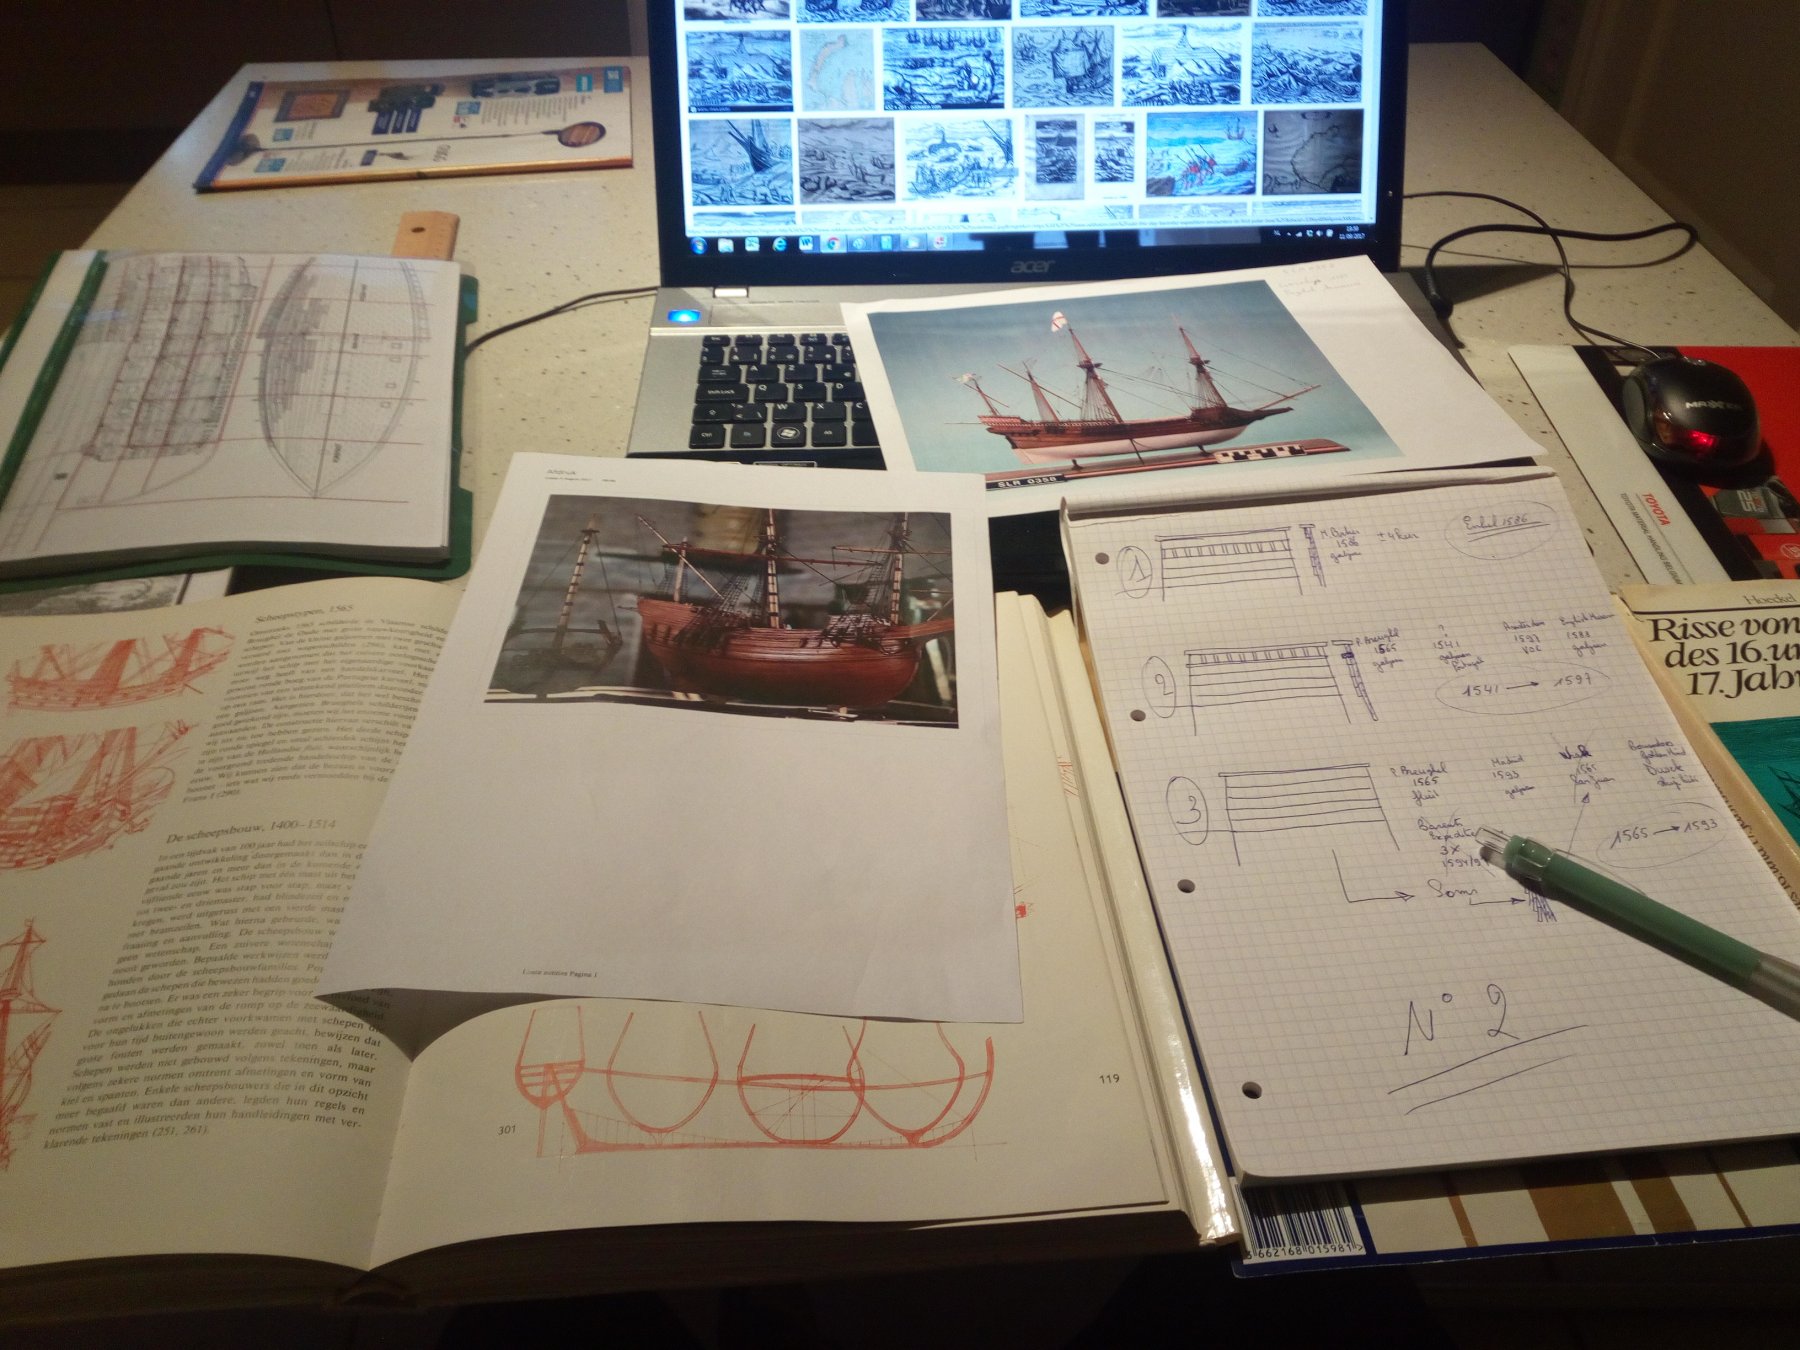
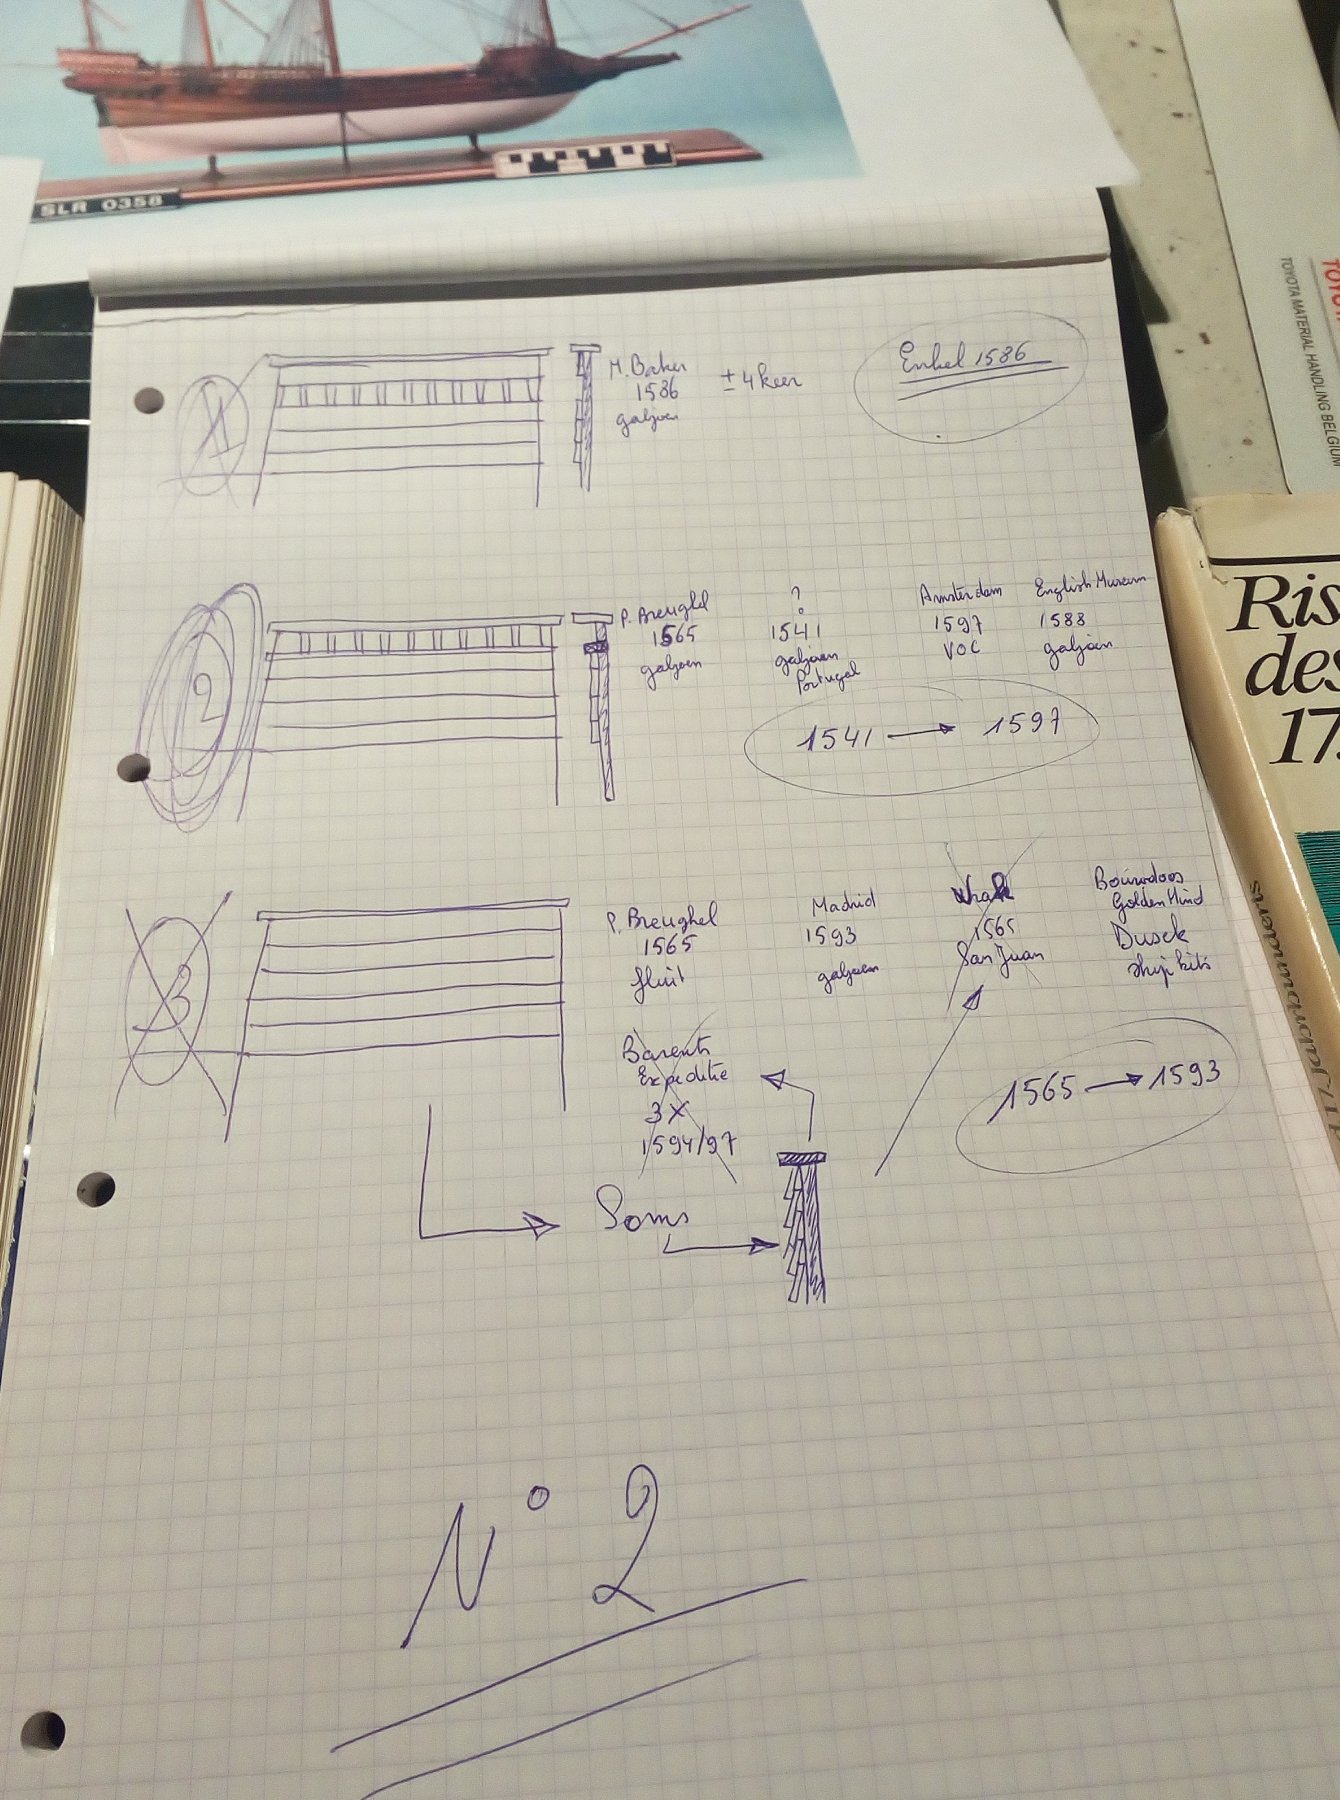
Thank you christian and michael. And everyone who follows I actually thought the hardest part was over. Well, it is not. For the time being, no remains of shipwrecks have been found for the upper part of ships from the 16th century. About the build: All that remains to use as an example are drawings and paintings from the 16th and early 17th century The Mary Rose, which is a little too old. And the Vasa, which is a little too young. And: The "Detailed" plans of ships from the 16th and 17th centuries. Usually these plans are drawn in the 19th and 20th centuries. They are useful, but compared to the remains of shipwrecks, they are full of mistakes. Using the modern replicas of the Golden Hind to build a model is also not the right way to me. So now, Before further planking, first think and make drawings I also think the stern is quite high. As it is now built. It must remain a stable ship So, it is possible that poopdeck wil be lowered. The inner parts (frames) wil be explaned later. When i complete the orlop deck And in September we will visit Batavia ship in the Netherlands. Not the same ship as the Golden Hind .. But ideal to think about life on an old sailing ship. I gowing to take a lot of photos (and if allowed post them on MSW)
- 756 replies
-
- 2
-
-
- galleon
- golden hind
- (and 2 more)