HOLIDAY DONATION DRIVE - SUPPORT MSW - DO YOUR PART TO KEEP THIS GREAT FORUM GOING! (Only 20 donations so far - C'mon guys!)
×


Srodbro
-
Posts
299 -
Joined
-
Last visited
Content Type
Profiles
Forums
Gallery
Events
Everything posted by Srodbro
-
Rigging Instructions 1/96 Revell Constitution
Srodbro replied to kruginmi's topic in Masting, rigging and sails
In the original post, in the second and third pics, the instructions on the left are the older set. The copyright date of the older set - 1966 - can be seen under the "Standing Rigging" title. The copyright date 1976 can be seen on the newer set in the lower left corner of the "Lifts" diagram. In the pic of the belaying pin diagrams, the lower Plan is the older (I have them from the kit I purchased in 1968) and the copyright date 1976 is visible in the upper Plan. So ... the rigging plans got better, but the belaying plans got worse? -
Captain Al's pic of the American Eagle shows several lines wrapped around the gaff and boom, holding the sail in place when the gaff is lowered. If those are utilized, then, as Russ points out, the peak and throats halyards can be pulled taught as if under strain from the weight of the gaff. Worked ok on my schooner model.
-
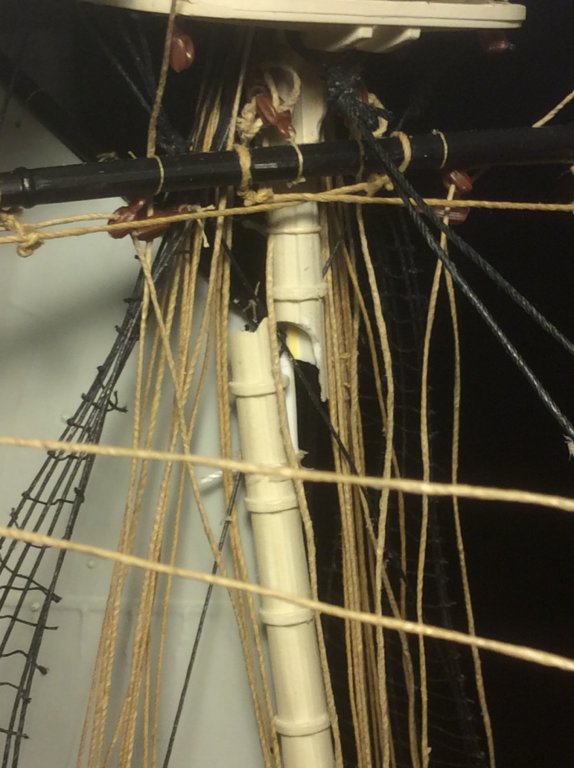
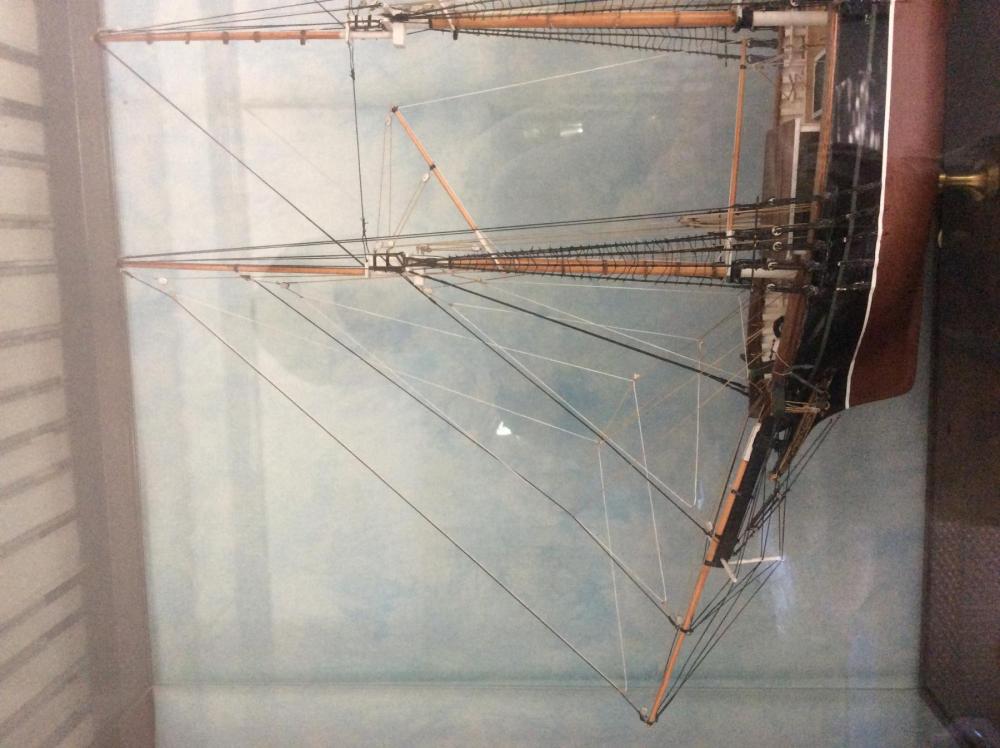
As stated by wefalck in his reply above, overly tight standing rigging can do a job on a mast (see the pic). In this case, I had returned to my model of Connie that I started 50 years ago, to finish rigging her. A styrene mast that sat in the attic for decades found a way to slightly warp, and I thought I could straighten it out with tight rigging. I was successful up until about a week after I completed the model, when there was an audible "ping" in my study, and an odd cant to the mizzenmast.
-
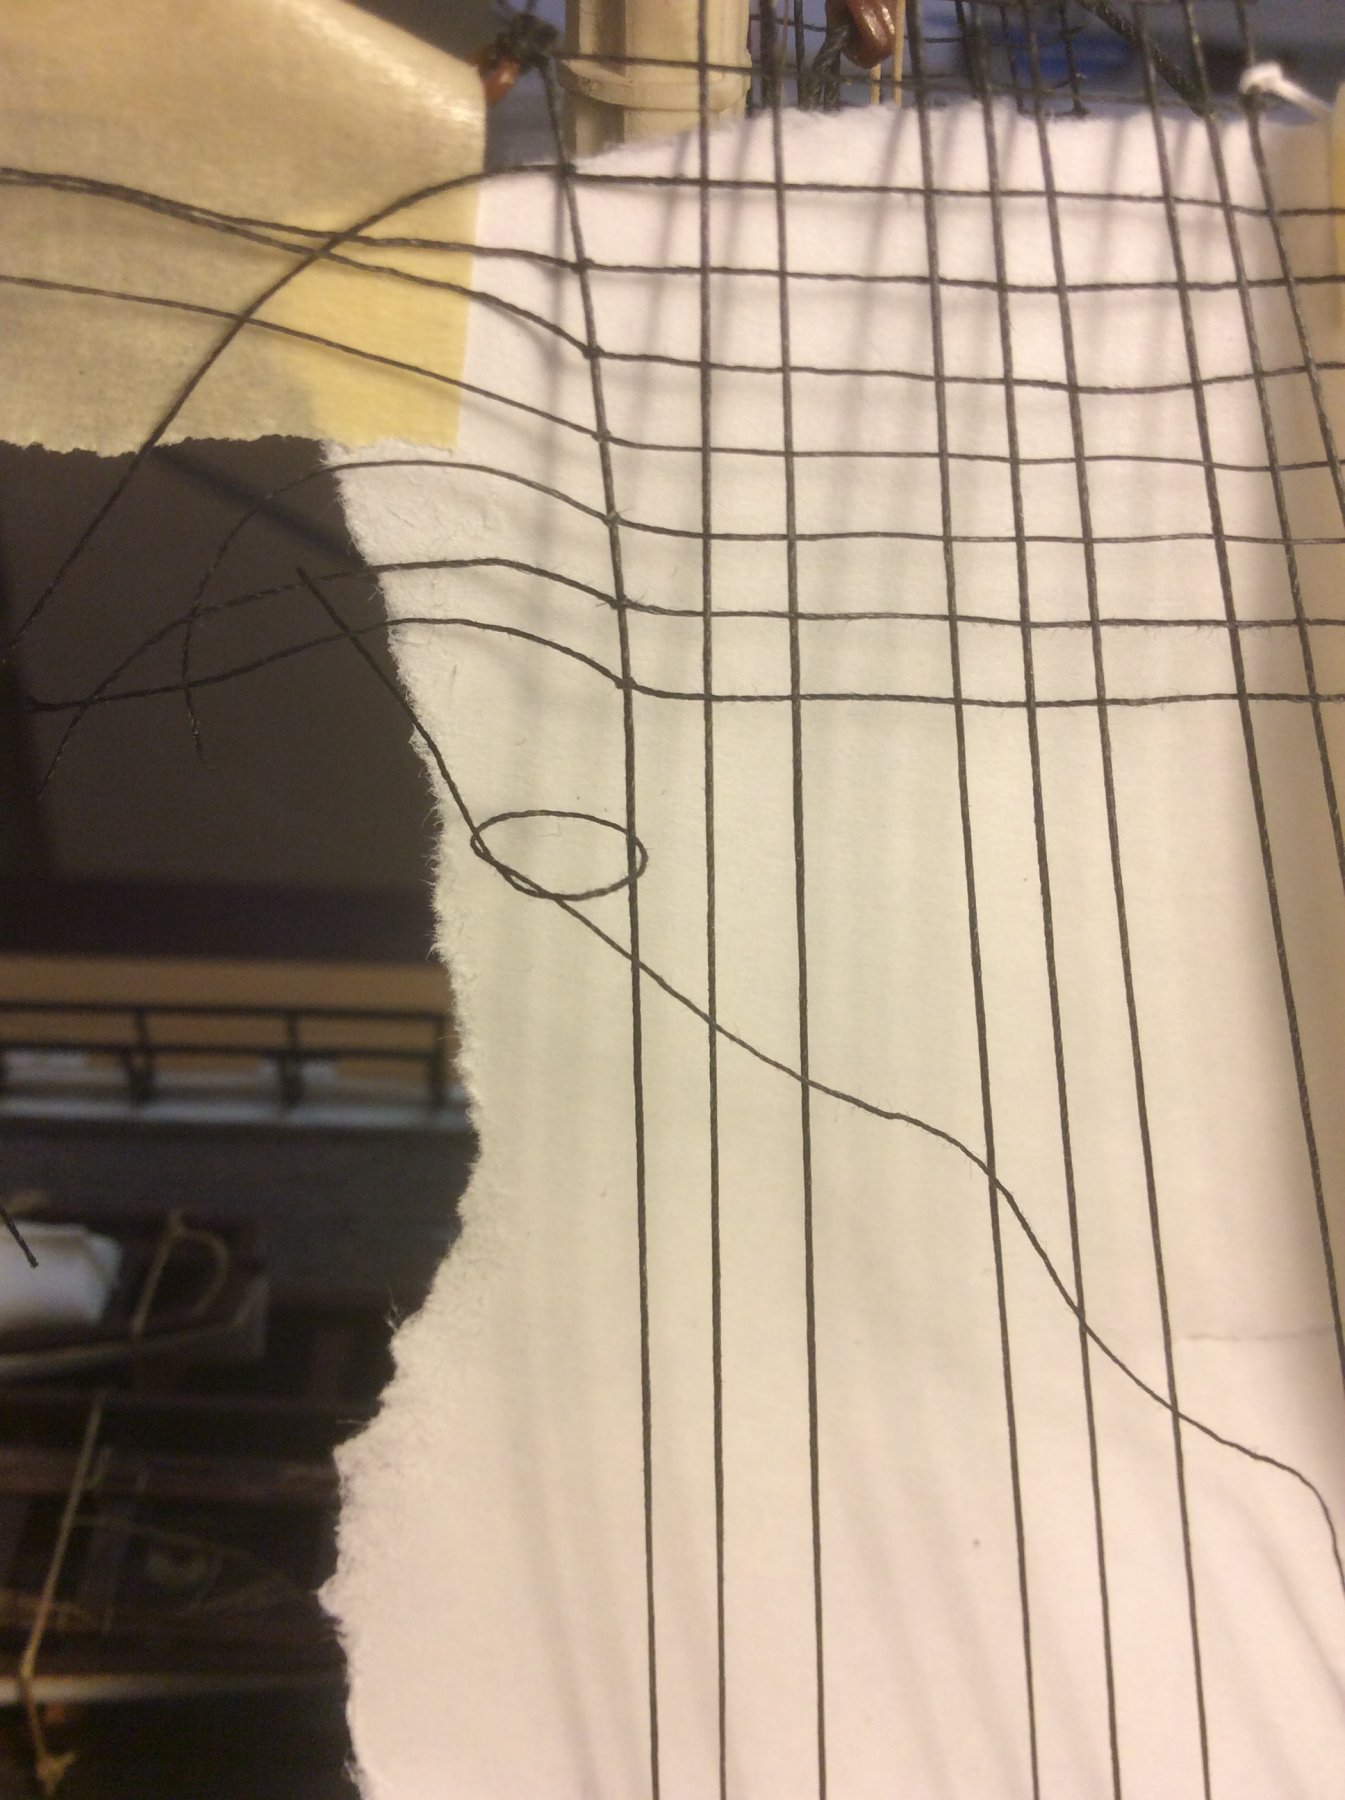
S. Coleman: i, too, favor limiting my knot tying on ratlines and use of 50/50 to secure them to shrouds. I am curious as to how the ratlines were held in place while you glued to the shrouds. Here is my method, as shown in the pics: 1. Secure a piece of paper behind the shrouds. This to better be able to see what I'm doing, and to separate the ratlines rigging process from the rigging in place behind the shrouds. 2. Secure a strip of masking tape along side of and parallel to the outermost right hand shroud. 3. Use a simple overhand knot to secure the ratlines to the outermost left hand shroud. 4. "Weave" the ratlines, in-and-out across the shrouds. Very gently lay the tail of the ratlines across the strip of tape. Repeat the process for several other ratlines, alternating the passes over the shrouds. Note that there is still some "hourglassing" of the shroud that the ratlines was tied to, but that can be eliminated by lifting the ratlines off the tape and adjusting to the final location before applying glue mixture. After glue dries, trim the ratlines ends. 5. Since I took the pics I've learned to begin the process about midway between the lanyards and the top, and to install only about five ratlines, adjust, then glue into place. This makes the effort to eliminate the "hourglassing" much less, and, after the glue dries on the initial five lines, helps prevent it on installation of the next ratlines above and below. I have found this works well on lower masts, where there are more than, say, four shrouds, but it doesn't work well if there are four or less, as the tension on the shrouds in the "basket weave" is most responsible for holding the ratlines in place until glued. Hence my question on how you hold the ratlines in place until glued.
-
Given the short build period, remote build location, and need to build cheaper, and the intent to go directly into battle, would either ship have originally been painted anything but a basic coat of black all over, if at all?
-
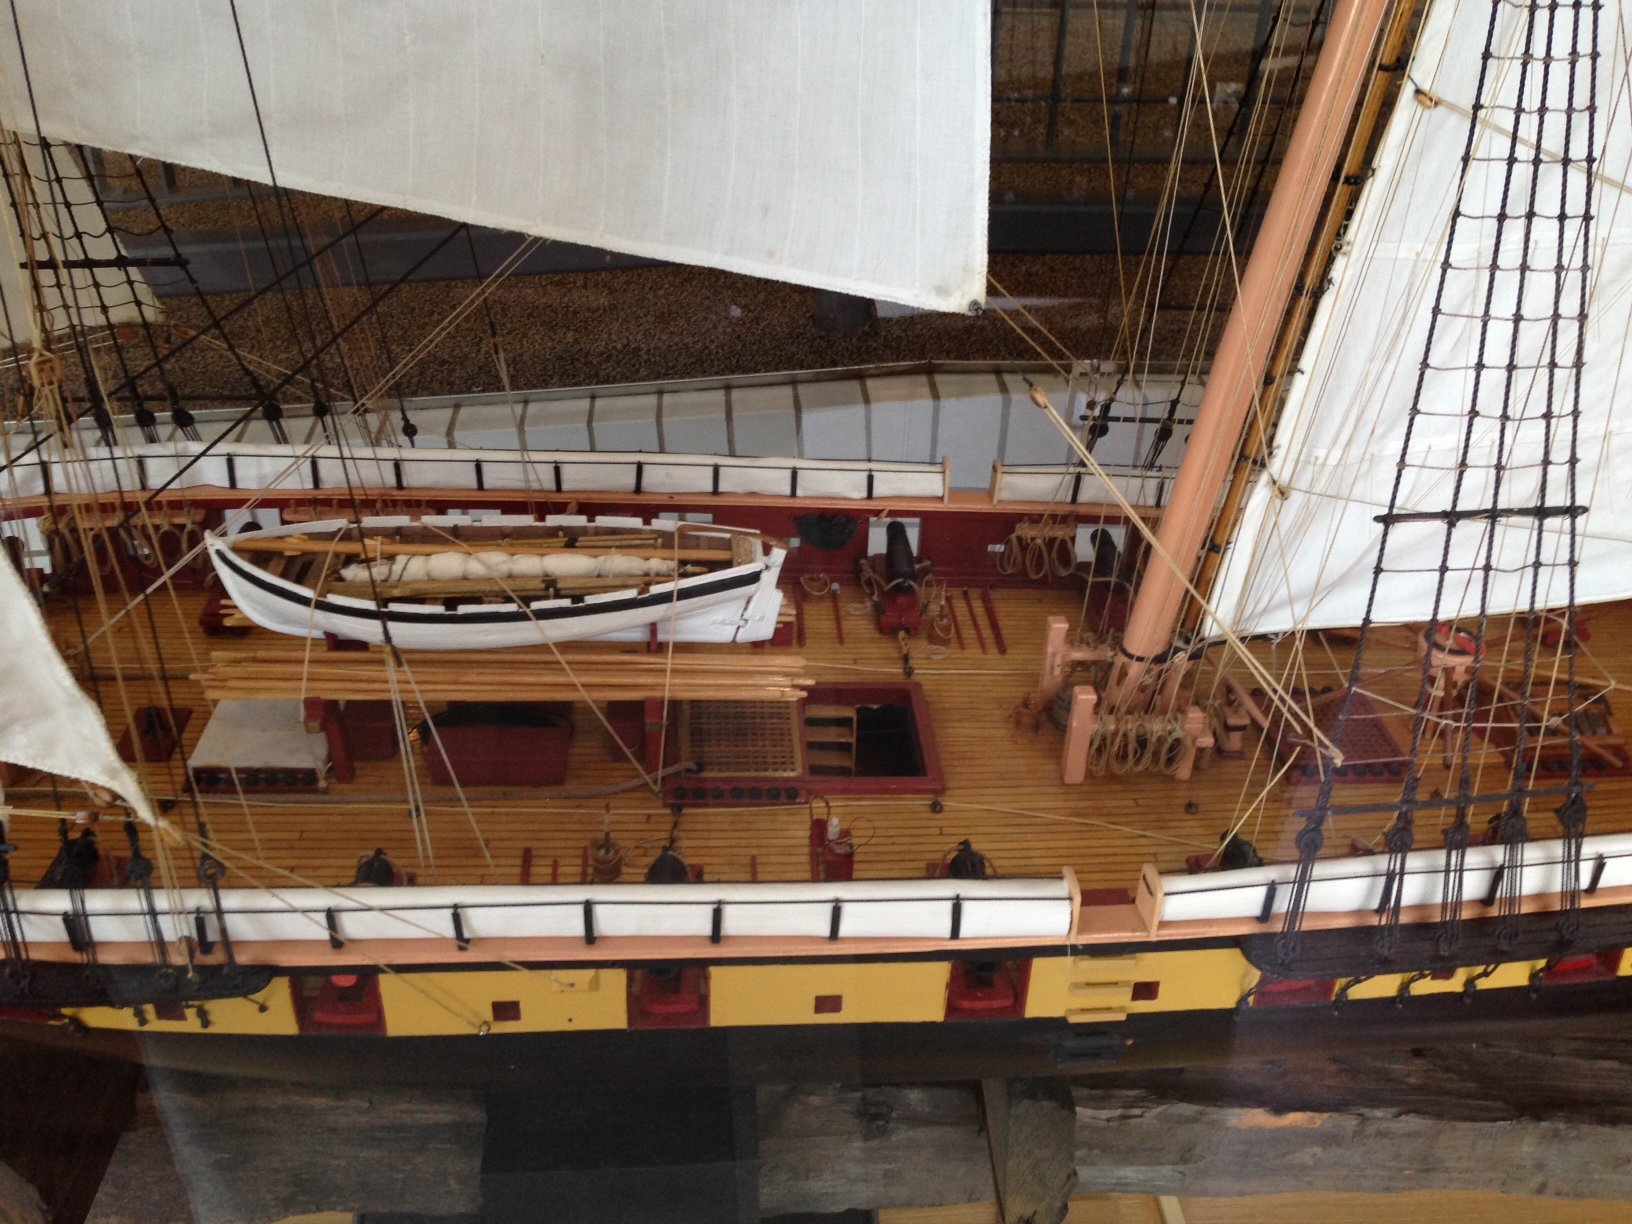
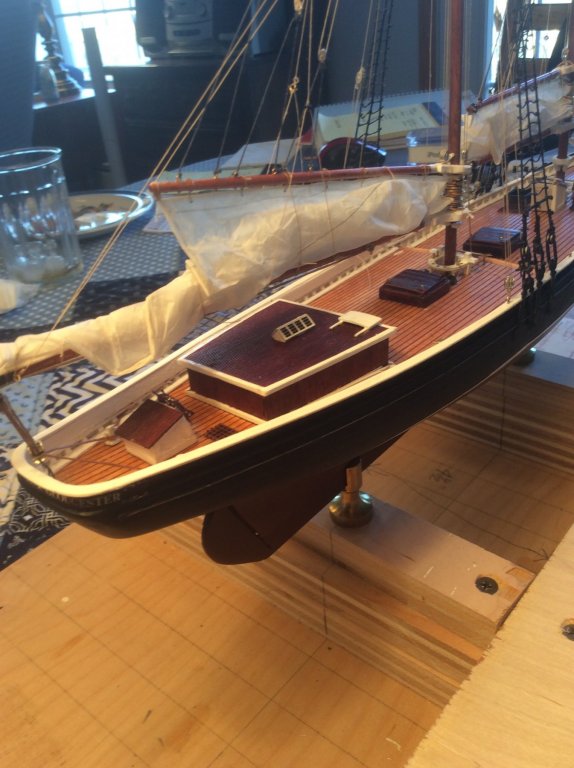
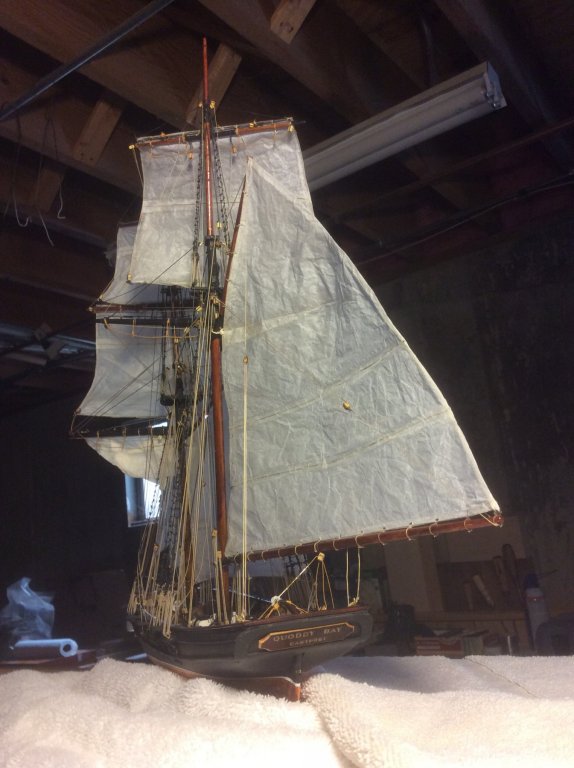
I built Dapper Tom as my fourth solid hull model (Eastport Pinky, Fannie Gorham, We're Here). All previous kits were Blue Jacket. The last kit hull blank was so bad (the bow-stern centerline at the deck was skewed out of line with the keel centerline so badly that you could never match the lines on the plans) that I swore off solid hull kits. But then I purchased on eBay a vintage (1950's or early 60's) partly finished kit of Dapper Tom. The hull was pine, and the shape matched the templates very closely; hats off to that unknown modeler. The instructions in the old kit were on one sheet of paper so I bought the Modelexpo plans and downloaded the instructions. I have enjoyed this model so much I've bought the newest modelexpo Dapper Tom kit. Here's the thing: except for the extreme sections at bow and stern, the rough hull blank in this new kit is close enough that light sanding will make it acceptable. Now, nobody is going to see my model in a museum, so the lines just need to be pleasing enough for the case in my study. Here are pics of the near completed kit. I chose to put sails on her. Also, since she really never existed, I chose to rename her Quoddy Bay in homage to the privateers that sailed out of Eastport around 1813.

-
Suggest White-Jacket: Life on a Man-of-war, by Hernam Melville for 19th Century American Navy life on a frigate. Also, there is an unforgettable chapter in Victor Hugo's novel Ninety-Three, about the battle with the canon (from whence "loose canon" derives) Amazon has a $2 kindle edition version, with period illustrations. For us oldsters, suggest Joseph Conrad's Youth. A good short read on a winter eve with a glass of port.
-
Would the sealer affect or be affected by CA or other adhesives?
-
I have the plans for the six-masted schooner Wyoming, and would like to build a half-hull model of her at 1/8"=1' scale. This will be quite large (about 43" long x 3" thick x 3 3/4" tall). I've made several solid hull kits, most of basswood, one of some sort of pine, which have turned out well, but the largest hull was only about 18" long. I have read the Half Model tutorial, and several of the forums, and am seeking advice on the proper wood (poplar seems popular) to use. I plan to paint the hull, so staining is not a consideration. Any suggestions? Any concerns about warping or twisting of such a long, narrow piece? Thanks.
-
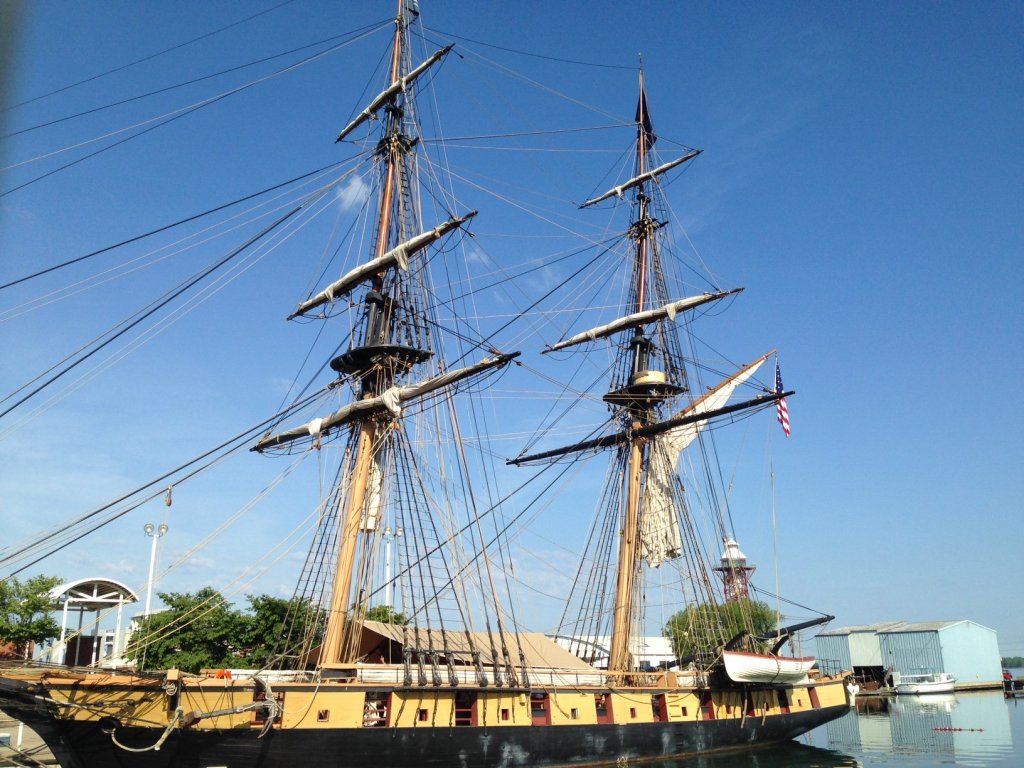
Thanks for the comments. I recognize the pic that Mr. Zardoz included as a model at the Erie Maritime Museum. Clearly this differs from another model at the same museum, and of the full size vessel. Looking at other pics online, I see at least two other variations in paint scheme (one with a narrow red stripe above the predominant yellow). Aside from paint schemes, I am not finding any information that clearly identifies differences. That being the case, I presume that nobody could have serious heartache if I called my in-progress build of a Niagara kit the Lawrence, in honor of the fallen commander of the Chesapeake?

-
I recently read Walter Rybka's Lake Erie Campaign of 1813. The two brigs, Niagara and Lawrence, were built at the same time and fought in the same battle. Perry initially commanded the Lawrence which took the biggest battering by the British, then he transferred to Niagara. I wondered if there were any notable differences between the two craft.
-
Working with braided steel lines
Srodbro replied to skipper1947's topic in Masting, rigging and sails
Skipper1947 ... hope this reply isn't too much off topic, if so I apologize. Can anyone address how how to straighten braided or twisted steel wire? Grsjax mentions the possibility of annealing the steel wire. I thought you could only anneal steel by very slowly cooling it after eating to bright red (not quenching, and not air cooling). To bend it I thought requires forming while red hot. ( at least, that is what I've experienced with "piano" wire) Not sure how to do that with braided steel. Thanks. -
Perfect ... thank you. There should be loose ends, and they are not tied to the tiller.
-
Here is a pic of the tiller rigging I was referring to. It doesn't seem to do anything.
-
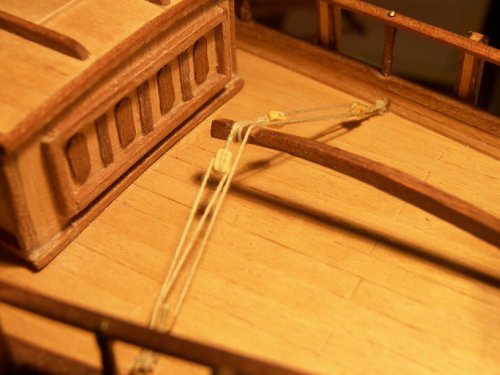
I am working on a Baltimore Clipper model and have a tiller, but know helm. I've seen pics that show some lines attached to the tiller that don't seem to attach to anything else .... I can't figure their purpose or advantage. There is a pair of blocks attached to the man-end of the tiller, which have lines rove thru them to a pair of blocks at the deck, and a line running across the deck. If there was a helm to which they attached, I'd get it. But, steering is only with a tiller. Can anyone enlighten me?
-
Biddlecombe's "Art of Rigging" shows (Plate VI, Fig. 10) an anchor on the bottom with the cable run thru the anchor ring, but extending further down to and around the flukes, secured with a clove hitch, but also continuing back to the surface and attached to a buoy. Not clear if an anchor bend occurs at the ring; I would assume it does otherwise it's just a clove hitch holding things together. Question is: When would this arrangement be used? When bottom is known to be snaggy? When the need to possibly slip the cable due to anticipated storm? Having the cable terminate at a buoy would allow a boat to retrieve the end, and then weigh the anchor from the fluke end if snagged. Obviously, the decision to use this arrangement would have to be made before the anchor is dropped.
-
Just displaying my ignorance: What are "baggy wrinkles " ? Anything like cross catharpins?
-
There are many methods to bend planks for models (see the many tutorials on the Framing-Planking forum). We know shipyards had steaming houses and chambers for bending planks. My question is: Your frigate having just done battle with the enemy somewhere in the Indian Ocean, how does YOUR ships carpenter bend planks to repair YOUR ship?
-
Do you think pre-painting elements will affect the ability to cement them together?
-
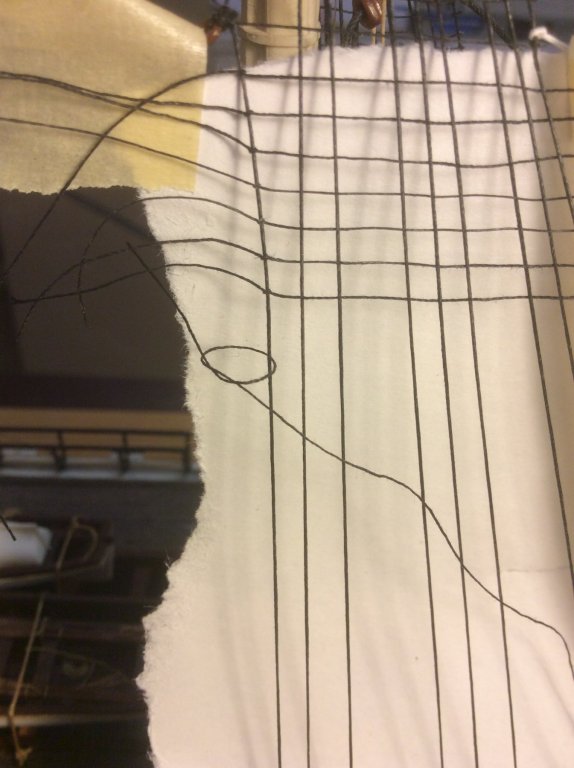
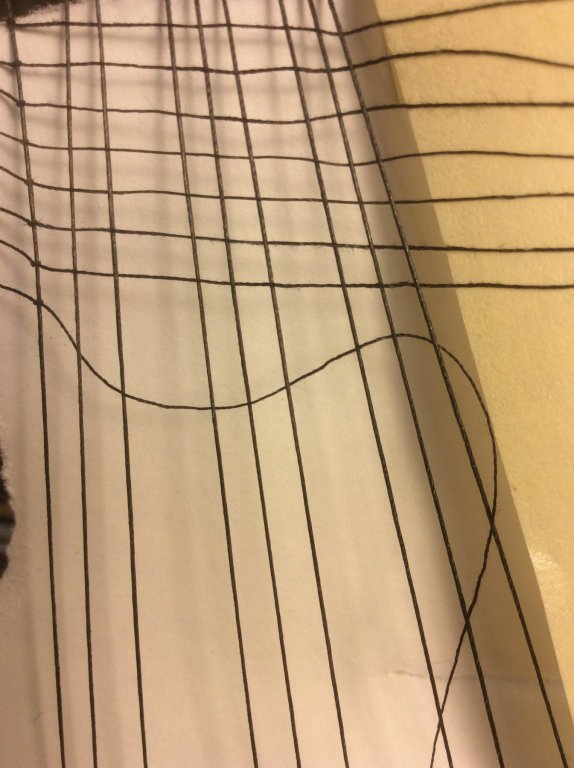
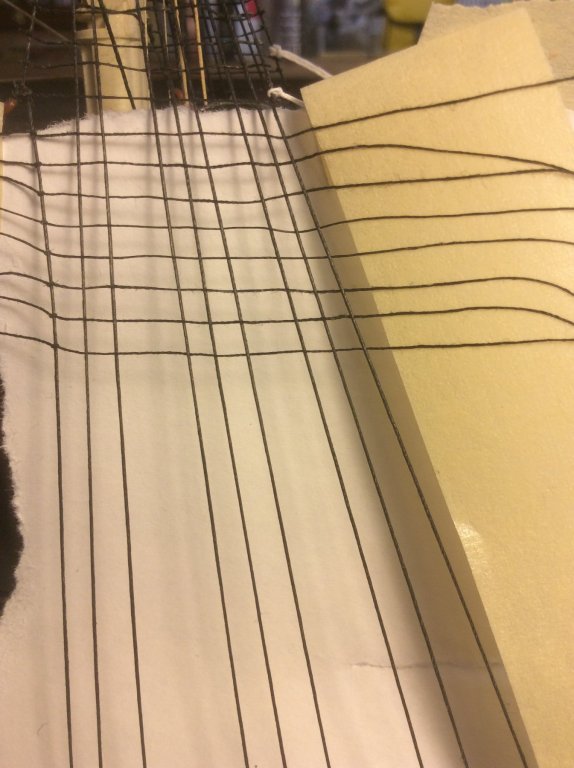
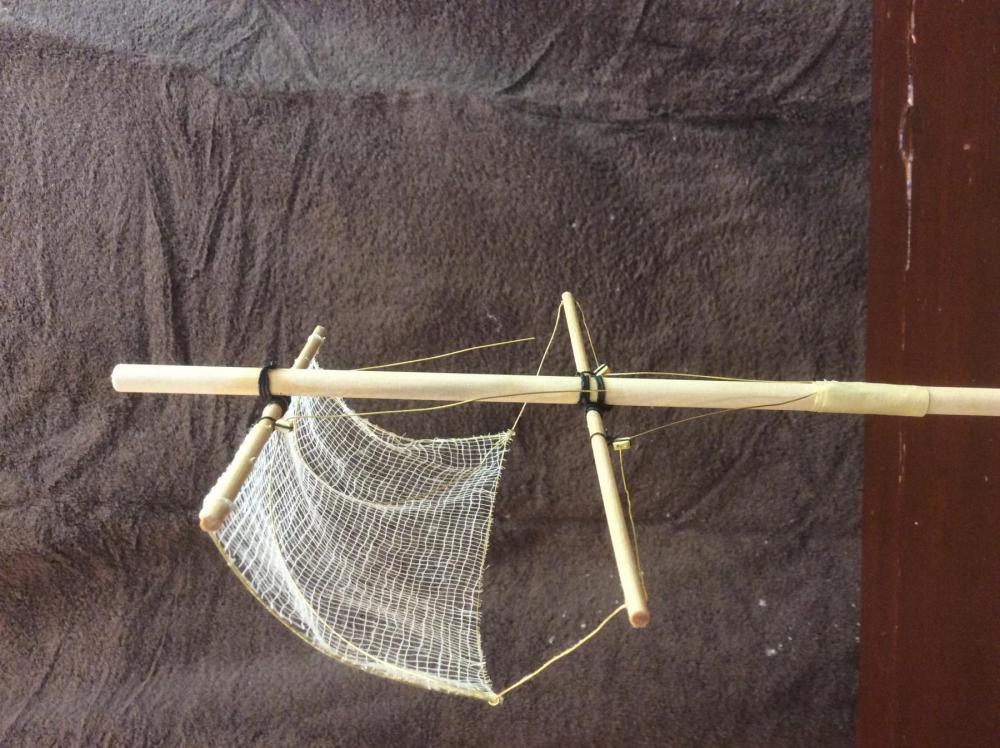
Ok ... Call me Steve. Here is a pic of what I was trying to describe for "Ghost sails". Just the sail outline in white thread. I built a quick mock-up today to test the idea. I think with a bit more refinement, I may have an acceptable alternative to the outline method. In my original post I was wondering if anyone else had tried this approach, and problems and solutions. Comments welcome.
-
I am a fan of modeling with "ghost sails", the practice of rigging a contrasting color "sail" that is just an outline of the sail, with connections to halyards, tacks and sheets. I guess it is for those of us that can't decide if we want to model sails or not. Clearly, it isn't "realistic", but for me that's OK. I've been satisfied with this technique on models with fore-and-aft sails. But, I am currently doing a Baltimore Clipper at 5/32" equal one foot, and want to do the square sails on yards in a raised position. I have not been satisfied with ghost sails I've rigged as square sails. I've been considering adding a little more substance to the sails on this model by making the sails of "cheesecloth" or gauze, to maintain some of the transparency of a ghost sail, while still giving a good impression of the sail area on this type vessel. Has anyone tried this?
-
Not oak. Tried it and it looked good until it was glued down. Then, the scale of the grain was too pronounced. Color was nice, though.
-
I obtained on eBay a kit advertised as "vintage", seller stating that kit had been stored in a closet for years, and had some work done on it; that it was actually a combination of two kits; appears complete, instructions but no plans. I am building this kit, and am remarkably satisfied with it. Whomever started it shaped the solid hull beautifully (there are still a couple of his pencil marks on it). The hull appears to be pine, really seasoned well and a joy to work with. Same for most wood strips. I obtained from MS a set of plans, and found updated instructions on their website for a kit that appears to be currently out of production. The plans are copyrighted 1954. One set of instructions (2 sets came in the box) is dated 1969 and has "Model Shipways, Bogota, NJ" noted on it; the other instructions (much more condensed) are undated, but is notated "Model Shipways, Fort Lee, NJ". So here are my questions.... When did kits transition from pine to basswood? Why? At least when well seasoned it (pine) seems a great material. When did MS move from Fort Lee to Bogota (and then to Florida)?
-
- 4
-