HOLIDAY DONATION DRIVE - SUPPORT MSW - DO YOUR PART TO KEEP THIS GREAT FORUM GOING! (Only 20 donations so far - C'mon guys!)
×


Srodbro
-
Posts
299 -
Joined
-
Last visited
Content Type
Profiles
Forums
Gallery
Events
Everything posted by Srodbro
-
Roter Löwe 1597 by Ondras71
Srodbro replied to Ondras71's topic in - Build logs for subjects built 1501 - 1750
Love the insight of your modeling techniques! Really nice craftsmanship. -
Regarding your response to my comments about the advantages of solid hull vs. POF or POB: (not wanting to further hi jack MTaylor’s log)
Yeah ... remarking station lines frequently is a pain, that’s for sure. However on the flip side, it ain’t hard to establish a waterline! But one spends much more time referencing station lines, it is true.
-
I’ve been following your build with great interest. This is going to be a great project. Your recent posts cause me to raise a question: On a ship with a complicated hull shape, that will present huge ( at least to this modeler) planking challenges, why not create a solid ( bread-and-butter) hull lay-up to begin with? Admittedly this question is coming from a rank neophyte modeler, clearly out of the league of you and most of your followers, but it seems to me most plank-on-frame and plank-on-bulkhead scratchbuilds wind up adding so much blocking that one has nearly a solid hull in the end, anyway. Why not start with one? Obviously, if one desires to model any interior detail a solid hull is out of the question, but aside from that, I am at a loss to come up with drawbacks to using a solid hull method. I am, of course, ignoring the satisfaction one may enjoy approximating true shipbuilding techniques, and the fact that one may have a sizable investment in technology and tools aiming to perfect POF or POB modeling (which can be big considerations), but to more quickly go from 2D plans to a 3D object, a bread and butter lay-up seems the ticket. ( Kit manufactures, I assume, find producing POF and POB kits more economical than producing kits with solid hulls AND planking to cover them) I apologize for sounding critical ... that’s not the intent. Merely trying to ascertain the fascination with POF method when scratch building. Maybe it just comes down to personal preference. Thanks. Sorry for the soap-boxing in your log. I’ll enjoy following your progress.
-
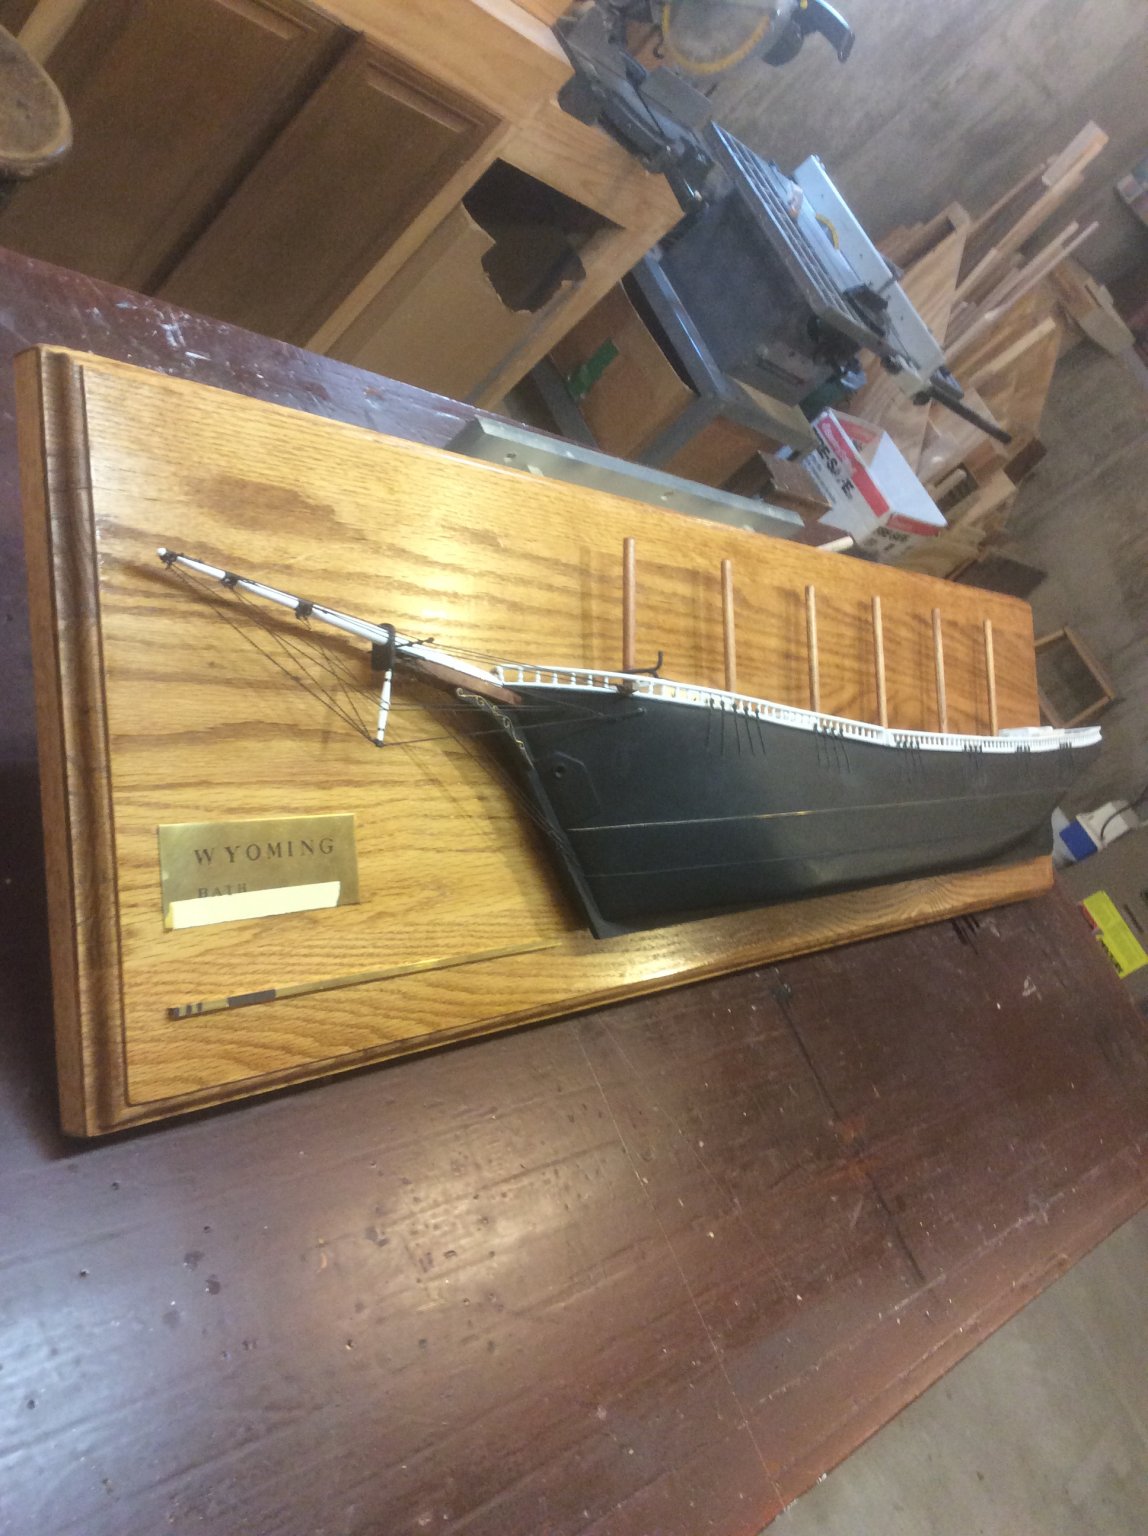
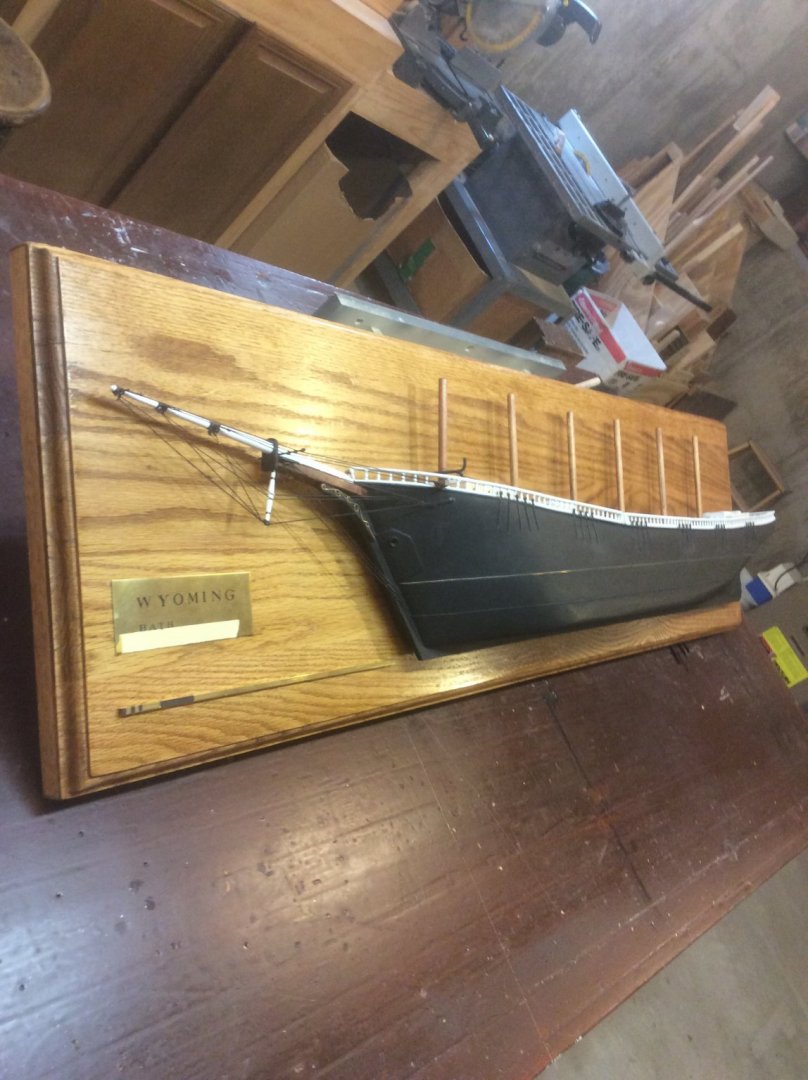
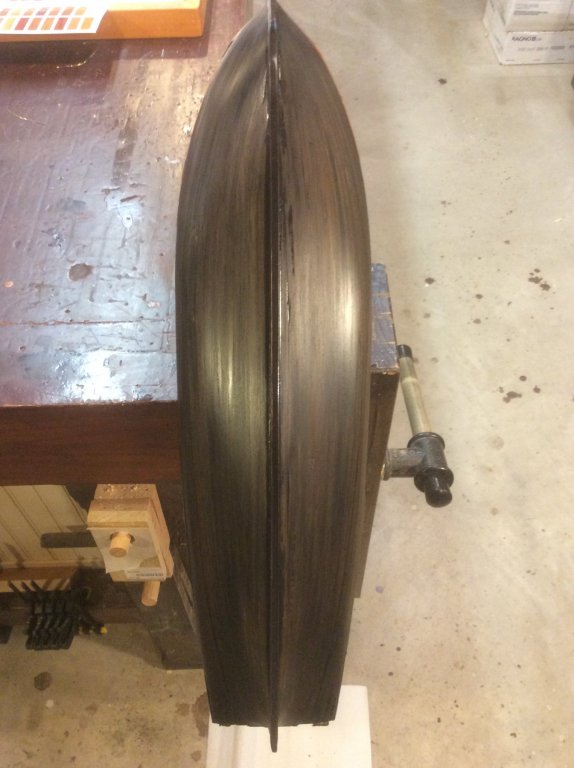
Yeah, Wyoming at 1:96 would be an impressive kit. I was intrigued by reading the book A Shipyard in Maine and, just to appreciate the size of her, built a half-hull model Of her at 1:96 a few years ago. She was really big! Took up all the space on the workbench, and I made her with stubby masts!
- 356 replies
-
- 8
-

-
- red jacket
- finished
- (and 1 more)
-
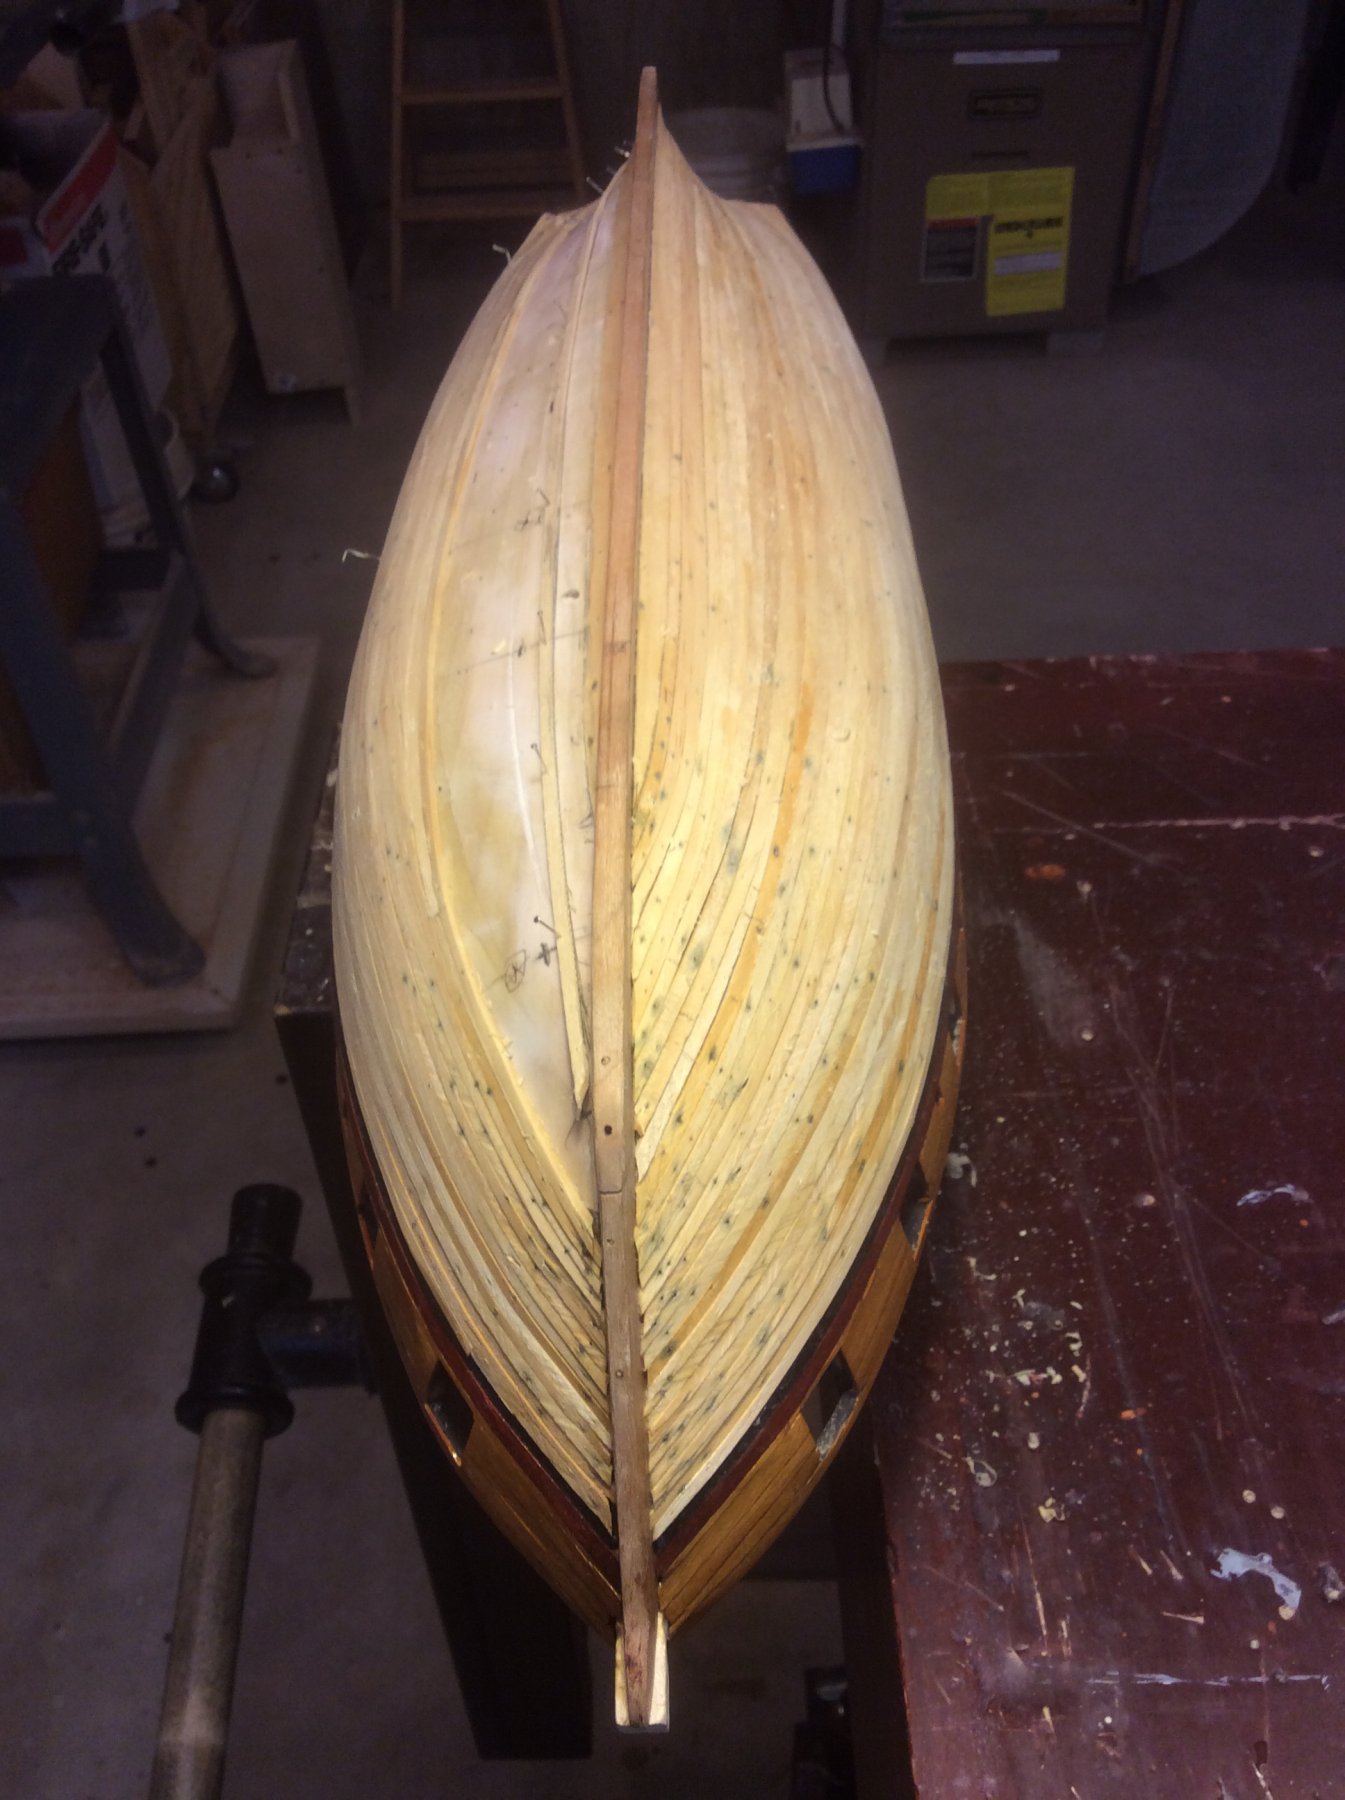
We’re Here is a nice choice. After I built Hero I did Fannie Gorham, then We’re Here. My last one was Niagara, but Instead of building her plank on frame, and having only experience on solid hulls, I built Niagara’s hull solid, then planked it. Got all the thrill of planking without the hassles of trying to keep bulkheads square and aligned with the keel, and had an infinite points at which planks could be glued. Had, I thought, very satisfactory results.
- 35 replies
-
- 2
-
-
- yankee hero
- first build
- (and 2 more)
-
Nice job. What’s next?
-
Mark Please allow me to slightly hijack your log to ask OC about his suggestion in the post above. Can you ( OC) expand on your technique of painting CA onto wood to strengthen it? Does that help only with minor surface chipping, or does it penetrate enough to actually reinforce, say, a timberhead, or, say, a small spar thru which you want to drill a hole near the end? Again, Mark, sorry for the digression.
-
Love following your work. Have you ever used any of United Fruit Company’s “Great White Fleet” of refrigerated cargo ships (“Banana Boats”) as a subject?
-
Ah-Ha! Good news. Glad I found this. Will be following.
-
Will miss it. And will anxiously await your next build log. Thanks for all your contributions.
-
I built a solid hull version of Niagara that I called Lawrence and planked over the solid hull. Had no problems. I made my own planking from clear white pine, cheap and readily available. I think it turned out well. With regard to using other woods in lieu of painting ... the red stripe below the gunports is Redheart, and the lighter stripe above is Osage Orange. I know both will darken over time, but I treated both with Hard Oil which will slow the process.


-
Very nice work. I have followed with interest and admiration.
-
Hi, Jeff This Kit was my first, as well. It was very frustrating to me to try to get the blank to match the hull profiles of the plans ... so much so that more than once the kit wound up in the trash can ( subsequently retrieved). But, with much filler, filing, sanding, more filler, more filing, more sanding, I finally got to what was pretty close to the drawings, and acceptable to me. I found that hull blanks vary greatly from what you would expect to get based on the drawings (true for several manufacturers), and frequently are not symmetrical side to side or end to end (I even had one where the deck centerline was about 10 degrees off from the keel centerline!). Ultimately I found that building up my own solid hull using layers of Wood cut out based on the kit drawings and sandwiched together with glue gave me a much closer starting point than the kit blank. Since then, I’ve built half a dozen solid hull models, which turned out pretty good. Here is what I concluded: Nobody is going to see my model in a museum so it just has to be good enough for me. Symmetry from portside to starboard side is desirable but generally not critical because one almost never sees both sides at one time. And, there is no sin in using a lot of filler, if the hull is to be painted. Yours looks pretty good. I’d prime the hull before adding the deck, as you may find the priming will highlight a lot of imperfections not noticeable at this stage. I typically have to prime/fill/sand several times before I’m satisfied. Its unfortunate that these hull blanks are frequently so far off ... I’ll bet that has caused many modelers to trash the whole thing and thus be deprived of the rest of the fun and satisfaction of completing the model. There must be something in the kit manufacturing process that makes good hull blanks too expensive to produce ( hence, the proliferation of plank on bulkhead models). Keep at it .. you’ve a good start. Will be following.
- 35 replies
-
- 5
-
-
- yankee hero
- first build
- (and 2 more)
-
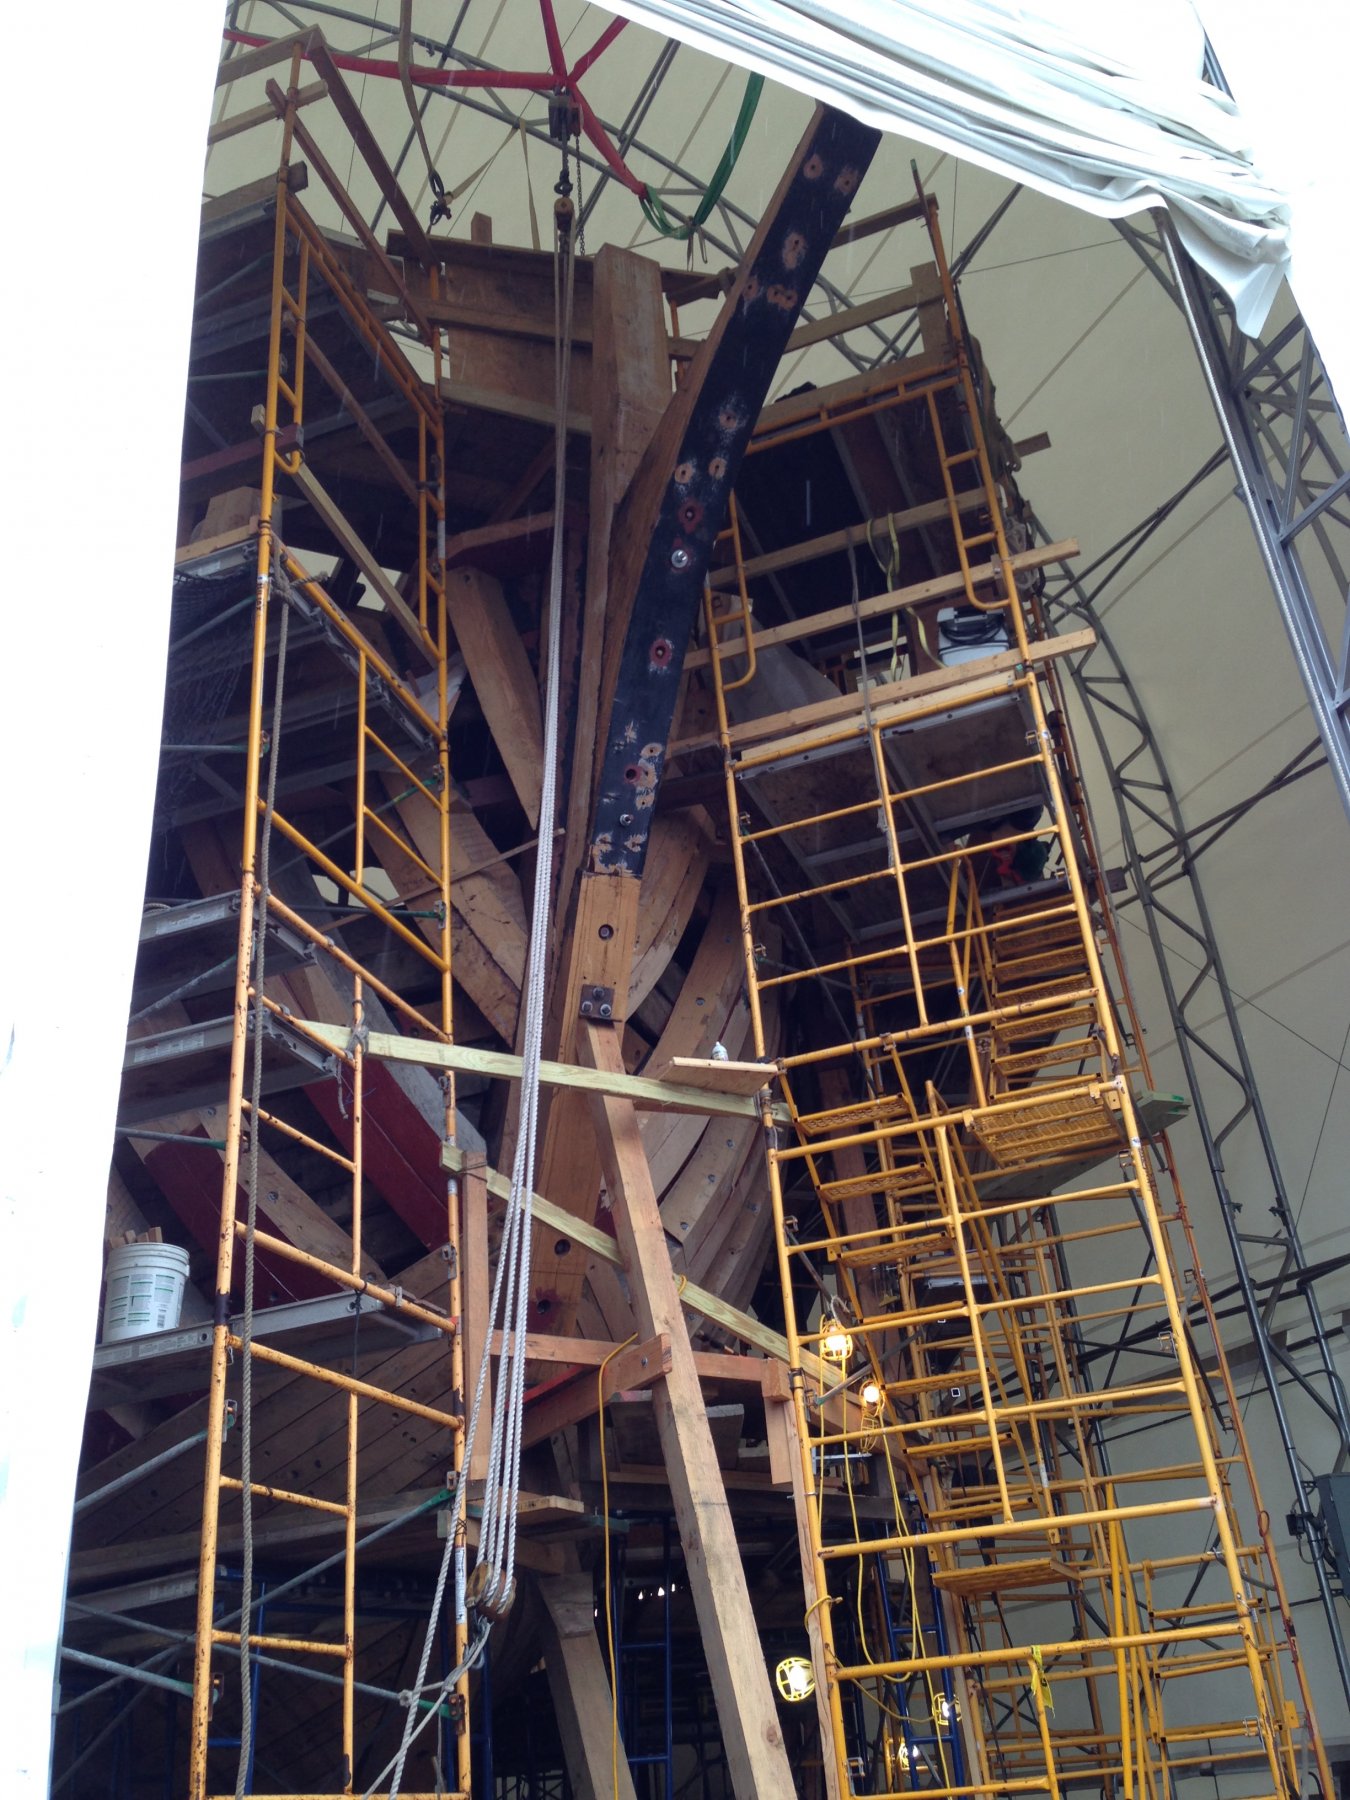
The reconstruction is being performed at Mystic, Connecticut. But, you can’t see a lot of her ( at least you couldn’t in June 2018)

-
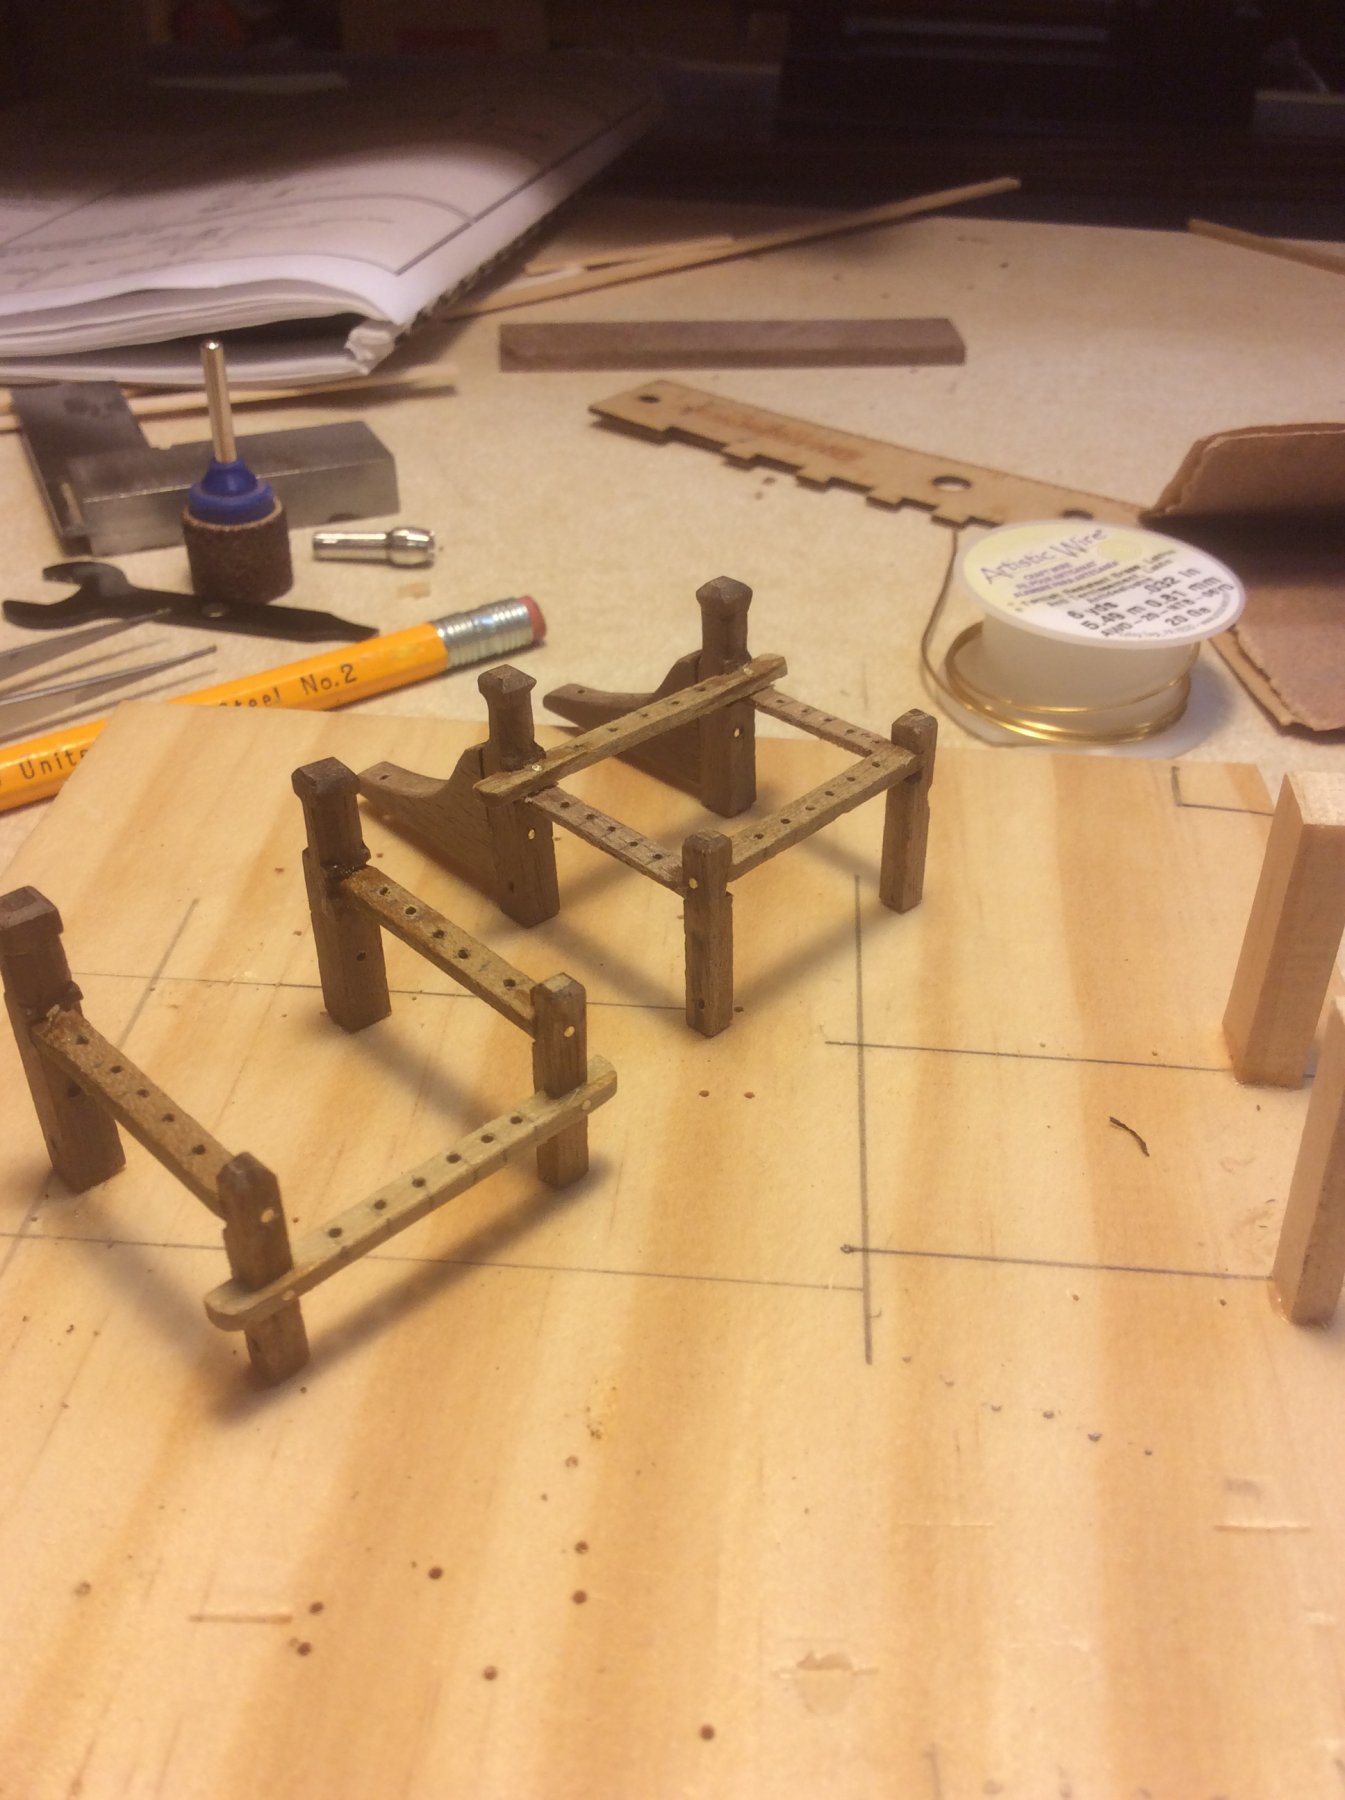
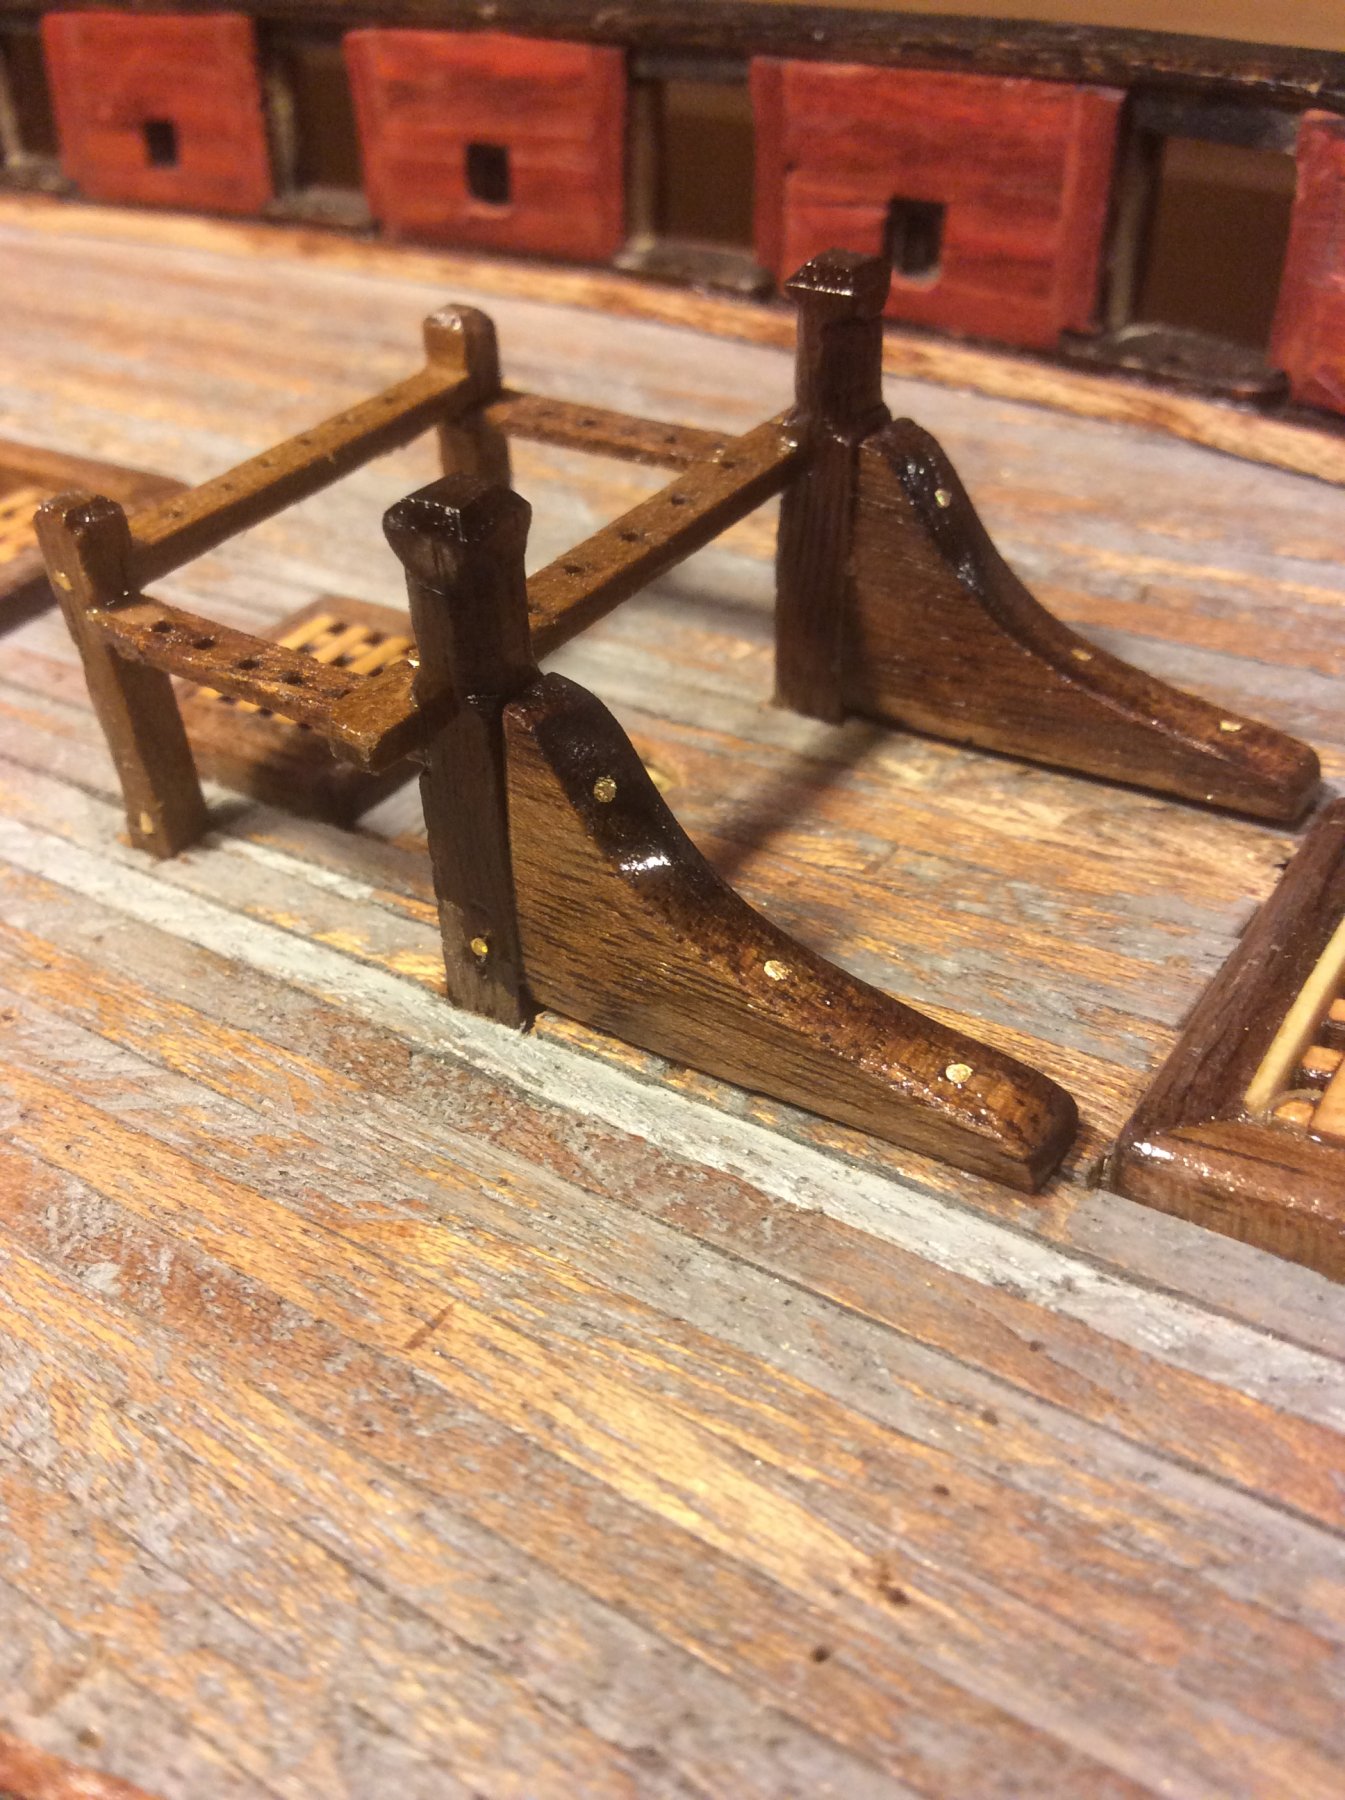
Ron: Fife rail looks good. Before mounting, you might want to consider reinforcing the joinery ... those rails take a lot of stress during rigging, and are a pain to repair at that point of the build. Pics below show how I inserted brass wire at the joints, and also when I mounted the assembly onto the deck. Just a thought.


-
Deck houses look really good. I’d have built them up by applying details to a solid block of wood. ... it doesn’t appear that is what you did. Can you describe your construction of them?Pics?
-
MBJ: Your wheelhouse looks good. Just curious: In many build logs I’ve seen nice detailed wheel houses, but then no deck furniture that would house a compass ... will Red Jacket have a something to steer by nearby?
-
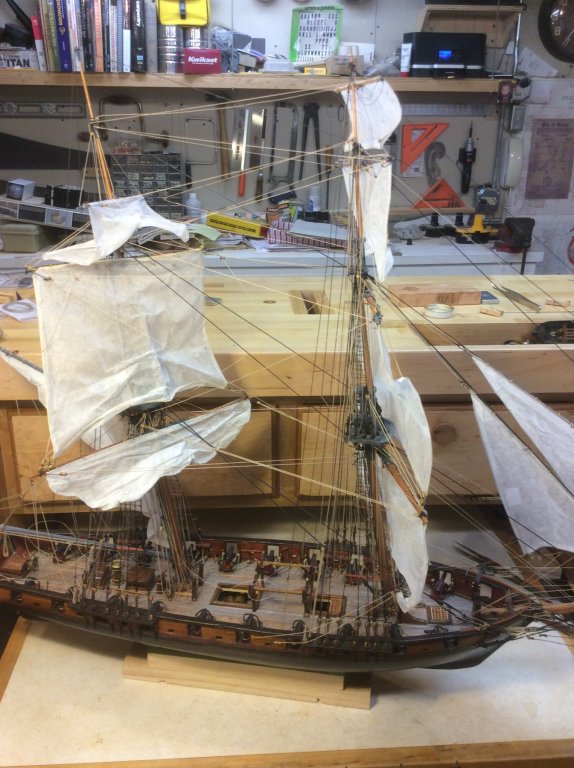
Modeling hove-to, main topsail aback
Srodbro replied to Srodbro's topic in Masting, rigging and sails
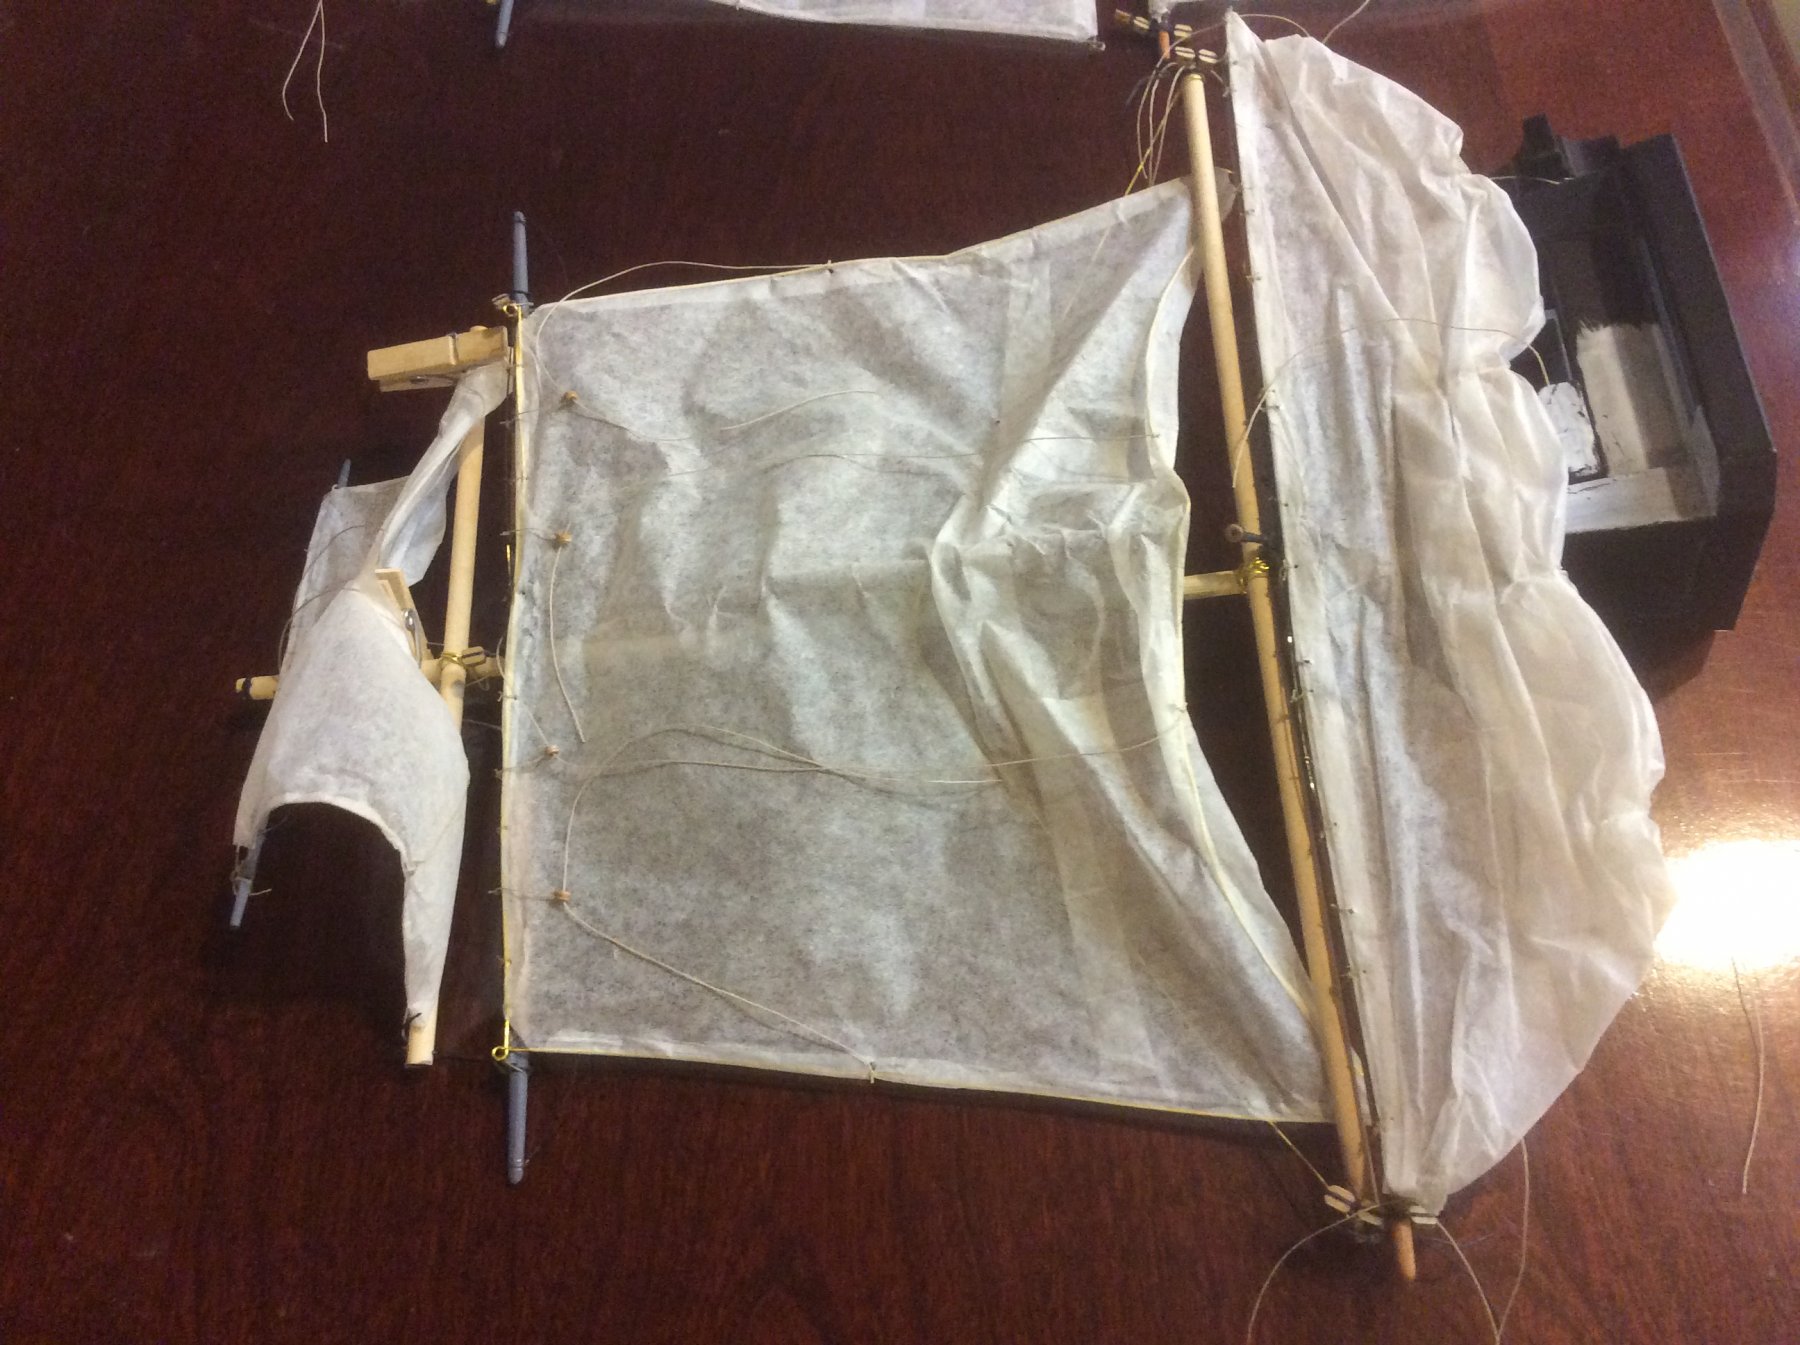
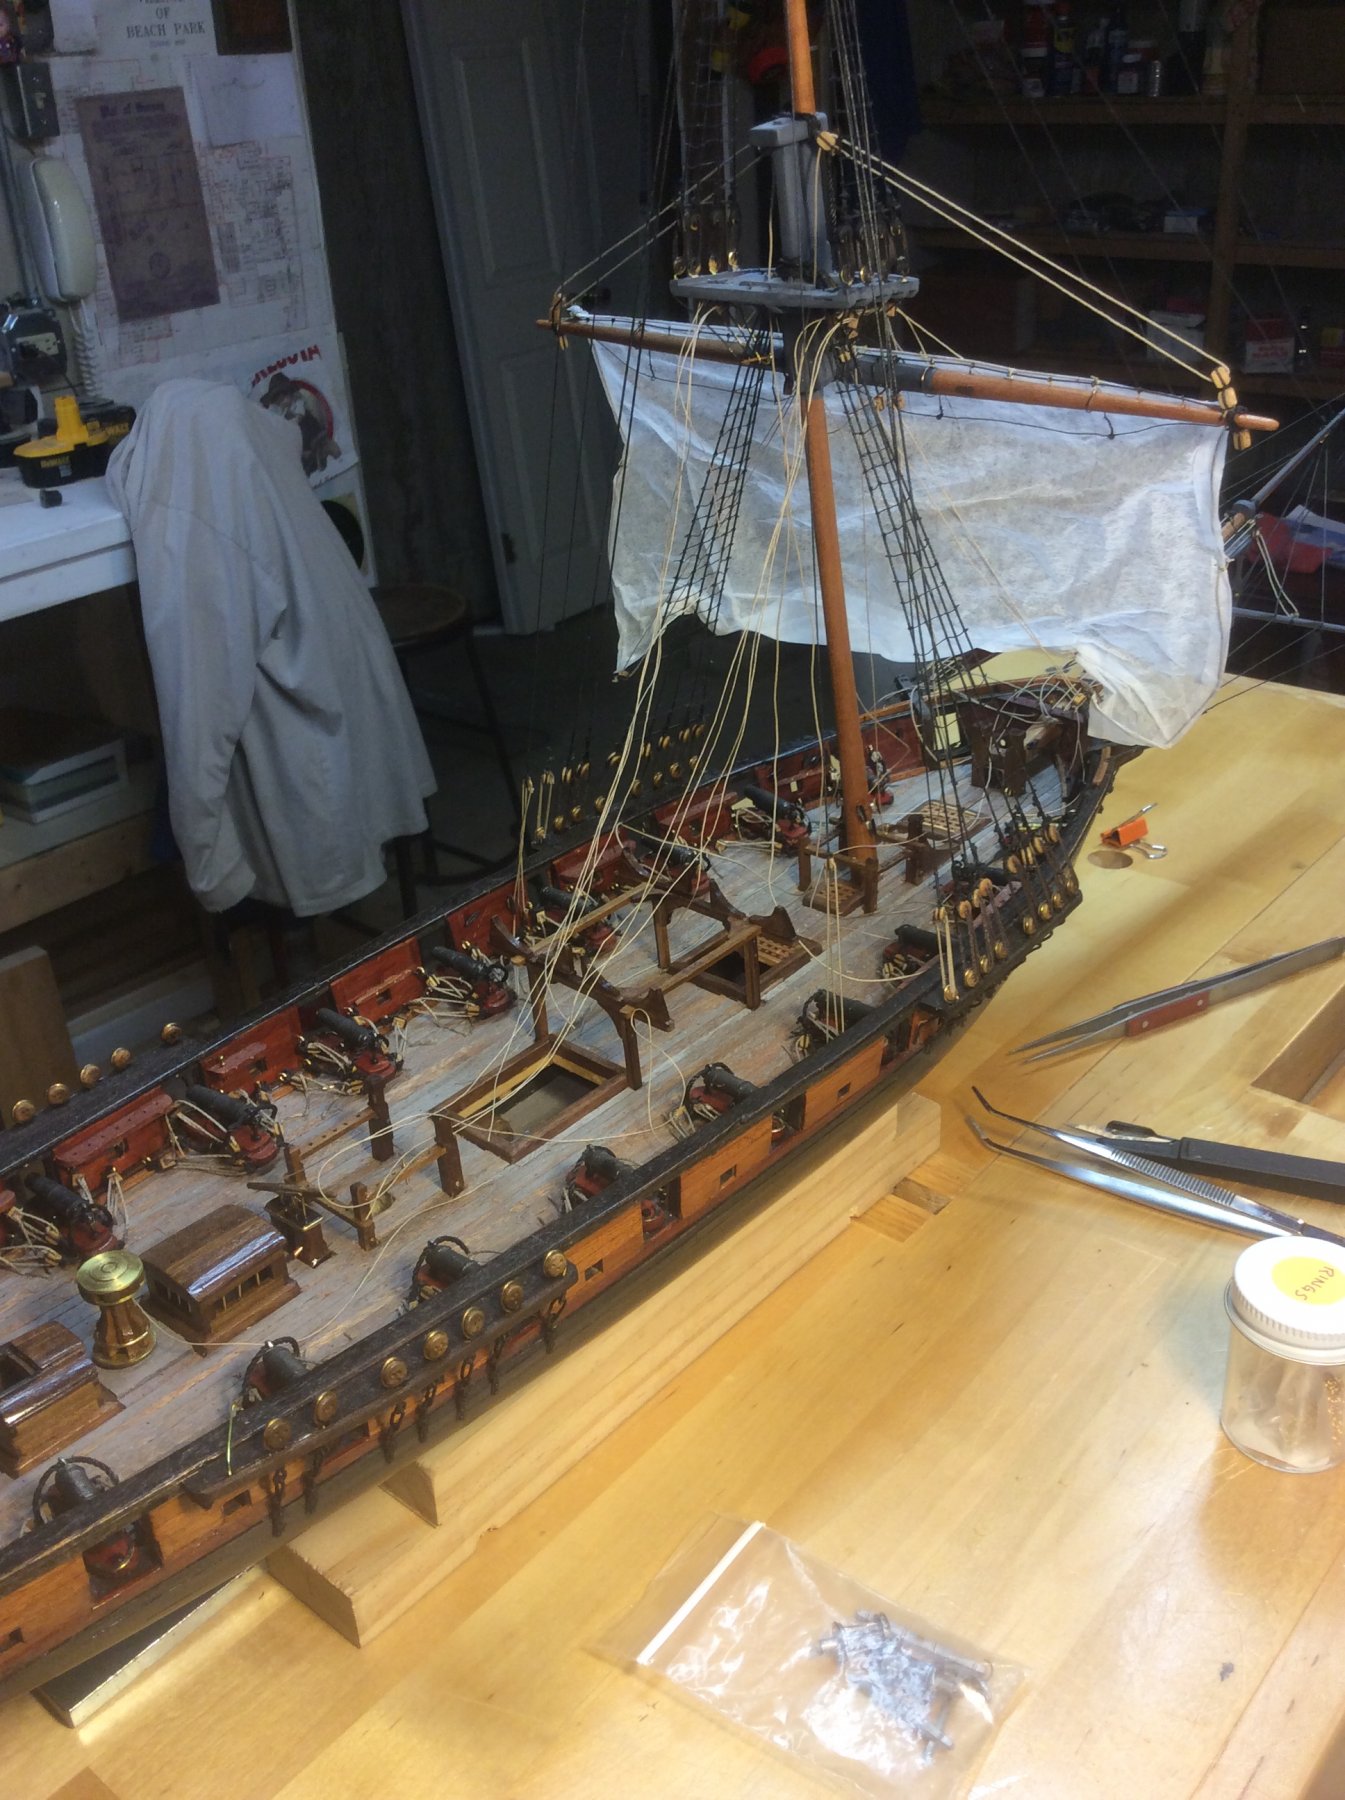
Thought I’d close the loop on this. In the end, I built a mock-up of the mast and some of the rigging, attached my sail, sprayed (saturated) the sail with diluted white glue, and dried with a hot hair dryer. After attaching to the model and adjusting the rigging, I got something pretty close to the look I was chasing. The idea is that the wind direction is at the viewer’s back. Thanks, all, for the suggestions.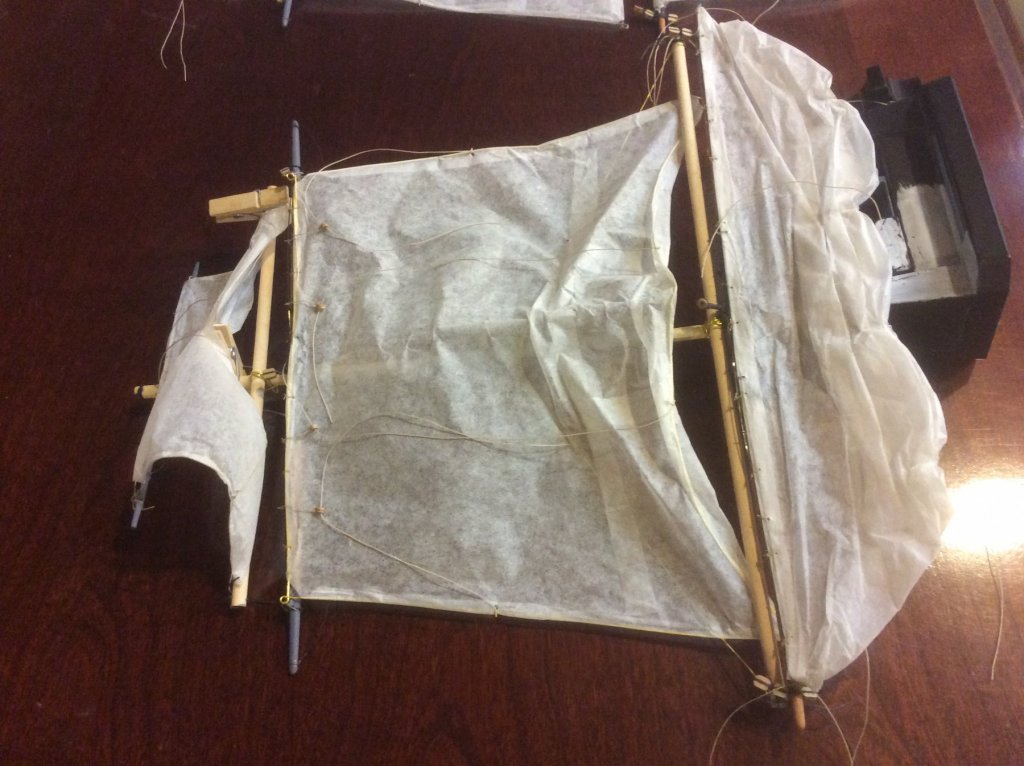
-
Gary: In reviewing your log, I’m not sure if you have yet stepped your bowsprit...I know you’ve rigged much of it. In the sequence you described, you’ll have to step the bowsprit prior to rigging your foremast stays (obviously). I’d suggest getting the bobstays below the bowsprit secure before any of the foremast stays ... without them (that is, without the rigging below the bowsprit that runs to the hull) there might be a tendency to bend the bowsprit assembly upward while tensioning the foremast stays, which may be difficult to correct given the few lines opposing them run between the bowsprit and hull, and the relative whimpy-ness of the dolphin striker. Other than that, I’m really diggin’ your sequence, and fully appreciate delaying many of the lower shrouds and ratlines until after all that stuff to the fife rails and pinrails is in ( the fairleads for buntlines and leechlines need only be attached to the foremost and aftermost lower shrouds). Although the forecourse and maincourse sheets will have to follow, they are more easily accessible.
- 367 replies
-
- 2
-
-
- model shipways
- niagara
- (and 1 more)
-
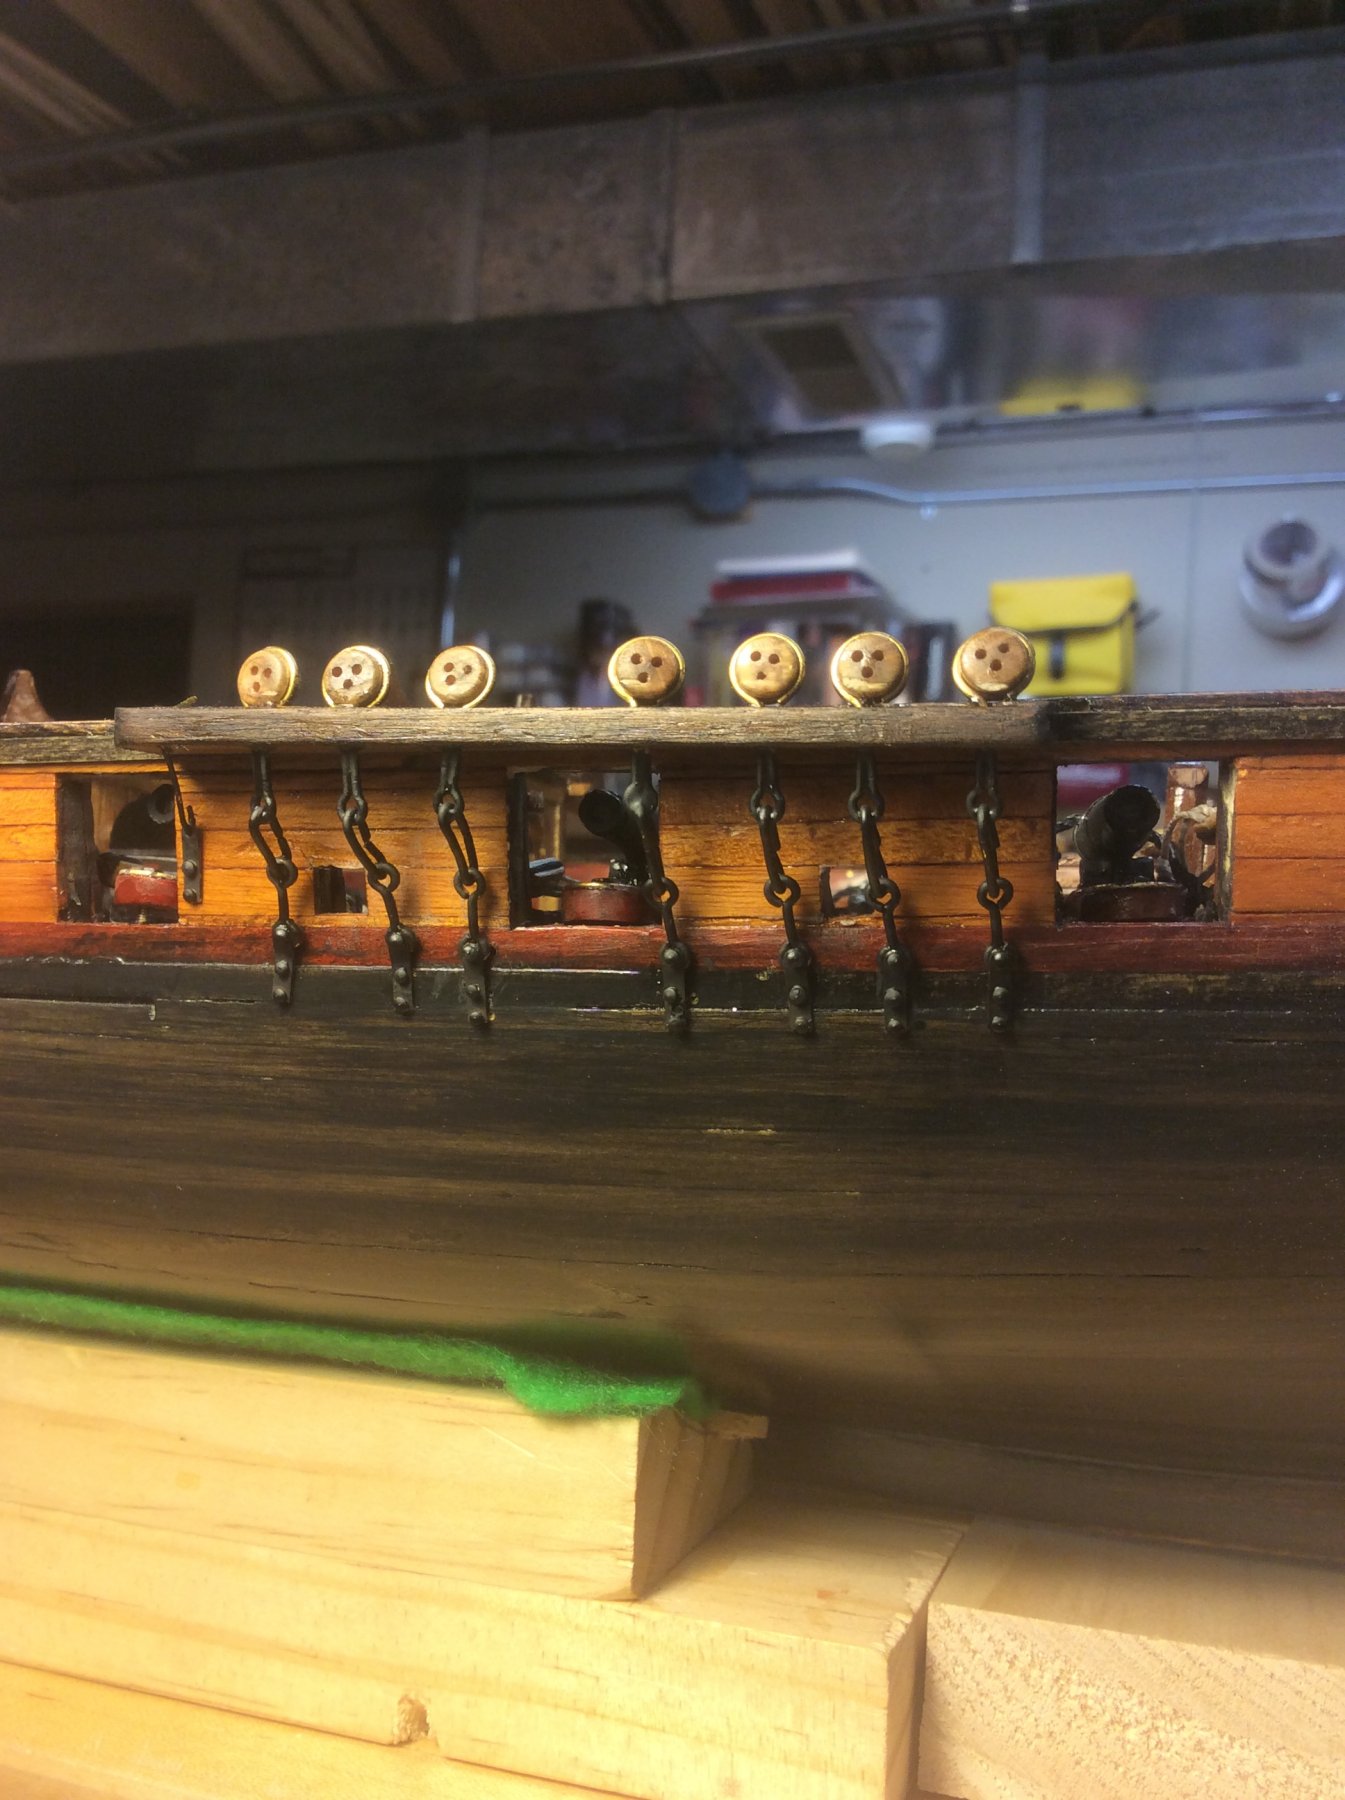
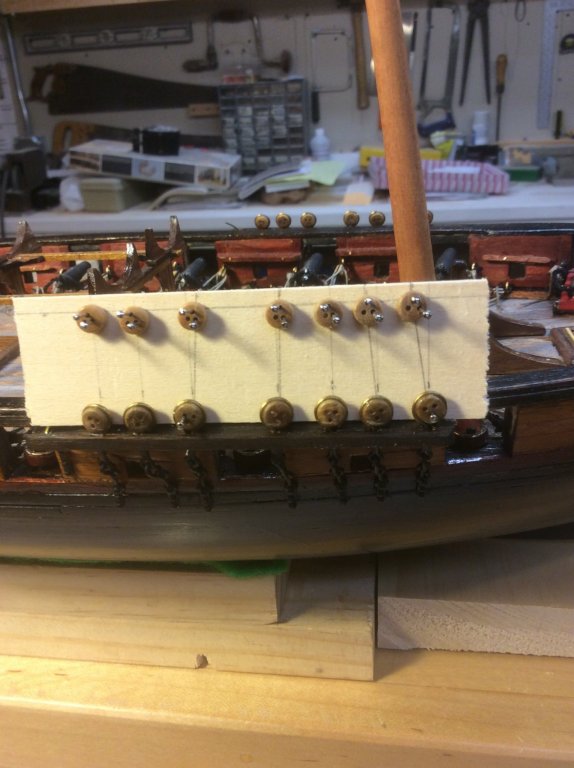
Gary Superb work. Really enjoying you log. Something you might consider when addressing your lanyards and lower deadeyes is a template (adapted from EdT’s Young America build) that holds the deadeyes exactly horizontally aligned and spaced while adjusting shroud length before reeving the lanyards. Here’s a pic of my application of his method.
- 367 replies
-
- 2
-
-
- model shipways
- niagara
- (and 1 more)
-
Tom: While you are working near the skylight, I was wondering if you intend to include a compass on it. While building my model, I discovered there is no mention of a compass or binnicle in the directions. Nor have I seen one in any build logs. Hard to imagine Niagara without one. There is a pic in Jersey City Frankie’s collection of pics of the actual modern ship with a “cabinet” containing the compass forward of the tiller, atop the skylight.
-
I just picked up this kit, which I promised my great-nephew that I’d have done for him by this Christmas. Really look forward to your posts.
-
Tom: I have been following your build with great interest. You’re doing a really fine job, clearly better than I’ve accomplished. I’m building a scratch version (but, based on the Model Shipways Niagara plans) that I’m call the Lawrence, and taking a lot of liberties with the appearance of the normal color schemes. That aside, I have a question for you about your forceps post. As I’m getting into rigging, I am experiencing frustration with the forceps I use ( they are on the bench of the pic above). I find that as I squeeze harder on the legs, ( which occurs whenever the manipulation of a line becomes more detailed) the tips of the legs of the finer pair part, usually releasing their grip on the lines, especially if working with fine thread ( like on the ratlines). I don’t think I’m unreasonably heavy handed, but maybe so. I was wondering if you have experienced anything like that with the set you mentioned. If those forceps are immune to this deficiency, I know I’ll be getting a pair. Again, really enjoy you log. Hope you soon overcome that bug.

-
Welcome. Lots of great modeling advice in these forums ( with the possible exception of the following paragraphs). I built plastic models as a kid, and when I was approaching retirement returned to the hobby. My first wooden ship model was Yankee Hero by Blue Jacket. I started with it primarily because I wanted a ship model for our place in Eastport, and an Eastport Pinky seemed a good choice. I found it was a good starter kit: Solid hull ( no planking), simple rigging, good advice on modeling techniques, and very good directions for a beginner (some more advanced kits have instructions that assume the builder has a lot of experience and knowledge of nautical terminology; and old kit I got on eBay had a total of one typewritten page). Next I resurrected a 50-year old partial complete plastic Constitution from the attic, and completed the rigging. Since then, moving away from plastic (which in no way is to denigrate plastic modeling) I’ve done the New Bedford Whaleboat, Dory, Fannie Gorham,We’re Here, Dapper Tom, Wyoming (scratch built half hull), Fra Berlanga (scratch half-hull half model) and currently working on a scratch build of US Brig Lawrence ( based on Model Shipways Niagara drawings). Clearly, I prefer solid hull work (my Lawrence is the only planked model, and that is plank-on-solid hull). Early on it seemed that an inordinate amout of forum discussion revolved around planking on frame or bulkhead problems, so I determined to avoid those. I don’t think that doing so has short-changed me on the pleasures of the hobby, but who knows, I might head in that direction some time. Which is not to say solid hull work is without irs challenges, as well. Following Mr BlueJacket’s build log of the Red Jacket kit will give a fair idea of solid hull work. One last bit of advice ... complete one or two simple builds before crowding your closet with unbuilt kits, as many of us do. Have fun.