HOLIDAY DONATION DRIVE - SUPPORT MSW - DO YOUR PART TO KEEP THIS GREAT FORUM GOING! (Only 20 donations so far - C'mon guys!)
×


Srodbro
-
Posts
299 -
Joined
-
Last visited
Content Type
Profiles
Forums
Gallery
Events
Everything posted by Srodbro
-
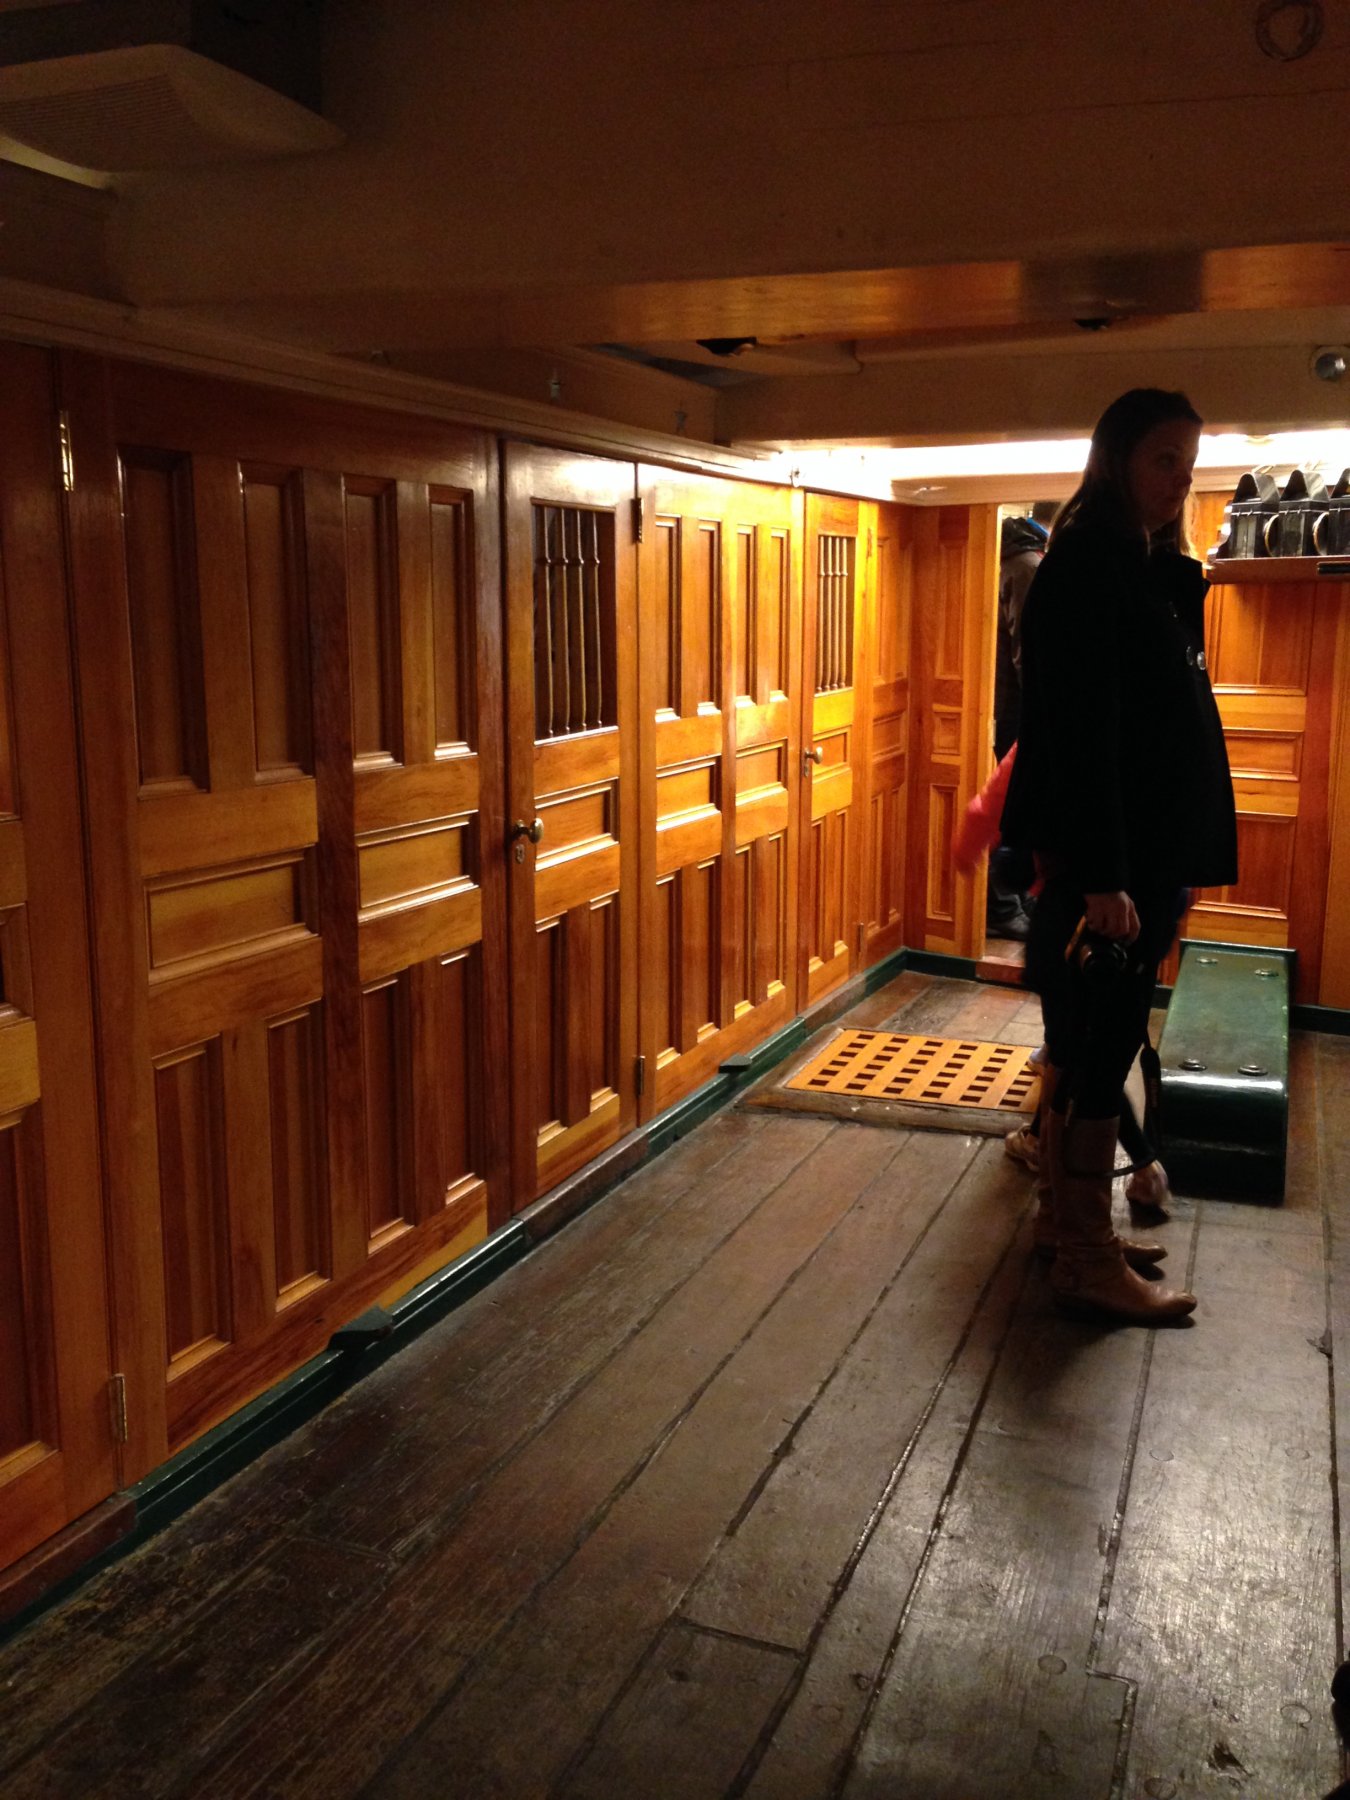
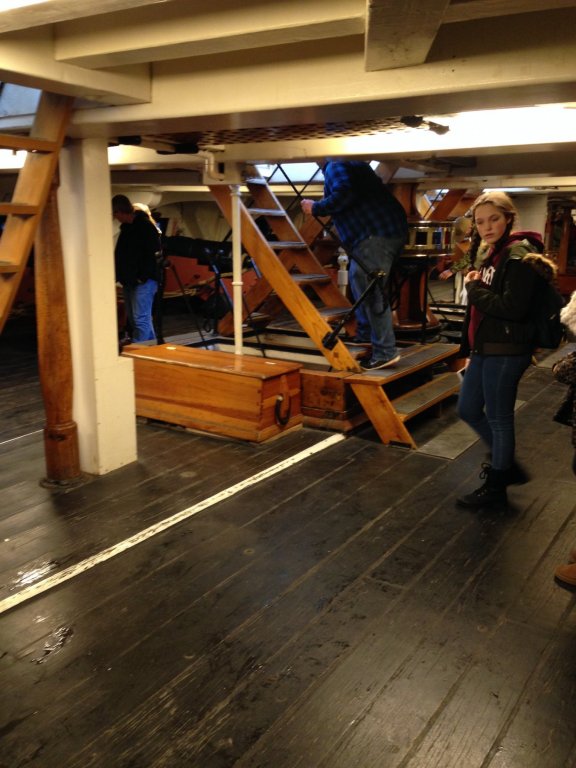
I was aboard Constitution a couple days ago and noticed the deck plank joint in the pic. Follow the plank joint starting at the toe of the person in the pic. Right at her toe, and again near the bottom right corner of the pic, there is a short “jog” in the joint, right angle, about 2” long. This is on the berth deck. There are similar joints on the gun deck (near the step, right of the white line, right of the sea chest in pic below) I noticed these joints in many planks, mostly within about 10 ft of ship centerline. A pair of adjacent planks may have several of these joints along their length. Do these “castellated” plank joints have a special function?

-
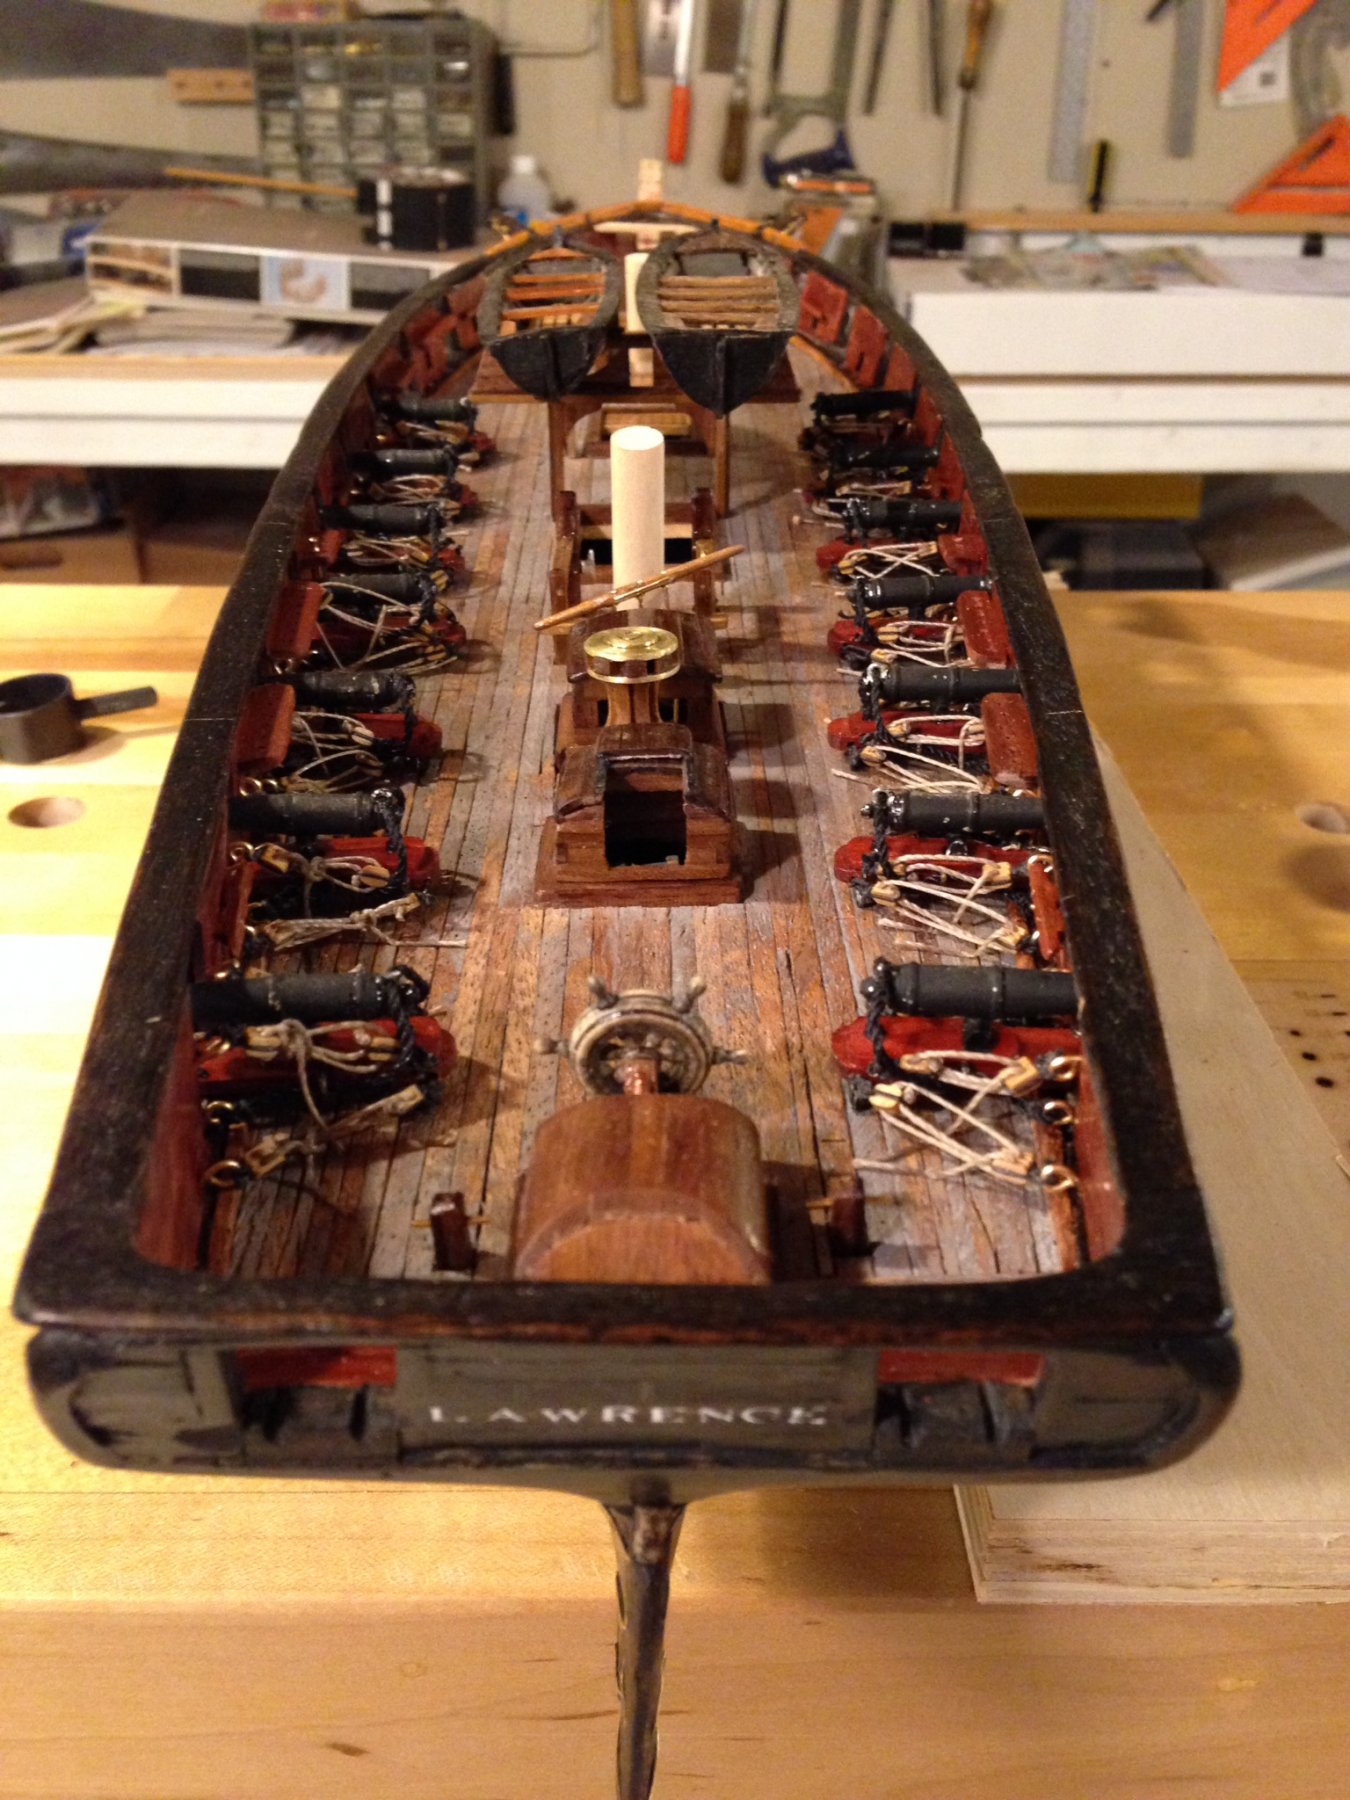
Darrell: My Lawrence is essentially scratch built based on the Model Shipways Niagara kit plans that I lofted to build a solid hull. I created a build log (in the scratch build forum, under the title “US Brig Niagara — solid hull experiment” ... sorry, don’t know how to make a link to it) and decided to rename my build Lawrence because there is even less historical information about her than Niagara, so I thought I could take more liberties with my model. The only parts from the kit that I have used so far are the horn timbers and the gun castings. I considered starting a log for Lawrence, but my workmanship is clearly at the lowest end of the spectrum of talent exhibited by most of the scratch-build modelers, and don’t want to diminish the quality of that forum. The helm ... I actually think they had a tiller, even though a wheel was used on larger contemporary ships. There is some real mechanical advantage contributed by all that tiller rigging. Thanks for for your compliment ... far too kind.
- 648 replies
-
- 3
-

-
- niagara
- model shipways
- (and 1 more)
-
Darrell: Sorry for hijacking your topic Mike: Certainly, I cannot say that there were differences between the two ships ... most texts I have read say they were identical (which, by the way, I question, since Lawrence was launched two weeks before Niagara) ... so my differences are between what is most typically modeled, and what I (with at least a little support from other authorities or logic) frankly, like. Here are the differences I am modeling: An extra gunport on each side near the bow The wheel instead of tiller No boat davits No royal yards (this, based on the painting below, which is purported to be Lawrence ... even tho it’s dangerous to base much on artwork ) Colors, obviously. I may find more on my next trip to the Museum in Erie, PA, which has a model of Lawrence. Ok, Darrell. I promise no more hijacking.

- 648 replies
-
- 2
-
-
- niagara
- model shipways
- (and 1 more)
-
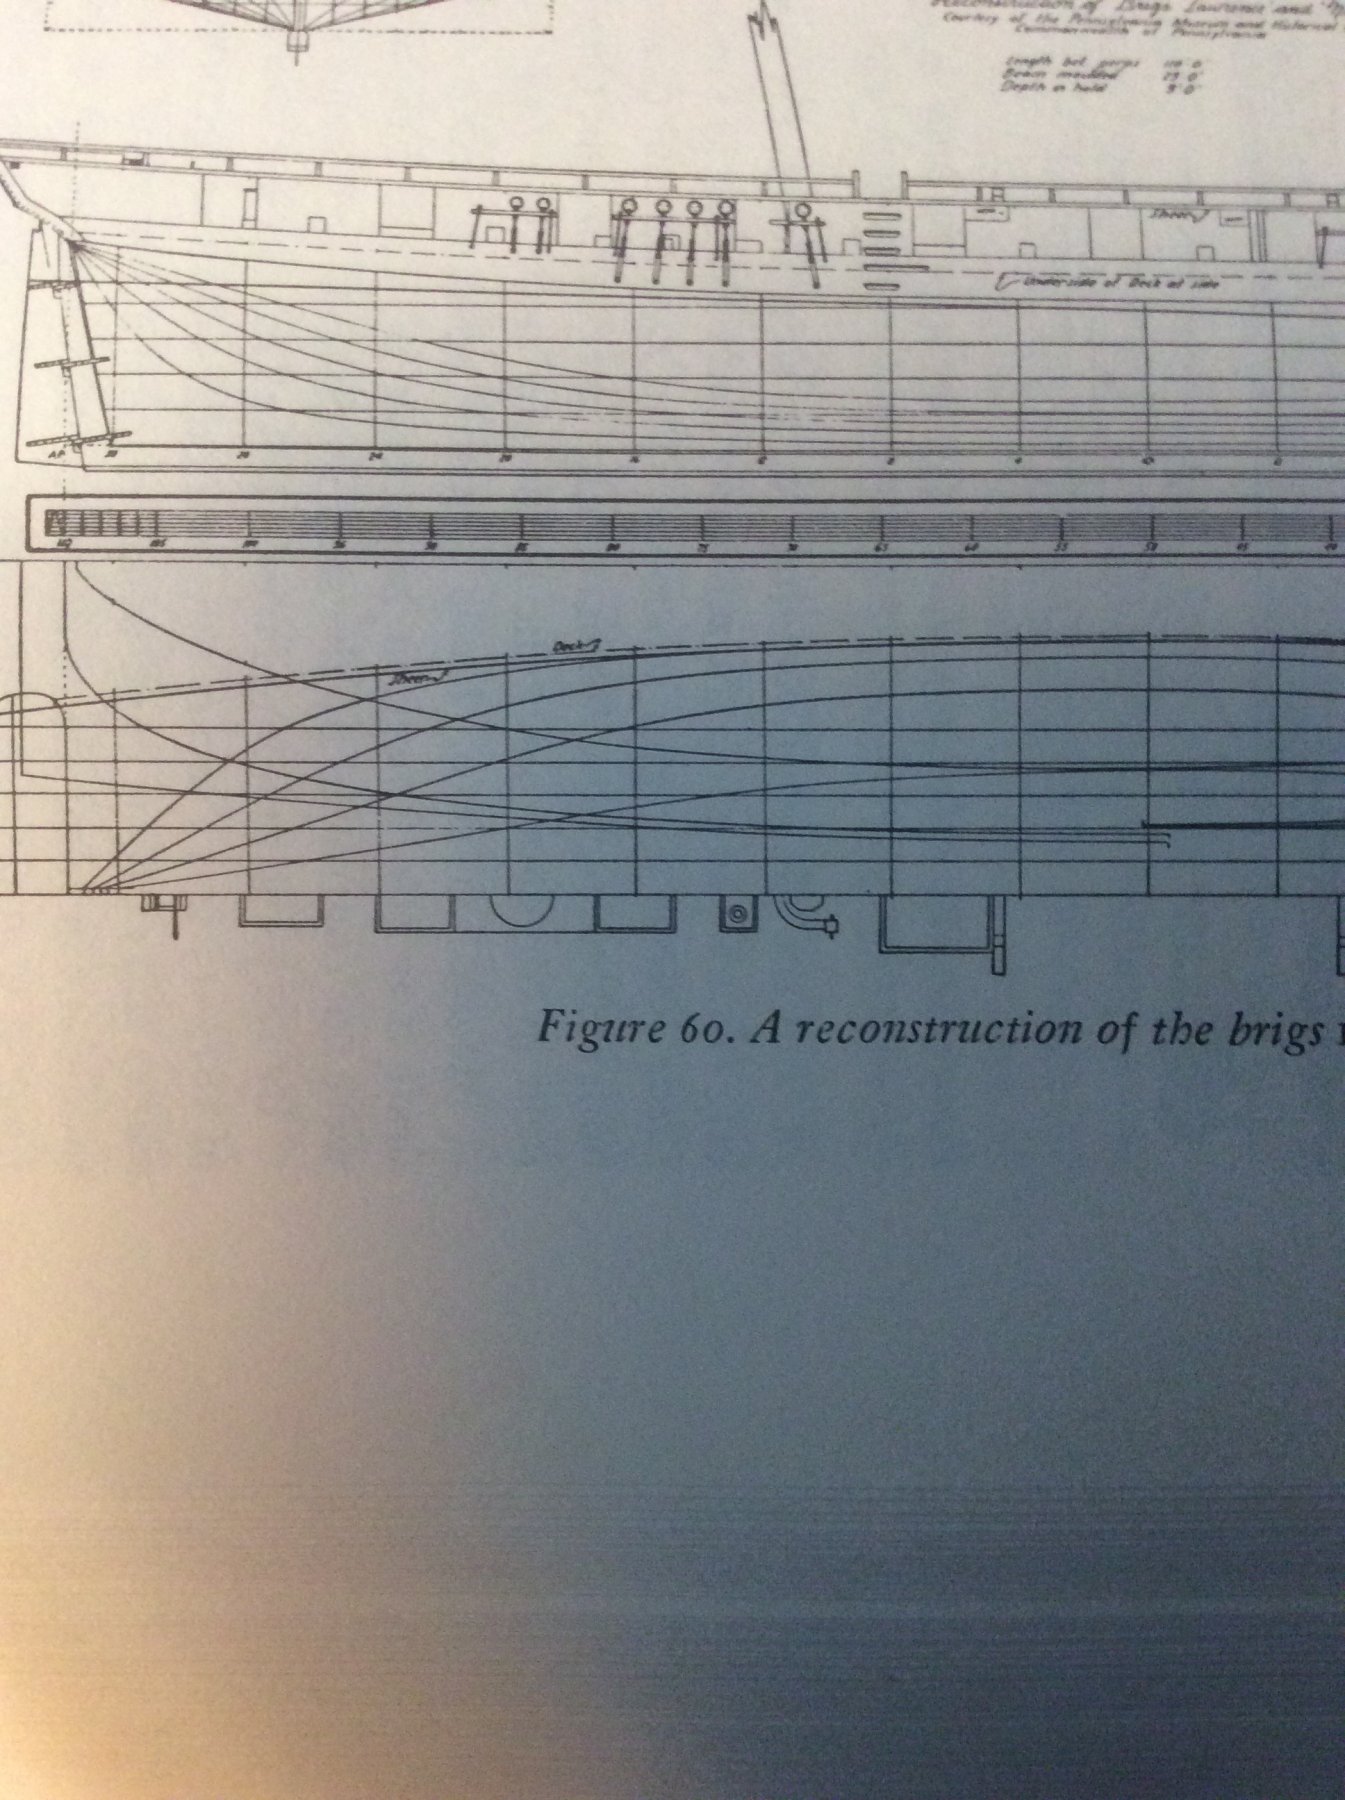
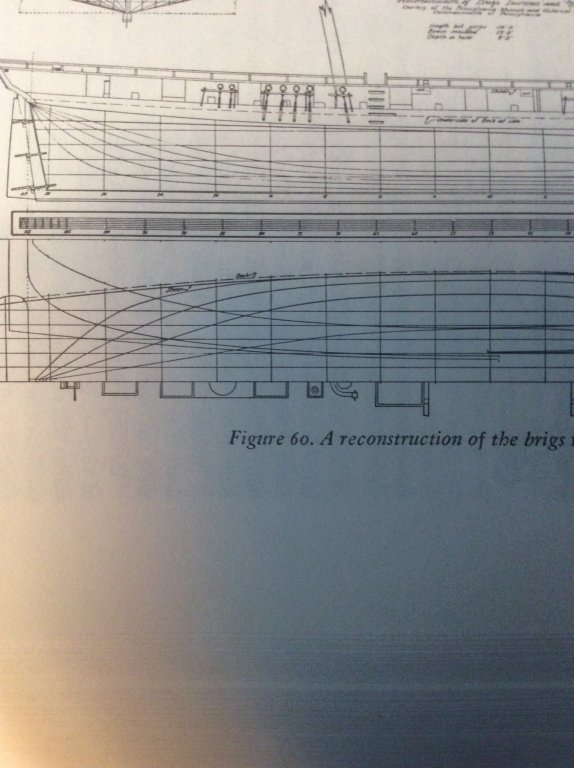
Darrell: I am building Niagara’s sister Lawrence, admittedly taking liberties with what is typically done by most modelers of these brigs, and was recently faced with the same dilemma as you regarding the space around the capstan, skylights and companionway. I am taking a different approach, capitalizing on differences among the authorities on what the originals looked like. Chapelle, in his History of the American Sailing Navy, Figure 60, (lower plan) appears to show, not a tiller, but a wheel as the helm, which frees up a lot of space in this area. That certainly doesn’t help you at the stage you are in your build (with your beautifully rigged tiller), but might be an alternative for others to consider. Which is the course I am following, and will be adding the aftermost “skylight” as a grate. (Although this approach begs the question of where the compass would have been mounted!). As I’ll soon be starting my rigging, I appreciate your tip on the braces.

- 648 replies
-
- 5
-
-
- niagara
- model shipways
- (and 1 more)
-
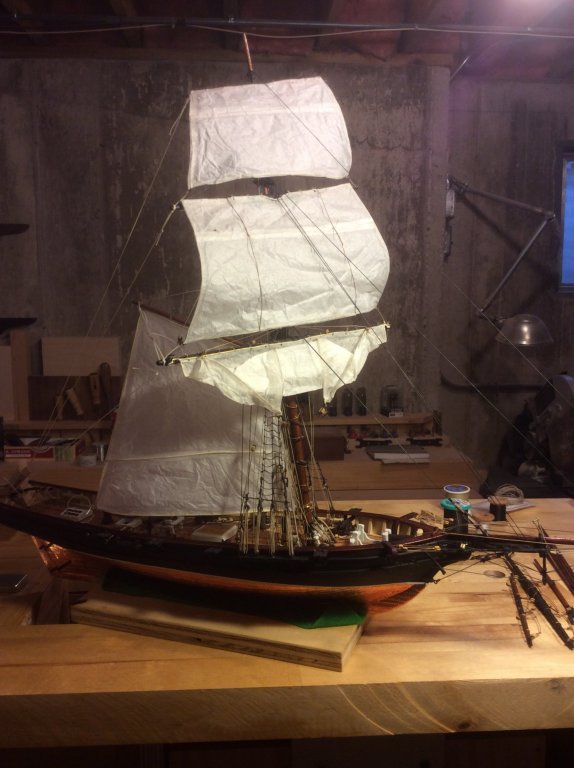
I am currently building the US Brig Lawrence and intend to rig her similar to that shown in this painting In the postings and build logs, I have seen examples of furled sails and full sails, but none of sails aback against the mast. I have had some success on another build, using paper sails, some with brass wire bolt ropes, in modeling full sails, and did okay with furled sails, but am troubled about getting the lines of the outlines of the mast and lifts into the backed sail. Any tips about achieving the desired look?

-
Tom: Rybka, in his book, the Lake Erie Campaign of 1813, refering to Niagara, lists “species used in construction of the hull as red, black and white oak, as well as cherry, chestnut and poplar, with cedar and pine being used to plank the bulwarks. The need for speed meant that the selection process was the nearest large tree, then the one behind it and then the next beyond that.” And while the species may have been red, black, or white, it was also “green”.
-
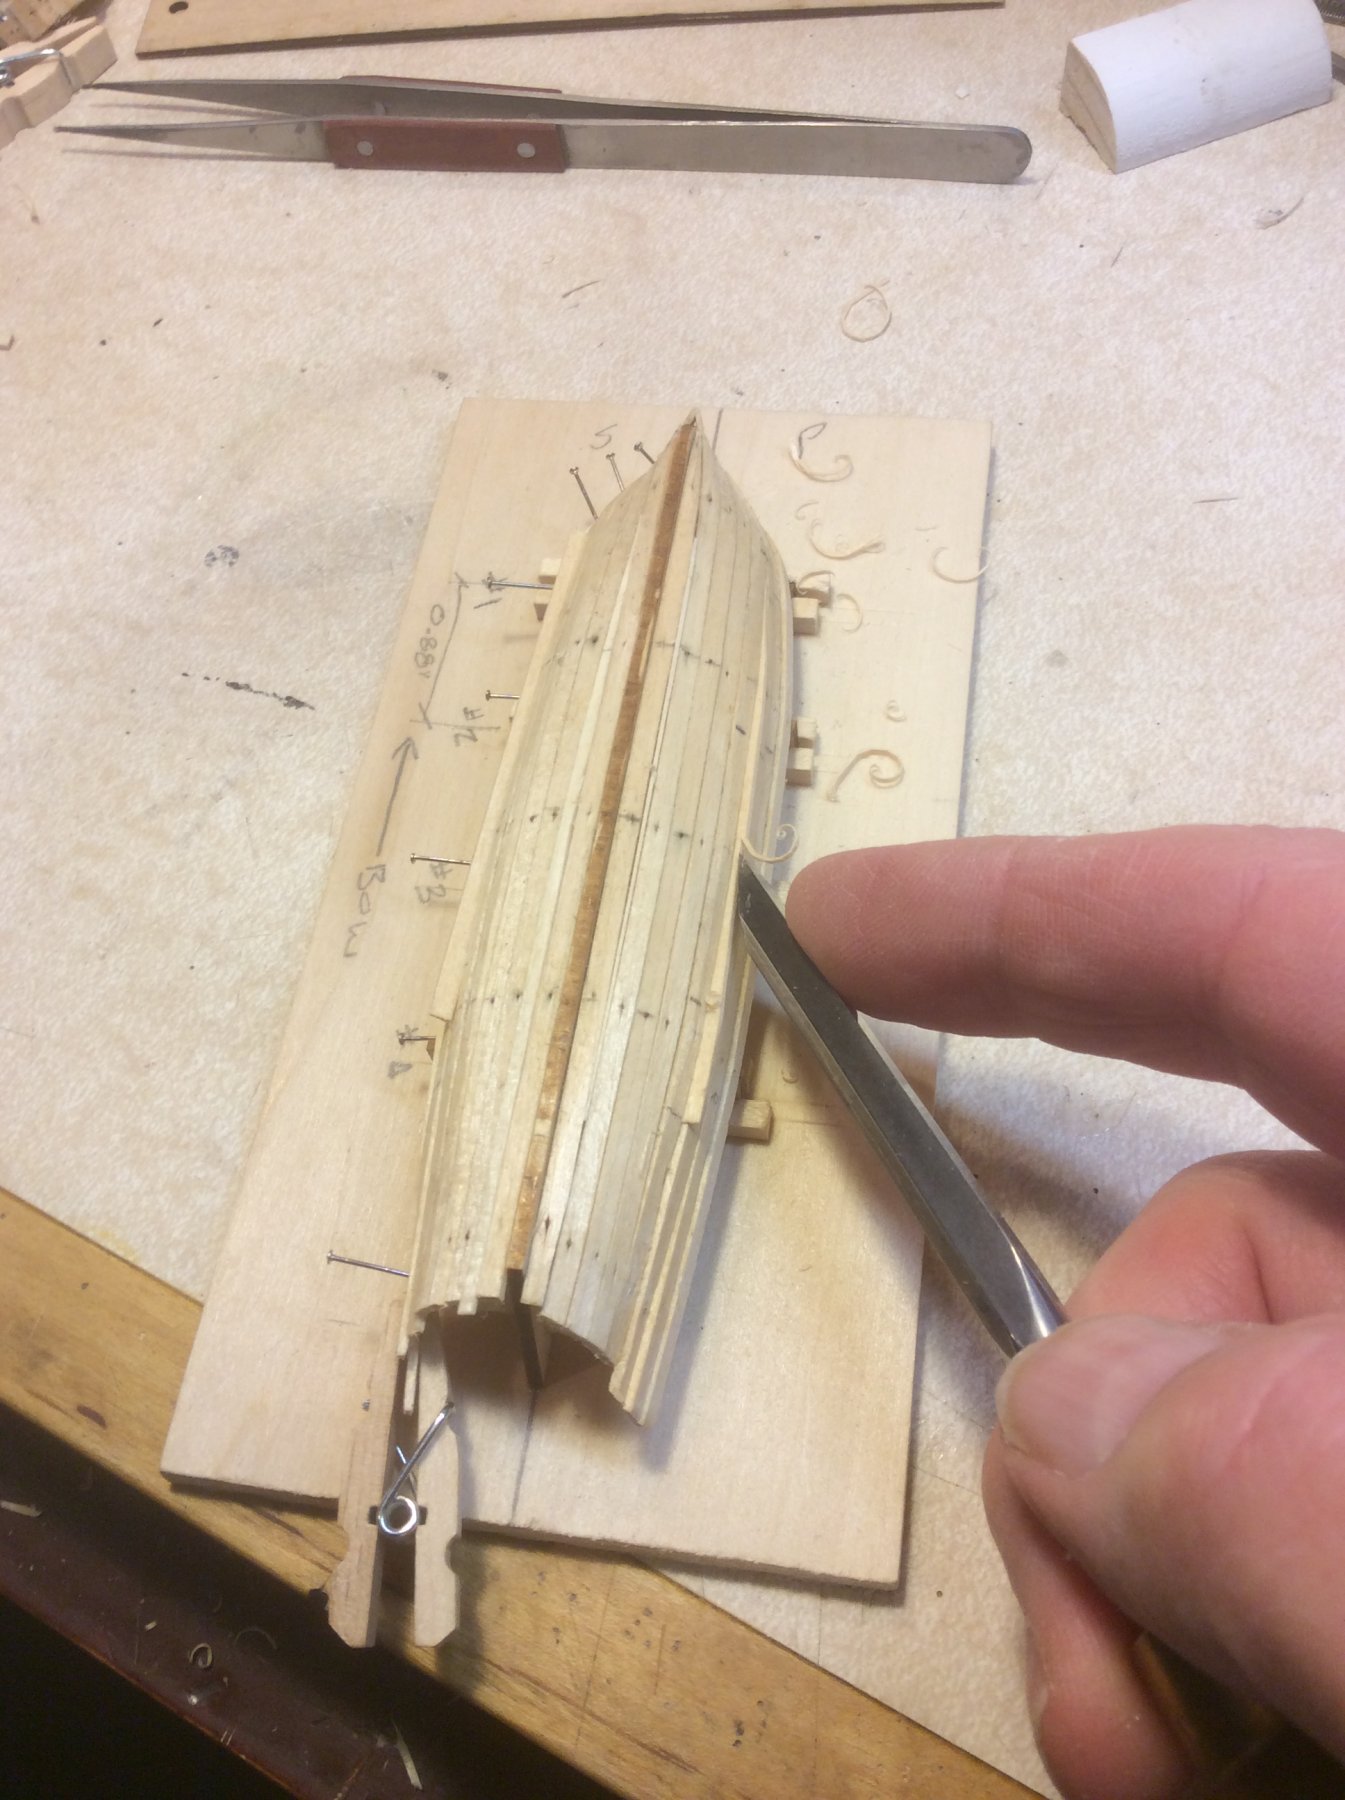
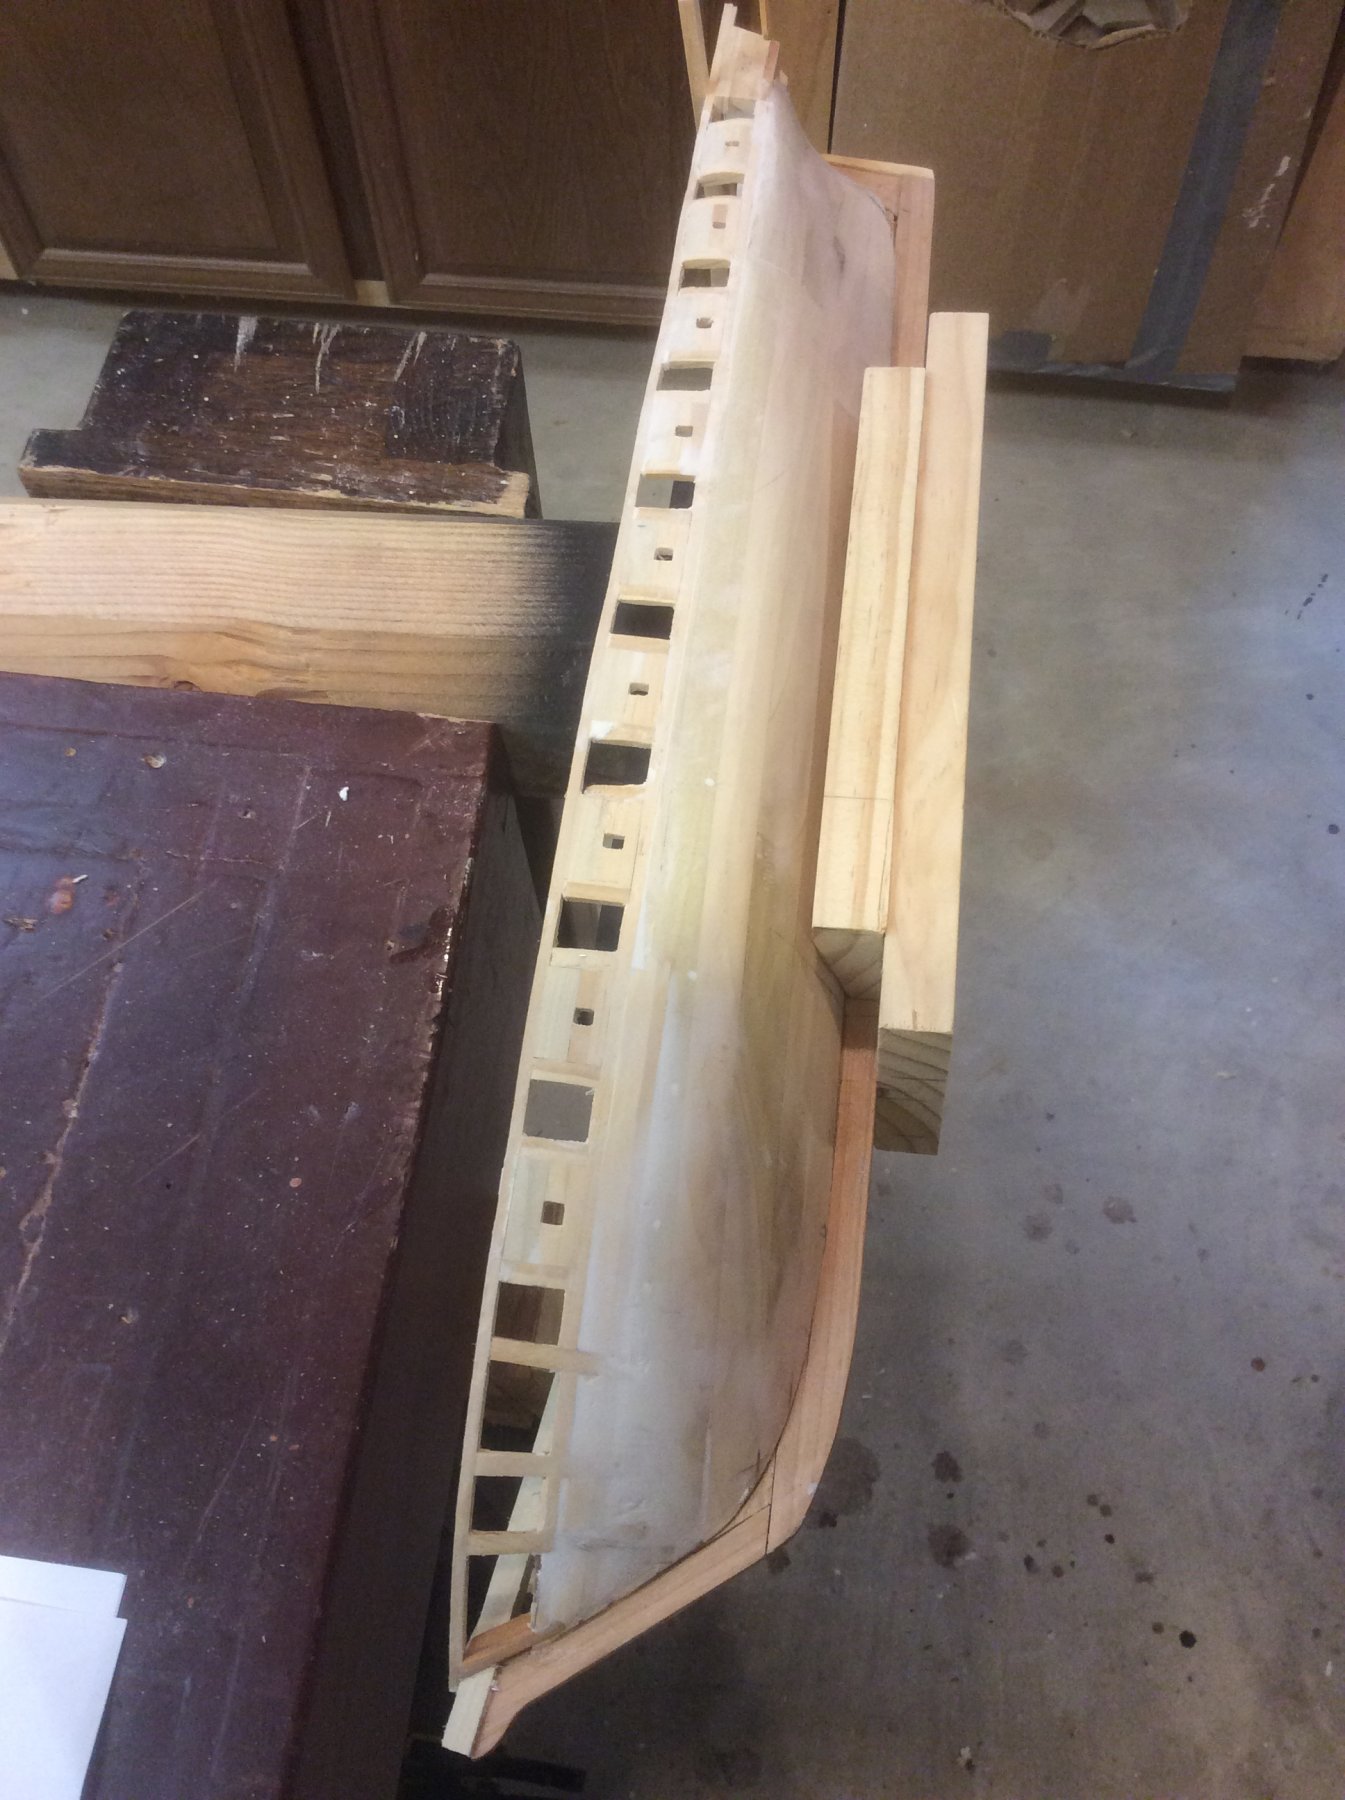
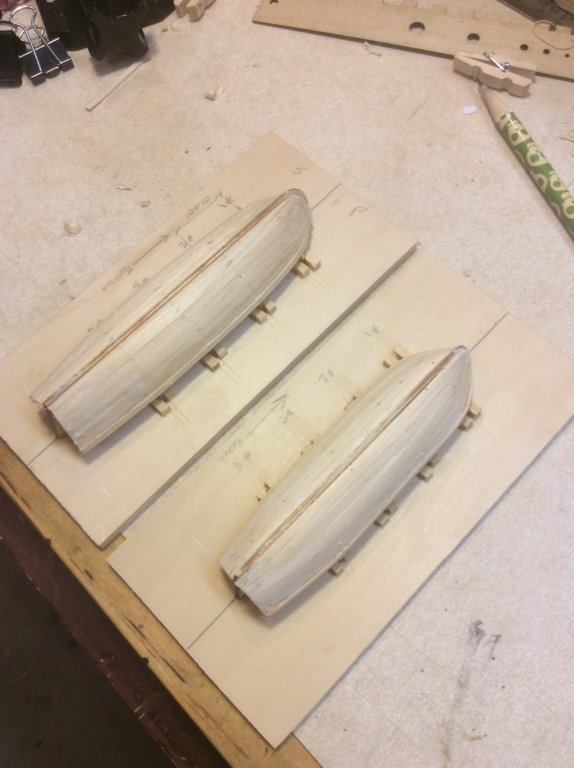
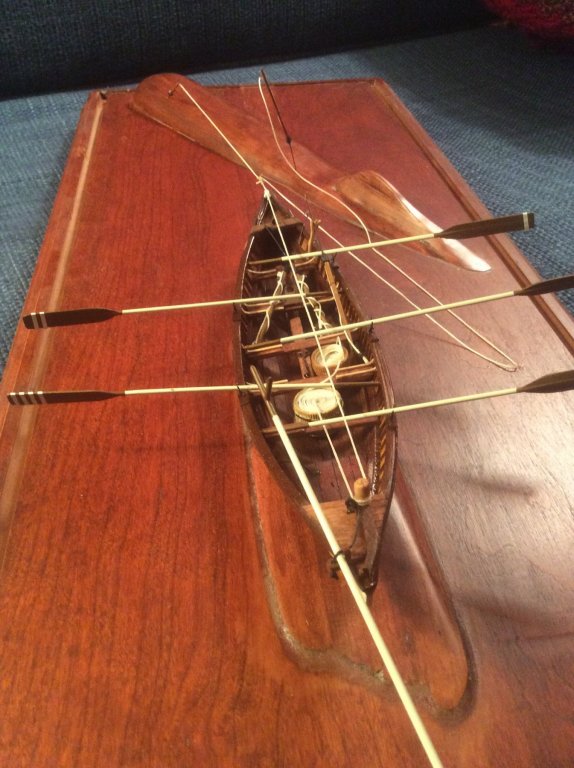
Ultimately got two boats that I’ll live with. Planking turned out okay but required some slivers to be added to fill gaps. Dark stain hides lots of problems.


-
Mark: Allow me to demonstrate my ignorance with a question ... On the section drawing of the cannon rigging, there is an eyebolt and ring above the gunport on the ceiling. Any idea what the purpose of this was? Your build looks great. I like the way the blackening of the guns turned out.
-
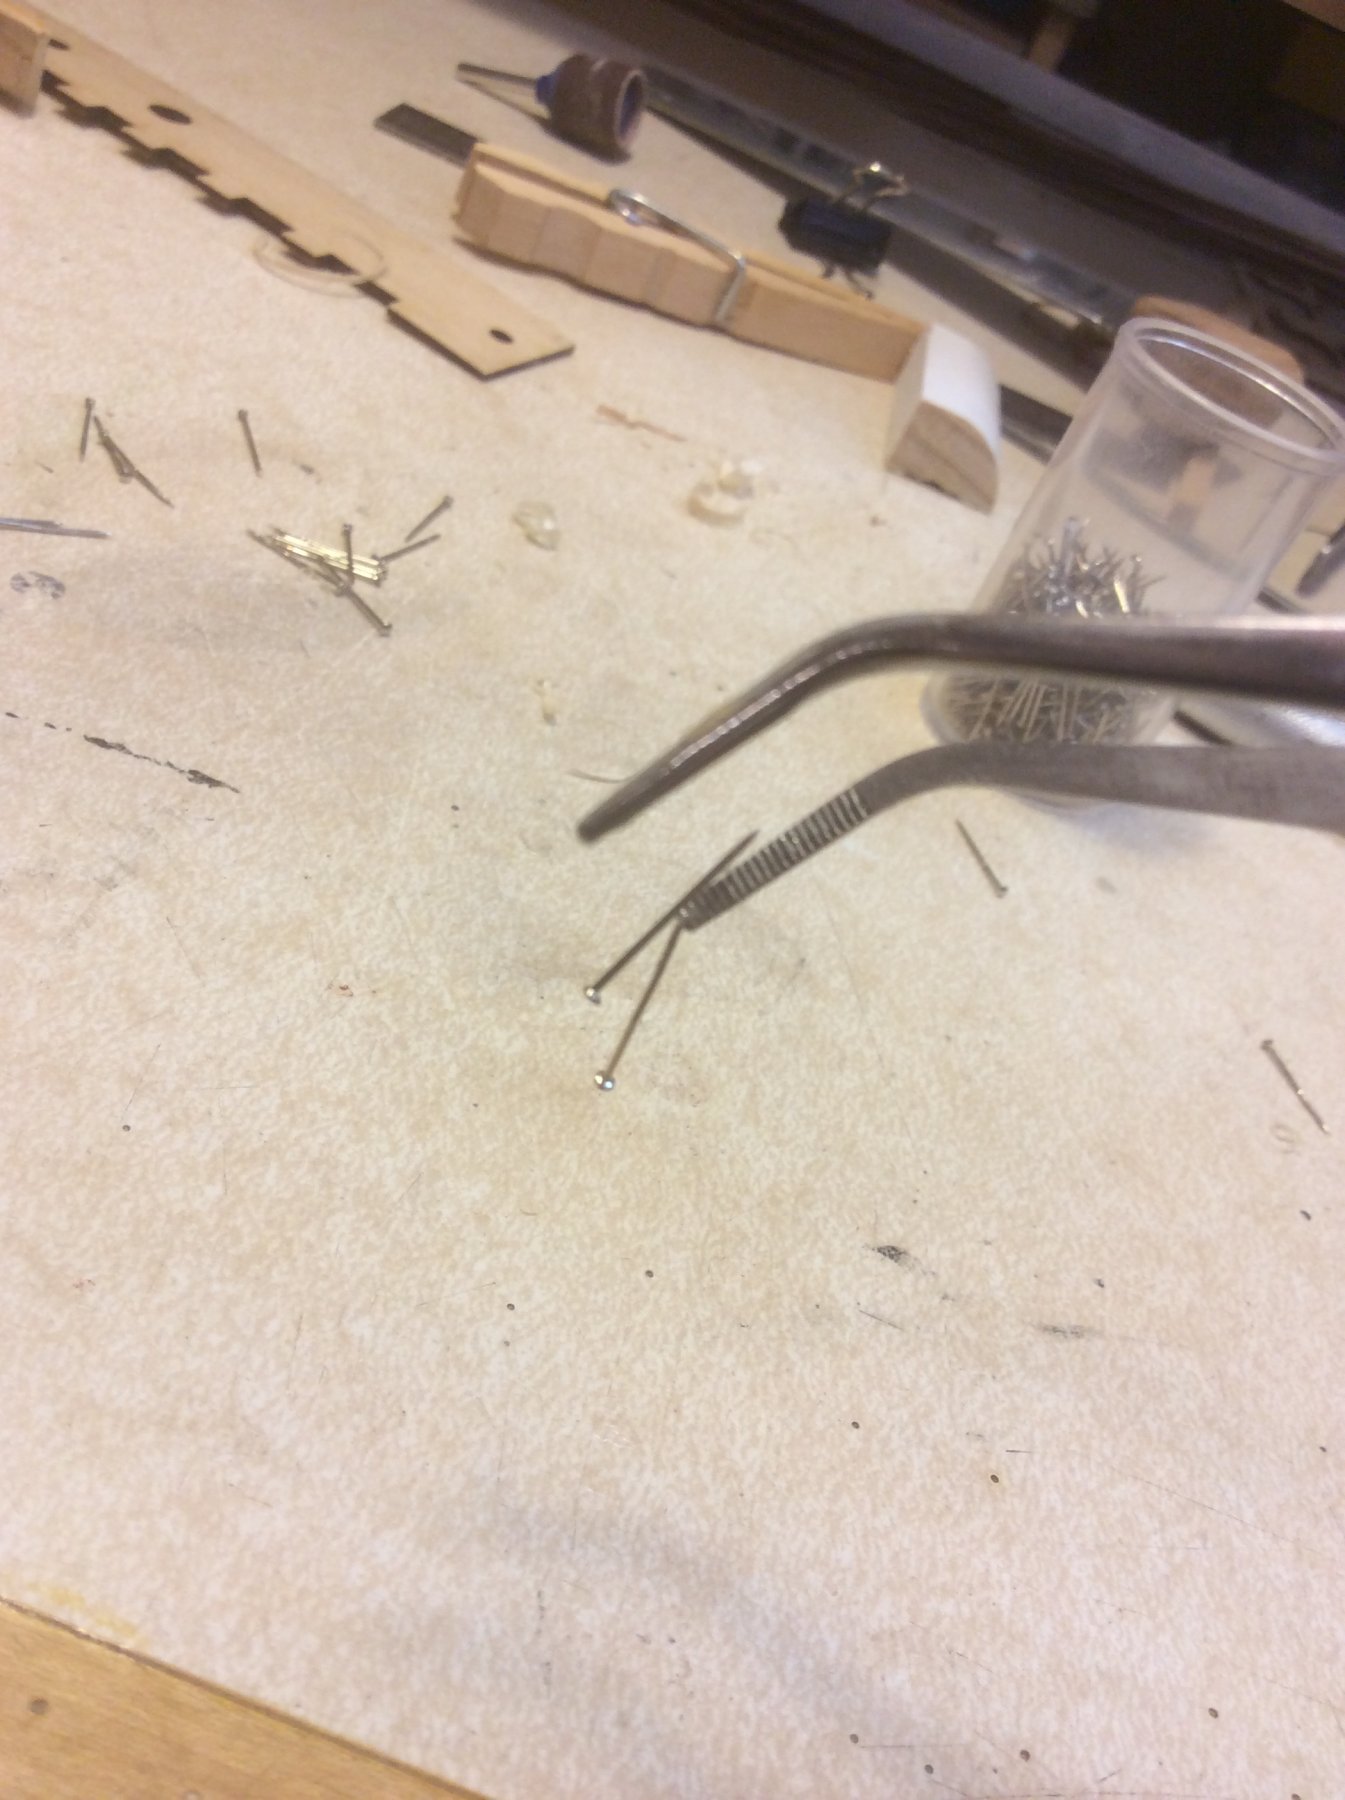
Thanks. I’ll pursue such a device. Hope I don’t have to apply it to all 700 pins.
-
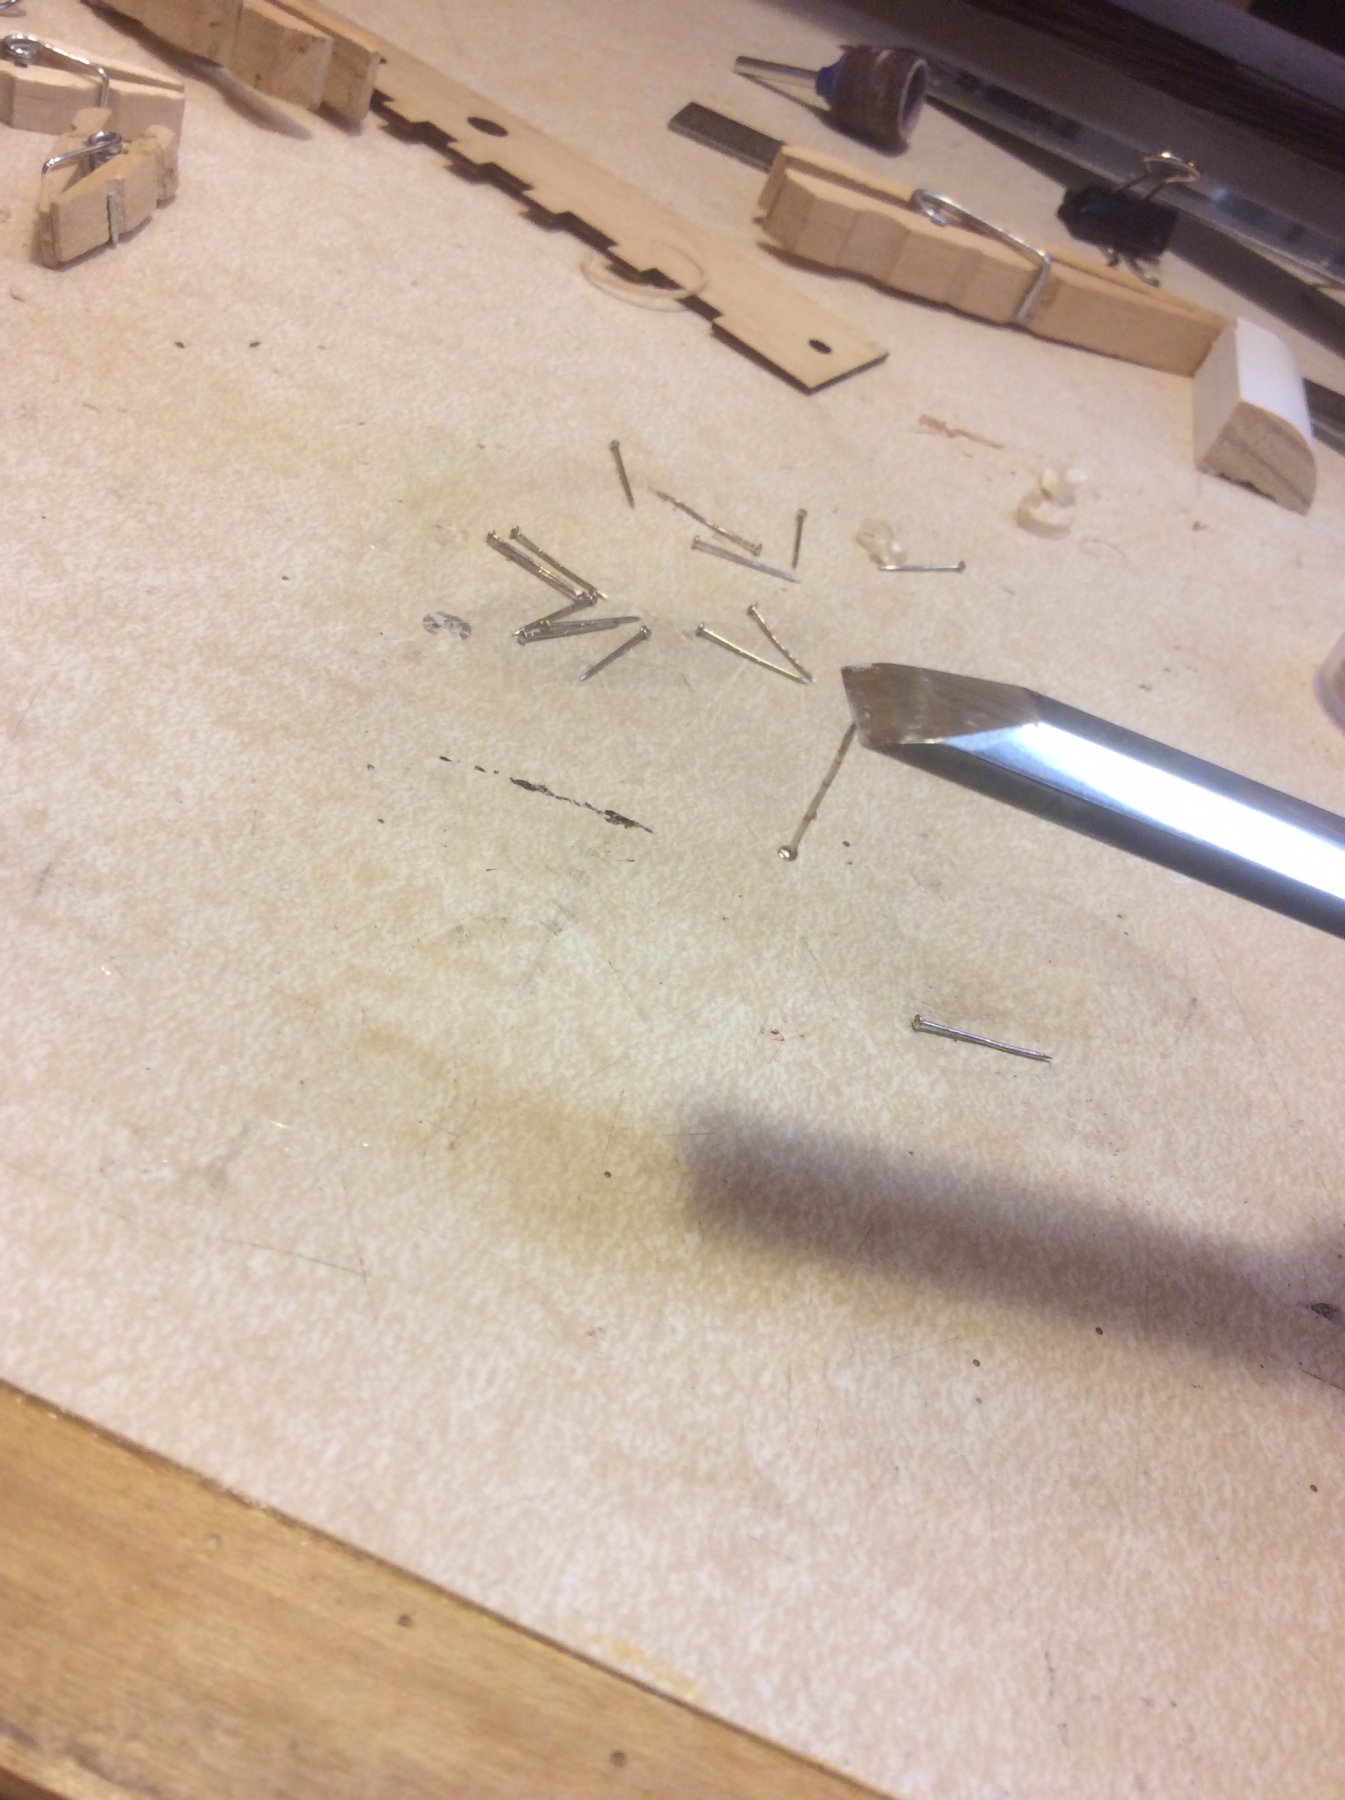
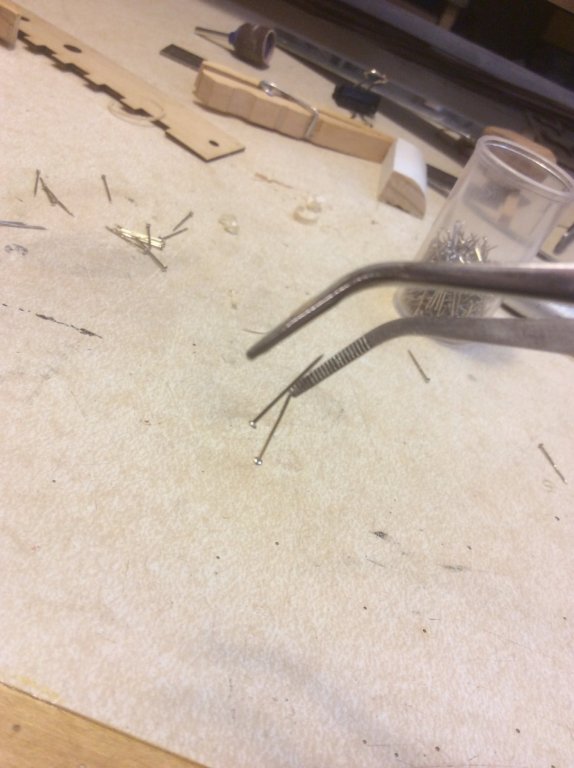
A chisel that I sometimes use while modeling usually resides in a carpenters toolbox. Apparently it has picked up a charge while stored next to a tack hammer with a magnetized head. Unfortunately the charge, while the chisel rested on the workbench, has transferred from the chisel to either my forceps or my supply of pins. Any way to “clean” the tools or pins of this annoying charge?

-
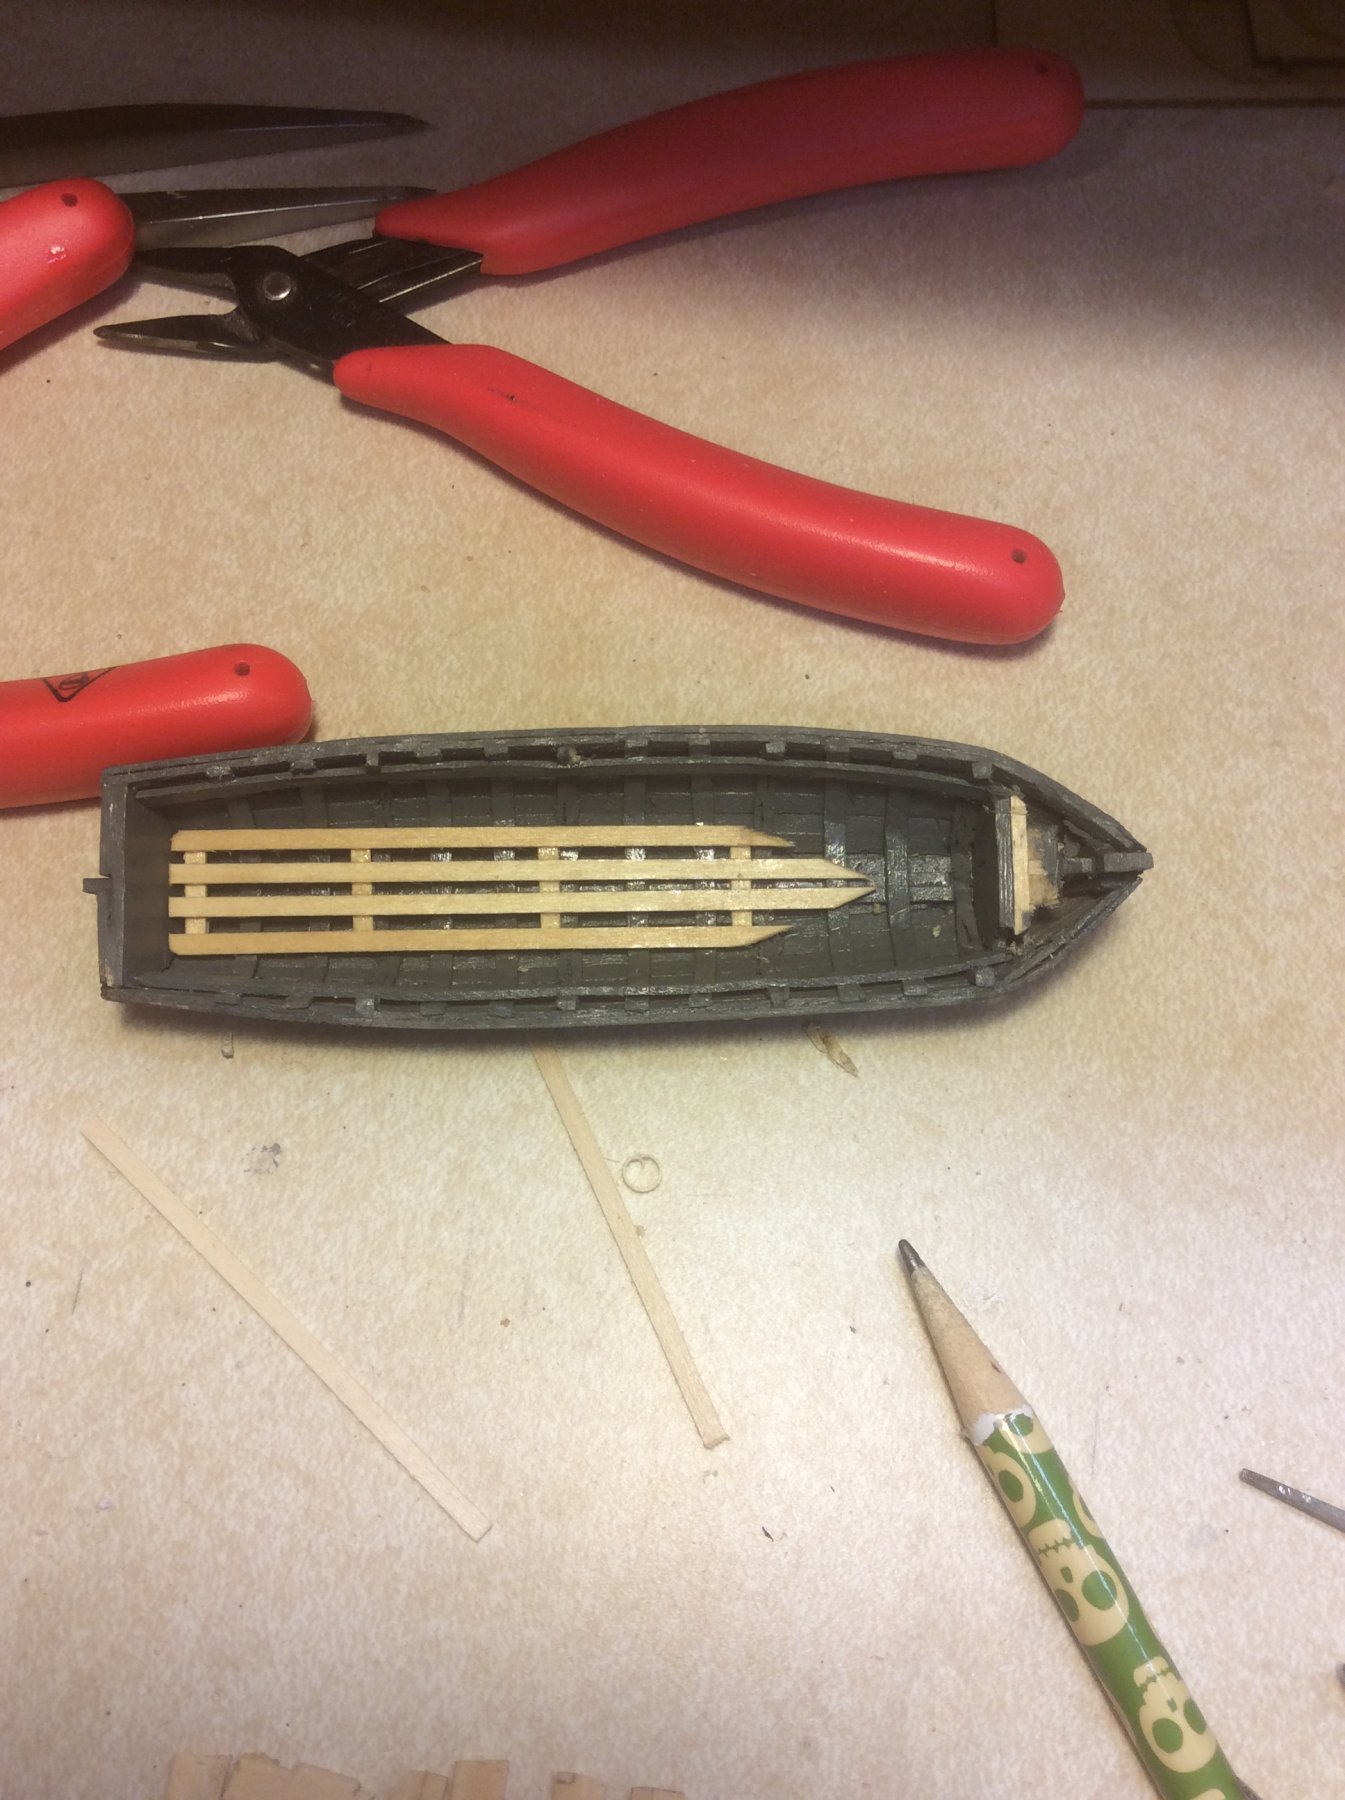
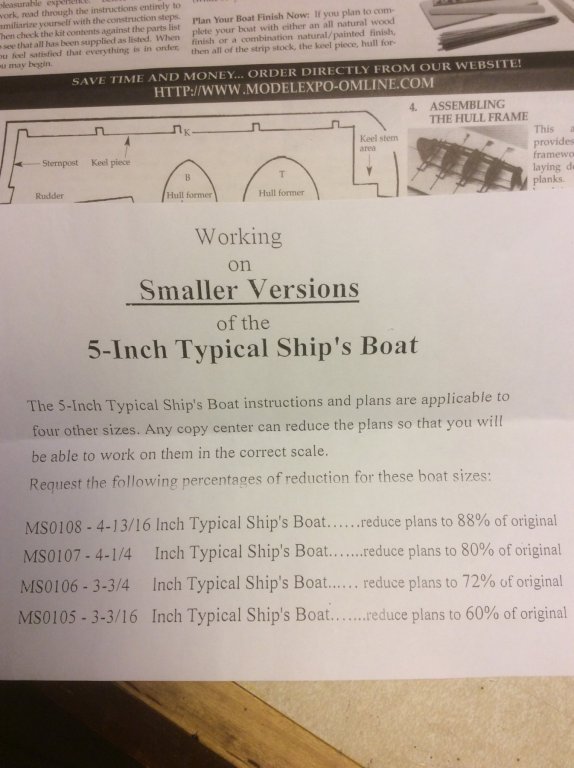
Wish I would have found this post and petehay’s log before I started building these boats. A couple of comments to those attempting to build these. [NOTE: Subsequent to my initial post, I discovered the kit build log Ships Boat by JSGerson. It is a superb log that covers this kit and problems with it. I realized that since the time of his build and now, Model Shipways has eliminated the boat plans and consolidated the two pages into one reduced page, which is probably the source of most of the problems I describe. Beware!] [Another NOTE: In my post below, I sound like I’m dumping on MS. Like others, I (unreasonably) expect perfection from my kit suppliers. I paid nine bucks for each kit, considerably more than what the kit went for in recent past. But, even at $9, there is probably not much profit margin for the seller on this little kit. Even with the inconveniences, I’ll probably purchase a couple more, and I’m glad that someone is selling such a kit. If nothing else, I have a better appreciation for those in this hobby who model at very small scales!] If if you want one finished boat, I suggest you buy two or three kits, because you will likely ruin two of them in the building process. This is NOT a beginner’s project. Soaking and steaming the 1/16x1/16 wood still doesn’t prevent splintering of them when attempting to form the very tight radii of the main ribs. (Count this as the reason to throw away one of the kits you bought!). Suggest laminating each rib from two layers of well soaked 1/16”x1/32” pieces. Despite the years between petehay’s original post and now, MS hasn’t improved the quality of the instructions. The photos in them are still not readable (in any of the four kits I purchased). Even if you could clearly read them, the figure number referred to doesn’t match the text. Also, the “Hull Frame without Planking” drawing is tagged “Scale: 1=1” ... it isn’t (but, it is still the most useful illustration). This kit comes in several sizes. For any but the largest size, MS has included an addendum to the instructions recommending the buyer have the instruction sheet reduced by photocopying to proportions they list. There is nothing useful on the figures in the instructions that would benefit the modeler by doing so. The one thing that does benefit by reduction based on the listed proportions is the statement in the text that says “Draw ... crosslines 1” apart” when building the hull building jig. This 1” dimension applies only to the largest kit. It must be reduced for smaller kits. (If you have followed this instruction and set up your hull building jig to 1” for any but the largest kit, count this as reason to throw away another one of the kits you’ve bought). Instead of using the listed proportions reductions, I suggest marking these crosslines (which establish the main rib spacing) directly off the laser cut Keel piece. The instructions say (referring to forming the main ribs over the jig forms) “At the keel position in the center there should be a 1/16” gap”. This means the modeler should NOT form the rib tight to the jig at the location of the keel ... but, while forming, that gap doesn’t naturally occur at 1/16”. Suggest either adding material to the jig to complete the curve of the hull while leaving a small notch at the keel location. The laser cut main rib formers have been truncated ( so much so that only about half of the former actually provides the “form” of the rib) in an attempt to create this gap, but if the hull curve of the former is continued it results in much more than 1/16” gap. It would have been nice if the former would have continued farther around, with a small notch to prevent improper glueing ... as they did where the rib ends are glued to the forms. Conclusion: I purchased four of these kits, in two different sizes, neither the largest size available. I am hoping to have one complete, good build and maybe one salvageable build. You can decide if something less than 50% meets expectations.
-
Thanks. I just spent a few minutes on their website and this looks promising.
-
Lou: I came across your post when searching for discussions on “capstans”, and soon became interested in the discussion on gunports. Lots of info from several respondents on the sizing and location of them, which lead me to wonder ... which comes first: gunport sizing and location, or hull frame location? I’m thinking frames, then gunport size/location adjusted to fit. Also, I’m wondering if they gave any consideration to the port size vs. carriage size, in the event they might have to lose their guns overboard if being chased. Finally, how does your build progress? I’ve not been able to find a log, if you’re posting one.
-
Just curious ... what did you wind up doing? Tiller or wheel?
-
Thank you for responding. Indeed, I have now been searching sites for 1:35 ( or thereabouts) figures, and the search continues. The second post was a weak pre-apology to those who might respond that I ought to have first looked at the pinned topic “In need of ... boat crew members” before posting my question. There were many good tips in that topic that I ought to have looked at first. Nonetheless, additional suggestions would be welcomed, as I am still looking. Thanks again.
-
Chop Saw from Harbor Freight - Review
Srodbro replied to mtaylor's topic in Modeling tools and Workshop Equipment
Thanks for the info. I picked one up this afternoon. I’ll be playing with modifications tomorrow. -
Chop Saw from Harbor Freight - Review
Srodbro replied to mtaylor's topic in Modeling tools and Workshop Equipment
Could one of you update your opinion of this saw now that it is five years later? still have it? Still working? Thanks. -
Duh ... just noticed the topic at the head of this page. Ill peruse the many responses.
-
Some years ago I built the Bluejackets New Bedford whaleboat. I mounted it on a base with a stylized sperm whale, harpooned and towing the boat. While building it, I intended to populate the boat with a crew. I have not installed all the paraphernalia that they stuffed into these boats, pending addition of the crew. Alas, the scale of this model is 1/3”=1-0” (so what’s that .... 1:33 ?), I am running to dead ends searching for figures that might be adaptable in this fashion. Any advice?
-
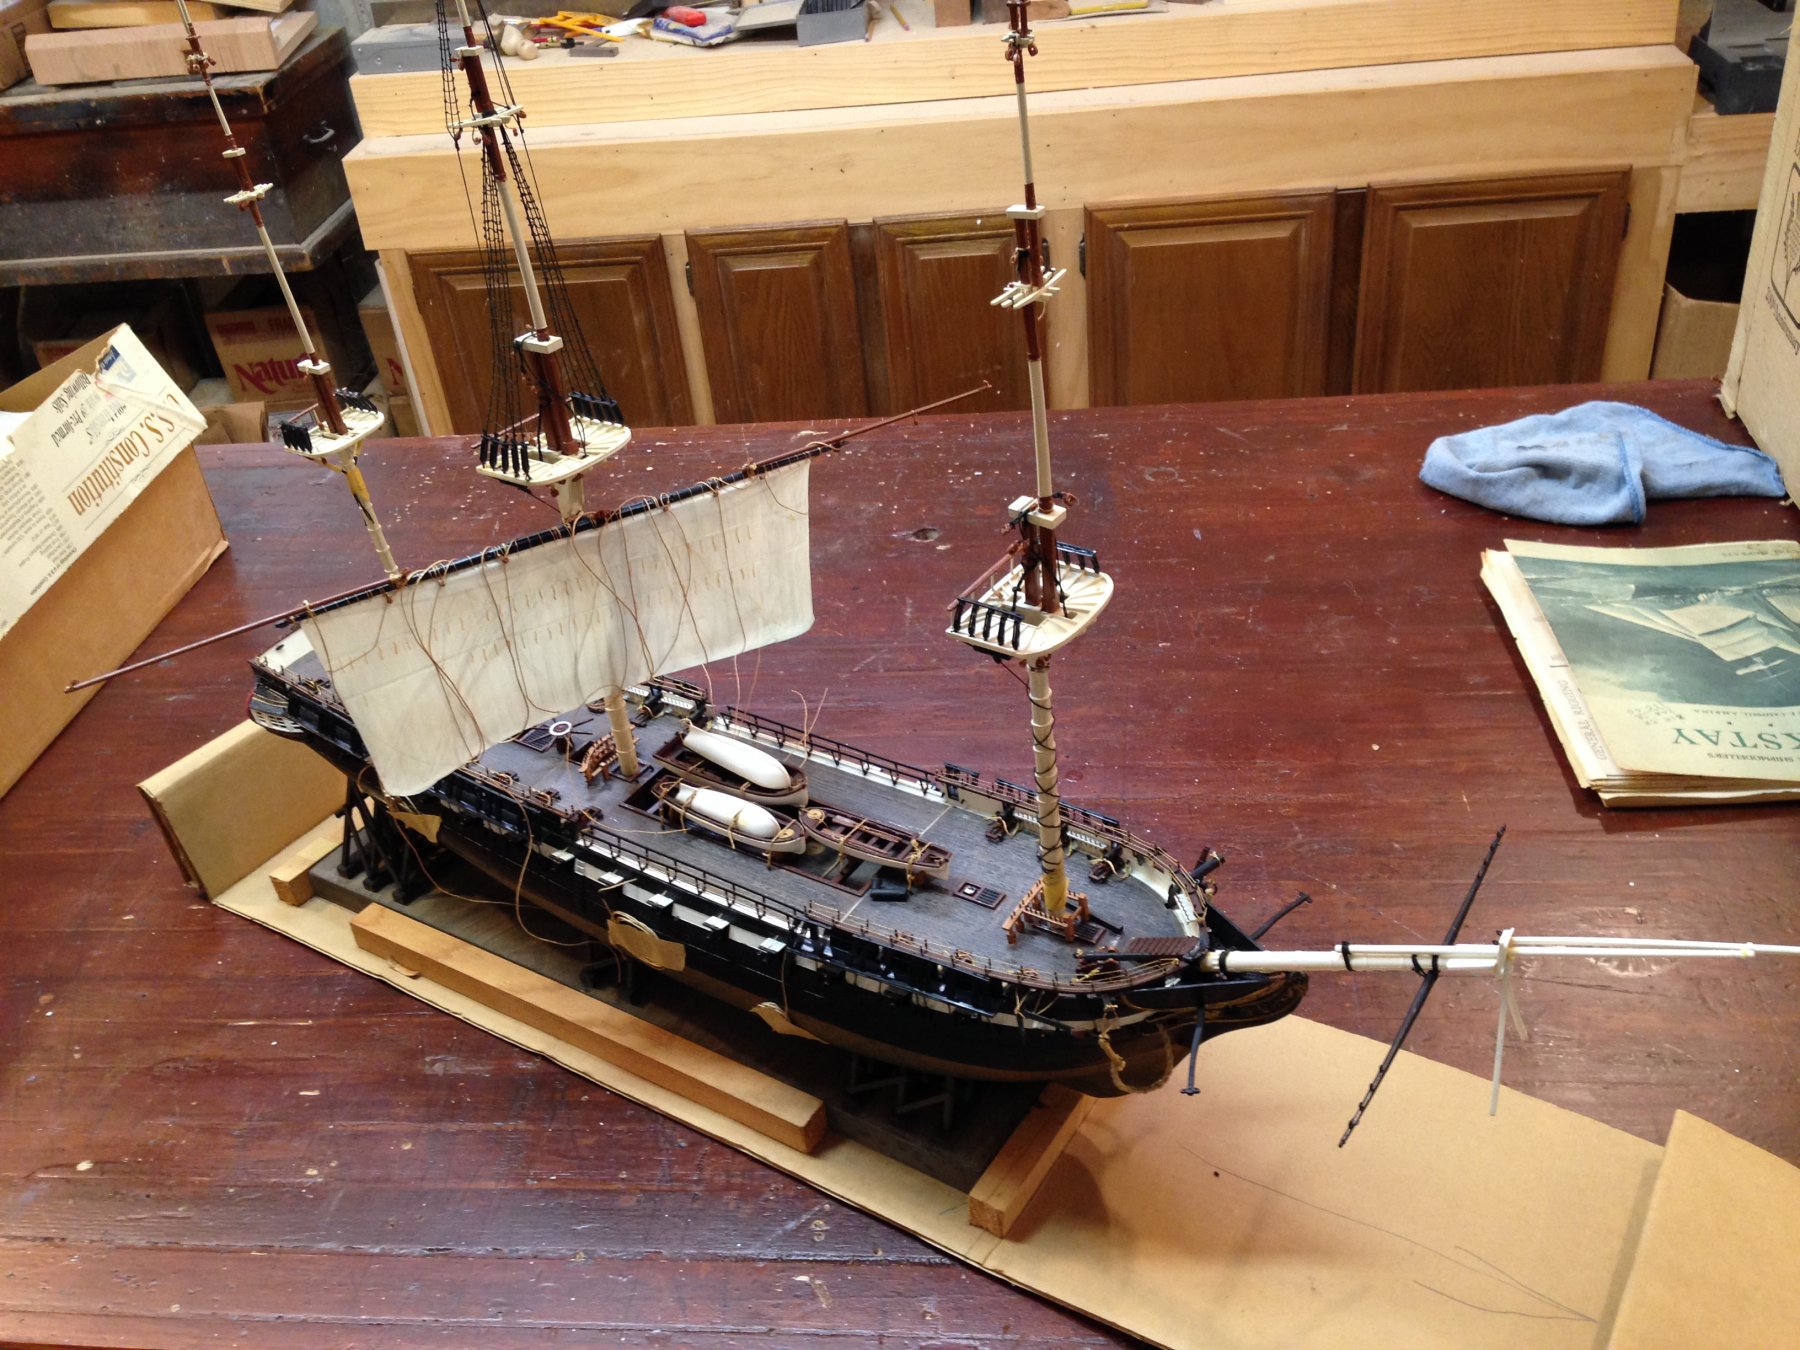
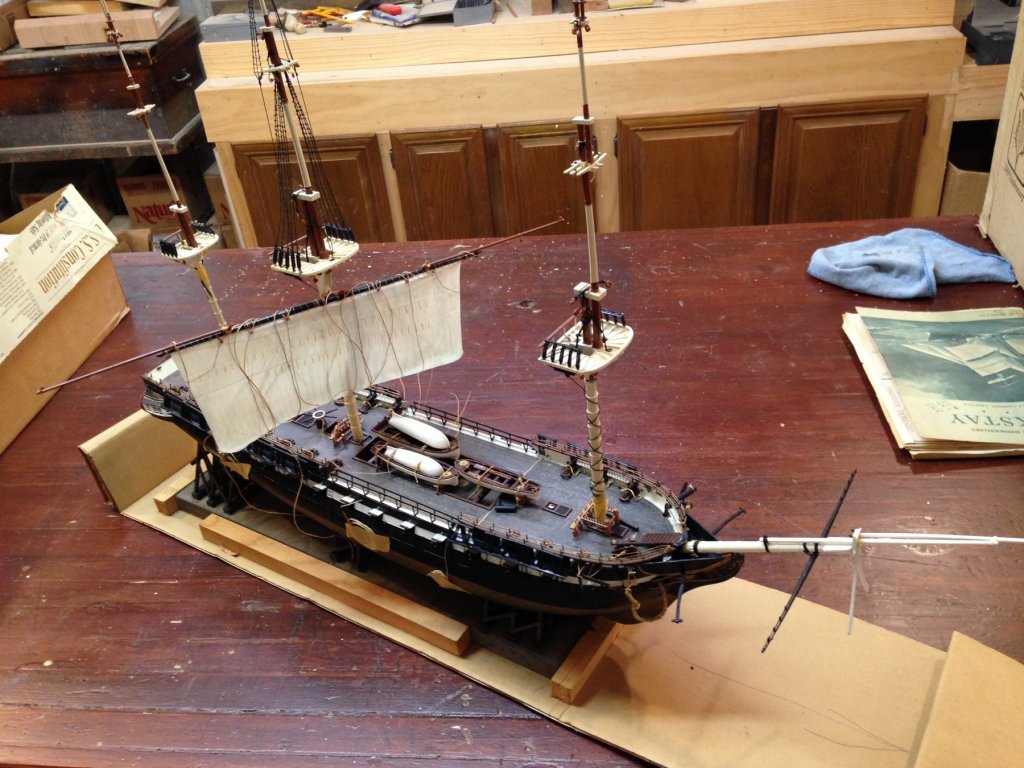
Ah yes ... your pics bring back memories. I understand about interruptions ... I started my plastic Connie in 1968, and finally took her out of storage over 45 years later. Finished her two years ago. Here is a pic of her when I took her out of the box in the attic. I would be so bold to make one suggestion while you are at this stage of your build. Once you start rigging, a lot of stress is applied to your fife rails, pinrails and the lanyards on the channels. Mine wound up breaking off the hull while rigging (perhaps a consequence of sitting in the sweltering/freezing conditions of the attic for decades), and were very difficult to reinstall with other rigging elements in the way. I would suggest reinforcing the connections of these rails with a steel pin thru the rails into the hull. And then don’t store it in the attic for many years. Have fun.
- 17 replies
-
- 3
-
-
- constitution
- revell
- (and 2 more)
-
Rigging Question - Virginia Privateer
Srodbro replied to David Lester's topic in Masting, rigging and sails
Nicely done. -
Hull filler.
Srodbro replied to bluenose2's topic in Building, Framing, Planking and plating a ships hull and deck
I have used drywall joint compound on solid hulls below finish planking without any problem ... can’t imagine why using it on under planking would be any different.
-
I doubt any French Captains would have turned up his nose at having British guns on his ship.
-
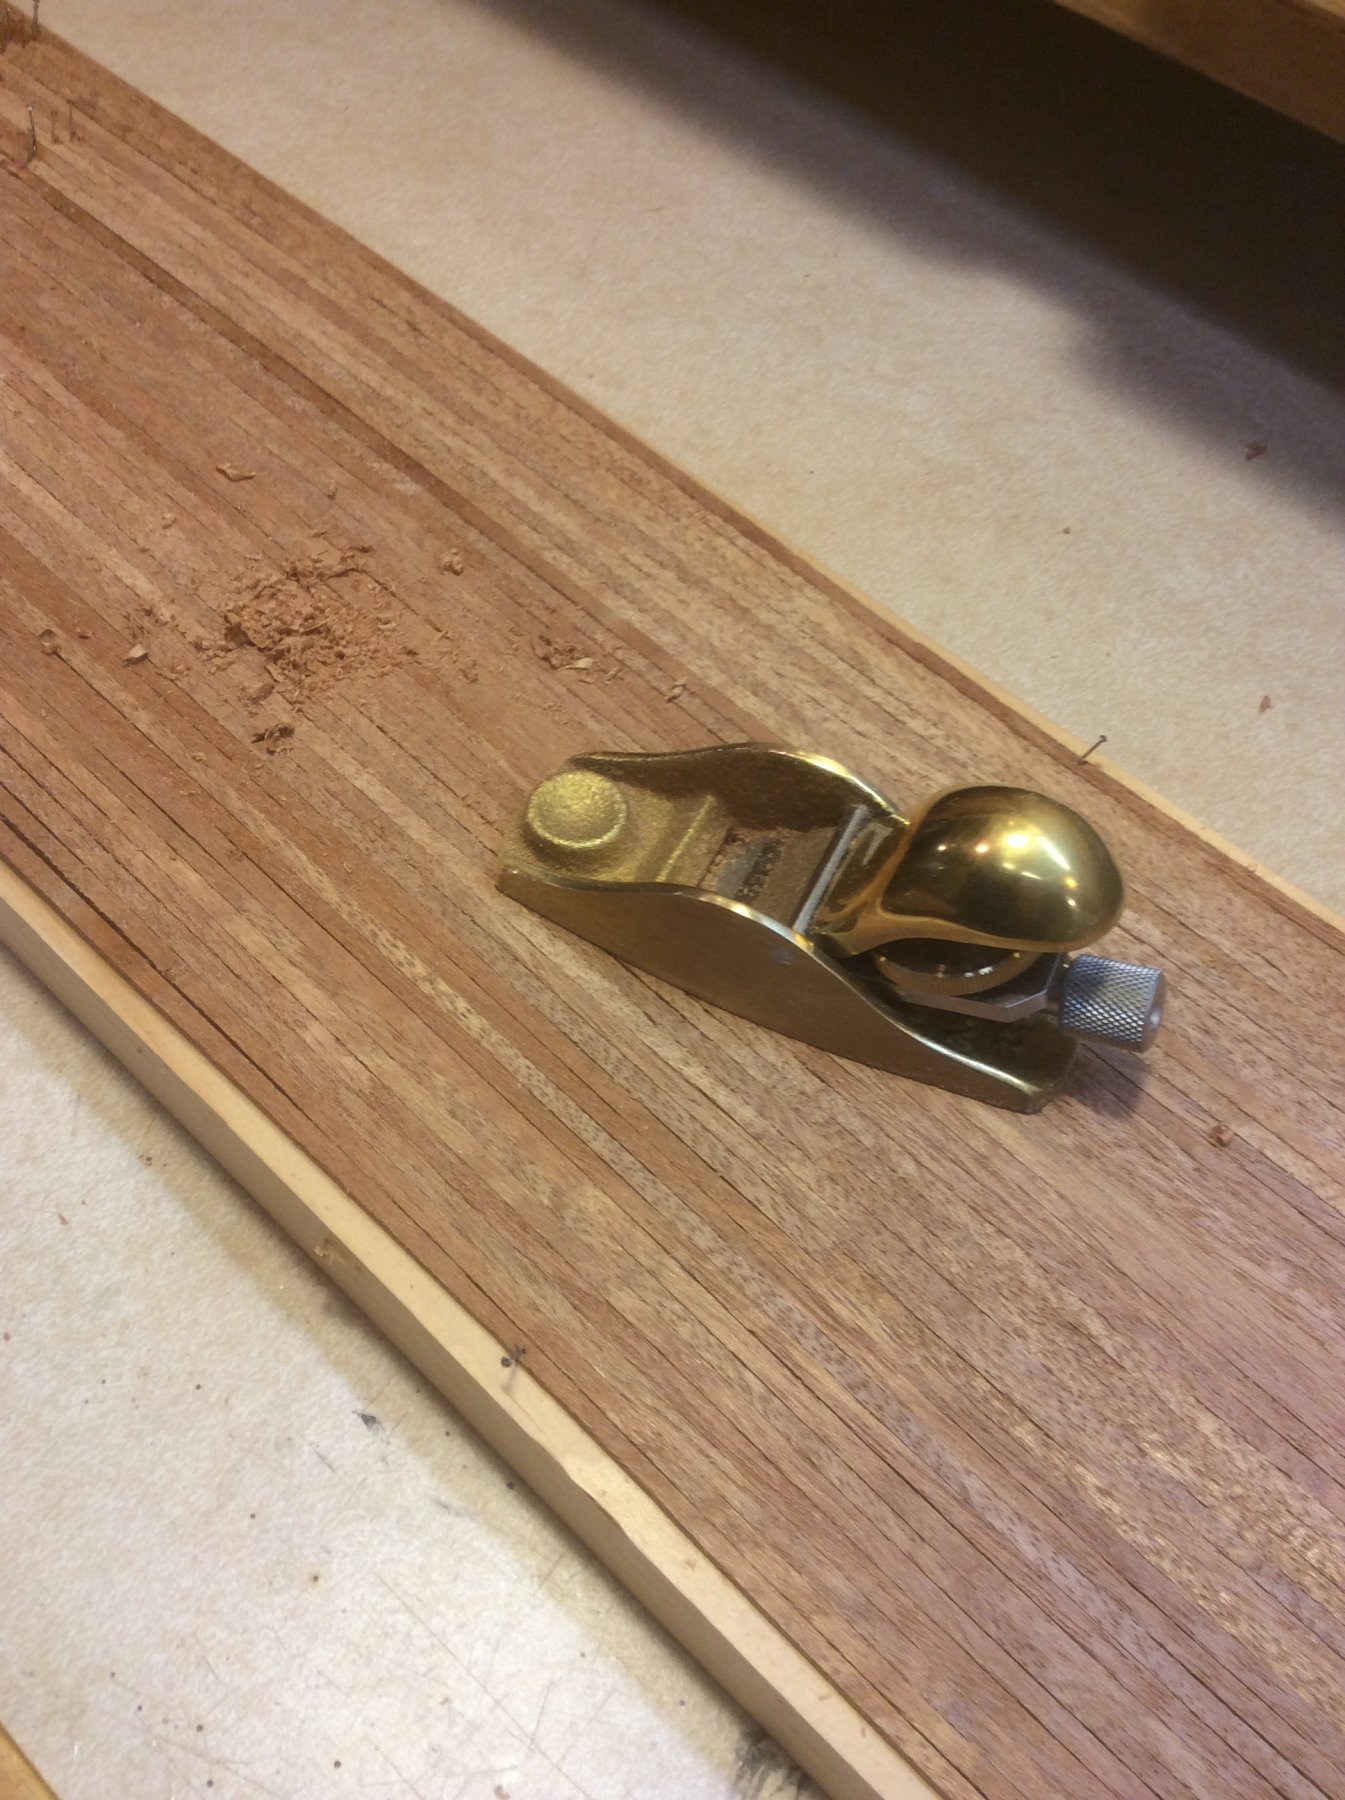
My handy Lie-Nielsen Violin Maker's Block Plane
Srodbro replied to Mike Shea's topic in Modeling tools and Workshop Equipment
That little plane is great. I’ve been cutting my own planks for a scratch-build I’m working on and it’s great for taking saw blade marks off the planks.