


SWOHammer
-
Posts
34 -
Joined
-
Last visited
Content Type
Profiles
Forums
Gallery
Events
Posts posted by SWOHammer
-
-
1 hour ago, Tigersteve said:
Room for one more on this one?
Steve
Welcome aboard, shipmate!
- EJ_L and Tigersteve
-
 2
2
-
Fellow Shipwrights!!
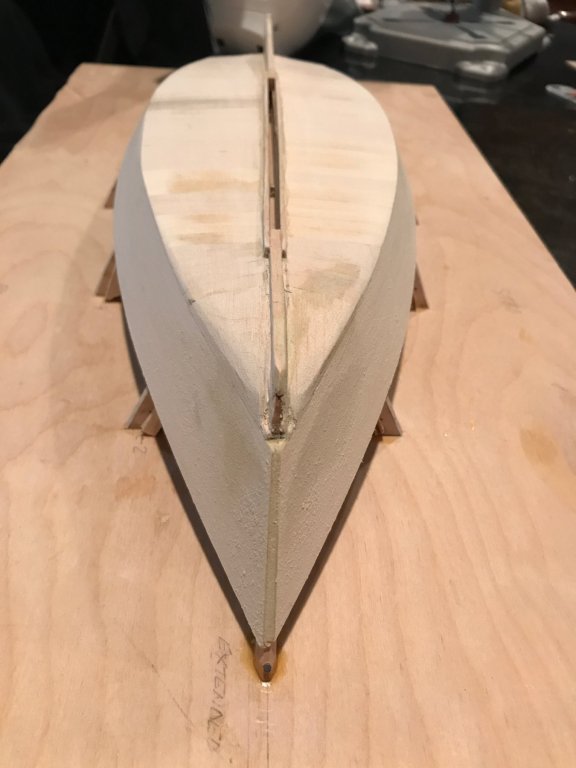
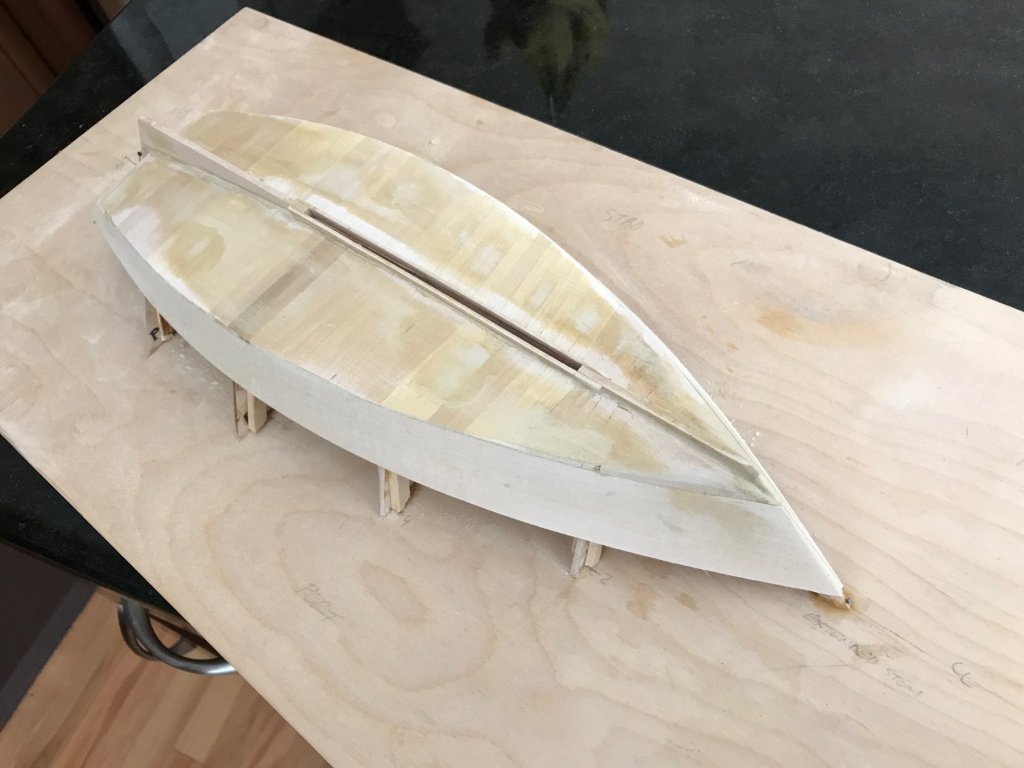
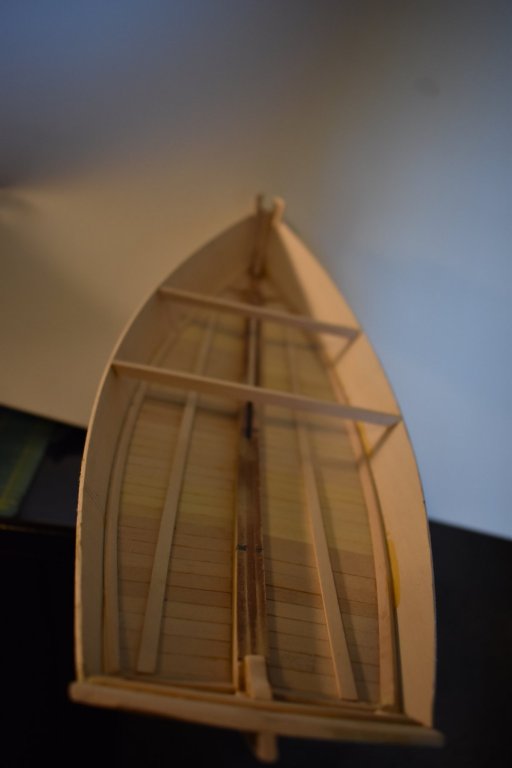
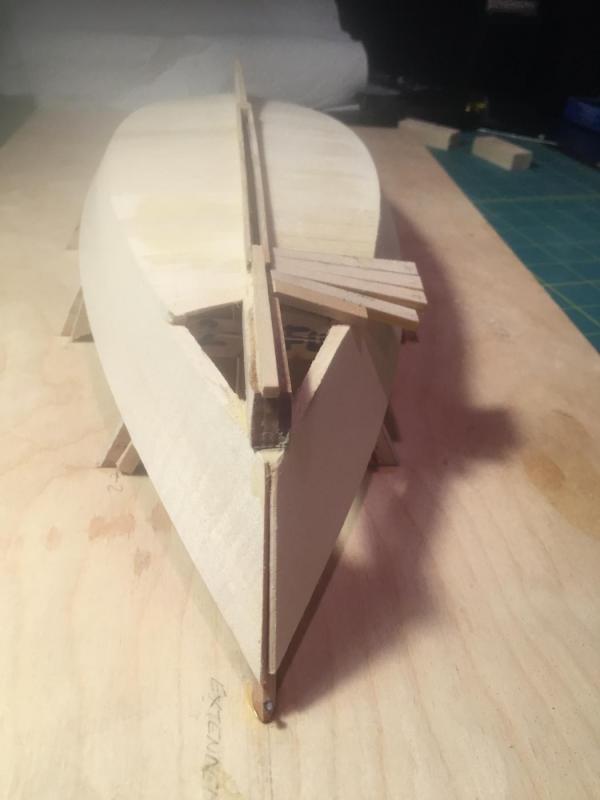
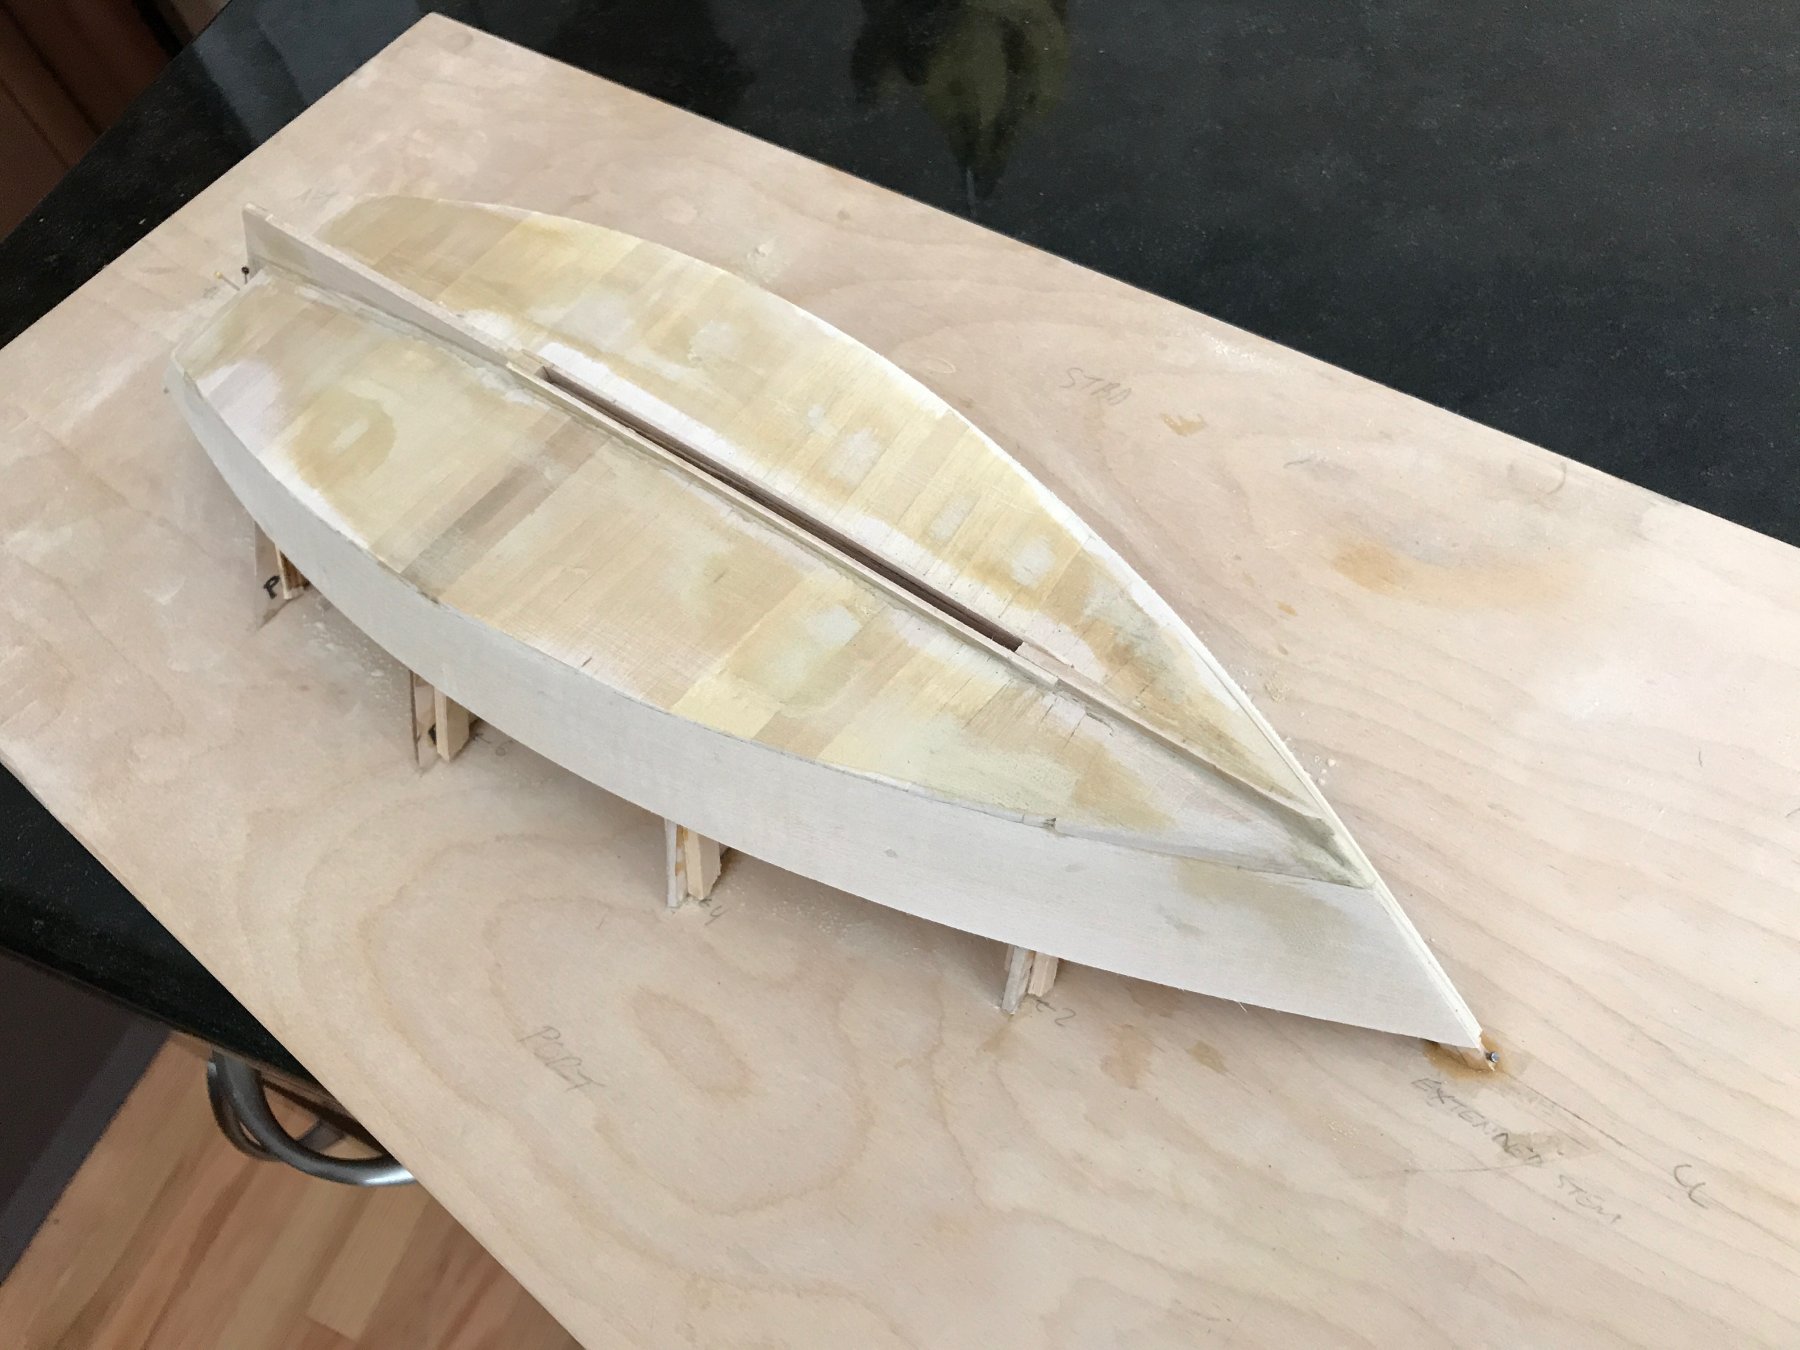
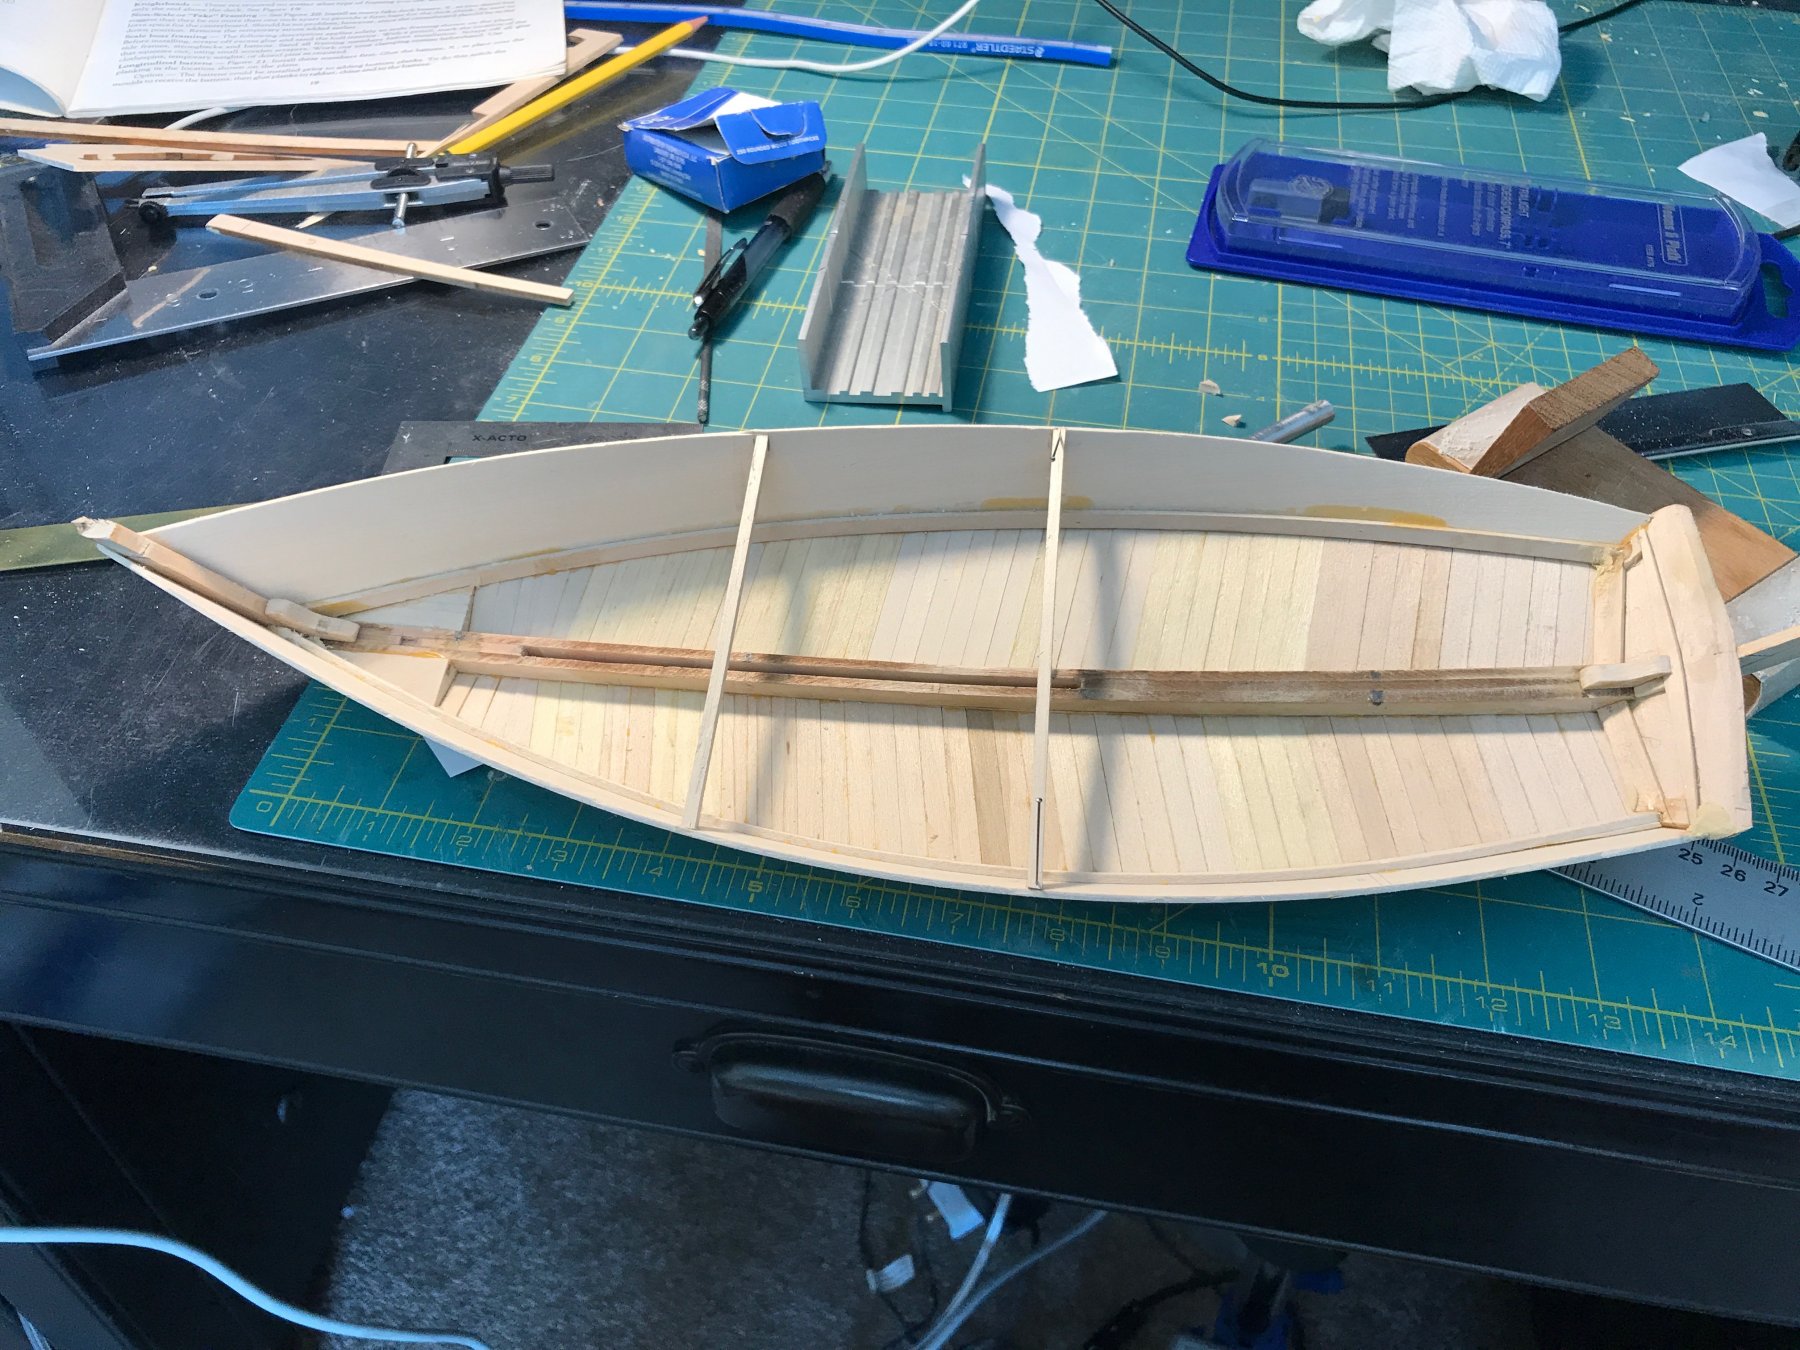
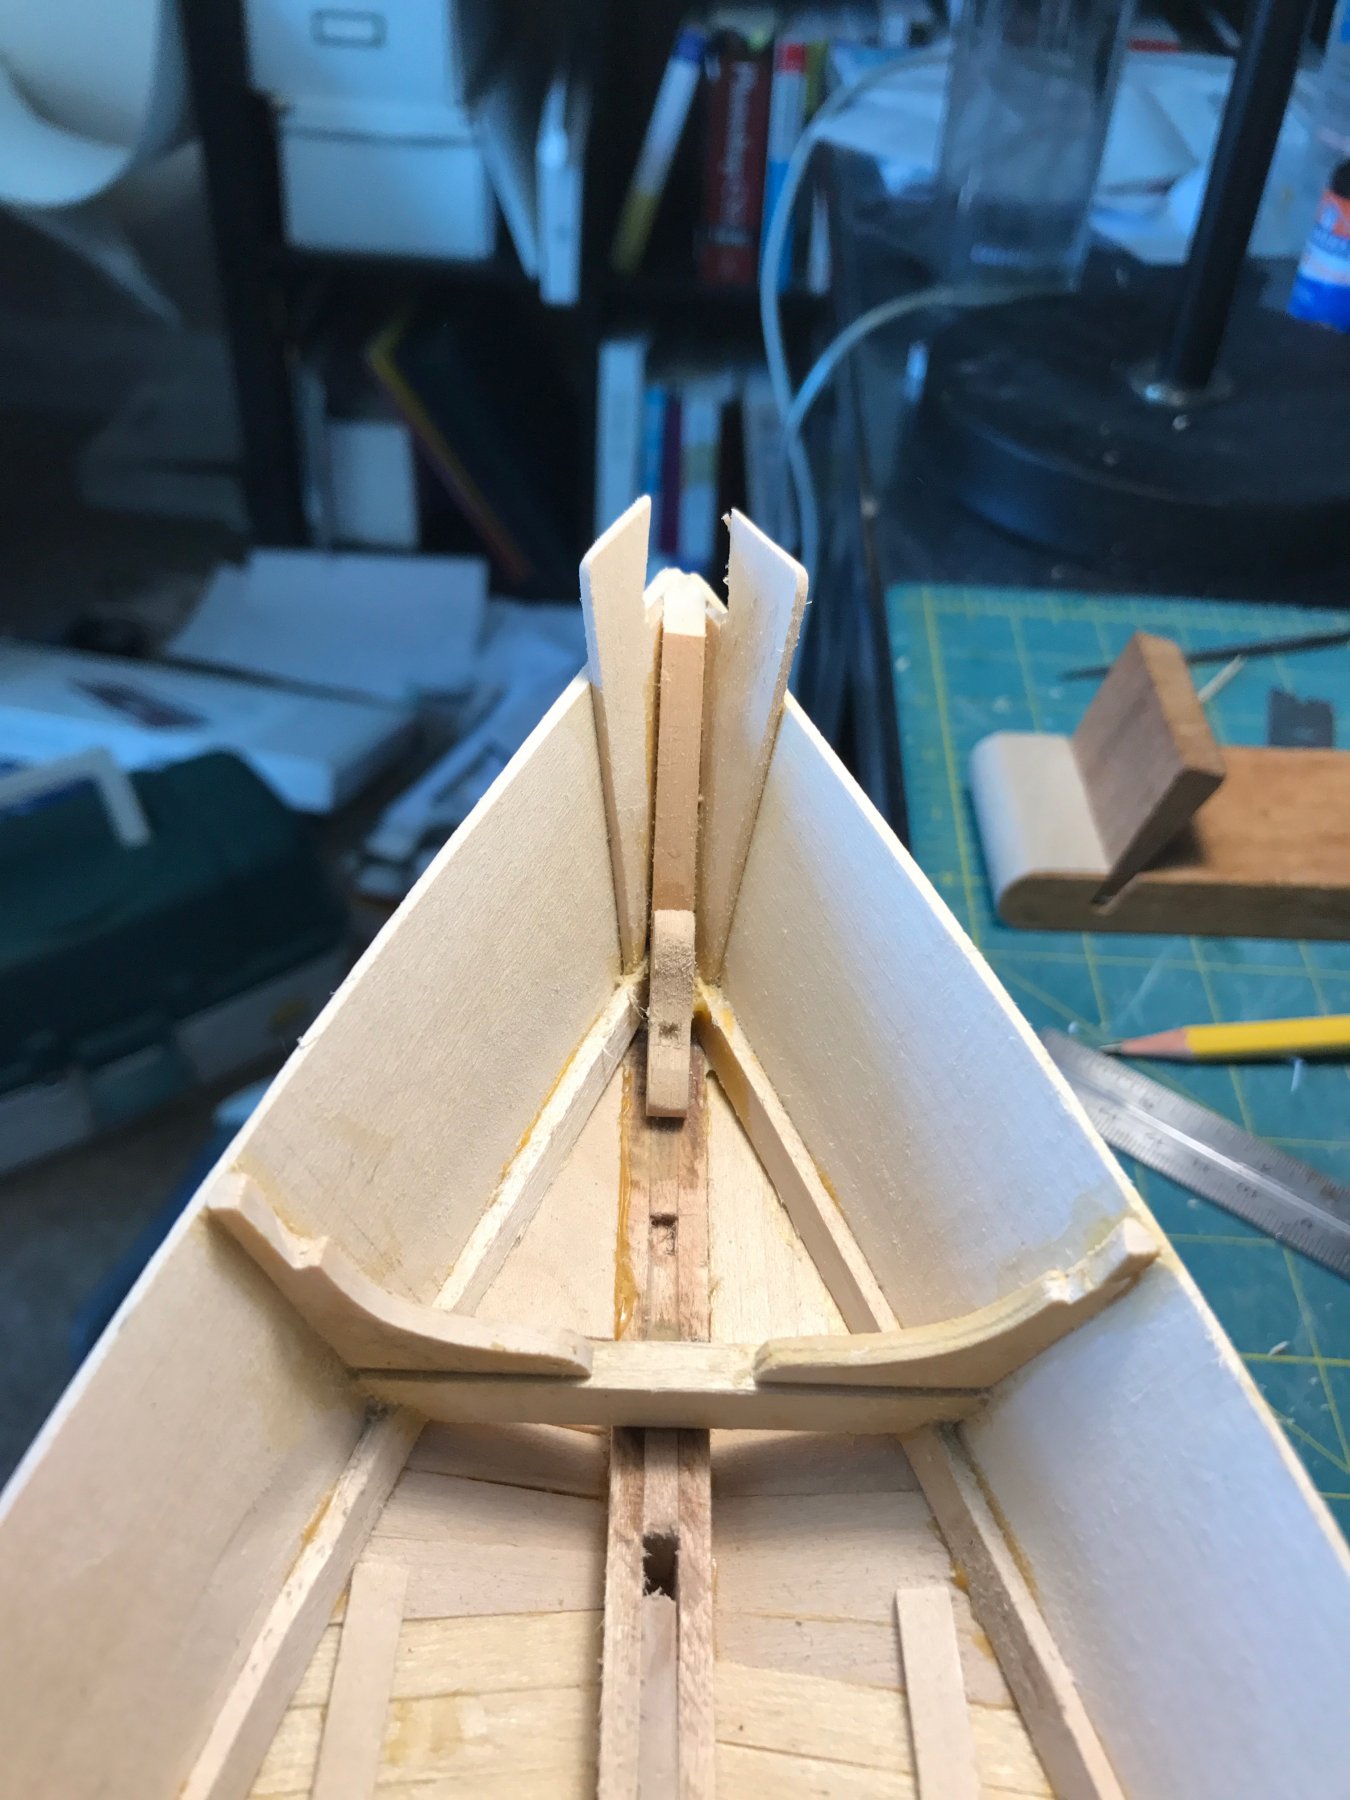
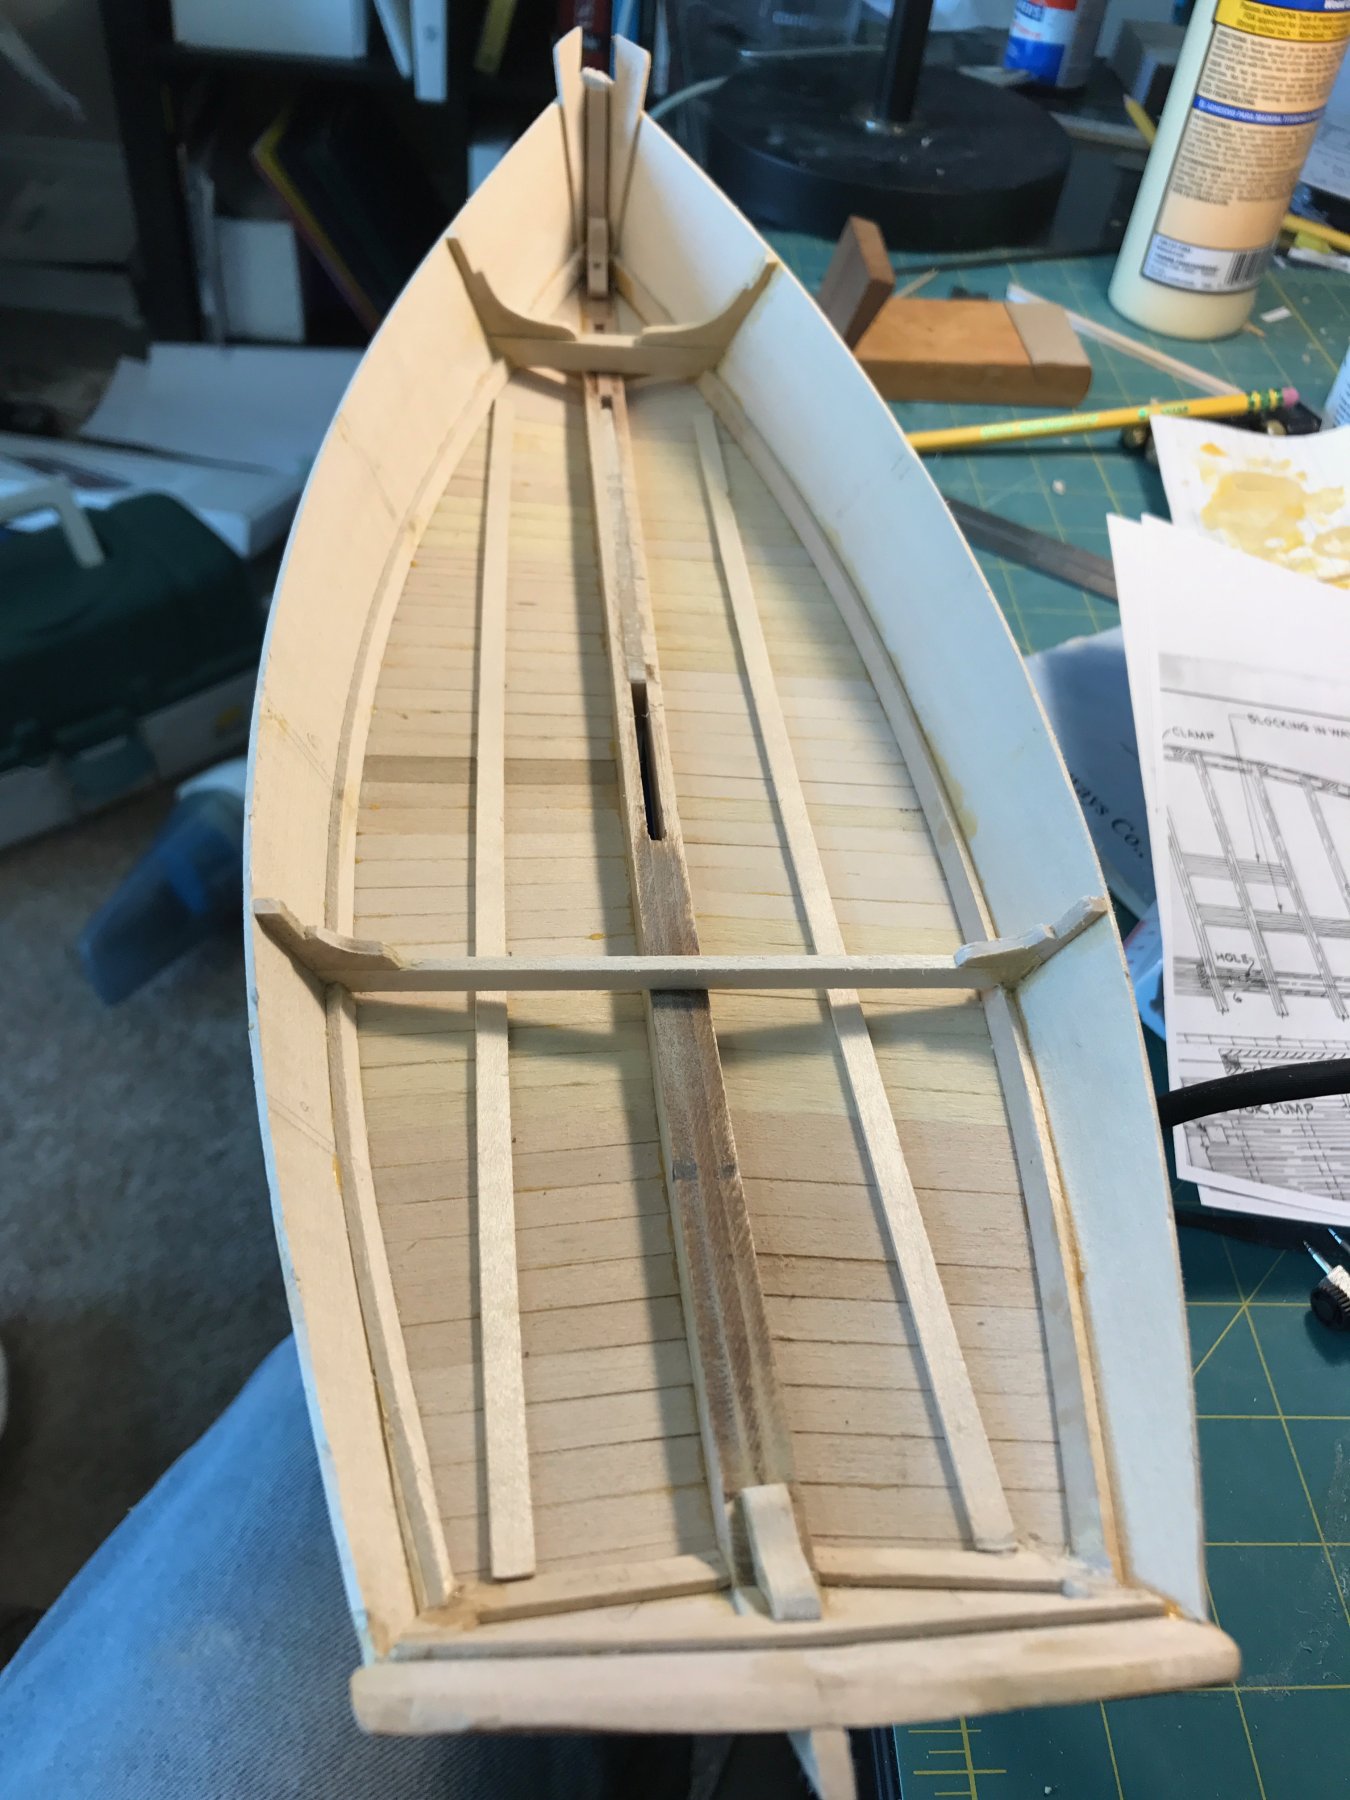
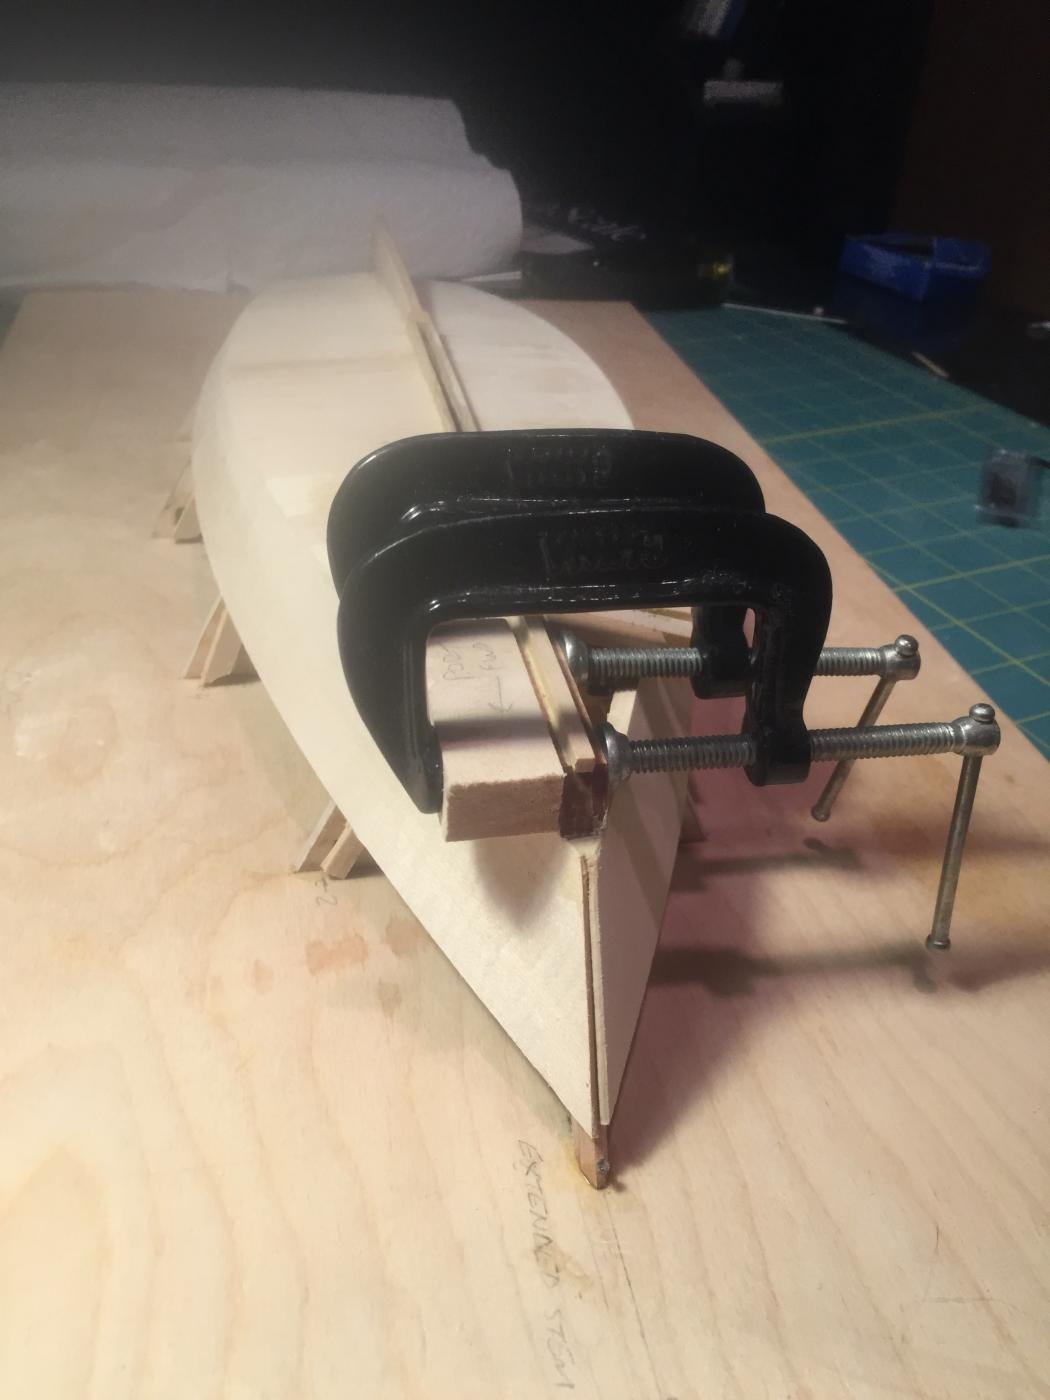
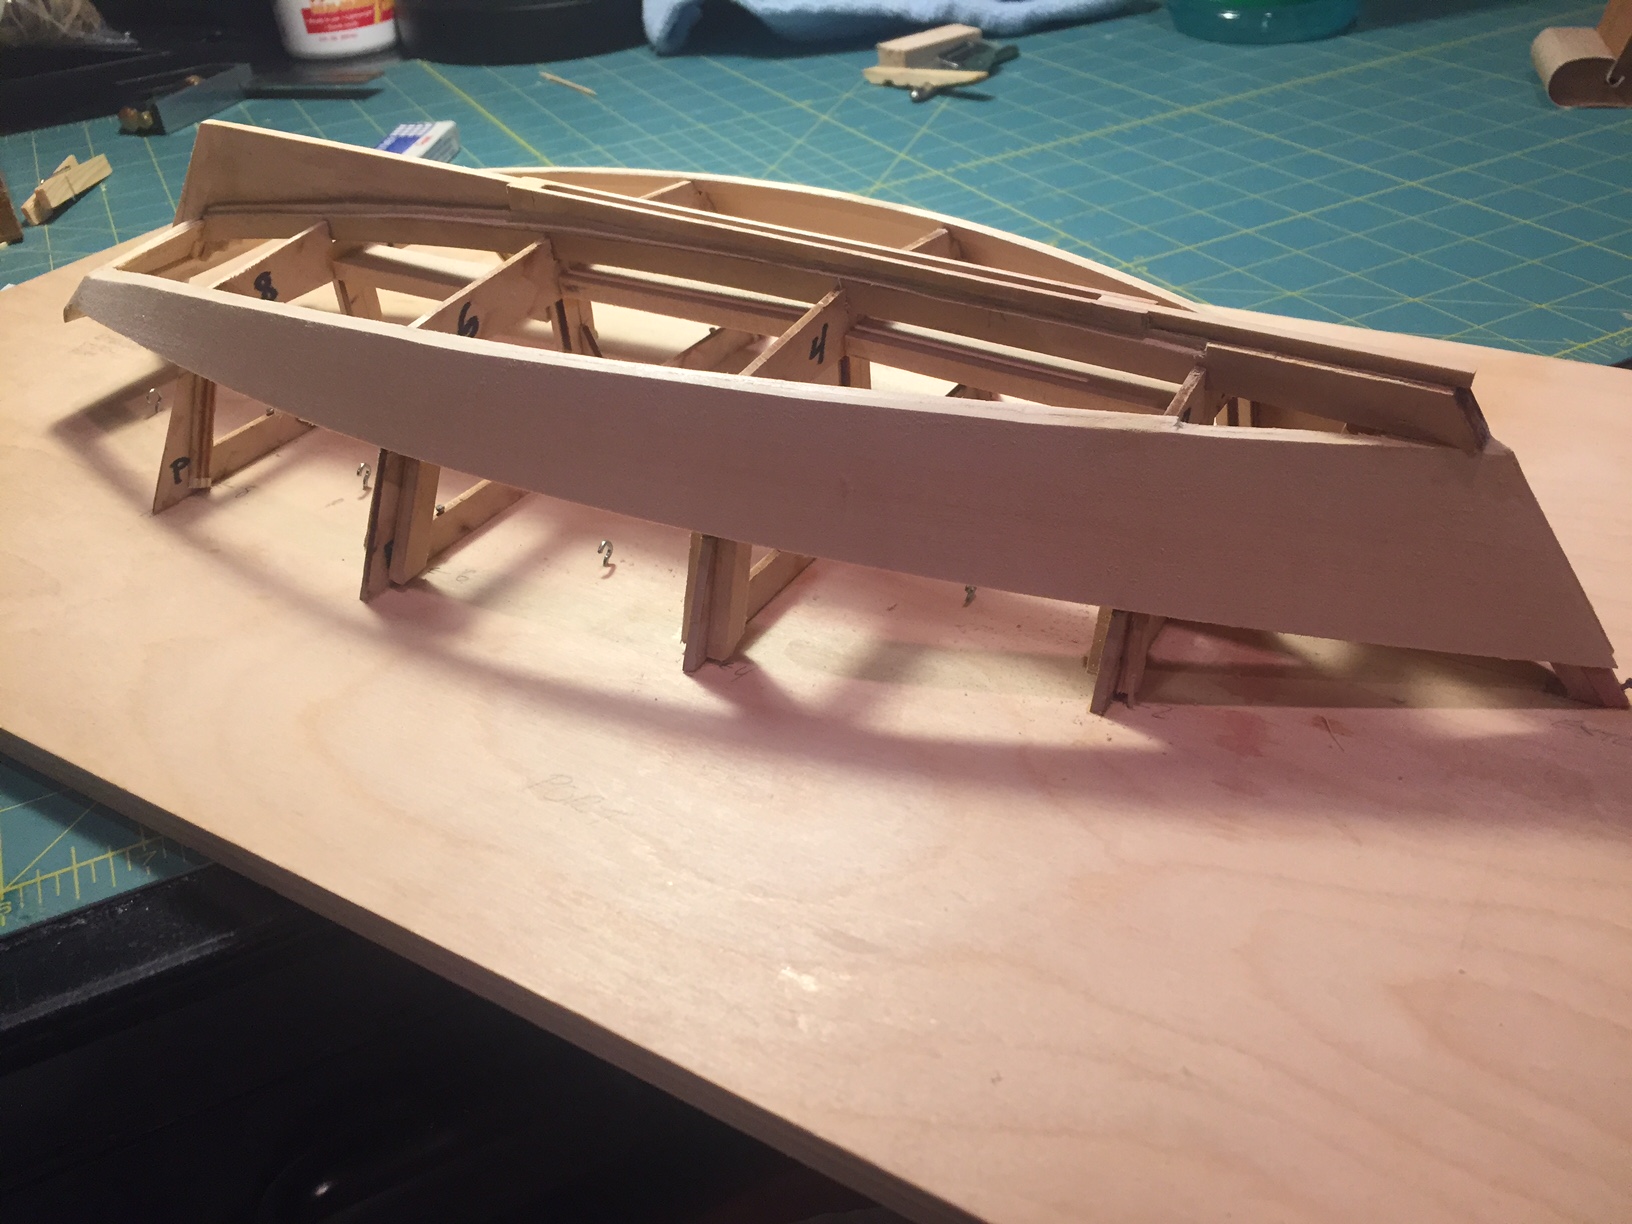
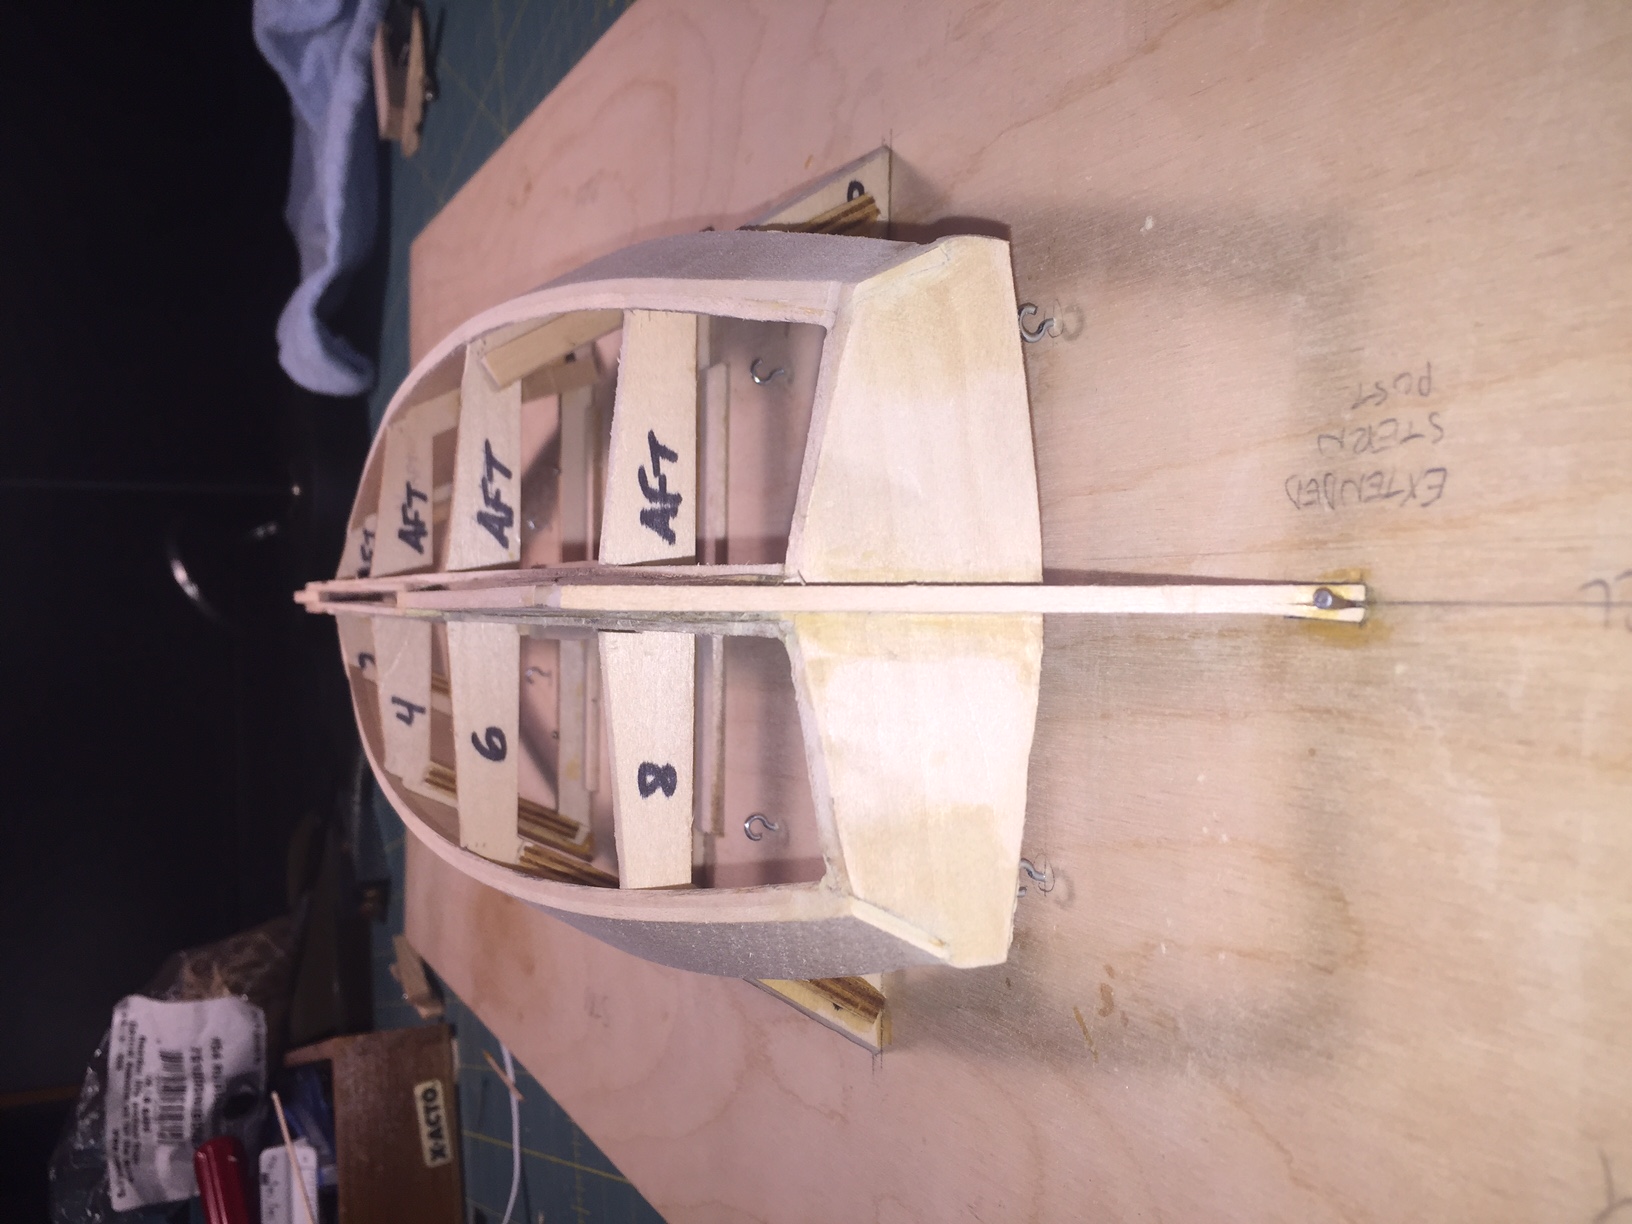
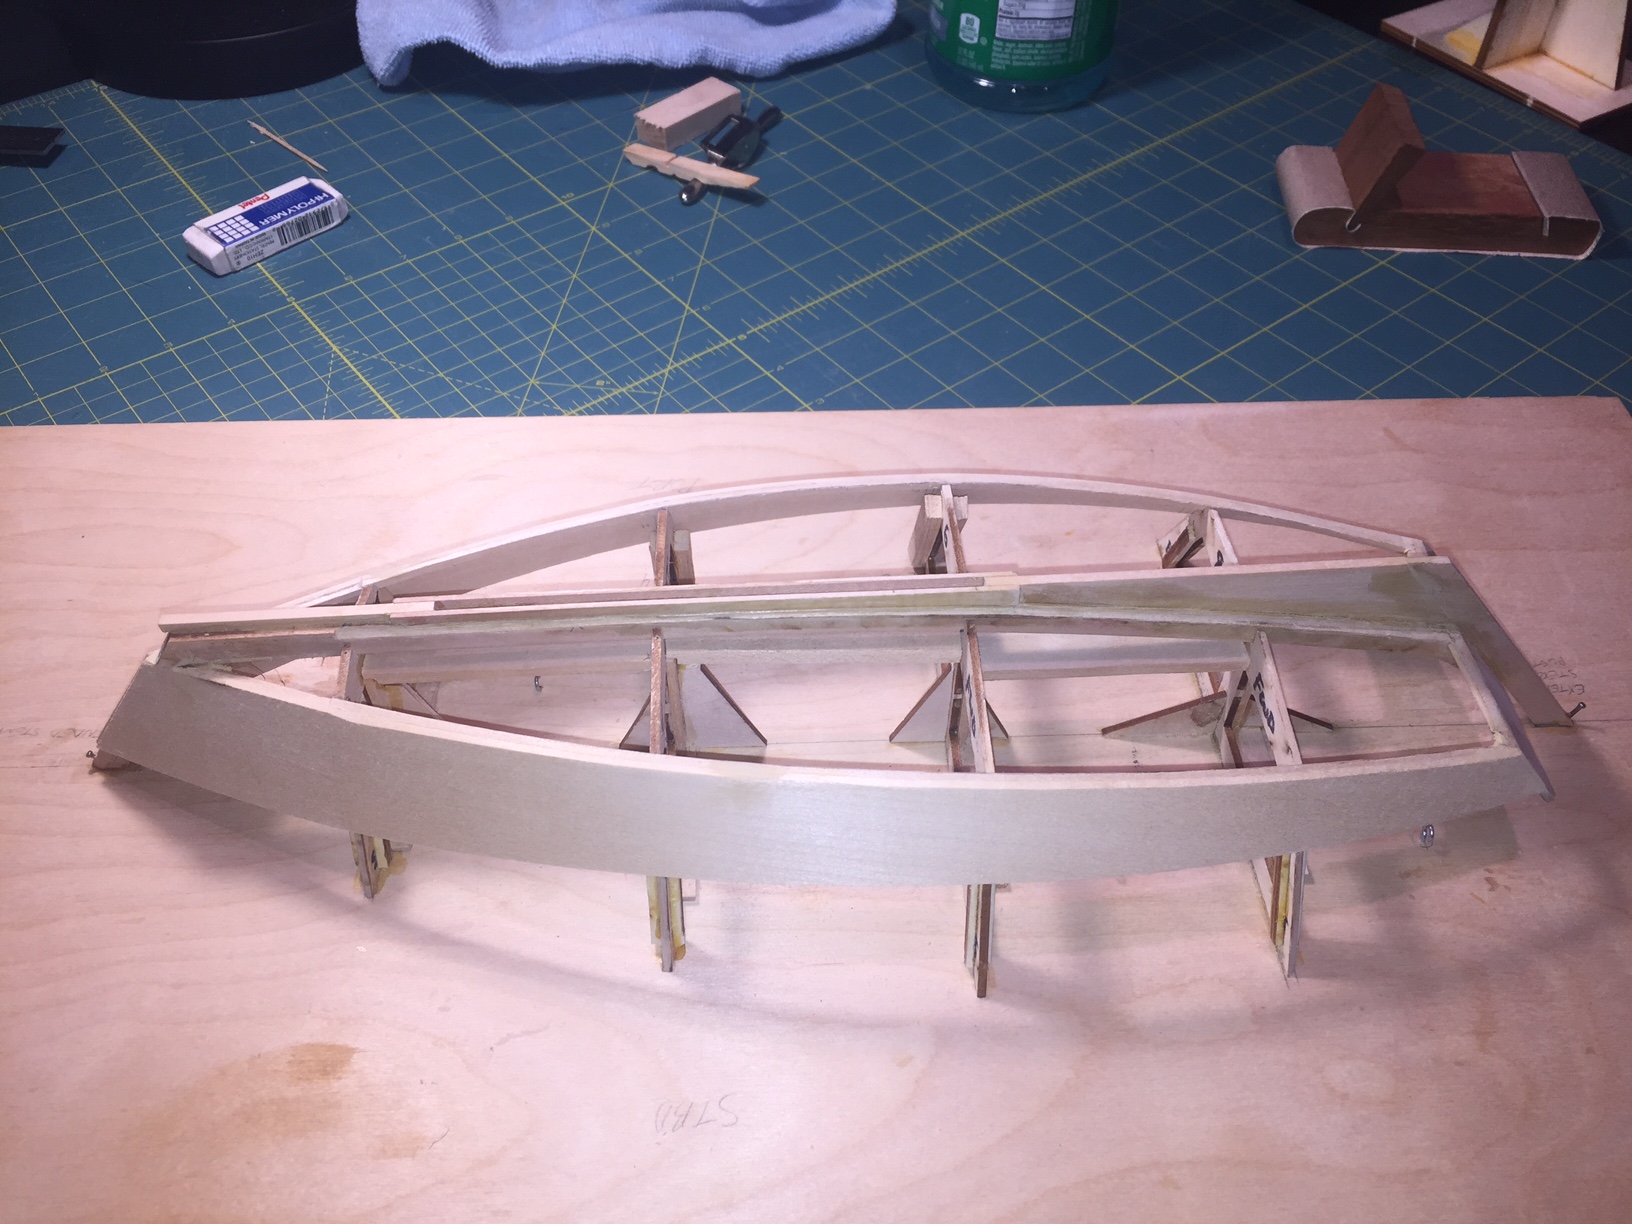
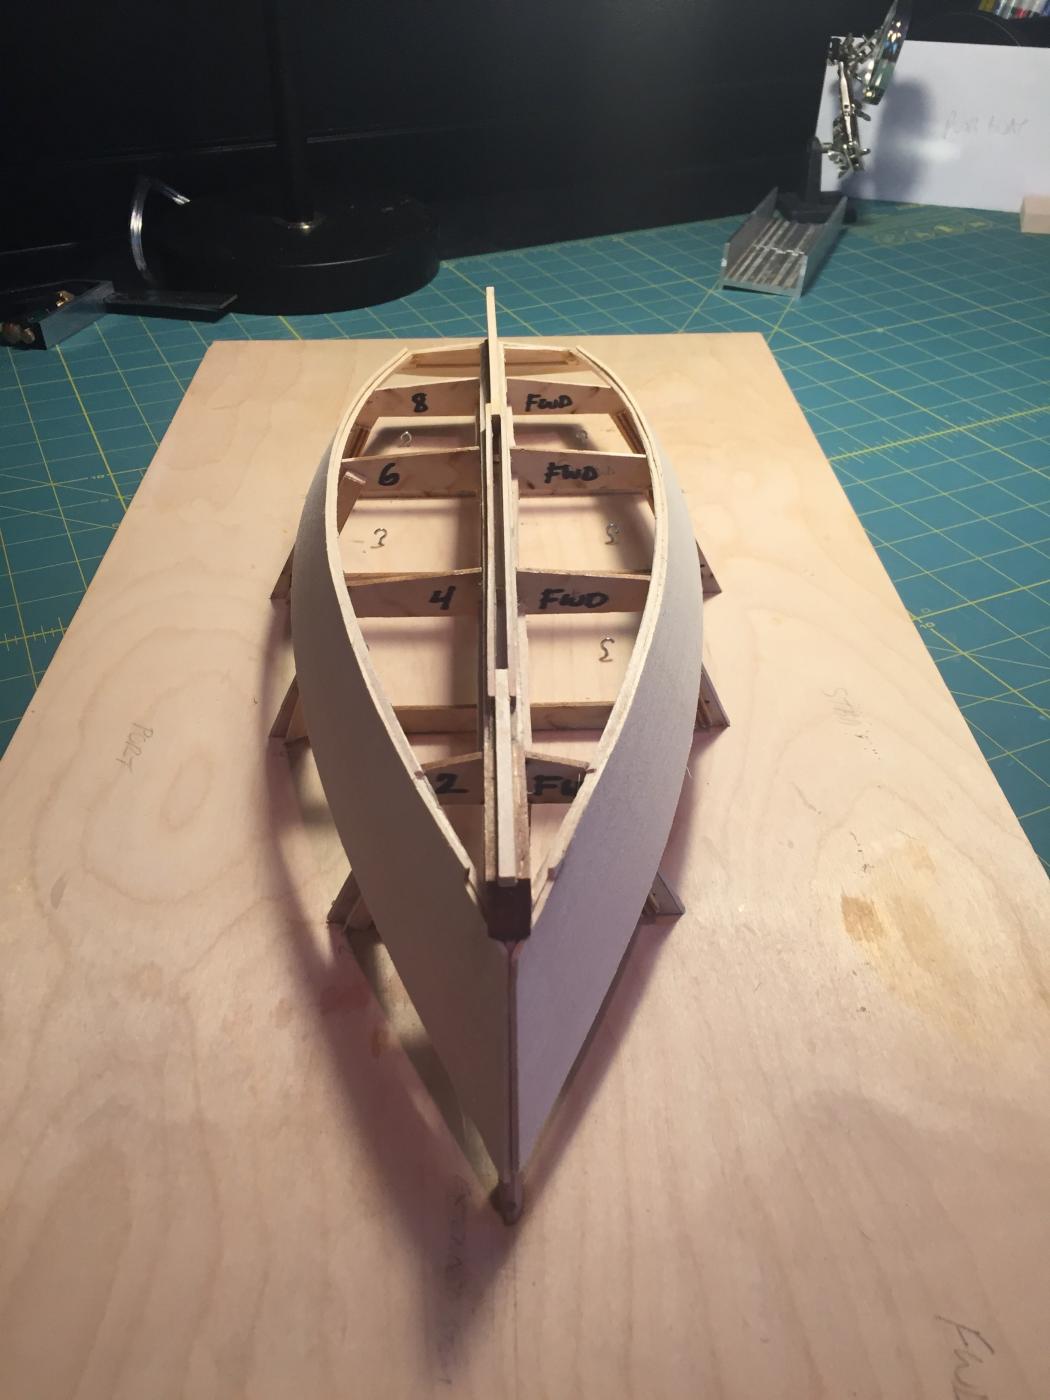
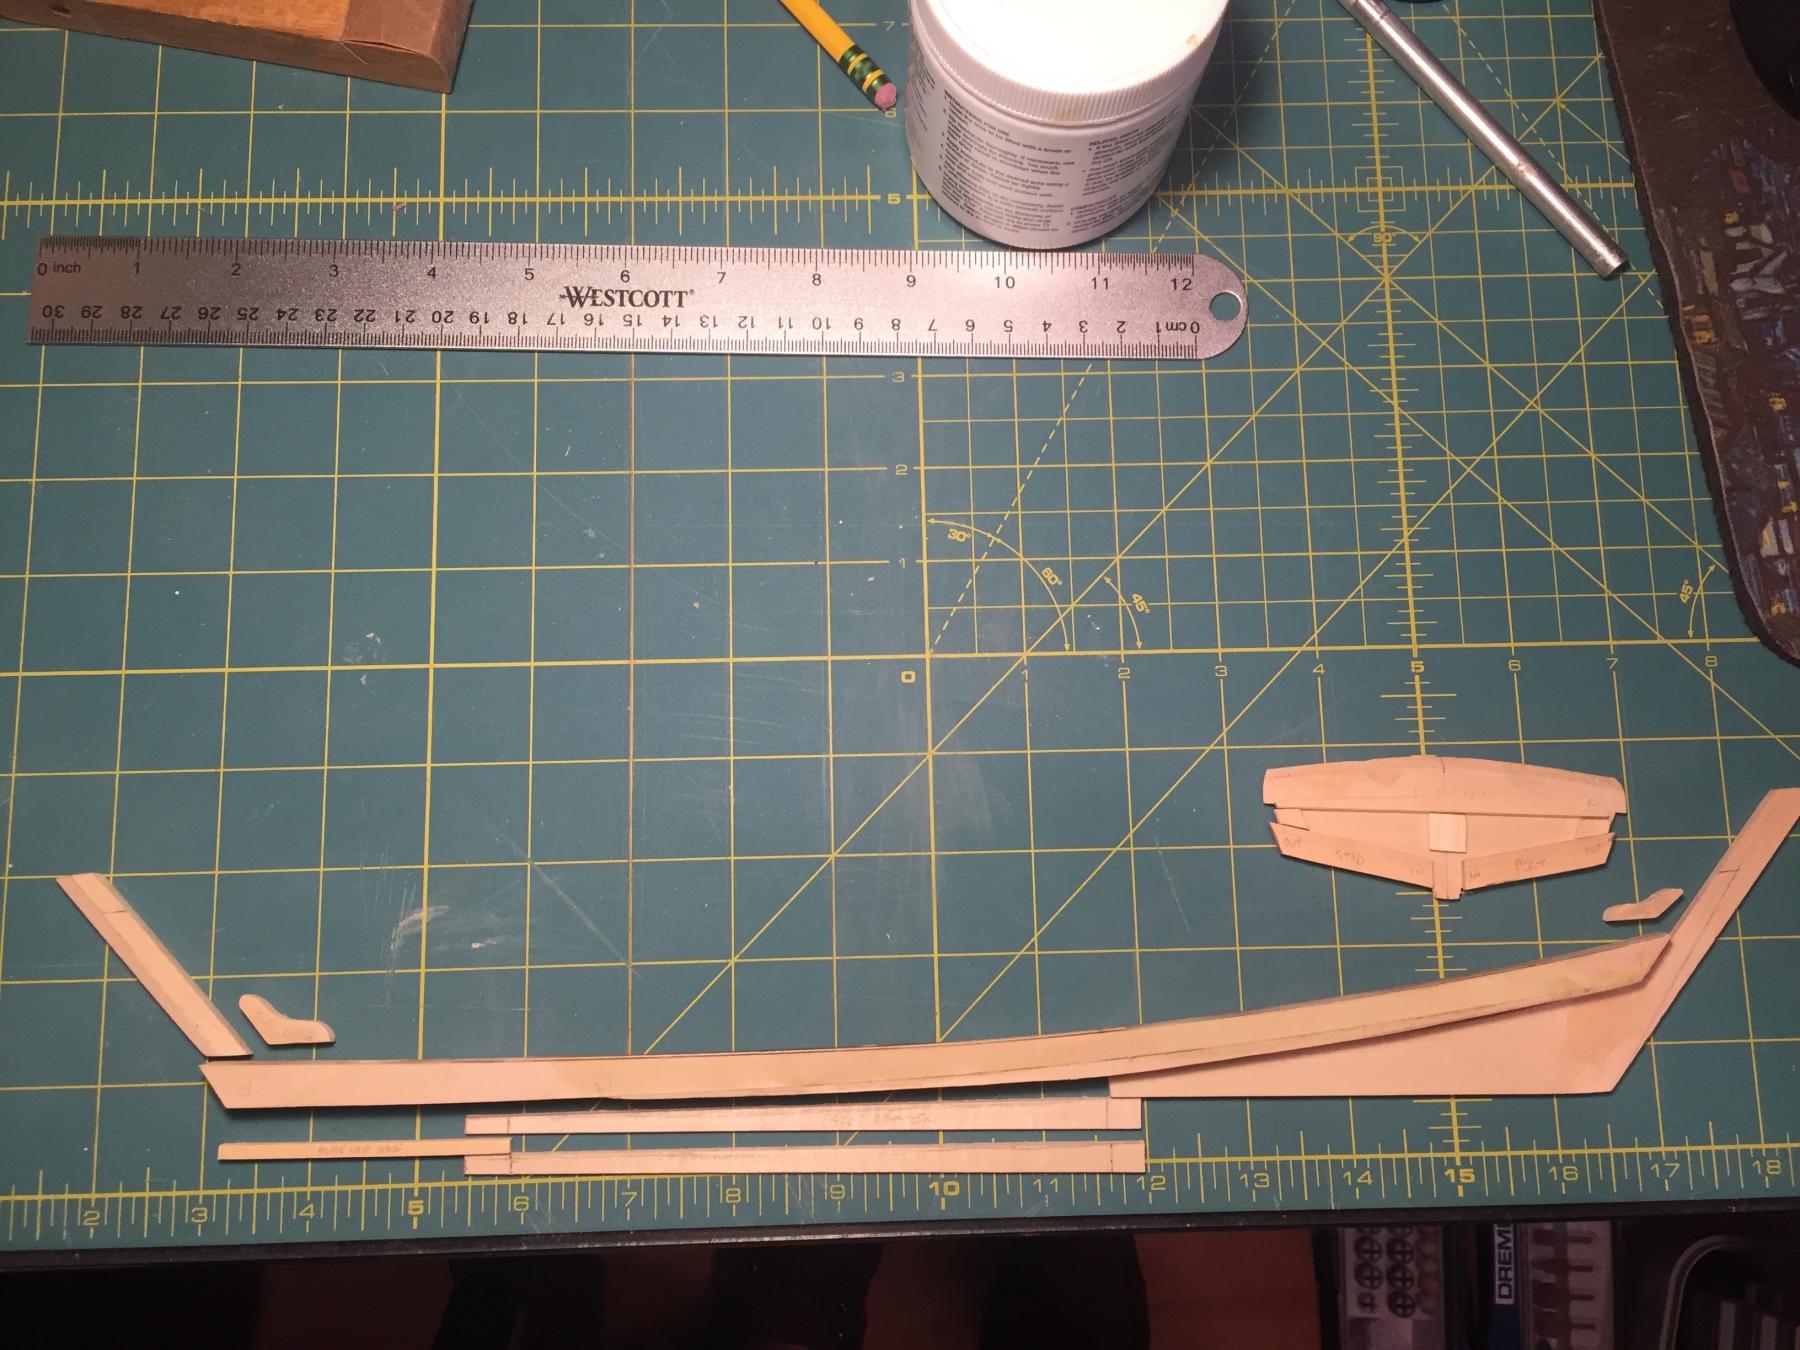
It has been ages since I posted an update, and slightly less than that since I finally got back to work on my model. It's amazing how a many "real life" events bumped my time for this endeavor. Nevertheless, I finally gained the courage to apply the chisel to the chunks and I shaped the bow of the Willie. Practiced and practiced on blocks before I was happy with my nascent chisel abilities. I'm still very unskilled. Thank goodness for filler. and paint. repeat. After that, I finished up the hull structure, filled in the holes, low spots, sanded the hell out of it, and finally pulled it off the mold!! After that, followed the instructions and installed temporary braces until I built the strong backs and the knees. Also got the knight heads cut and sanded. Looks much different when you can HOLD it and not just look at the bottom of the ship. Now working on the framing. At least I'm back at it and making progress. Happy to be back! You all have been doing fantastic work while I've been away!


- EJ_L, Ryland Craze, src and 2 others
-
5
-
I'm watching this thread closely because my son and I are about to start building the MS Phantom solid hull.
Though not completely not germane to the topic of the OP, I noticed the perfectly drawn lines in the photos (both longitudinally and athwartship). How do you all achieve this? This applies to all ship molding techniques (POB, Solid, etc.)? VERY Impressed
Thanks,
Rob
- Eddie, mtaylor, thibaultron and 1 other
-
4
-
Joe,
I, too, am a product of Great Lakes. I graduated from boot camp there in early 1989. I remember living in an apartment in Alameda, CA; three or four of us at any given time crammed into a two-bedroom apartment. The only redeeming quality about the place is that it was only a couple of blocks from all of the bars.
-
Thistle,
You are absolutely NOT insulting my intelligence; I drive and fix ships made of steel, blood, and sweat in the Navy for a living, and have done so for almost 28 years. In that time, I've had little opportunity to learn how to carve wood; thus, I have NO experience...zero, zilch. I need the BASICS!! Thanks!!!
Cheers,
Rob
-
Hervie,
I know I'm late to the party, but I just finished pouring over your build log; you do a FANTASTIC job of documenting your work (and your re-work, which I think is VERY valuable). I am many years away from plucking up the courage (and the skills) to attempt a build such as this one, but I do aspire to one day. In the meantime, I like to sit in awe at the artistry, craftsmanship, and talent of the builders that contribute to this site. Thank you so much for sharing. The ship looks AMAZING so far; keep up the great work on the ship and the excellent log. I know that I'll use it when I finally promote myself to this level of building experience.
If you don't mind, I will pull up a chair, pour a couple fingers of single-malt, and continue to watch with reverence and anticipation!!
- Ryland Craze, hervie and EJ_L
-
3
-
Good Morning, Happy Friday, Everyone!!!
E.J.,
Thanks for the tip. The "conventional" finish is paint on the hull and vertical surfaces, and stain on the deck and other horizontal surfaces. I think I'll end up doing just that, depending on how the decking turns out. I think the hull looks great with the hull red below the waterline and white above.
I forgot to post the last couple of photos I took last night that show where I was when the yardworkers punched out.
I need to pluck up the courage to start carving the chunks; the ONLY experience I have with a chisel was the other night when i shaped the forward bottom planks.
See you in the Fleet!!
Cheers,
Rob
-
Good Evening Fellow Shipwrights,
Thank you all for your kind feedback and likes; it really helps motivate me.
Also, thank you, Kurt Van Dahm for responding to my question I PM'd about the camber. I'll respond to your message in kind, but wanted to publicly acknowledge my appreciation for your assistance.
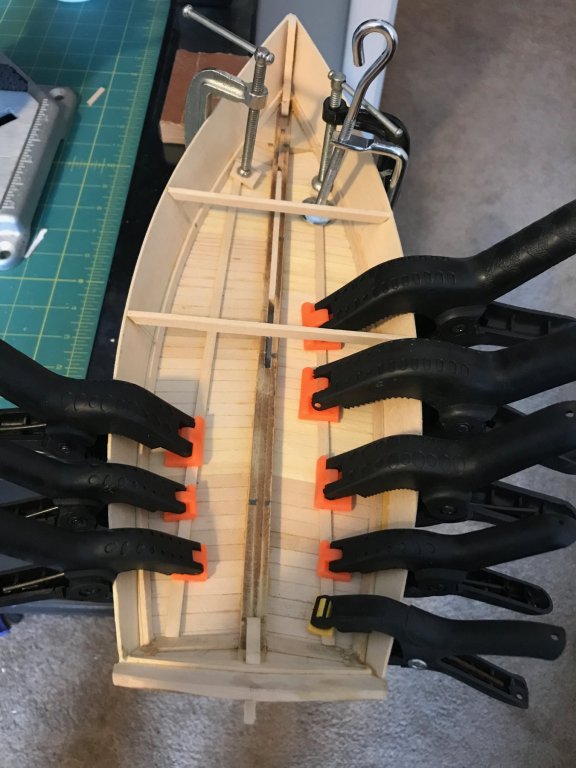
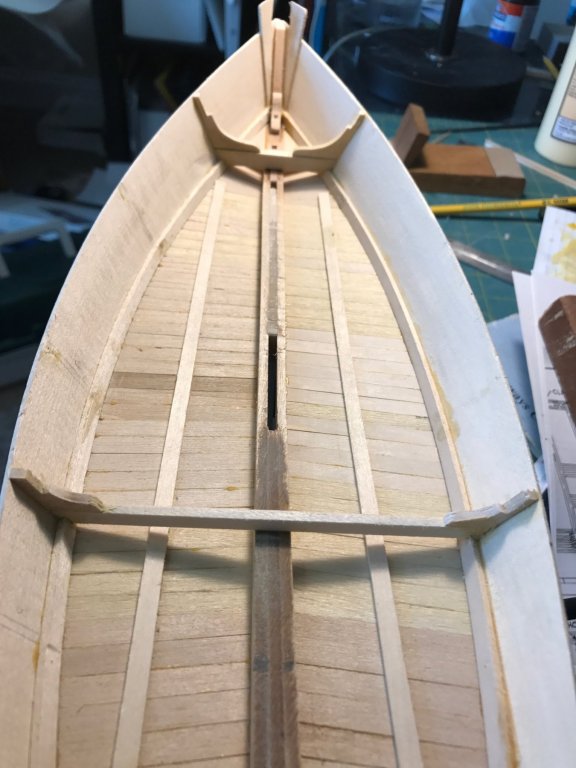
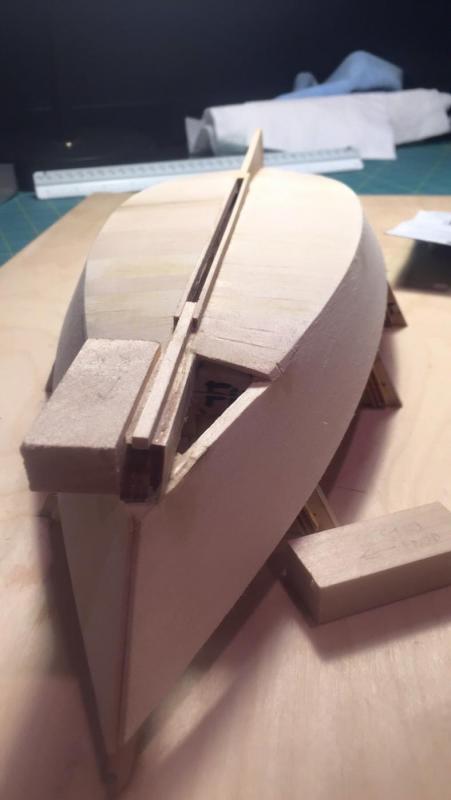
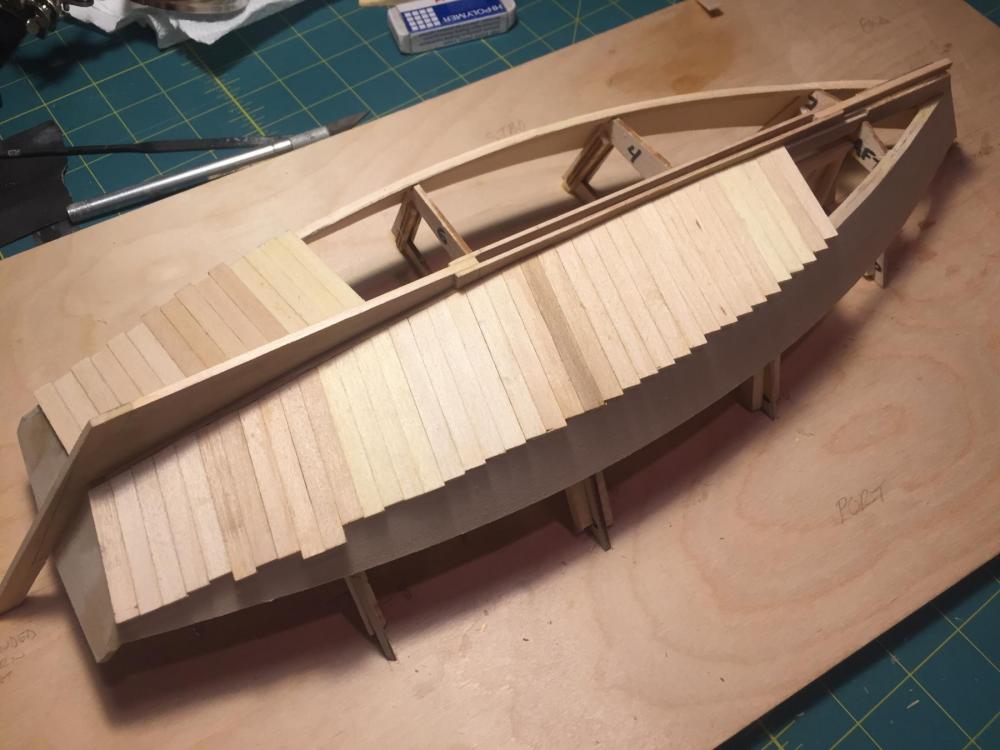
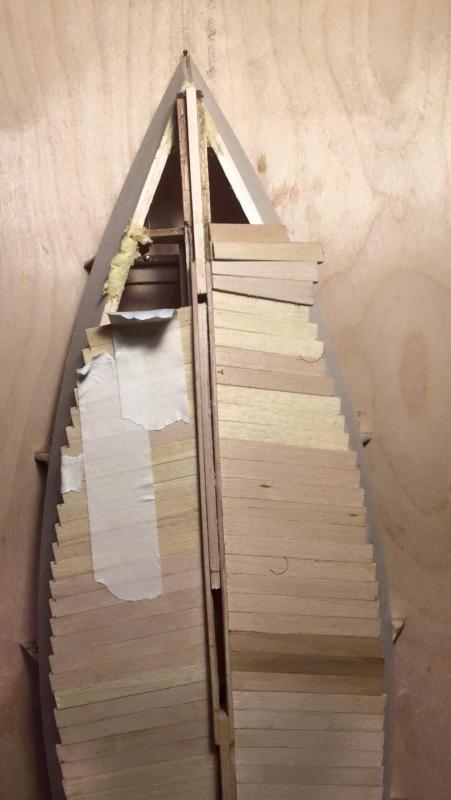
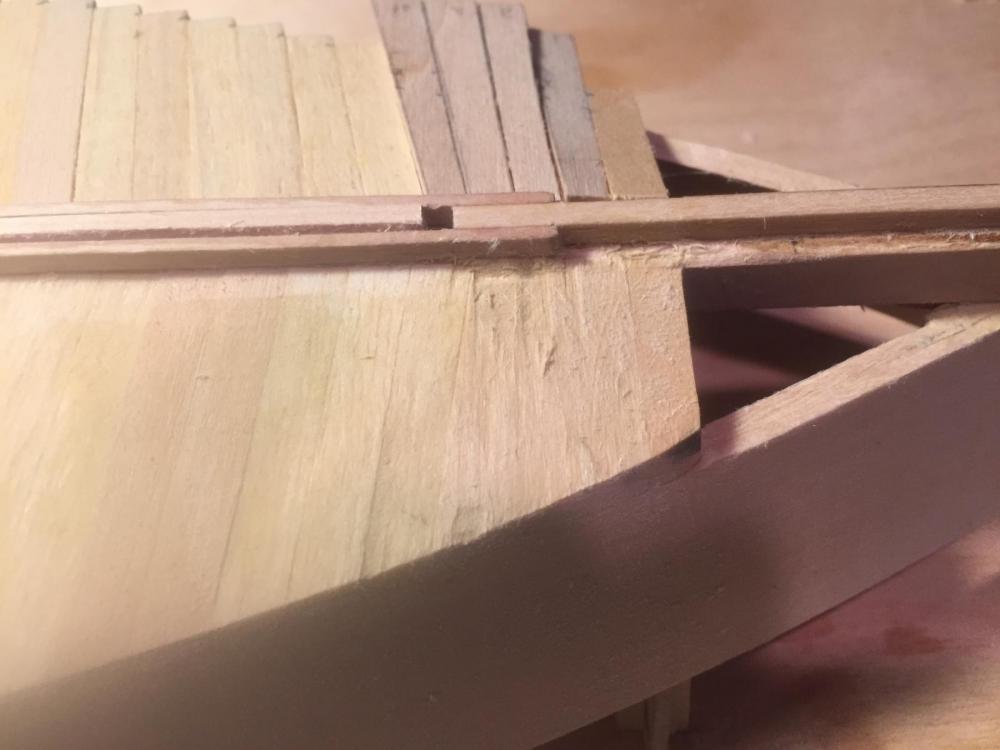
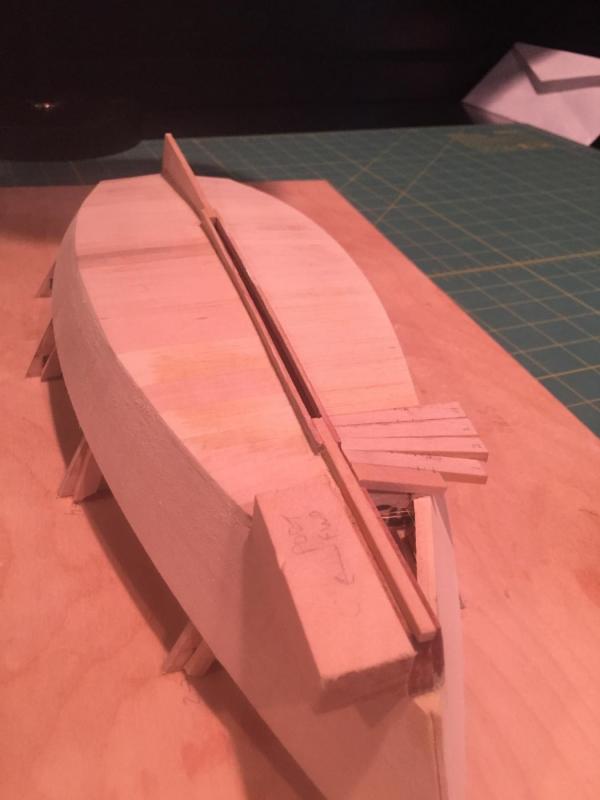
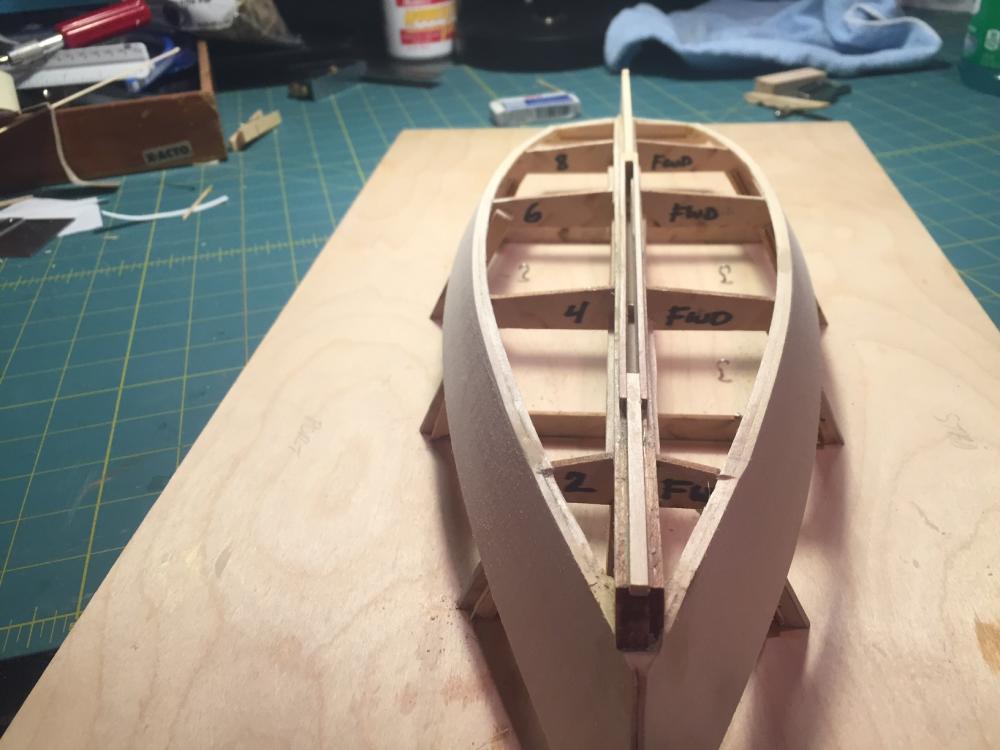
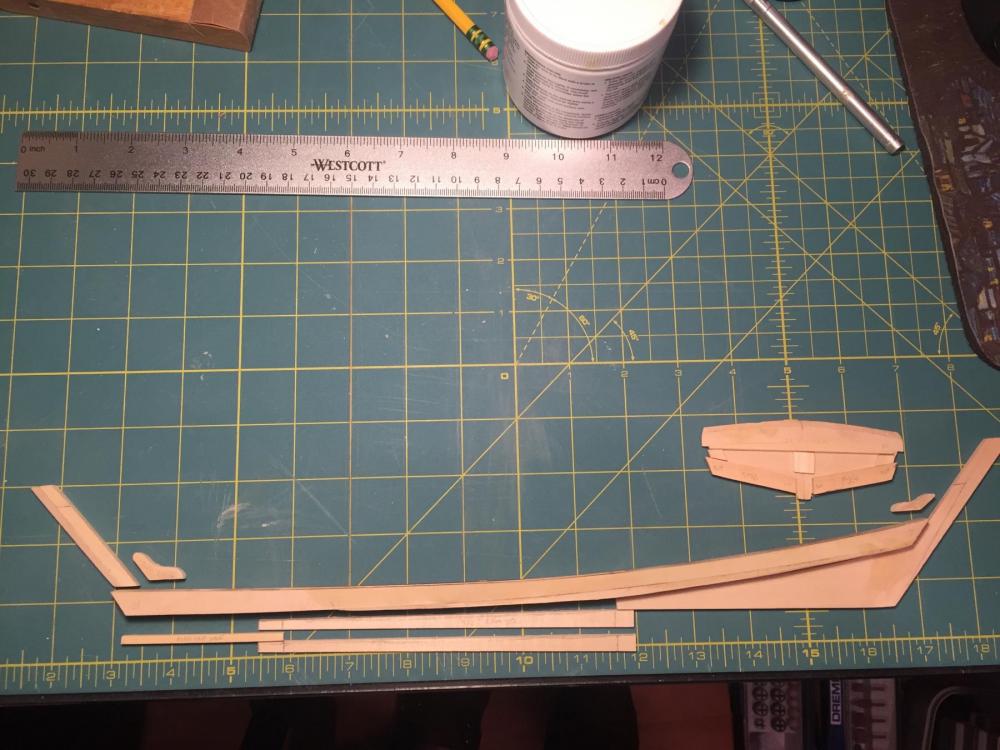
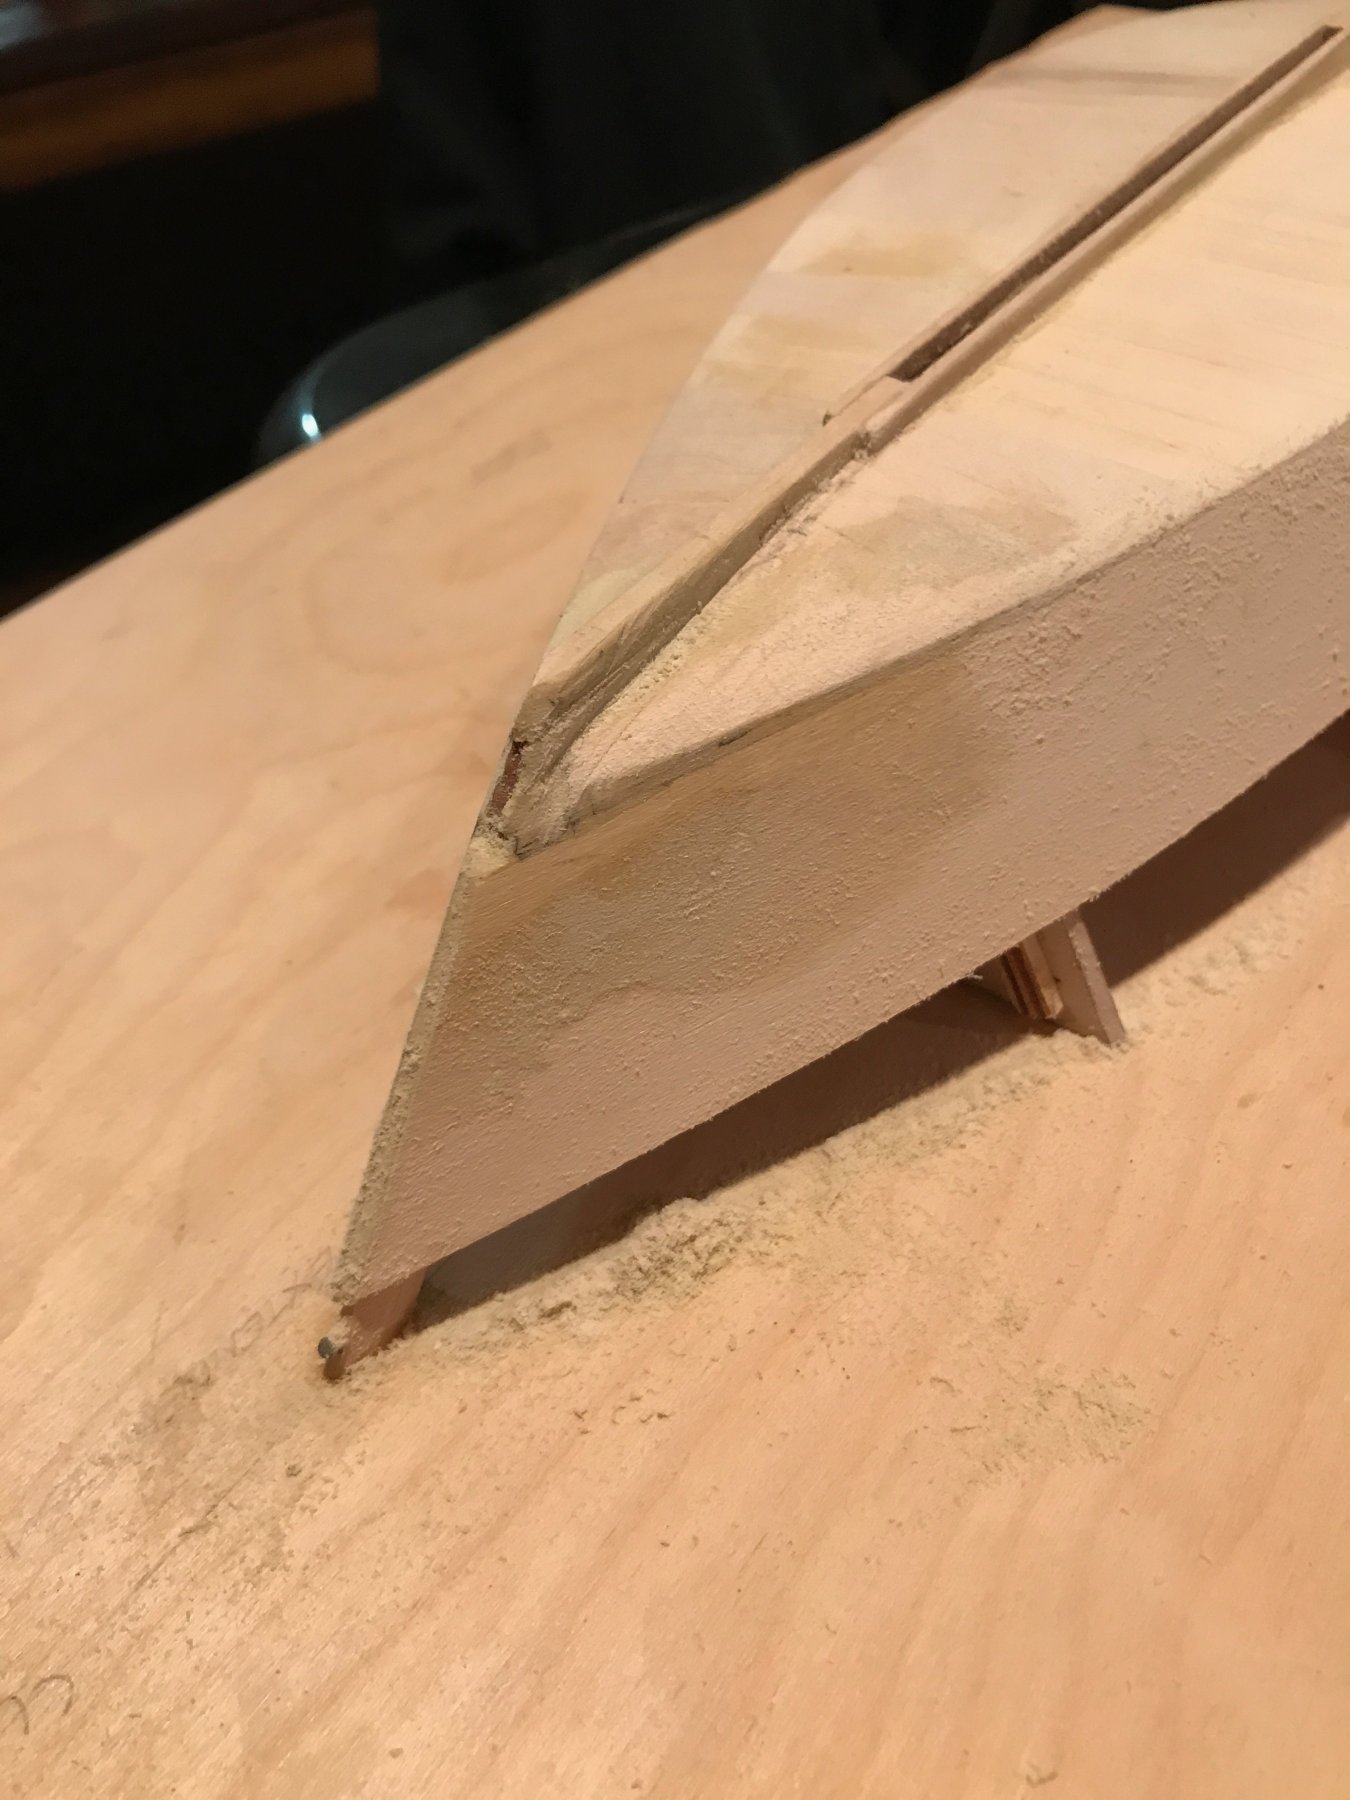
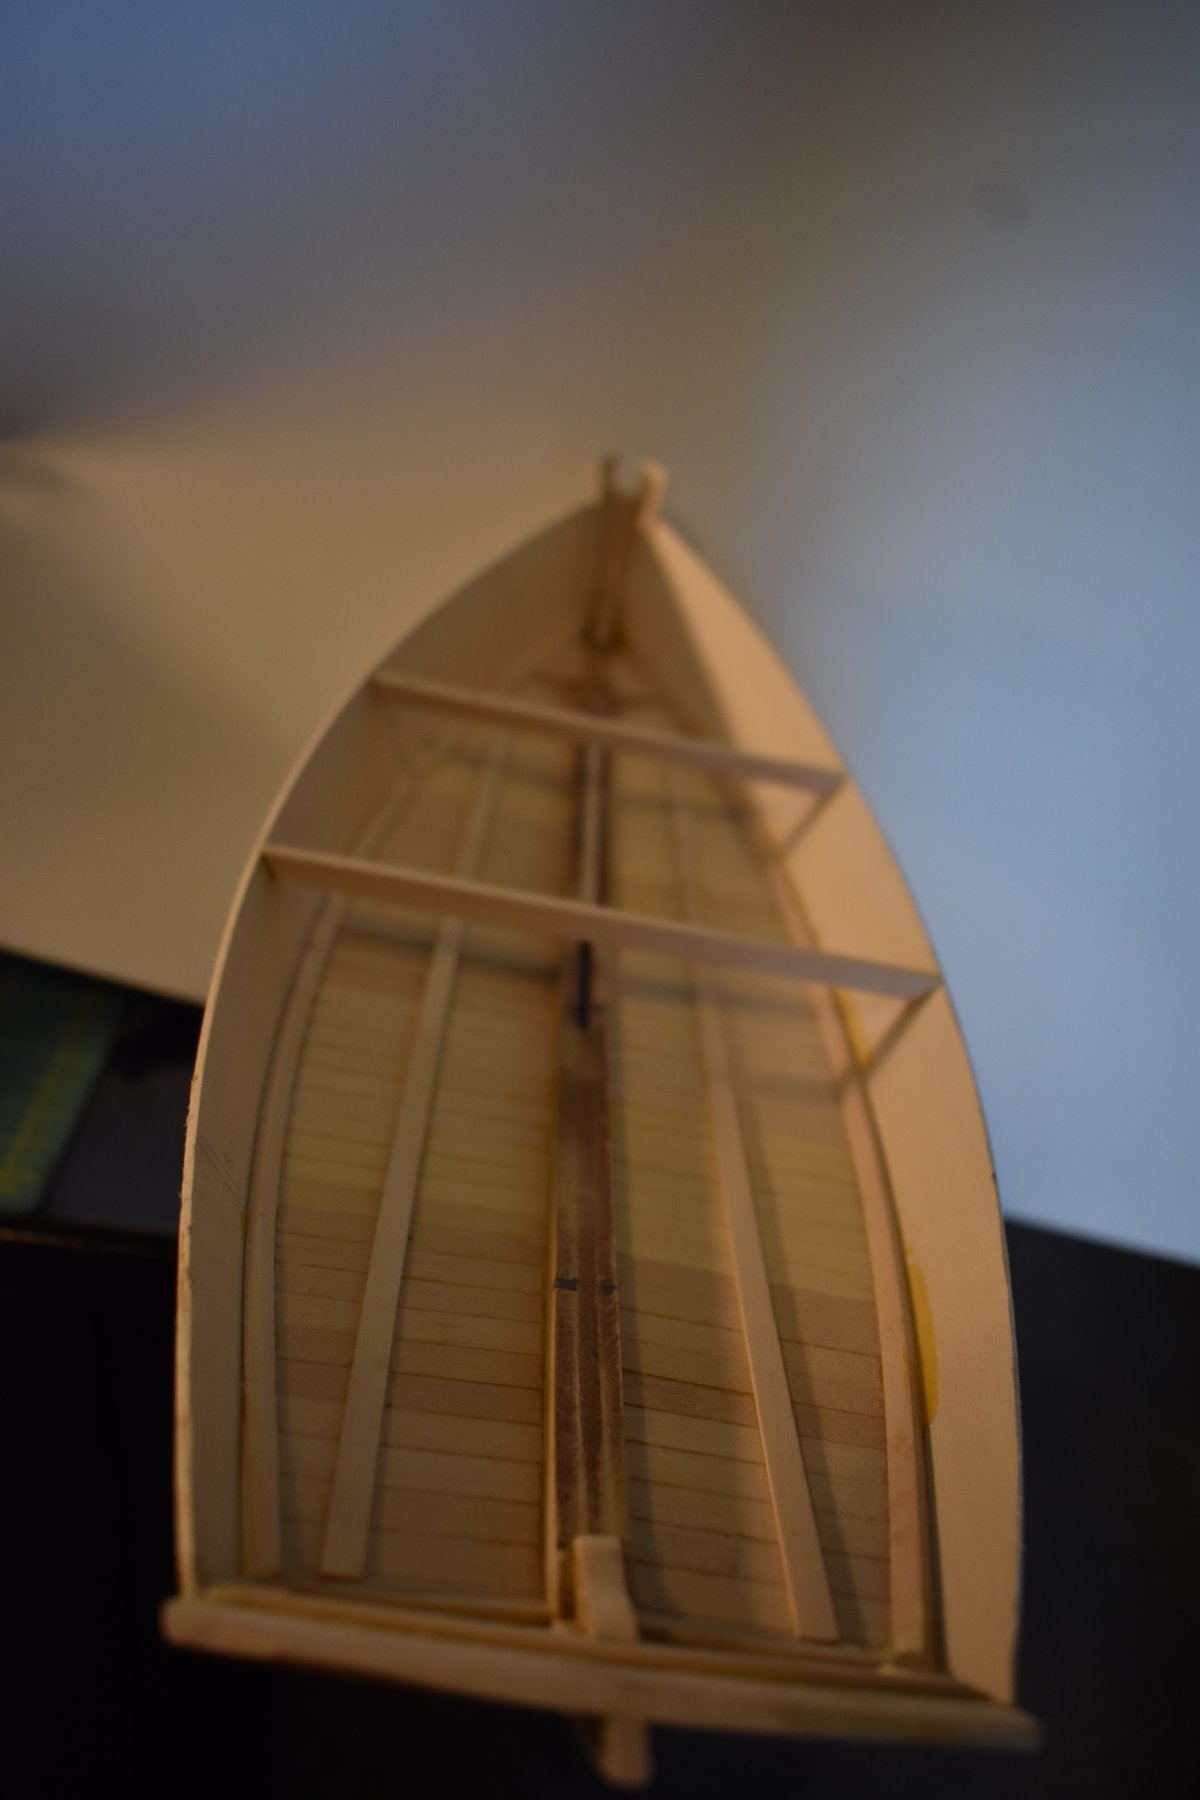
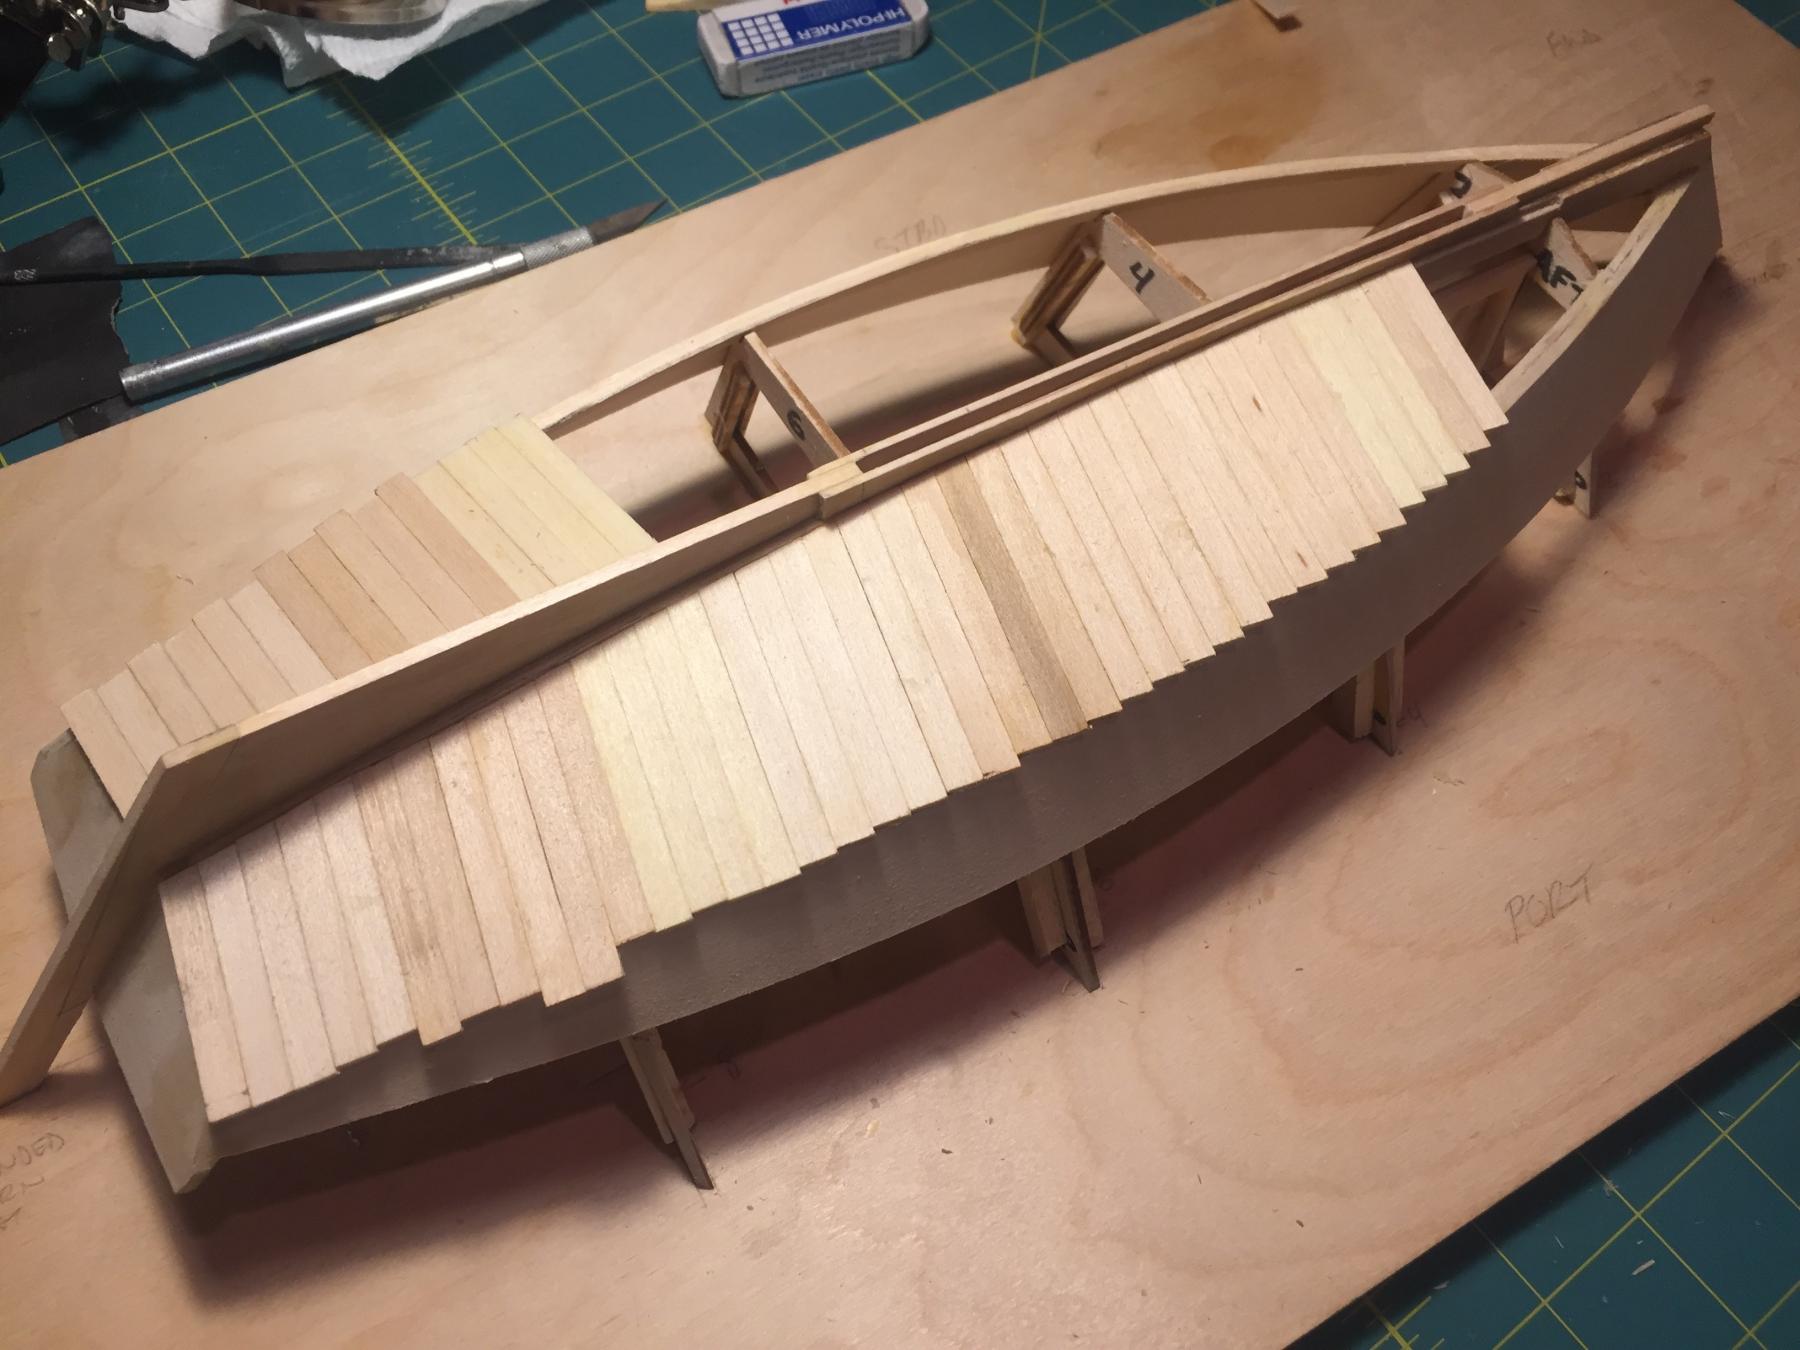
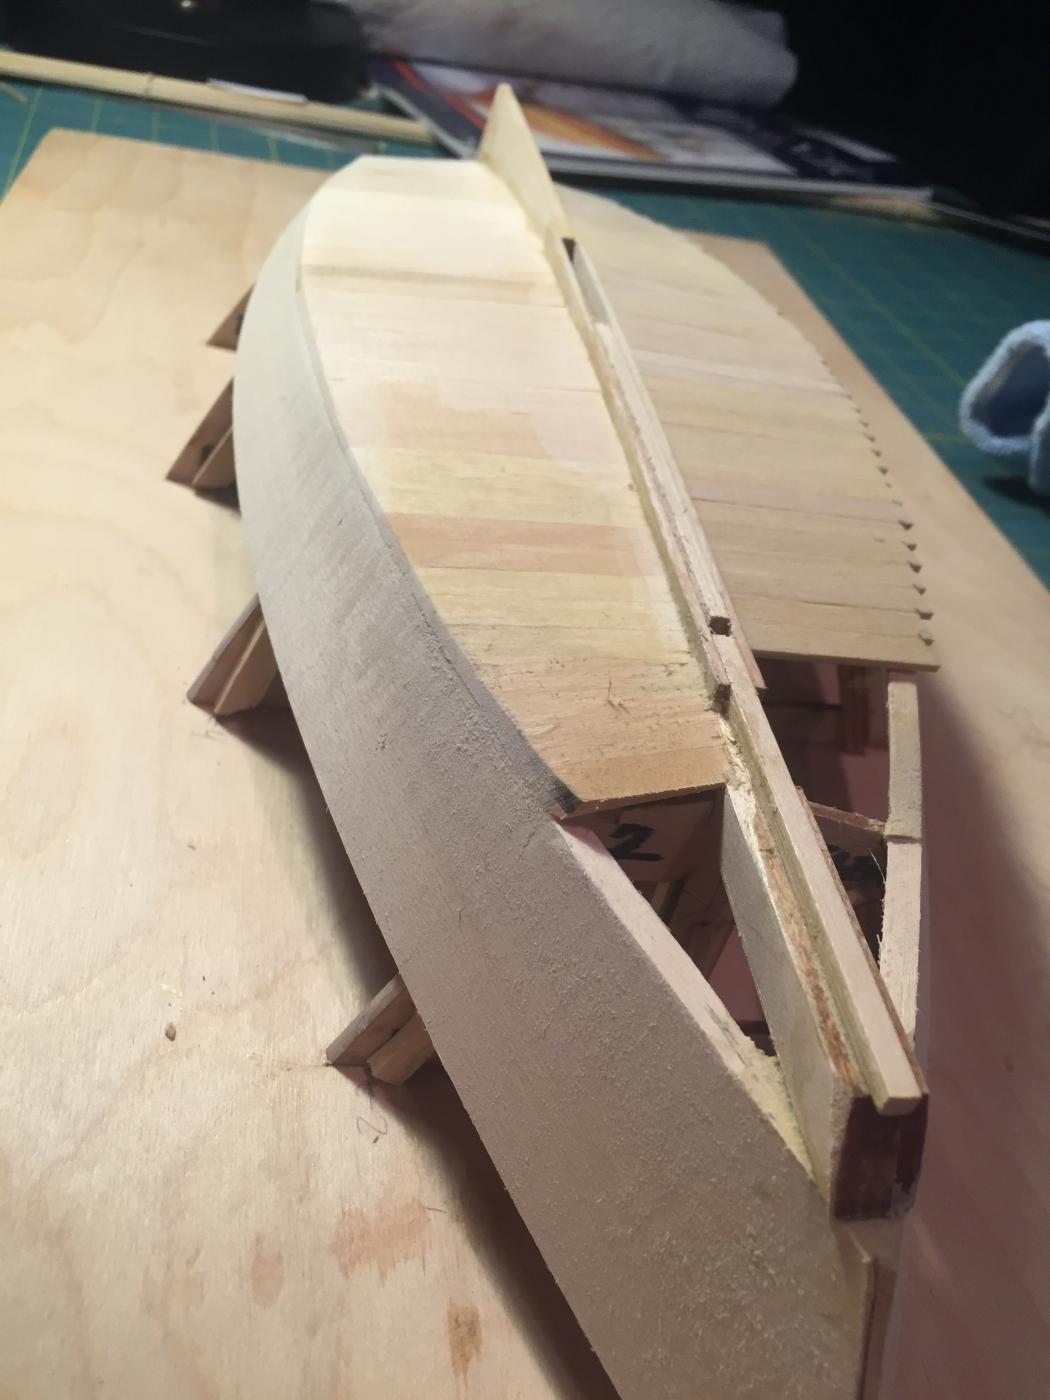
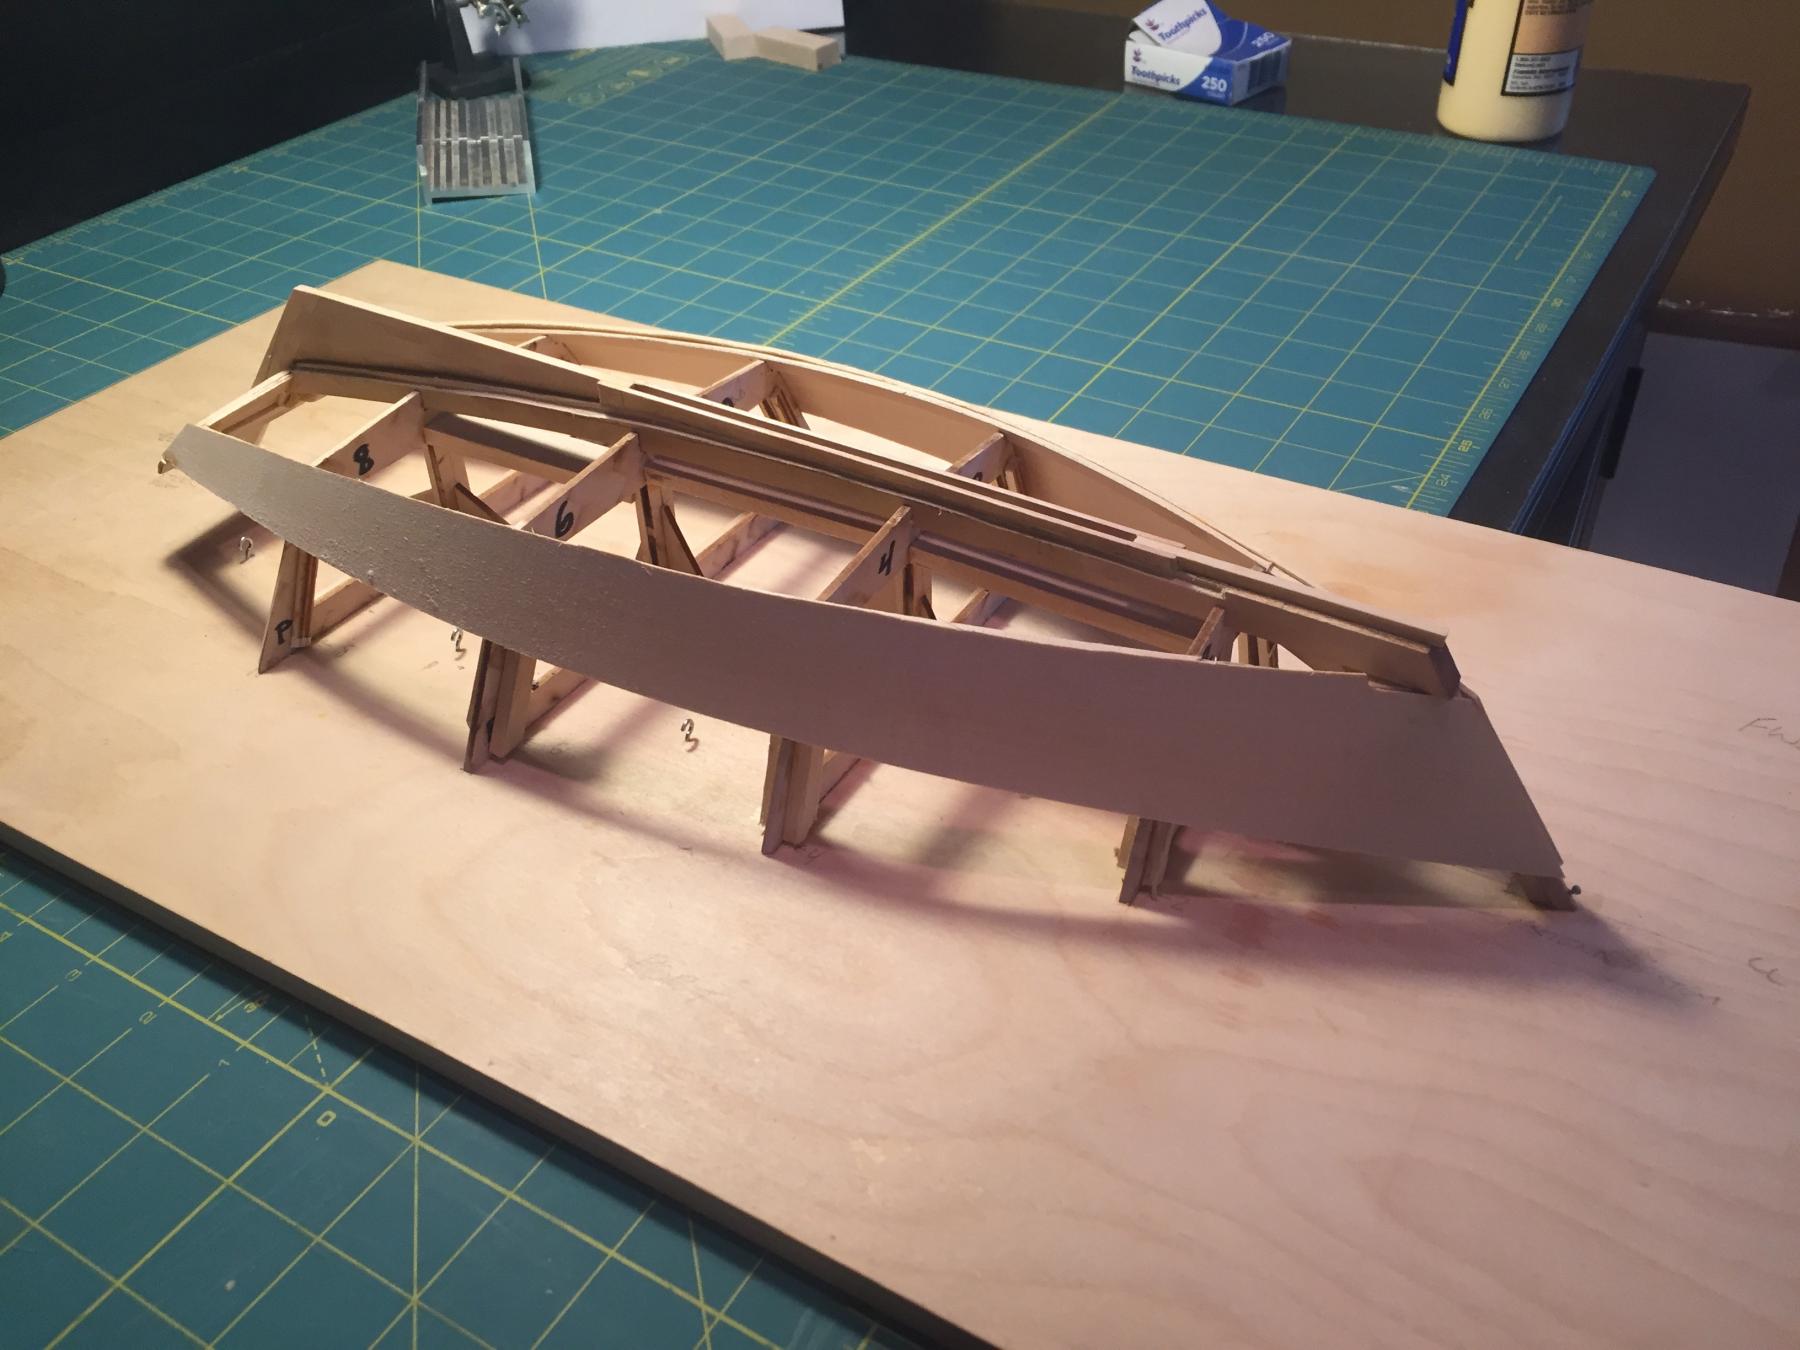
It's been a few days since I provided an update, but I wanted to have substantial progress before sharing. I'm almost finished planking the bottom; I have a couple of the thicker planks to trim and I have to carve the "chunks" on the bow.
I've noticed that even as careful as I was, I'm going to have to sand so much of the bottom down to make it all even, I'm wondering if I should get most of it true and then use putty to fill in the planks that are still too low...Thoughts?
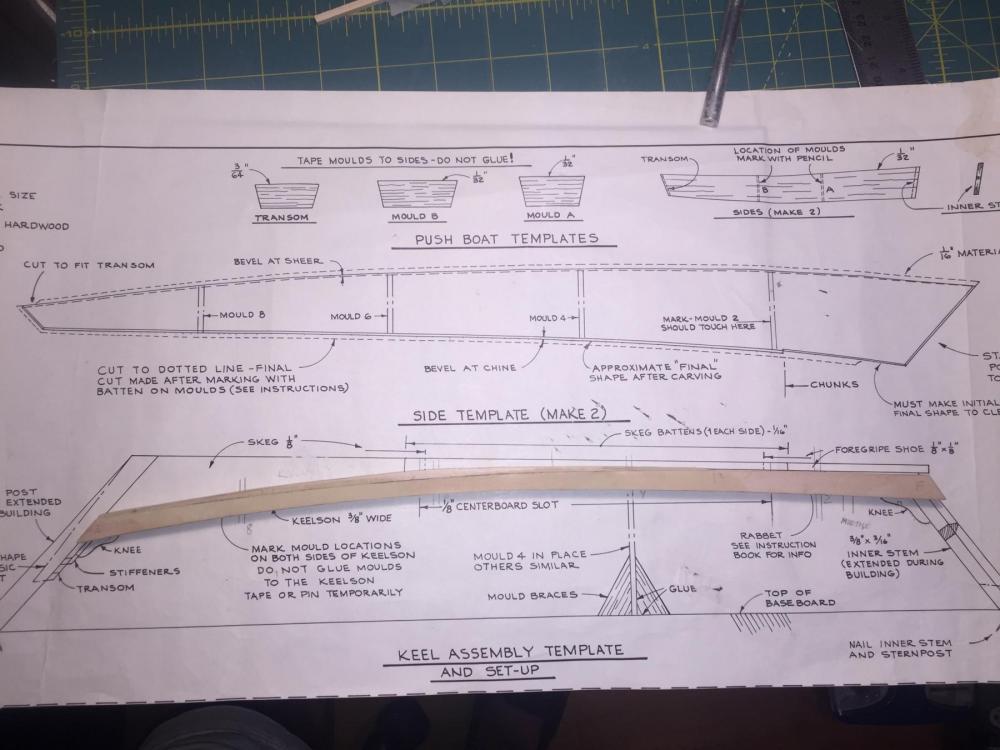
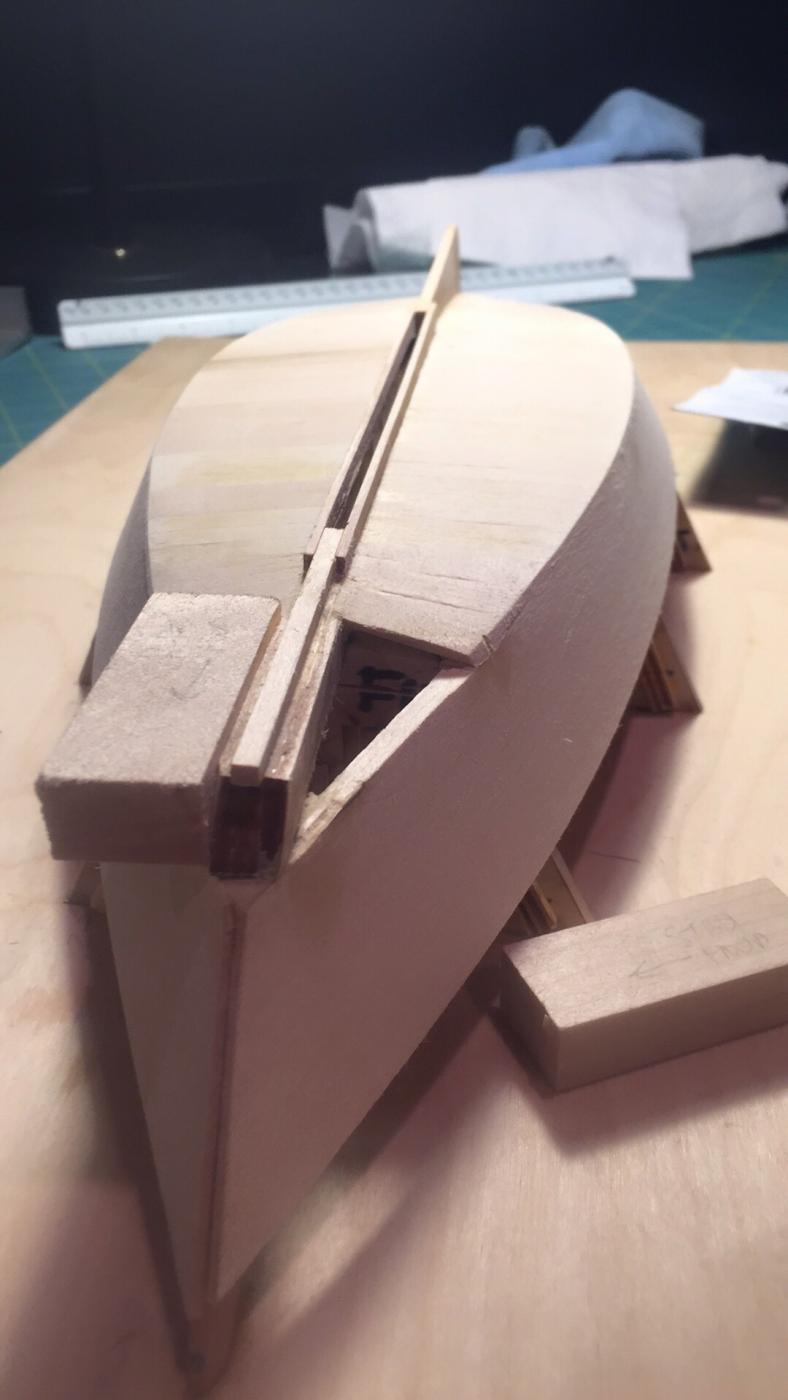
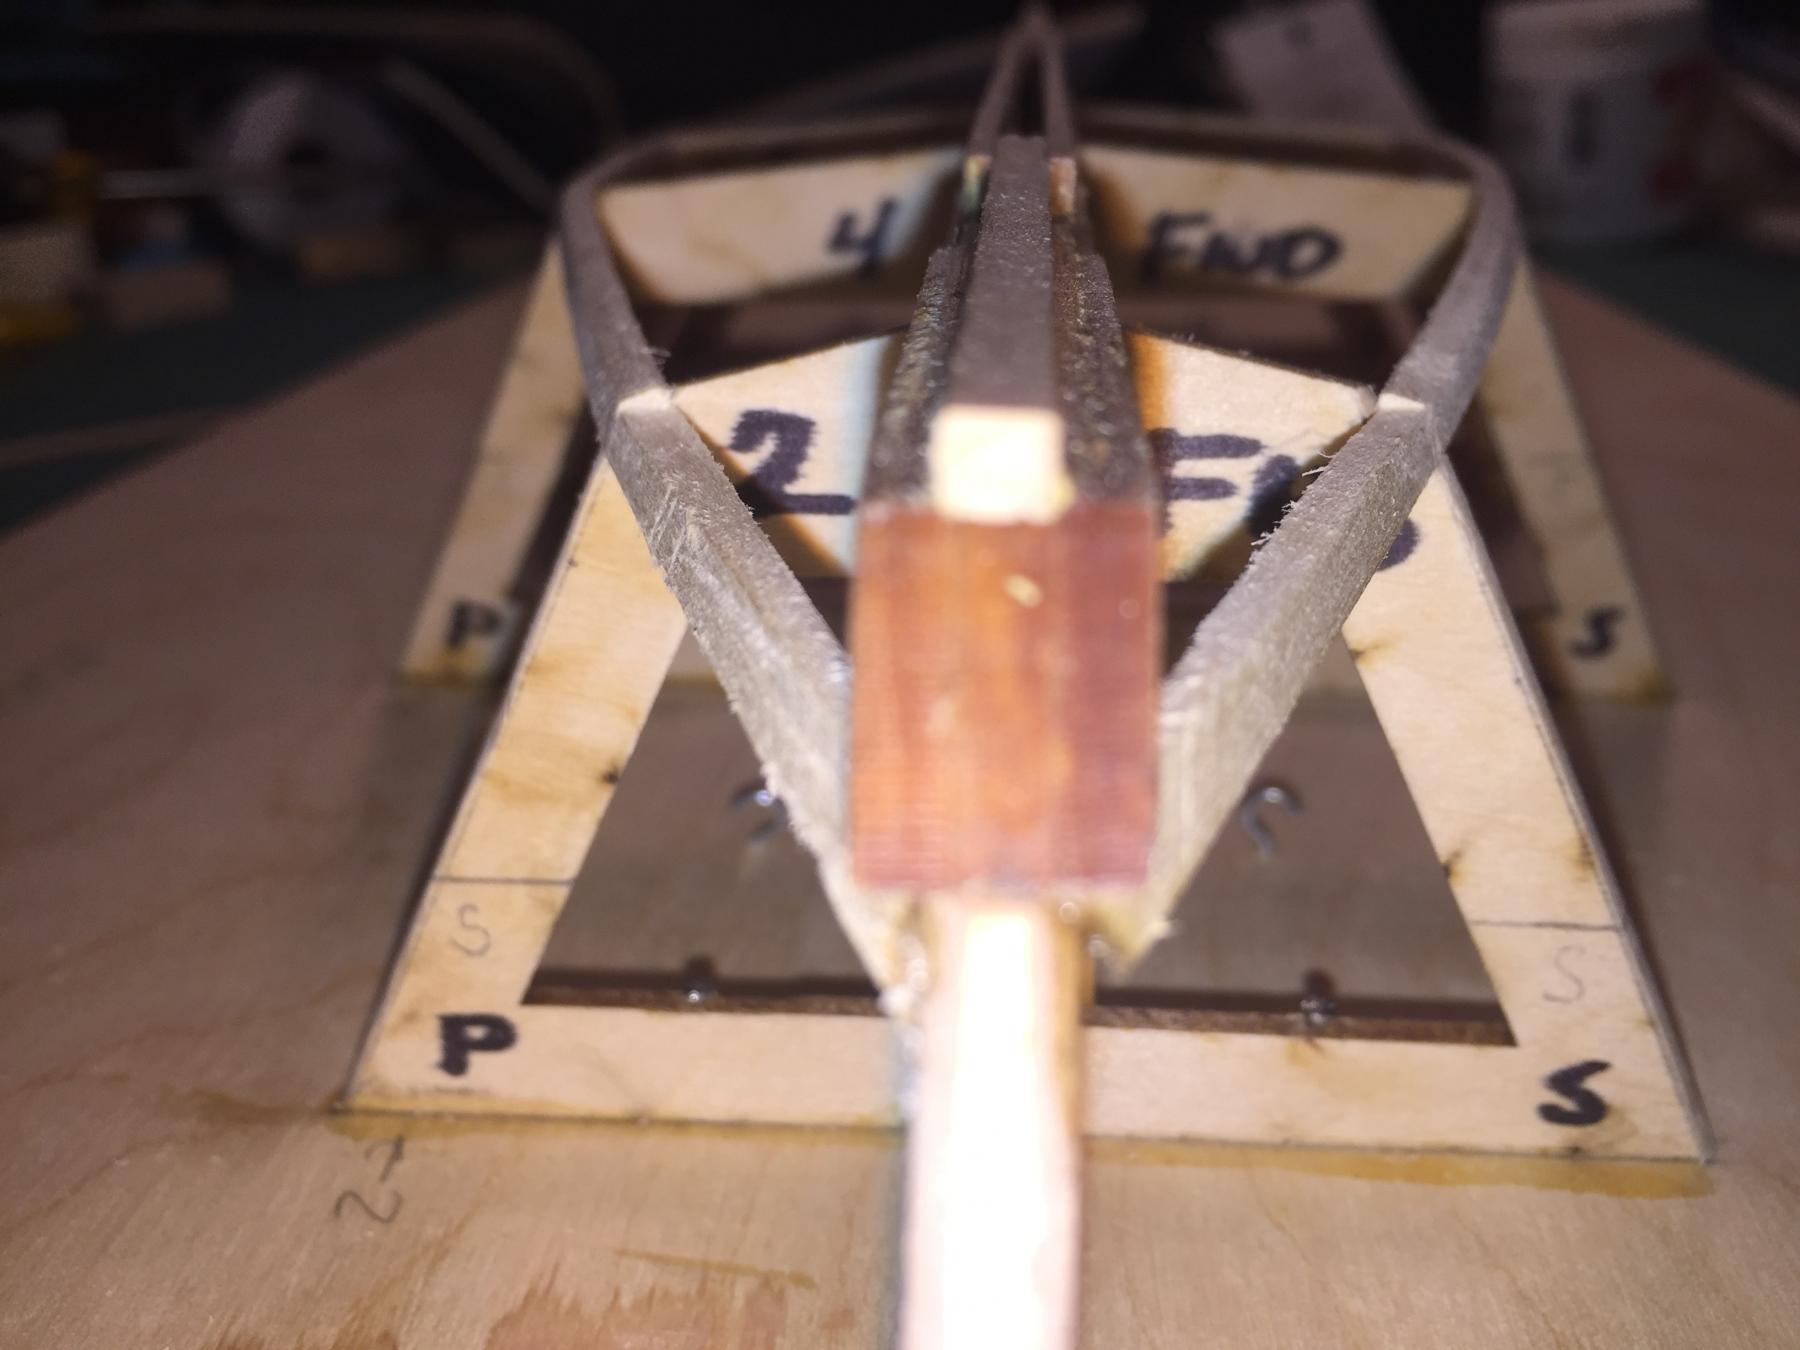
For those of you who have already built this model, do I need to trim the stem (most forward part of the bow) to be even with the forward part of the keelson? There are drawings in the instruction book that seem to indicate that I do, but others, make it look like it still ends up at a fine taper. I know I have to add the cutwater, and the very forward part of the bow will need to be flat to fit that piece, but I'd think I would only trim the stem until it is as thick as the wood used for the cutwater. What did you do?
Thanks, and here are some photos showing the progression.
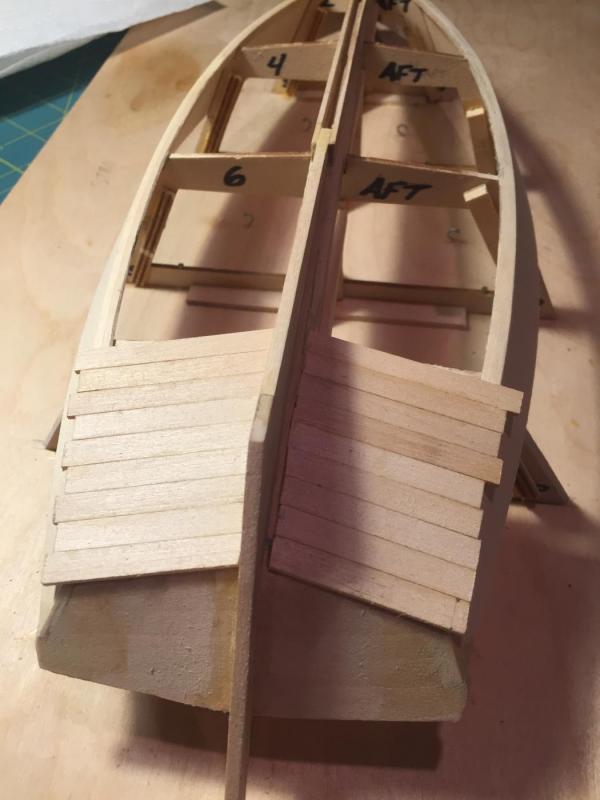
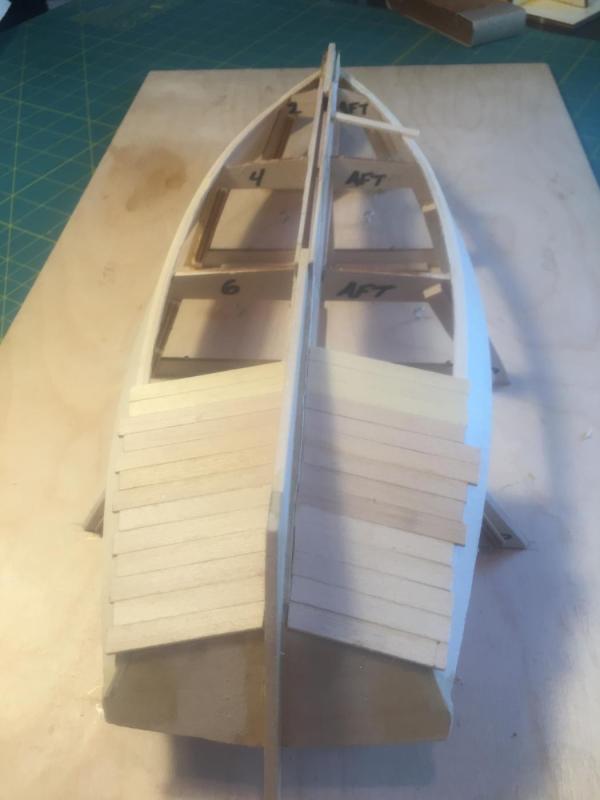
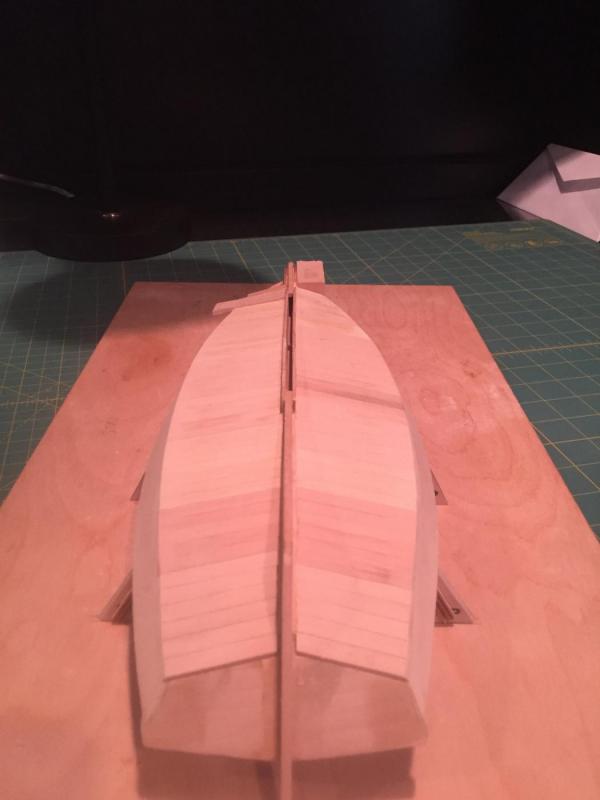
I left the aft end of the bottom plank "square" as shown in the instructions, though I've seen many shipwrights sand them down to be flush with the transom. While just getting started, I was cutting each plank and measuring each angle every time. I knew there HAD to be a better way...
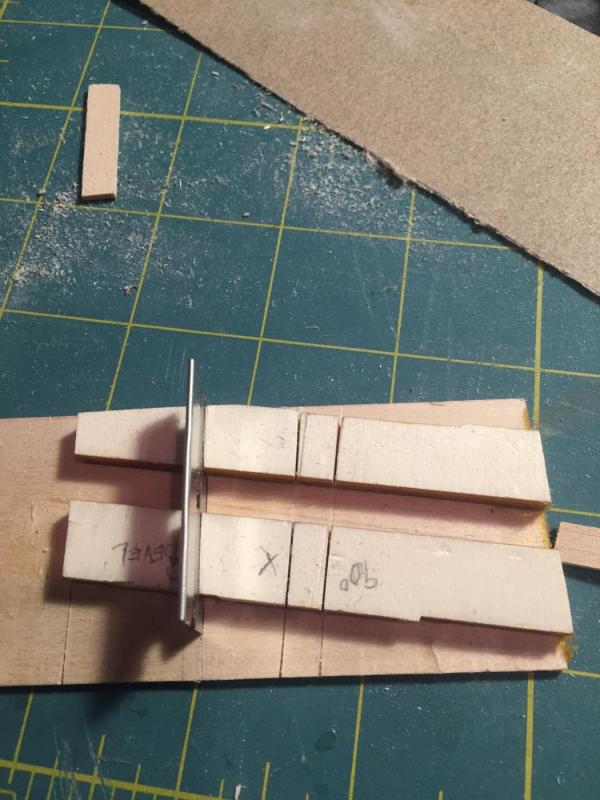
...So I made this jig which made things a little faster, but the angles weren't perfect so each plank had to be individually fitted anyway; nevertheless, I think it sped things up a bit.
Progress on the Port side. Decided to mostly finish the port side before finishing the stbd side. Easier to cut the same angle rather than switch back and forth because there was a little variation between the two sides.
You can see how I had to "fan" out the forward planks as well as use thicker wood because of the "twist" between the chine and the rabbett.

Port side trimmed and sanded. Took a long time to make those thicker planks look like they are part of the same ship!!
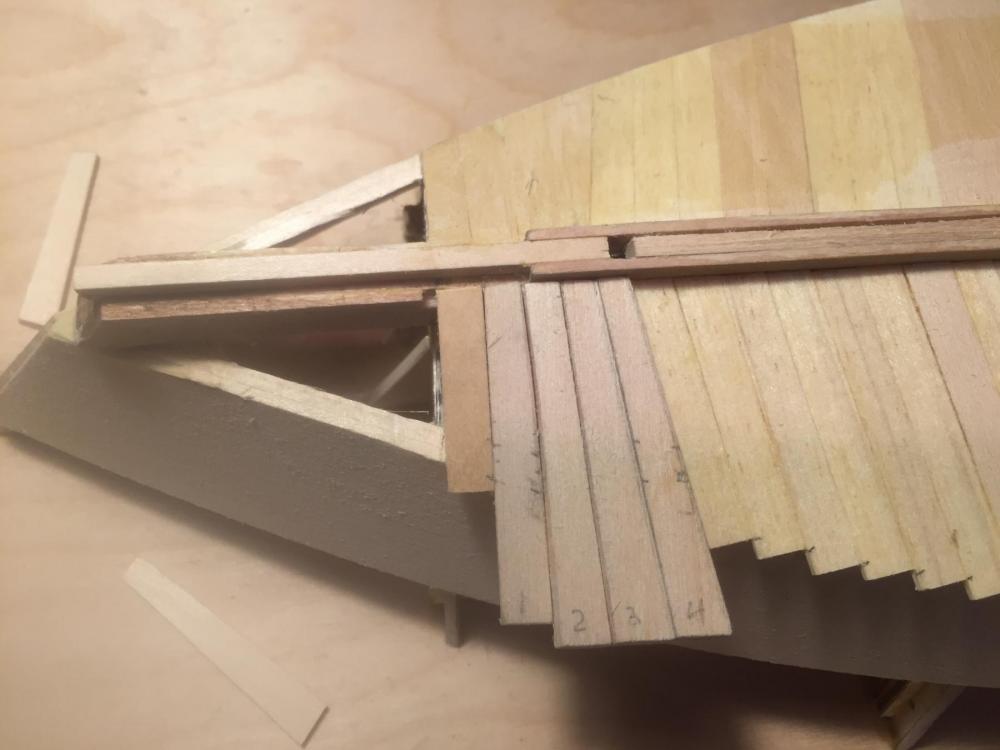

Port side "chunk" glued on. A bit intimidated to start carving it. Think I'll finish up the starboard side first and then try not to screw it up too badly!!
I look forward to your continued critical and constructive feedback. Thanks in advance!
See you all in the fleet!
Cheers,
Rob
-
-
All,
Great advice all around. I think my best course of action is to contact Model Expo and explain the situation to them and ask to purchase a replacement hull from them.
Thanks!!
See you all in the fleet!
Rob
- John Allen, EJ_L, Altduck and 3 others
-
6
-
Good Evening Fellow Shipwrights,
I got the sides of the Willie B. glued and beveled, and I'm ready to start planking the bottom. I'm building a jig to simplify cutting the inboard angle of the planks, but once that is done, I'll begin. I hope to have the entire bottom finished by the end of this weekend, which will be the end of building the "basic" hull and I'll be ready to take this thing off the building board and the "real" work can start!!
Being in a Drydock is the toughest time to be aboard a ship...Sailors belong on ships, and ships belong on the seas!!
I hope you all are doing well and thanks in advance for your constructive criticism!!!


-
All,
Even though I'm embroiled in building Willie Bennett, my next build is the MS Phantom. My friend purchased it a fair time ago, and it looks like he quit right after he started hacking away at the stern before giving the entire shebang to me. I think he realized his talents lie elsewhere. At any rate, if I wrote Model Expo and request they send a new hull for "my" Phantom, do you think they'd send one? For a solid hull kit, it seems like a pretty important part, but I don't want to take advantage of them, considering how great they've been for me with the WLB. Has anyone tried to get this particular part replaced under their part guarantee?
Thoughts?
Cheers,
Rob
-
Good Evening Fellow Shipwrights,
Well, shaping the sides to match the bevel of the chine logs is taking longer than I had anticipated, so I thought I'd bring you all up to date with photographs starting on Friday and ending tonight. I swear, I take two steps forward and one back. Thank whoever invented glue and tape (and wood filler). I'll be using it aplenty once I get the bottom planking in.

Cheers,
Rob
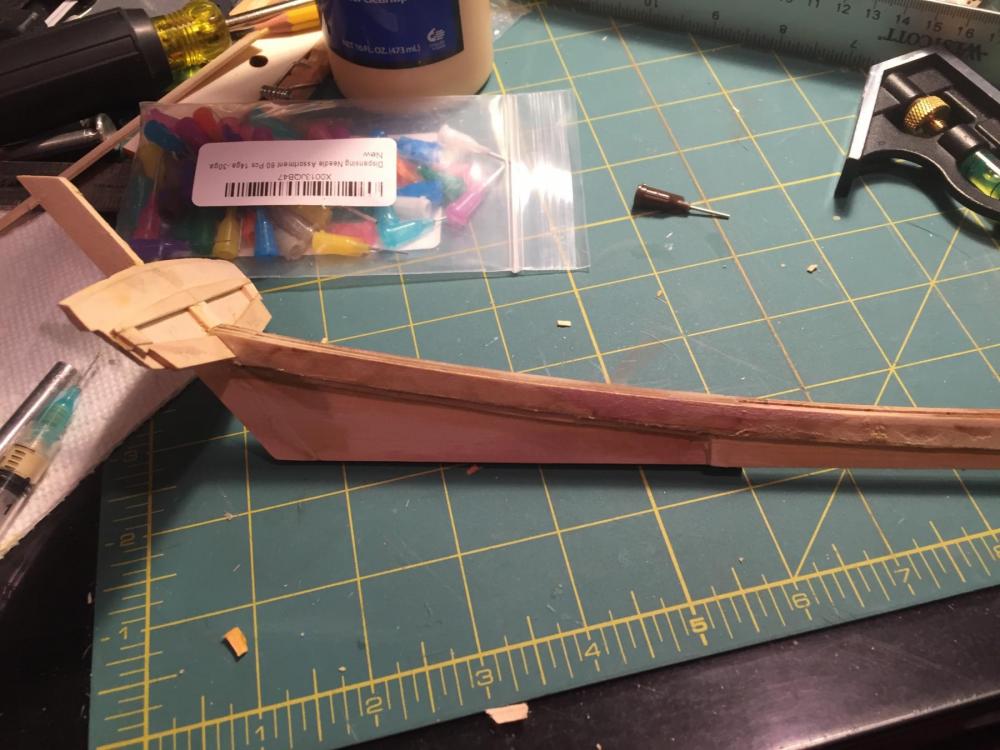
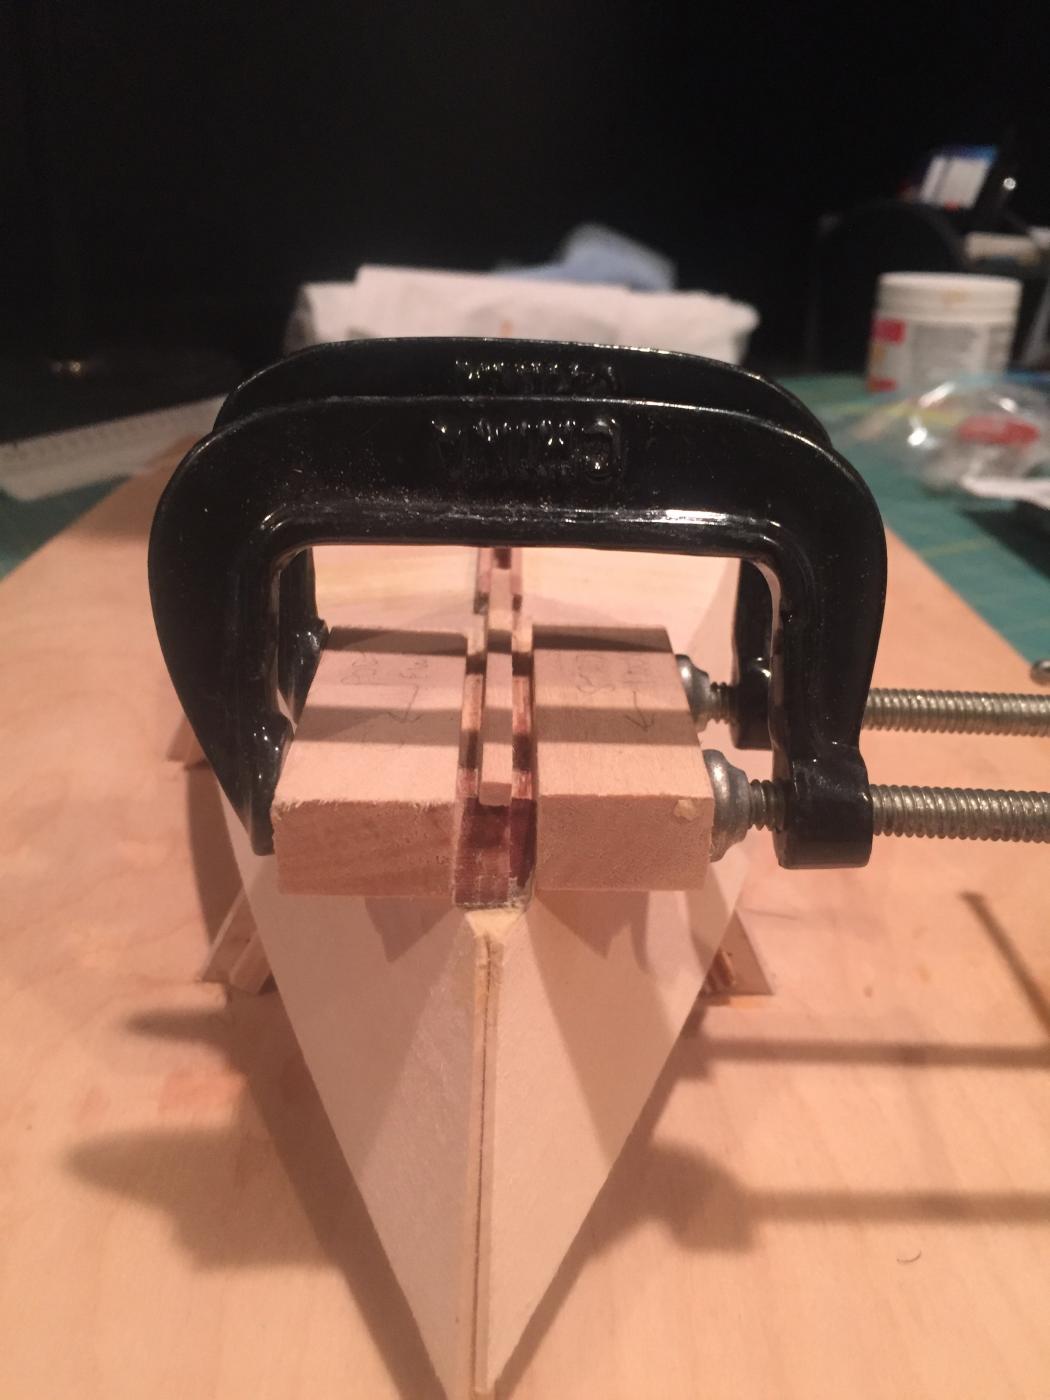
Here is the chine log meeting the keelson. You can see where the bevel changes to mount the forward "chunks"

Bow aspect of the chine log bevel

Starboard side (the keelson isn't as beat up as it looks...nothing a little filler won't fix...besides, the chunks will cover them anyway).

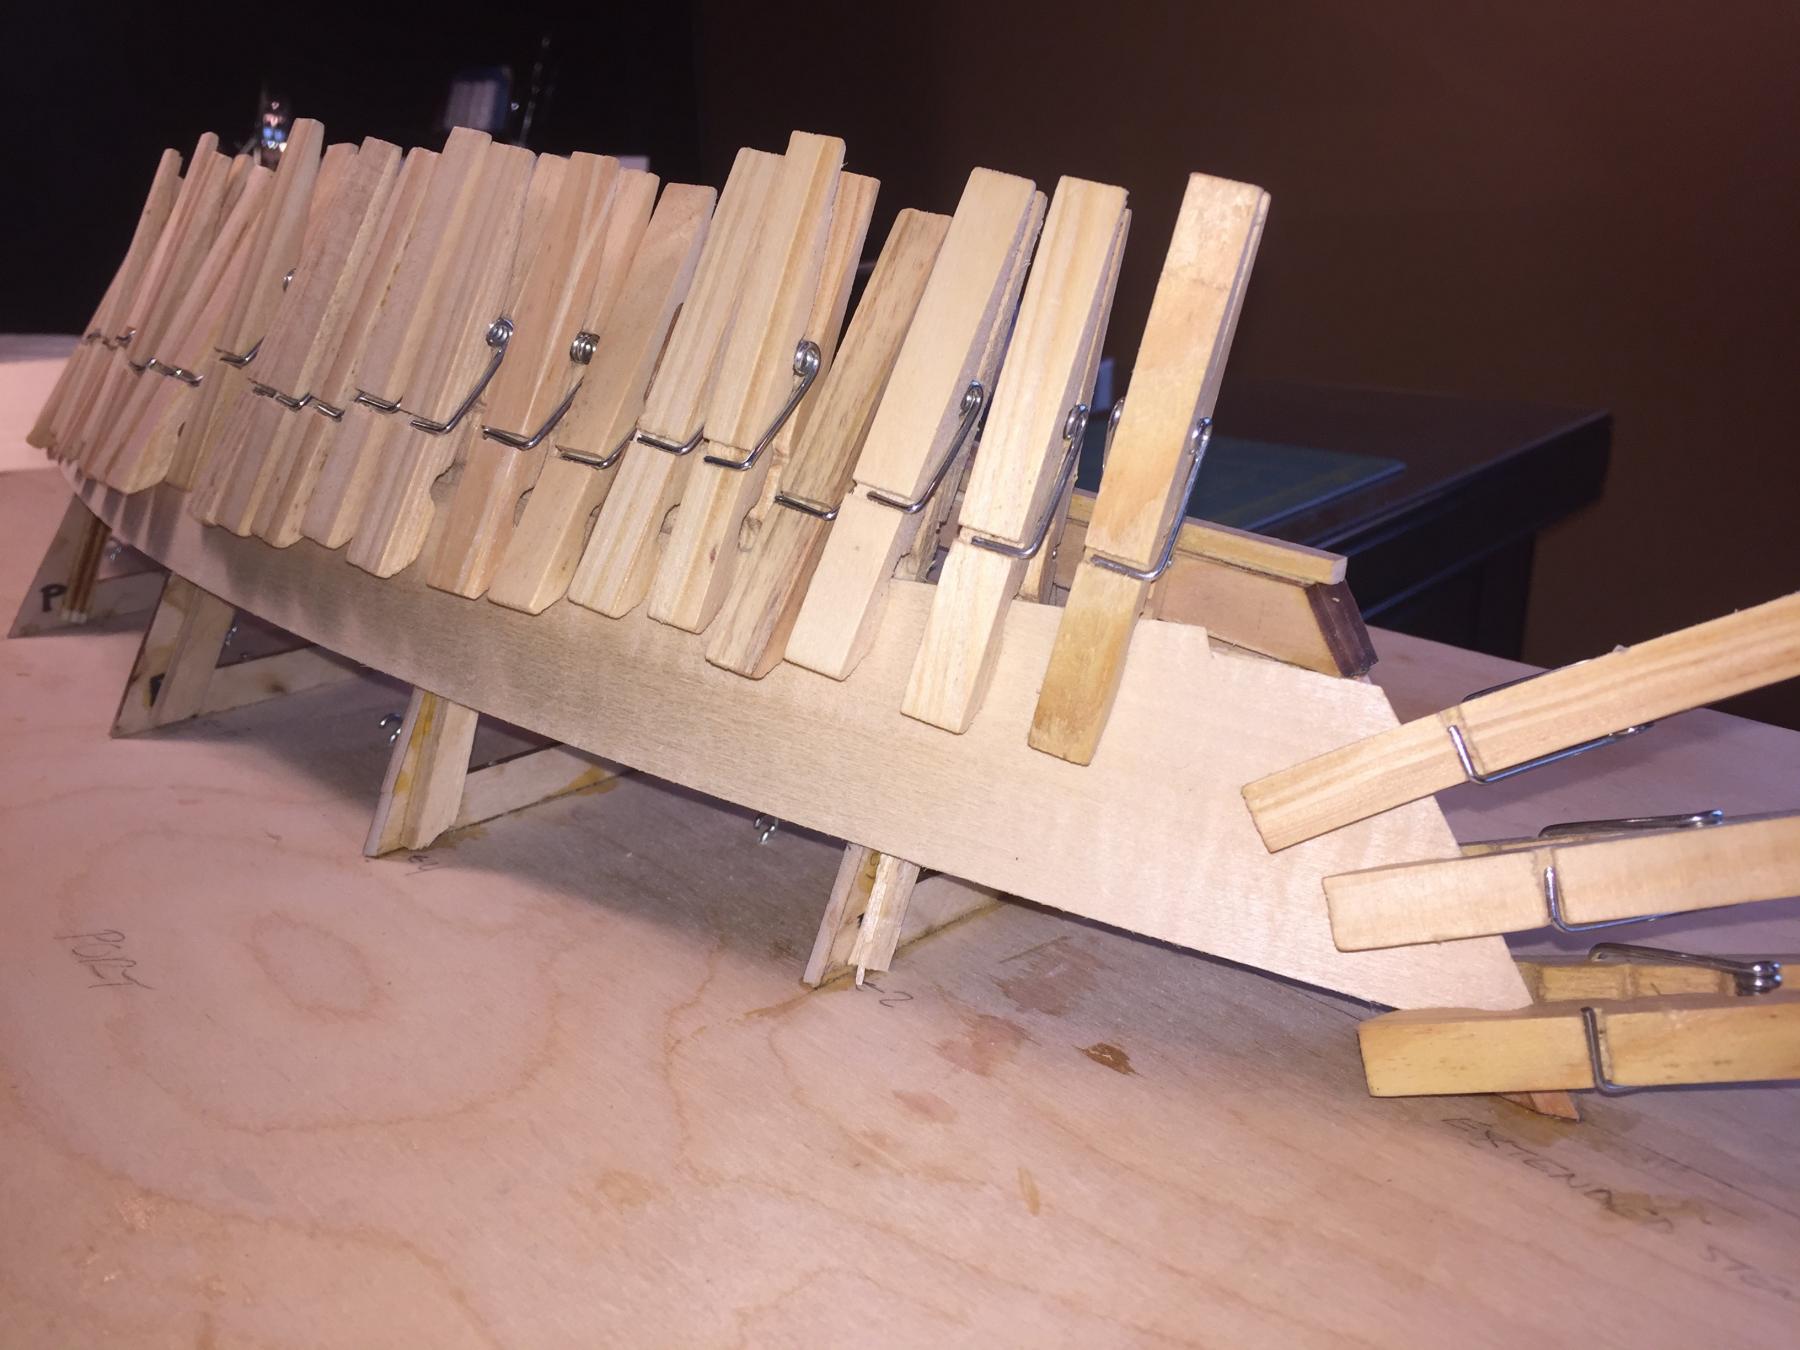
Don't laugh...I didn't want to use too FEW clothespins!!!
Port side (after trimming sheer but before starting to bevel the sides to match the chine log

Stbd side (same as above)

Starting to resemble something nautical...maybe. Looks as if the skeg has a list but I think it is a trick of the quality cell phone camera. It lines up straight with a rule.
-
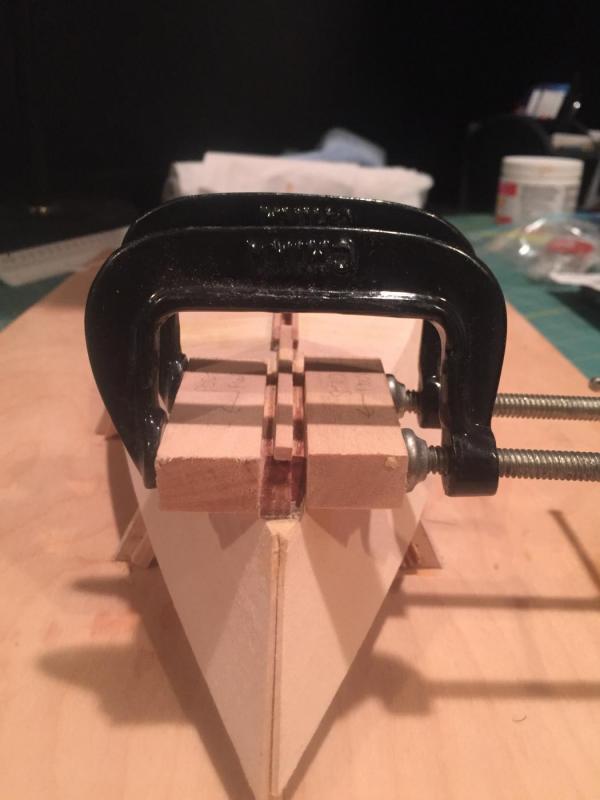
Update: Beveled the chine logs and the rabbet for the bottom hull planking (great technique described in the instruction manual, but I used a small file rather than a sanding block). I knew I'd run into snags sooner or later (doesn't everyone?). Found out that my chine logs were glued too far inboard on the transom so I had to fix that in order for the sides to fit properly. For the starboard side, tried to cut the chine log off the transom and resposition it only to find it too short. Ended up replacing the entire thing (after beveling it for hours, mind you). The port side was also off, but I ended up building up the chine log with some stock and then reshaped it. Wish I had thought of that for the port side; MUCH quicker and less painful.
At any rate, got past that issue, beveled both chine logs, cut out the sides, measured and marked the sheer line, trimmed the sheer to fit, and glued the sides on (one at a time, leaving about an hour after gluing the port side to allow the glue to set before removing the clothes pins).
That's where I am right now. After I bevel the bottoms of the side to match the bevel of the chine logs, I'll post pictures and start the dubious task of bottom planking.
Cheers,
Rob
-
-
Jerry,
I think the foredeck planking looks great and you did a really fine job on the nibbing. I'm watching this build closely because even though I'm a few builds away from gaining the confidence to tackle the Bluenose, she is on my shelf ready to rock and roll. Thanks for sharing all of your lessons learned and I'll keep watching!
Cheers,
Rob
-
Jack,
The jig looks like it saved a tremendous amount of time. Does the tubing pass through a hole drilled in the end piece? Where did you find the fitting you are using on the end of it to hold the tube (or what is it)? Does the other, unsecured end try to pop up, or does your jeweler's saw hold it in place while you are cutting?
Cheers,
Rob
-
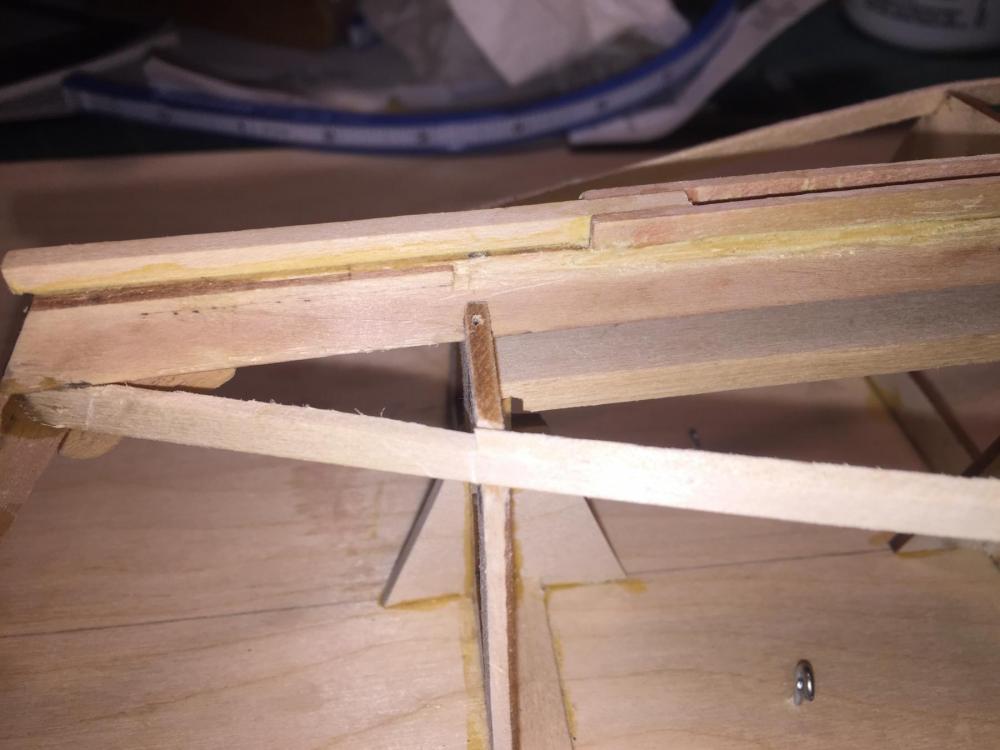
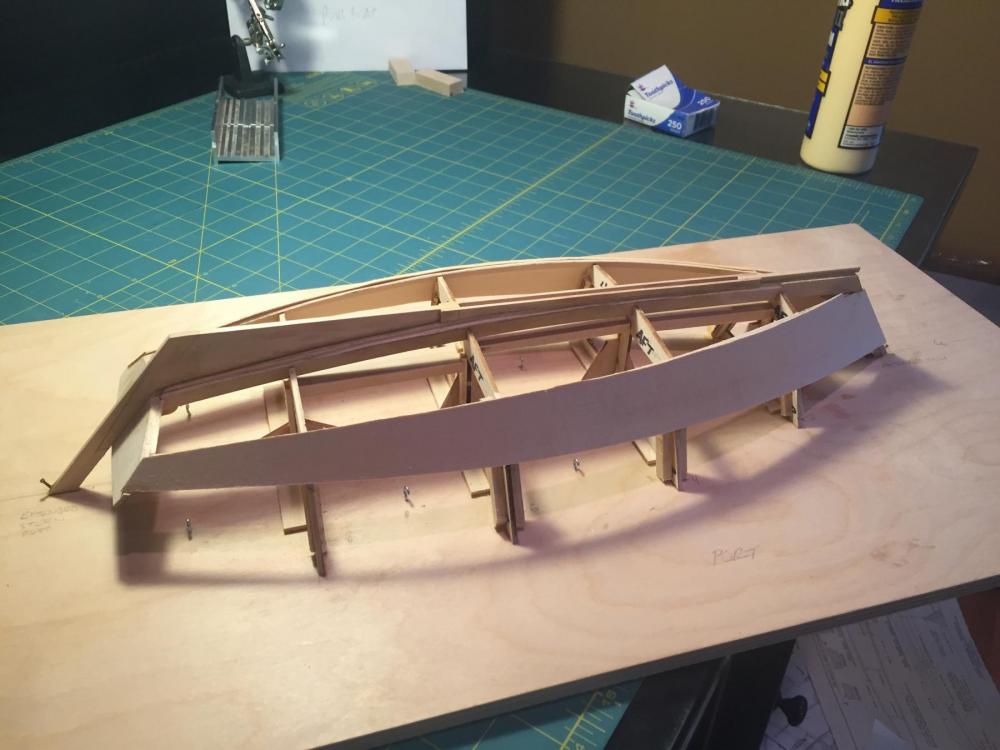
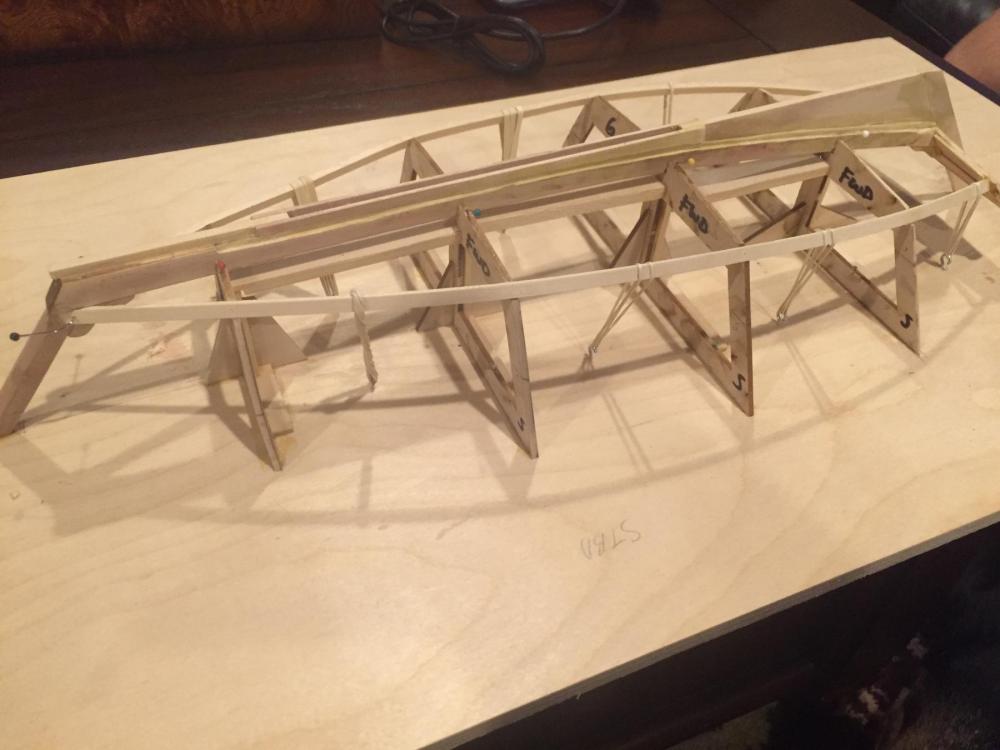
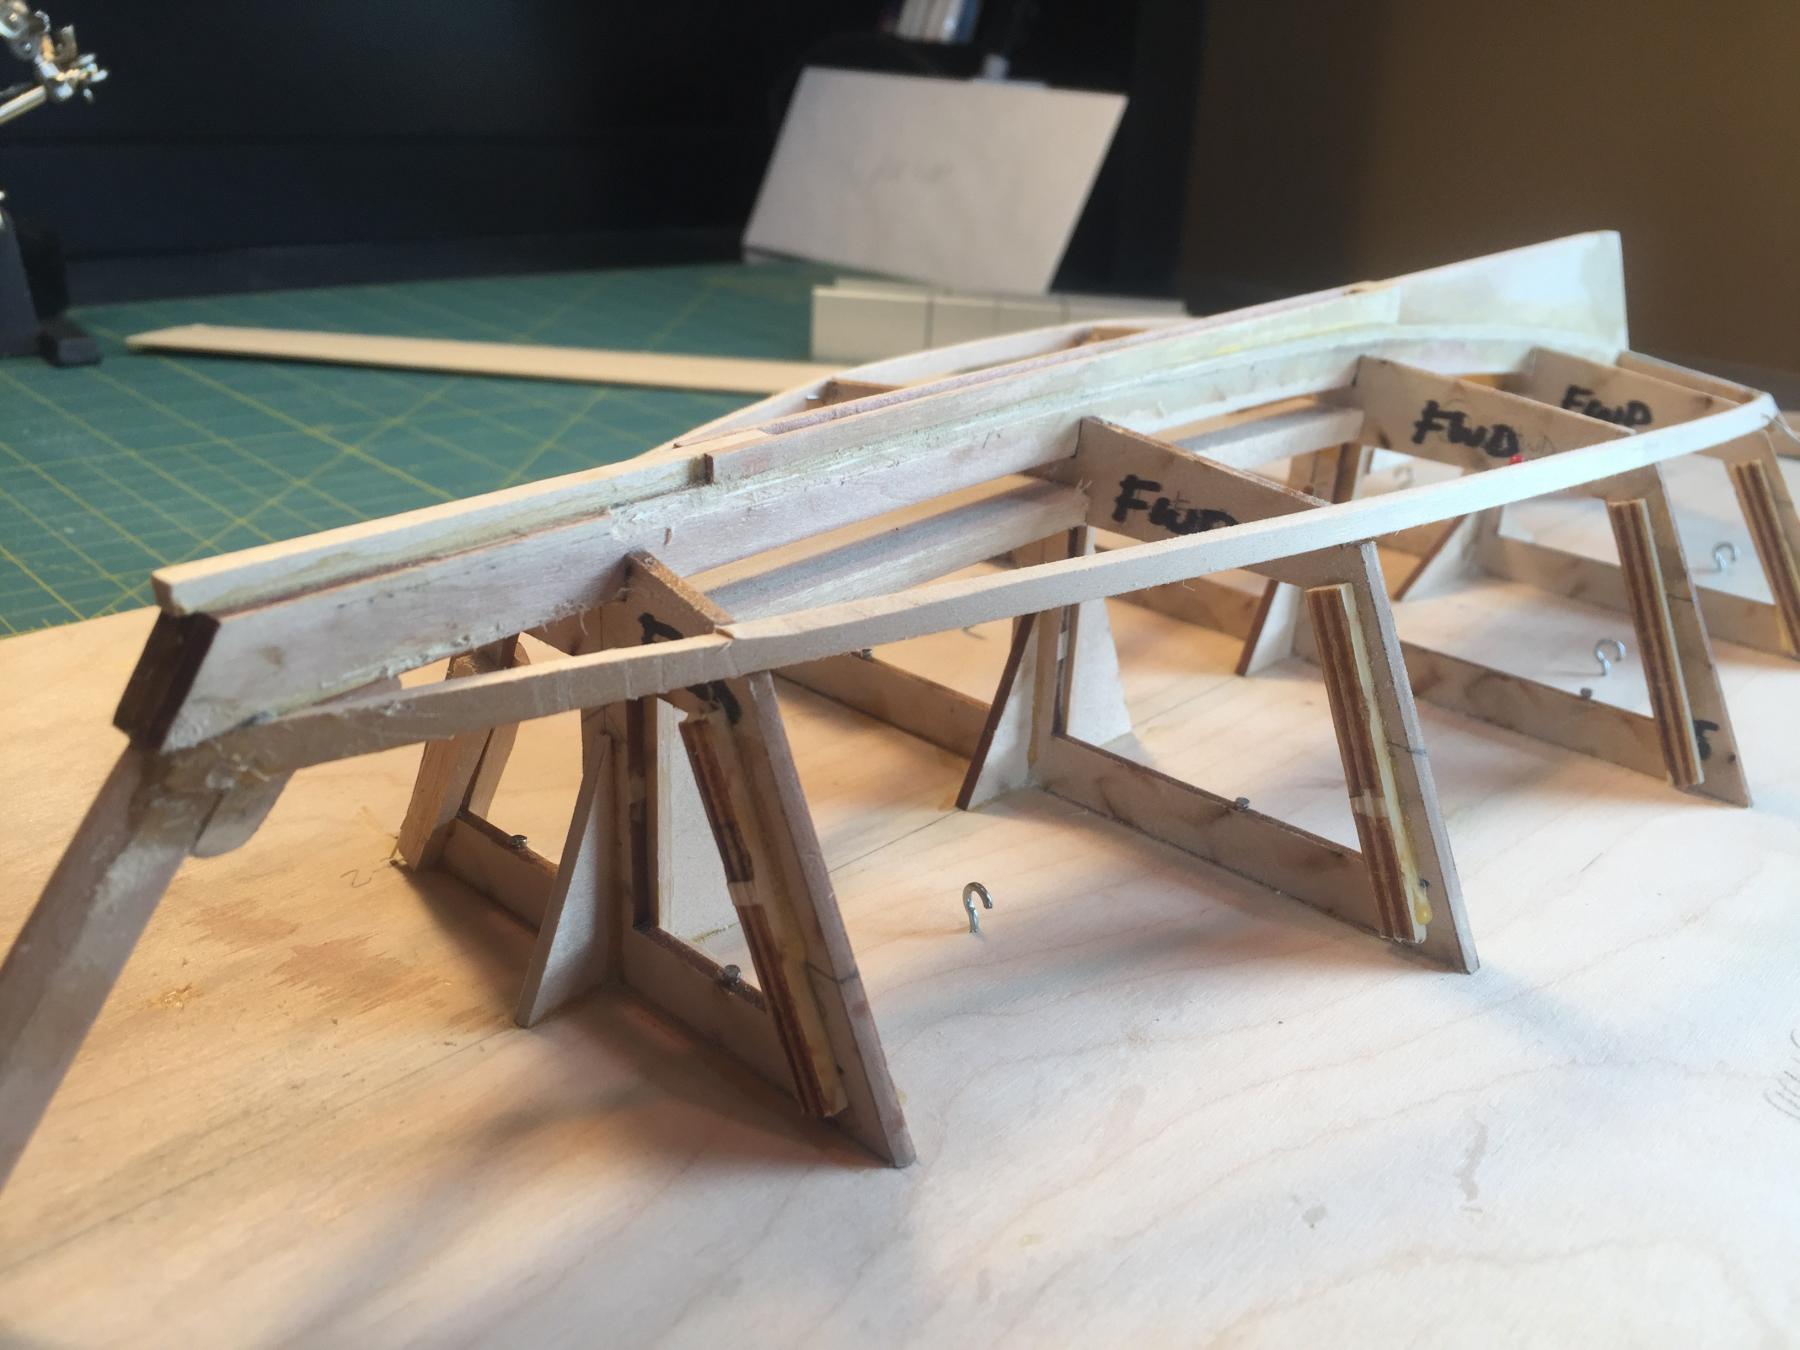
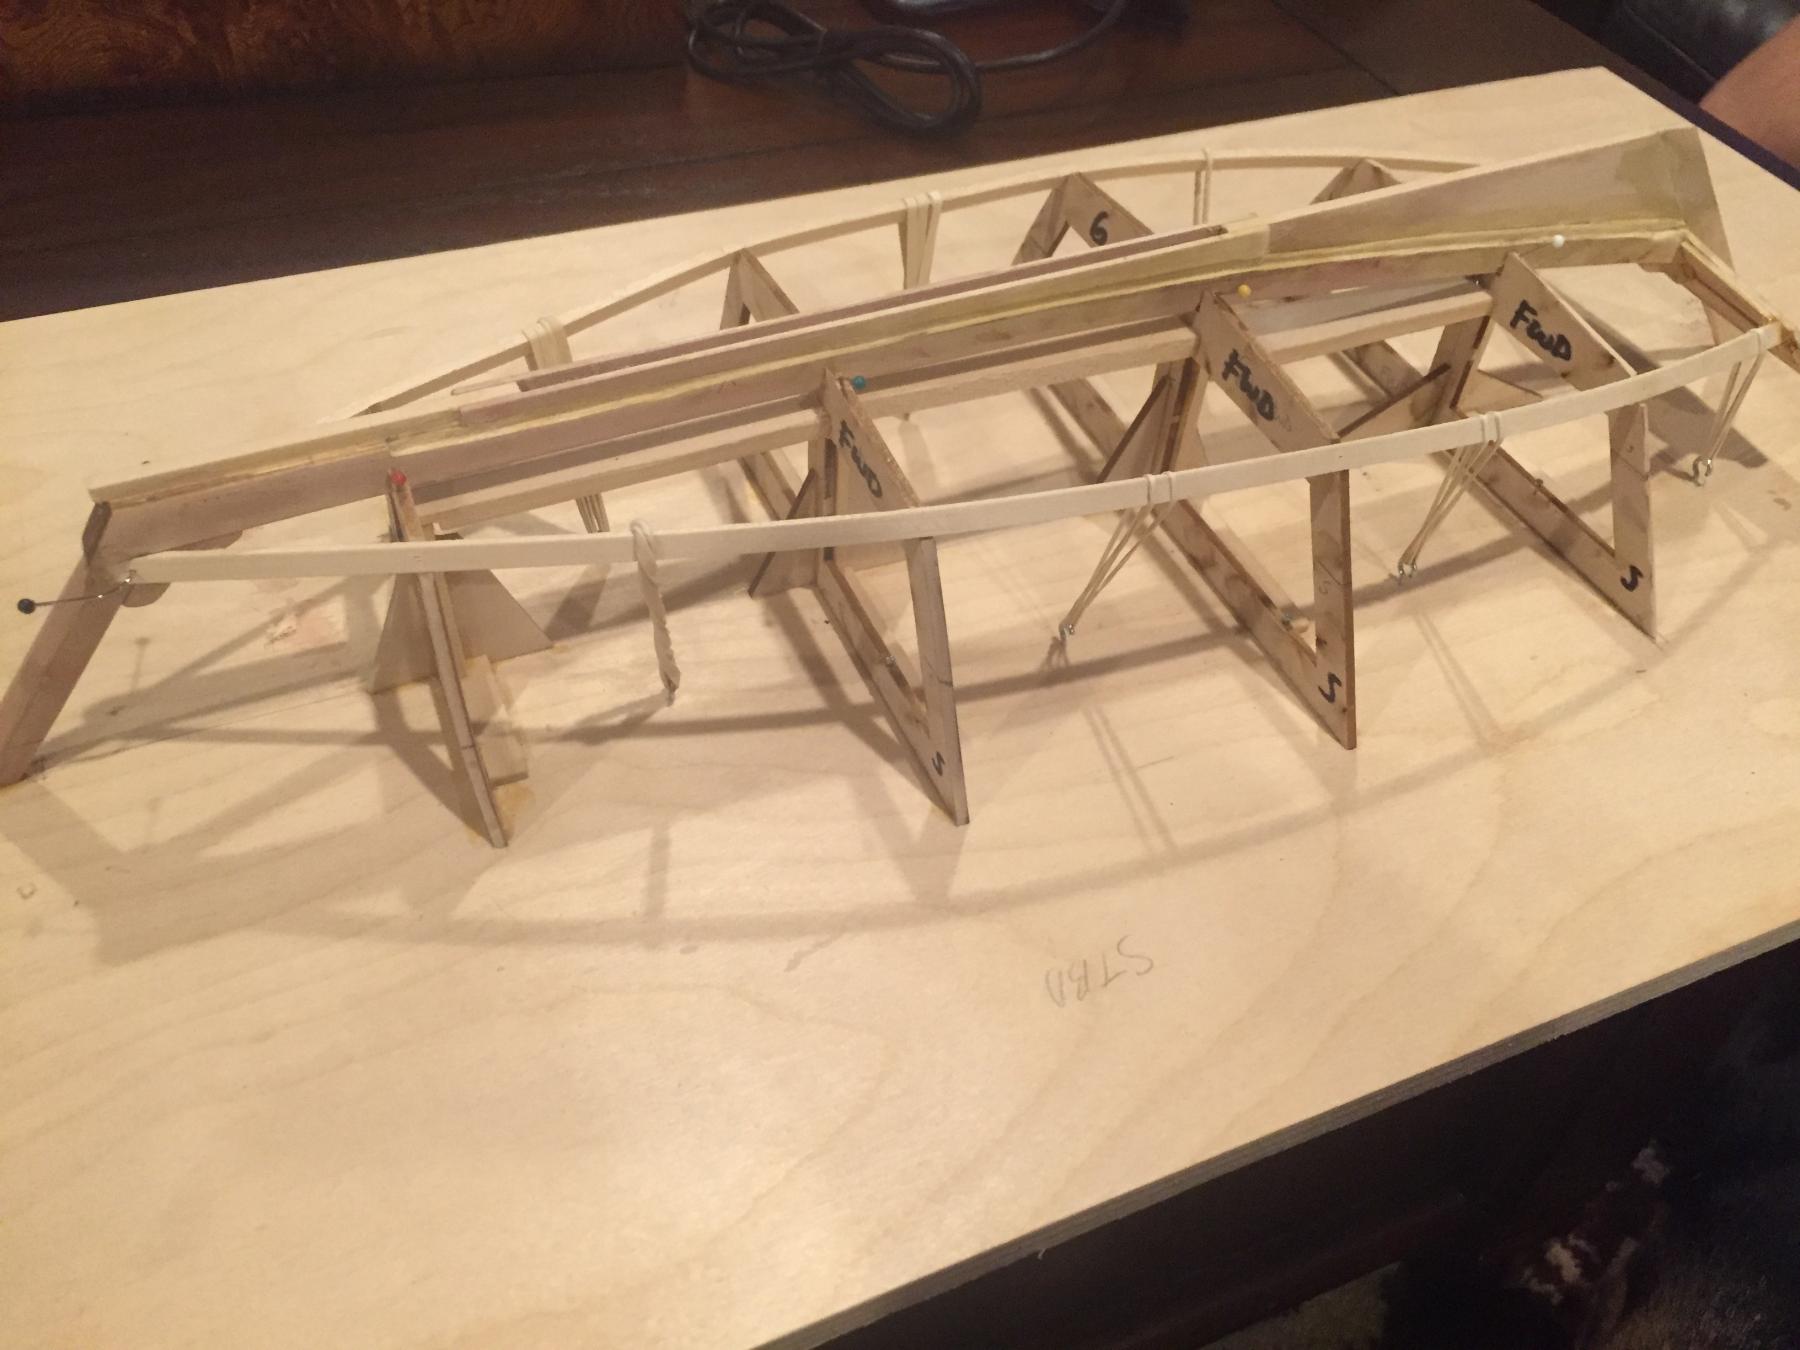
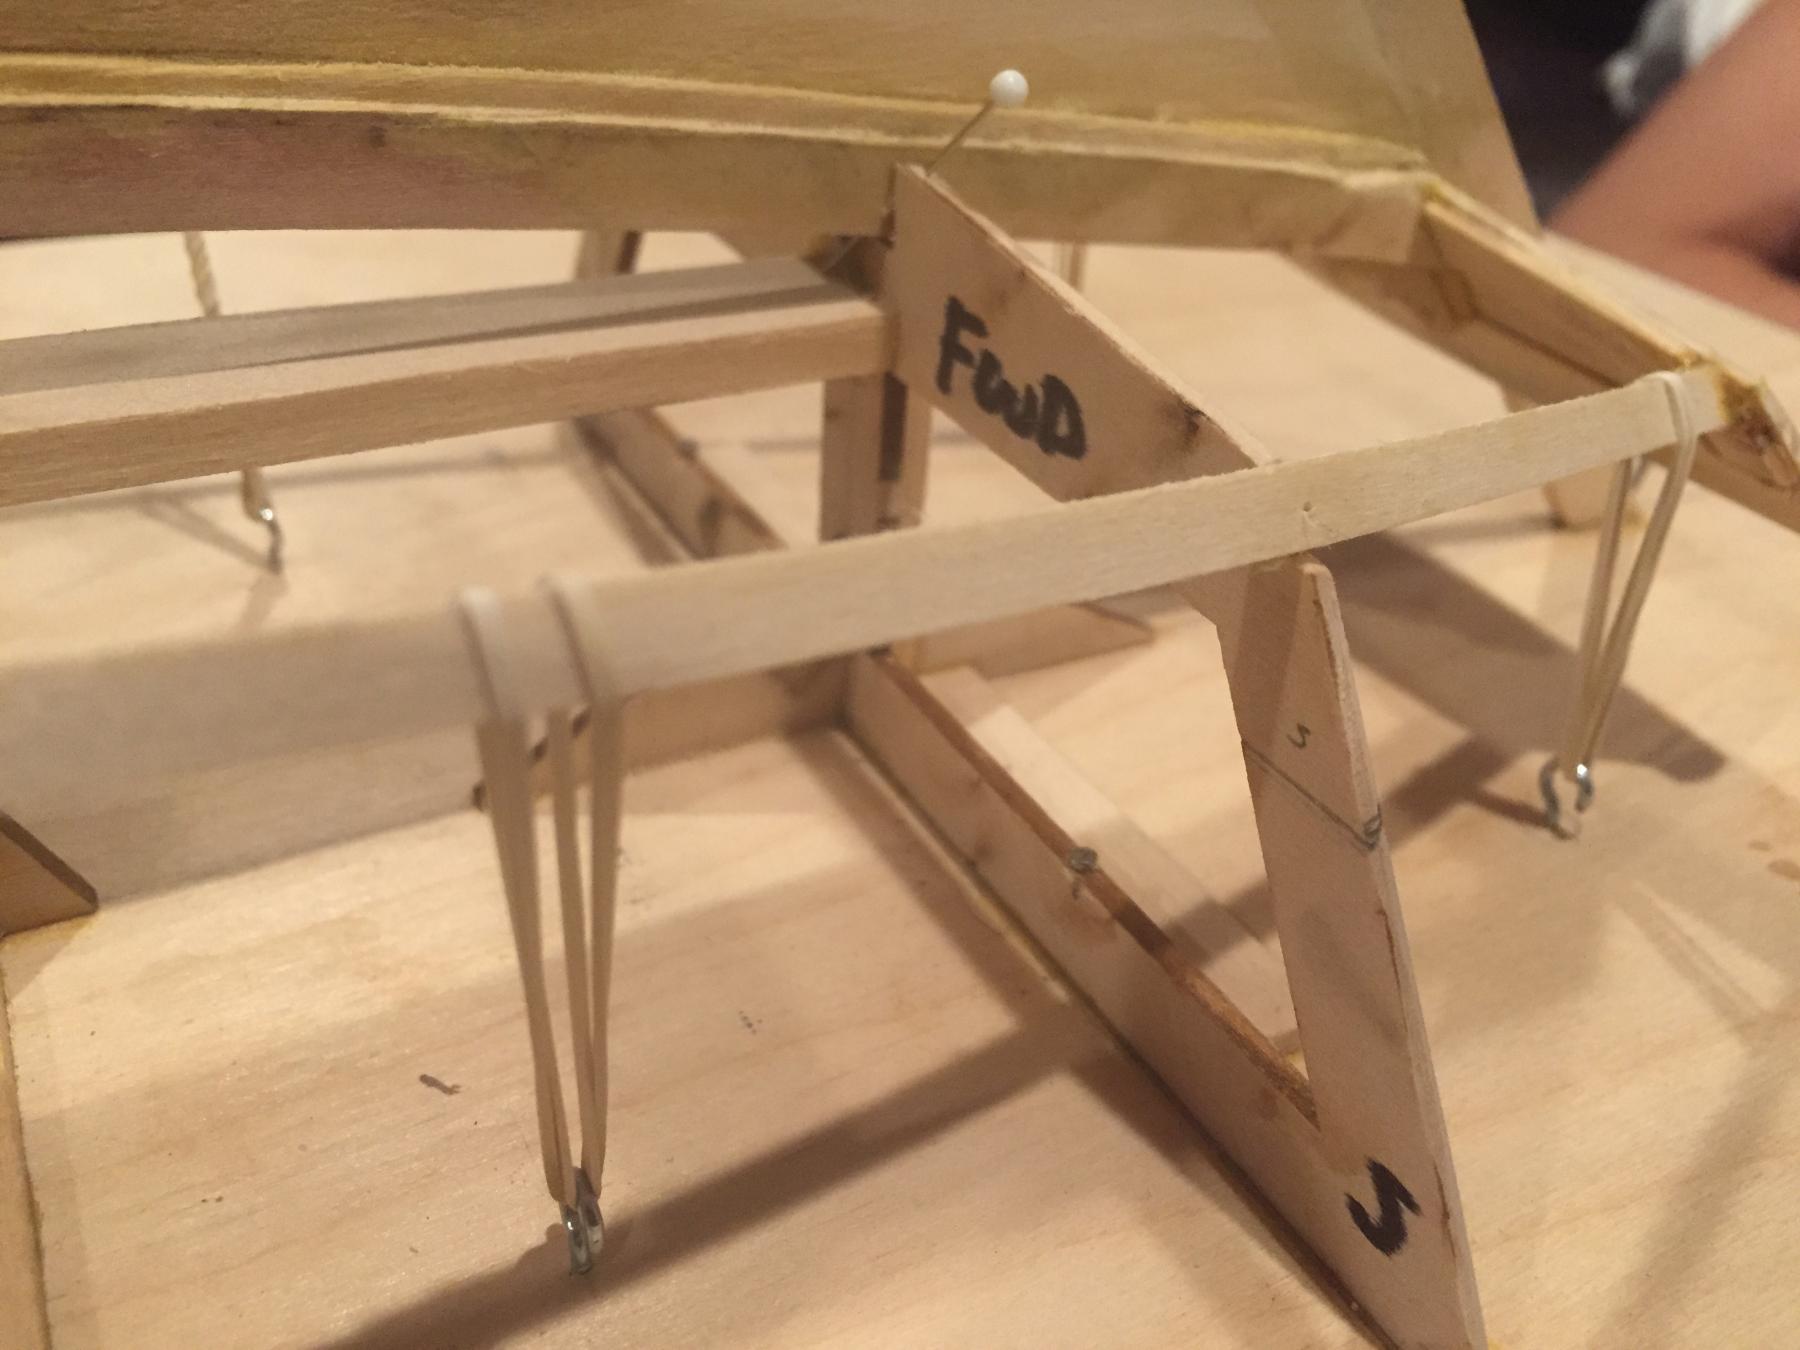
NEAR DISASTER!!! The rubber bands put a little to much strain on mold #6 and caused it to buckle a little on the starboard side. When I tried straightening it out, it cracked in half horizontally. Being a former Damage Control Officer, I quickly put my skills to use. I cut and glued shores to each side of the mold, but I need to be more careful in the future. I think I'm just going to shore up all of the molds on the outboard sides to prevent similar casualties. The center of the molds are strengthened well-beyond what was suggested in the instructions, but I neglected to do anything to the outboard sides. Dang. Oh well, new day, new lesson learned.
That all said, I removed the rubber bands and it looks like the chines are shaped the way they are supposed to be. The only thing that troubles me is that the chine doesn't completely "sit" in the molds' grooves so I'll need to tackle that problem when I glue the sides on.
At any rate, I can report that the rubber band/hook technique was a success, despite the problem.
Next comes the tedious task of tapering the chine logs and the rabbetts for the bottom planking that will commence once I get the sides glued on.
-
Sam and E.J.,
I got the idea for using the hooks and rubber bands from the Seaways' Ships in Scale article series on the Willie L. Bennett Skipjack (published May through Dec 2004) written by Kurt Van Dahm. They held the chine logs in place against the molds perfectly; no weird twisting or unnatural curves. Also, I used 5-minute epoxy and pins to hold everything in place. So far, I'm happy with the way it's turning out. I'm going to remove the rubber bands tonight so I'm crossing my fingers that everything holds together!!! I'll report whether it worked or not because I'm also curious to see how the shape turns out without the tension of the bands.
E.J., There is still plenty of room at the bar for you, enjoy the complimentary pretzels.
Thanks for the likes!!
Cheers!!
Rob
-
Happy Independence Day, Fellow Shipwrights!
It was a very productive weekend. I solved my keelson issue, glued the skeg, foregrip shoe, and skeg battons together, glued that assembly to the keelson, attached the keel assembly to the build board, and glued the chine logs. It actually has the shape of a ship!! I know I have a long way to go, but I feel like I'm finally on the right track. Figuring out the angles to cut the chine at the transom and the inner stem was very tricky, and I ended up just eyeballing it (for lack of a better way)...is there a tried-and-true method for this for next time? After reading the Van Dahm article, I used his method of the cup hooks and rubber bands...worked like a dream.
Thanks in advance for the feedback, and I will see you in the fleet!


- EJ_L, Elijah, Ryland Craze and 3 others
-
6
-
-
Jerry,
Your craftsmanship is awesome. I watch this log with much interest as I intend on building the MS Bluenose when my confidence and skills increase. I will indeed be using your build-log (as well as the other artists' build logs) when I start this bad-boy, though it is fourth at bat and the first batter just walked up to the plate.
By the way, where did you buy the clamp you are using to hold the ship?
-
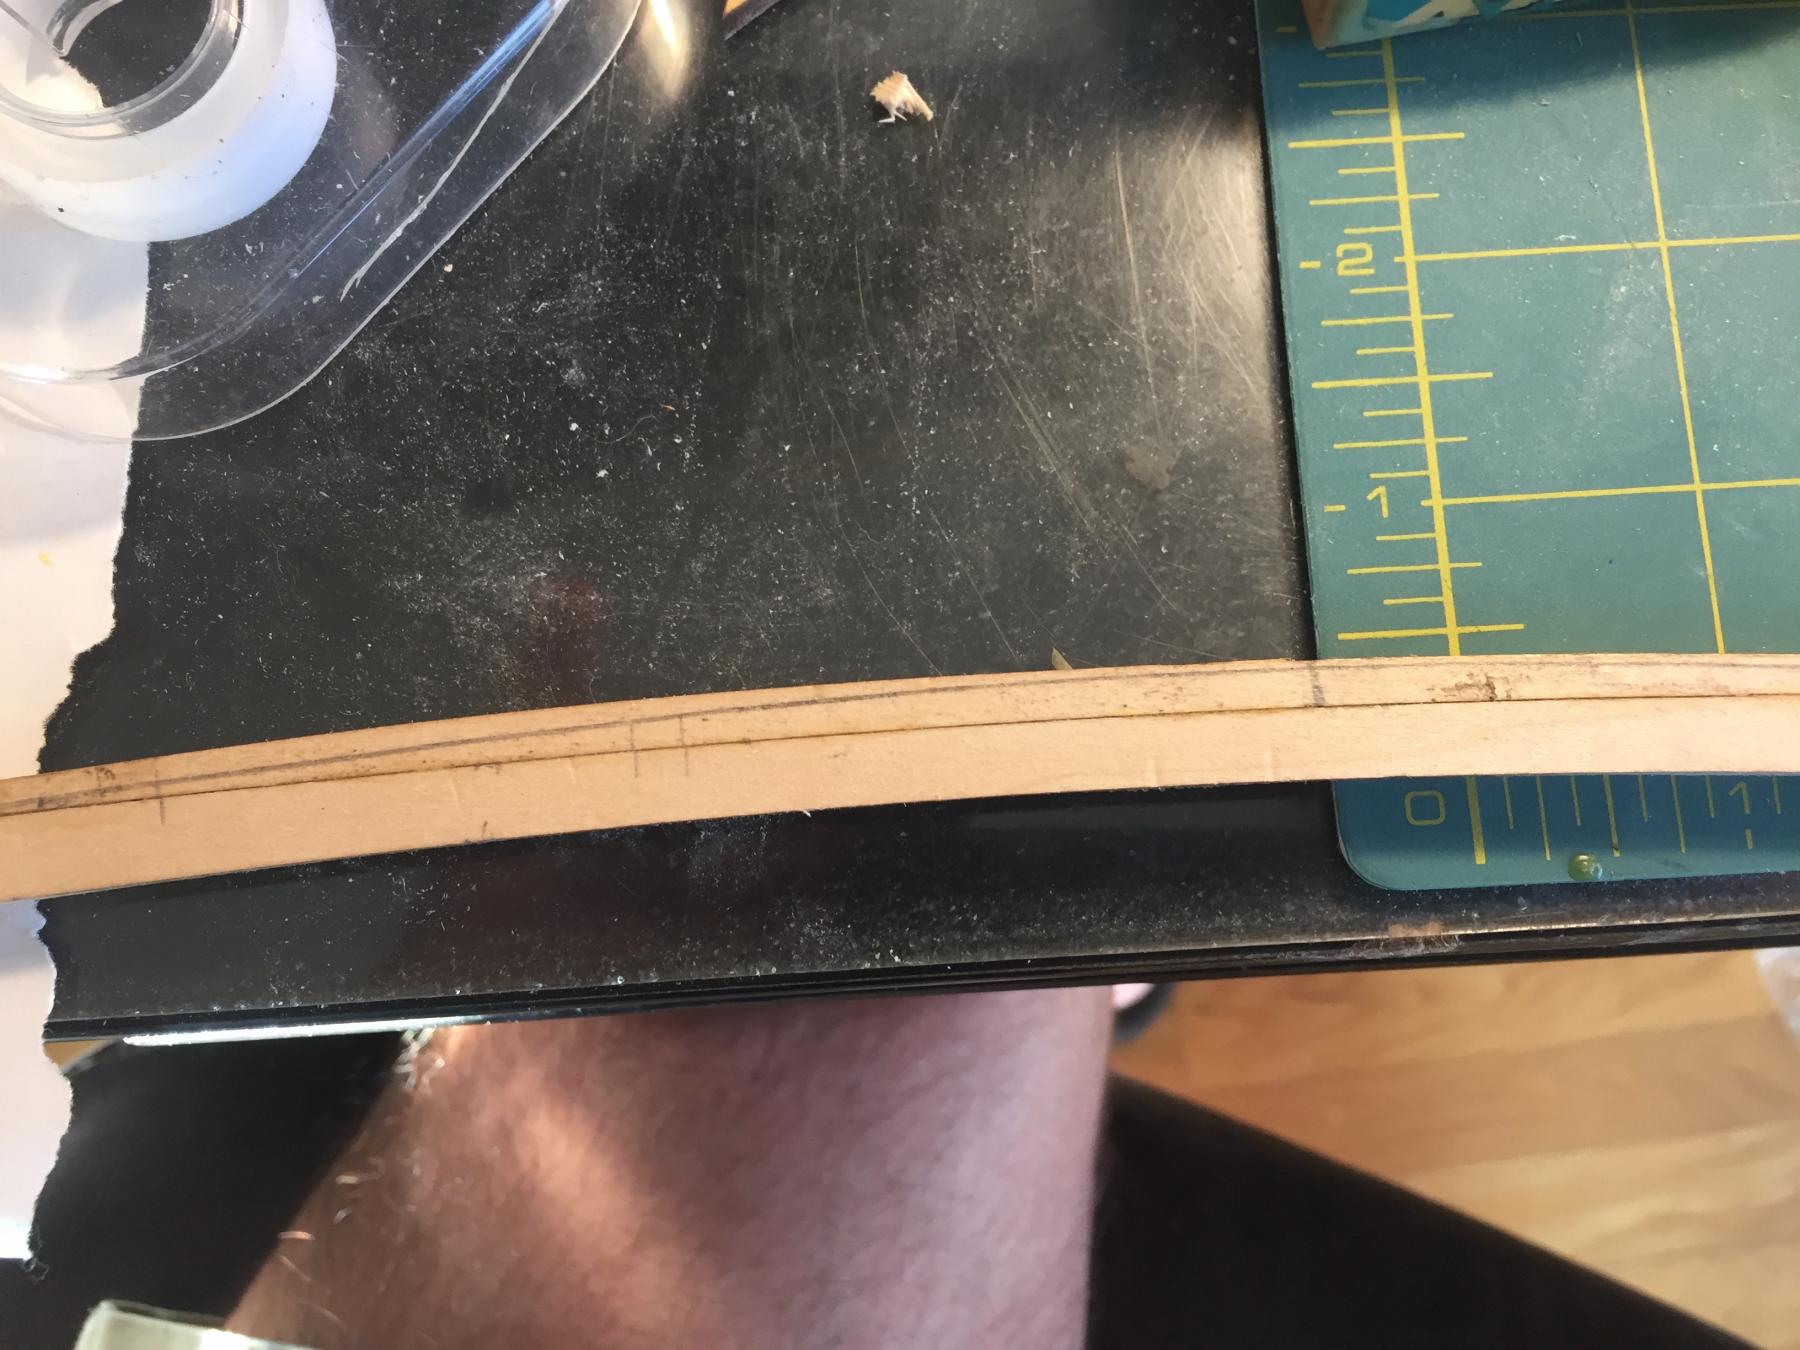
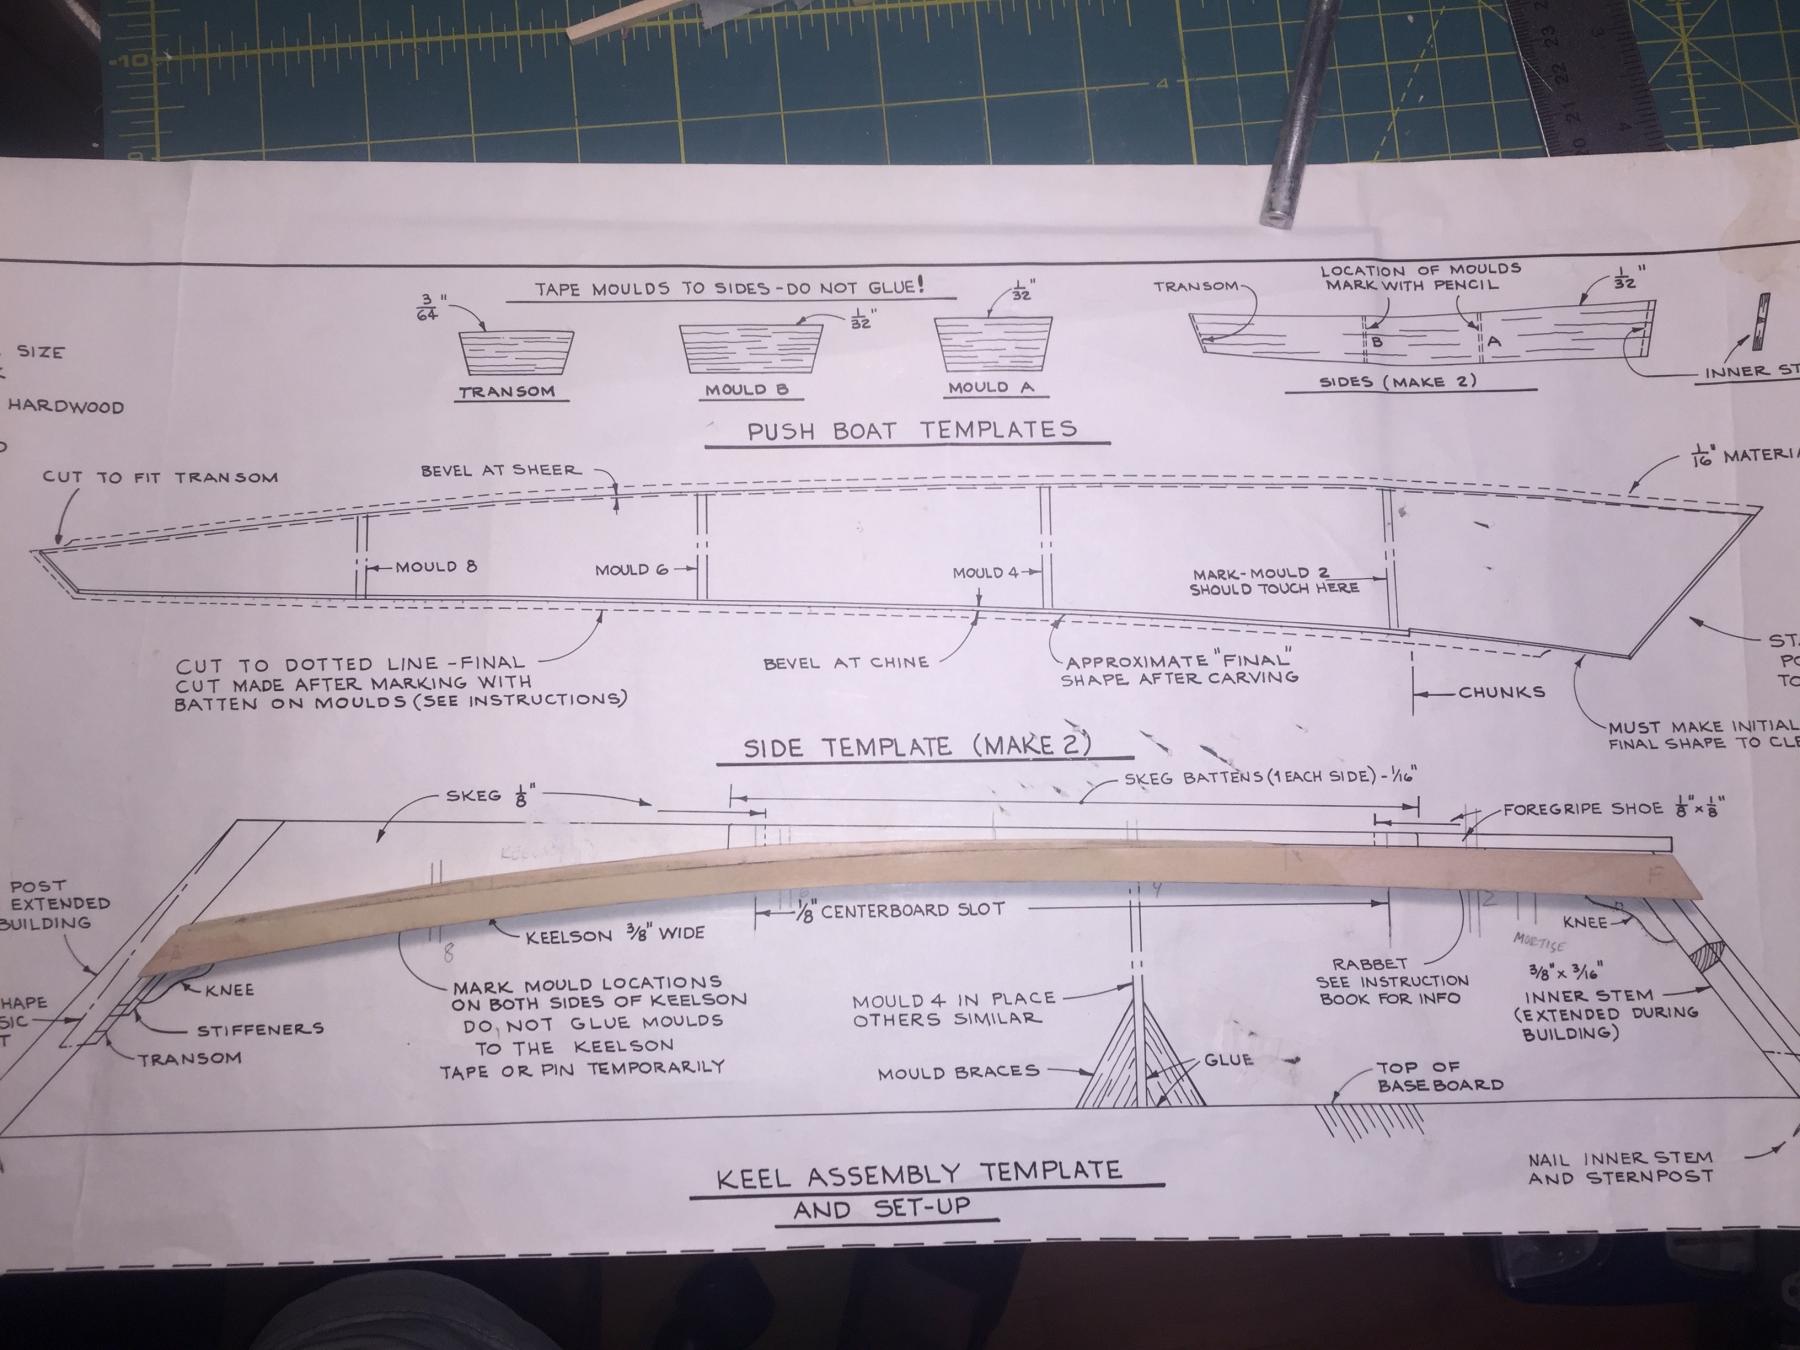
After much hand-wringing and AMAZING customer service from Model Expo, I fixed my keelson issue. You can follow the issue here: keelson question but I wanted to include some photos (in case someone else runs into this issue, which presumably, someone will.
Summary: The new keelson I got from Model Expo was the exact same size as the one I had originally, and did not match the plan (presumably, the laser cut is different than it used to be). I used the sprue from the keelson laser-cut sheet to match the arc of the keelson and sandwiched three of them together and glued the new part to the bottom of my keelson, traced the line of the keelson from the drawing, and then shaped it with my Dremel sanding drum in the Dremel drill press.
Finally! I'm ready to move along and actually start building a Skipjack! While waiting for the keelson issue to be resolved, I started pre-cutting parts I knew I needed soon (transom, transom stiffeners, skeg, foregrip shoe, skeg battens; they still need some slight trimming once they are in place). Hopefully I'll have some new photos by the end of the three-day weekend!!

 Note: Not TWO SECONDS after I took the last photo, I spilled an entire glass of wine all over EVERYTHING within a 3 foot radius!!!! Now my keelson, skeg, etc. is a nice shade of Cabernet. Good thing this part of the model will be painted...
 -
Update:
Since the keelson pieces provided with the kit seem to have deviated from the drawing over the years, I decided to improvise and keep the model loyal to the plans. I took three pieces of the sprue from the laser-cut sheet by cutting strips from the top of where each section of the keelson originated, and glued them together (after measuring for and cutting the middle piece to make room for the centerboard slot). After drying, I glued that assembly to the bottom of the original keelson so I had an extra tall keelson. I then marked the line of the original keelson from the drawing, and carved/sanded the assembly to its proper shape. Now I have a keelson that matches the diagram precisely!!! Thanks for all of the comments.
If anyone else runs into this issue, let me know and I'll give you the down-and-dirty. I'll update my build-log soon and include some photos.
Cheers,
Rob
- Jack12477, mtaylor and Ryland Craze
-
3


Willie L Bennett by SWOHammer (Rob Kallman) - Model Shipways - Scale 3/8" - First Build
in - Kit build logs for subjects built from 1851 - 1900
Posted
That's incredible! Not only that you've persevered, but that it is still in great shape and looks FANTASTIC! I wish you all the best on you finishing it. I hope you have a build log so we can see your progress (hint, hint); if you do, can you share the link?