HOLIDAY DONATION DRIVE - SUPPORT MSW - DO YOUR PART TO KEEP THIS GREAT FORUM GOING! (83 donations so far out of 49,000 members - C'mon guys!)
×


Brucealanevans
-
Posts
450 -
Joined
-
Last visited
Content Type
Profiles
Forums
Gallery
Events
Everything posted by Brucealanevans
-
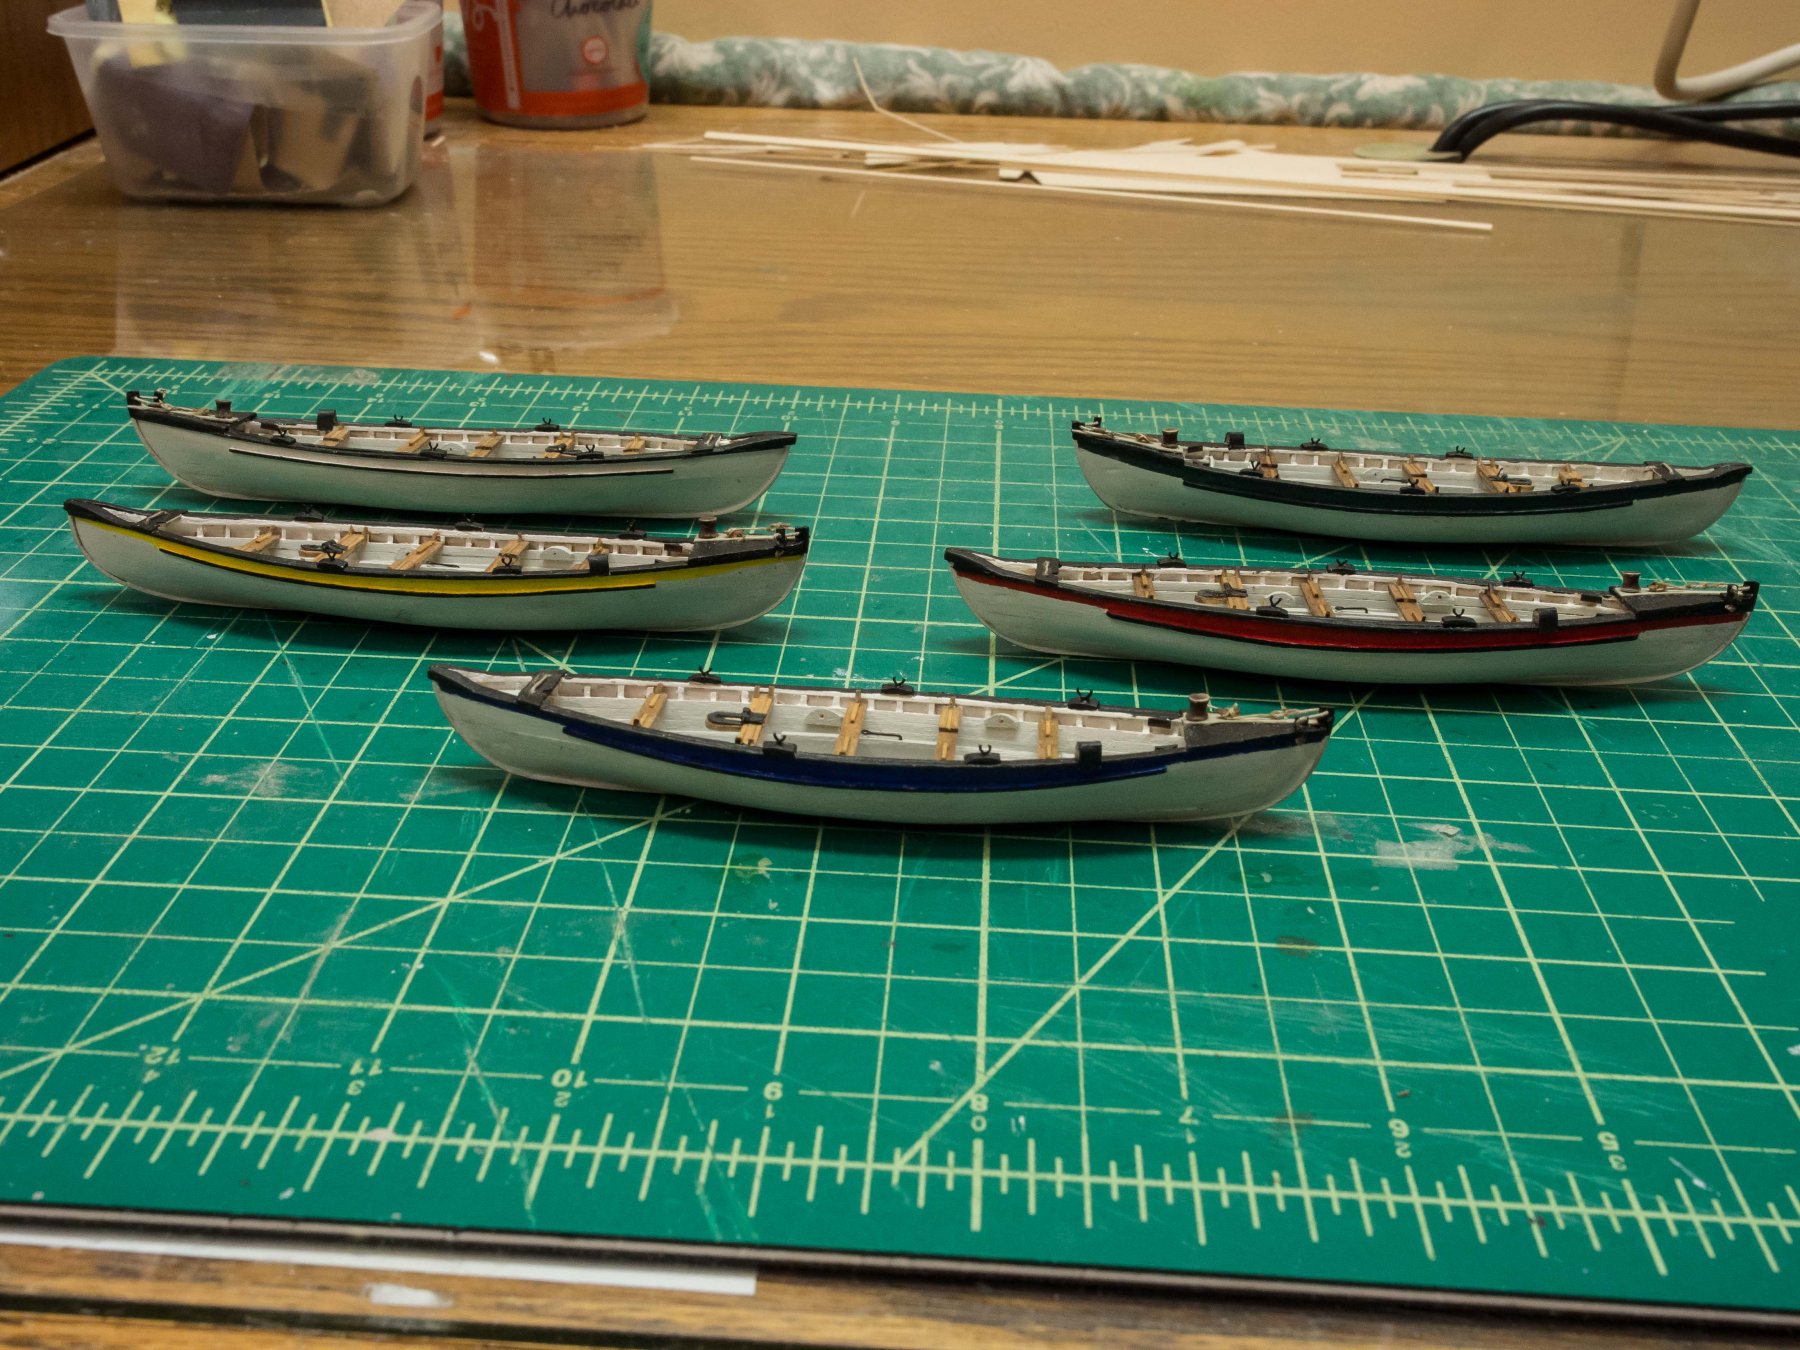
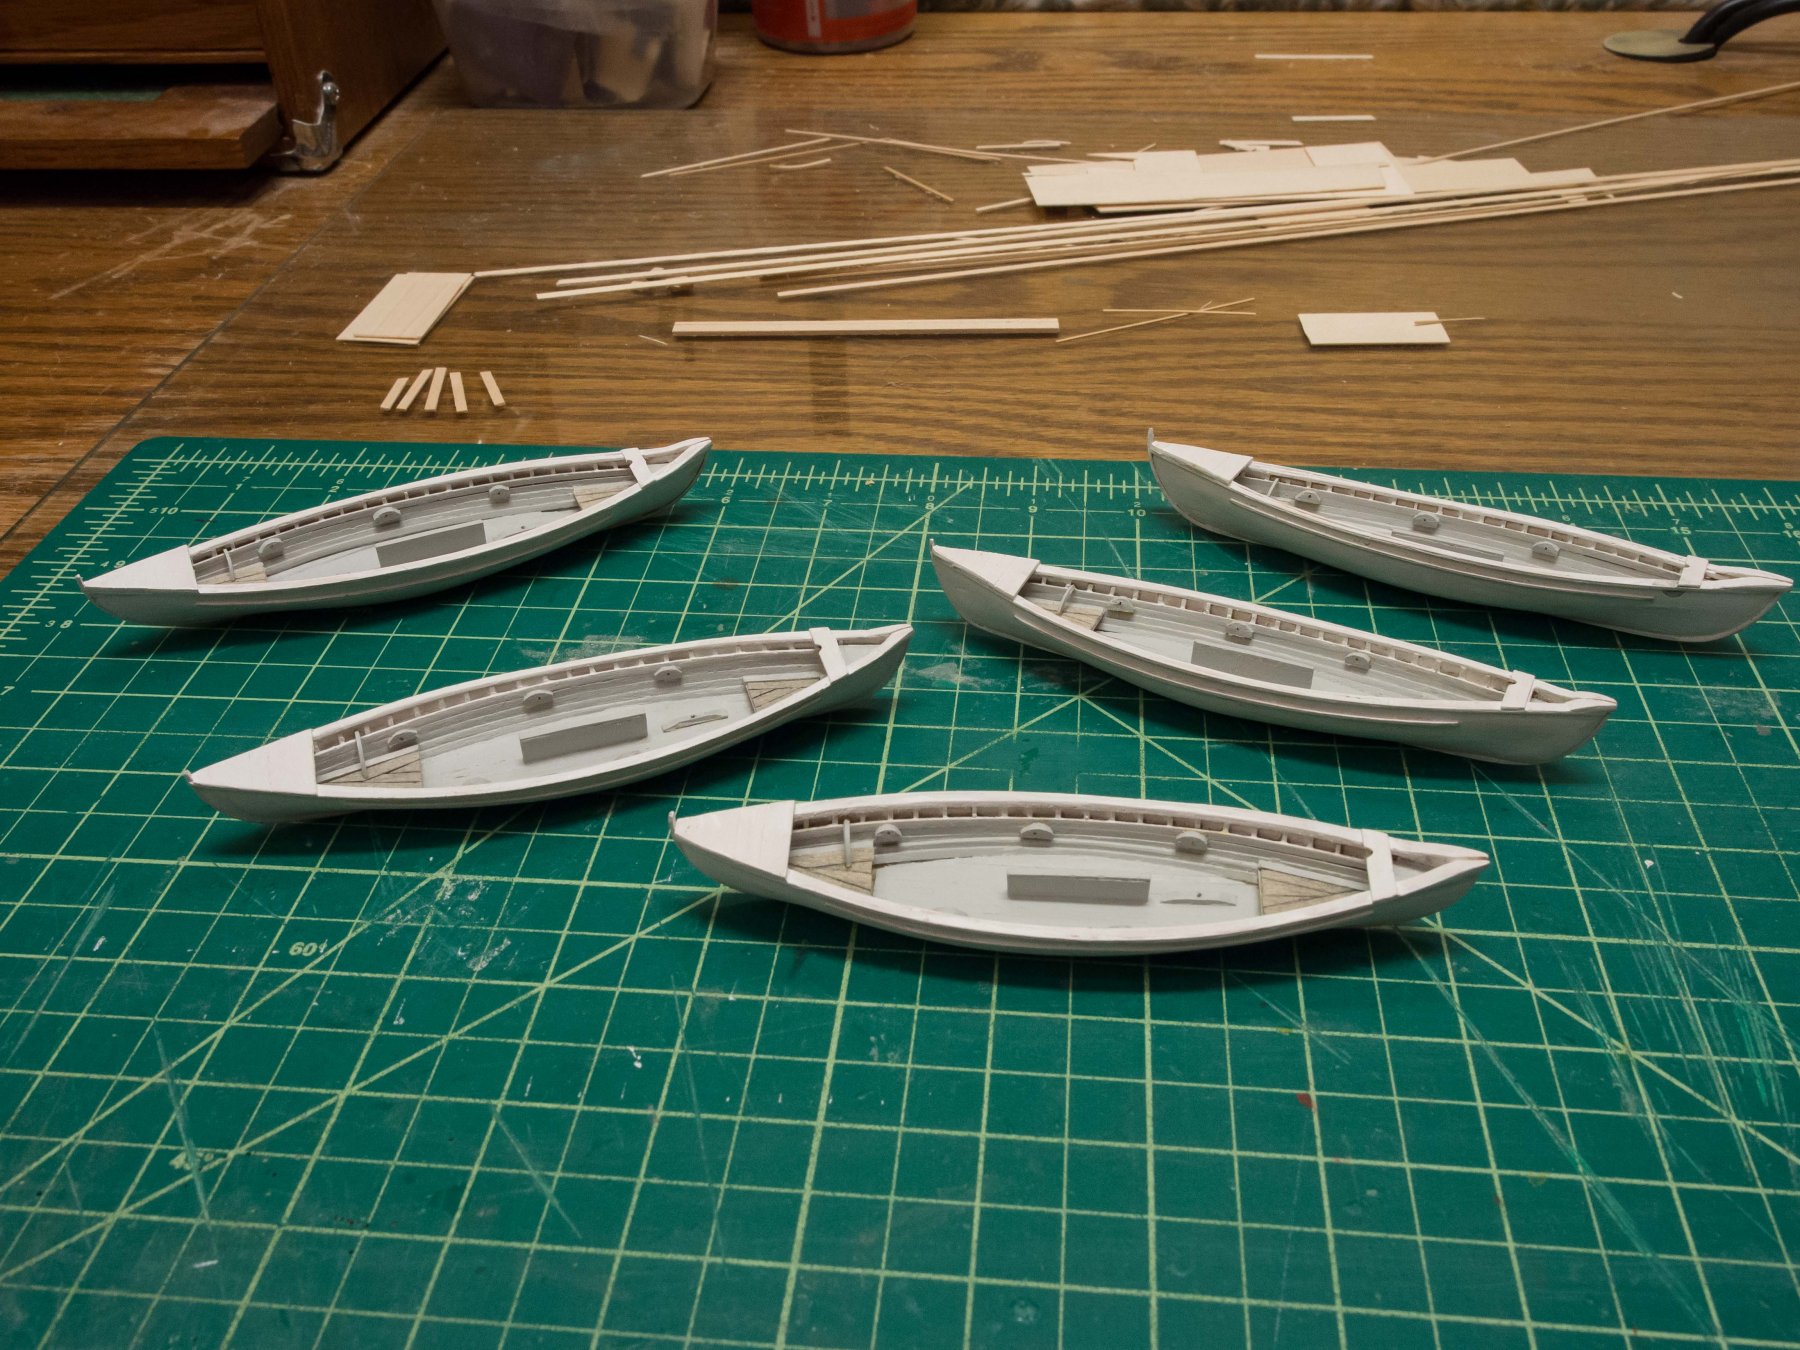
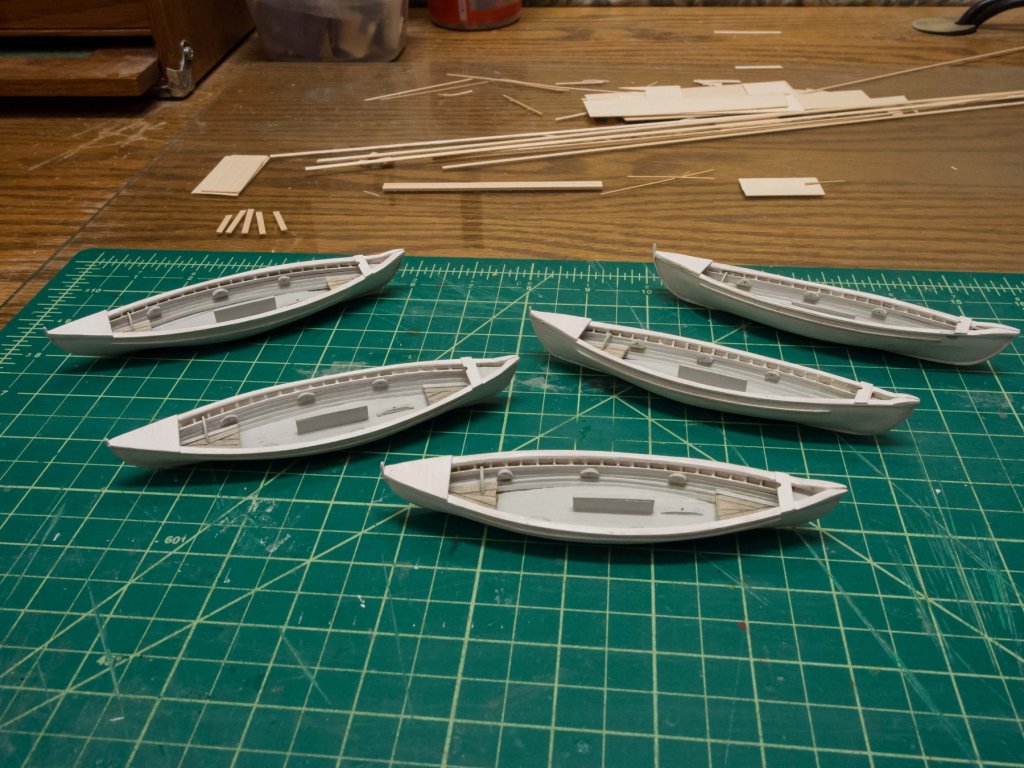
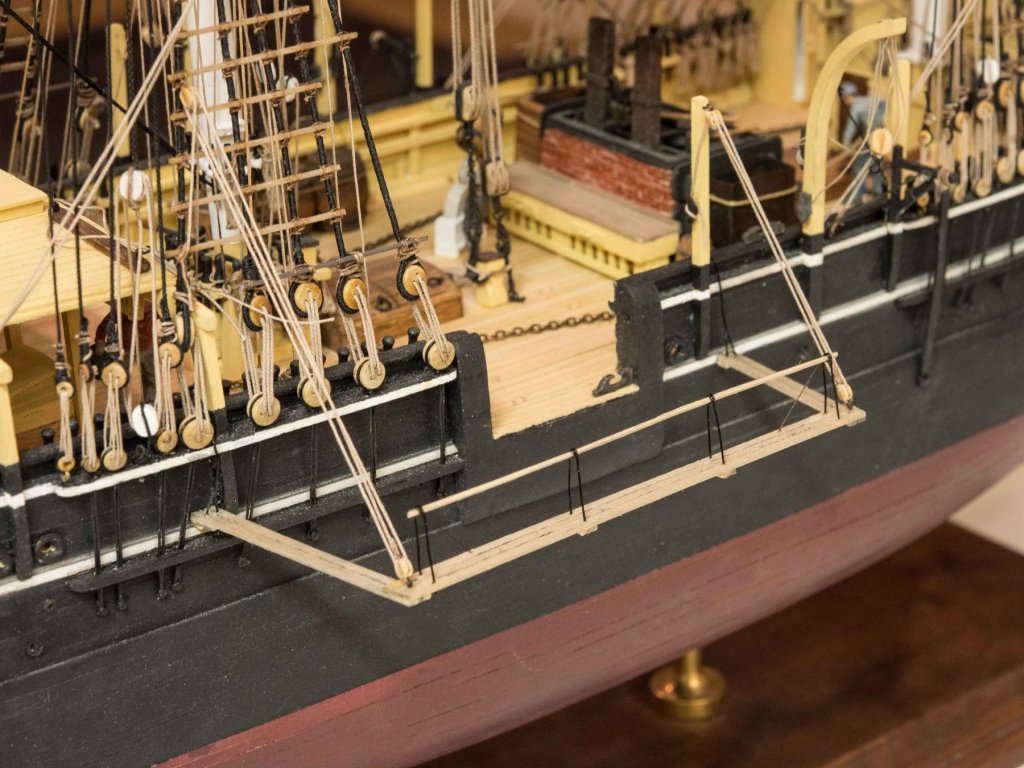
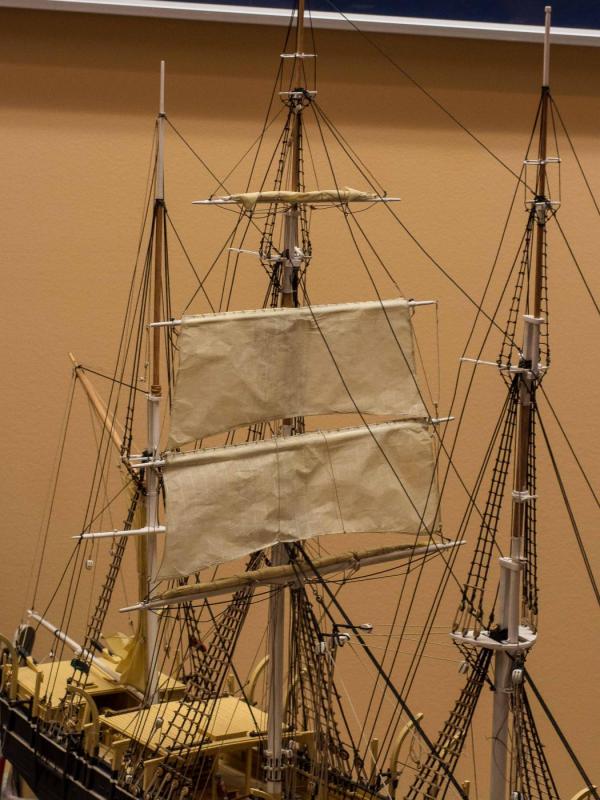
 The whaleboats are now done except for the rudders. Today finished the rigging of the steering oar braces, added the steering oar rests, two cleats inside rail aft, and did some touch-up. I'm not sure if I'll give the boats a coat of white (below the rubbing strips) since I kind of like the weathered and beaten look of the primer coat. Tomorrow, detailing the rudders and deciding on the rigging of the 2 lines that suspend them in the stored position.
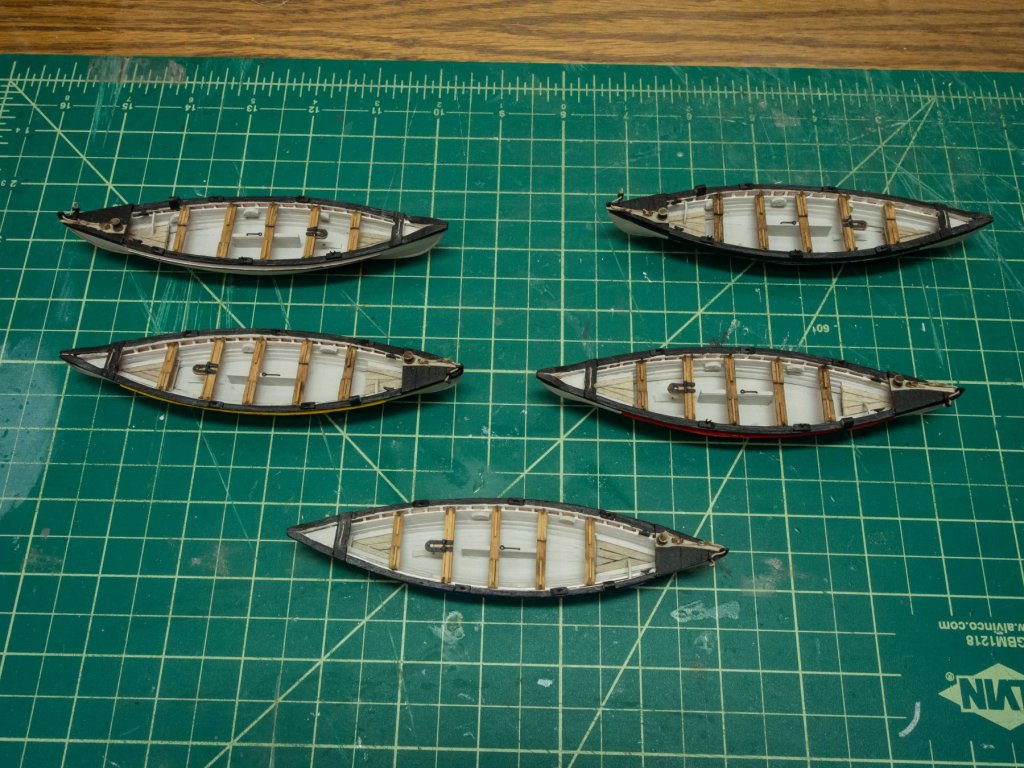


- 245 replies
-
- 11
-

-
- model shipways
- Finished
- (and 1 more)
-
Thanks for the comments and likes. I'm having a lot of fun now with these whaleboats. Just how much detail can I cram in? Referring frequently to the plans for the MS New Bedford Whaleboat, with occasional simplification in deference to the scale. Painted the boats. Added (25) oarlock supports, and made 25 oarlocks out of 28 gauge black covered copper wire by twisting it around a small drill, adding a drop of CA to keep it from unraveling, and clipping off the top of the loop, and trimming the stem. Added them to the oarlock supports in pre-drilled holes. They look good and in scale. A touch of black paint to hide the copper where clipped. Now I'm adding the steering oar support, which is actually a bit complicated as the rope goes thru the stem (which I had to build up to be big enough for a transverse hole) and has a small closed loop at the end. The loop is attached to a lanyard which ties off on a cleat on the lion's tongue aft of the loggerhead to allow the loop around the oar to be tightened. Will post more pictures when that is done. Next up will be the (suspended in storage position) rudders, which also require either one or two (depending on how compulsive I feel) lines. I have cut and painted the rudders, but not added gudgens and pintels yet. Approaching the end of the boats themselves - probably another week. Only additional detail will be a steering oar rest on the port rail of each boat. Then I start making oars and sails wrapped around spars. After review of the literature, and some opinions from experts here, I will not be adding the stuff that wasn't put in the boats until they were getting ready to launch them, including line tubs, implements, casks, etc.
- 245 replies
-
- 1
-
-
- model shipways
- Finished
- (and 1 more)
-
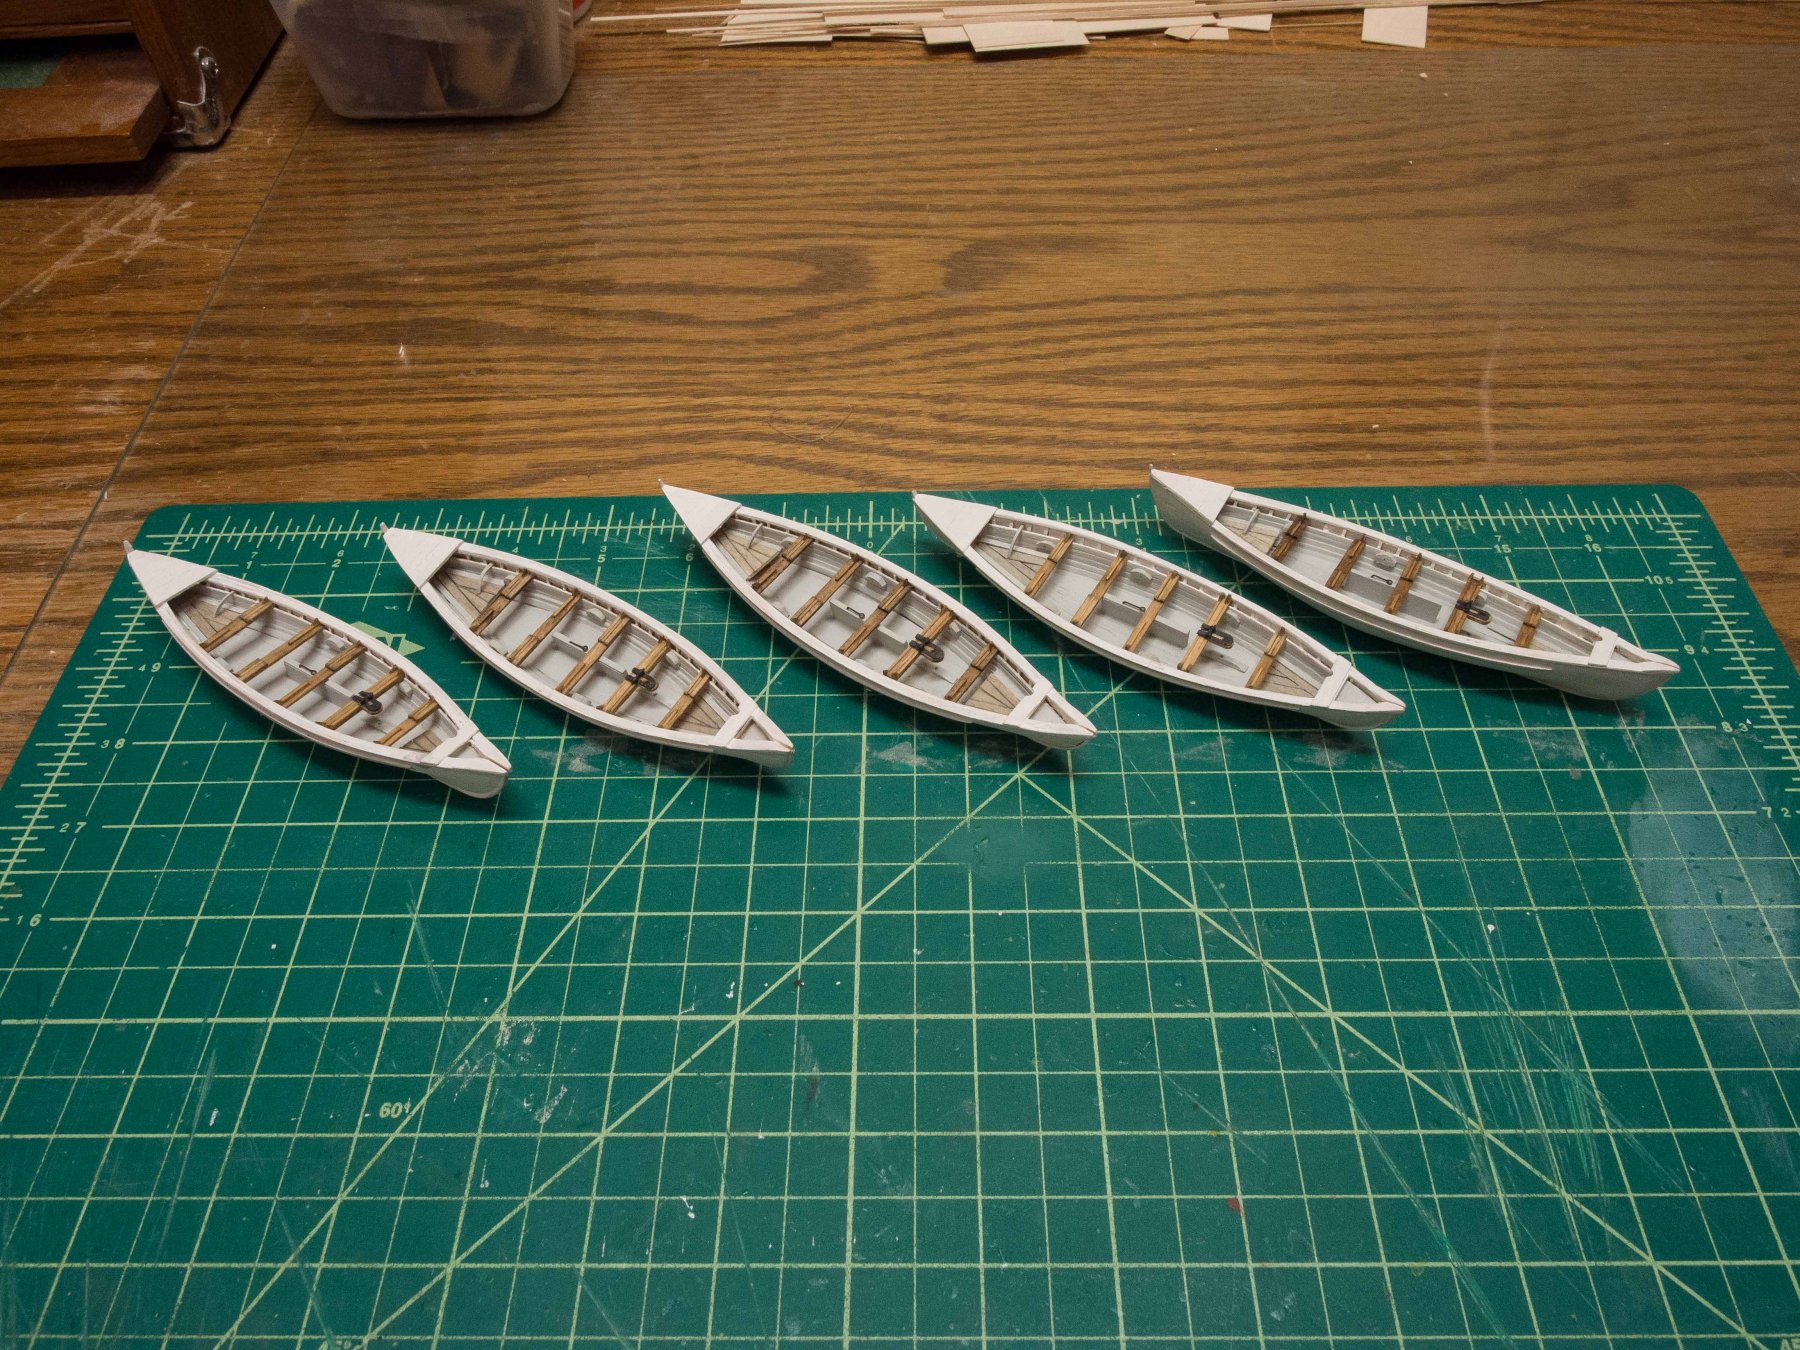
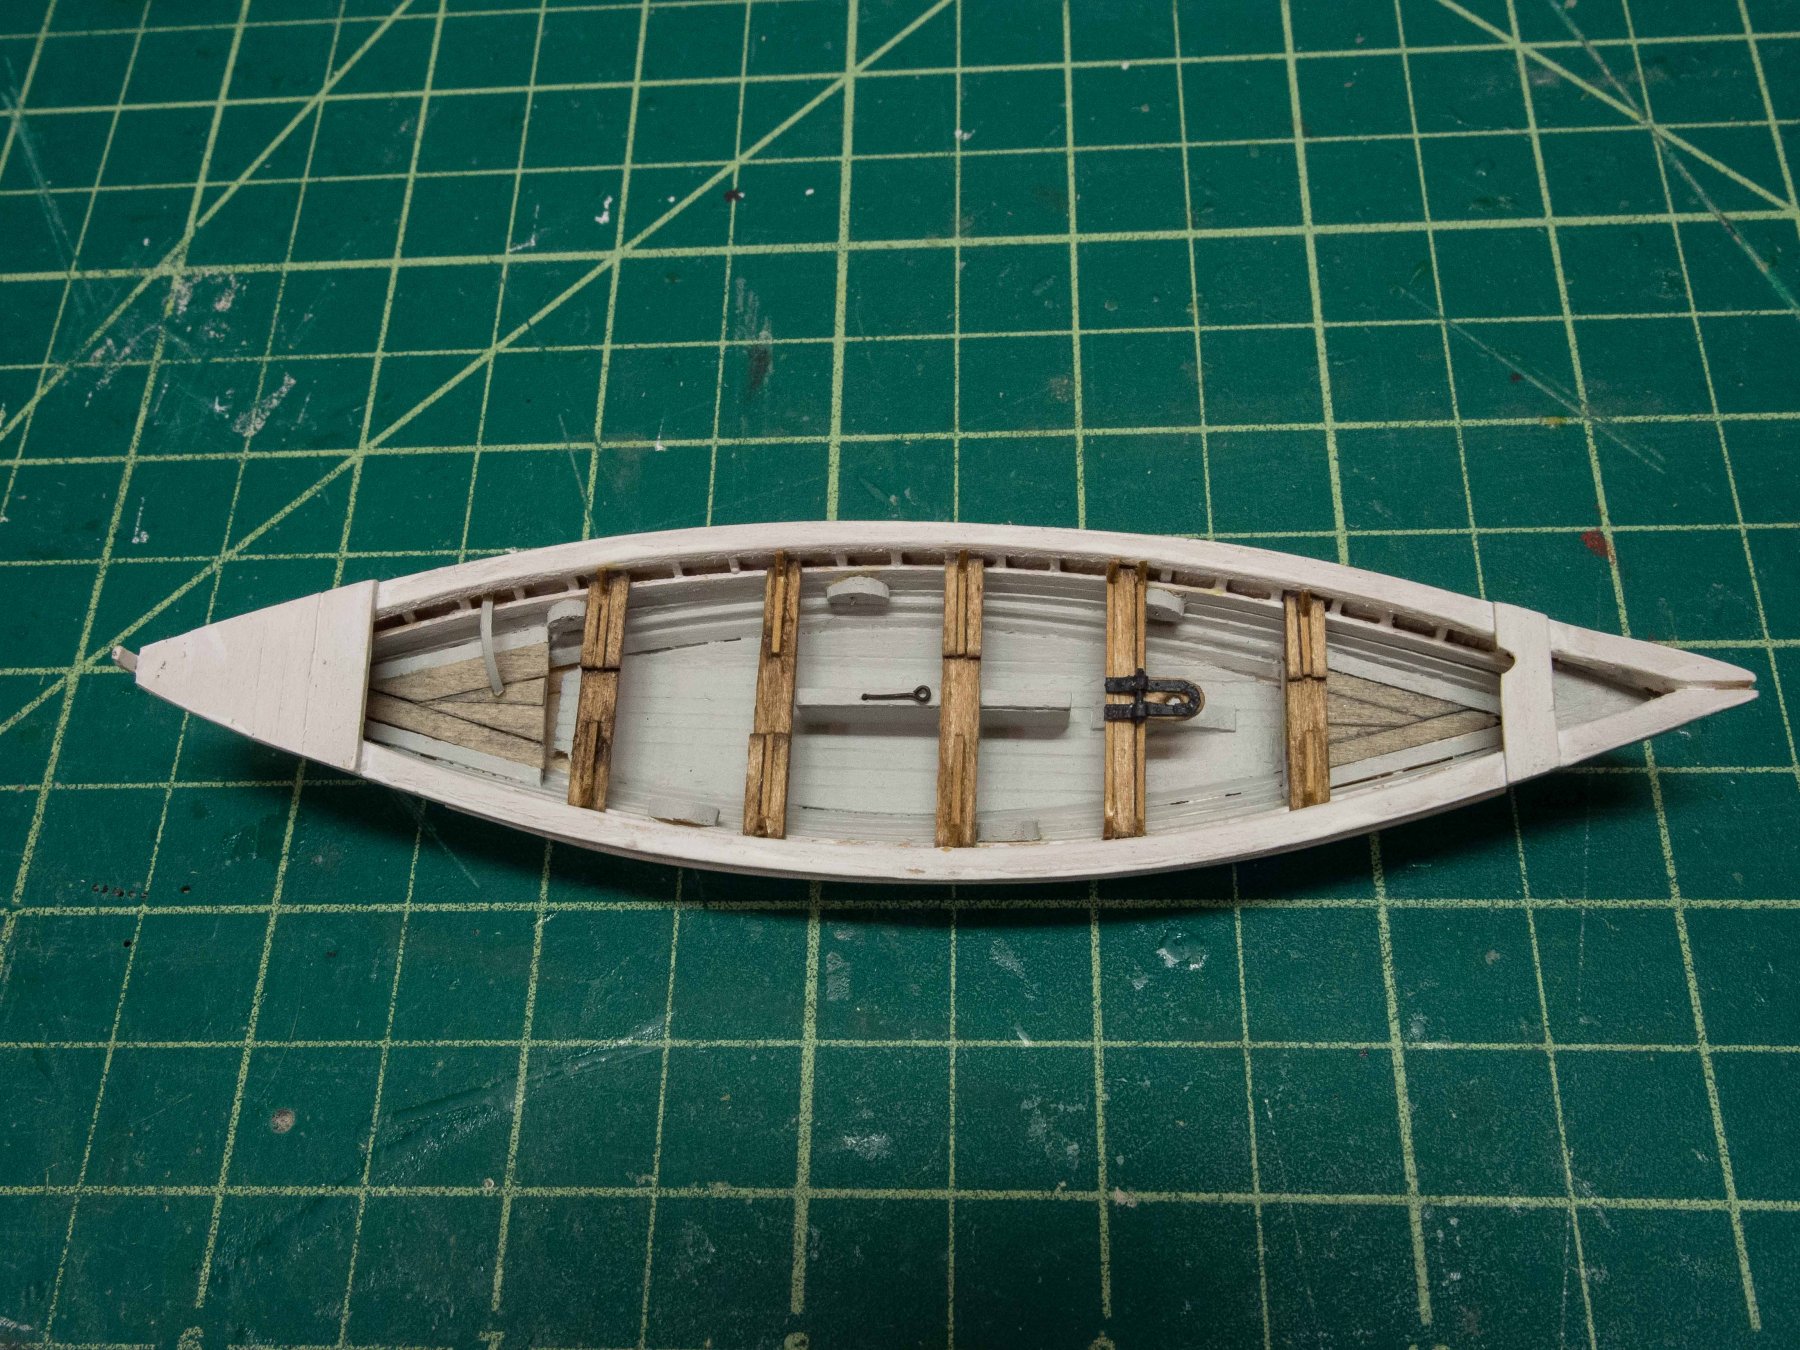
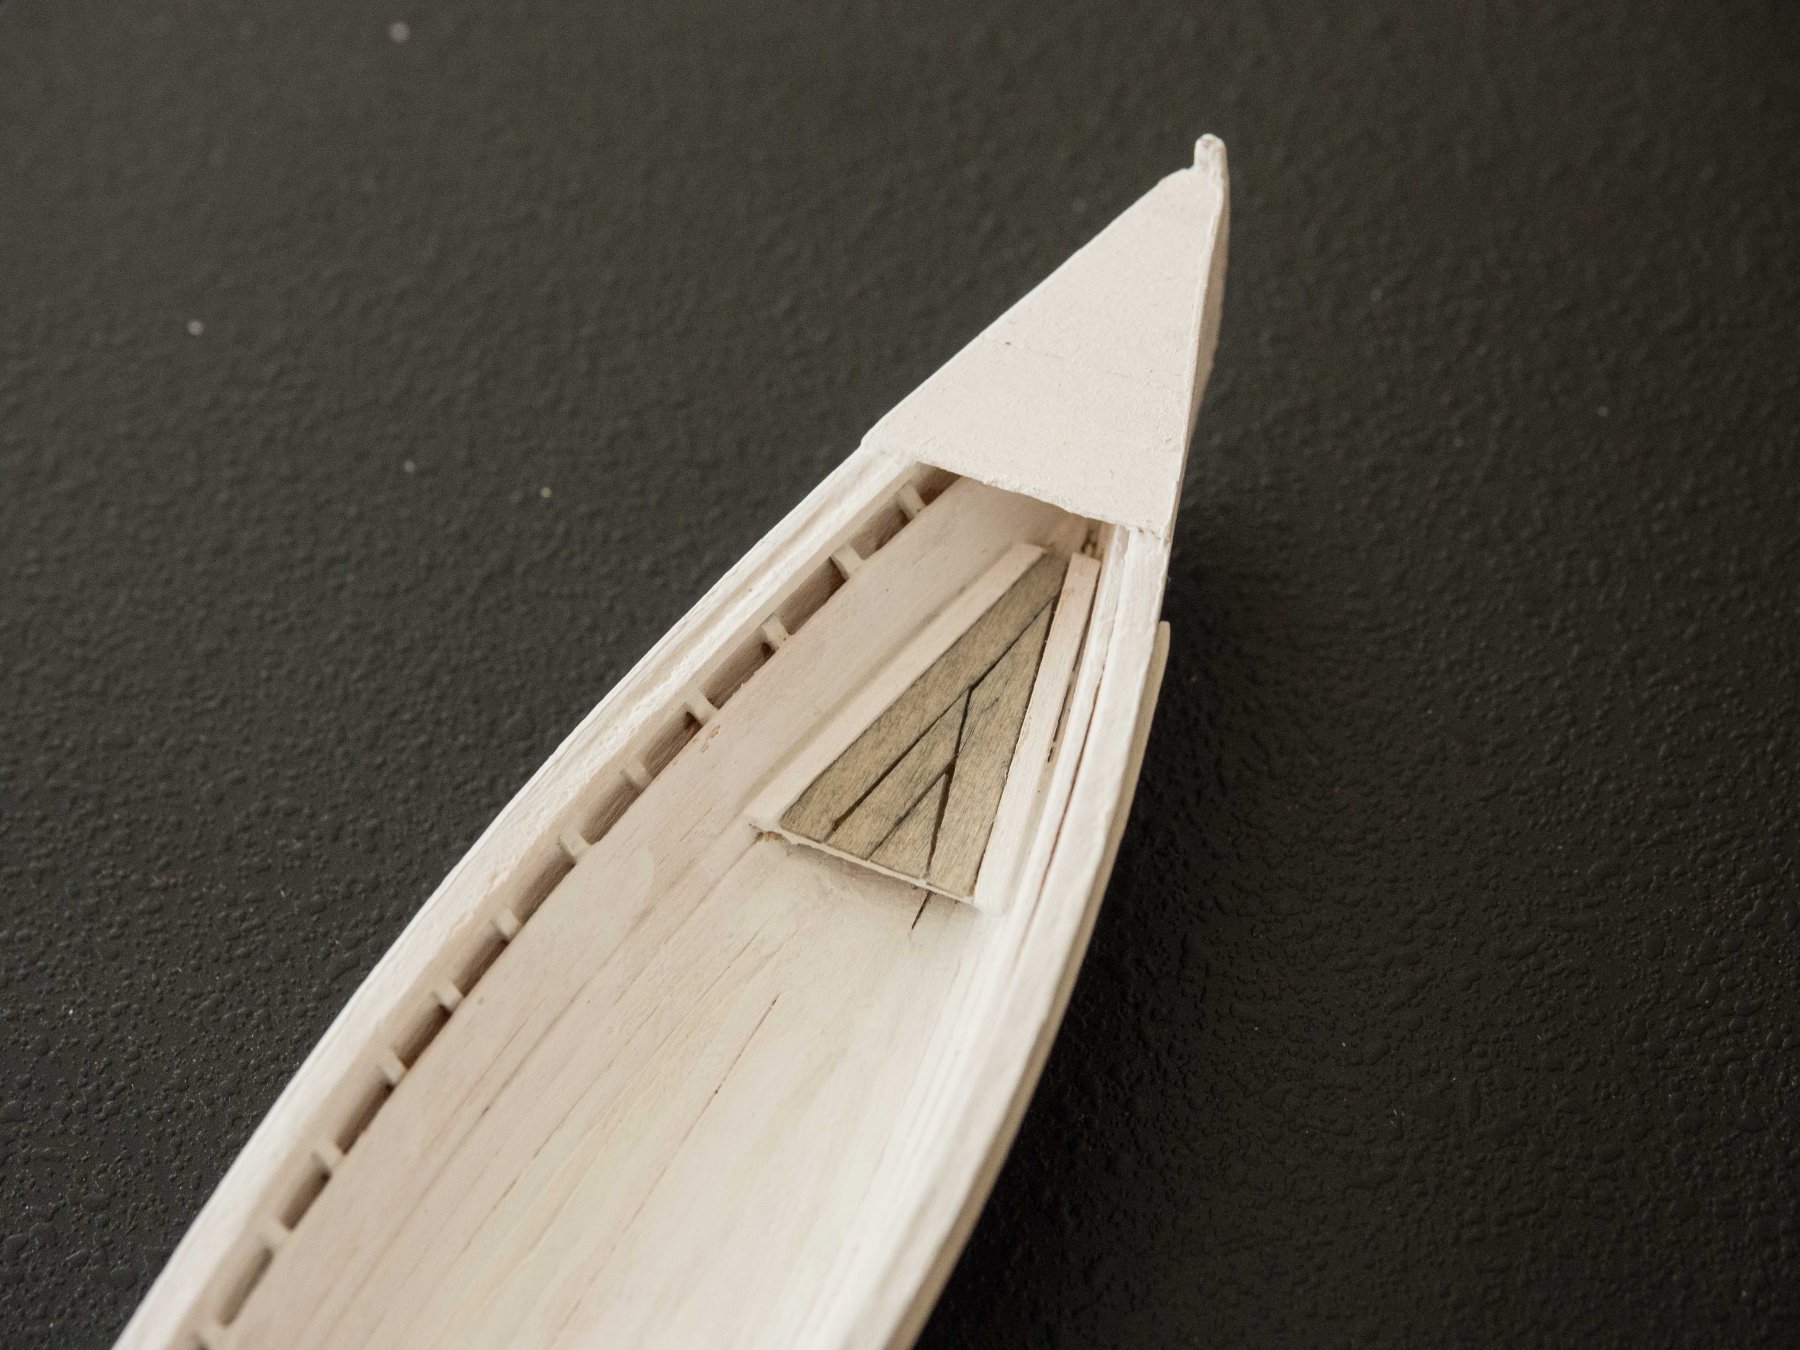
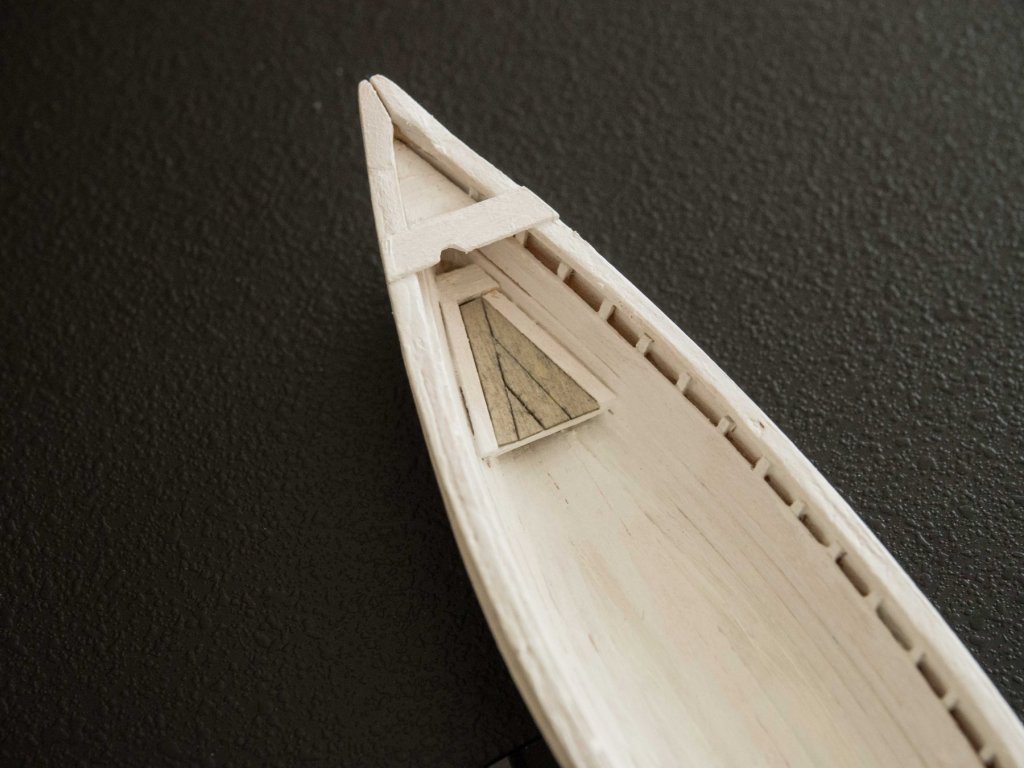
I've finished the interiors of all five of the whaleboats. After completing the detailed thwarts, I added the "metalwork" for the mast support and "hinge". These were cut out of cardstock and painted. Rivets were simulated with pinpricks from the reverse side prior to painting. The hinge pieces on the thwart were wrapped around a small piece of metal wire prior to painting. A long small eyelet was used to simulate the centerboard pull. Overall I'm quite happy with how these look. The detail work after the thwarts were stained and glued in place took about 6 hours. Next up are the lion's tongues and the loggerheads. Once I got past the carving of the hulls this became fun again.


- 245 replies
-
- 9
-
-
- model shipways
- Finished
- (and 1 more)
-
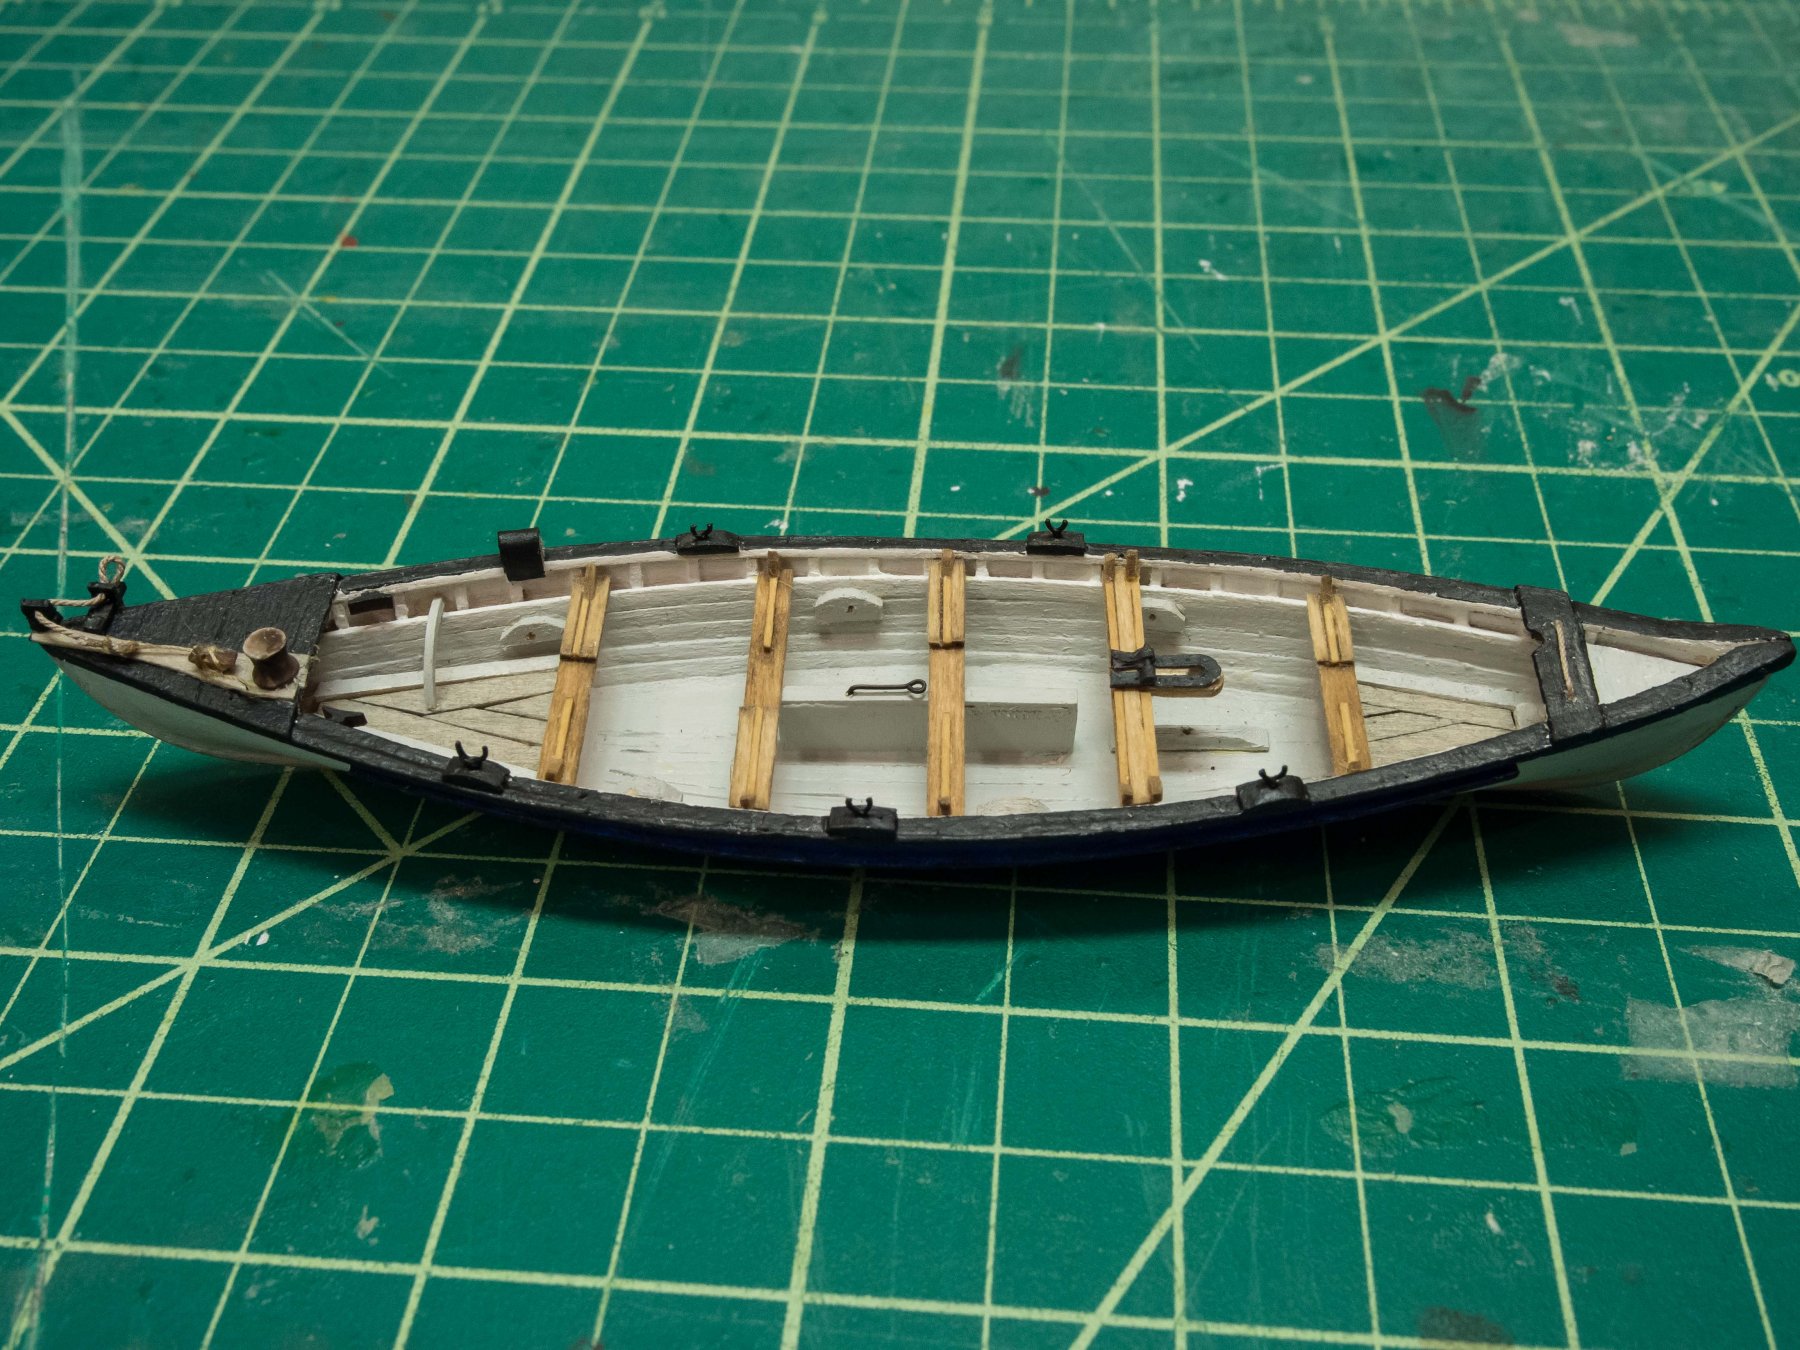
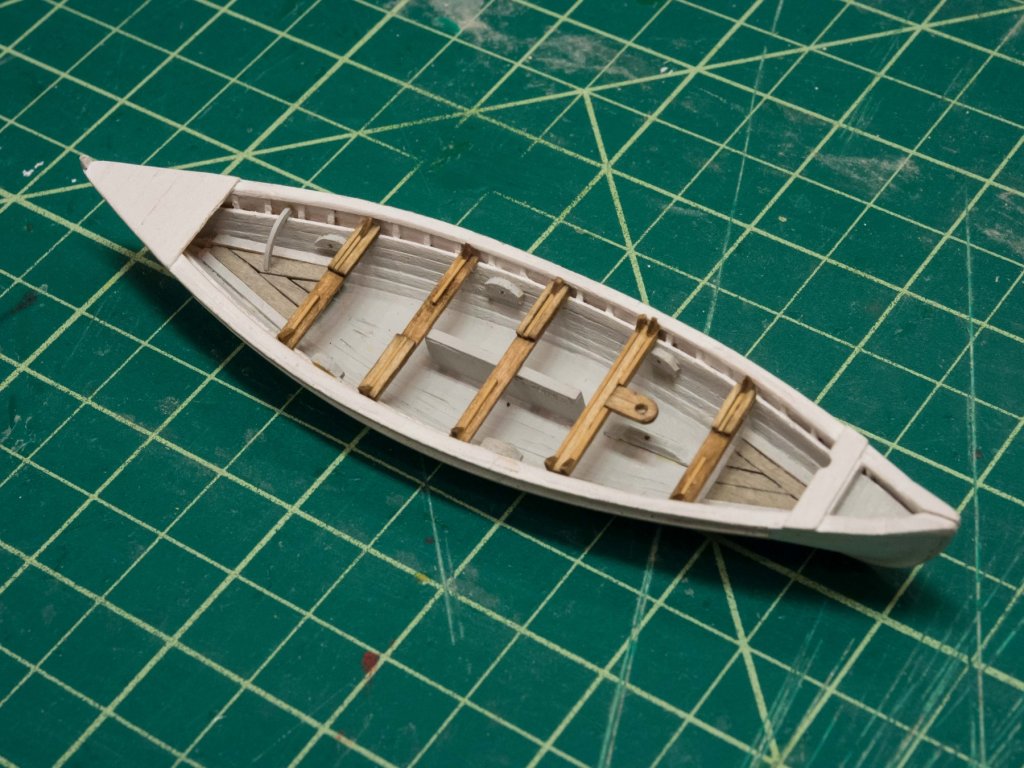
Here's one boat with the finished thwarts in place. I decided to go for stain over paint both to give some sense of weathering and to highlight rather than hide the construction of each thwart. The details just draw the eyes. I find myself grabbing it and just gazing when walking by the shipyard. Now to bring the other four up to this level, and then add a bit of inside detail hardware to each - pull for the centerboard in the up position, and some approximation of the brass support/hinge for the mast support. That will likely be painted paper with small rod taking the place of the hinge. These really are little projects in and of themselves, but they are so visible on the finished ship that to shortchange the detail and/or put oars and spars/sail in that are clearly out of scale in thickness would really detract from the model. Since I've spent so long on the ship itself, putting some extra time into these is worthwhile. Probably 4-5 hours to construct and finish the thwarts for one boat including interval drying time.
- 245 replies
-
- 10
-
-
- model shipways
- Finished
- (and 1 more)
-
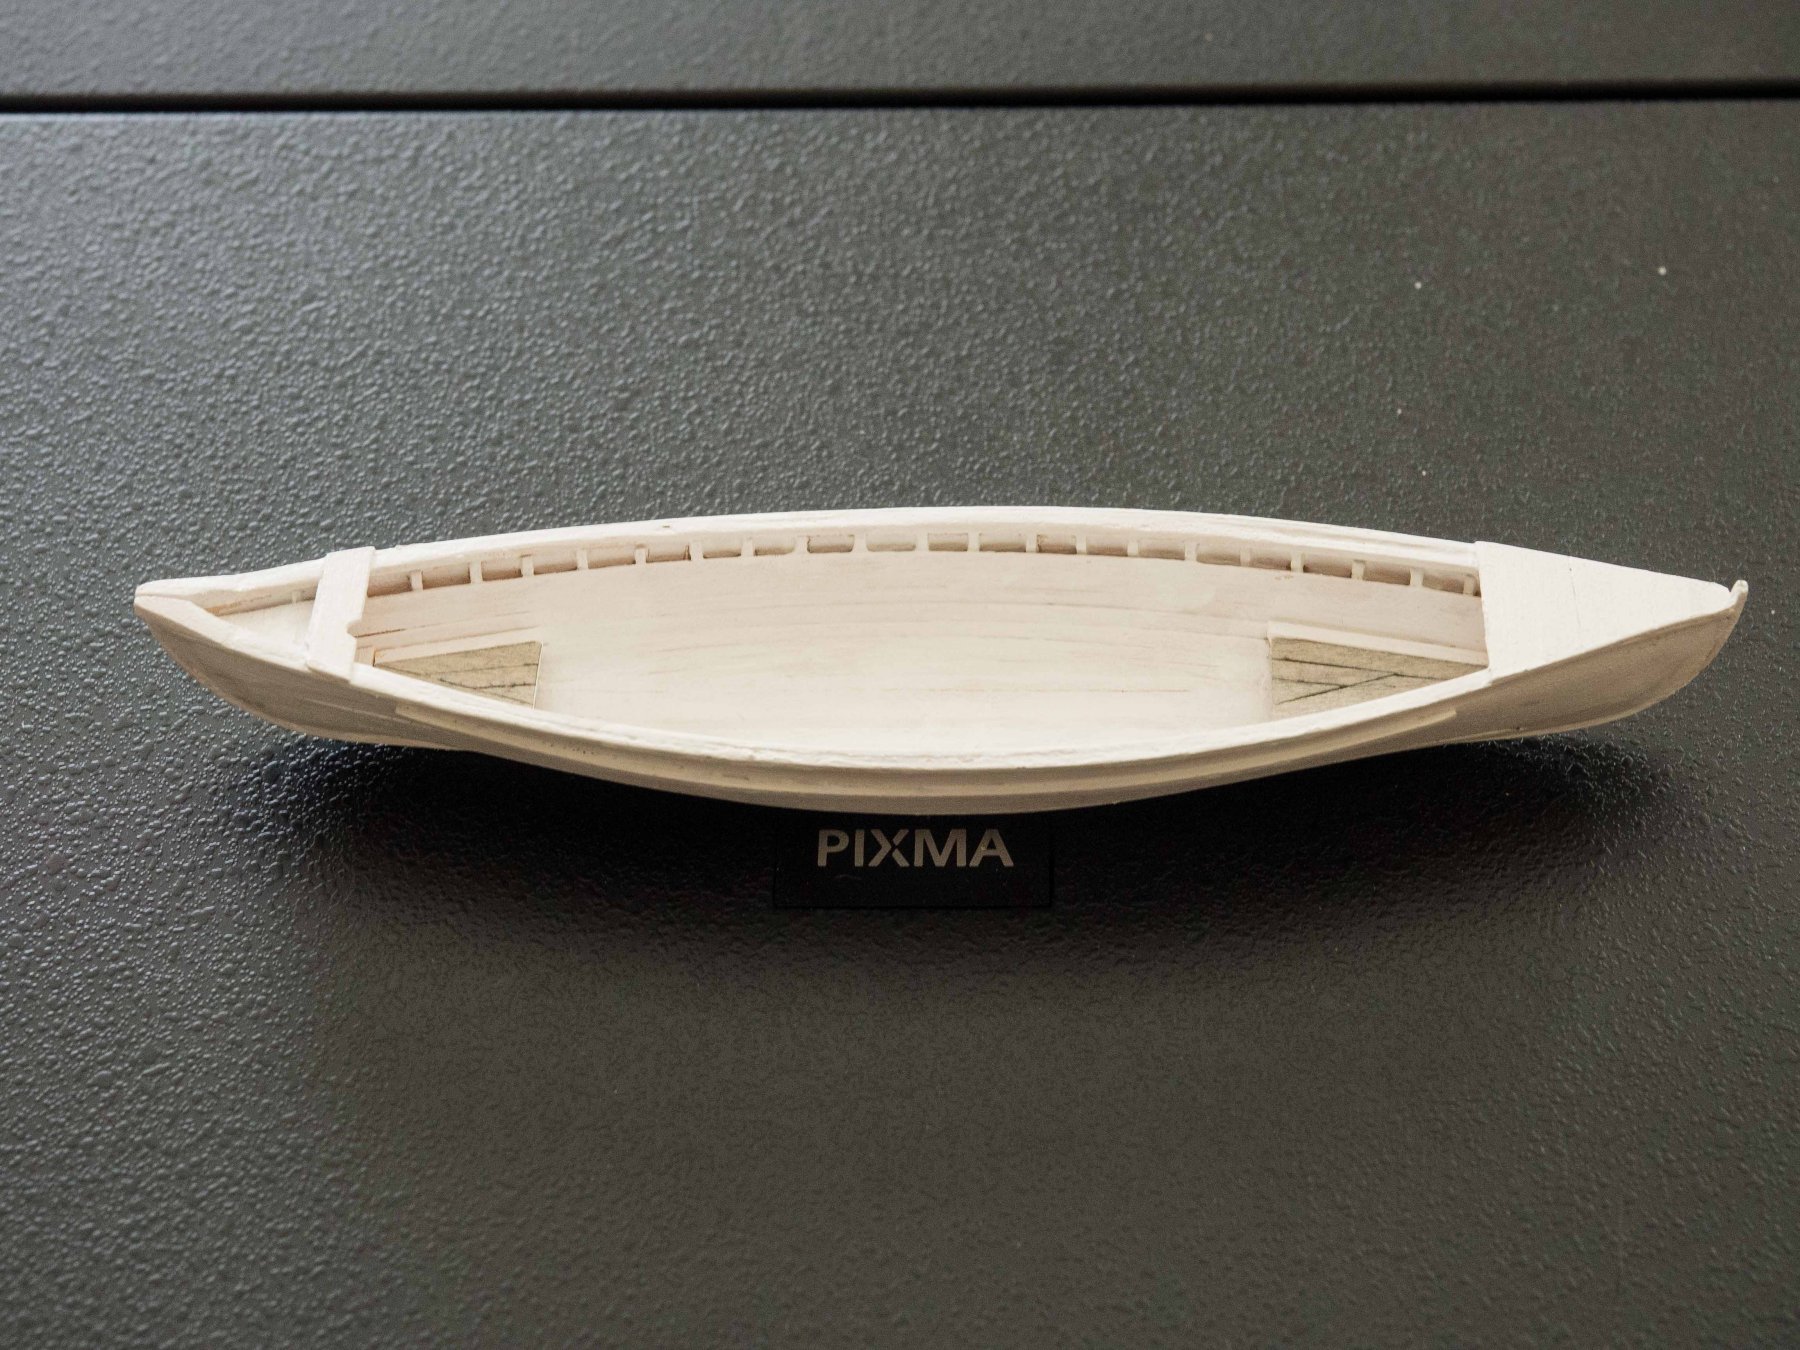
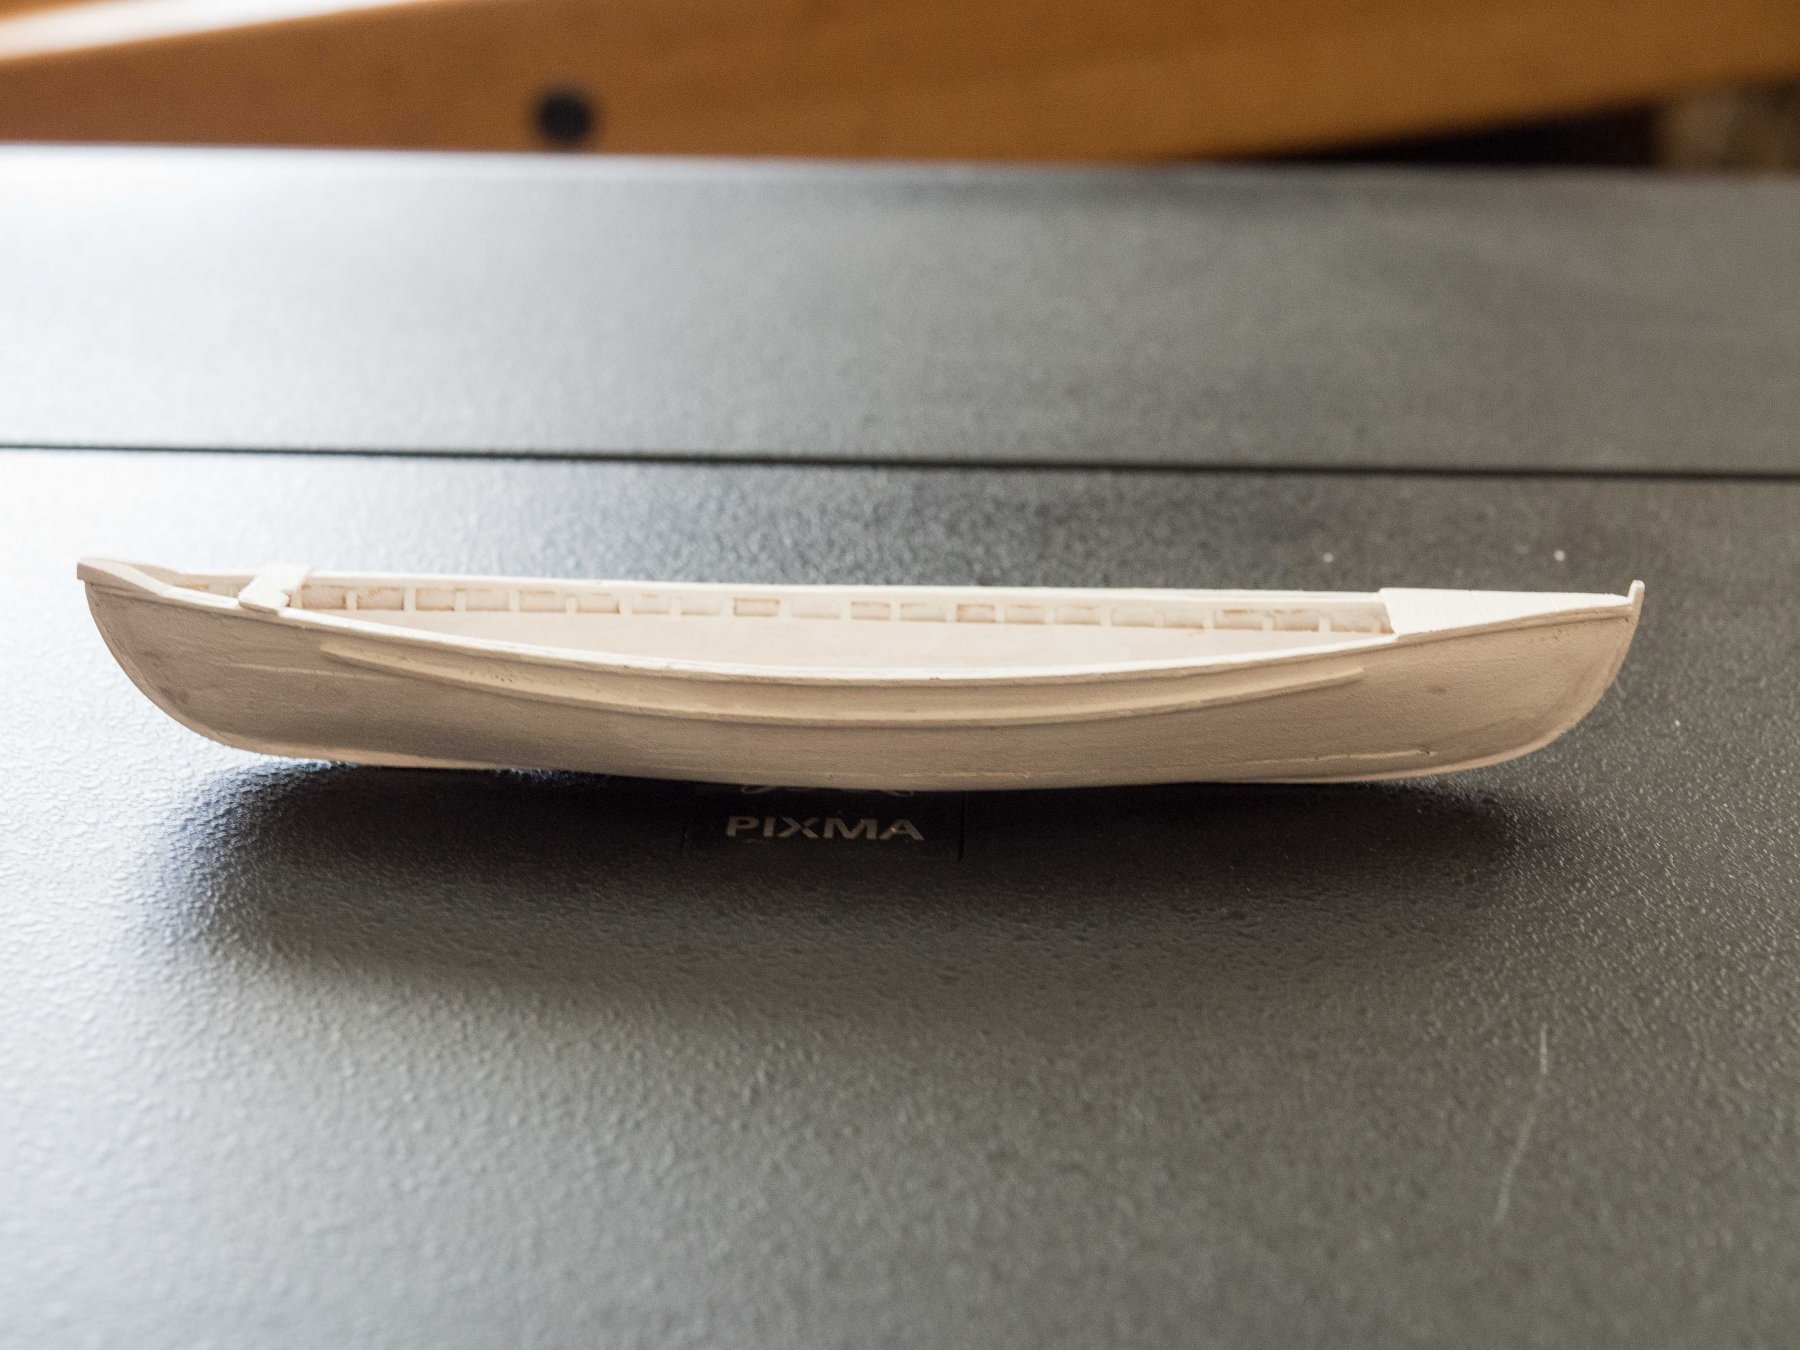
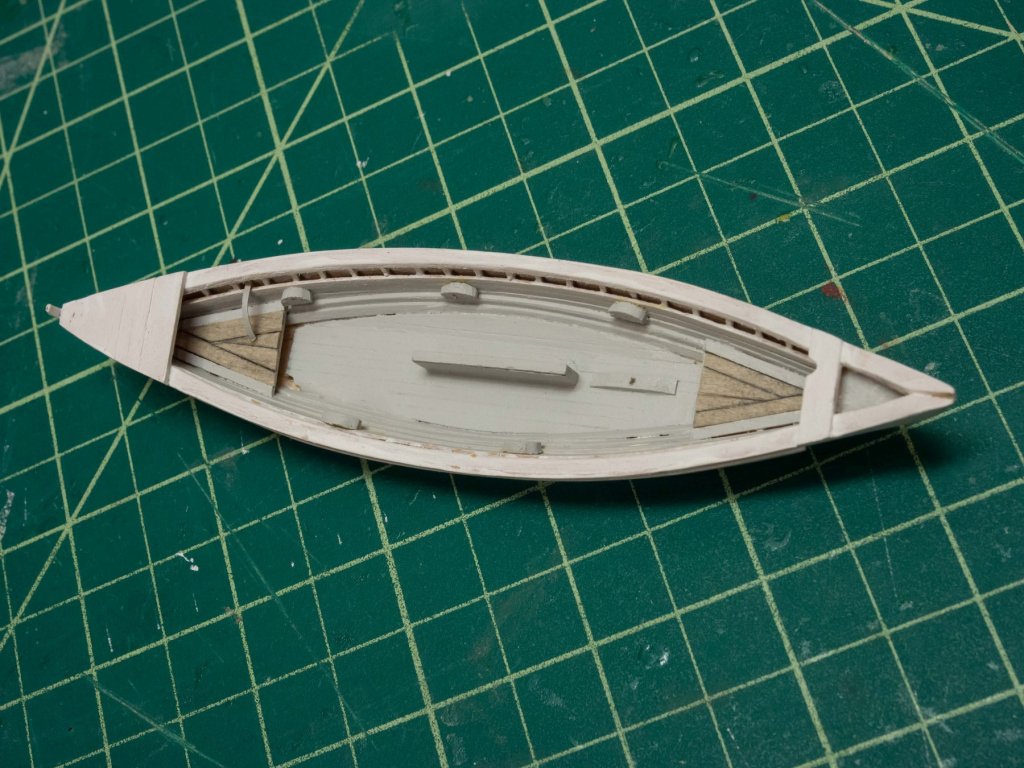
Slow but sure. Turns out the limiting factor is deciding how much detail to include in these little whaleboats. I've finished the interior and painted the interior details and the ceiling boards. Now on to the thwarts - as I know from my New Bedford Whaleboat build years ago these are more complicated than simple planks. We'll see how much translates to this scale and my ability to work with itty-bitty parts. The rail ended up a bit too thick but I can live with that.
- 245 replies
-
- 11
-
-
- model shipways
- Finished
- (and 1 more)
-
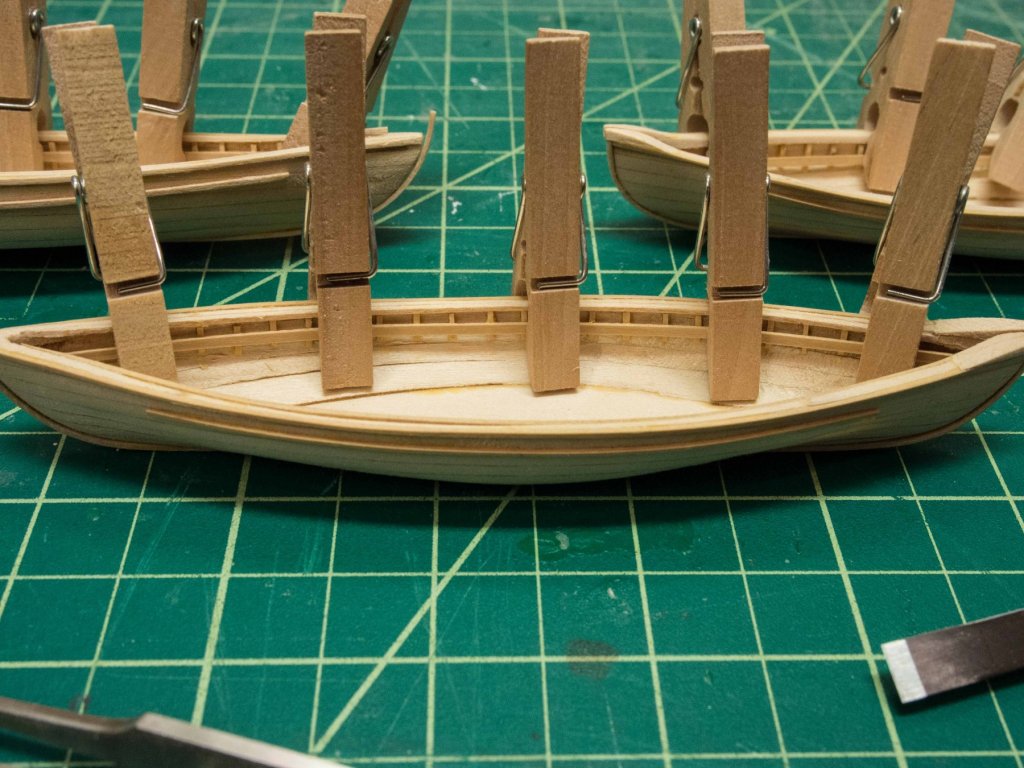
Rib (ends) glued in place on all four boats, and tapered towards the lower end so that the ceiling boards will lay well. First ceiling board glued in place on all four boats. I'm going to do these in parallel; it's psychologically easier than doing a lot of work on one and then starting all over again on two, three, and four. I'm using some boxwood 1/32 x 1/16 strips I have for these ceiling boards, and used boxwood 1/32 x 1/32 for the ribs. I've used up all the small basswood strips that came with the kit as well as additional ones I got some time ago. The boxwood is a pleasure to work with - the ease with which fine chisel work for the tapering can be done is night and day over the basswood. Next project, whatever it is, will use basswood (or limewood) kit wood only for first planking where a second one will be done. Given the time I spend working on these (3 years plus on the Morgan) the investment in good wood is reasonable. I wish I'd made the skylight on the Morgan from boxwood so I could have had the correct number of rods - the basswood uprights split if I tried to drill the correct number of holes for the rods, so I had to reduce the number.
- 245 replies
-
- 11
-
-
- model shipways
- Finished
- (and 1 more)
-
After about a month of going downstairs to the shipyard, and looking at 4 7 layer wood sandwiches waiting to be hollowed/carved and deciding to do something else, I decided to force myself to get back to work on the whaleboats. I'm sure that the admiral's proclamation that I could not start a new project until they were done had nothing to do with it! So each day I brought a boat to stage one (inside hollowed out and outside sanded down) for 4 days. Then each day bringing one boat to stage two (fine shaping, installation of rails, keel, bow chocks, and rubbing strips). 8 days and this is where I am right now. About 4-5 hours each day (some waiting for glue to set). Now I'll put the ribs (visible ends), taper them, and install the first two runs of the ceiling planking on all four boats as stage 3.


- 245 replies
-
- 6
-
-
- model shipways
- Finished
- (and 1 more)
-
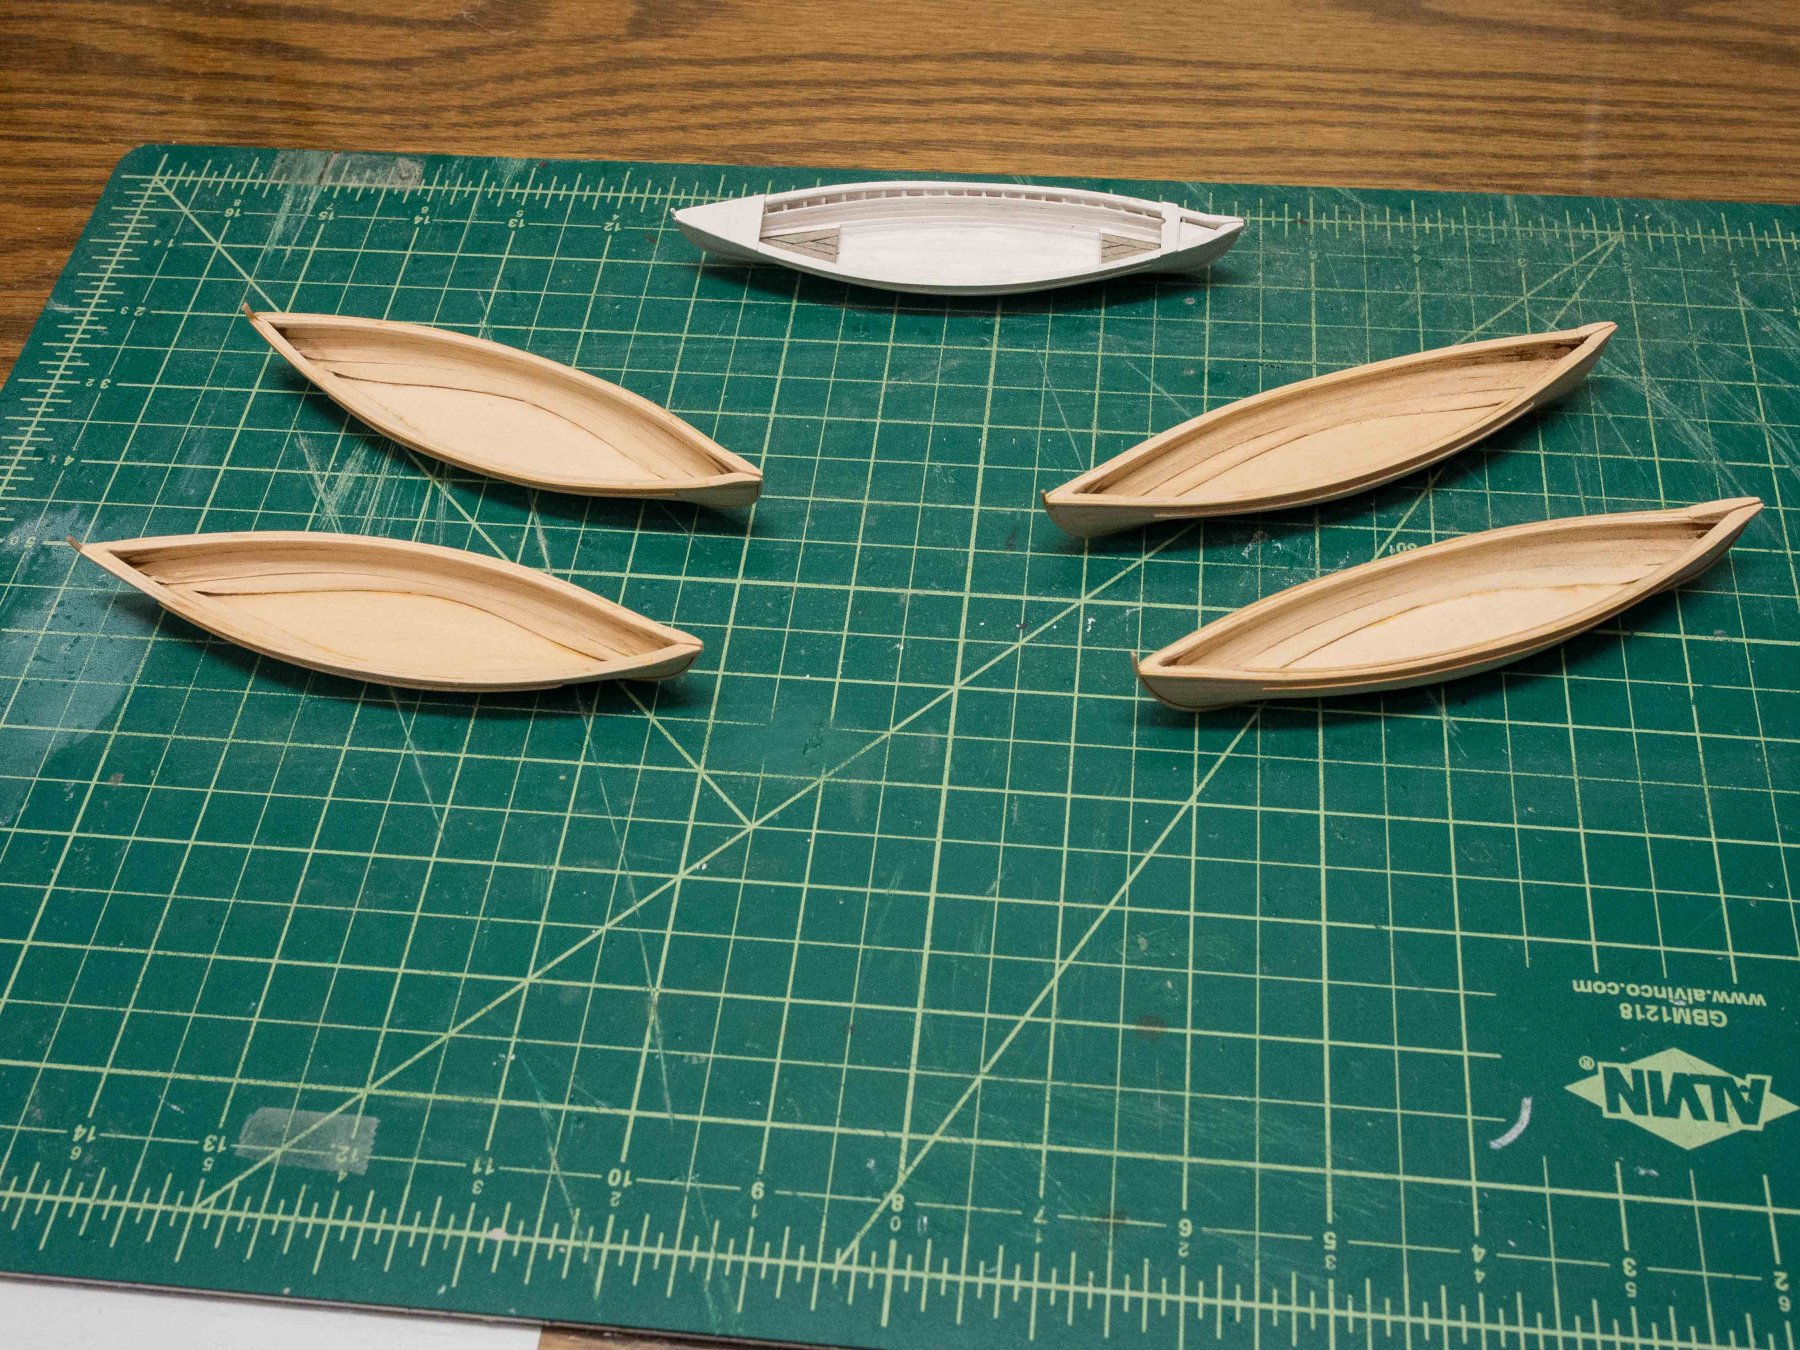
I decided to move ahead with one whaleboat, just to figure out how to approach the construction, what tools and wood to use, etc. I have finished one to the primer stage shown below, but now have decided to get them all to this stage before doing the detailing. It's a lot of work, and I suspect doing another four will take me some time as I only spend a few hours 4-5 days a week working in the shipyard, and we've been doing a fair amount of traveling. I did have my first opportunity to fire up my new Byrnes thickness sander to create some 1/64 thickness sheet for these.


- 245 replies
-
- 10
-
-
- model shipways
- Finished
- (and 1 more)
-
USS Kearsarge BlueJacket Shipcrafters Kit
Brucealanevans replied to David Rice's topic in Wood ship model kits
Ships in Scale is currently running a series of a twin build of the Bluejacket Kearsarge and Alabama -
The whaleboat, which I have built, is the easiest to plank because the planks are pre-cut, and as long as you keep the order and the fore-aft orientation straight, you can't go wrong. Having said that the model itself is not a "beginner". You construct an inverted form with "bulkheads" and build the model over that. The planks themselves are a combination of clinker (overriding the adjacent plank with some angled edge sanding to get the proper orientation) and edge to edge supported by an underlying batten. The ribs themselves are added after removal from the form, so it's not a "framed" build.The planks are glued to each other and, for the edge to edge planks to the underlying batten and not to the "bulkheads". Excess glue and especially glue that gets between the planks and the form "bulkheads" can make the removal process "exciting". Although not a "beginner" it was the first ship I built, although with more experience now I know I would have done a better job if I were to build it today. The included book is great and all the resource you need. Good luck.
-
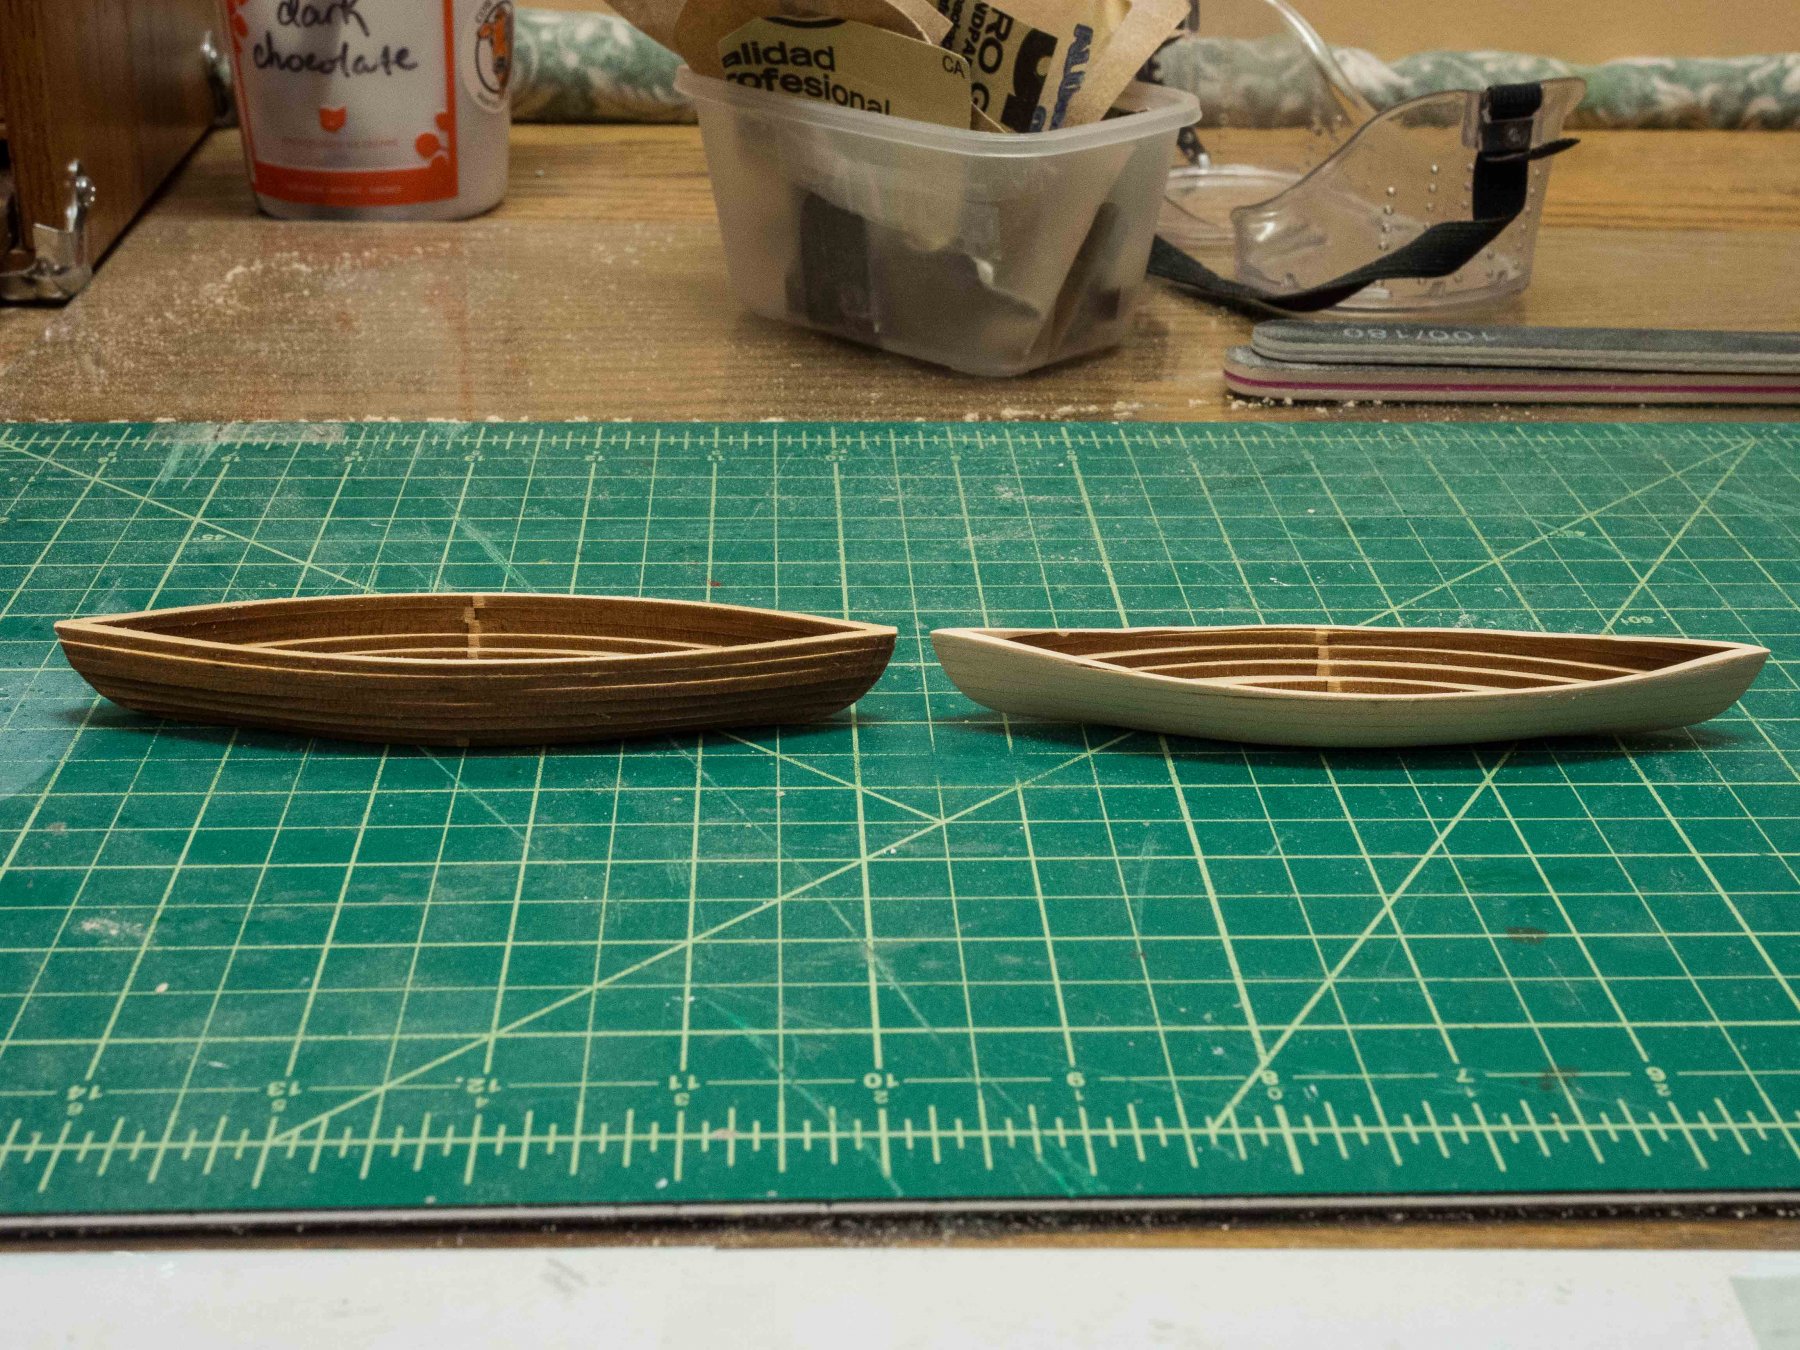
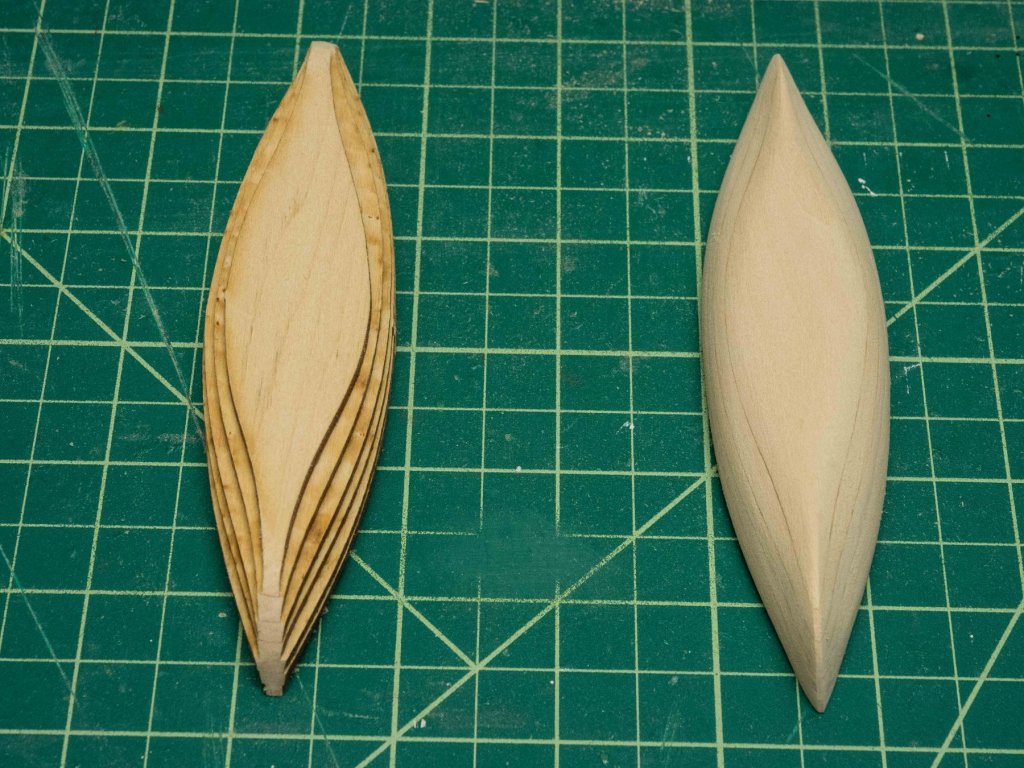
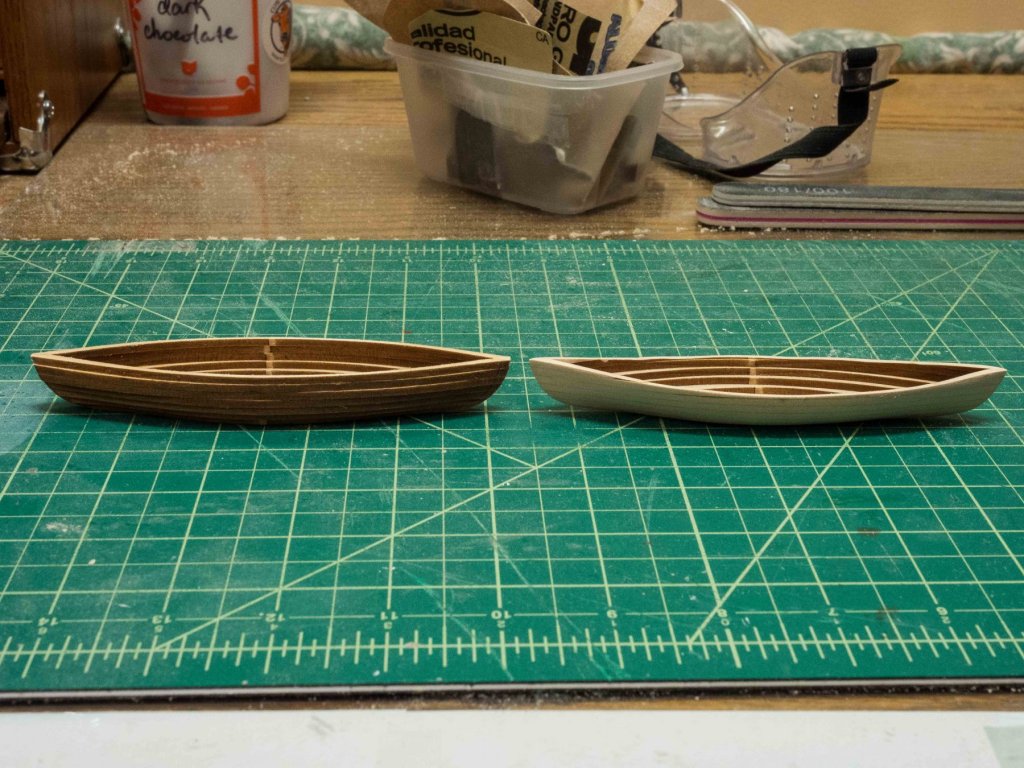
On to the whaleboats. Each is made up of 7 lifts glued together and then carved/sanded to profile. I glued all seven sets, and set to work on the boats that will be the spares stored upside down on the boat bearer/shelter of the Morgan. My references suggest that these were primed only, to be painted when needed to replace a lost boat. Below are the two boats, one with only the fore and aft profile sanded and the other (exterior shaping) complete. About 3 hours work to turn the left hand example into the right hand result.
- 245 replies
-
- 9
-
-
- model shipways
- Finished
- (and 1 more)
-
Thank you. This makes great sense to me and mirrors what I originally thought about the iron goods and rust. The line tub weight is an excellent point. I have read both Moby Dick and Heart of the Sea and your post has tickled my memory about bringing goods to the boats prior to launching. I appreciate the reply. Bruce
-
Thanks to all, especially for the pictures. I have previously built the MS New Bedford Whaleboat so I know the equipment - just not certain how much to add to the 5 inch long whaleboats of the Morgan's davits. I like the look of the Lagoda model whaleboat contents and will try my best to duplicate that in this scale - mast/sail, oars, paddles, line tubs with canvas cover, rudder in stored position, and probably the line up front that the harpoons were connected to. Bruce
-
As I work on the whaleboats for my Charles W Morgan build a question has come up I cannot find an answer for in my scanty references. What equipment stayed in the boats when stored and lashed on the davits? At least the furled sail and mast I suspect and probably the oars lashed down. What about the line tubs with their canvas covers? What was brought on only when preparing to launch? Implements (harpoons, lances and so on), water cask, etc.? I'm not at all sure that having the stored boats "fully equipped " is realistic unless immediately ready to launch. Anyone have references? Bruce
-
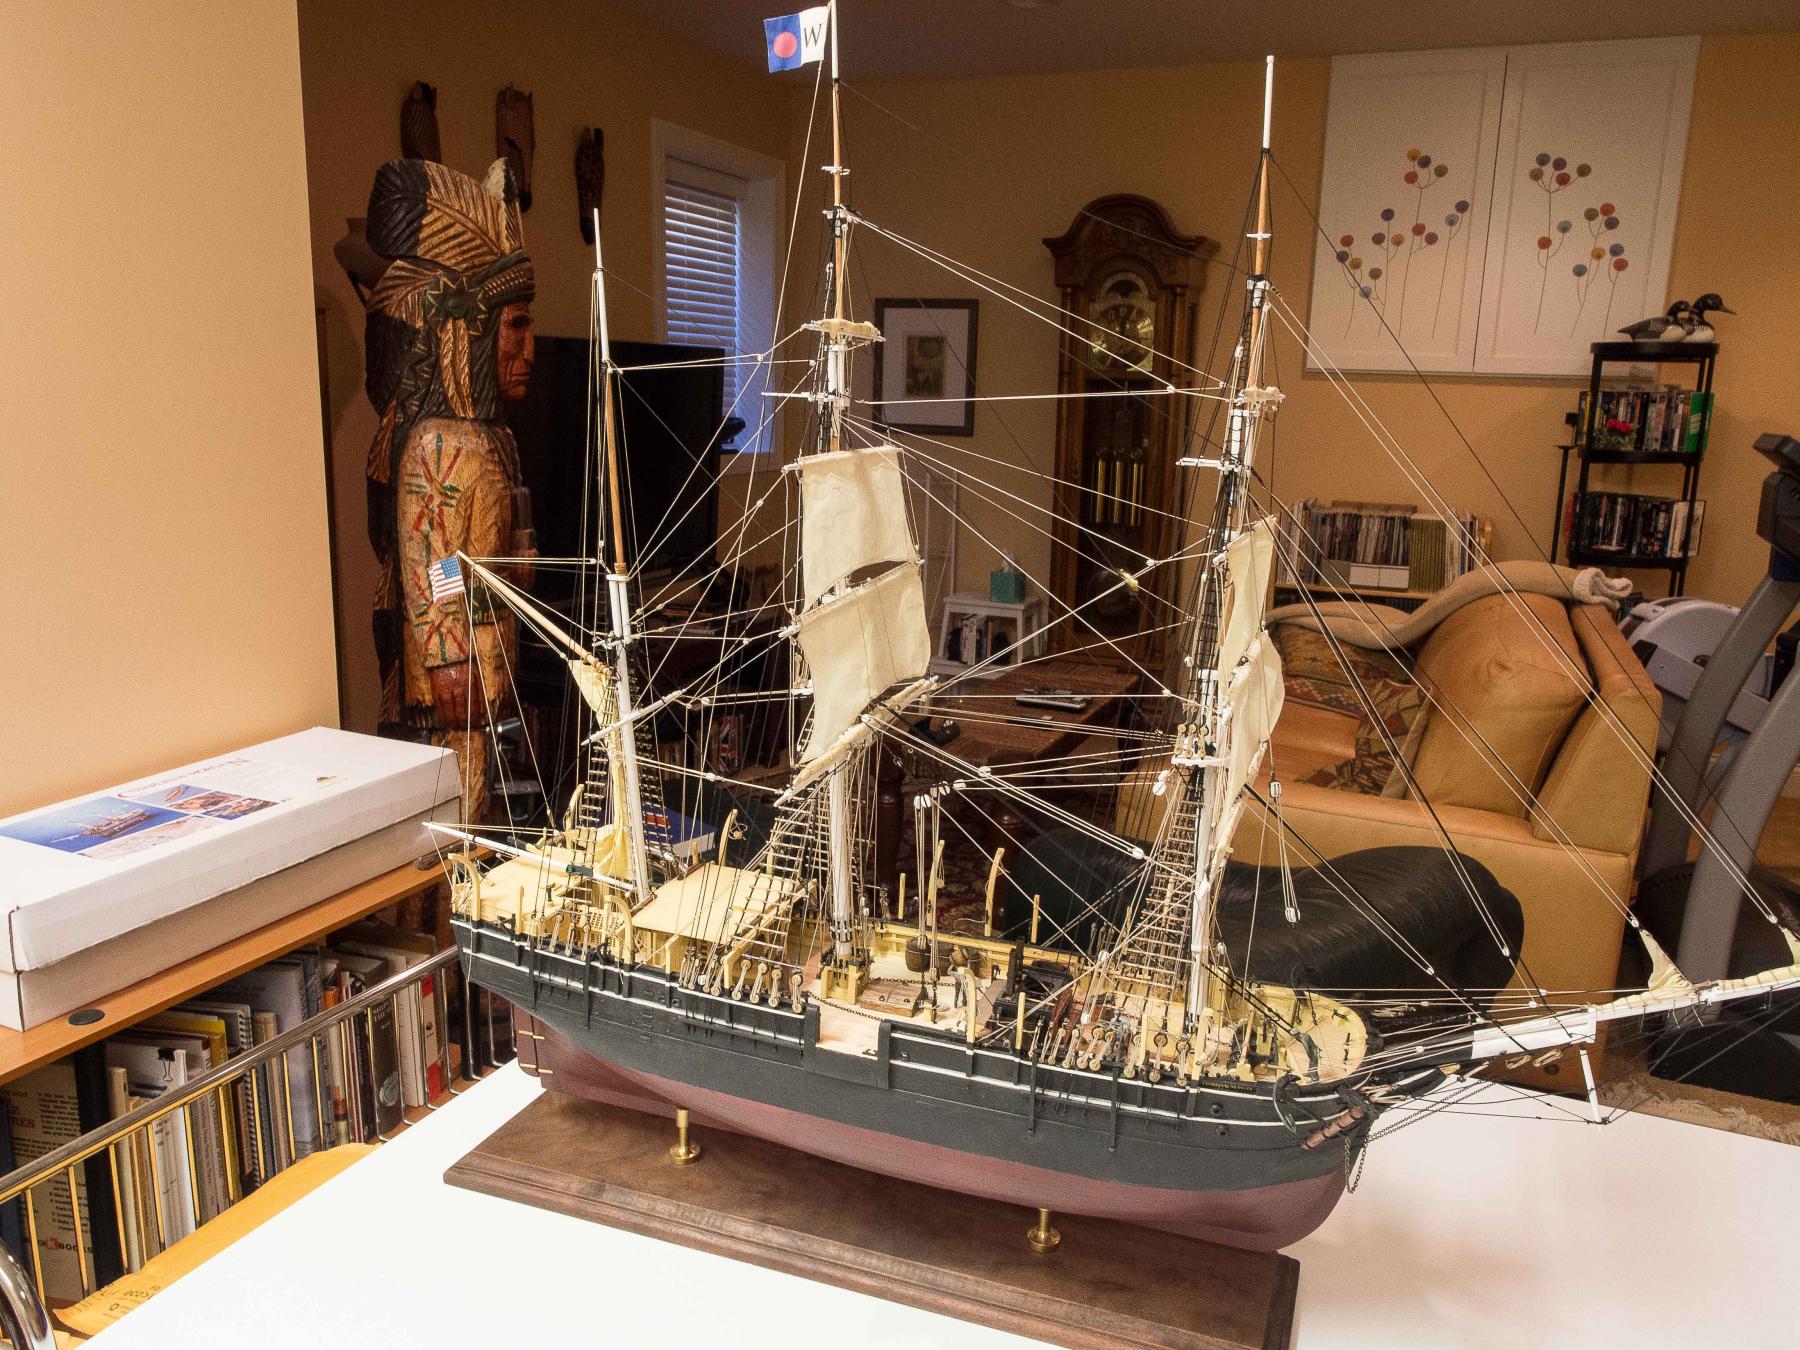
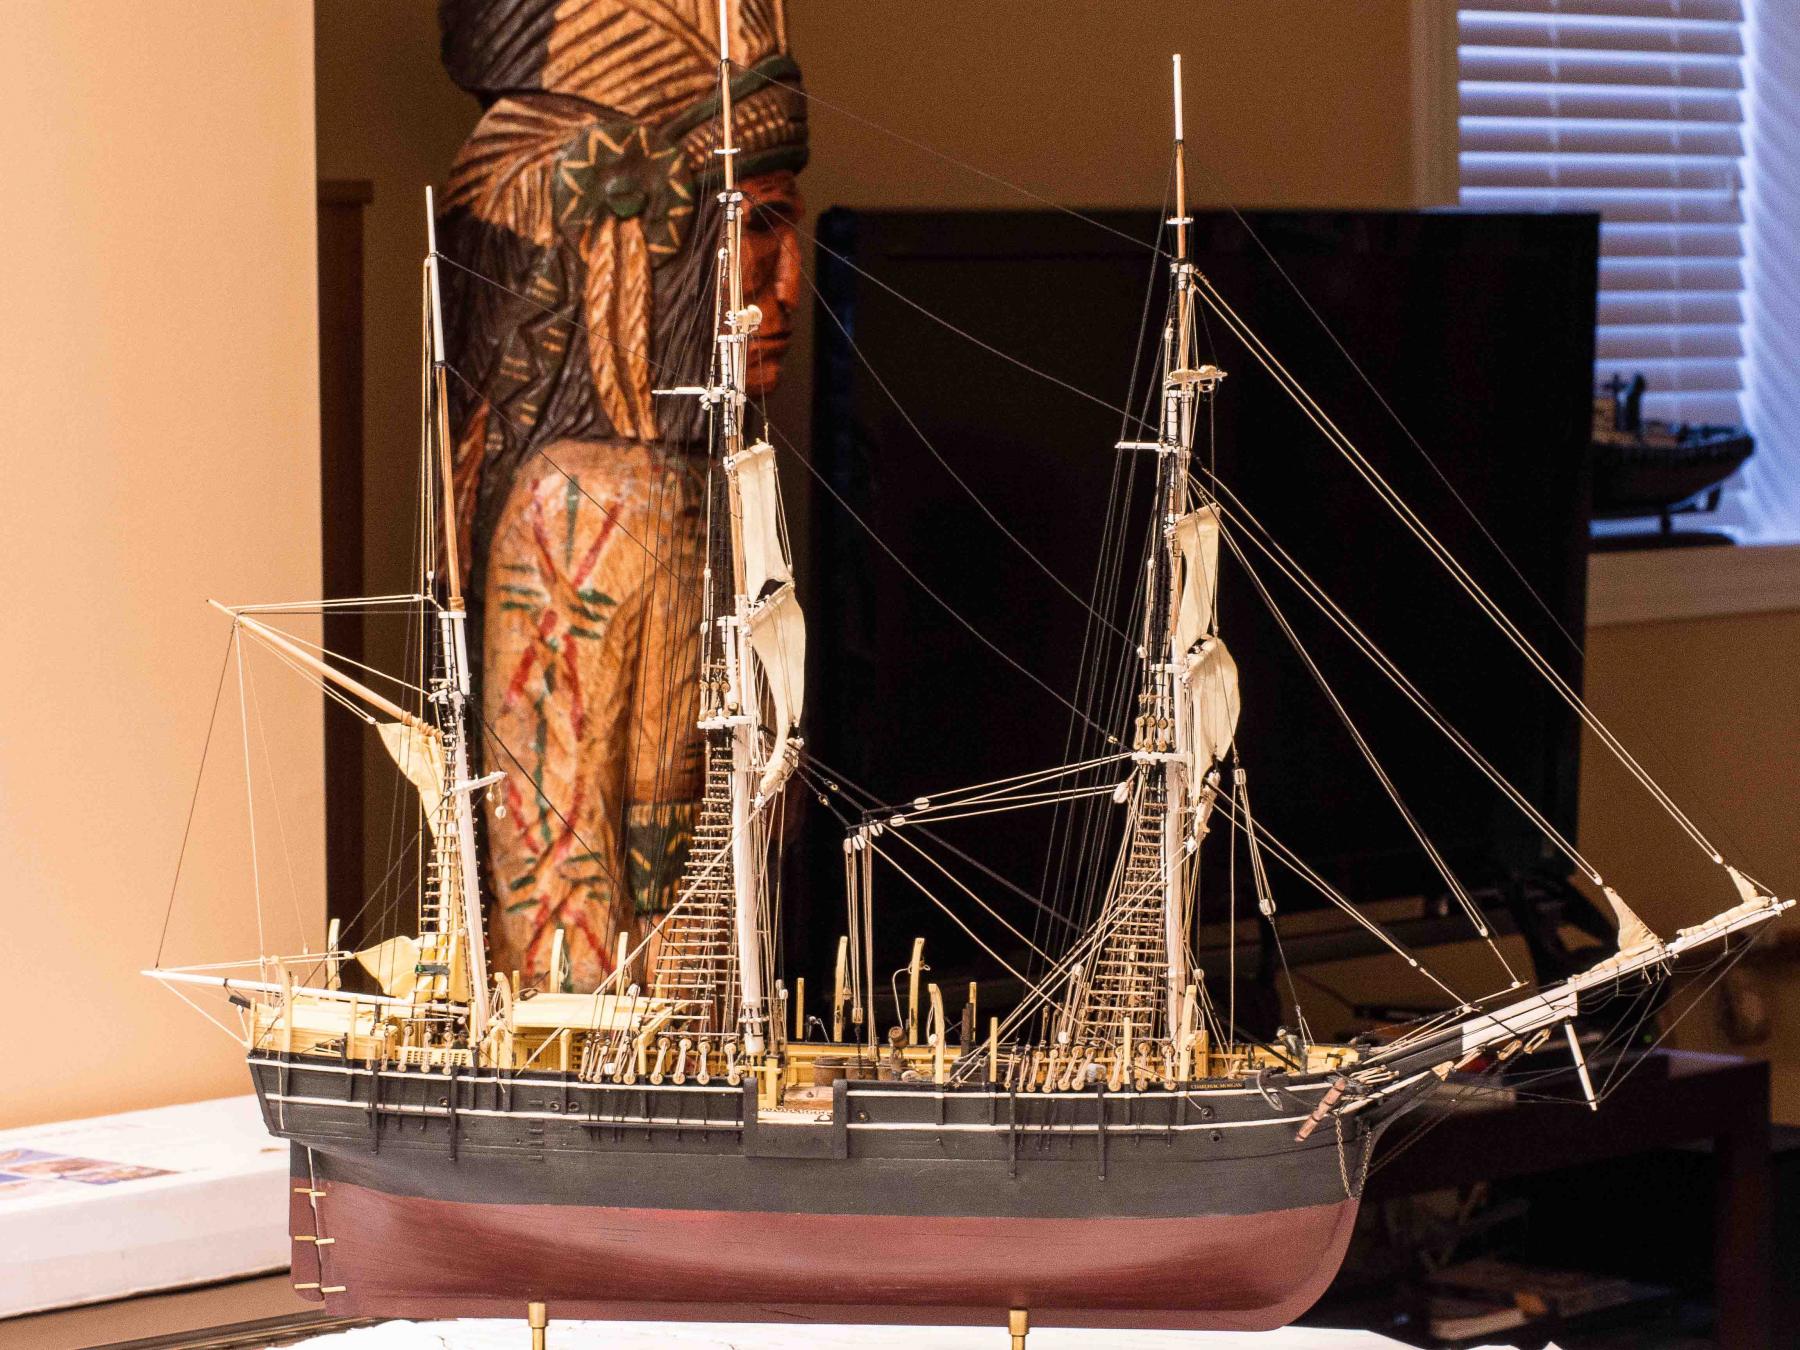
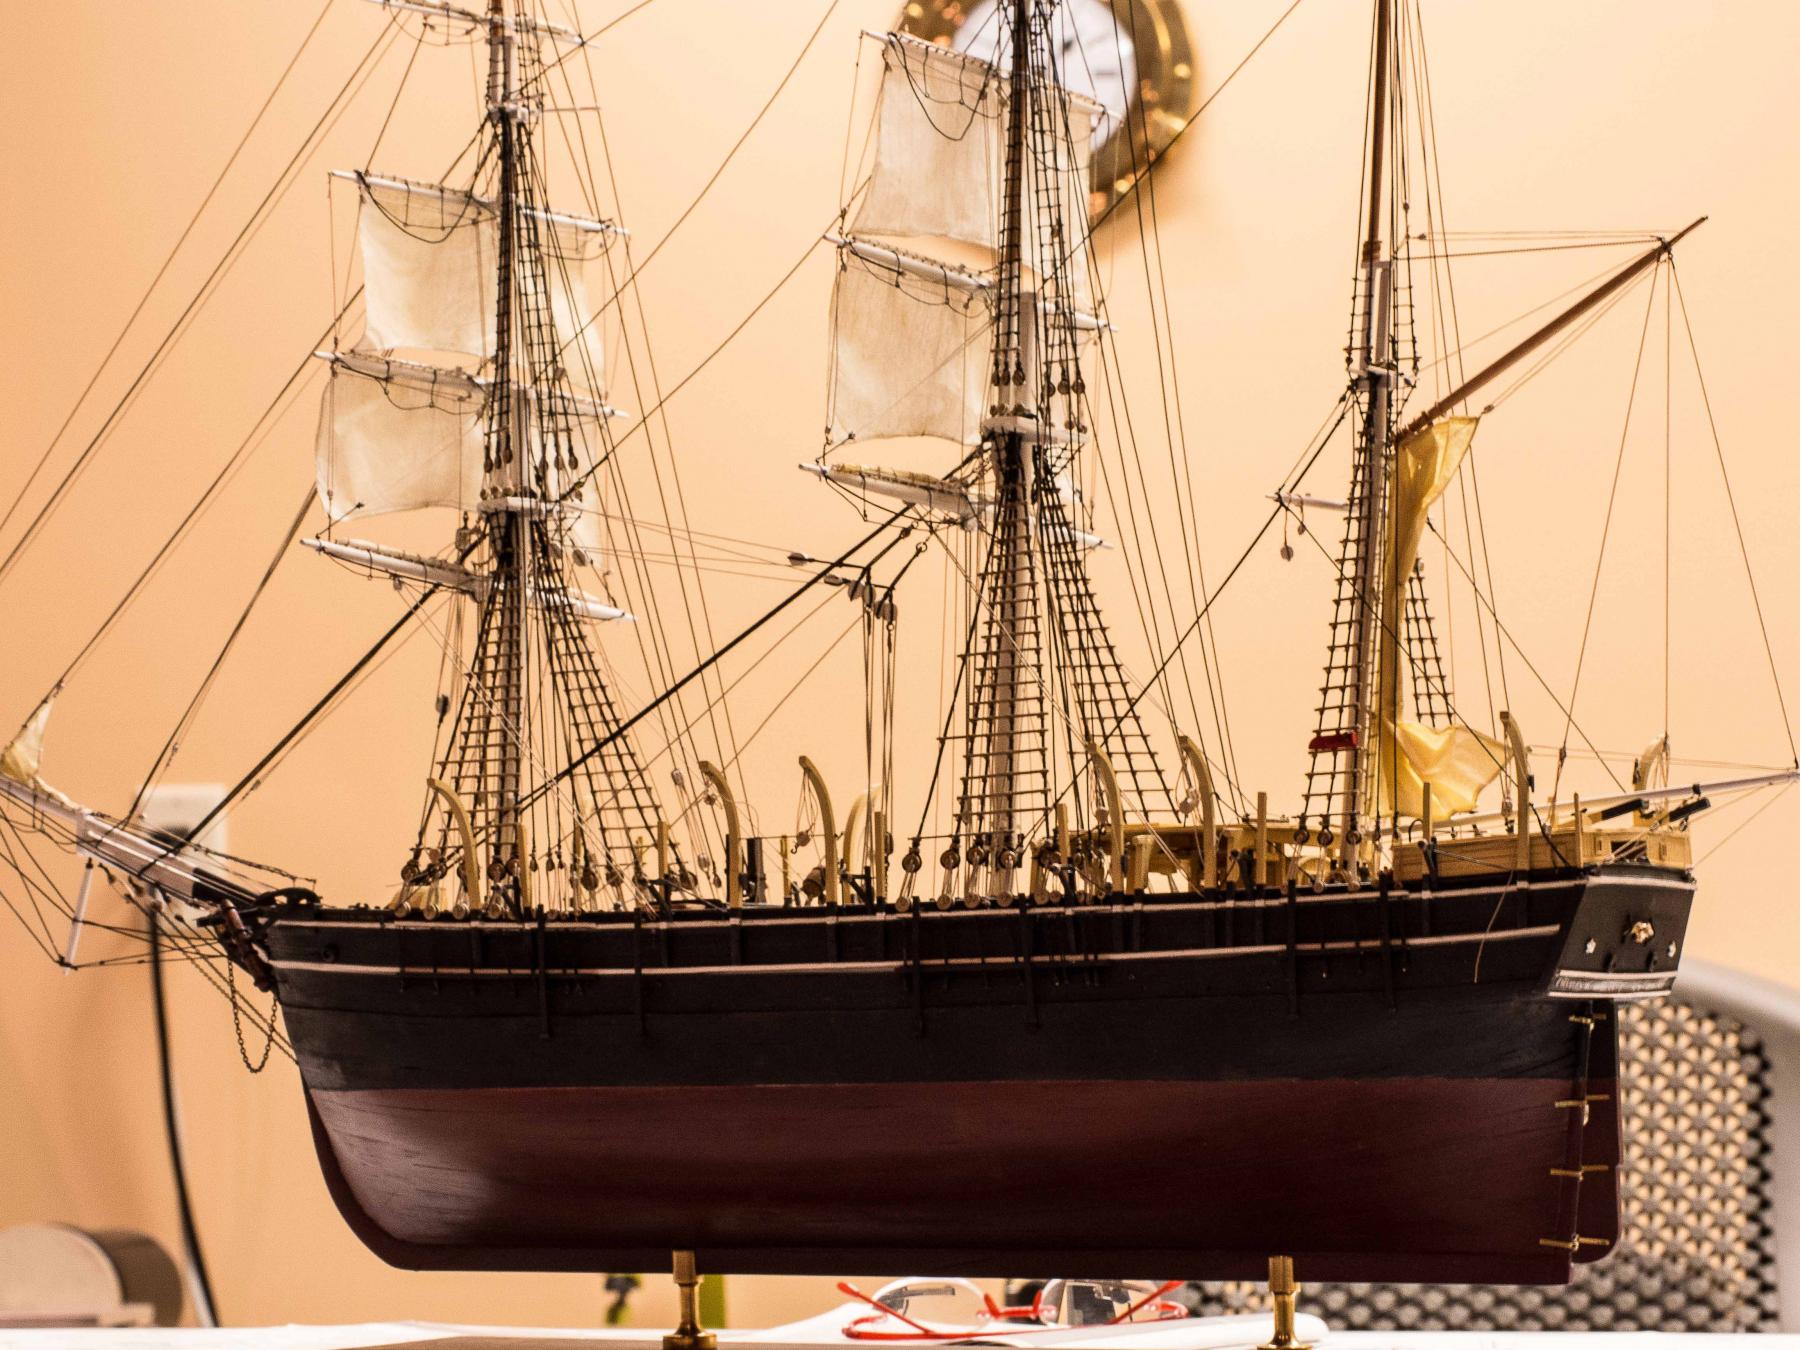
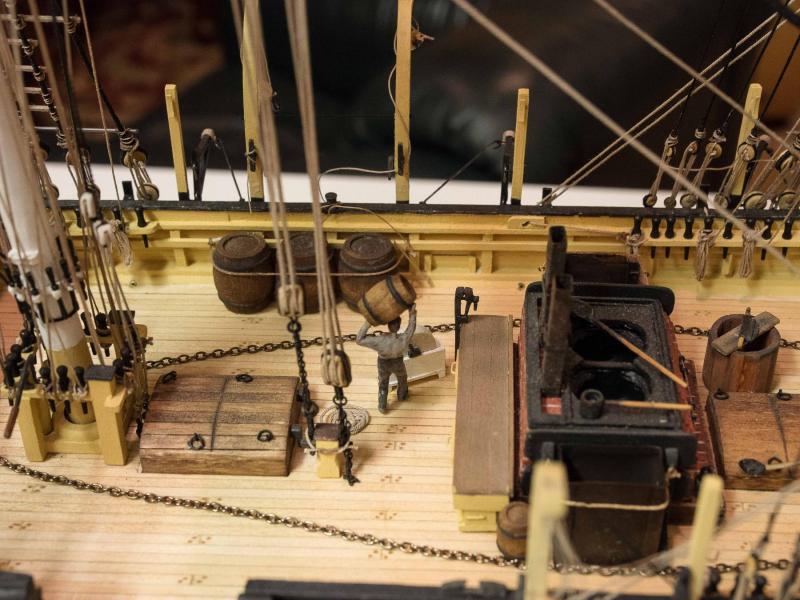
Finished the cutting in stage today. The Morgan (ship) is done. I'll put it somewhere safe and begin working on the whaleboats. Since I've been ignoring other projects and interests to push to get to this stage, I'm going to limit myself to mornings in the shipyard till the whaleboats are done and mounted. Here's the cutting in stage:
- 245 replies
-
- 12
-
-
- model shipways
- Finished
- (and 1 more)
-
The drawback to learning on the go (first rigged ship) is that it's like having your first grade, fifth grade, and eight grade school projects jumbled up and presented together. On the plus side I've learned better ways to do most things and stuff NOT to do. I'm fairly pleased with it tho, for all its little warts.
- 245 replies
-
- 2
-
-
- model shipways
- Finished
- (and 1 more)
-
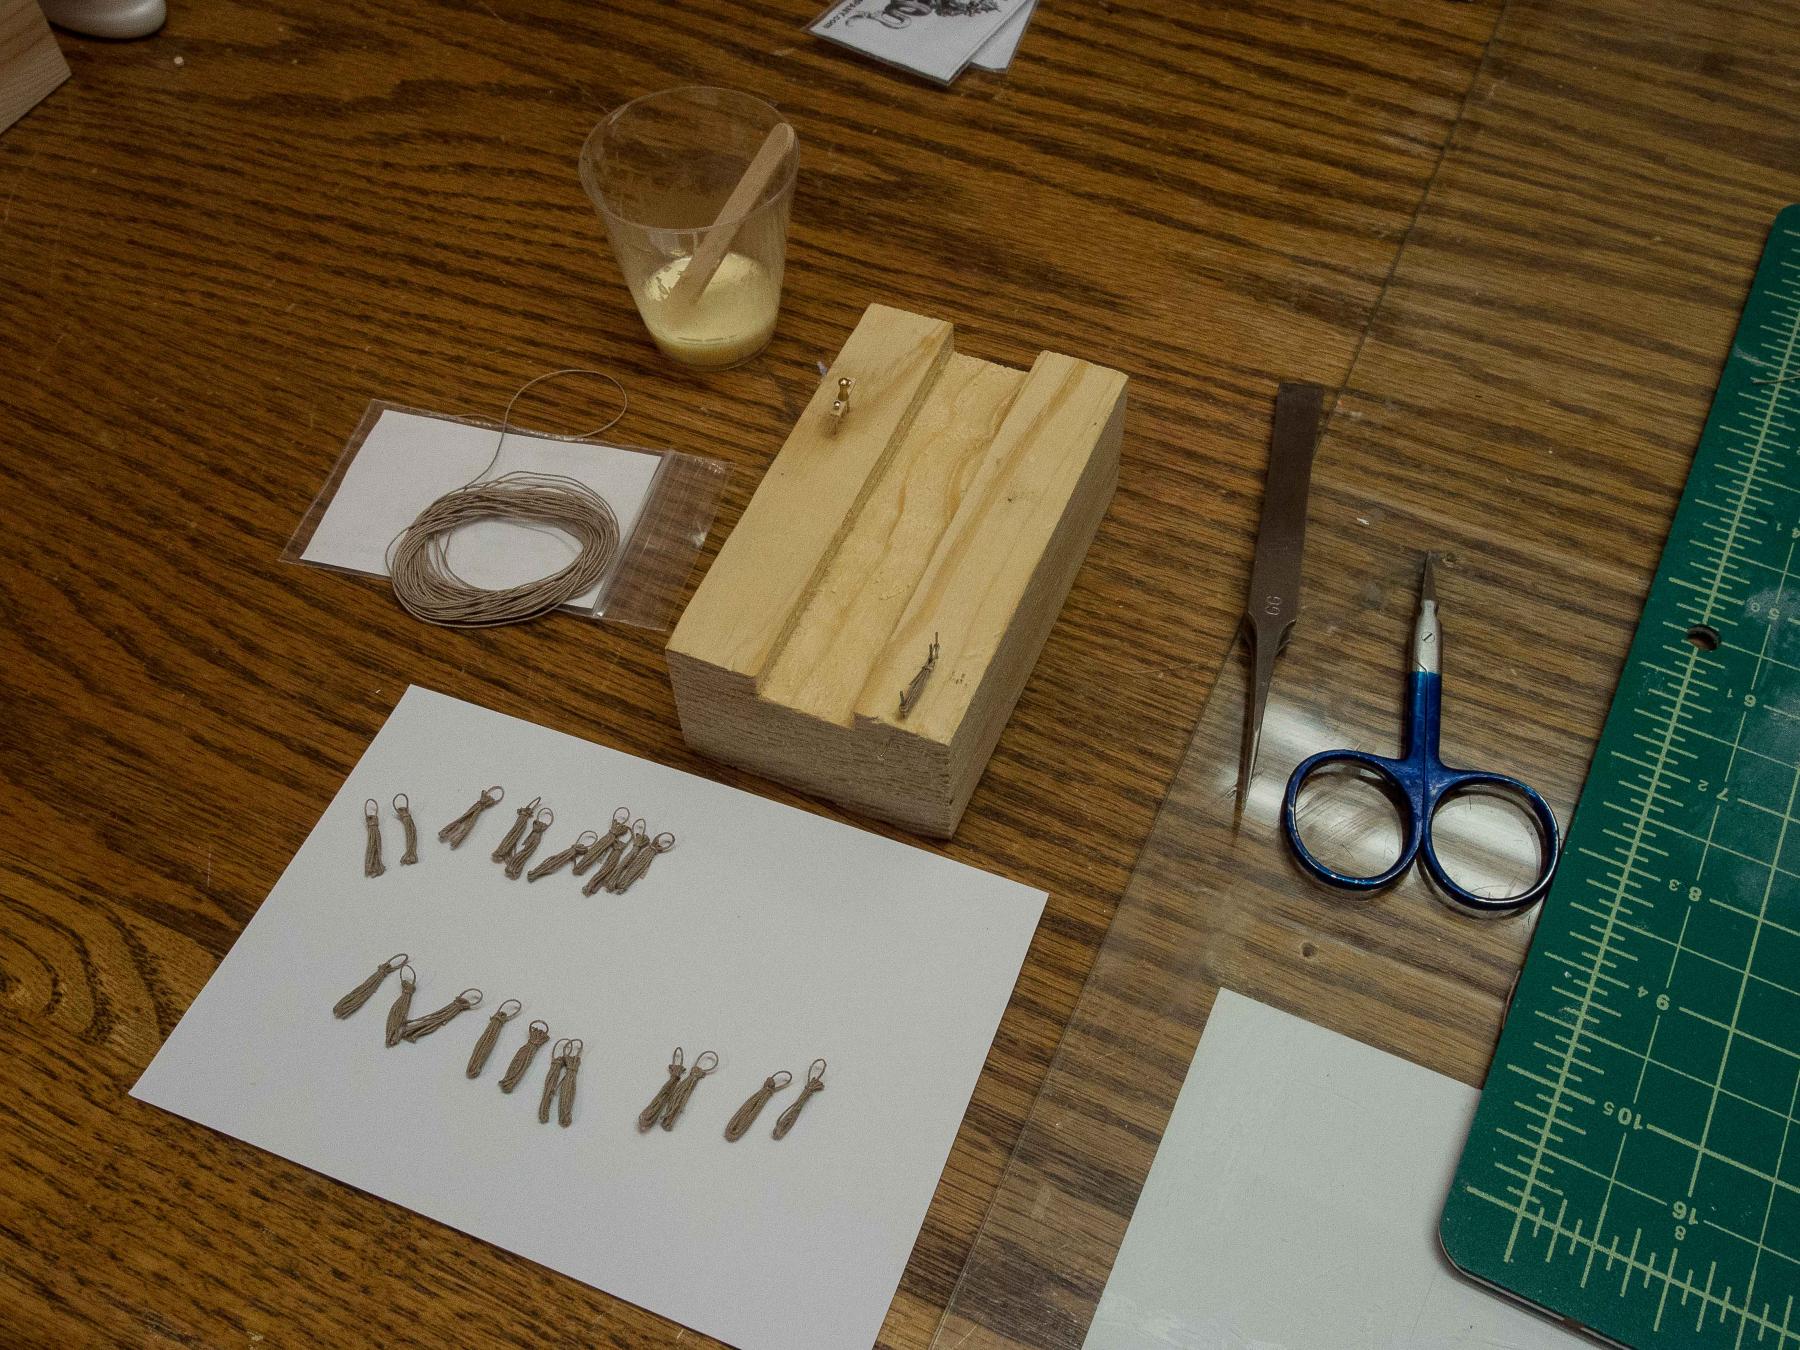
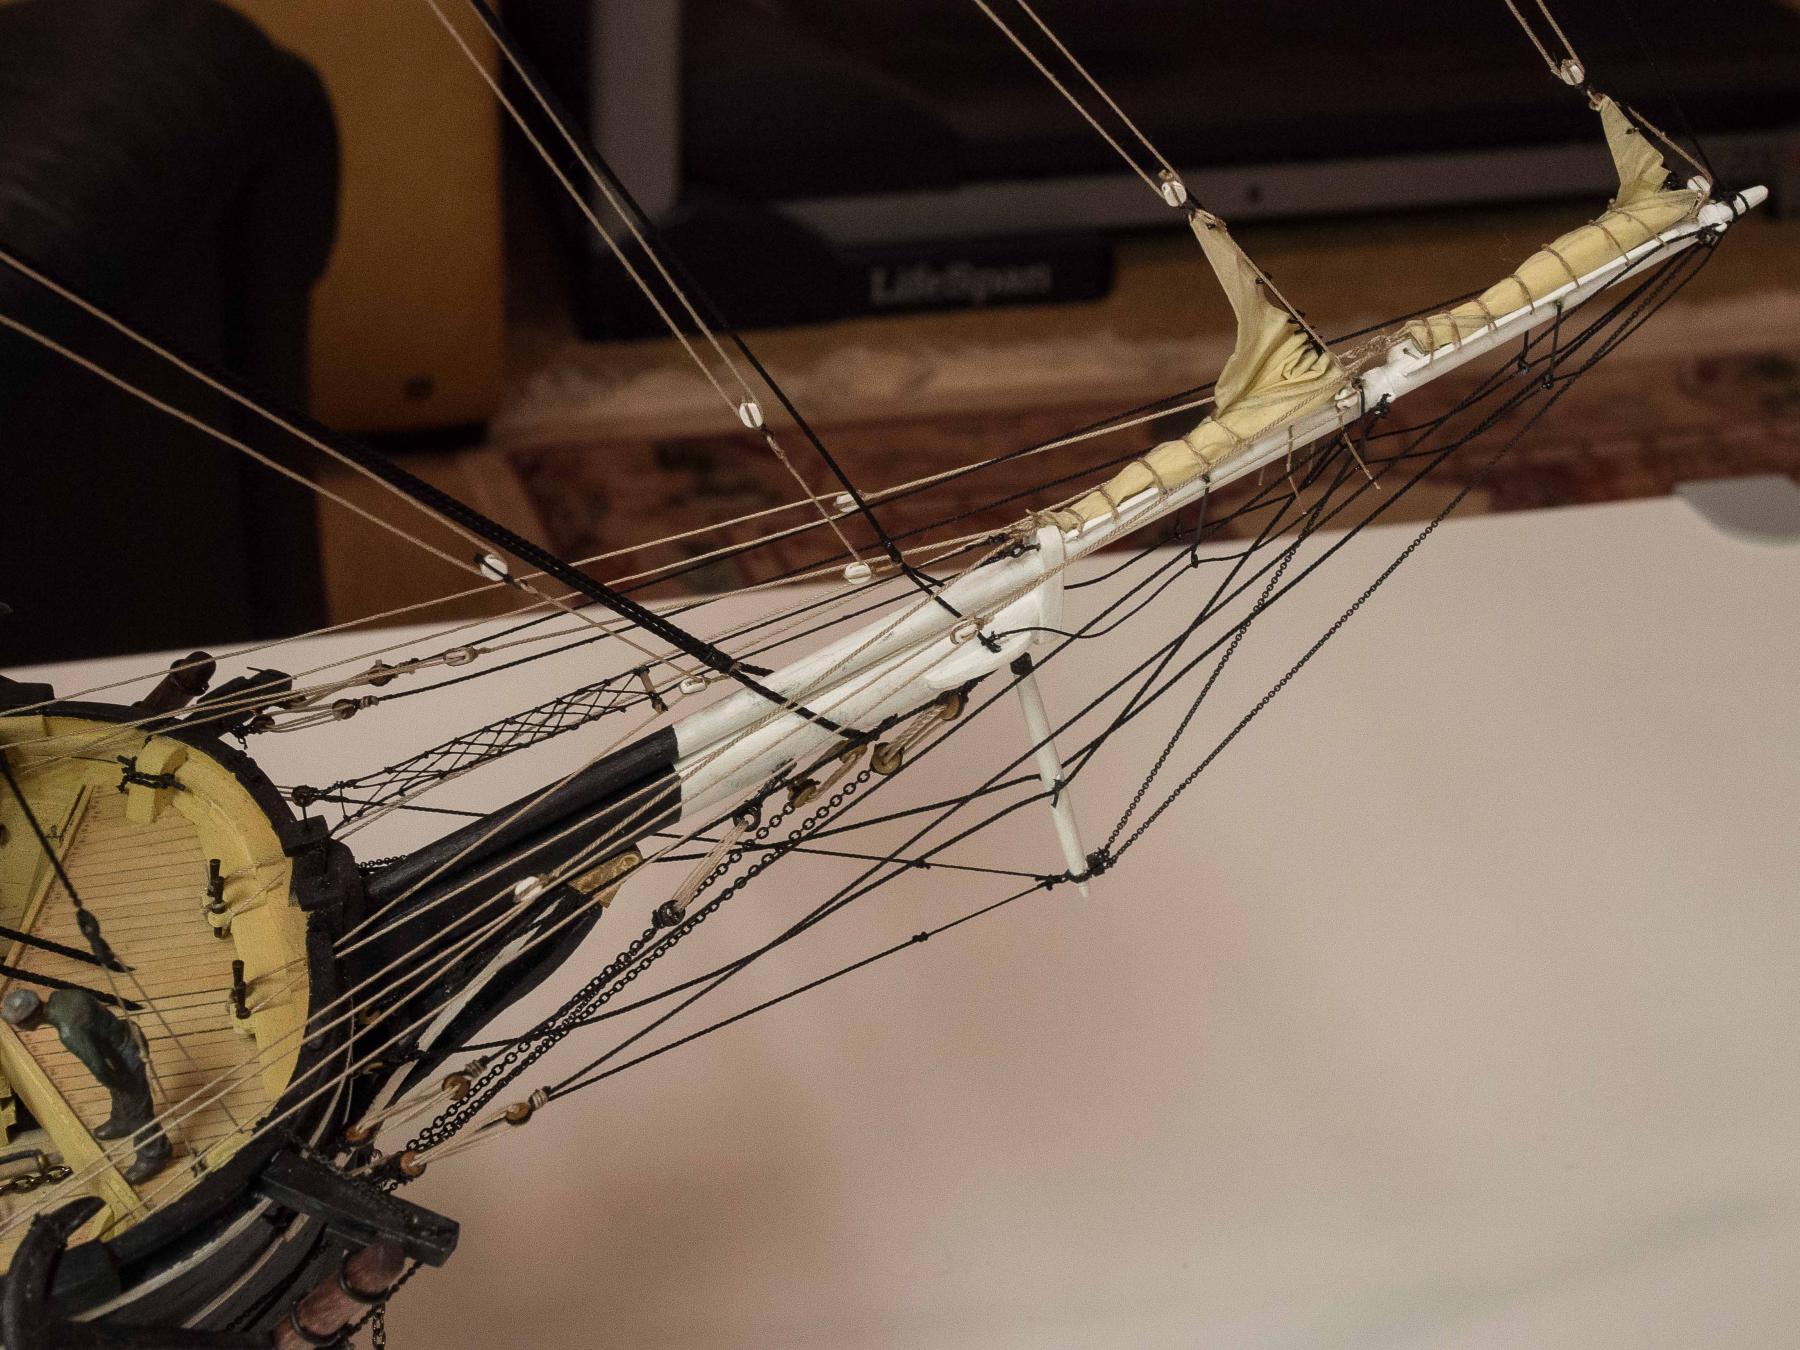
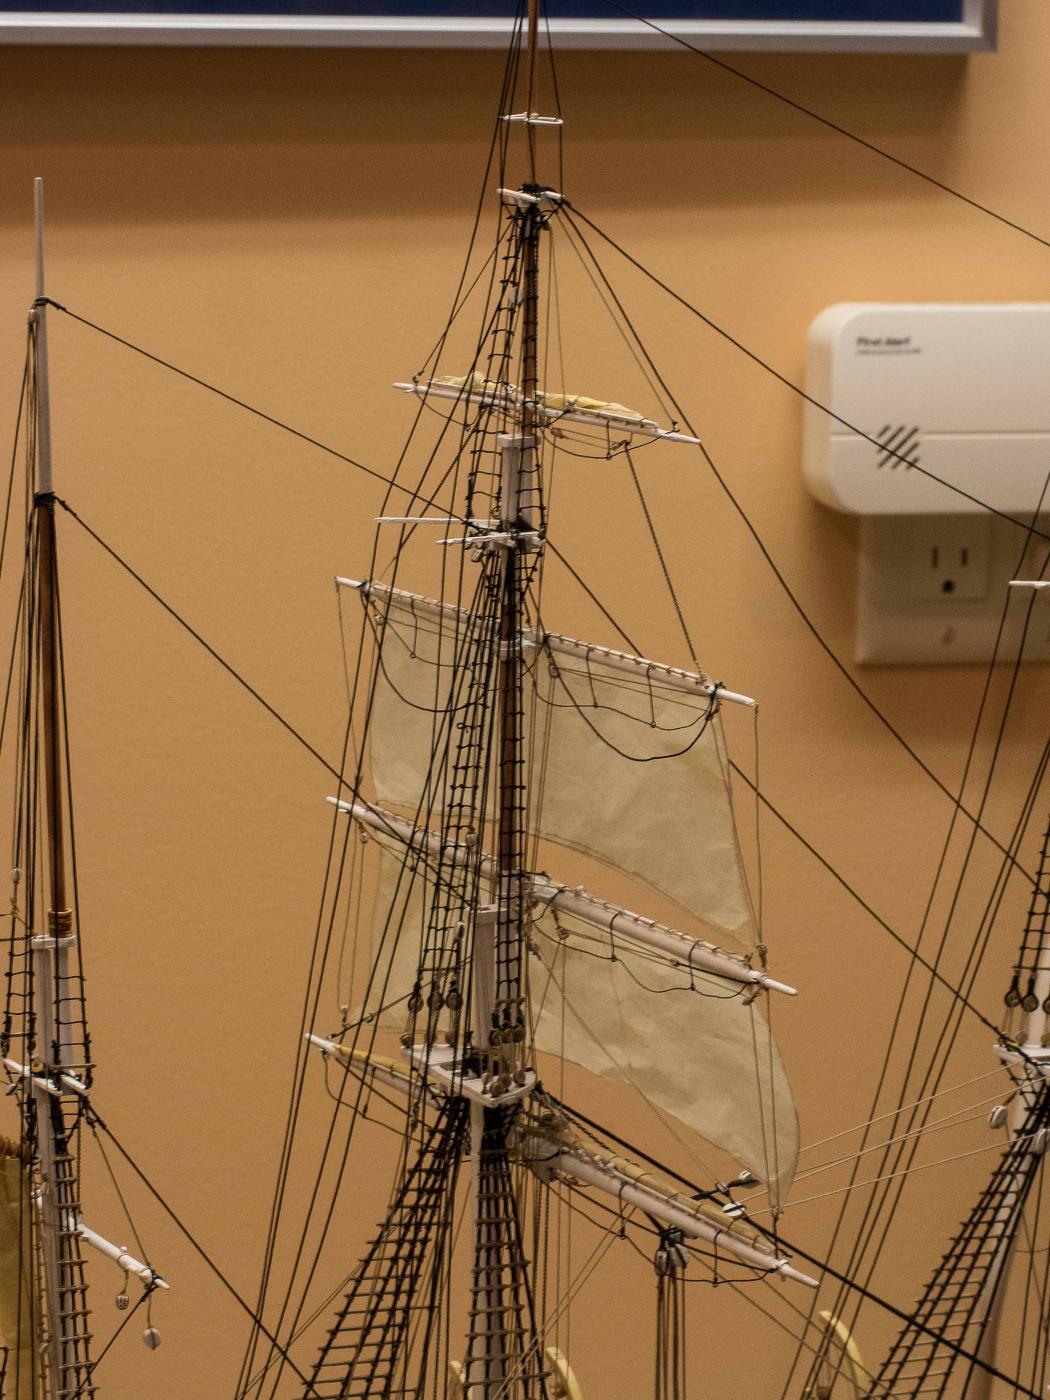
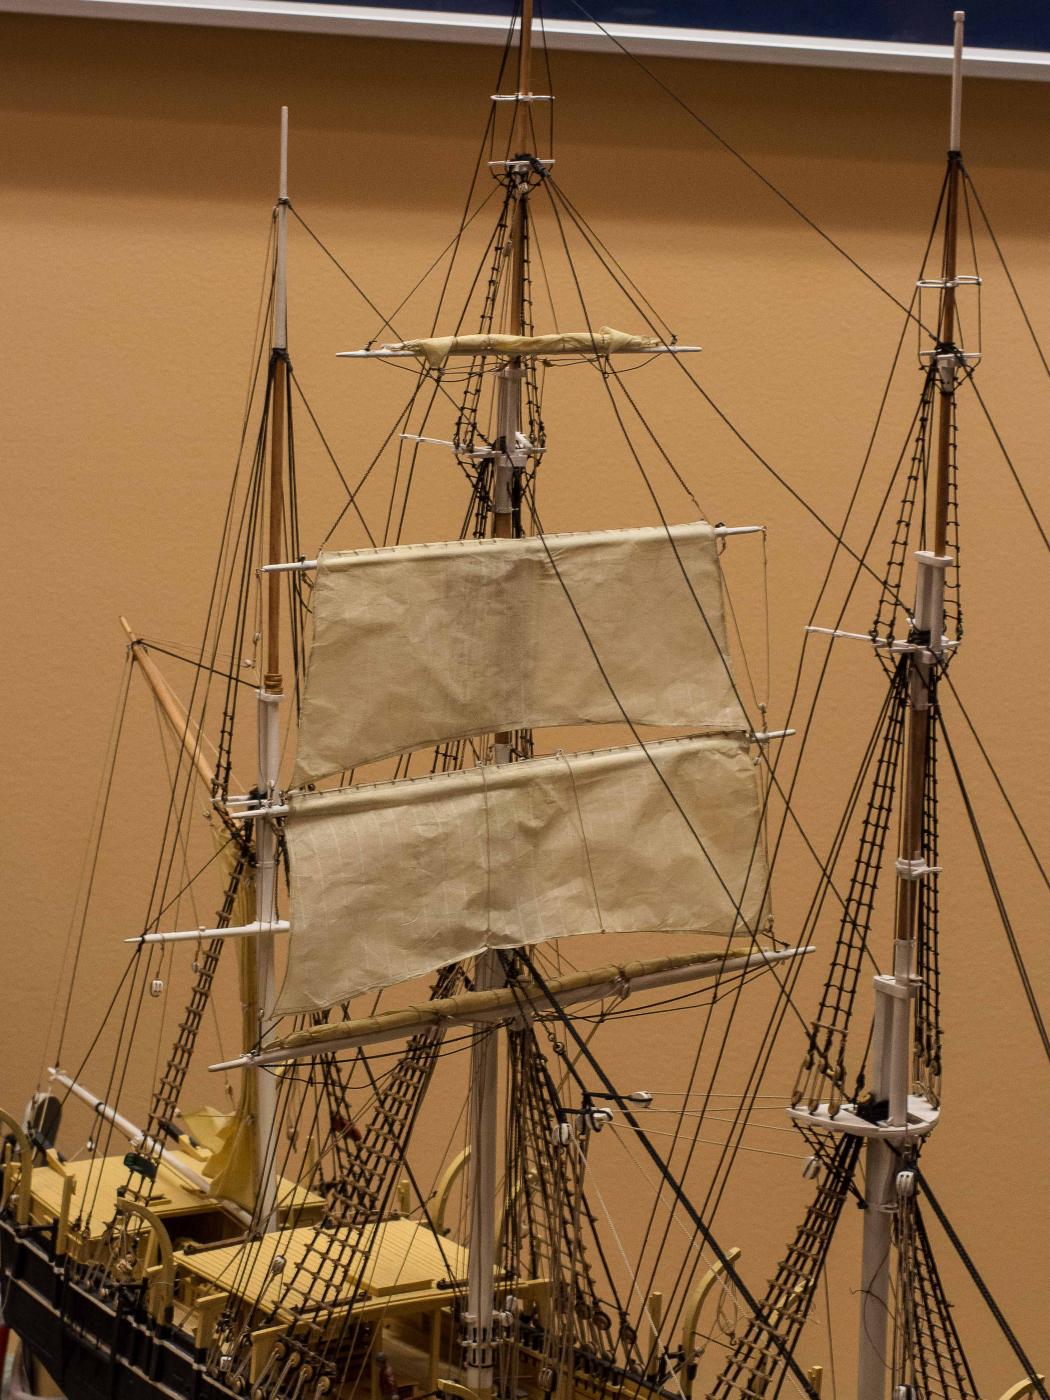
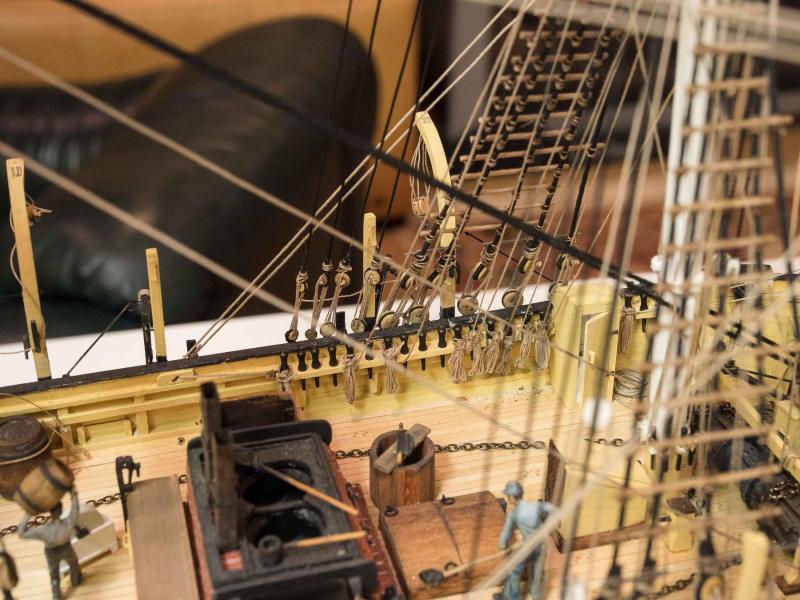
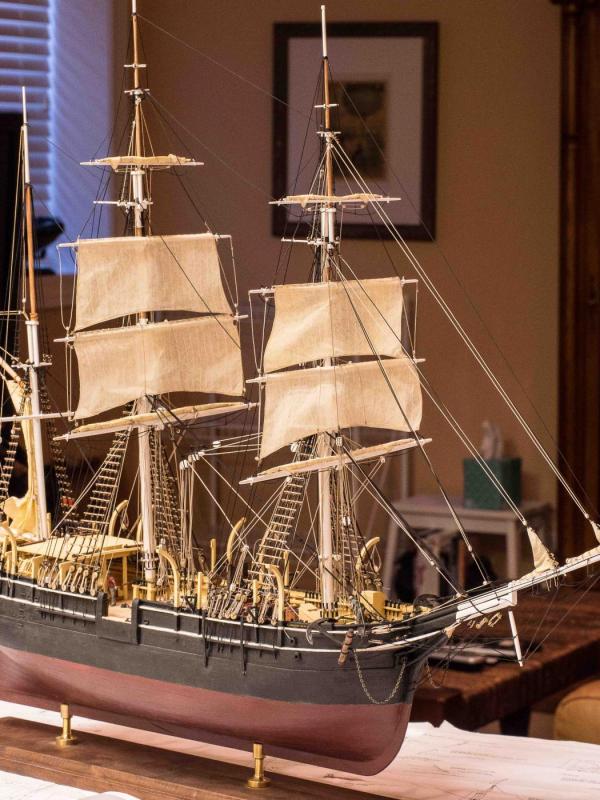
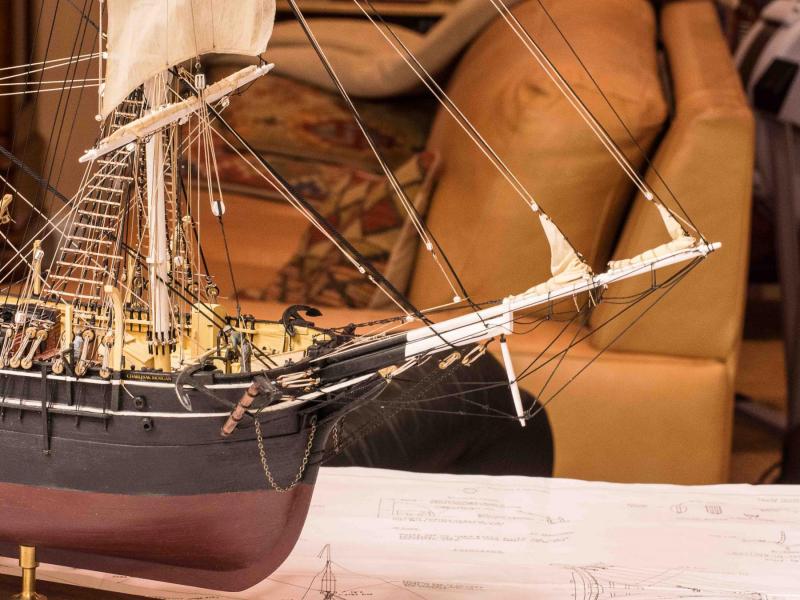
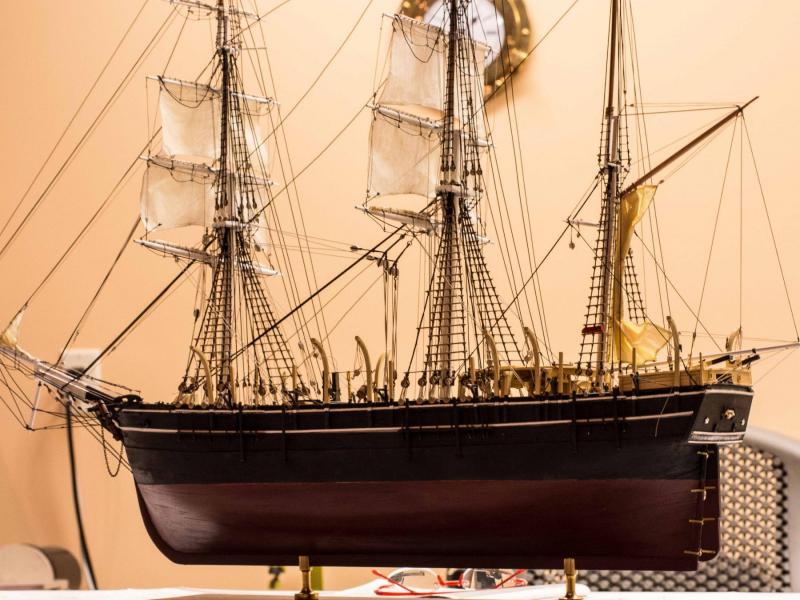
Running rigging is now done. New candidate for repetitive mindless job of the month: making dozens of rope coils for the belay point (last picture). The rest are views of the essentially complete Morgan with coils for the spider bands and mainmast pinrail yet to be placed. I was hoping to be completely done (except the 7 whaleboats) before I leave the country for a week, but the coils took longer than expected and I won't have time to do the cutting-in stage and the paint touch ups here and there that it needs. Only a day or two work remaining.


- 245 replies
-
- 12
-
-
- model shipways
- Finished
- (and 1 more)
-
Thanks for the likes. Today's task is painting the last set of blocks white, for the braces but also for the tack lines (sheets) for the two jibs I've set (forgot those in my enthusiasm at being almost done with the rigging!). First post in this log 3 years ago, about 2 months after I started the build. I'll post a full set of pictures once the rigging and cutting stage are done, as the boat goes into its case awaiting the project of building 7 whaleboats. I'm looking forward to a miniature carpentry task after all this rig(ing)amarole.
- 245 replies
-
- 2
-
-
- model shipways
- Finished
- (and 1 more)
-
I haven't posted progress because the foremast was just duplication of the mainmast yards, and I also took a week or so away to recharge. Having said that, I must be learning something from this process since the foremast went easier (altho the belay points were also more accessible, which helped. Certainly doing the Morgan for my first truly rigged ship turned out to be a real challenge. Some bits don't bear real close inspection, some lines had to be spiced, etc. etc. At any rate, the running rigging is now done except for the braces and placing rope coils. I expect that to take me a week or perhaps two. Then the Morgan goes into it's case in the living room while I build the whaleboats. Unless I add the cutting stage first.

- 245 replies
-
- 13
-
-
- model shipways
- Finished
- (and 1 more)
-
I wish I had done this, Maze of ropes and spars is right.
-
Guidance, Encouragement, or just a Sanity Check
Brucealanevans replied to RFP's topic in Wood ship model kits
Rob My Morgan (build log in progress) is the first fully rigged ship I've attempted. Been working on it for 3 years. With more time now that I'm retired (I'm 67). The end of the running rigging is in sight! It is a challenging build with a lot of scratch work but I've learned a lot, and if the result is not contest worthy it (so far) is certainly "living room" worthy and I love just looking at it. I'm glad I took the challenge. Have fun and consult John's (texxn5) build log and his website at.charleswmorganmodel.com. Saved me multiple times.from errors. Bruce -
Thanks all for the pointers. There is much I will do differently on my second fully rigged ship based on this feedback and my experience. The main problem I have with the Morgan is the relative inaccessibility of the majority of the belay points making tying any kind of secure knot without glue an impossibility at least for me. Unfortunately I glued the pins in (what WAS I thinking?). Oh well, the first build is an education.
-
Thanks all for the comments and likes. This is the first fully rigged ship I've built and the experience has been invaluable. My previous builds (New Bedford whaleboat and Picket Boat #1) sharpened my miniature carpentry skills and guided my shipyard equipment acquisitions but did nothing to prepare me for a successful rigging process. Once I finish this rigging I'll be more ready to put it all together to try and raise my standards to a higher level. That's why I have Grenado on the shelf and will attack it before the Confederacy which has minimal rigging. Also, I have an extra display case for a fully rigged ship.
-
Finished hoisting the Main Topgallant yard (sail furled) and all the attendant running rigging except for the braces. Now I put the ship up and away, and begin working on the foremast yards. Hopefully the experience of the main yards and the trouble spots due to not recognizing things best done before anything is mounted will stand me in good stead, as this will be essentially a repeat of the mainmast yards. I will repeat the same mixture of set and furled sails on the foremast. For simplicity sake and my sanity, I have not set/rigged for the staysails. Apparently the main staysails were often not set, but I probably should have set the mizzen staysails - will, however, leave well enough alone. Learning a lot, and rigging my next full ship - likely Grenado - will hopefully benefit from the experience.

- 245 replies
-
- 12
-
-
- model shipways
- Finished
- (and 1 more)
-
As I work on the very complex and difficult (at least for me) running rigging on my CW Morgan build, some of my standing rigging has gradually stretched, and some that I have "twanged" while trying to work in inaccessible places have slackened. Are there any tricks for tightening a line short of snip and reattach? Doing this will not be easy or in some cases of multiple stacked stays in tops now crowded with multiple eyes, blocks, and rigging even possible. Looking at pictures I realize the standing rigging was not uniformly taut, but I'd like to improve the appearance a bit if I can do it without causing more eyesores than I'd be addressing. Thanks for any experience or thoughts. Bruce