MORE HANDBOOKS ARE ON THEIR WAY! We will let you know when they get here.
×


Brucealanevans
-
Posts
450 -
Joined
-
Last visited
Content Type
Profiles
Forums
Gallery
Events
Everything posted by Brucealanevans
-
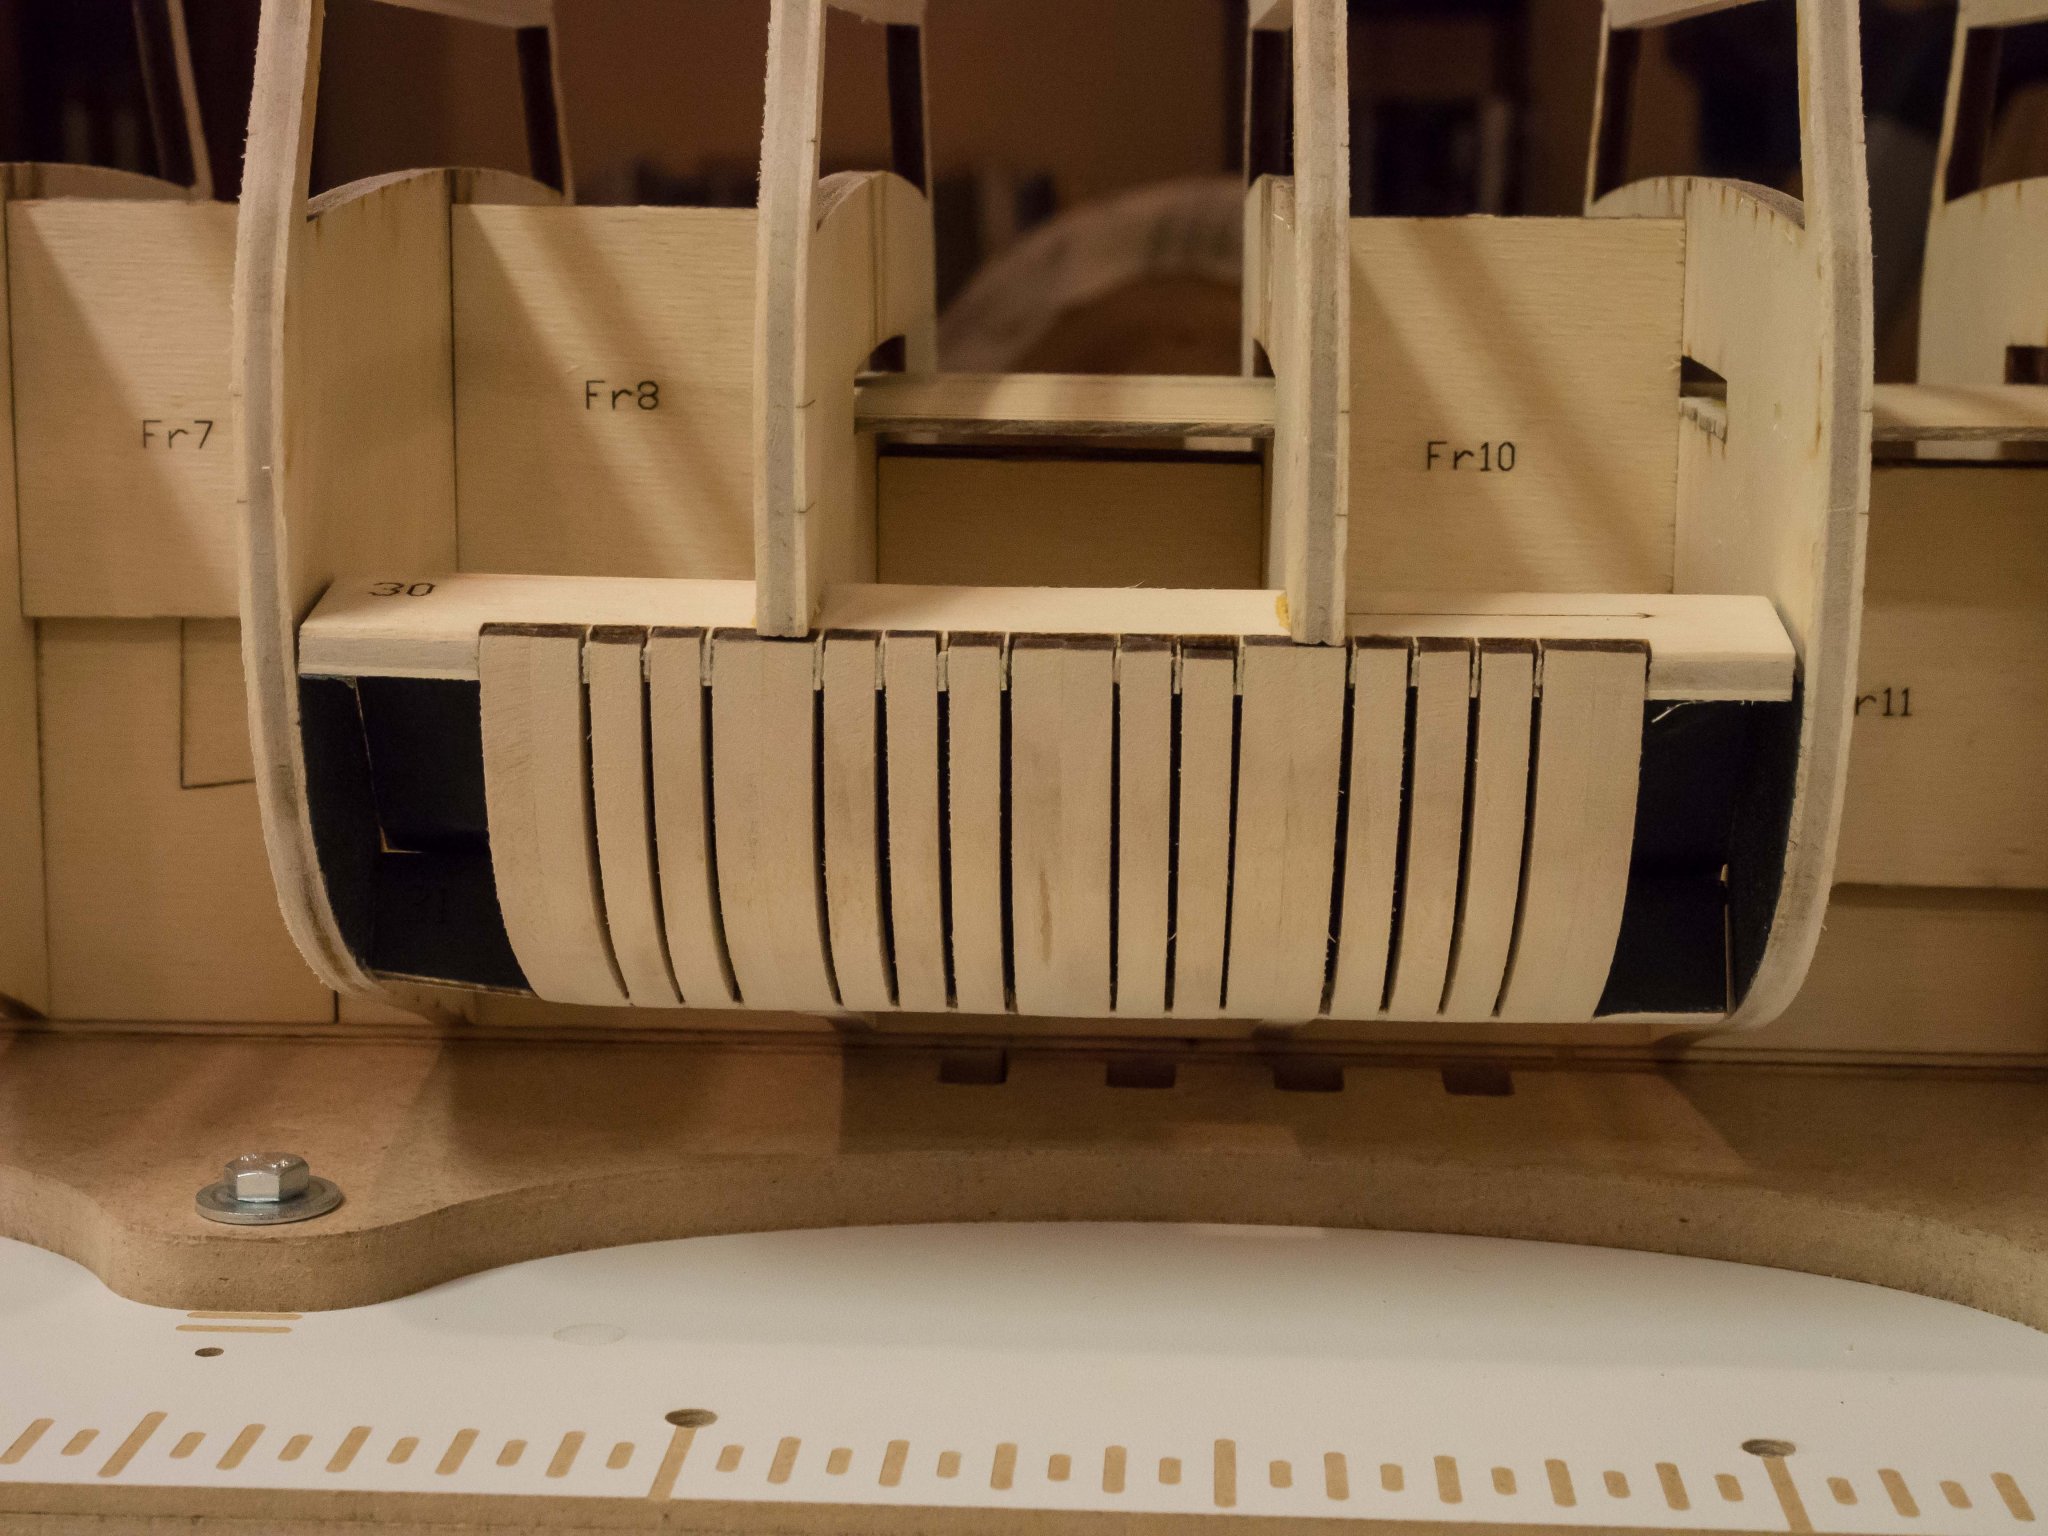
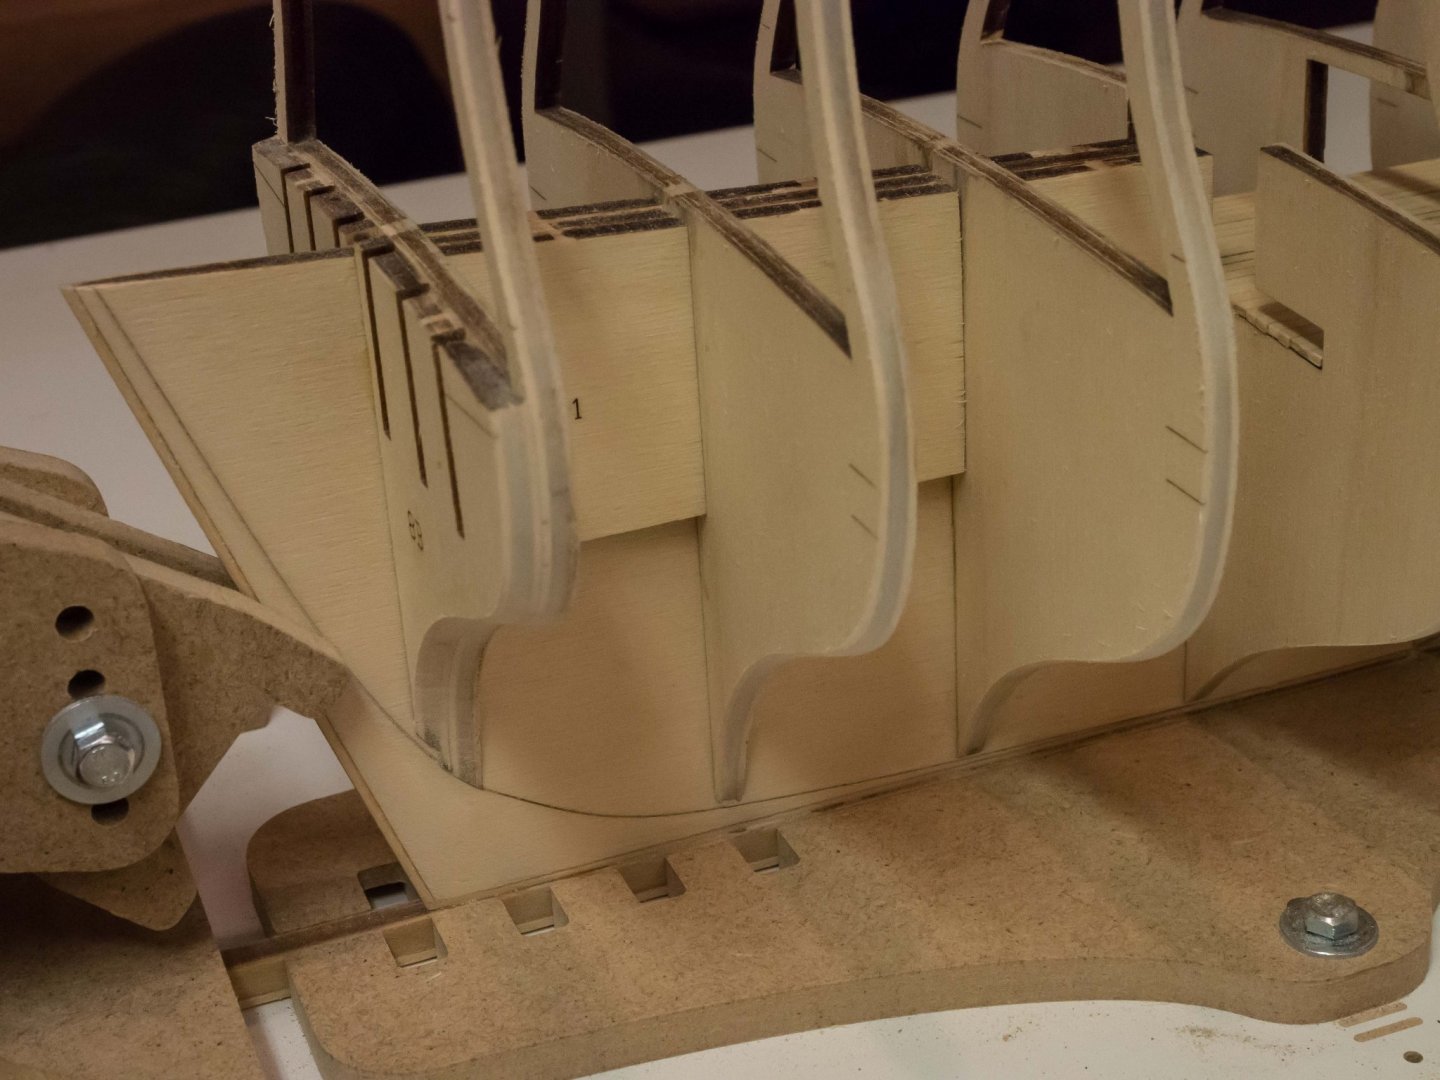
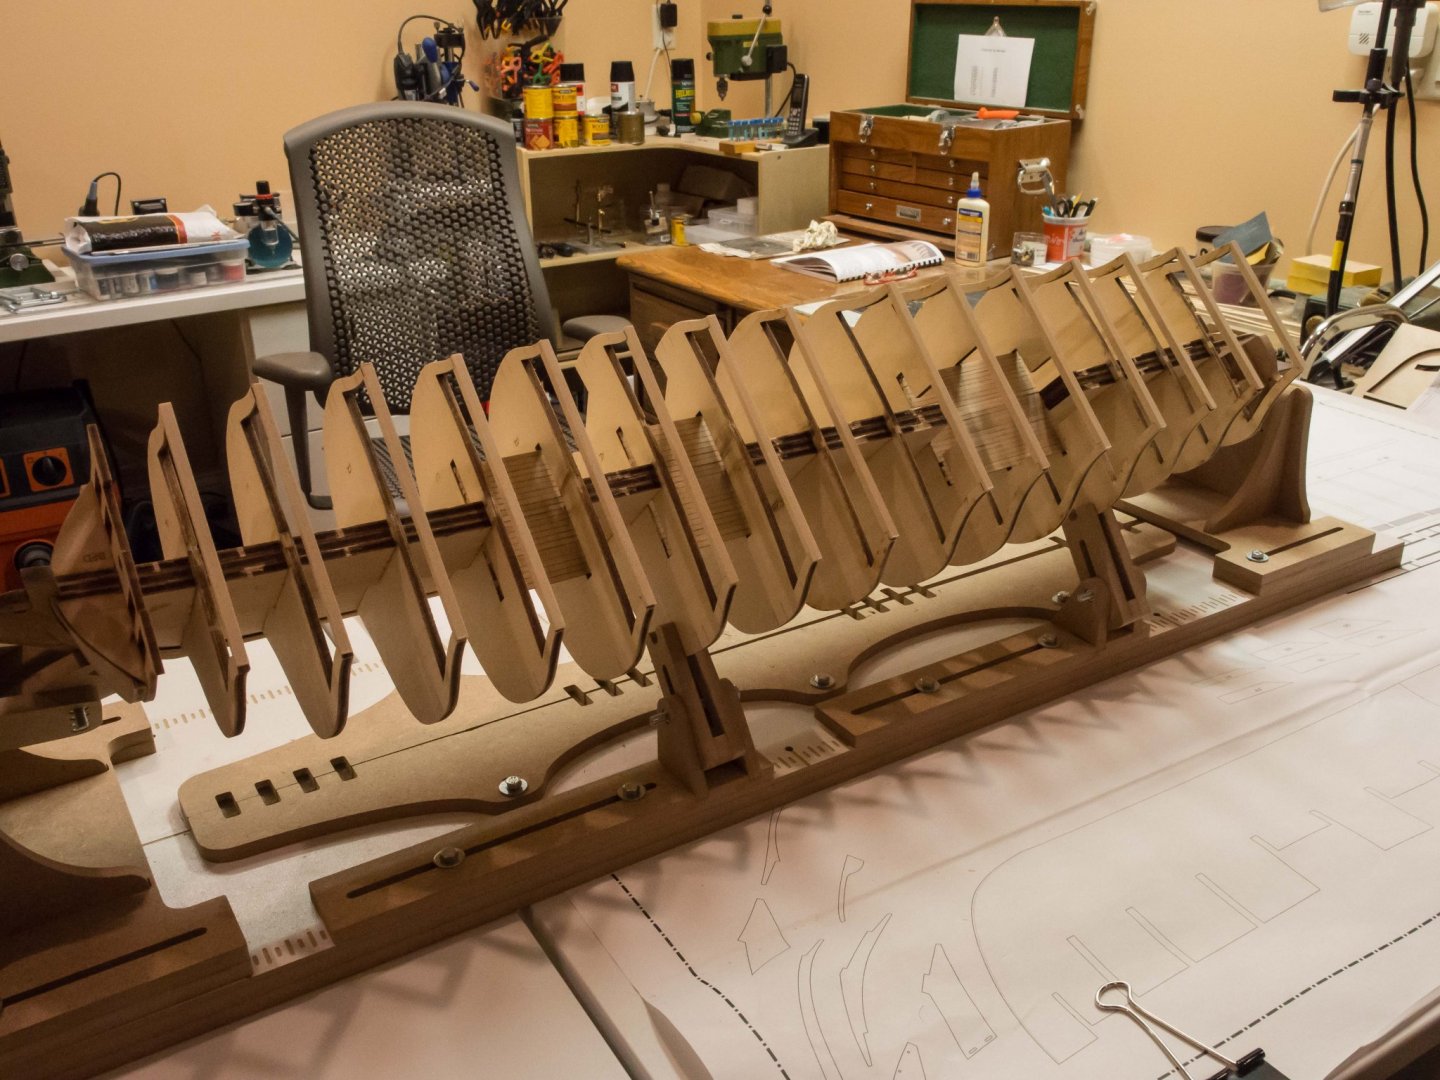
 Finished with bulkhead faring. A lot of sanding. I was really quite diligent with this, probably more so than on the previous builds. Also put the shadowbox and its ribs in - again, a lot of sanding to bring it into line with the bulkheads. No surprises or issues thus far, but I'm about to start on the stern structure, the like of which I have not previously done. May not get going on this for a week or two with holiday and other projects. This will be a slow build.
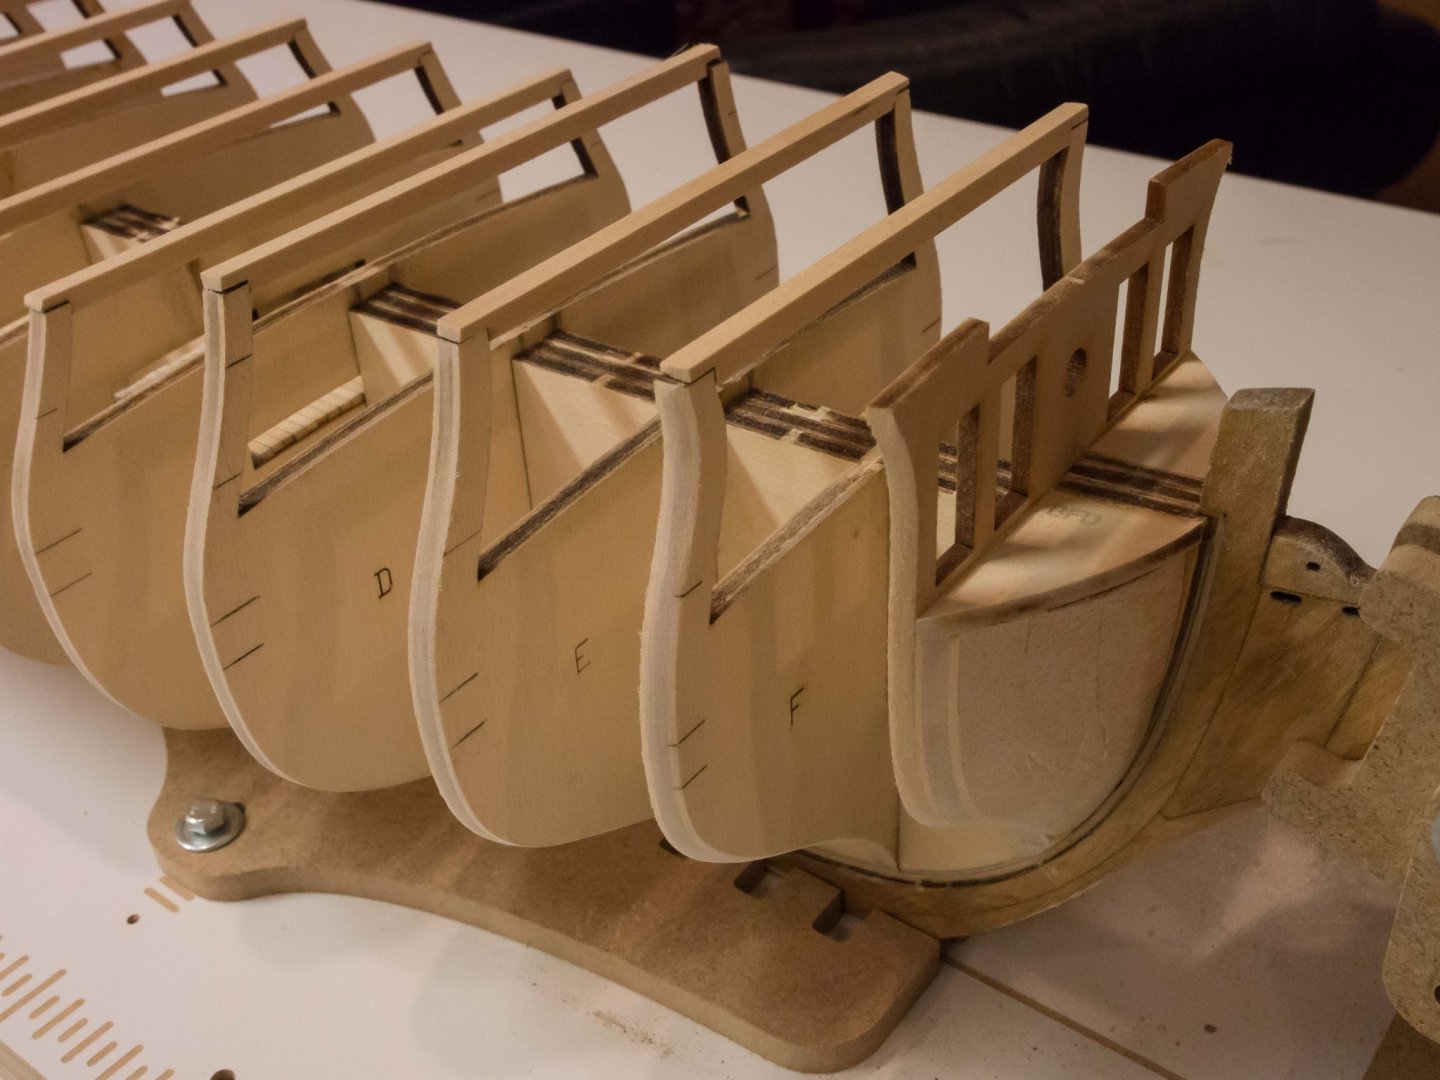

- 126 replies
-
- 8
-

-
- Finished
- confederacy
- (and 1 more)
-
Search hobby world USA for hobbyzone professional building slip. it was discussed quite a bit here a few years back. putting it together from diagram based instructions a bit of a PITA - you need to be very careful regarding part identification and orientation. Originated in Poland I think. there is a smaller one nowhere near as flexible.
-
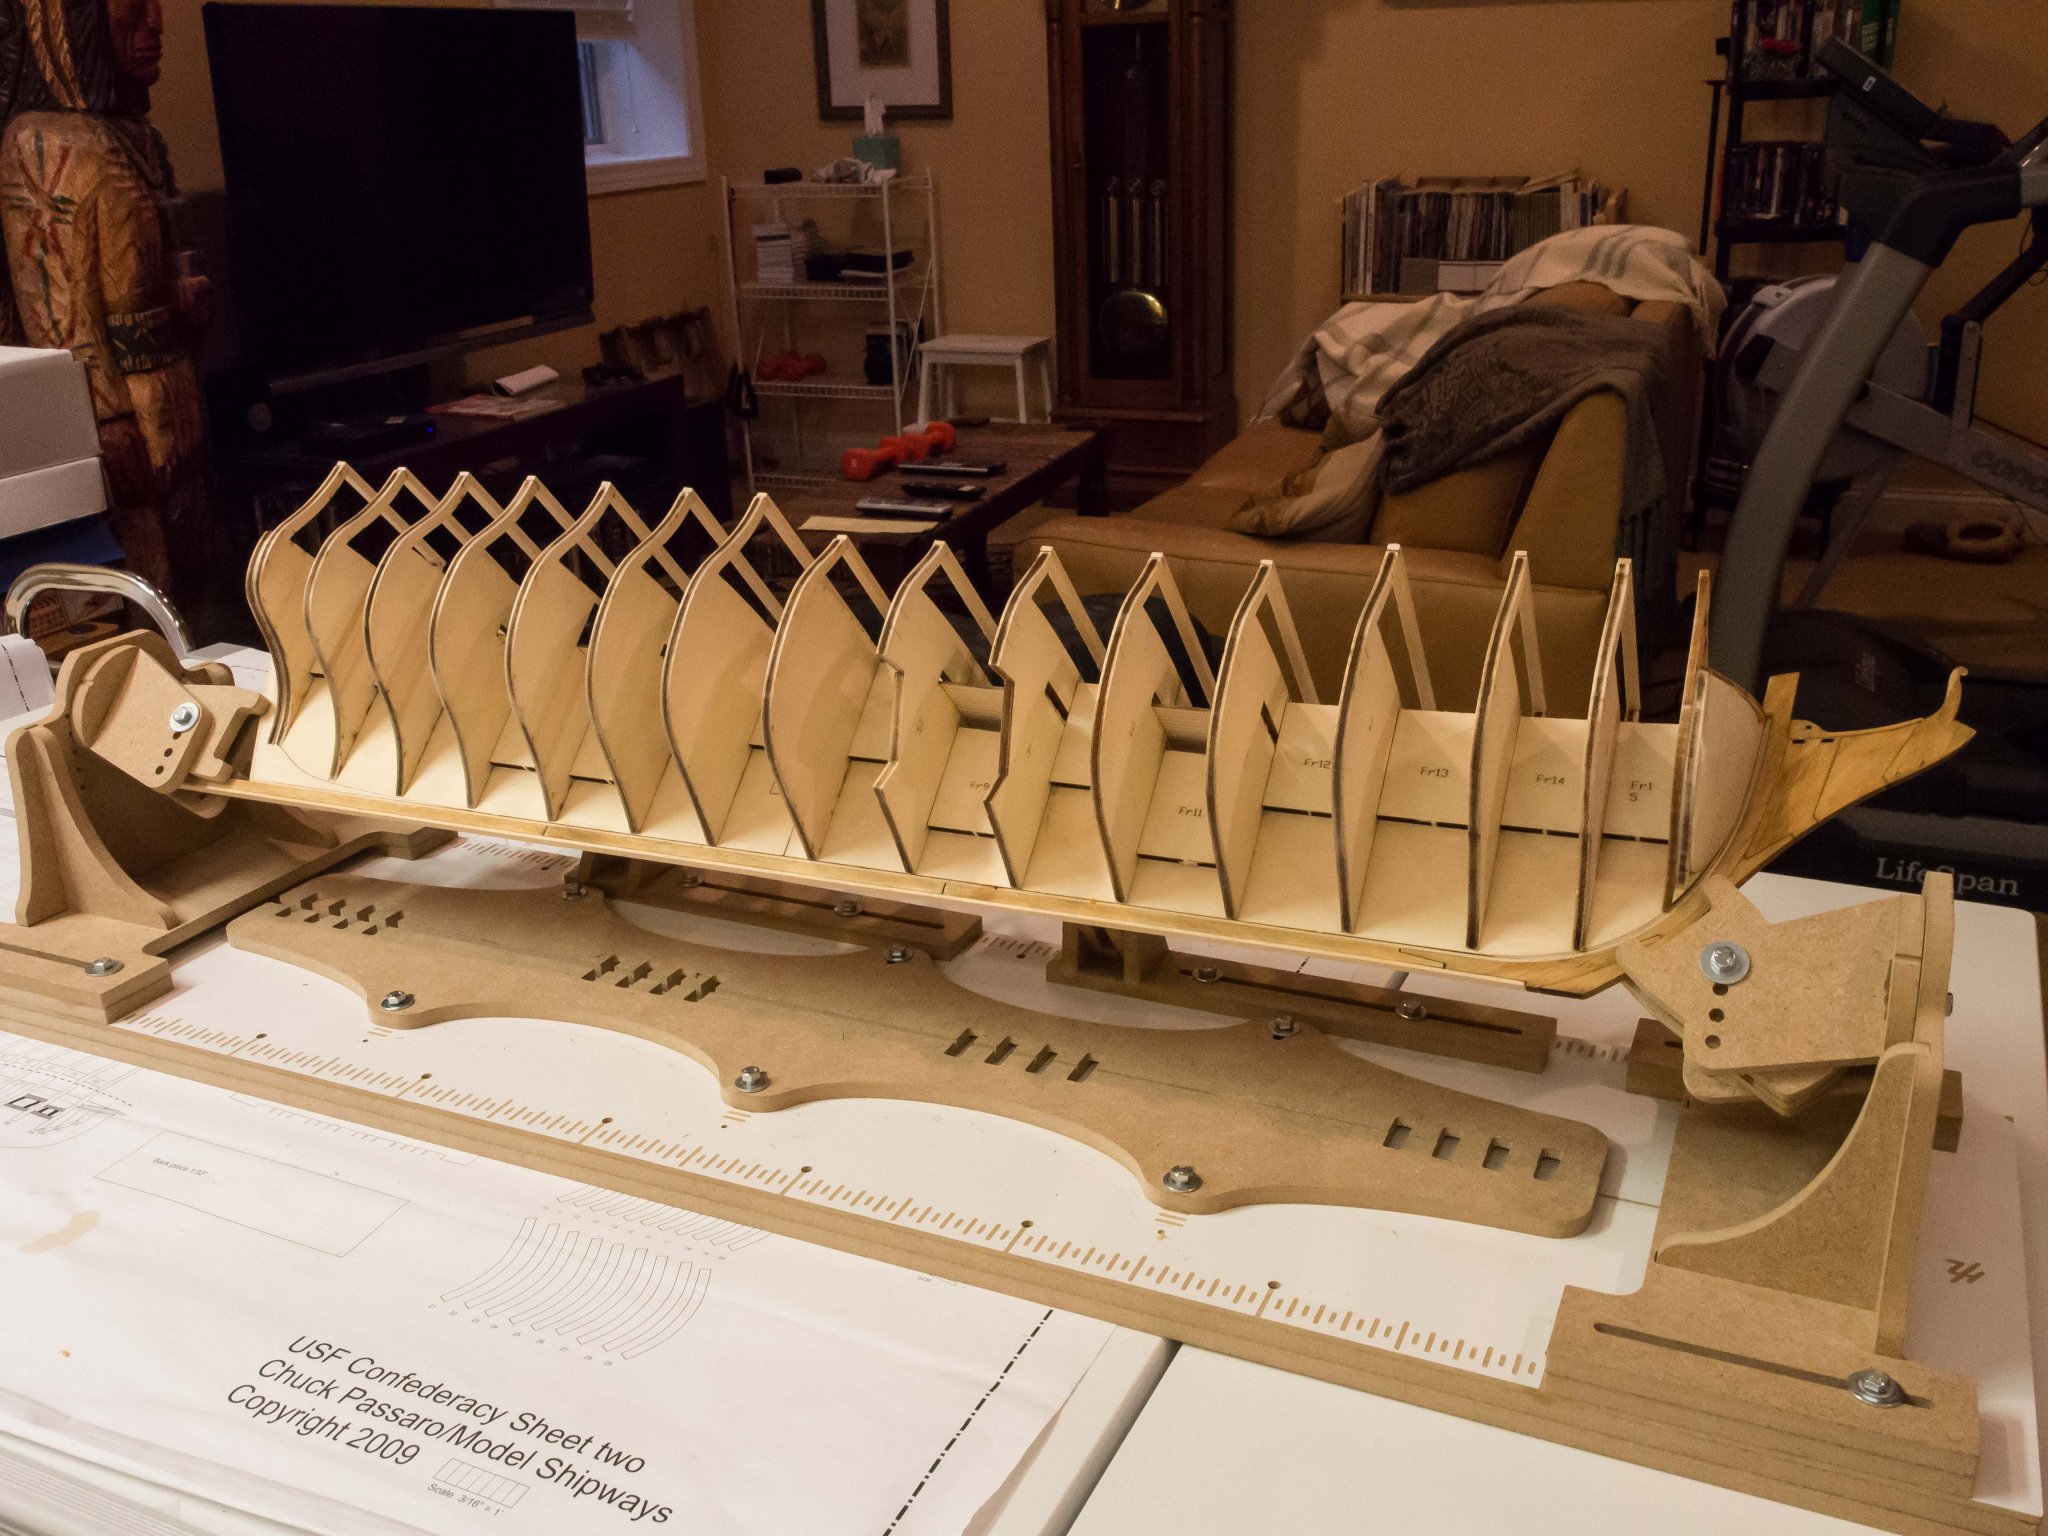
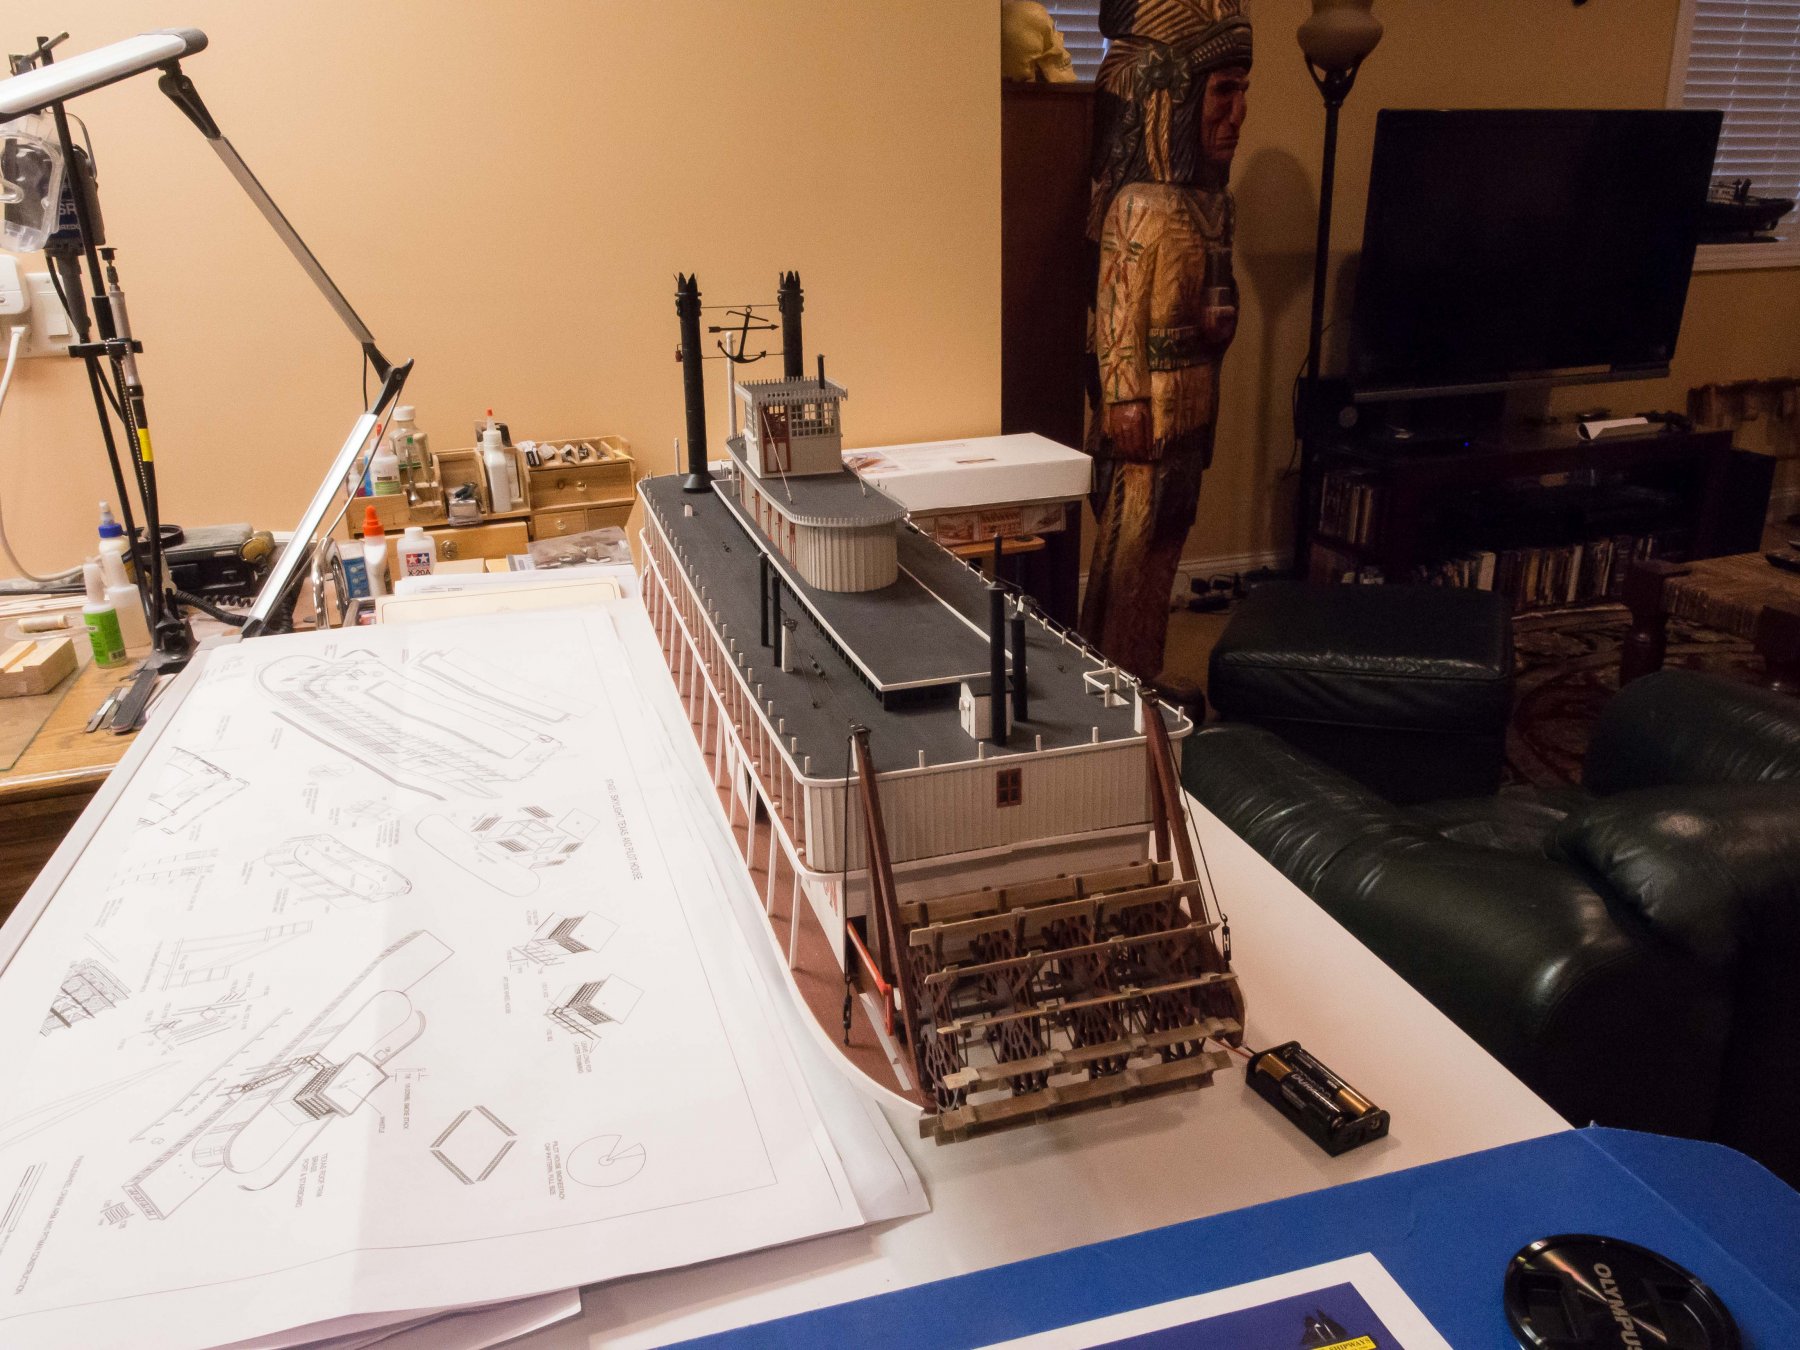
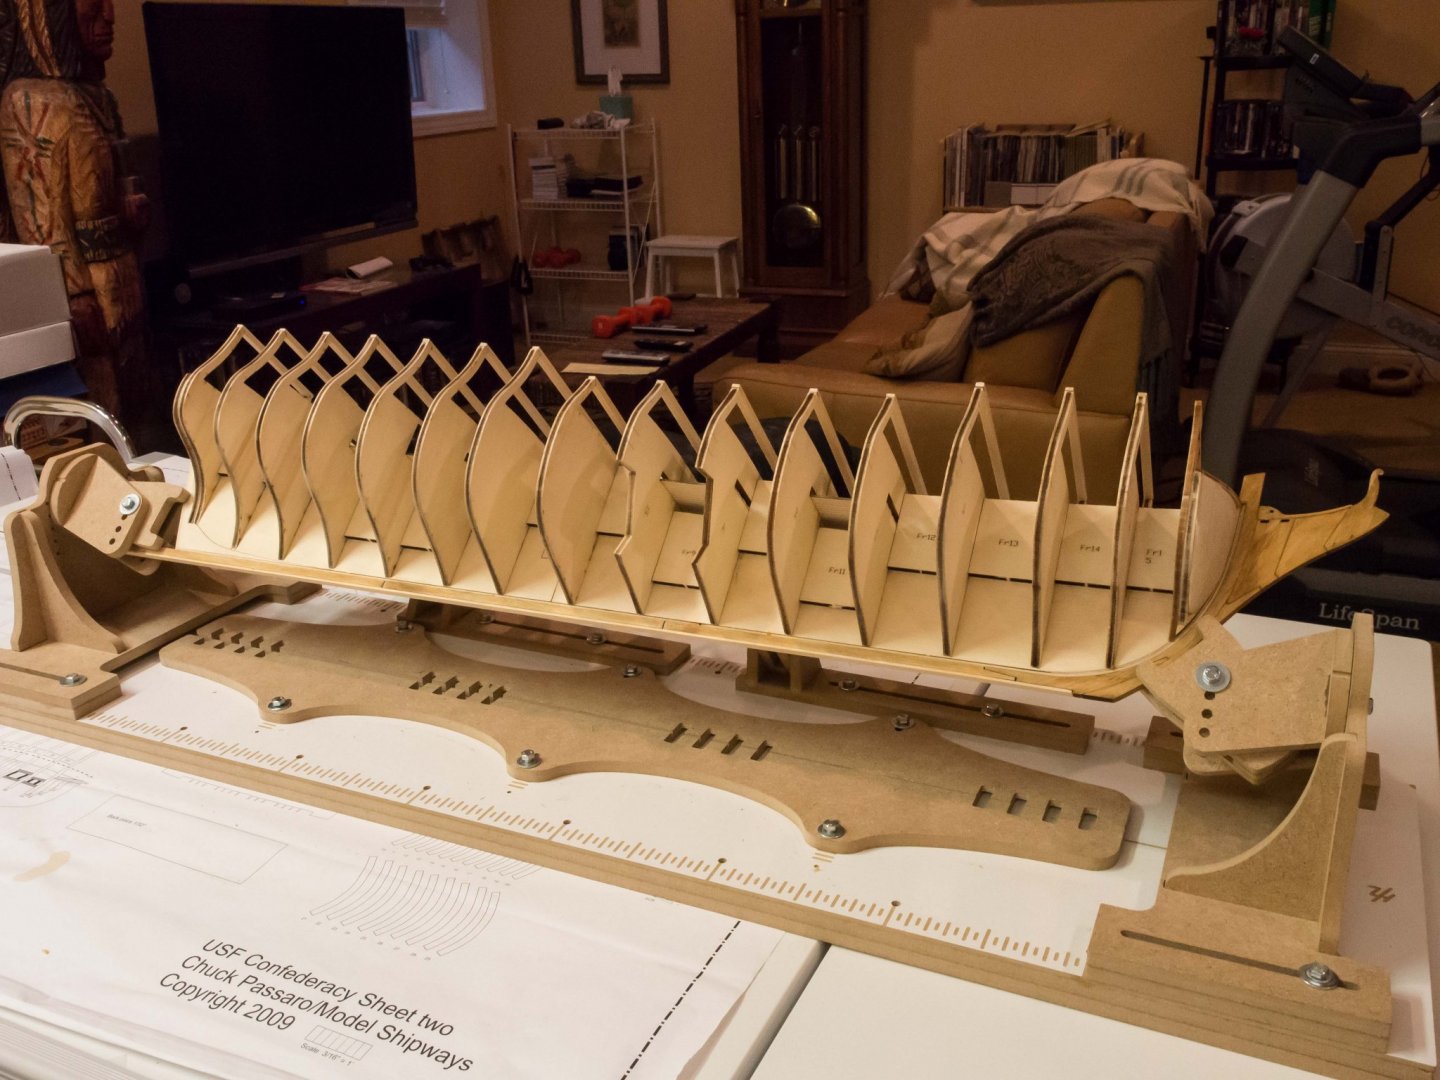
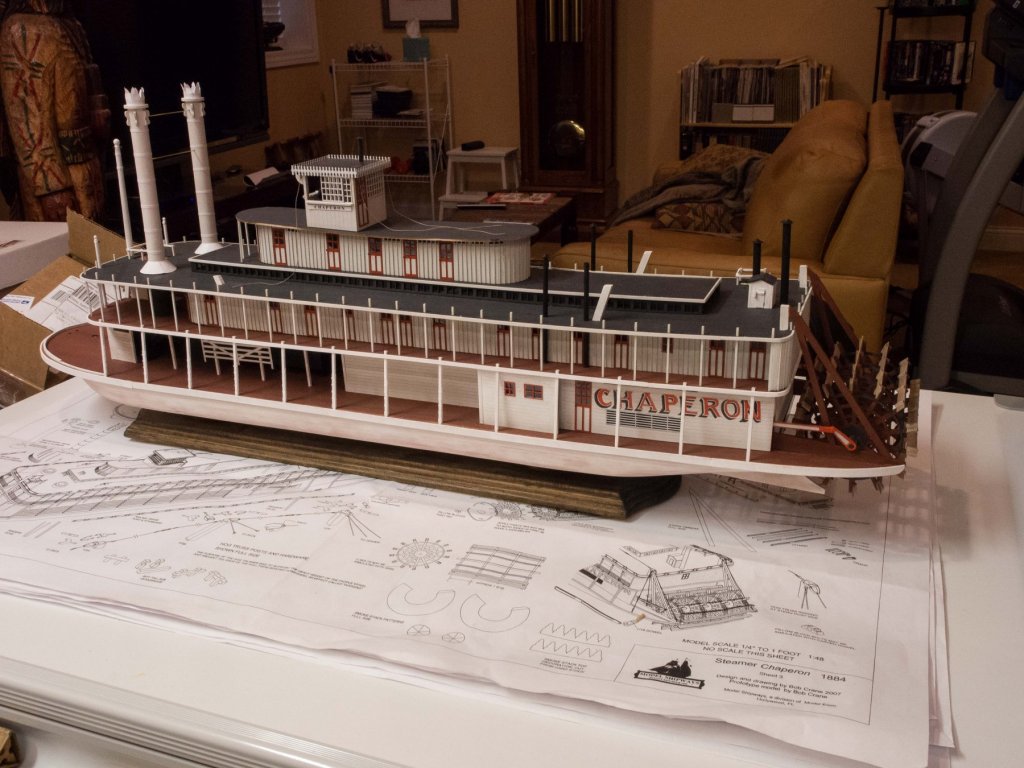
I've decided to dig into my stash and take out the oldest resident there: Model Shipways USF Confederacy. Should be a challenge for me. This is going to be a slow build, because I only have a couple of hours a day to devote to it; too many other kinds of projects going on. Since there are a very large number of both old and new build logs of the Confederacy, I'm not going to post a blow by blow description. Plan on periodic updates and asking advice for problems encountered since many have built this model. I was relieved to find the kit had the good plywood, and there was no warping despite its period of neglect. I dusted off the snazzy build board I bought primarily for this build once I determined that this big mother would fit. The building "board" is amazingly flexible once you figure out how to arrange all the bits depending on what you want to do. I just moved the model up from the base clamp once I finished placing the bulkheads, filler blocks, stern and bow fillers, and fitted balsa blocks at the bow. So, ready for faring. The board apparatus allows for rotation of the model, and some clamps (visible in the photo below) holds it rock steady together with the fore and aft clamps. I've got it turned to work on the starboard faring, and will start that soon. It looks like I will have plenty of clearance for constructing the stern pieces, and other than rotating from side to side I should be able to do all of the upper planking at least with the current positioning of the attachment points. Pretty neat. Planning pretty much an out of the box build, perhaps except replacing the cannon with Chuck's. I wish he still had replacement figurehead though. That's all for now.
- 126 replies
-
- 6
-
-
- Finished
- confederacy
- (and 1 more)
-
As I recall the rudders are missing or at least very hard to find in the instructions (no longer have). Worth investing in Kurt’s cd of his magazine series. (See further up here)
-
Going to take a break for a bit. The house is filling up with ships. I think I’ll eventually be diving to the bottom of my stack and take on the Confederacy. I need something that will take a while to do well and I’m still not anxious to take on a big rigging job. I do wish Chuck still had some of the nice figureheads....
-
Thanks to all for the likes and nice comments.
-
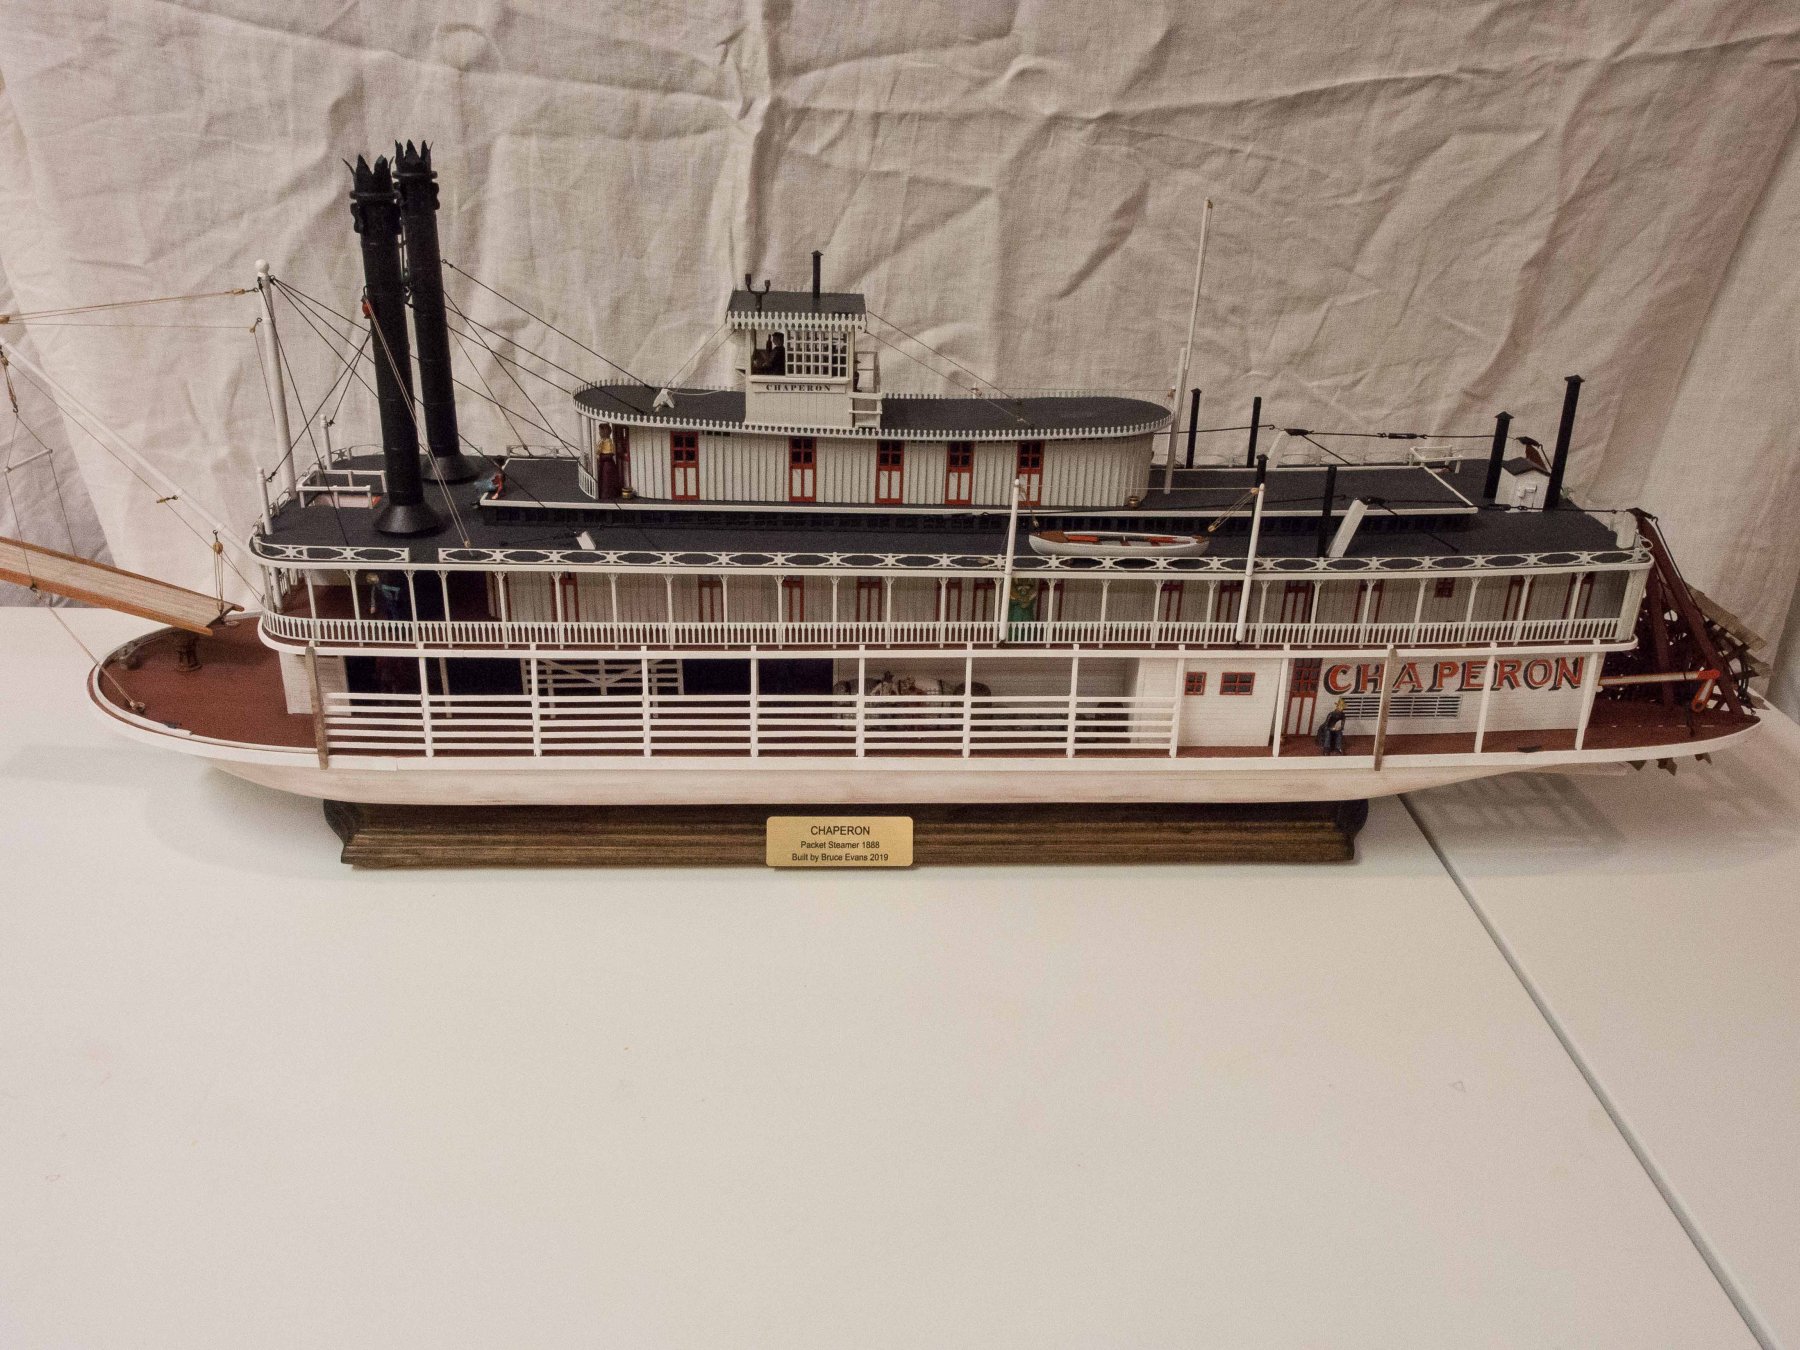
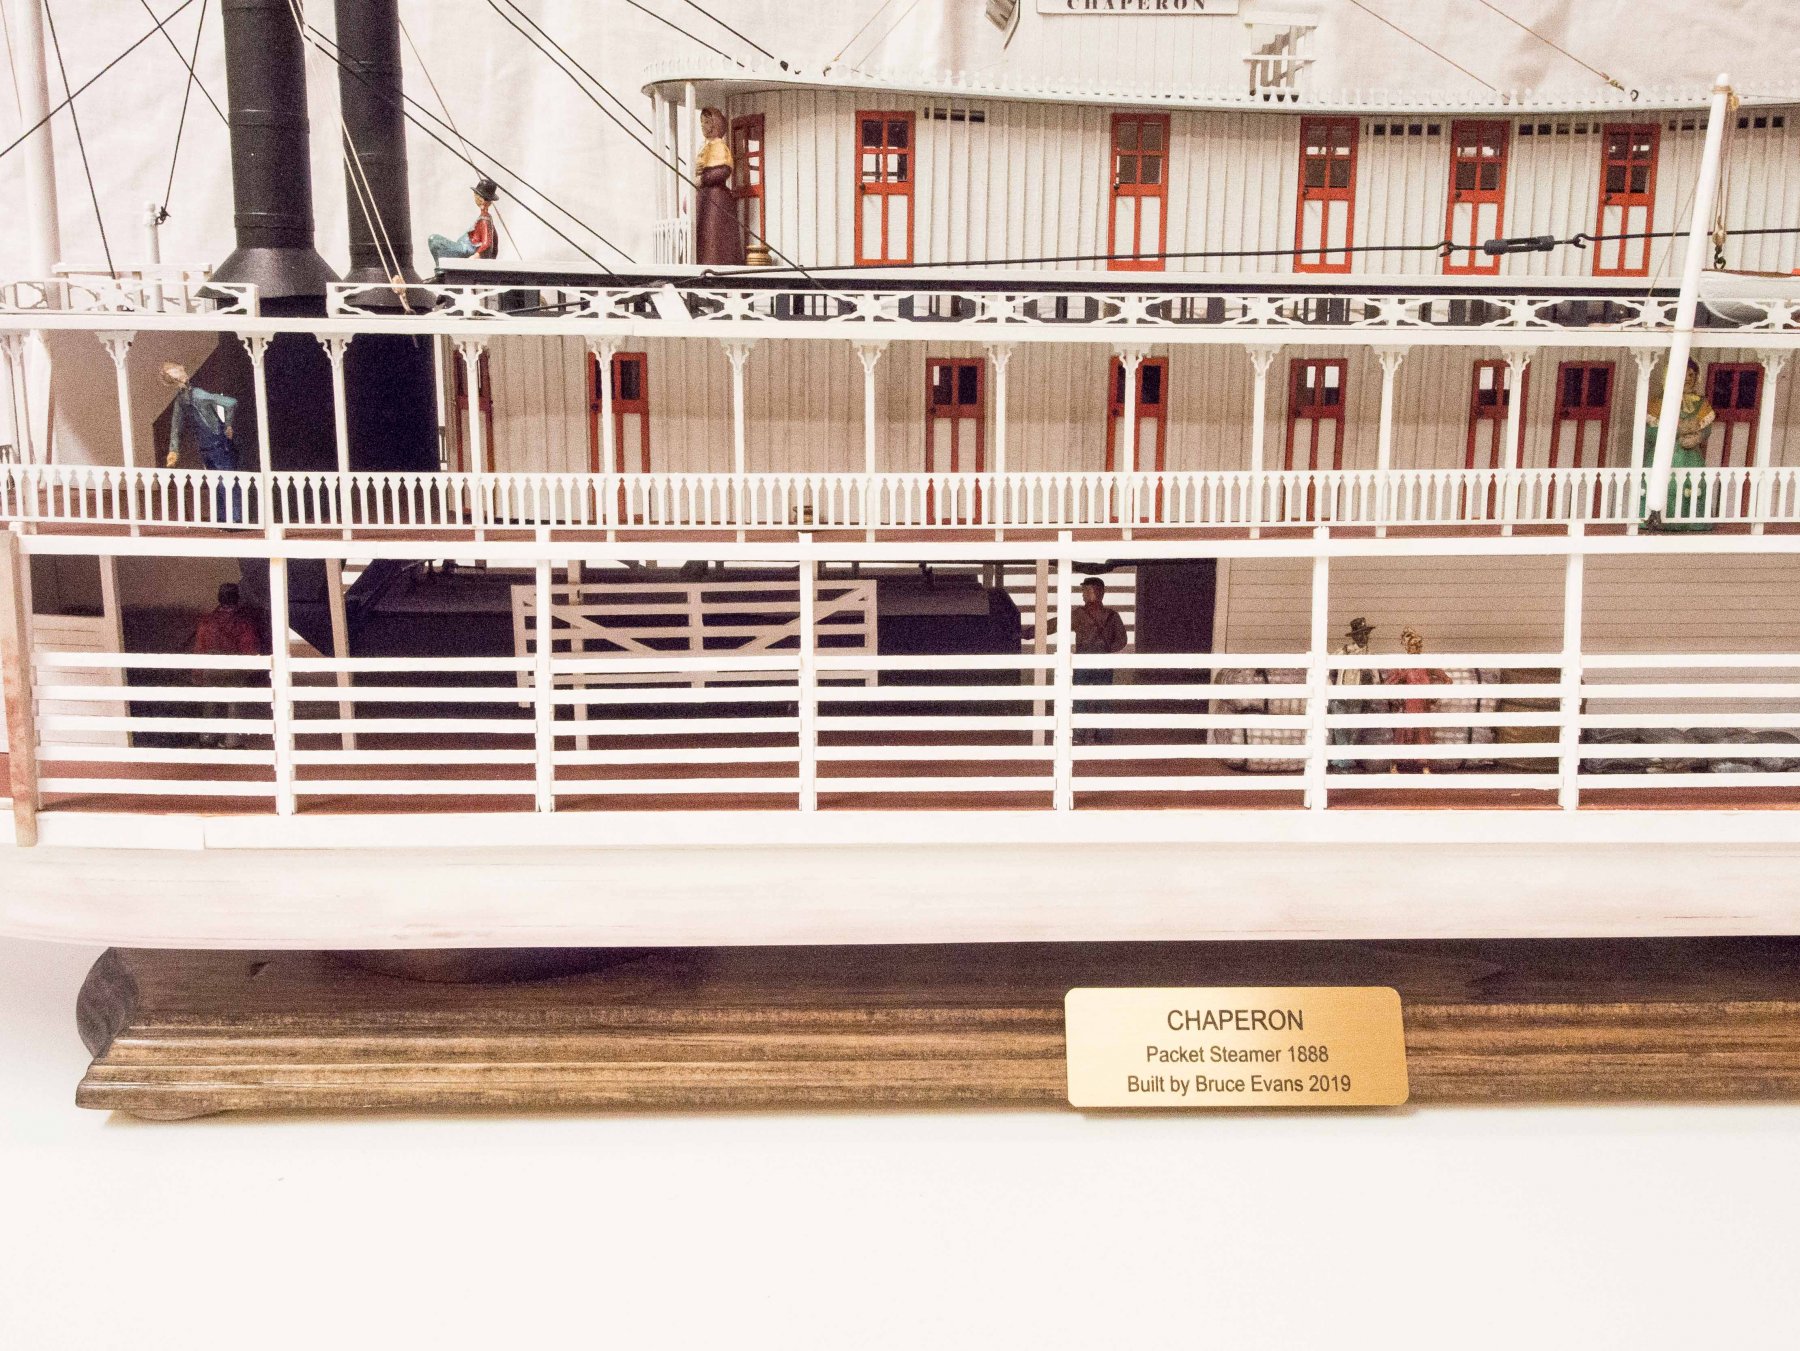
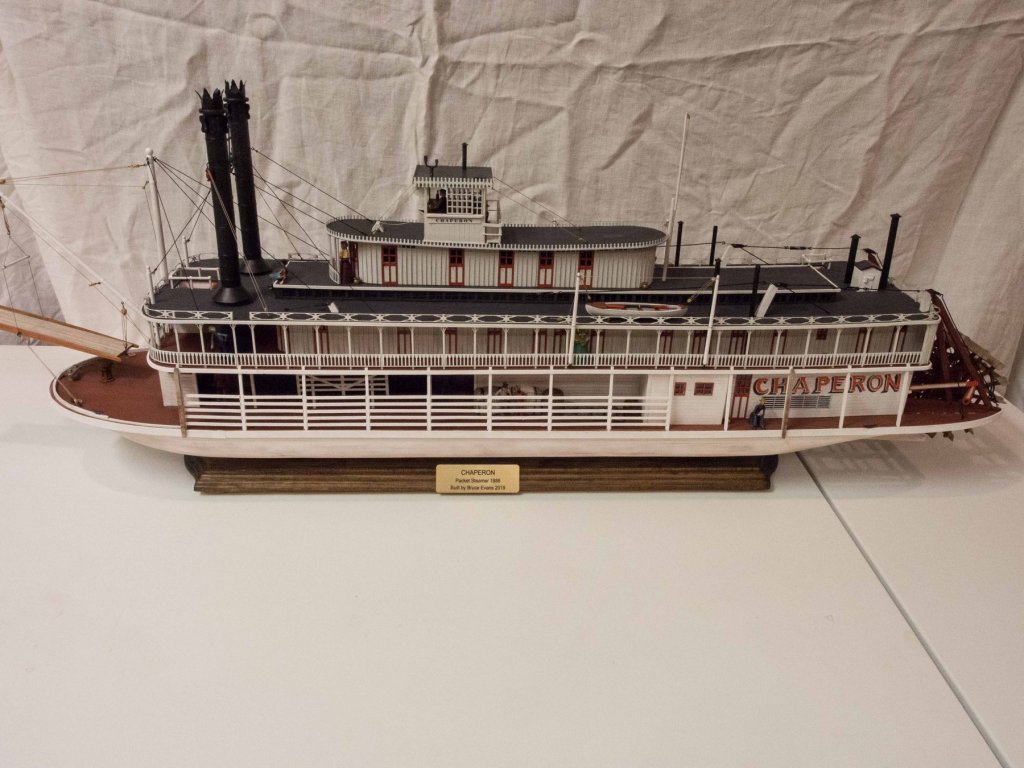
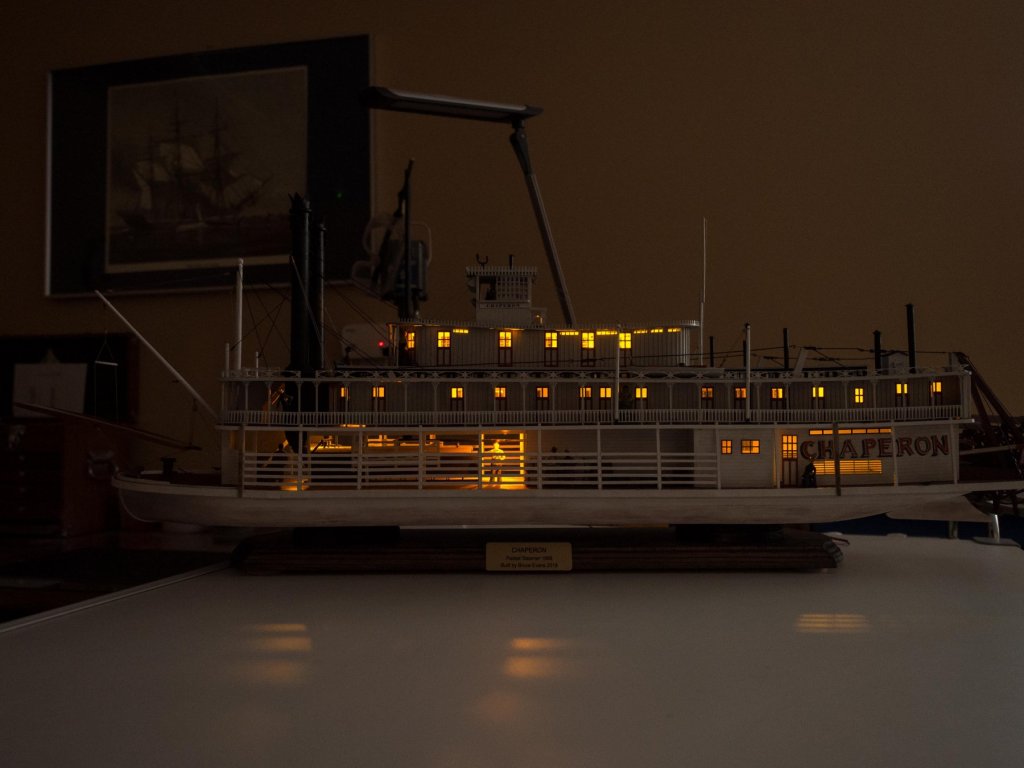
OK I think I'm done now. Maybe a bit of touch up paint but I'll wait for that till I have a case. Here are some pictures.


- 76 replies
-
- 13
-
-
- model shipways
- chaperon
- (and 1 more)
-
I like these because the small ones are very light and don’t cause any sag in the rigging.
-
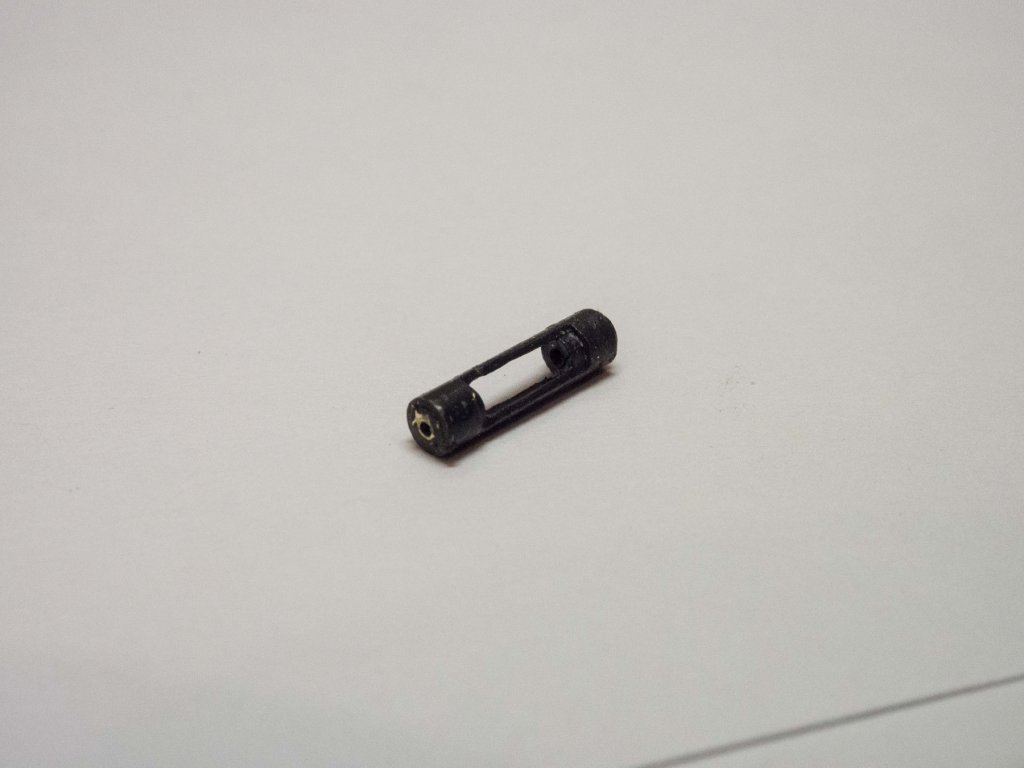
8Pair Round Colored Single Hook Clip Test Probe for Electronic Testing (amazon description)
- 76 replies
-
- 1
-
-
- model shipways
- chaperon
- (and 1 more)
-
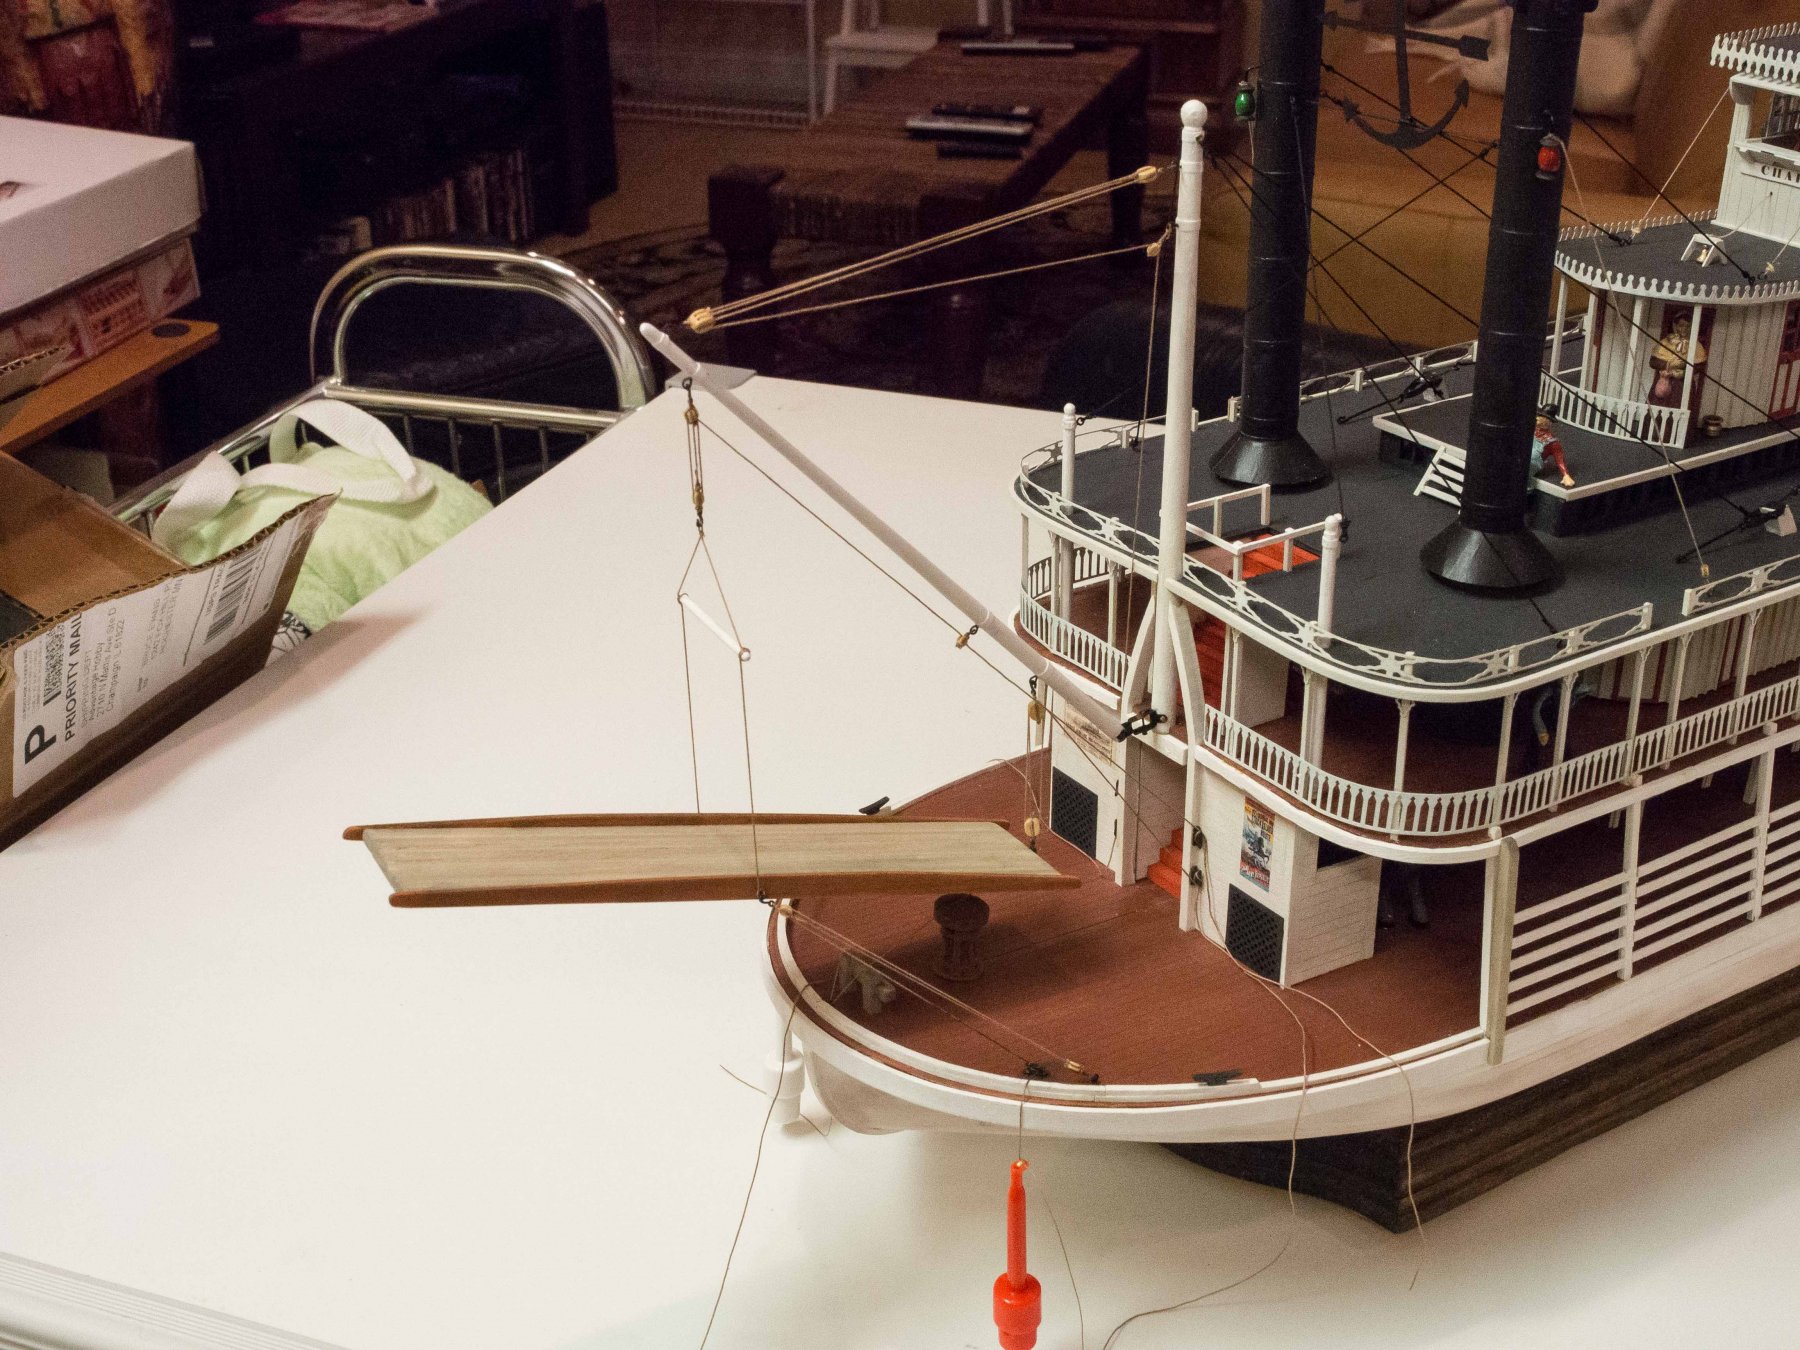
Yeah, just there to keep tension on the line while I adjusted the position of the stage by fussing with the lines in turn. They are for holding small electrical wires in contact - pushing a button in the end extrudes a small copper hook which retracts when button released. I use them to hold rigging line under tension when seizing.
-
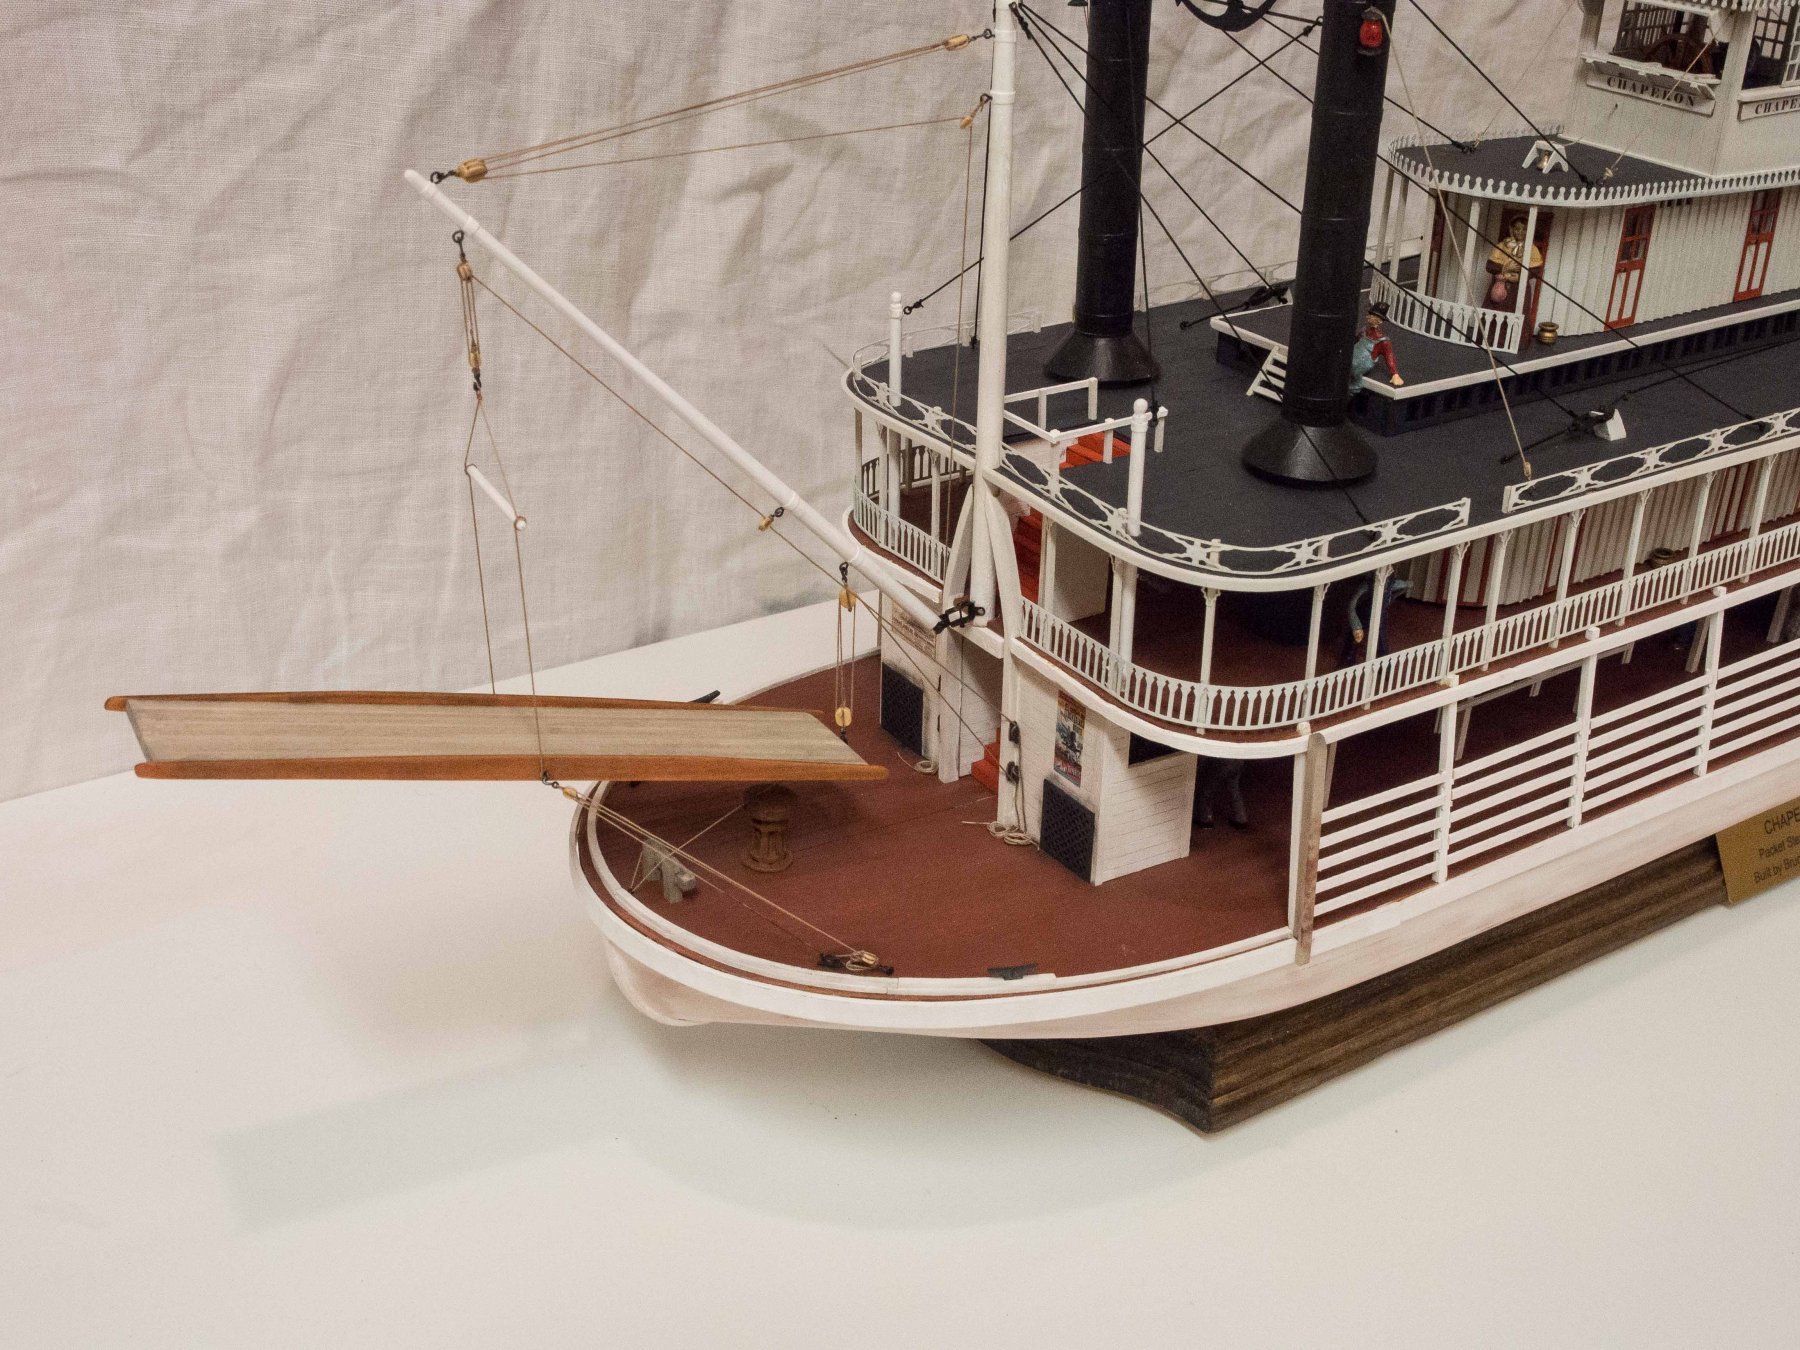
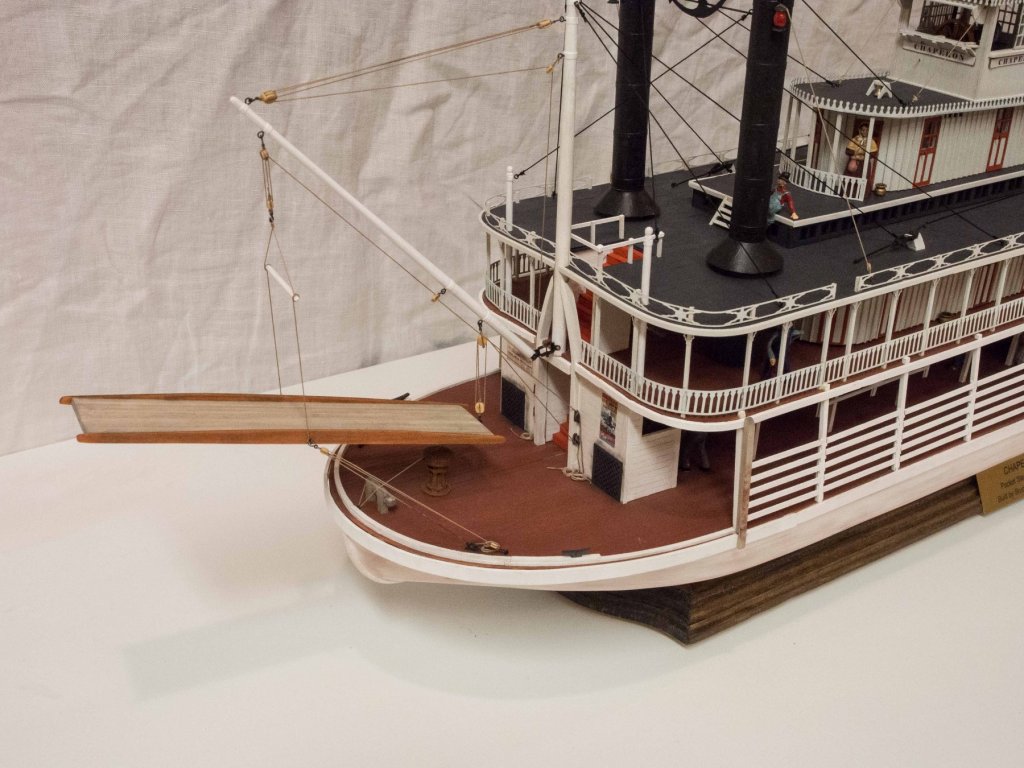
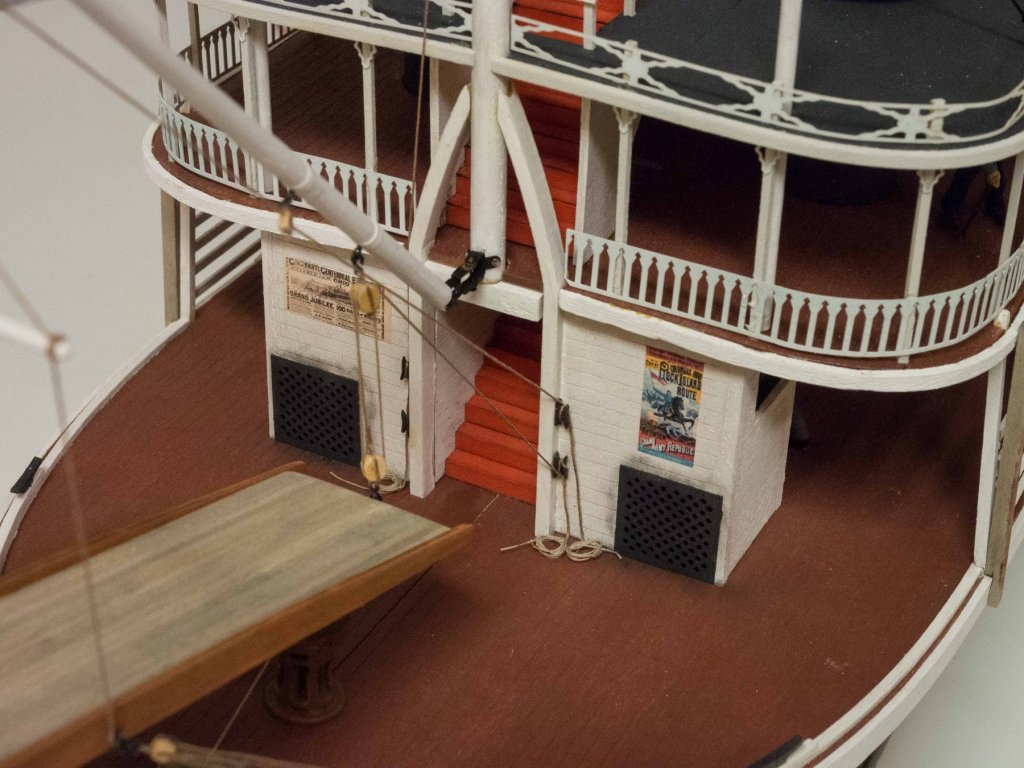
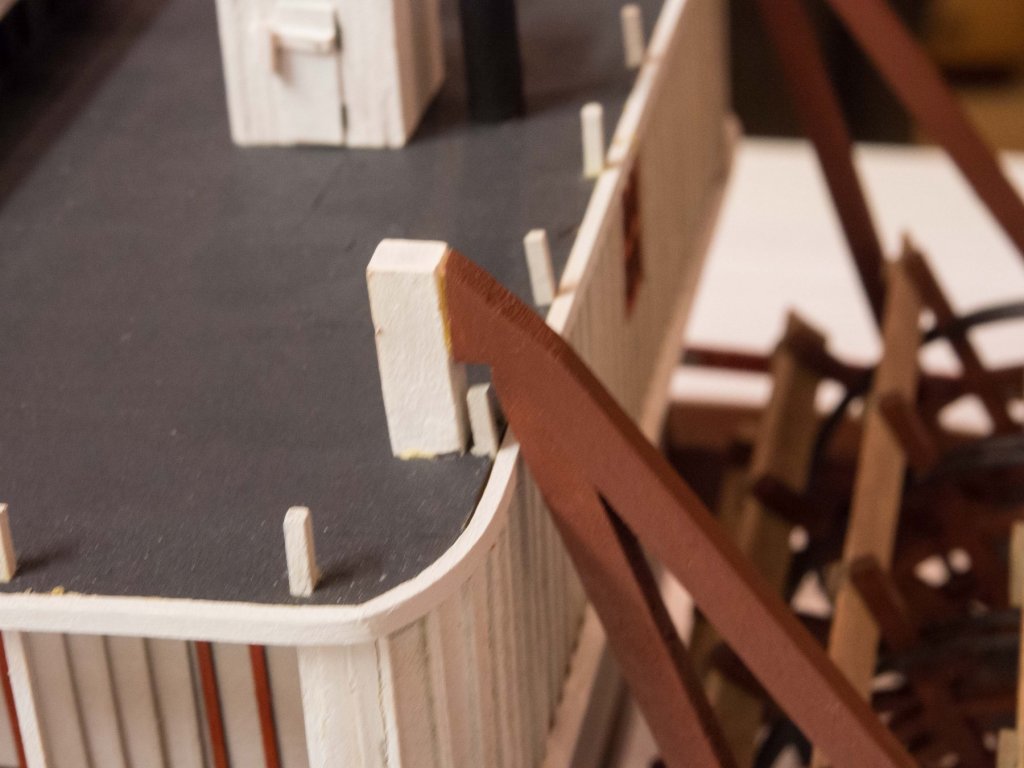
Getting real close now. With the cargo and main deck people in place I could finally add the bull rails. It really helped to paint the whole set of wood strips (24") ahead of time. Then I could measure for each interval and cut 5 pieces off with a sharp x-acto chisel and immediately place them on/in the brackets, and then glue a bunch of them in place at one time. Put together and installed all the rigging for the stage. I used Syren Co. small hooks (the older black plastic ones I had from the Morgan build) which worked really well. I used epoxy for all of the cleats - learned my lesson from previous builds when cleats popped off using CA when tension applied. Adds a overnight wait but the security is worth it. Now trim the stage rigging, make and place a bunch of rope coils for that rigging and for the 2 sets of boat boom rigging. And some touch-up painting here and there and a bit of pastels weathering in a few places. Then .... finished.


- 76 replies
-
- 8
-
-
- model shipways
- chaperon
- (and 1 more)
-
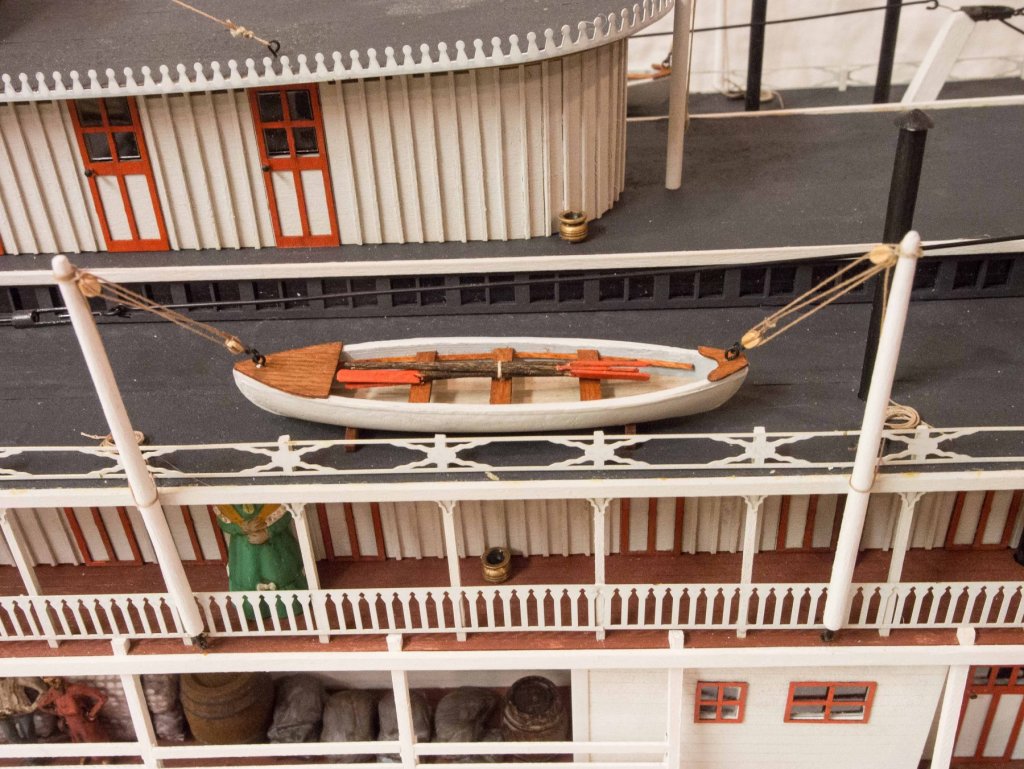
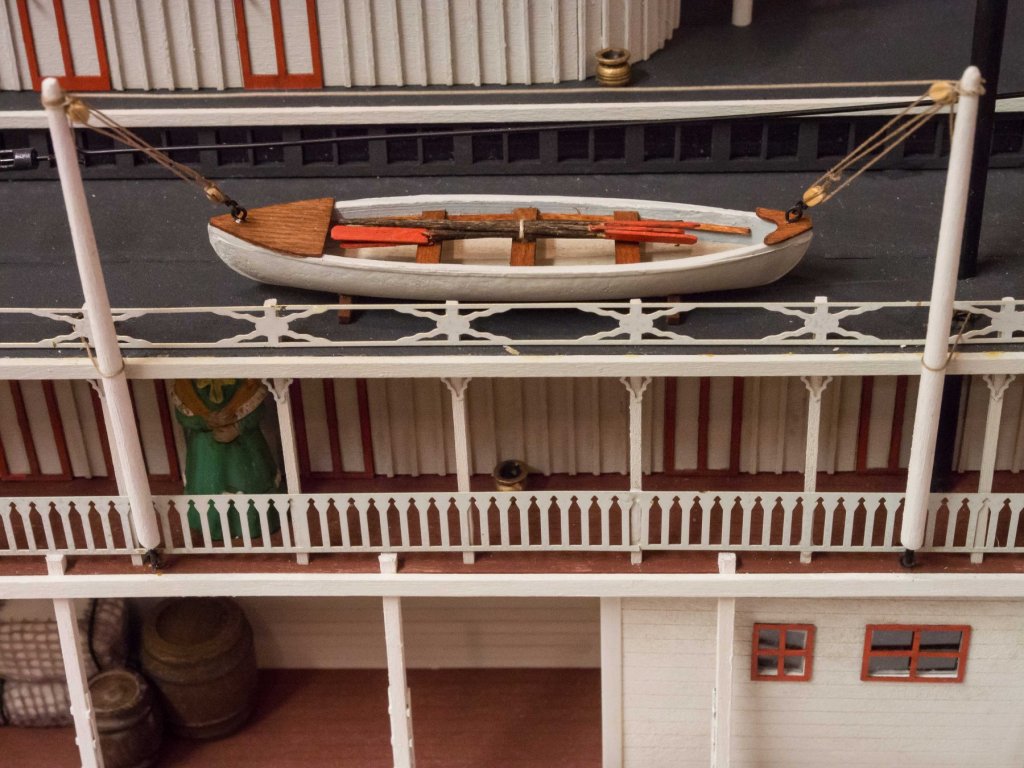
One of the boats mounted and connected to the booms.

- 76 replies
-
- 7
-
-
- model shipways
- chaperon
- (and 1 more)
-
Kurt Many thanks to you. Without your series of articles this build would not have been anywhere near what it is. I strongly suggest that anyone undertaking building the MS Chaperon kit have copies of those articles in hand. The suggestion of scratch building turnbuckles rather than using the supplied flat brass pieces alone added significantly to the appearance. Gluing card to the inside of the cabin walls that are bent 90 degree curves was truly a lifesaver. To say nothing of the modifications to the pilot house and the boiler that add greatly to the realism. Thank you again. By the way, did the end part of Part 2 get cut off in the publication?
- 76 replies
-
- 3
-
-
- model shipways
- chaperon
- (and 1 more)
-
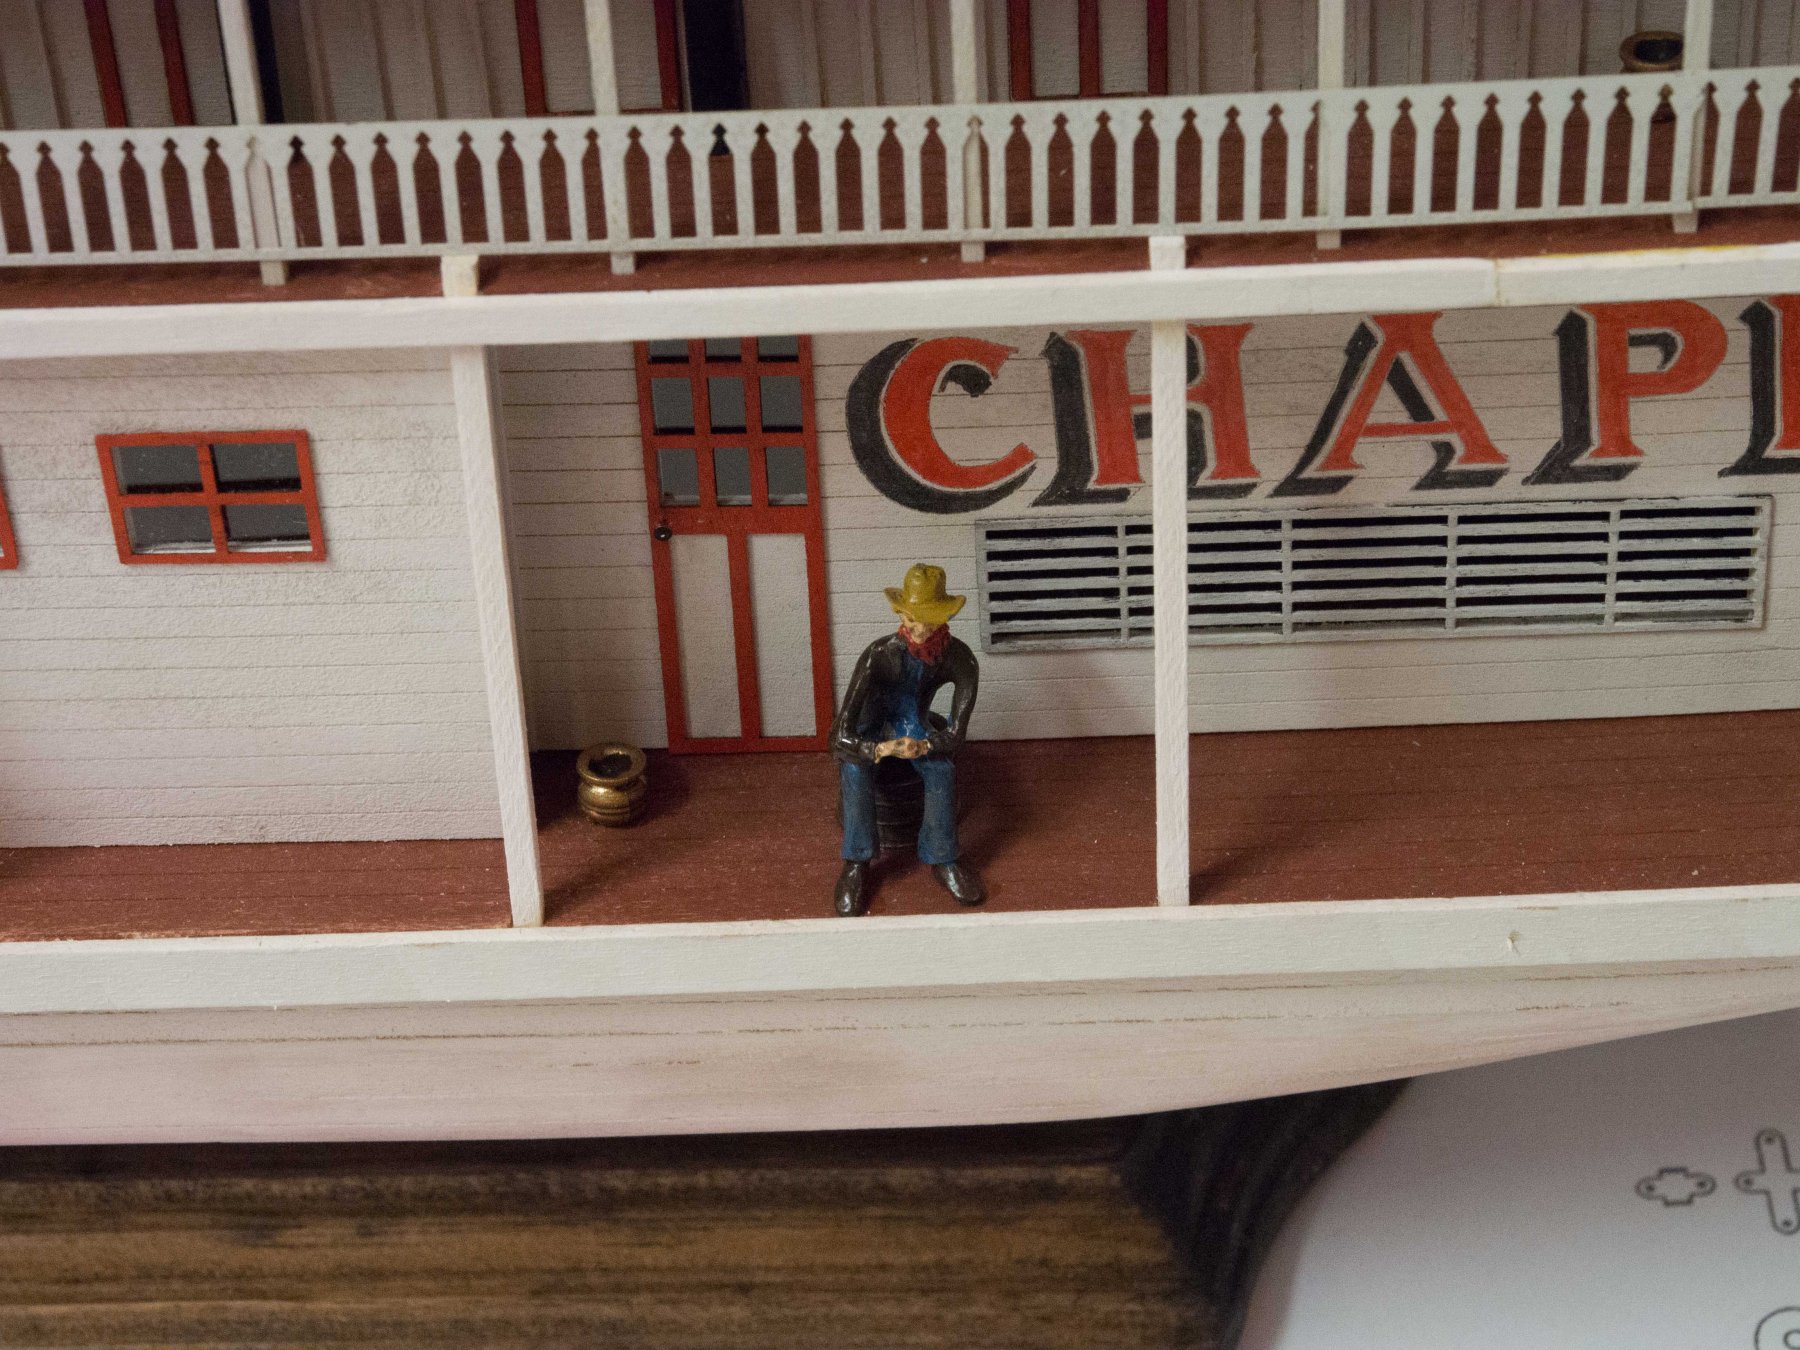
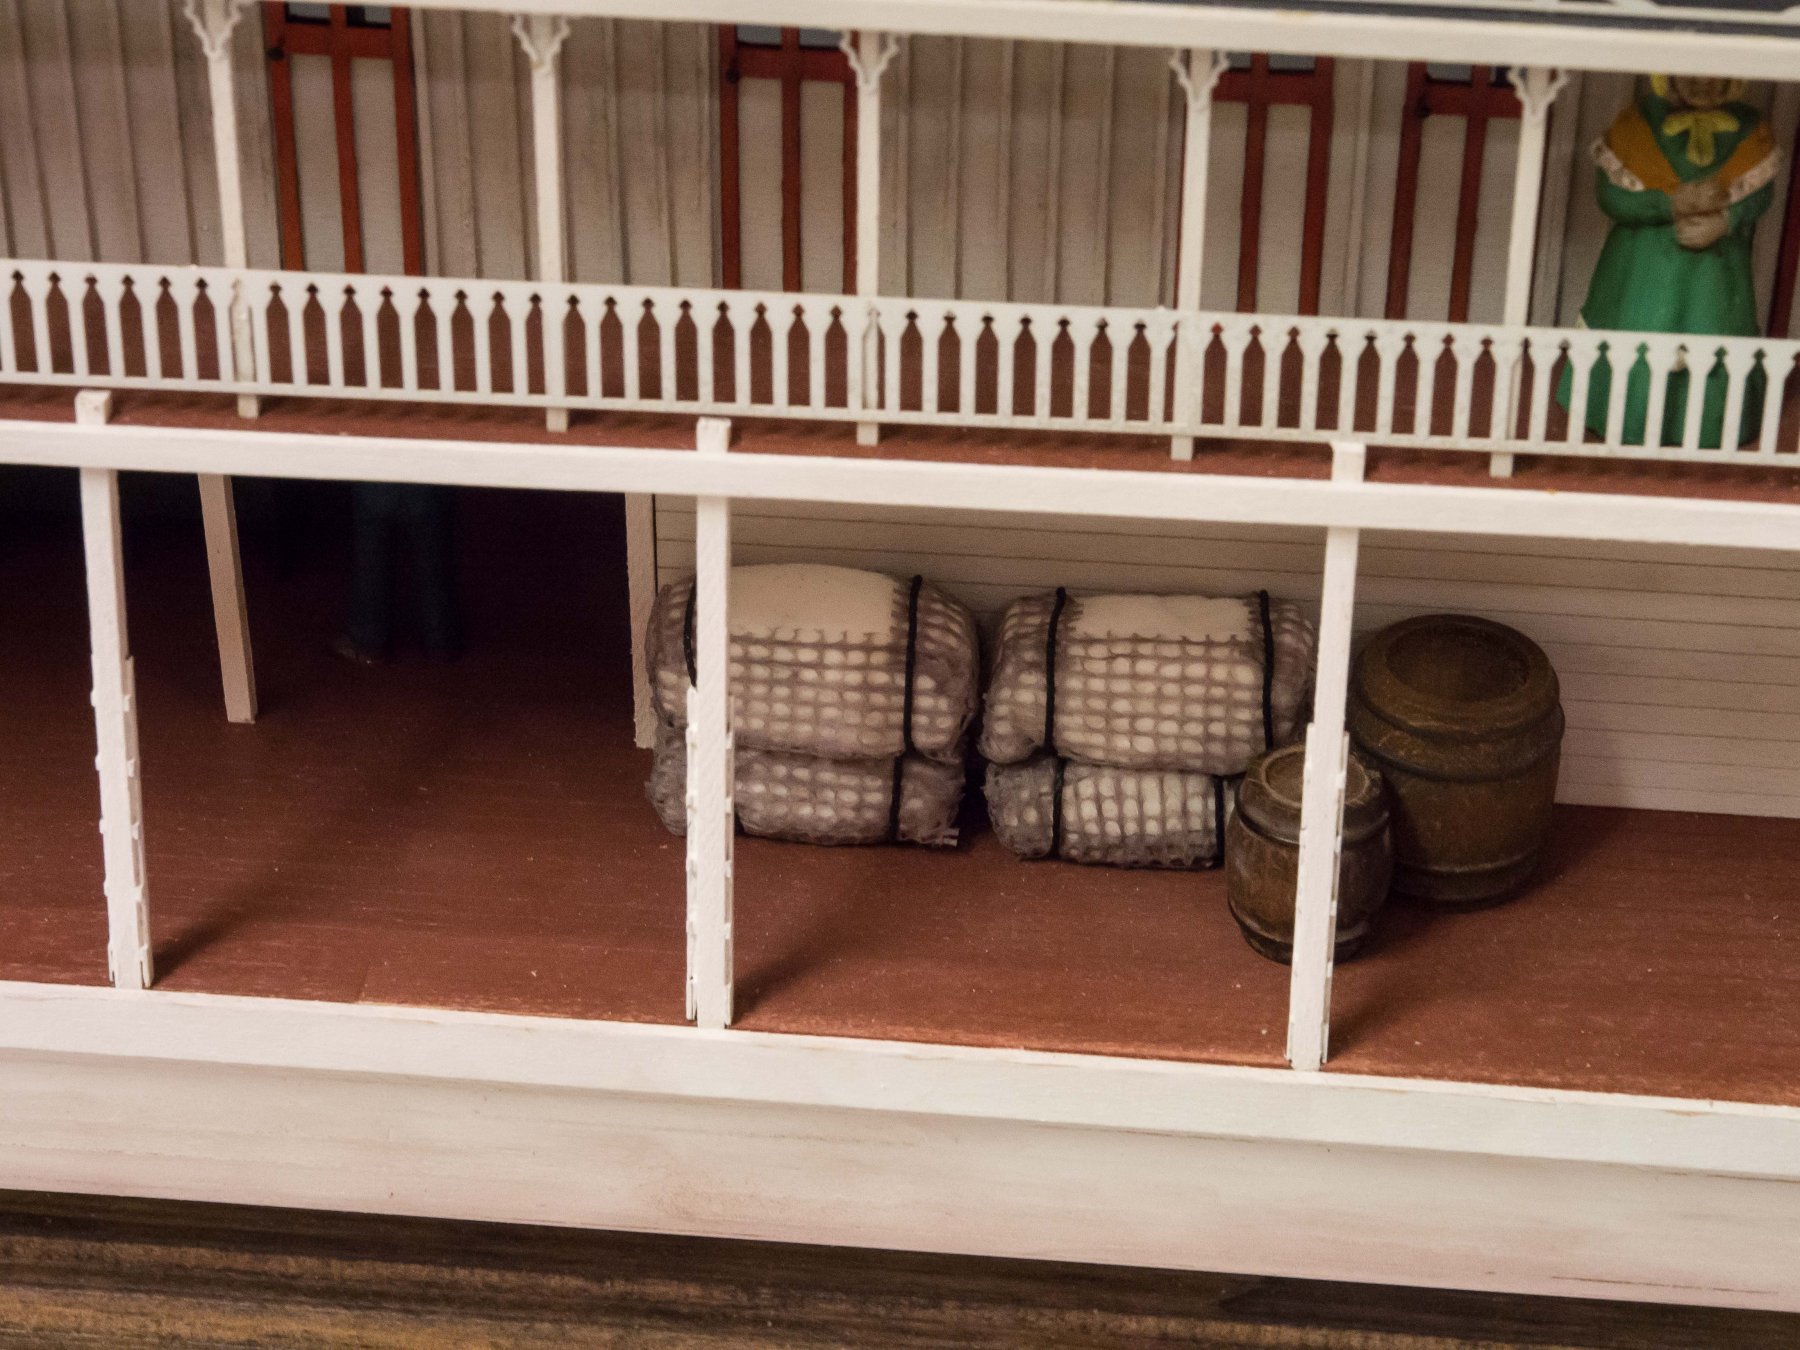
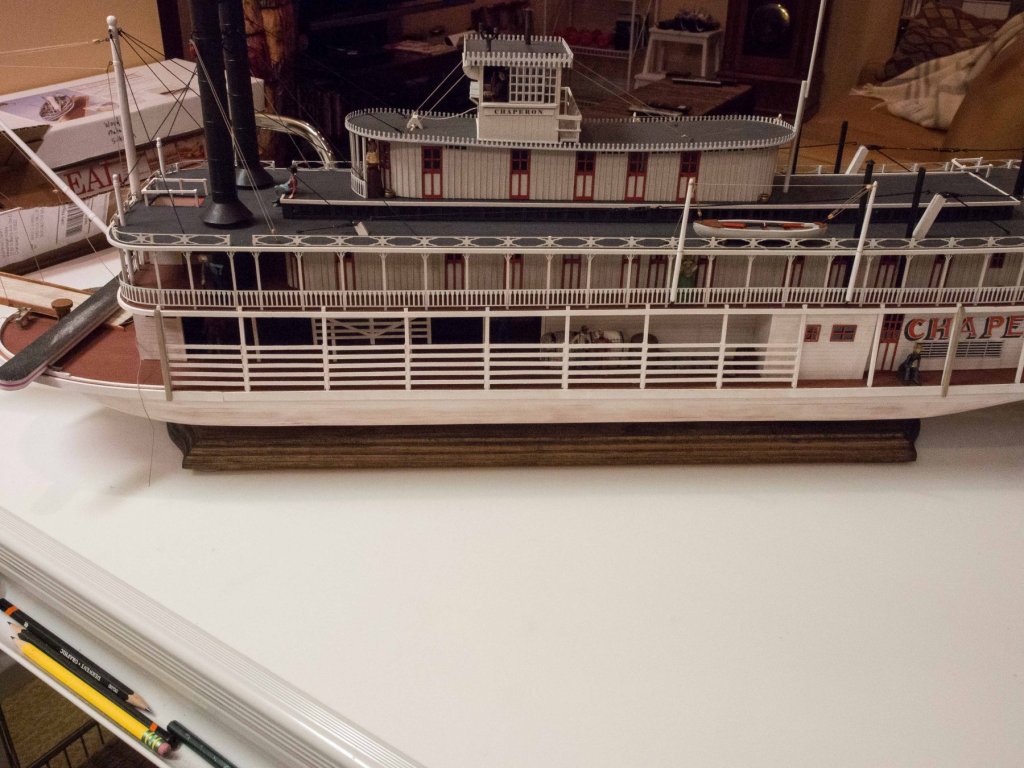
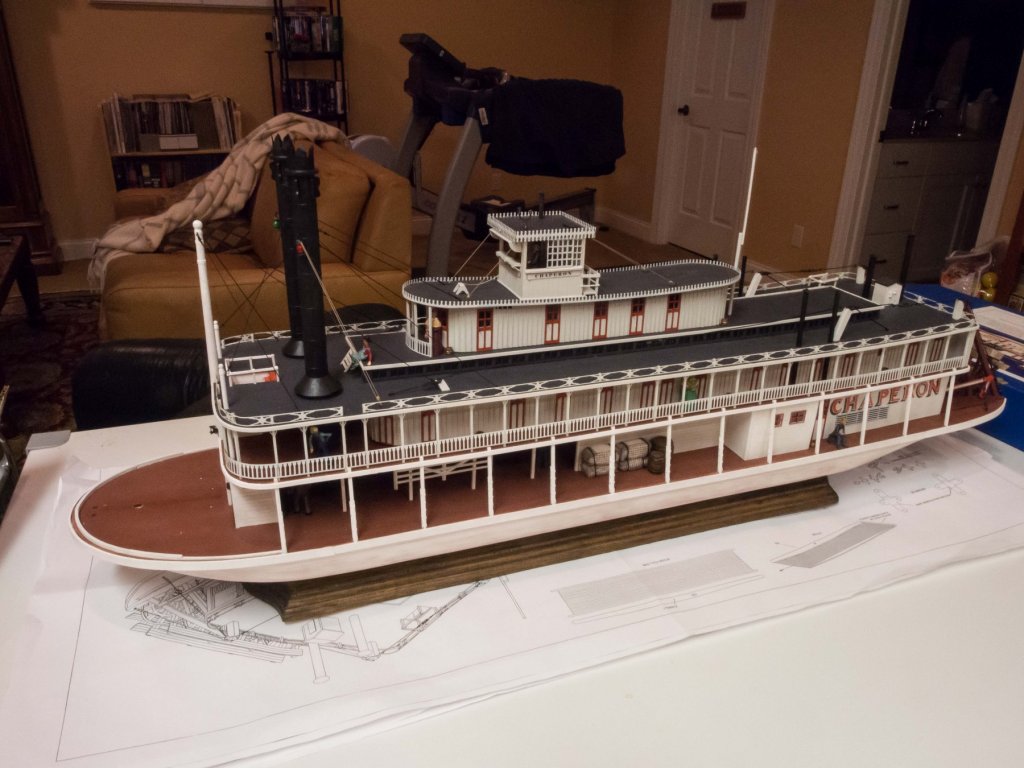
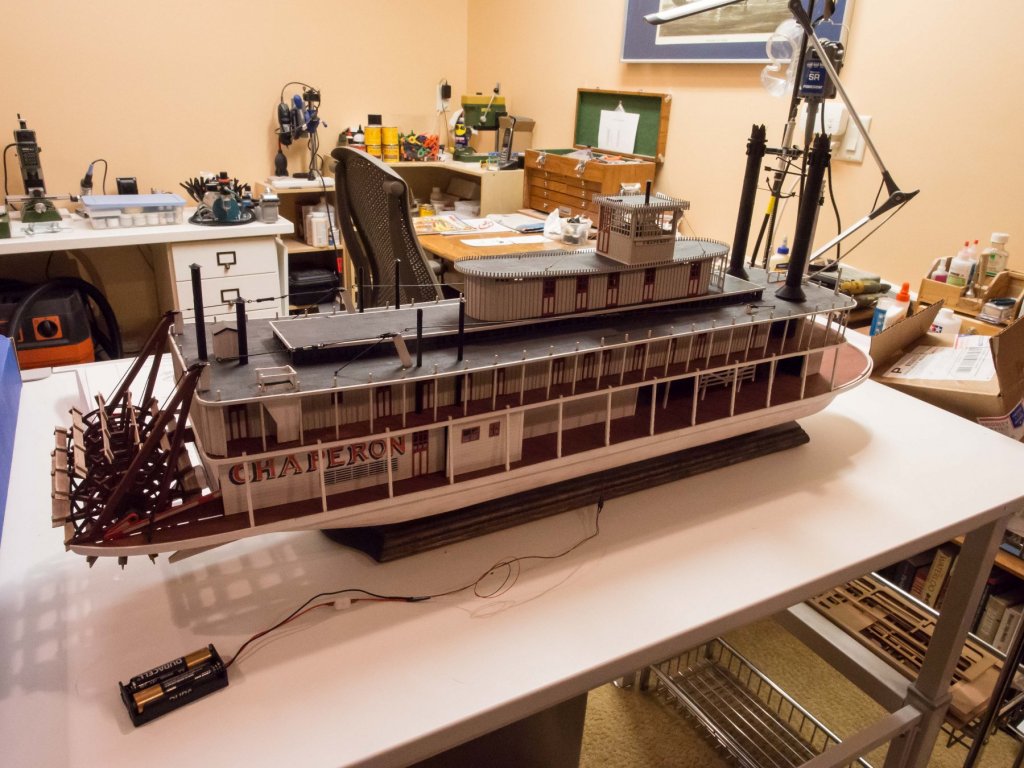
Moving along... Finished the rigging (except for the boats). Got the railings all in place. I had a lot of trouble with the brass roof decorations for the pilot house and Texas. Decided to try a different brand of CA (Bob Smith Industries) and it worked much better - no problem with placing and gluing the railings which I had been dreading. Here's some pictures of current status. Most of the people are in place. Awaiting some cast seed/grain bags to fill out the cargo areas, after which I'll place the main deck rails. Other than that, the boats and their booms and rigging and the foredeck stuff remain.


- 76 replies
-
- 9
-
-
- model shipways
- chaperon
- (and 1 more)
-
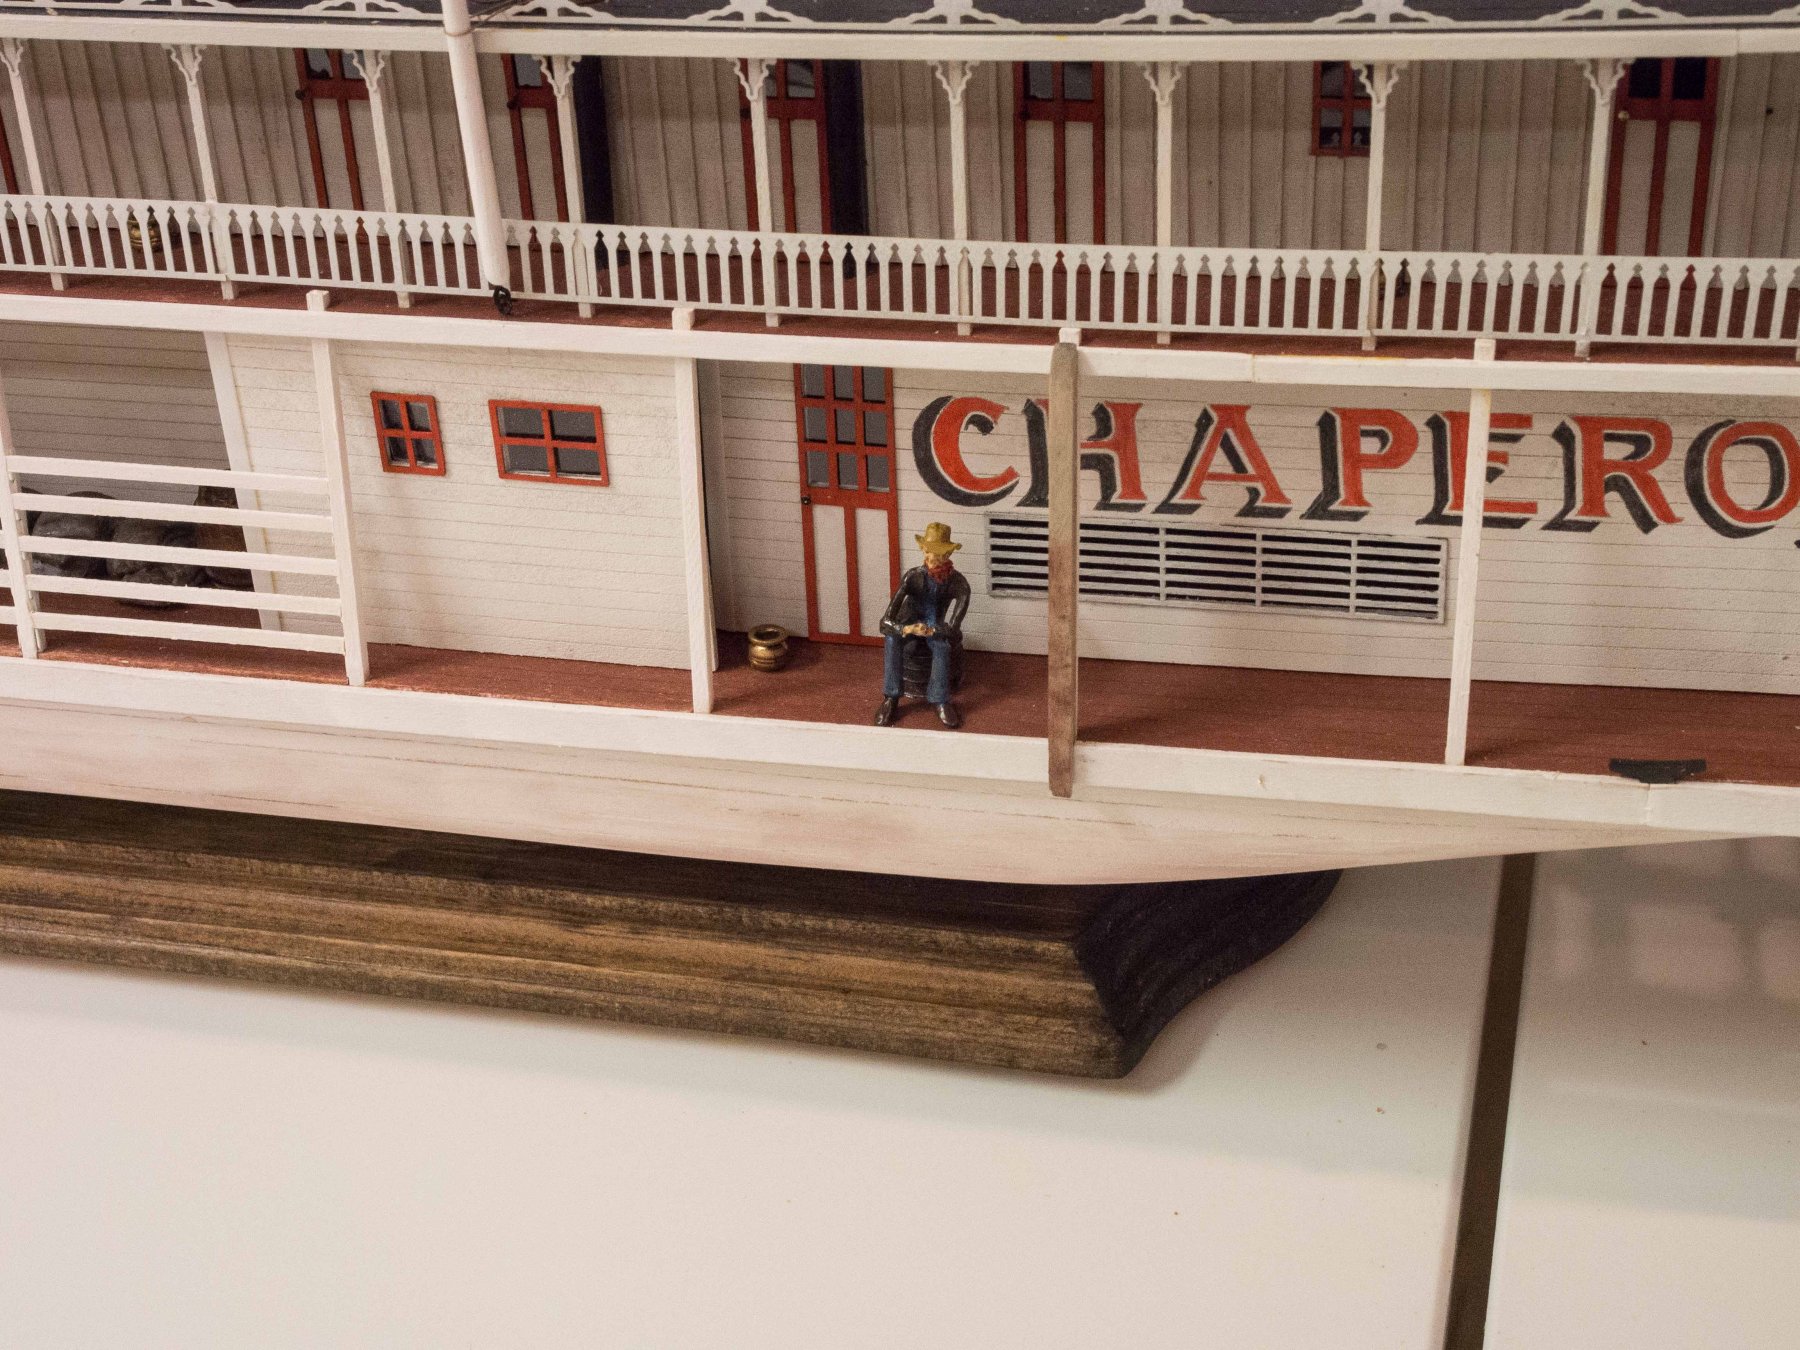
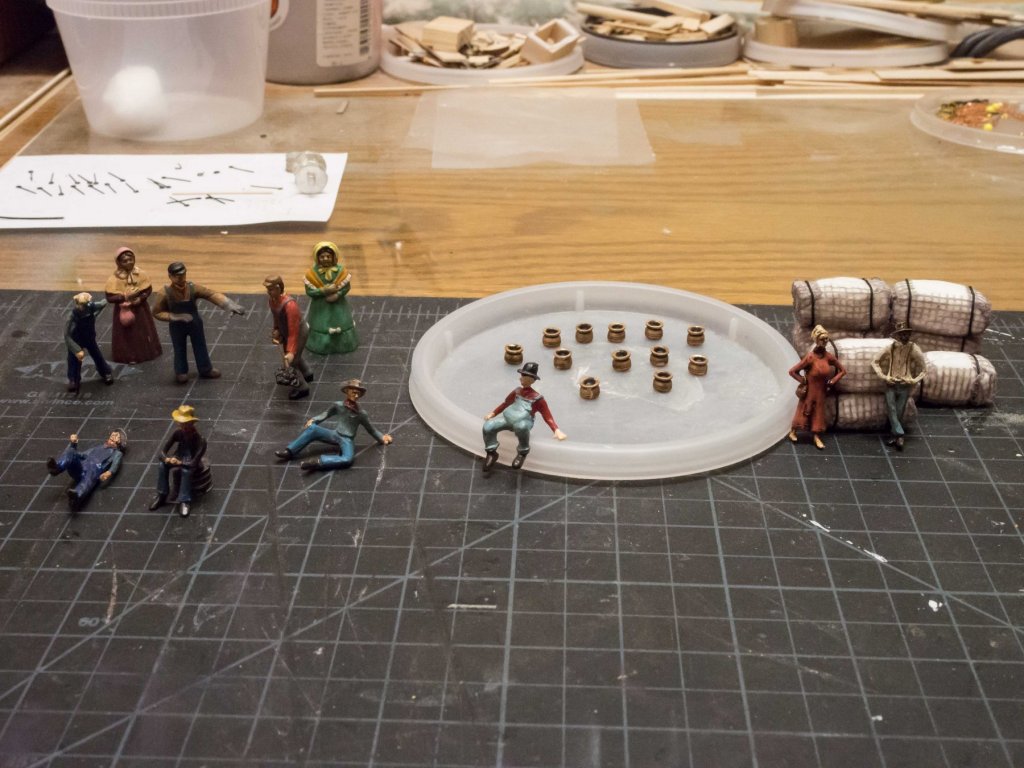
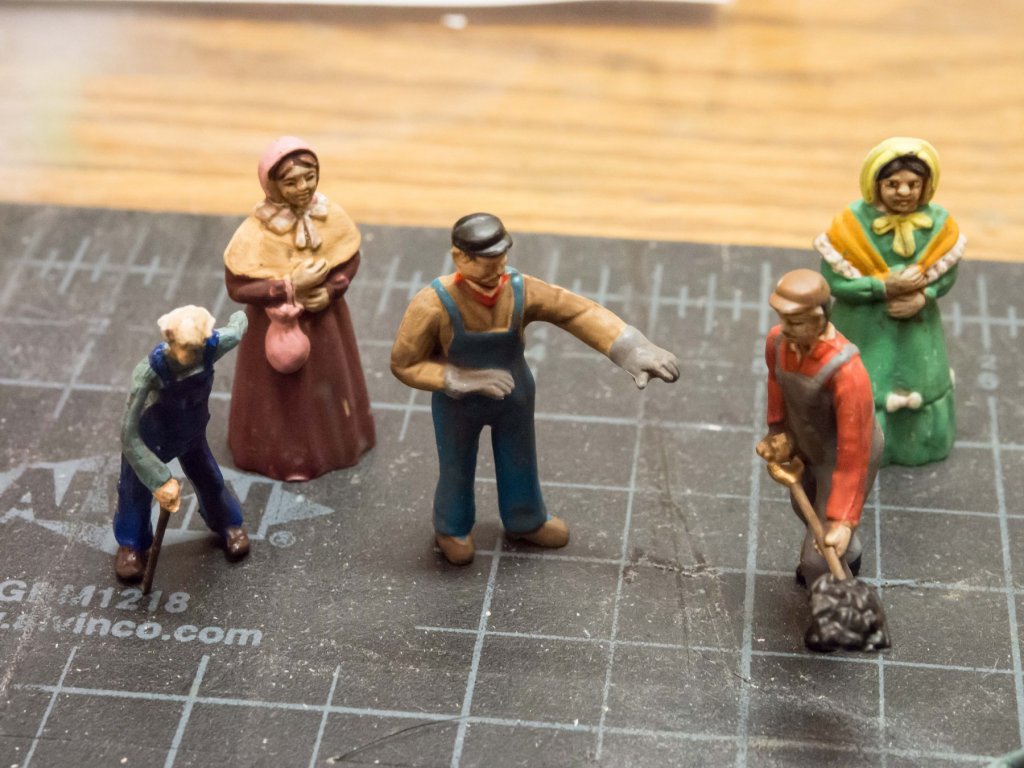
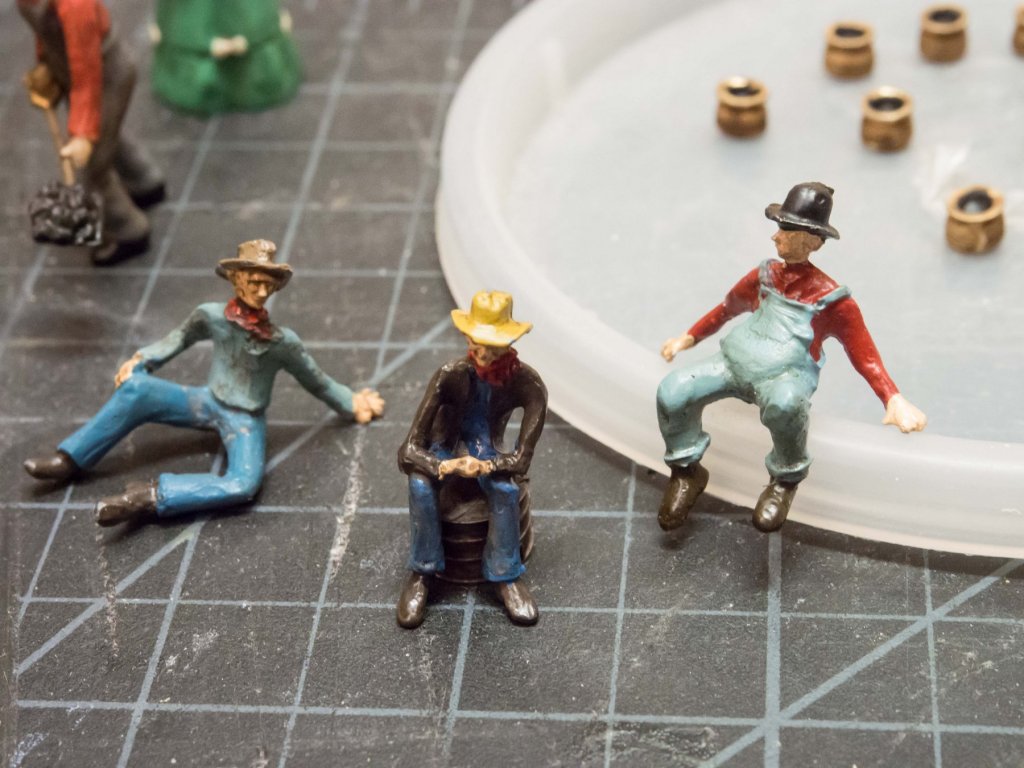
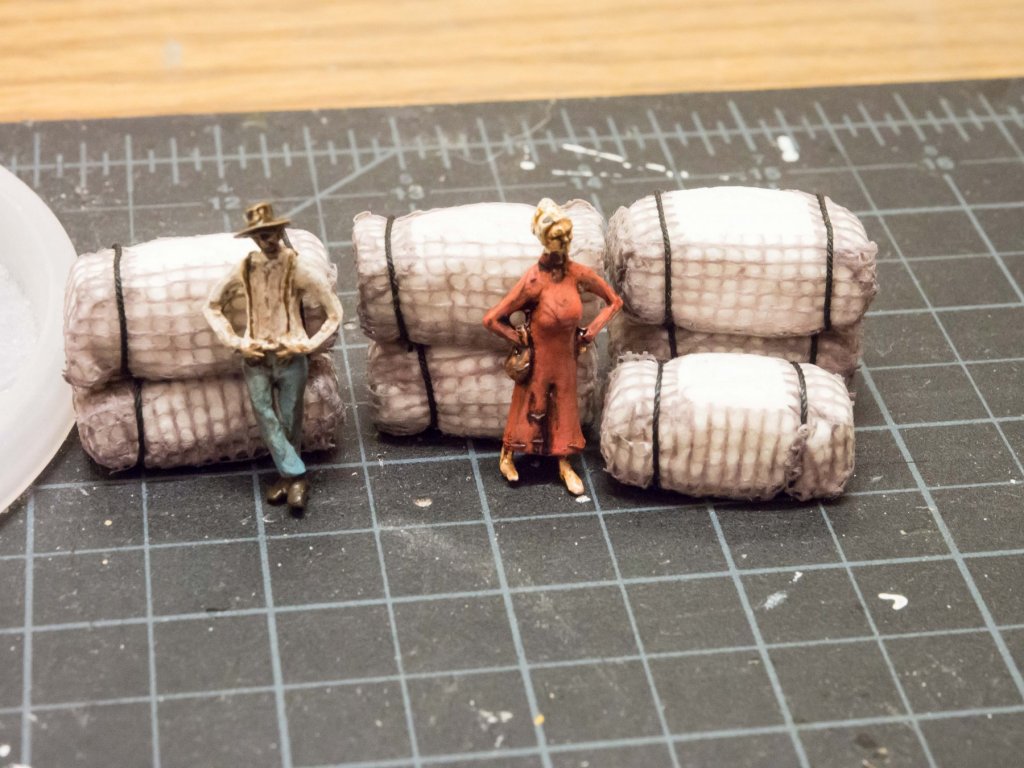
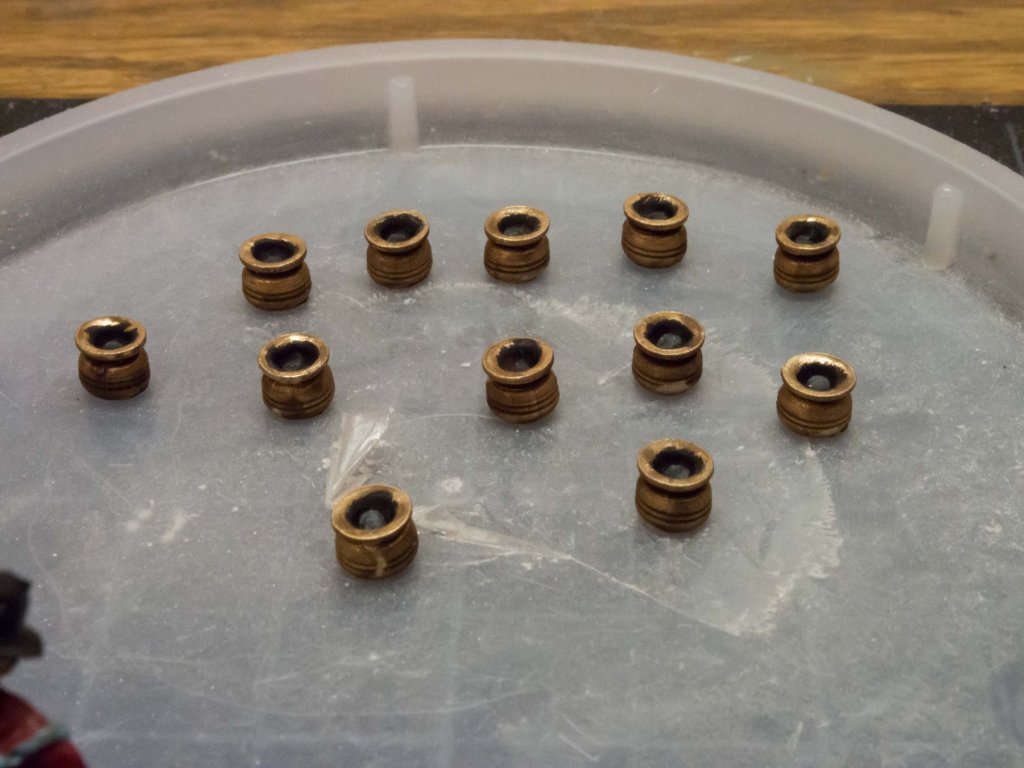
Took a break and made up some cotton bales for cargo. Painted my cuspidors to look like brass. Touched up some of the people I've been collecting for the voyage. I have a few barrels left over from previous builds, and have some white metal grain/seed sacks coming. I think that will complete the cargo loaded onto the main deck.
- 76 replies
-
- 4
-
-
- model shipways
- chaperon
- (and 1 more)
-
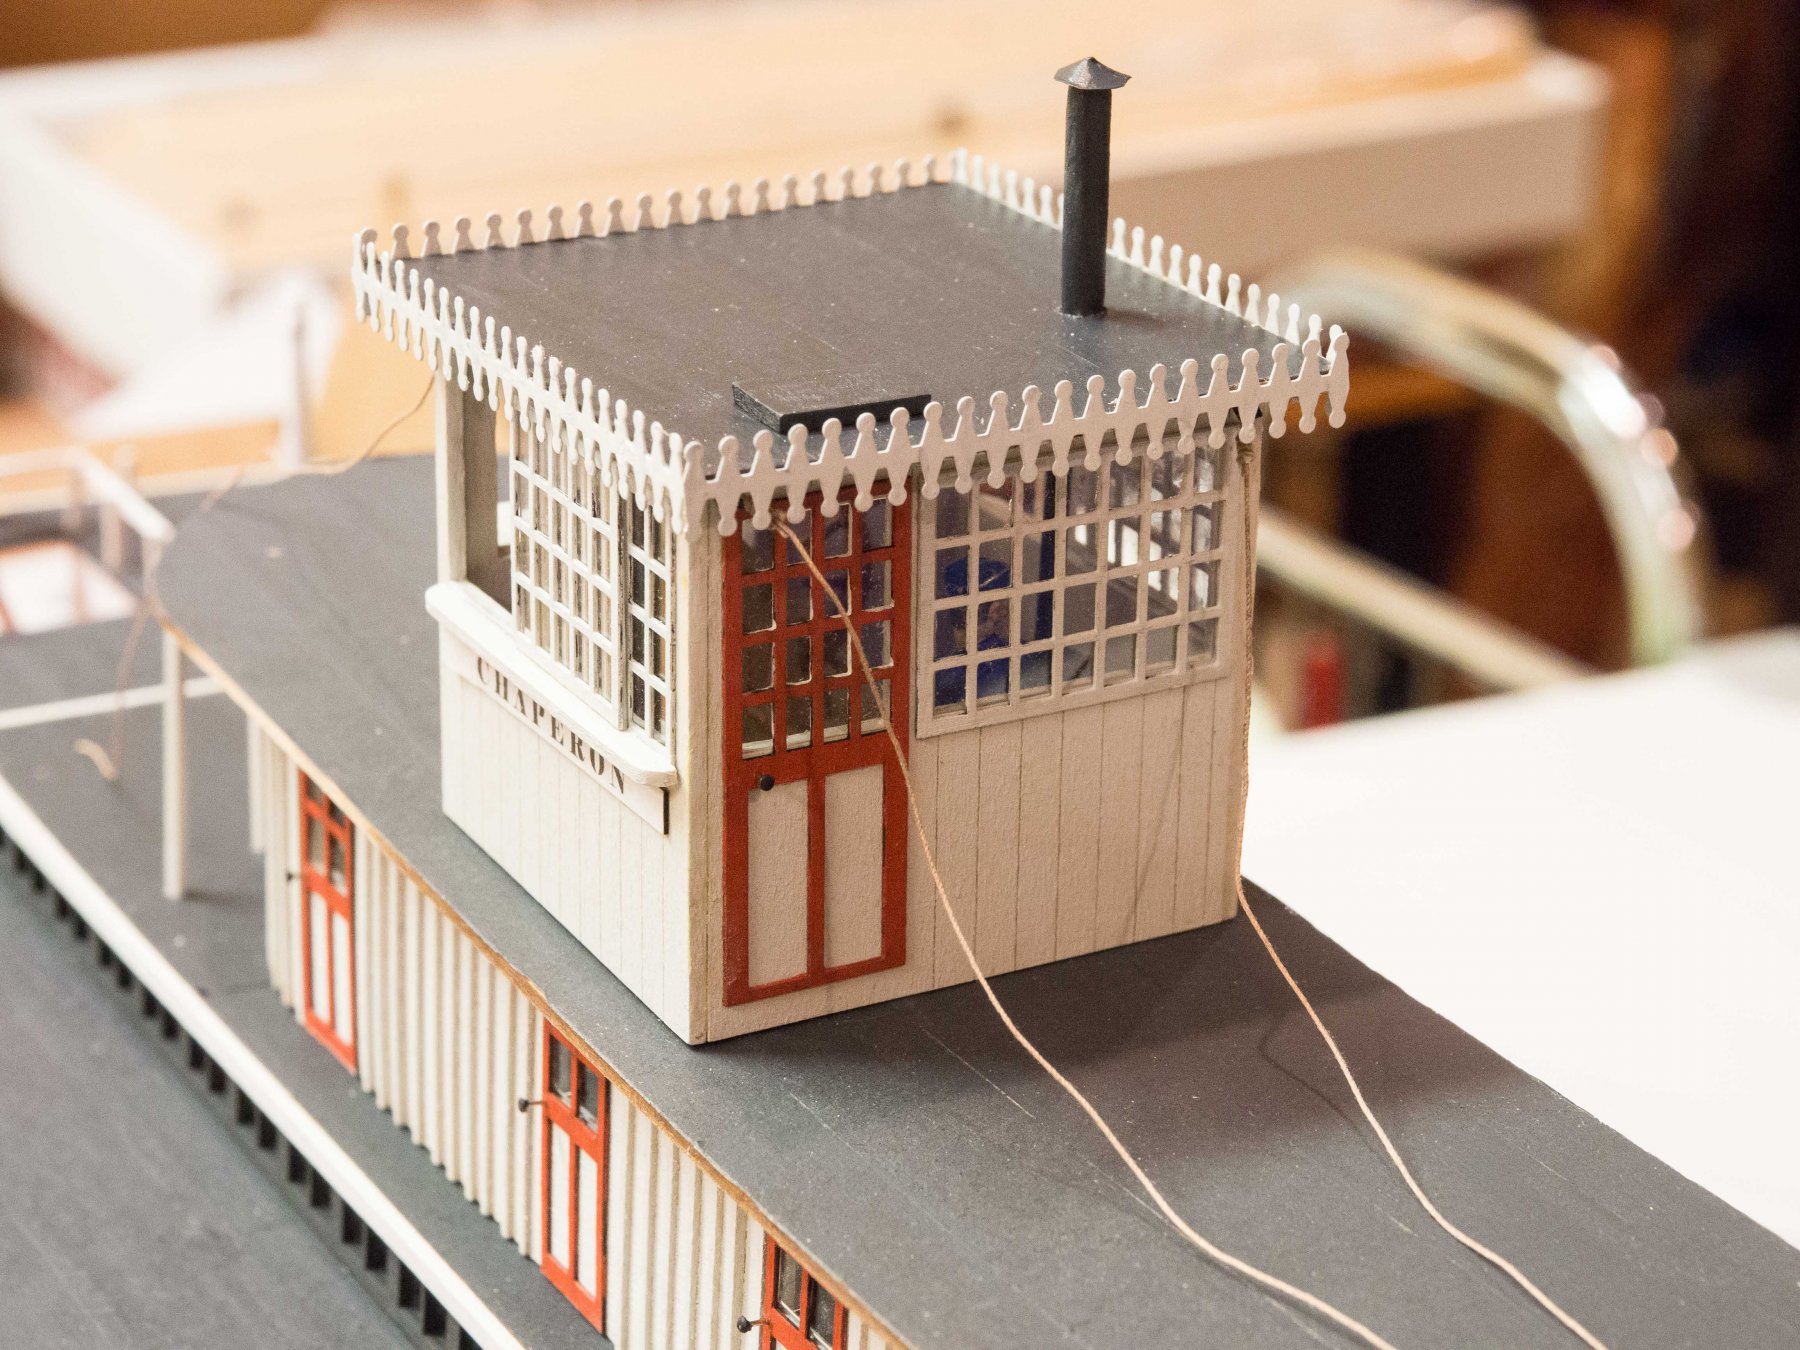
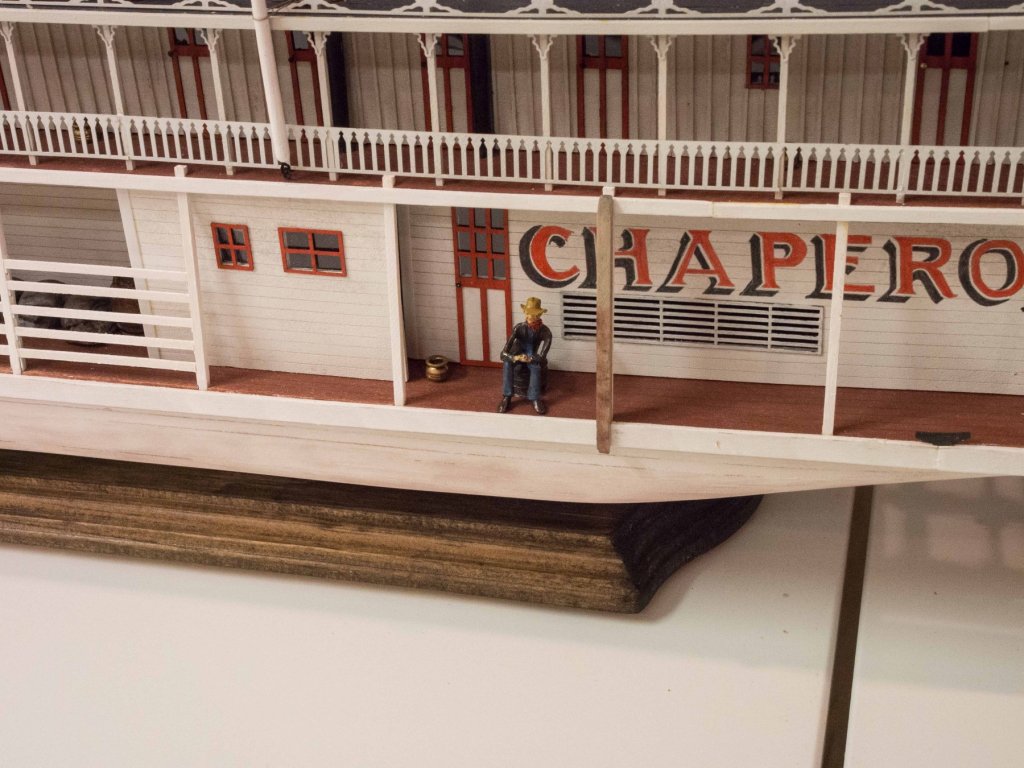
Unless we assume the door swings IN! will leave as is.
-
My wife just pointed out that if I don’t move the pilot house door handle to the other side no one will be able to get in or out due to the narrowness of the landing ...
- 76 replies
-
- 1
-
-
- model shipways
- chaperon
- (and 1 more)
-
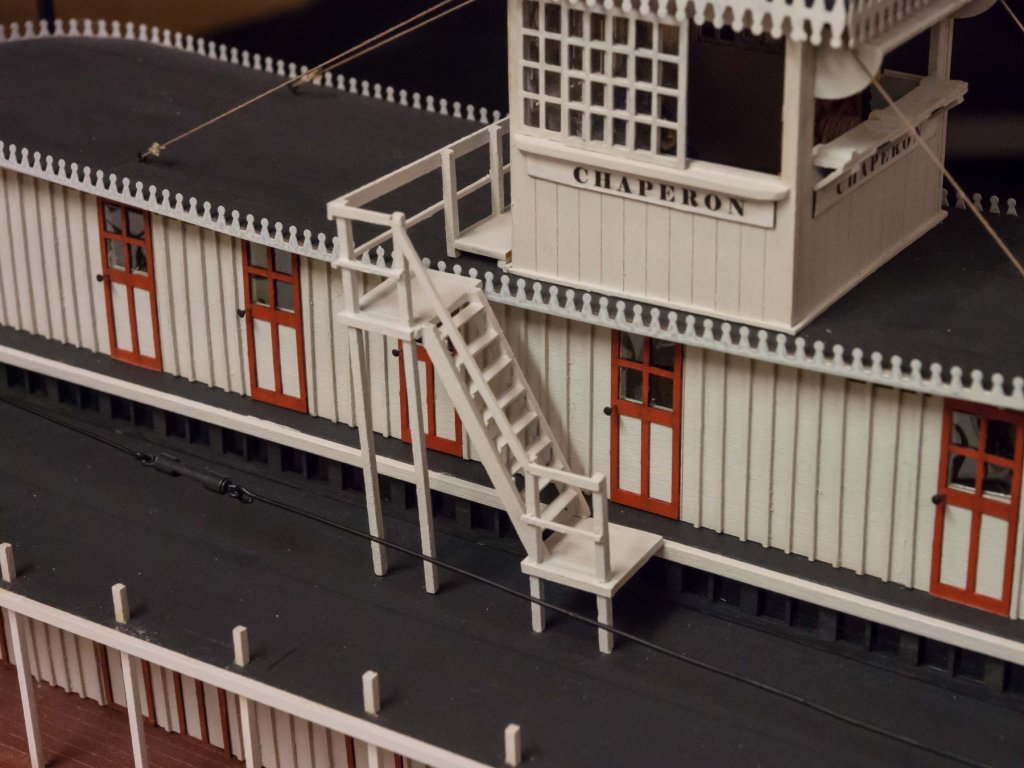
Finished and glued in place the pilot house staircase. This was fiddly - getting the alignment of the staircase and the pilot house landing correct - and many of the glue spots were small so really quite fragile. Took 3 days to give the glue (used Tite-Bond carpenter's glue to allow adjustment during the setup time) time to securely set before advancing to the next step and then finally painting. I was glad to finally get it glued securely in place. Next will be the bits and bobs that go on the texas deck as well as placing all of the eyebolts on that deck prior to putting the rail in place.
- 76 replies
-
- 6
-
-
- model shipways
- chaperon
- (and 1 more)
-
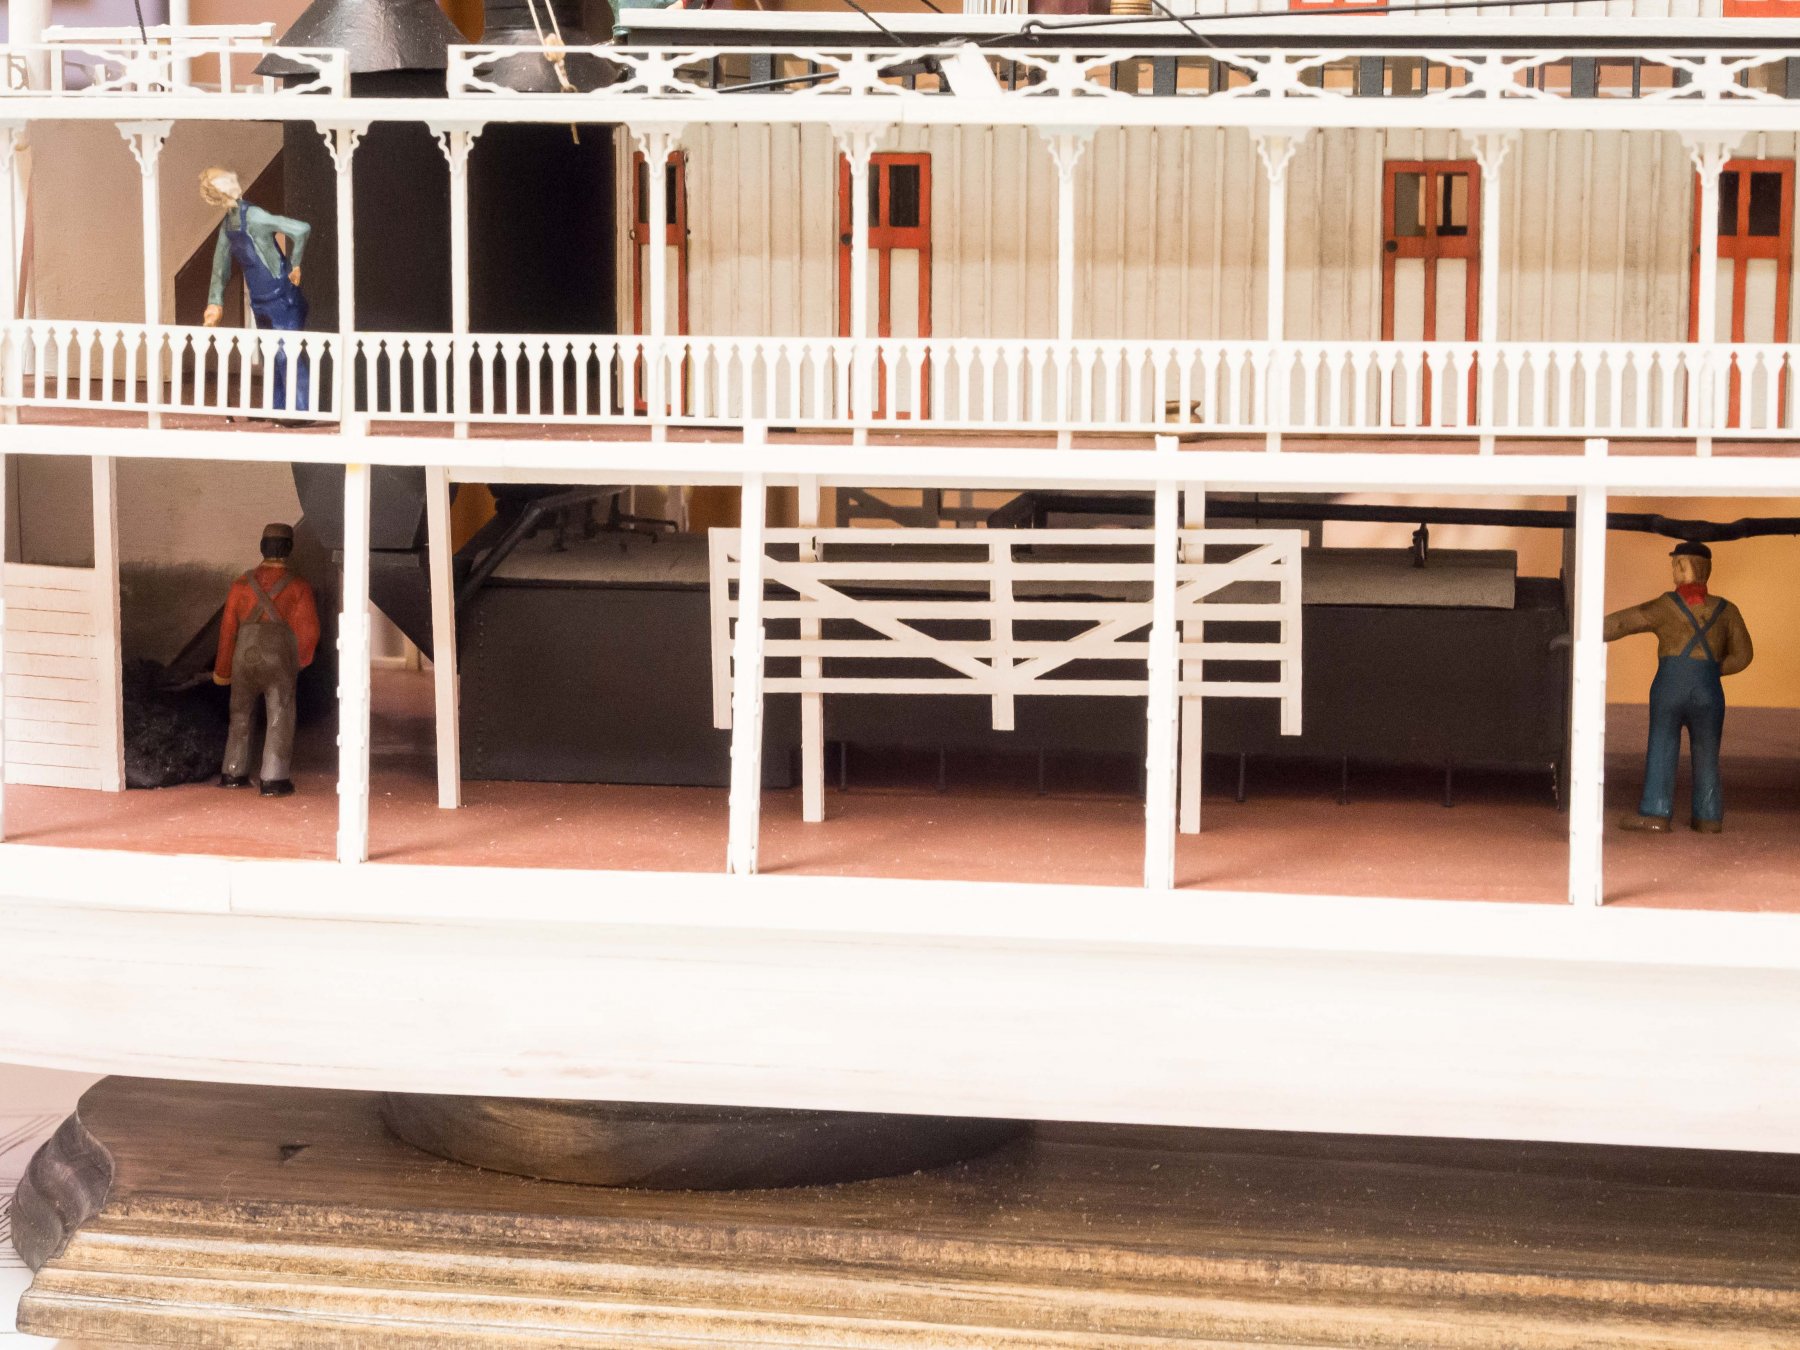
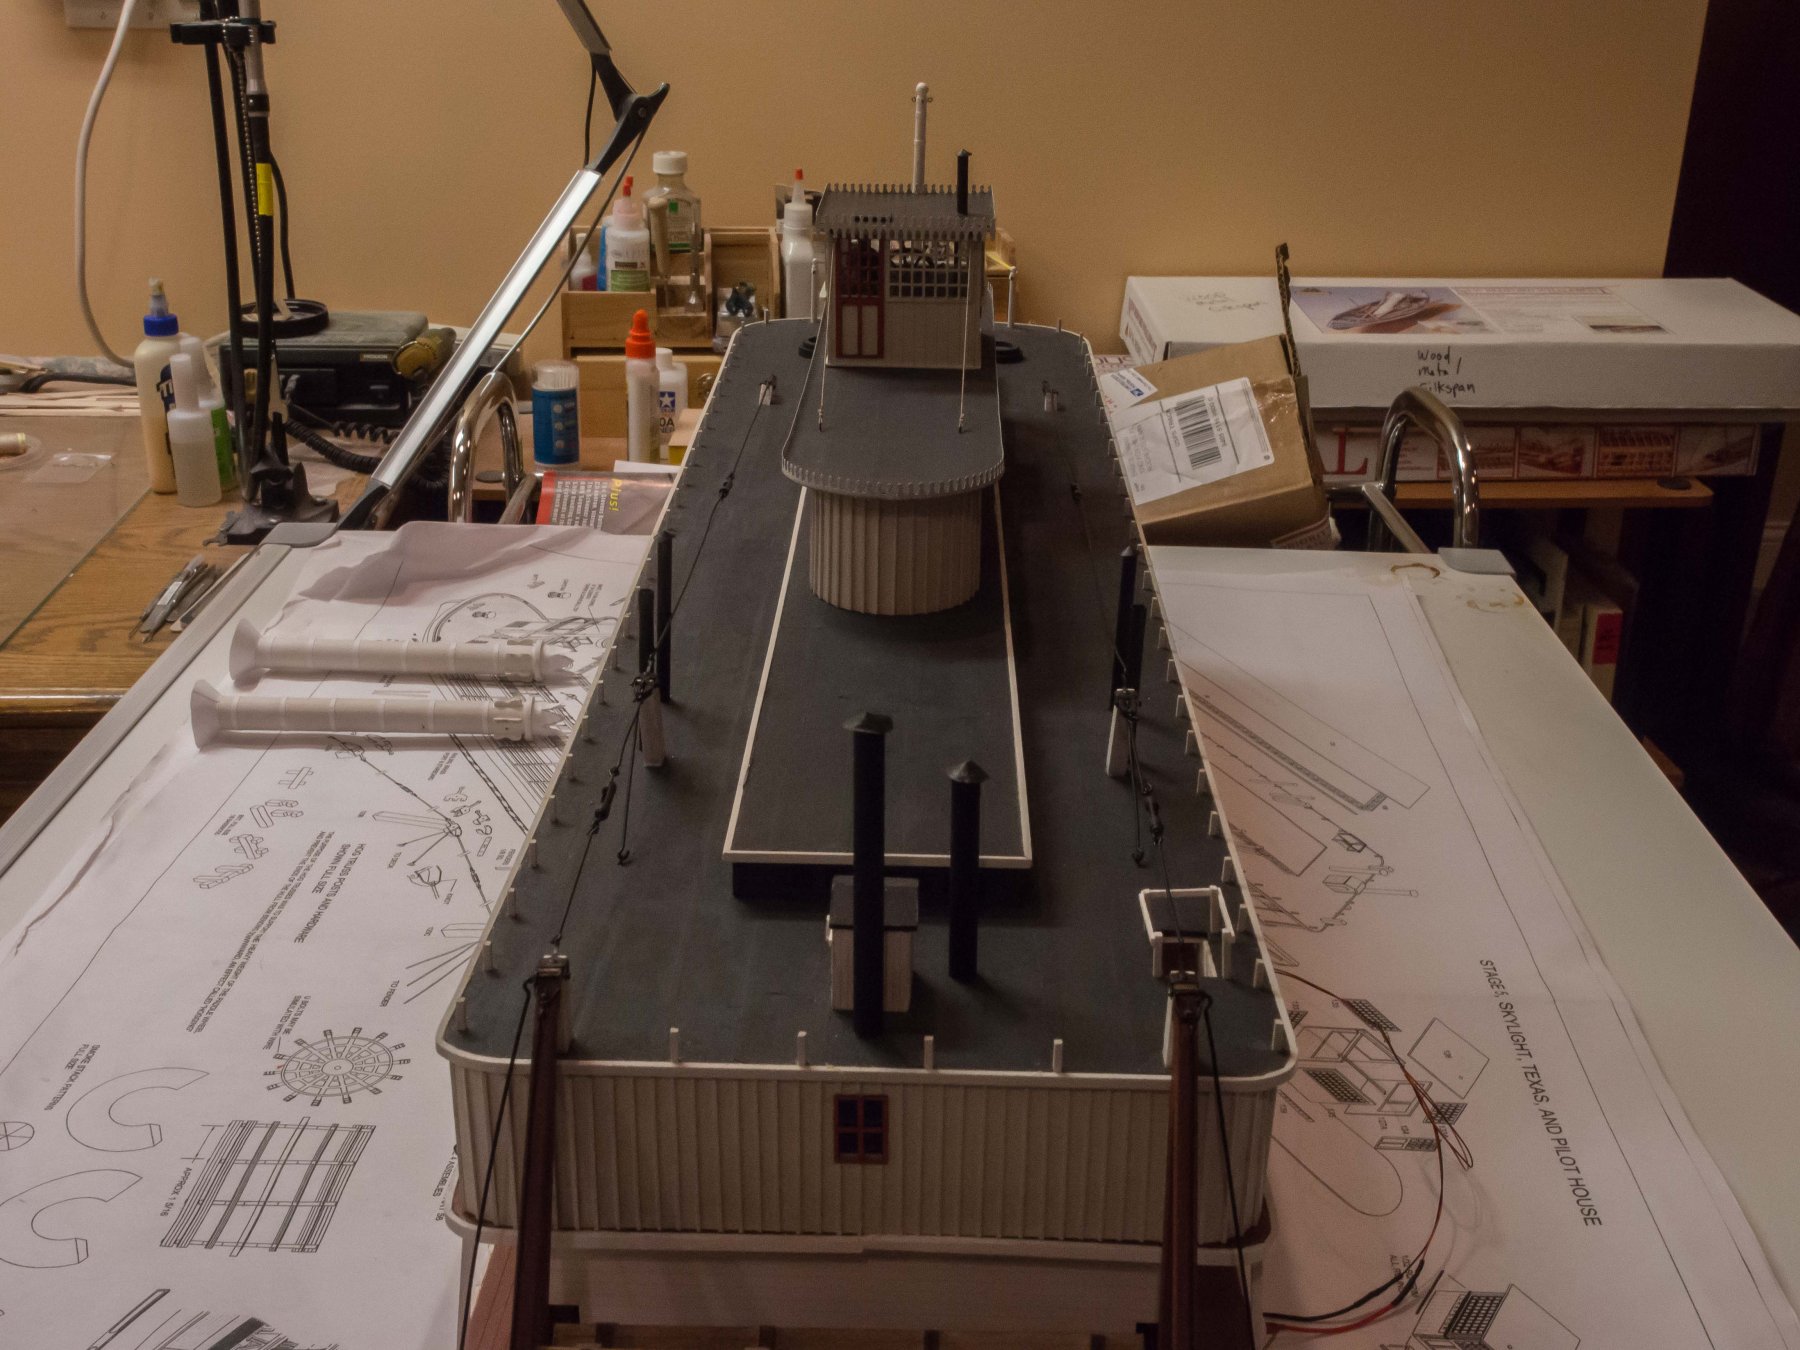
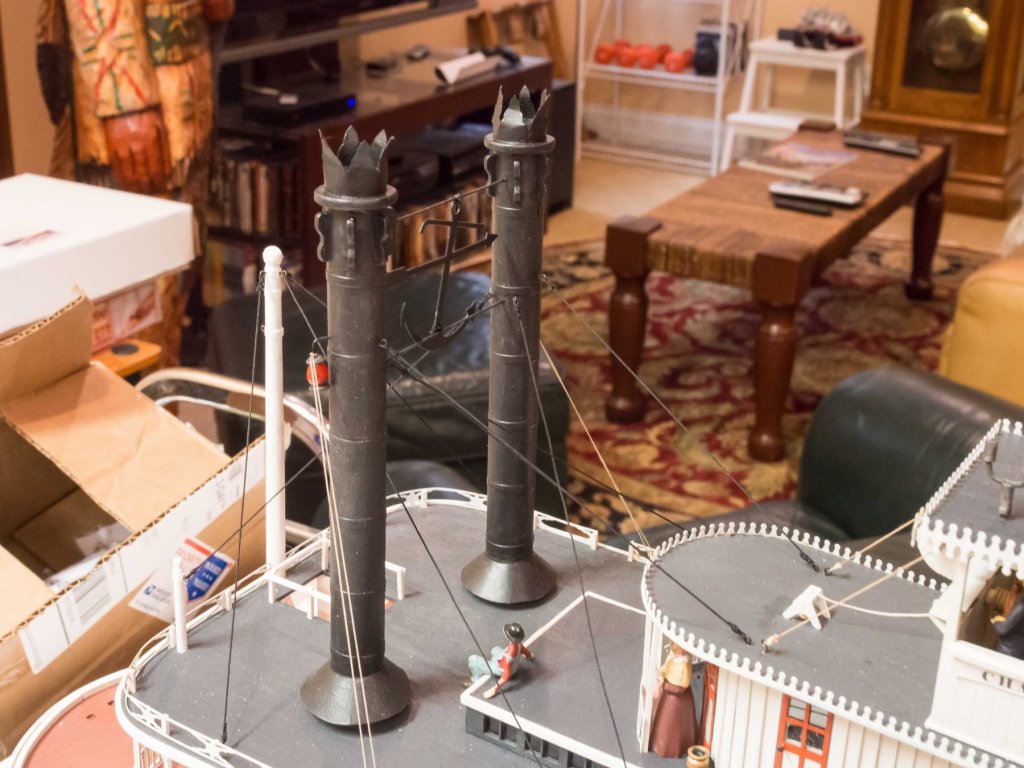
Finished the stacks and put them in place and glued. Wondered about the running lights as when placed per the plans I thought "well, how do they fill/light them?" Apparently the brackets had a small sheave in the end so that the lamp could be lowered and raised by a halyard. Interestingly, the picture on the cover of the box shows such a halyard although the rigging plan sheet does not. Anyway, I did mount the lights on the stacks, and will approximate the function of the halyard when rigging. You can just make them out in these views from behind since apparently they were placed so as not to be visible from the pilot house and compromise the pilot's night vision. So I guess I was right not to light the pilot house with an LED lamp, or so I can tell myself.

- 76 replies
-
- 7
-
-
- model shipways
- chaperon
- (and 1 more)
-
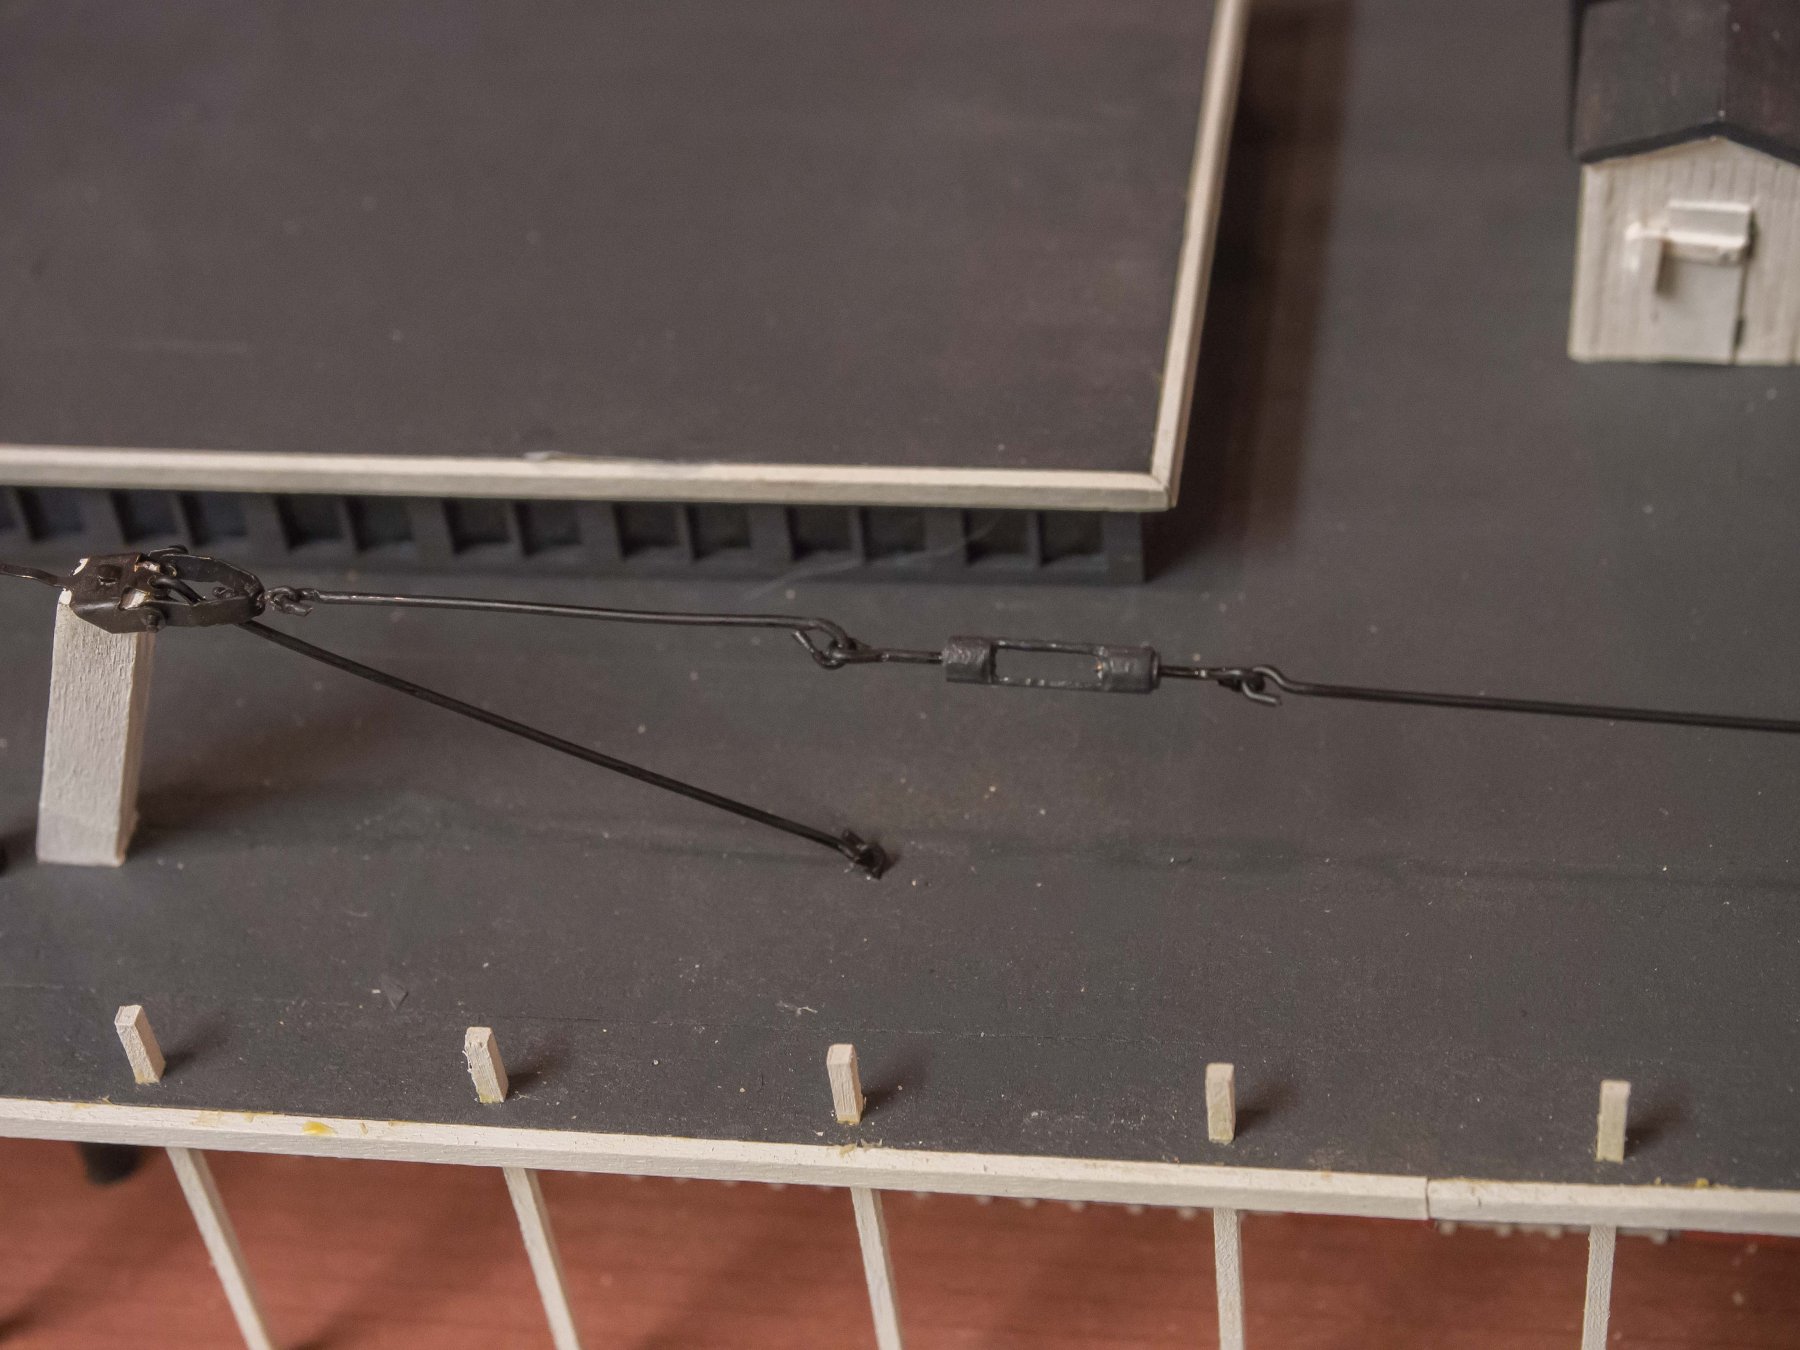
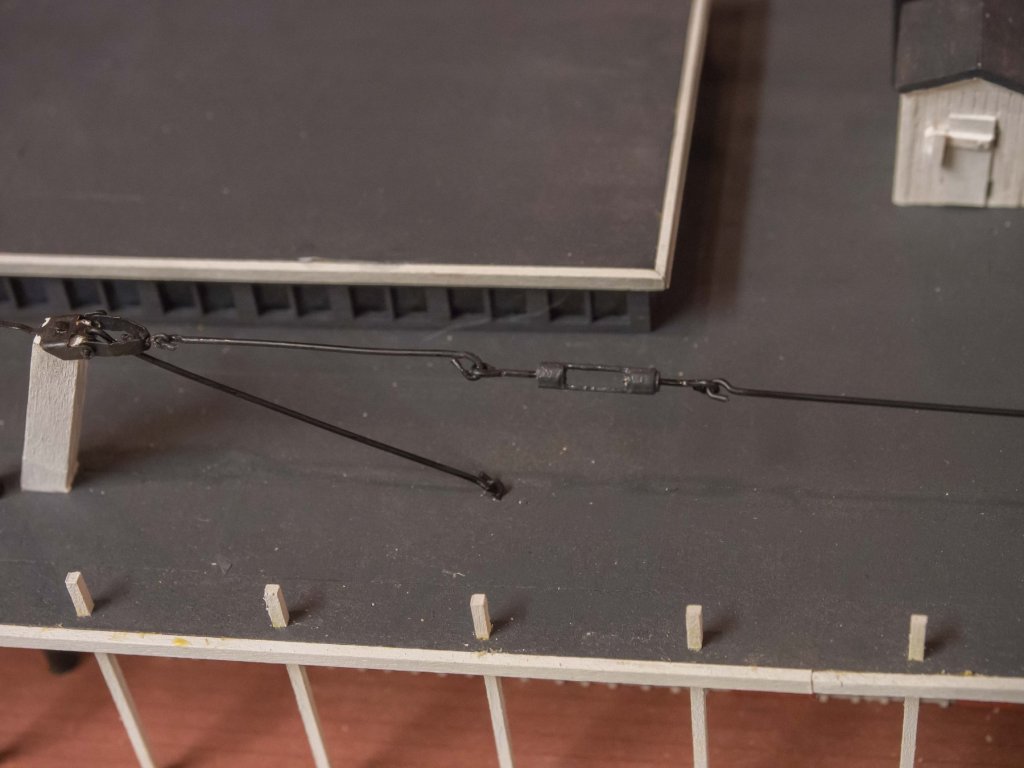
Finished the Hog Chains today. I found this the hardest thing I've done so far on this build. If I had 3 hands it would have been easier to make and attach everything while maintaining a taut appearance. I went with a black coated 20 gauge copper wire and home made turnbuckles. Decided to go with black rather than white (design decision). Some paint to touch up where copper bright showed at cut ends and abrasions. Then coated the wire with matt finish to get rid of the plastic shine. Glad to have this done. Next the stacks, which will finish articles 1-5 of 6 in Kurt's Ships in Scale series.


- 76 replies
-
- 9
-
-
- model shipways
- chaperon
- (and 1 more)
-
OK wire it is!
-
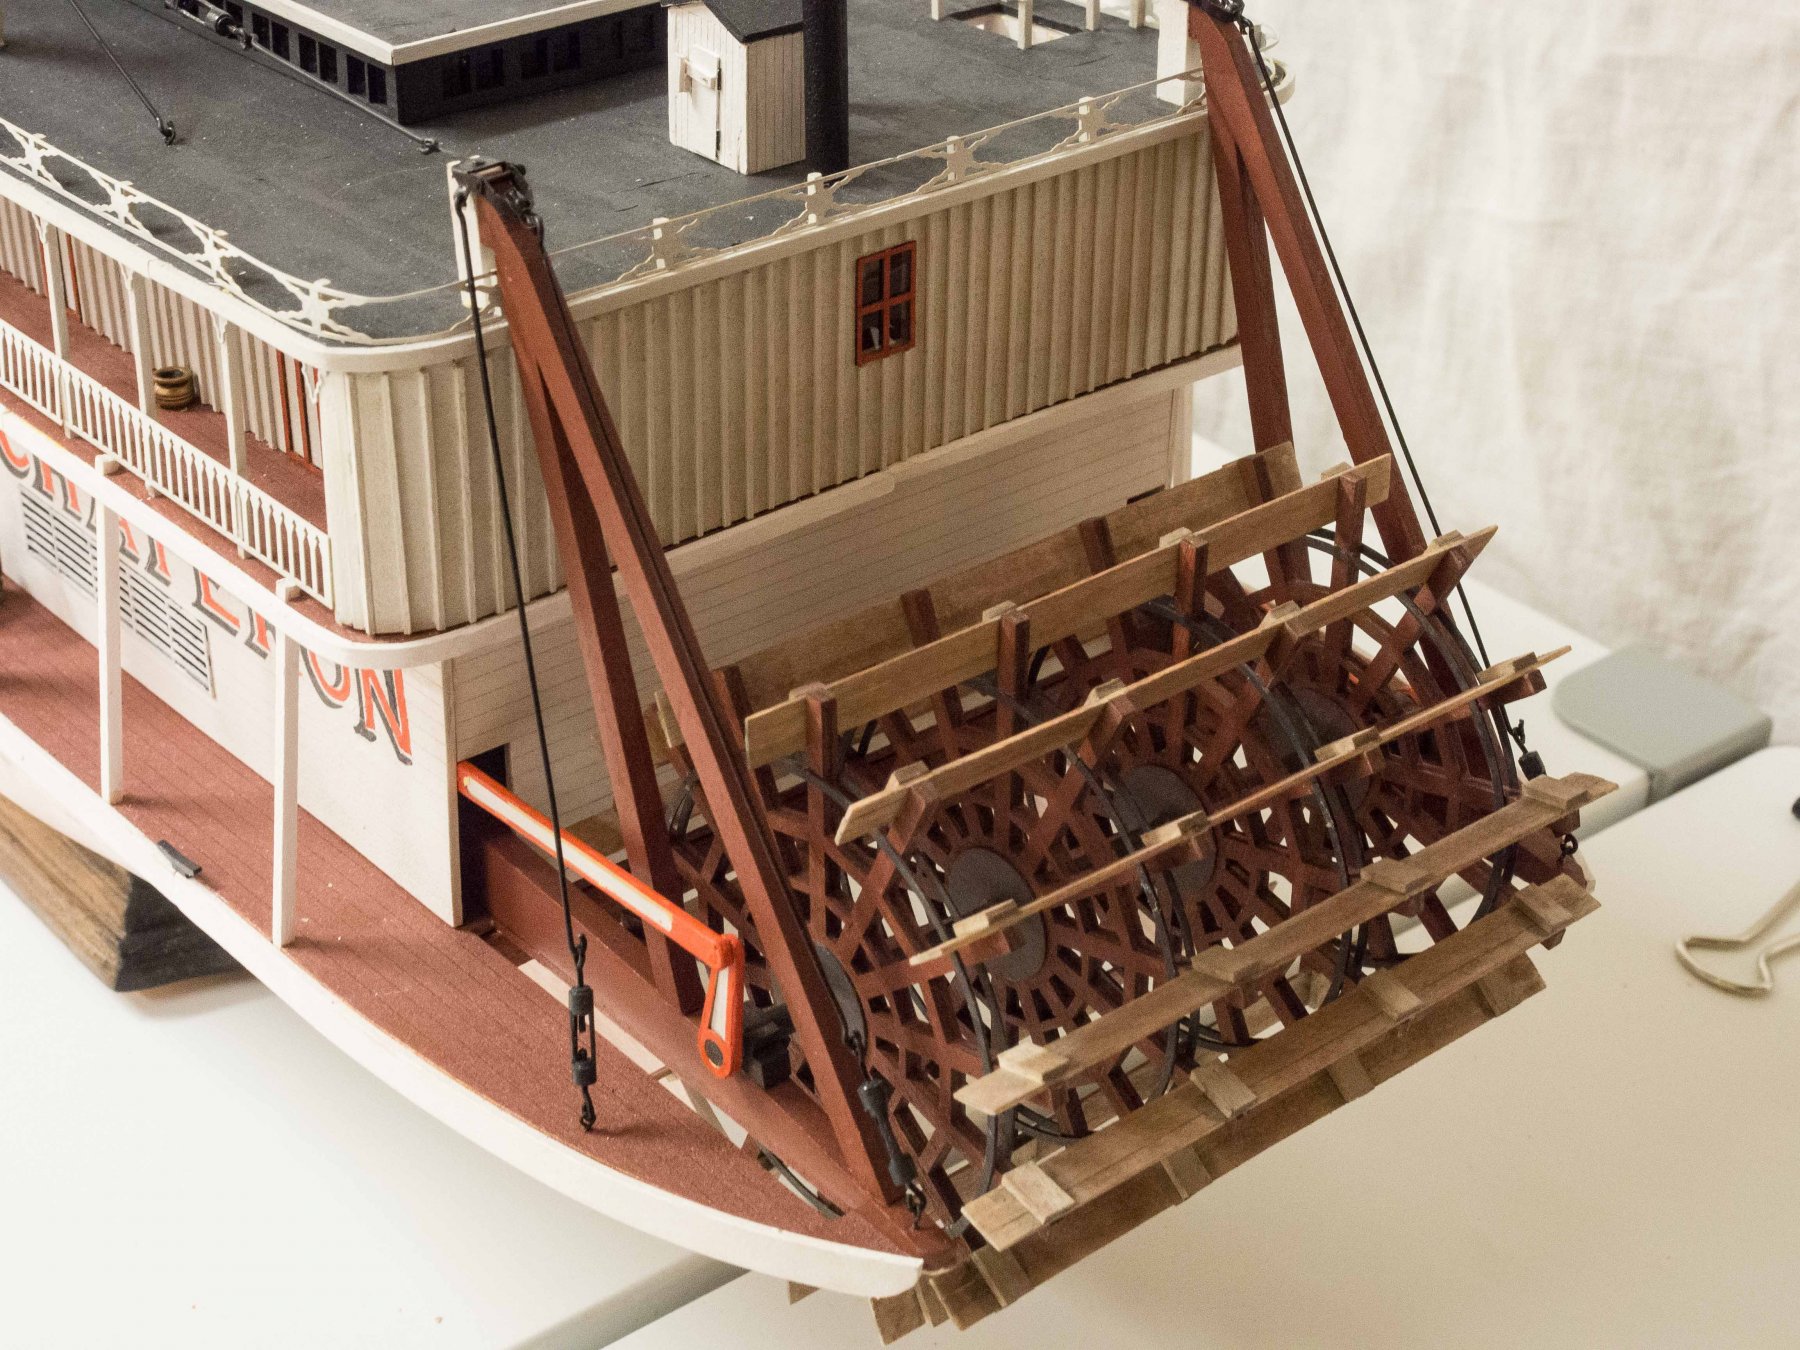
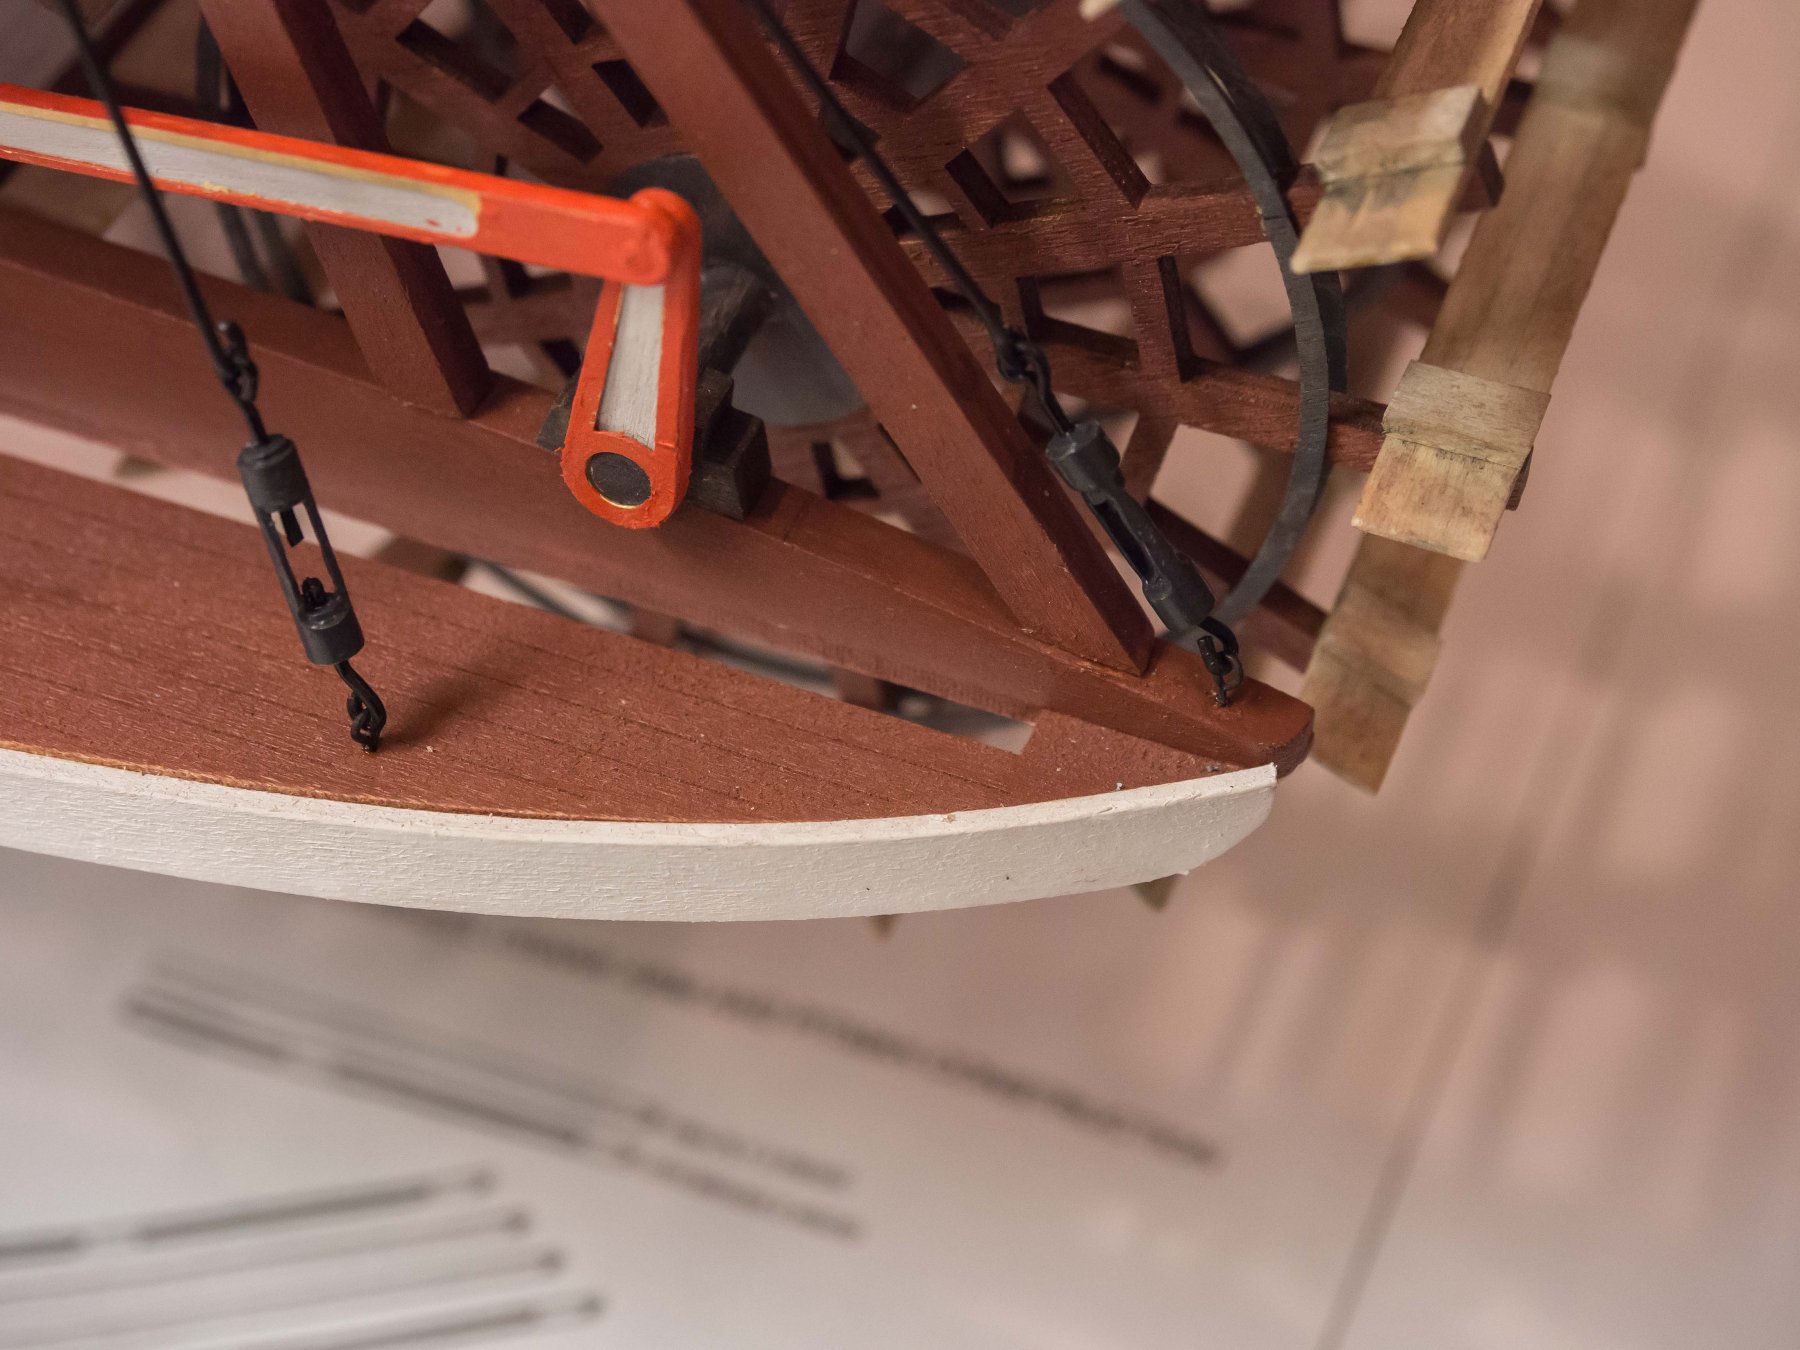
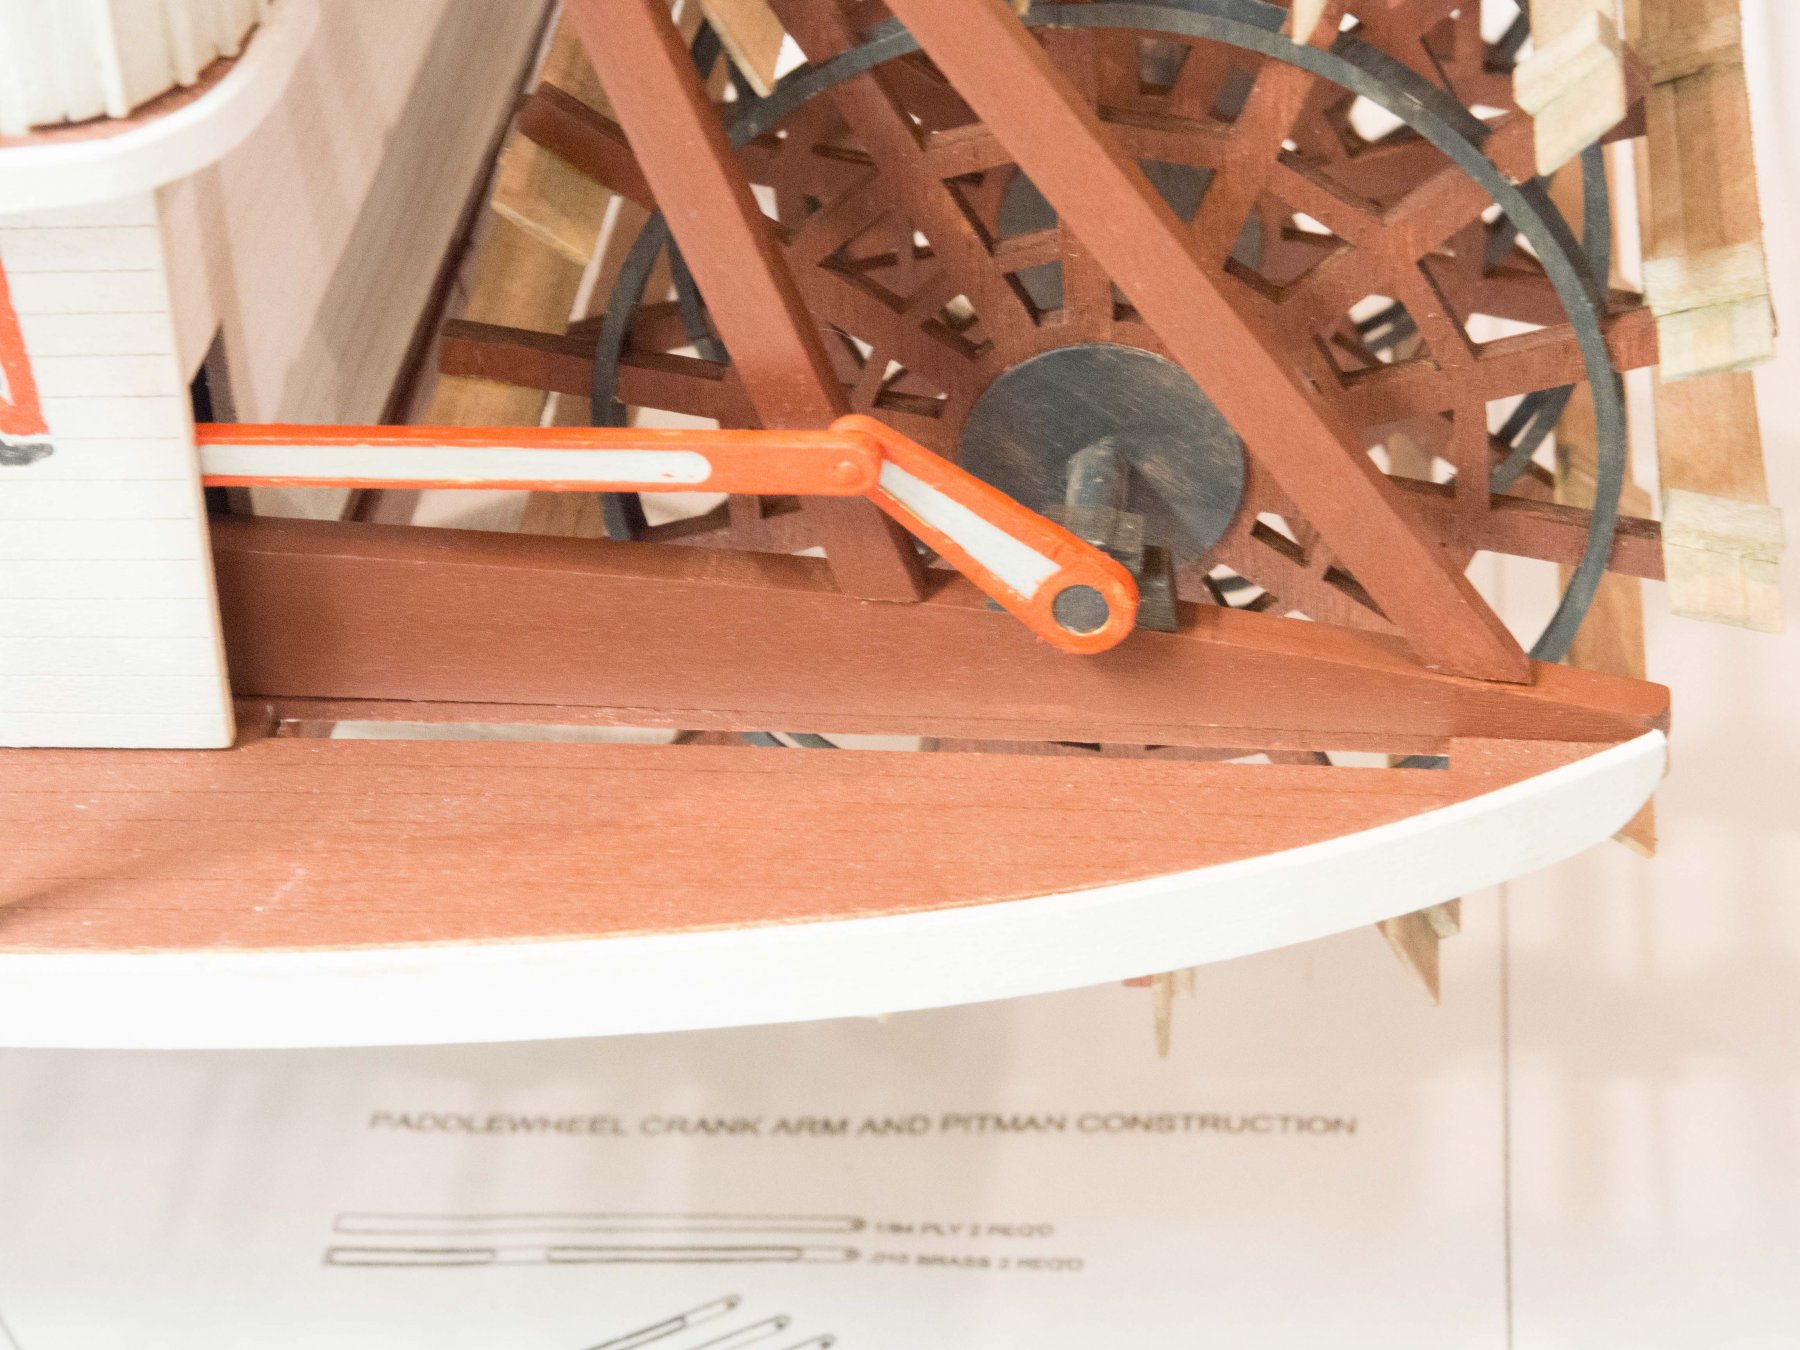
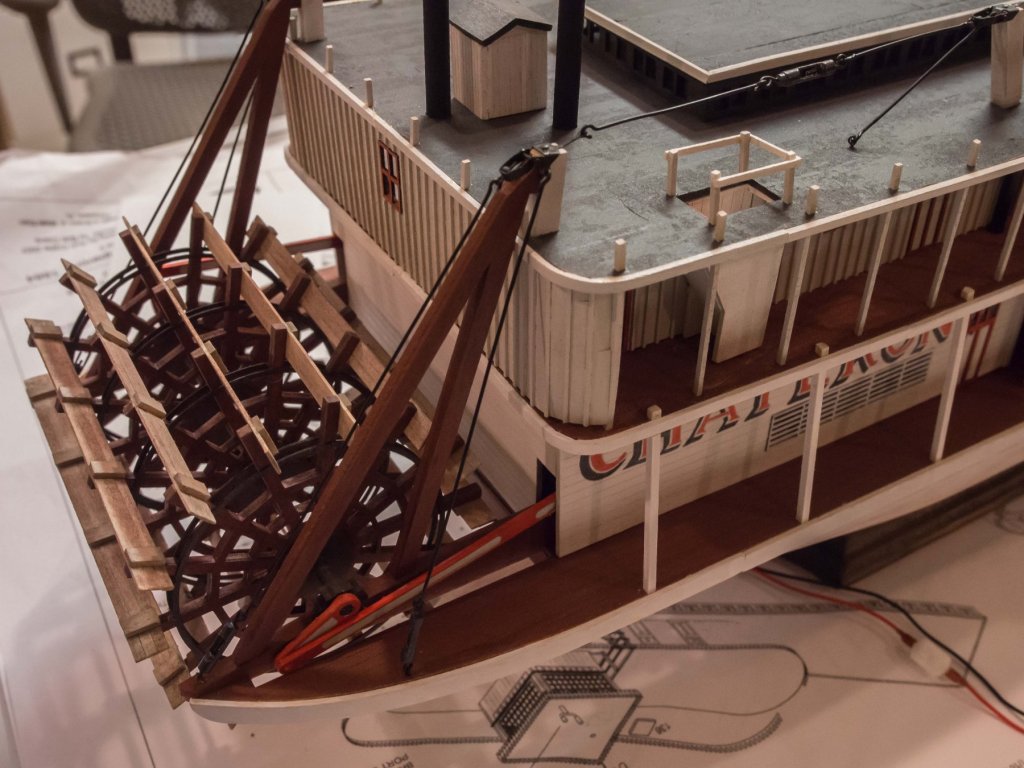
Now the not so good ... It seems with every build I screw something up that needs a work around. Each model has something my eyes go straight to with regret. In this case, I managed, way back at the beginning, to install the pieces that the wheel rests on UPSIDE DOWN! So they are curved on the top, and straight on the bottom. I fussed a bit, but there was no way to unglue/pin them without risking major destruction. I noticed this when looking at the template for the stern timbers and saw they expected a straight line attachment. The curve not only meant the timbers had to be longer and angled, but screwed up the angle of the timbers so that I had to put a small extension on the top where they connect to the aft hog chain post in order to clear the deck and the (eventual) placement of the decorative railing. So a day's work fitting a solution with which I'm not totally happy but it's the best I can do. Sigh. Thank goodness these things are made of wood.

- 76 replies
-
- 7
-
-
- model shipways
- chaperon
- (and 1 more)
-
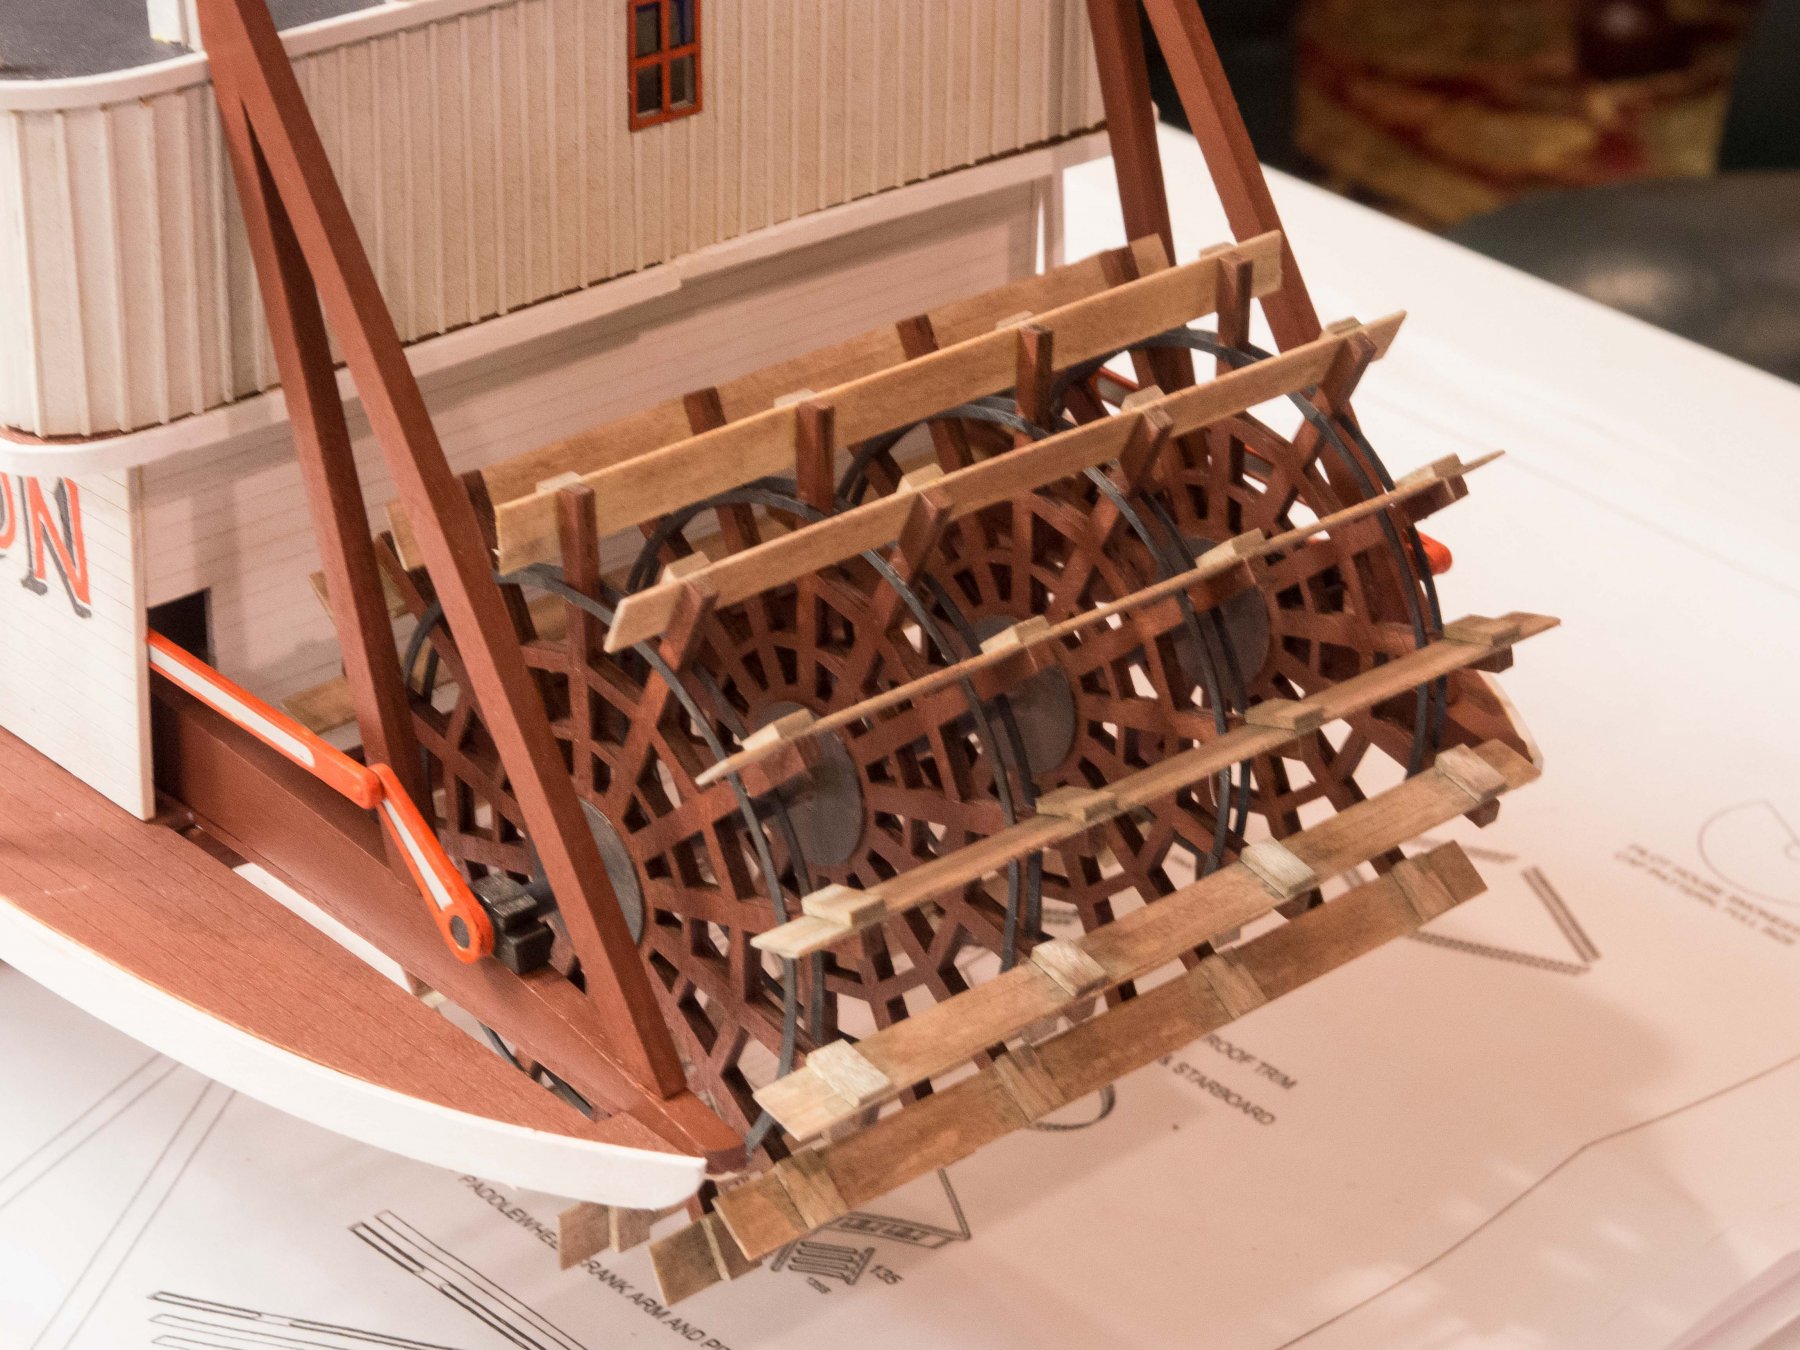
OK, first the good. Made the stacks and primed them - put in place without glue pending painting and blackening the rod connecting them. Then on to the paddle wheel. Fiddly but not really hard. Also took some time to make turnbuckles as I don't like the flat brass ones that come in the kit (Thanks Kurt). These are a half inch long. Will touch up the paint once they're installed. I found a long bit of copper chain in my stash and I believe I will (at least try) to use chain for the hog "chain" - I gather cable was most often used instead of chain but I think I like the look of the chain so will try that. First though I'll put the trim on the roof of the Texas cabin so the hog chain rigging doesn't get in the way of my clumsy fingers as I fuss with that what with CA and clamps and all, and them glue on the pilot house and fasten its tie-downs.

- 76 replies
-
- 7
-
-
- model shipways
- chaperon
- (and 1 more)
-
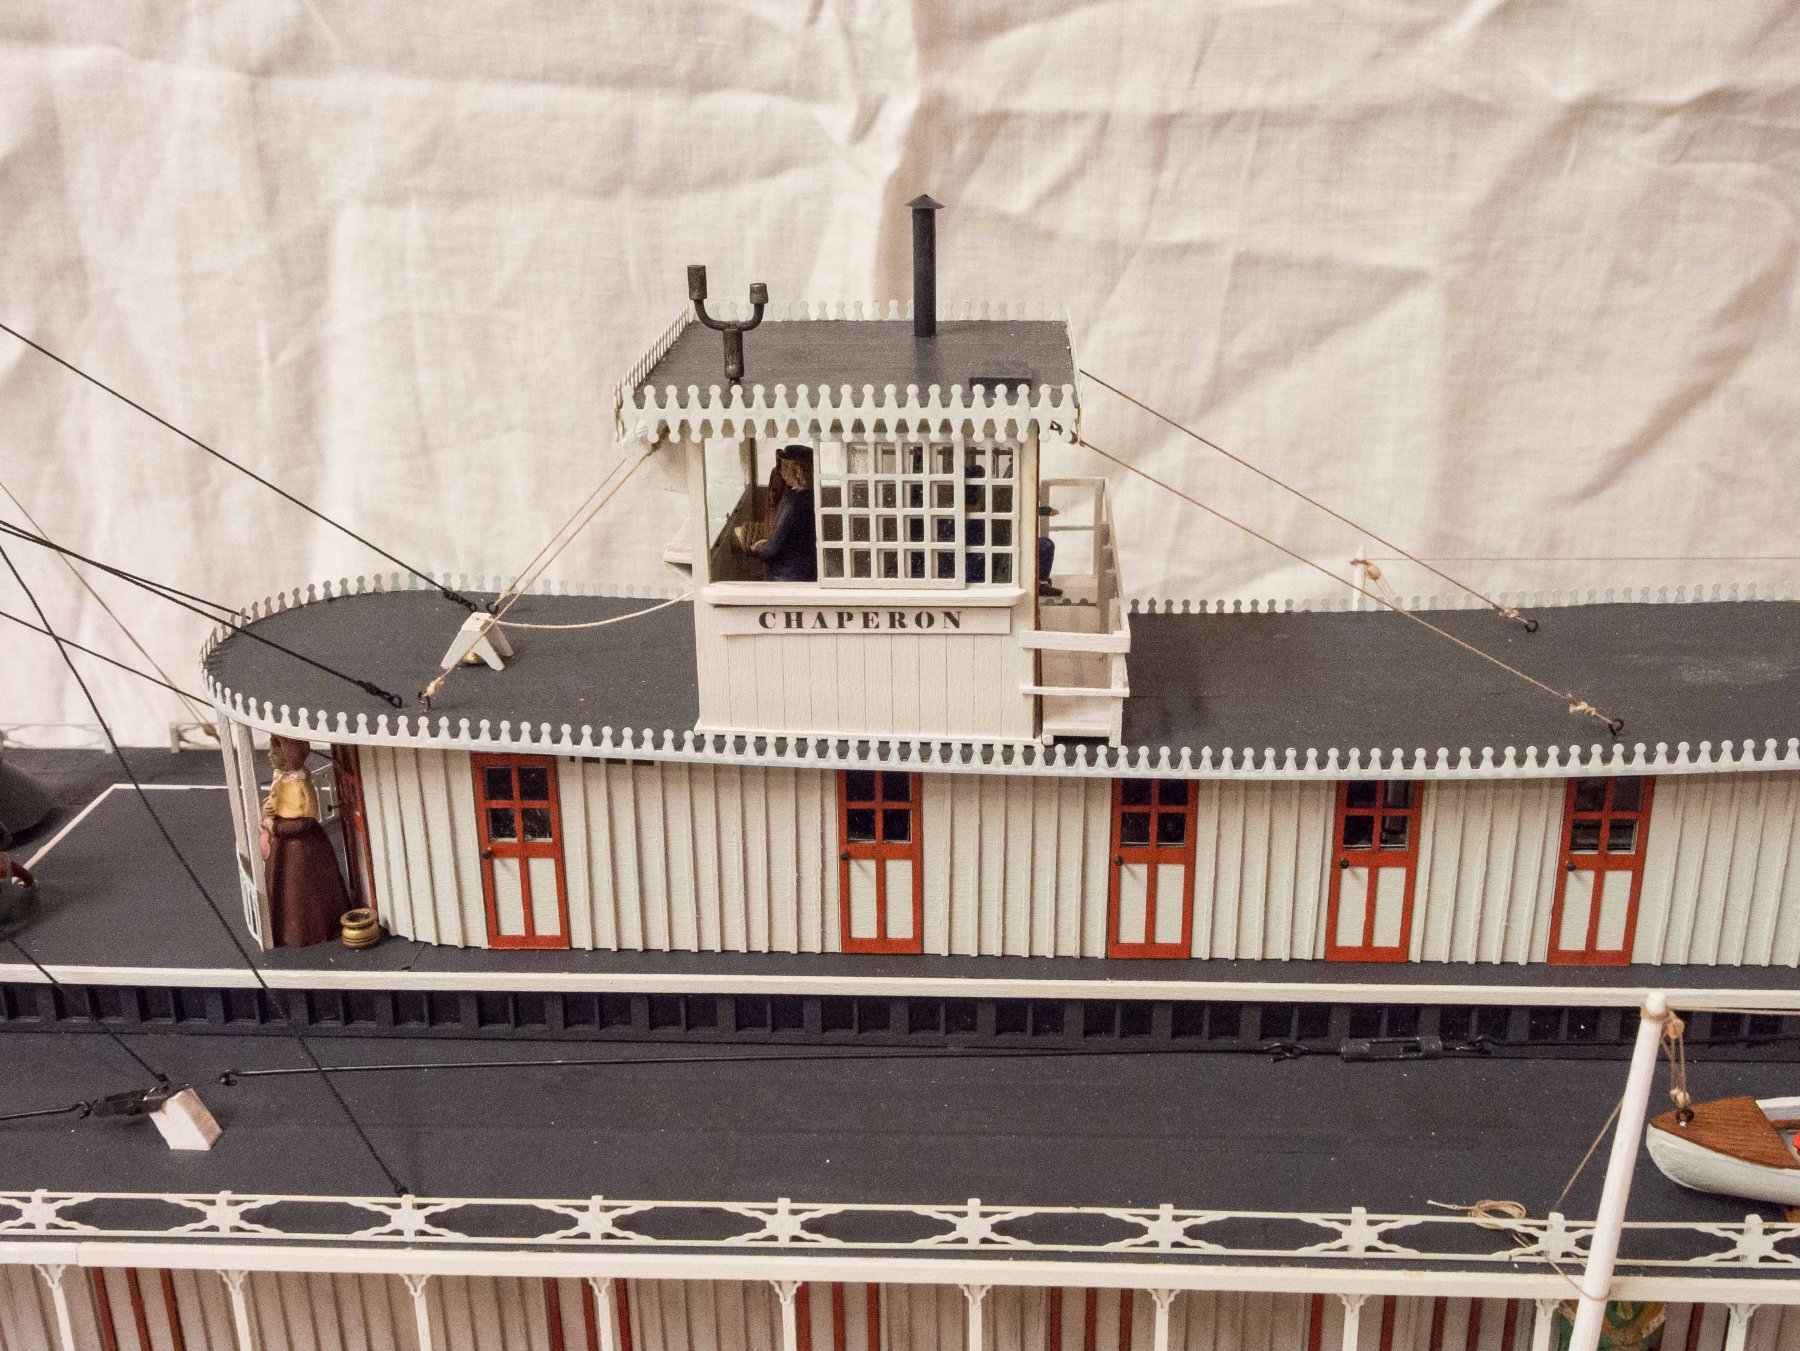
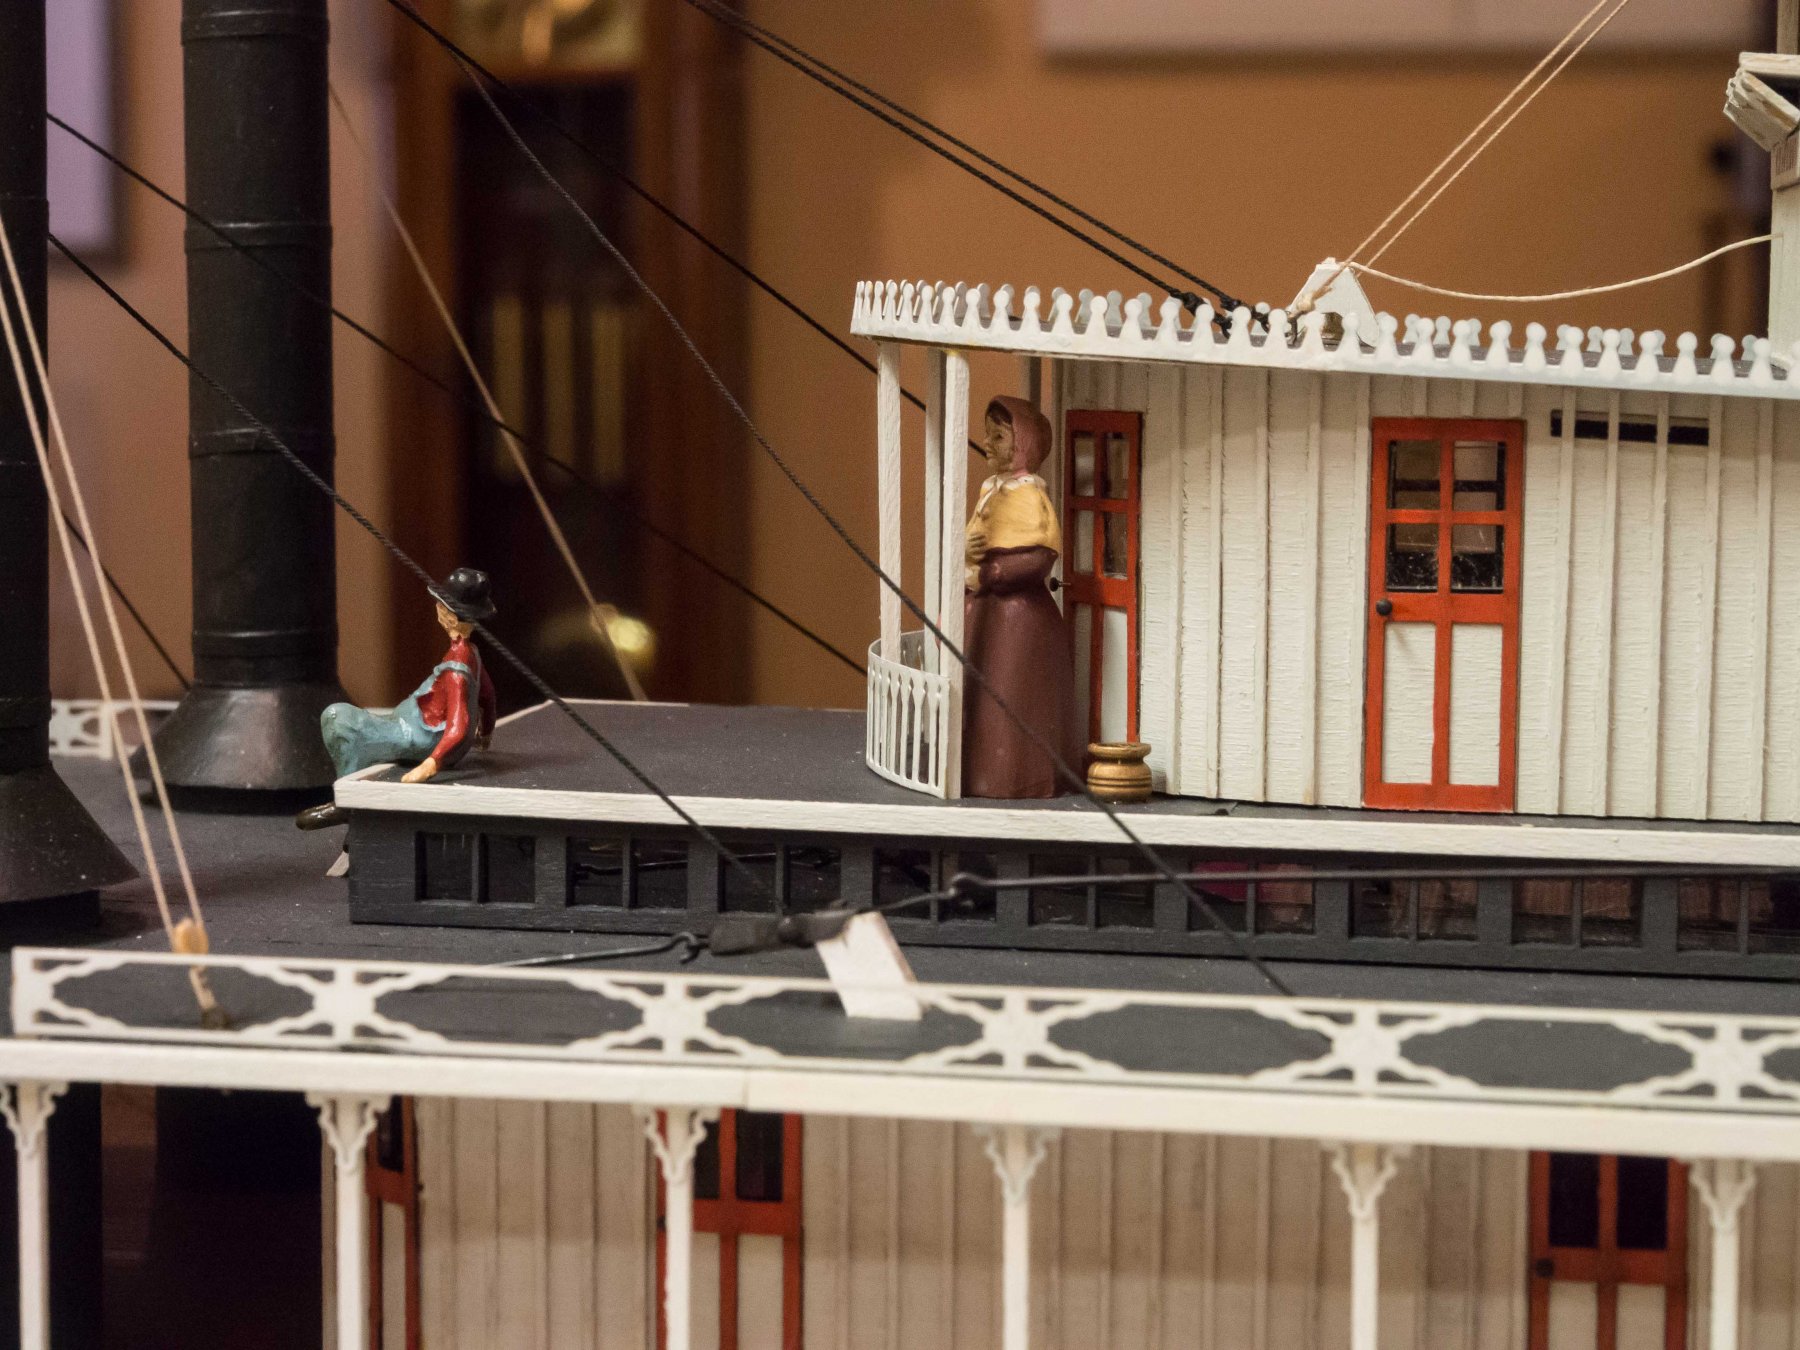
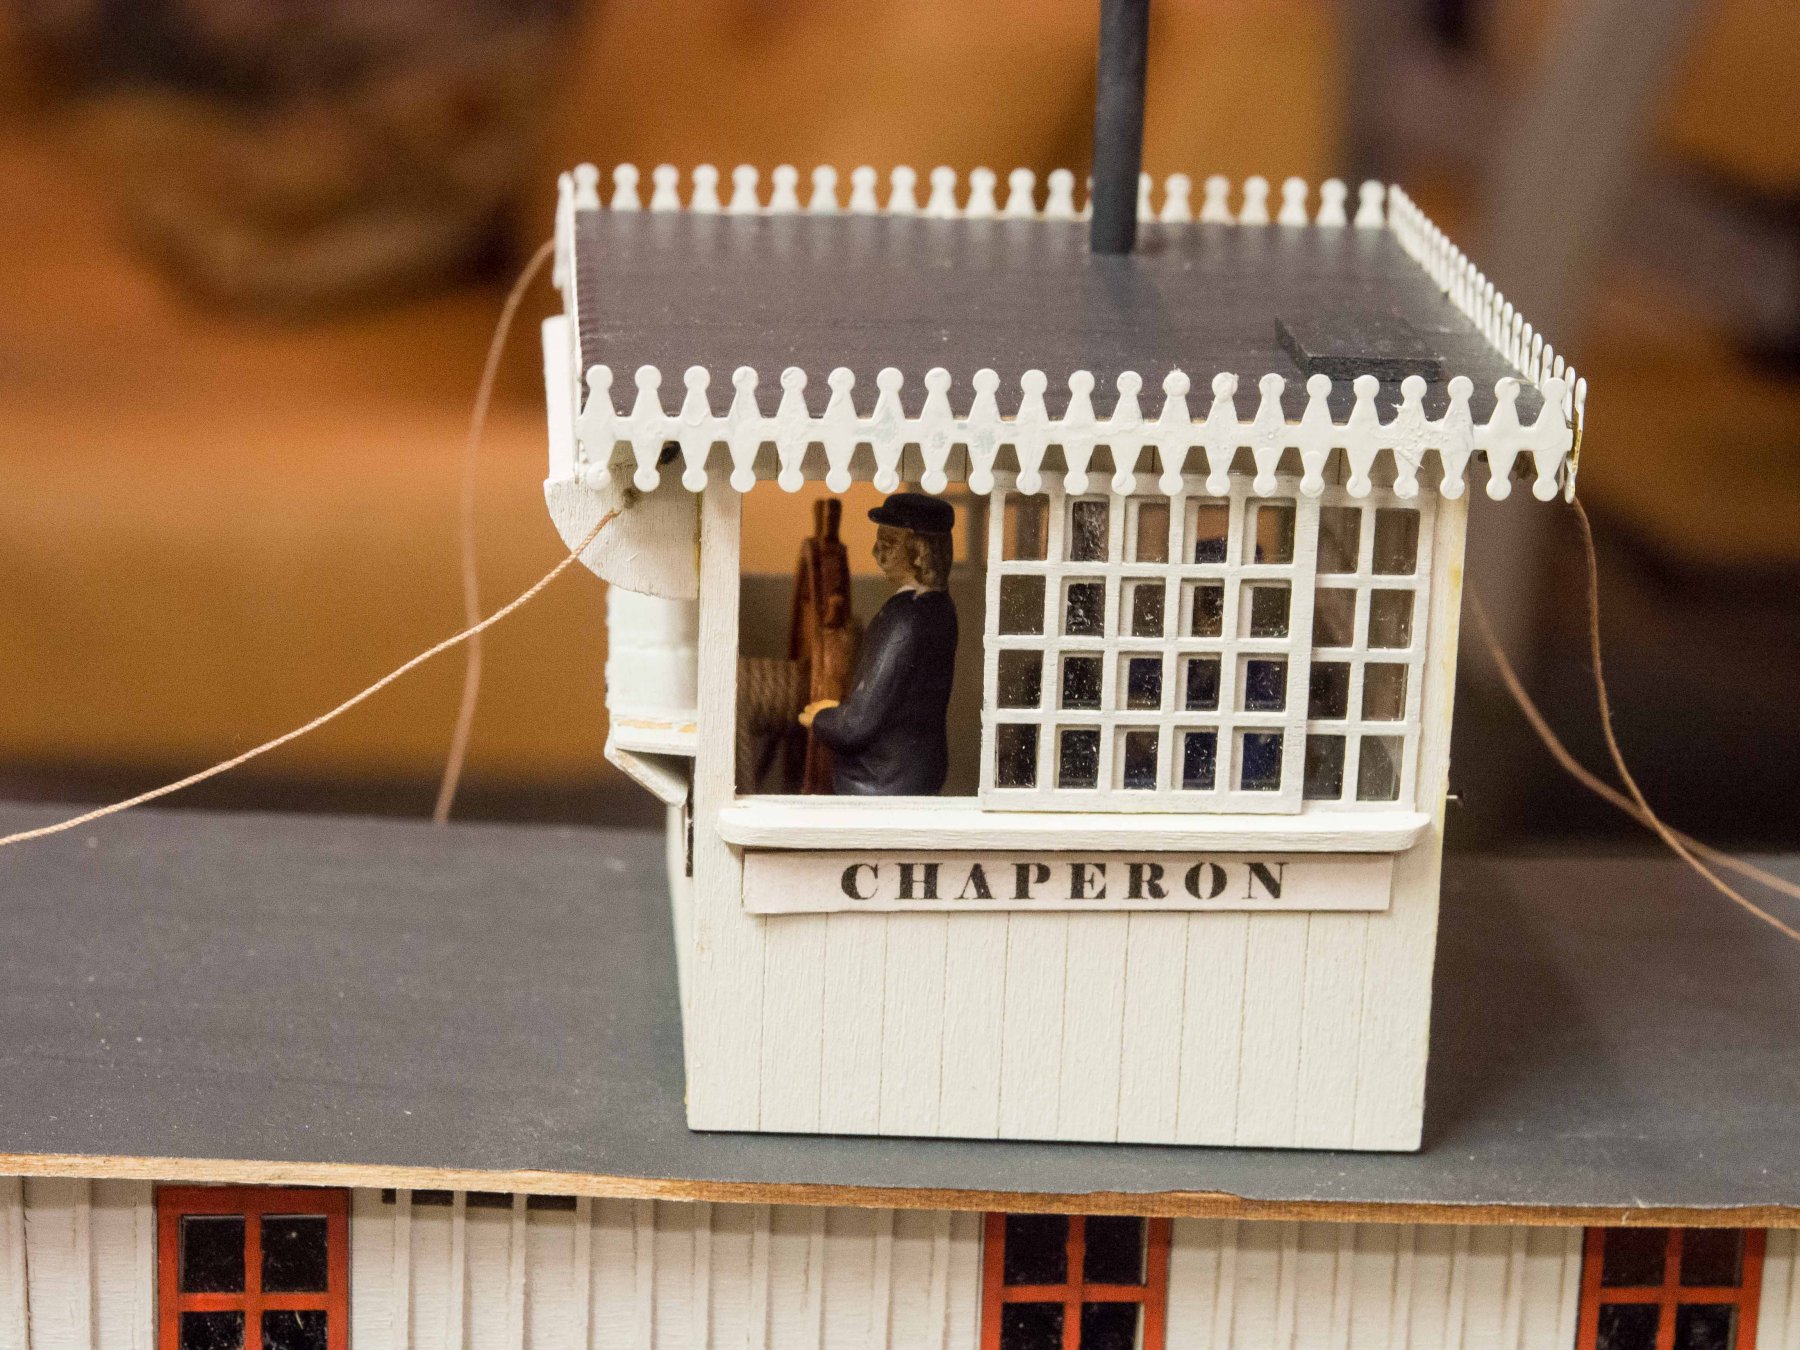
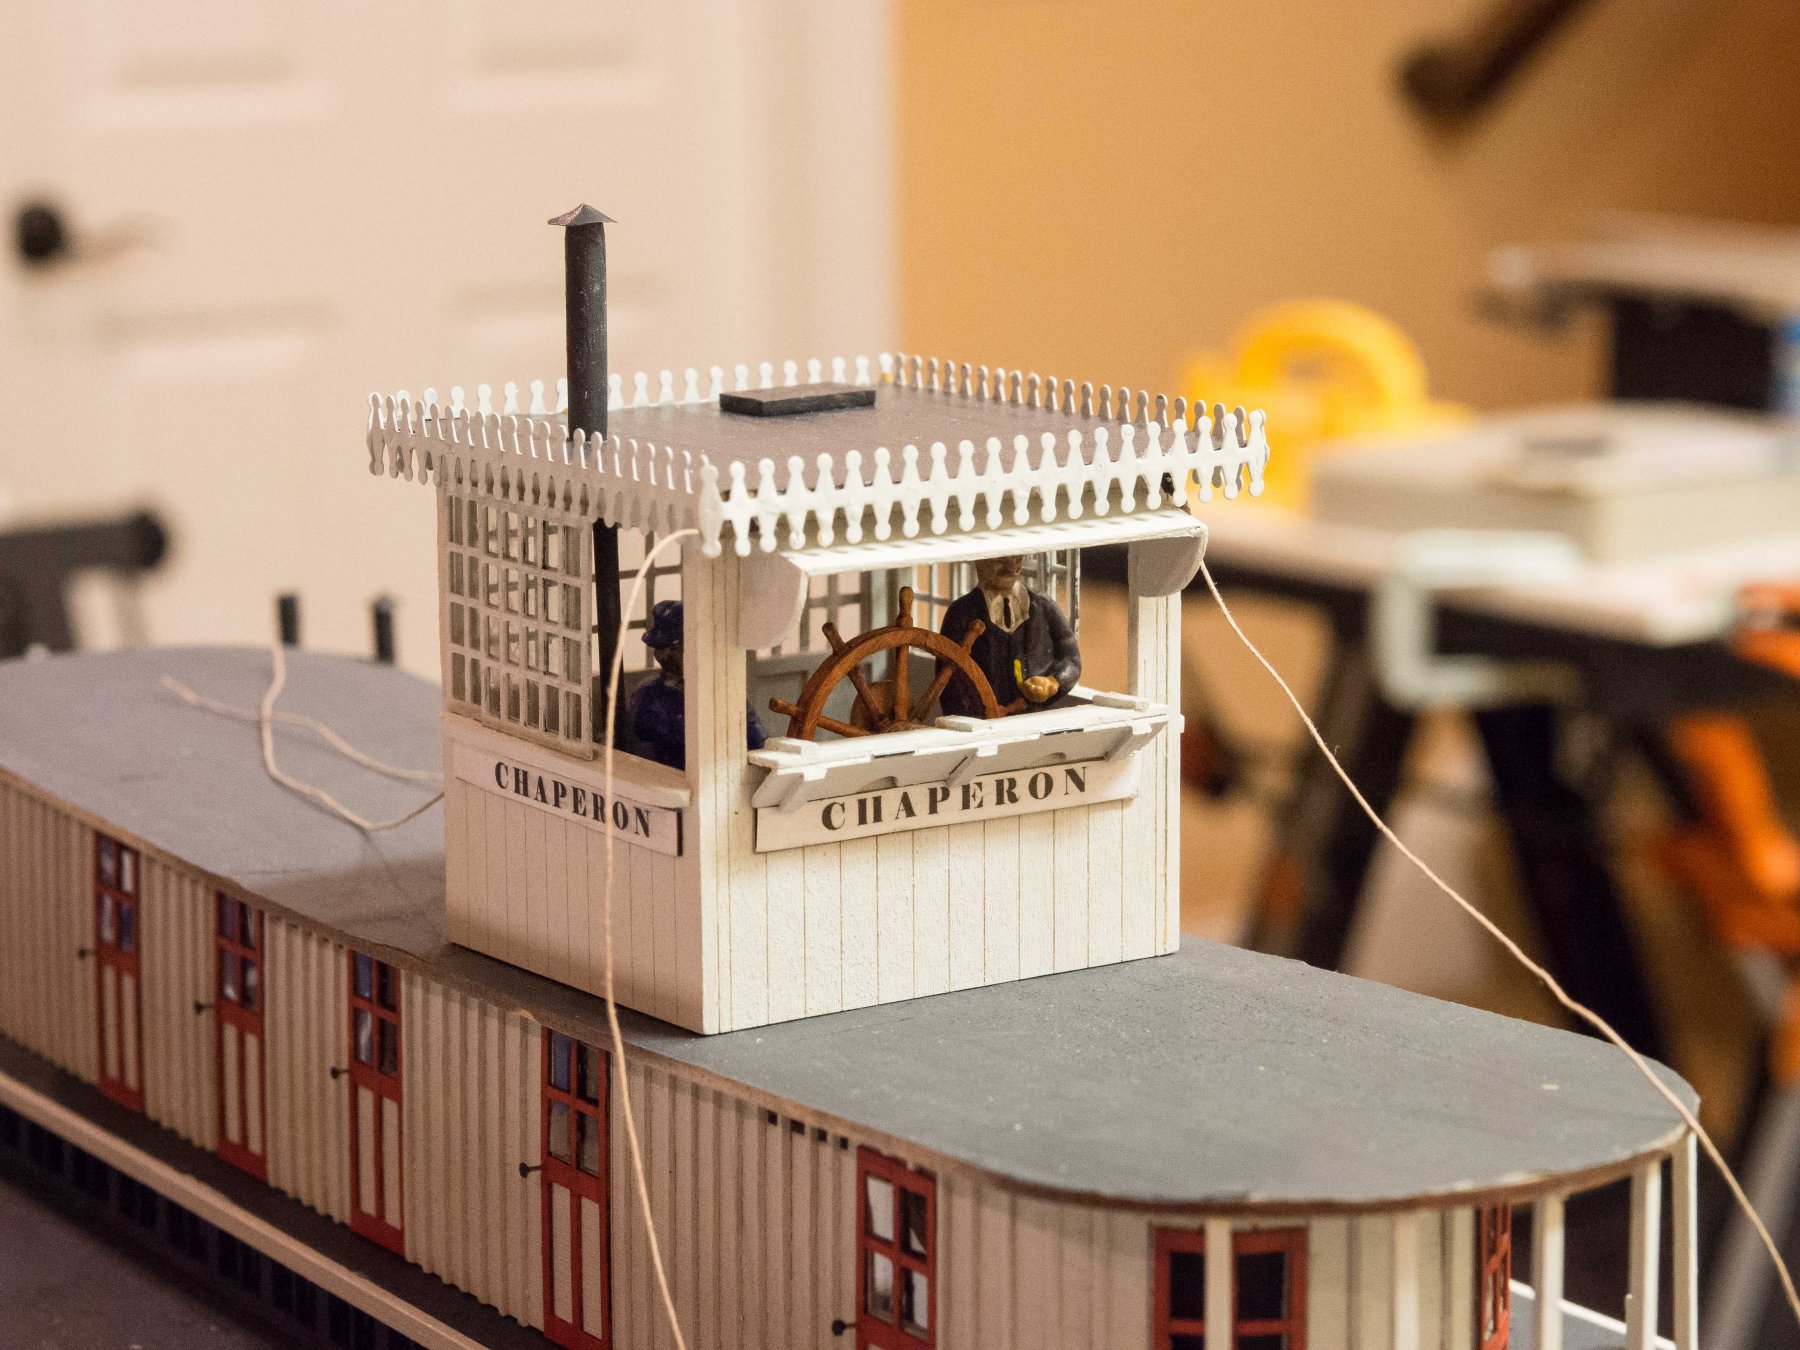
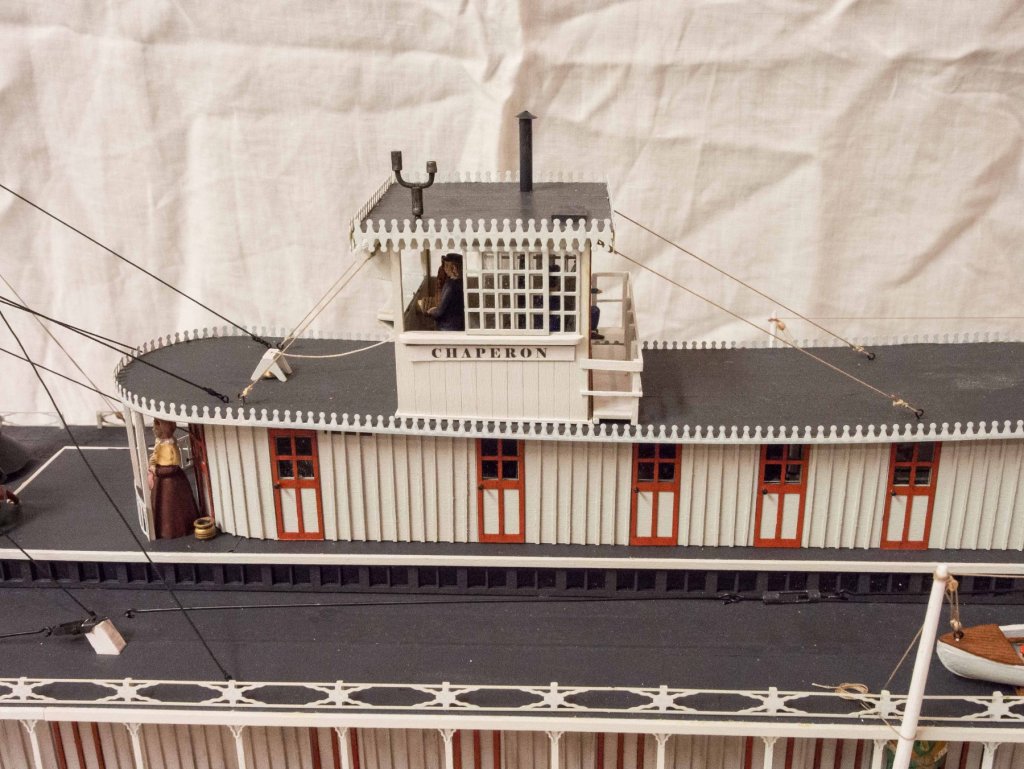
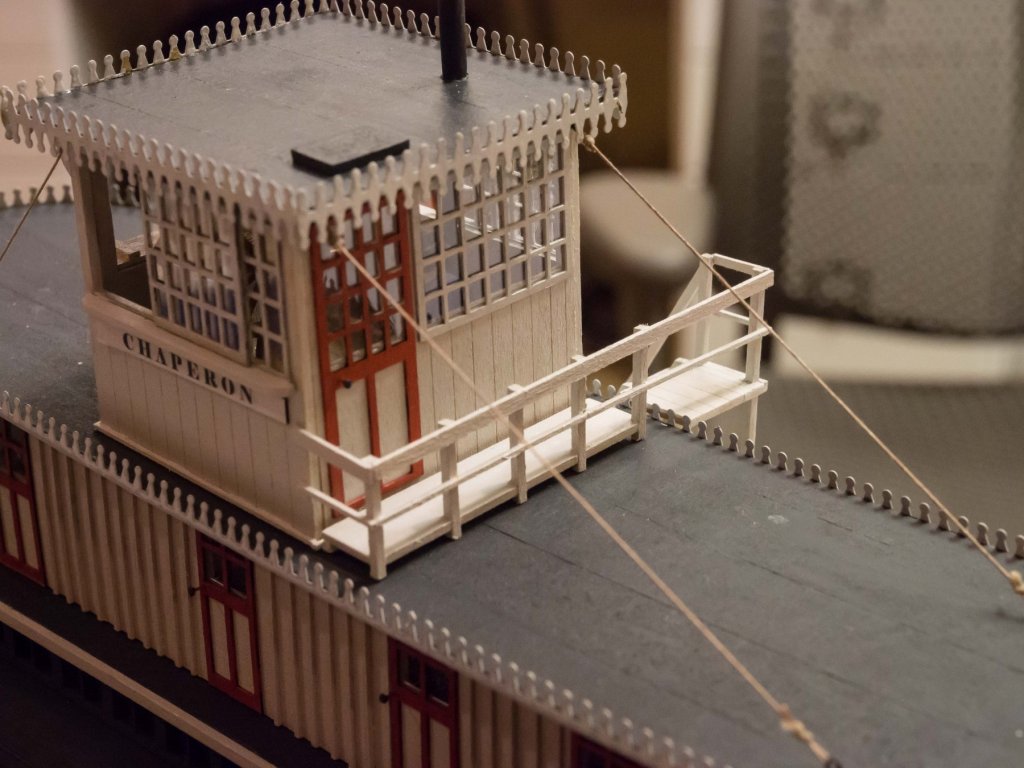
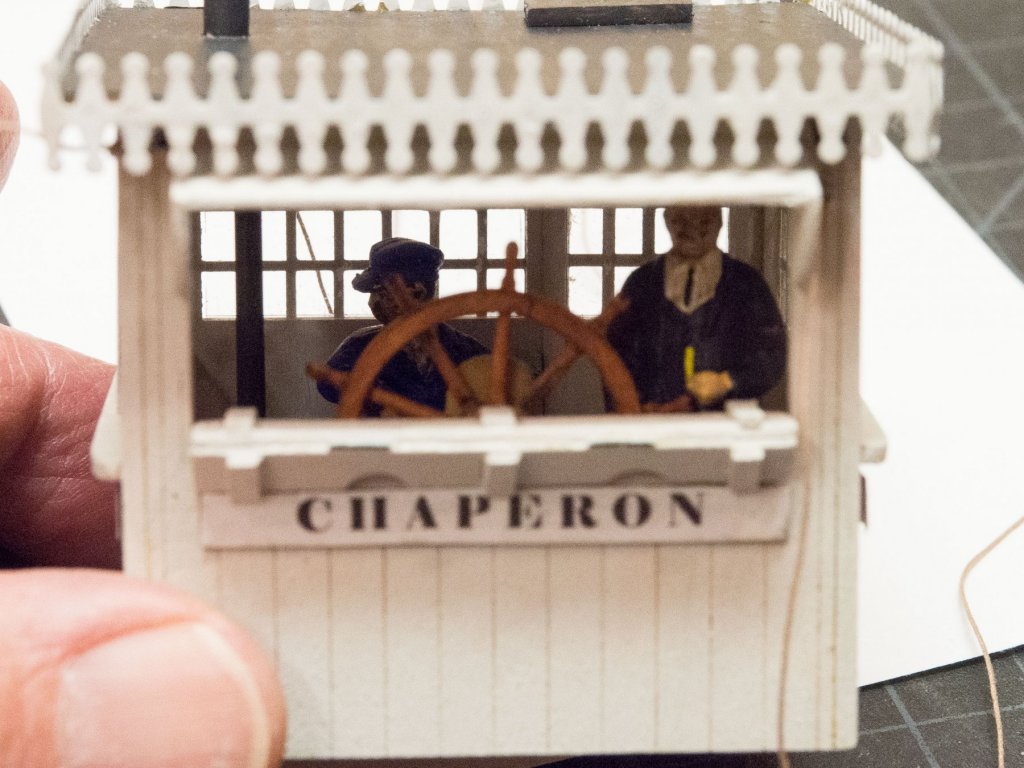
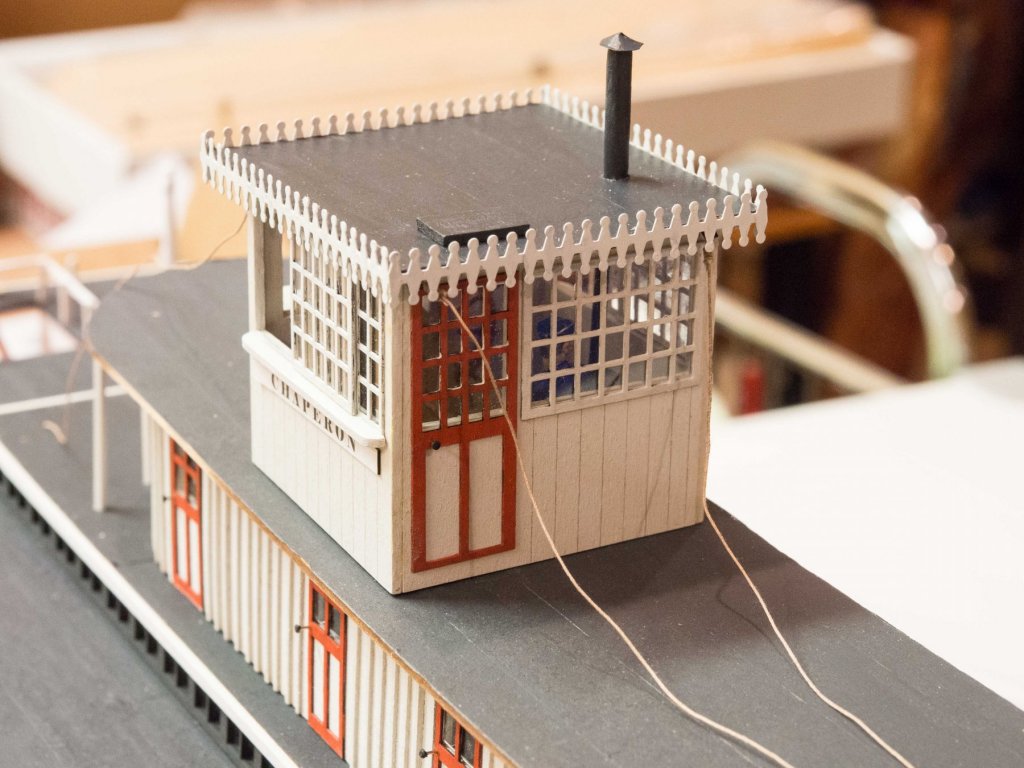
Finished the Pilot House except for a bit of white touch-up here and there. Made the modifications as per Kurt and the Steamboat Cyclopedium (see first post this topic) - sliding windows on the sides partly open and visor and folded breastboard in the front rather that the latticed window. Put in a wheel (which should be 50% bigger but that's the largest I could find), a pilot figure holding the wheel and a guy lounging in the back next to the stove. Next up is the stairway to the Pilot House and the railing around the Texas deck.


- 76 replies
-
- 8
-
-
- model shipways
- chaperon
- (and 1 more)
-
I got the silk-span procedure from Kurt Van Dahm's Ships in Scale series on the Chaperon build when I was able to get the back issues involved before they ceased operation. I had some silk-span on hand since I had used it for sails in a previous build. I really like the effect. The silk span is cut into strips 3/4 by 5-6 inches and fastened down with Acrylic Mat Medium, with 1/8 inch overlap. When dry, painted (airbrush works well) with flat black and when dry covered with dull-coat type spray. The strips need to be cut with a sharp x-acto blade, and the cutting works best when the silk-span sheet is taped at the sides to a cutting board so it doesn't slide, and a straight-edge pulled down from the taped area the appropriate difference to flatten the sheet when cutting. Drew light lines on the deck 5/8 inches apart to guide the application of the Mat Medium and allow for the overlap of the 3/4 inch sheets. Fiddly, but otherwise straight forward. I'm not sure how emery paper would look. Is it too thick? The silk-span really snugs down. Would the edges of the emery paper show white and require painting anyway? Don't really know. thanks all for the "likes" Made a test turnbuckle from brass tubing. Once I found the right way to cut the windows in the outer tube it went pretty well, so I guess I'll make 11 more rather than use the flat brass ones provided with the kit. Thanks for the tip, Kurt! Luckily I had the three sizes of tubing on hand, since my local hobby shop where I bought such stuff has gone belly up. Used CA jell to glue the nested tube ends rather that soldering, which seems to have worked well. 20 gauge black coated copper wire for the inserted hooks in the end. I think I'm going with black for the hog-truss hardware and the wire (rather than line) to connect them.
- 76 replies
-
- 3
-
-
- model shipways
- chaperon
- (and 1 more)