RGL
-
Posts
5,388 -
Joined
-
Last visited
Content Type
Profiles
Forums
Gallery
Events
Everything posted by RGL
-
 Well done mate. It’s the start of a beautiful relationship......
- 77 replies
-
- 3
-

-
- icm models
- Markgraf
- (and 1 more)
-
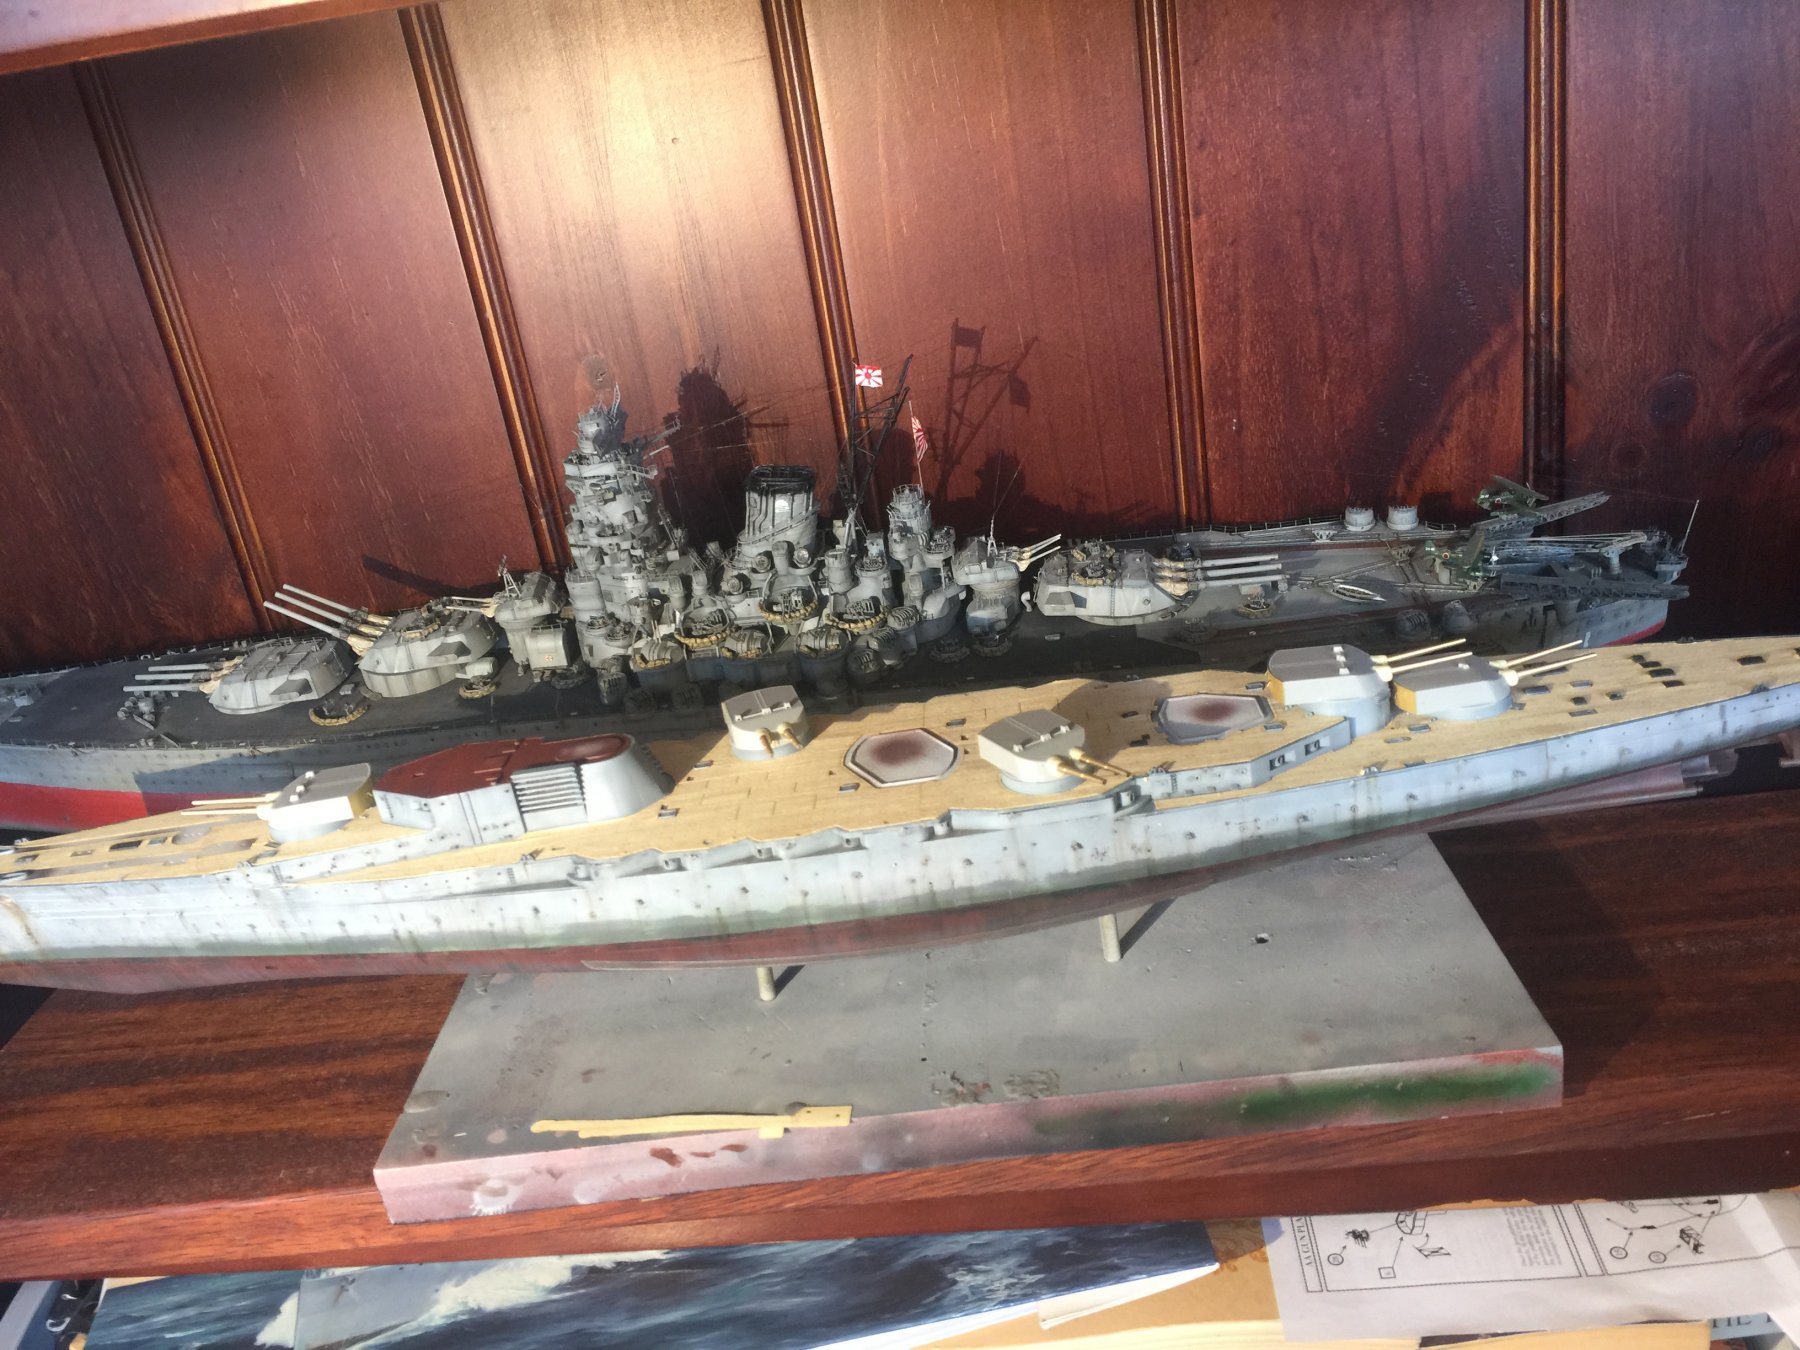
I find I need to take it in bite size pieces otherwise I get lost in the details and forget what goes where.
-
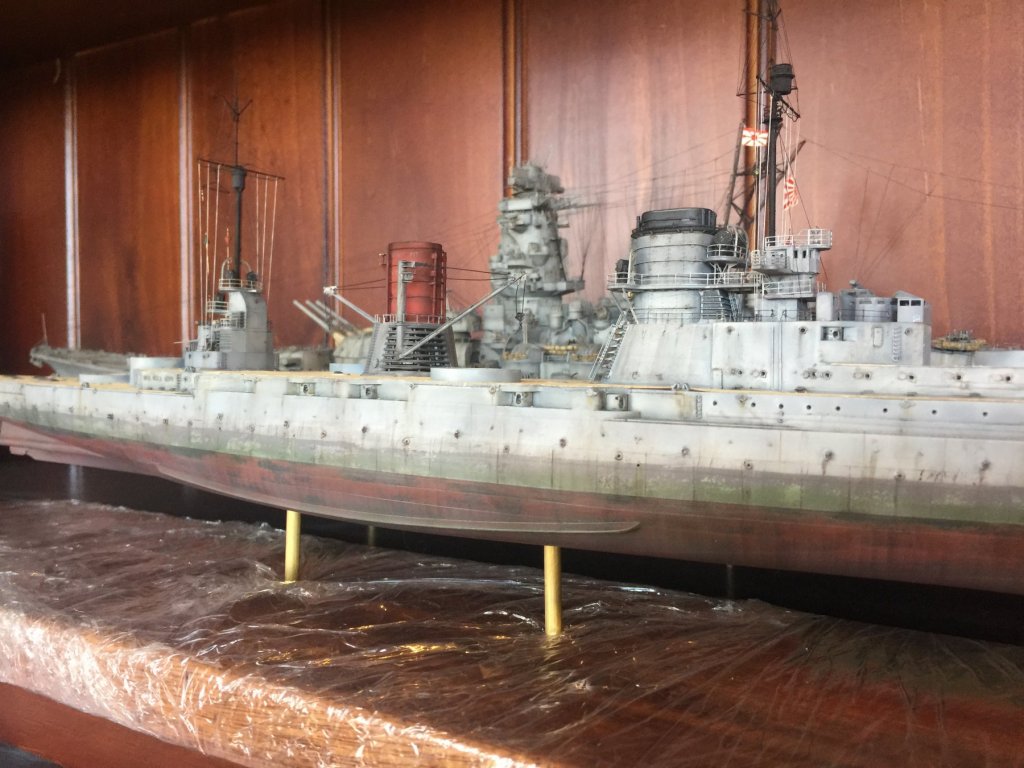
The three main superstructures are done, there is a fold out flybridge to go yet but I need to do stuff to the deck which will place them at risk

- 540 replies
-
- 18
-
-
Welcome from Canberra
-
It’s about the same as the Pontos Dreadnought I think and priced about the same. You’ll love it Carl.
-
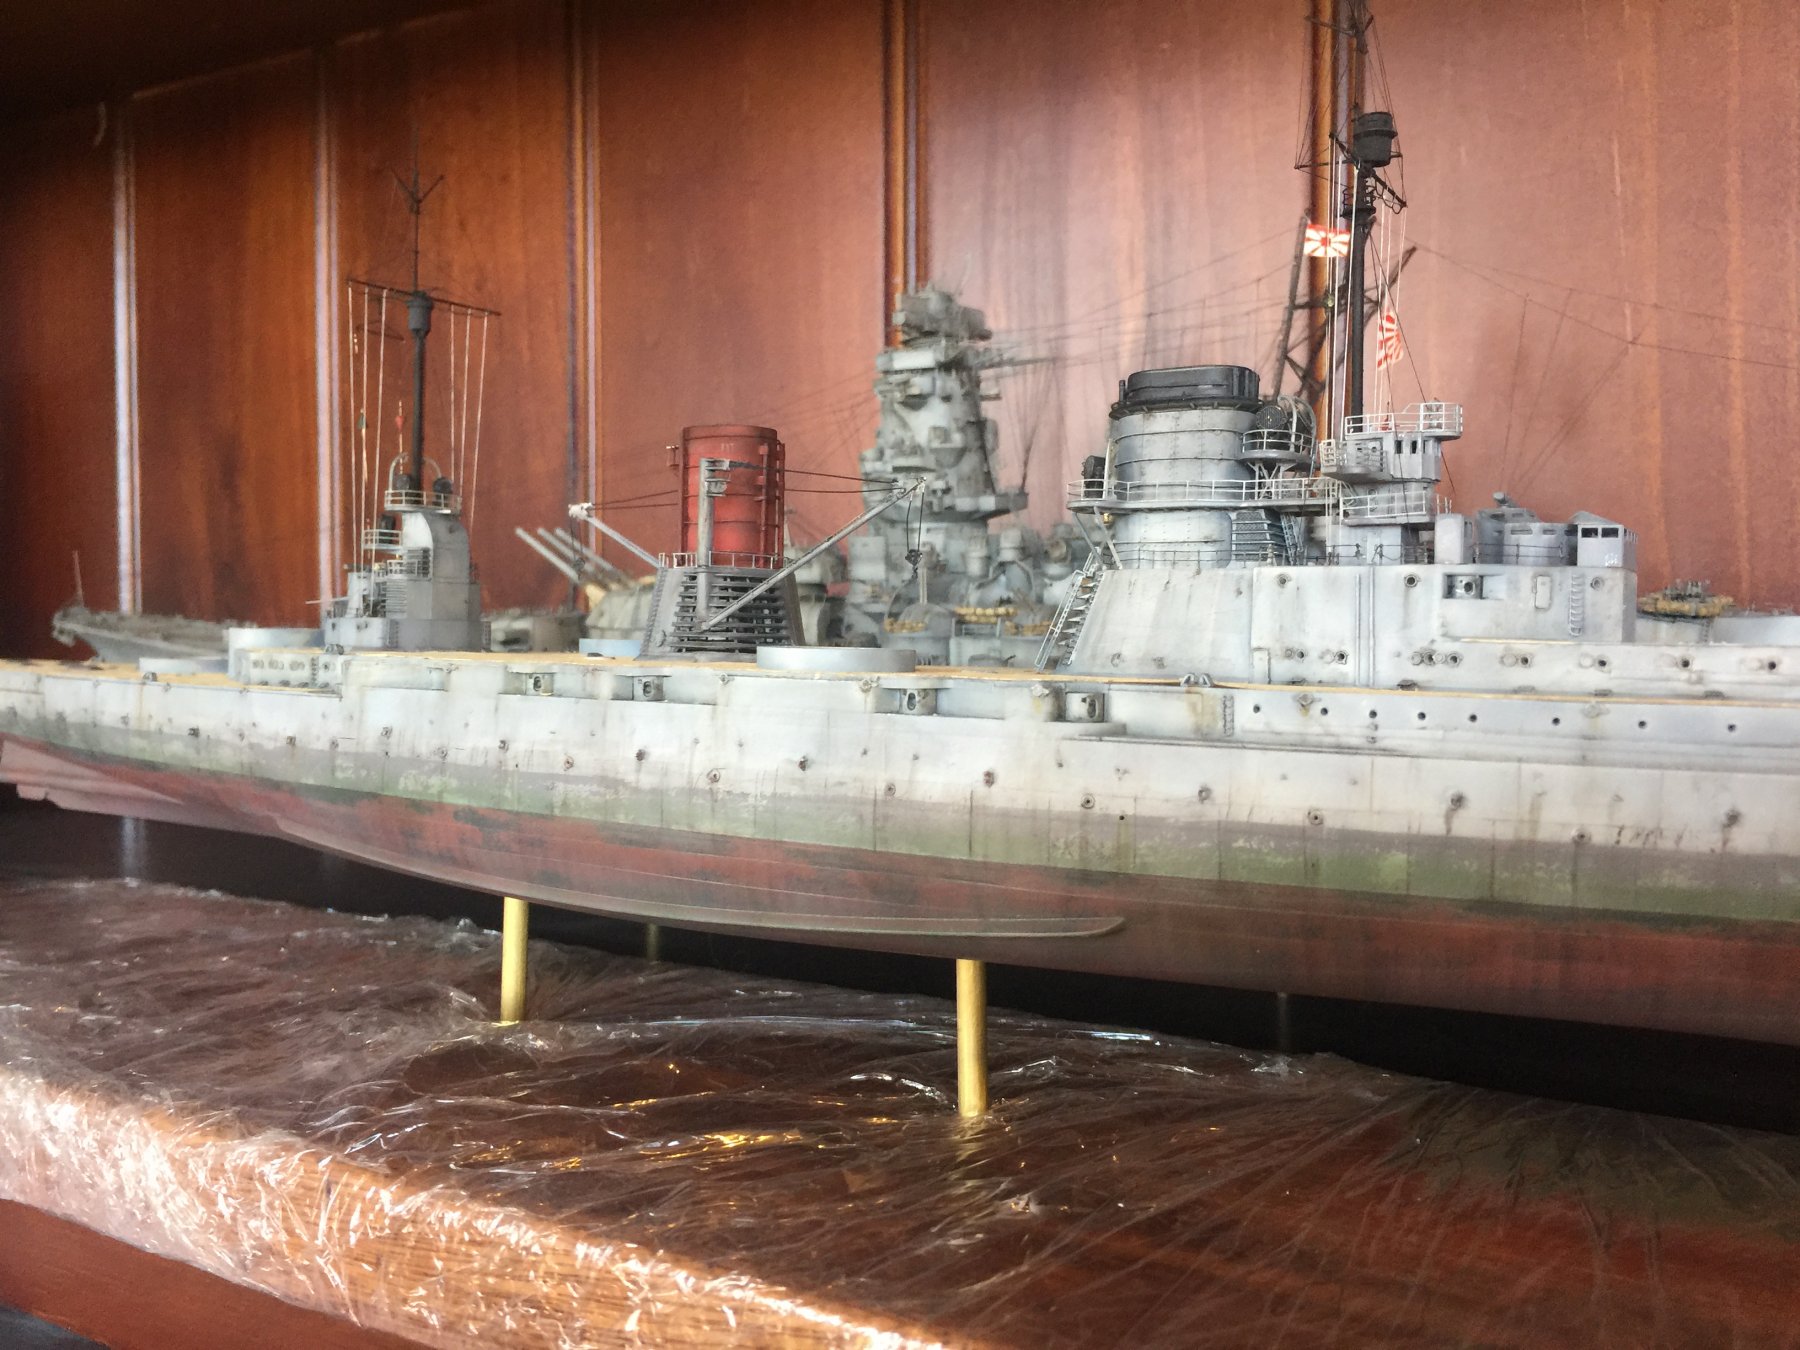
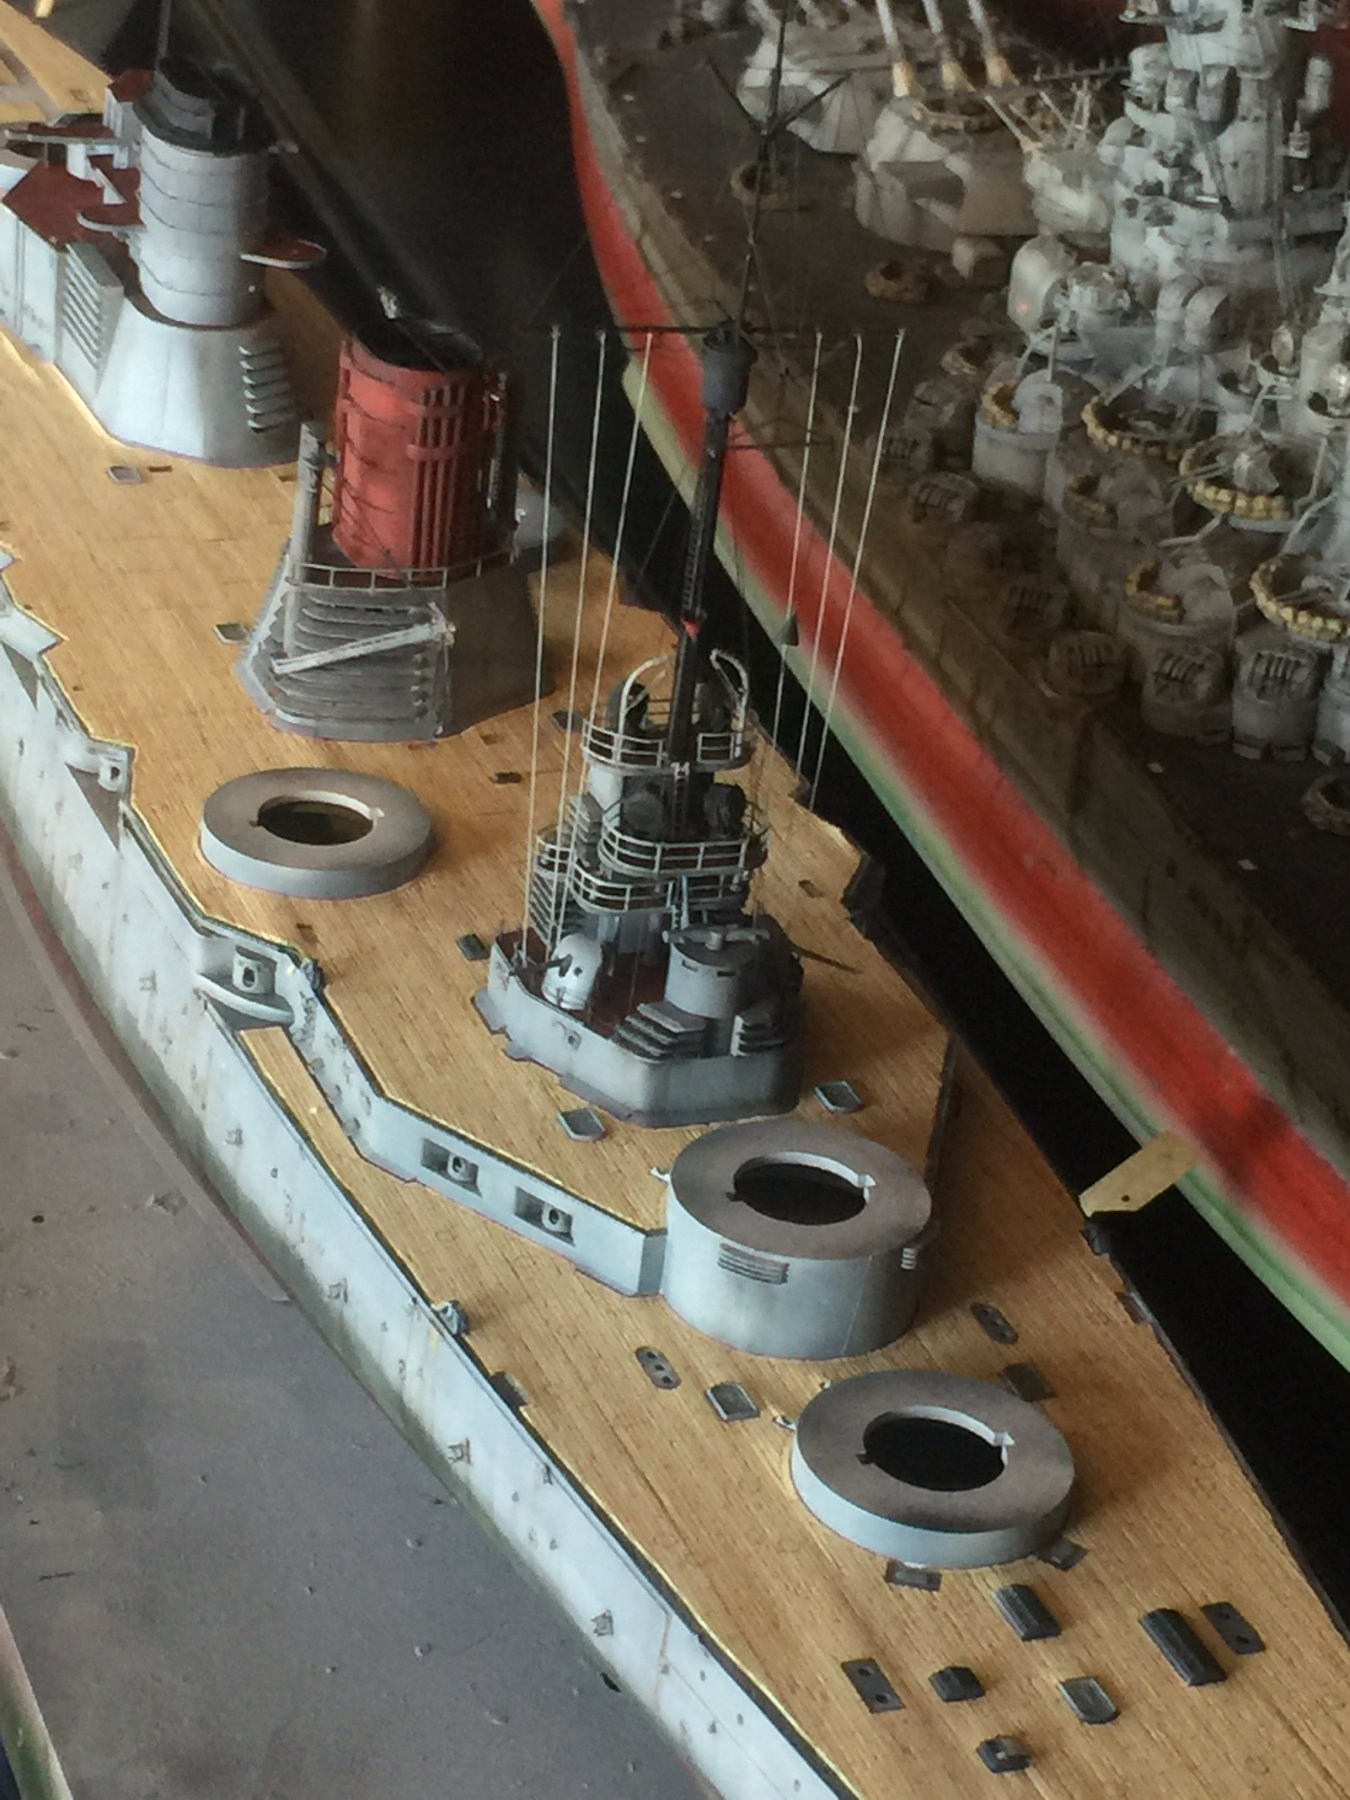
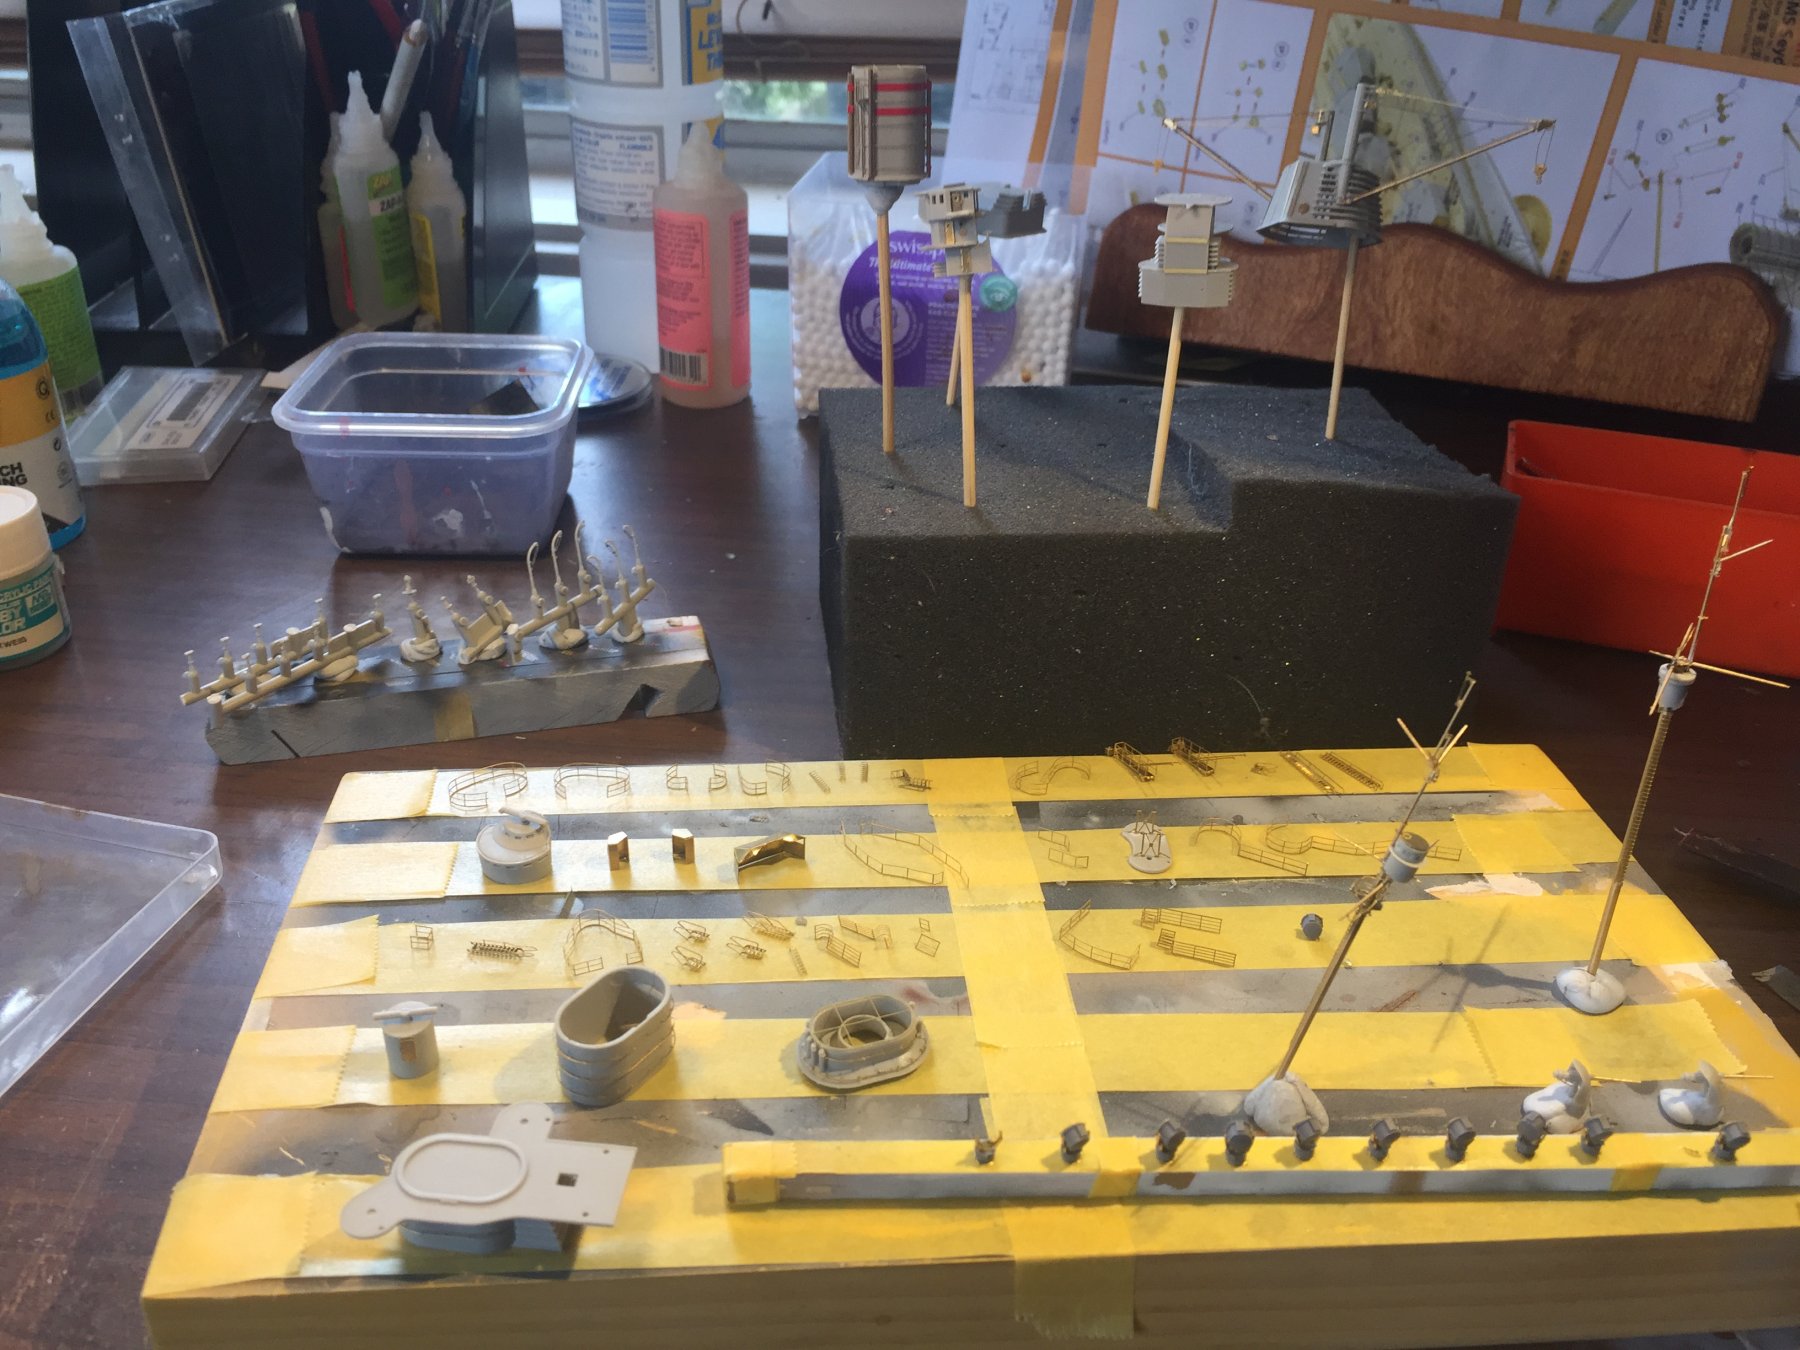
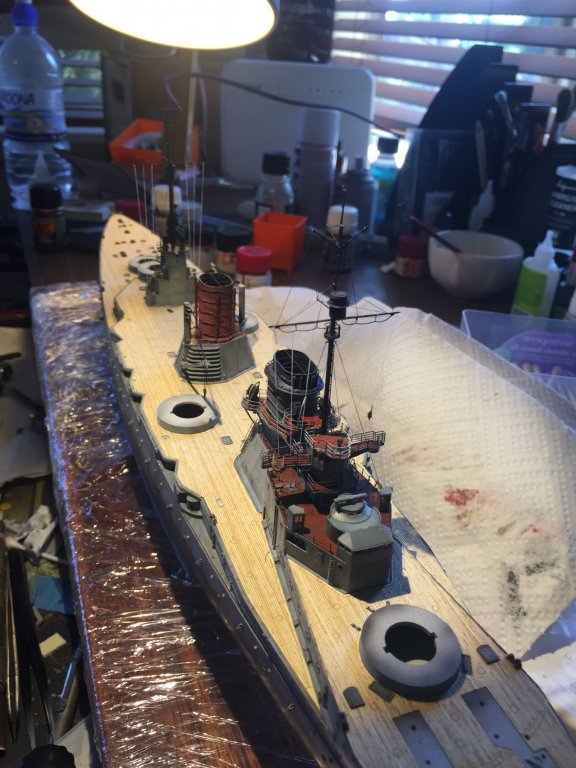
None of this is glued down yet, the deck appears to keep popping up. The bridge is next. Then the deck features, then figure out the deck rigging for the nets.
-
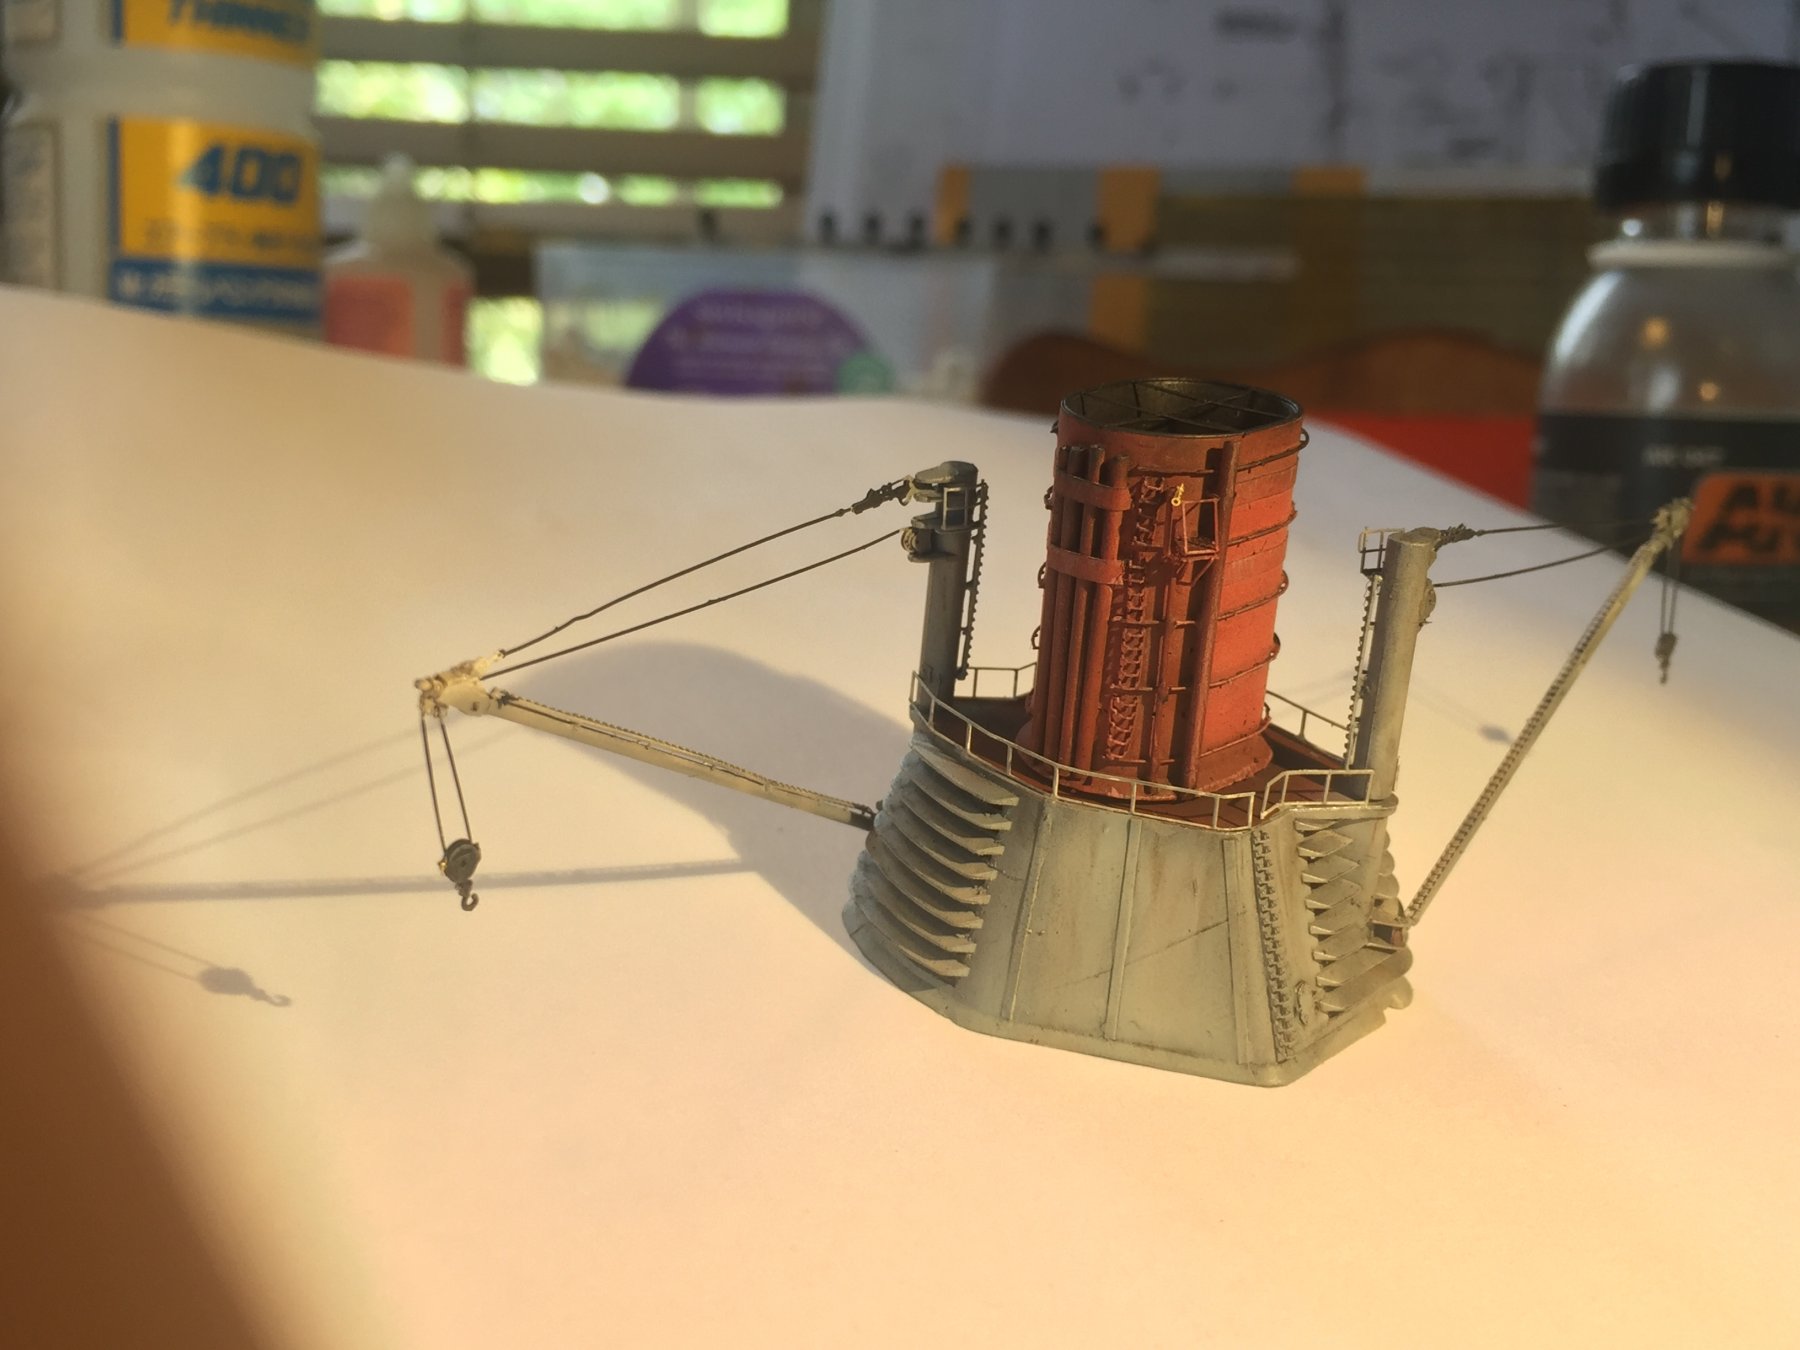
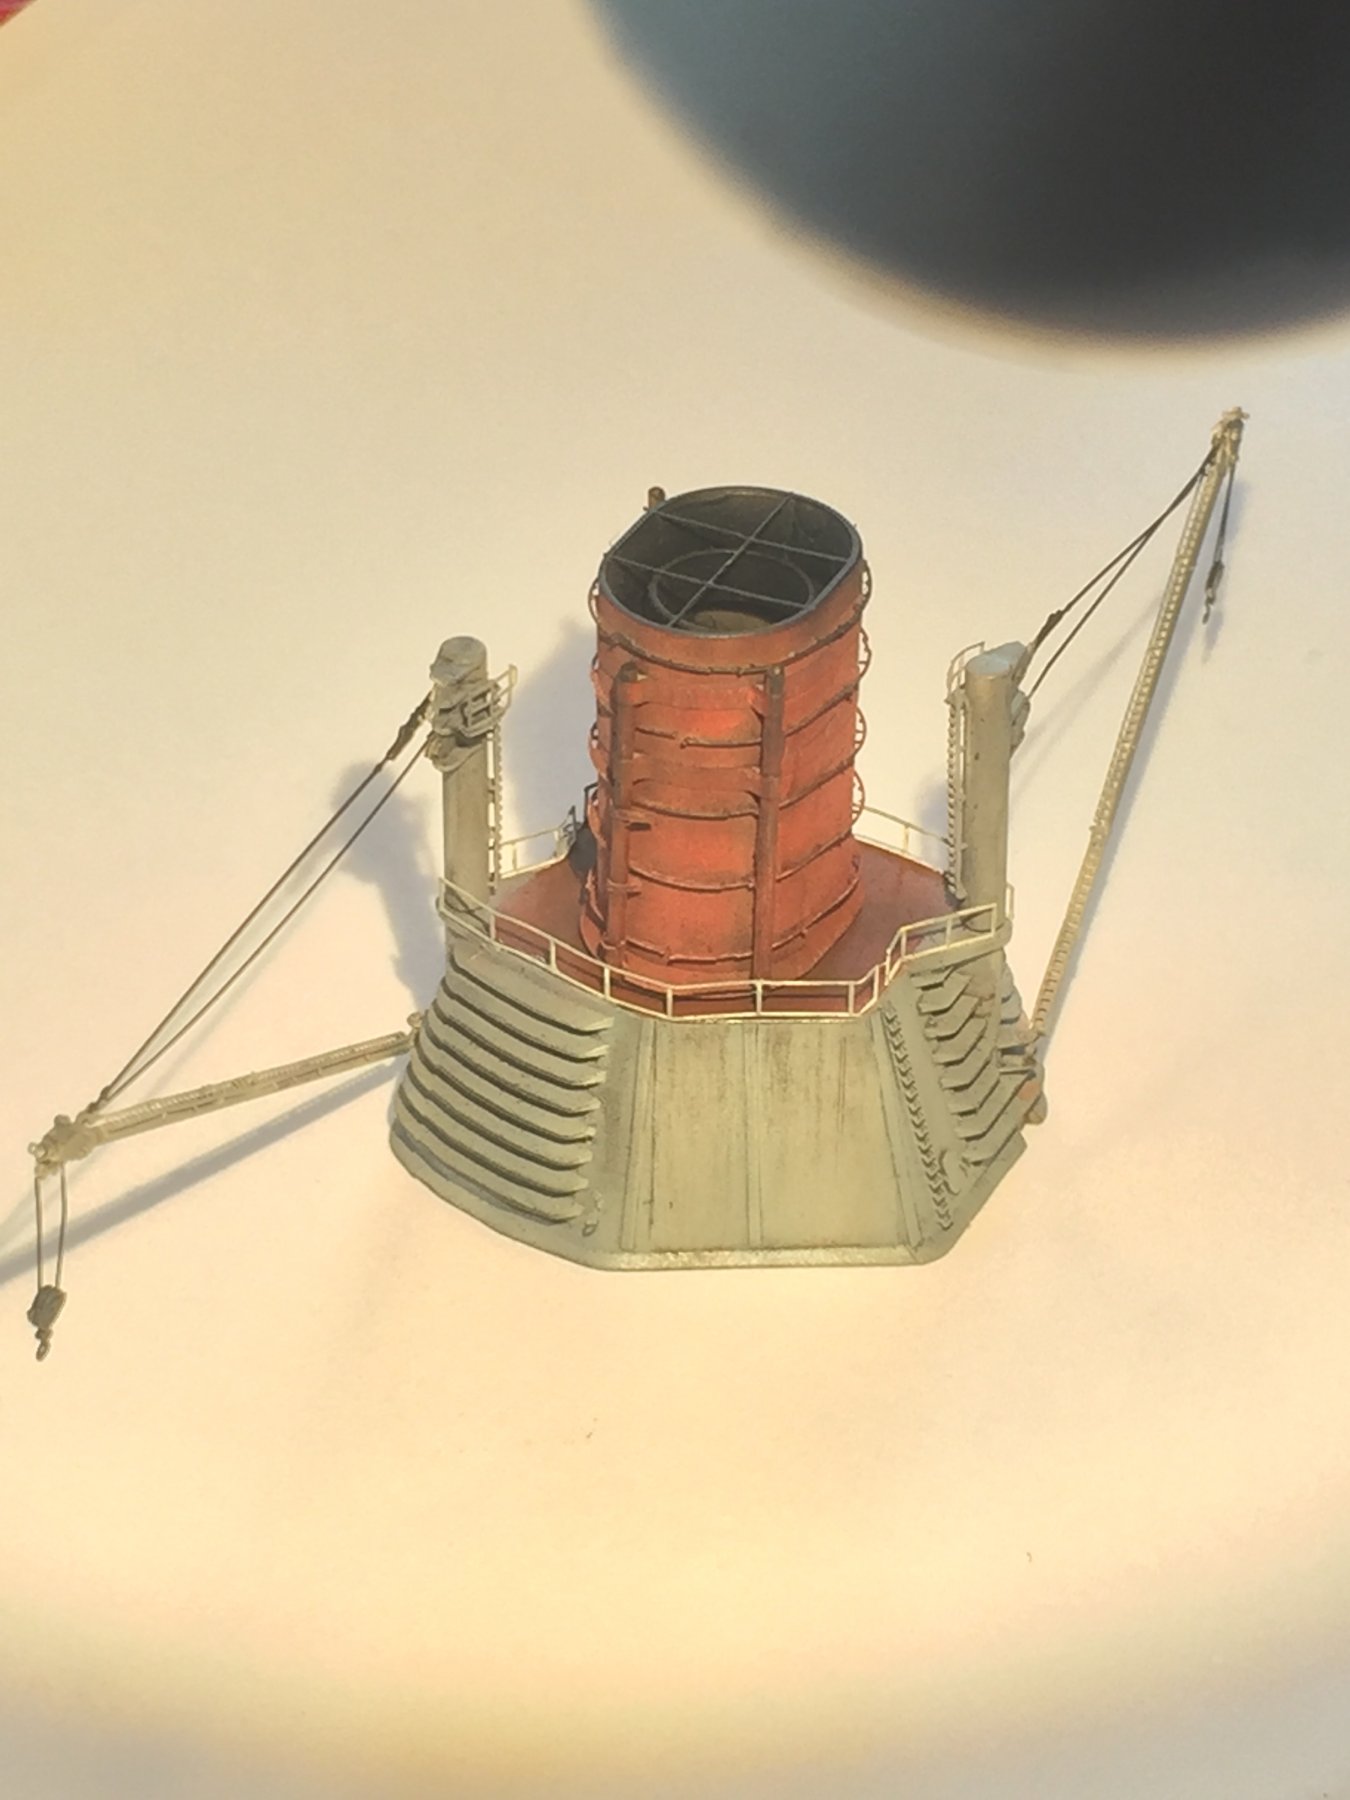
The Lino is actually the correct colour, but I’m going to have to overspray the funnel again to lighten it up.
-
No,the limo is sprayed. I tried to use three shades of red. I’m thinking of using another layer of red on the aft funnel.
-
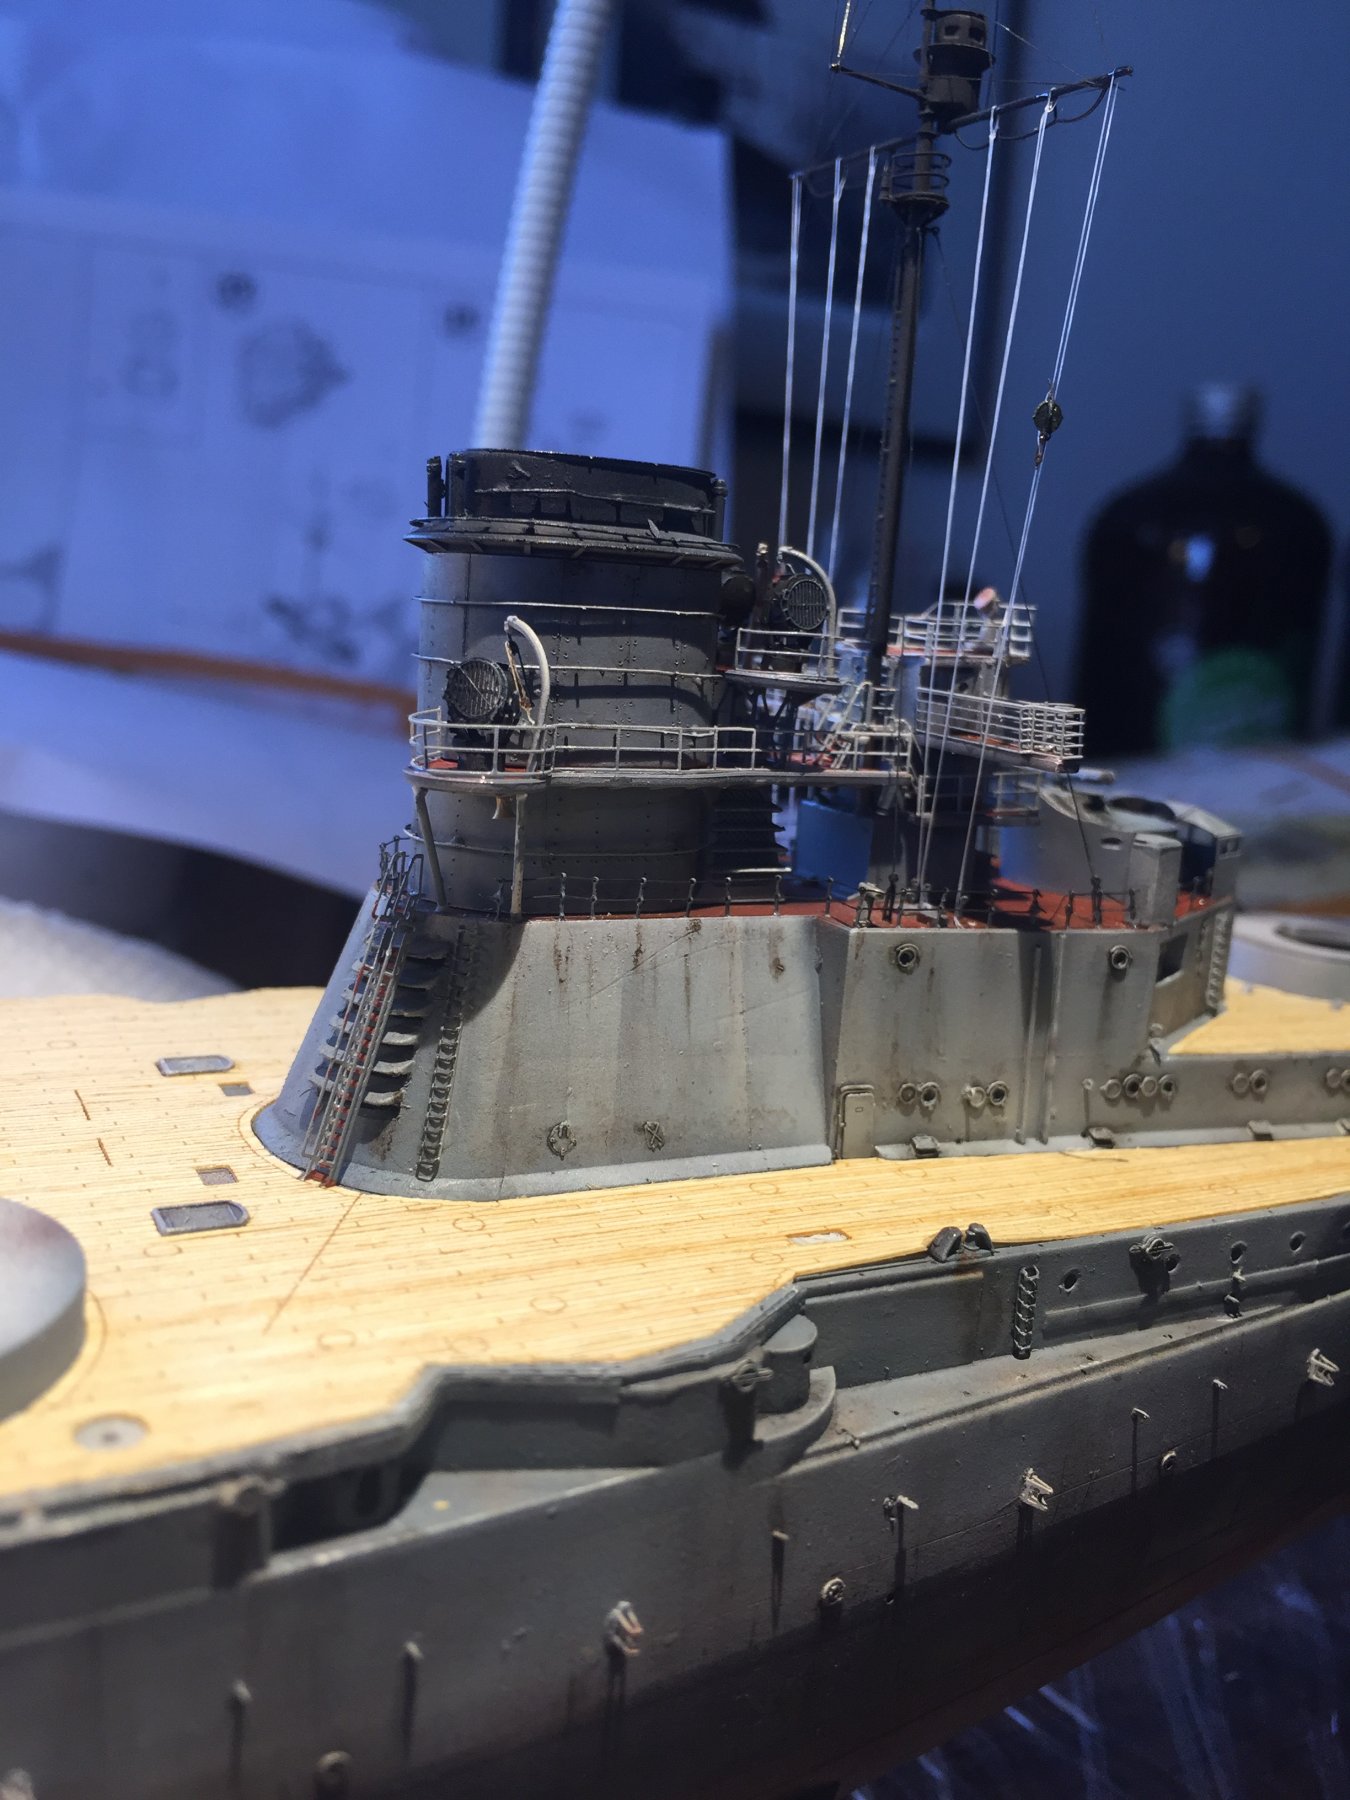
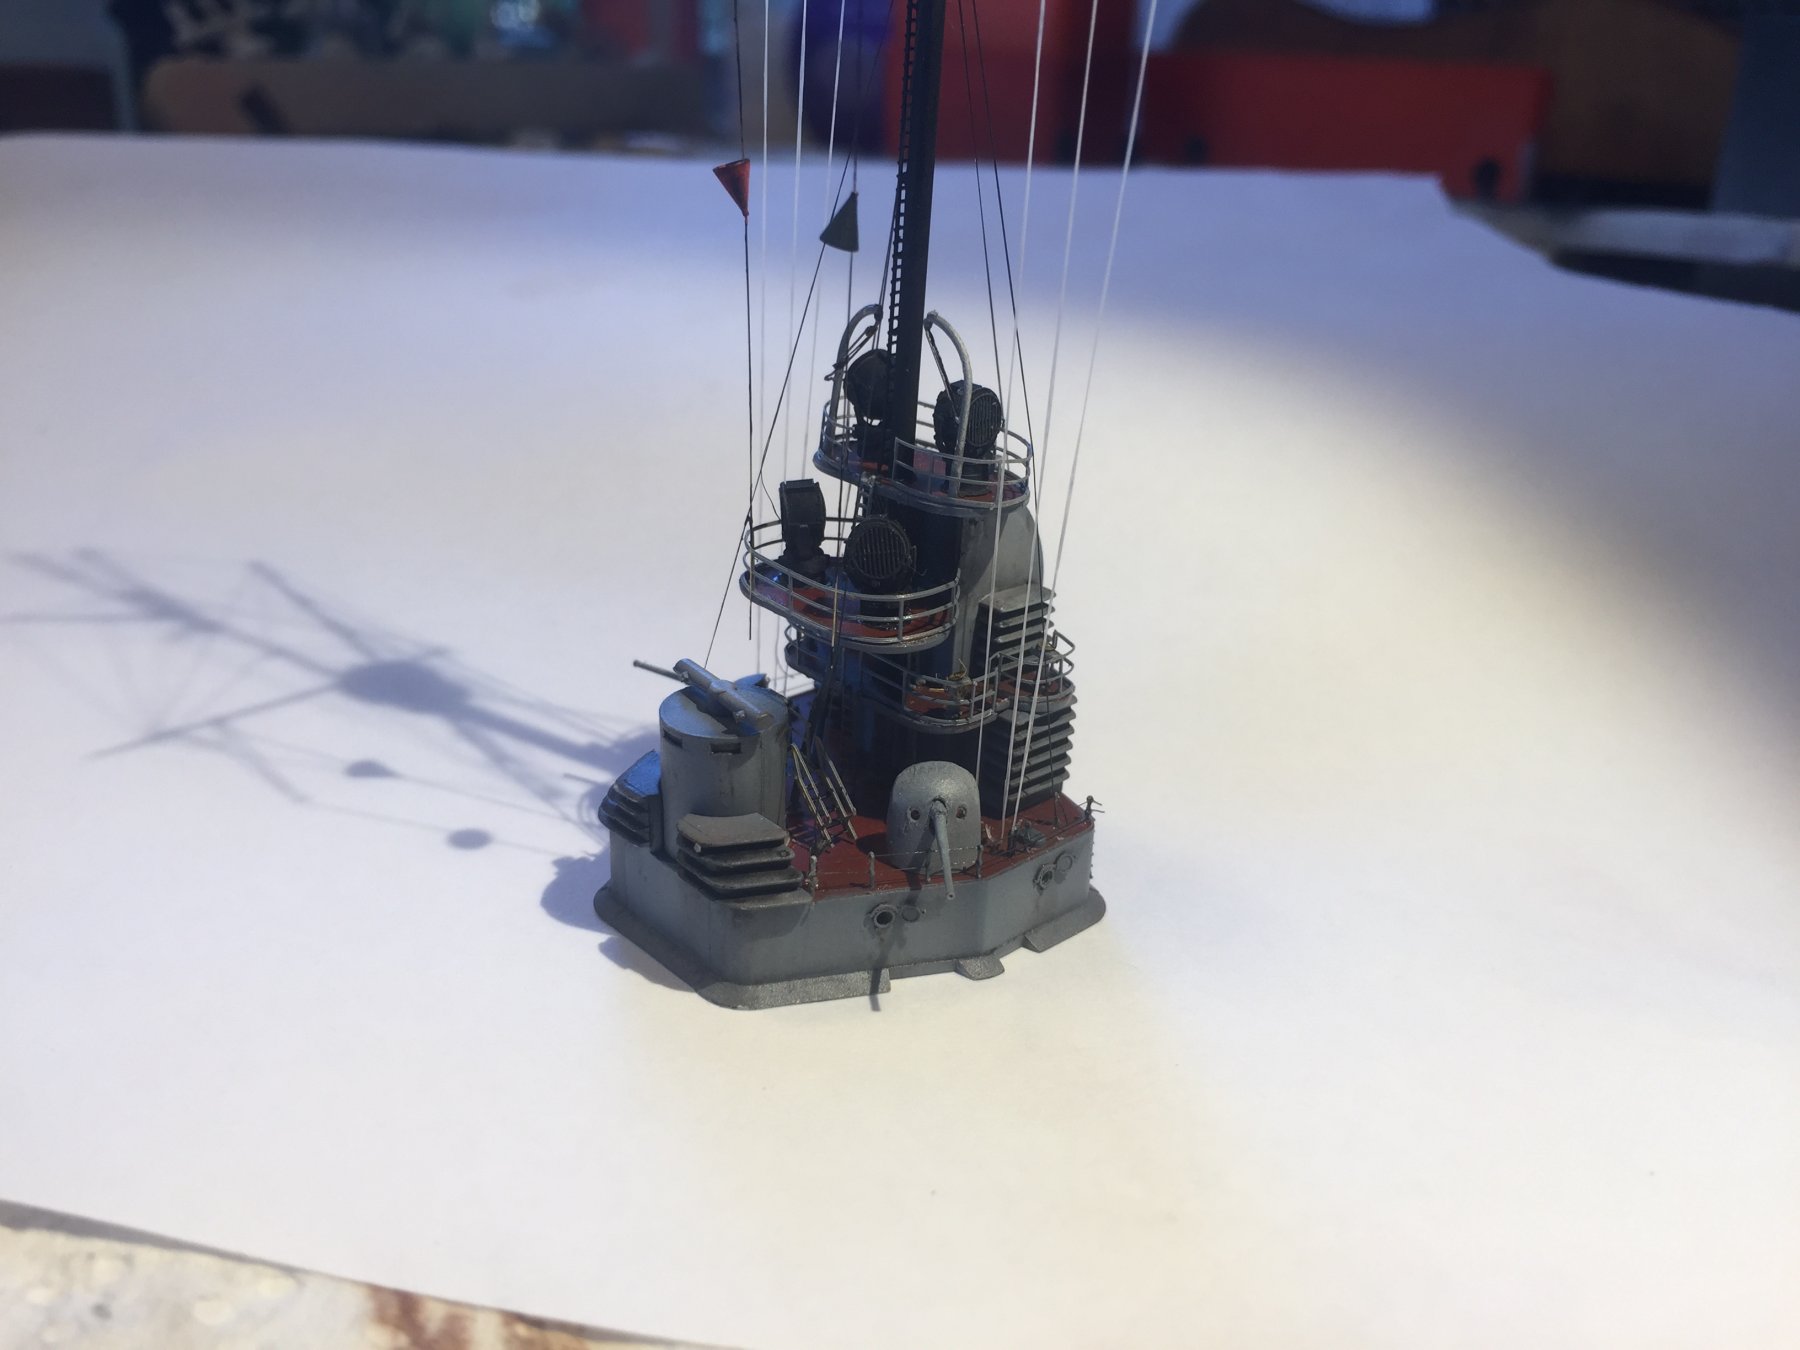
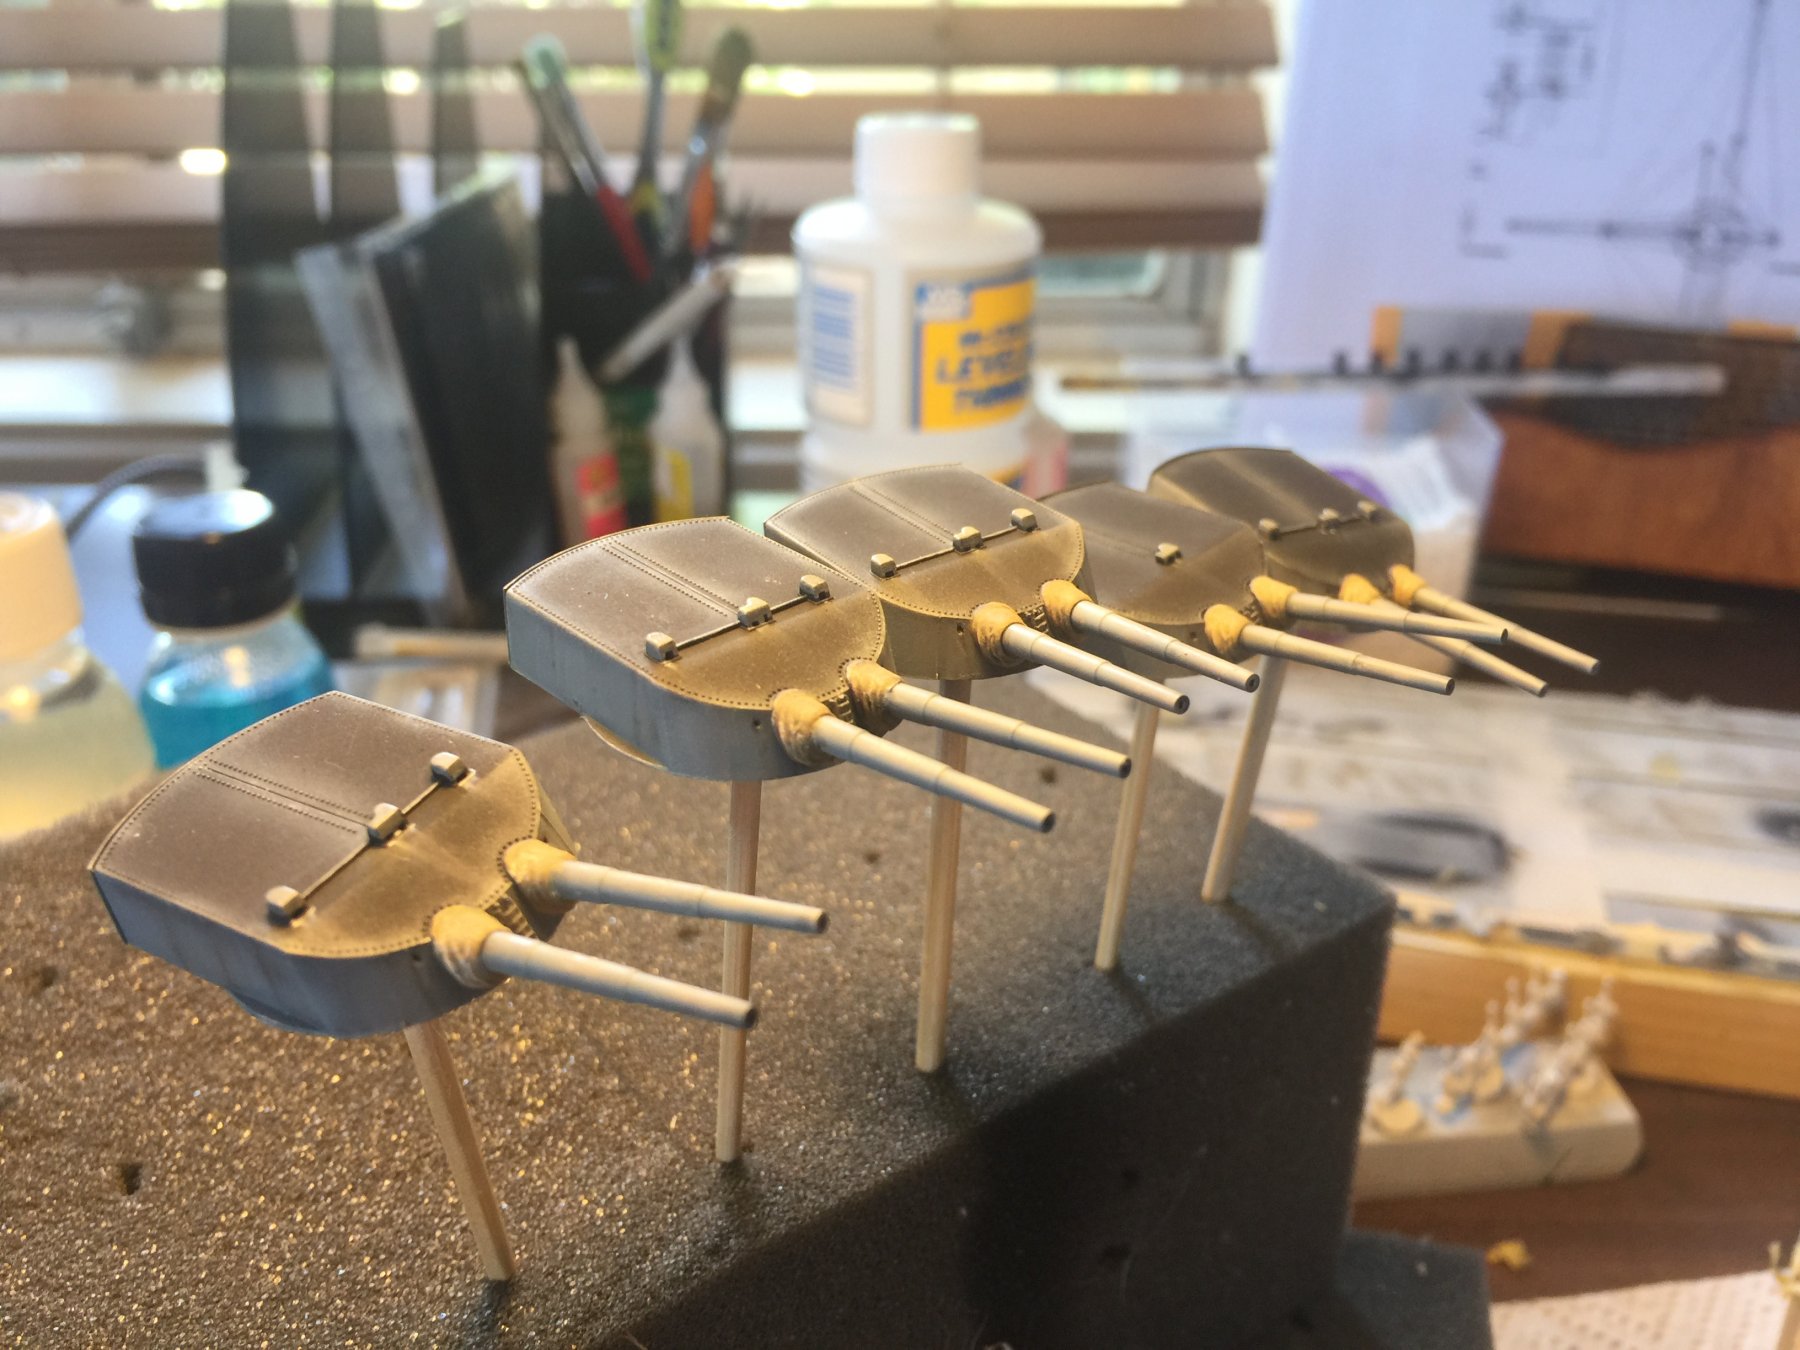
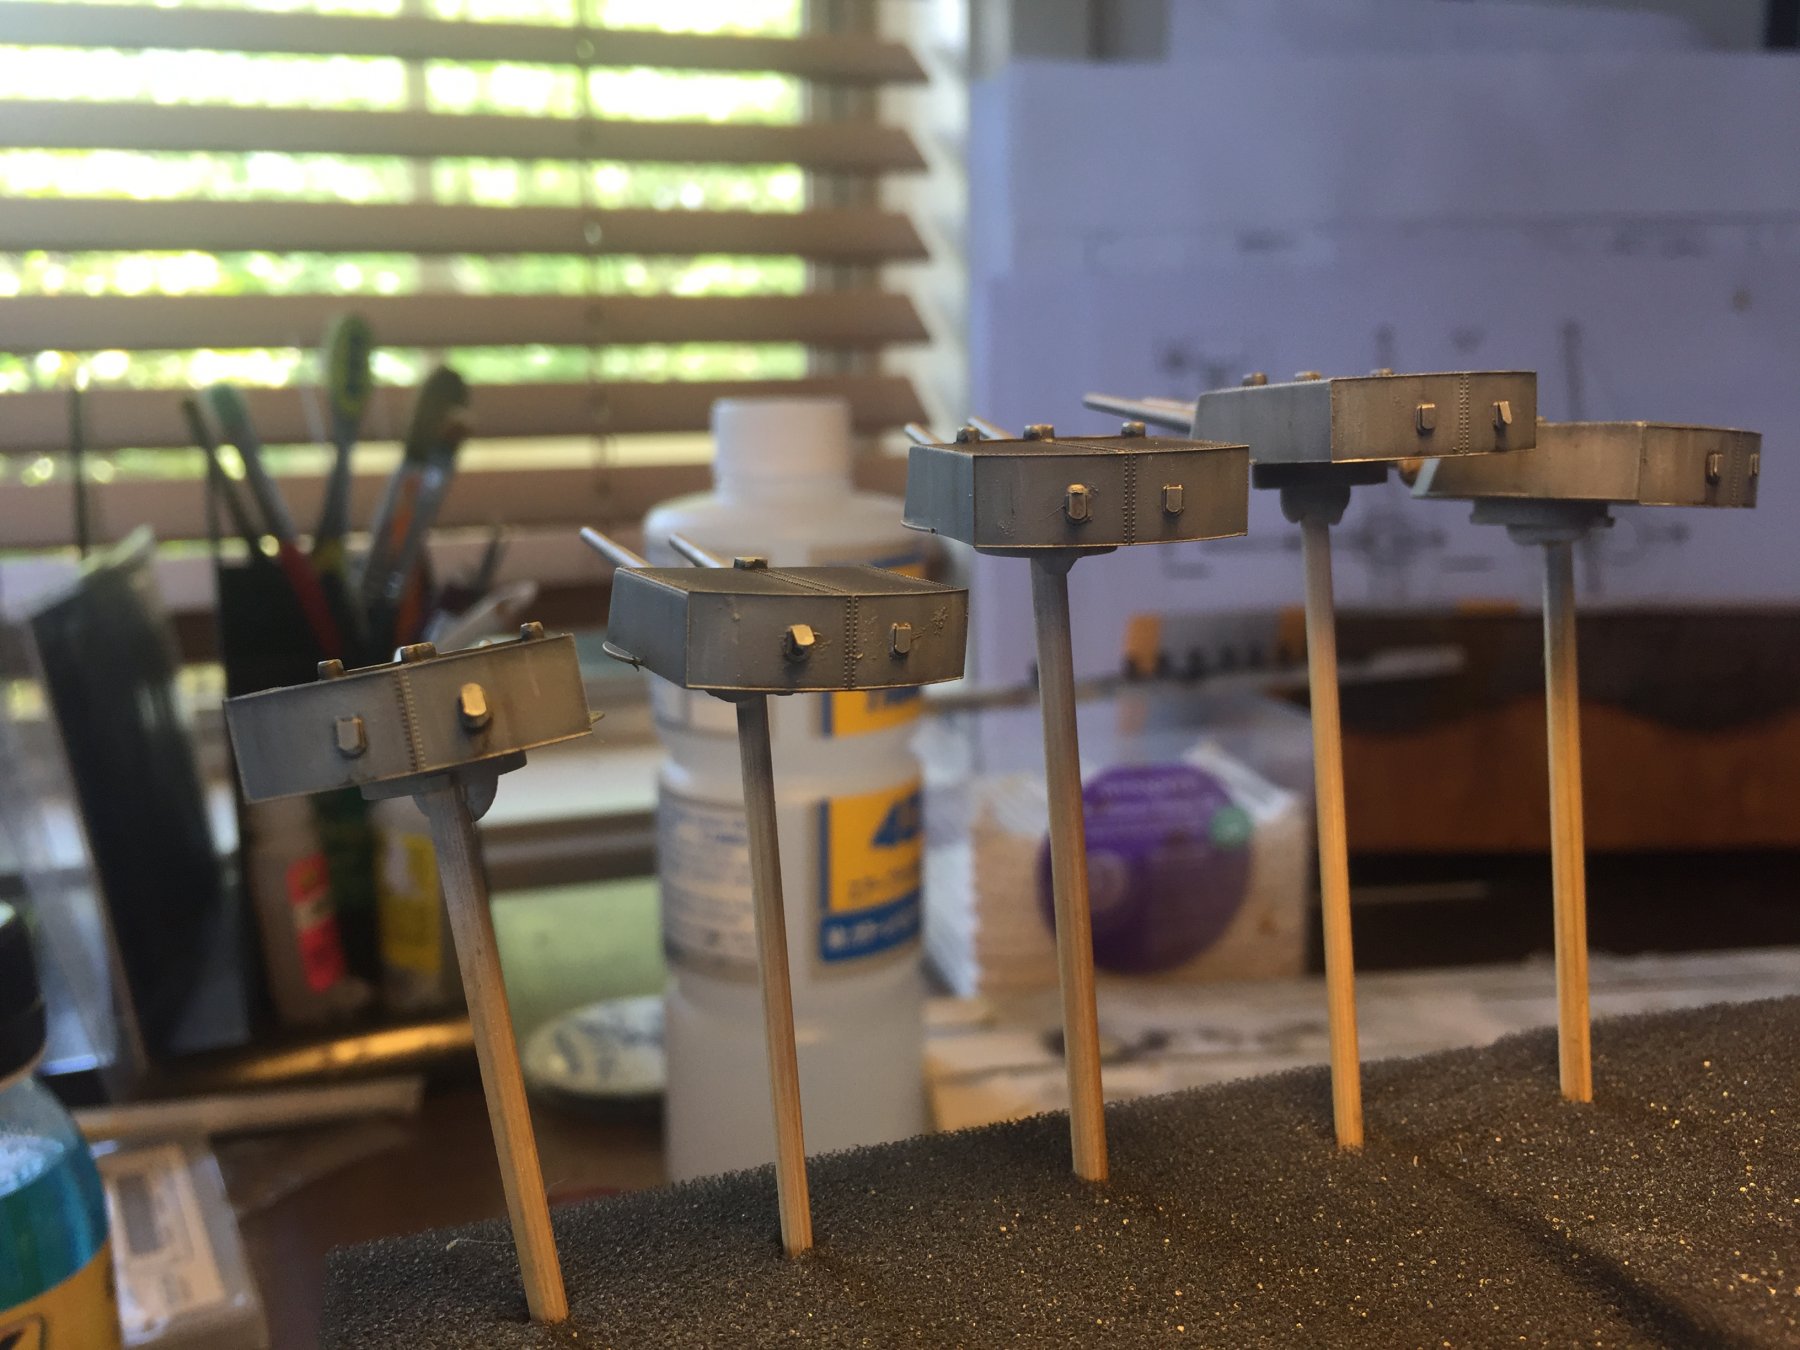
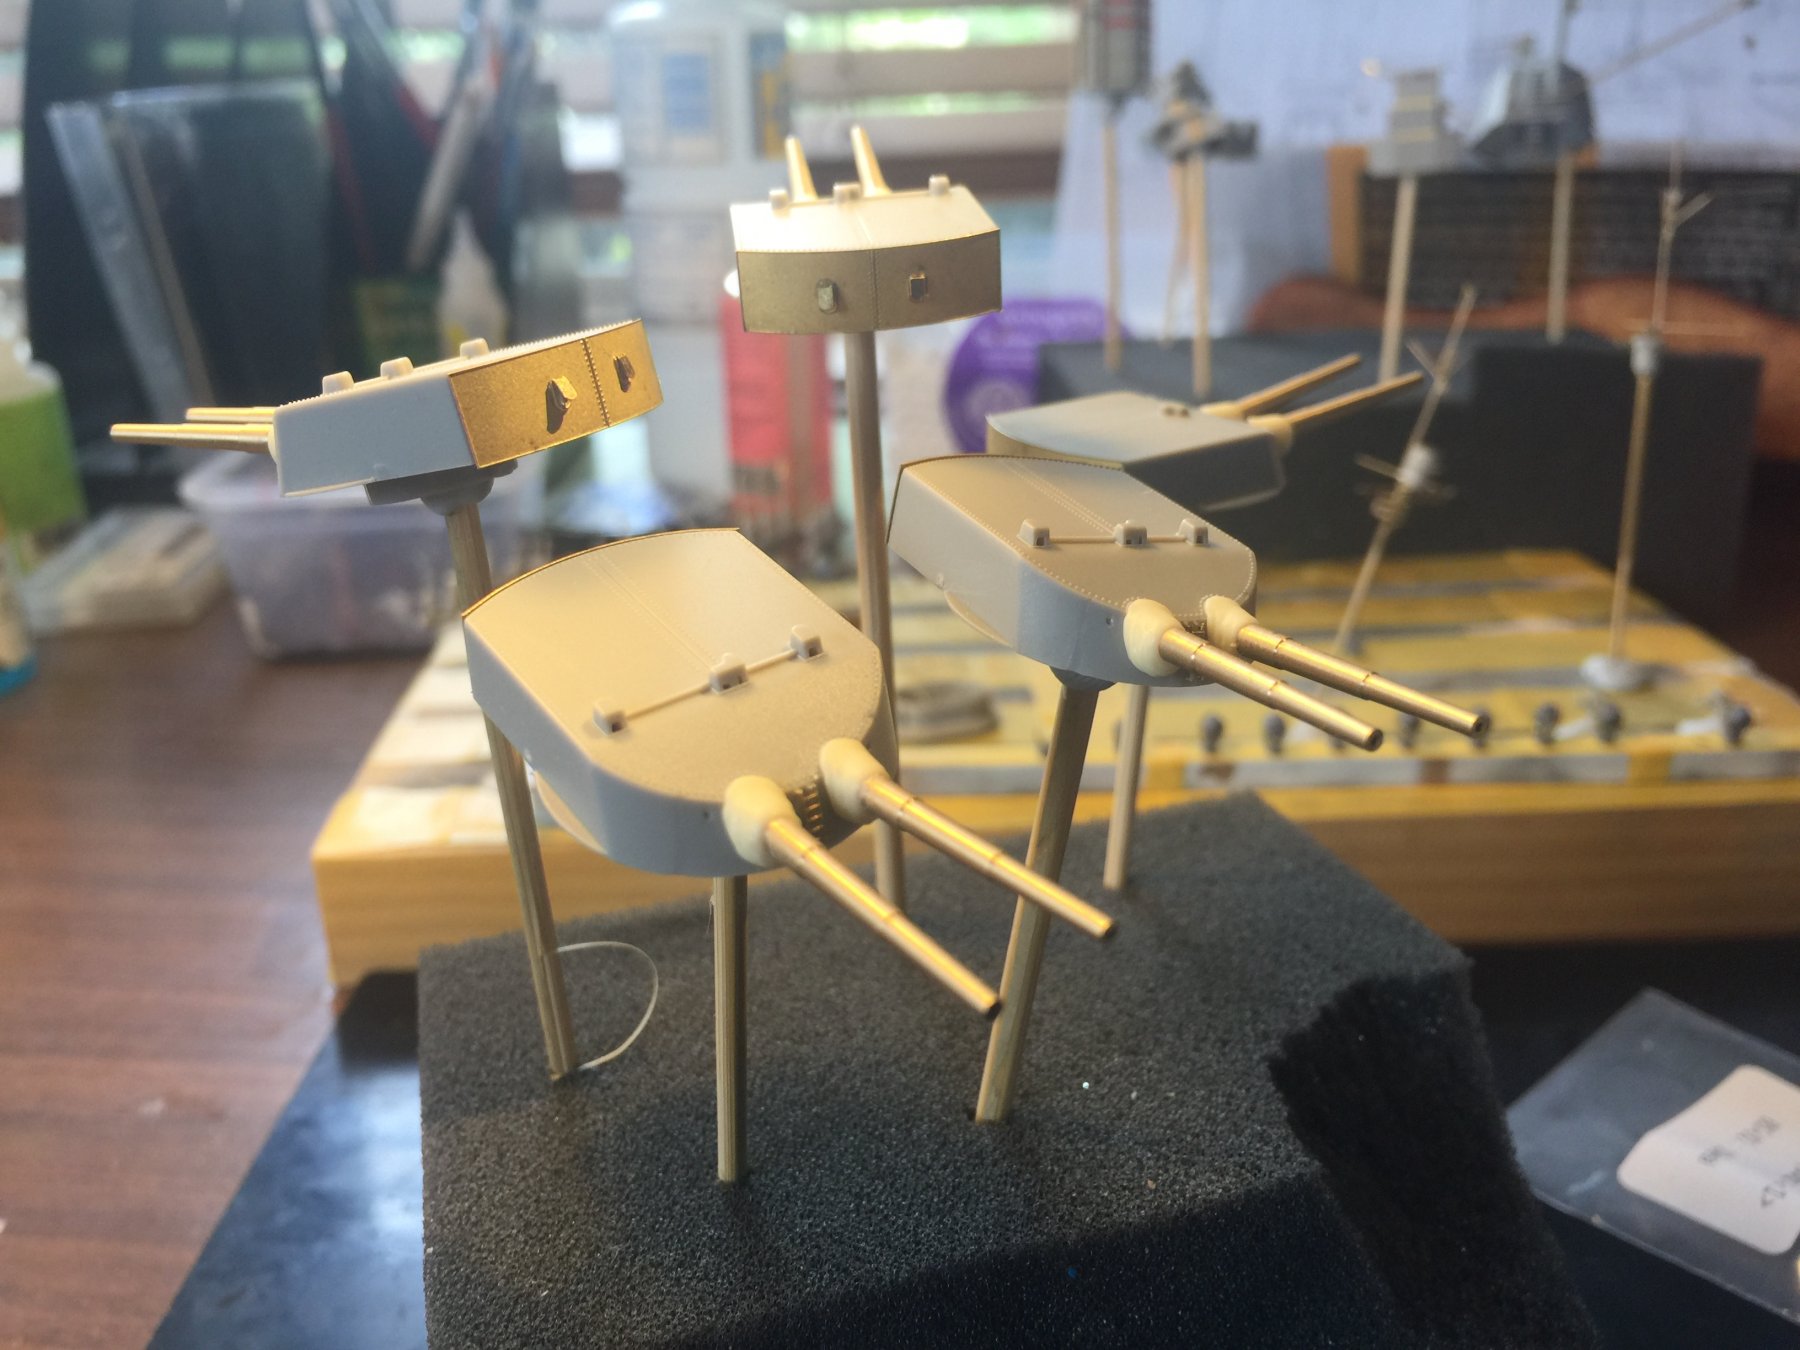
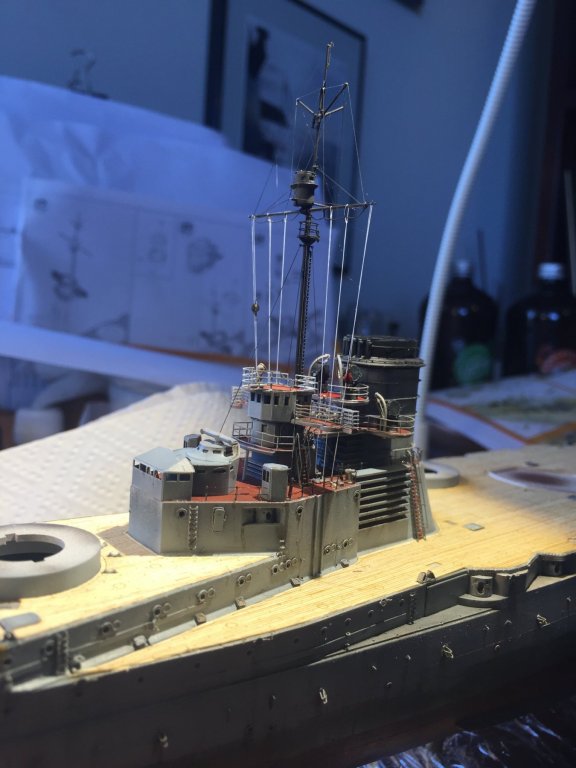
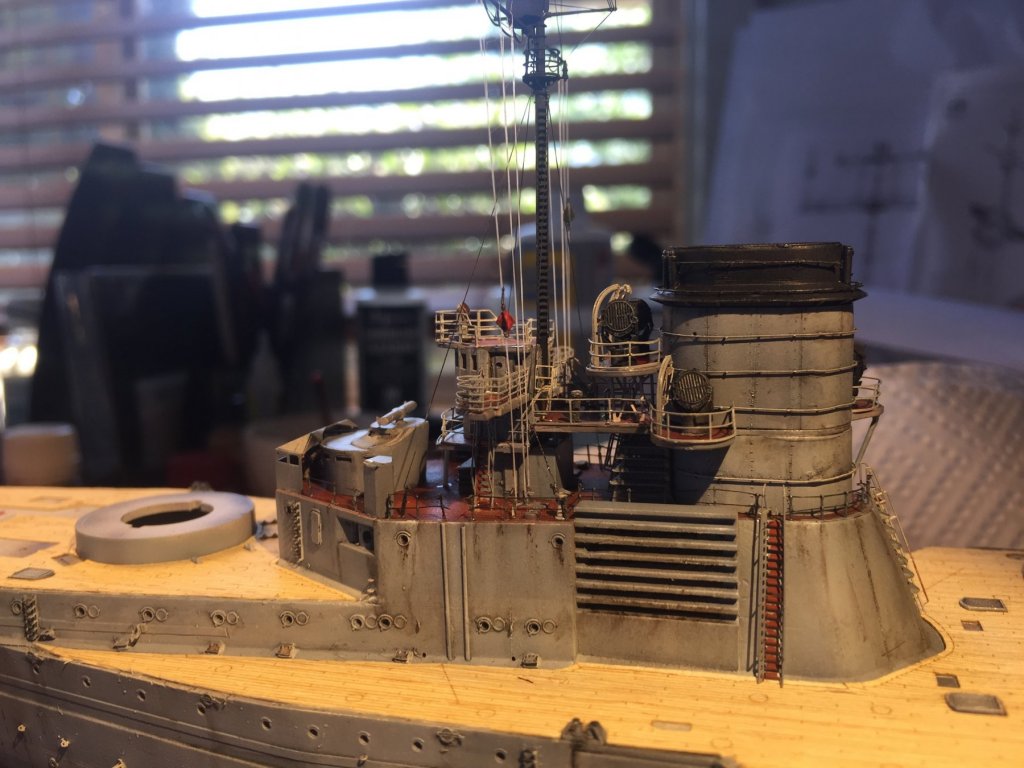
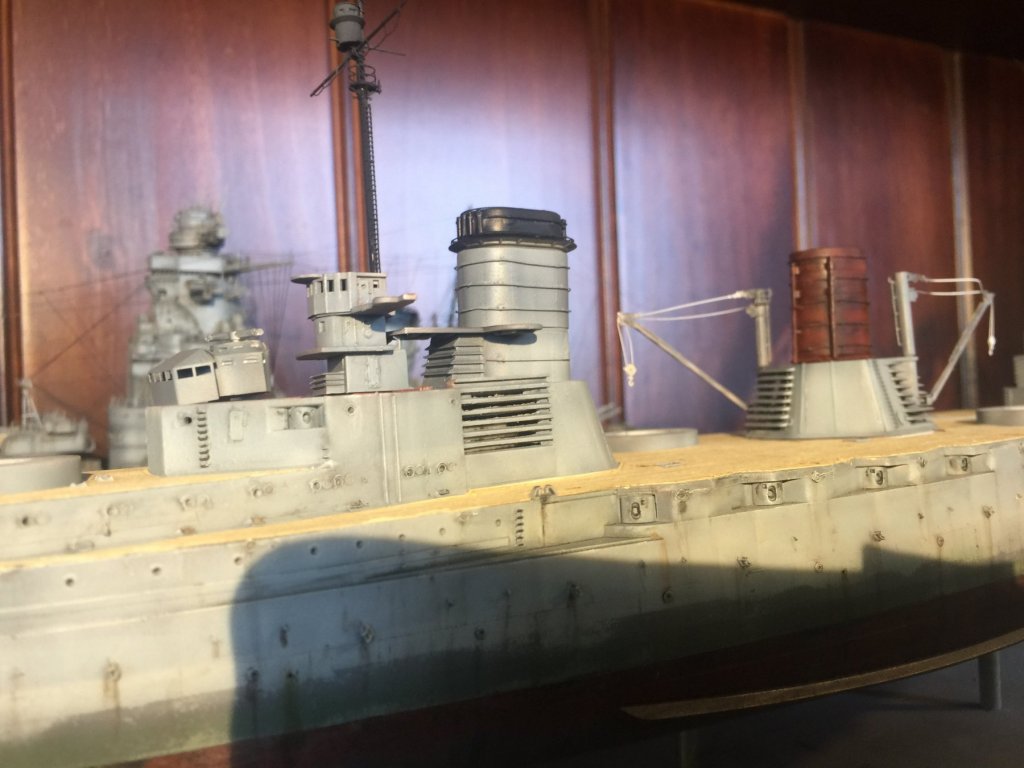
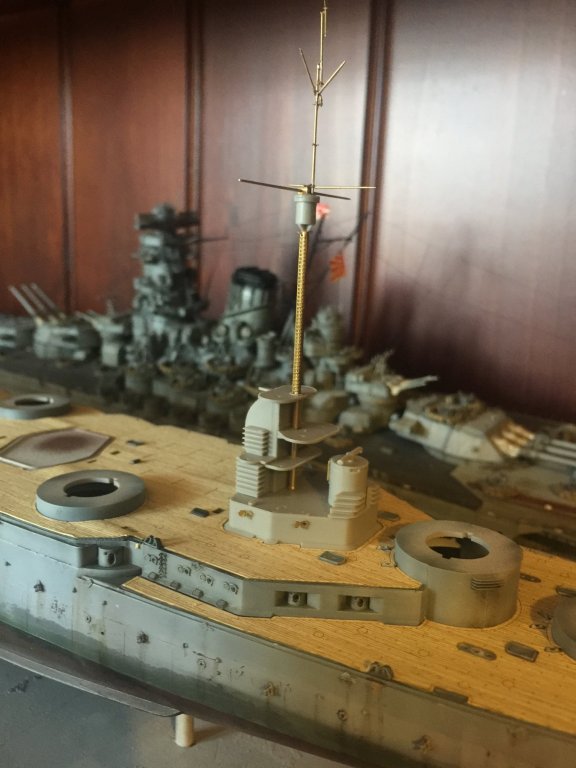
Main superstructures are now painted, a quick dryfit. I can now start hand painting and weathering then rigging. The guns are done just need weathering.

- 540 replies
-
- 14
-
-
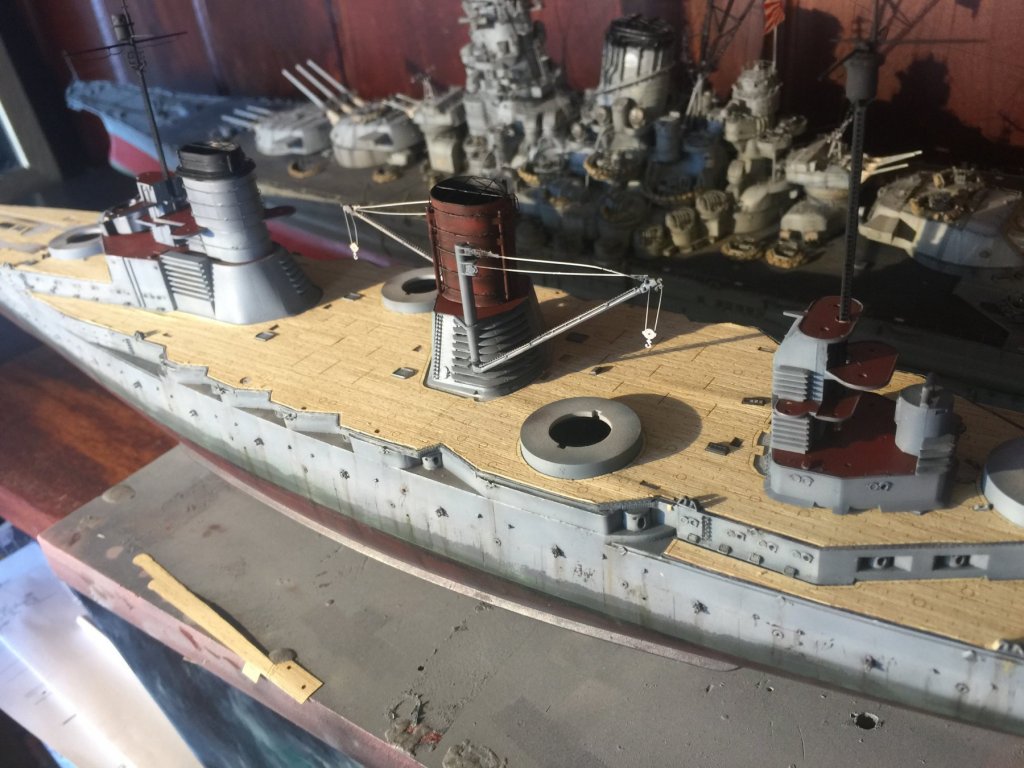
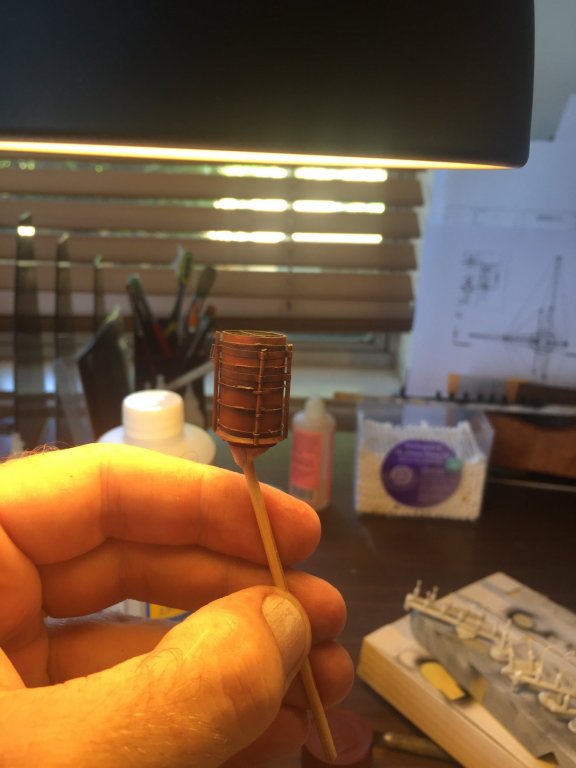
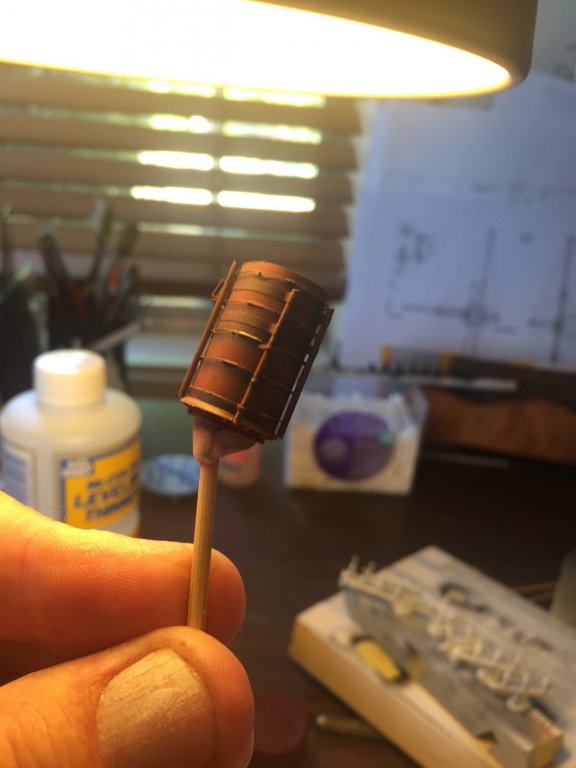
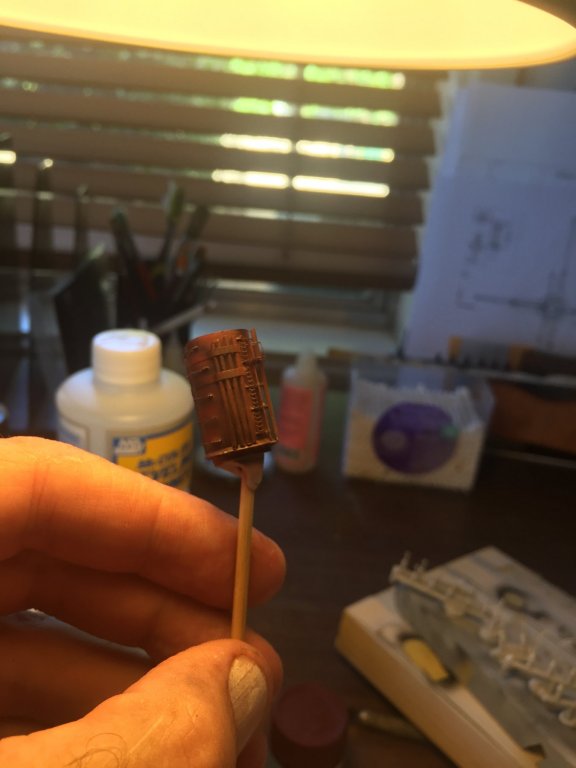
The aft funnel originally has two white bands added for identification, they were painted over as the war began but left in place. I replicated this with tape. The aft funnel was painted red when away away from the shore to identify her in the battle line then repainted grey when it came back to port. I’m going to leave it red because I can. I’ve added a platform not mentioned anywhere but the original photos and I’ll add a small brass steam whistle.
- 540 replies
-
- 15
-
-
At the start of the build I bought Gary Staff’s German Battlecruisers Of WW1. it has a fantastic history and reference photos but very limited on painting. This reference http://german-navy.tripod.com/sms_paint-overview.htm really points out correct colours, thus I need to repaint the top of the turrets jet black but with no circles as that didn’t come till 1917 when the torpedo nets were already removed.

- 540 replies
-
- 11
-
-
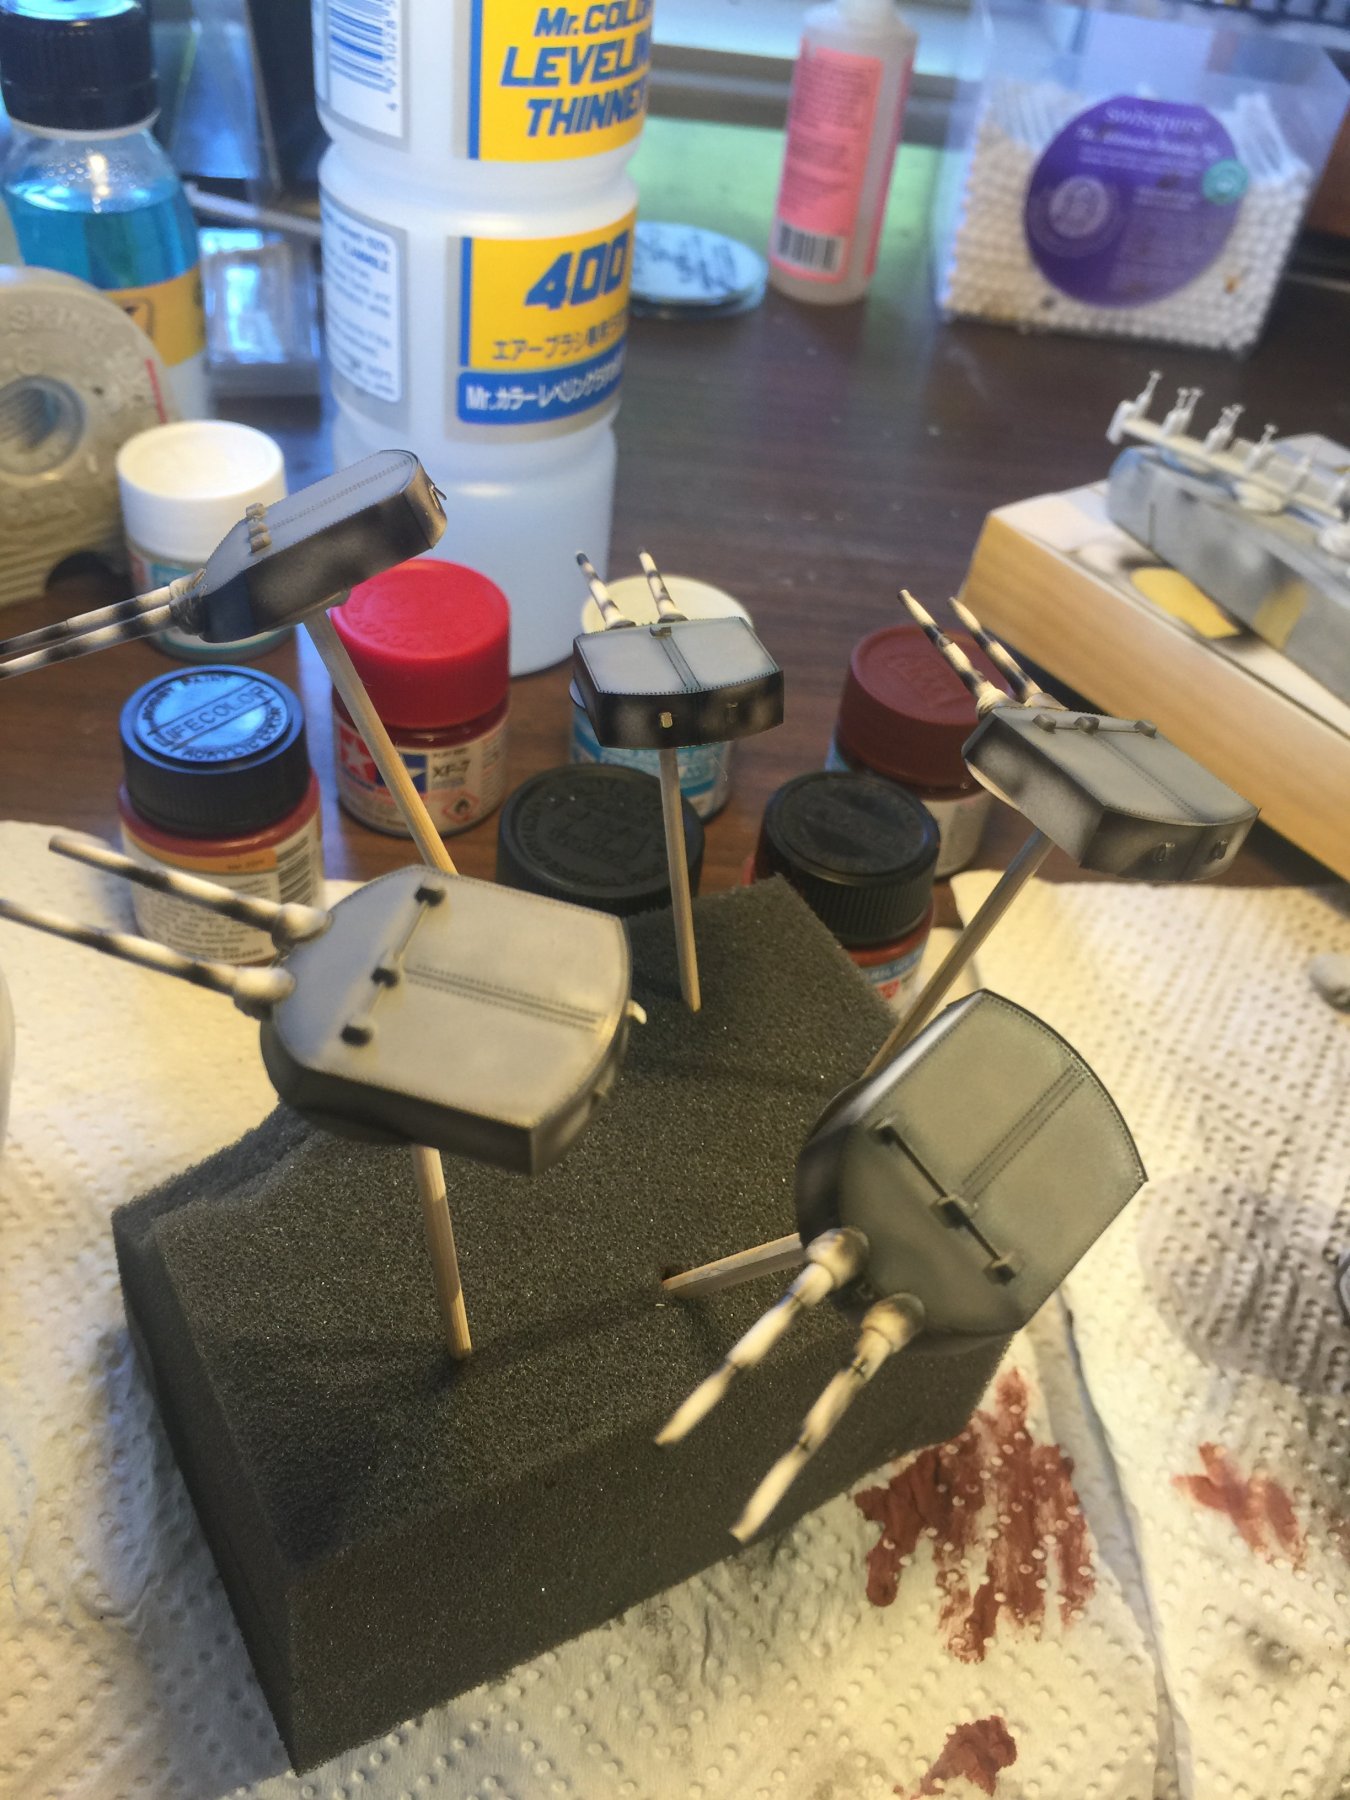
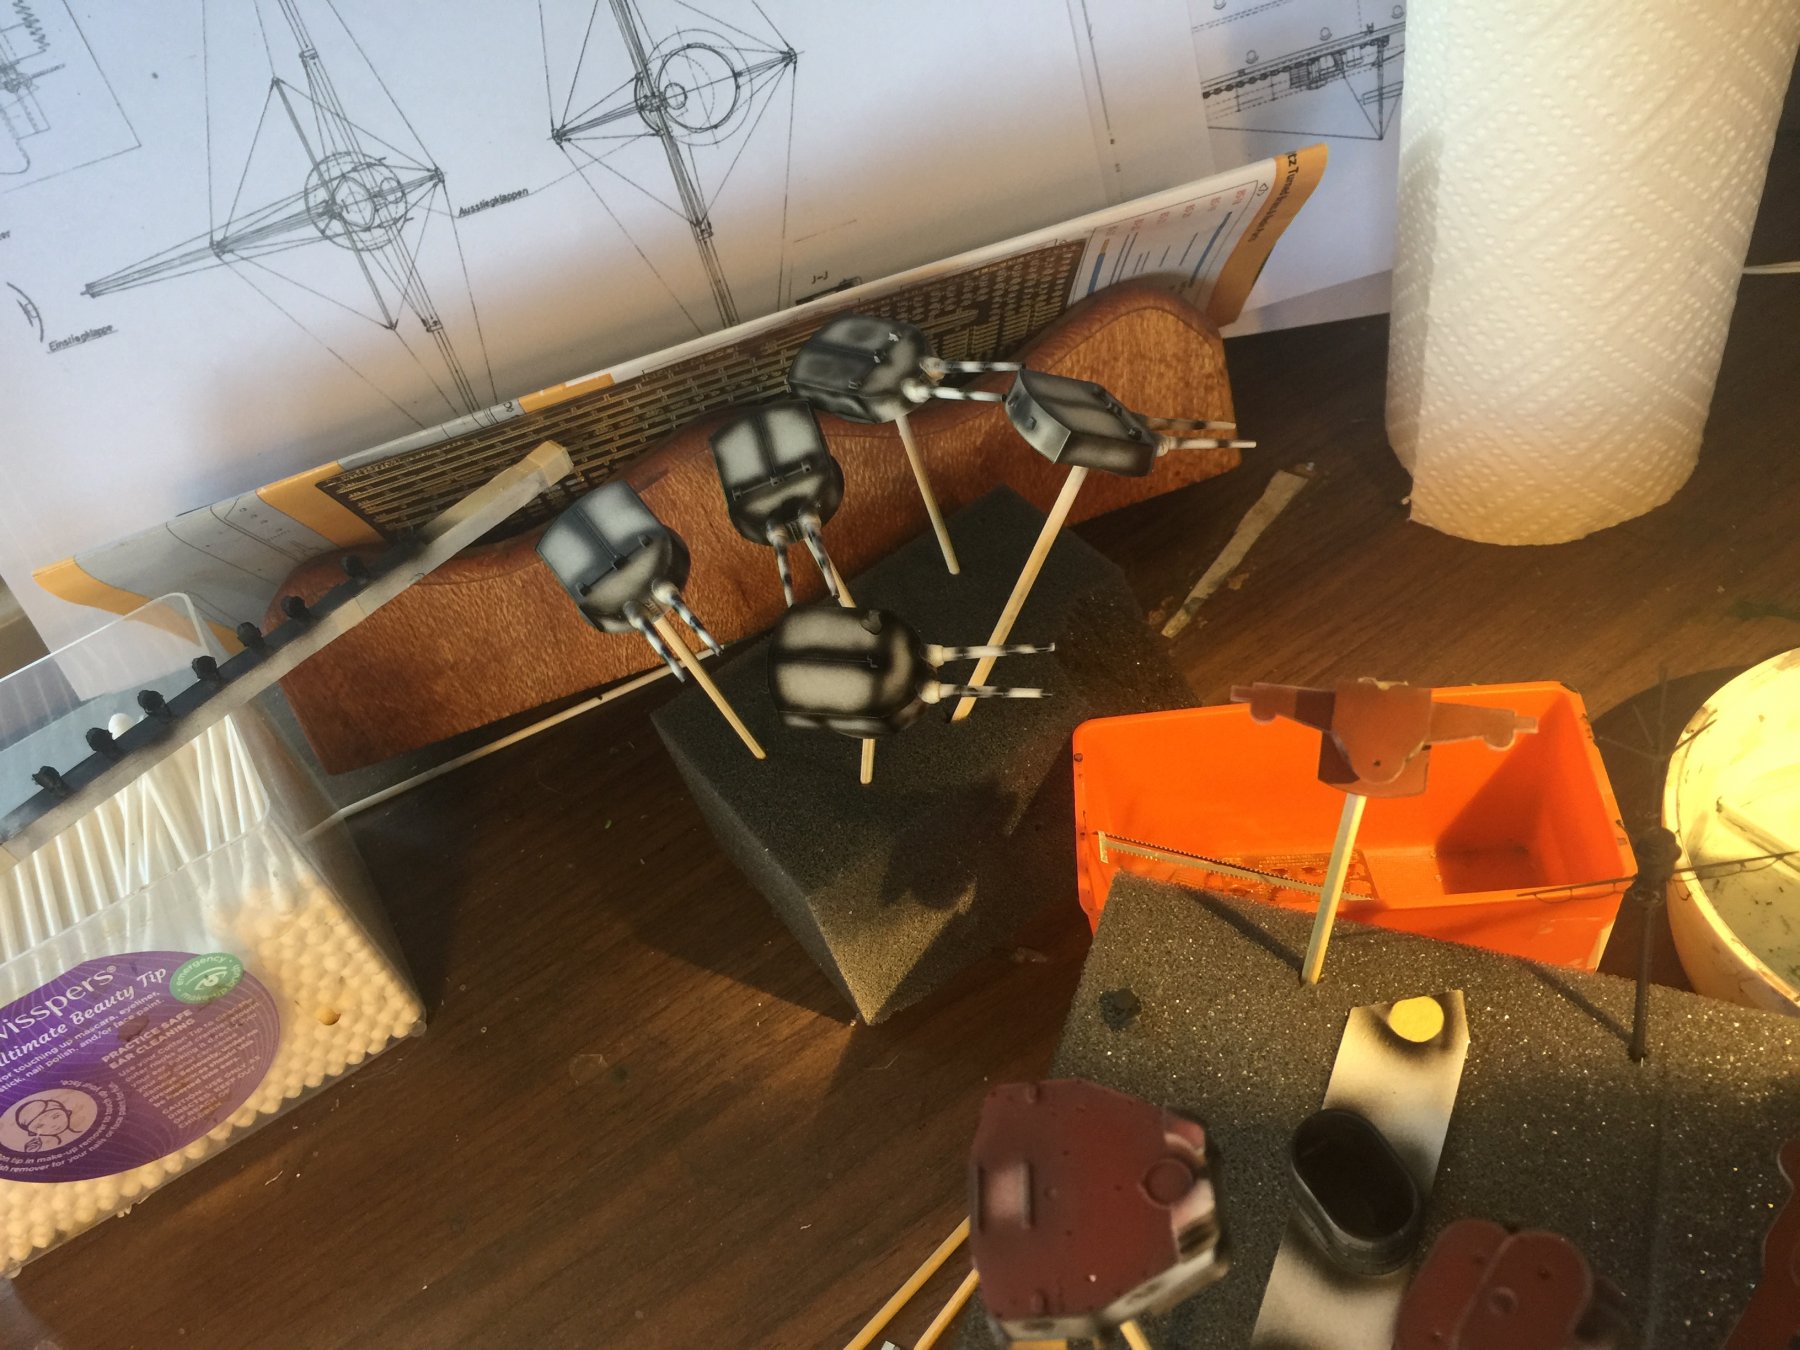
You’re welcome, remember my erstwhile friends will PSO be adding their interpretations. Ive preshaded the guns and superstructures, added a German red/brown Linoleum and finished painting the railings which are the only full metal ones on the ship, the rest are stanchions. Ive replaced all the kit searchlights with North Star ones as they are beautiful.

- 540 replies
-
- 10
-
-
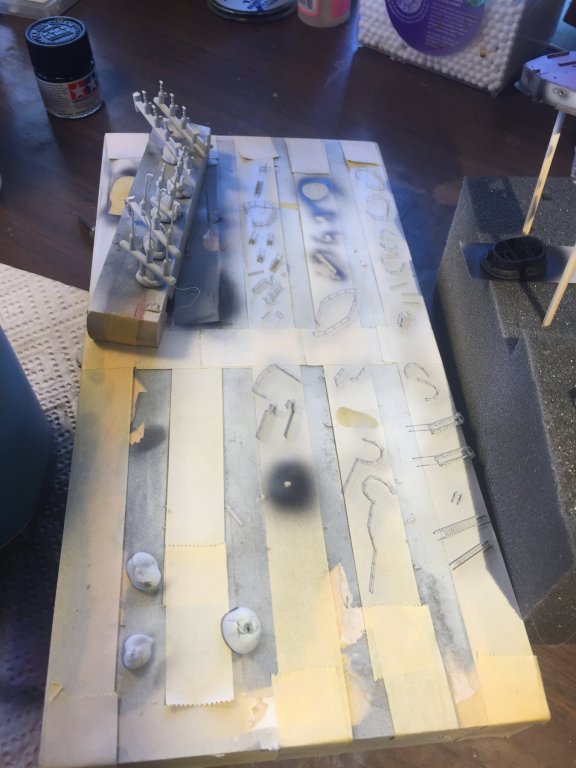
I use a rattle can for primer on metal as it sticks really well. I used to do it all by can and brush now it’s mainly airbrush as it is such a scalpel. You can do so much with it and only uses a tiny amount of paint. I would only paint a really big piece of metal on the fret if it didn’t need to be bent. My dreadnought was all rattle can.
-
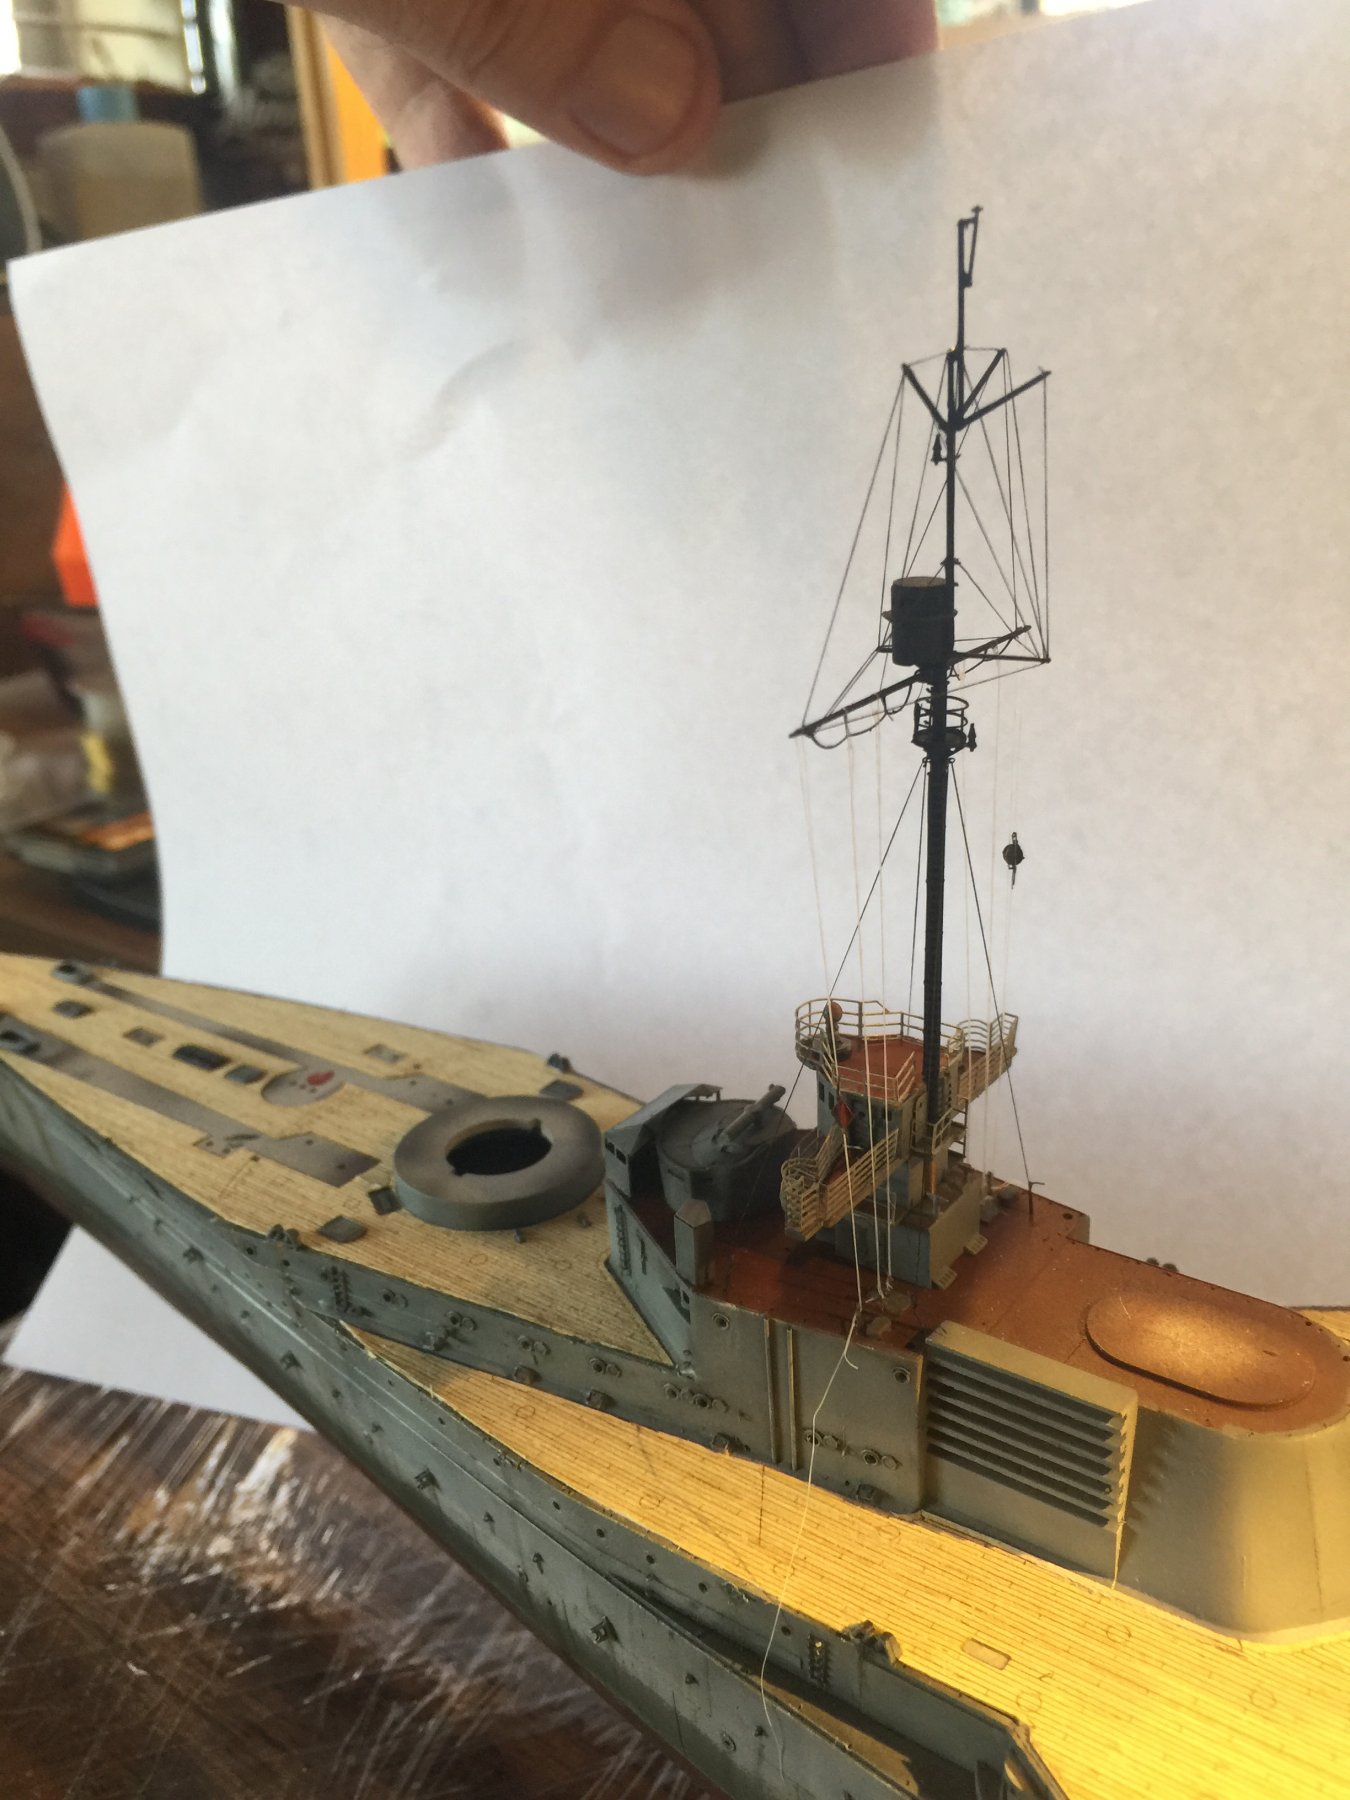
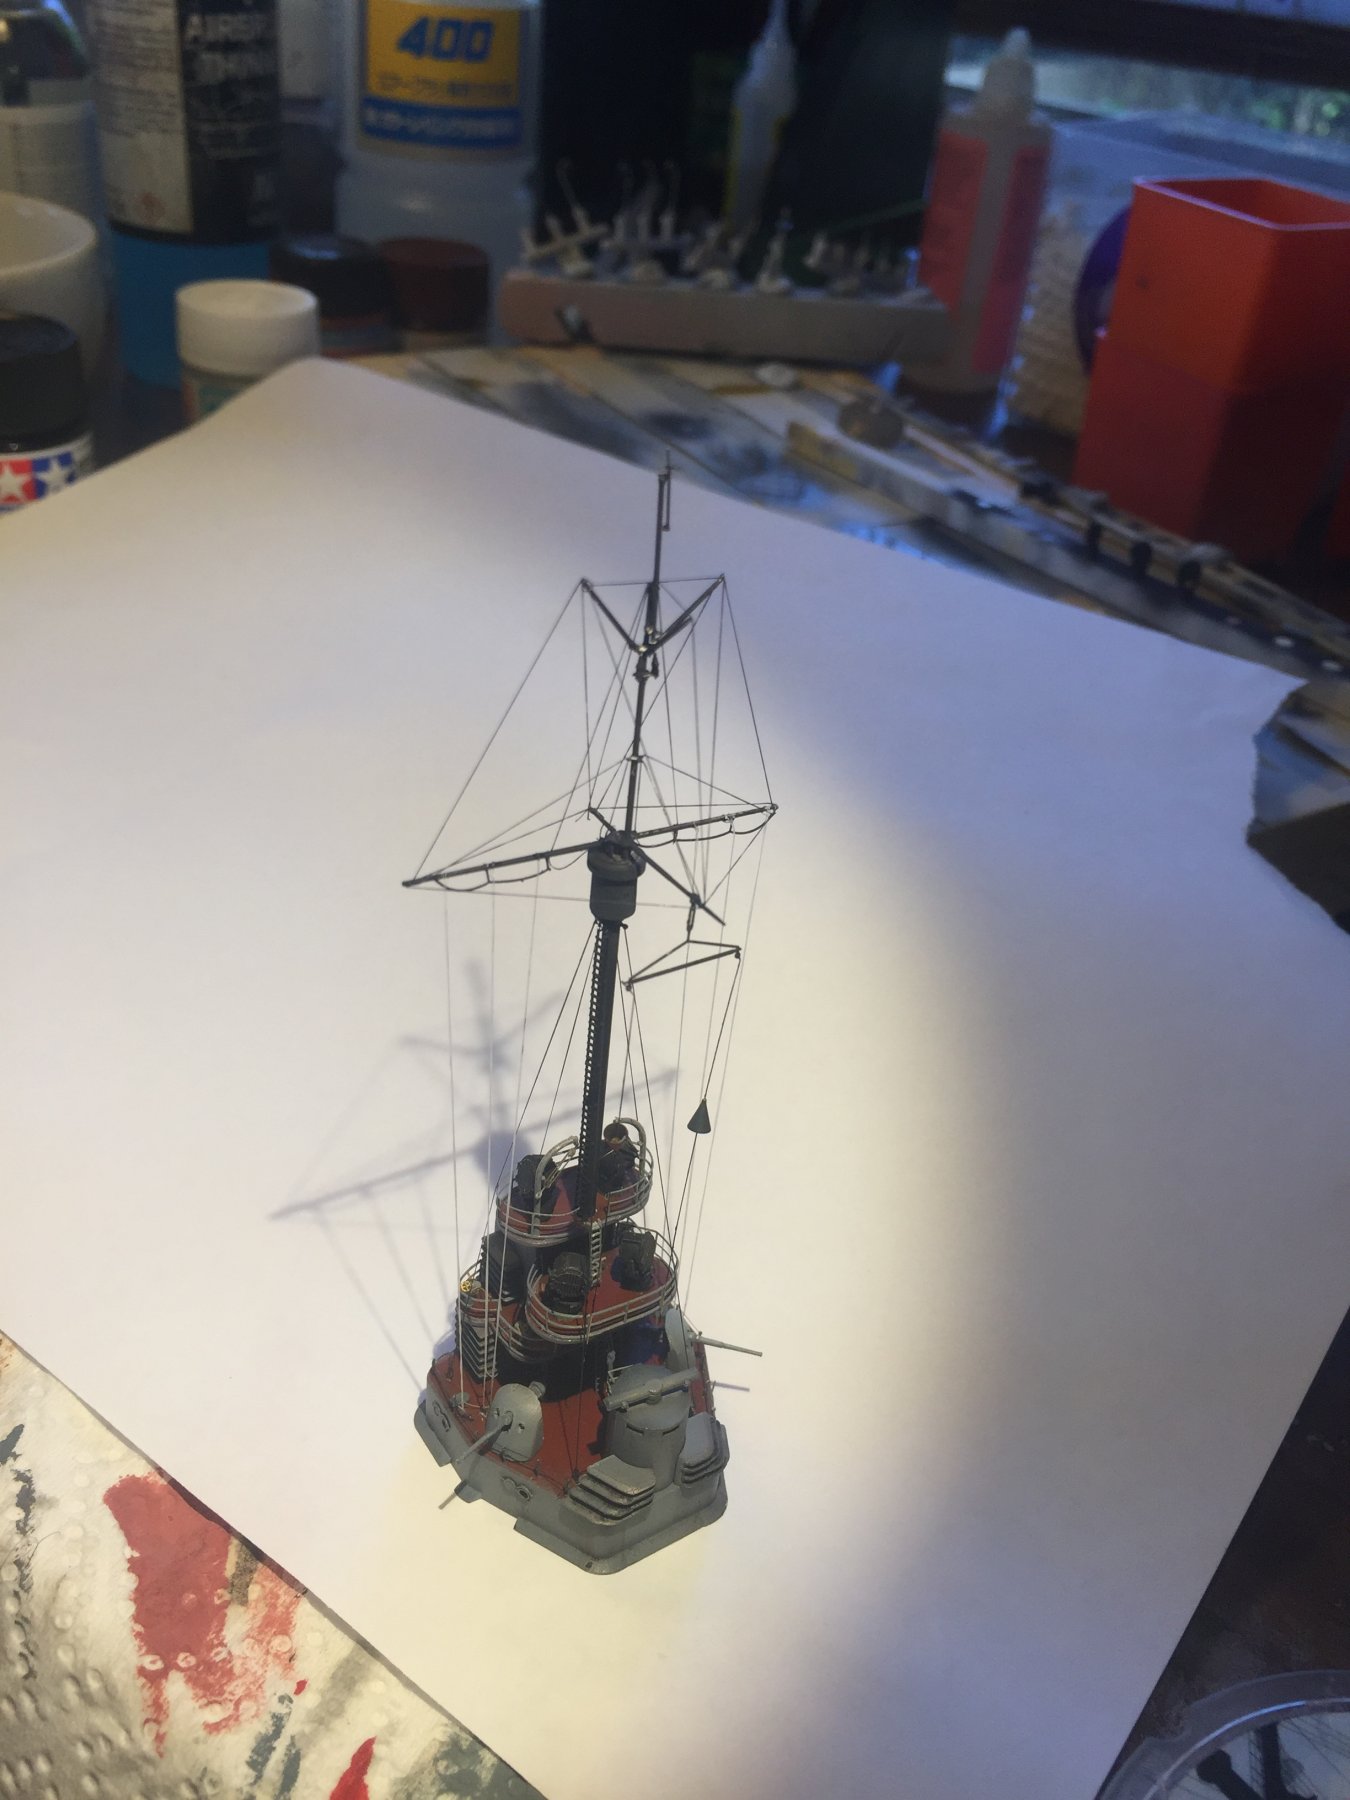
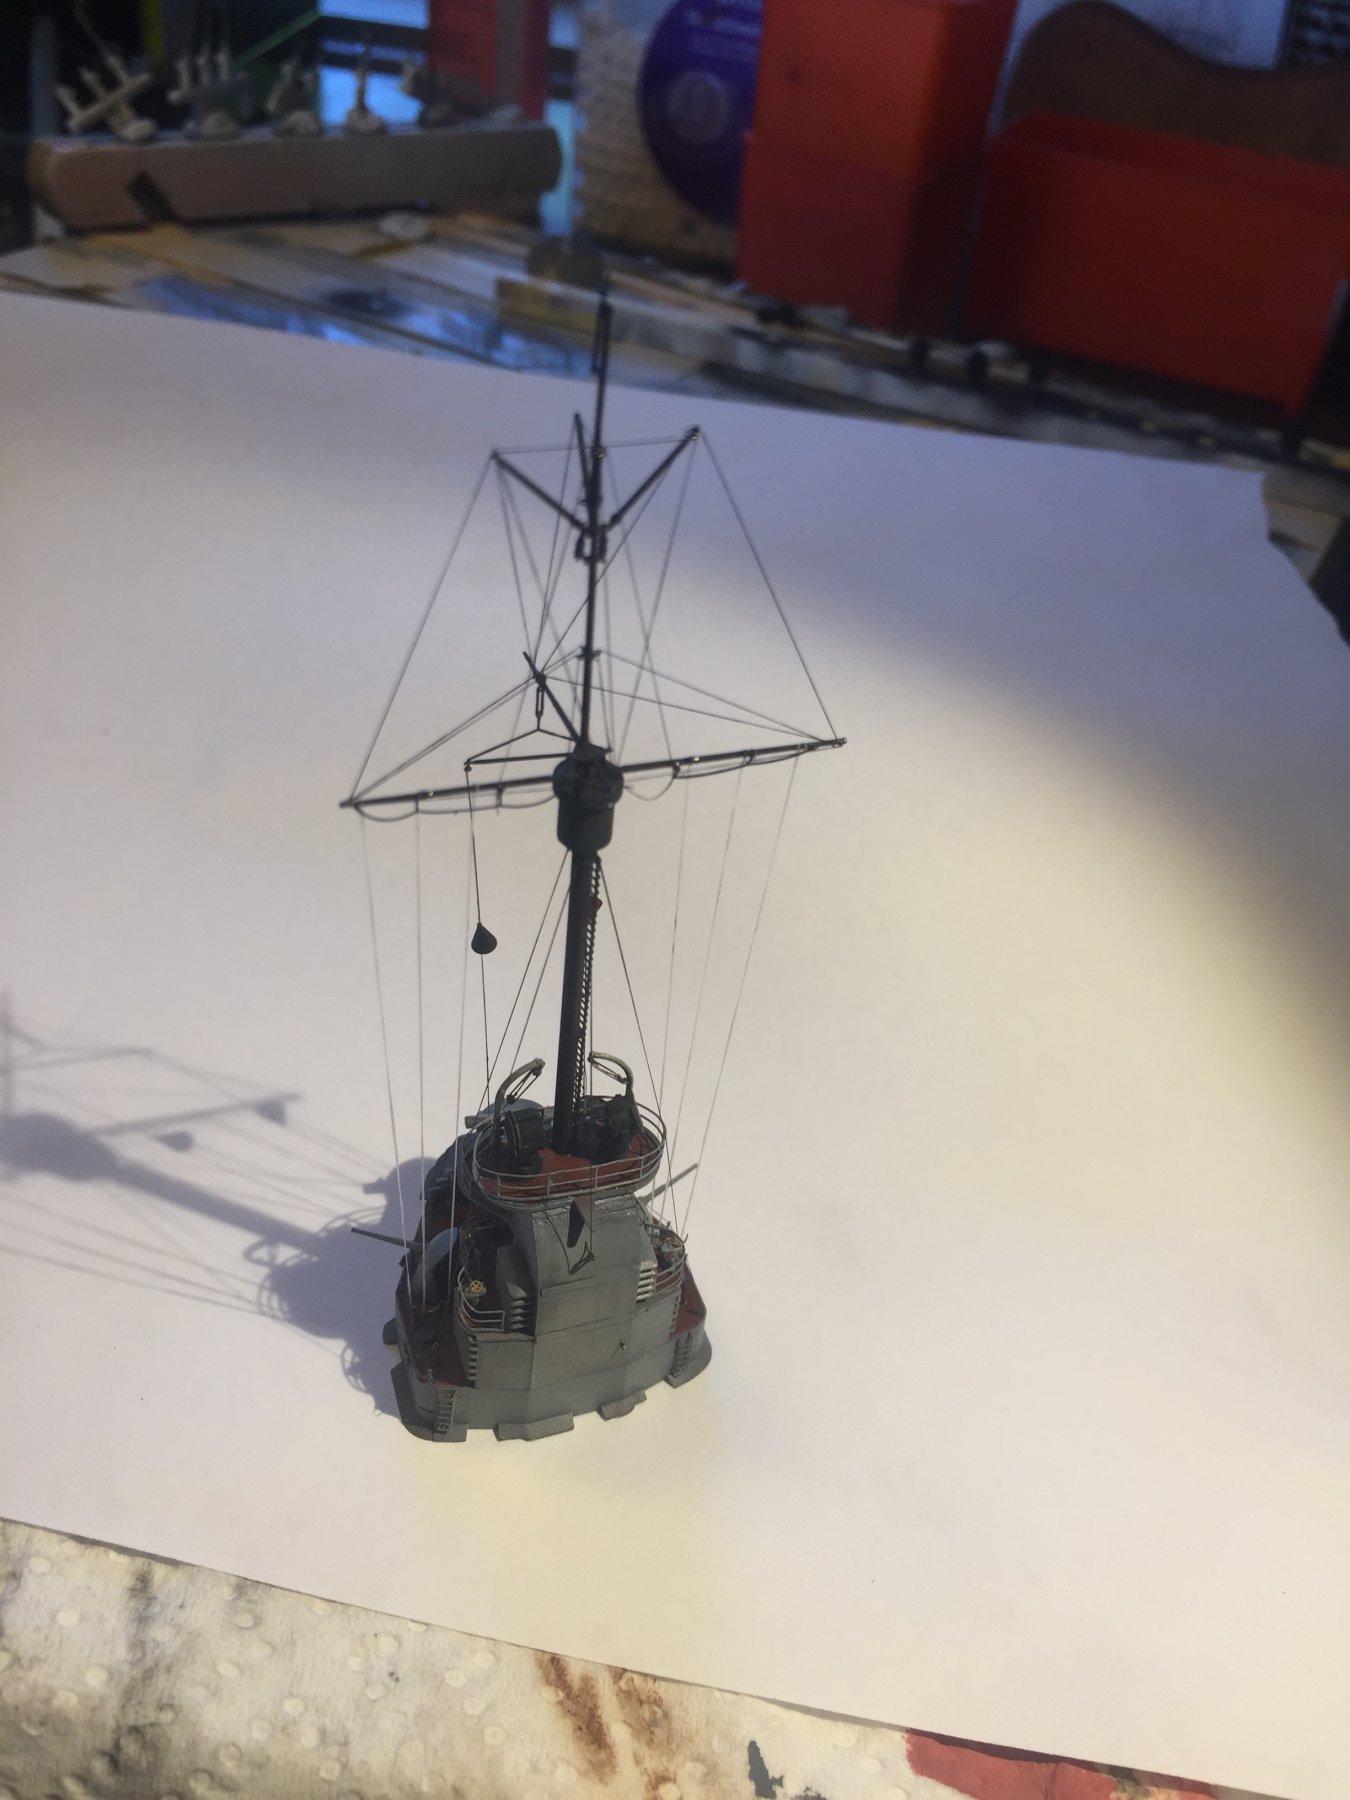
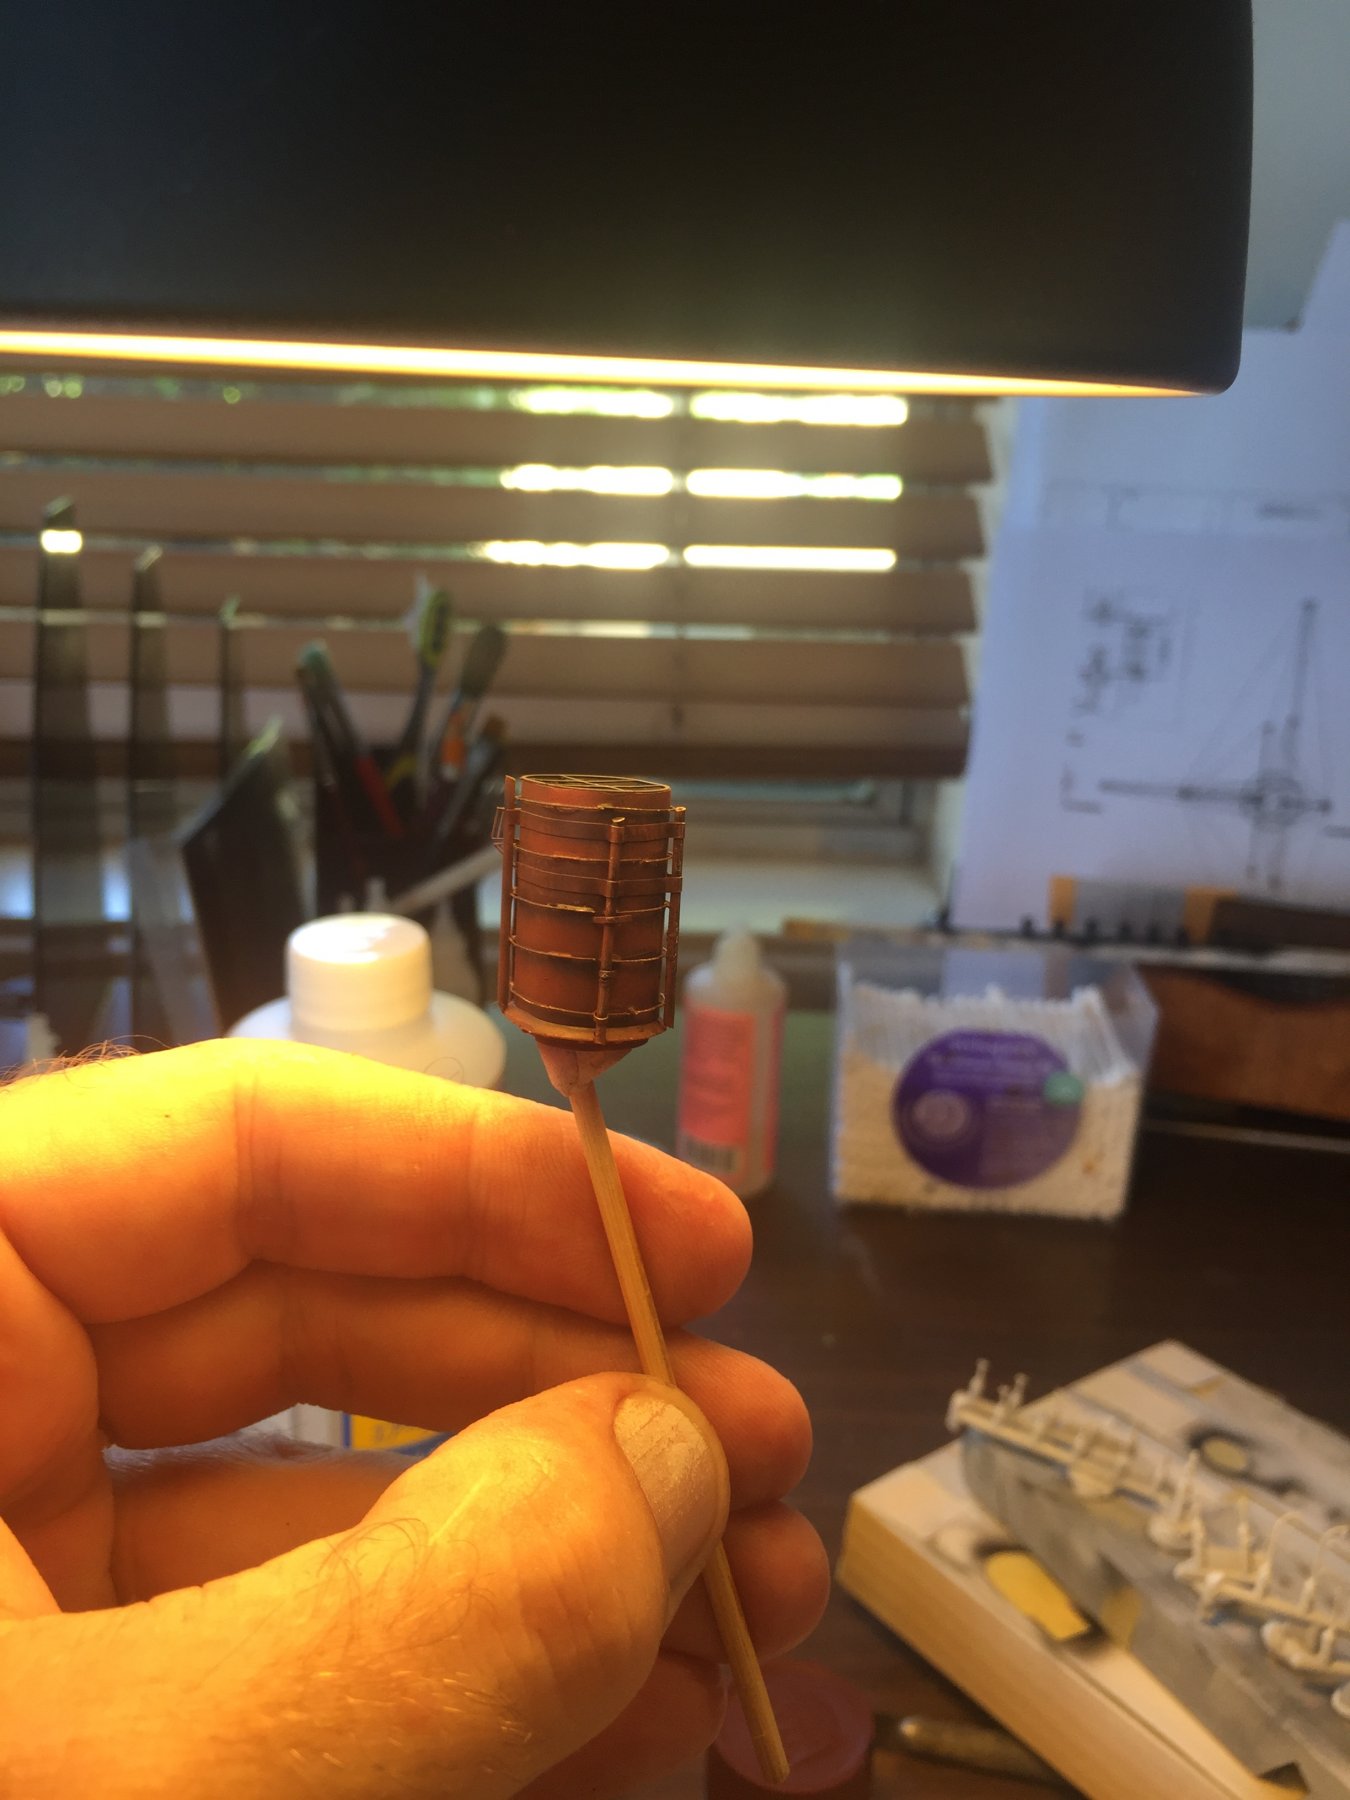
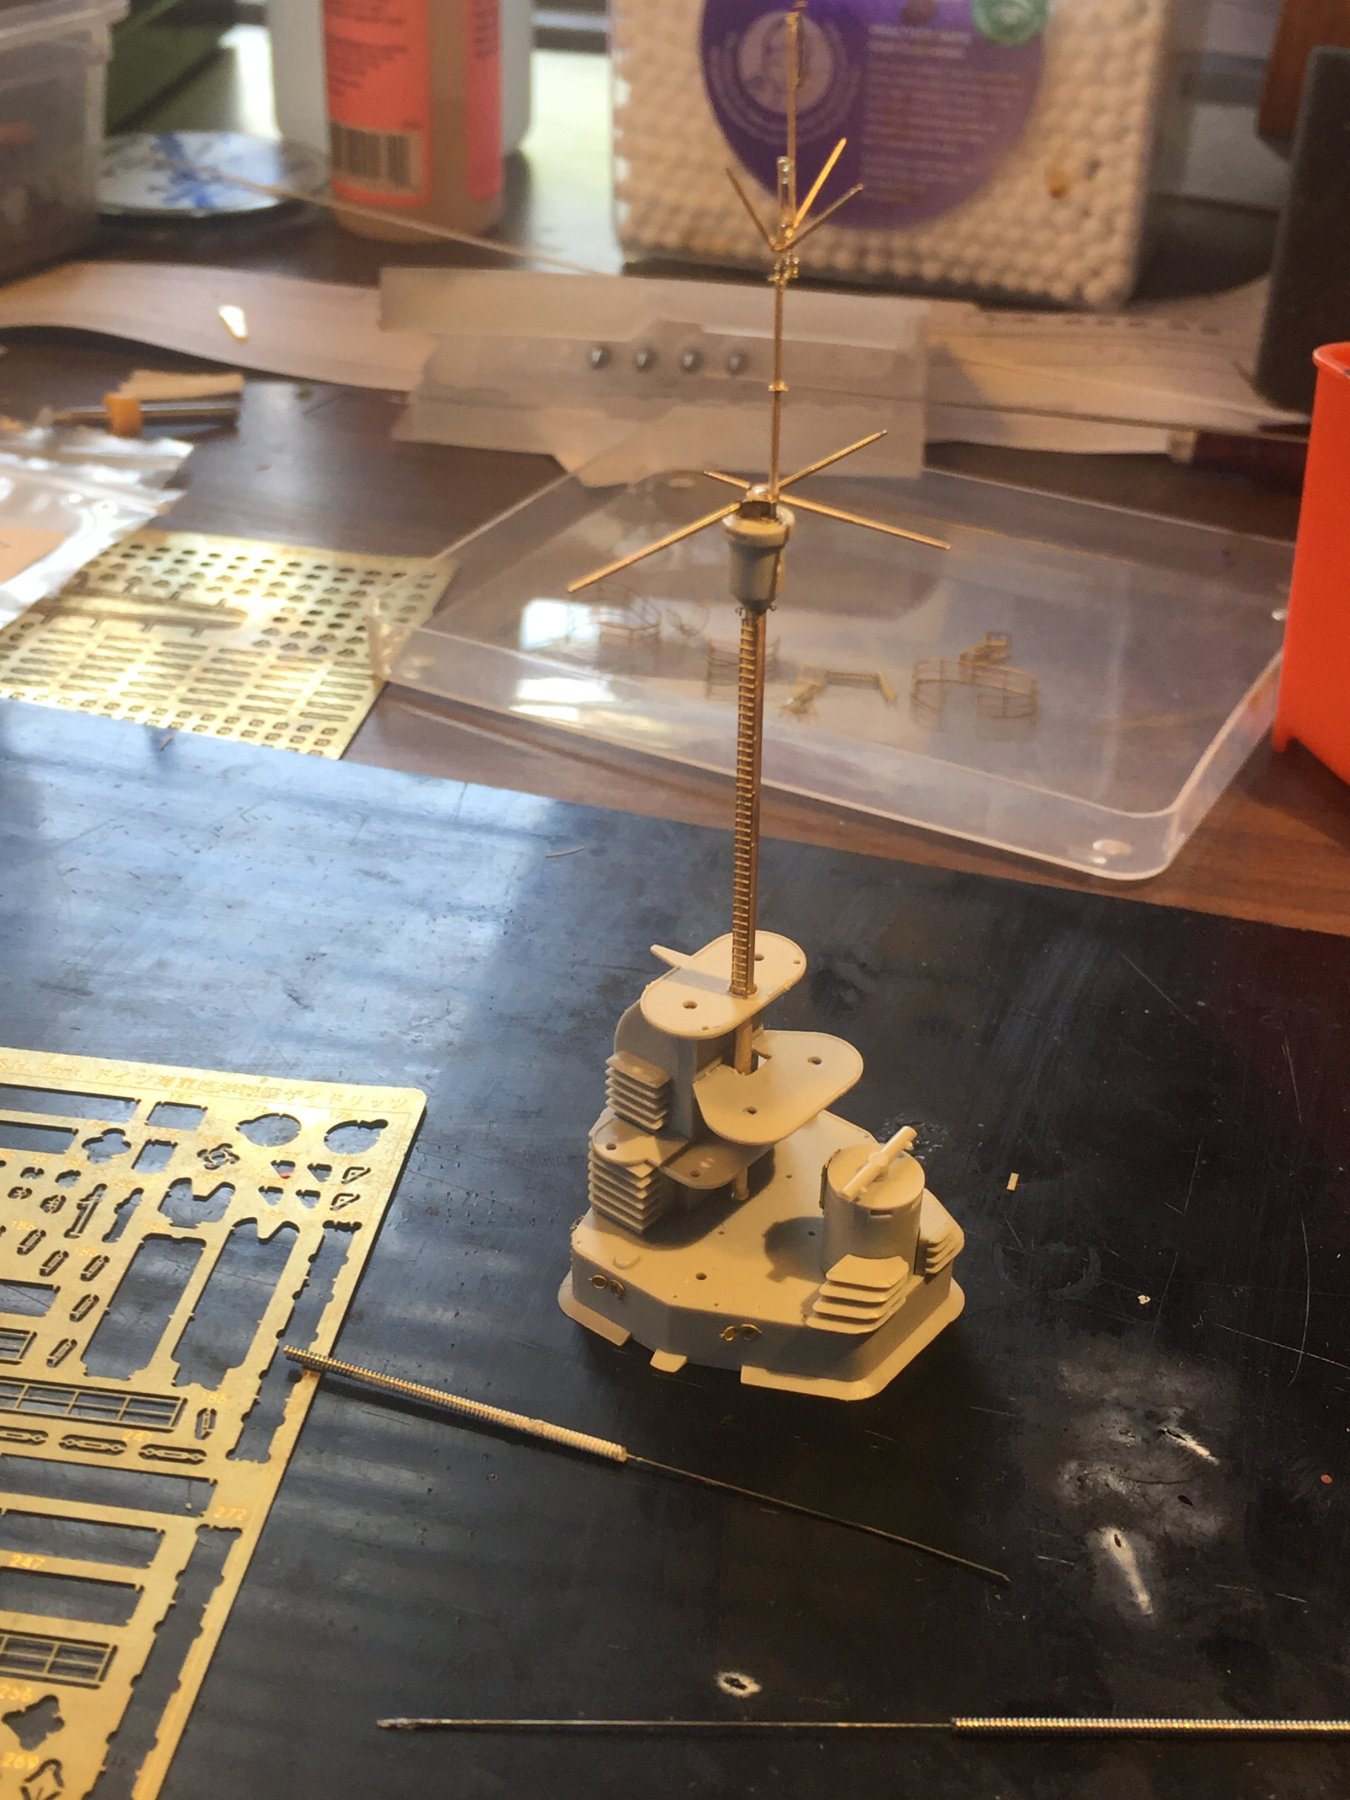
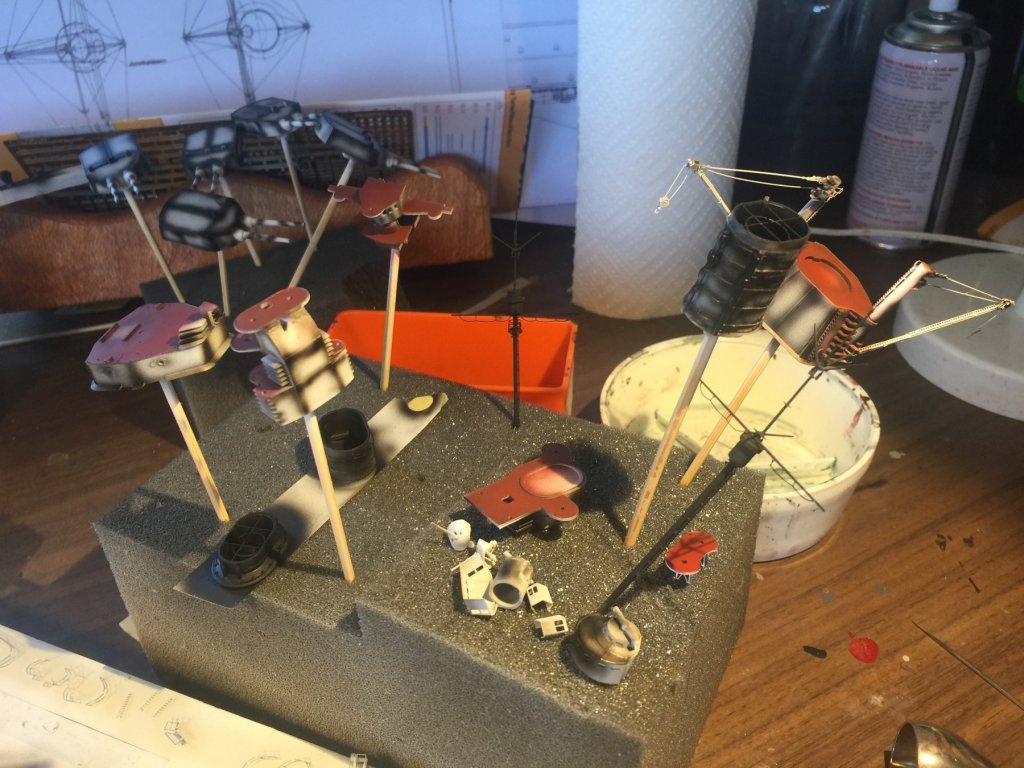
The main mast. I’ve bent all the railings and ladders, I’ve a couple of little bits to do then I can move to painting again. These are very heavily rigged so I need to figure out a lot of belaying points.

- 540 replies
-
- 11
-