


RGL
-
Posts
5,111 -
Joined
-
Last visited
Reputation Activity
-

 RGL got a reaction from popeye the sailor in VARYAG by RGL -FINISHED - Artwox - 1/350 - Plastic, resin and photoetch - Protected Cruiser
So, back to the drawing board. I used a .4mm brass rod to make the top rung, cut offs to make the side rungs and then the remaining frets of large companion ways to utalise the third and centre arch. To put the size in perspective when in my hand this is bloody fiddly.
My head hurts. I now have to attach the rims with the dogs on them and do the doors then paint the base, black on the outside and white on the inside and leave the struts in brass.
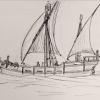
The photos of what i expect is the Varyag post the battle with the Japanese and a more modern photo is what I expect came from a refit.
-
RGL got a reaction from popeye the sailor in VARYAG by RGL -FINISHED - Artwox - 1/350 - Plastic, resin and photoetch - Protected Cruiser
Going back to Post 26, the companionway covers. The instructions show this thing, which may have been used in a later variation of the ship, the the photos show a brass cover.
So I started on the North Star covers. When put together they were a bit small for the hole in the deck so I used the Artwox base as they have fold up dogs.
I then used the Eduard doors filed down to fit within the rectangle.
Scan-002.bmp
-
RGL got a reaction from popeye the sailor in VARYAG by RGL -FINISHED - Artwox - 1/350 - Plastic, resin and photoetch - Protected Cruiser
After 3 days, the companionways are finally complete and back into a box for safety. The blueprints prove my point on their design. I made 10 (it needs 9) as an emergency. A bit of black wash to bring out the details and a dry fit on the deck.
-
 RGL got a reaction from RRLittle in VARYAG by RGL -FINISHED - Artwox - 1/350 - Plastic, resin and photoetch - Protected Cruiser
After 3 days, the companionways are finally complete and back into a box for safety. The blueprints prove my point on their design. I made 10 (it needs 9) as an emergency. A bit of black wash to bring out the details and a dry fit on the deck.
-
 RGL got a reaction from Jason in VARYAG by RGL -FINISHED - Artwox - 1/350 - Plastic, resin and photoetch - Protected Cruiser
After 3 days, the companionways are finally complete and back into a box for safety. The blueprints prove my point on their design. I made 10 (it needs 9) as an emergency. A bit of black wash to bring out the details and a dry fit on the deck.
-
 RGL got a reaction from Old Collingwood in VARYAG by RGL -FINISHED - Artwox - 1/350 - Plastic, resin and photoetch - Protected Cruiser
So, back to the drawing board. I used a .4mm brass rod to make the top rung, cut offs to make the side rungs and then the remaining frets of large companion ways to utalise the third and centre arch. To put the size in perspective when in my hand this is bloody fiddly.
My head hurts. I now have to attach the rims with the dogs on them and do the doors then paint the base, black on the outside and white on the inside and leave the struts in brass.
The photos of what i expect is the Varyag post the battle with the Japanese and a more modern photo is what I expect came from a refit.
-
RGL got a reaction from popeye the sailor in VARYAG by RGL -FINISHED - Artwox - 1/350 - Plastic, resin and photoetch - Protected Cruiser
Yes, so clever until I looked at the original photos again.
Wrong wrong wrong.
-
 RGL got a reaction from Captain Slog in VARYAG by RGL -FINISHED - Artwox - 1/350 - Plastic, resin and photoetch - Protected Cruiser
Going back to Post 26, the companionway covers. The instructions show this thing, which may have been used in a later variation of the ship, the the photos show a brass cover.
So I started on the North Star covers. When put together they were a bit small for the hole in the deck so I used the Artwox base as they have fold up dogs.
I then used the Eduard doors filed down to fit within the rectangle.
Scan-002.bmp
-
RGL got a reaction from Captain Slog in VARYAG by RGL -FINISHED - Artwox - 1/350 - Plastic, resin and photoetch - Protected Cruiser
So, back to the drawing board. I used a .4mm brass rod to make the top rung, cut offs to make the side rungs and then the remaining frets of large companion ways to utalise the third and centre arch. To put the size in perspective when in my hand this is bloody fiddly.
My head hurts. I now have to attach the rims with the dogs on them and do the doors then paint the base, black on the outside and white on the inside and leave the struts in brass.
The photos of what i expect is the Varyag post the battle with the Japanese and a more modern photo is what I expect came from a refit.
-
 RGL got a reaction from Canute in VARYAG by RGL -FINISHED - Artwox - 1/350 - Plastic, resin and photoetch - Protected Cruiser
So, back to the drawing board. I used a .4mm brass rod to make the top rung, cut offs to make the side rungs and then the remaining frets of large companion ways to utalise the third and centre arch. To put the size in perspective when in my hand this is bloody fiddly.
My head hurts. I now have to attach the rims with the dogs on them and do the doors then paint the base, black on the outside and white on the inside and leave the struts in brass.
The photos of what i expect is the Varyag post the battle with the Japanese and a more modern photo is what I expect came from a refit.
-
 RGL got a reaction from ccoyle in VARYAG by RGL -FINISHED - Artwox - 1/350 - Plastic, resin and photoetch - Protected Cruiser
So, back to the drawing board. I used a .4mm brass rod to make the top rung, cut offs to make the side rungs and then the remaining frets of large companion ways to utalise the third and centre arch. To put the size in perspective when in my hand this is bloody fiddly.
My head hurts. I now have to attach the rims with the dogs on them and do the doors then paint the base, black on the outside and white on the inside and leave the struts in brass.
The photos of what i expect is the Varyag post the battle with the Japanese and a more modern photo is what I expect came from a refit.
-
 RGL got a reaction from Omega1234 in VARYAG by RGL -FINISHED - Artwox - 1/350 - Plastic, resin and photoetch - Protected Cruiser
So, back to the drawing board. I used a .4mm brass rod to make the top rung, cut offs to make the side rungs and then the remaining frets of large companion ways to utalise the third and centre arch. To put the size in perspective when in my hand this is bloody fiddly.
My head hurts. I now have to attach the rims with the dogs on them and do the doors then paint the base, black on the outside and white on the inside and leave the struts in brass.
The photos of what i expect is the Varyag post the battle with the Japanese and a more modern photo is what I expect came from a refit.
-
RGL got a reaction from Canute in VARYAG by RGL -FINISHED - Artwox - 1/350 - Plastic, resin and photoetch - Protected Cruiser
Going back to Post 26, the companionway covers. The instructions show this thing, which may have been used in a later variation of the ship, the the photos show a brass cover.
So I started on the North Star covers. When put together they were a bit small for the hole in the deck so I used the Artwox base as they have fold up dogs.
I then used the Eduard doors filed down to fit within the rectangle.
Scan-002.bmp
-
 RGL got a reaction from dgbot in VARYAG by RGL -FINISHED - Artwox - 1/350 - Plastic, resin and photoetch - Protected Cruiser
So, back to the drawing board. I used a .4mm brass rod to make the top rung, cut offs to make the side rungs and then the remaining frets of large companion ways to utalise the third and centre arch. To put the size in perspective when in my hand this is bloody fiddly.
My head hurts. I now have to attach the rims with the dogs on them and do the doors then paint the base, black on the outside and white on the inside and leave the struts in brass.
The photos of what i expect is the Varyag post the battle with the Japanese and a more modern photo is what I expect came from a refit.
-
RGL got a reaction from Canute in VARYAG by RGL -FINISHED - Artwox - 1/350 - Plastic, resin and photoetch - Protected Cruiser
Yes, so clever until I looked at the original photos again.
Wrong wrong wrong.
-
 RGL got a reaction from GuntherMT in VARYAG by RGL -FINISHED - Artwox - 1/350 - Plastic, resin and photoetch - Protected Cruiser
Going back to Post 26, the companionway covers. The instructions show this thing, which may have been used in a later variation of the ship, the the photos show a brass cover.
So I started on the North Star covers. When put together they were a bit small for the hole in the deck so I used the Artwox base as they have fold up dogs.
I then used the Eduard doors filed down to fit within the rectangle.
Scan-002.bmp
-
 RGL reacted to gdollow in S-100 & Flak 38 by gdollow - Revell - 1:72 - PLASTIC - with PE
A new build for the S-100 torpedo boat. Enjoy the pictures so far. Here are the sprue and photo etch pictures. This is using the Griffin Models PE. The first picture is of the torpedoes
-
RGL reacted to mtaylor in VARYAG by RGL -FINISHED - Artwox - 1/350 - Plastic, resin and photoetch - Protected Cruiser
Greg,
I was thinking the same thing as Brian... I am surprised at how small it really is and your work is even more impressive.
-
RGL got a reaction from popeye the sailor in VARYAG by RGL -FINISHED - Artwox - 1/350 - Plastic, resin and photoetch - Protected Cruiser
Thanks, it's a challenge after working at 1/60 for such a long time and a lot less forgiving as you usually just can't re fabricate the damaged piece. Luck I'm shortsighted!
-
RGL got a reaction from popeye the sailor in VARYAG by RGL -FINISHED - Artwox - 1/350 - Plastic, resin and photoetch - Protected Cruiser
The deck, alignment at the bow was a bit difficult as the hull needed a little work to get it to fit snugly, requiring the dremel to dig a bit out. The rest of the pieces fit well, but the stick wooden deck requires very very precise alignment, as .5mm out means you require a little bit of file work.
I dry fitted a few of the pieces and they come up nicely. I'm still not happy with the doors and will probably replace them. I intend to attach the ladders internally beforehand as well as the pieces that I blackened that will be bases for the cannon and bollards.
The centre piece is snug enough that I probably will not need to glue it, but the bow and stern pieces will require gluing. It is my intention to have most things done prior to fixing them so I can check alignments before throwing it all together.
-
RGL got a reaction from popeye the sailor in VARYAG by RGL -FINISHED - Artwox - 1/350 - Plastic, resin and photoetch - Protected Cruiser
Gun cleaning grates (I assume). The kit included 6 of the little grates that are stored inboard, but the instructions only place one set near the fore cannon. The other two attach to the hull. I blackened them so as to get some contrast, intending to dry brush them white but they are so small that it just did not work, so I used the rattle can which did!
-
 RGL got a reaction from mtaylor in VARYAG by RGL -FINISHED - Artwox - 1/350 - Plastic, resin and photoetch - Protected Cruiser
Thanks, it's a challenge after working at 1/60 for such a long time and a lot less forgiving as you usually just can't re fabricate the damaged piece. Luck I'm shortsighted!
-
RGL got a reaction from RRLittle in VARYAG by RGL -FINISHED - Artwox - 1/350 - Plastic, resin and photoetch - Protected Cruiser
The deck, alignment at the bow was a bit difficult as the hull needed a little work to get it to fit snugly, requiring the dremel to dig a bit out. The rest of the pieces fit well, but the stick wooden deck requires very very precise alignment, as .5mm out means you require a little bit of file work.
I dry fitted a few of the pieces and they come up nicely. I'm still not happy with the doors and will probably replace them. I intend to attach the ladders internally beforehand as well as the pieces that I blackened that will be bases for the cannon and bollards.
The centre piece is snug enough that I probably will not need to glue it, but the bow and stern pieces will require gluing. It is my intention to have most things done prior to fixing them so I can check alignments before throwing it all together.
-
RGL got a reaction from mtaylor in VARYAG by RGL -FINISHED - Artwox - 1/350 - Plastic, resin and photoetch - Protected Cruiser
Gun cleaning grates (I assume). The kit included 6 of the little grates that are stored inboard, but the instructions only place one set near the fore cannon. The other two attach to the hull. I blackened them so as to get some contrast, intending to dry brush them white but they are so small that it just did not work, so I used the rattle can which did!
-
RGL got a reaction from Old Collingwood in VARYAG by RGL -FINISHED - Artwox - 1/350 - Plastic, resin and photoetch - Protected Cruiser
The deck, alignment at the bow was a bit difficult as the hull needed a little work to get it to fit snugly, requiring the dremel to dig a bit out. The rest of the pieces fit well, but the stick wooden deck requires very very precise alignment, as .5mm out means you require a little bit of file work.
I dry fitted a few of the pieces and they come up nicely. I'm still not happy with the doors and will probably replace them. I intend to attach the ladders internally beforehand as well as the pieces that I blackened that will be bases for the cannon and bollards.
The centre piece is snug enough that I probably will not need to glue it, but the bow and stern pieces will require gluing. It is my intention to have most things done prior to fixing them so I can check alignments before throwing it all together.