
HOLIDAY DONATION DRIVE - SUPPORT MSW - DO YOUR PART TO KEEP THIS GREAT FORUM GOING! (Only 13 donations so far - C'mon guys!)
×
.jpg.4b9546914df2c235b4fe82d7c03670bd.jpg)

Worldway
-
Posts
628 -
Joined
-
Last visited
Content Type
Profiles
Forums
Gallery
Events
Everything posted by Worldway
-
 I just finished the skylight and started to work on the companionway. Again, I figure this would be easier to build if I started with a solid piece of wood. I found some scraps and glued them together to get the desired width I needed. Once completed I will still have to fabricate the Hoisting Engine Box and the Clutch Cover Box. I think after that things will get a little tricky with the Jumbo Boom Crutch and Hoisting Machinery Support and the Windlass. The Britannia fittings that come in the kit aren't the best but I'll have to work with them. I did order some Pewter Black from Blue Jacket Shipcrafters. It does a good job at blackening the Britannia fittings. Once I finish up with the deck furniture and gear I will then paint everything. I haven't decided on colours or how much I will paint. I'm not too interested in staying true to the original Bluenose colours and colour detail. That would mean more detail than I care to get into. I will hopefully find a compromise that will still be appealing to look at and will be somewhat close to original. Meeting with Alan and taking into consideration what Bob mentioned above, I've ordered some silkspan and will experiment with it over the next few months to see if I can produce decent looking sails. If not, I'll revert back to the material that came with the kit. As far as the heavier material I bought recently, perhaps I can make a shop apron or something similar from it. It's definitely too heavy to be used as sails. As you can now see, things have progressed nicely the last little while. She's starting to take shape.
.jpg.5353f957ff6d7cbed10769b5cef229be.jpg)
.jpg.ca58bc16f854533da1204aa5ff321096.jpg)
.jpg.2b3a6e35340656a923964ab825fc0e4c.jpg)
.jpg.a445903220fc7d5d4198b2442d08e784.jpg)
-
Welcome Jared.
-
I spent part of the day working on a platform with which to set the Bluenose on. I will use it for the rest of the build but may elect to build something more suitable for the finished model. If I do decide to keep it, it will need a lot more finish work.
.thumb.jpg.6f9556fe9e29db964e9e3aff2c970c18.jpg)
.thumb.jpg.31897a69d23eb4aa3693f79cdfd3e462.jpg)
.thumb.jpg.9eff2d7c4d9bd3bf24438be34fed97ae.jpg)
.thumb.jpg.fd6c0a3e8d673d53728205f5047dbbf9.jpg)
-
Thanks Bob, I agree with what you are saying about the dories. Luckily this boat had two configurations, one for racing and one for fishing and the dories were removed for racing. It is something, in my opinion, that won't affect the overall look of the Bluenose when complete and is also something that can be added in the future quite easily. For now I may just leave them off and continue with the build. As for the sails, I don't know how to judge if the sail material is too heavy. The kit material seems just fine to me and the heavier material I bought seems to be even more in line with a sail 'feel'. Perhaps as you suggest, it is too heavy in regards to scale. Alan, I have seen posts on the use of silkspan. I am not familiar with it but who is one to argue with the teachings of David Antscherl. I assume it is a very light material hence the need for acrylic paint to help strengthen it. Perhaps I will raise the question of its use at our next meeting.
-
Today I finished the bulk of the hull painting. I still need to add the yellow pin stripe but that will come later. Initially I painted the hull white then marked the waterline. After masking the waterline with tape I painted the lower half red. I then masked about 1/8" or so above the red to include a white stripe prior to painting the black Once I did that I painted the upper part black. I was quite happy with how it turned out. There was minimal bleed through and the little there is can easily be touched up. As mentioned previous in my log I used Washi Masking Tape that I bought off Ebay. It was a while ago but if memory serves me correct, it was dirt cheap. I think I got 30 rolls for a few dollars. It worked very well and I was impressed with it. I see that there are fresh marks where my hull was mounted on my build clamp. I will sand them off and retouch them. I will no longer use the clamp on this build and will very shortly build a proper base for it. I ran out today and bought some felt to install in the base. A couple of items I wouldn't mind help / advise on. Although I'm no where near this point yet, but I'm wondering how the material that comes with the kit works for making sails? It seems like a decent linen. However, when I was buying the felt at our local fabric store I also bought a meter of a heavier linen. I'm not sure if I should use the kit material or the slightly heavier material that I bought. I have also tried my luck at building the dories and quite frankly, they are a mess. The kit material for this is very thin and the build fixture they provide is finnicky at best. I may try my luck at scratch building a couple of dories. The Bluenose had 8 dories because it used the dory trawl method for fishing. I think that 2 would still look proper to most people. The above was taken from a page of the Bluenose II book I have. I has a lot of great reference information.
.thumb.jpg.c45b44cb43aa867308175952518fed44.jpg)
.thumb.jpg.caccbdf528d84a6b990720d35f8de96f.jpg)
.thumb.jpg.1235621c26bab3affaaa17adb3703ebf.jpg)
.thumb.jpg.097b283c0348f29c27f46e0b636ef7d4.jpg)

-
I started today by marking the waterline with a home made jig I put together. It wasn't the best in the world but it did the trick. I simply drilled a hole into a piece of scrap and used a square to make sure I was vertical. I got the height measurement from the drawing using the bottom of the keel as a reference. I measured the distance from the keel to the water line closest to the rudder and added the distance the ship was sitting off the surface in the jig. Once I had it marked I masked off the area then proceeded to spray paint the red lower portion. I will try painting the black upper section tomorrow. Because of the white base coat, I will use that to incorporate the stripe in the hull. I'm not sure what I will do for the yellow stripe yet. I may use vinyl strip as David has mentioned above. It may be the easiest. It seems that my problems with the bow cap rail actually revert back to the stern. Because I needed to extend the distance at the bow, I realized that the stern was sitting back a little too far. Not that it overhung too far off the back. Somewhere, I made something not completely correctly or built something to a slightly wrong dimension which resulted in a small misalignment. The main sheet boom buffer wouldn't fit under the bench so I had to slightly extend it by about 1/8". Shown below are before and after pics.
.thumb.jpg.762231e05ce6f672f6b0160ed998d092.jpg)
.thumb.jpg.d0daaa9f1190e166a045430e9c54d7f5.jpg)
.thumb.jpg.23ea8e1026311e7acfaff00c6571f62a.jpg)
-
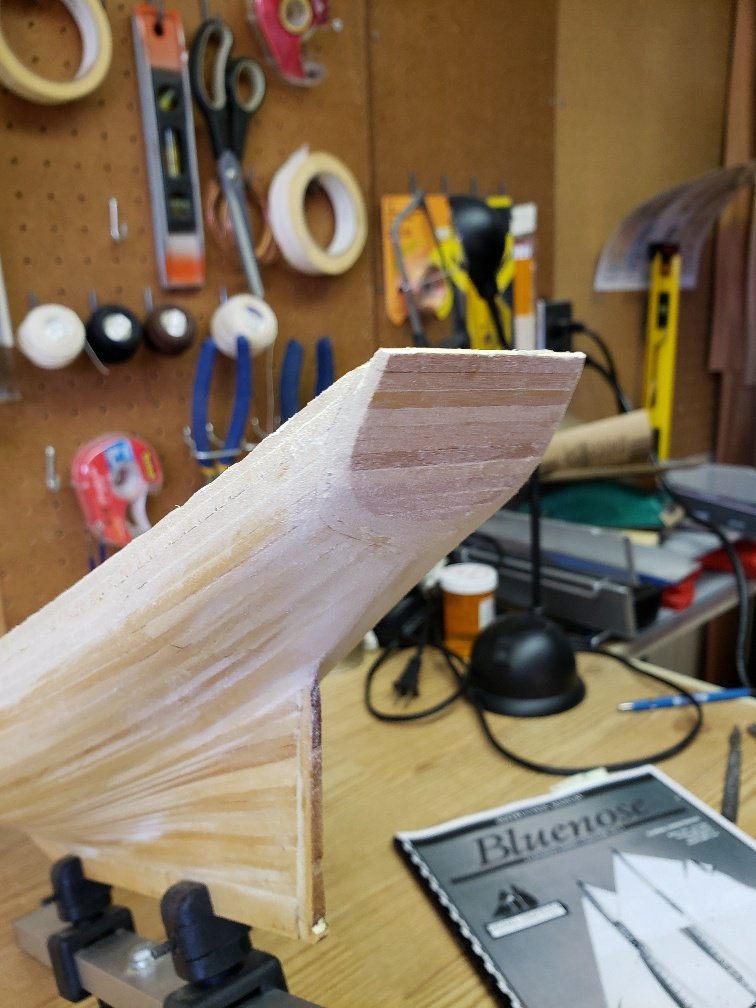
Alan, I thought I could simply remove and rearrange the pieces but they didn't look the best once I got everything unstuck and simply figured I would start over again. As said earlier, I decided this time to go with a solid piece. I ended up cutting the glue up shown previously incorrectly so I tried for number 3. Three times lucky I guess. I was discouraged, Hamilton, with the fit of the cap rail but even surprised myself with the look of the results. Thanks for the kind words.
.thumb.jpg.4abc01db532e6f40661bb2d1e5100438.jpg)
.thumb.jpg.ba8d9ef1ab22275430504a93daf2278c.jpg)
.thumb.jpg.bd6b50d9bb9f9ce9aa6596b36b14051d.jpg)
-
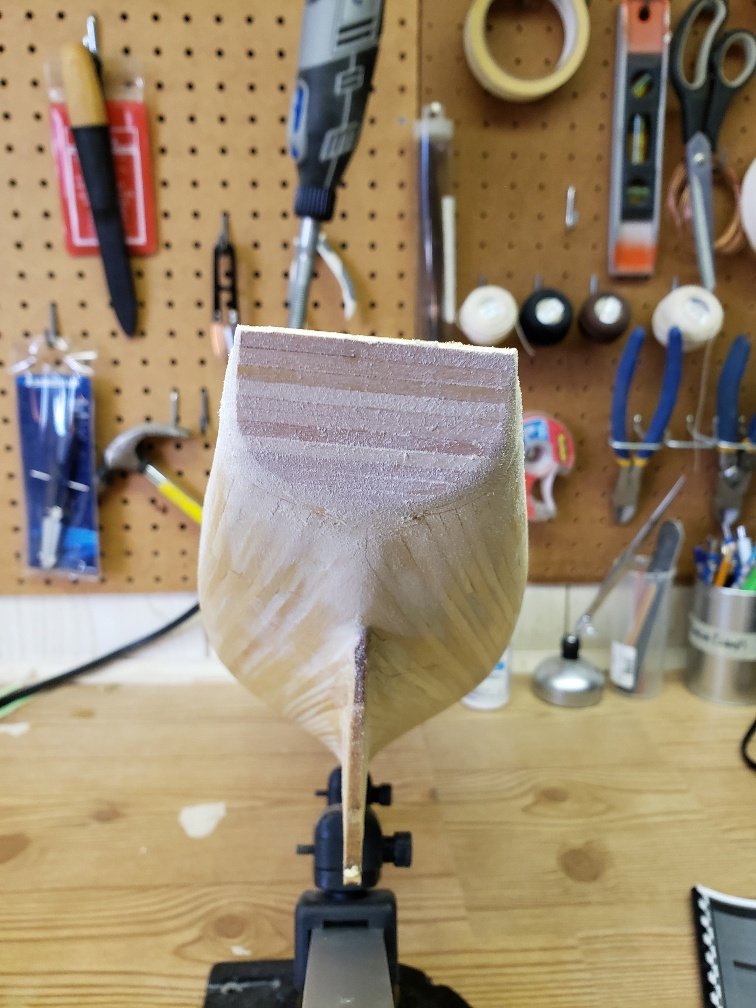
I found that the cap rail at the bow didn't fit properly. It was too wide and not long enough. I tried adding some filler pieces but I ended up with quite a mess. After applying some wood filler and a bit of sanding later it started to take shape I still have some more work to do but, once complete, I'm hoping a coat or two of paint will hide any defects. And now, for the $64,000 question. Can someone tell me what's wrong with the steering box I assembled? I built it backwards, it is supposed to tilt away from the wheel, not towards it. I am in the process of redoing it but thought I would use a solid bit of material this time. I glued up 3 pieces to get the desired thickness. I also spent a part of the day sanding the hull and adding two coats of white paint. Tomorrow, weather permitting, I'm hoping to add the red and black paint to the hull.
.thumb.jpg.742d06ce73ba7ed477439c20a1daac5d.jpg)
.jpg.7e0744b312b9ad76e6d746e53e8f7713.jpg)
.thumb.jpg.88e063e76ffad95eb3dcc663bd3e55ef.jpg)
.thumb.jpg.dea83a21bdba48f9263d8d43430671f2.jpg)
.thumb.jpg.f002b67211472a8b2c5e537a5be41b4d.jpg)
-
Thanks for the words of thought Alan. I think what got me discouraged in the first place was trying for perfection and realizing I could never achieve it. I even figured that all I needed was better tools and equipment. That really didn't work however,,,,, well there really is nothing bad or negative to say about that. Thanks also David for the information. It will definitely be helpful. I am putting off painting for a while as I want to sand and fill the hull more plus I want to install the rudder. I am working on the cap rail. I haven't included any progress pictures of that yet. I have started the rough work and hope to be sanding shortly. I will post progress pictures soon. My idea above didn't work with the precision I had hoped so I'm in the process of waiting for copious amounts of wood filler to harden. In the meantime I've been working on all the deck furniture. Once completed these will all either get painted or have a coat or two of Polyurethane applied. The main cabin was roughly completed. I will do some finish sanding before painting. I plan to add a base molding but will do that after installation to hide the natural curve of the deck. For the bitts, I used a bit of thick metal wire I had on hand. For the hatch, I cut the shape from some scrap wood I had laying around. The thickness was correct and it gave a textured appearance. I wrapped the edges for a finished look and sanded it all smooth. I once debated the merits of keeping off cuts and bits and pieces of leftover wood but I can honestly say for the deck furniture I haven't had to use my kit wood very much. There is also a piece on the drawings that refer to an "unidentified object". Although not true to scale as it should be 1/2" diameter, I had a length of 3/8" dowel in my shop which I used. I simply cut it to length. I will paint it to suit later. For the base of the boom crutch I used the same technique I used to cut in the scuppers. I had a 1/8" wide file which I used to remove the material. I see I need to change my depth of field on my camera. I am in the process of setting up lighting and my DSLR in my shop in order to take better pictures of my progress. In the meantime I have been using my cell phone. I've started to work on the wheel box and have completed the base. I've also started on the fife rail.
.thumb.jpg.ecf479507e7d8e30eead091ee6773341.jpg)
.thumb.jpg.3f0cce45acf4d7212ea1e59c827ac945.jpg)
.thumb.jpg.57cd08d6f6f849db8294a7fbdff62af4.jpg)
.thumb.jpg.c1c09b02269cc418a646557d25eee86e.jpg)
.thumb.jpg.acb93be1e9c493eccfb16e6b9186255a.jpg)
-
While waiting for the cap rail repairs to set up I decided to work on some of the deck furniture. I was giving thought as to how detailed I wanted to make the Bluenose. I figured at this point in my ship building career I would keep things relatively basic. I've seen some work by true artists on this forum and I will never try to be like them, but I figure I can build up to greater detail as my skills improve. I need to keep my work within my means.
.jpg.d449df035f77fbd7a276bfc9a10ea5e2.jpg)
.thumb.jpg.84927957003dd49875c65fea97a48025.jpg)
.thumb.jpg.fed5aa95f6370e5f1215ab1bdb4cd8c3.jpg)
.thumb.jpg.64fade130f17cc85186a140bda6bd7ab.jpg)
.thumb.jpg.1db174f8ca411546a902e466aac005ec.jpg)
.thumb.jpg.20ea16f2ff6ea23e5e6e80ad2548821b.jpg)
.thumb.jpg.21a8b4e511a2cc652a0a9a29240b3660.jpg)
-
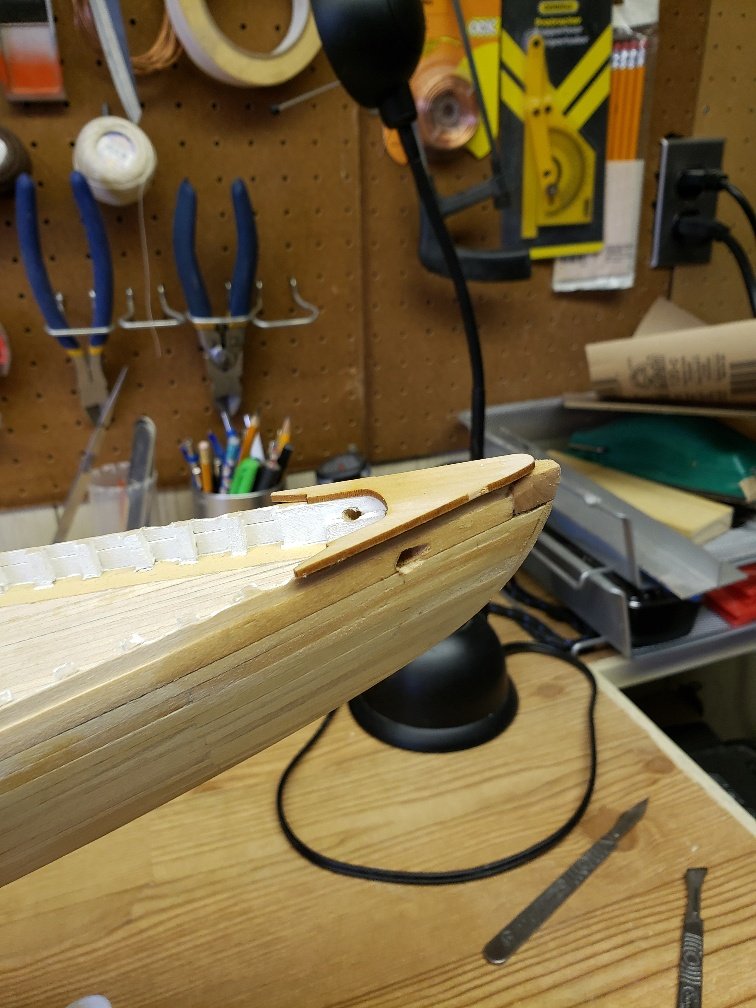
Dealing with the bow cap rail, I had to lengthen it and narrow it. I cut it in half and sanded each half. I also made filler pieces to lengthen the cap rail. I've done the one side and clamped it. Once dried, I will do the other side. Then it's off to sanding
.thumb.jpg.dabed118963a765dc3a3c95a202f14af.jpg)
.thumb.jpg.543f8201fe09ebdd42901c80540edf50.jpg)
-
I know it's been a while since my last post but I am back working on the Bluenose. First order of business is to repair the misalignment of the bow cap rail. It's my usual MO. I see an error, justify it by thinking it will look OK in the finished product, think and think about it then finally remove and repair it. Luckily the piece popped off quite easily. I'll add a couple of extenders and remount it. I have also had a good look at the progress so far and have determined that there are a few places that need additional attention to detail which I will take care of over the next while. Plus, overall it could use a good sanding (and perhaps some filler here and there). I'm not a fan of painting but realize that it's a necessary evil. Especially on the Bluenose where it's signature look is the red/black hull. At a very minimum, the hull will get painted. I have invested in an airbrush and compressor so I should really learn how to use them. No pictures this time. I think you can see from my previous posts what I'm referring to in this post.
-
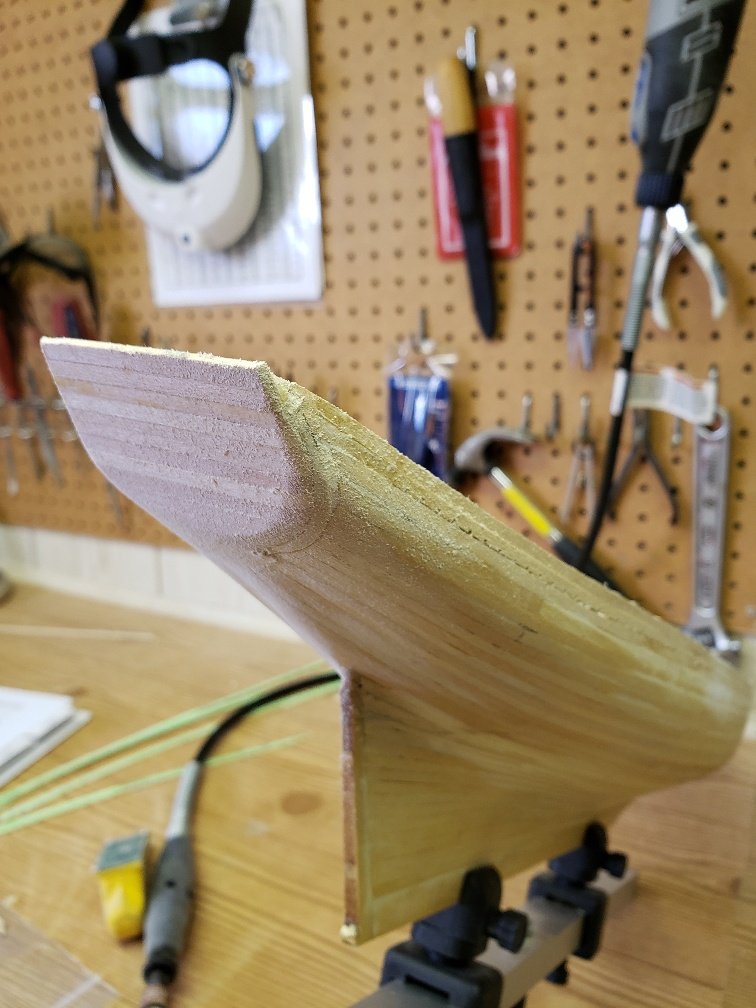
I spent some time finishing up the transom and installing the cap rail. The bow cap rail didn't fit as expected however I think this will sort itself out when I drill the hole for the bowsprit I completed the cap rail and added some filler in the odd location. It's just a matter of a bit of final sanding then it's off to the paint booth.
-
What do I want for Christmas
Worldway replied to Worldway's topic in Modeling tools and Workshop Equipment
Thanks for all the responses, very much appreciated. Because my shop is in the basement of our house I think I'm going to concentrate on dust collection for now. I did have my eye on Byrne's thickness sander and his disc sander but I believe I need to control the amount of dust entering the house. I do use a shop vac, which works OK, but I think I can do much better for not much of a significant investment. And yes, I agree with those who wish this pandemic would come to an end. Hopefully the new year will see life starting to slowly return to normal. -
OK fellow Modelshipworldians. My wife asked me tonight what I wanted for Christmas and I didn't know what to say. I suppose the usual socks and underwear but I think I have a chance to throw a cool tool in the mix. What do you think, any suggestions? Keep in mind, I already have the Byrnes table saw. Possibly thinking of another power tool or perhaps some really beneficial hand tools. I could use your help for ideas.
-
Tool Price Public Service Announcement
Worldway replied to turangi's topic in Modeling tools and Workshop Equipment
I bought one from Lee Valley when it was on sale. Don't remember exactly but I think it was around $16 CDN. It's digital and is very accurate with the test blocks I have. It was a special promotion they had on and I don't think it's even available to purchase today. Too bad because the one they advertise now is $75. -
Fairing the bulkhead
Worldway replied to Worldway's topic in Building, Framing, Planking and plating a ships hull and deck
Excellent advice, I really appreciate it. Thanks. -
Fairing the bulkhead
Worldway replied to Worldway's topic in Building, Framing, Planking and plating a ships hull and deck
Bob, Thanks for the information, it's very useful and has given me a few ideas. Do you use a particular batten or specific material to make one? I never considered using hand tools. I have a miniature plane but never thought to use it. I have recently ordered a miniature spoke shave and decent chisel. -
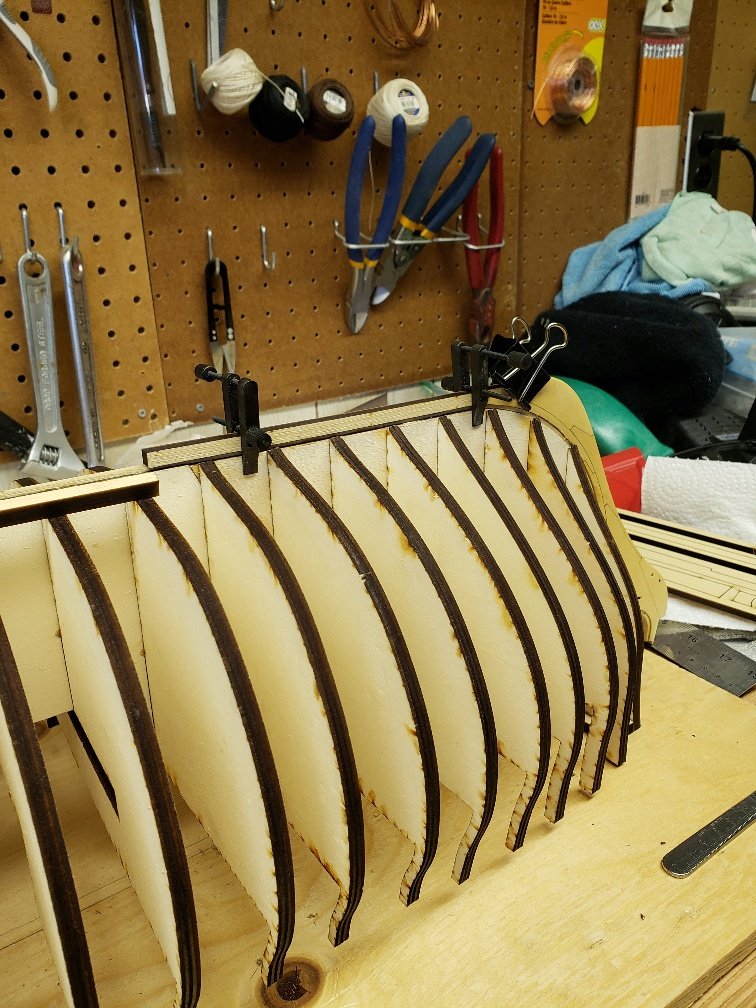
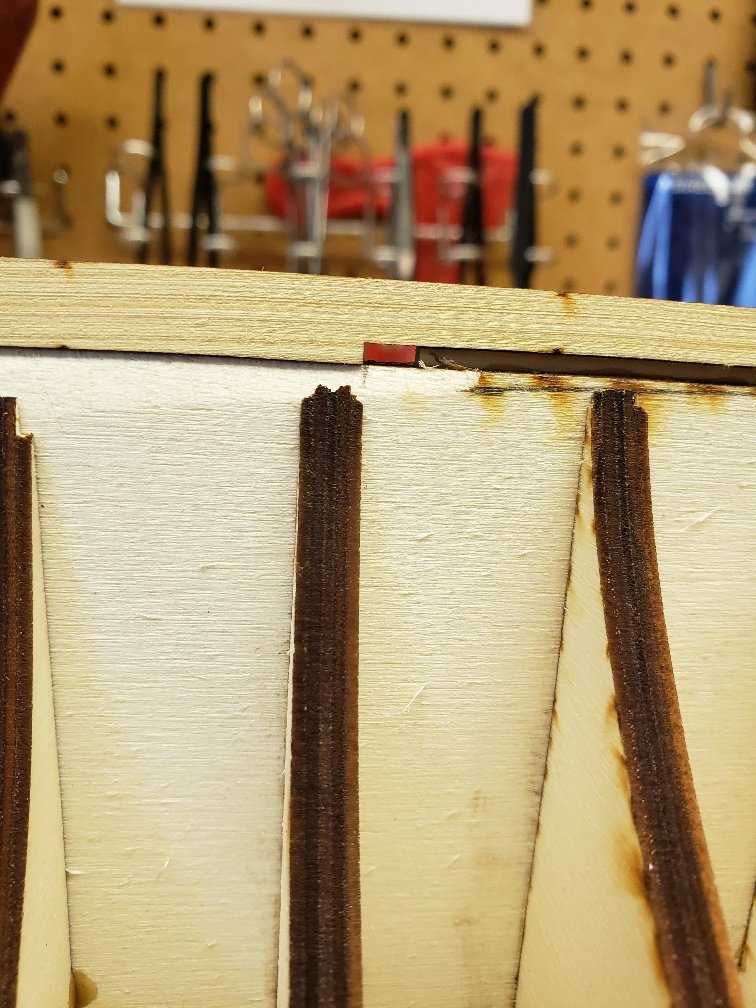
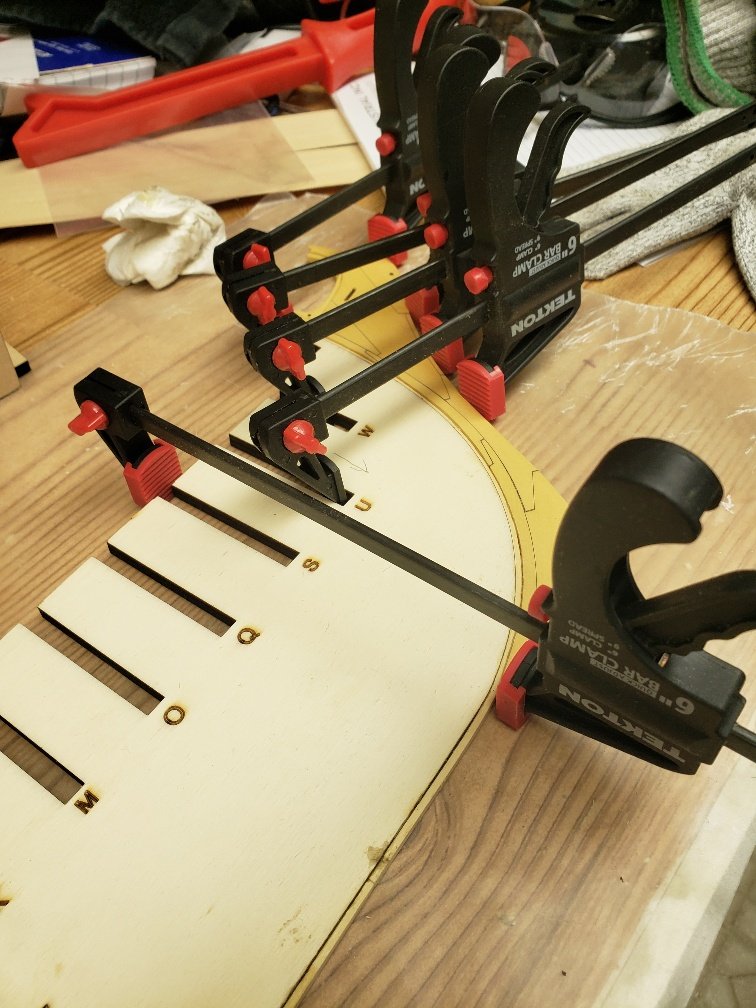
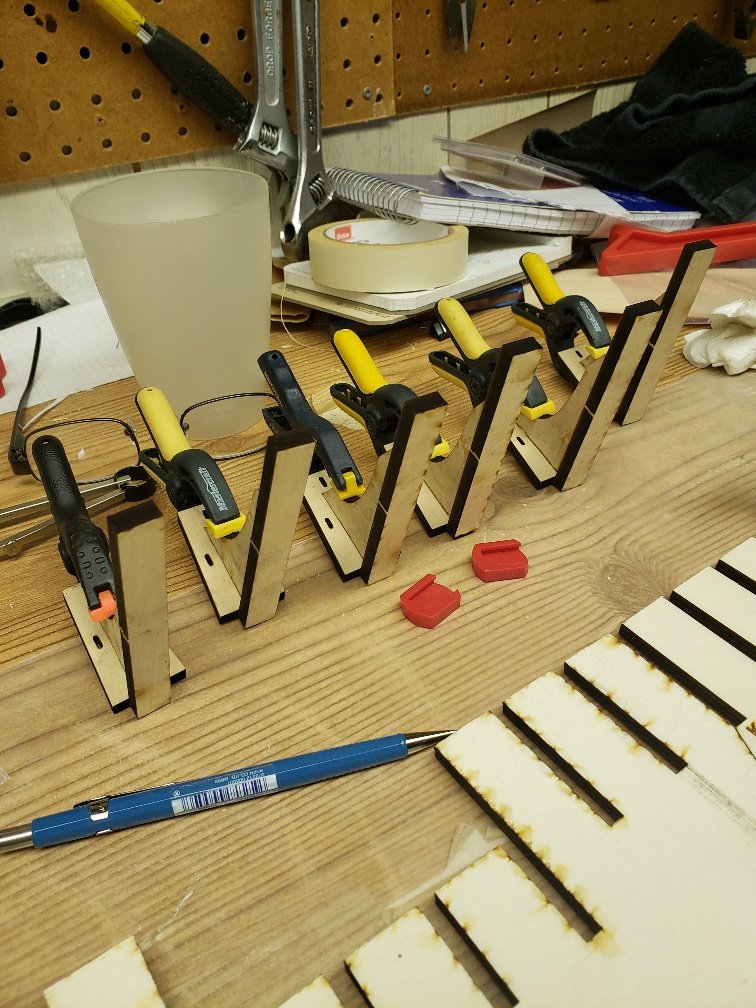
I have done a lot of searching but haven't been able to find the information I'm looking for. I am starting to fair the bulkheads for the Winchelsea project. It's a large project and I know fairing will take a while but I'm curious what techniques, tools, jigs (perhaps) or other methods you use to accomplish the fairing. Right now I'm using a few different sanding blocks with 60 grit paper. I also have a Dremel with a flexible shaft but I'm afraid of removing too much material. I also found that the bulkheads get in the way of the handle so I can't remove material at the proper angle using a sanding drum. Do you use a different kind of attachment? Using the sanding blocks moves the bulkheads quite a bit back and forth as I sand. Do you have any special techniques to keep them more rigid? I'm using Chuck's suggestion using binder clips on the bulkhead extensions as to not break them off. I have one bulkhead that moves so much back and forth as I sand that I feel it hasn't been glued (although I know it has). Do you sand side to side, up and down or another way? Any response would be helpful to establish a proper routine of fairing as I know this is an important step in the building process.
-
Personally, I wouldn't use a crimp type bender. Building this model was my first and I had a lot of trial and error. In the end, I ended up soaking the wood and bending with a curling iron. I have one that runs off butane so it doesn't need to be plugged in. I also found that once you soak the wood and bend it using heat, it's usually dry enough to install right away.
- 20 replies
-
- 1
-

-
- artesania latina
- mare nostrum
- (and 1 more)
-
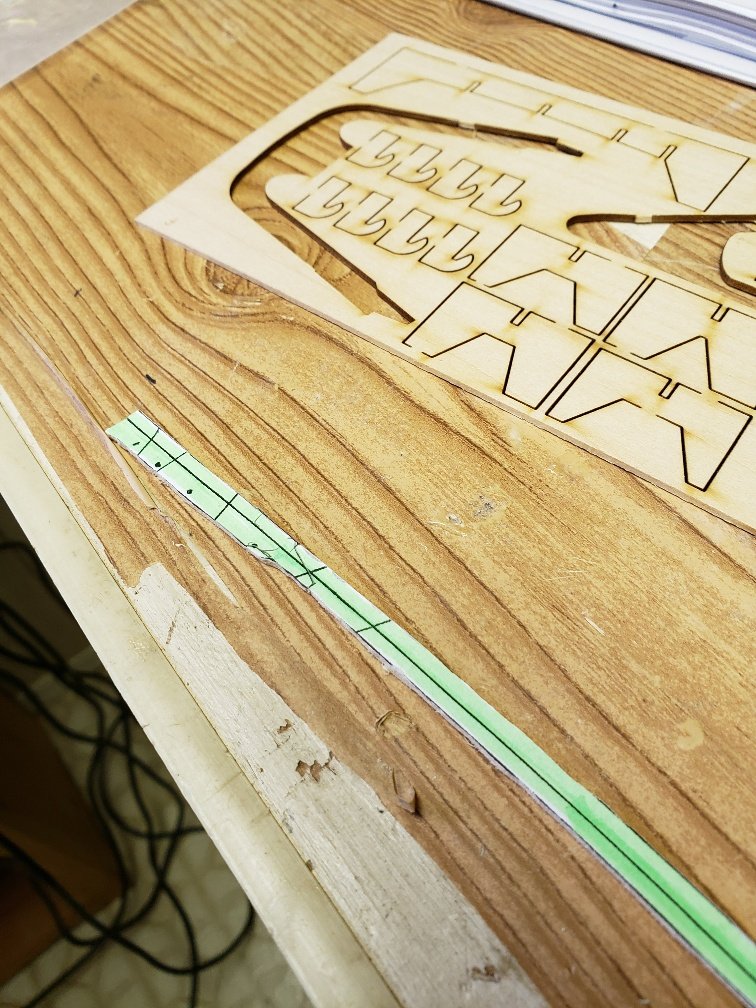
No pictures tonight, but I finished the keel assembly and transferred the plank run and port position marks to the opposite side of the bulkheads. To do this I used miniature screw clamps. I lined up one side on the line then retraced the line on the other side of the bulkhead. One question I had, is that when I finished the head knee assembly, I finished it with wipe on poly. Now I have the keel assembly done and sanding has meant that I sanded into the head knee assembly. So, should I be using wipe on poly at this stage or wait and apply it at a much later date. Is there an effect if I added the poly, then sanded, then added more poly? Or is it better to wipe it on as you go as a bit of protection?
-
So, I ran into another problem and I was going to PM Chuck with this to get his opinion but I thought this forum is the best place to let people know what not to do. The biggest what no to do is to not pay close attention to the monograph. Read and re-read until you are familiar with all steps. As with my last post above, I omitted adding the keel which I fixed tonight. However, reading through the monograph again I noticed a very important piece of information. It states "When installing the bulkheads I made sure that the laser etched reference marks were facing the correct direction. All of the numbered bulkheads have the etched side facing aft....... the lettered bulkheads are facing forward. This is very important." So my question is....... how important? I installed them all facing forward. They are glued with Titebond III glue and I doubt I will have any success in ungluing them. Is there a fix to this problem or have I just sunk the ship to to speak? Huge lesson learned over the last two days.
-
Today I decided to re-read Chuck's monograph to make sure I am on the right track. I realized I forgot an important step. I didn't finish installing the keel. So I started to install it but had some dimensional issues. If you look at the pictures, the length of the keel doesn't add up, however, if I look at each of the 4 sections, they match the drawing precisely, length wise. I don't know how the dimensions are off and can't figure it out. I've looked at a few of the other build logs and haven't seen anyone else with the same problem. If someone could suggest a fix that would be helpful. I've stopped assembly right now hoping for a suggestion or two. Like I've said, I've measured all the dimensions against the drawing, including the rabbet strip and they all check out, it's just that when they are combined they don't measure up. Help.

-
Just curious about the blades. Could we not simply purchase them from Jim Byrnes on his website? I know we are all looking for after market blades but maybe the best bet is Jim himself. I certainly can't find a supplier easily in Canada.
-
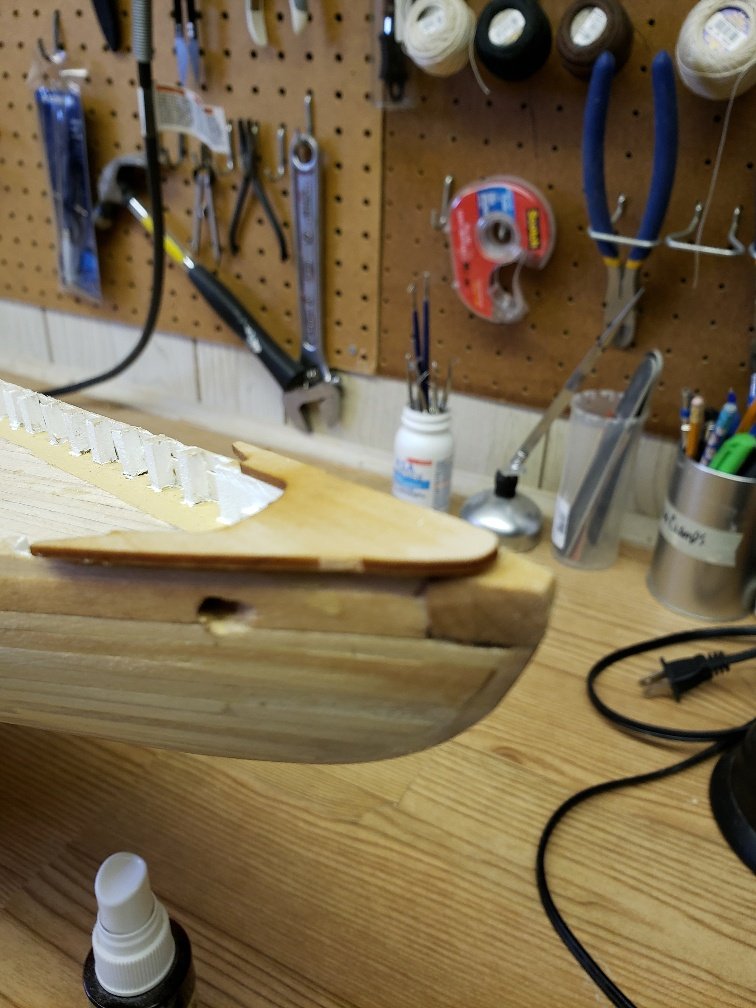
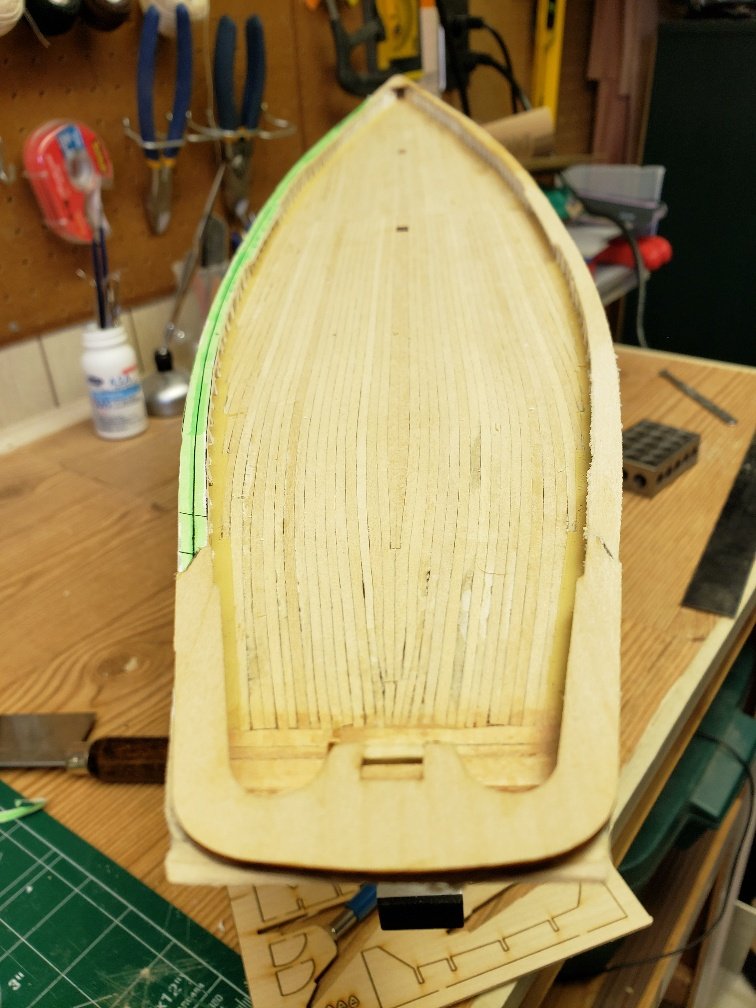
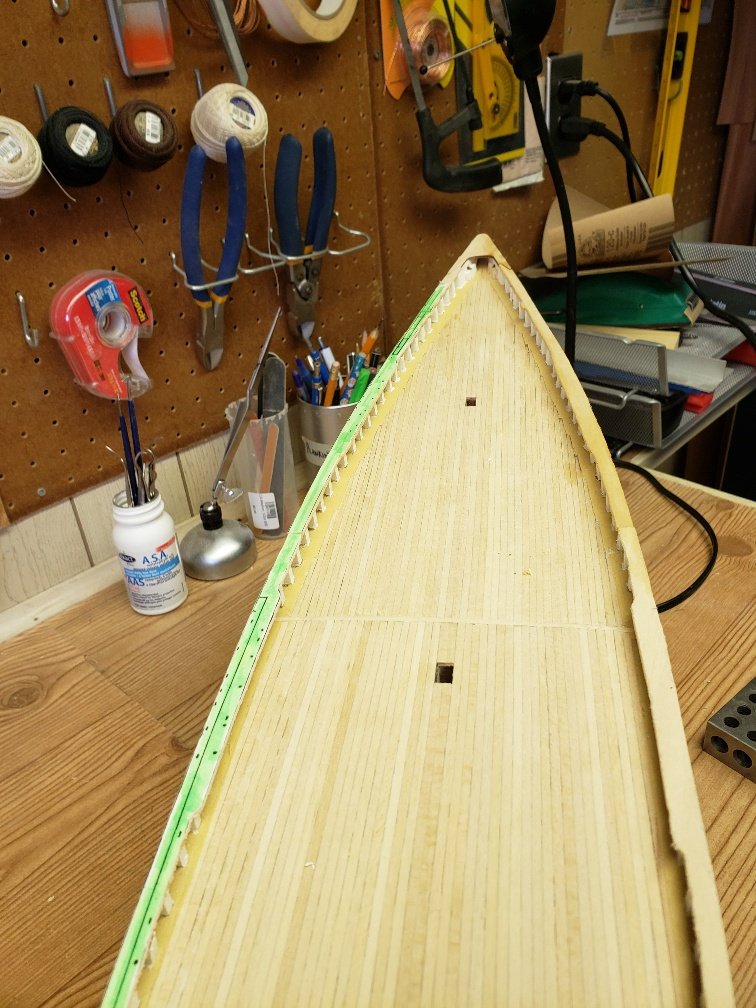
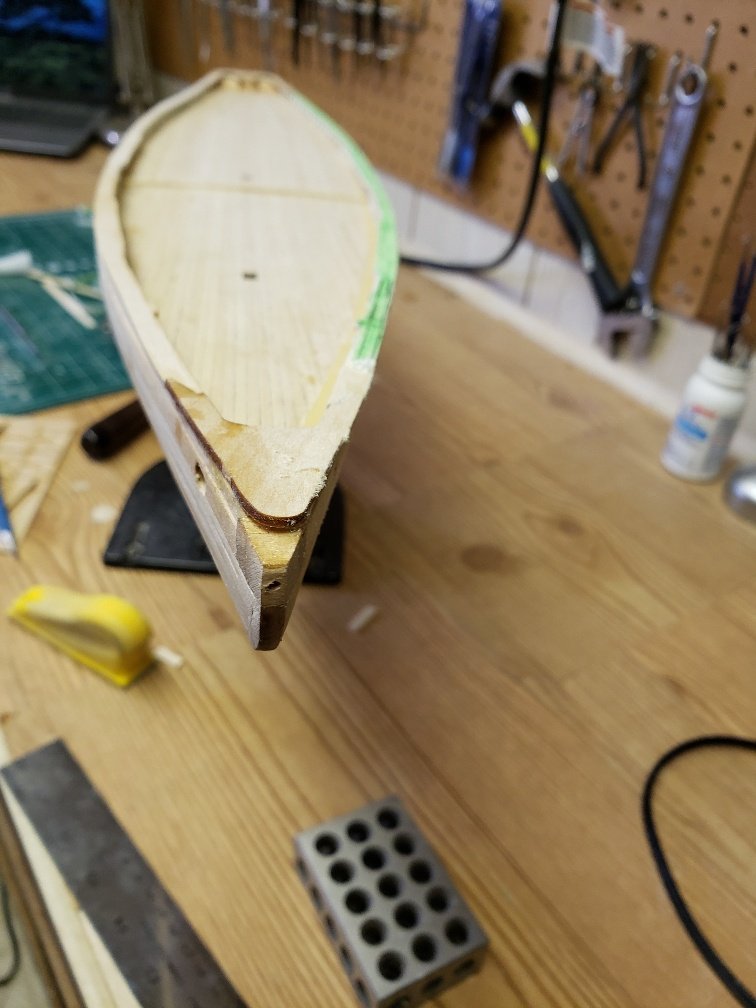
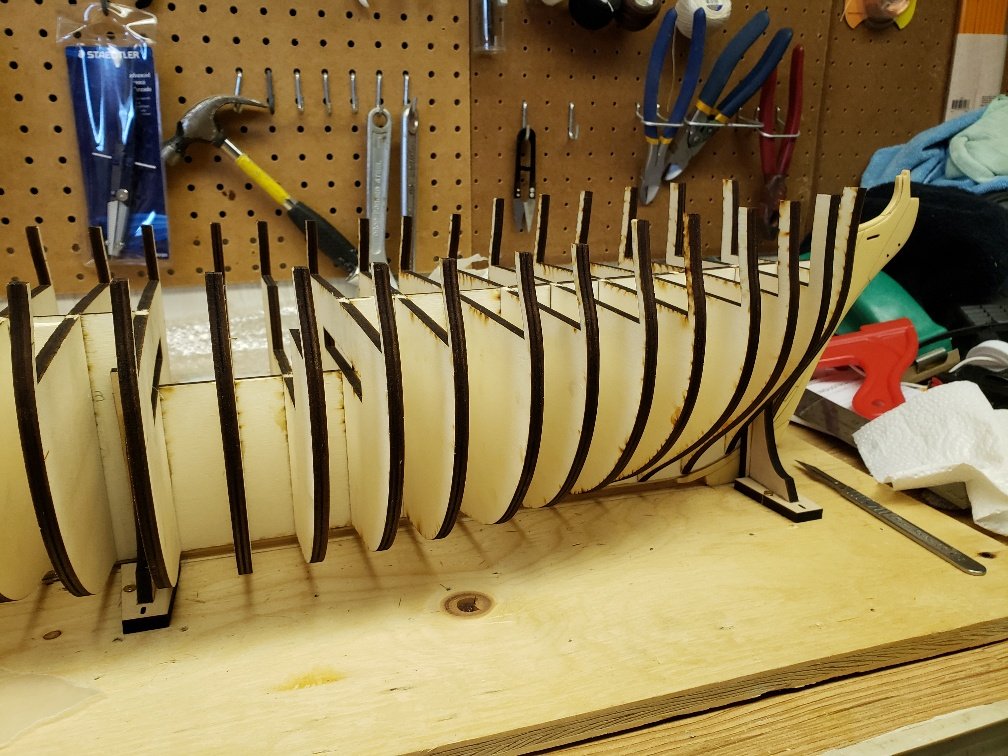
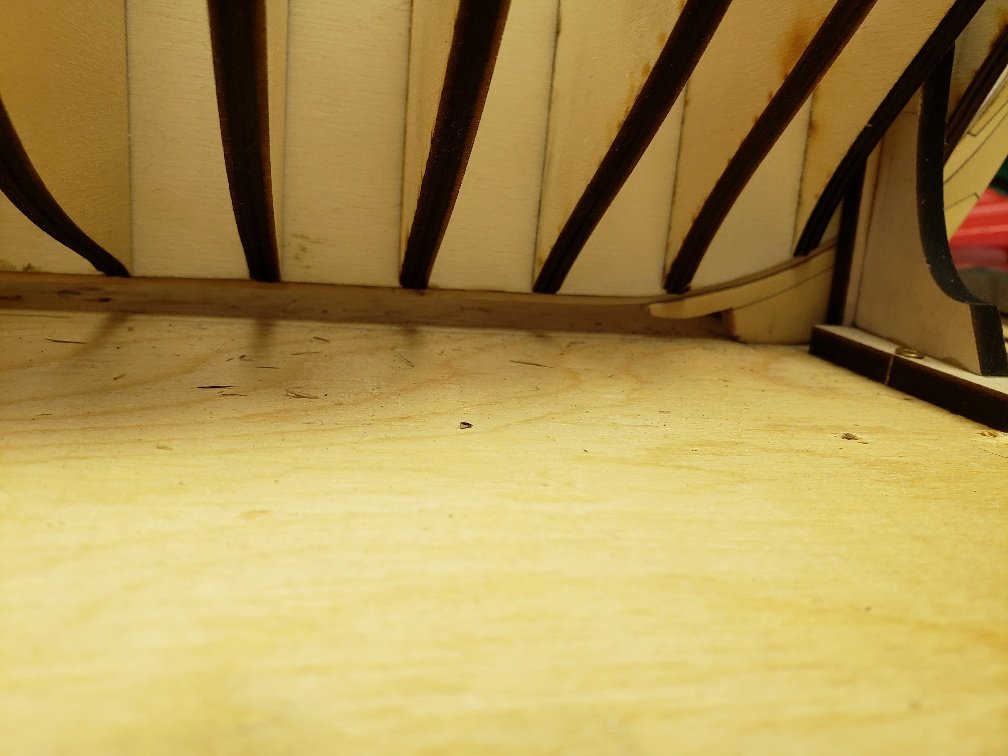
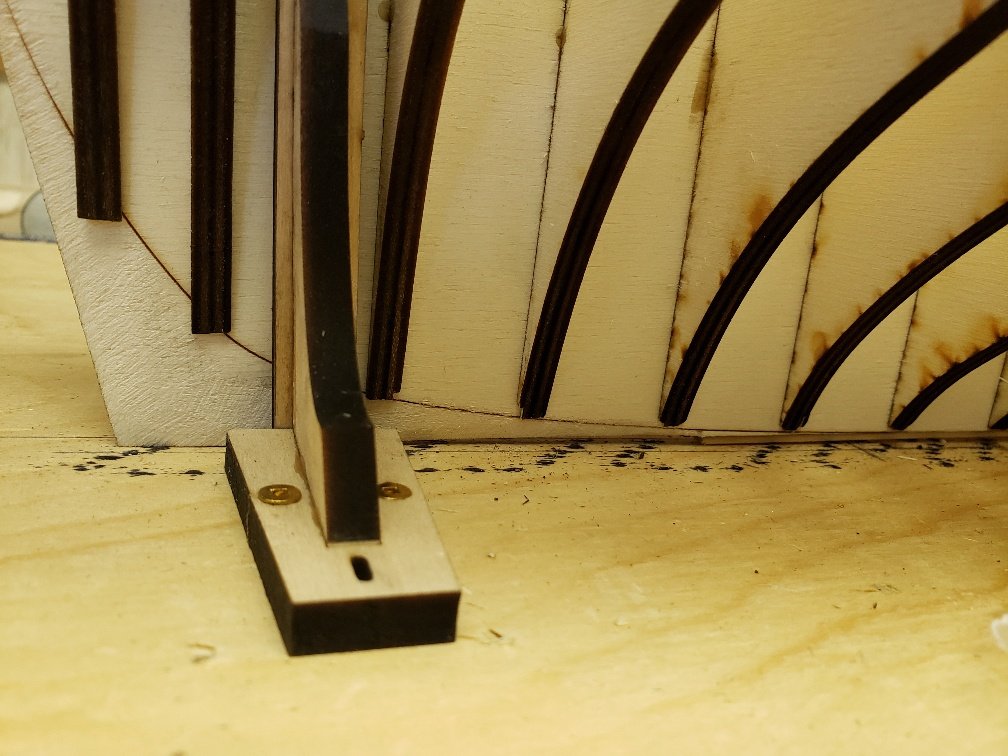
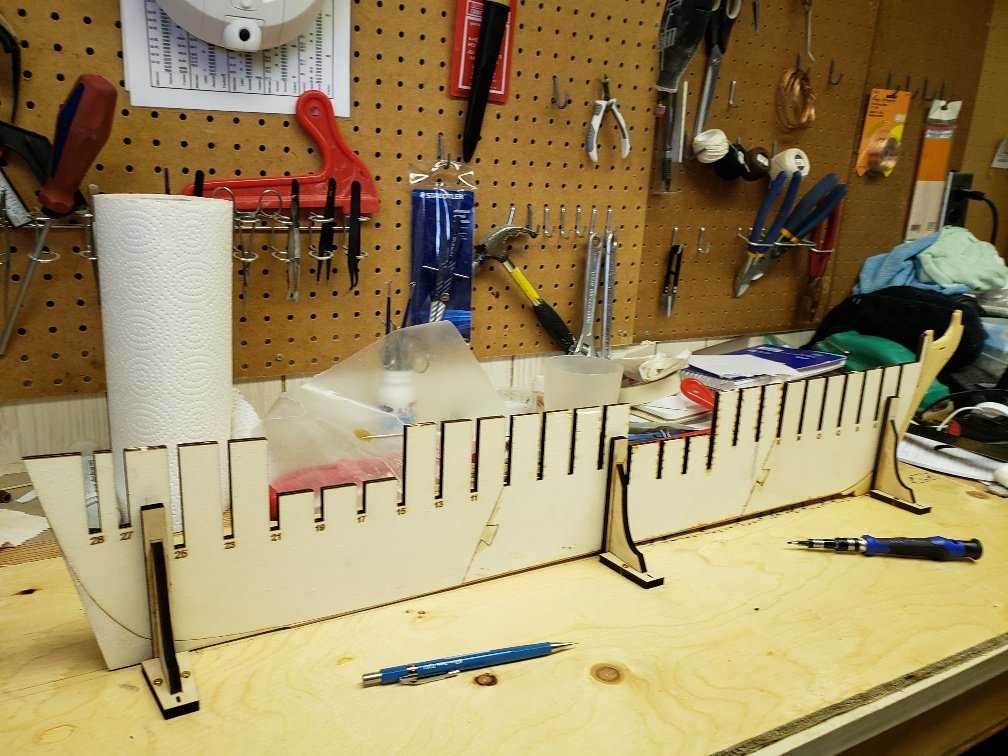
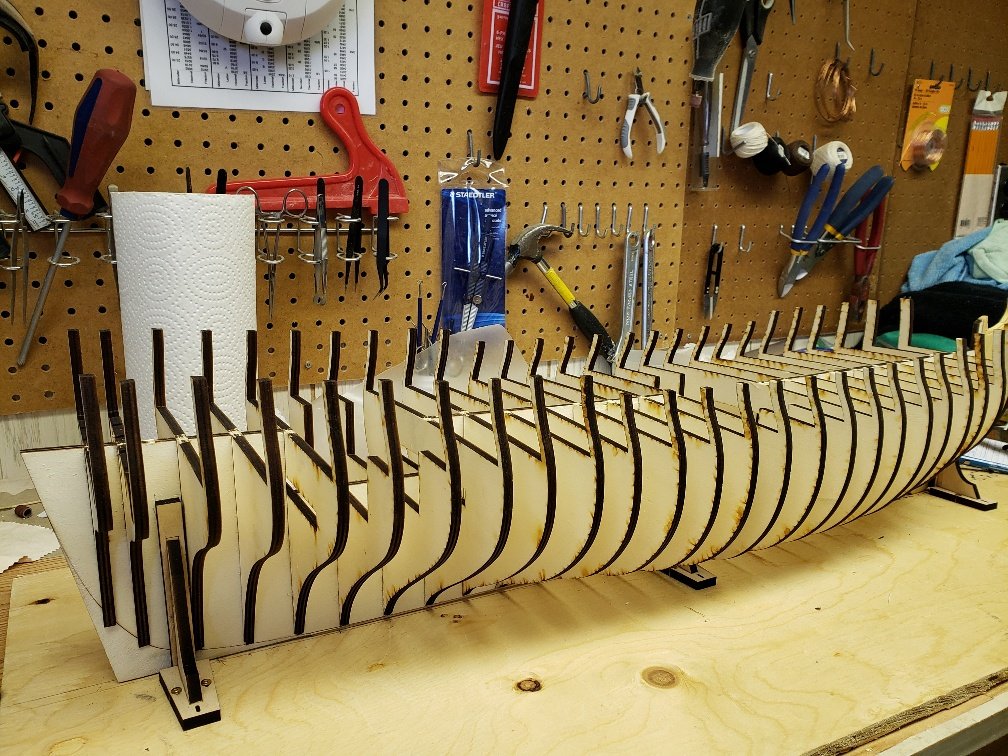
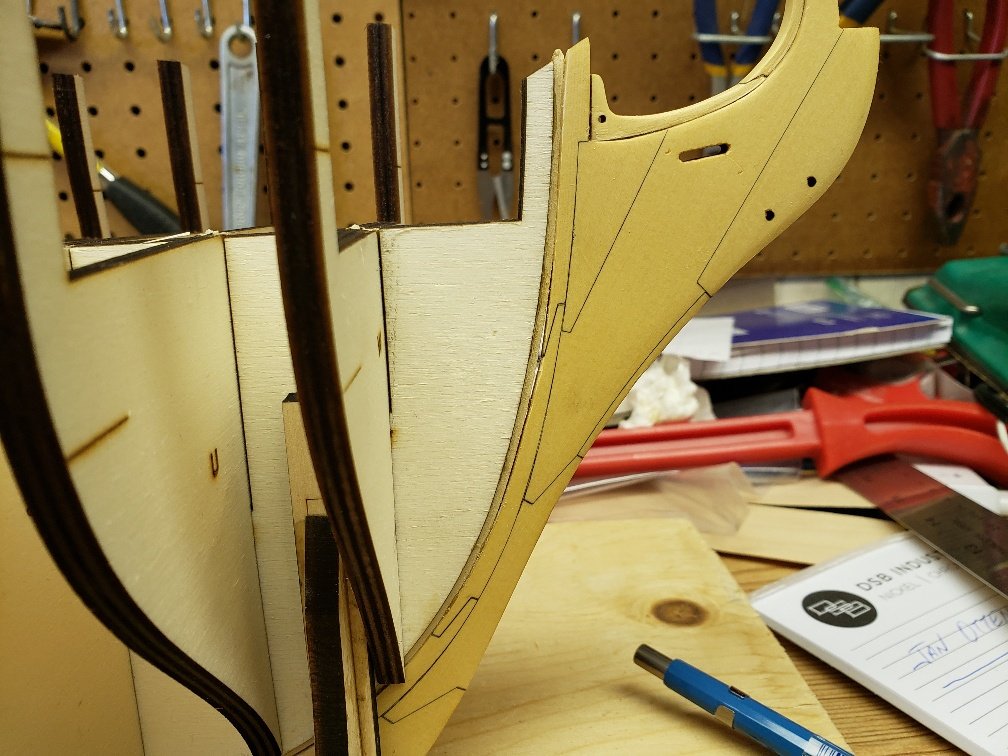
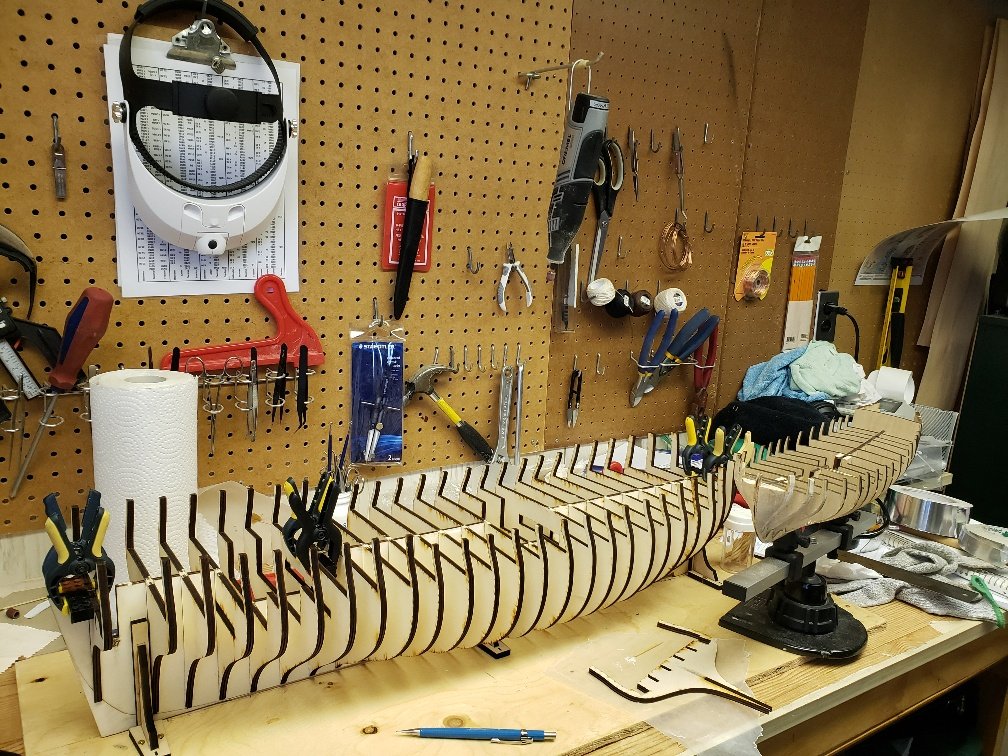
It's been quite some time since my last post. Luckily, I've had the false keel lying on a flat surface. Time seems to have removed any warpage or bending that I previously had. I attached the Knee of the Head to the false keel. Unfortunately, with a lot of sanding and clamping I still ended up with a gap. I'm hoping this can be covered up later in the build when I do the planking. I assembled the brackets and attached them to my build board to support the false keel. Next, I dry fitted the bulkheads to ensure a nice tight fit. I'm in the process of gluing the bulkheads. A couple of minor issues I ran into. First, when I was carving the rabbet from the bearding line I found I went a little too deep. So the false keel is a little thinner than it should be. I'm hoping I can shim the planks a bit to make up the thickness. Second, when I was removing the dry fitted bulkheads to permanently attached them, I inadvertently broke off one of the bulkhead extensions. It was a minor repair and barely noticeable. Perhaps though, I may sit down tonight and re-read Chuck's Monograph because he clearly talks about this problem and how to avoid damage (I actually just noticed those paragraphs). I doubt if it will be such a long delay before my next post.
.jpg.e206883e4dc701513150ac7d1be20378.jpg)
.jpg.a2c194176a96e9ea5aa96d01ac5345a5.jpg)
.jpg.19690a45a20afaa5458cb63fdcaffdd2.jpg)
.jpg.438ed0d017150a2d1e1a63e5cedbc7fd.jpg)
.jpg.db9d0432ecdcf39416e6a5b02af1407d.jpg)
.jpg.b9f995e5d216c68ffd98c4e17696107e.jpg)
.jpg.ae5966483e4a65fe2e0eb3e78ebae615.jpg)
.jpg.b6c8d8b76f7c281de32a11b9fab608d1.jpg)


.jpg.40f1a699db2b8fe7ff0464d4f90f5e94.jpg)
.jpg.55e7be225b503a7af0f263e923efd94d.jpg)
.jpg.8f14fbb966ff3b3a7e0a0a98dafcb748.jpg)
.jpg.41655792b6faf97c6ffa4081018e0027.jpg)
.jpg.8c69e2228b22c6caa485e52c8419d96d.jpg)
.jpg.a750efb74c58526cbd69fee41ca7e45f.jpg)
.jpg.7af3705ab46f78509b87c6a5b96f1fbc.jpg)
.jpg.9360eda8e0902ab03adceafa43e6a49f.jpg)
.jpg.8cc97bbea34b56c4bb8a0698616ad6ee.jpg)
.jpg.e7728f3304ec0f7a424f4c23f920a7cb.jpg)
.jpg.ed227e4715c3ef38a8bacb8ef6a77d23.jpg)
.jpg.8ec93b6eb842b8c2ab6a238d417ccf91.jpg)
.jpg.6117139e52c9d26c7ed7f759baef42b1.jpg)
.jpg.bbb002d79f2b8f014eac6500d4168d99.jpg)
.jpg.c59d1477078a6f9701c6ee5c6e801c22.jpg)
.jpg.07d164a538503522a889243c122818e4.jpg)
.jpg.fe50a8030e67fd55d88822f9bc47f141.jpg)
.jpg.e02b3de3dfa0677a4d28b5fe88212f71.jpg)
.jpg.b5fd2690001699e0126ca74140079d5a.jpg)
.jpg.ac2118ad4e933ca46e5dc25eb02bac89.jpg)
.jpg.4f5082ad437818fa8c9cb7040f1d931c.jpg)
.jpg.2ef6d884eb31006afb74f233deafe560.jpg)
.jpg.3d24e16ca4a4042f5a38e48eb3e1135f.jpg)