.jpg.4b9546914df2c235b4fe82d7c03670bd.jpg)

Worldway
-
Posts
628 -
Joined
-
Last visited
Content Type
Profiles
Forums
Gallery
Events
Everything posted by Worldway
-
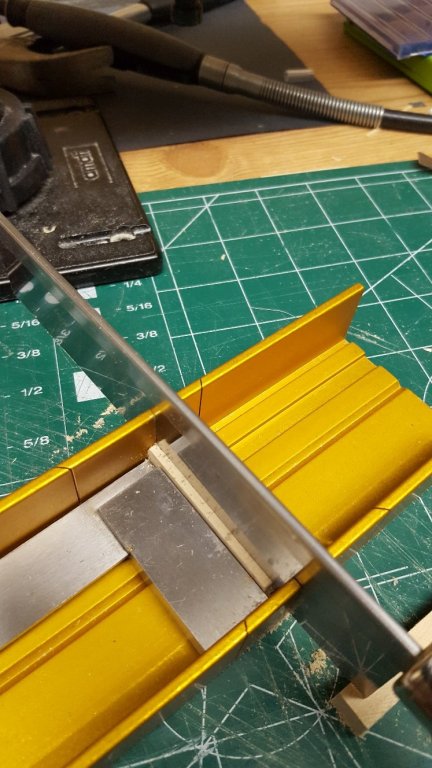
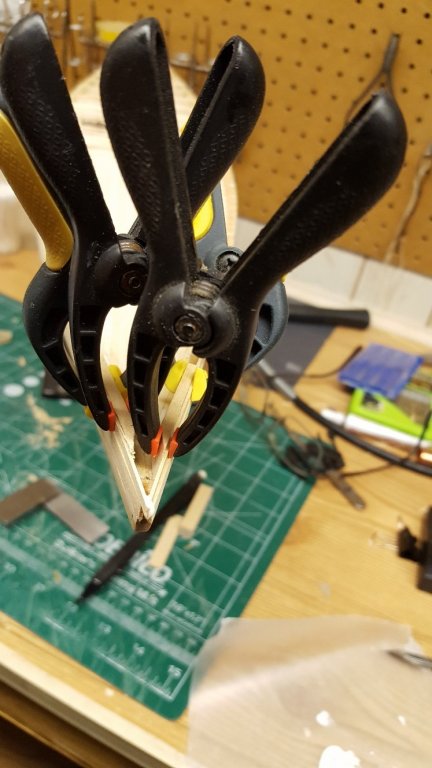
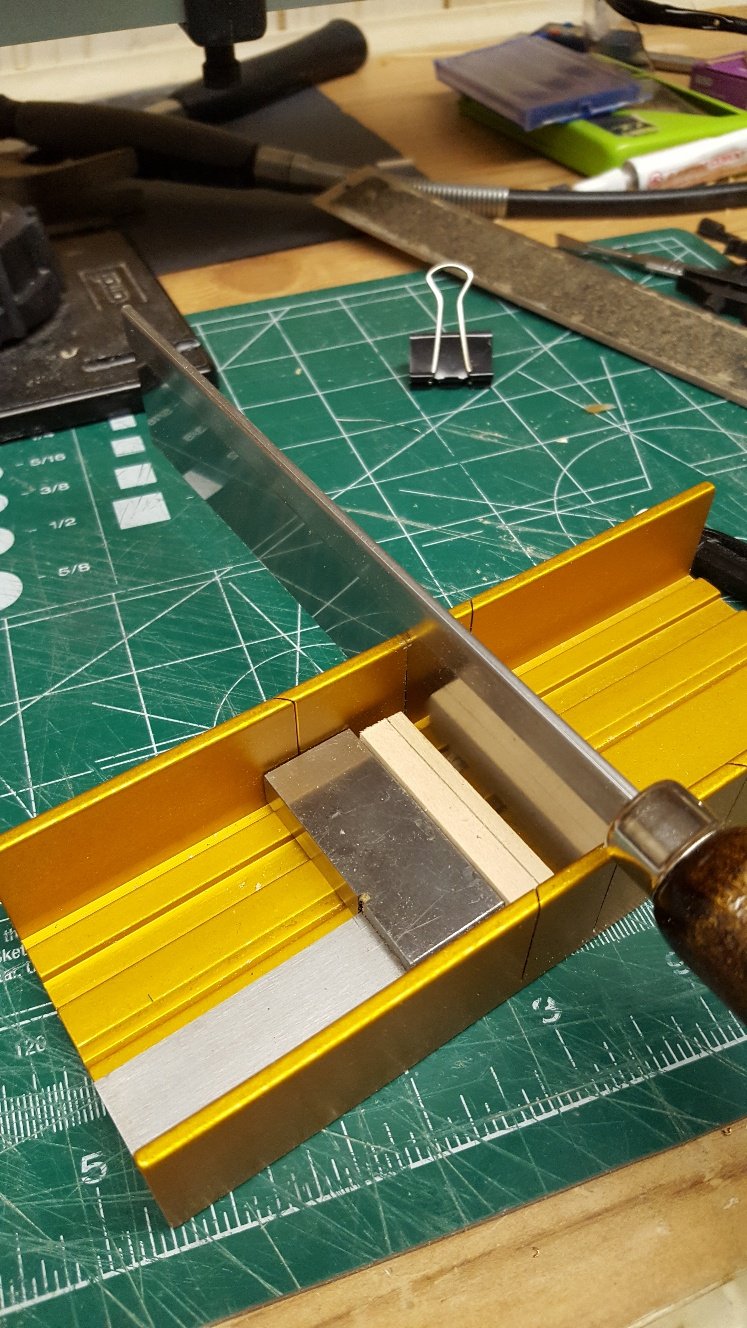
 I finished the planking and wanted to add the Knightsheads and Hawse Timbers. The plans said you could build it "proper" or you could simply use a solid sheet. It calls for 1/8" thick sheet and, from measuring off the drawings, I saw that it had to be 1 7/8" long by approximately 3/8" high. I had nothing that came close to those dimensions. I did however have a block 3/8" x 3/8". I cut it to length and luckily enough it fit inside my miter box. So I used it to cut two boards 1/8" thick. It actually worked out well. I then installed them using a 1/4" dowel (which is the size of the bowsprit) as a spacer. Then, using my Dremel with a sanding disc I ground down the false frame timbers to match the top of the planks Next step was to add the chafe block. I cut two pieces to length and installed them. I have now started some of the painting. I masked off the quarter deck and painted the outer planks a buff colour (the drawings specify either gray or buff). I'm trying to get up the nerve to airbrush the hull. I'm not sure what approach I will take yet. I have paints for the airbrush but may end up picking up some spray paint. I'll let you know in the near future.
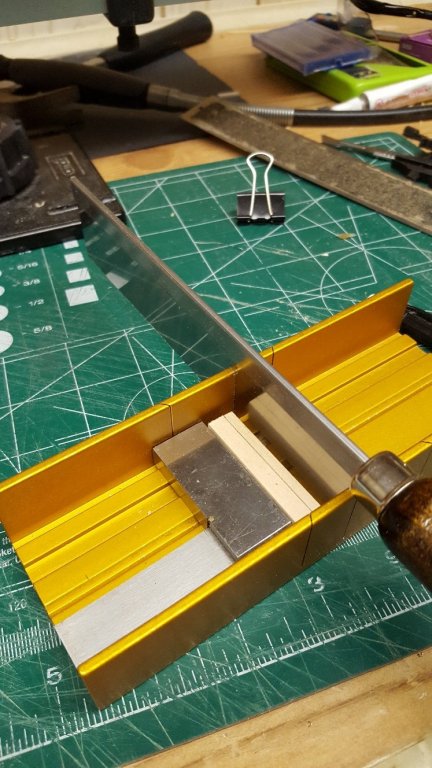


-
lol Steve, but remember you're still flying foam planes.
-
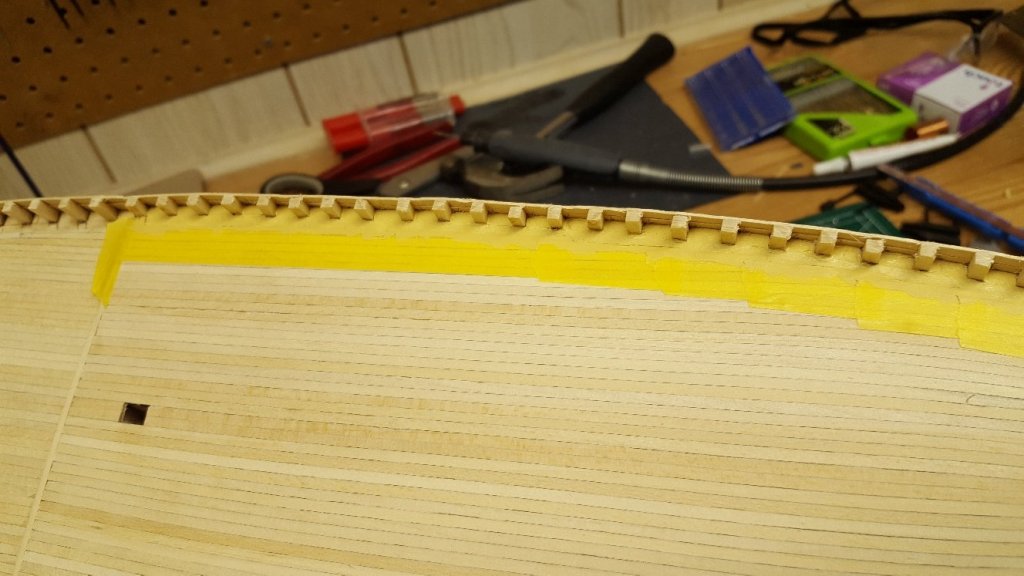
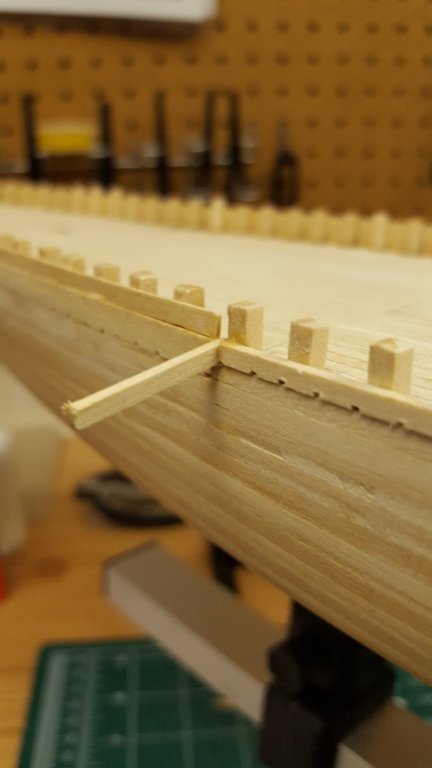
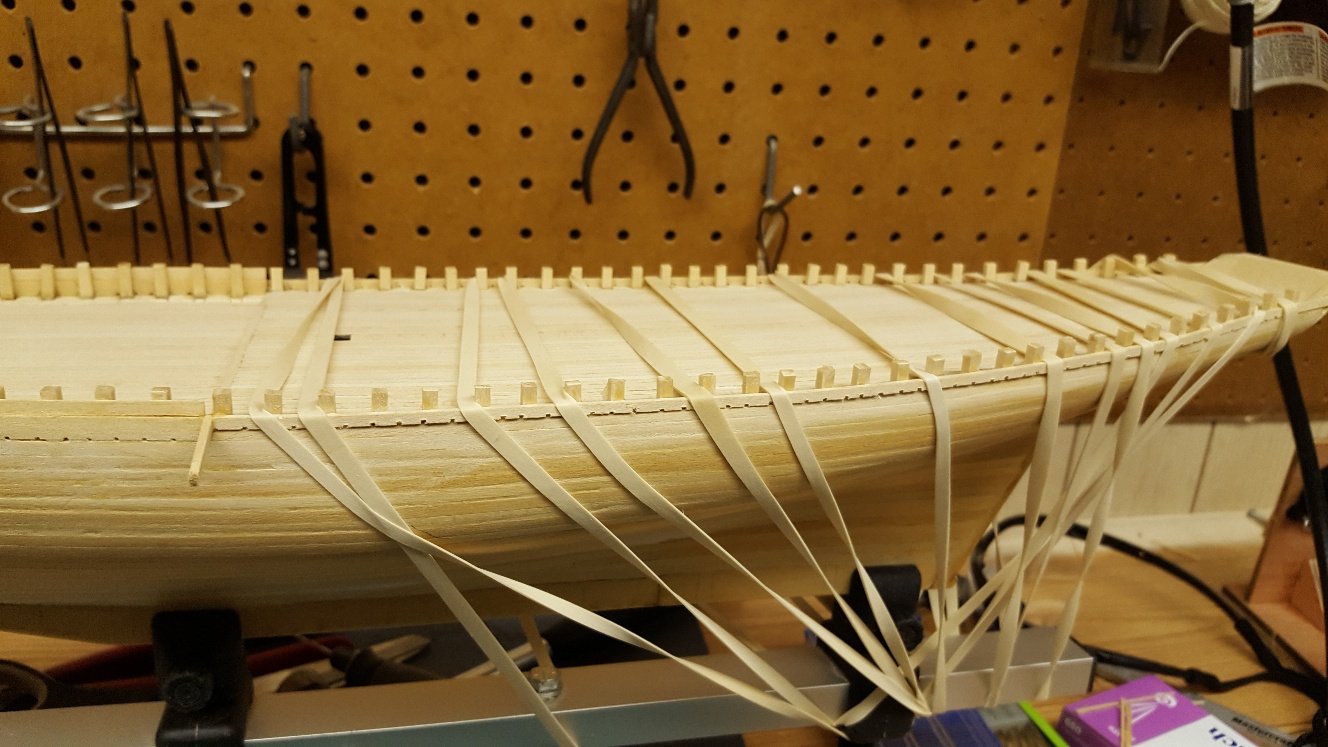
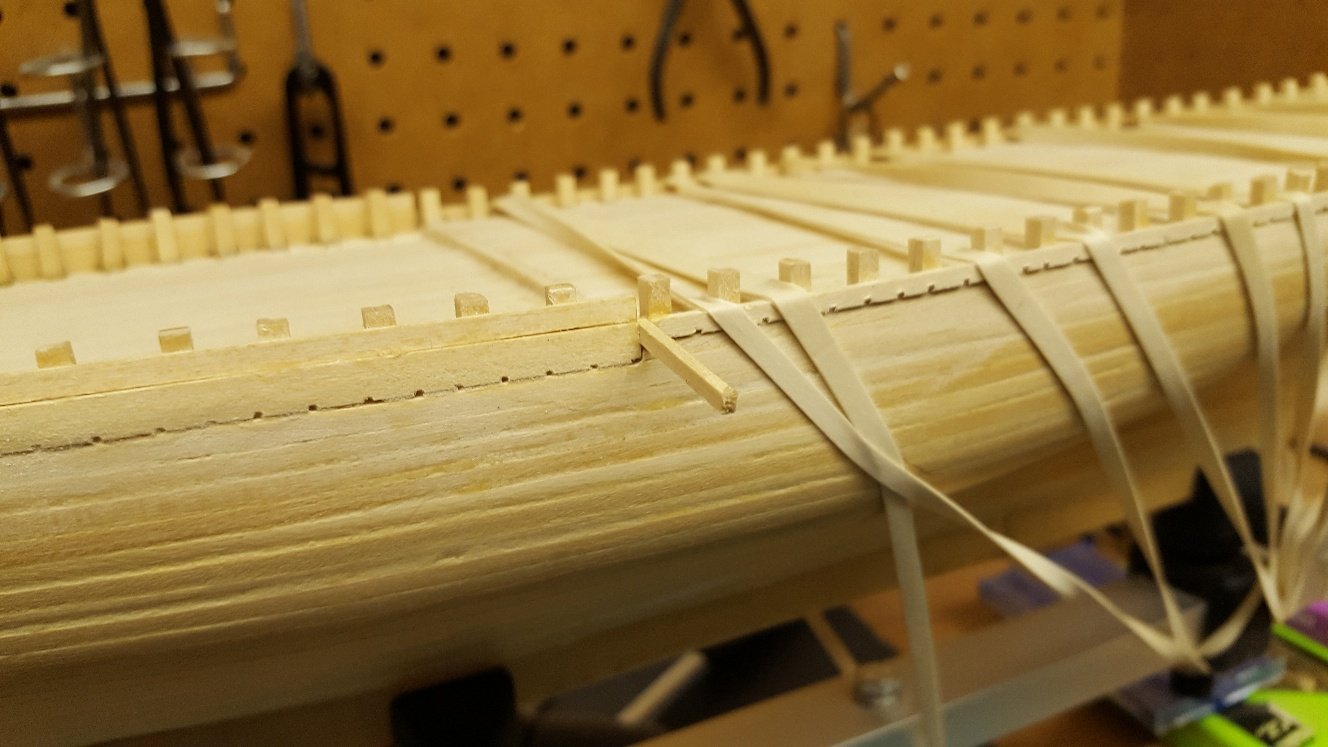
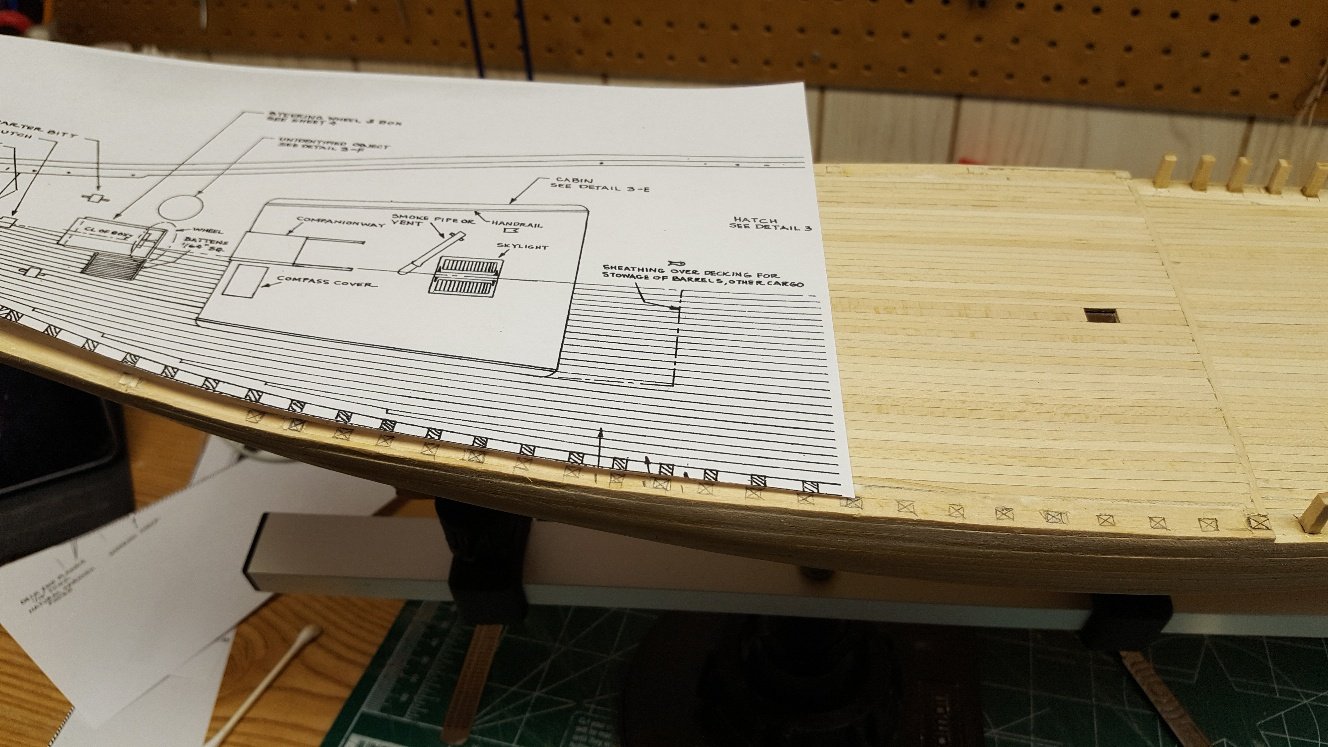
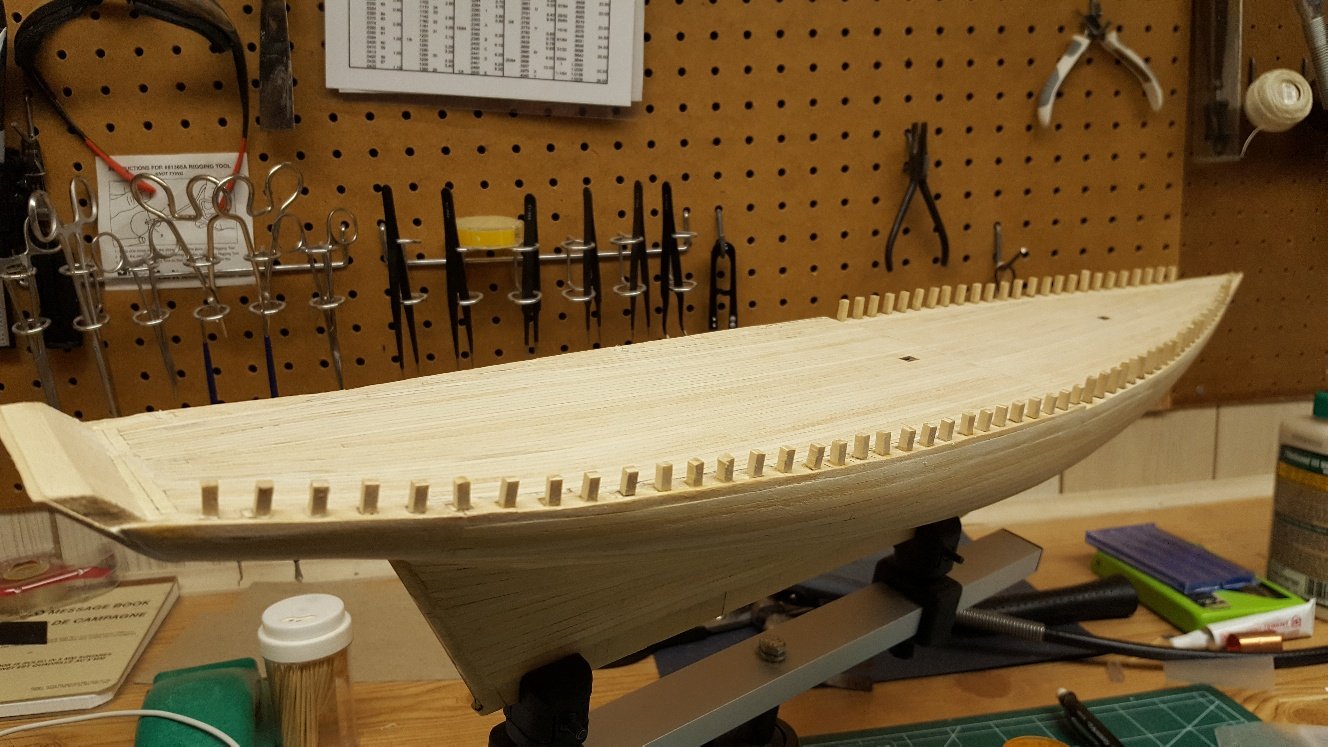
And the planking continues and cutting in a crap load of scuppers. I temporarily installed the plank and laid out the scuppers which i then cut in. However, they weren't exactly in line with the false frame timbers. I think however though that this detail will be better appreciated looking at the exterior of the ship and don't think the error will be that obvious. The plans called for using a 1/16" thick plank for the first row of planking. However, I found the plank stood proud of the edge of the hull. Once the glue has cured I will take my mini plane to it to reduce the thickness to match the rest of the hull. On each side I cut the plank a little short. I used a piece of plank fitted on edge to fill in the gap. Once painted, you will never know. This is the repair on the opposite side.


-
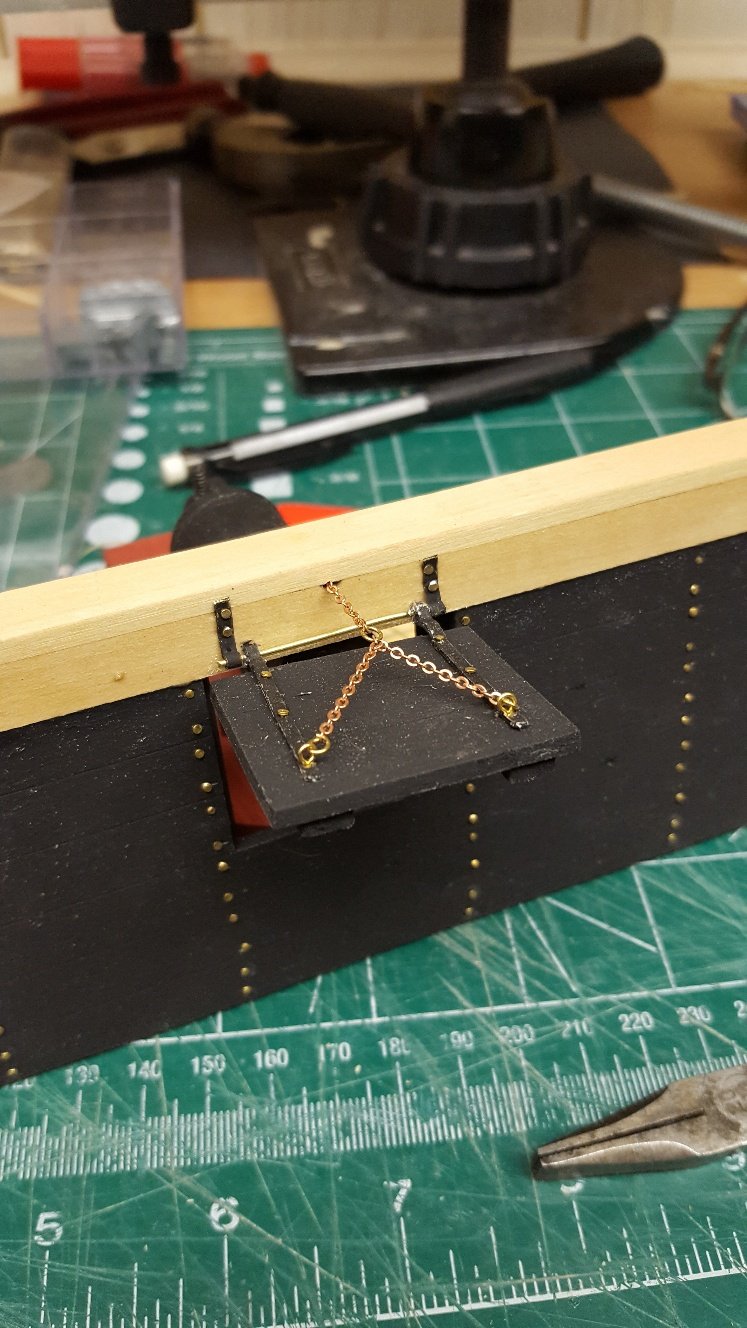
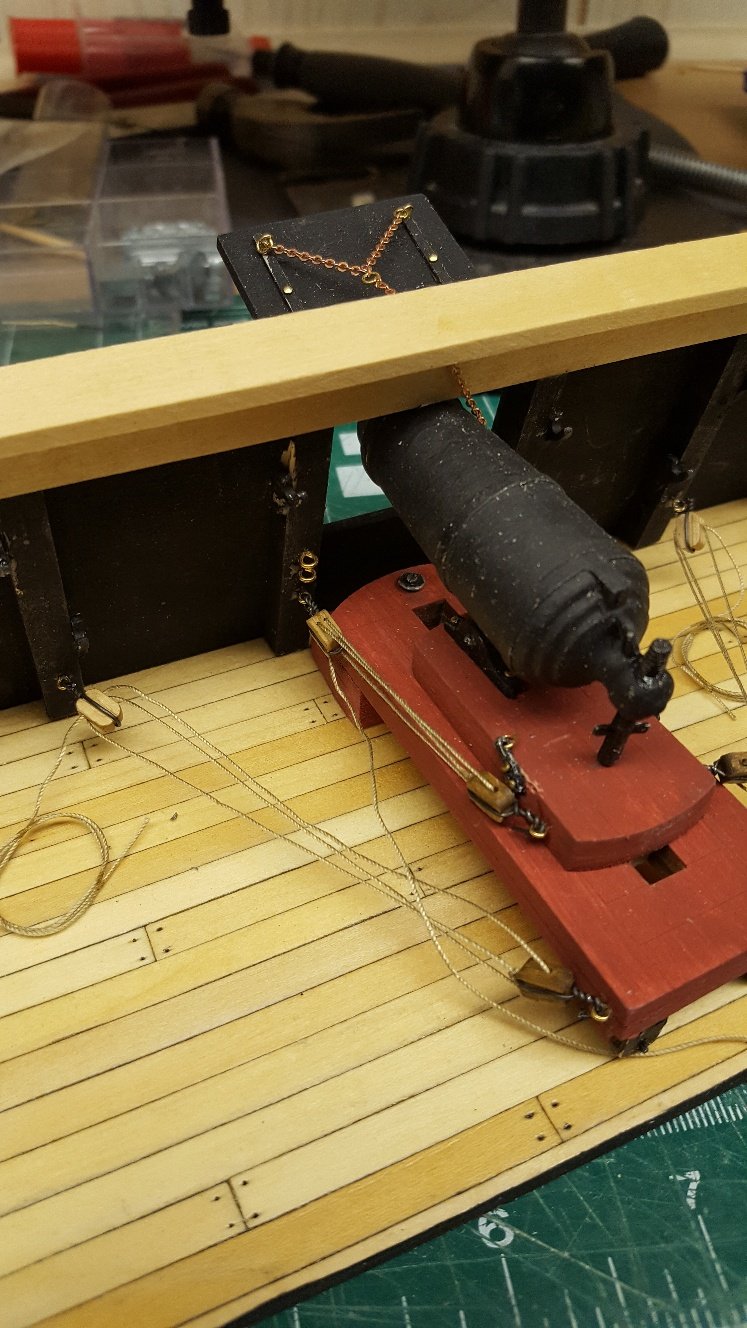
Continuing with the rigging. I am starting to enjoy this project although I've had my share of problems. However, I am learning a lot from it. My next ship is the Fair American which has cannons so this is an introductory course for me. I do however have the Naval Smooth bore kit to do and will apply the lessons learned on this kit to the next one. Perhaps I enjoy rigging and haven't realized it yet. You have to attach the chain using very small round brass rings. I found the best way to deal with this was to use hemostats. They actually really helped me with the installation. I also used reverse grip tweezers a lot to help hold assemblies. I thought this was going to be a very tricky step but turned out to go better than I thought.


- 30 replies
-
- 5
-

-
- model shipways
- finished
- (and 1 more)
-
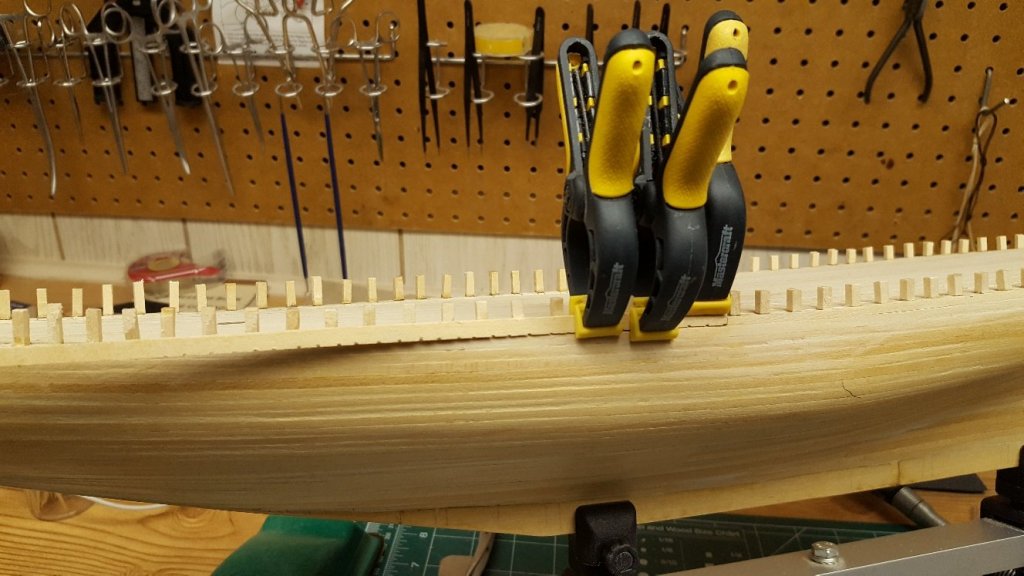
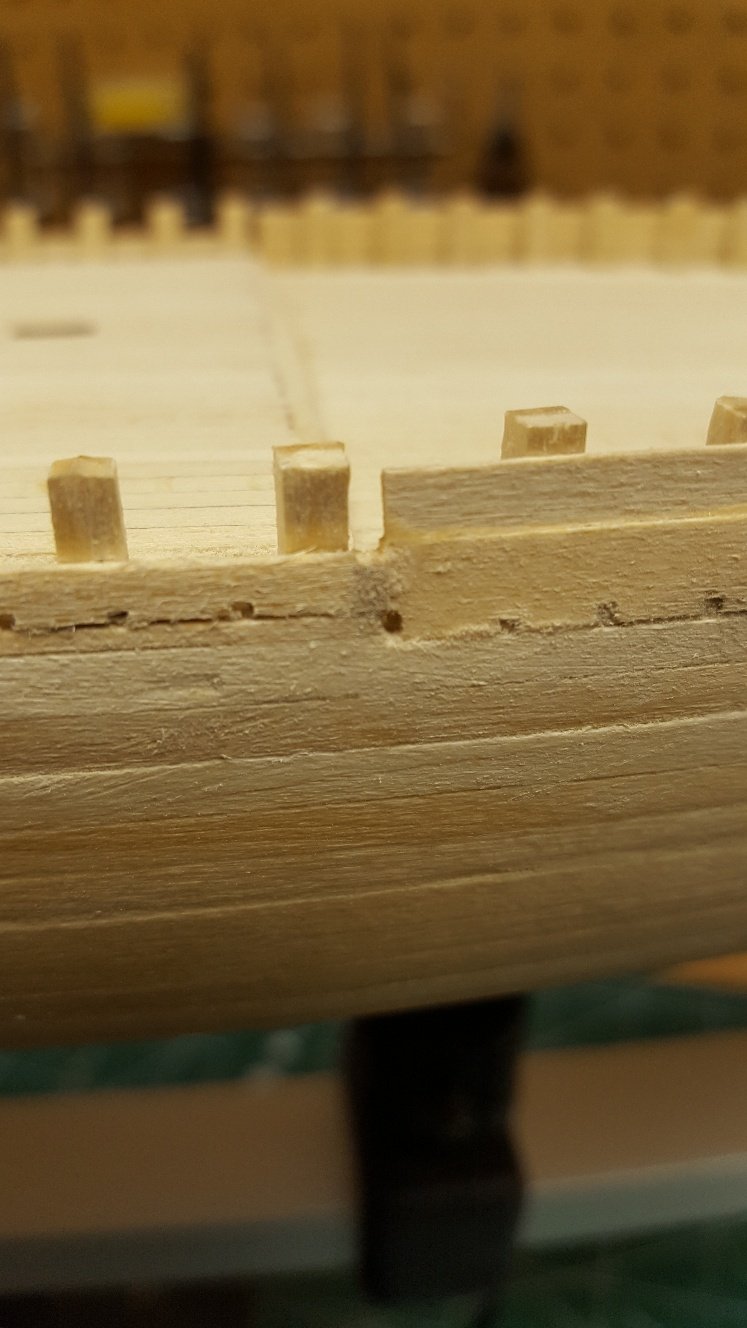
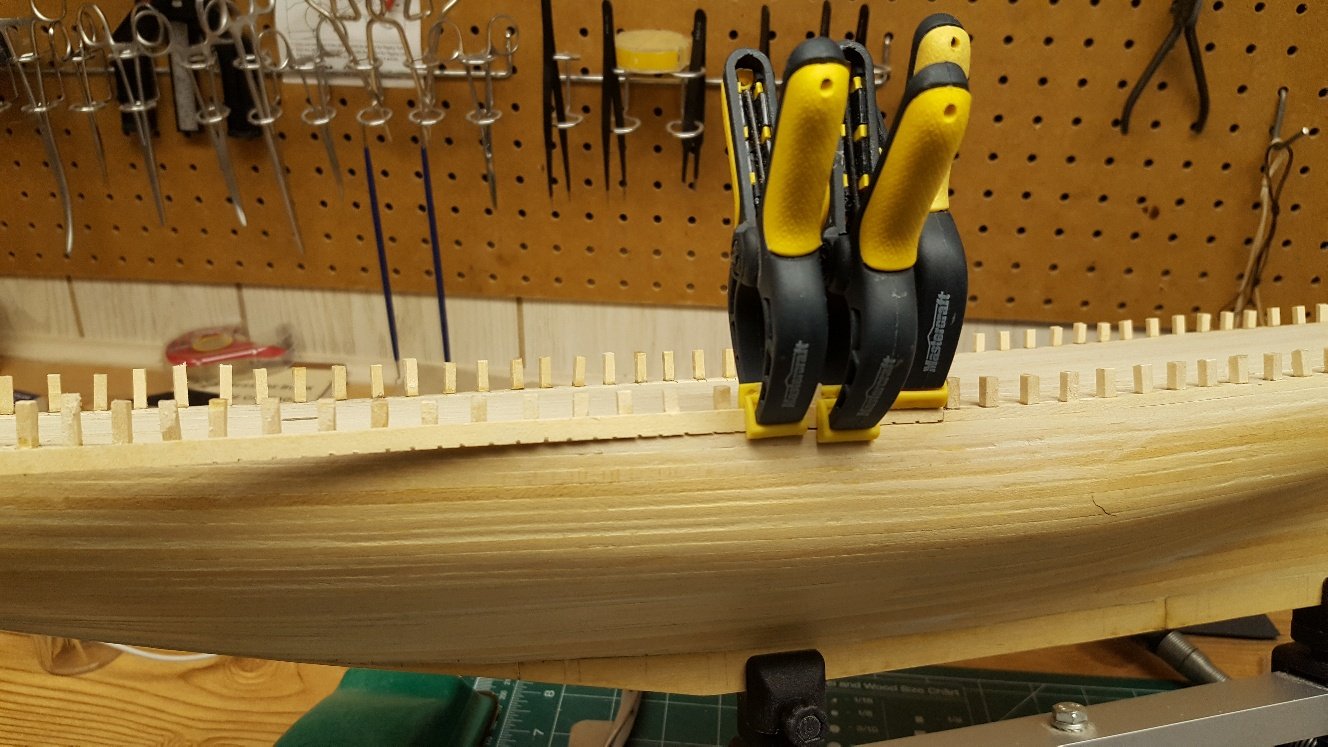
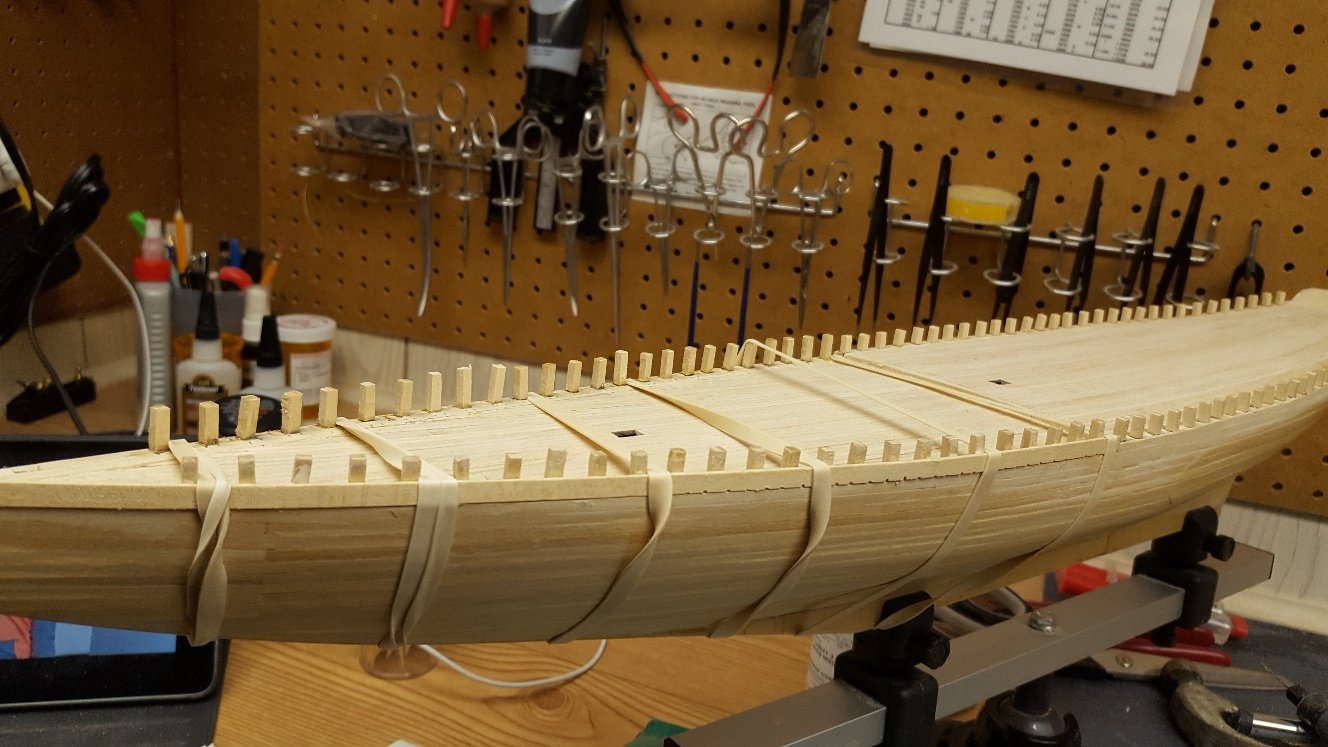
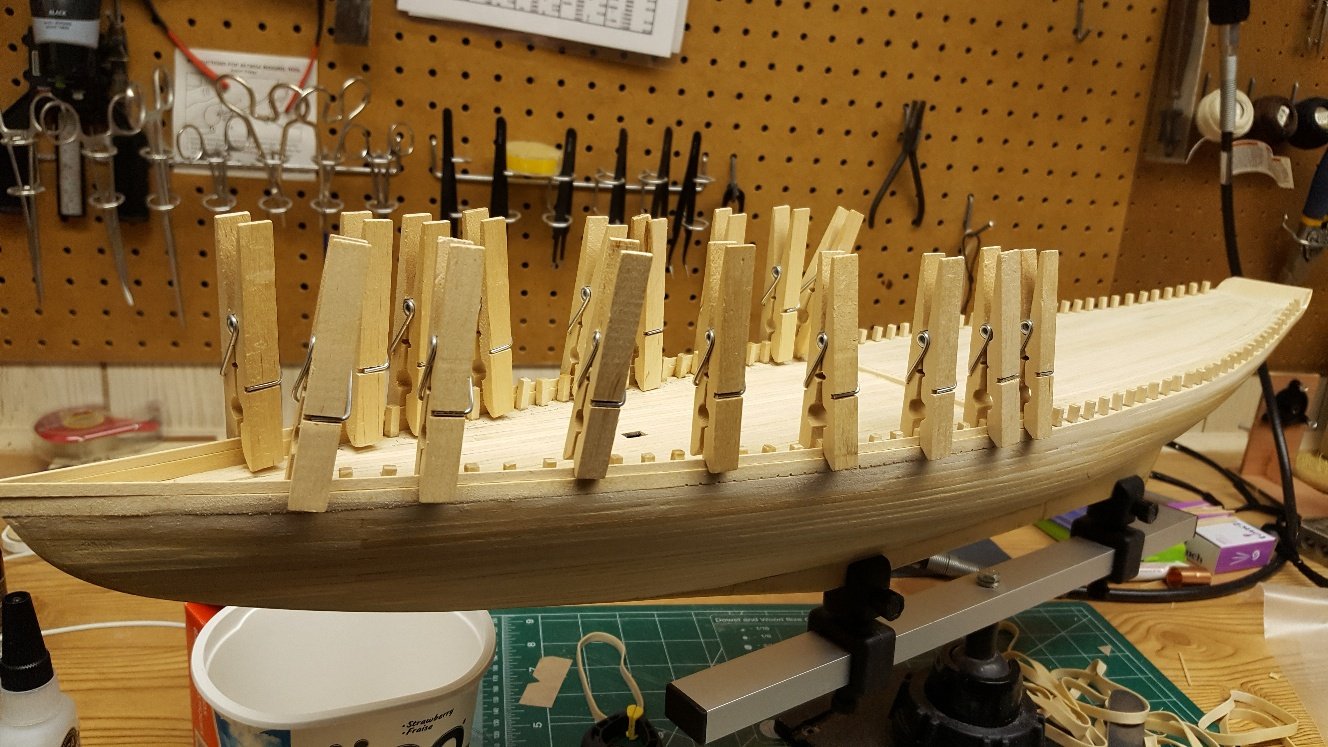
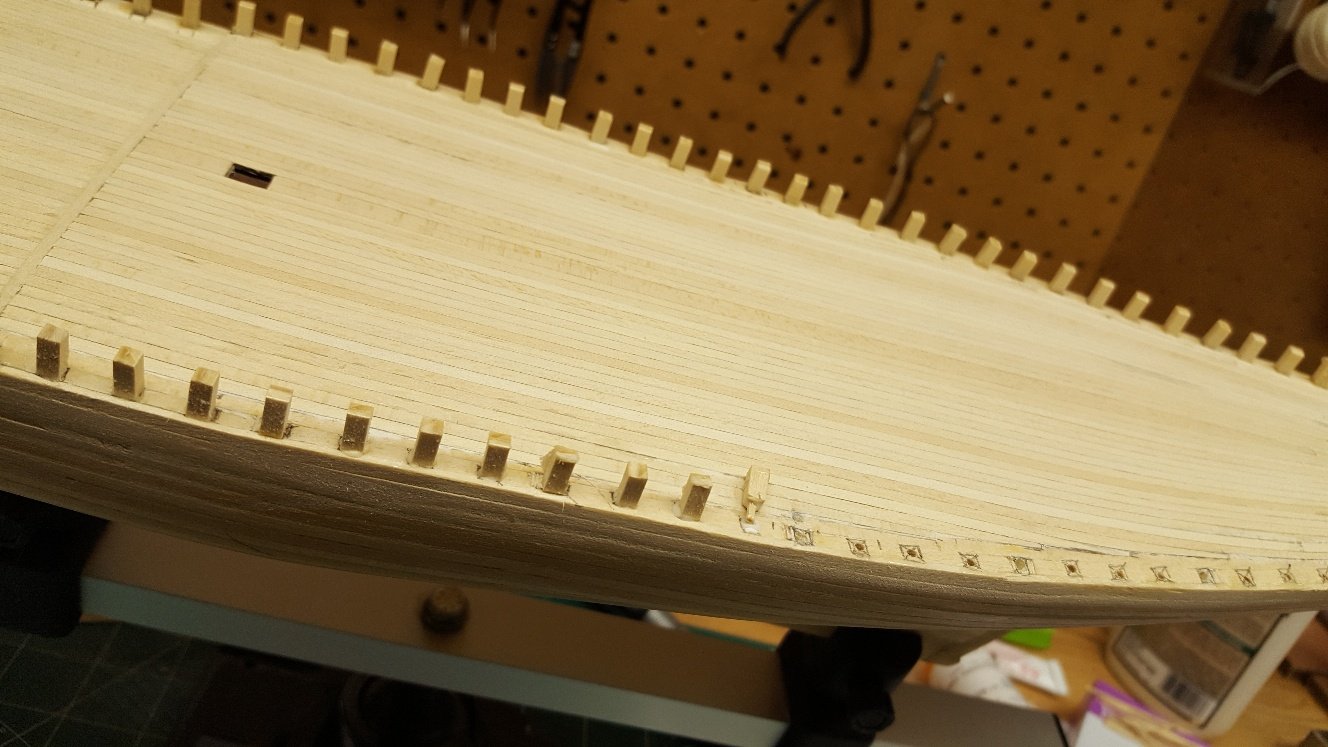
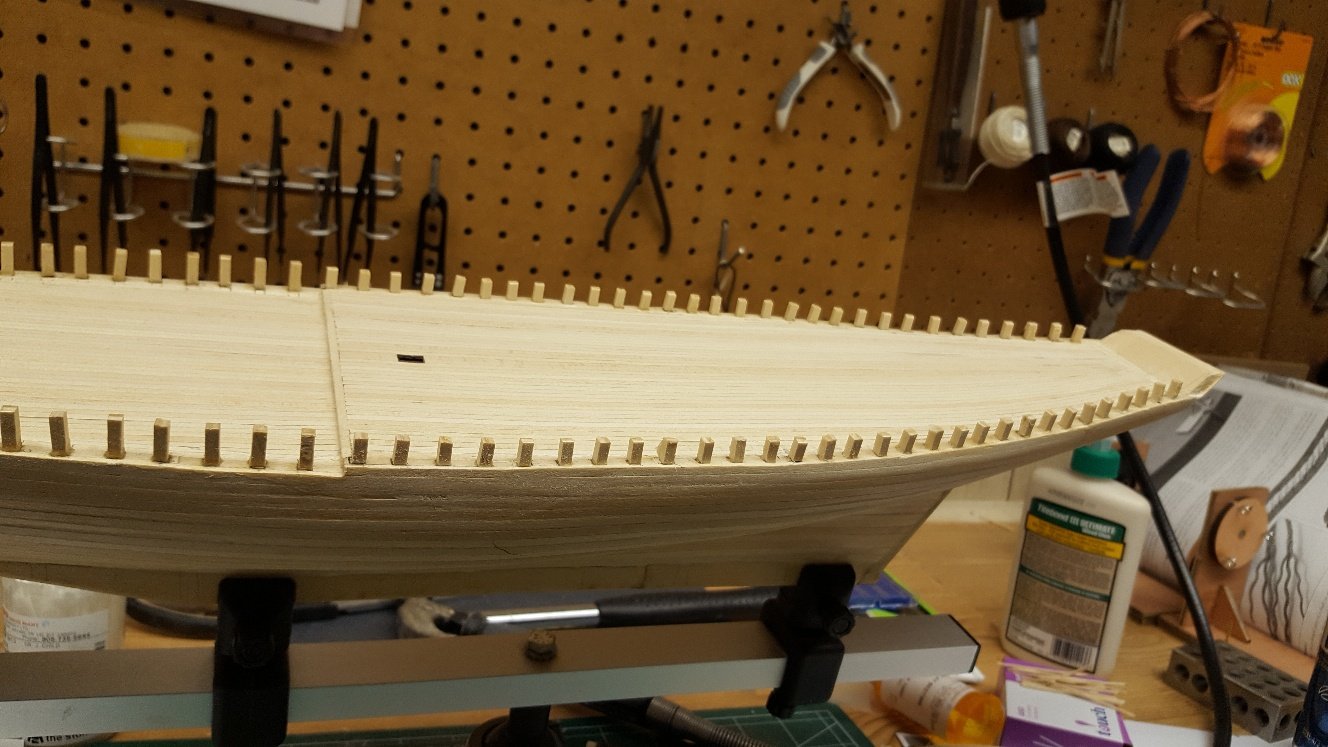
I installed the fore deck planking. I used the same method as previous to cut in the scuppers. It's a lot of work for very little visual appearance. Hopefully, after painting they will stand out more. It seems the false frame timbers were cut a little long and each will have to be trimmed. I'm trying to think of the best way to trim them


-
Model Shipway Ratline tool
Worldway replied to fnkershner's topic in Modeling tools and Workshop Equipment
Really appreciate you doing this and posting your results Doug. I am a far cry away from rigging but what you have shown seems very positive. And any advantage I can get I take. I'll likely purchase one in the following months to use on my Bluenose. Can't wait to see your future results. -
So Doug, I'm curious, when are you going to start your first scratch built? I think you are heading in that direction and I can see your skills are improving (and I've noticed you seem to be "gearing up"). This is starting off great, but I know that you like to have two or three on the go at the same time. Great work. I'm envious.
- 79 replies
-
- 2
-
-
- marisstella
- barque
- (and 1 more)
-
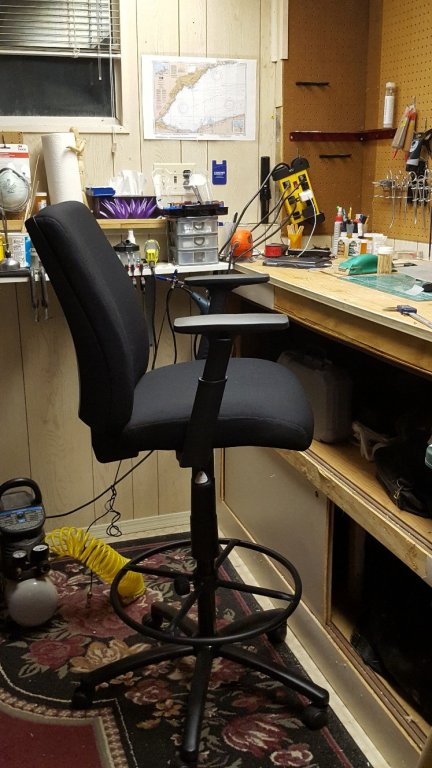
So after a break from the Bluenose I decided to continue the build. The Admiral bought me a bench height chair which makes life a lot more pleasant. I continued adding the false timbers on the aft deck, pegging every one. Hopefully this will resolve my issues. I will also take the advise from Jon and bend the planks before I install them.


-
Model Shipway Ratline tool
Worldway replied to fnkershner's topic in Modeling tools and Workshop Equipment
Doug, I'm curious and am probably asking a silly question but does it make a long enough ratline to run from the top of the mast to the dead eyes? Can you adjust the length of them? -
Pulling up a chair for this build. Looking forward to it.
- 79 replies
-
- 1
-
-
- marisstella
- barque
- (and 1 more)
-
Model Shipway Ratline tool
Worldway replied to fnkershner's topic in Modeling tools and Workshop Equipment
Looking forward to your thoughts on this. I'm hoping it's positive. -
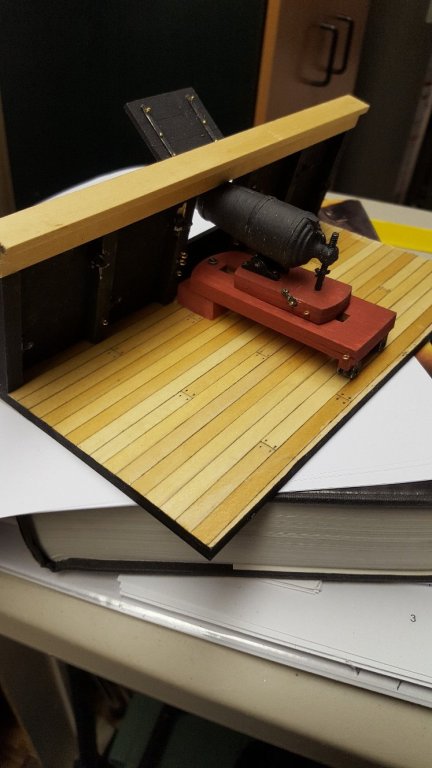
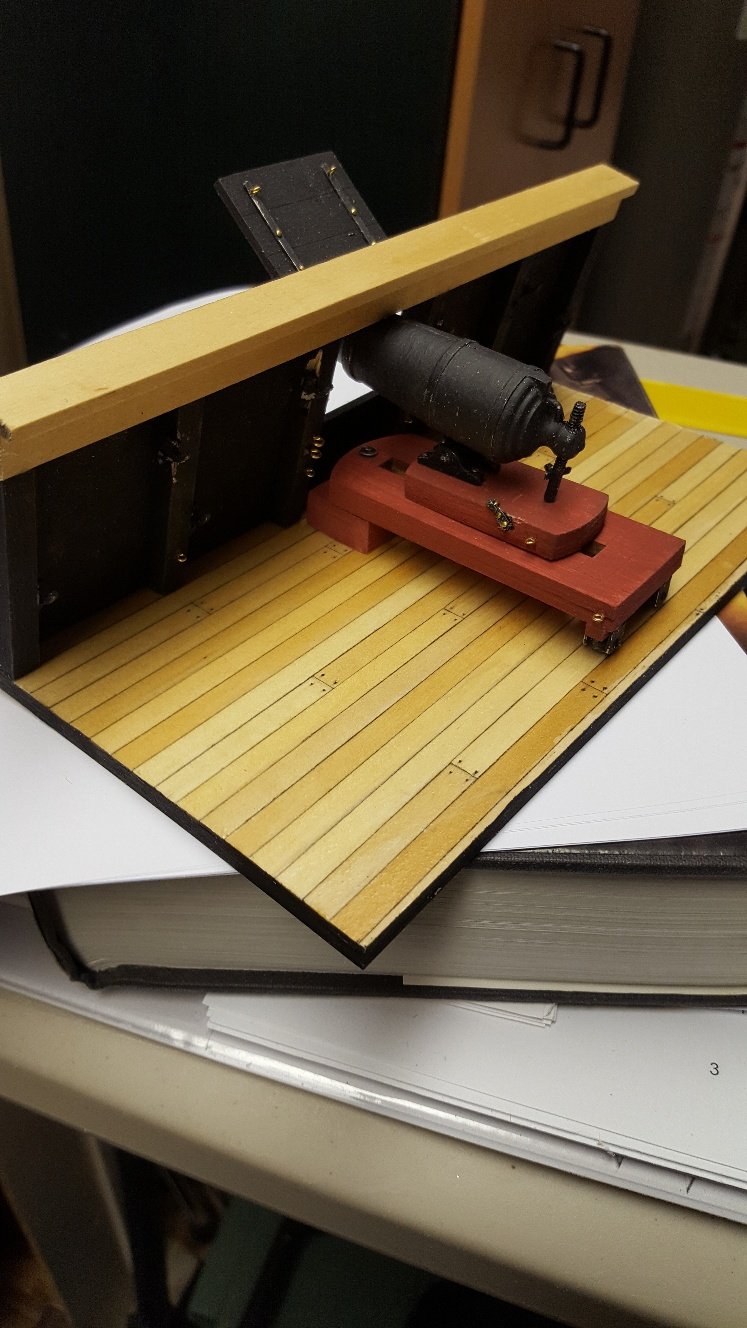
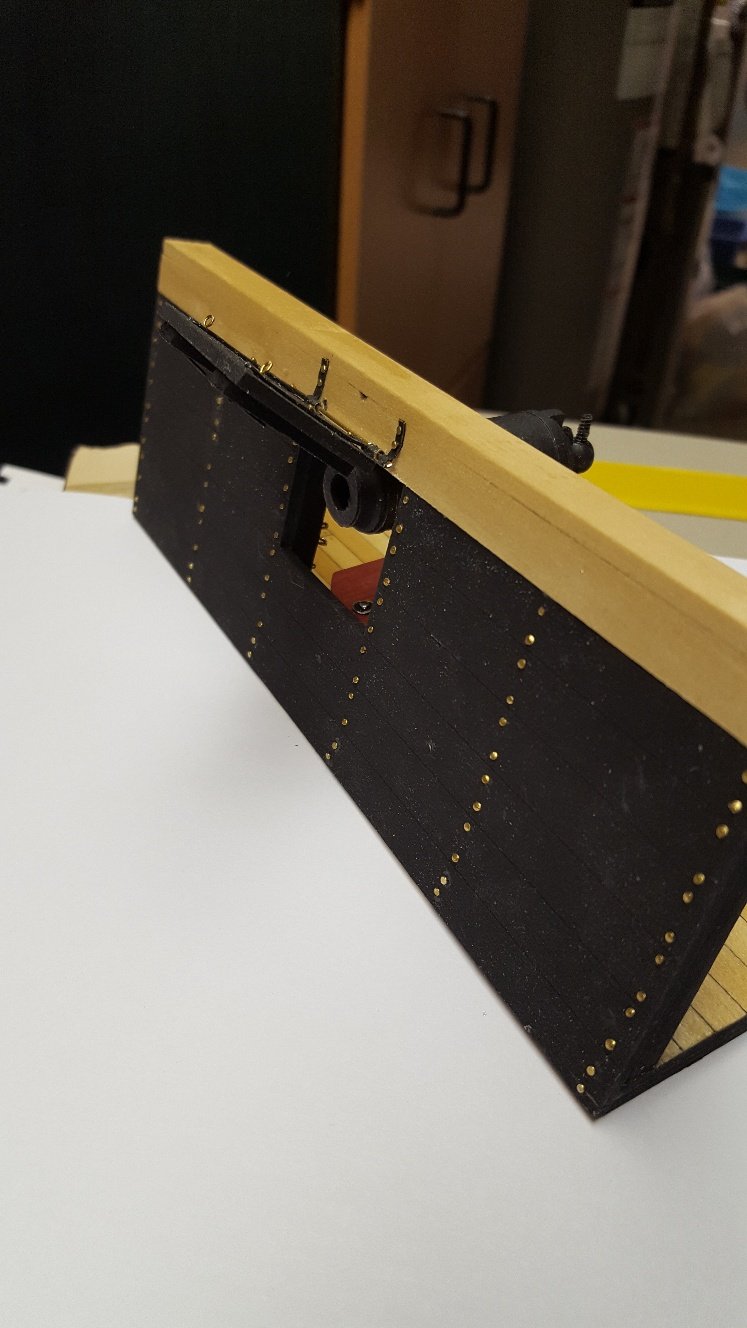
Continuing on. The cannon barely fit in the opening because the angle of the bullwarks was too much. However, it will work. Starting the finicky job of rigging. First lesson learned, glue the rope knots. Will continue with the rigging. Should be done this soon.


- 30 replies
-
- 5
-
-
- model shipways
- finished
- (and 1 more)
-
Model Shipway Ratline tool
Worldway replied to fnkershner's topic in Modeling tools and Workshop Equipment
Hi Doug, I hope you post a detailed review when you get it and try it out. I am curious if they are worth the investment. -
Air Brush Paints
Worldway replied to Worldway's topic in Painting, finishing and weathering products and techniques
Thanks for all the great advice. I have a long way to go before I get proficient with air brushing. I found a Canadian supplier that sells the Vallejo line. They are reasonably priced and shipping isn't too bad. I'll try the paint and see if I can achieve the desired results. I have two airbrushes. One is by Campbell Hausfeld which has the paint bucket under the brush. The other is a decent no name product that has a cup on top of the brush. The no name has two tip sizes. I think it's just going to be a matter of trial and error until I get the results I want. -
This book has helped me greatly. It's my go to book for nautical information. Highly recommended.
-
Air Brush Paints
Worldway replied to Worldway's topic in Painting, finishing and weathering products and techniques
Tonight I placed an online order for Vallejo Model Air paints. I bought "inexpensive" acrylic paints from my local art store and didn't have very good results with the airbrush. I'm sure I added too much water to thin it. This is certainly going to be trial and error as I'm sure you all know. I figure with having Vallejo pre-thinned paints half the battle is won. On another thread I started about Model Shipways paints, someone commented not to use them in an airbrush because the pigment size is too big and will clog the gun. However MS claims their paint is suitable for air brushing. I'm not sure if I should try them or not. Thanks for all your suggestions and comments. -
Hi fnkershner, can you send me a pic of your decal paper name. When I tried using "clear" labels you could definitely make out the label after applying polyurethane.
-
Hi, I'm being lazy and I hope it's OK. I tried doing a quick search on air brush paints but didn't come up with what I'm looking for. What is the best paint to use with an air brush?? Also, what is the best way to thin and what is the best thinner. One last question, what is the best way to clean the air brush? I guess while I'm at it, is there a better air brush over others?
-
Actually Brian, I haven't given it any thought yet. i'll let you know when I do
-
Dave, I think I'll invest in the Dremel Workstation. I may need to work on convincing the admiral for a few days. Fnkershner is Blackin-It the name of the product. It would be great to use, I really don't like using paint Don, thanks for the tip. Do you simply use a hammer with the bit to punch through?
- 30 replies
-
- 4
-
-
- model shipways
- finished
- (and 1 more)
-
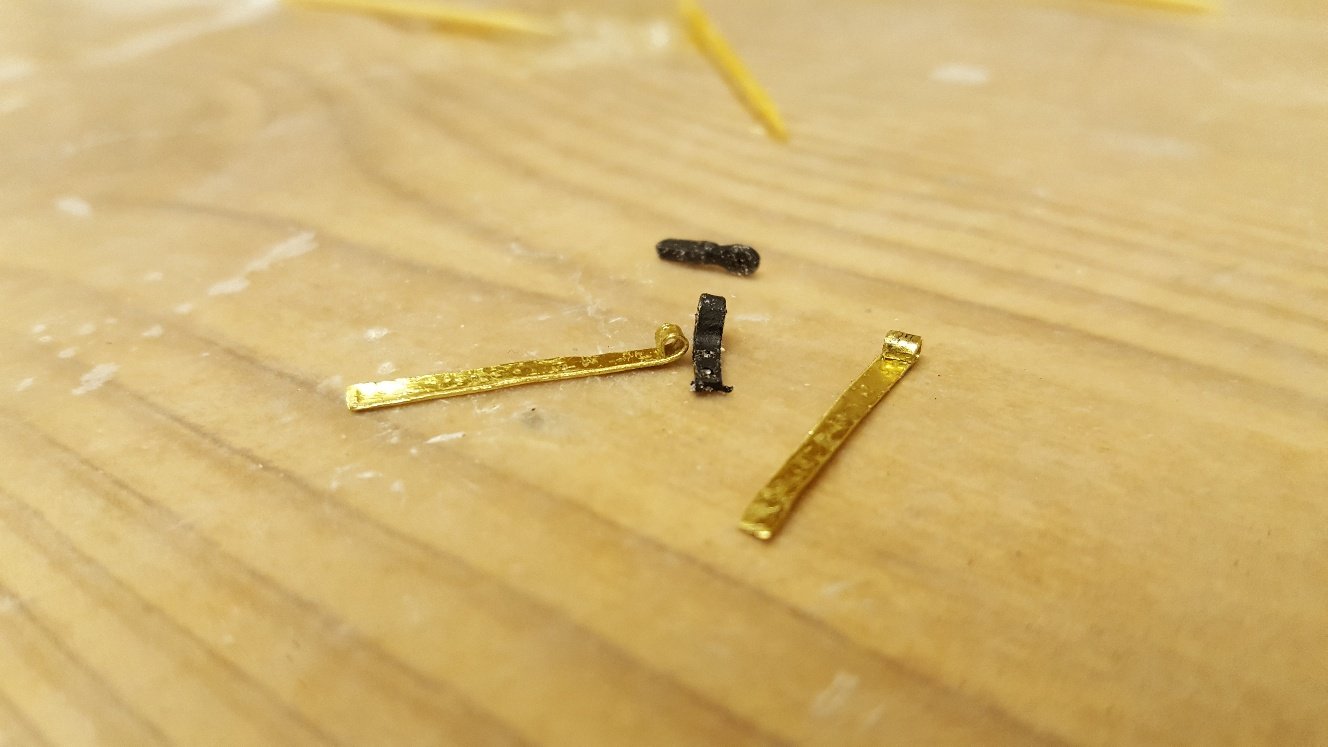
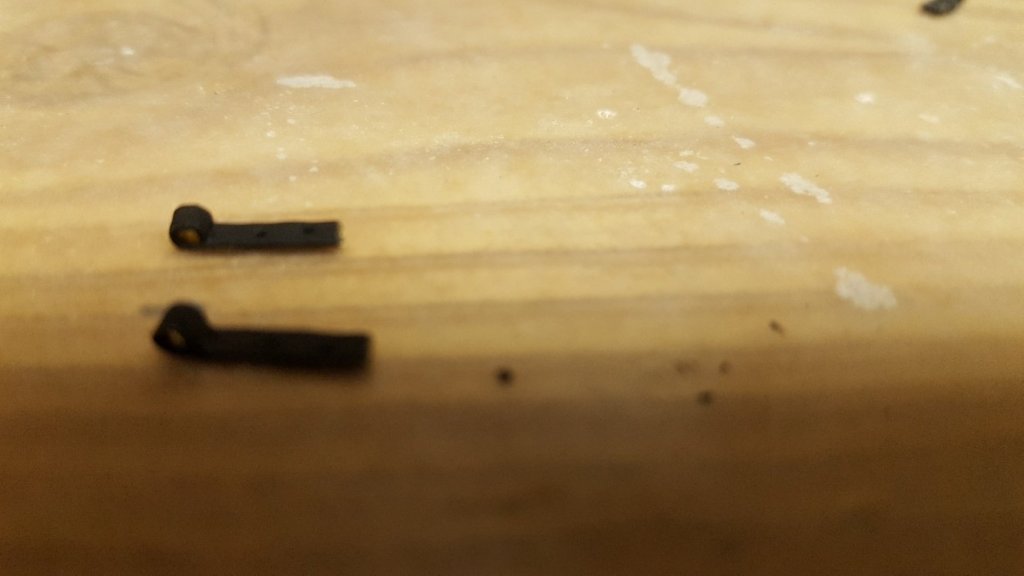
What is the best way to drill small holes in cast metal and brass? My drill set for my pin vice doesn't do anything on metal and my metal drills are too big. For the brass strip above I hammered a needle through it to get the hole. For the other half of the hinge I used the smallest drill bit I had but it was too big. I managed to hammer a pin through it as well but ended up doing some other minor damage that I now have to repair.
- 30 replies
-
- 1
-
-
- model shipways
- finished
- (and 1 more)
-
I scored the brass down the middle then bent it in half. I then unbent it and in doing so it naturally just tore at the bend. Didn't really think it would be this easy.
- 30 replies
-
- 2
-
-
- model shipways
- finished
- (and 1 more)
-
Wow, learning a lot with this build. I plan on using this log when I build mine. Very good ideas here.
- 82 replies
-
- 2
-
-
- naval smoothbore
- model shipways
- (and 1 more)
-
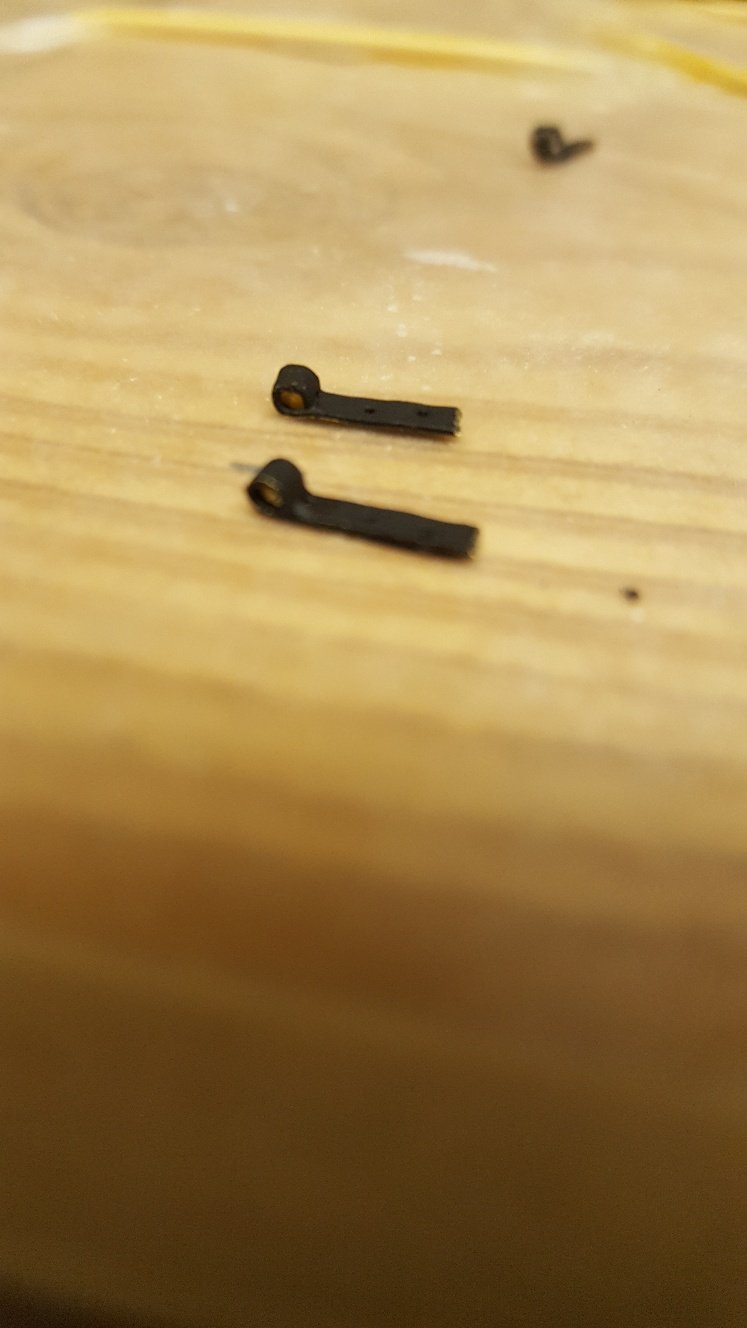
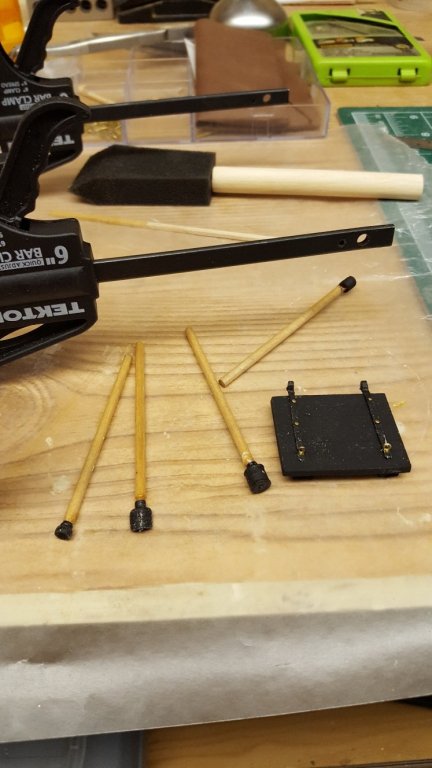
I ended up with two different upper hinges. I decided to make my first foray into metal working. I had some spare brass strip and thought I could refashion a couple of new hinges. First job was to split the strip in half to narrow the thickness Next was to fashion a loop on one end. I used a piece of brass wire for the loop radius. I had to add two nail holes in each. The easiest way I found to do this was too use a needle and hammer it through the soft brass. I then painted the brass black I varnished the tool handles and the top rail. Before assembling the top rail I filed a notch in the center to accept the chain. I then installed the top rail.
.thumb.jpg.ed8cc25158b8abd3bab99cdfc836efbd.jpg)


- 30 replies
-
- 4
-
-
- model shipways
- finished
- (and 1 more)


.jpg.840aa6e211db83cf5959f60046c4585c.jpg)