MORE HANDBOOKS ARE ON THEIR WAY! We will let you know when they get here.
×


JRB9019
-
Posts
249 -
Joined
-
Last visited
Content Type
Profiles
Forums
Gallery
Events
Everything posted by JRB9019
-
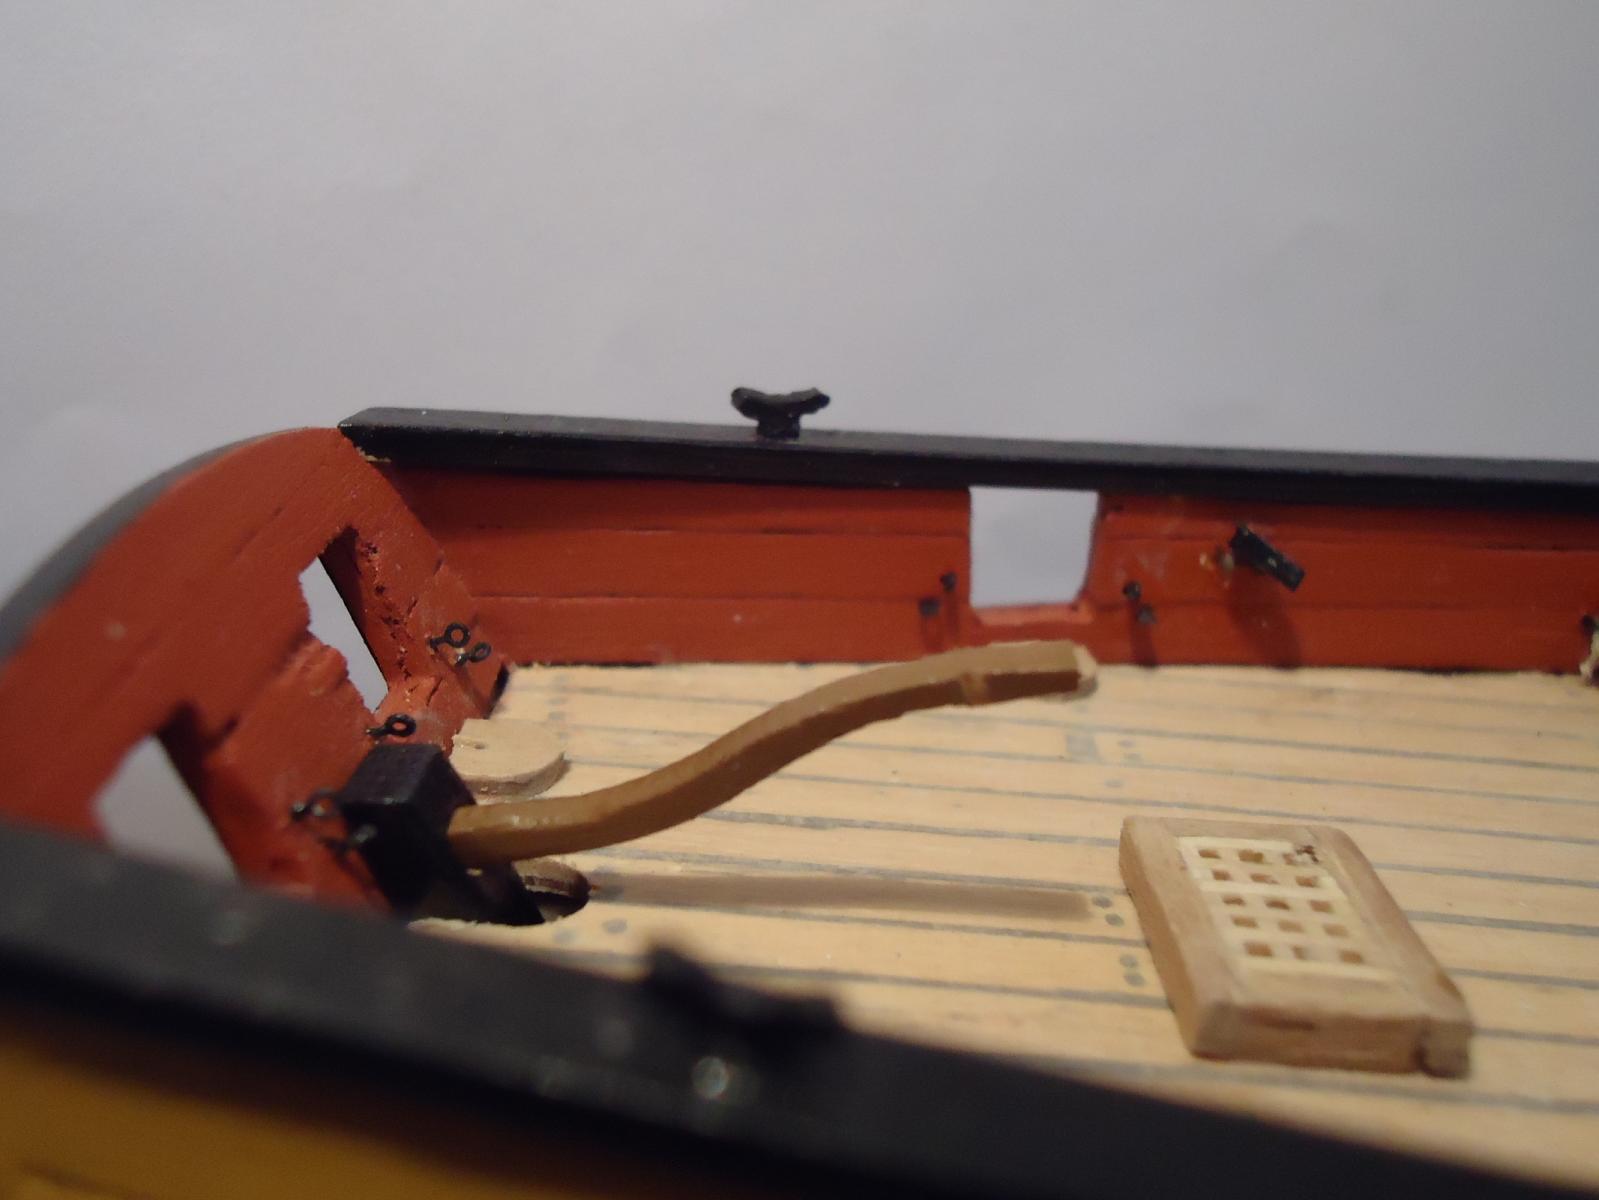
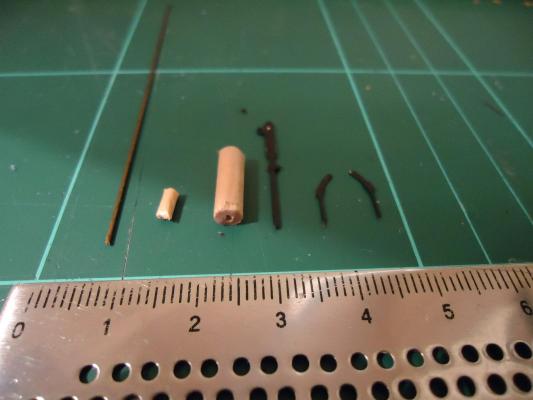
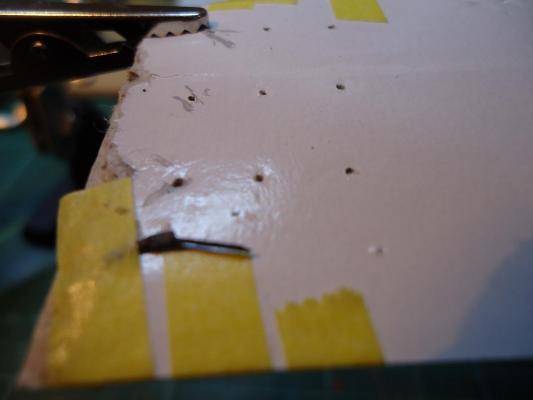
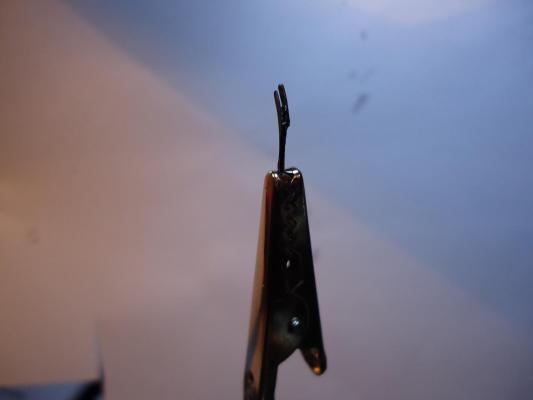
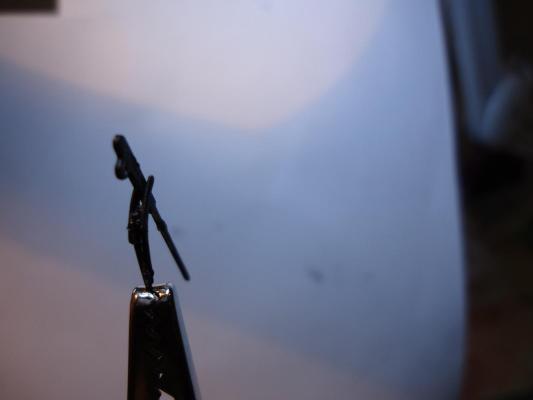
The Build – Phase 9 The Elm Tree Pumps – Part One Time to do some more building. I looked at the instructions and saw that the next phase was the Elm Tree pumps. Great, that looked easy. As suggested, and in the modelling time honoured tradition, I located, identified and removed all the required parts for the Pumps. WOW are they tiny!!! OK, so this isn’t going to be as easy as I thought…. So, for a reference for future new builders, I have created the following step by step guide to creating these Pumps. I hope they are of some use to someone in future Anyway, I cut the 2mm and 4mm dowels to the required length and lined up the parts. So we have, left to right, 1) a section of 0.70mm Brass Rod, 2) a piece of 2mm dowel, to be used as the pump outlet, 3) a piece of 4mm dowel as the main pump body, 4) the brake handle and 5) two yokes So the first problem arose when I had to glue the two halves of the yoke together. Believe me, this really was no Yoke at all (sorry, I couldn’t resist!). The problem that presented itself was that gluing wasn’t simply a case of putting the two pieces together – difficult enough when I almost needed a radio telescope to see the two halves. No, we now have to only glue the bottom half of the yoke as the top half needs be kept separated so that the brake handle can slot in between,,,, This first picture hopefully shows how tiny the yokes are: If you look carefully, this picture shows the top third (on the left) of the Yoke that must NOT be joined (Sorry it's a little blurred). I tried putting these pieces together dry, and it wasn't working. My method was certainly not going to work and the whole piece would end up distorted and glued together - not a good idea. And then I had an idea! I placed one Yoke on a piece of card, and carefully secured the Yoke with a piece of masking tape – thus covering the area not to be glued. Genius!! And then, after a few dry runs, I glued the second piece on top. And after leaving to dry – I was delighted with the result Finally, I added the Brake Handle, slotting it in between the two Yoke sections.


-
Hi Peter Many thanks for the update. As mentioned, I have had to order new strops to replace all my broken ones, so at the moment, I don't have to worry about them too much. I've just about finished the pumps - also added brass strips around the top and bottom - so they are looking quite smart. Once again not an easy task but have learnt ways around the problem - half of the 'fun' of this modelling. As usual, I have taken phot's and will be writing up and adding to the log over the next couple of days. Re the belaying points, I made a copy of the deckplan from Sheet 2 and am working through my reference books and slowly adding them. As the same time. I am adding the actual names of all the belay points (e.g Mainsail hoist instead of C2) as it wil help to make sense of it all later. Serveral rings will be needed to be added to the decks around the bow for the various sheets and I ordered some additional rings and thread in readyness. Apart from that, I haven't thought too far ahead in mpre detail yet.......... plenty of time. Meanwhile, it's back to my pumps! Thanks again. John
- 293 replies
-
- 2
-

-
- pickle
- caldercraft
- (and 1 more)
-
Hi Peter, Referring back to your posting from October above, you mentioned that you had sorted out the positioning for all the additional cleats, belay points for the sails. Have you got any further with that - any photos ready??? Also, thinking ahead, you may remember that I am planning to add furled sails to my Pickle. A thought crossed my mind that it may be easier to thread the sails to the forestays and then attach the forestays - as opposed to rigging all the stays etc. etc. and then having to sew / open and close rings etc. etc. afterwords. Any comments?? Meanwhile, it's back to finishing my pumps - wow, they are fiddely !! John
- 293 replies
-
- 1
-
-
- pickle
- caldercraft
- (and 1 more)
-
Thanks Jaager I've seen the DRL-300 - doesn't seem to be widely available here in the UK - Ebay only shows US suppliers and costs. I'll keep looking.
-
Hi all I've noticed that many of the experienced modellers here have their workshops kitted out with all sorts of machinery that would put the majority of the factories around here to shame! When I started modelling, I have tried to get away with the least amount of tools possilbe - mainly due to financial restrictions. However, I see time and time again drills and drill stand / pillar drills being used for drilling through masts and yards - anything where a deep straight hole is critical. To date, I have a hand-drill and try to keep things as straight as possible - but it really isn't easy and I've messed a few things up such as when I have to drill top - down through dowelling, so my thoughts turned to drills and drill stands. I have looked on Ebay and the like and have found several examples e.g.Dremel, and was wondering if anyone can recommend anything half decent, use it for modelling purposes so it needs to do the job, but without breaking the bank. If possible, any advise would be appreciated for UK suppliers.... Thanks John
-
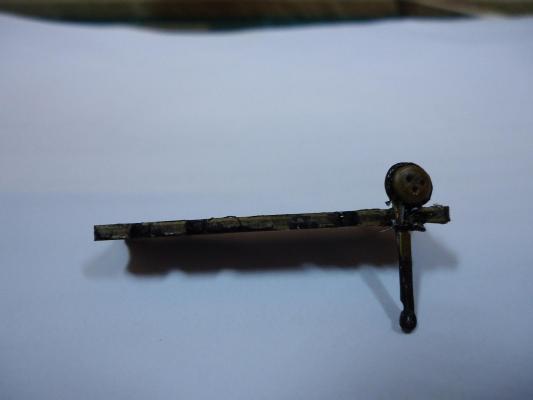
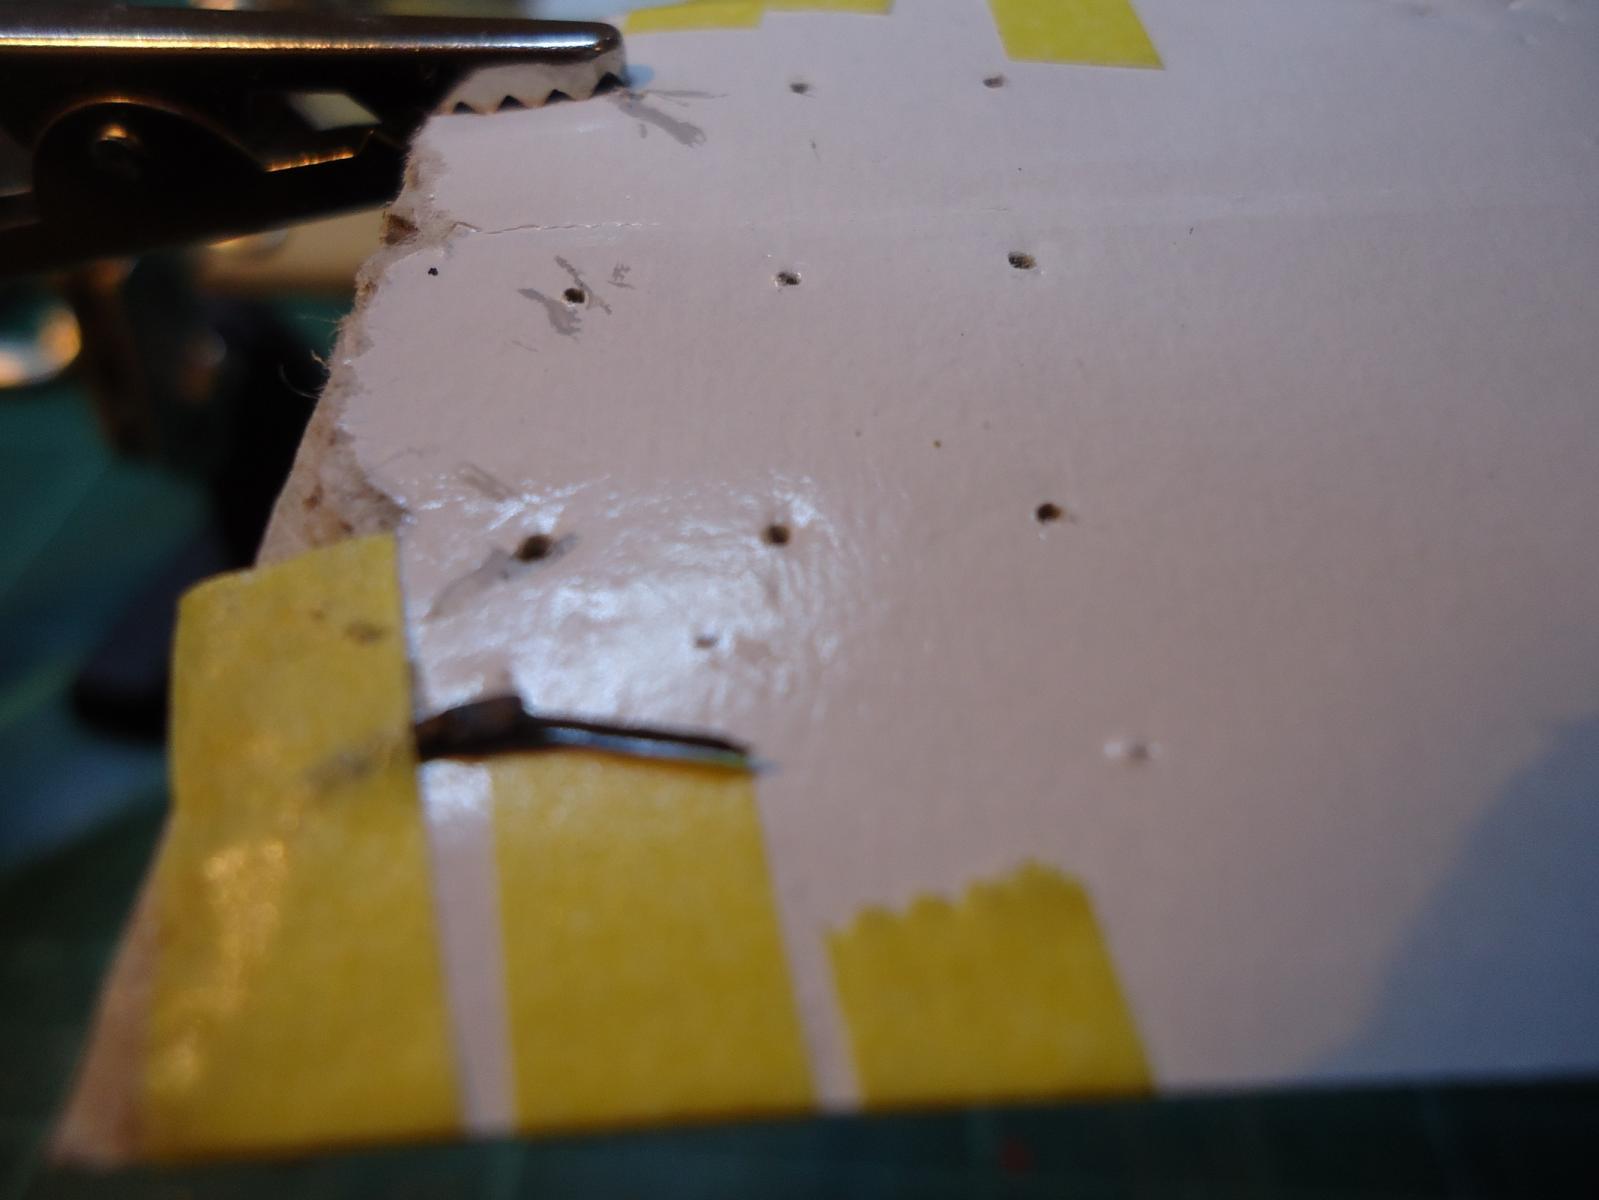
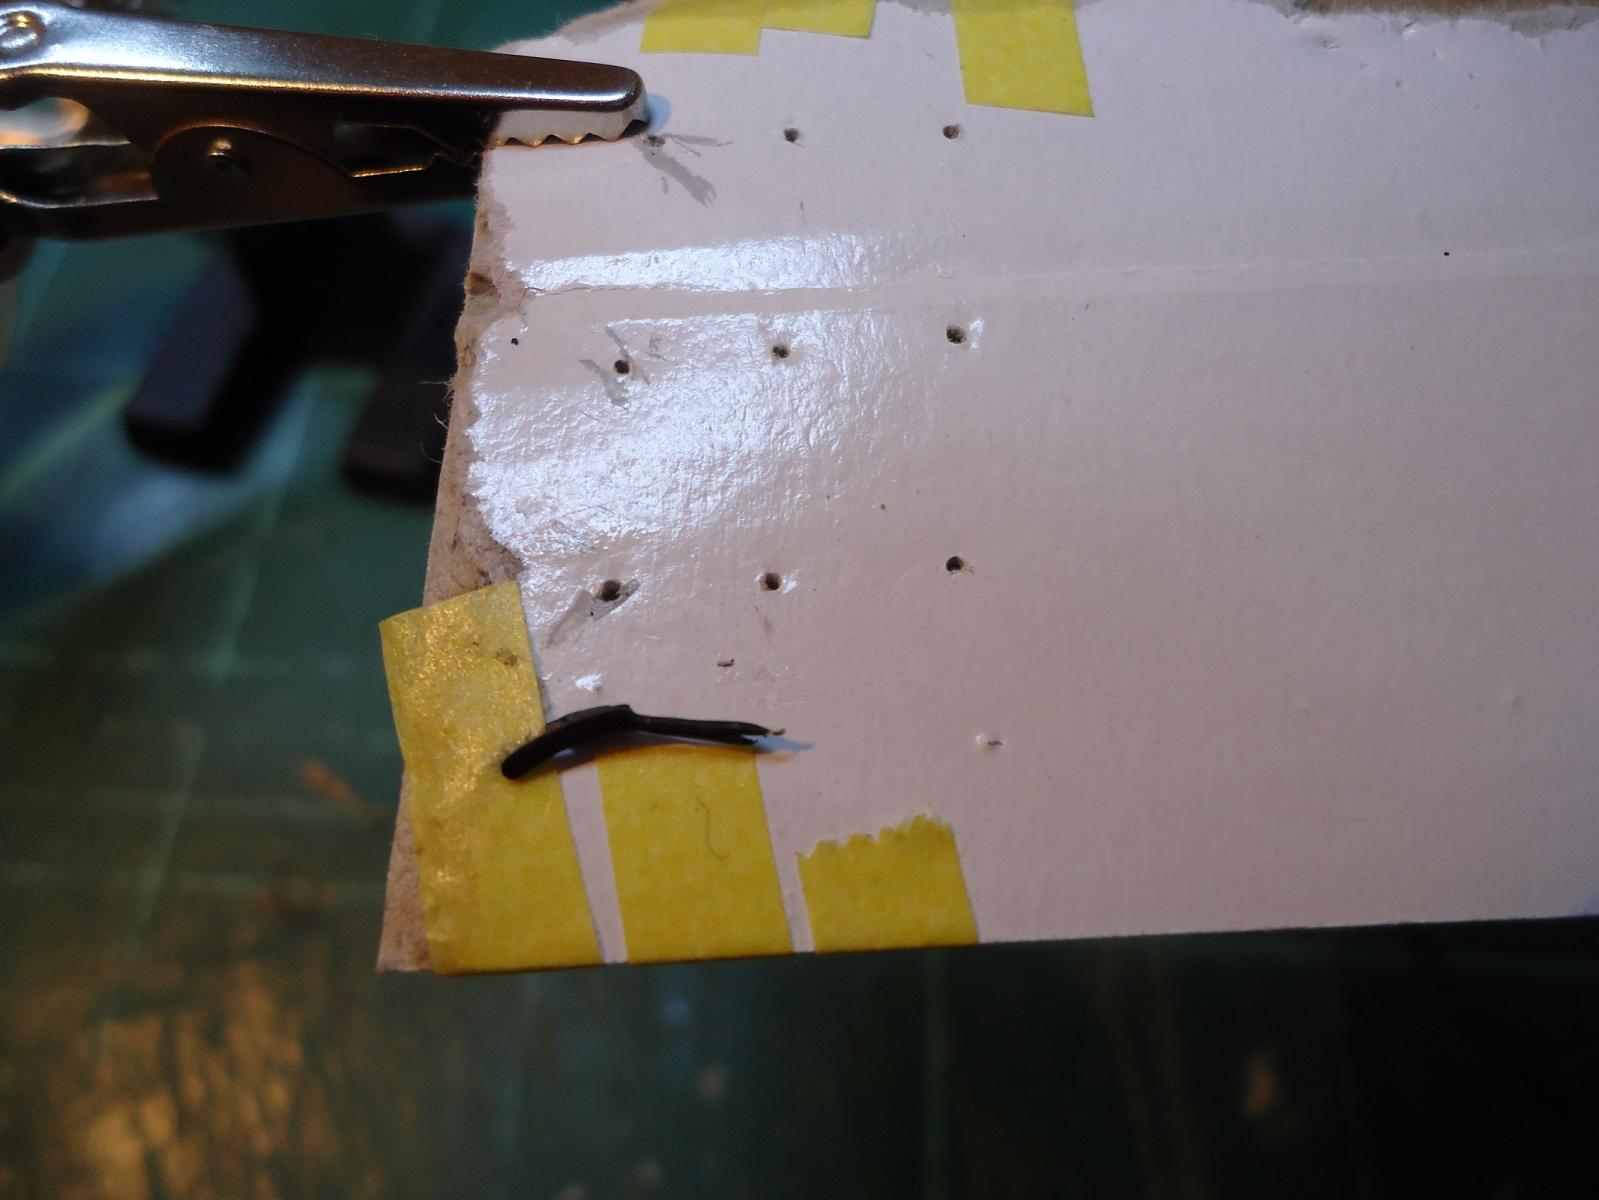
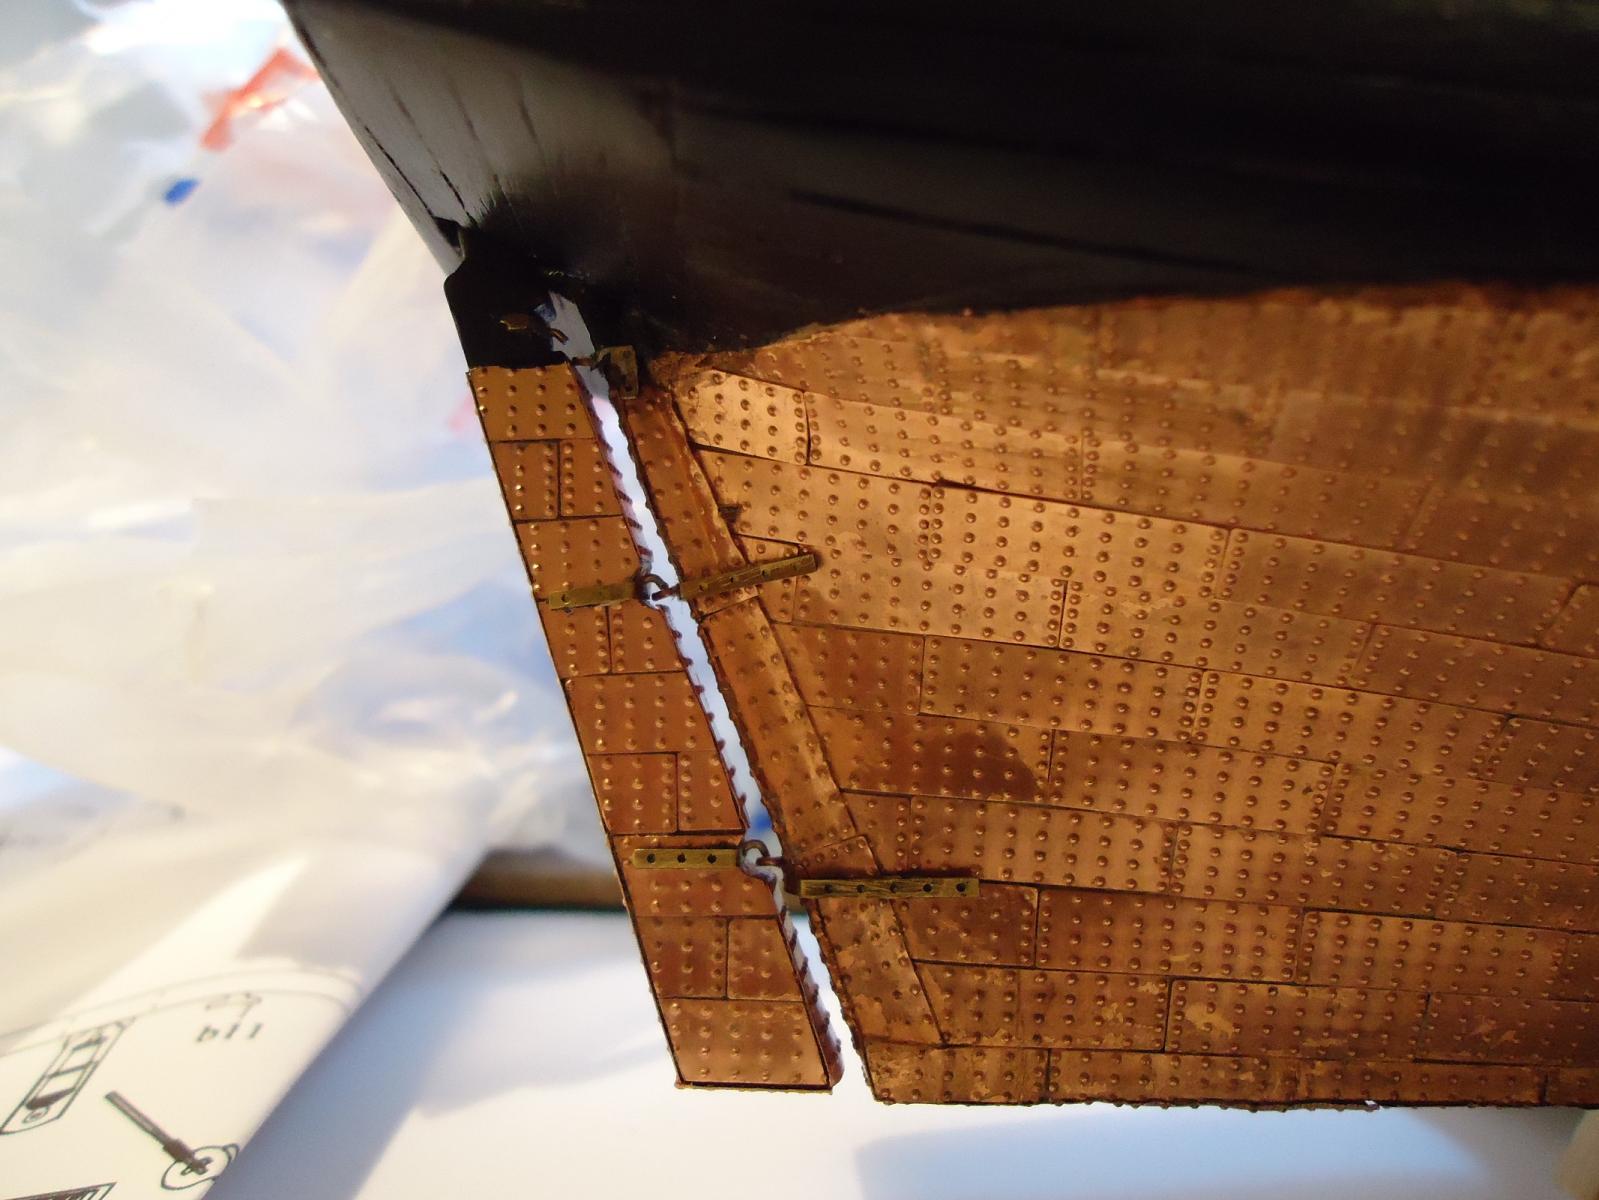
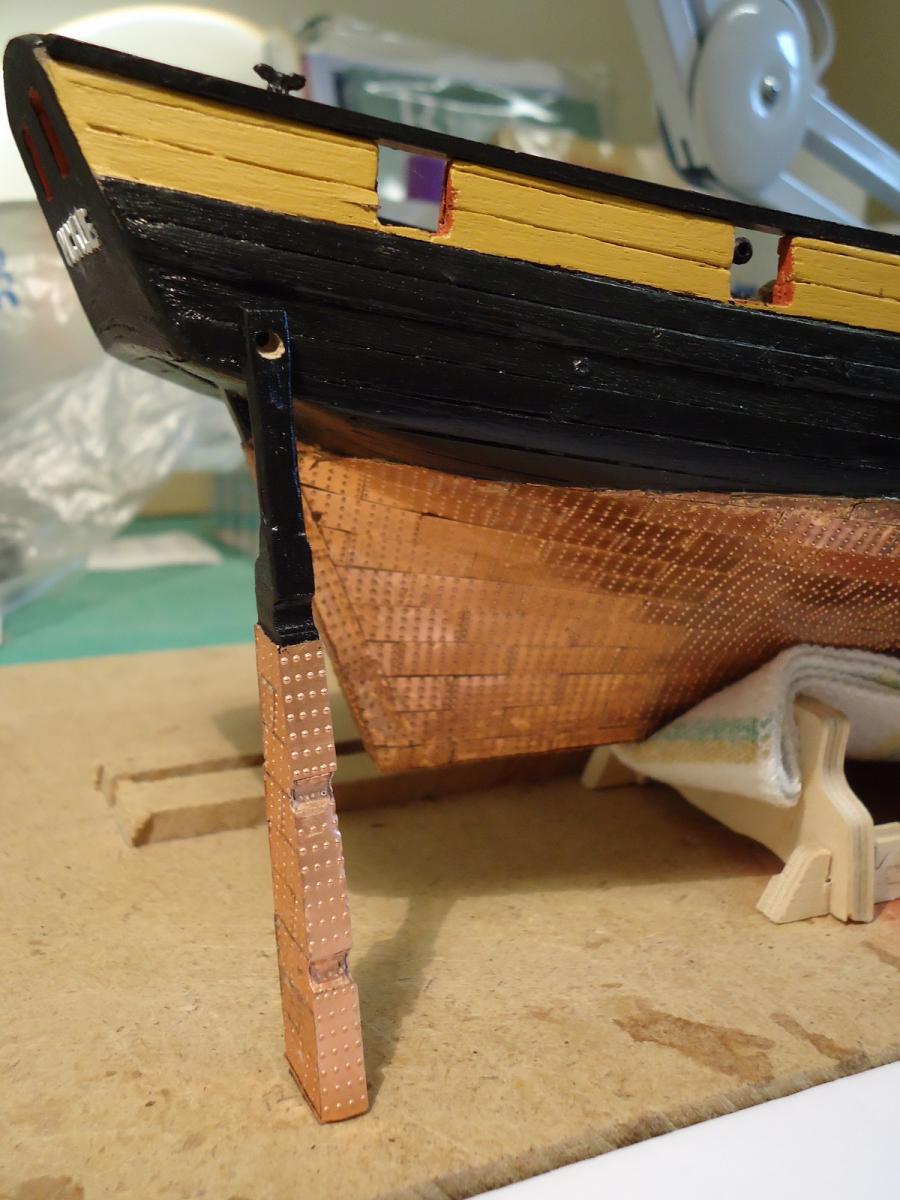
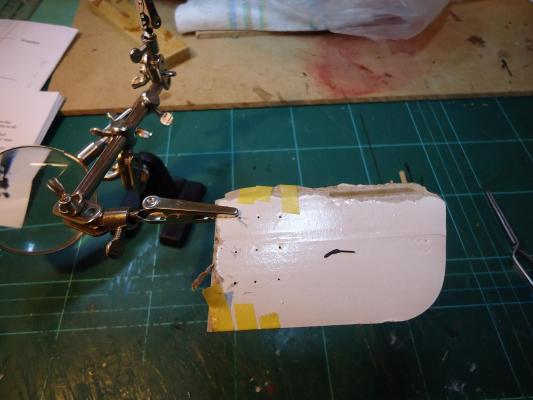
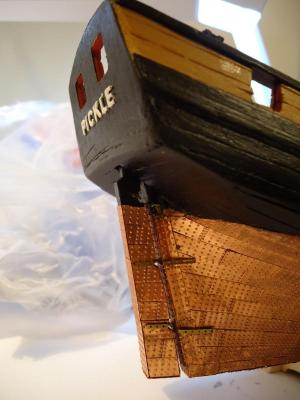
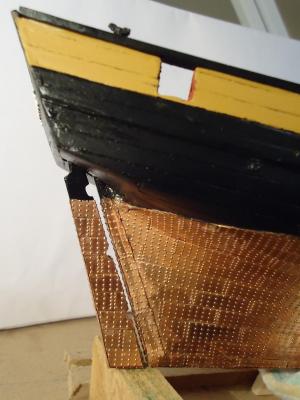
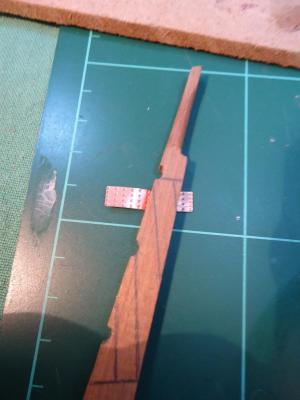
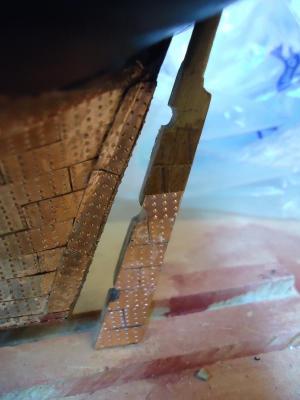
Pintles and Gudgeons So, I finally have the rudder more or less completed, and for now, another step acomplished. When I read Blue-Ensign's comments "An afternoons work to secure these, a little fiddly getting the pintles and gudgeons to meet up" I knew there were interesting times ahead. First step was to fit the Pintles to the Rudder - hey, at least I got it the right way round - progress indeed. Hmmm, trying to centre the straps was quite fiddly so I had the idea of drilling a pilot hole in the percieved currect place, then using a dome-head pin to keep the straps more or less in the right place before starting to glue them down. Great idea....... if you're an octopus - I'm not, so resorted to my 'helping-hand' to help me out.... that worked well. A word of warning. As the strap's centre now has a hole drilled through it, it makes the strap very delicate indeed. On my first strap, I managed to glue the first side to the rudder OK, but as I bent the second side........... it snapped. Not too much of an issue as I could simply glue the part on - and the join can't be seen.... Note to self, "I must be more careful"..... I finished the straps the carefully drilled the holes out to accept the pins which by now were shortened and bent to the correct 90 Degree angle. Trouble was, I then realised that the downward pin section was too long and if I had fitted it I wouldn't be able to hook it to the Gudgeon later on. Luckily I hadn't glued in the pin so pulled it out and did a little snipping .......... and of course dropped the pin into the black void that surrounds the modeller, never to be seen again. Three pins later, I got it about right (so I thought) and finished off the rudder. Then as per instructions, I positioned the rudder and, using masking tape, fixed the rudder in place. I then worked out where to fit the Gudgeon straps and marked up accordingly. Off with the rudder, drilled the holes, added the Gudgeon pins, removed the pins and messed around for a while as I glued the straps and Gudgeons in place. And there you have it (sort of). The beedy eyed ones among you will possibly (how could you not!!) notice that the top Gudgeon doesn't line up correctly and that I seem to have made the Pintels just a little too short. Still, it's too late now as everything is glued into place. I will be adding rudder chains, 'leather' covers deck-side and below the Transom and finally 'metal support straps' to the tiller arm when I make the final fit in due course. I'm sure that my Rudder chains will distract from the imperfection......... that will be a "Yes of course it will" then!! Next, it's time to drill various holes around the ship and add various eyelets, gammoning rings and the like..


-
Thanks Rick Always glad to be of service! I've just finished adding the Pintles, Gudgeons and straps to the rudder - wow, that was fun!! My rudder now hangs unaided, so something must be right!! I will post some photo's later today. All I can say is - read the instructions VERY carefully - follow them EXACTLY and you should be fine. John
-
I have seen some modelling skills in the past few years - but I've just had the privilage of spending 30 minutes with my jaw constantly hitting my desk as I surveyed the photographs of the Pandora build - and I've only just looked at a small part. Should all models be built to that level of detail? Well I personally would absolutely love to have even 1% of the skills to be able to come anywhere near this level of detail - and that would be when using a kit!! And then I realise that this is a complete Scratch build - I'm afraid I don't have long enough to live to learn these skills. Meantime, I return to my attempt at building Pickle to the very best of my abilities so that when she is finished I can look at her with pride of a job well done........
-
Re expensive books as mentioned above, I obviously don't know what it's like where you live, but I have been able to borrow many of the 'standard set' of books that are generally referred to here, from my local library. That way, I can check them out before deciding whether to buy or not ........ or putting them on my Christmas list ........ or at the very least having a look around the Internet via some of the major Purchasing sites (no names)...... .
-
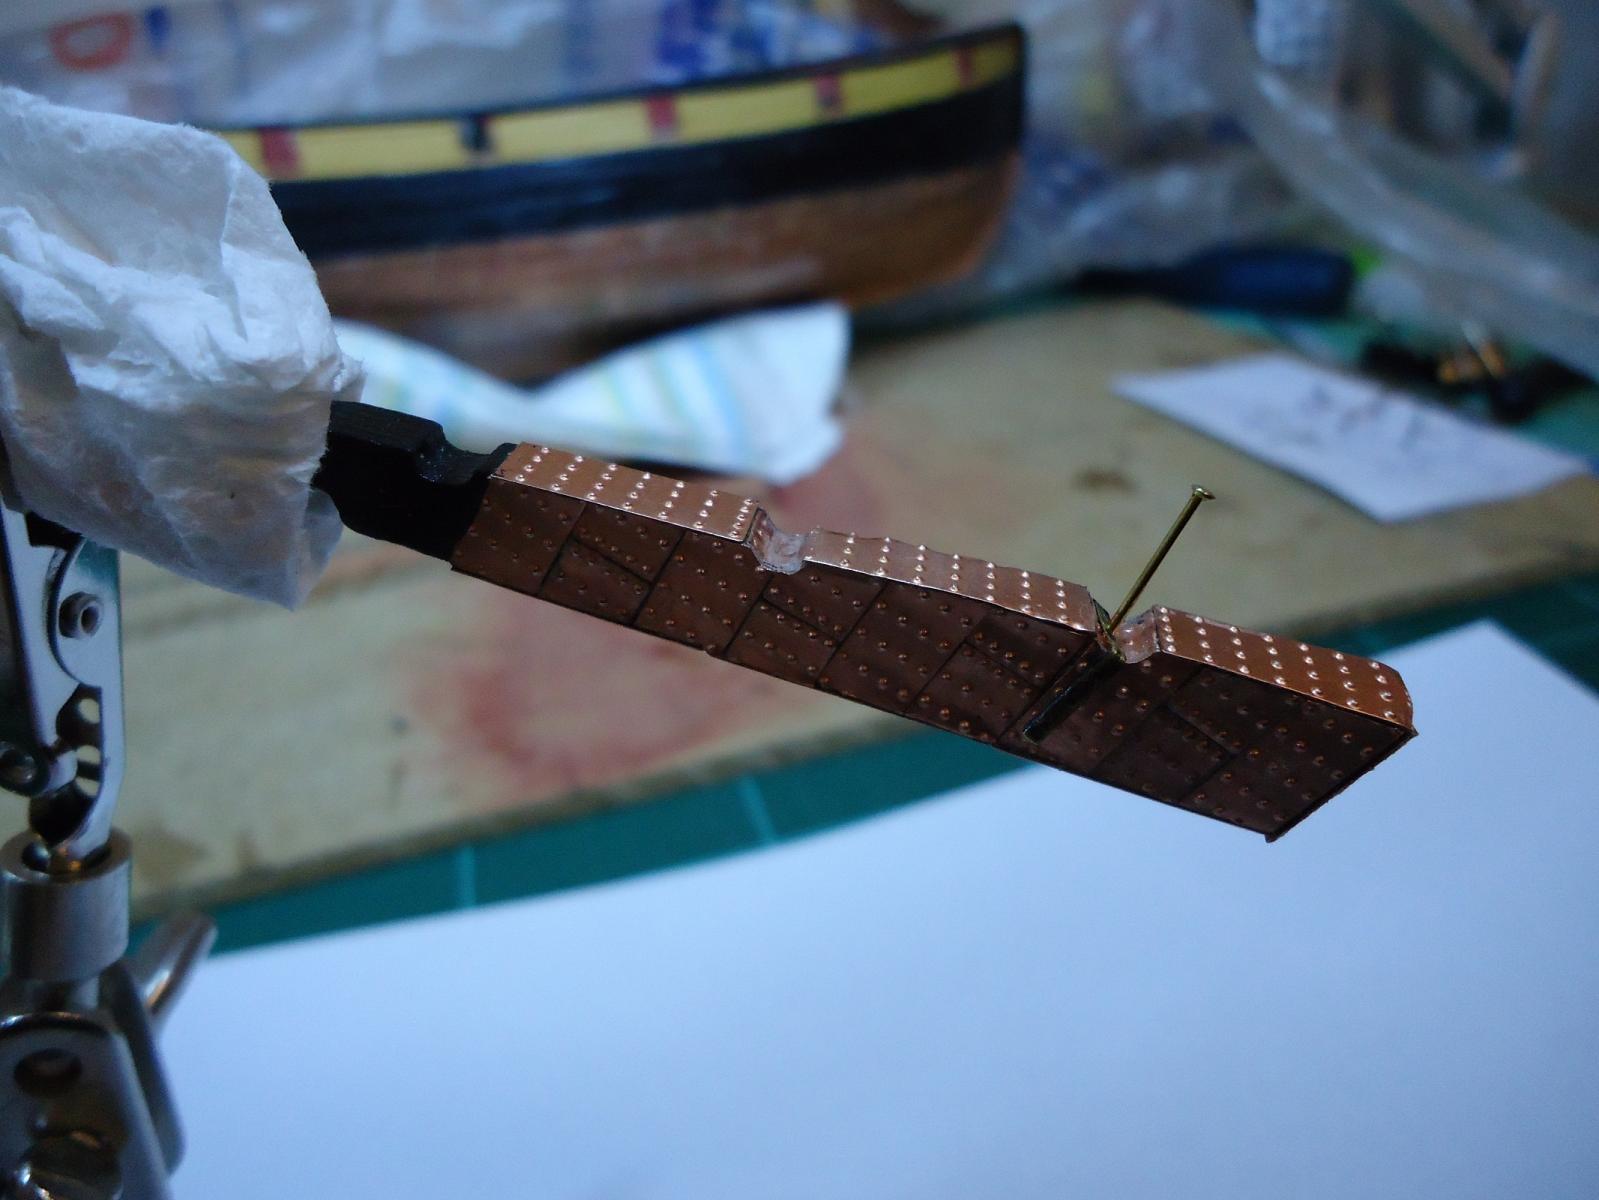
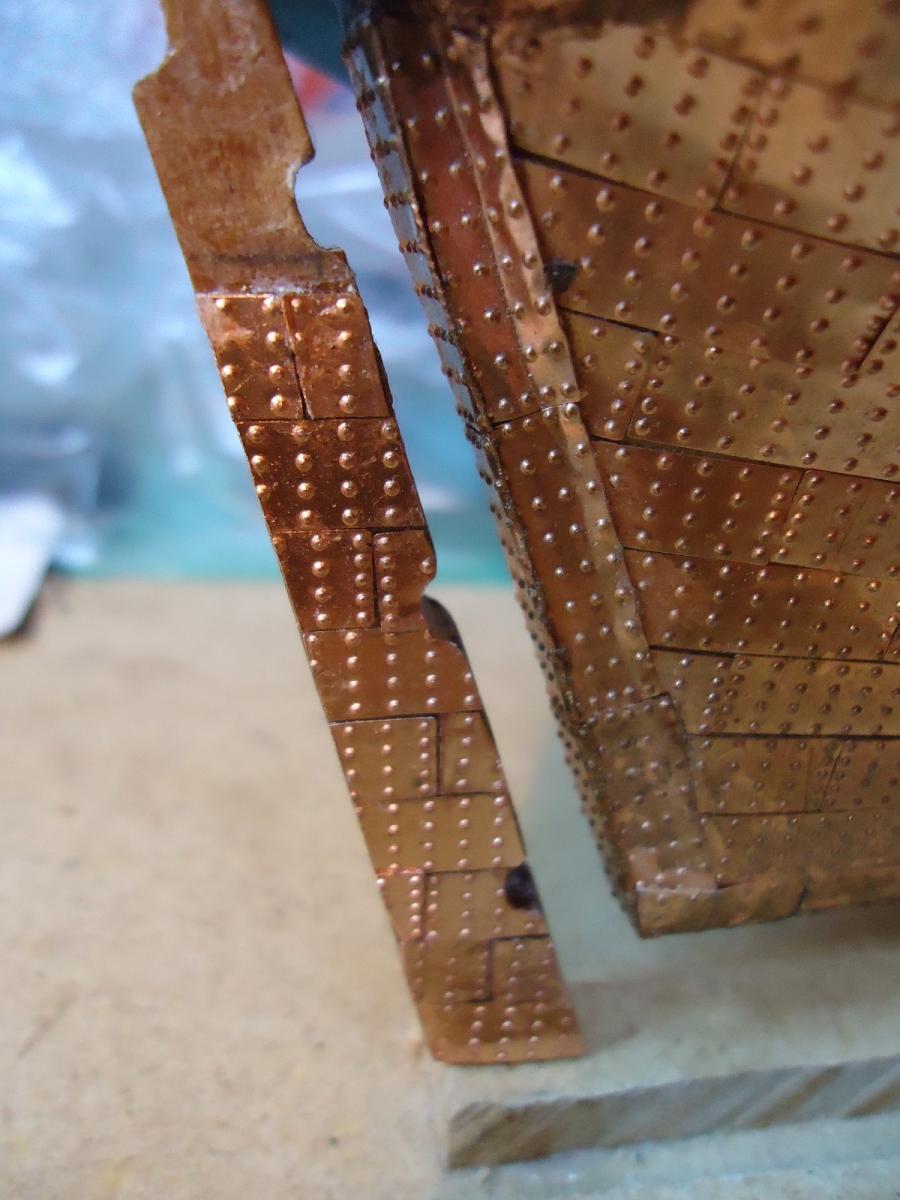
Plating the Rudder - Part 2 After looking at my ruined Rudder I wondered what I was to do. Hmmm, I carefully counted up my remaining copper plates, did some calculations and realised that if I was very, very careful and made no mistakes, I had just enough plates left to start again. Out came the knife and chisel - and off came the plates (wow, they were stuck on really well!!!). Using my files, I carefully removed the remains of the adhesive, remarked the rudder with my guidelines and started again. This time, I started with the front (keel side) and plated the three curved rudder cut-outs. With those out of the way I plated the rudder again on both sides and finished with inboard and outboard sides. Finally, I painted the top part in black. So that looked better - almost proud of the results! Time for a trial fit............ With the rudder temporarily in place, I checked the tiller. All looked well. Now there was more work to do on the rudder and so it was time for the workers to have a tea break before tackling the Pintles and Gudgeons - oh I can't wait. Having read other Pickle logs, it sounds like its going to be lots of fun......


-
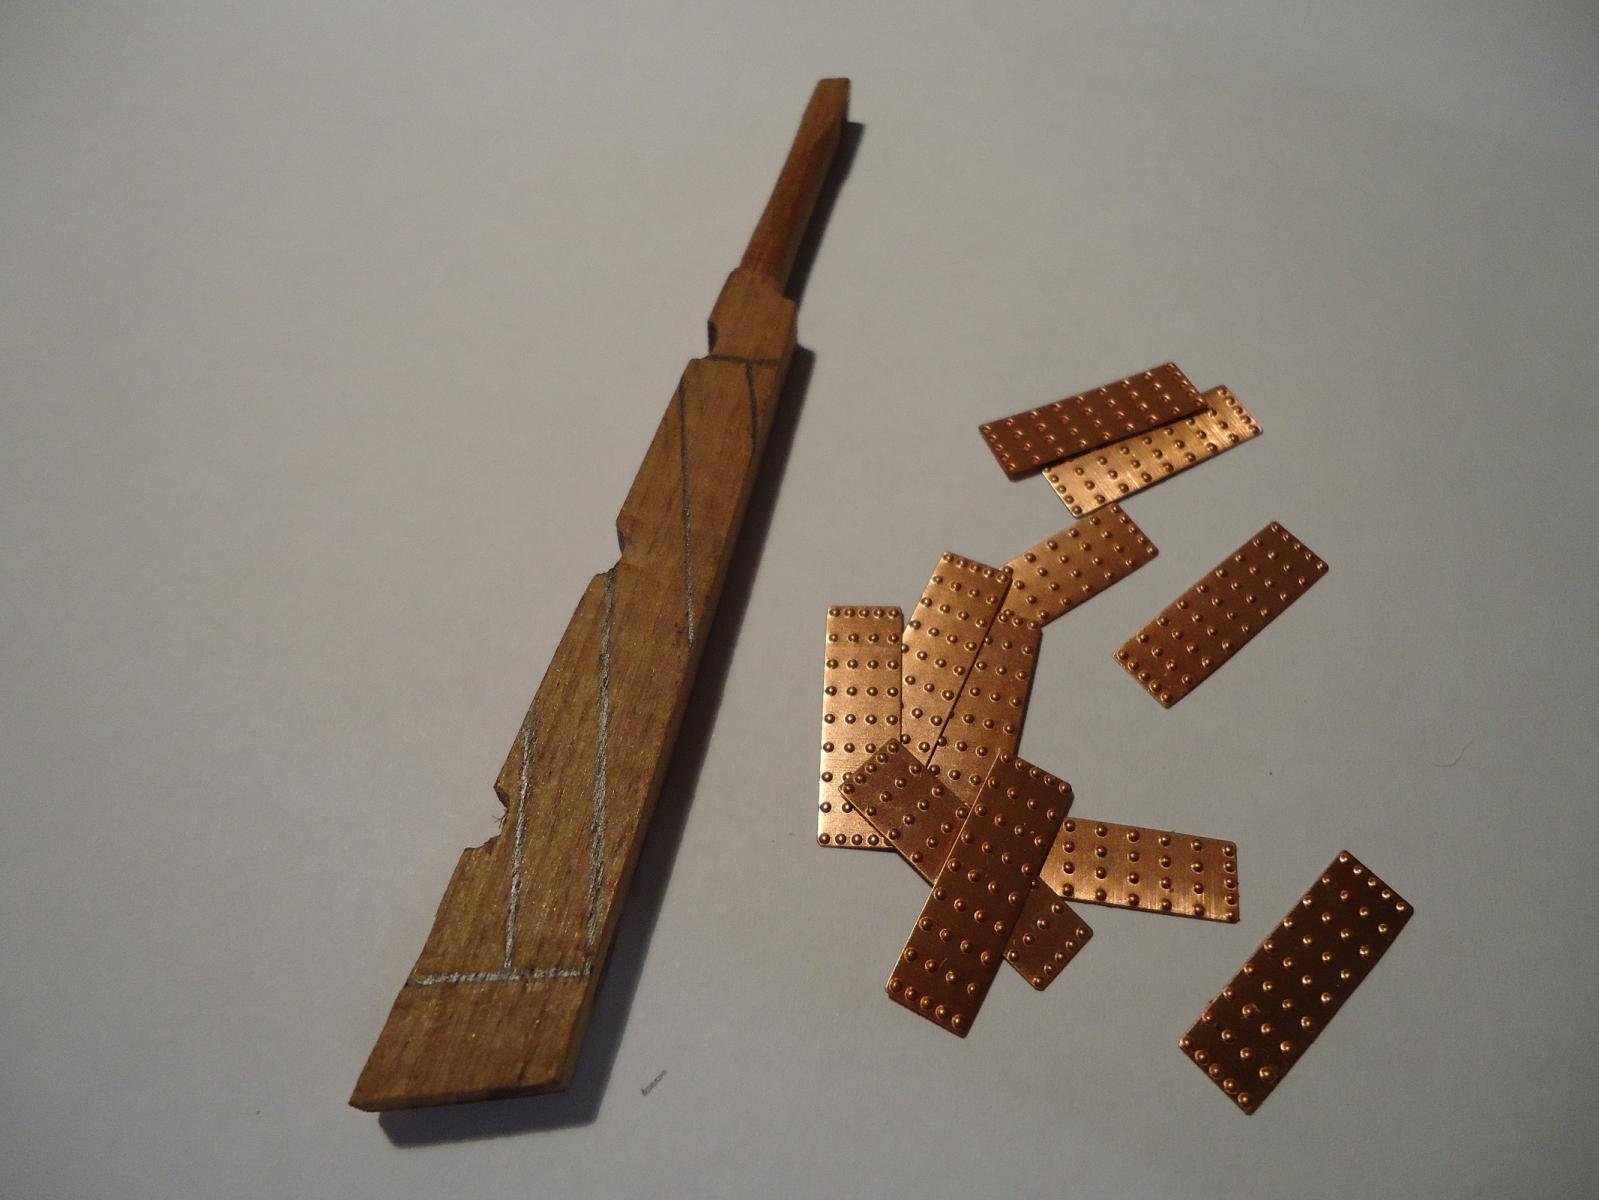
Phase 8 Plating the Rudder The rudder build comprises of plating the rudder up to the water line, painting the rest of the rudder black, then cutting a notch in the rudder above decks to take the tiller itself. But first, on with plating the rudder. This was a lot harder than I thought it would be and, as it turns out, I enjoyed it so much that I did it twice – but more of that later. I started by marking out the rudder with the vertical lines for a guide to fix the copper plates. I found that cutting the plates correctly and then trying to position them exactly without getting adhesive everywhere was a nightmare. So, I started fixing the plates without cutting them to size, then turning the rudder over and cutting the excess off with a knife. I then finished the plates off using a file to get a smooth flush finish. Half-way through, things were not looking good – not helped by the fact that the top came off the adhesive bottle and glue flew everywhere – mainly all over the rudder. By the time I finished cleaning everything, the workers went out on strike and the health and safety department put a stop to the proceedings due to the chemical spillage….. By now, the rudder looked a real mess as you can see below. By now my moral was down, not helped by the fact that I was following the Pickle builds of Blue Ensign and Flyer. When I saw their completed rudders, I knew that something had to be done to get anywhere near such standards.


-
Update on my Channel Strops attempts!! I continued in the same way I had explained previously, but by the time I had completed one Channel of four strops, I had snapped so many strops that I hadn’t enough to continue. So, I called Jotika and placed an order for more. They also promised to send me additional instructions - that will be interesting to see. So, I put the Channels to one side for a while and moved on to having a look at the Rudder...
-
Just to add my thoughts, apart from plastic modeling, my current H.M. Pickle build is my first of this type. Reading all the comments above, I feel I am extremely lucky to have a kit from Jotika. With the kit comes a 60 page instruction guide, an 18 page parts booklet and 6 full-sized plans for the build, masts, rigging etc. Yes, I agree that I have to learn the new language, although the parts booklet also contains a glossary of the main terms used, and I suddenly get pulled up short when reading an instruction, wondering what on earth was being talked about - but after a little research into the glossary and the parts-list, things usually become clear. The instructions themselves?? Fantastic - the only moan to date was about the instructions to fit the deadeye strops - try "Spring the 'nubs' of the strop, with deadeye, into the locating slot" for size!!! However, a quick phone call to Jotika provided the translation - and even a more detailed instruction leaflet!!! Yes, additional books are really important to get the additional info - I was even able to borrow some from my local library and road-test them before buying. Finally, I read some comments that instructions aren't necessary and the ships can be built from the plans alone. I can only say that I'm sure this is possible - but I feel that a complete beginner would have to be extremly gifted to do so (depending on the model of course). Even the 'plastic model' type plans wouldn't help with many of the exciting tasks that have to be done to complete a ship model - and Pickle is classed in the 'beginner category' ...... John
-
Rick, far be it for me to offer advice whilst being in the company of so many awesome modellers, but I'll try! You start your planking from the top downwards as you are doing - until you are about half-way. Then, start again from the keel and plank upwards. In this way, the planks seem to run easier and the gaps are filled with cut-down pieces later. Blue Ensign's log shows the pictures of this process very clearly - to see, press >>> the link, I trust it's OK to provide links to other peoples logs??? As it is written there and in other logs, the first planking is the basis for the rest so it needs to run smooth and provide the correct shape so that the 2nd planking lies correctly. What the first planking looks like doesn't really matter - well, apart from personal pride's needs I suppose!!. Hope that helps. John
-
Julie I quite agree with your comments - especailly that build threads help. Looking at build logs from those who are making or who have made the same model, in my case H. M. S. Pickles, is a real help. For newcomers like me, these logs are not only a source of a wealth of knowledge and experience, they are also an inspiration to try harder, go the extra mile and increase the quality of the build. What many of the people on these forums achieve in their model making is unbelievable. Just when you thought you had set your goals high enough, you make the mistake of looking at a new log - and you realise you have a long, long way to go. Still, having goals to aim for is always great. I am following your build with interest and look forward to seeing your progress. Until you posted a photo of the frame on your table, I hadn't quite realised how huge this model is. Wow. Regards John
-
Keith - a fascinating read. Do you have a picture of your "Piece of oak"? Not that I could reproduce it at present as I haven't gone down the 'invest in machine's' route yet - but knowledge is knowledge for future purposes! Regards John
-
Simulated caulking
JRB9019 replied to Nirvana's topic in Painting, finishing and weathering products and techniques
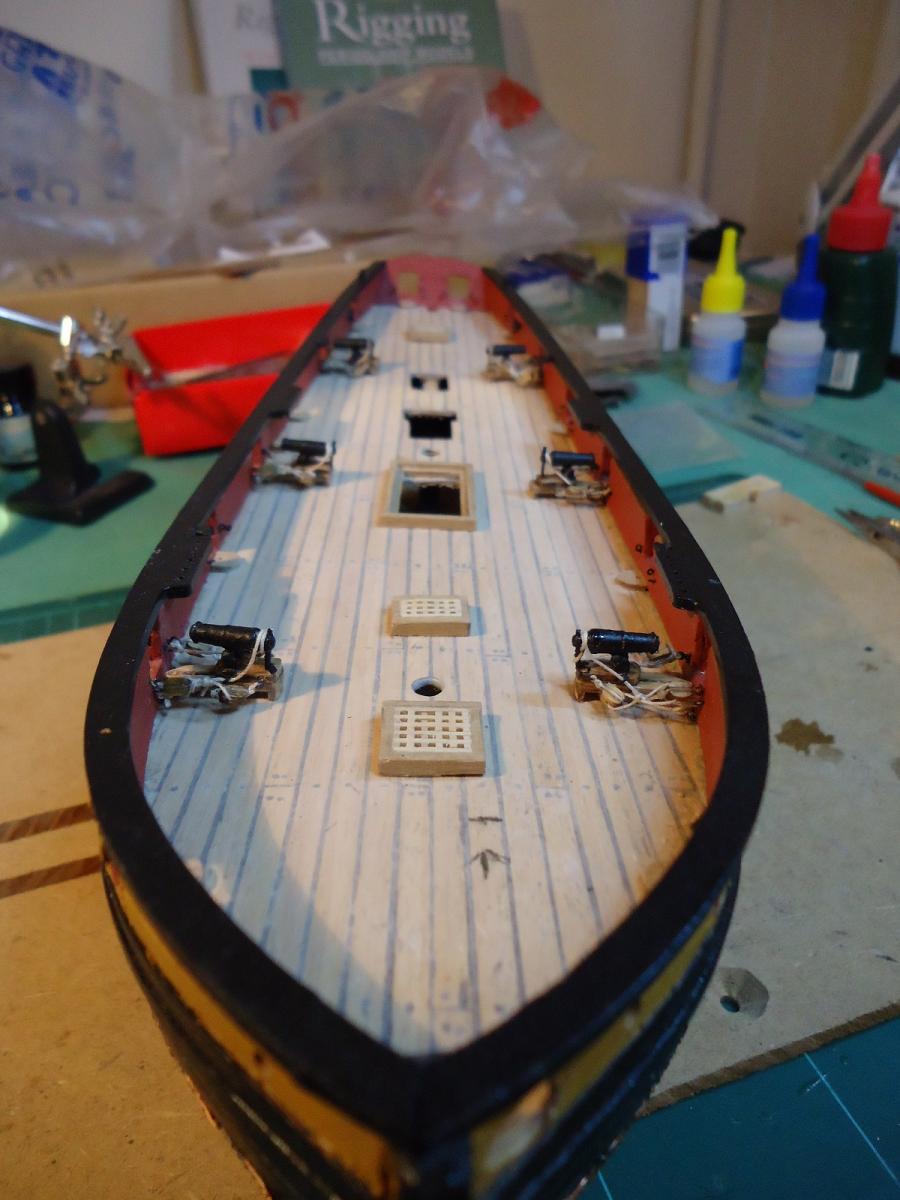
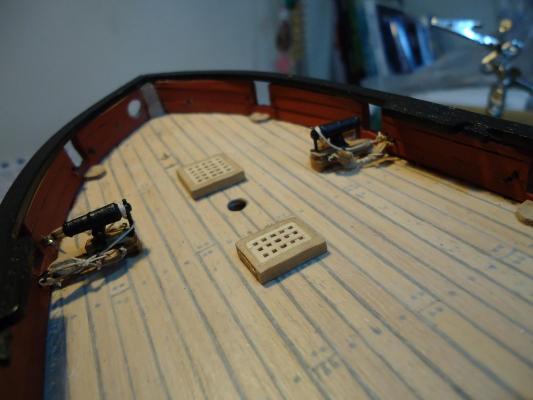
Before my first attempt at decking and calking, I dearched through the many ideas found on this site. I wasn't too sure about the marker pen approach as in tests I had a lot of 'bleeding'. I then found the idea of using plaster filler and coloured it with black acrylic paint - and I'm sure to the looks of horror from the awesome specialists of there, this is what I used. So, using the Three Butt Shift System, I completed the decking, leaving a small space between each plank. I then finished off my “imitation” fittings by drilling holes in the appropriate in each plank. I made up a batch of plaster filler and coloured it with black acrylic paint. I had tried this method on the lower deck – and perhaps because of the confines of the space hadn’t been too happy with the amount of colouring left behind. So, I lost my nerve and only coloured to a mid-grey !! Using various tools, I applied the mix and ensured that all the gaps were filled both between the planks and my imitation fitting holes. Quickly moving on, I cleaned and scraped the deck and finally sanded the whole lot down with fine sand-paper and finished off with 600 grade. Once all was smooth, a quick wipe-off and then a couple of coats of protective non-gloss varnish. Normally in the past, when I have used varnish before, the varnish has really brought out the colours of the wood. However, this varnish didn’t do that and so therefore the contrast between my caulking lines and “fittings” are somewhat lost. Still, not too bad for a first attempt!! In retrospect, I'm quite happy with the result. Yes, the 'calking' isn't quite dark enough but I am happy with the deck as it has bleached apperance that I like. I think I will try the 'black tissue paper' approach with my next ship, but still 'bleach' the deck using the method described above. Below, a couple of shots of the finished deck....
-
Hi Rick First planking done? That's cool. I think many people look at their first attempts of planking and wonder where it all went wrong! I certainly did - it looked terrible - and I had to in-fill with additional planking around the bow area to make the 2nd planking sit........... but there you go. Yes, and I will be using balsa wood in-fills aroudn teh bow-area in future.!! Life is one long learning curve - the modelling learning curve is just a bit steeper!!! You mentioned you have sanded a lot down. Shouldn't be too much of a problem - just don't forget that once all your planking is complete, to give the inside of the hull a good coating of wood glue to really bond everything. If you want to make yourself feel better and see how NOT to plank - check my build log out - Phase 2 is the planking section... Onwards and upwards. John
-
Simulated caulking
JRB9019 replied to Nirvana's topic in Painting, finishing and weathering products and techniques
Nice models Tadeusz - I really like Golden Yacht -
Simulated caulking
JRB9019 replied to Nirvana's topic in Painting, finishing and weathering products and techniques
I have looked at the photos from the HMS Sphynx supplied via the link in Greg's posting. The result looks very impressive - however I am wondering if the technique only works on larger scale models as in this 1/48 one. Do you think it would be too much on, for example, a 1/64 model where teh 'soft pencil' or 'marker pen' approach tends to be used? John -
Simulated caulking
JRB9019 replied to Nirvana's topic in Painting, finishing and weathering products and techniques
Wow, I've just seen this posting - and unfortunately clicked on the link. Oh my goodness, and I thought I was doing pretty well with my model - this is on another planet - the detailing is incredible. In awe John -
Hi Peter Thanks for the Info, Ill certainly follow that up. By the way, your advice re fixing the Deadeye Strops to the channels sort of worked. I have managed to get 4 Strops fixed the the first channel.................. but have broken 4 Strops in the process and I also find that one of the Strops on the completed channel looks as if it is going to break as soon as I touch it again!!!! I will have to phone Jotika on Monday to order some new Strops as I now no longer have enough!!!!! Oh the joys of modelling.. John
- 293 replies
-
- 1
-
-
- pickle
- caldercraft
- (and 1 more)
-
Hi Henrik For what it's worth, I half-built the Gorch Foch as a Revell Plastic Kit. (I've actually still got the whole thing in a cupboard somewhere and should start again!!) I love the ship - even though it is "modern" compared with the wooden ships I am building now. To your question. In the UK, the Mantua comes in at £20 more than the Occre if you include the sails, so no, not much difference. Referring ONLY to the photos found, the Occre seems to have more rigging than the Mantua, so if riggings for you, I would certainly look in to that side of things as well. A tough call - you could always build both and then report back to tell us which one was better !!!!! Happy Christmas anyway - it sounds as if it will be a good one with such a gift in store for you!! John
-
Peter, Re Rudder Chain I've seen that 1:64 Rudder chain can be purchased in either 8 or 12 links per inch. Which size do you use? Also, the only supplier I've found is Jotika and they are selling it by the metre - which is a lot of chain!!! Anyone know of any other UK suppliers where less can be purchased? Thanks John
-
Now back to my Deadeye Strops Assembly. As I wrote previously, alll went well until I started to read the "Spring the 'nubs' of the strop, with deadeye, into the locating slot" instructions. Having completed the repaint, I was ready to try the assembly again. Despite Flyer's valient attempts, my brain just doesn't seem to be functioning with this! OK, so I tried again............. SNAP oops So I tried again and have managed to get the first Strop into the Channel. However, I have left the lower 'nub' under the Channel - just hoping that is OK. I guess it will at least help stop the Strop being pulled through the hole in the Channel......... which I suppose will be quite hard anyway as I have used Caldercraft's medium glue to seat the Strop. Here's a photo of the first Strop in it's Channel hole. Ifyou look closely, you will clearly see the nub underneath the Channel. It looks as if the Nub is outside the hole, but it is actually underneath. Oh, and I know I have to straighten things up as well! Any comments from you professionals out there before I carry on??? Thanks John