HOLIDAY DONATION DRIVE - SUPPORT MSW - DO YOUR PART TO KEEP THIS GREAT FORUM GOING! (Only 20 donations so far - C'mon guys!)
×


garyshipwright
-
Posts
927 -
Joined
-
Last visited
Content Type
Profiles
Forums
Gallery
Events
Everything posted by garyshipwright
-
 Hi Guys. Just a late reply on the theard about the ports and the lining. I have done some research on this and do believe that Mark P, may just be right about it. I don't think they did a lining around the inside of the port which like some would say cost money to do and really didn't do nothing. Why would you need 3 inches of lining as a stop when you have such big timbers already. Am not sure how many read Fincham who was a Master ship wright for the English Navy I do believe and wrote several books on the subject. I went and took a look in his book Outline of Ship Building written in 1852 and was wondering what is port stops. My self am thinking that they put a stop lining around the inside of the gun port itself and am sure a lot of folks think the same thing. In Fincham book he tells you what the port stops really are and until now had no clue what it is other the the port linings.Which is total wrong for me The contract's I have says that the stops can not be more then 2 and 1/2 inches which doesn't tell me much, until now. Here is what Fincham say's about port stops Part 4, vocabulary of terms, page 94. Port stops are the ends and edges of the planks left round the ports, from one and a half to two and a quarter inches from the sides of the timbers and upper and lower parts of the sill, to receive the port lids and half-ports. Seems, that this is saying size wise, the same thing from my contracts. I understand this is a bit of time from Alfred's building to Fincham time but would the term have been different back then. Don't believe so. Sorry for being late with a little bit more info on this. Now all I have to do is rip out all the sill's I put in. :o{ Gary
 -
Hi Mark. You might able to get a look at Steel's rigging and seamanship vol 1 and 2 which was writtern in 1794, reprint by Sim Comfort Associates in1978. Also Steel's Elements of Mastmaking, sailmaking and Rigging reprint by Edward W. Sweetman. This is a smaller book then rigging and seamanship but do believe the info came from that. This one was also writtern in 1794 and was reprint in 1932 The last on I have come up with is Lever's Young sea officer's sheet anchor also done by Edward W Sweetman reprint in 1963 and was from the second edition 1819. Hope this is of help when you get to that point sir. Gary
-
Optivisor Recommendations?
garyshipwright replied to Landlubber Mike's topic in Modeling tools and Workshop Equipment
Does any one have a lighting system on their Optivisor? I added one but it stop working really shortly after turning it on so am looking for a better one. I like my optivisor but it would be so much better when you add a light to it. Gary -
Thank you sir. Gary
-
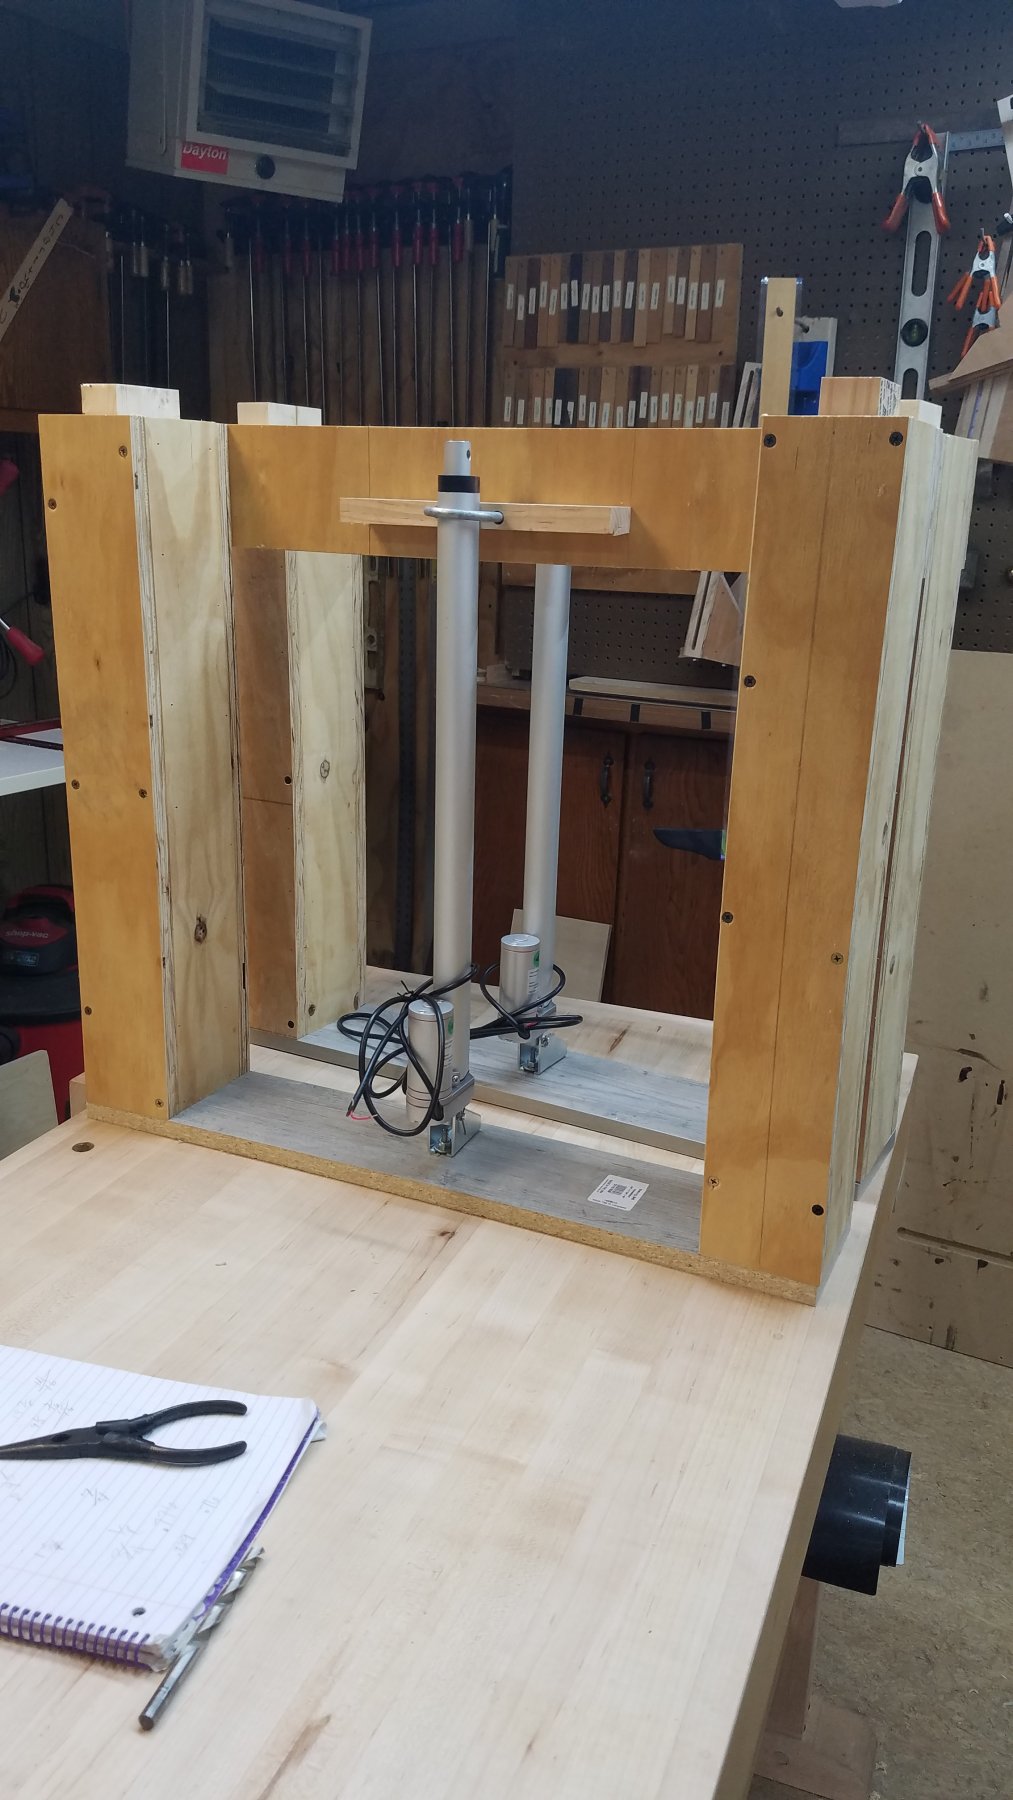
variable height desks
garyshipwright replied to bigcreekdad's topic in Modeling tools and Workshop Equipment
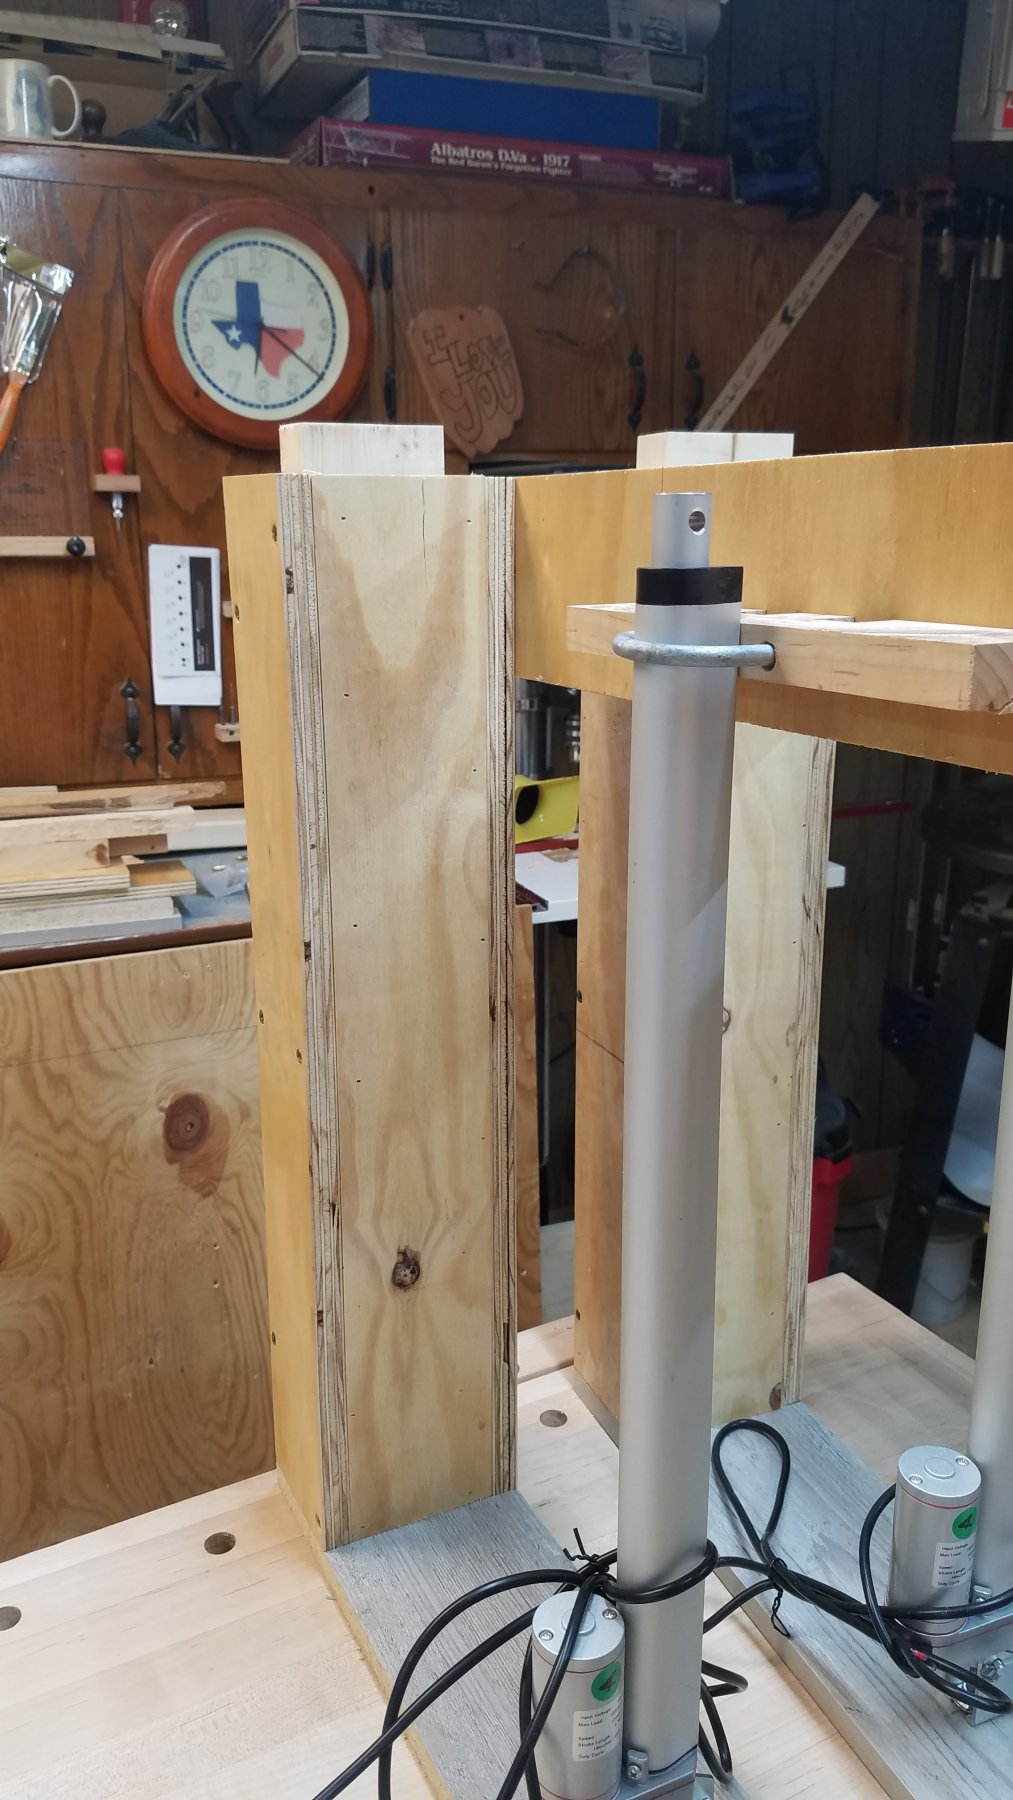
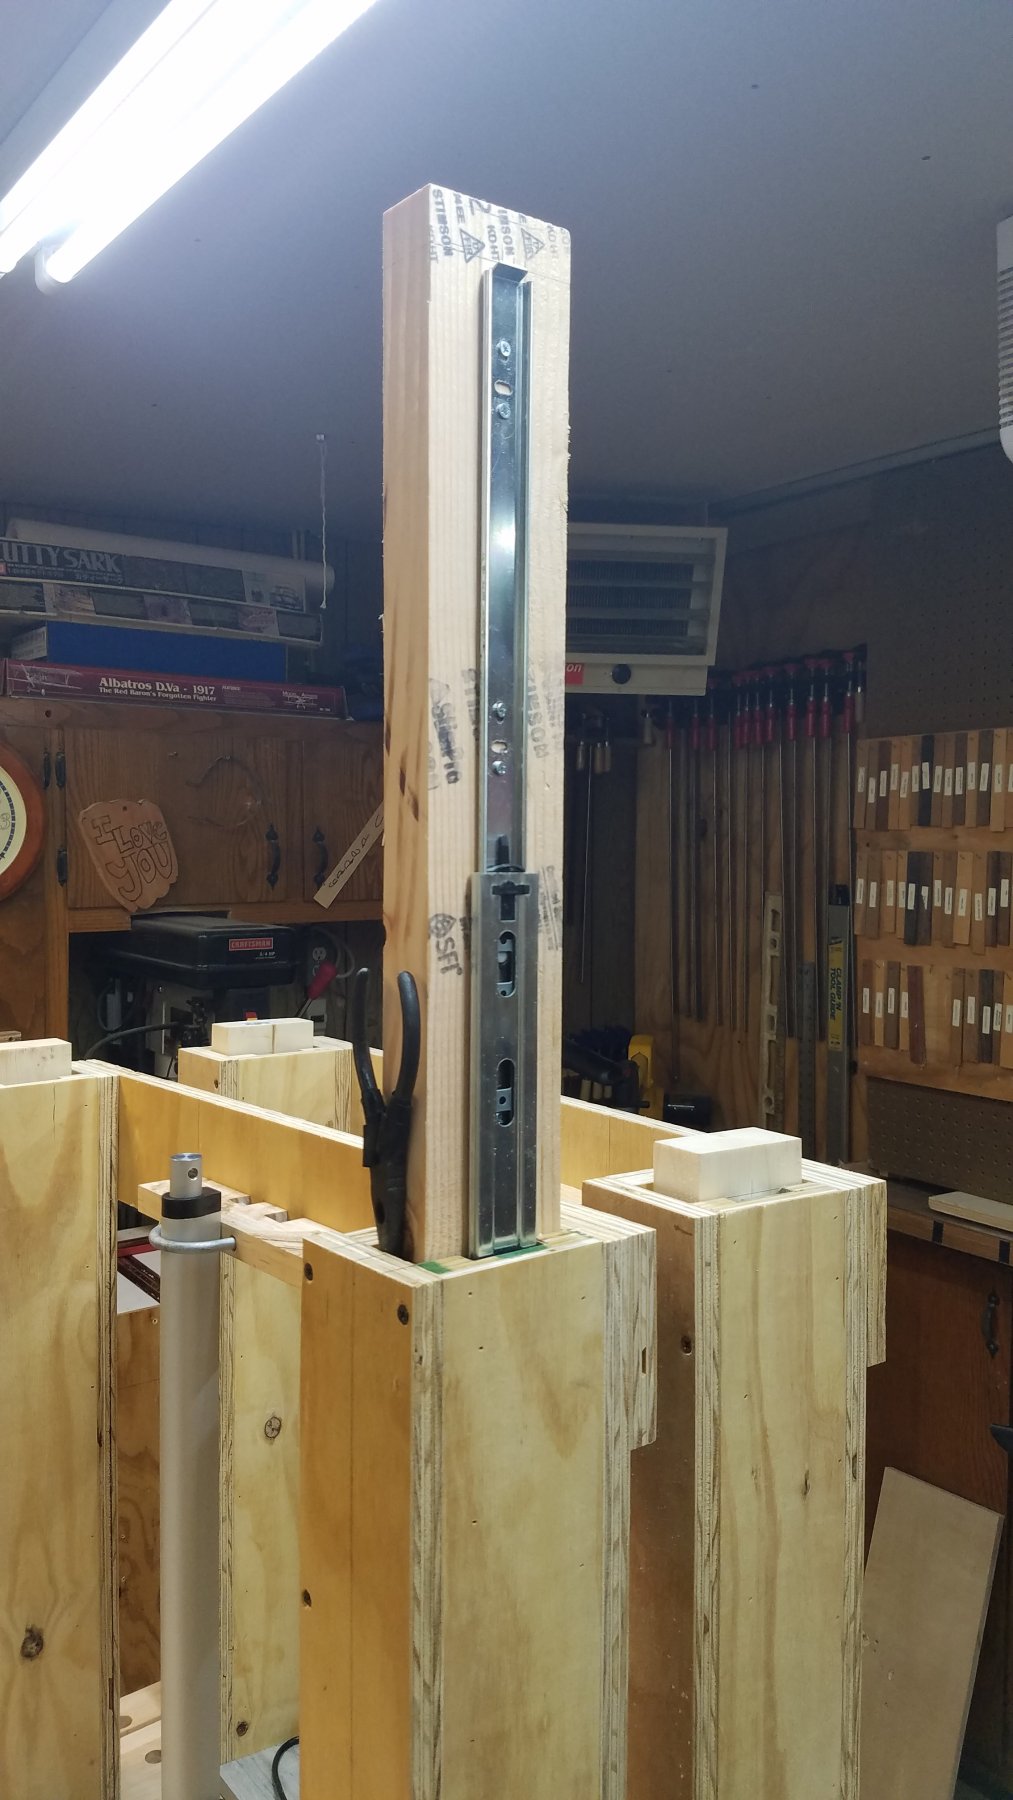
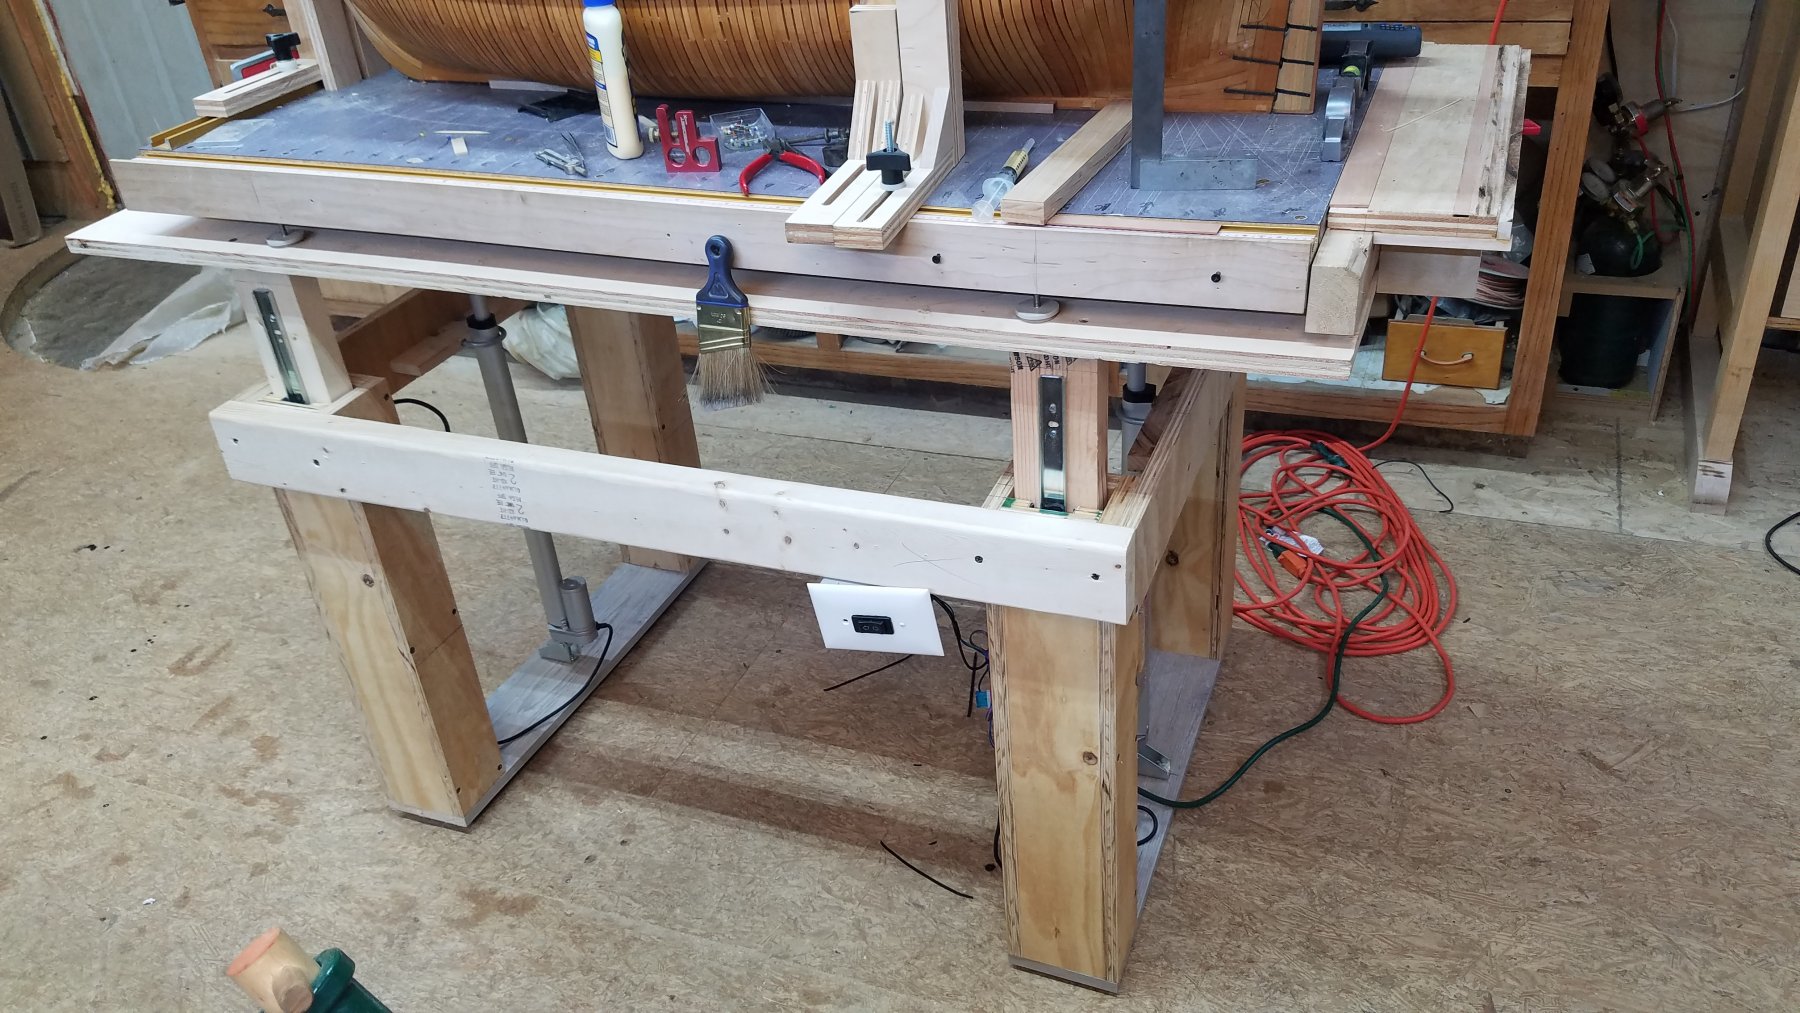
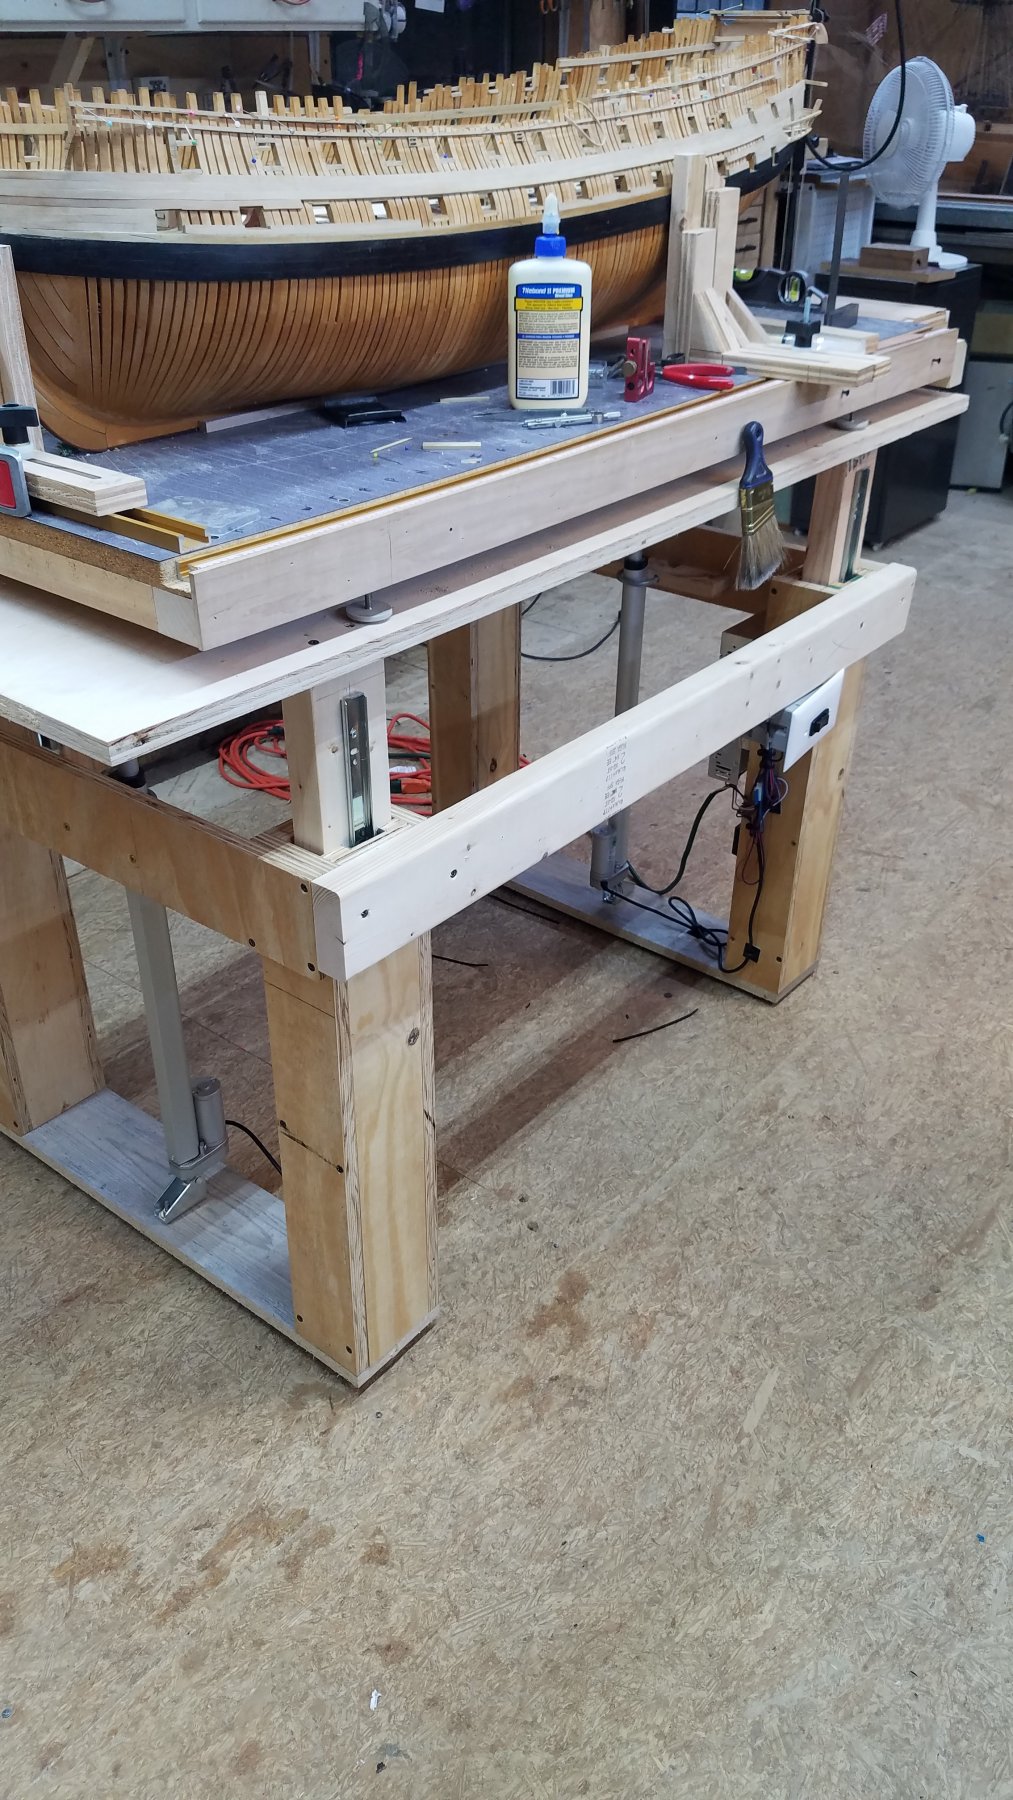
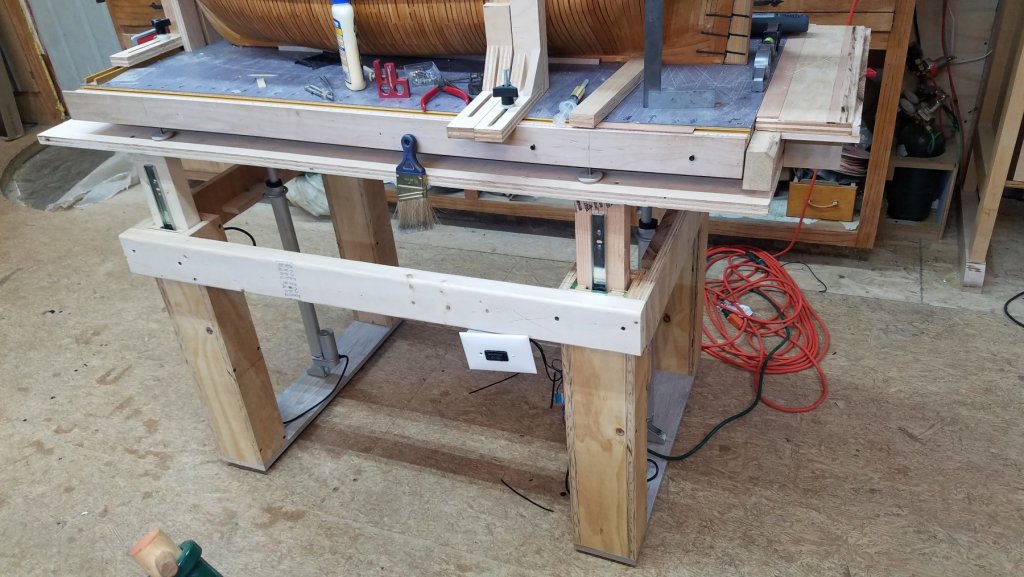
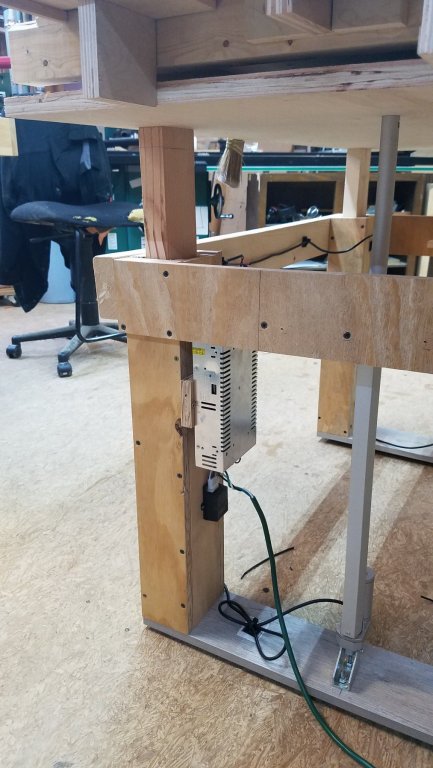
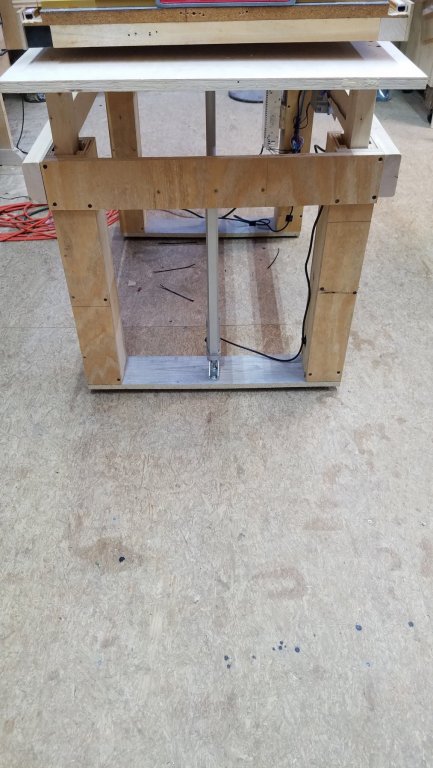
Hi Guys. I just finished building a variable height table for Alfred and its already made me wish I had made one years ago. The family and I was in IKEA a few years back and saw one of their desk and gave it a try. Thought how nice that would be for working on Alfred. That thought stuck with me and a few weeks ago I was in office depot and looked at one that sat on top of the desk but was to small and a little high on the cost so I still didn't get one. I finally got serious a with cash in hand went shopping on line that is. Well got to thinking why don't I just build one to suit me and Alfred. I went and brought the pieces for it linear actuator, dc power supply, control system, a couple of piece's of ply wood and 4 drawer slides. So after a week it was done and today I used it for moving Alfred up and down and as I said earlier which I had done this a few years back. Here are some photos of it. Probabley end up adding some shelfs to it and a few other things. Gary


-
Hi Matiz. I take it you mean razor blades good sir? Enjoying your build very much. Thank you for sharing it with us and always enjoy your updates. Gary
-
Mark in the book Legacy of a Ship Model, the Princess Royal 1773 by Rob Napier, page 91, he has a picture of the aft side of the port round house and it is not very deep at all and no door was installed on it. Sort of like being in a out house with no walls or door. Wonder were the hung the rope/ toilet paper. Mark I took a second look at more of the photos of the Princess Royal and seems that it did in fact have door's for the round house. There is also a photo that shows the dog leg frame( the core of the model which looks just like what you have drawn. Good job sir. Gary
-
Mark the stanchion at the dog leg landed some what on the dog leg frame. I believe that's what I found when I was working on alfred, sort of rebate in to it. More like a half stanchion.
-
Mark go to the gallery at the top of the page, then go to page 2 and there are a few outstanding photo's of the head work of 74's. When you look at them as a whole it makes it look like the had a lot more room. Even the Bellona is there. Gary
-
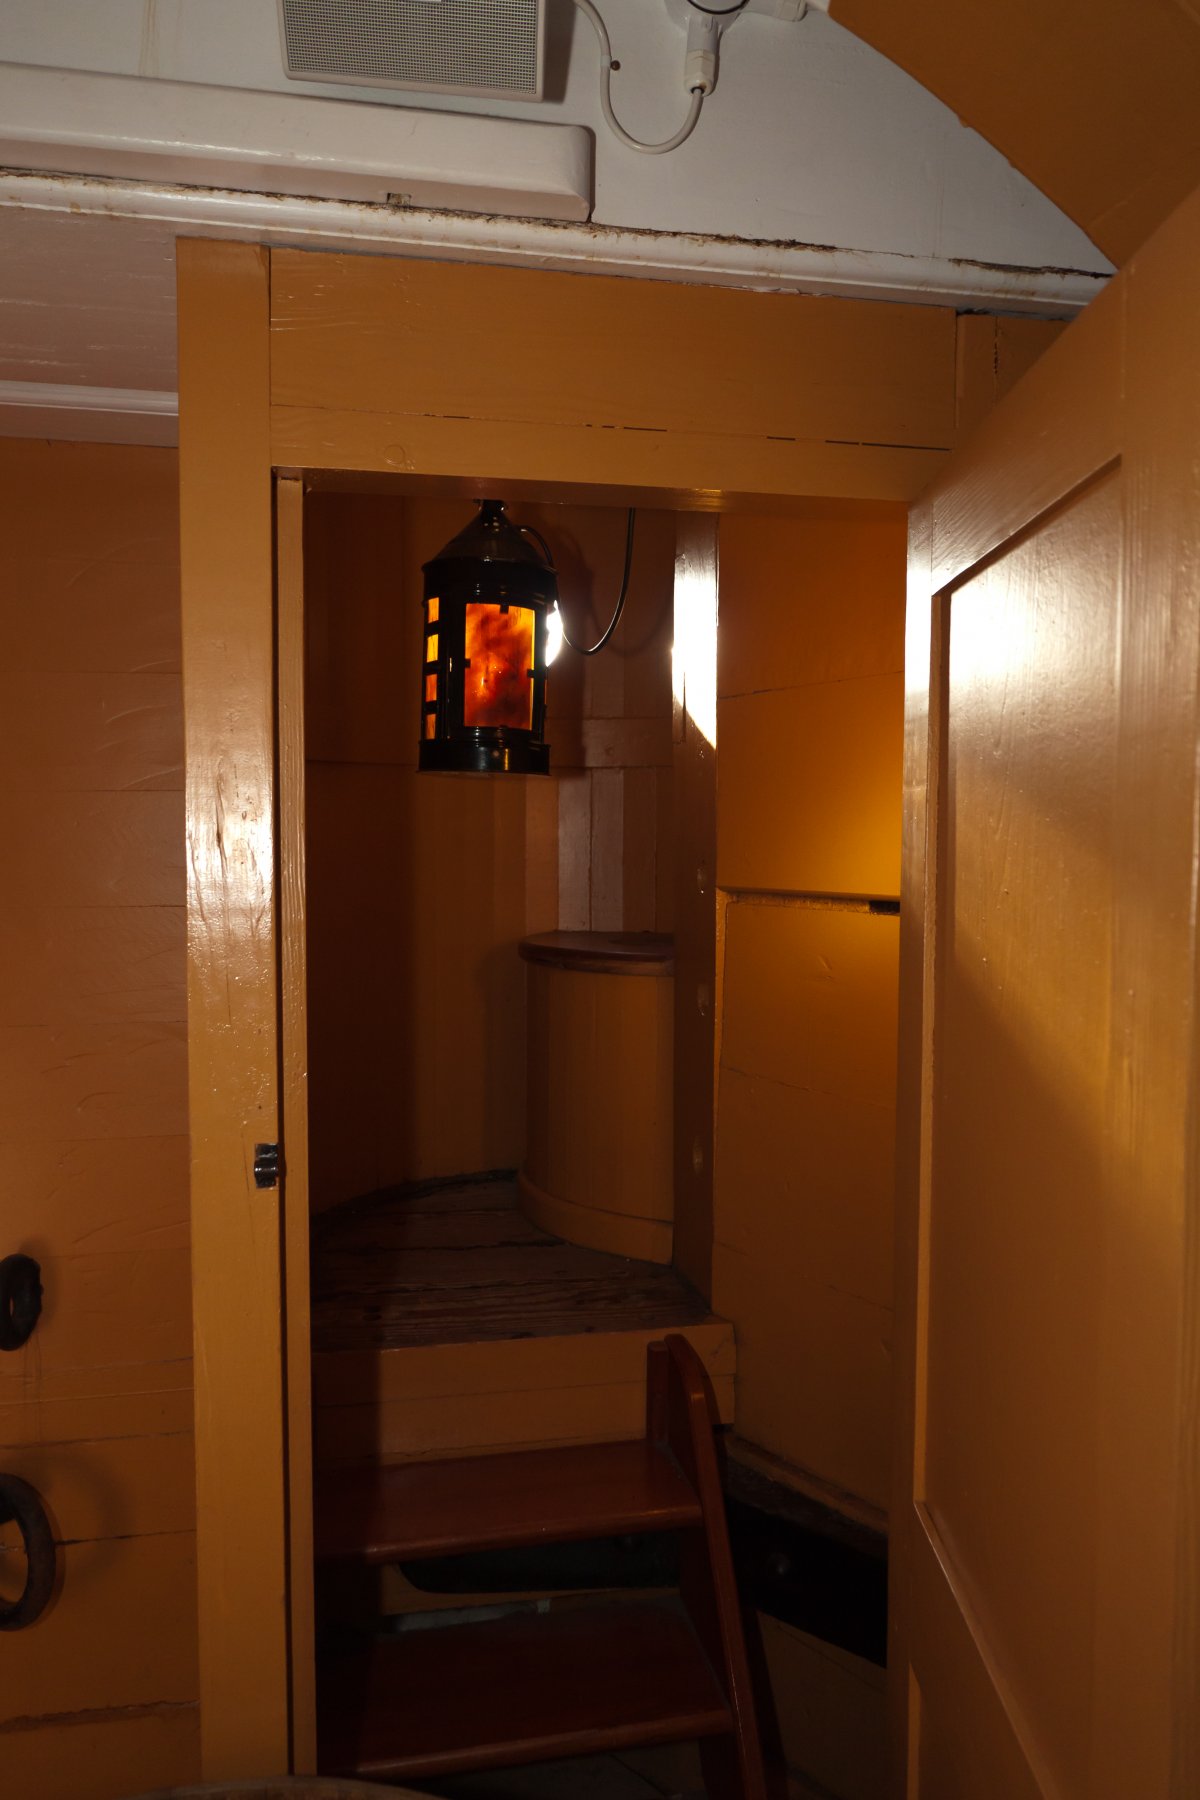
Hi Mark here is a photo of the Victory showing the doorway with a little set of stairs. Gary

-
Mark could the door have been on the inside of the beak head bulkhead. Thought I saw a photo or maybe it was the victory that showed this. If so wouldn't that given them a couple of more feet with a set of stairs to help get you in there. Think I see if I can found the door. Gary
-
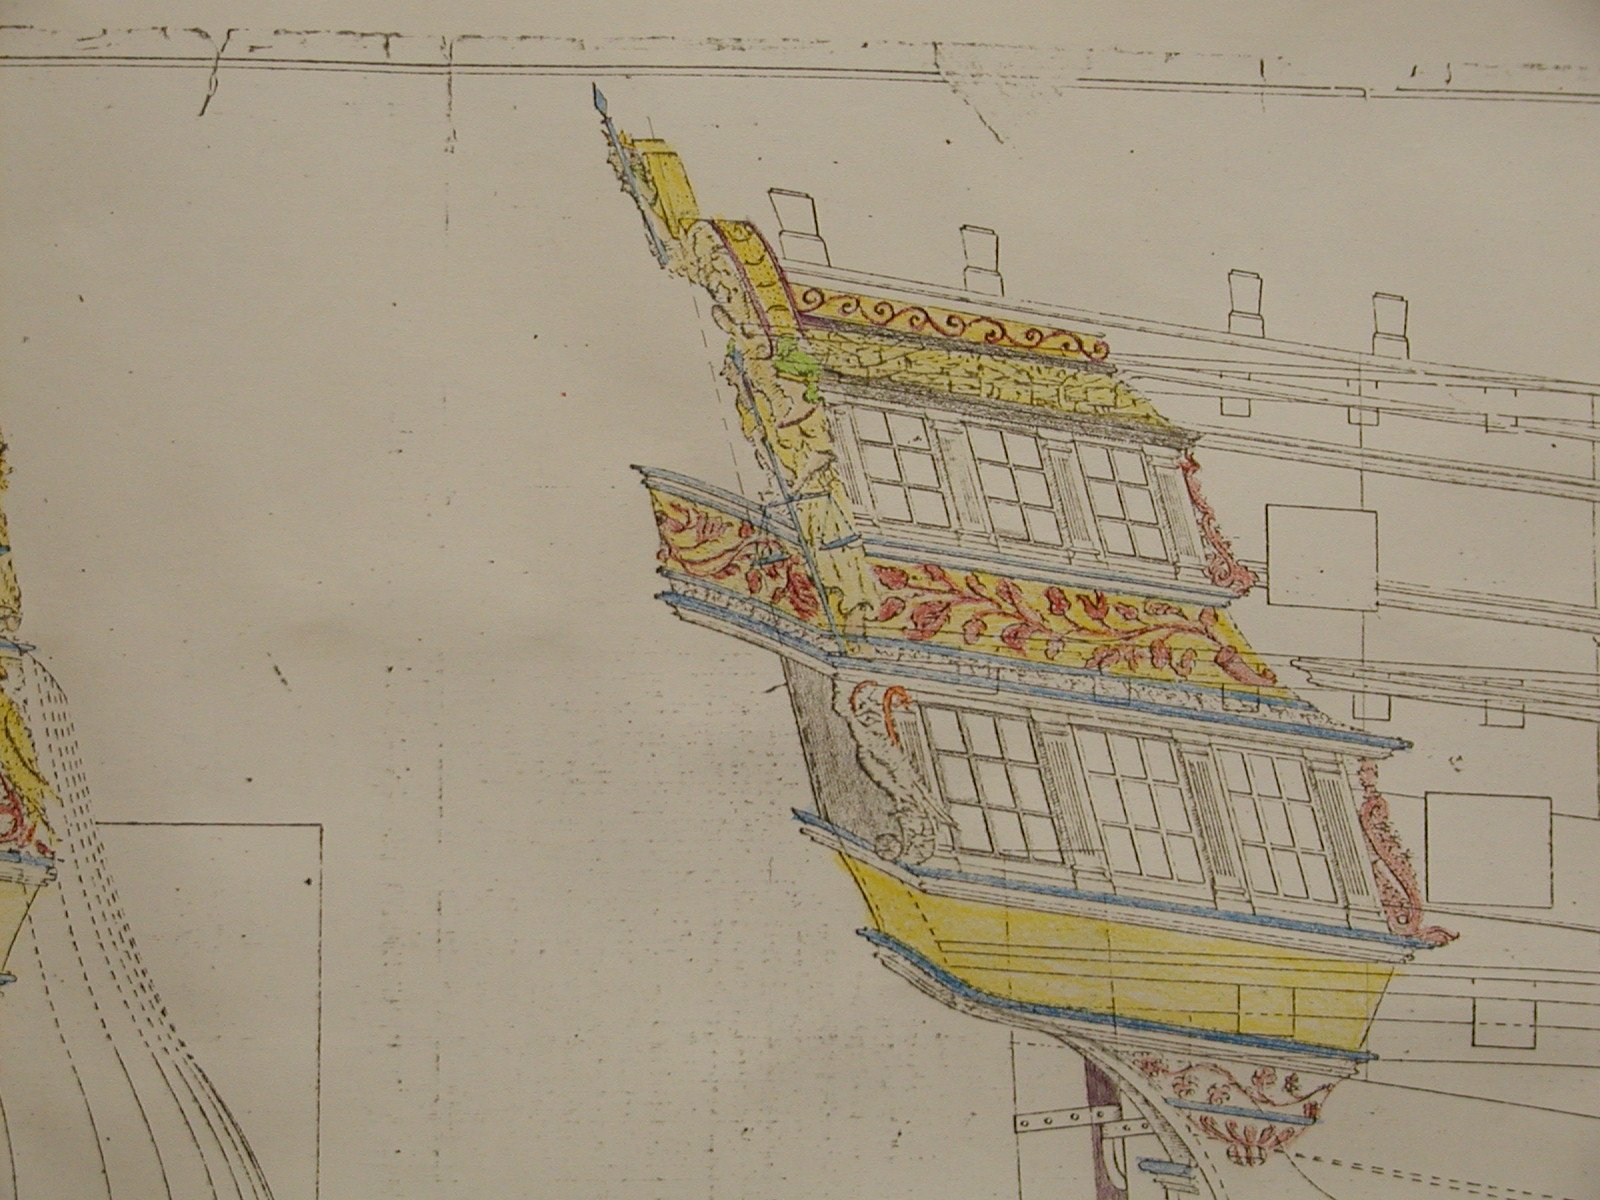
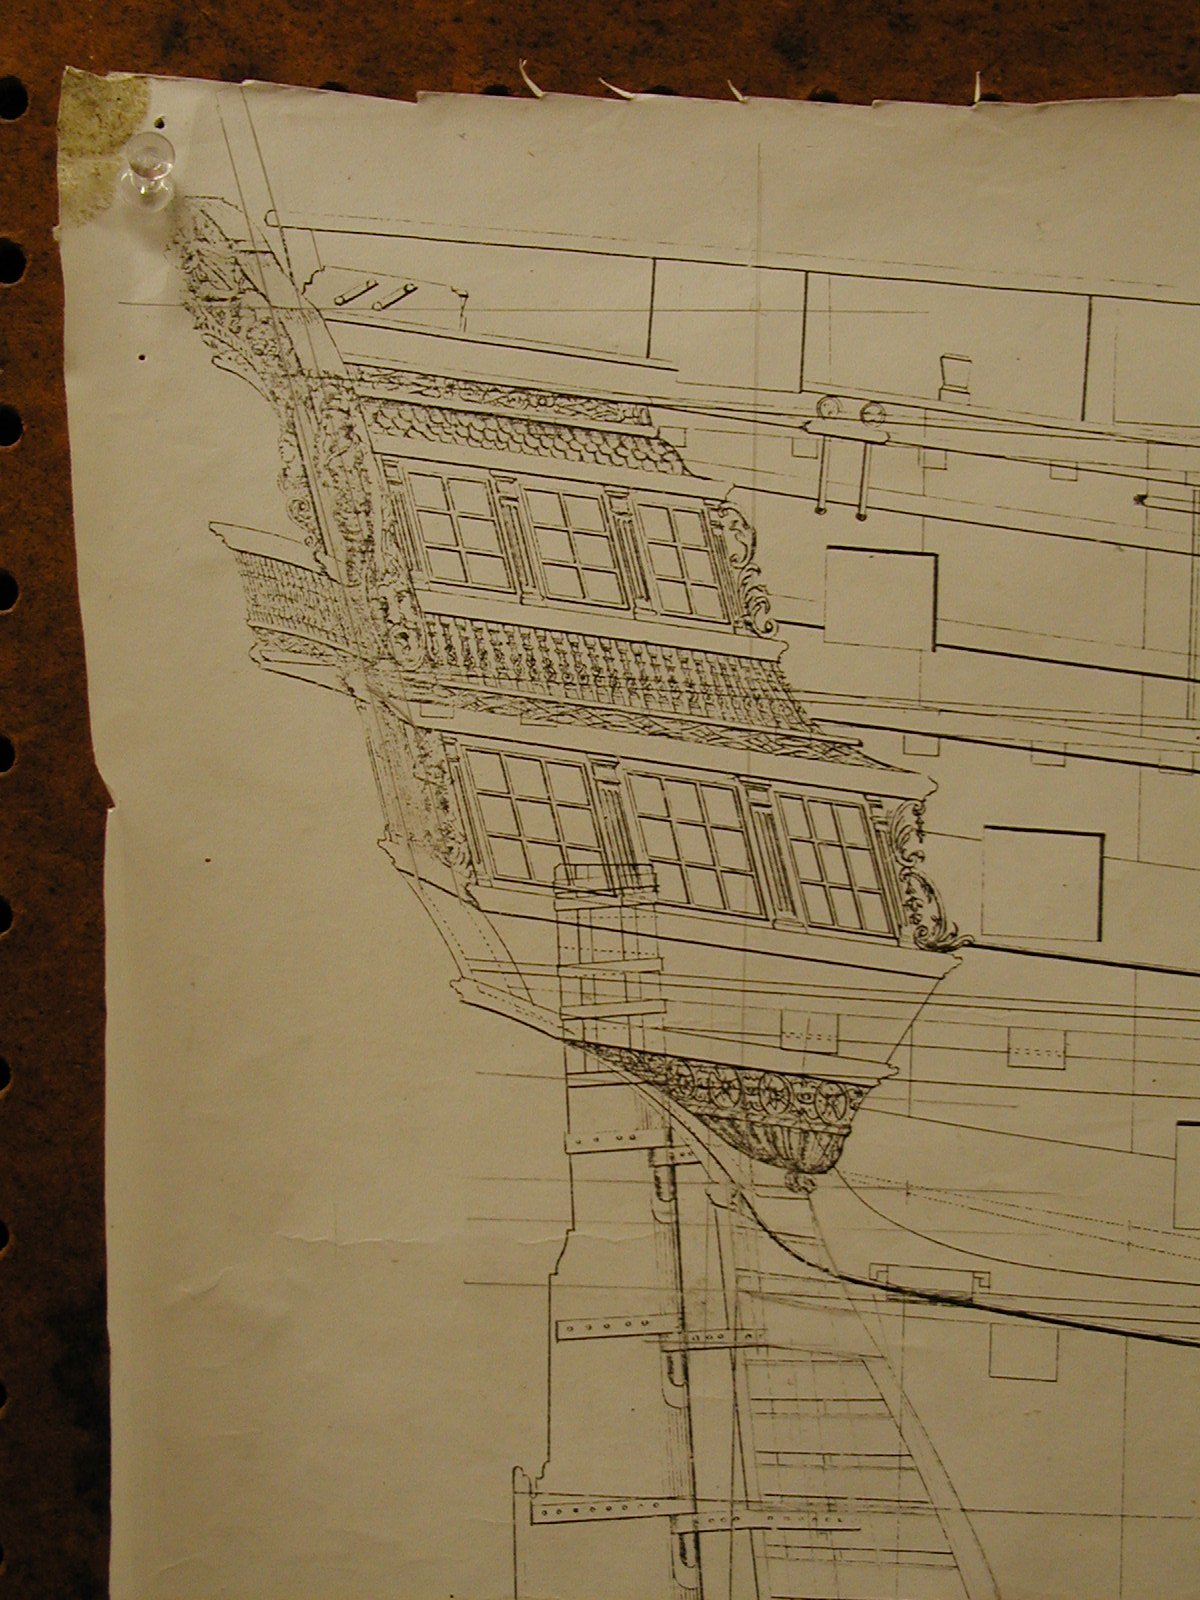
Mark thats a nice drawing. I have allways liked your drawing. Is it possible to see one of a head on view? Thank you sir. Gary
-
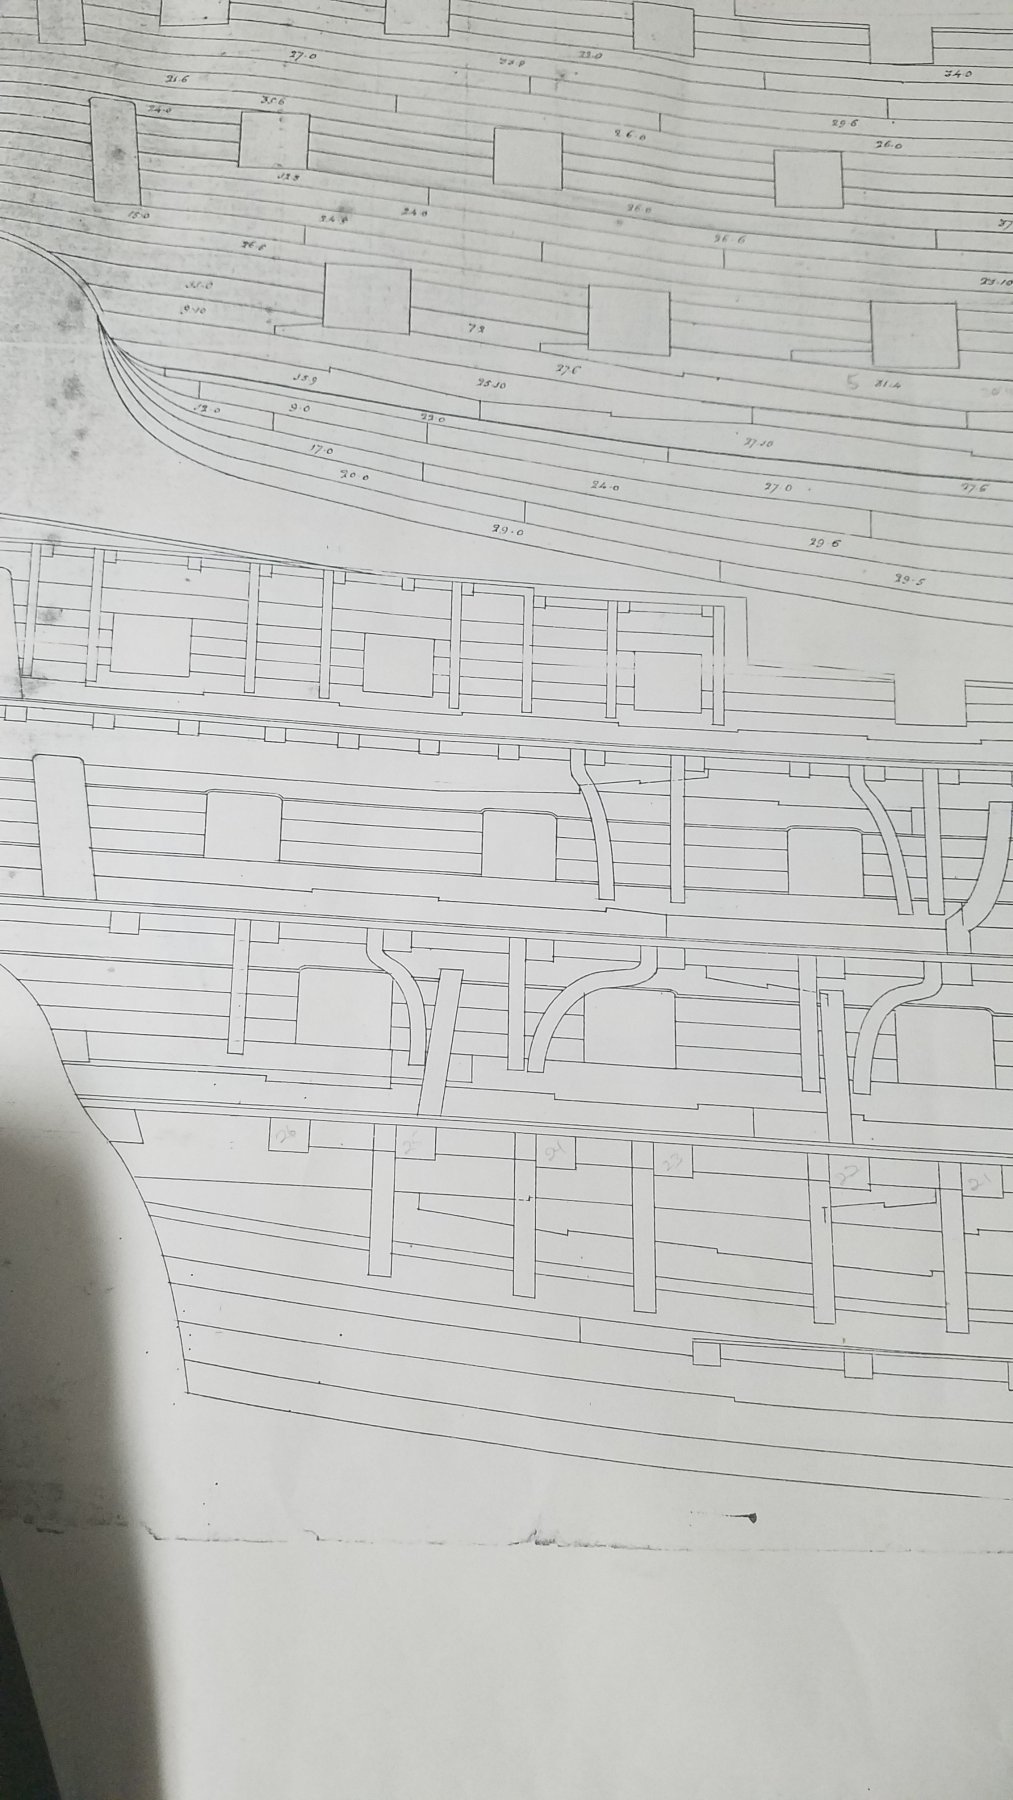
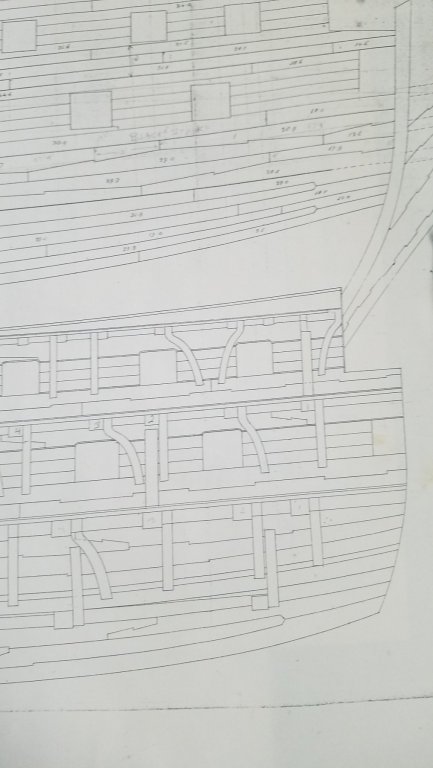
Mark on that plan with the knees there is another lay out of the spirketting and quickwork of the Berwick which is what I used on Alfred. Gives you another choice which is allways a good thing. Look forward in to seeing your planking good sir. Gary
-
Thanks Gaetan . Bruce I ordered one off of Amazon already sir. Should come in handy, and thank you. Pat sounds like you didn't have to bad of a time. I have heard other people say the same thing. Like you said they must have a good reason. Well maybe next time you go you will have a better time on the Victory. Gary
-
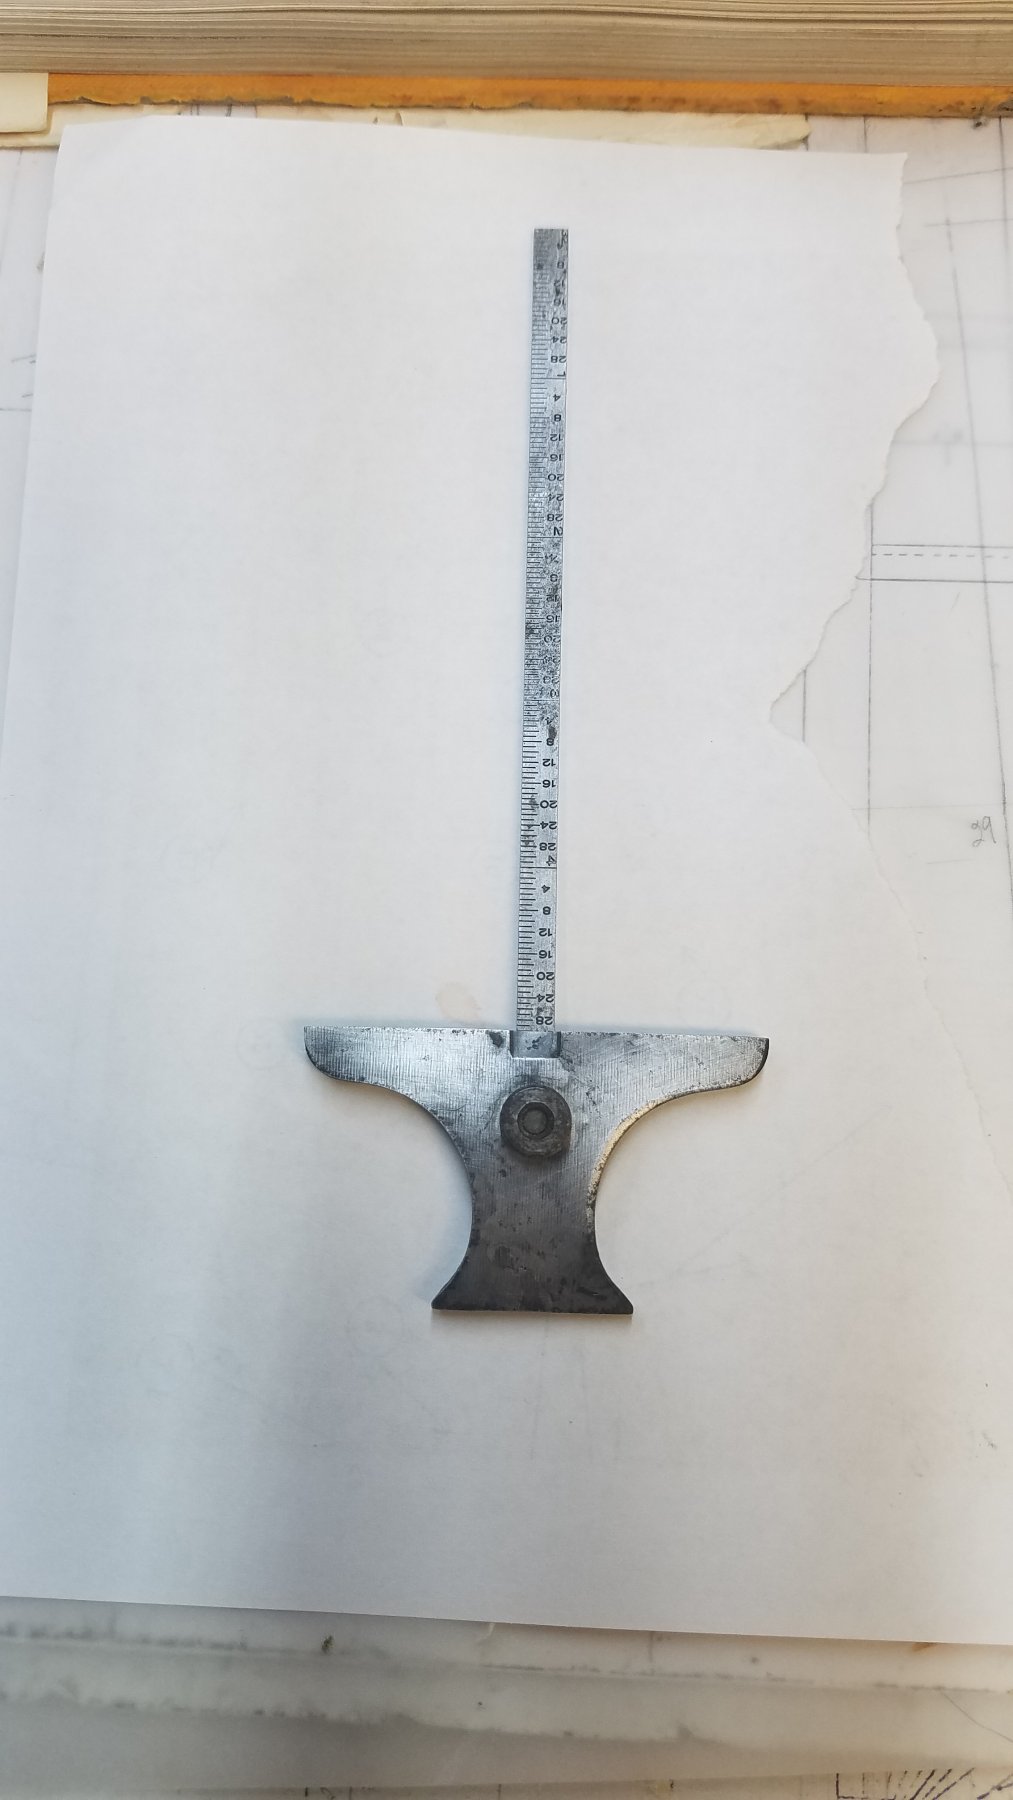
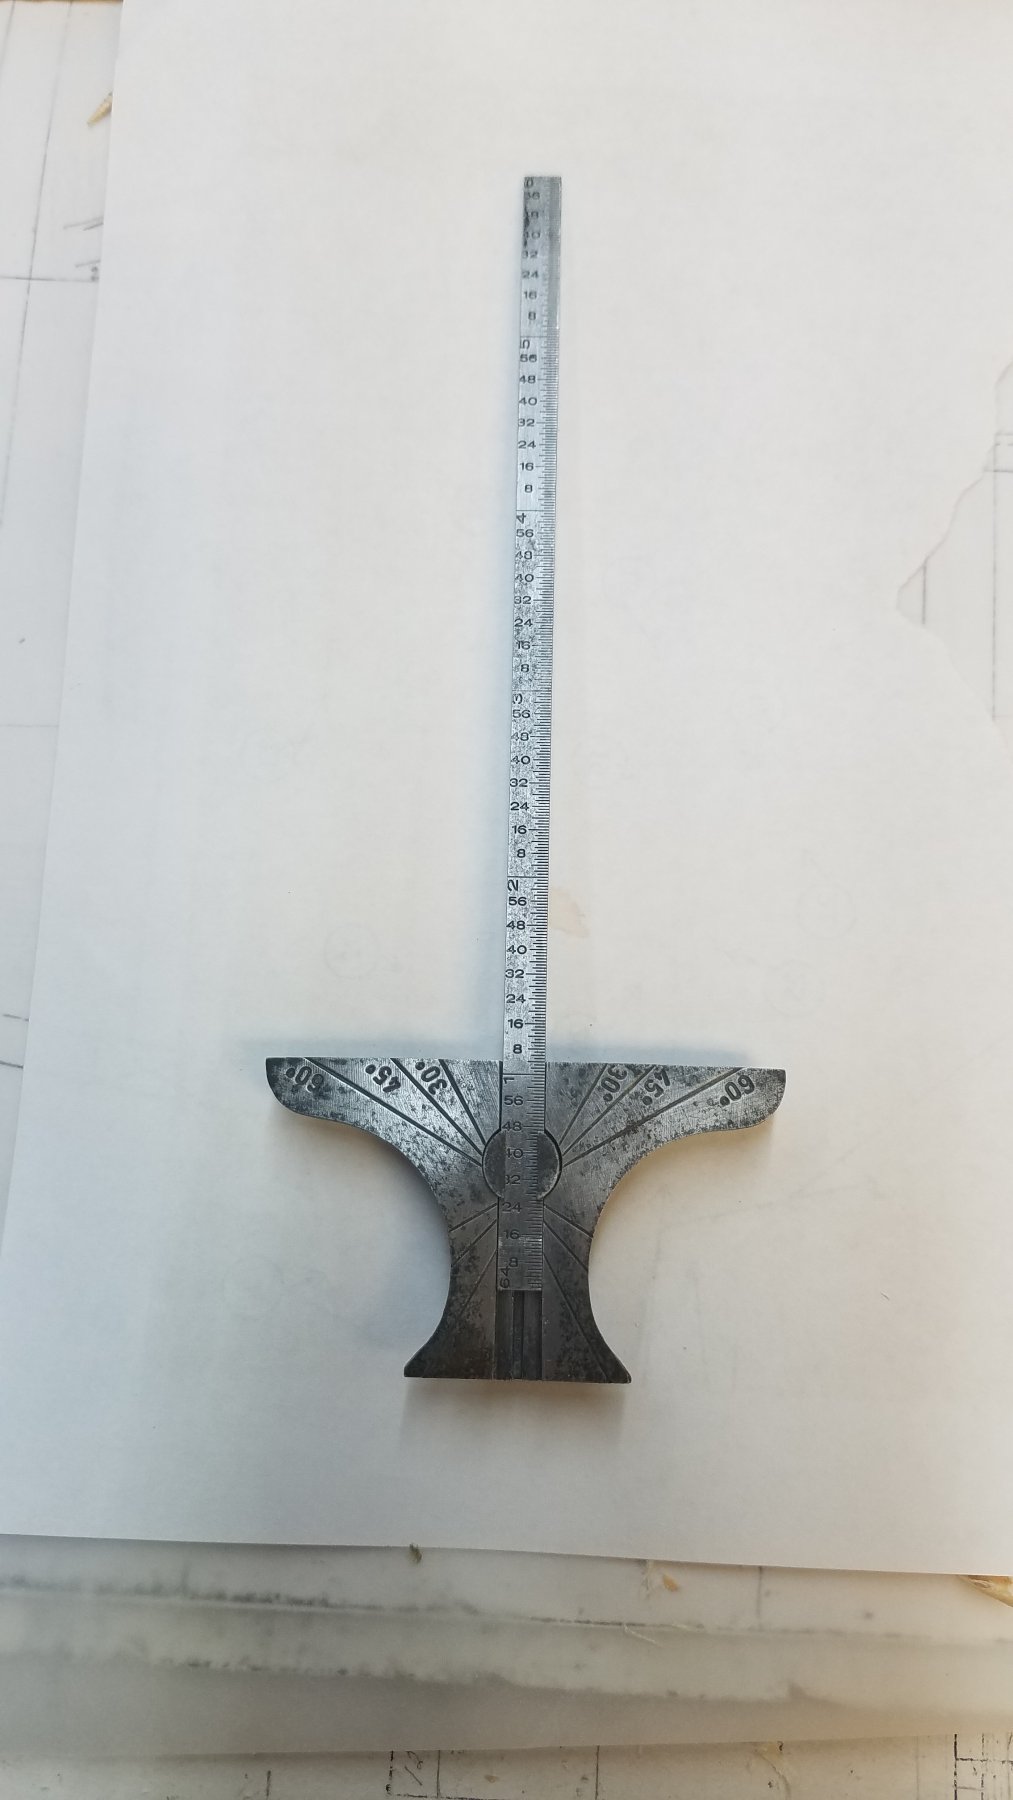
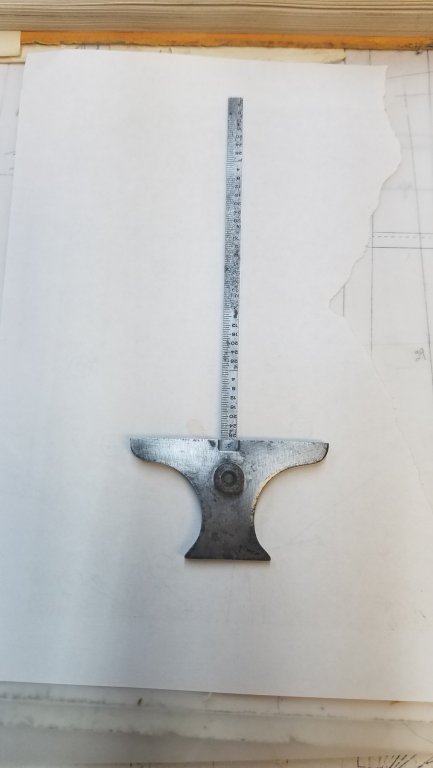
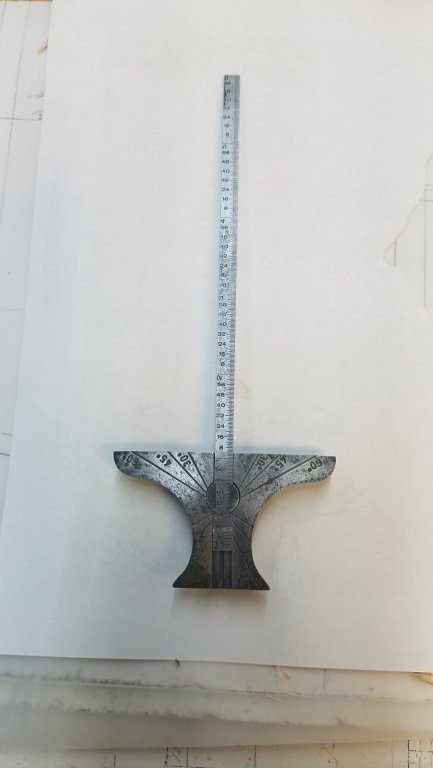
On a different not I have this tool, had it for years and not sure what its called, maybe a depth/ angle gauge. Any ideals where I might get another one. Comes in real handy and would like to have a second one when this one is tied up. Thank you good sir's. Sorry guys already found one. Gary
-
Hi Mark. No color/stain this time. Used Tamiya flat black thinned down and didn't come out to bad. Used the same thing on the stbd side for some of the upper works. Hope it doesn't peel off any time soon. Gary
-
You are so right Mark. You figure after 30 years I would know what am doing but as the saying goes, you will allways be learning something new in this hobby. Gary
-
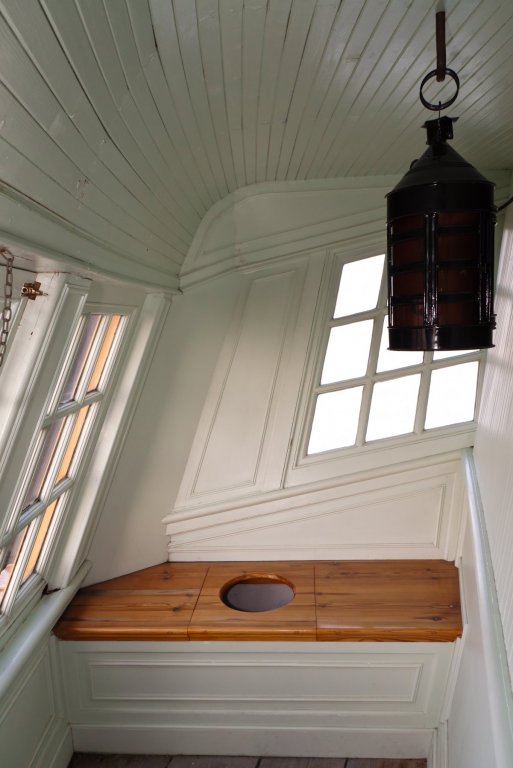
Thanks Pat. Hope you had a good time and did you happen to get any photos of the inside of the gallery on the Victory. Maybe as your looking forward from the seat of ease. If not thank you any way and do hope you had a great time. Getting her lower parts of the gallery done is I believe a step in the right direction. Gary
-
Thanks Mark. At the moment am working on the upper stool and getting it to look just right is just a tad touchie. Can't wait to see some of those knees and hope to get some ideals from you for doing my own. Gary
-
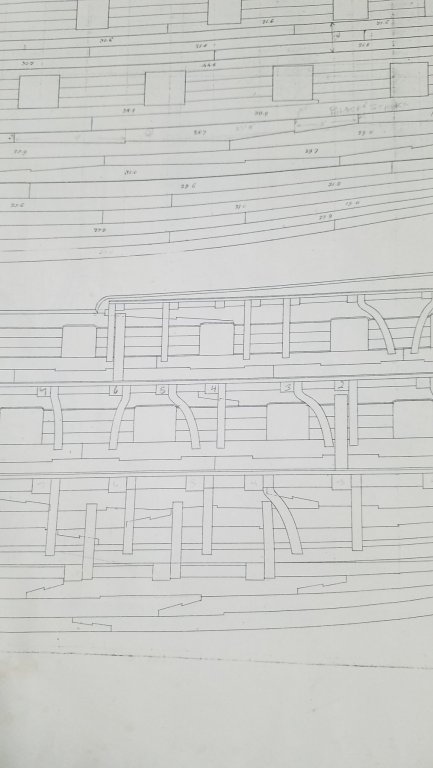
Hi Mark. Good to see you back to making sawdust. Has far as the knee's go I have a drawing from the NMM of the Berwick that shows how every thing was laid out which when it comes to Alfred will be a big help. There is one hanging knee close to what you show but not quite that bad. As far as swaping it to the other side, if you look at the photos, they stuck to the side they were meant to go on. Should be a lot of fun making them. Gary
-
Thanks druxey. I just may have to make a slight modification and round off the coner's. :0)
-
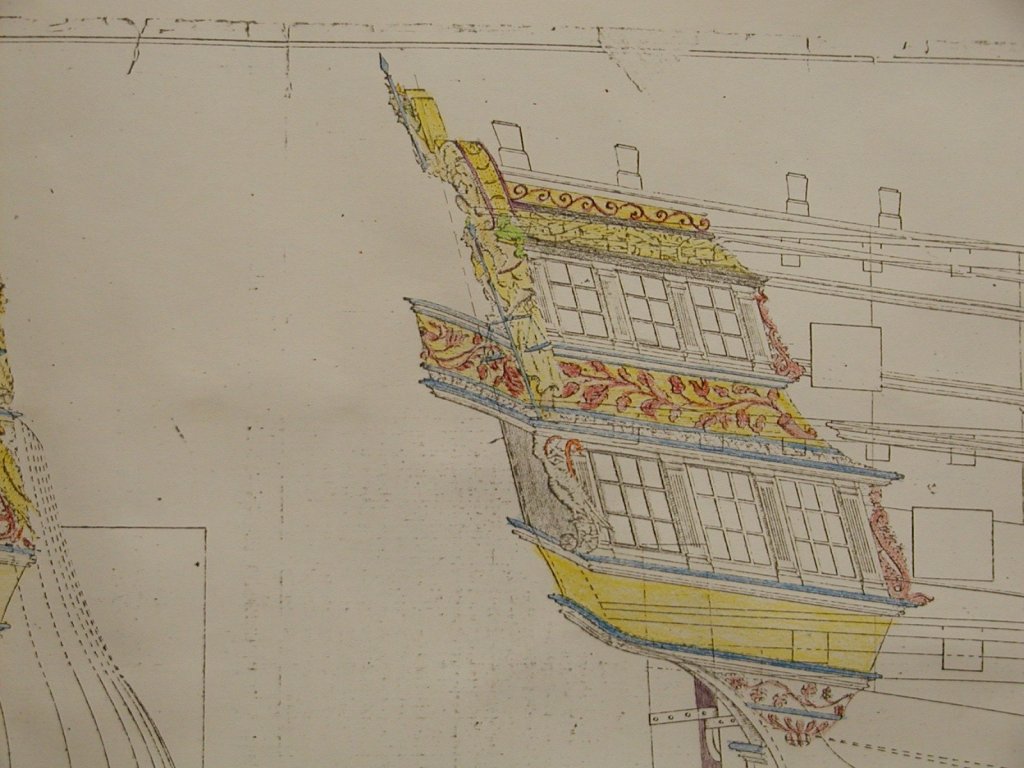
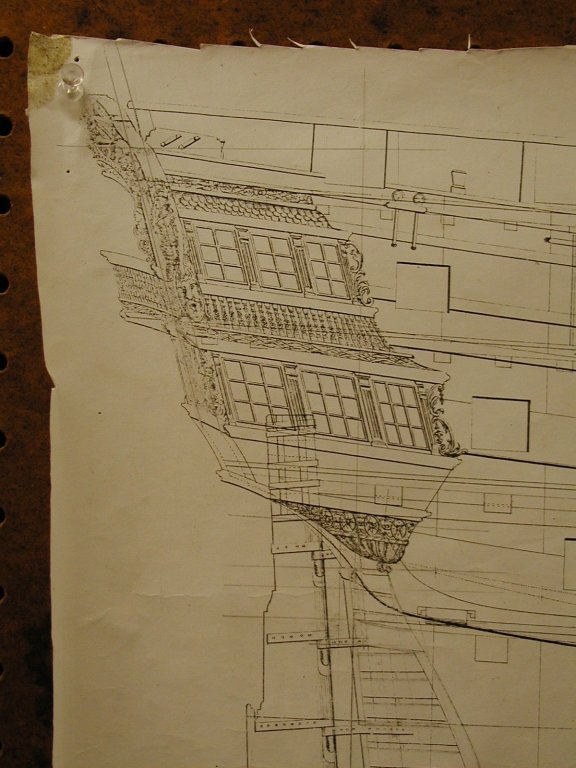
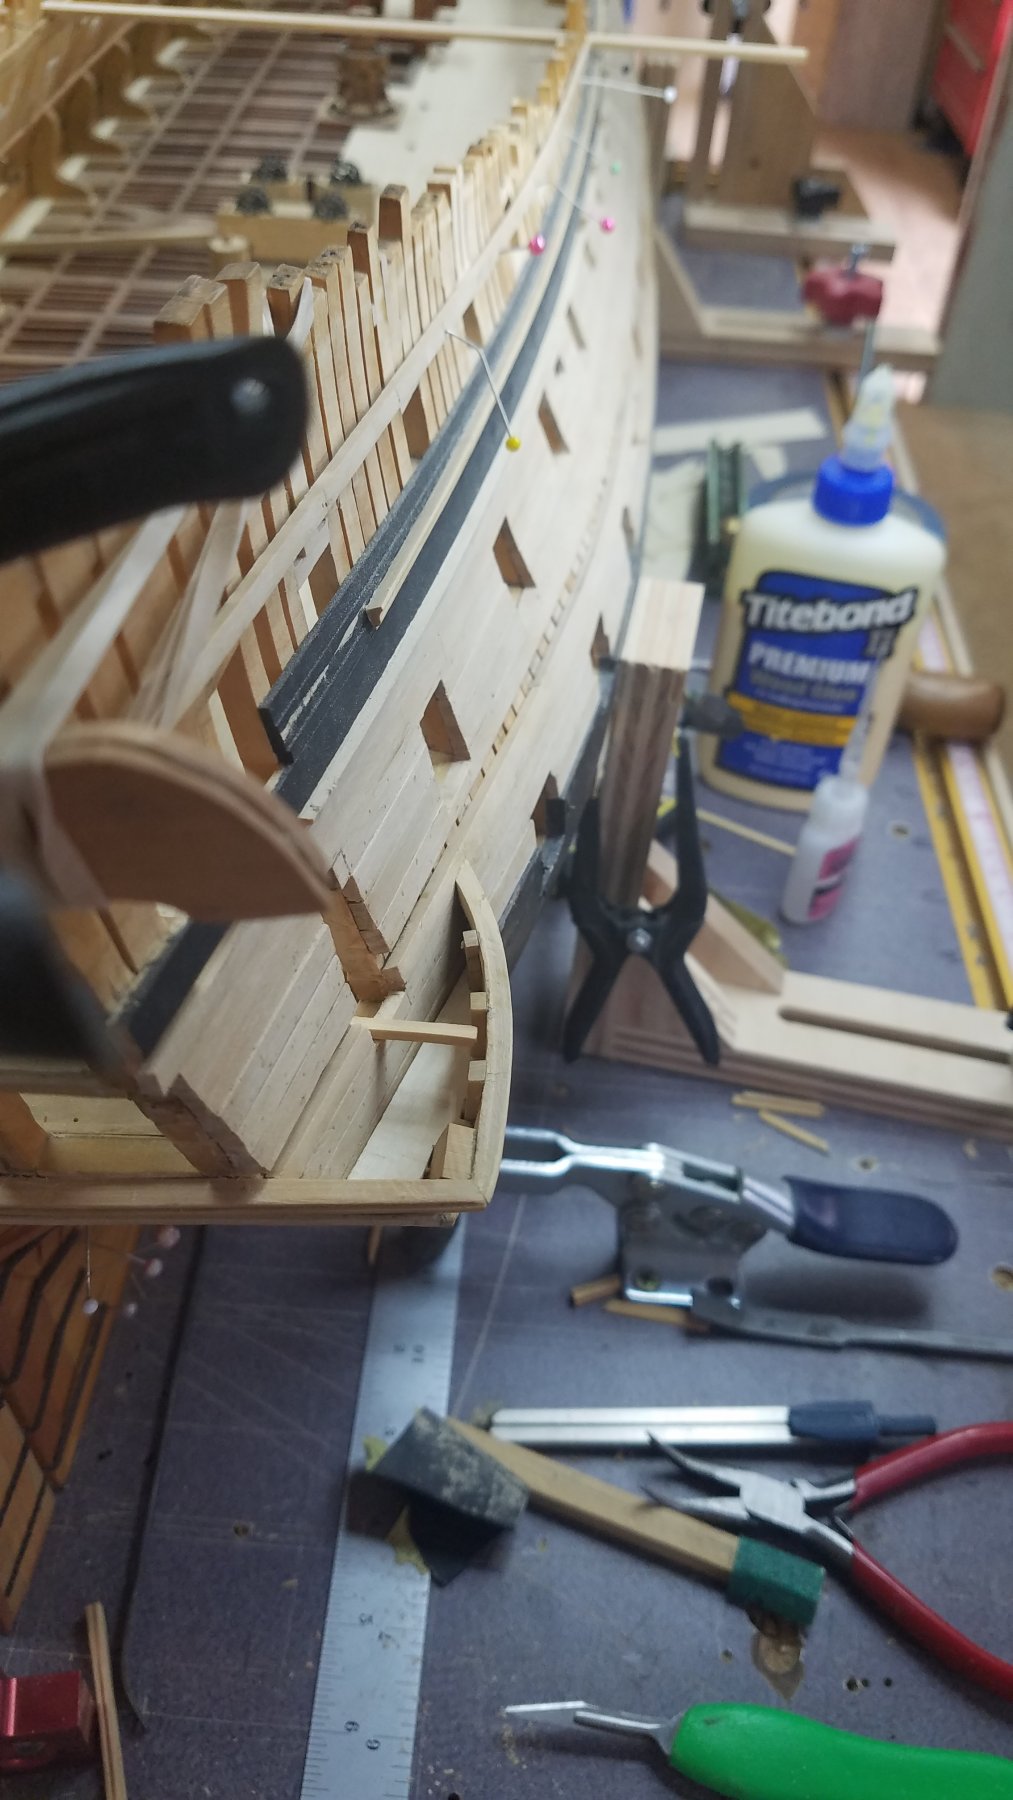
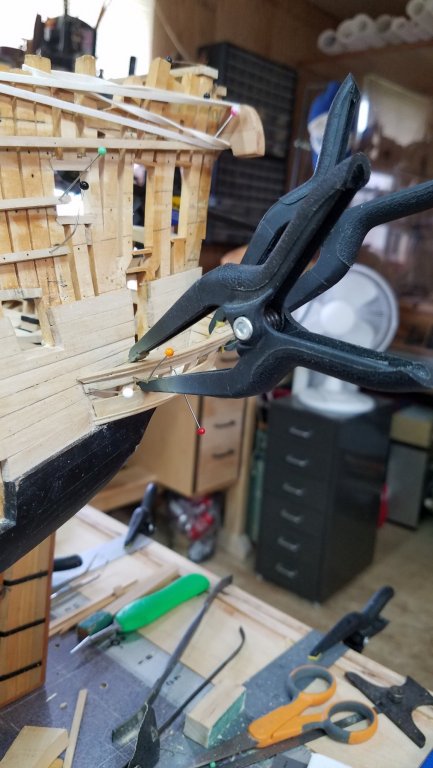
Hi guys. I finally got the lower part of the quarter gallers and the counter all planked up. I didn't leave it bare and painted it to match the wales. One thing about it this time is it's easy on the eyes which makes me think that maybe just maybe I got it right or at least close to being right. Gary

- 835 replies
-
- 22
-

-
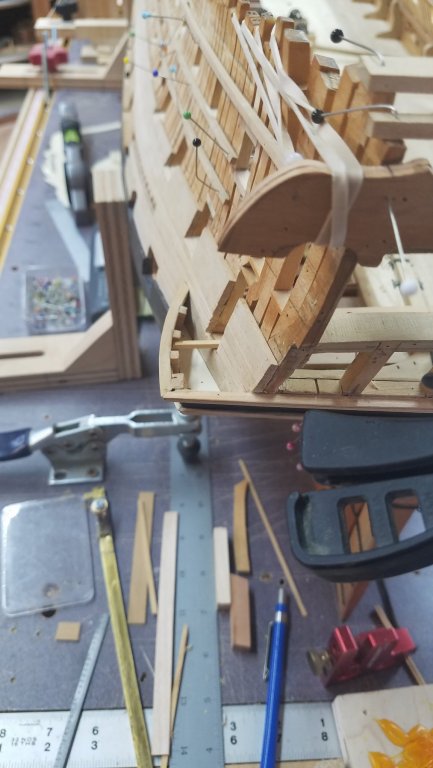
Thanks guy I take all of the info I can get. HJX there is a difference in the height of the lower stool that one has to take in to account with Alfred and that is the forward height of the lower stool when compared with her sister Warrior. If you go to the most forward upper edge on the lower stool and measure from there up to the top of the gun deck beams you get 18 inches and Warrior most forward edge is 14 inches. The stool on Warrior I do believe sets up from the wale by another 14 to 15 inches but don't hold me to that one. Believe thats what I came up with. Because of this difference you lower stool on Warrior is a lot closer to the top of the beams. I have attach a photo of Warrior stern and Alfred's stern so you can see this. I have also added another photo which shows the ceiling in the quarter gallery higher then what we are seeing making it possible to stand up.