mtbediz
-
Posts
1,362 -
Joined
-
Last visited
Content Type
Profiles
Forums
Gallery
Events
Everything posted by mtbediz
-

USS Constitution by mtbediz - 1:76
mtbediz replied to mtbediz's topic in - Build logs for subjects built 1751 - 1800
As always, you've come back with far more material than I expected, Jon. Thank you so much for your efforts. The photos and plans will be very helpful during my construction. 🙏 -
USS Constitution by mtbediz - 1:76
mtbediz replied to mtbediz's topic in - Build logs for subjects built 1751 - 1800
Thank you. -
USS Constitution by mtbediz - 1:76
mtbediz replied to mtbediz's topic in - Build logs for subjects built 1751 - 1800
Thanks, Greg. A modeler wrote in his build log that he couldn’t use the laser‑cut cap provided in the kit because it wasn’t the correct size, and that he had to make it from scratch. If that’s true, when the time comes you can also easily make the cap using this method. -
USS Constitution by mtbediz - 1:76
mtbediz replied to mtbediz's topic in - Build logs for subjects built 1751 - 1800
Thank you very much for the photos, Jon. They are wonderful and very helpful to me. Do you have a photo in your archive showing how the flying jibboom is connected to the cap? Thanks again. -
USS Constitution by mtbediz - 1:76
mtbediz replied to mtbediz's topic in - Build logs for subjects built 1751 - 1800
Spent about two hours today on the bowsprit cap. Rather than fussing with an angled square hole, I just built it up from two pieces and glued them together.


-
USS Constitution by mtbediz - 1:76
mtbediz replied to mtbediz's topic in - Build logs for subjects built 1751 - 1800
Don't worry Peter, I might have gone a bit overboard 😁 With the gratings in place, tying the Gammoning knot won’t be easy, and wrapping it around the bowsprit will be tricky too. It could also make the bumkins installation a bit of a headache. -
USS Constitution by mtbediz - 1:76
mtbediz replied to mtbediz's topic in - Build logs for subjects built 1751 - 1800
Thanks Greg. I deliberately held off installing the gratings at the bow until now, just to make it easier to secure the gammoning. Without the gratings in place, tying it wasn’t difficult at all. I’d recommend you do the same, it saves a lot of trouble. -
USS Constitution by mtbediz - 1:76
mtbediz replied to mtbediz's topic in - Build logs for subjects built 1751 - 1800
I’m back at the shipyard, continuing from where I left off. I’ve mounted the bowsprit in place and secured the gammoning. As mentioned earlier, I decided to use rope instead of chain. After that, I glued the steps onto the bowsprit. Finally, I prepared the fore stays and connected them to the hearts on the bowsprit.


-
USS Constitution by mtbediz - 1:76
mtbediz replied to mtbediz's topic in - Build logs for subjects built 1751 - 1800
Hi Peter. Now that only the masts, spars, and rigging remain, there aren't many options left. Since you won't be bringing any machinery, it seems you won't have much opportunity for woodworking. You can complete the dead eyes and eyebolts on the fighting tops, and prepare the bobstay and shroud collars on the bowsprit. If you're unhappy with the shape of the blocks that come with the kit, you can shape them with files and sandpaper, you can strop the blocks as you said or you can just do R&R as the woodartist suggested. -
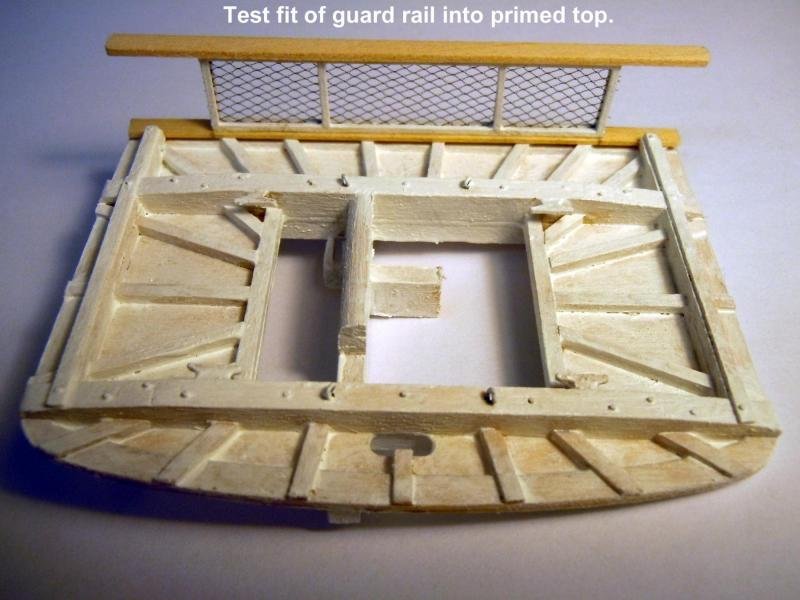
These are very thin and fragile. I'll make the stanchions for the railing from square brass rods if I can find. If not, I'll settle for round brass rods. They won't be noticeable because I'll paint them all white. Brass stanchions are a suitable material for your overall concept. You could consider using them on the railings as well.
-
The details look fantastic, Frank. It's a great stroke of luck for us Conny builders that Conny is still with us today and that countless images of her exist online.
-
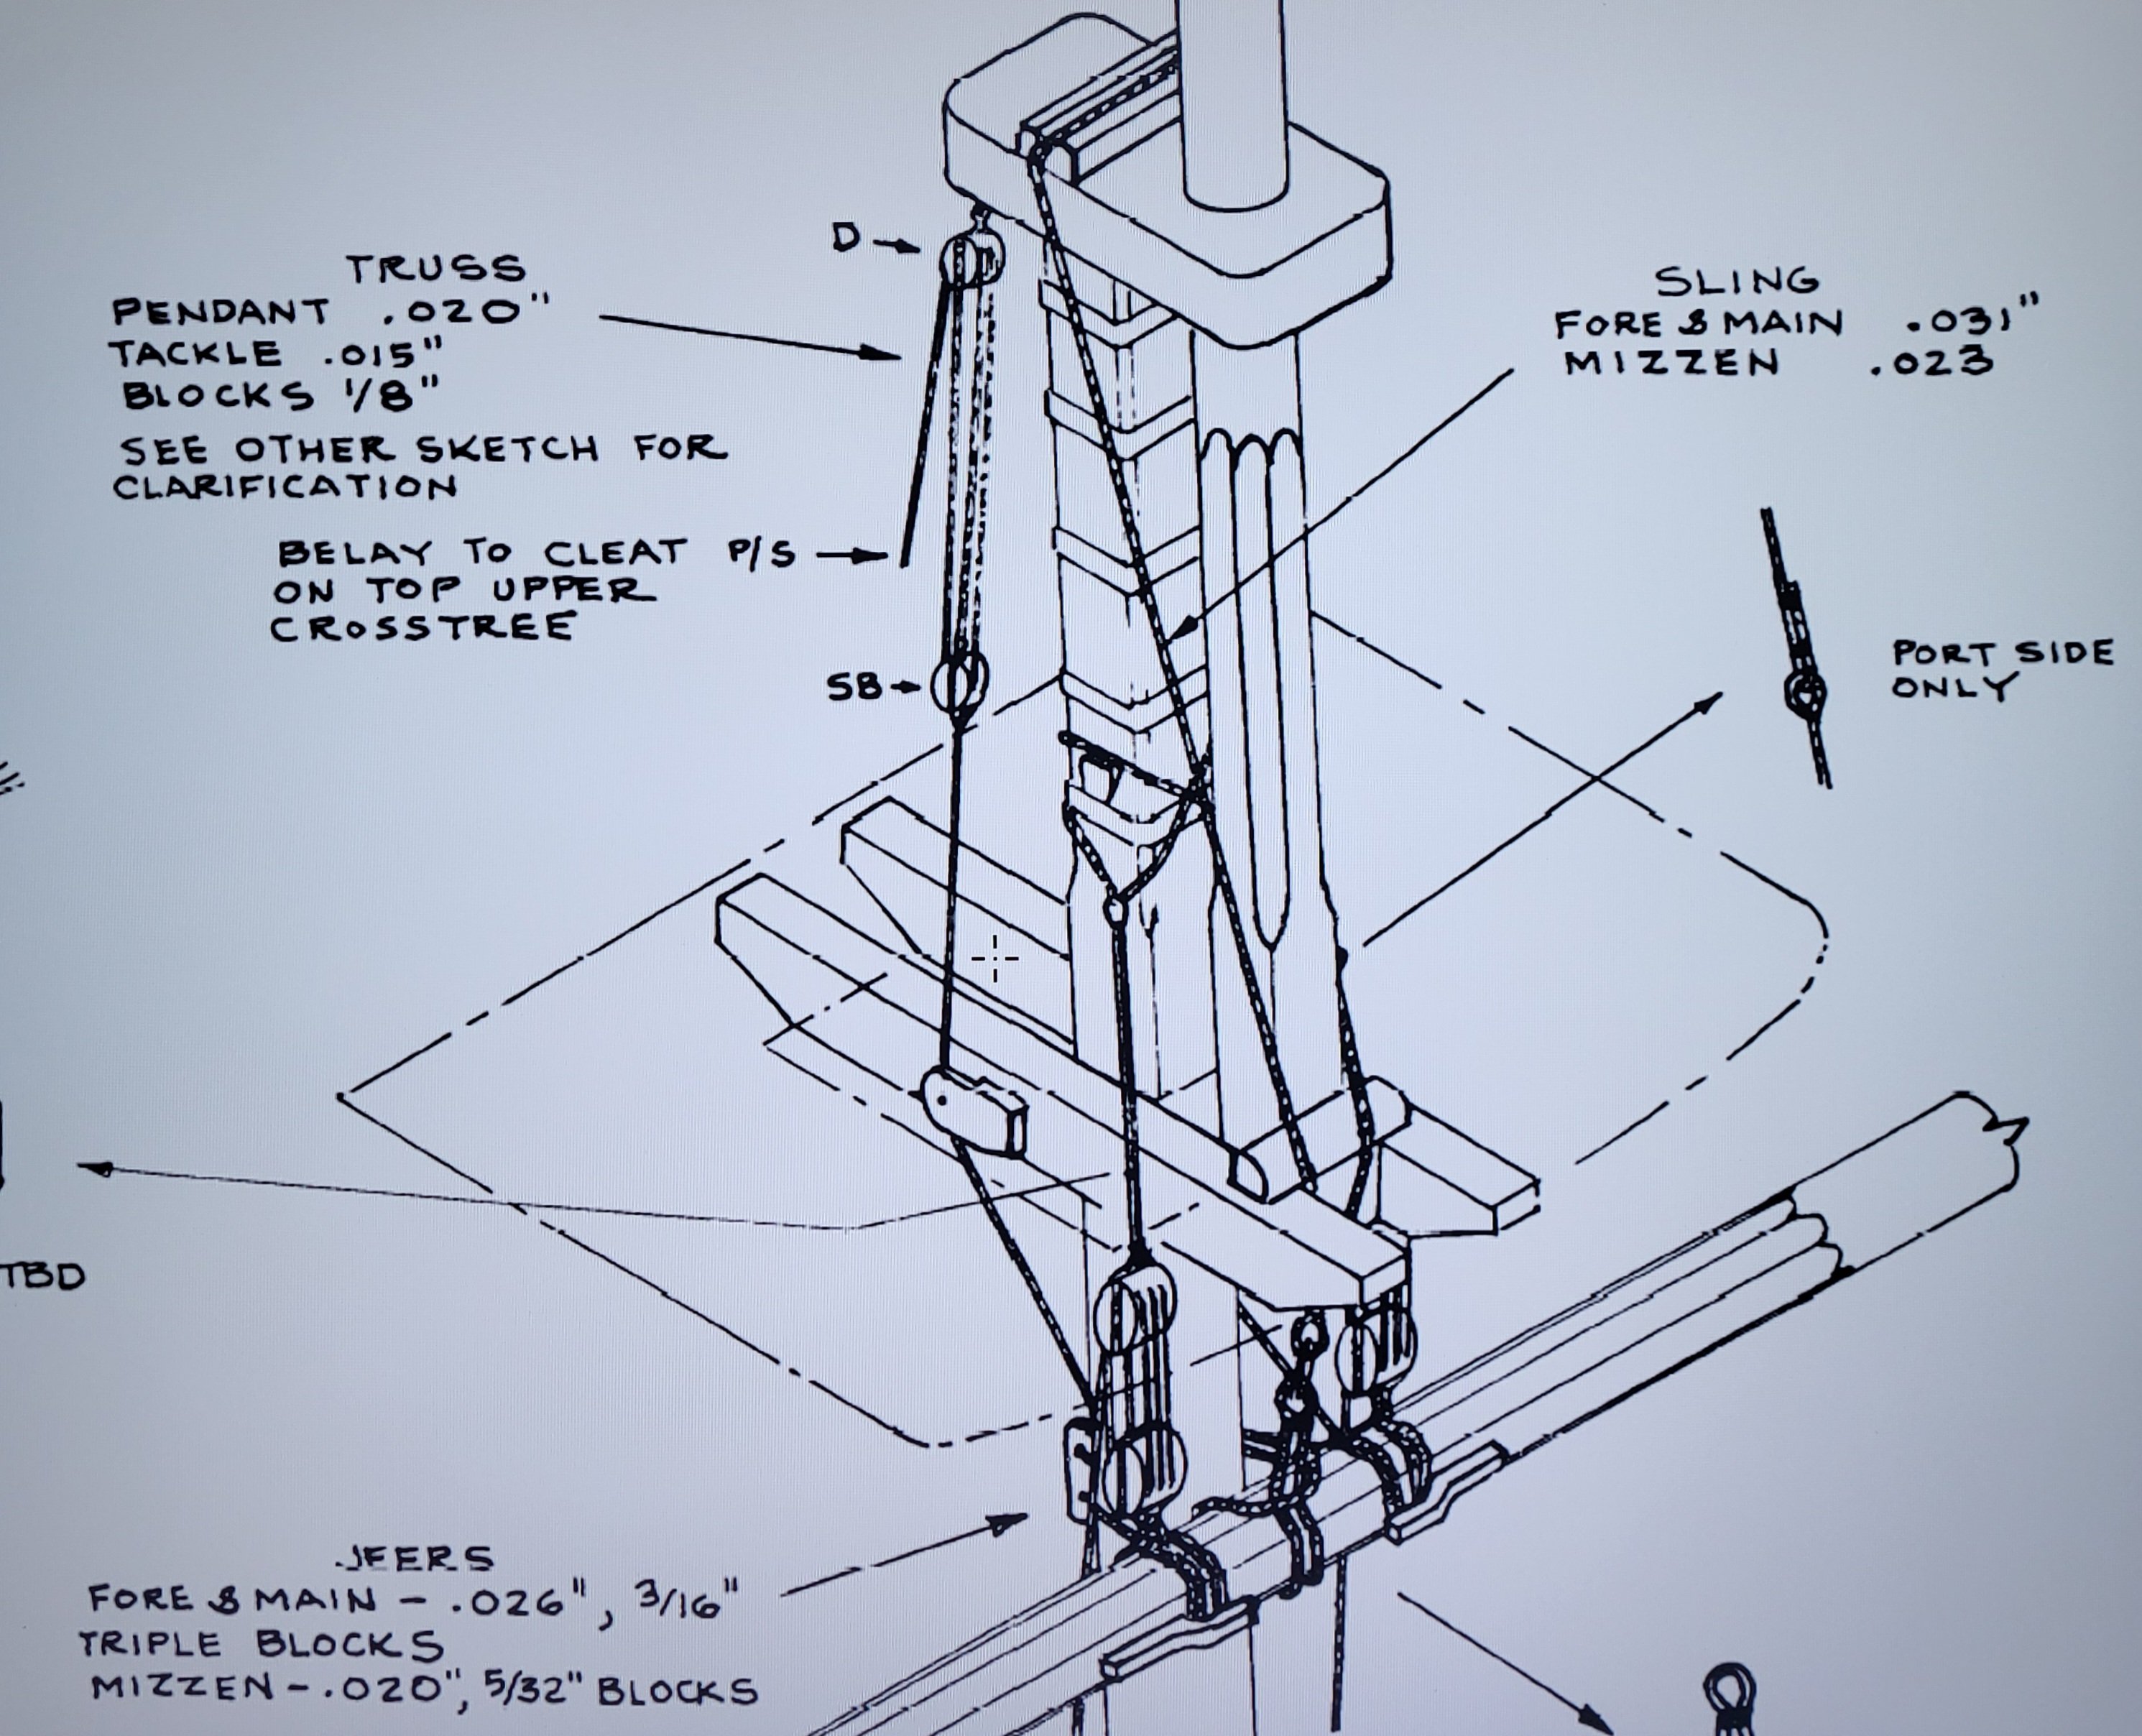
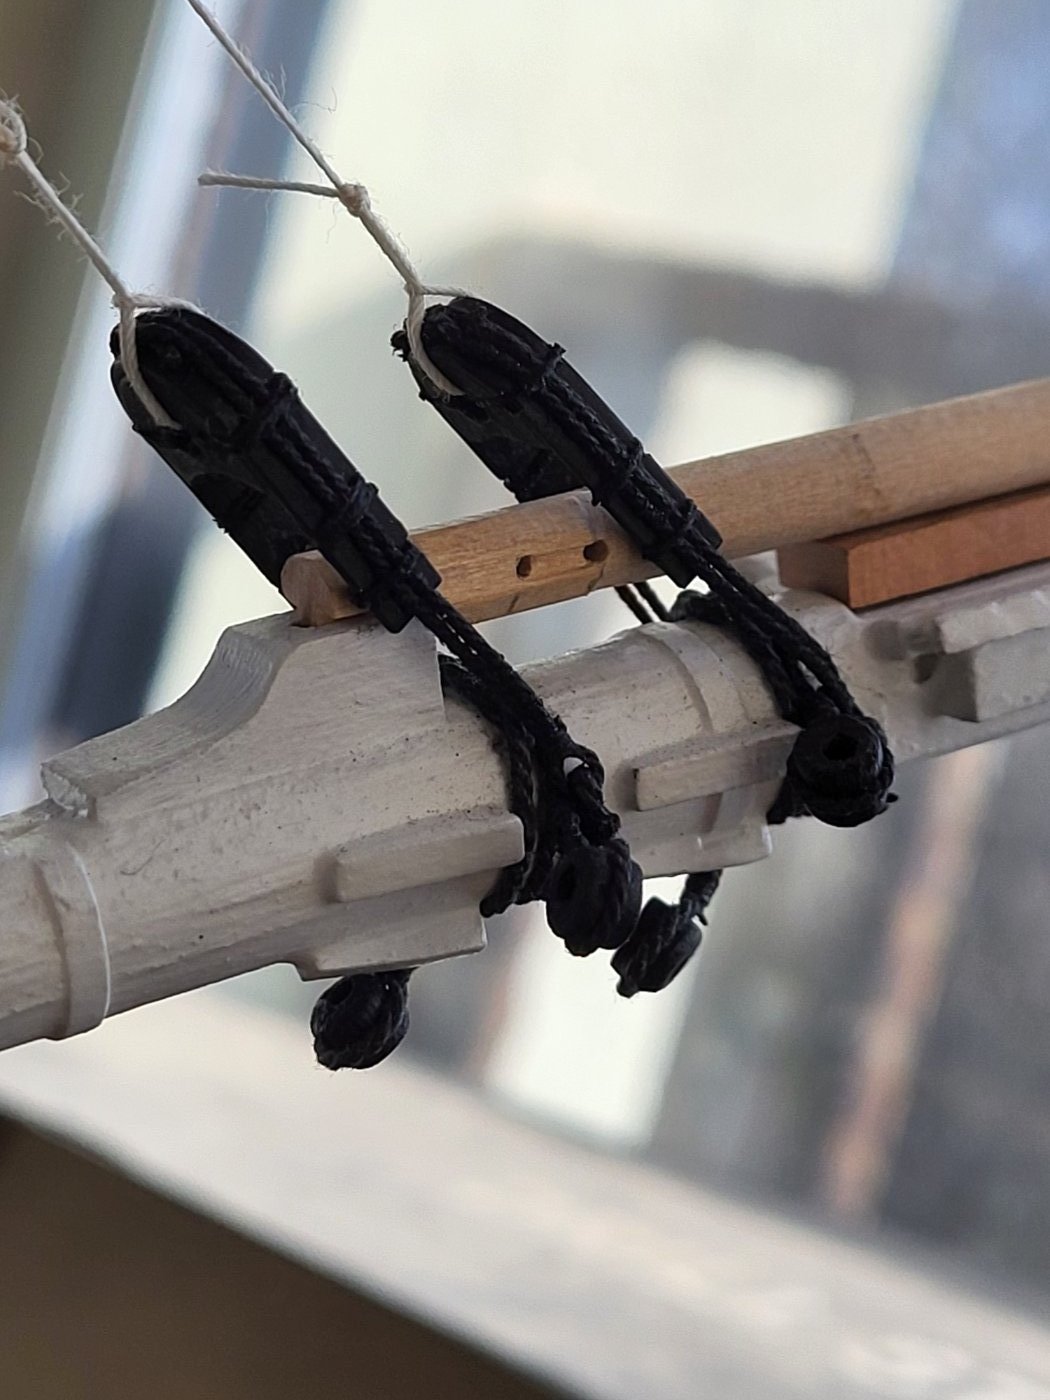
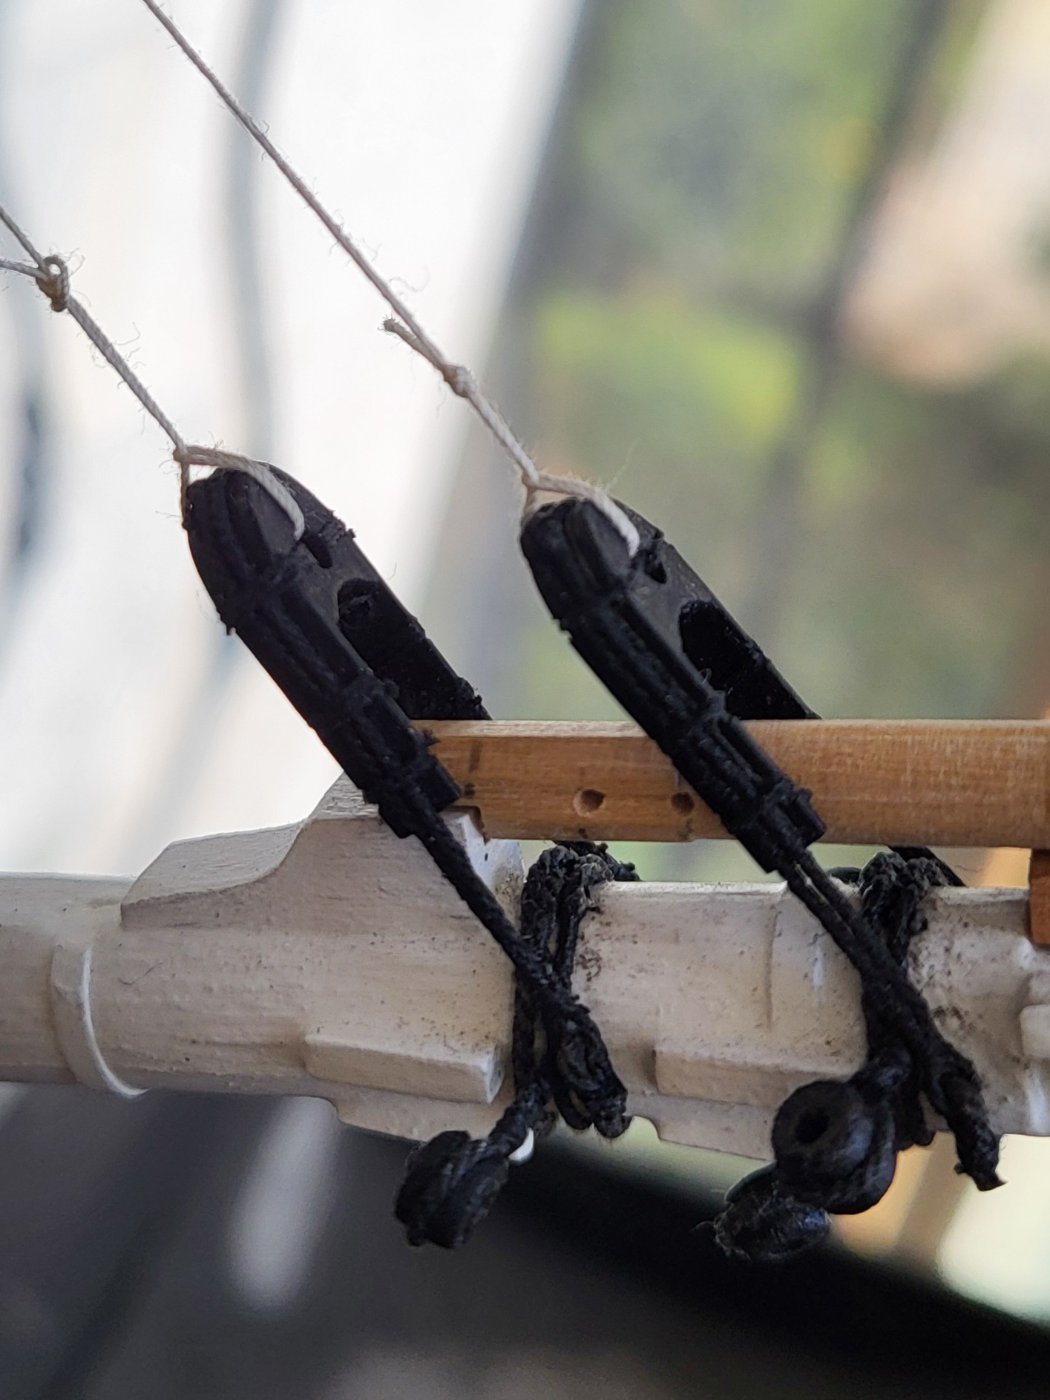
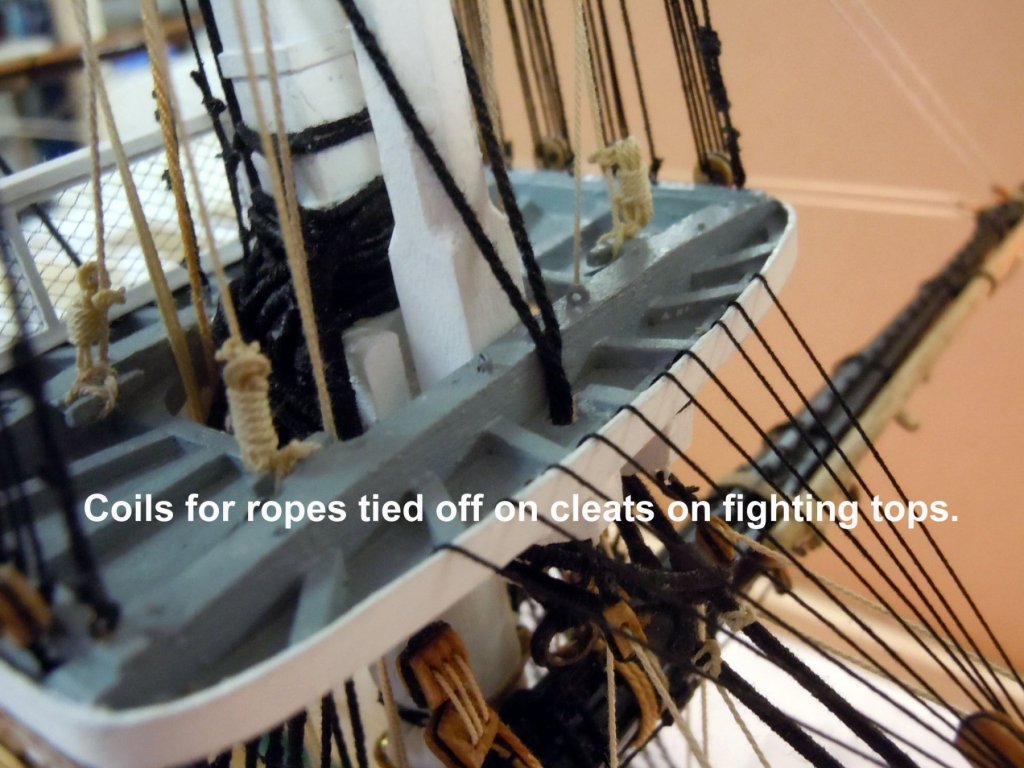
I figured out which ropes are attached to two of these cleats. If you're adding yards to the masts, the truss pendant tackle ropes for those are attached to these cleats.

-
Xken's ship is one of the rare Connys with complete rigging. Ken has attached some ropes to these cleats. I haven't yet discovered where these ropes came from, but their colors suggest they're part of running rigging.
-
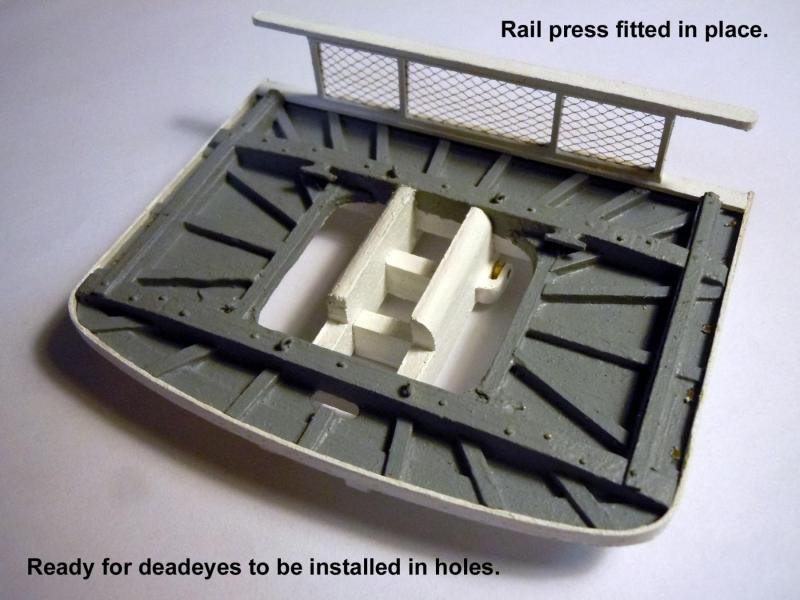
I apologize if I caused any confusion. Actually, I'm following Xken's concept, and my fighting tops will also have that trailing edge, but I'll mount them last, along with the guard rail, after the rigging is finished because I don't want it to prevent me from reaching the fighting top while I'm rigging. I took these photos from Xken's log.
-
USS Constitution by mtbediz - 1:76
mtbediz replied to mtbediz's topic in - Build logs for subjects built 1751 - 1800
Thank you Jon. My daughter and grandkids are coming to stay with us for the next two weeks. I probably won’t be able to work on the ship during that period, but I’ll keep checking in on the forum. -
USS Constitution by mtbediz - 1:76
mtbediz replied to mtbediz's topic in - Build logs for subjects built 1751 - 1800
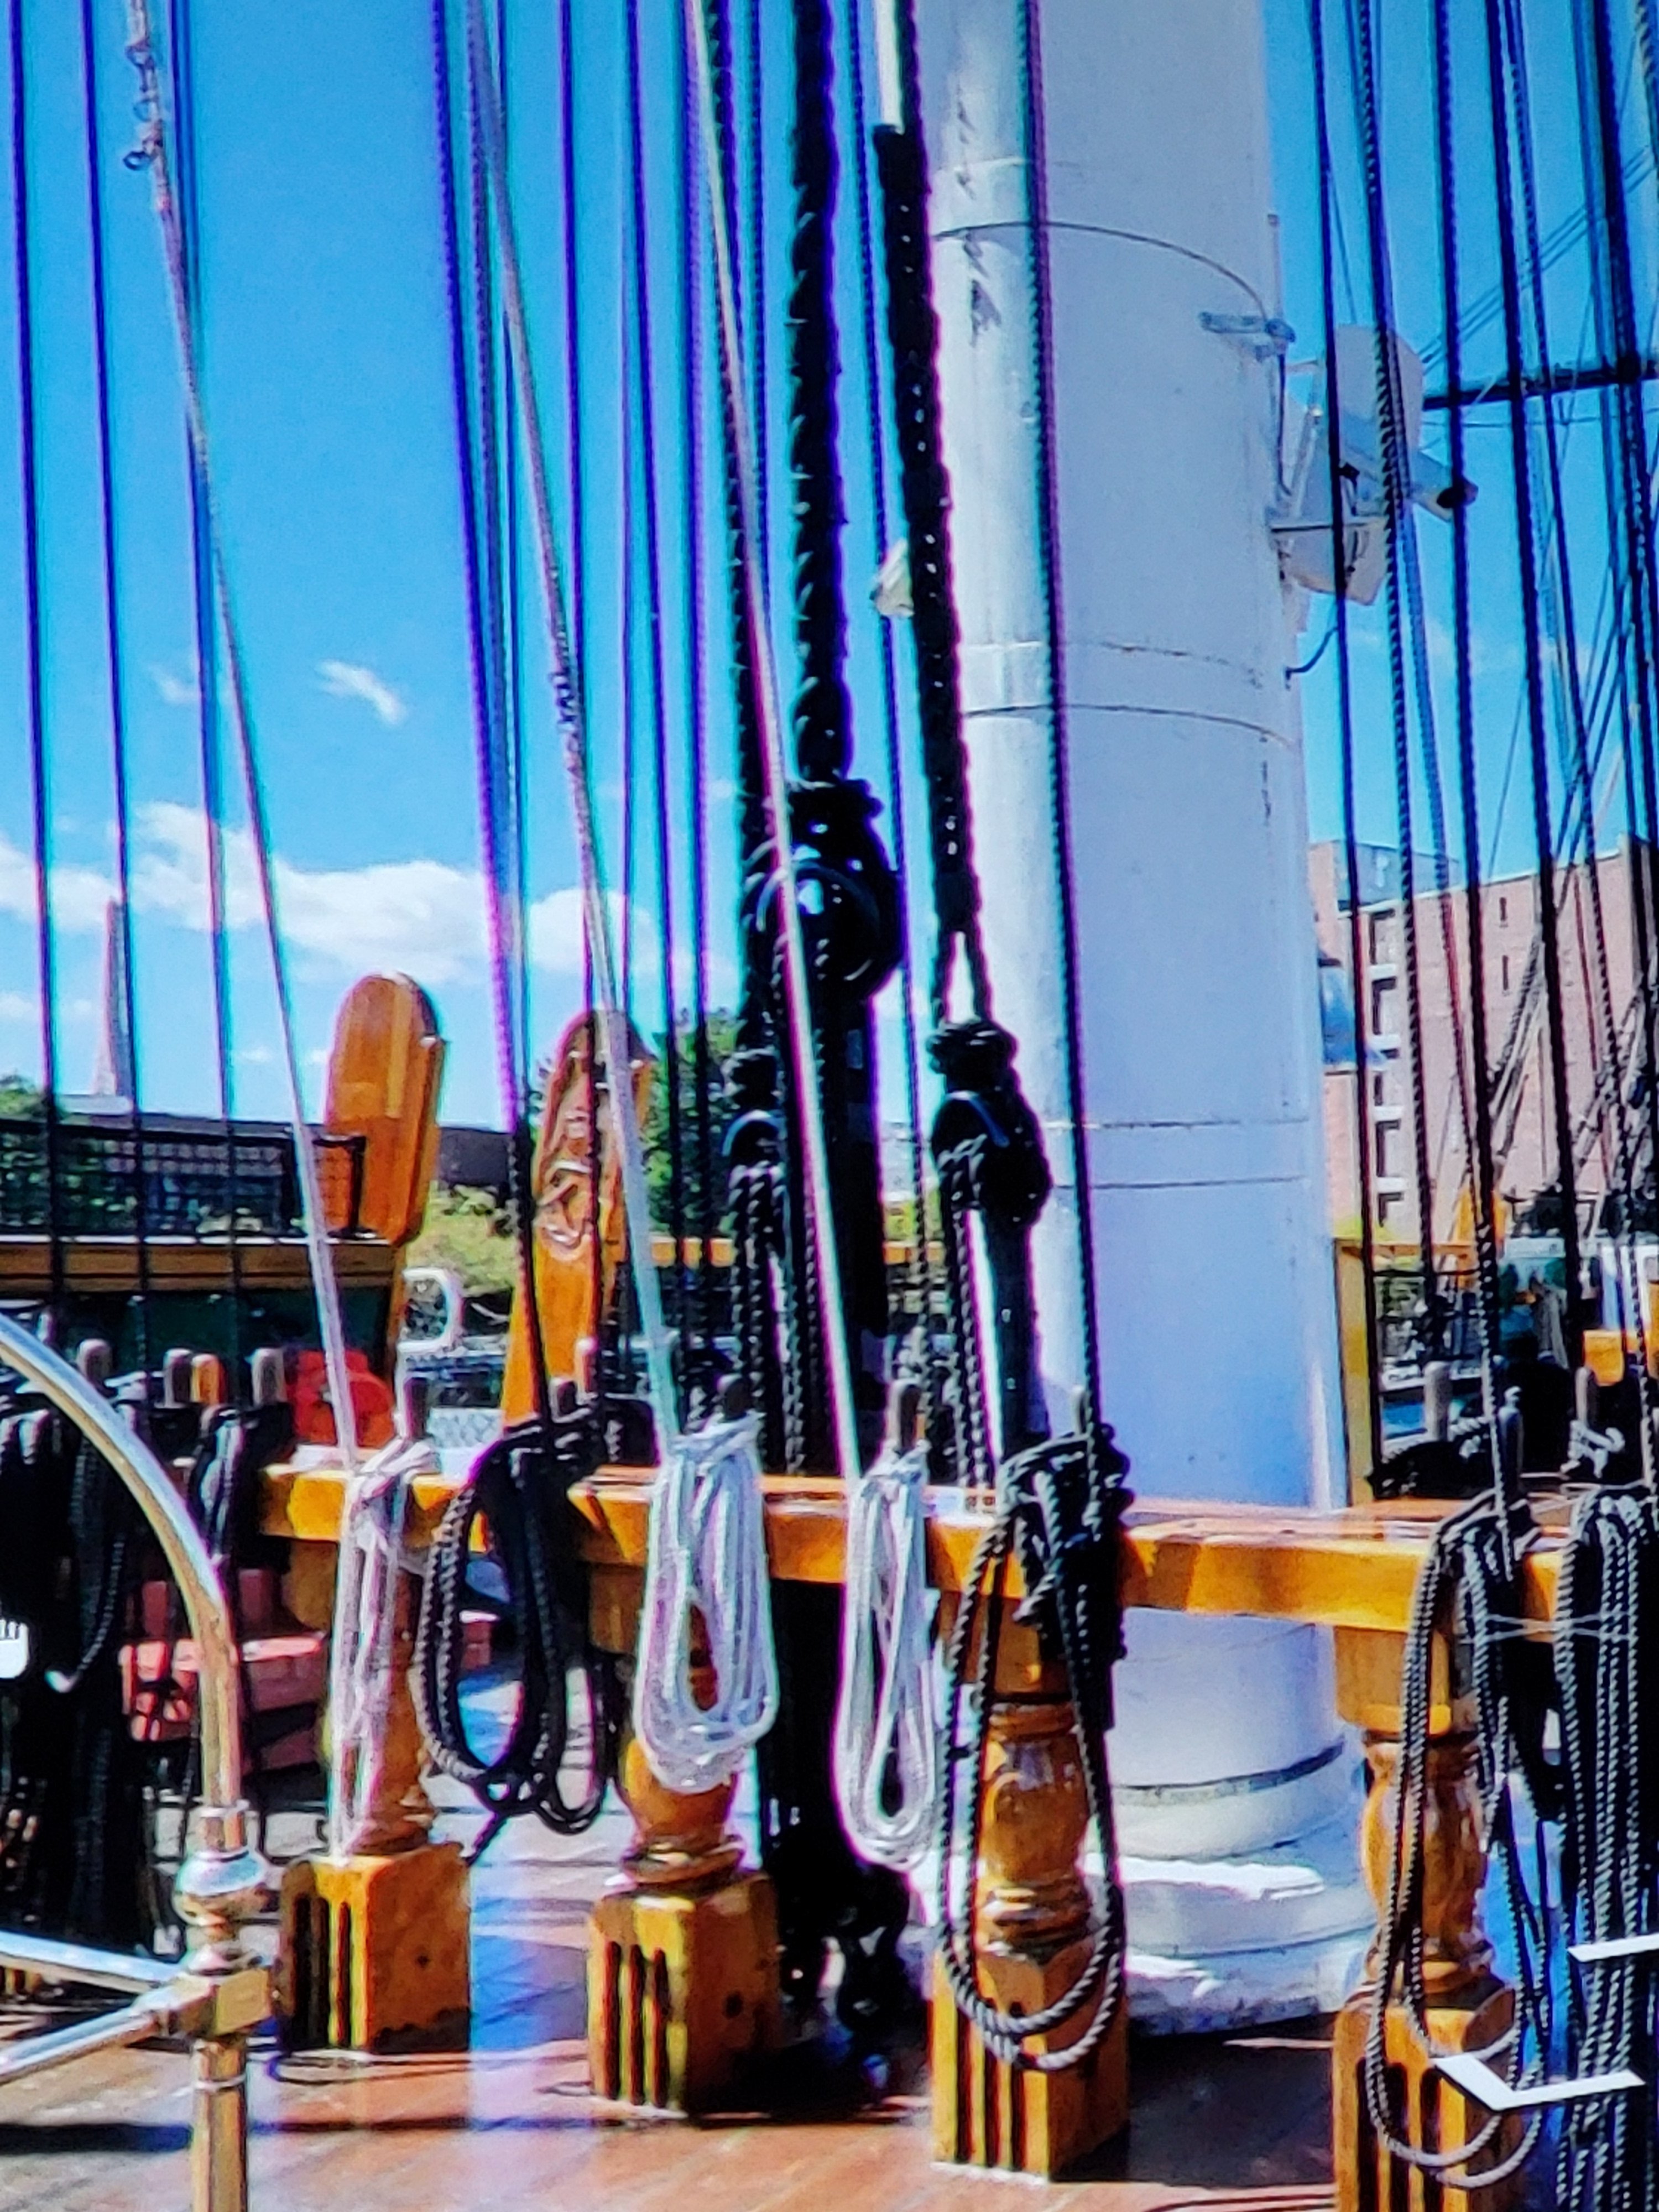
Today I rigged the bobstay collars, shroud collars, and fore stay hearts on the bowsprit. The white ropes are temporary. By the way, Greg was right; when I looked at the photos more closely, I noticed that the hearts were black everywhere, so I painted them black too. Actually, the insides are supposed to be white, but since I'm not very good at painting, I painted them all black.

-
USS Constitution by mtbediz - 1:76
mtbediz replied to mtbediz's topic in - Build logs for subjects built 1751 - 1800
Thank you Jon! I couldn't sleep last night thinking about how to prevent these from breaking, but I finally found a solution. I would be grateful if you could provide the source link. -
USS Constitution by mtbediz - 1:76
mtbediz replied to mtbediz's topic in - Build logs for subjects built 1751 - 1800
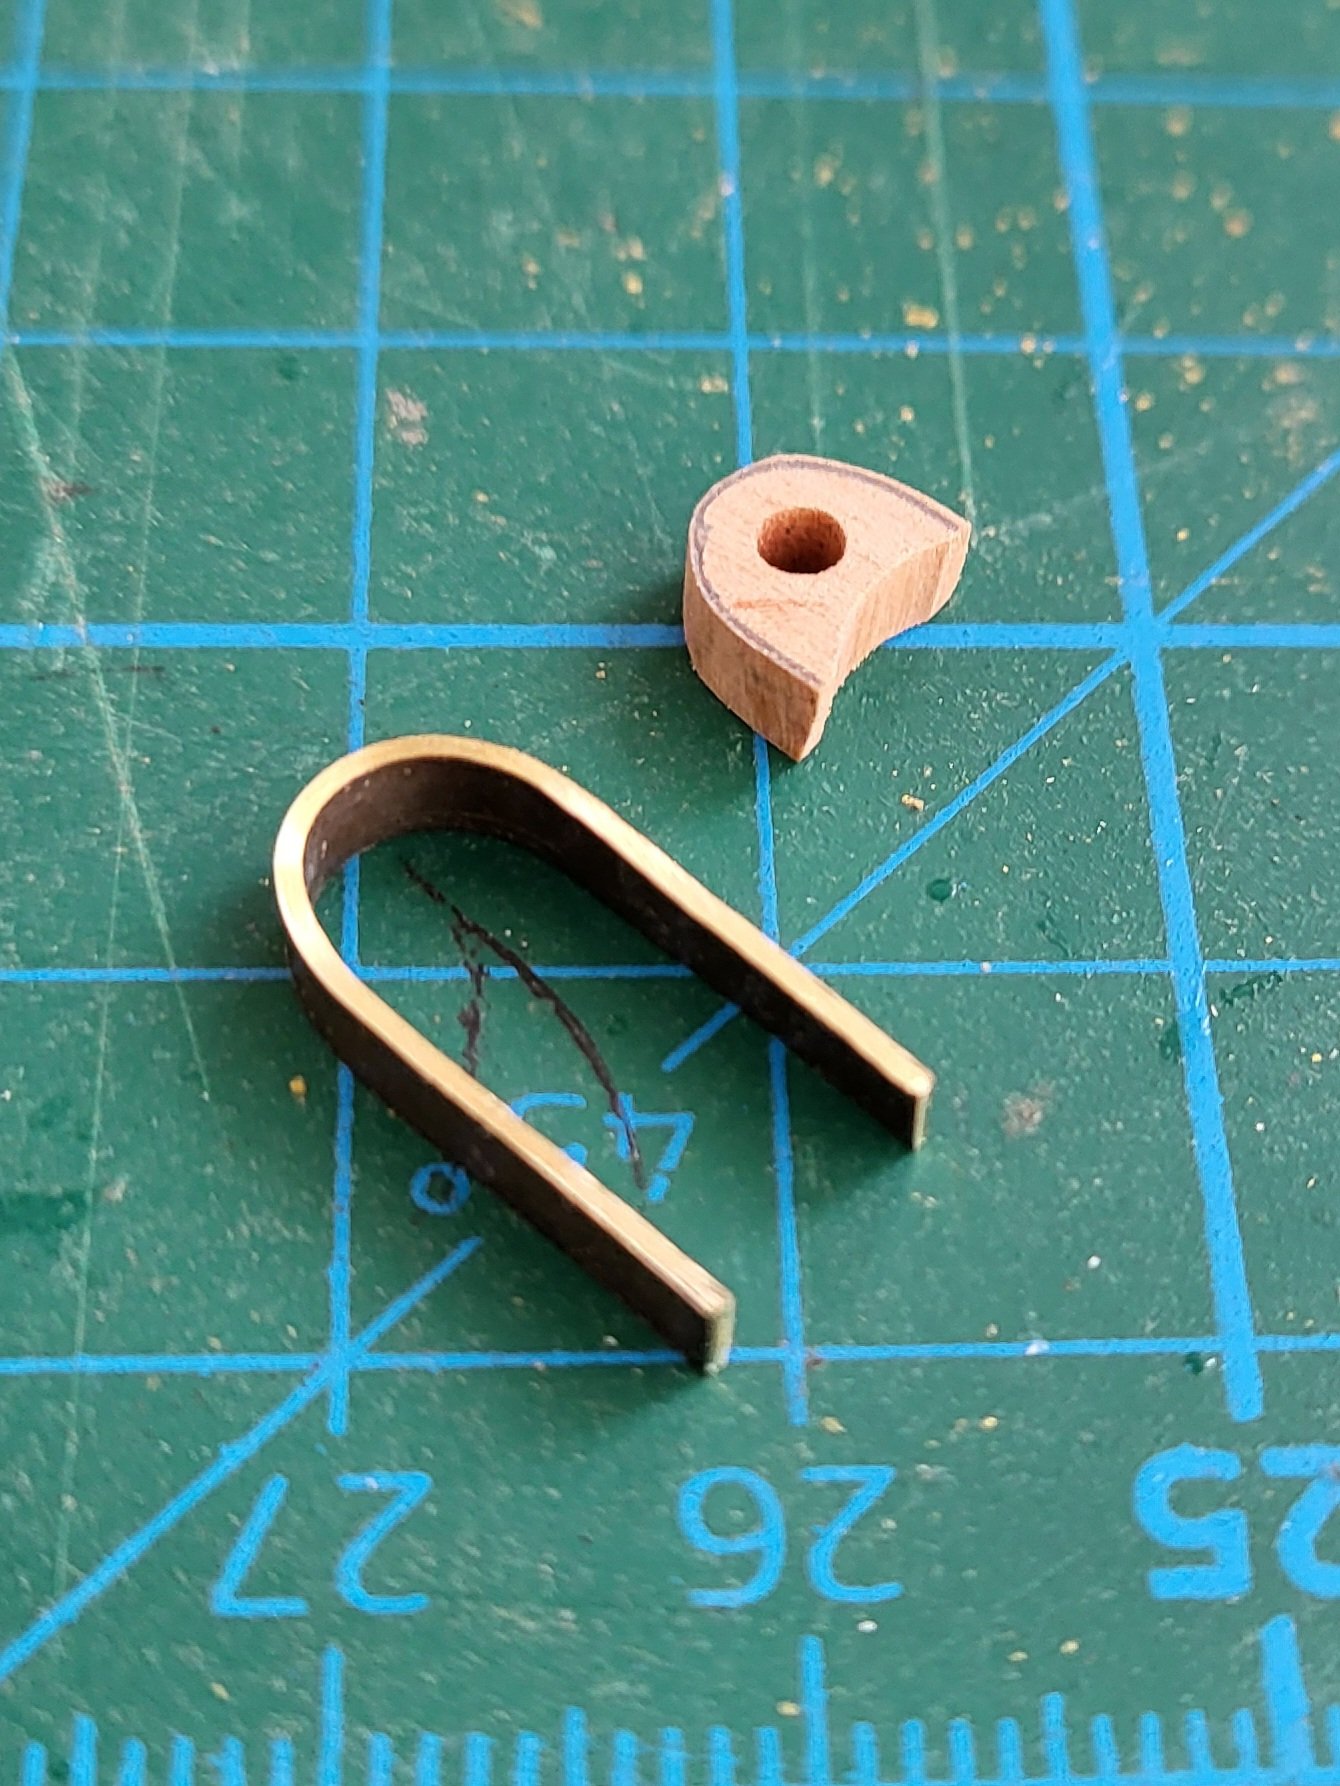
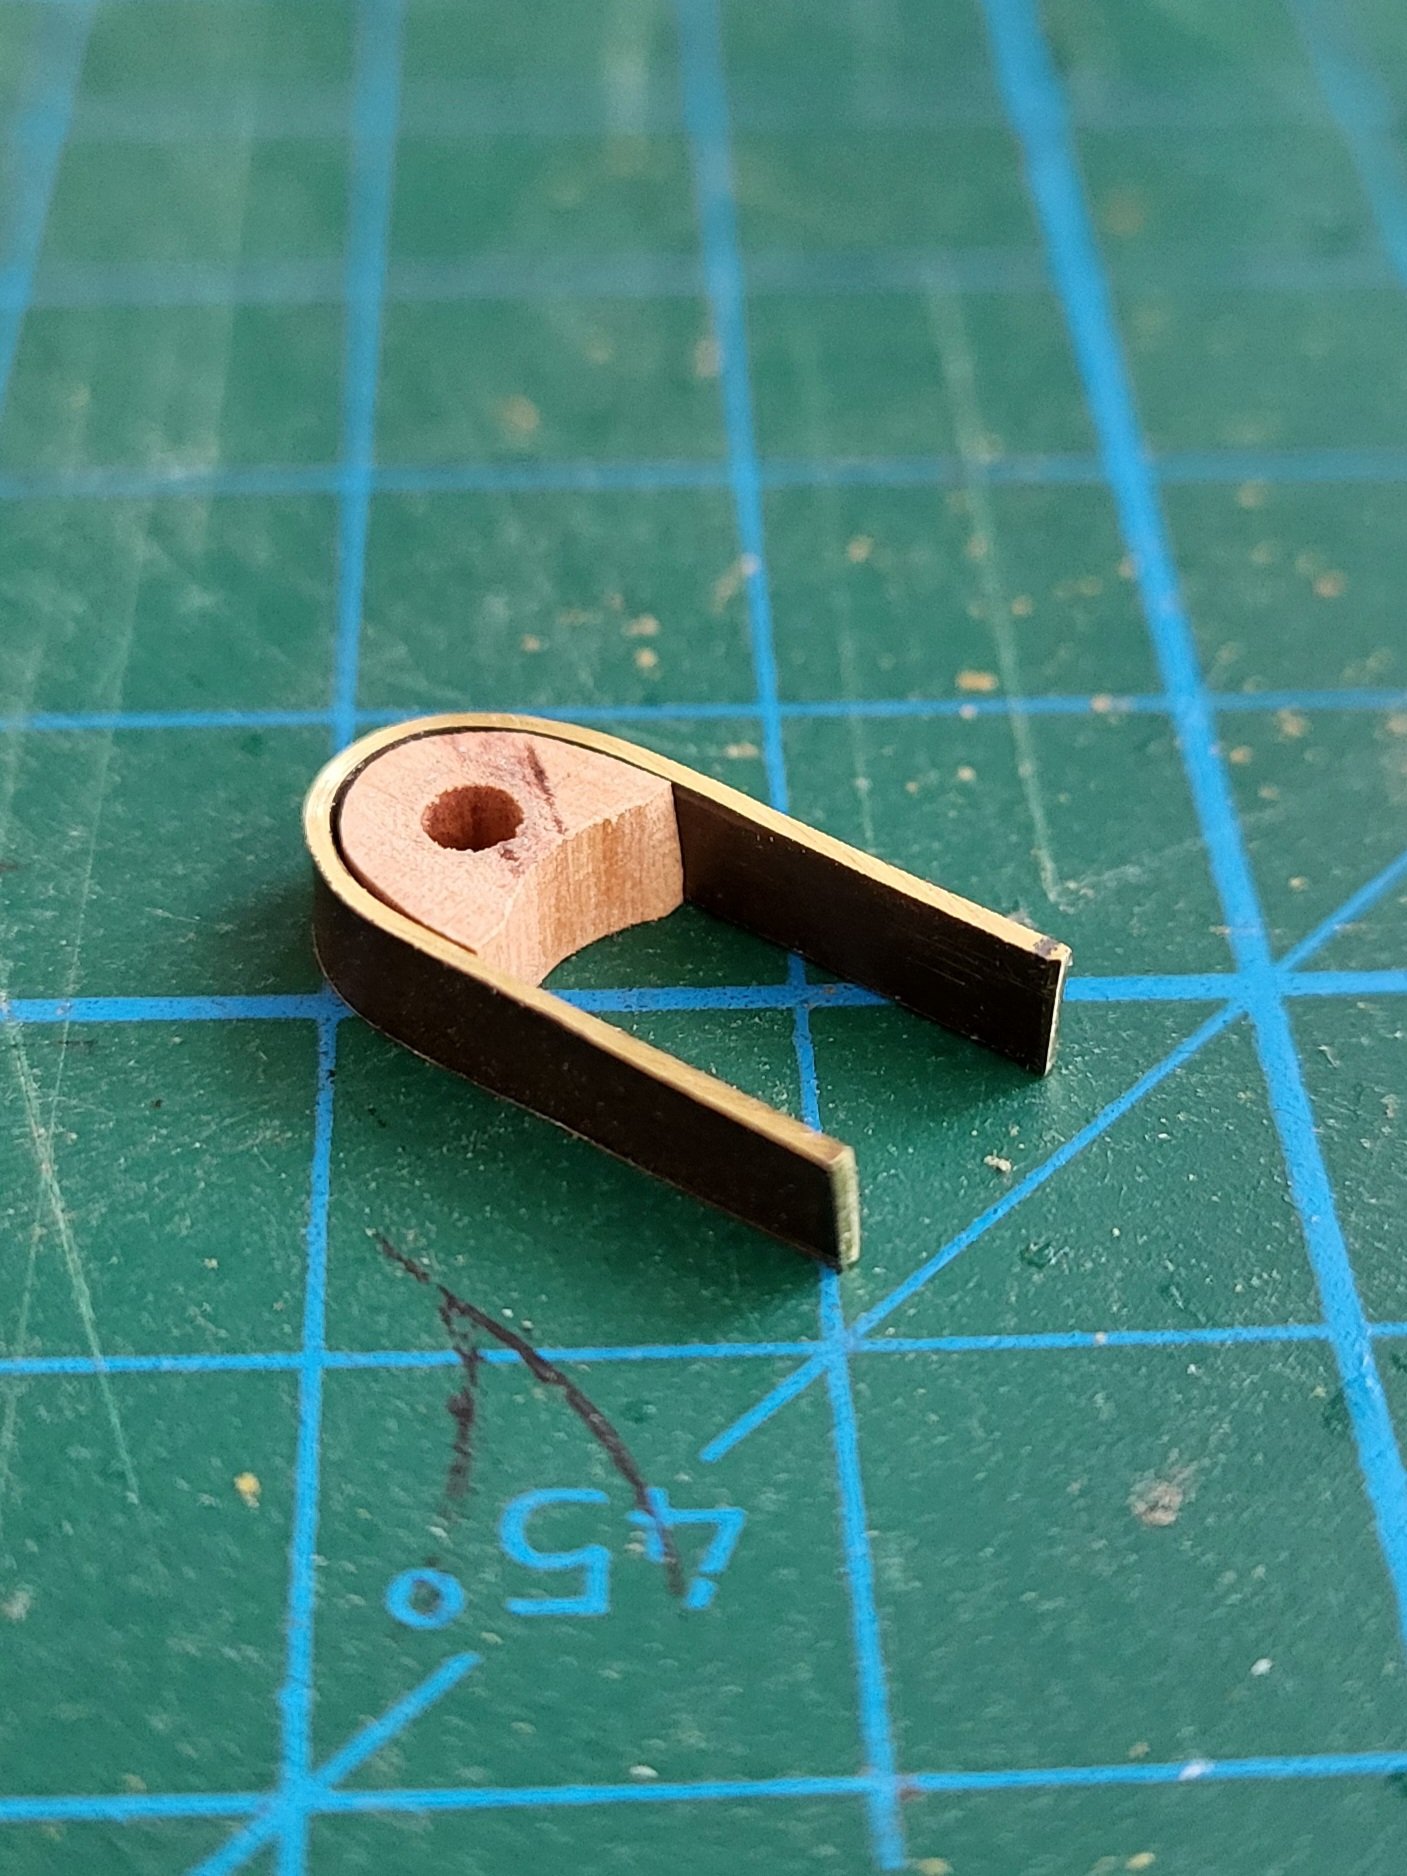
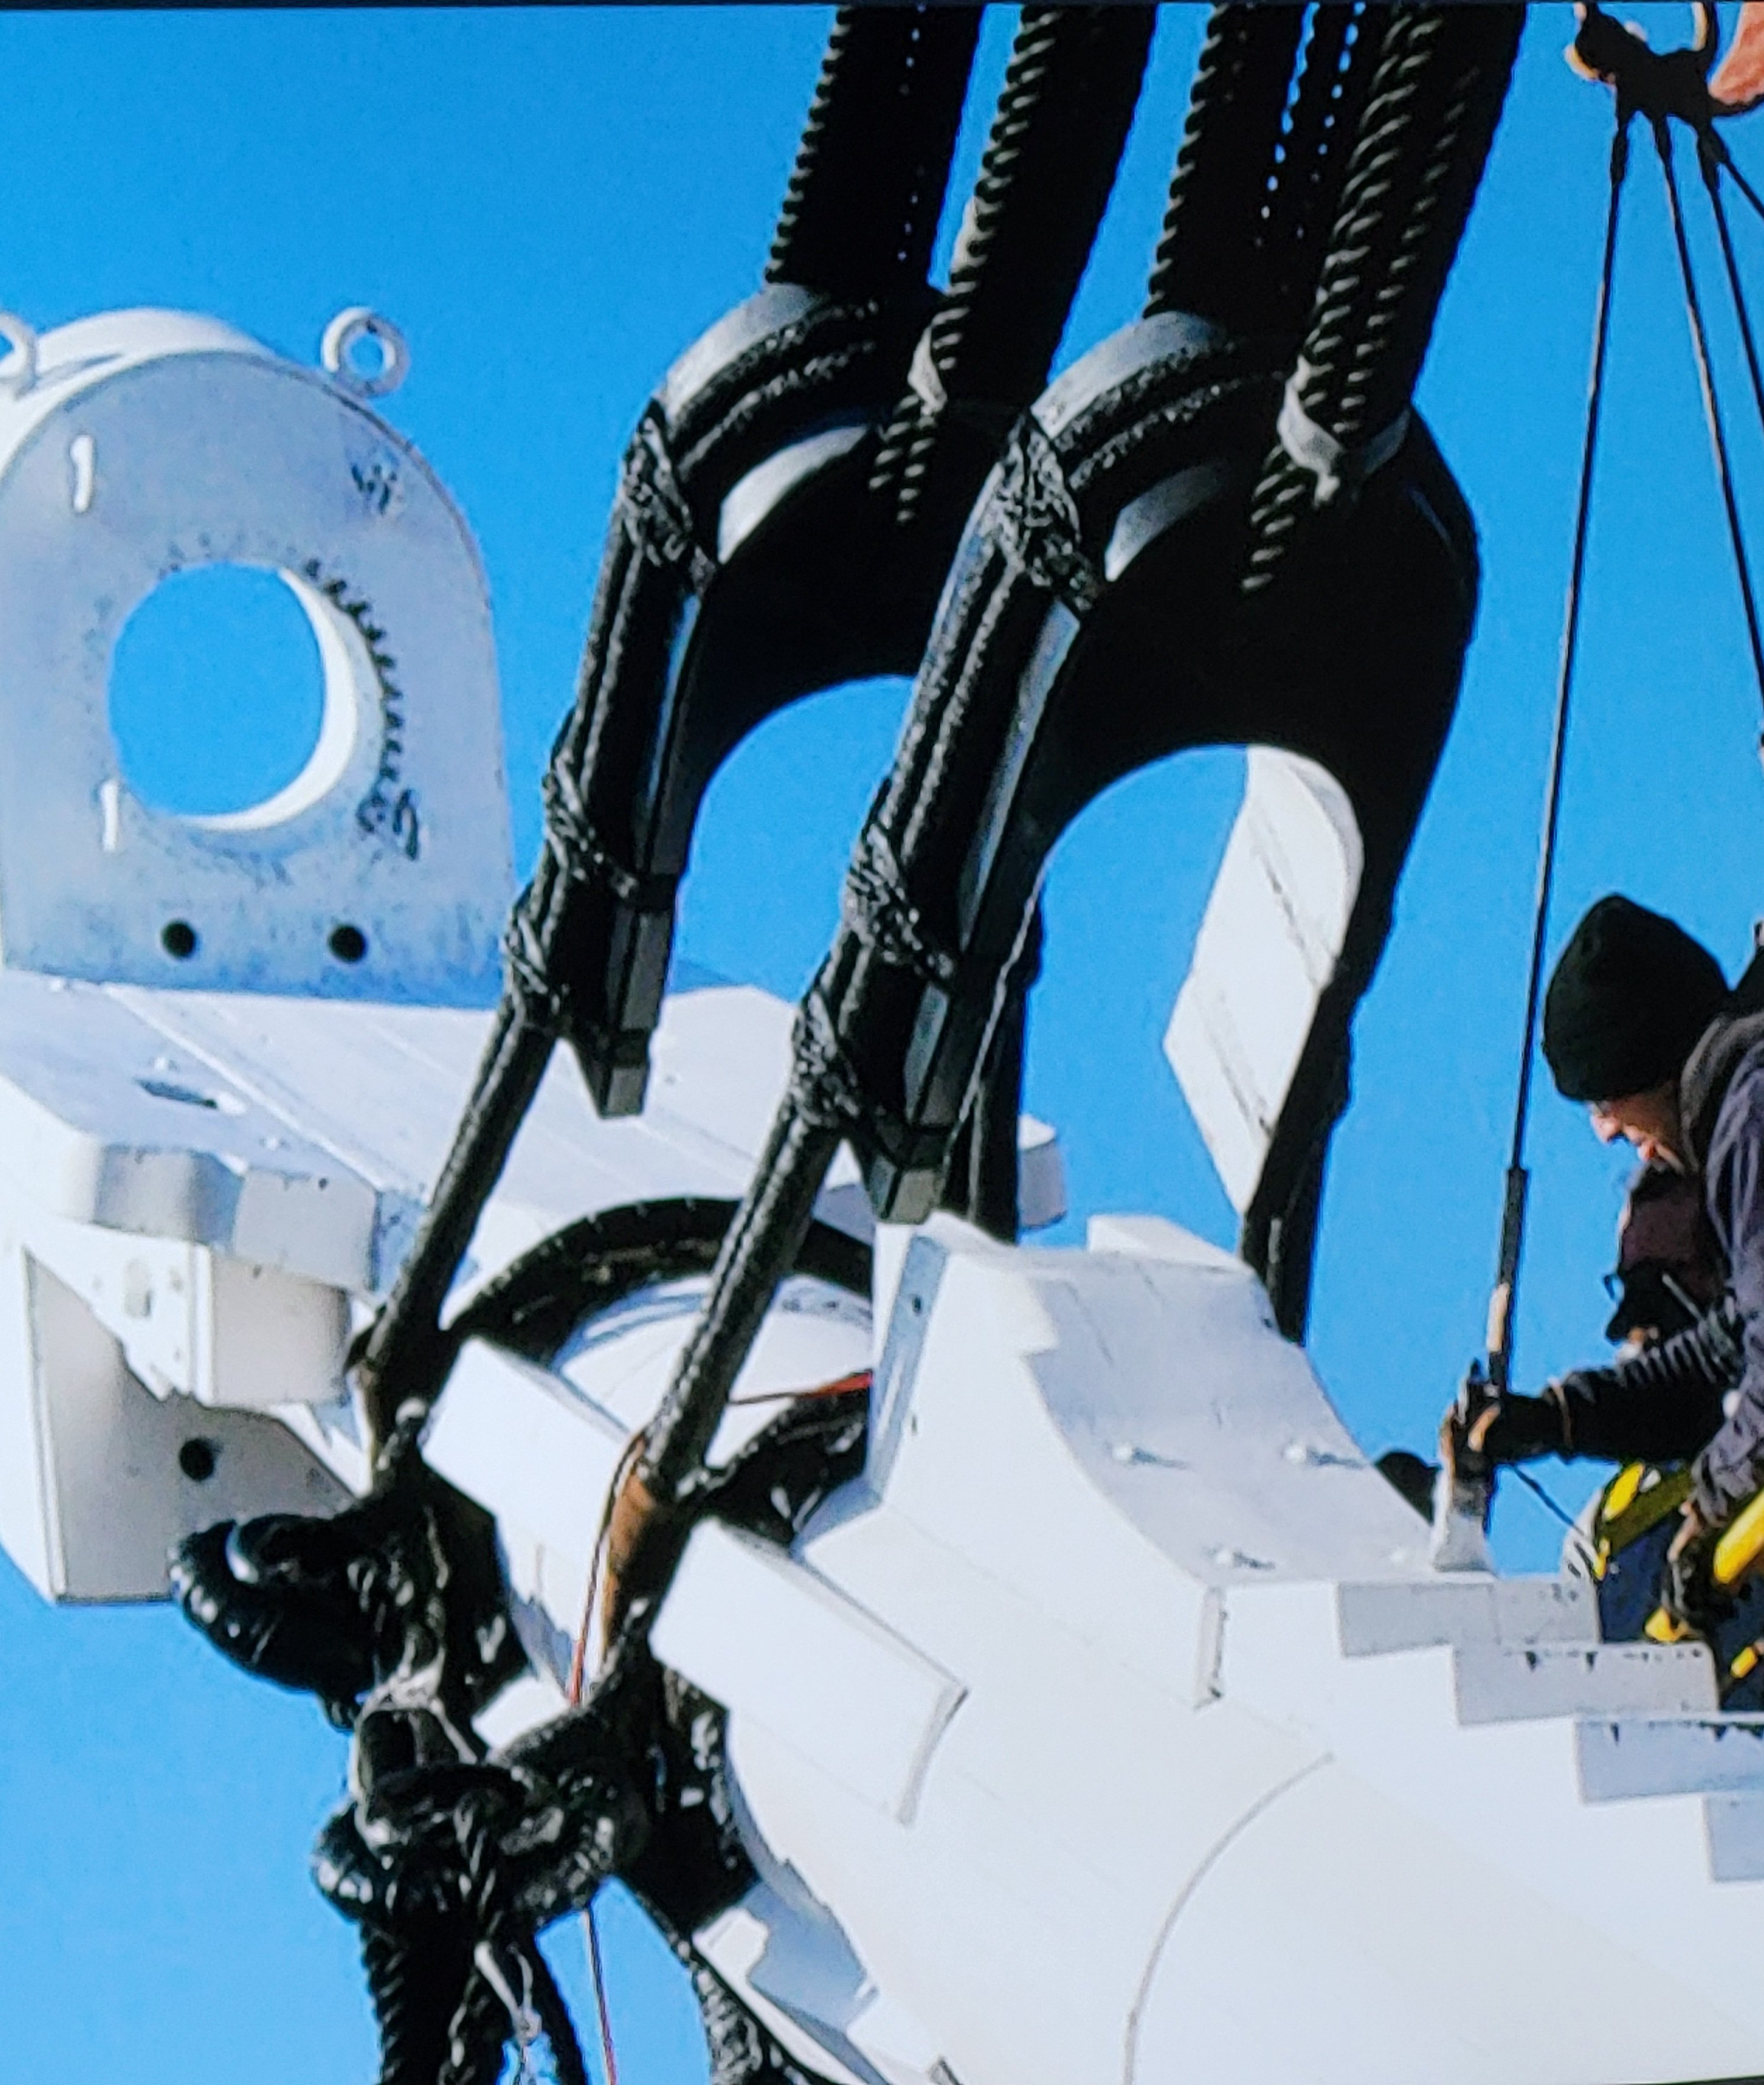
Thank you, Greg! The brass sheet I used is 0.7 mm thick and 3 mm wide. I wrapped the brass strip around a round rod with a 6 mm diameter. As you know, I’m modeling the ship as it appears after the 2015 restoration, and for reference I usually rely on the interior visual tour available on Google Maps. Since the open hearts are shown in white there, I’ll be painting mine white as well. -
USS Constitution by mtbediz - 1:76
mtbediz replied to mtbediz's topic in - Build logs for subjects built 1751 - 1800
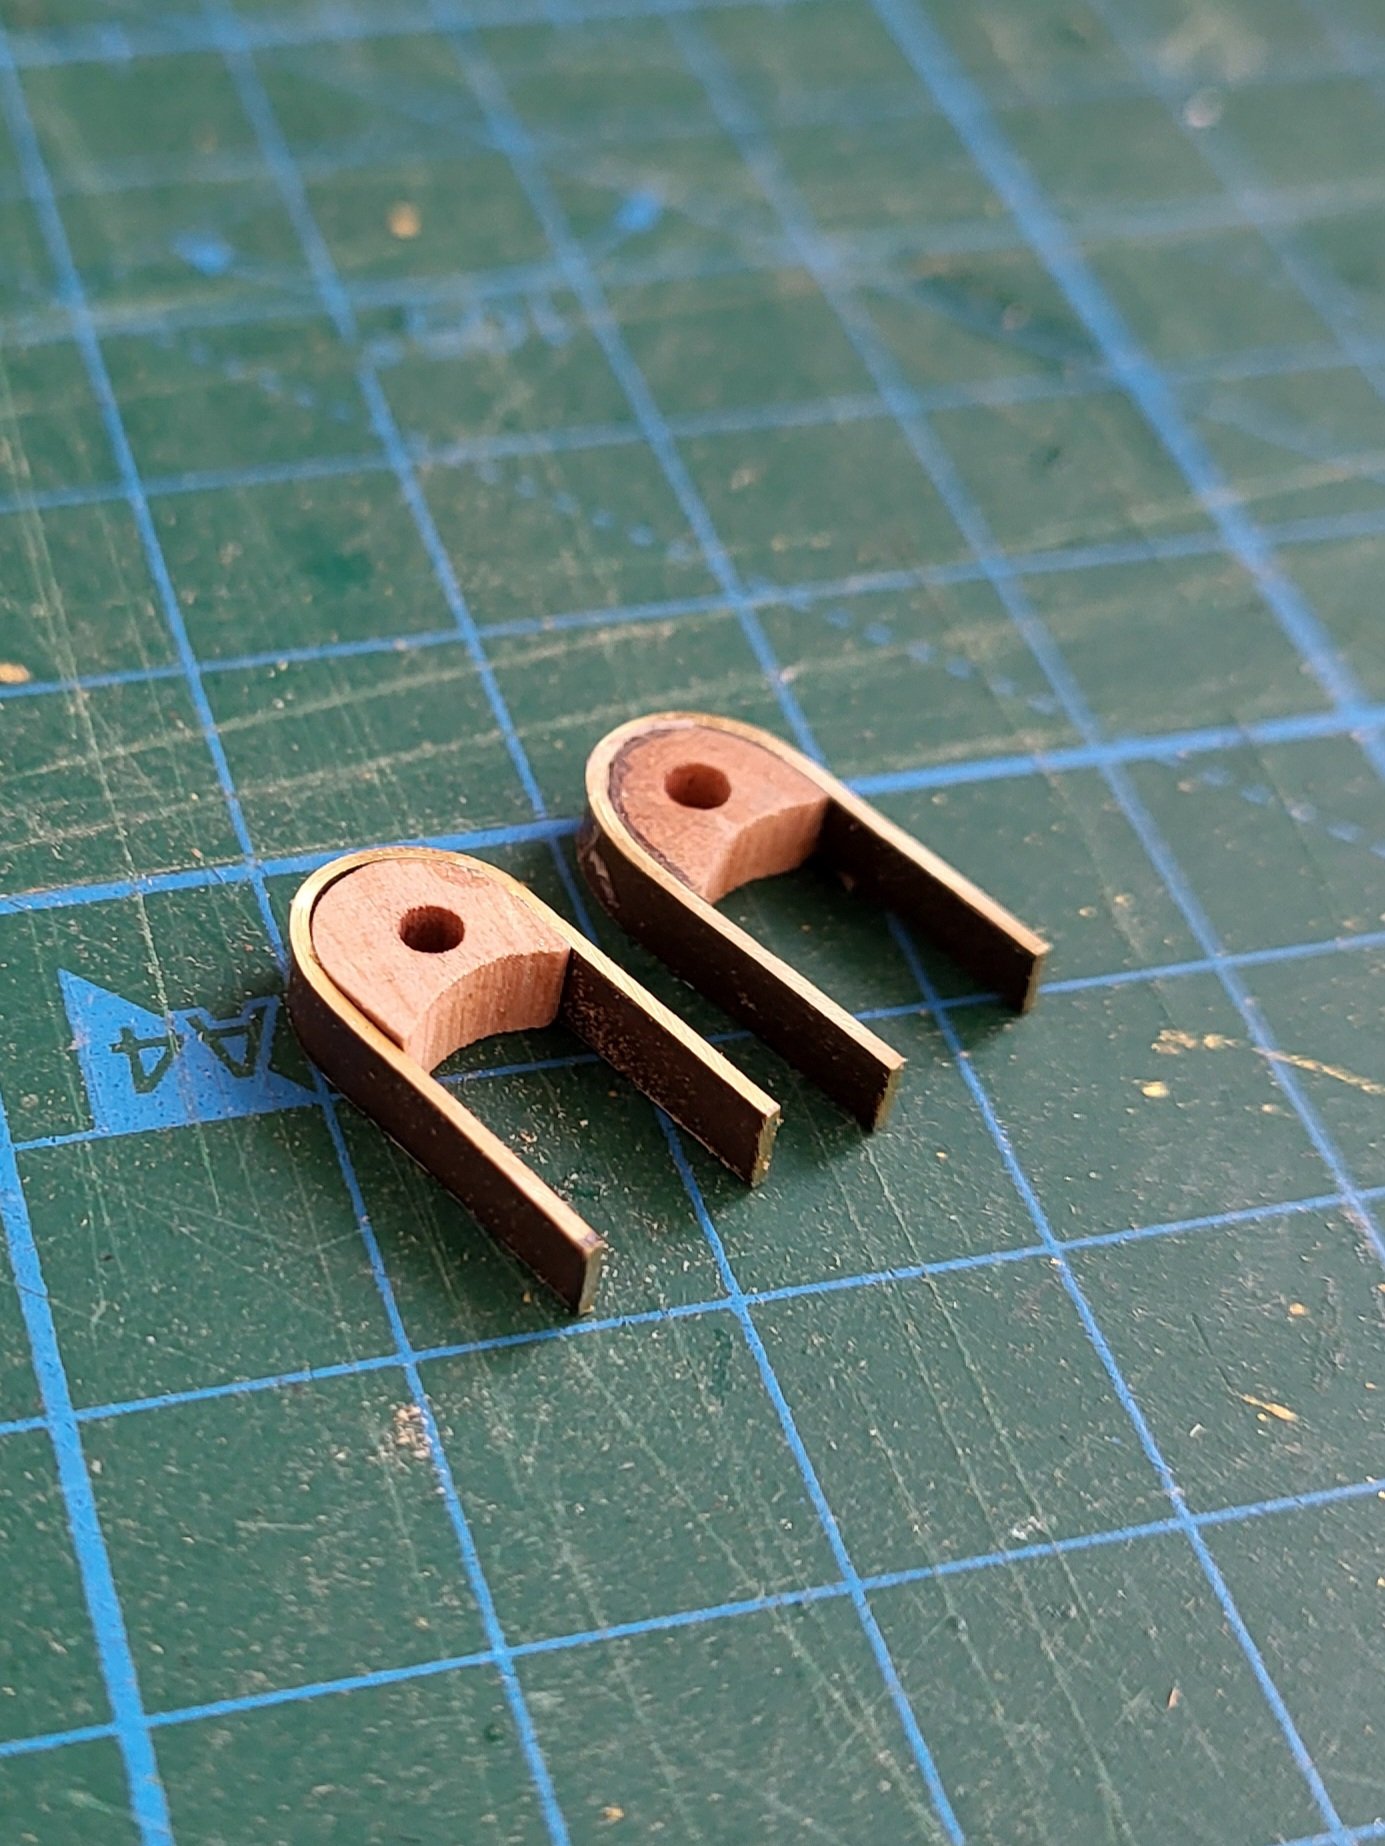
I’m currently working on the open hearts that connect the fore stays to the bowsprit, using photos of the actual ship as reference. At first, I tried making them entirely out of wood, but the side extensions were so thin that they kept breaking during construction. So I abandoned that approach and came up with a hybrid solution, which turned out really well. This hybrid structure combines brass sheet and wood. Once the open hearts are painted white, the mix of materials is practically invisible—unless you look very closely with a magnifying glass.


-
Nice work on the chafing fish, Peter! Just a heads-up—the space between the main mast and the fife rail looks pretty tight in the photo. You’ll need room there for three stays coming off the mizzen mast, which get tied down to the deck with bullseyes. On my build, that gap was really small too, and I had a tough time securing the mizzen stays. Hopefully you haven’t glued the fife rails yet. Also, before you set the masts in place, it’s a good idea to get the eyebolts around them installed first.


-
Perfect work Peter. She is going to be a very beautiful ship.
-
That was a good decision, Greg, you now have a much more comfortable workspace on the gun deck.
-
That was a good decision, Greg, you now have a much more comfortable workspace on the gun deck.
-
USS Constitution by mtbediz - 1:76
mtbediz replied to mtbediz's topic in - Build logs for subjects built 1751 - 1800
Yes friends, after buying and starting to use the milling machine, I began to enjoy this hobby so much more. Yes, it’s a bit of an expensive investment, but it’s worth every penny. Also, once you own this machine, don’t forget that you won’t be spending tons of money on kits or accessories anymore. In the long run, your money will stay in your pocket. -
USS Constitution by mtbediz - 1:76
mtbediz replied to mtbediz's topic in - Build logs for subjects built 1751 - 1800
Jon, Peter, Greg, thank you so much for your kind words. Greg, all of the detail pieces are made from pear wood. I have never used boxwood, as it is both expensive and difficult to source locally. Pear wood offers similar working properties to boxwood while being a more economical and accessible alternative. Bowsprit itself is made from hornbeam wood.