drobinson02199
-
Posts
1,079 -
Joined
-
Last visited
Content Type
Profiles
Forums
Gallery
Events
Everything posted by drobinson02199
-
 Allan: After I finished the center hatch, I wished I had decided to do it that way. Would look very nice, although higher hatches than what's called for in the plans (higher like the ones on the lower deck, as you note). I'm happier with the result on the second hatch using the bottom support strips. Regards, David
- 218 replies
-
- 2
-

-
- Victory
- Caldercraft
- (and 1 more)
-
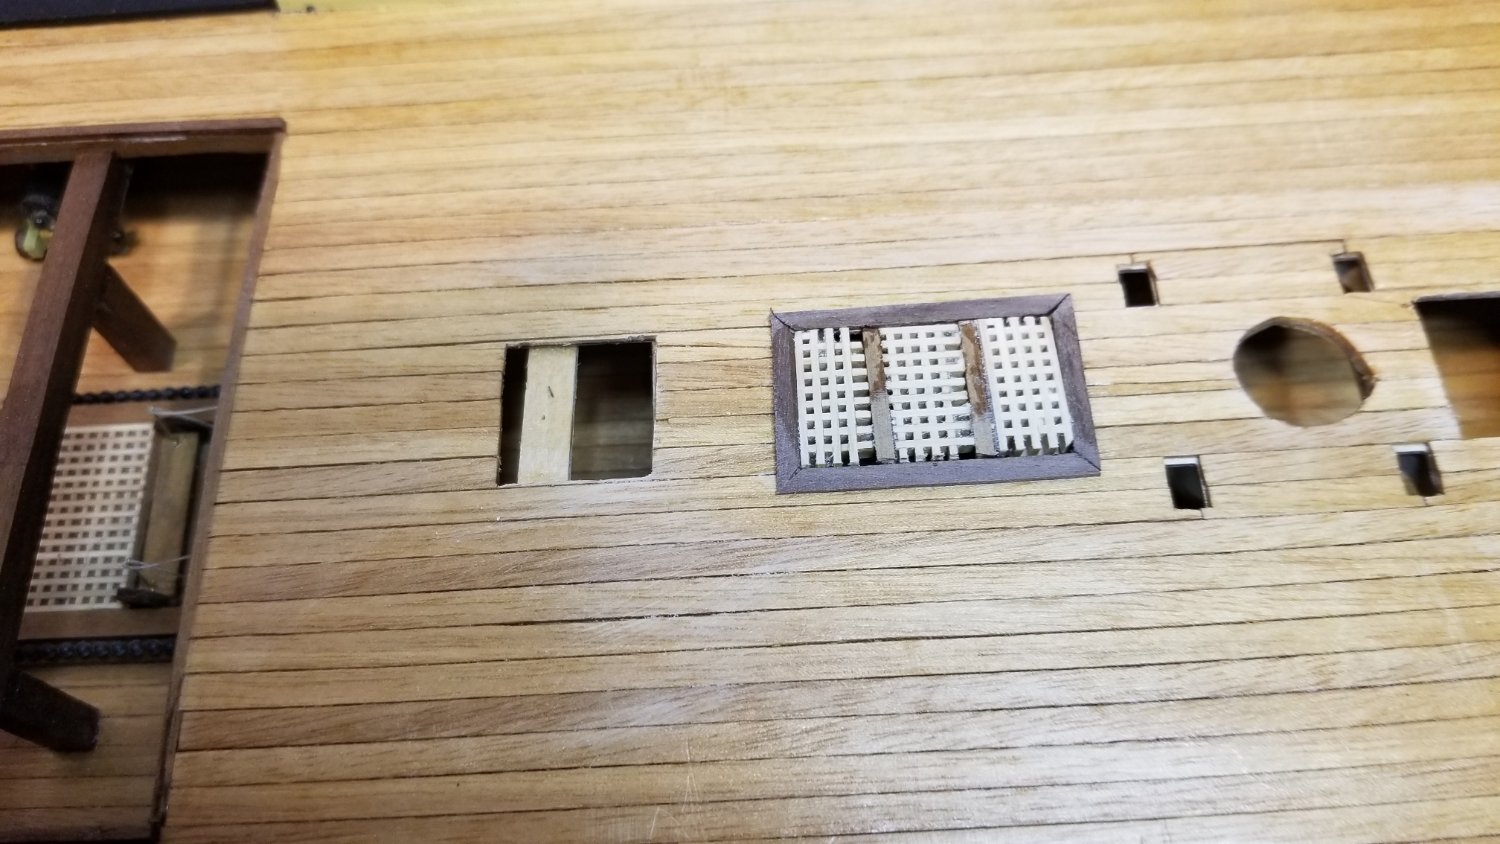
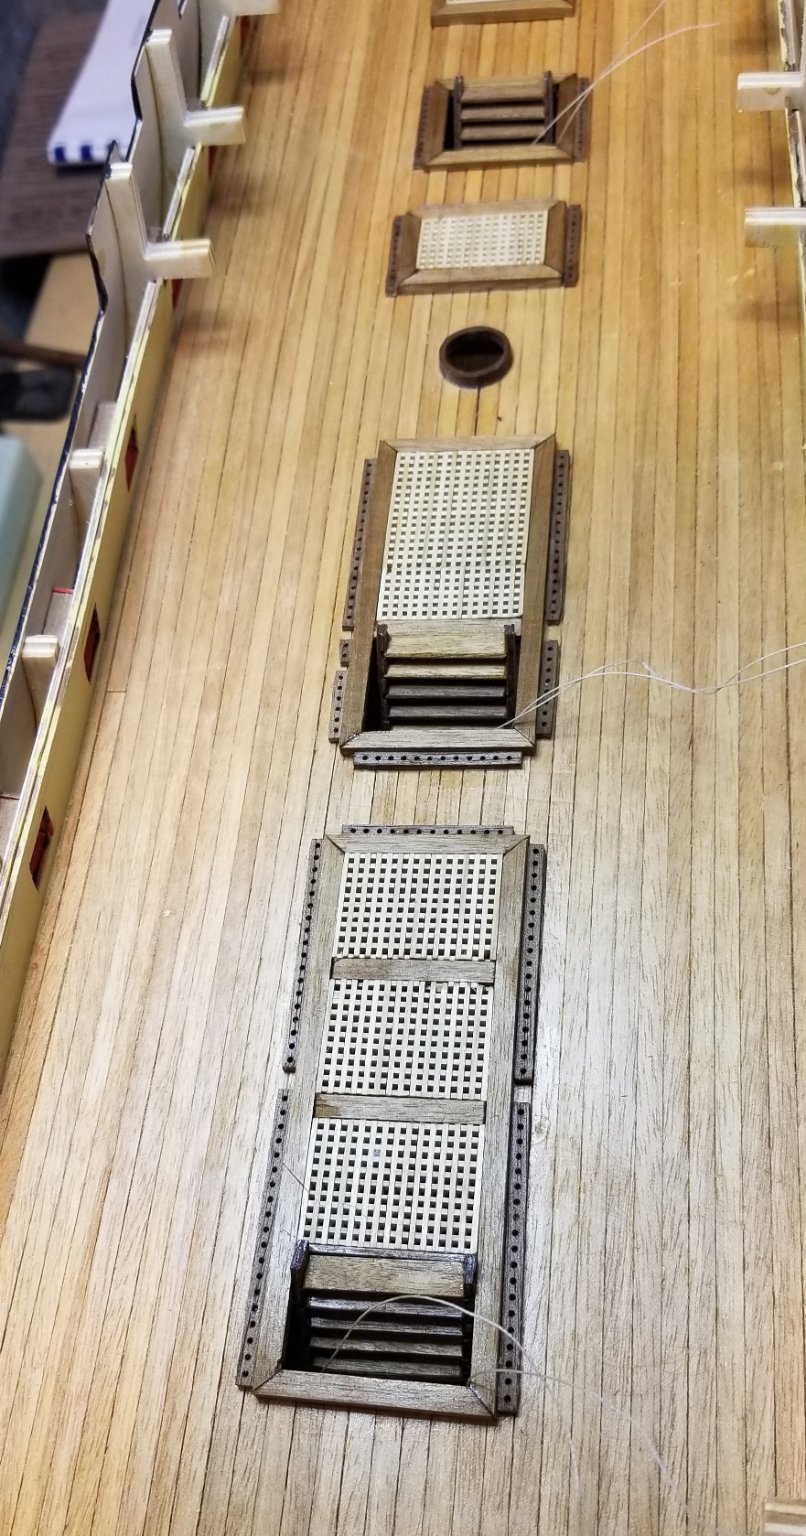
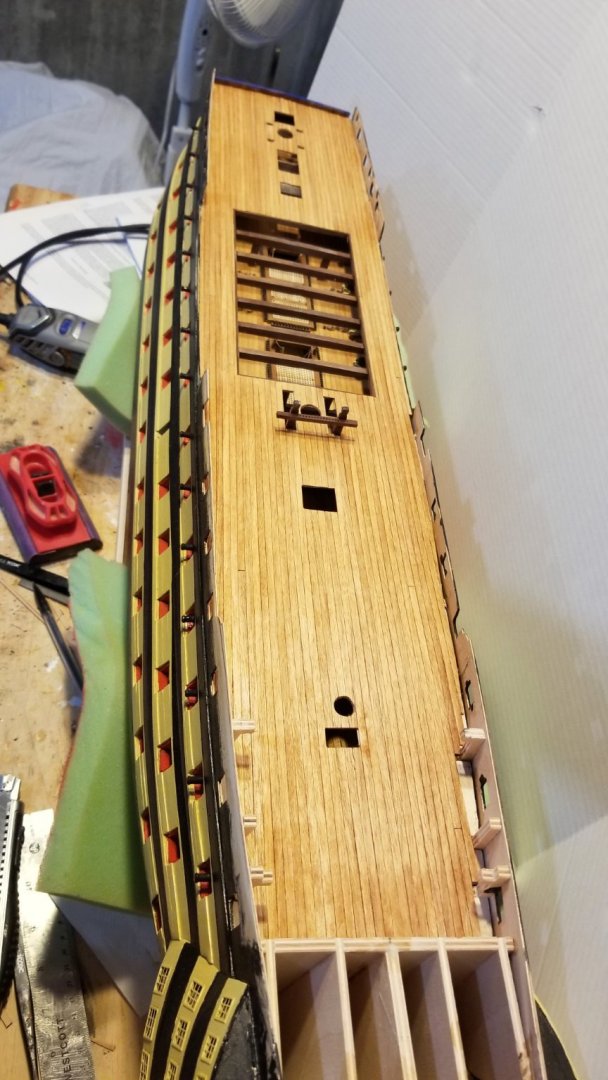
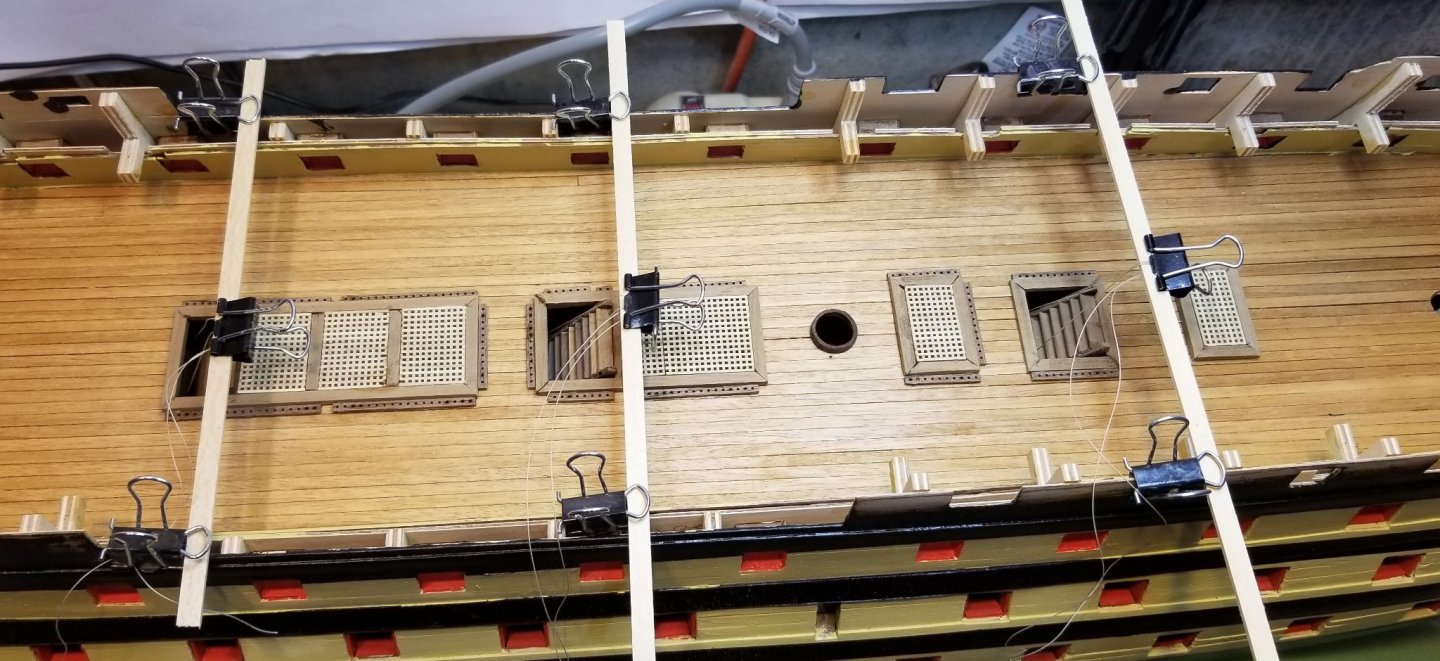
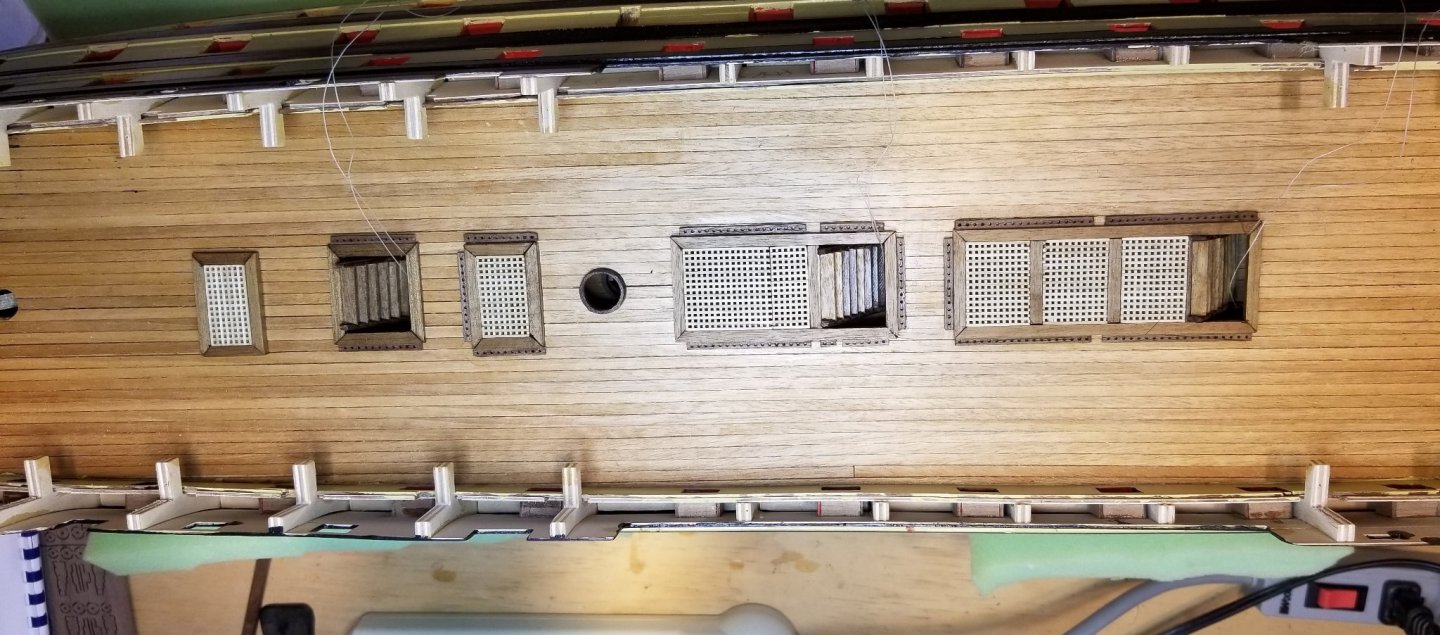
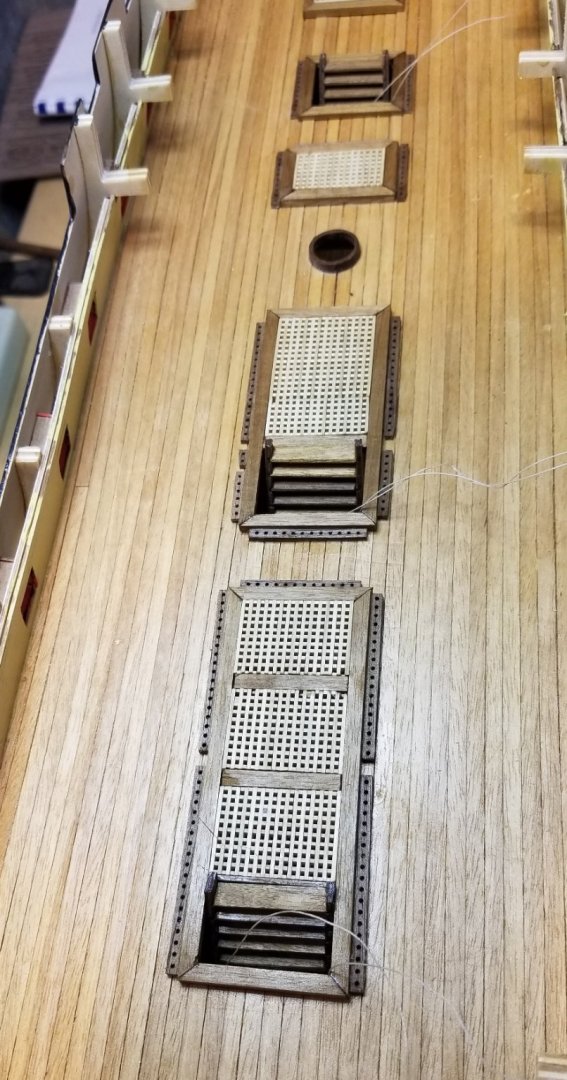
Working on the forecastle gratings. The gratings and spacers are mounted inside the hatch openings, and with no support I found that really difficult. On the one I've assembled, I had to put a support strip in to get the third grating section in. It will look better once varnished, but I'm not thrilled with it. So for the square hatches, I'll pre-mount support strips. The first of two that I've mounted is shown, and since taking the picture I have started to assemble that grating, and it's much easier -- and facilitates dry-fitting the components. Regards, David

- 218 replies
-
- 5
-
-
- Victory
- Caldercraft
- (and 1 more)
-
Capping rails painted, mounted, sanded and repainted on forecastle, waist and quarterdeck. Regards, David

- 218 replies
-
- 7
-
-
- Victory
- Caldercraft
- (and 1 more)
-
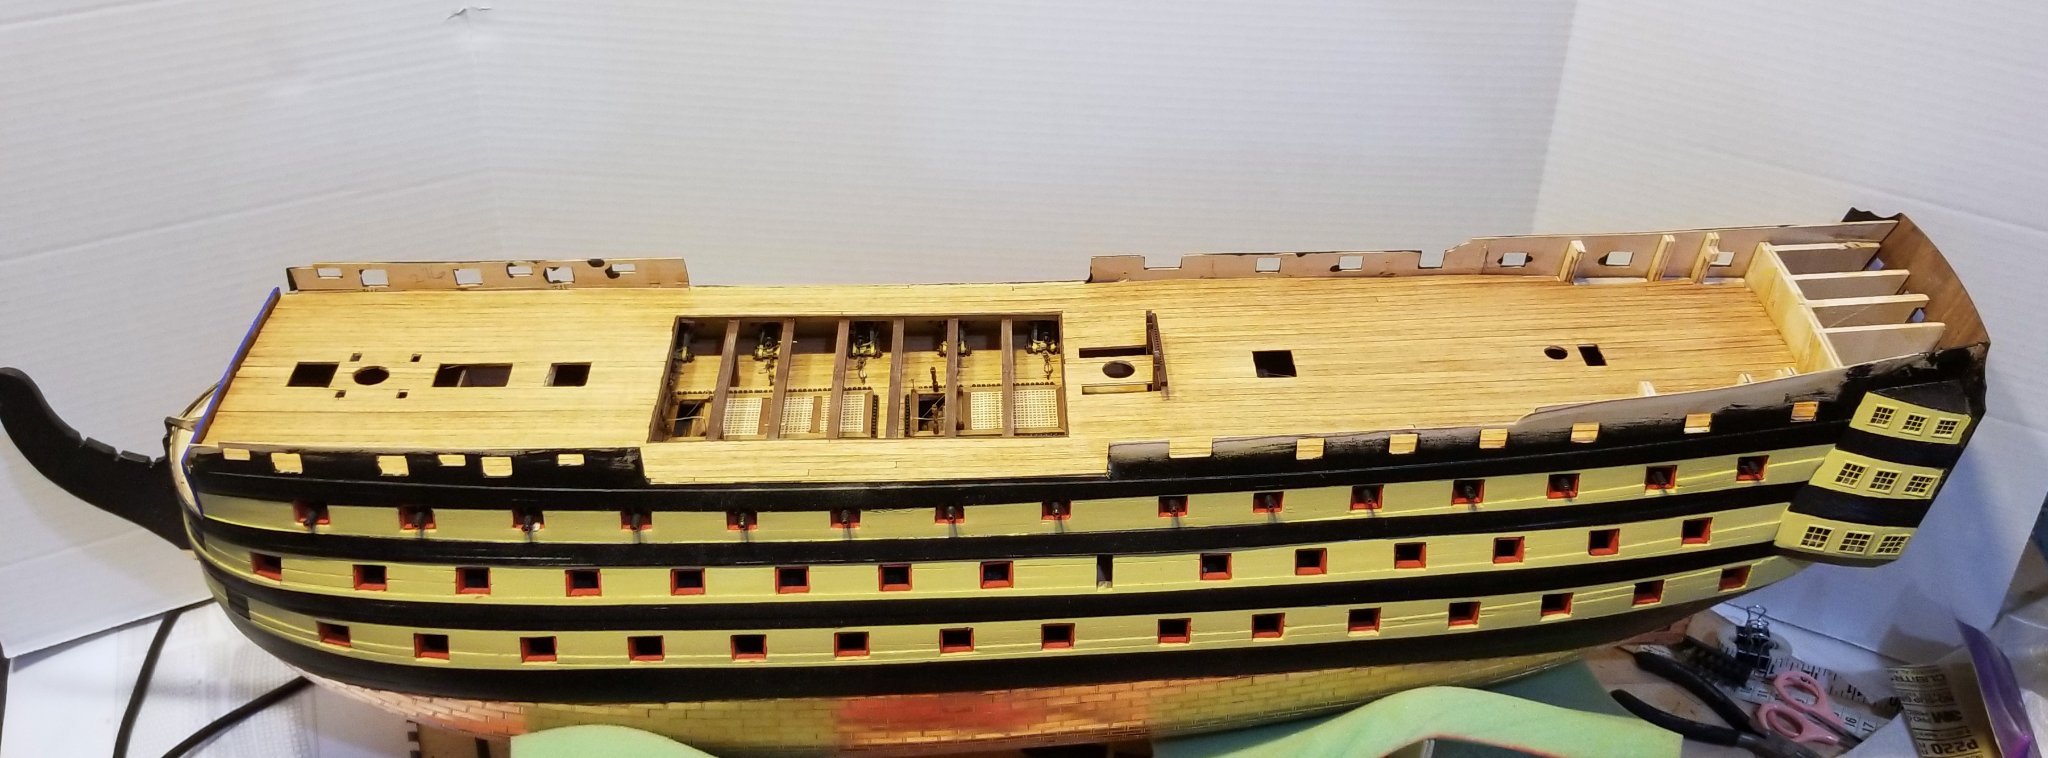
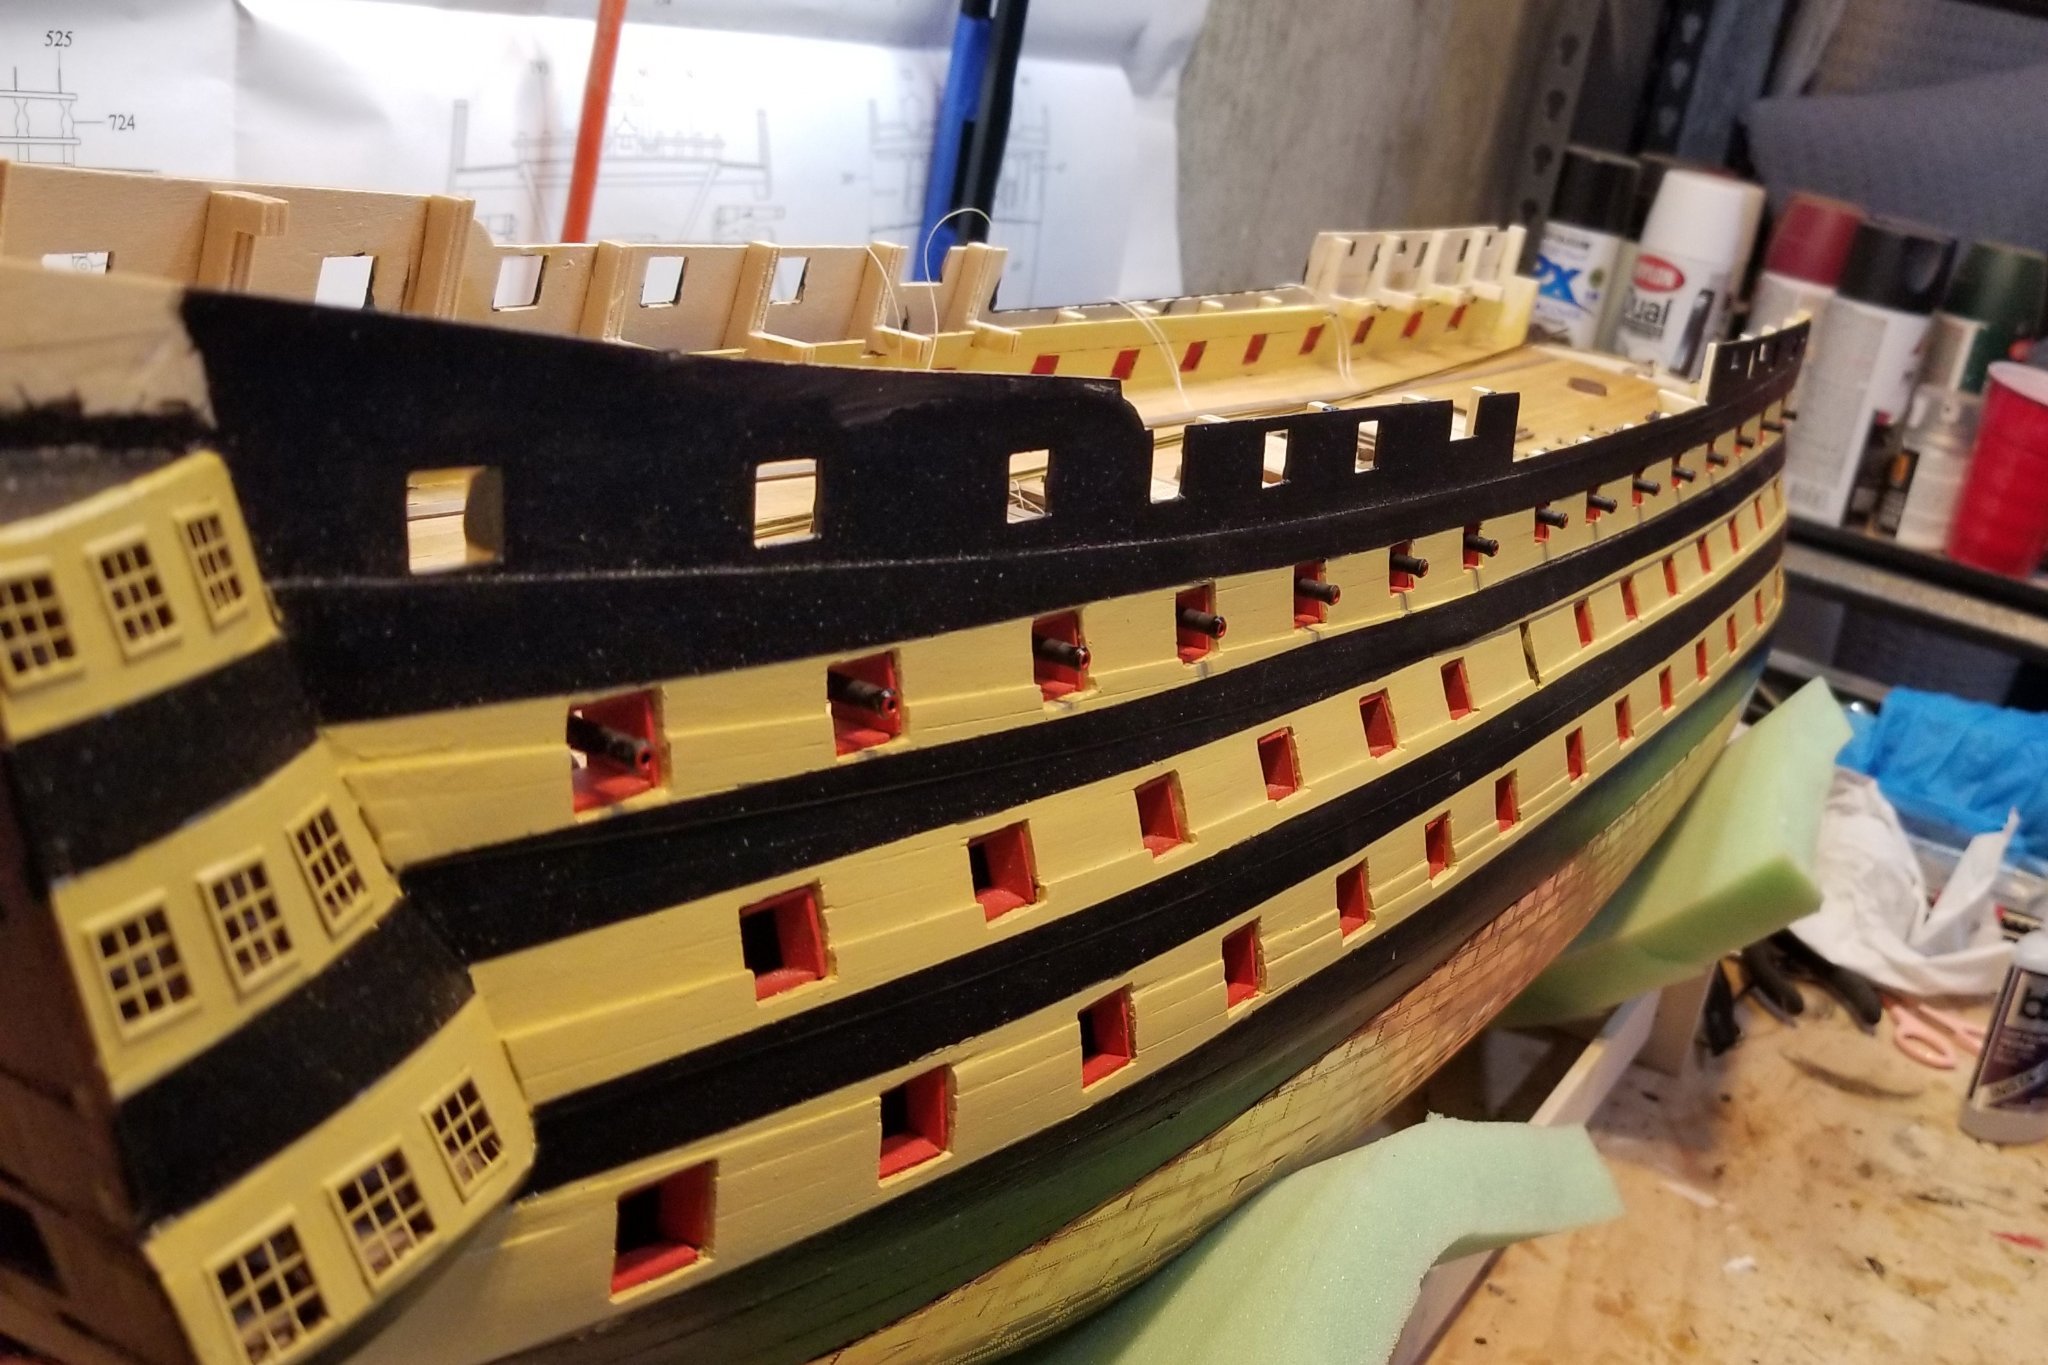
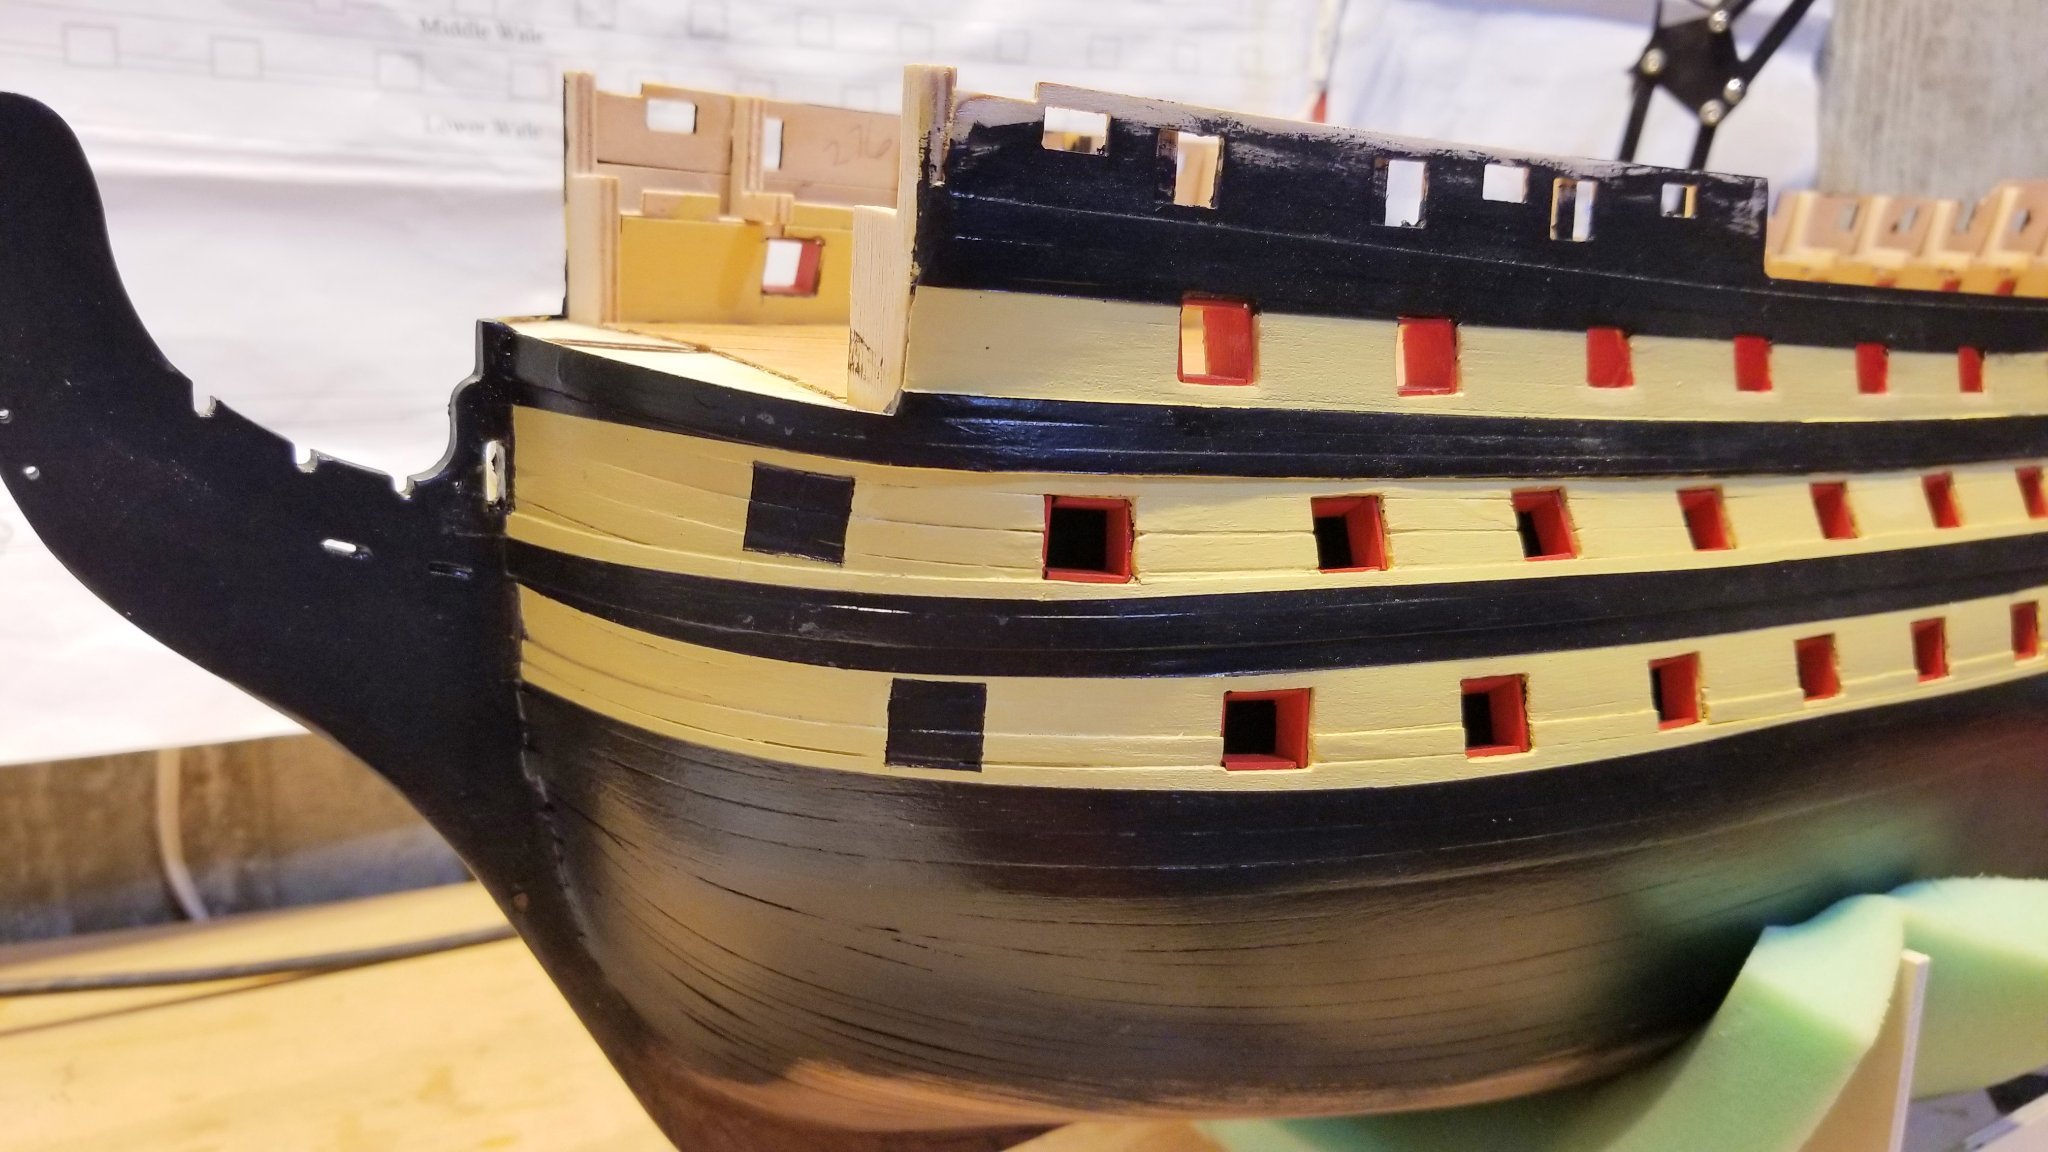
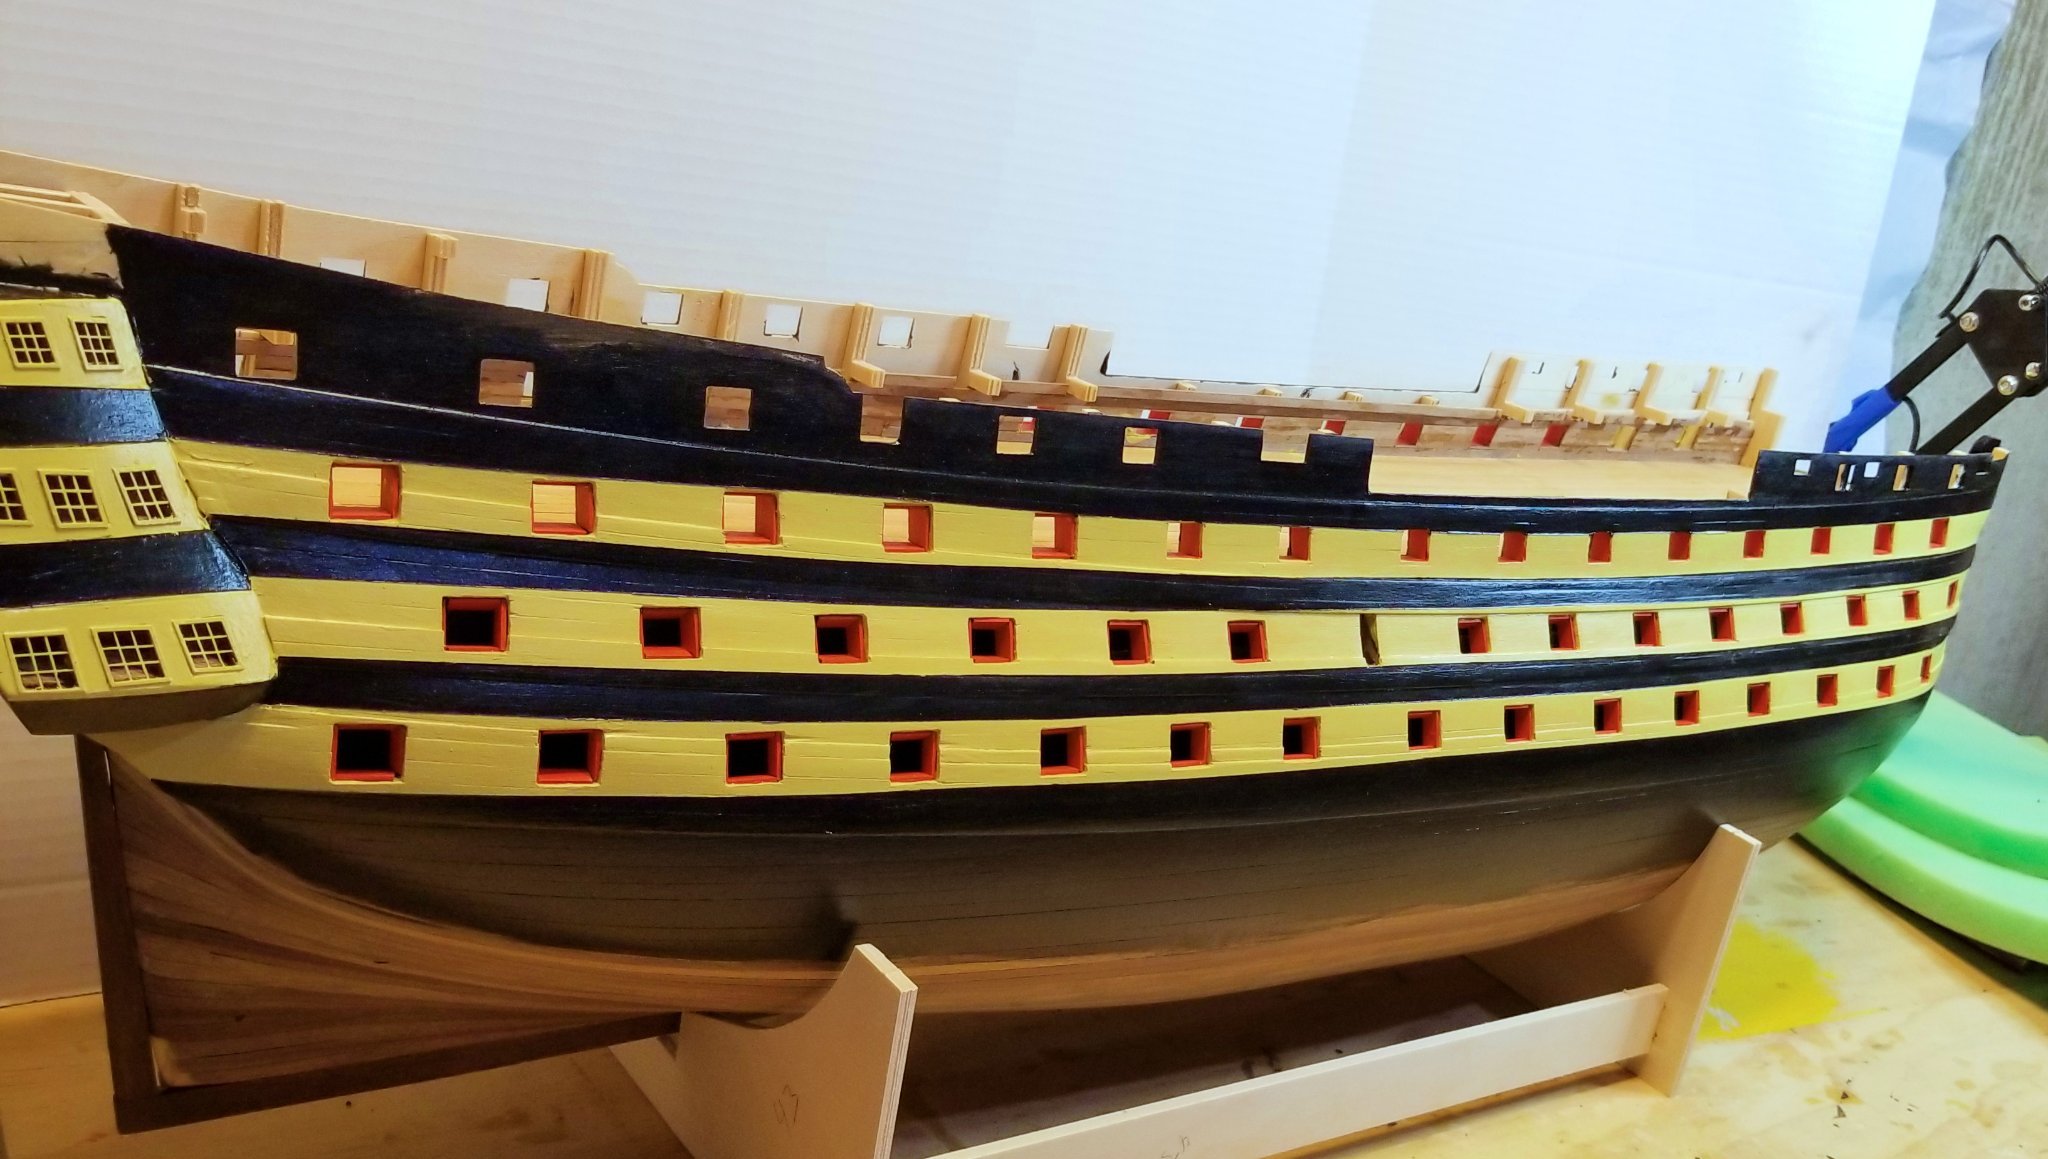
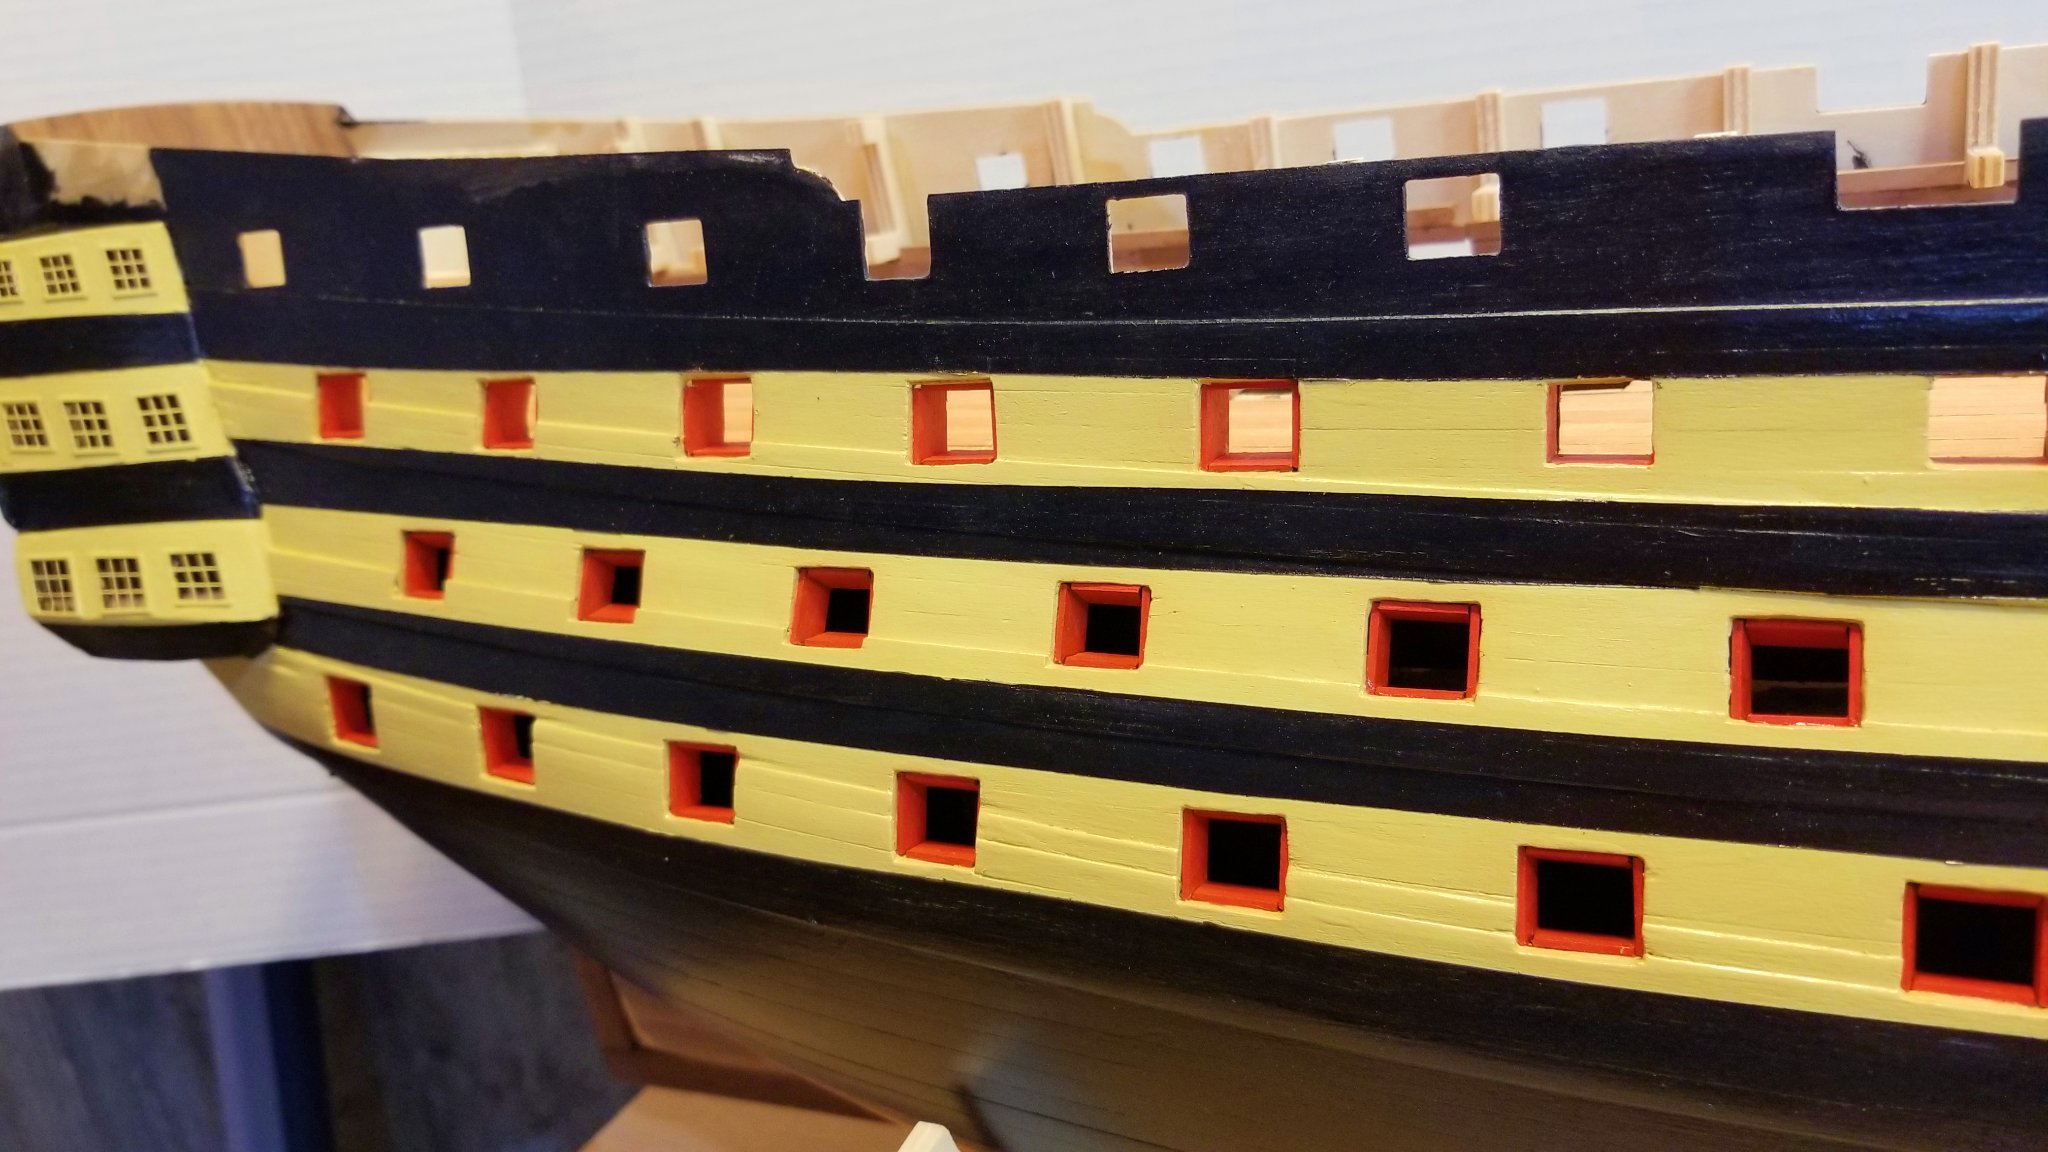
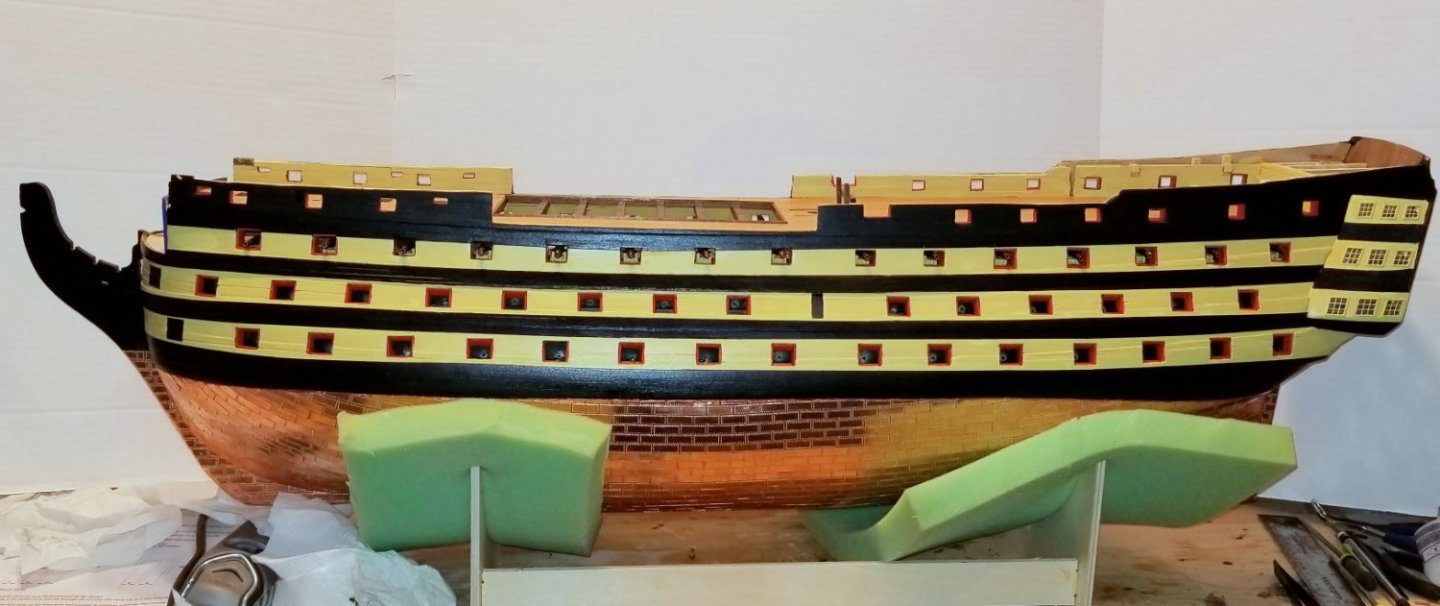
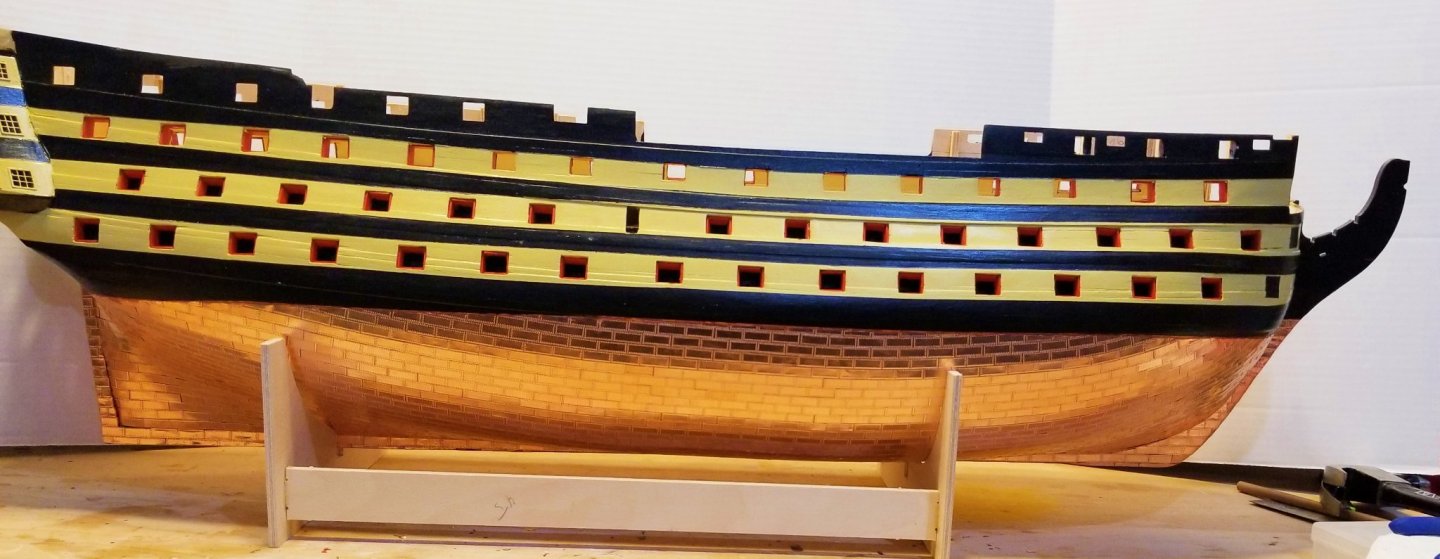
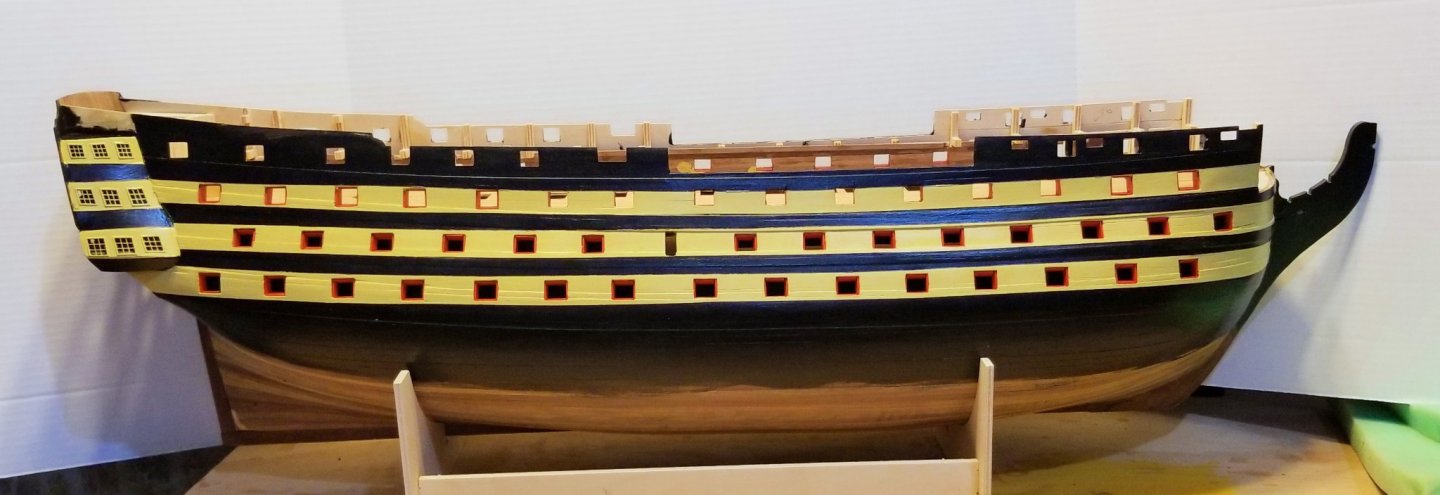
For those of you who were following this log in late 2021 and have picked this post up, I've been on a hiatus from the Victory primarily due to a Jan-Mar winter trip. But then I got home at the end of March and snagged a case of Covid. Nothing serious, but unpleasant symptoms and really didn't feel like working on the ship until a couple of weeks ago. But have jumped back into it now. Finished the second planking up to the top of the bulwarks, finished painting it, and then installed the final gunport linings. Did lots of touch ups in red, ochre and black to correct painting errors, and now it's done. Picture below. Regards, David
- 218 replies
-
- 11
-
-

-
- Victory
- Caldercraft
- (and 1 more)
-
Bob: I'm going to lump Amati and Vanguard together, because the things that stand out are similar in both. Feels like Chris Watton took the standards he had used with Amati and maintained them in Vanguard. Here is my comparison: Standout items: Quality of wood: Amati and Vanguard are the best I've seen in a model. Caldercraft seems close -- I'd say that the Caldercraft decking is perhaps a step below the others. Hull wood is similar. More of the laser cut wood parts are walnut in Caldercraft, even when they will be painted vs. varnished. Frame material: I prefer the MDF that Amati/Vanguard use, but the Caldercraft plywood was very high quality with no warping. It did require a lot more sanding in the slots to make it fit. Manual: the Amati and Vanguard manuals (particularly the Amati Revenge manual) were clear and logical. The Caldercraft manual requires more checking between plan sheets and the manual, and some things aren't (in my view) clearly stated and require looking at the JoTika website pics and other builds to be sure about. On the Amati Revenge, there are 3D rotatable pics on the Internet that are a marvel in helping the buil With all that said, I'd easily add Caldercraft to my "top 3" kit makers -- above Artesina Latina, Bluejacket, Mantua and Dumas in terms of the "standout items" above. Hope this helps. Regards, David
- 218 replies
-
- 3
-

-
-
- Victory
- Caldercraft
- (and 1 more)
-
Quarterdeck planked and first coat of varnish. Three coats planned. Regards, David

- 218 replies
-
- 7
-
-
- Victory
- Caldercraft
- (and 1 more)
-
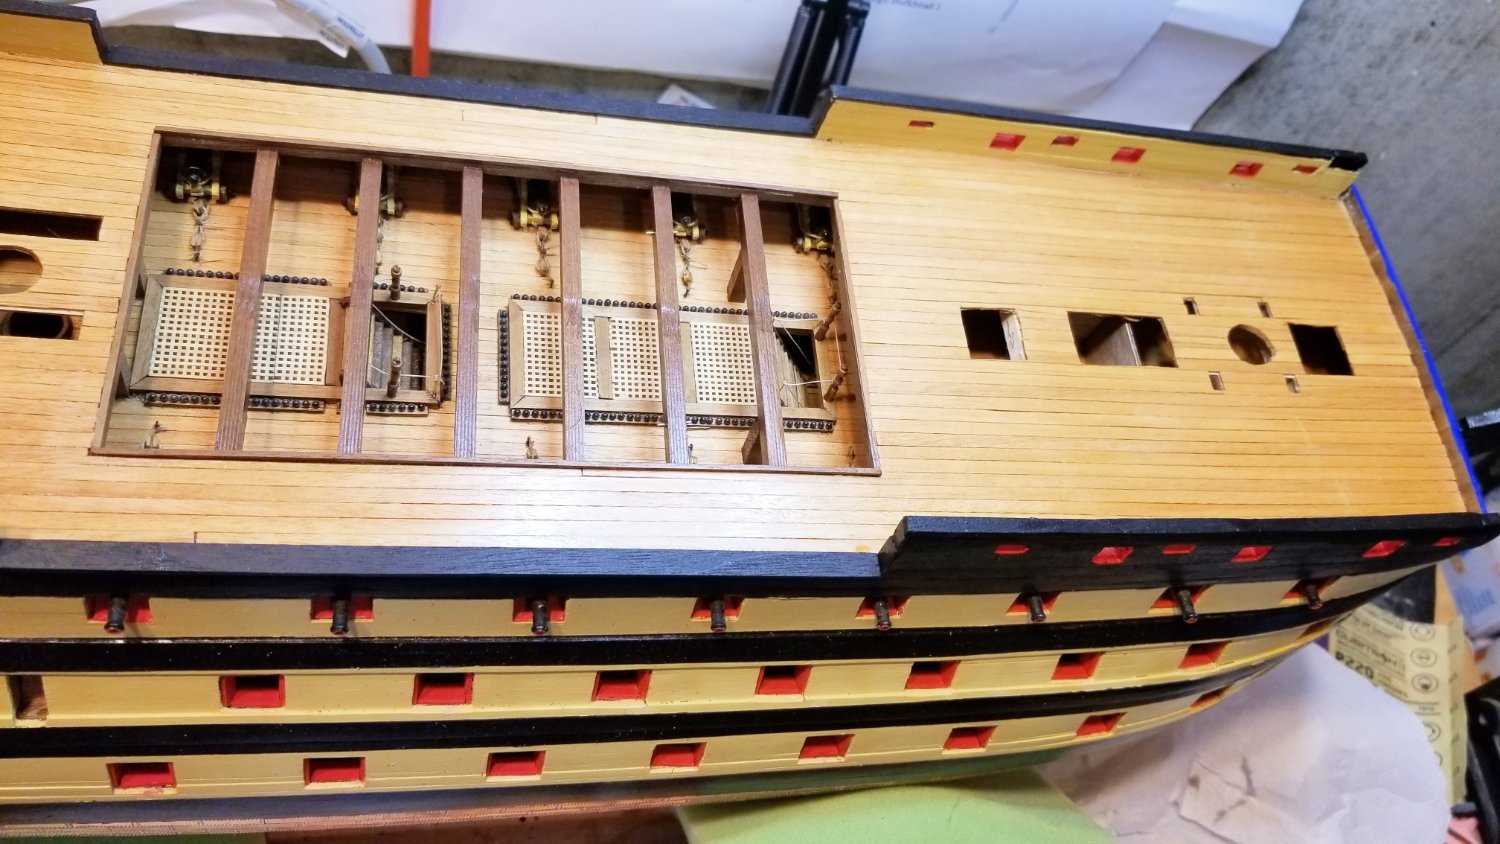
I've now mounted the quarterdeck (main deck). Took a lot of dry fitting done over & over. It went differently than in the manual because I split the deck, as you can see, and I'm frankly not sure how you'd do it the way the manual says. I decided to keep the skid beams and bitts in natural walnut vs. painting them black. I may live to regret this choice, as I'll need to carry it through the other fittings, but for now I'm happy. I also made a goof while finishing up the upper gun deck. I finished off the stair railings, and didn't read far enough ahead so used the wrong balusters on two of them. Those were supposed to be supports for the skid beam. So . . . I have mounted two square posts (you can see them) under the skid beam where it needs support. I will use the support posts (which look like balusters) for the quarterdeck railings (because I now don't have enough of the regular balusters). They will look fine once I cut them down. It's not a major thing, and the missing support posts won't be noticeable. One thing I have noticed is that there are some finished items on the upper gun deck that are now totally invisible with the quarterdeck mounted. So I guess they are just there for the spiritual reinforcement of the builder. Regards, David

- 218 replies
-
- 6
-
-
- Victory
- Caldercraft
- (and 1 more)
-
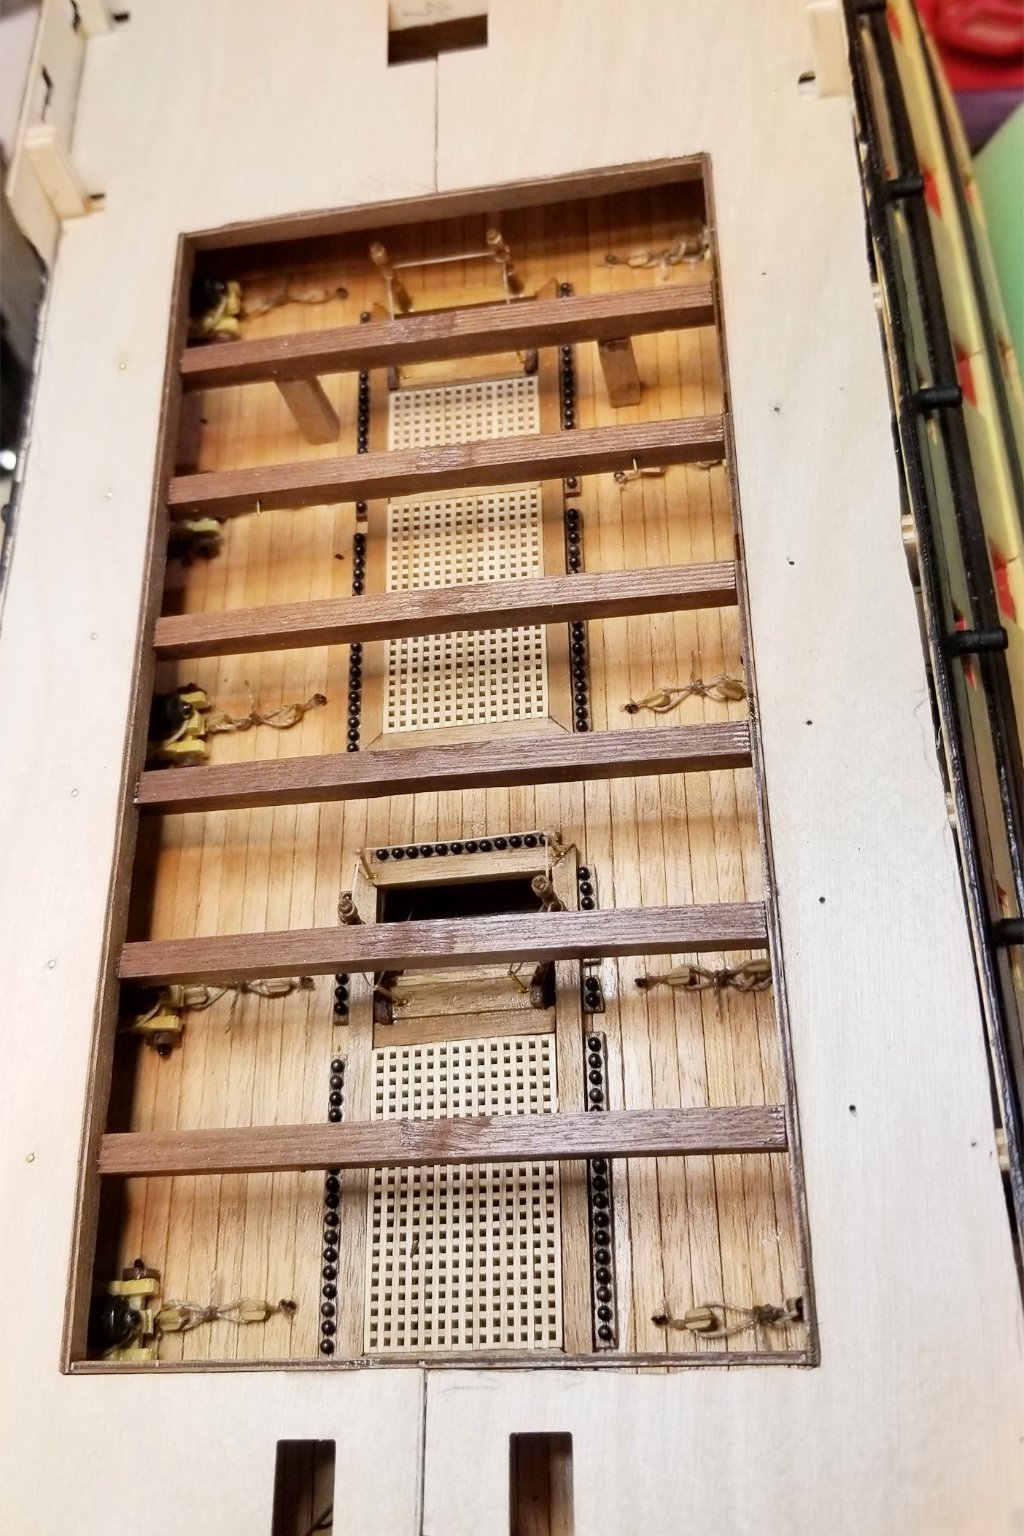
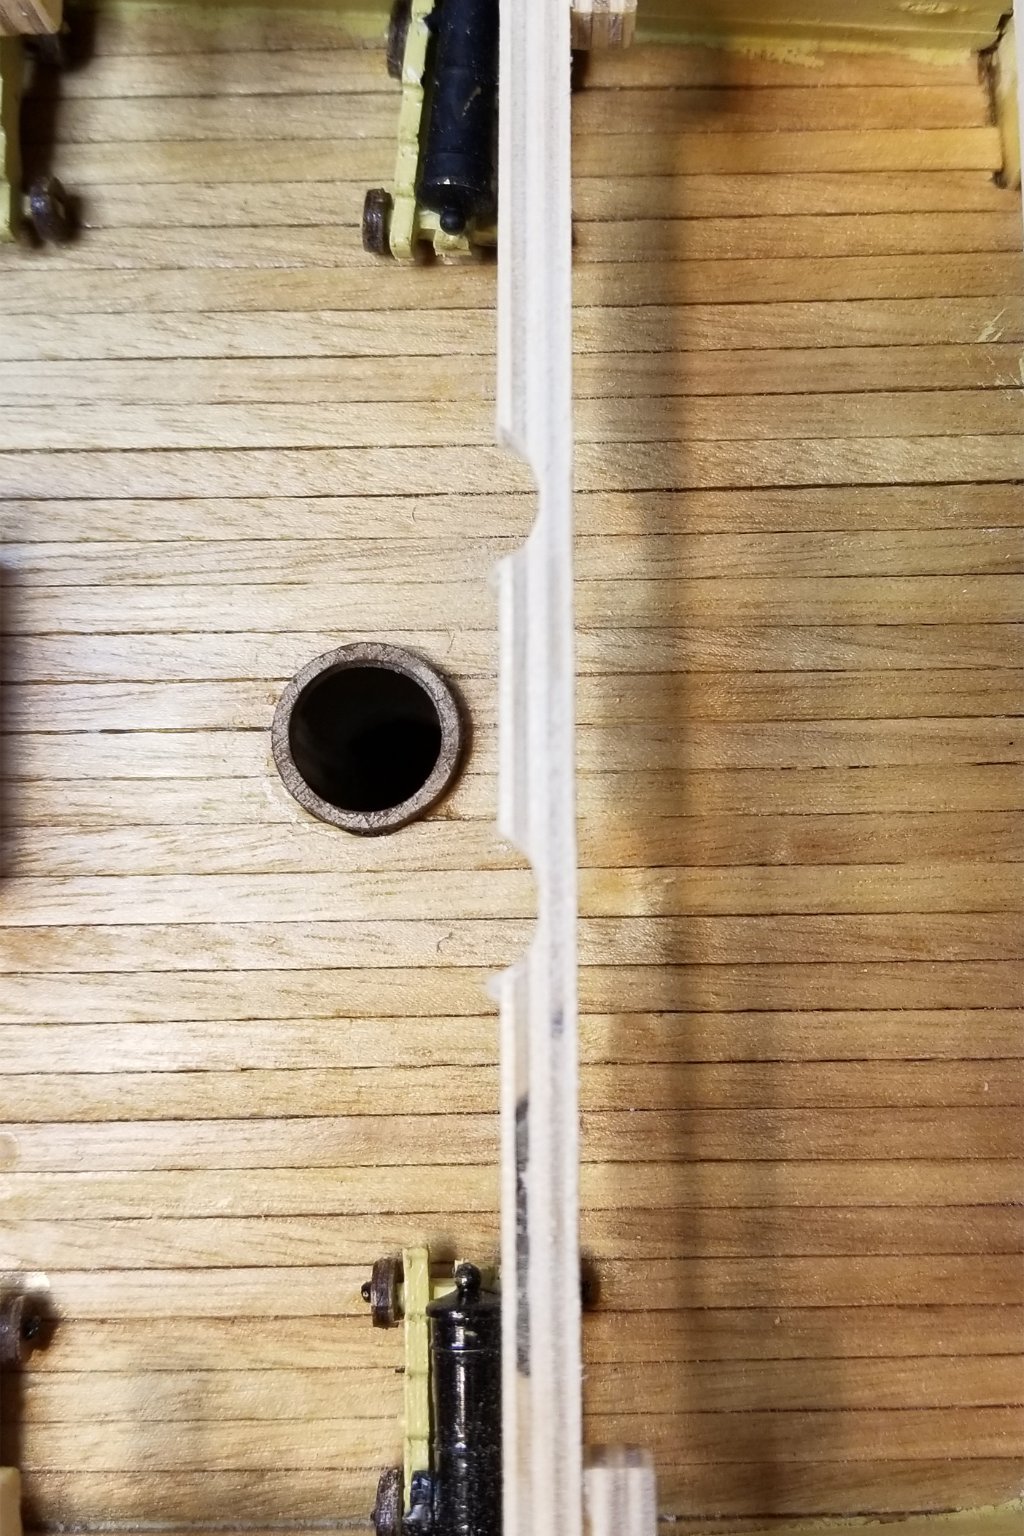
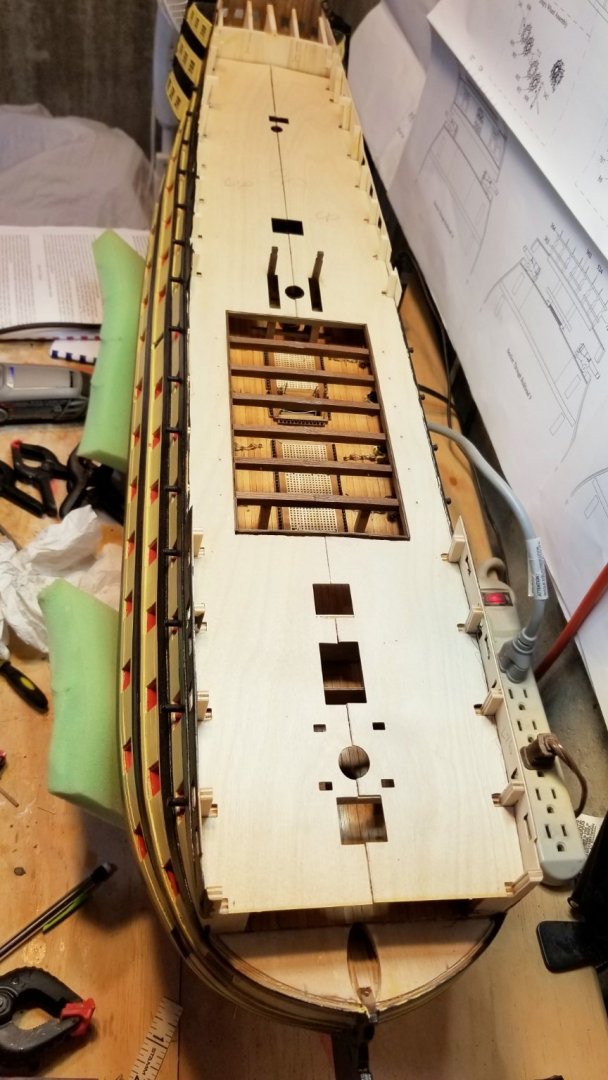
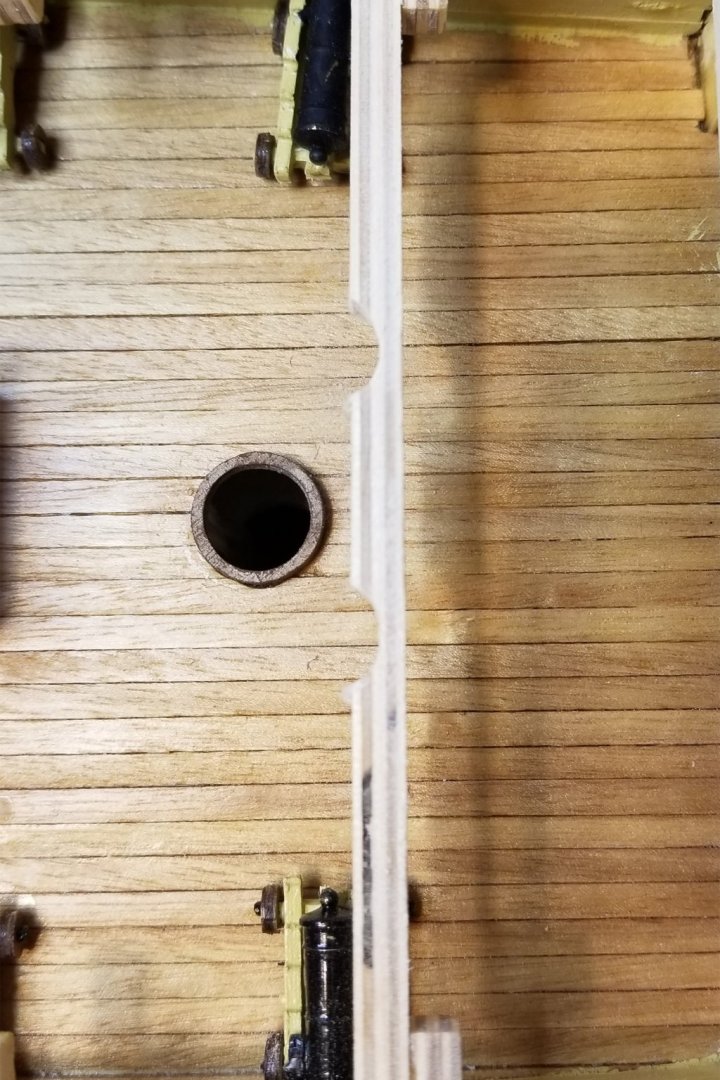
I have started work on the quarterdeck (main deck). As was the case with the gun deck, I split it lengthwise to make fitting easier. [I don't understand why this isn't recommended in the manual. Mud wrestling those decks in one piece is much harder]. I've been carefully dry fitting everything, and one thing I noticed is that the second camber beam back from the bow interferes just slightly with the square bit holes in the deck. I double checked, and I did mount that camber on the correct side of the frame. The picture shows the adjustment I made. This would be really easy to miss until after the deck is mounted, and it would be a bear to clear at that point. So I'm glad I caught it. Regards, David
- 218 replies
-
- 2
-
-
- Victory
- Caldercraft
- (and 1 more)
-
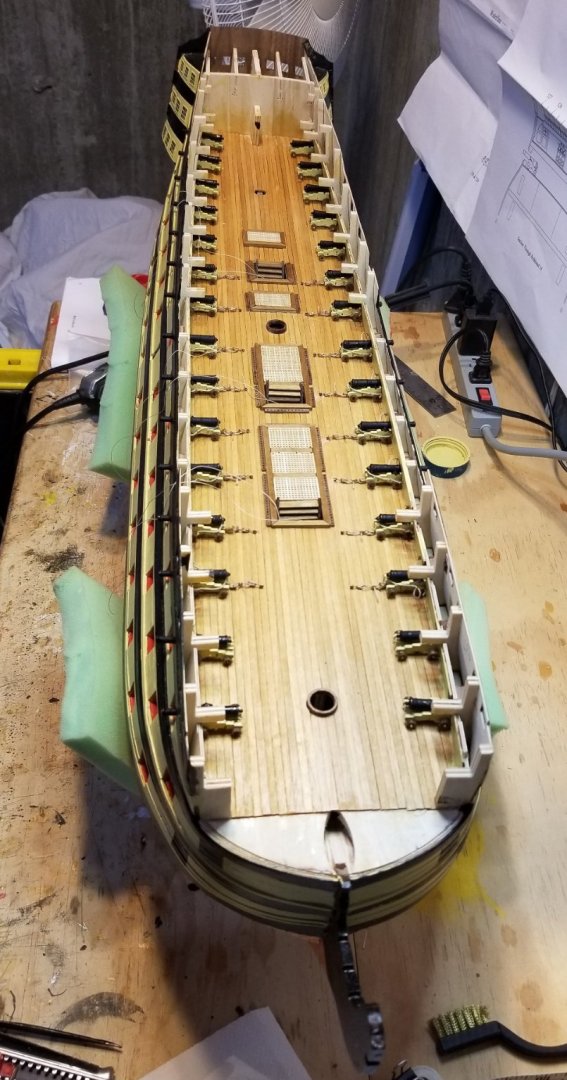
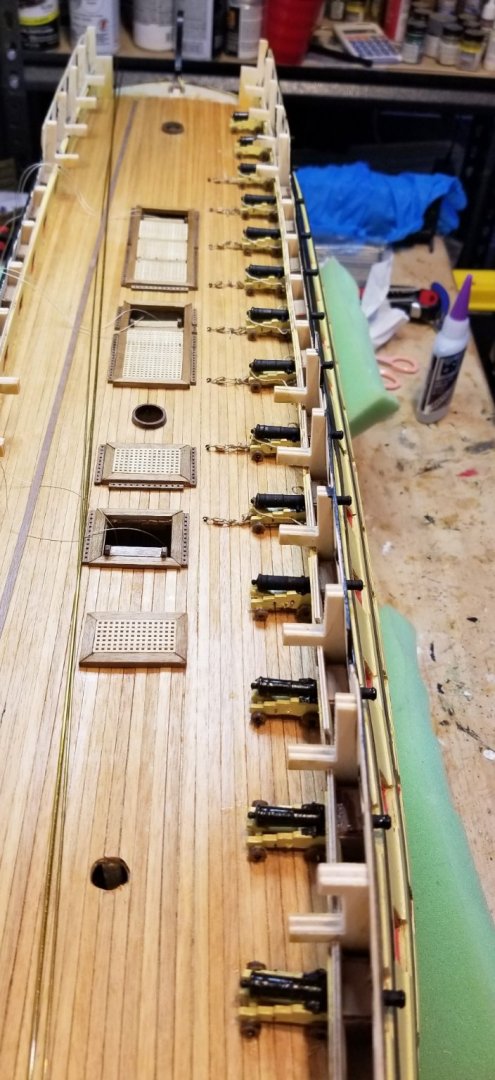
Finally finished all of the gun deck cannons. Took about 3 weeks to get through all of them. See picture. I only rigged the ones that are visible from the deck above. Regards, David
- 218 replies
-
- 7
-
-
-
- Victory
- Caldercraft
- (and 1 more)
-
Cannons completed on one side. A few comments: I only rigged the ones that are visible. Regarding rigging: there are three elements (inhaul, outhaul, breech line), and I only used two -- inhaul and breech. Two reasons: first, adding the outhaul tackle on each side just seemed busy, and I felt that the breech line would add enough interest on the side. Second, I'm lazy. Regards, David


- 218 replies
-
- 6
-
-
- Victory
- Caldercraft
- (and 1 more)
-
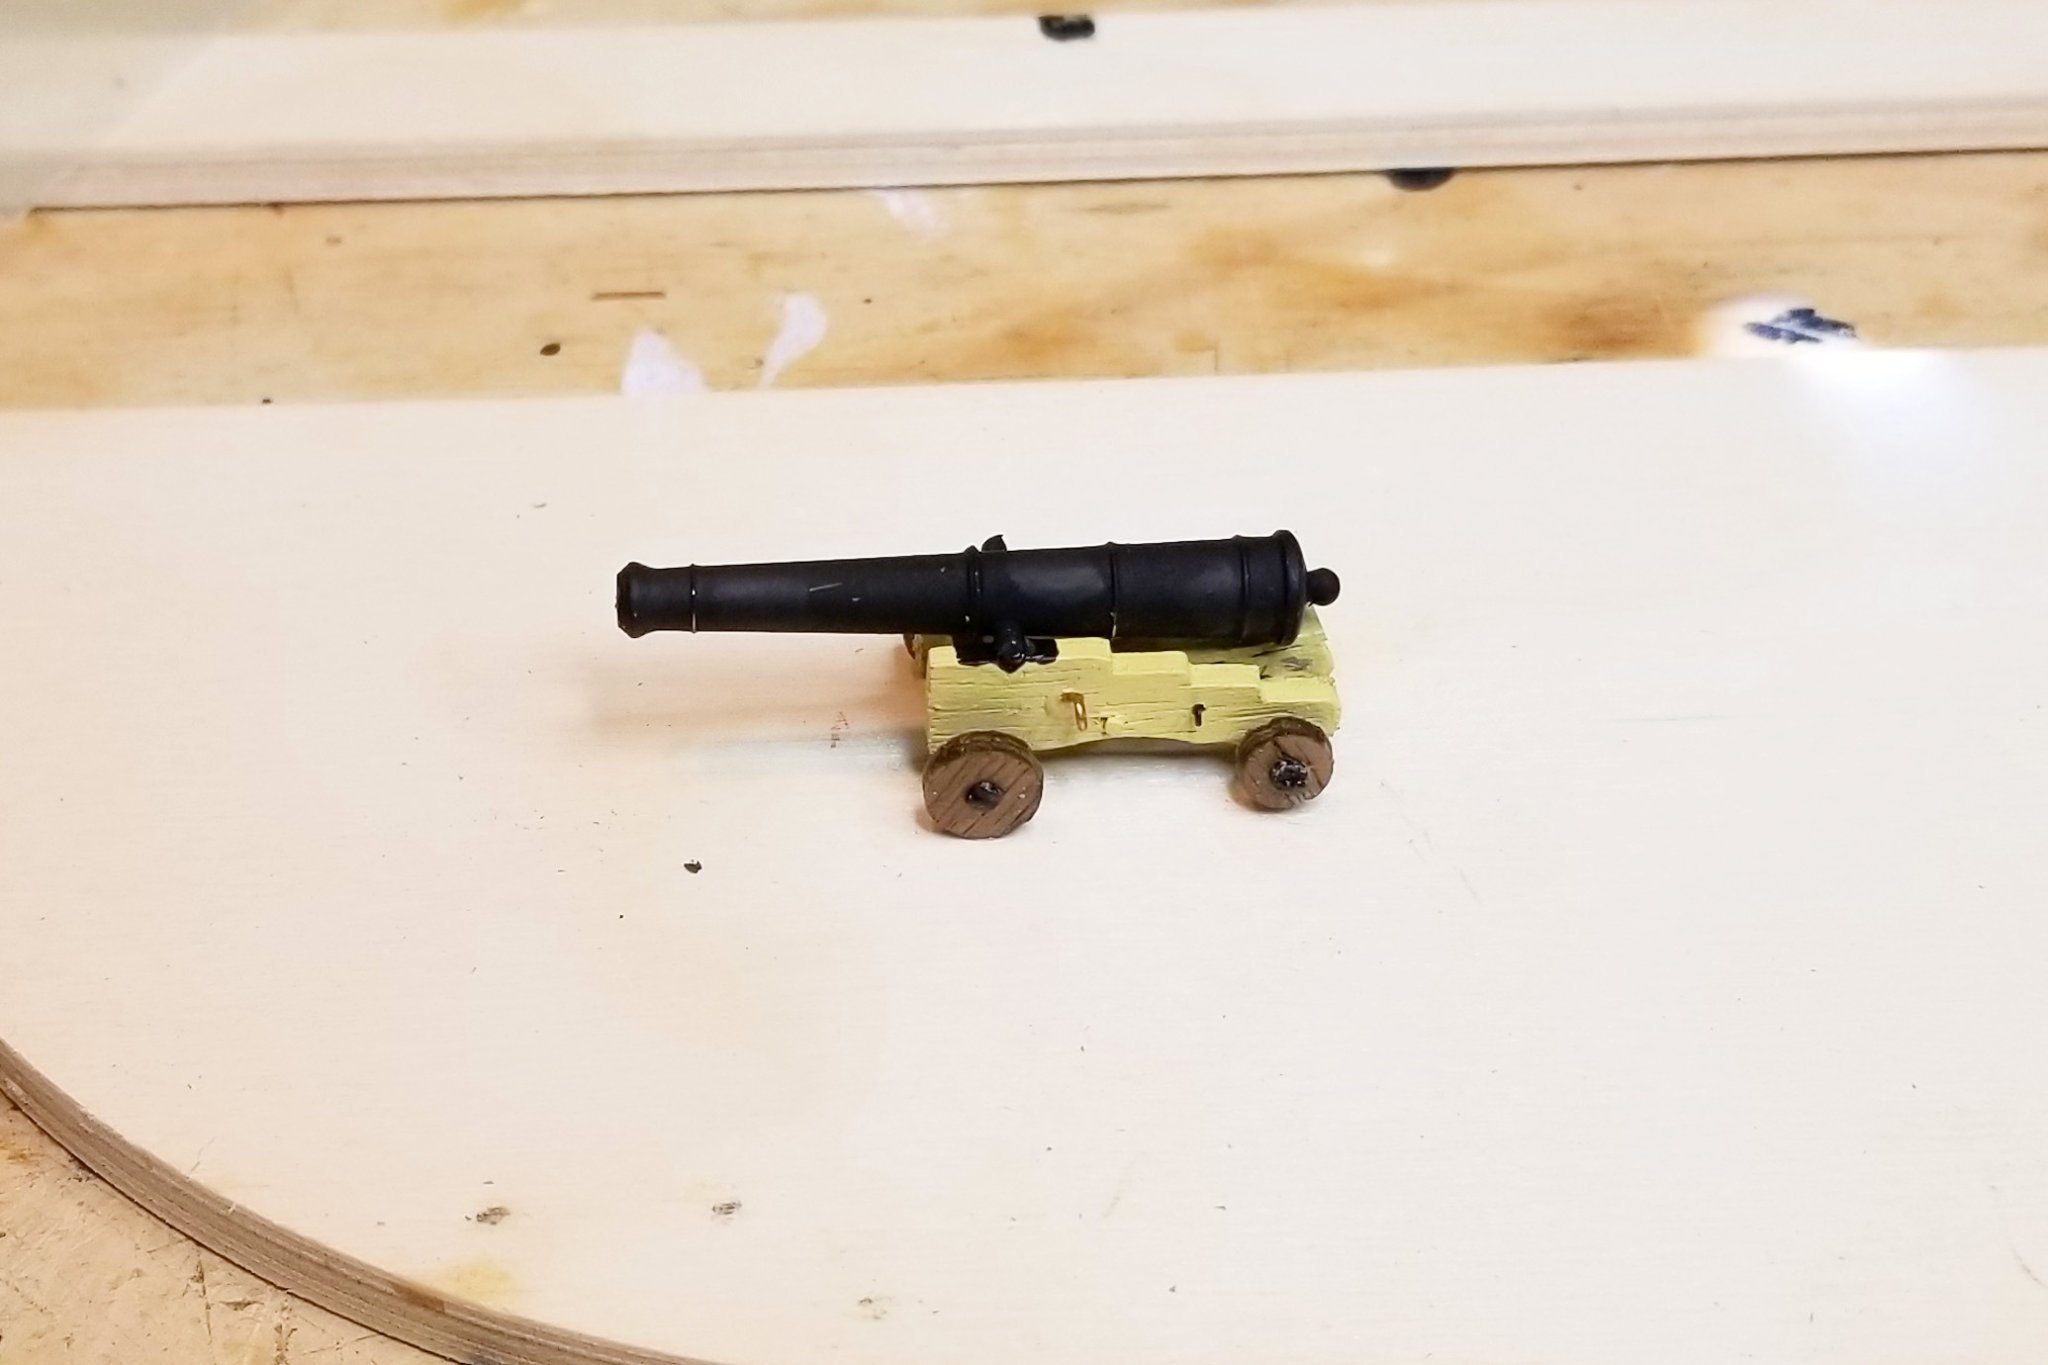
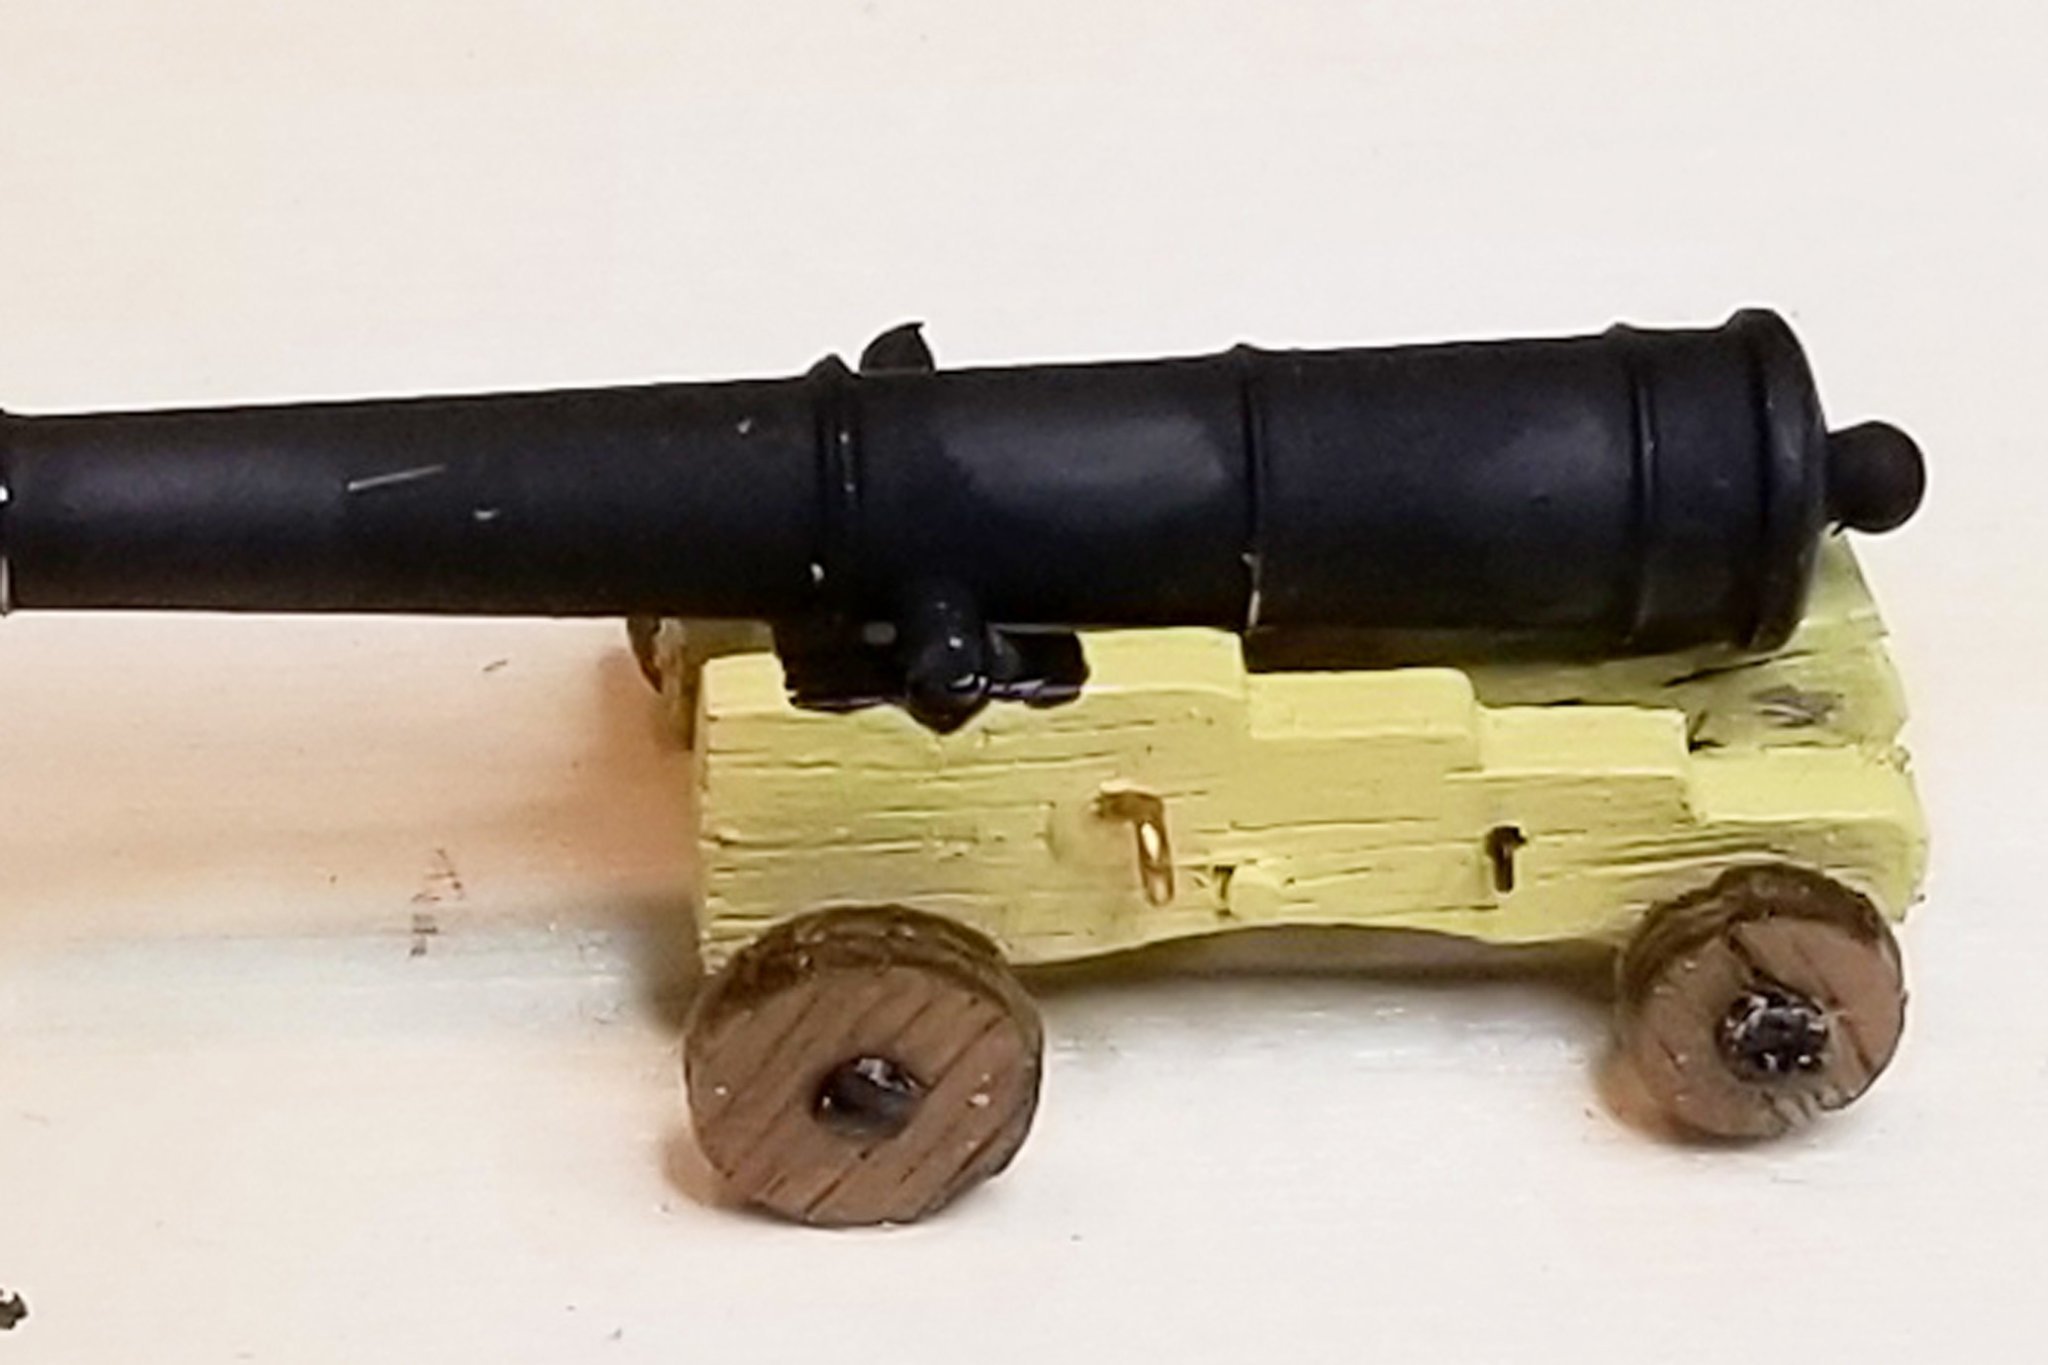
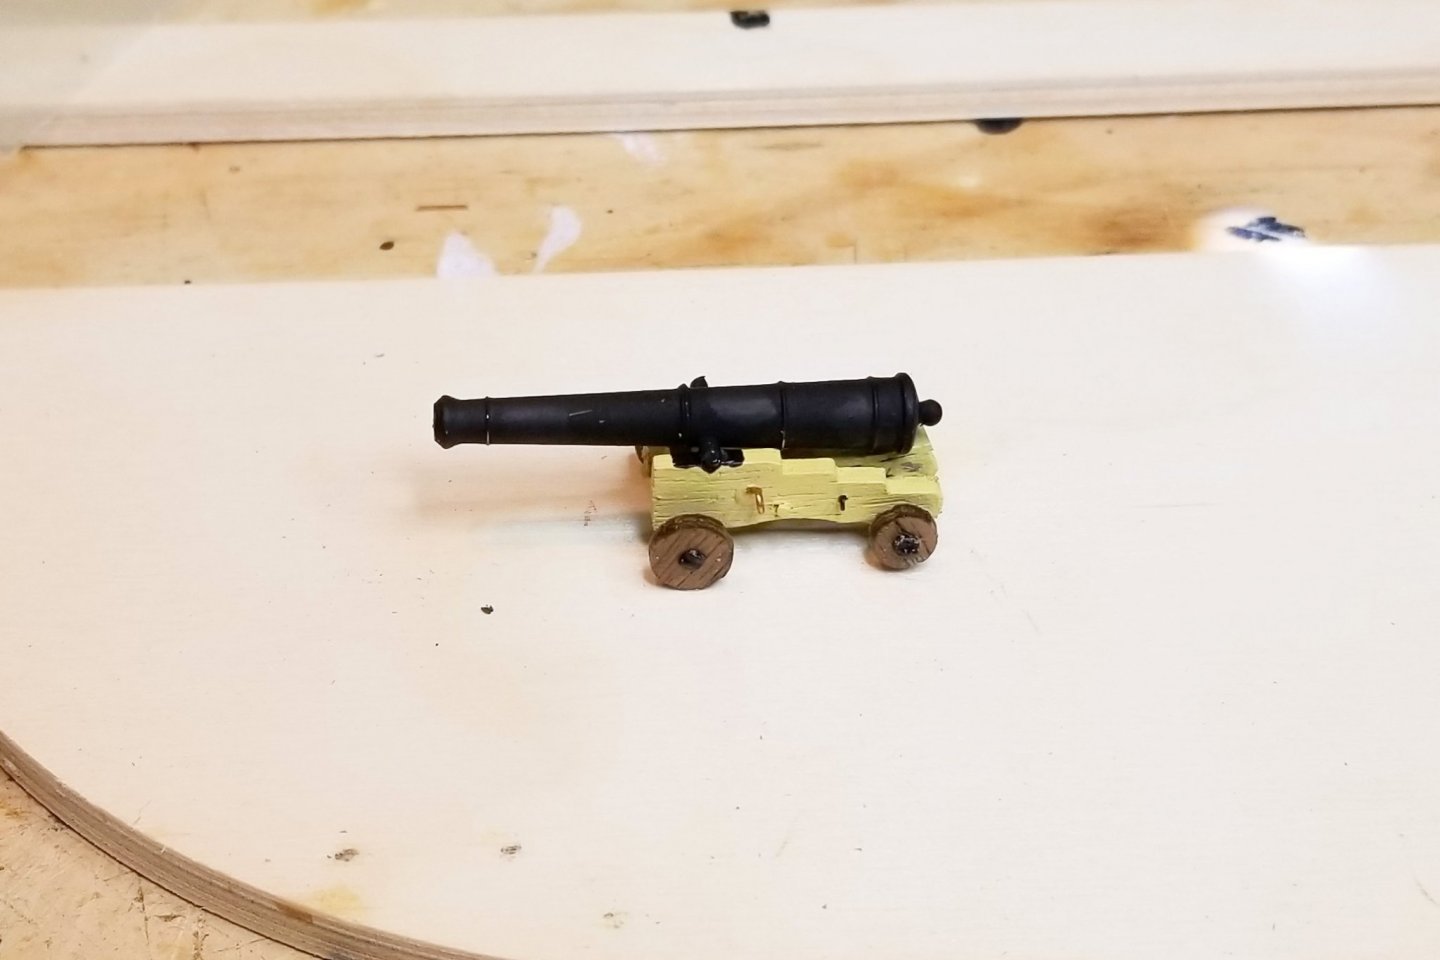
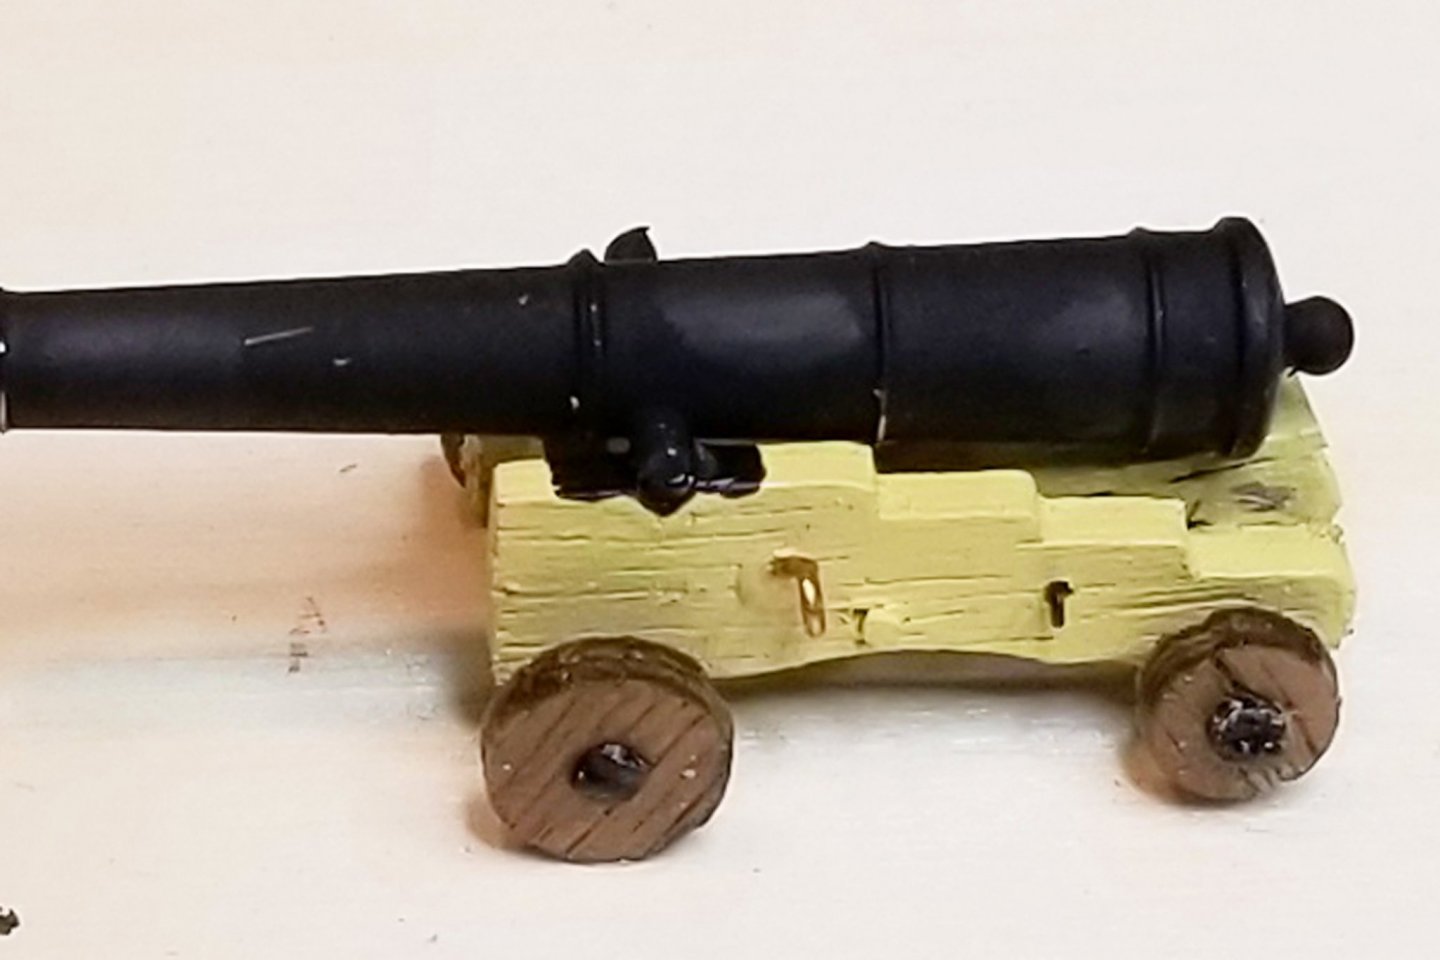
I've started building cannons in batches of 6 (to break up the work). This one is from my second batch. I tried to fit the trunion brackets in the first batch, and wasn't able to get them to fit well, and ended up just gluing them down -- but in closeup they look sloppy. So those 6 cannons are mounted in a not-visible part of the ship. For the second batch, I just painted the trunion brackets on, and I think they look pretty good -- and much better than the real ones that I couldn't get to fit. Closeup below so you can see it. Regards, David
- 218 replies
-
- 6
-
-
- Victory
- Caldercraft
- (and 1 more)
-
Here's a building board I made out of plywood scrap from the kit for painting the cannon carriages and cannons. Regards, David

- 218 replies
-
- 4
-
-
- Victory
- Caldercraft
- (and 1 more)
-
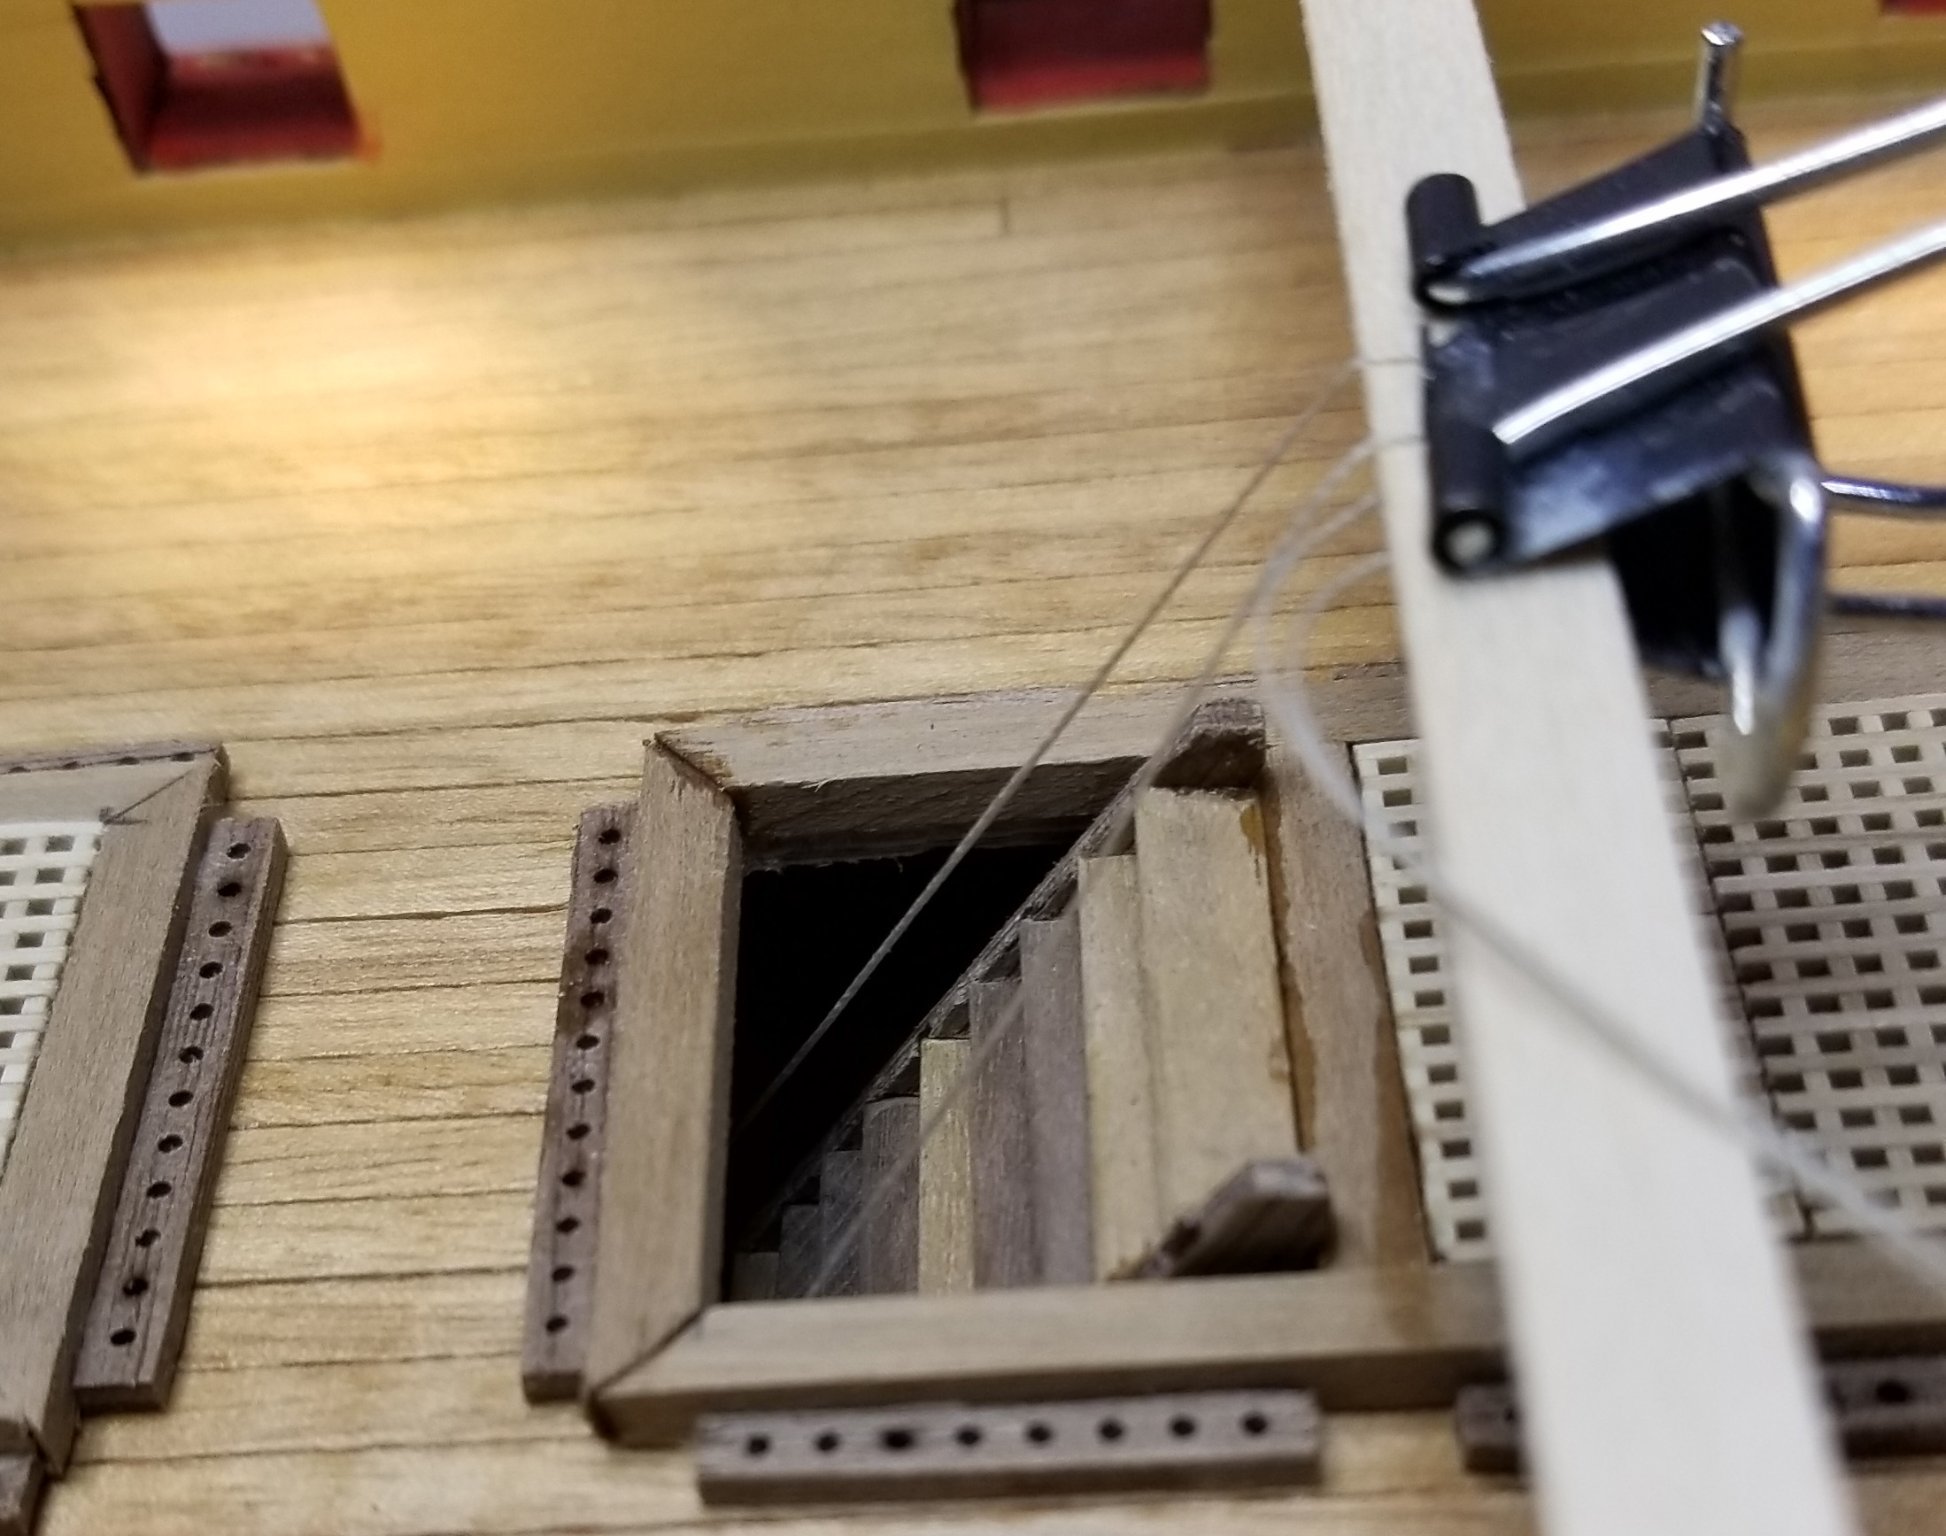
Built and installed the upper gun deck hatches and stairs to the lower gun deck. I ran into a kind of sequence issue. You have to install stanchions at the bottom of the stairs, and then put thread into them which leads up to the upper gun deck for later use as part of the hatchway guard rails. So when I went to varnish the whole hatch/stairs assembly, I had those threads in the way. If I had thought of it, I could have varnished the stairs before installing them, but I didn't -- so I rigged a temporary set of crossbeams to hold the threads up while I varnished the stairs and hatches. Those are shown below, along with the finished product. Regards, David

- 218 replies
-
- 7
-
-
- Victory
- Caldercraft
- (and 1 more)
-
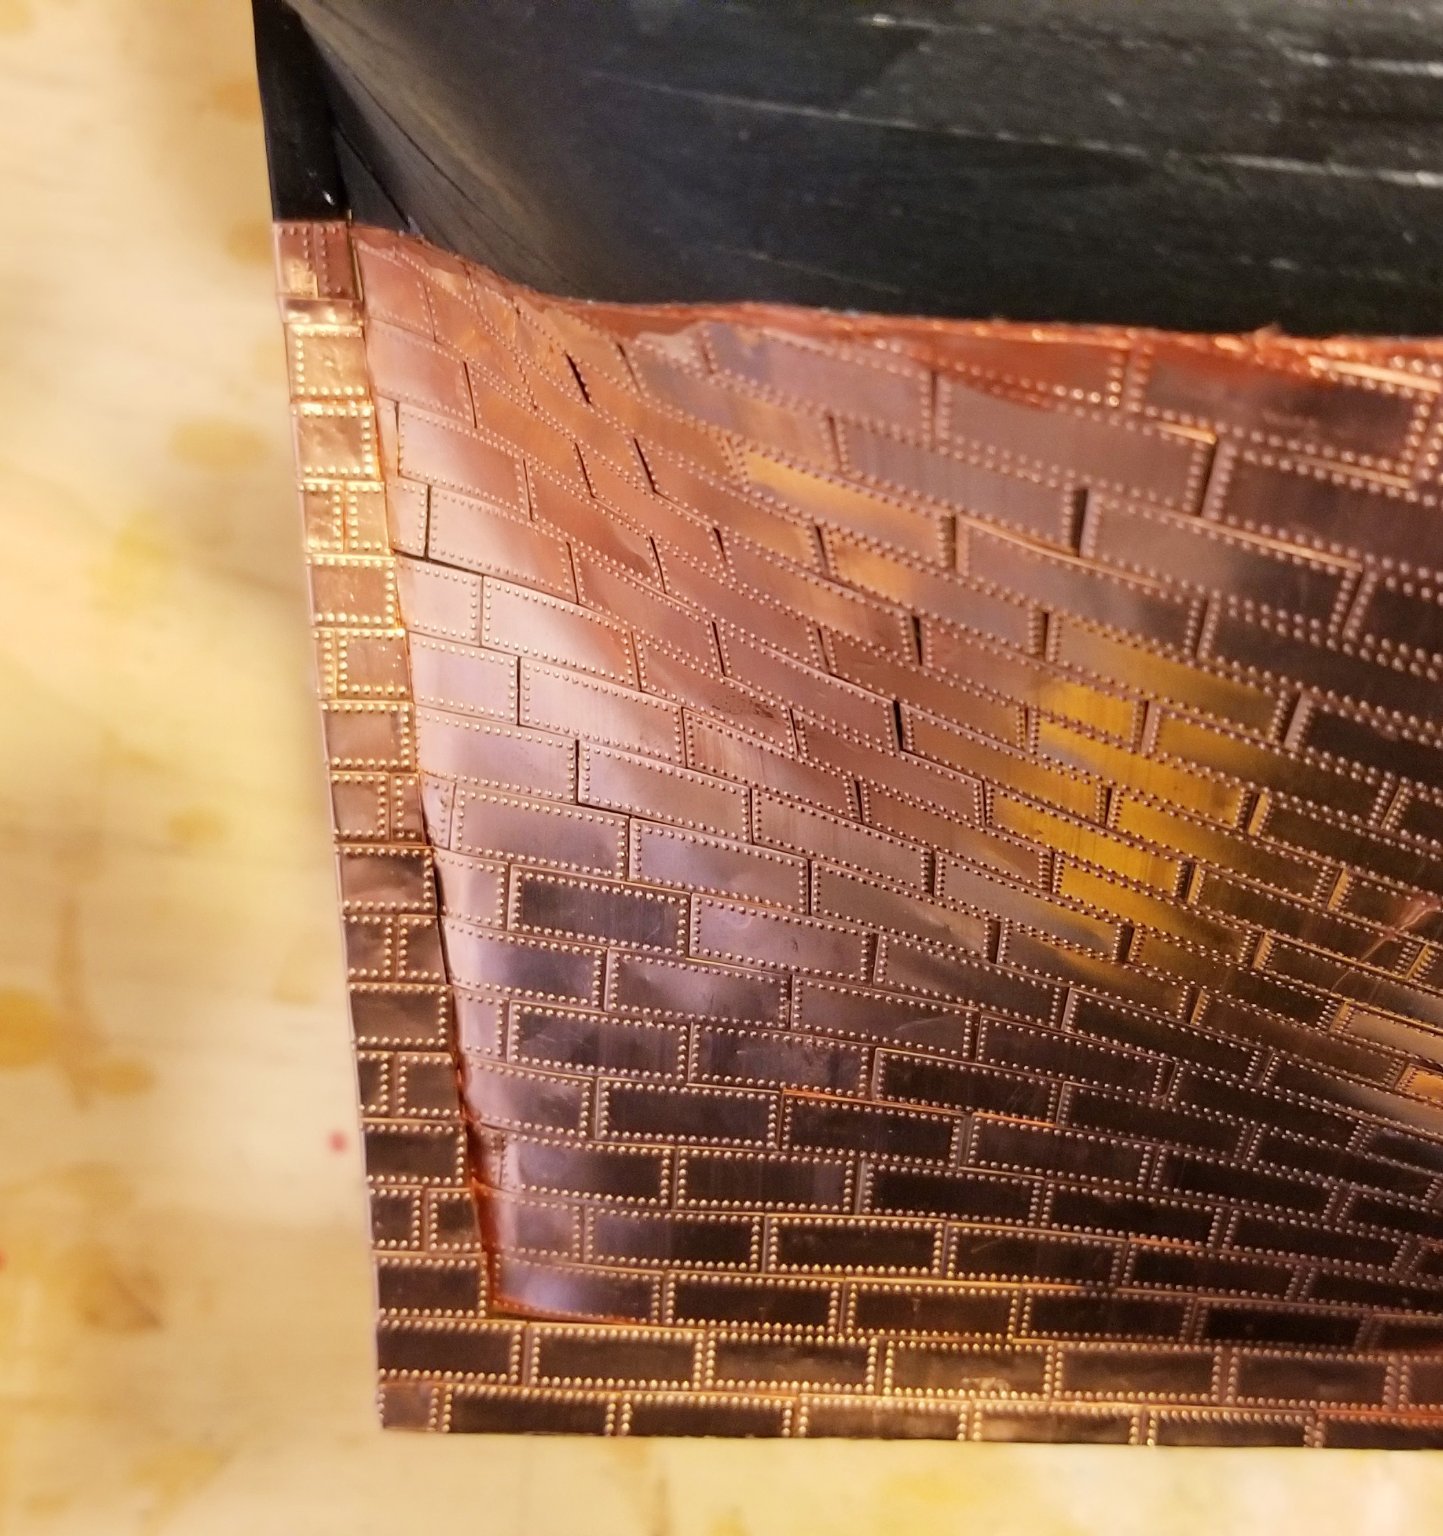
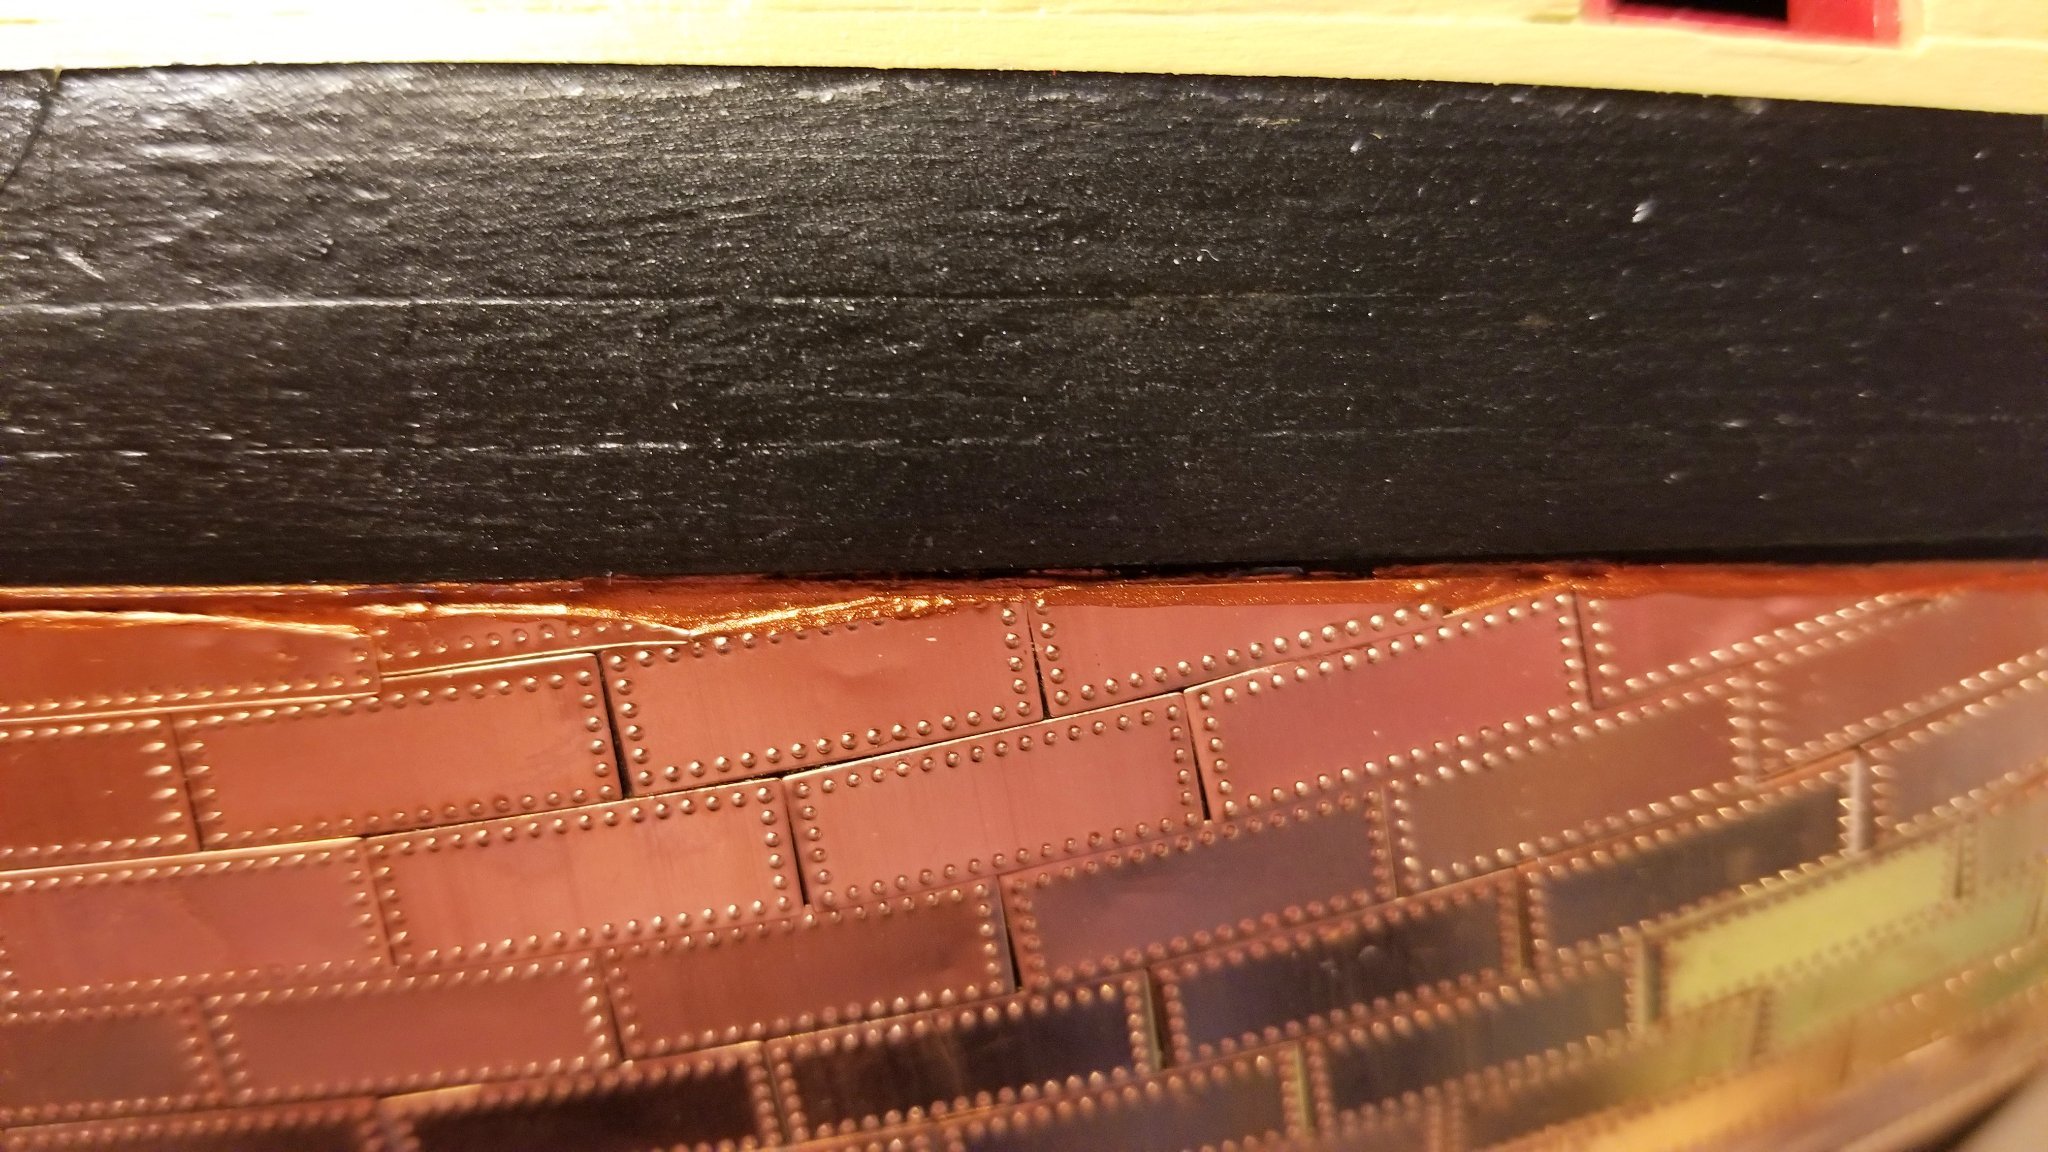
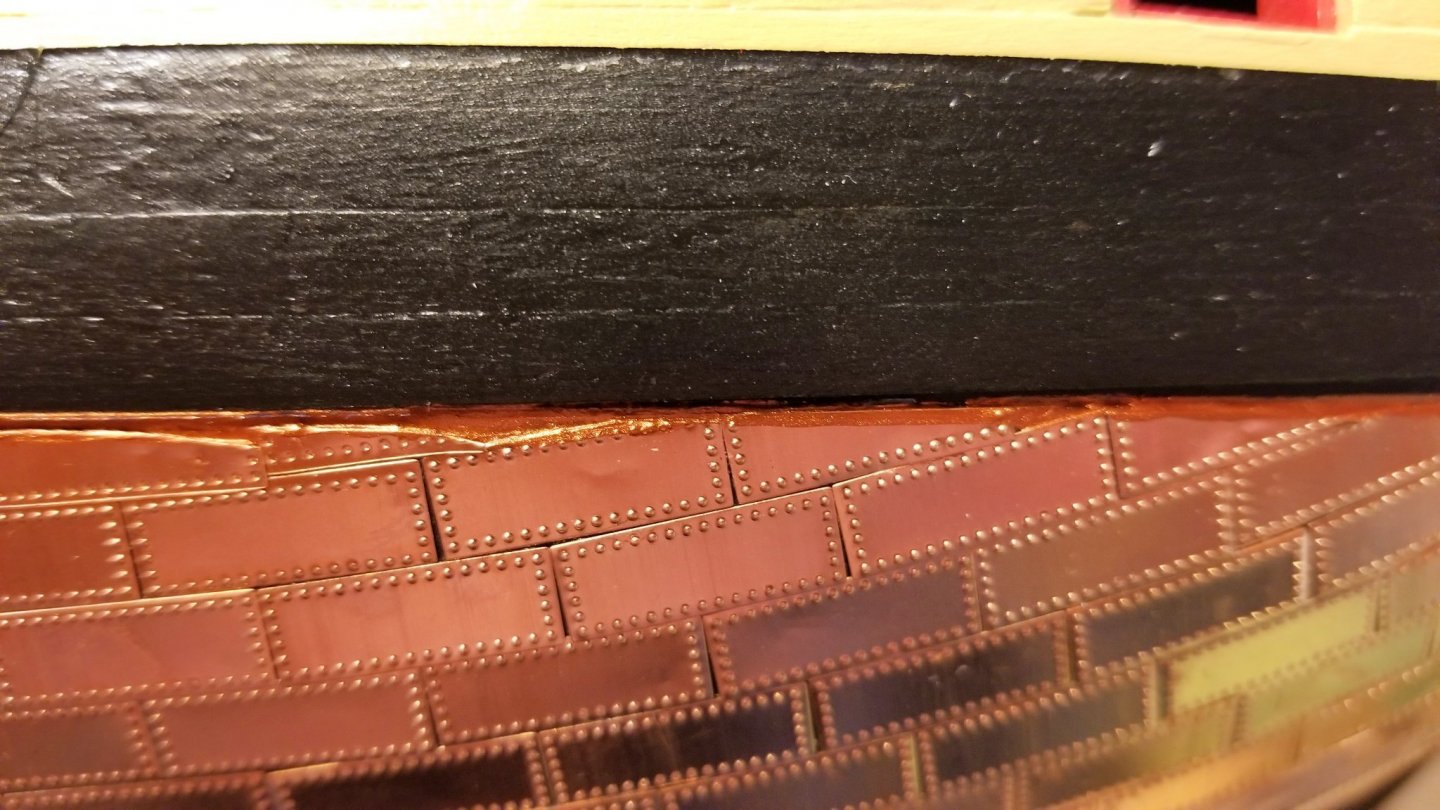
Allan: Sorry, it's a trick of the photography. My bumps face outward. It's my second coppered model, and I've always assumed that the bumps are supposed to represent the nail heads. The copper plates are also shaped to glue down more easily that way -- it's more difficult with the bumps facing in, and the edges wouldn't mate cleanly. Interestingly, there have been a few plates that have black paint stripes on the "bumps in" side, which would indicate that that manufacturer intends for them to face out. So no kudos for me on that one.😛 On your second point -- I don't know what you mean by "gun port stops". Are you talking about the lining that I did in red -- or is it something that I will encounter further on in the model? Thanks, and regards, David
- 218 replies
-
- 1
-
-
- Victory
- Caldercraft
- (and 1 more)
-
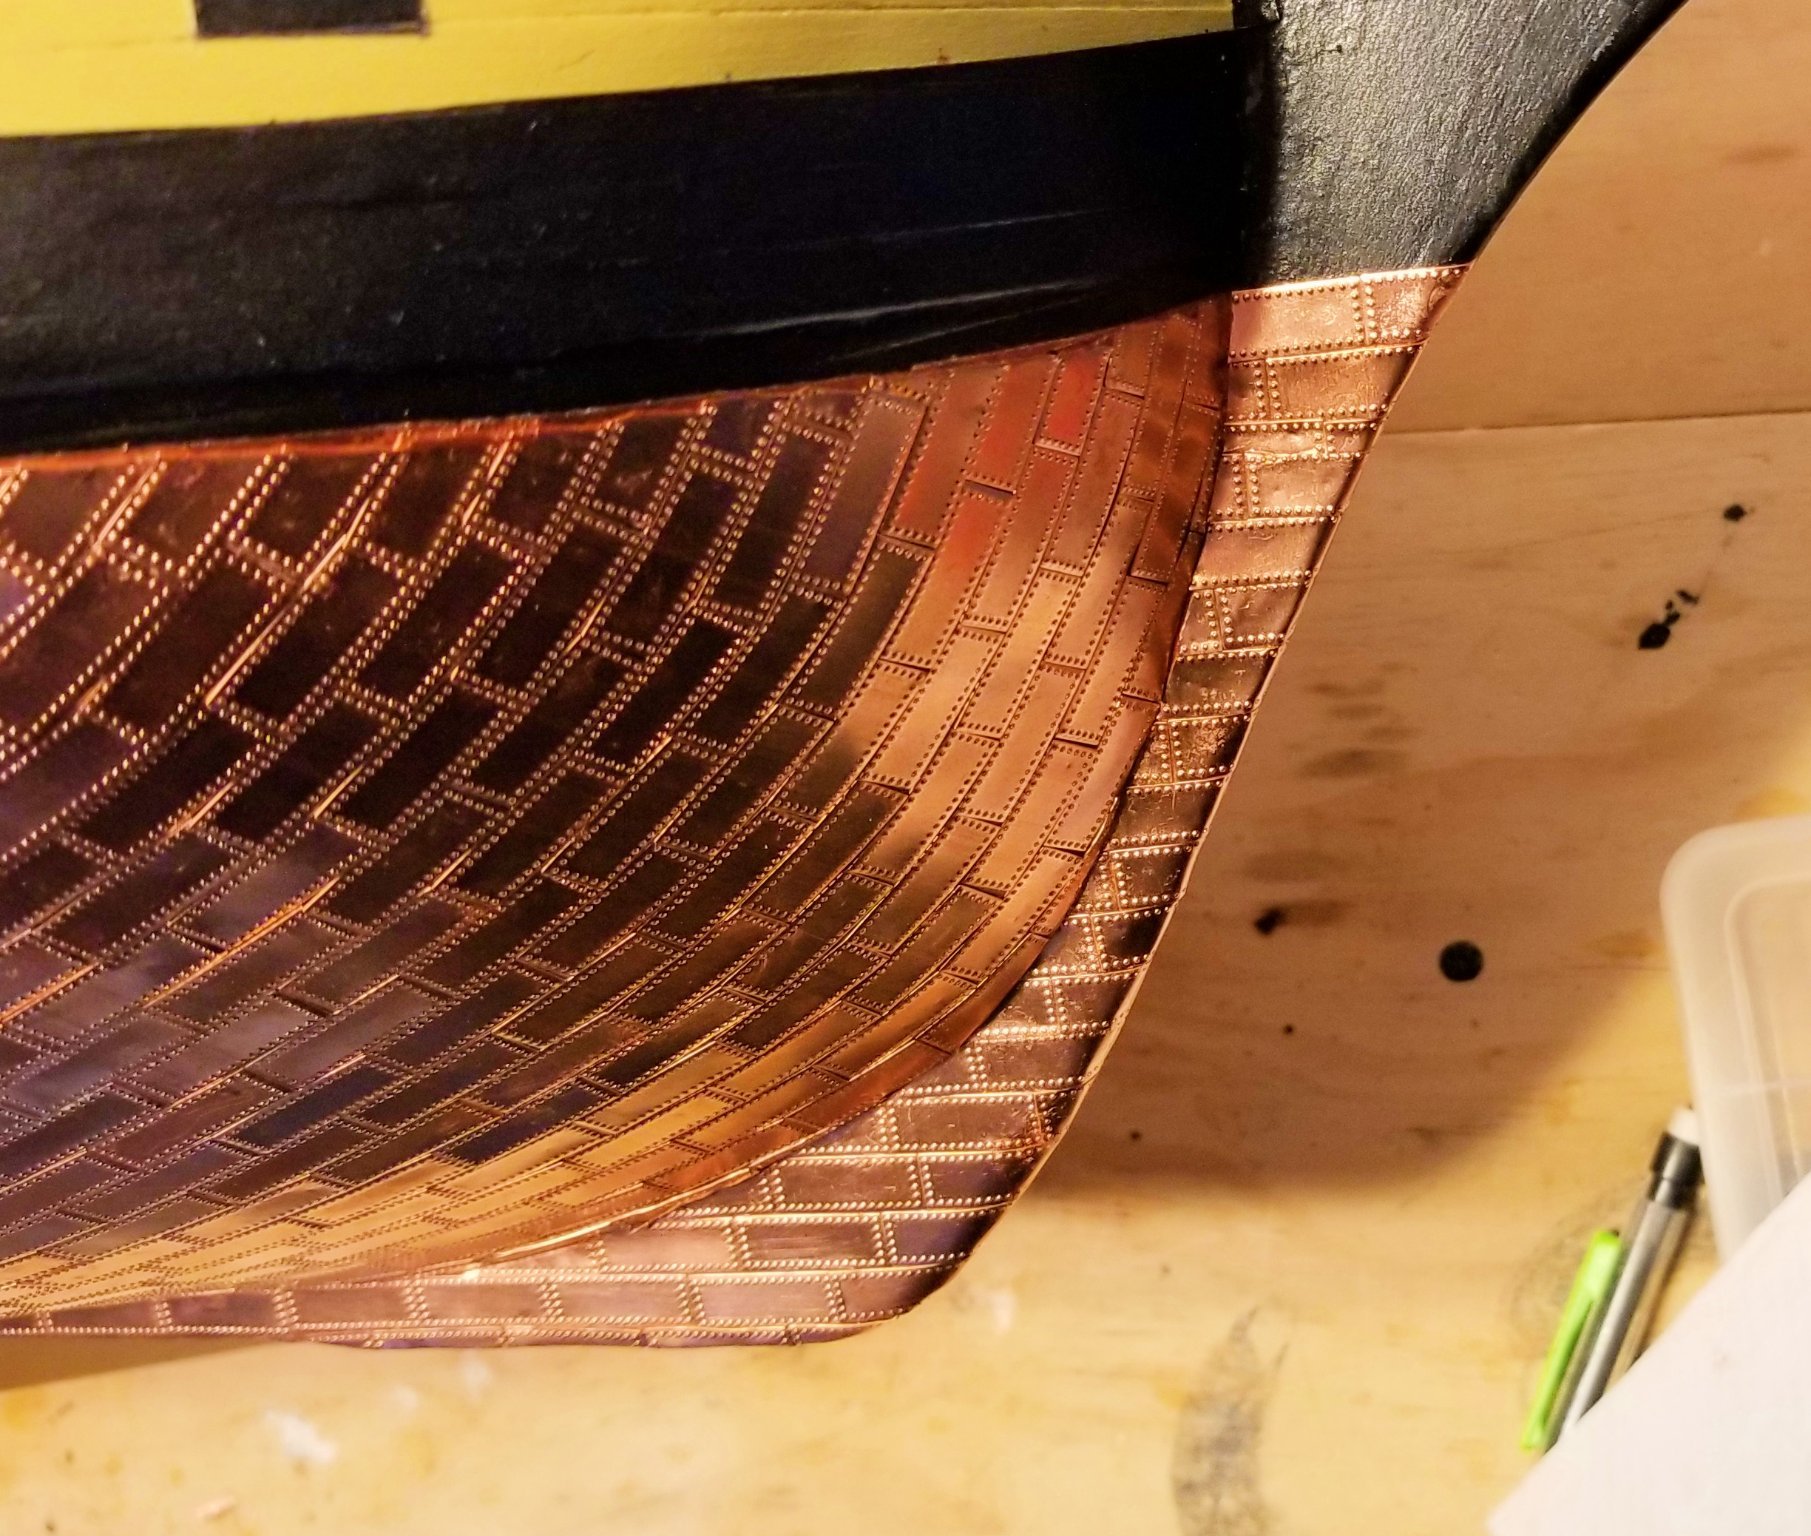
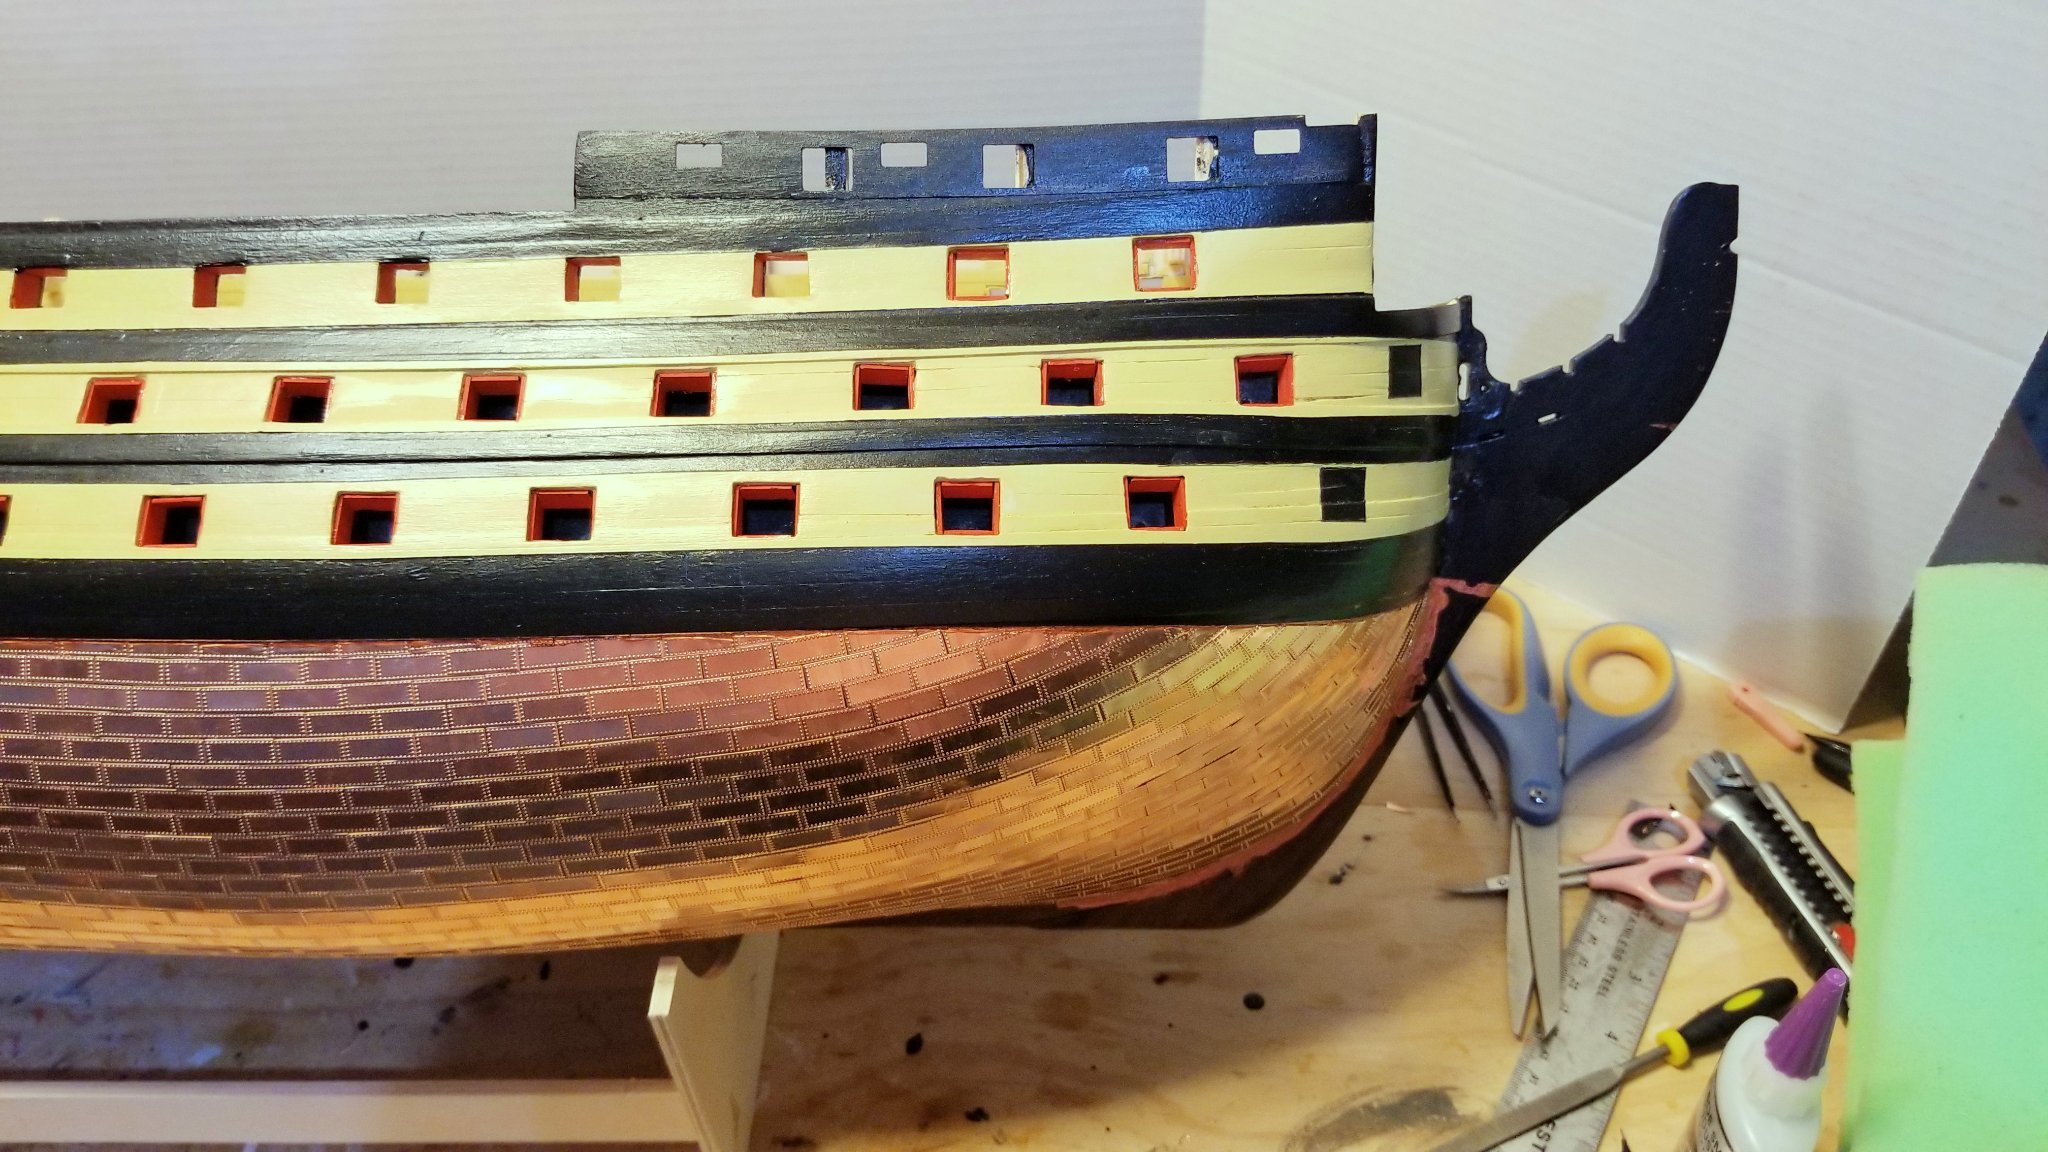
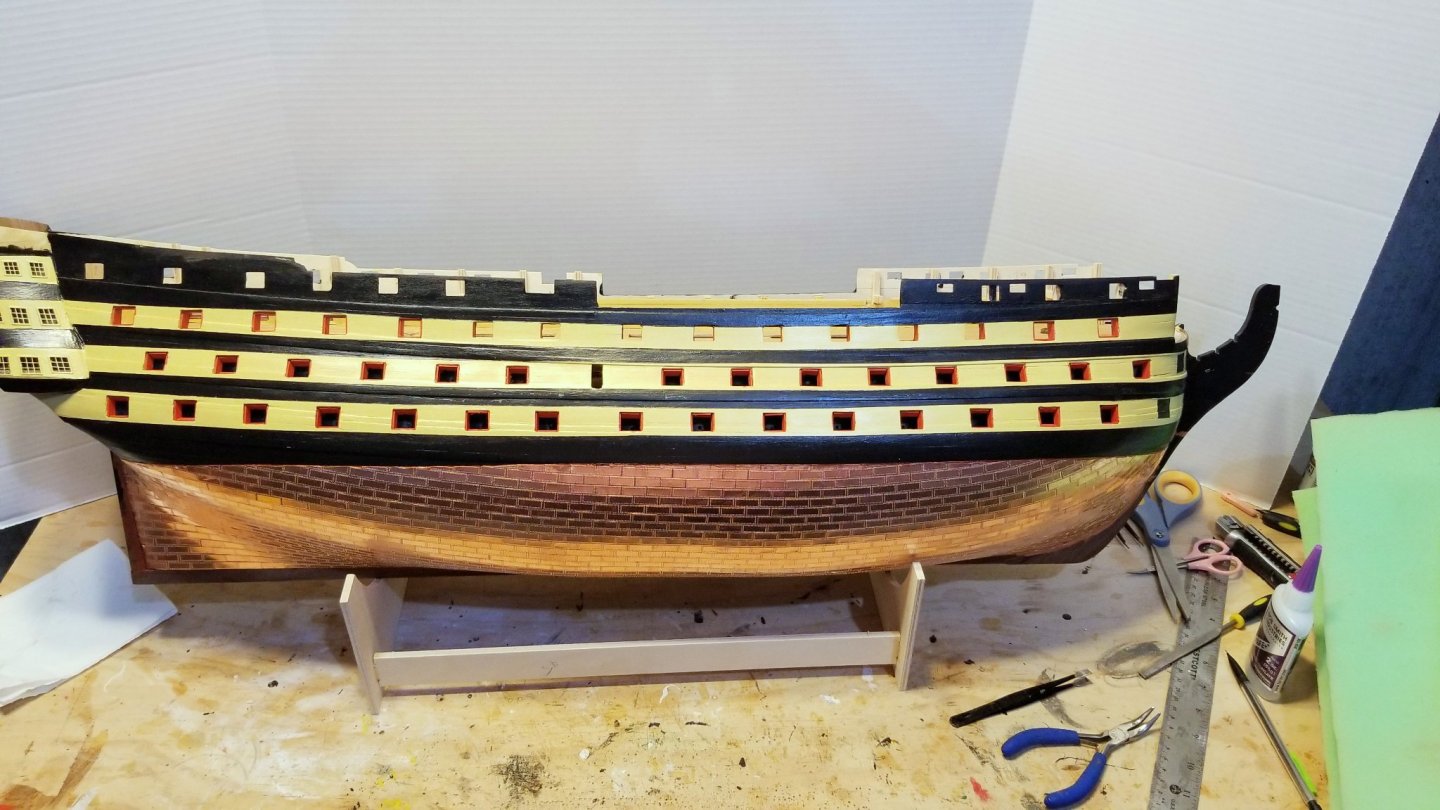
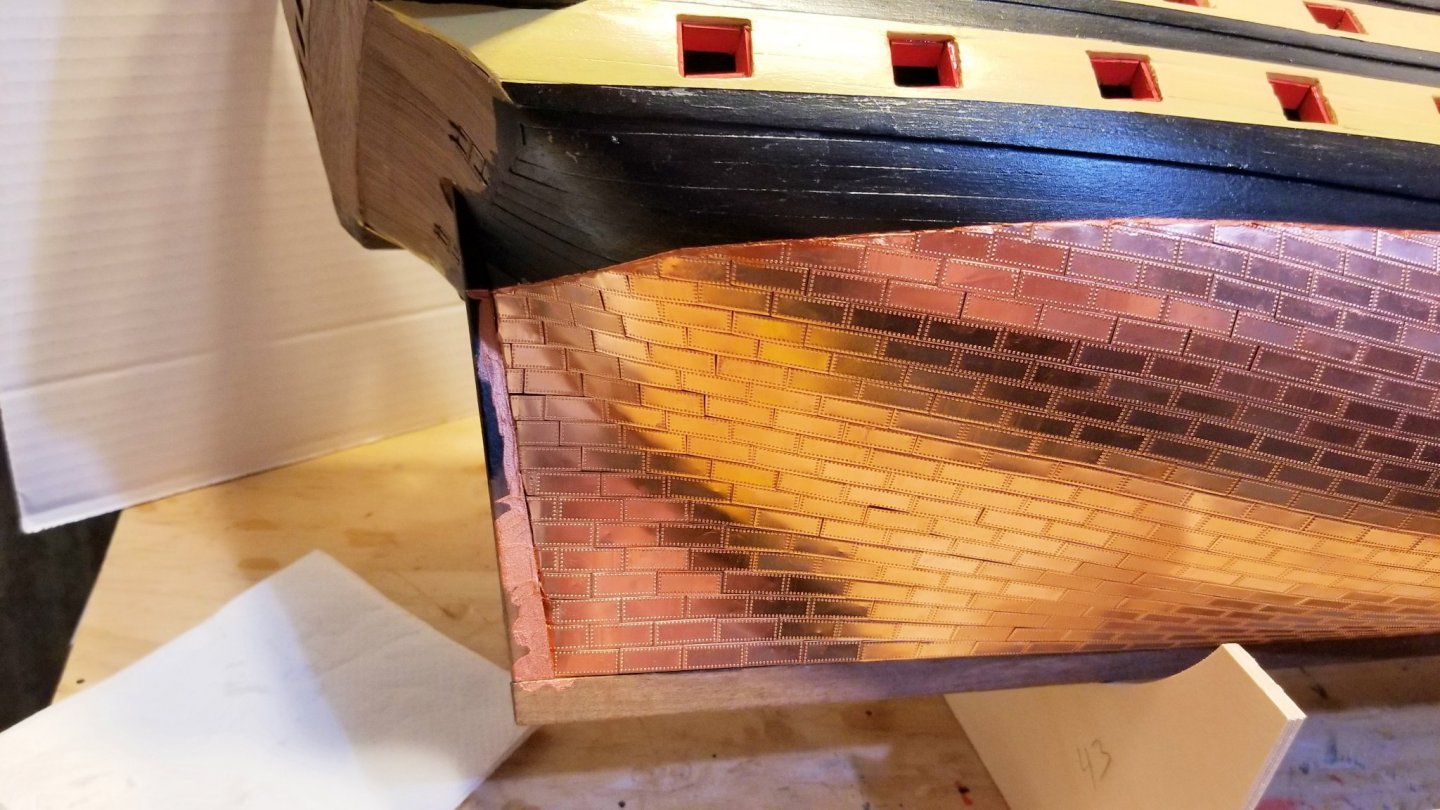
Coppering of starboard hull is in the previous post. I've now finished coppering the port hull (looks the same). I've also finished coppering the keel, stern post and bow on the starboard side, and pictures of those are below. Regards, David


- 218 replies
-
- 9
-
-
-
- Victory
- Caldercraft
- (and 1 more)
-
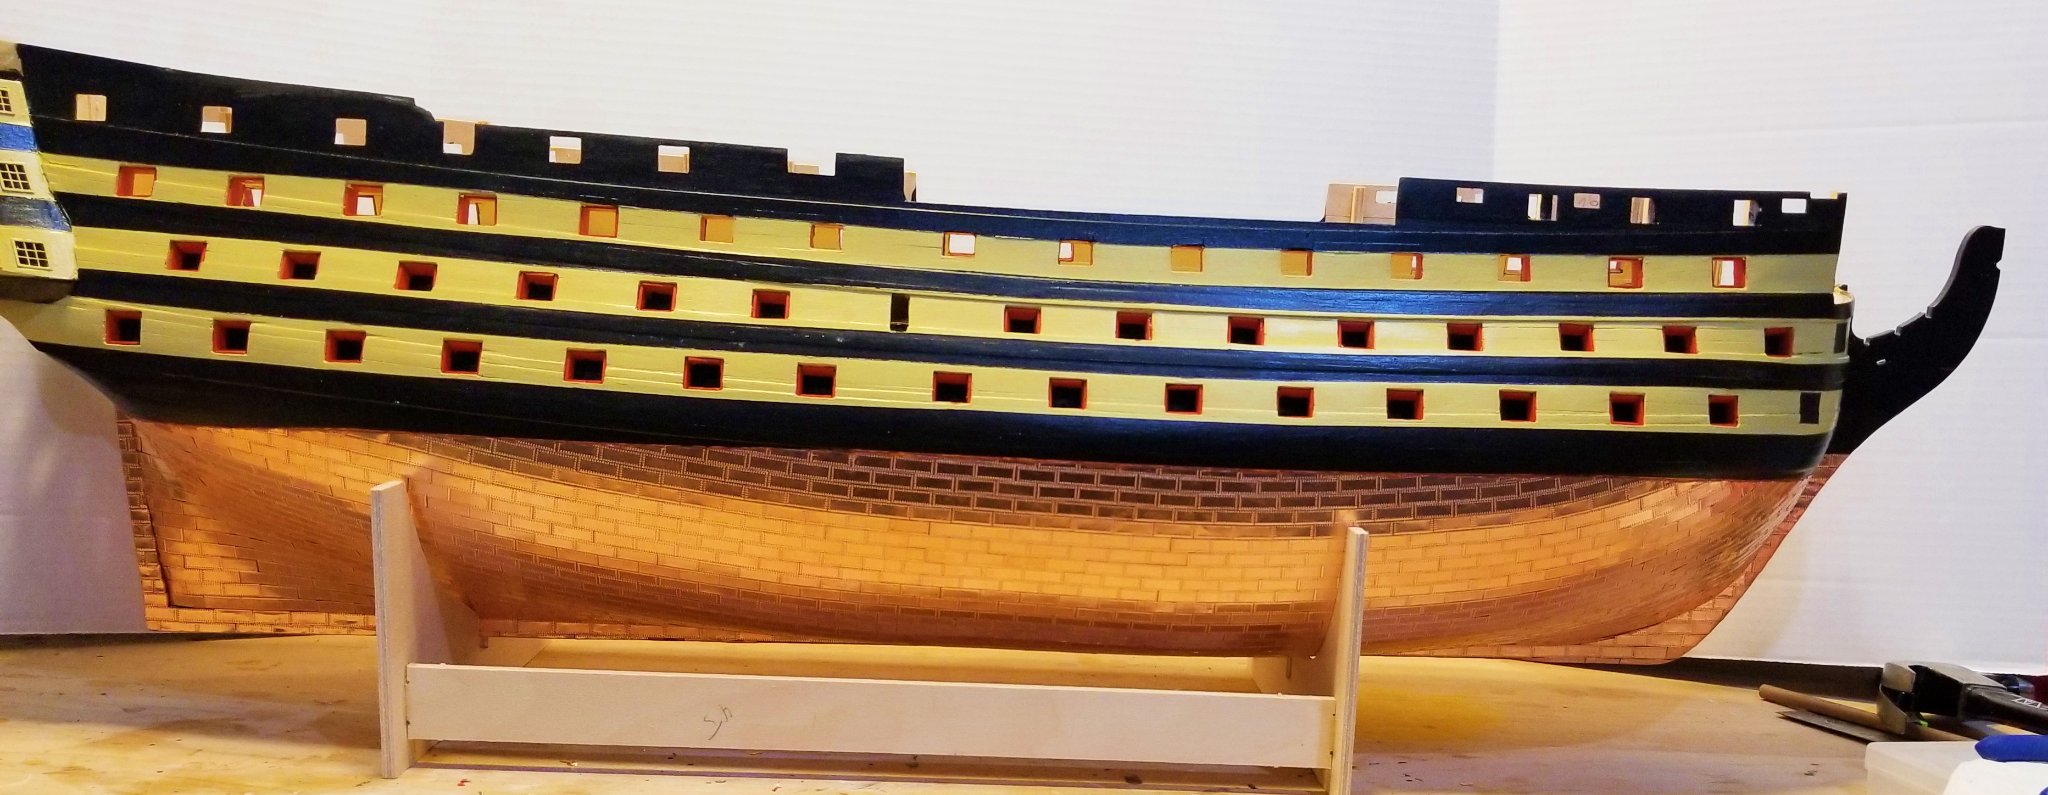
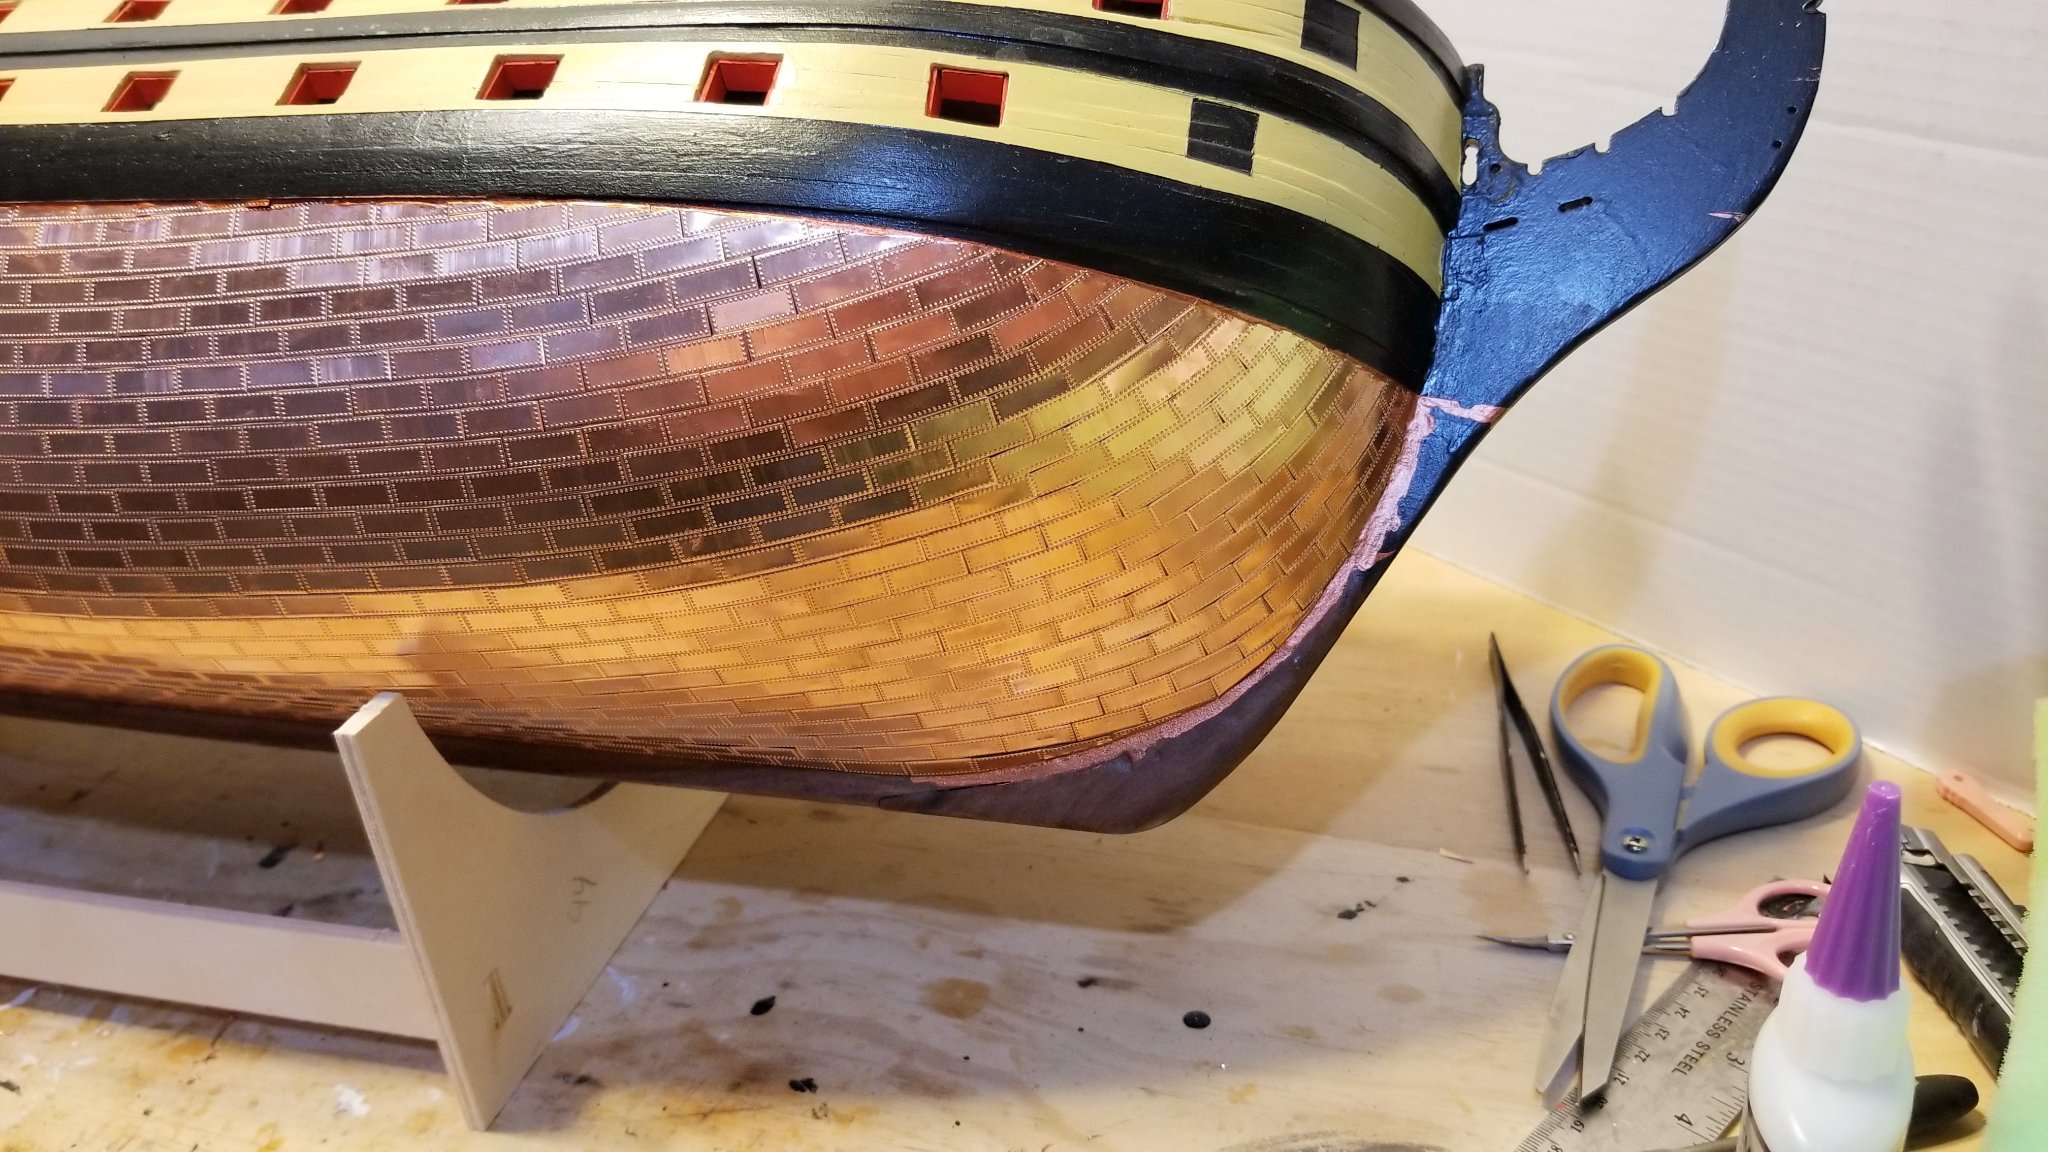
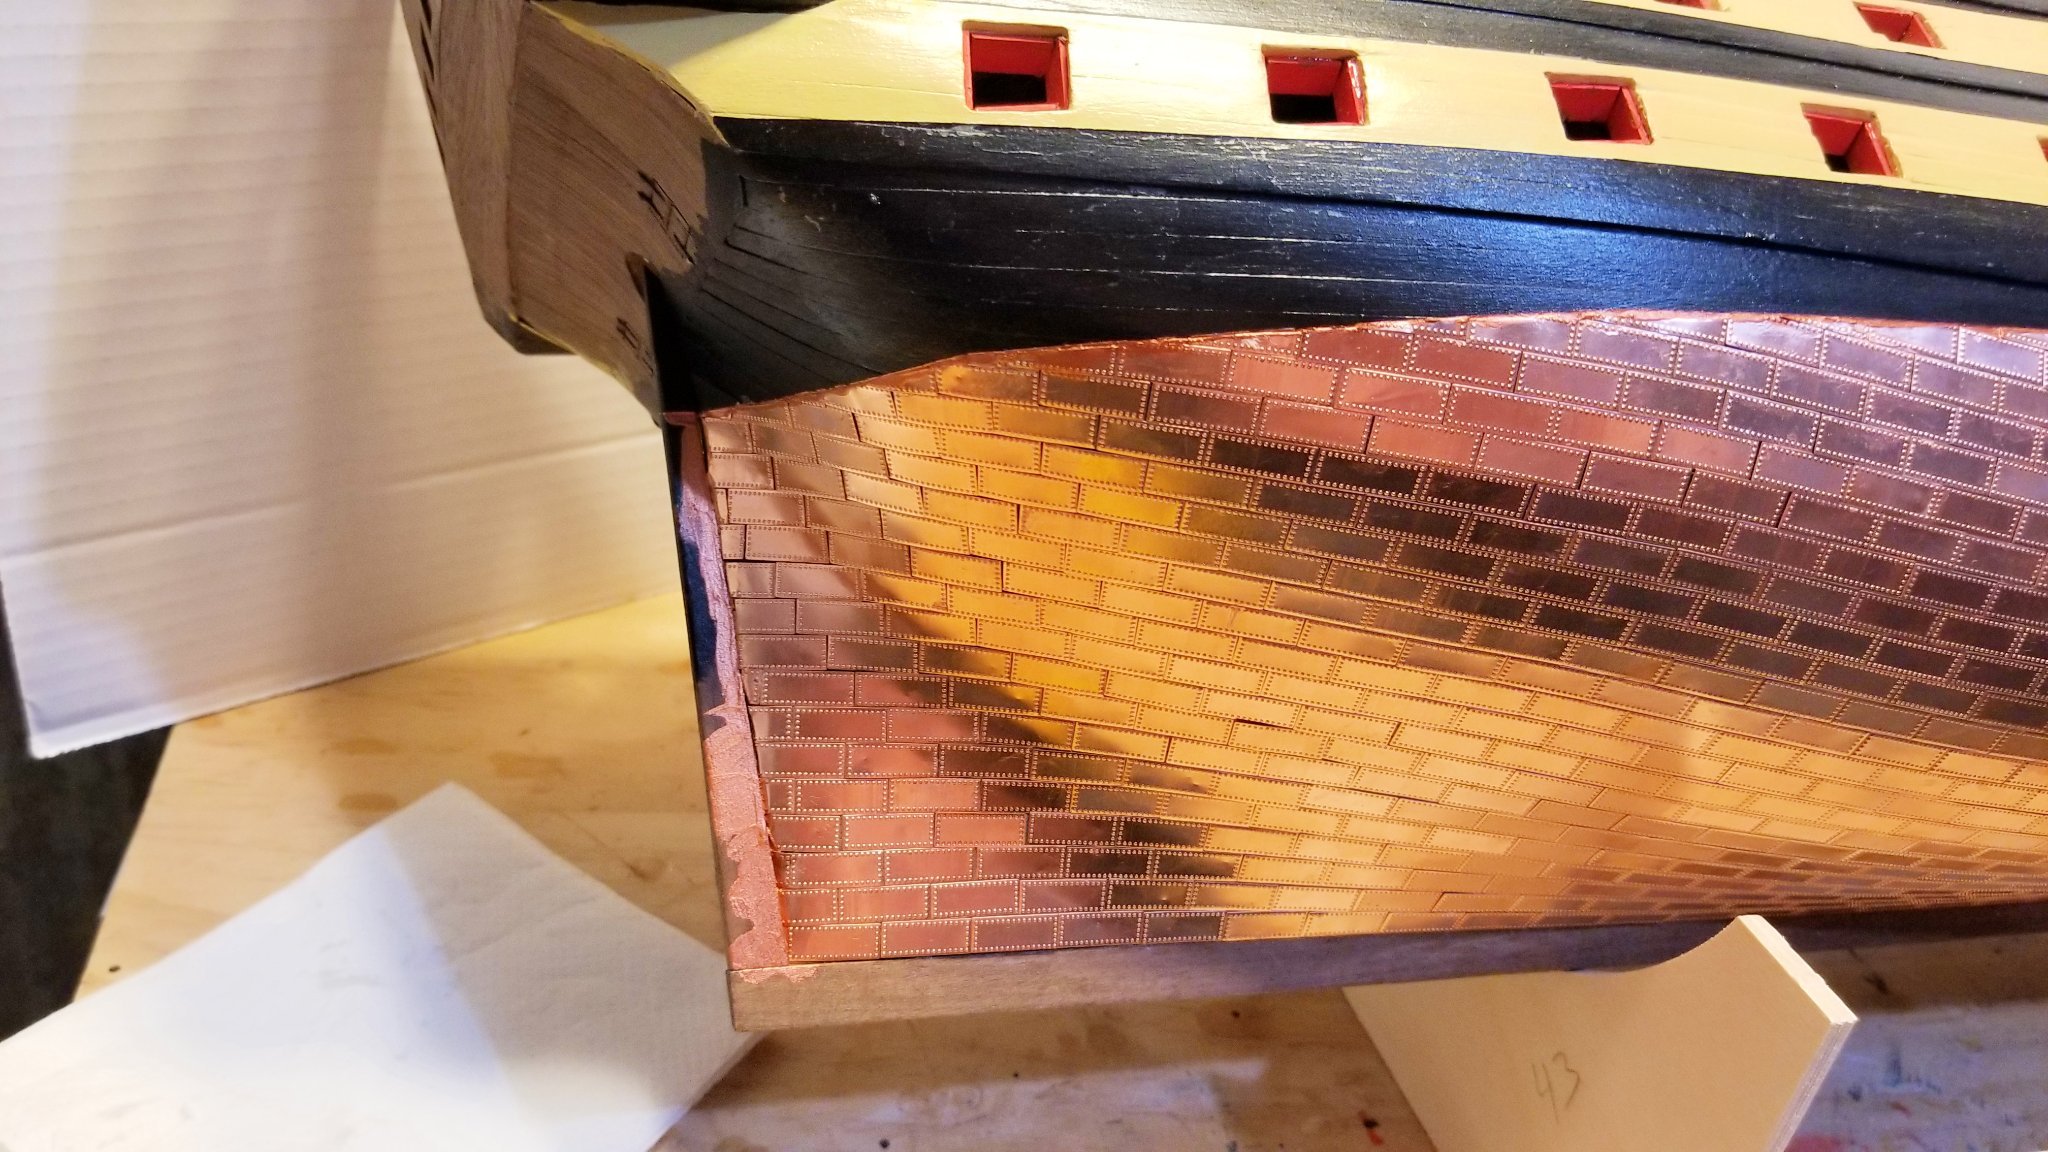
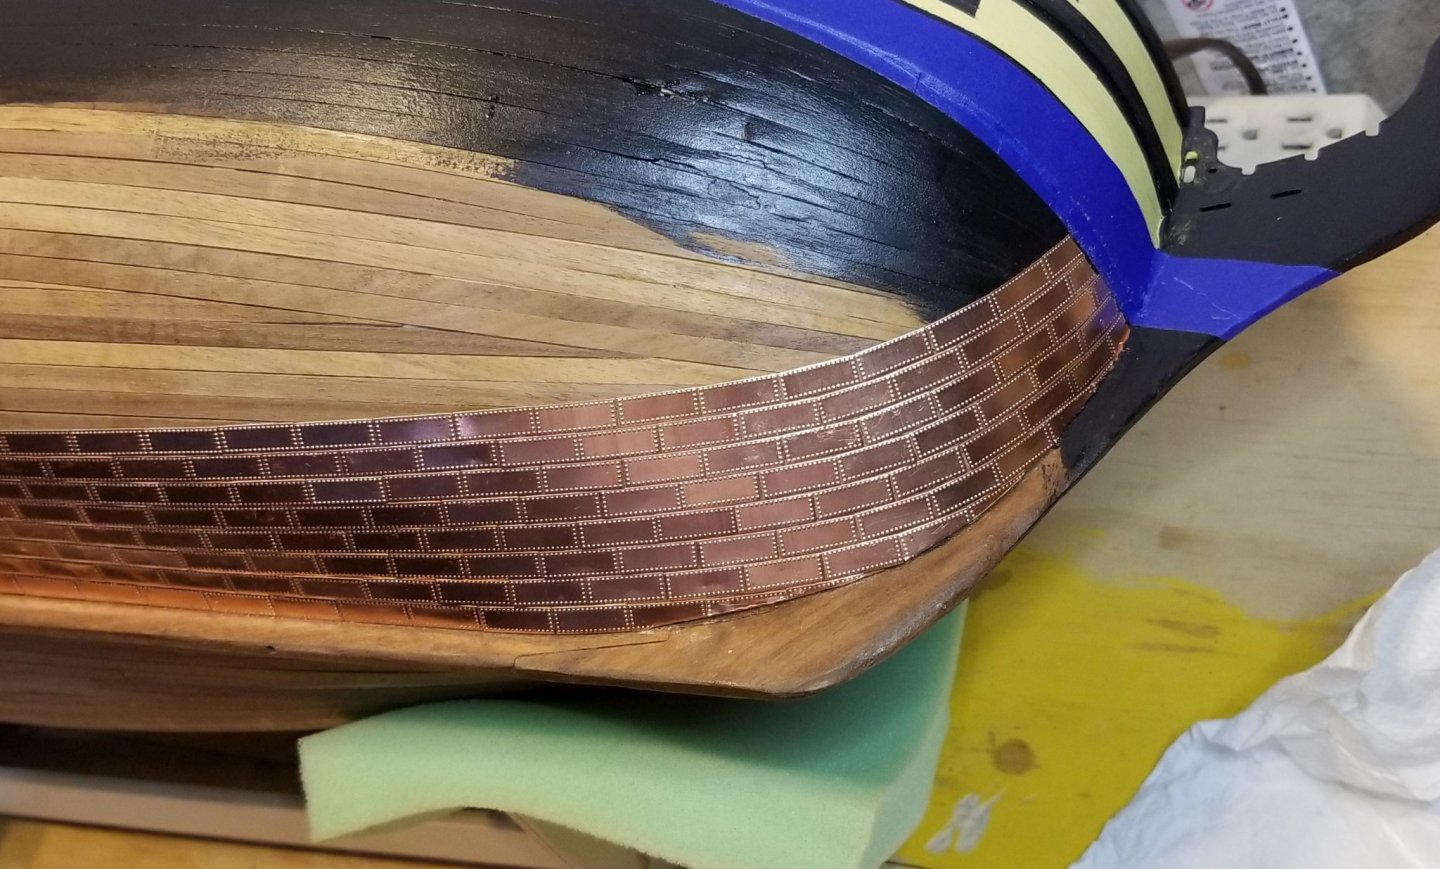
I've finished coppering the starboard side (not yet the rudder frame or bow piece or keel). I gave some thought to whether to start at the keel, as the manual suggests, or start across the waterline to get a straight edge. I knew if I did the latter I would lose the beautiful upsweep at the bow, so I went with starting at the keel and hoped that the suggested technique of using copper paint and masking tape would work. So I masked off the waterline and then coppered up to it, leaving gaps in spots. Finally finished, and applied copper paint at the top, said a prayer and peeled off the tape. I was delighted with the result. A really straight looking waterline. Several pics here of the result that show how good the waterline looks, and also that upsweep at the bow -- and the stern line. I also took a closeup of one of the "gaps" that is filled in by the paint, and then stepped back to viewing distance with that gap in the center, and you don't really see it unless you are looking for it. The copper paint is made by Golden, and it's "Iridescent Copper". Got it on Amazon. Regards, David


- 218 replies
-
- 9
-
-
-
- Victory
- Caldercraft
- (and 1 more)
-
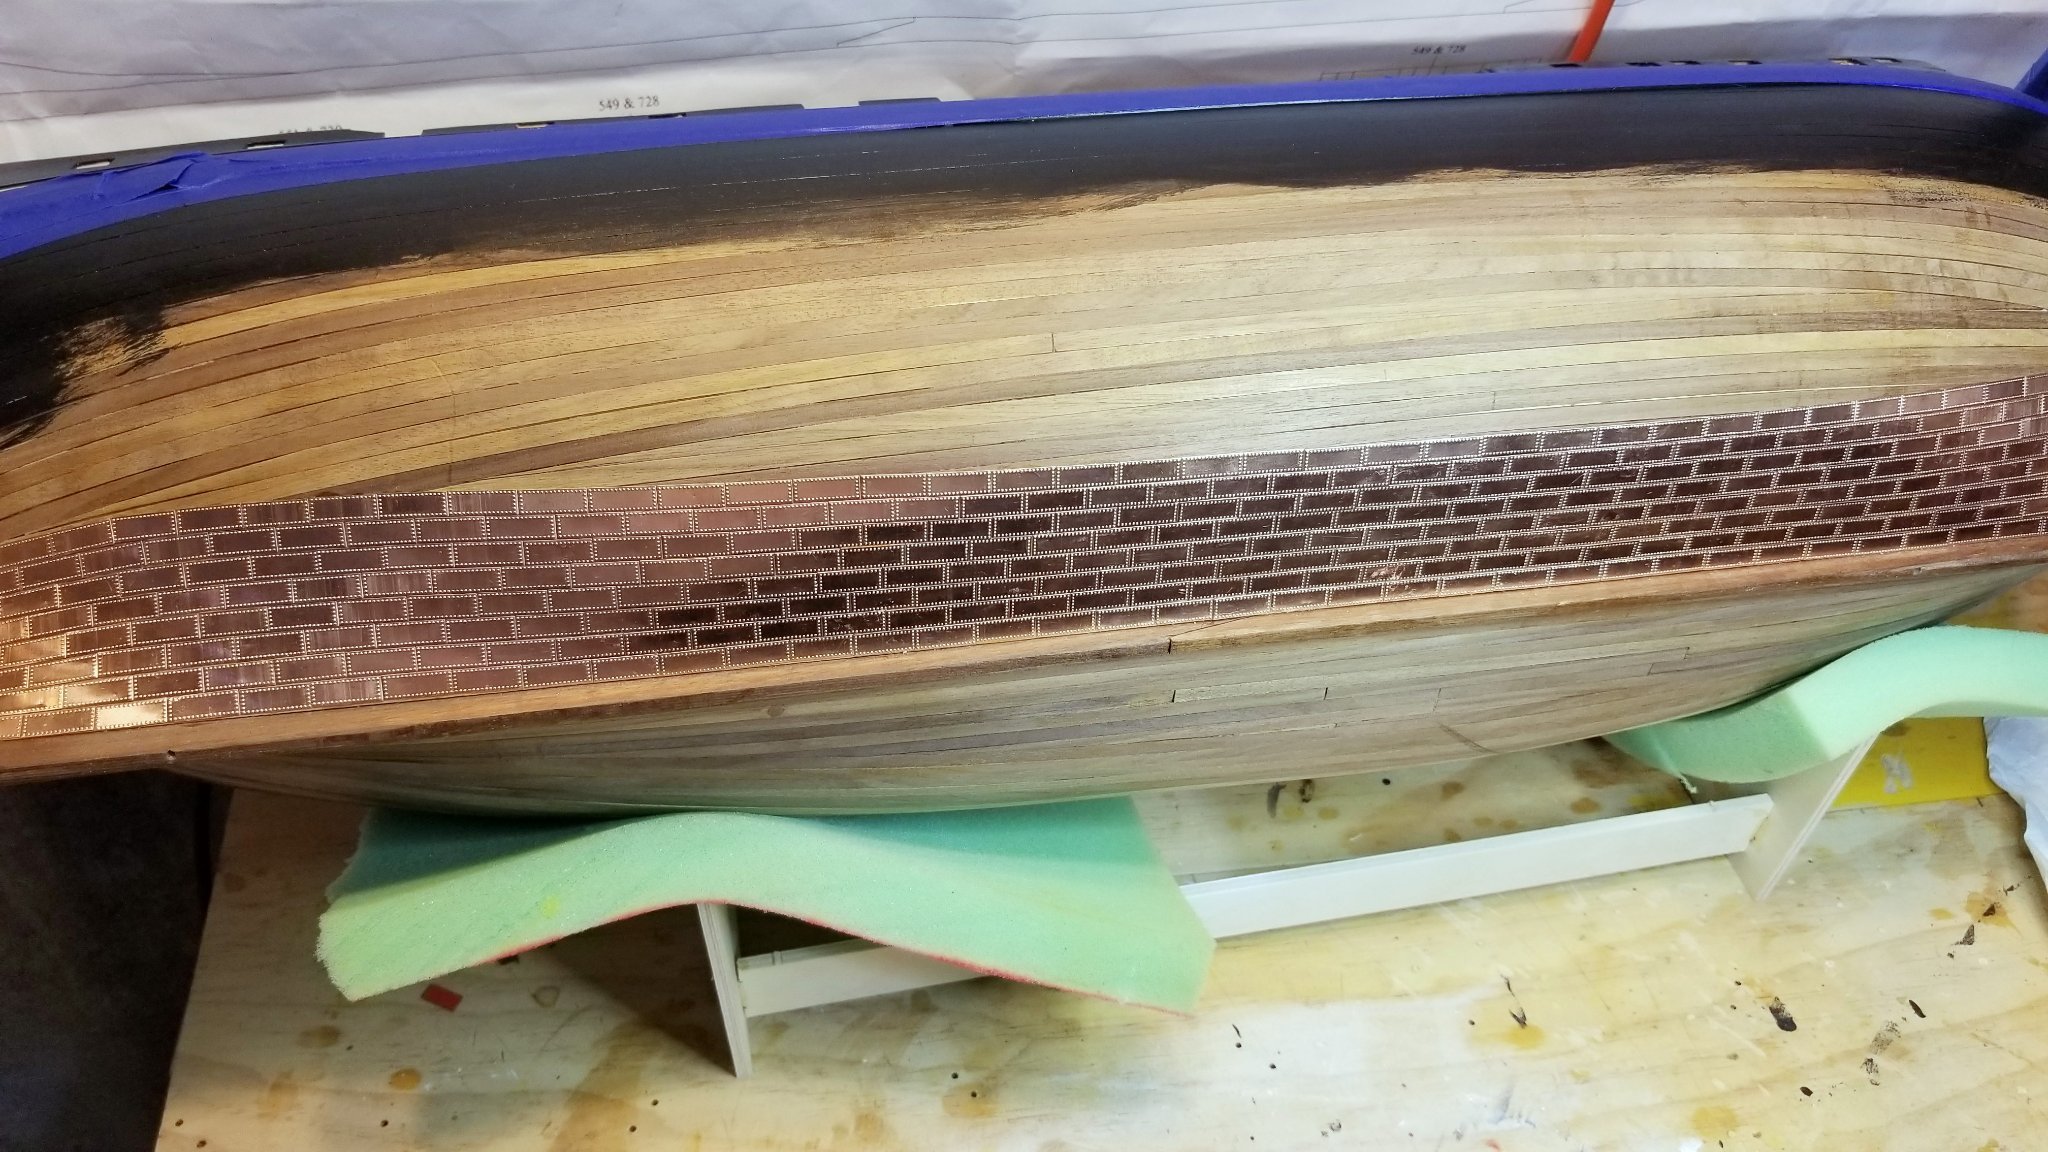
Started coppering the hull. You can see the curved section running up to blue masking tape, which is marking the waterline. I'm trimming it close, and then plan to use a tip from the manual by applying copper paint into the gaps to get a straight waterline. This is my "bad" side (the side that faces the wall), so we'll see how it comes out when I'm done. Not sure there's much choice to do it differently. Regards, David

- 218 replies
-
- 6
-
-
- Victory
- Caldercraft
- (and 1 more)
-
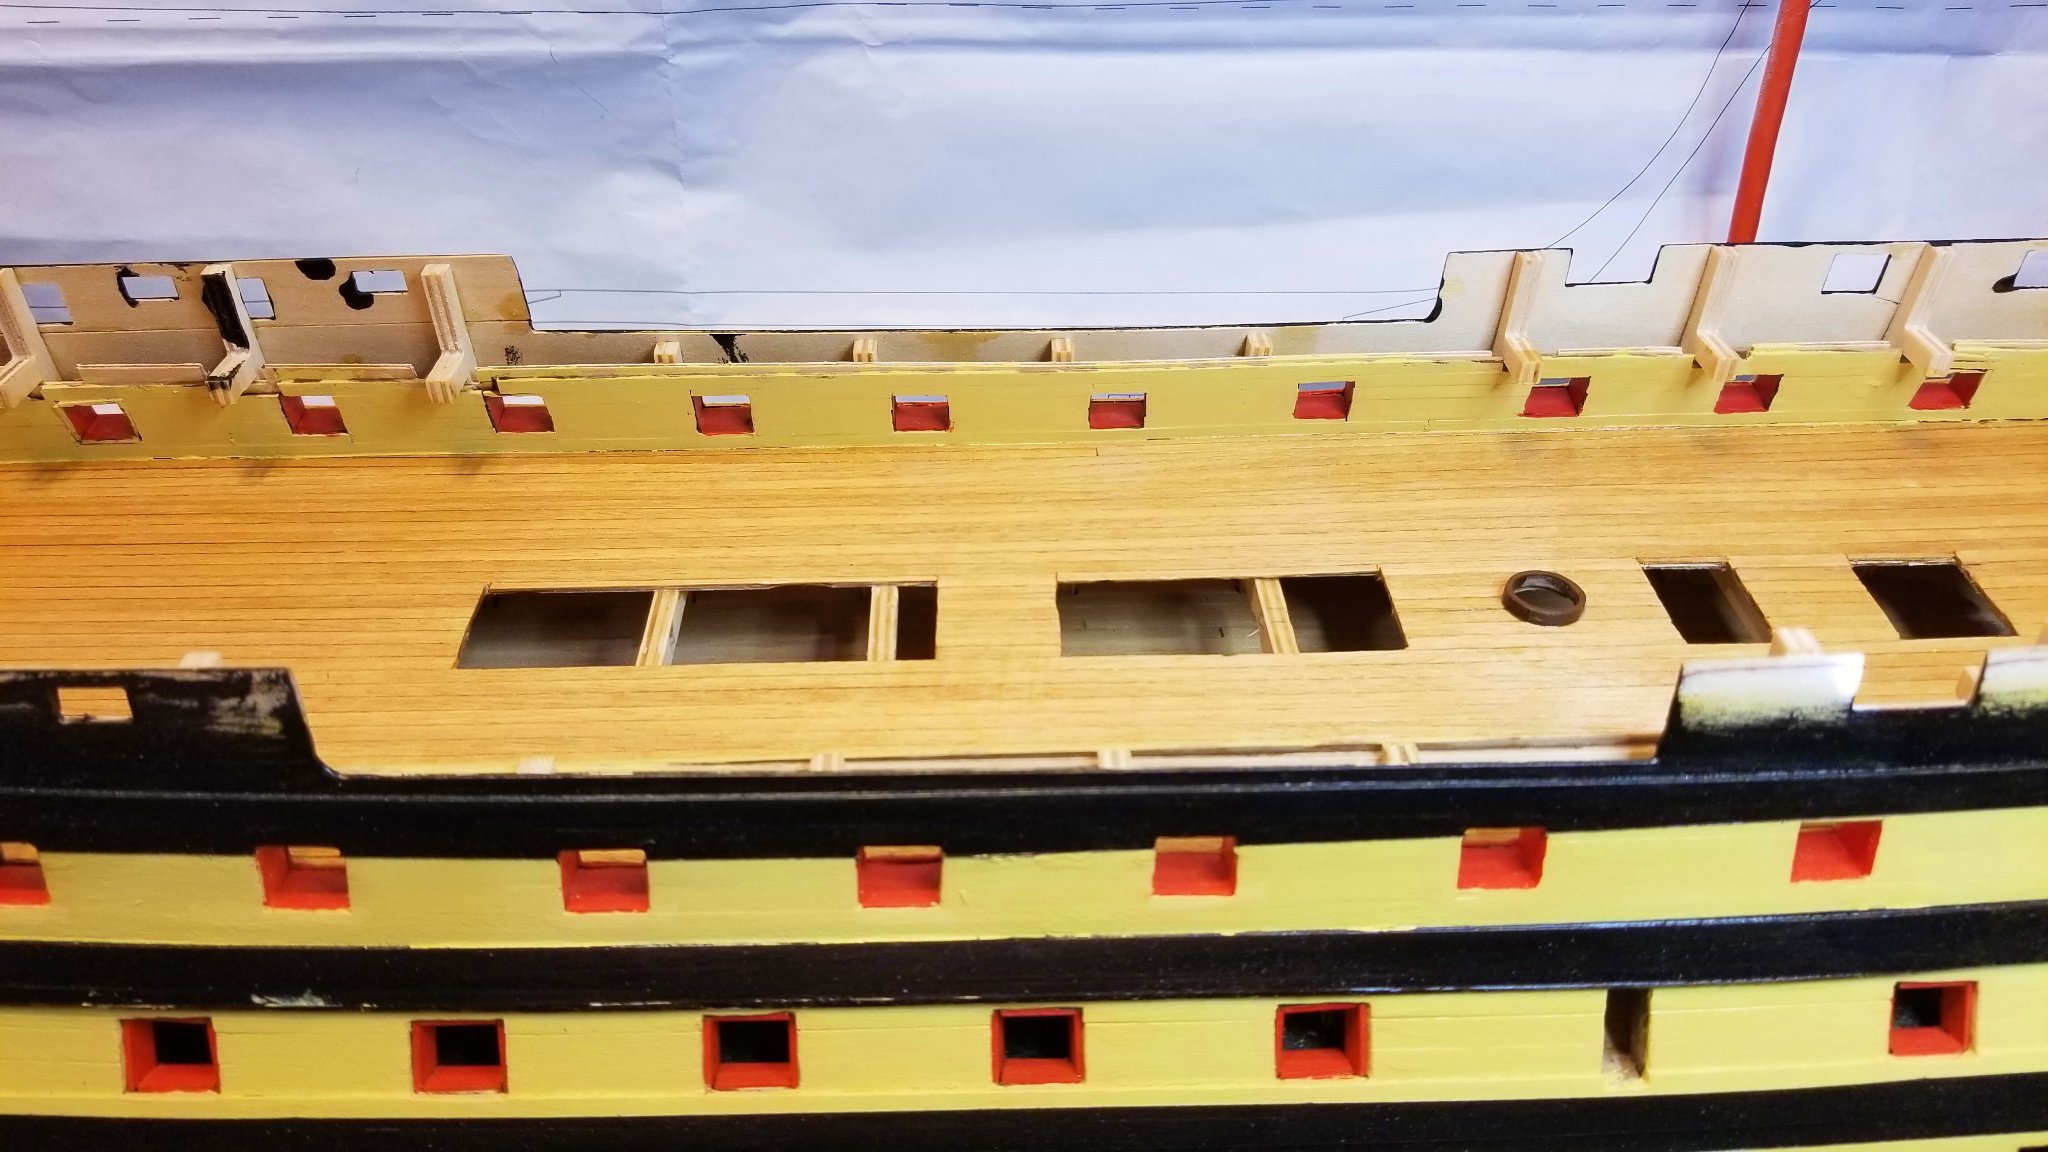
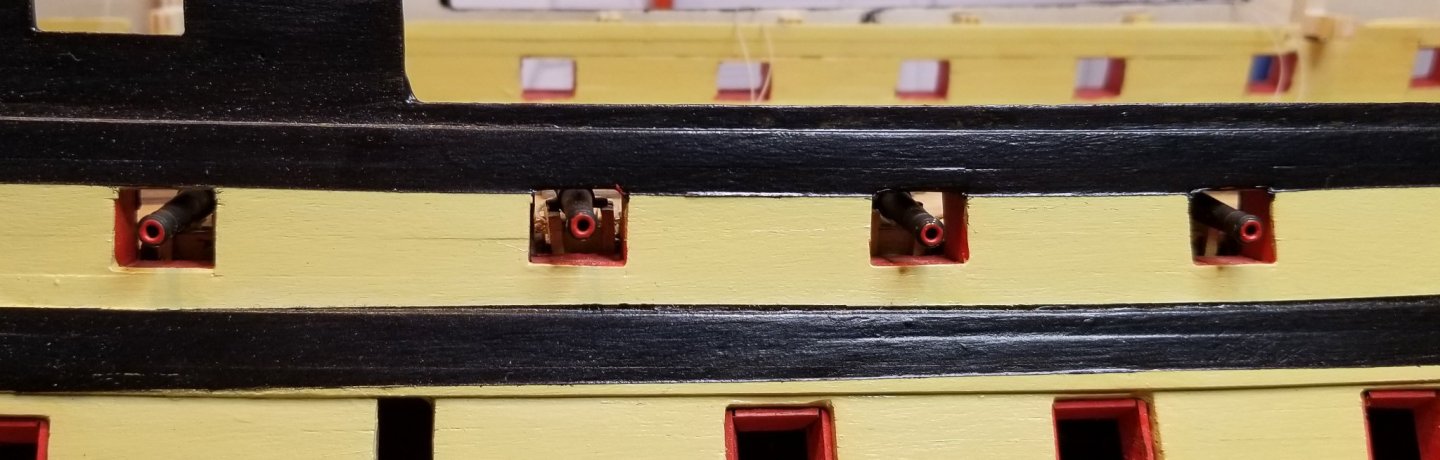
I've drilled the holes for the dummy barrels -- sort of. In the waist area of the boat, the dummy barrel strips rise behind the second level gunports to a point where there's no way to drill a centered hole -- nothing but air there. I drilled off-center holes anyway, but I think for those I'm going to have to put in a jury-rigged fix to keep the cannon barrels aligned. I'll have to drill a hole in a short piece of first planking, put the dummy barrel in the hole, and then using super glue, place the short planking back in the rear of the gunport such that the hole is centered and the barrel is aligned, but at least one end of the planking glues to the part of the barrel strip that's visible. It should work if I align the barrels for the centered holes first. It's a "down the line" step (mounting the dummy barrels), but that's the solution I"ll try. Regards, David
- 218 replies
-
- 3
-
-
- Victory
- Caldercraft
- (and 1 more)
-
Finished scoring and painting the false gunports at the bow. Regards, David

- 218 replies
-
- 4
-
-
- Victory
- Caldercraft
- (and 1 more)
-
Gun deck inside bulkheads painted. The critical area to get right is at the waist -- the quarterdeck will block visibility of most of the rest. Regards, David
- 218 replies
-
- 8
-
-
- Victory
- Caldercraft
- (and 1 more)
-
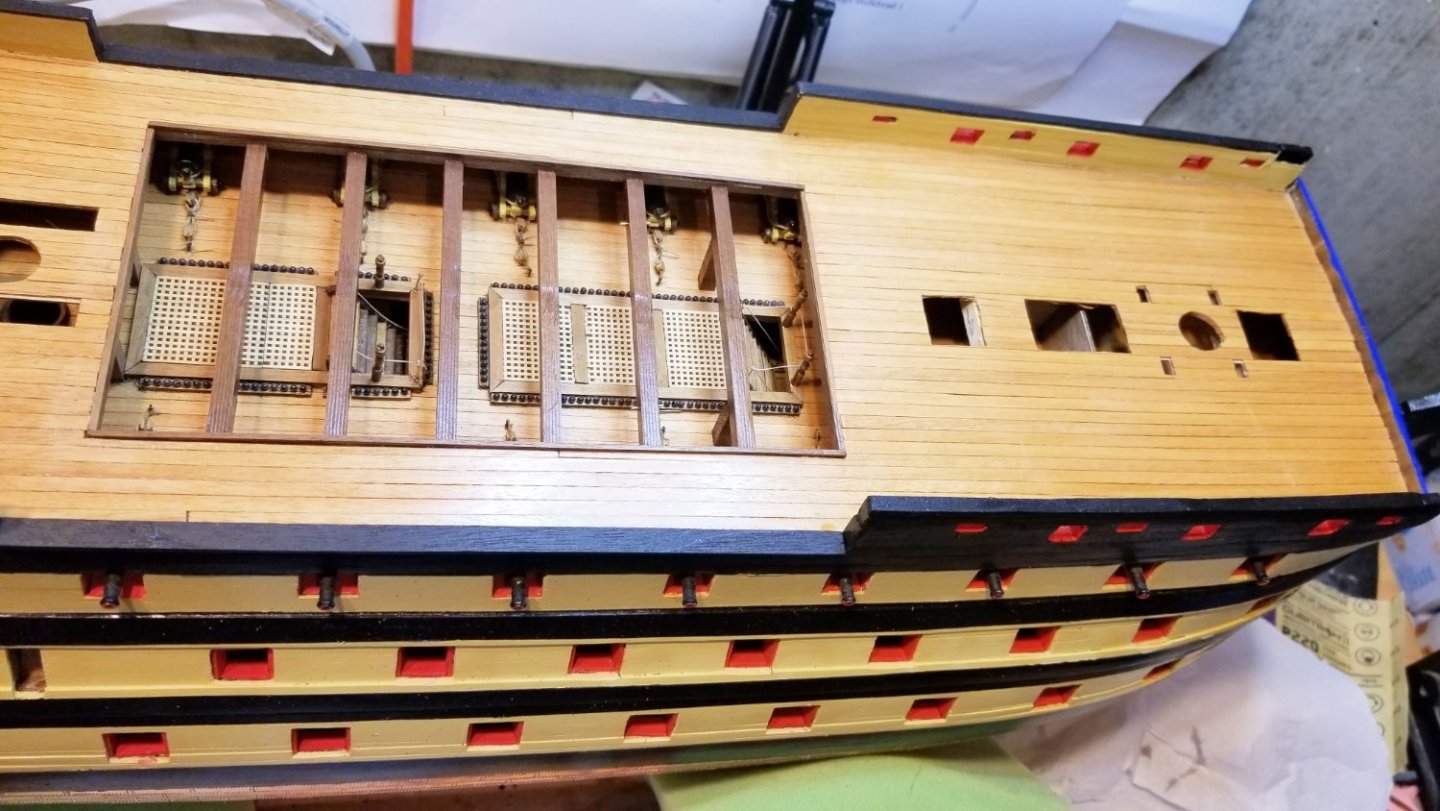
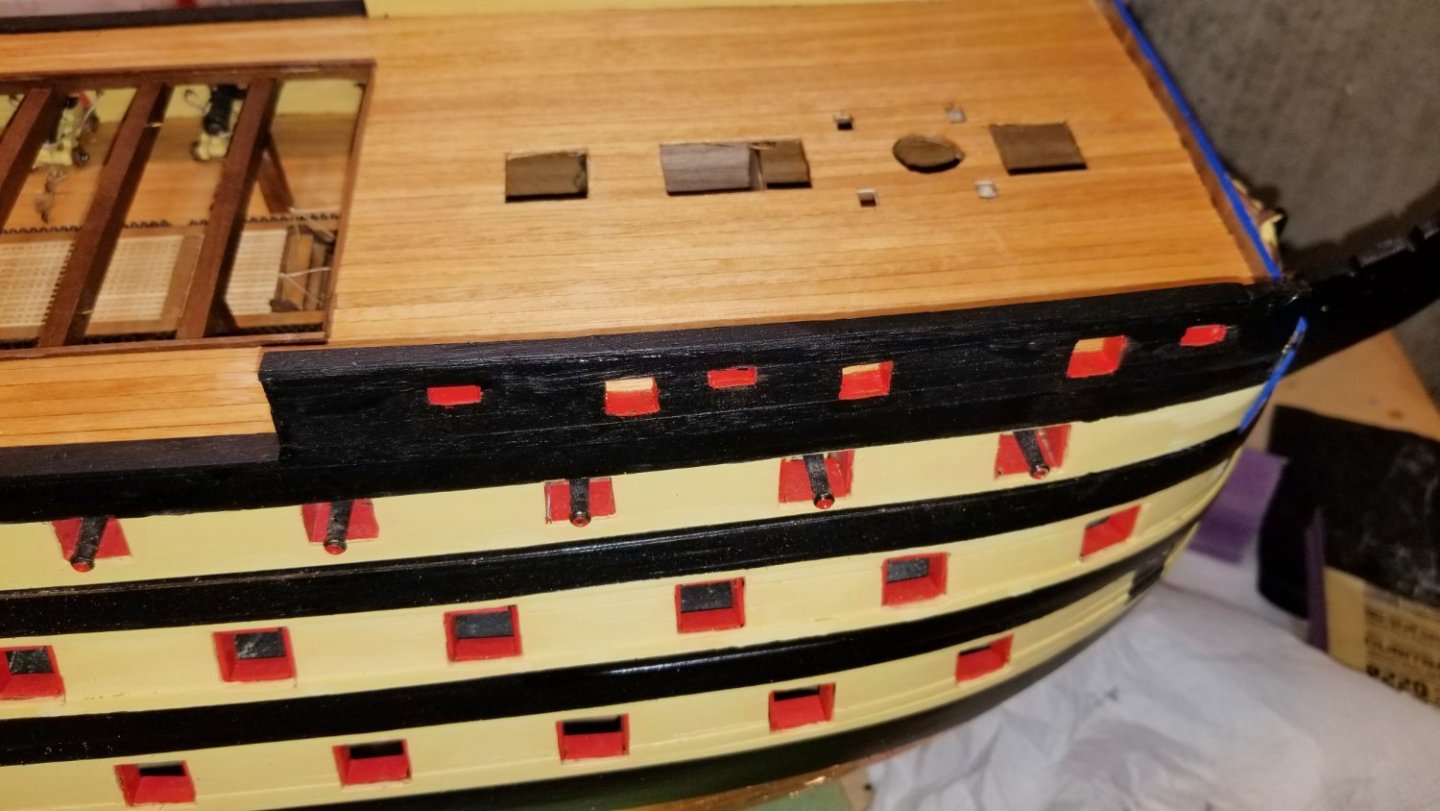
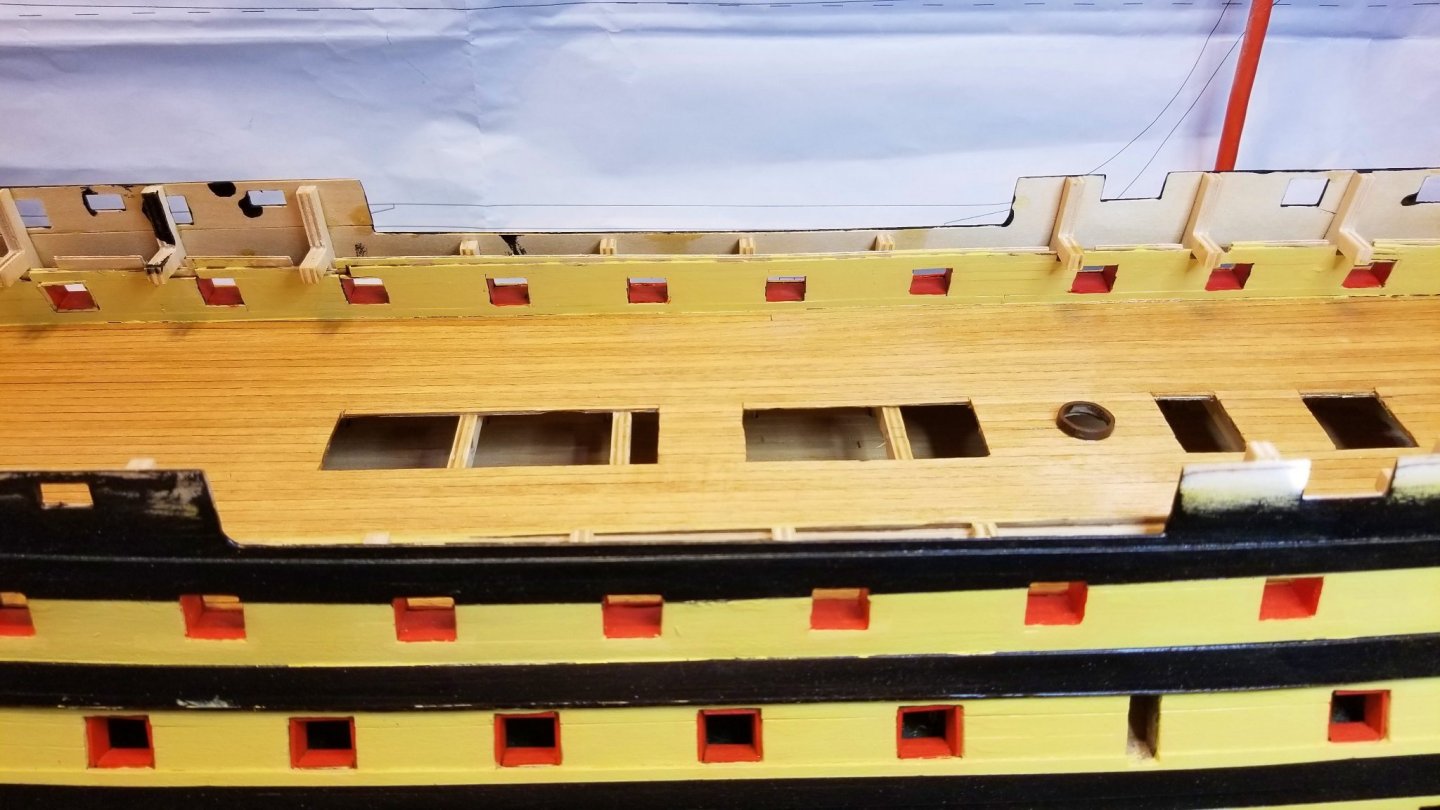
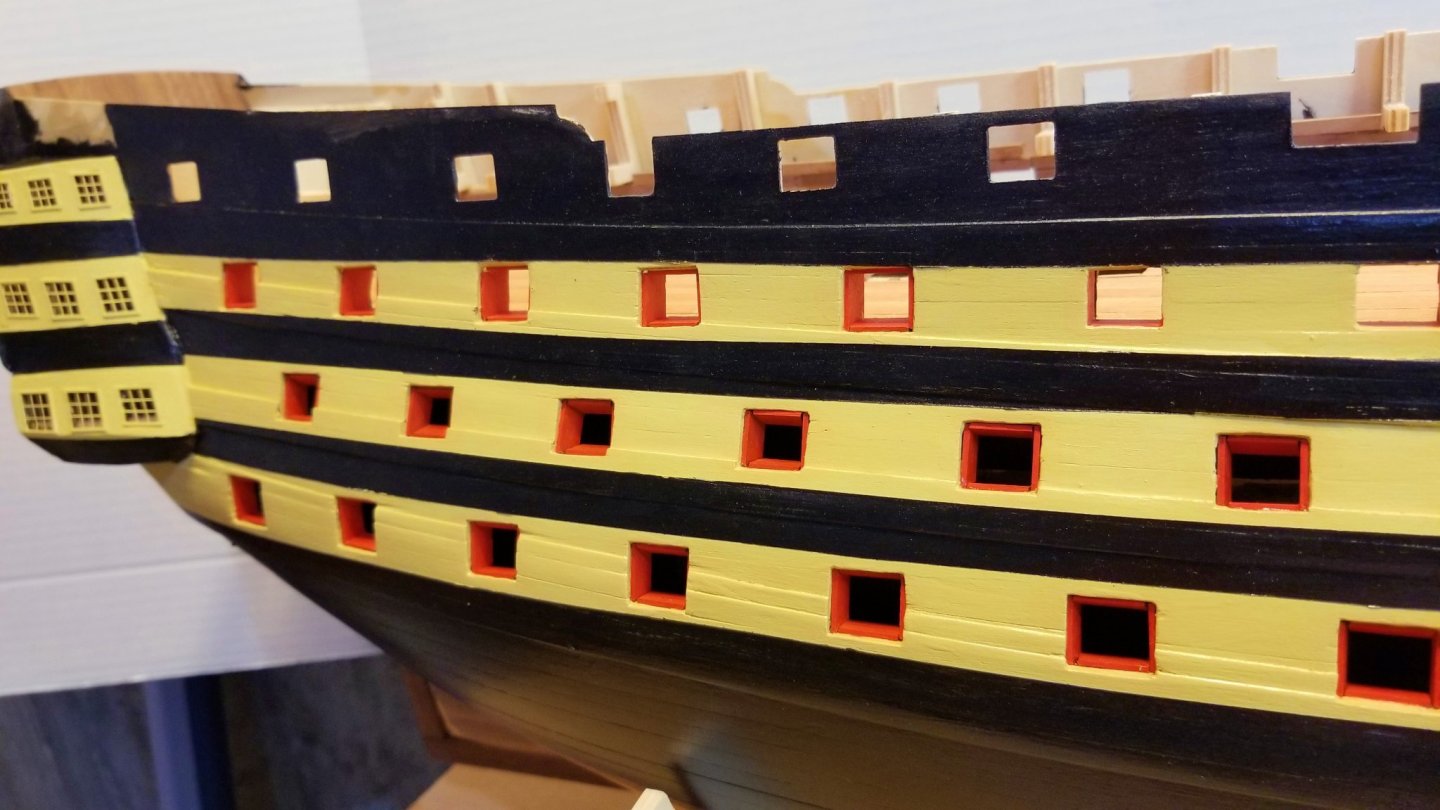
I've lined the gunports on the starboard side. I really like the look of the 3 colors together. I slightly flared the linings inward on the lower two gunport rows to show off the red just a bit more. Can't do it on the top row as the lining orientation is governed by being attached to templates at front and back. Regards, David


- 218 replies
-
- 12
-
-
-
- Victory
- Caldercraft
- (and 1 more)
-
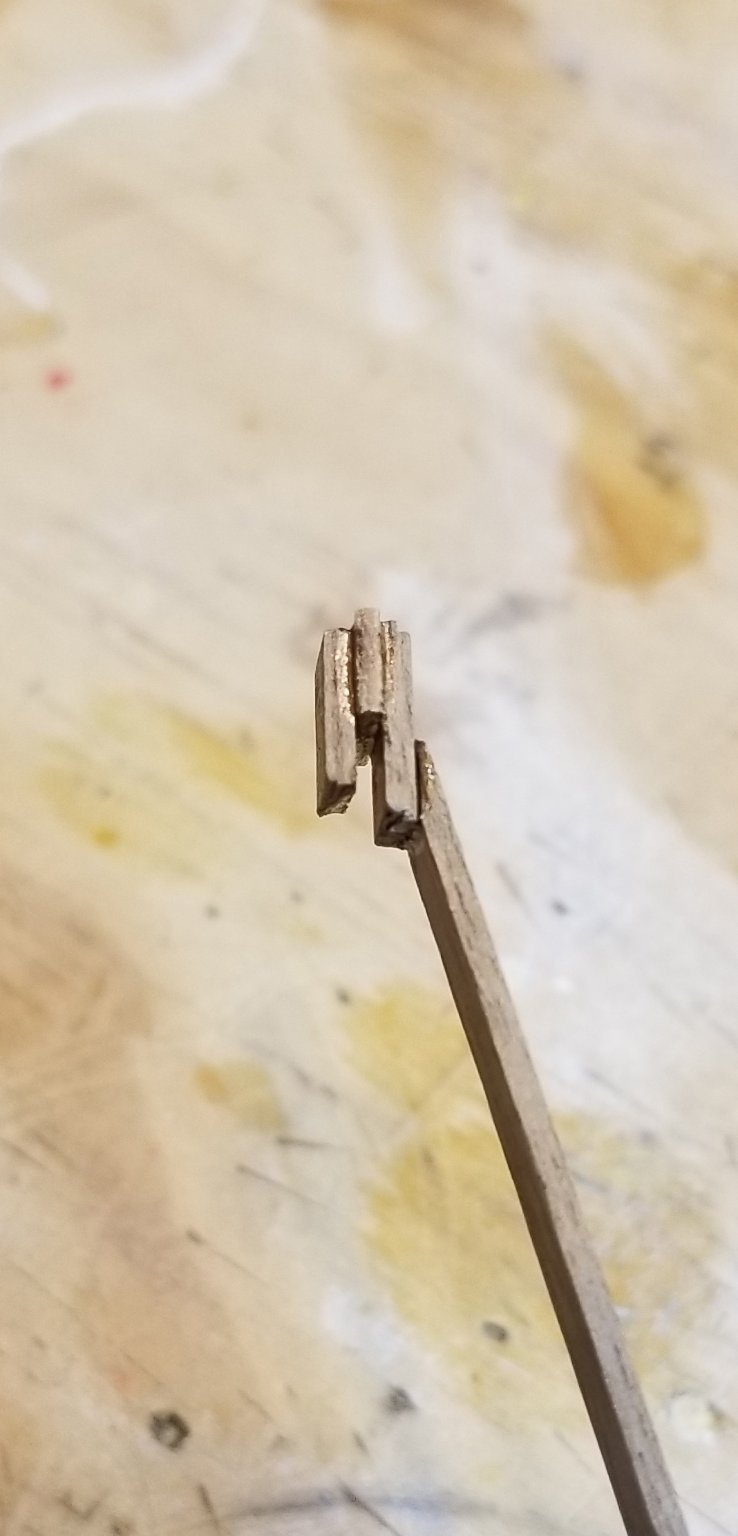
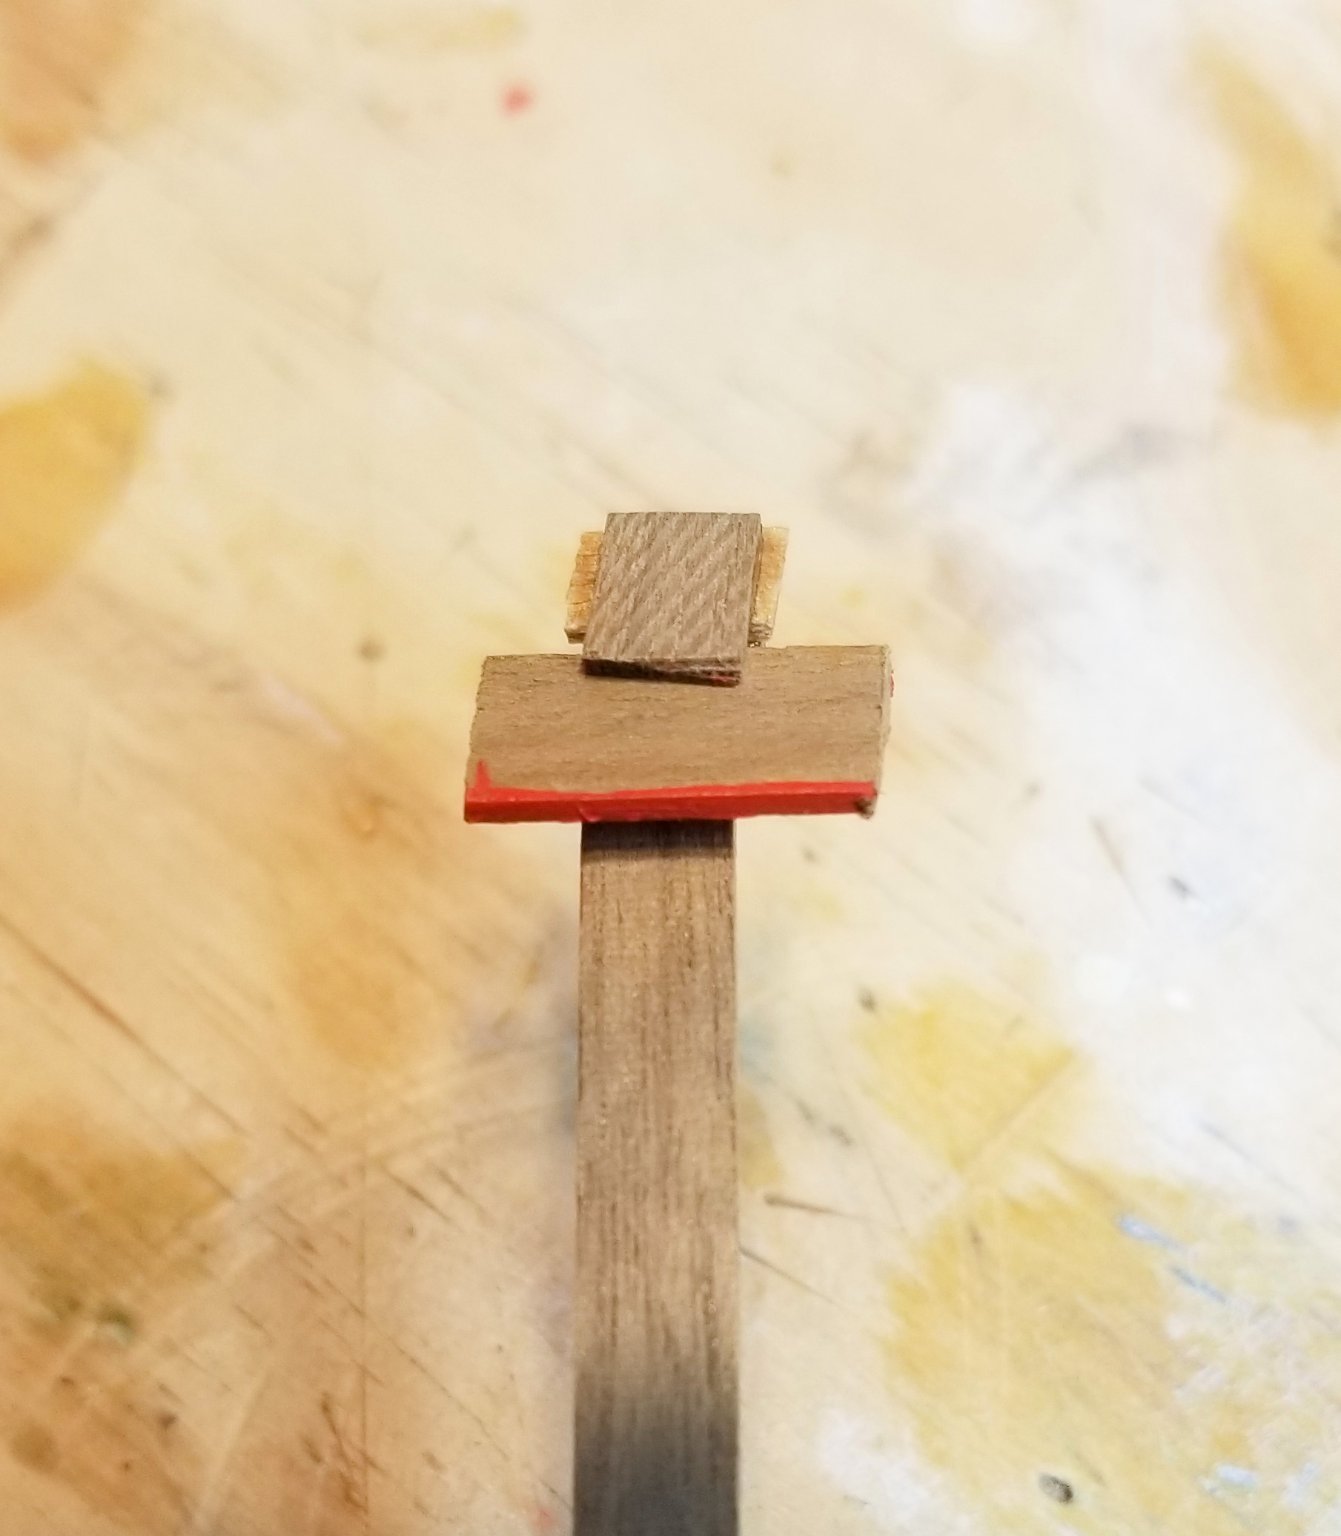
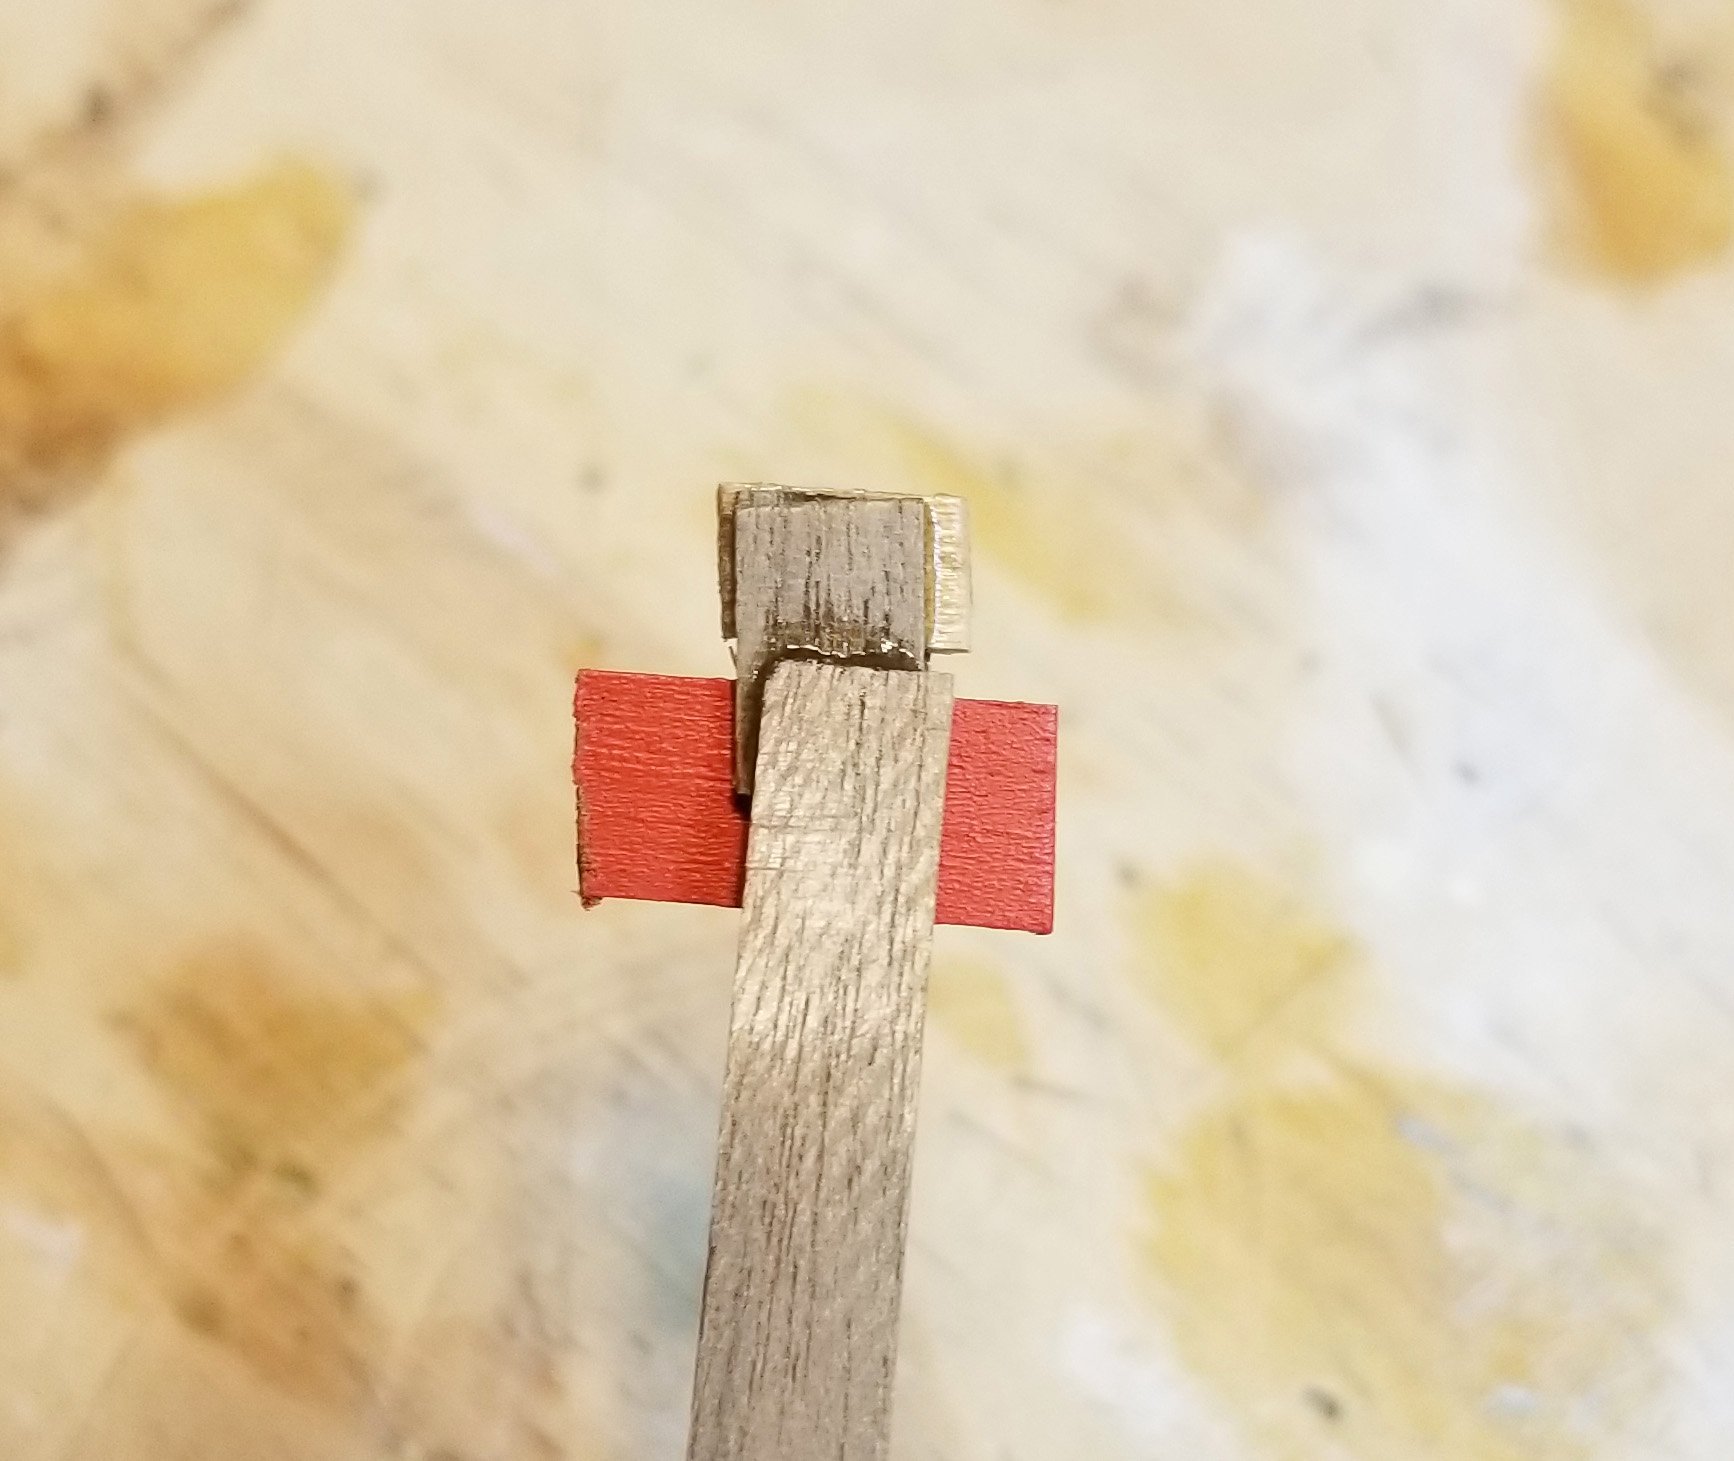
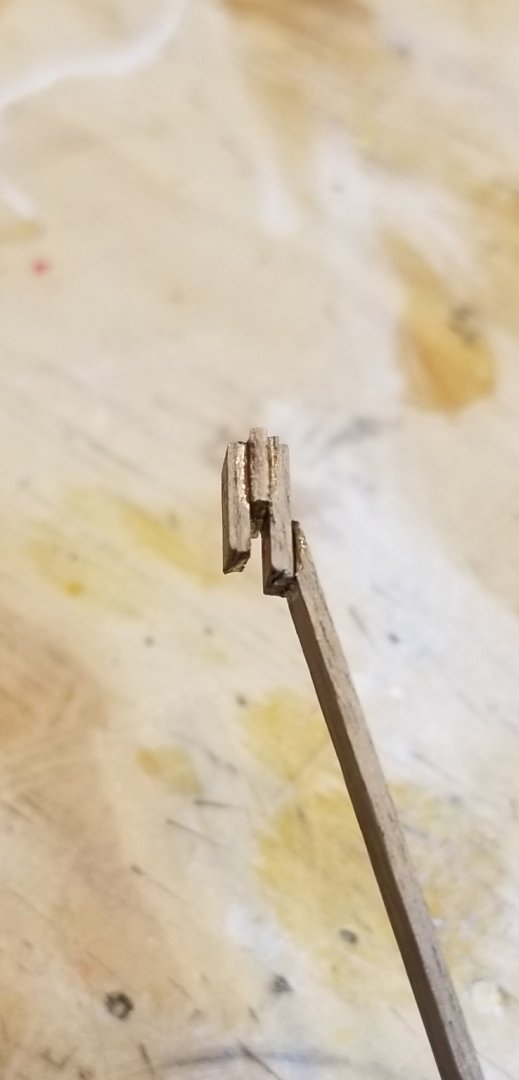
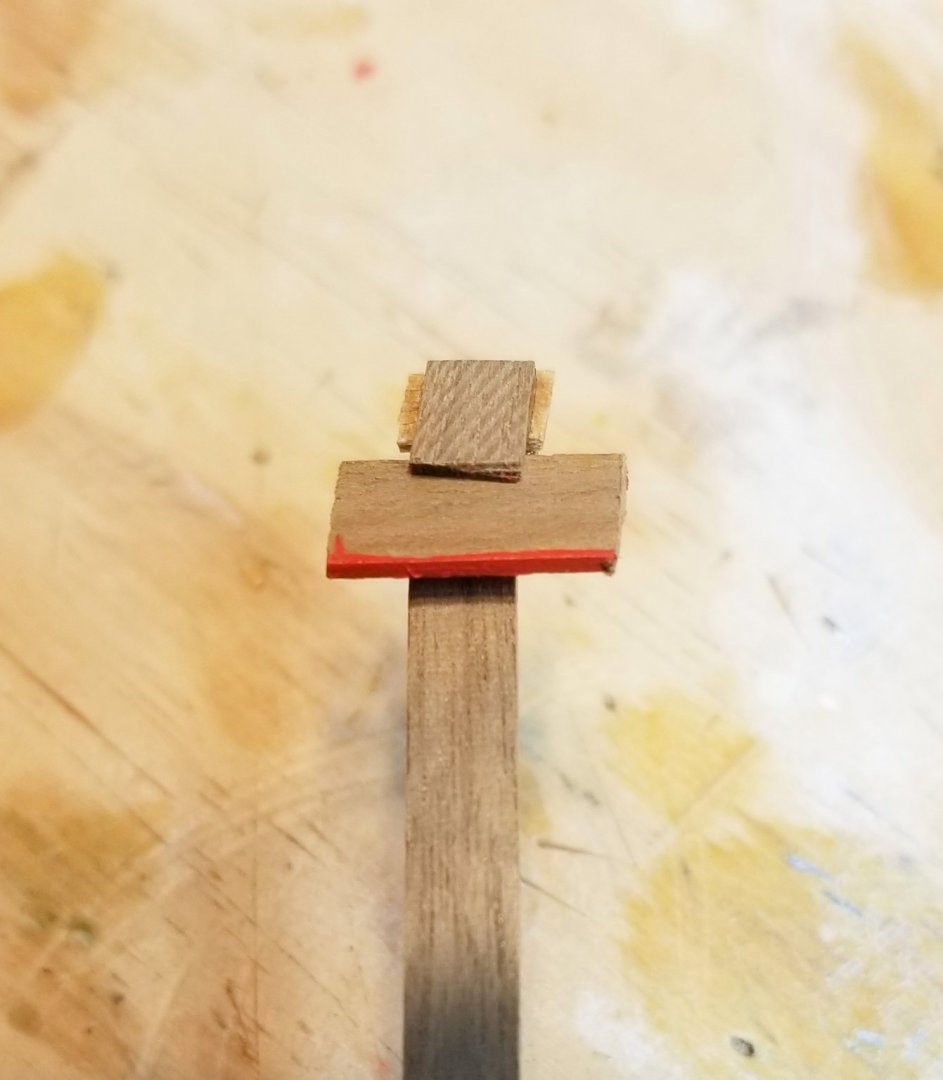
I have started lining the gunports. They attach by a very thin edge, with 1mm recessed positioning important, so I needed a way to hold them in place while gluing. I made this jig which holds the side pieces with slight pressure, and allows them to be positioned. One finished gunport positioned -- 80+ to go! Regards, David


- 218 replies
-
- 4
-
-
- Victory
- Caldercraft
- (and 1 more)
-
That "floor" idea is a great one. I already have some miscellaneous wood chips rattling around inside my hull. Regards, David
- 218 replies
-
- 2
-
-
- Victory
- Caldercraft
- (and 1 more)
-
Toni: I took the color scheme from this picture on the Caldercraft Website. There are about 80 Victory pics in different stages of construction. Best regards, David Robinson

- 218 replies
-
- 7
-
-
- Victory
- Caldercraft
- (and 1 more)