HOLIDAY DONATION DRIVE - SUPPORT MSW - DO YOUR PART TO KEEP THIS GREAT FORUM GOING! (Only 24 donations so far out of 49,000 members - C'mon guys!)
×


Richvee
-
Posts
385 -
Joined
-
Last visited
Content Type
Profiles
Forums
Gallery
Events
Everything posted by Richvee
-
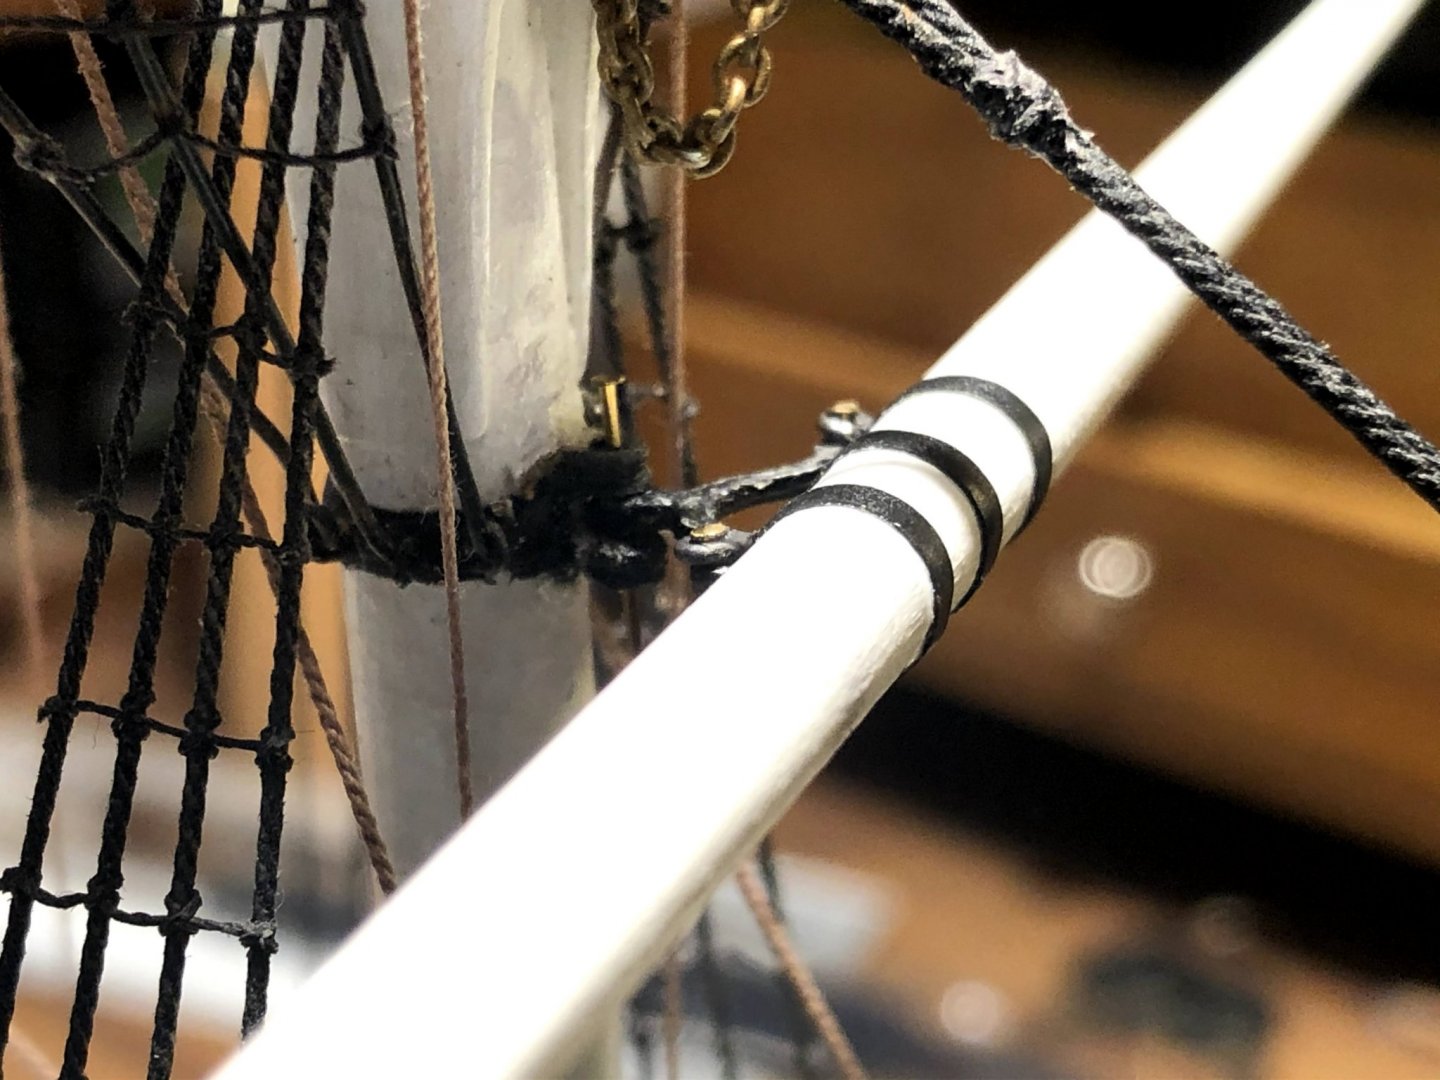
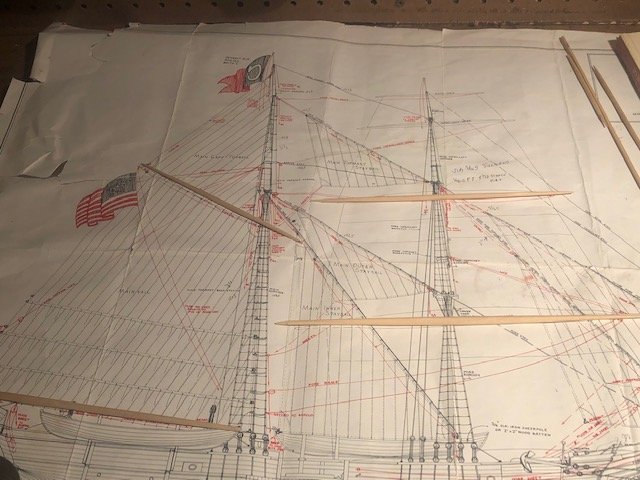
My plans and instructions for the Kate Cory say the topgallant and royal yard halyards do not have a halyard band and an eye for securing the halyard. The directions simply say.. "The tye is hitched to the yards centerline and not to a metal band like the topsail yard". While the rigging specs booklet states "Tarred manila, 2 1/2"c. Sling end seized around yard in a bight. " There are no pictures of this in the plans or instructions. My question is, how was this slung around the yard with a timber batten mounted to the yard to fit it to the mast? My only guess is there a space between the batten and the yard to slip the halyard though to get around the yard? Yet I see no evidence of such a space on the kit's plans, nor in the detailed plans from New Bedford. Can anyone explain to me what kind of knot/sling was used on these yards? Thanks
-
 Thanks Bill. I’ll be on the meeting call as soon as I can. Working til 6:30. Unless I can sneak out early😁
 -
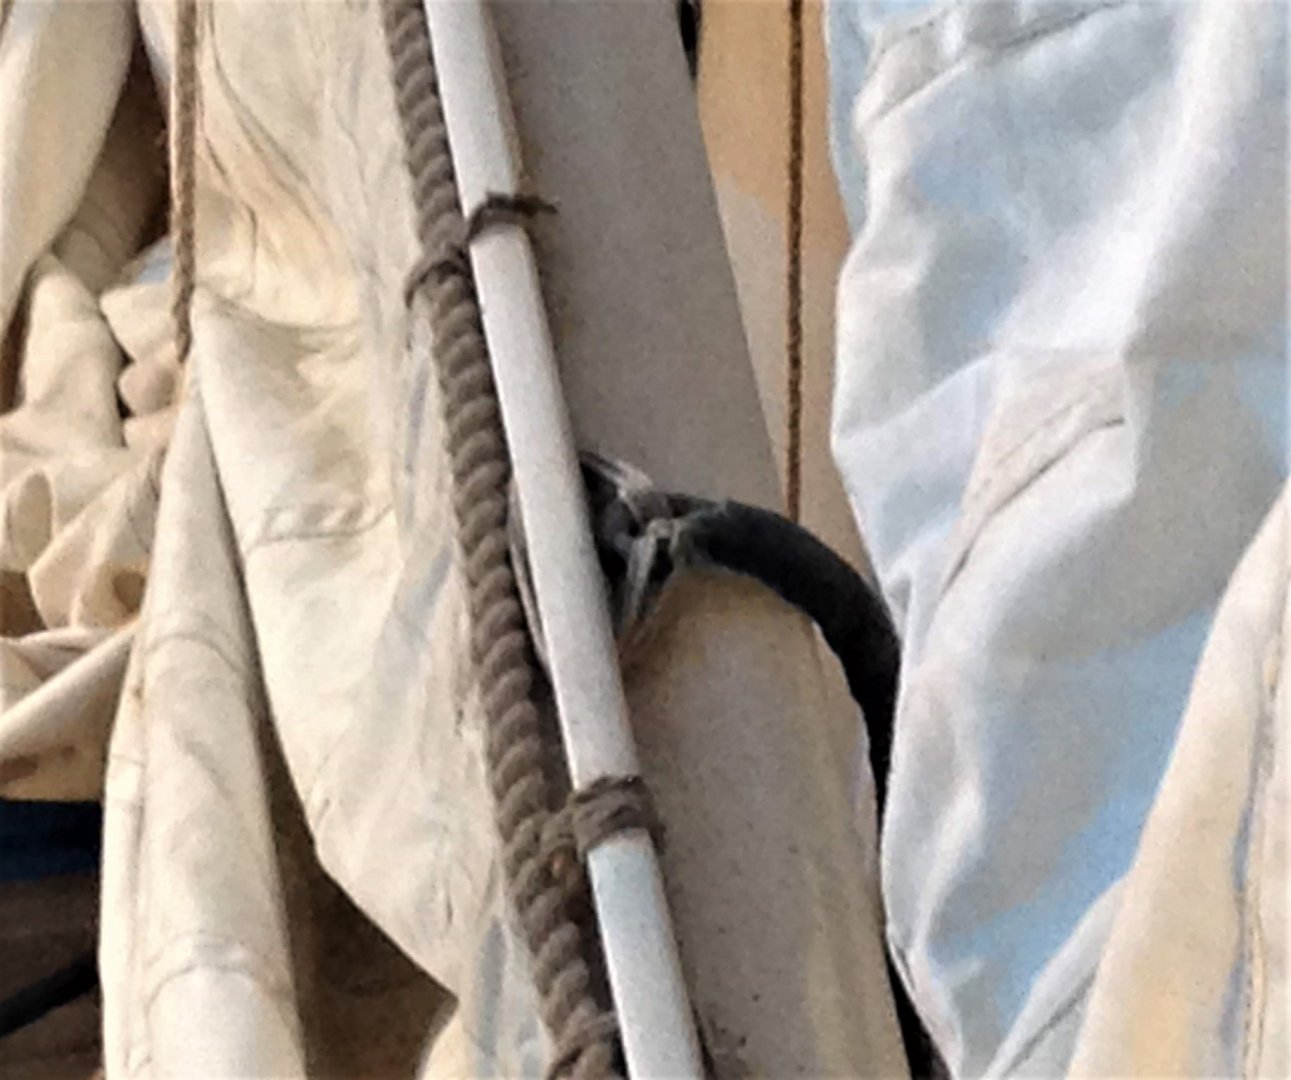
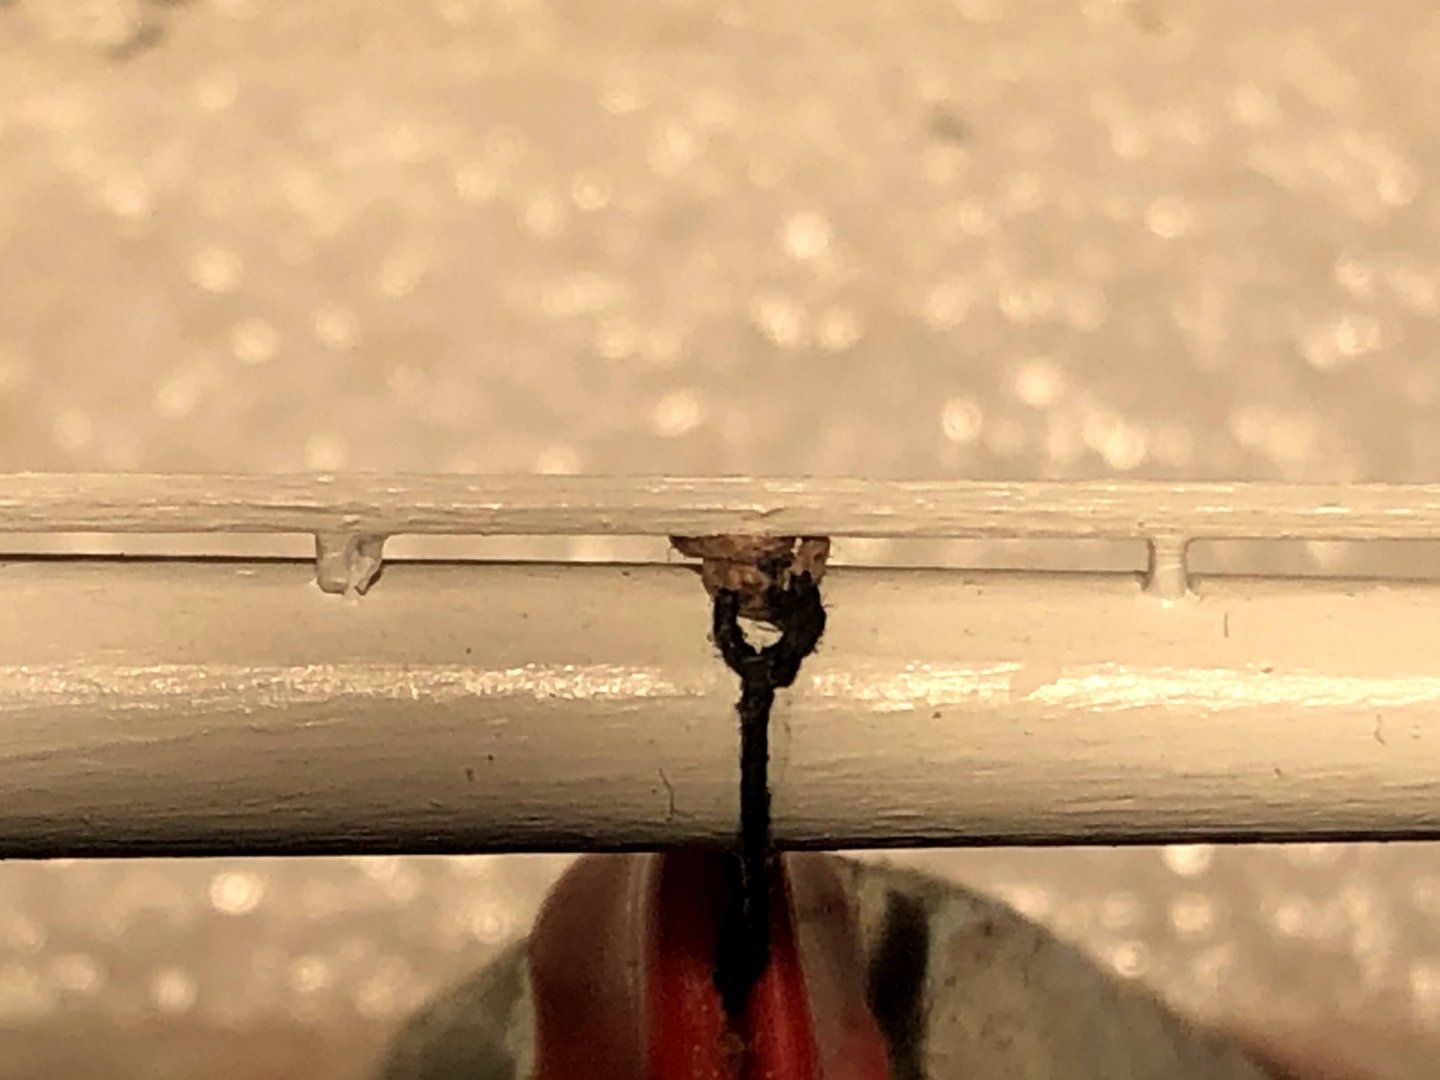
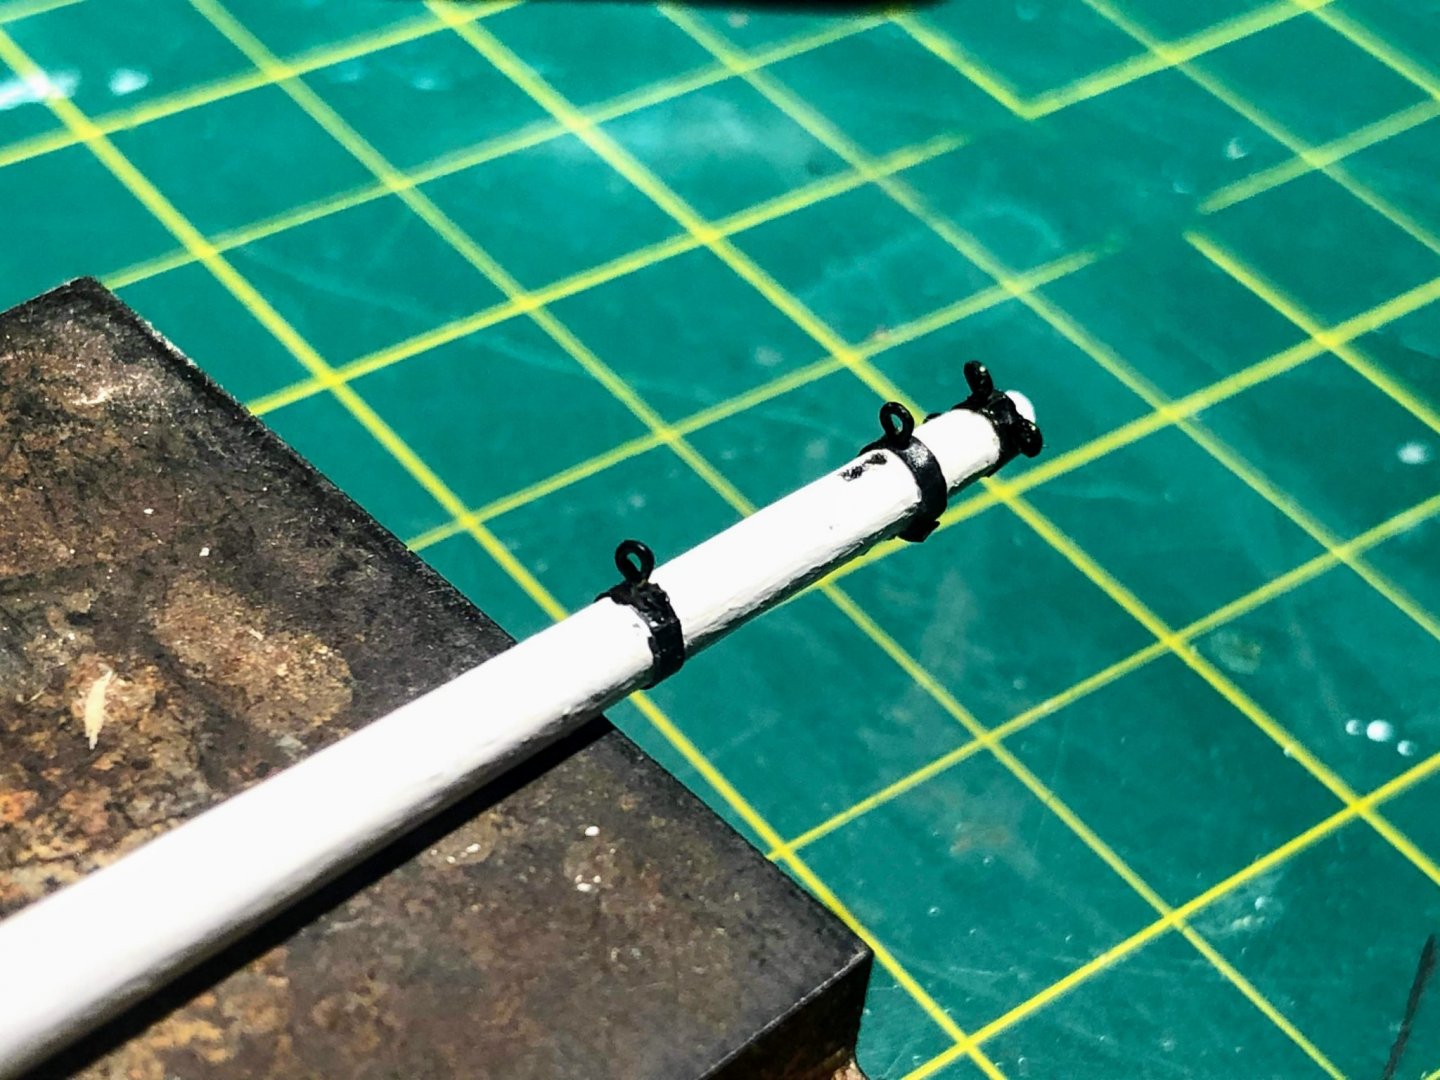
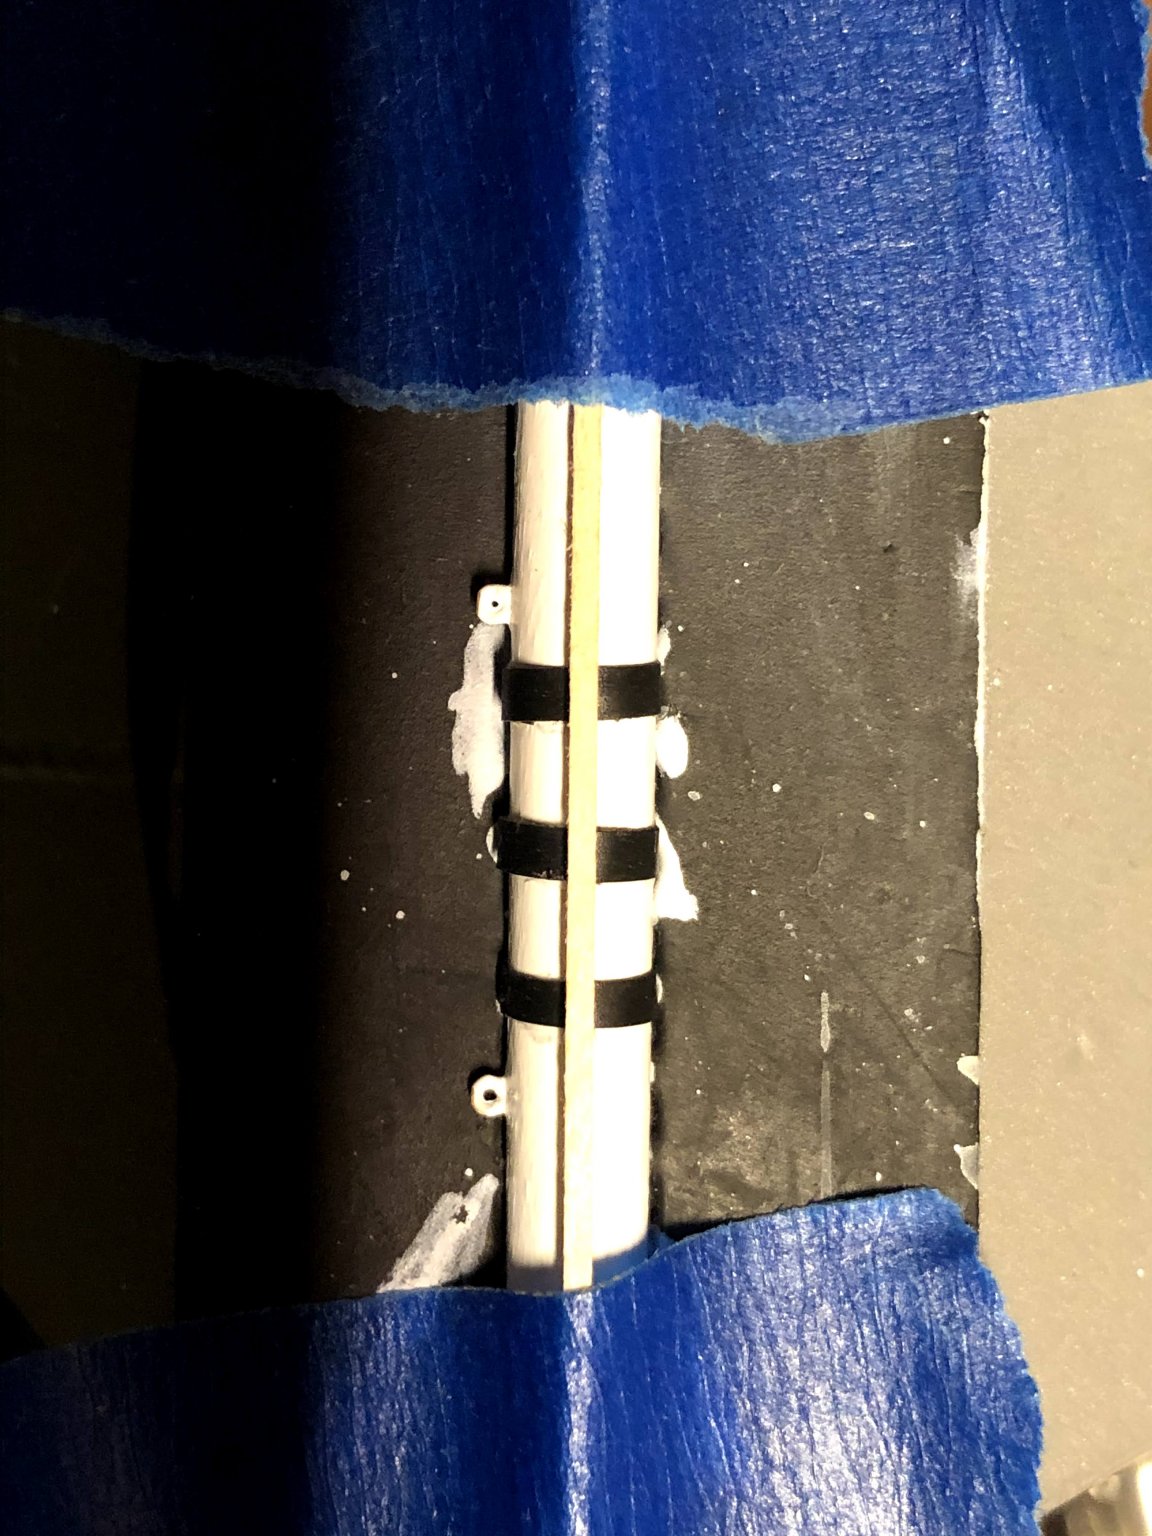
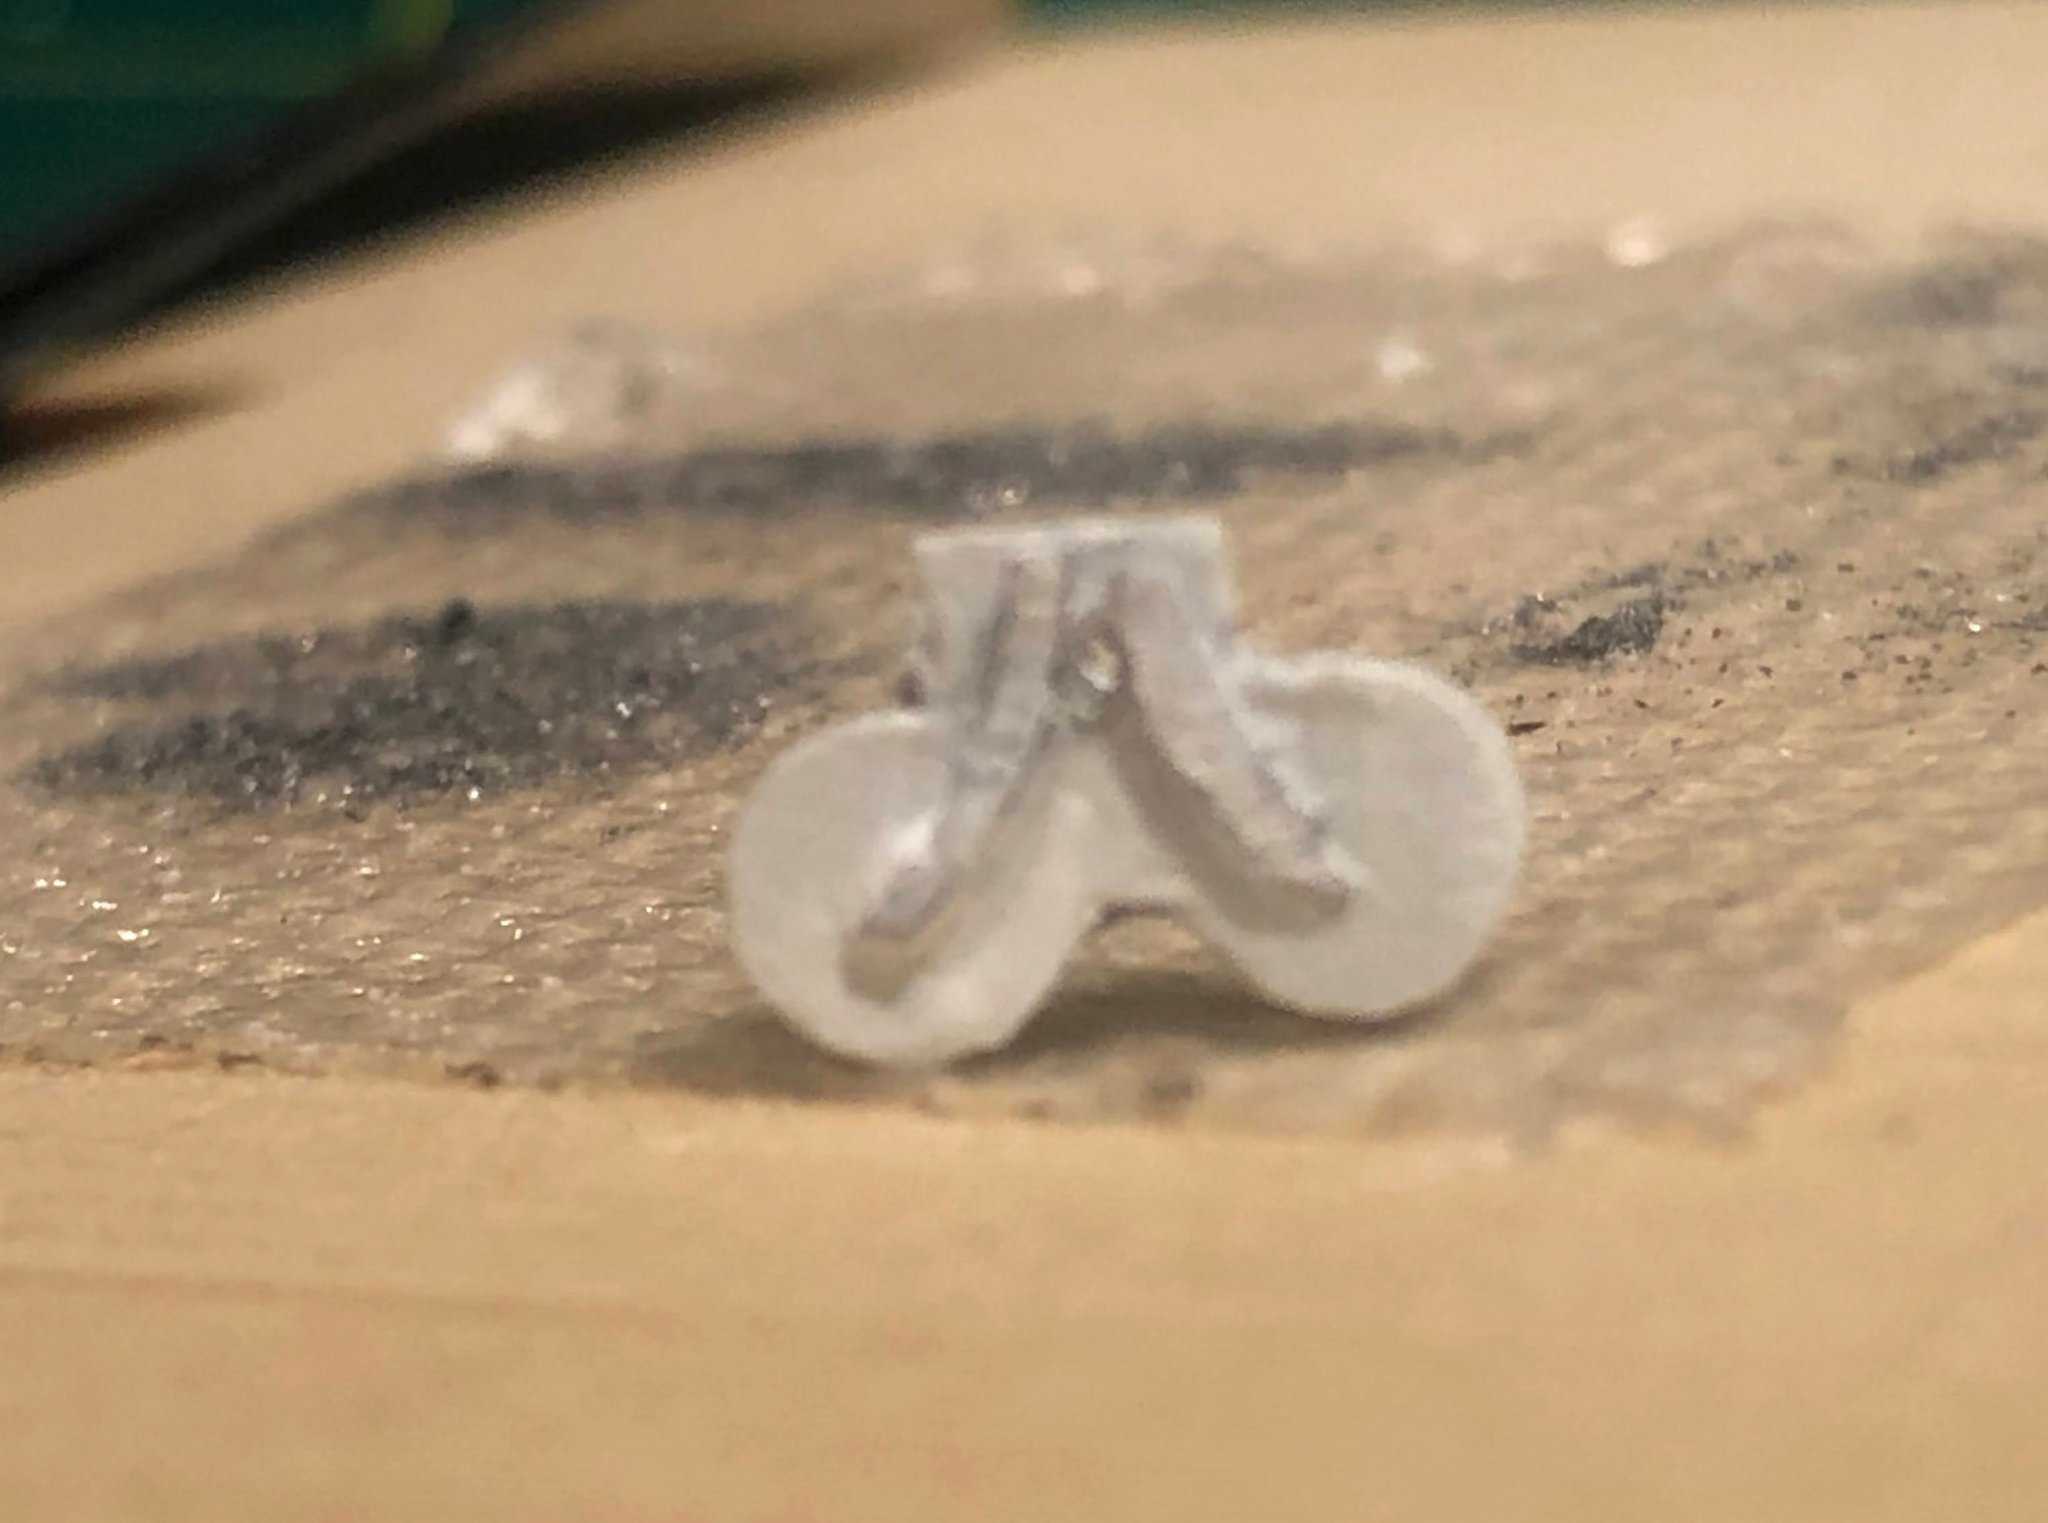
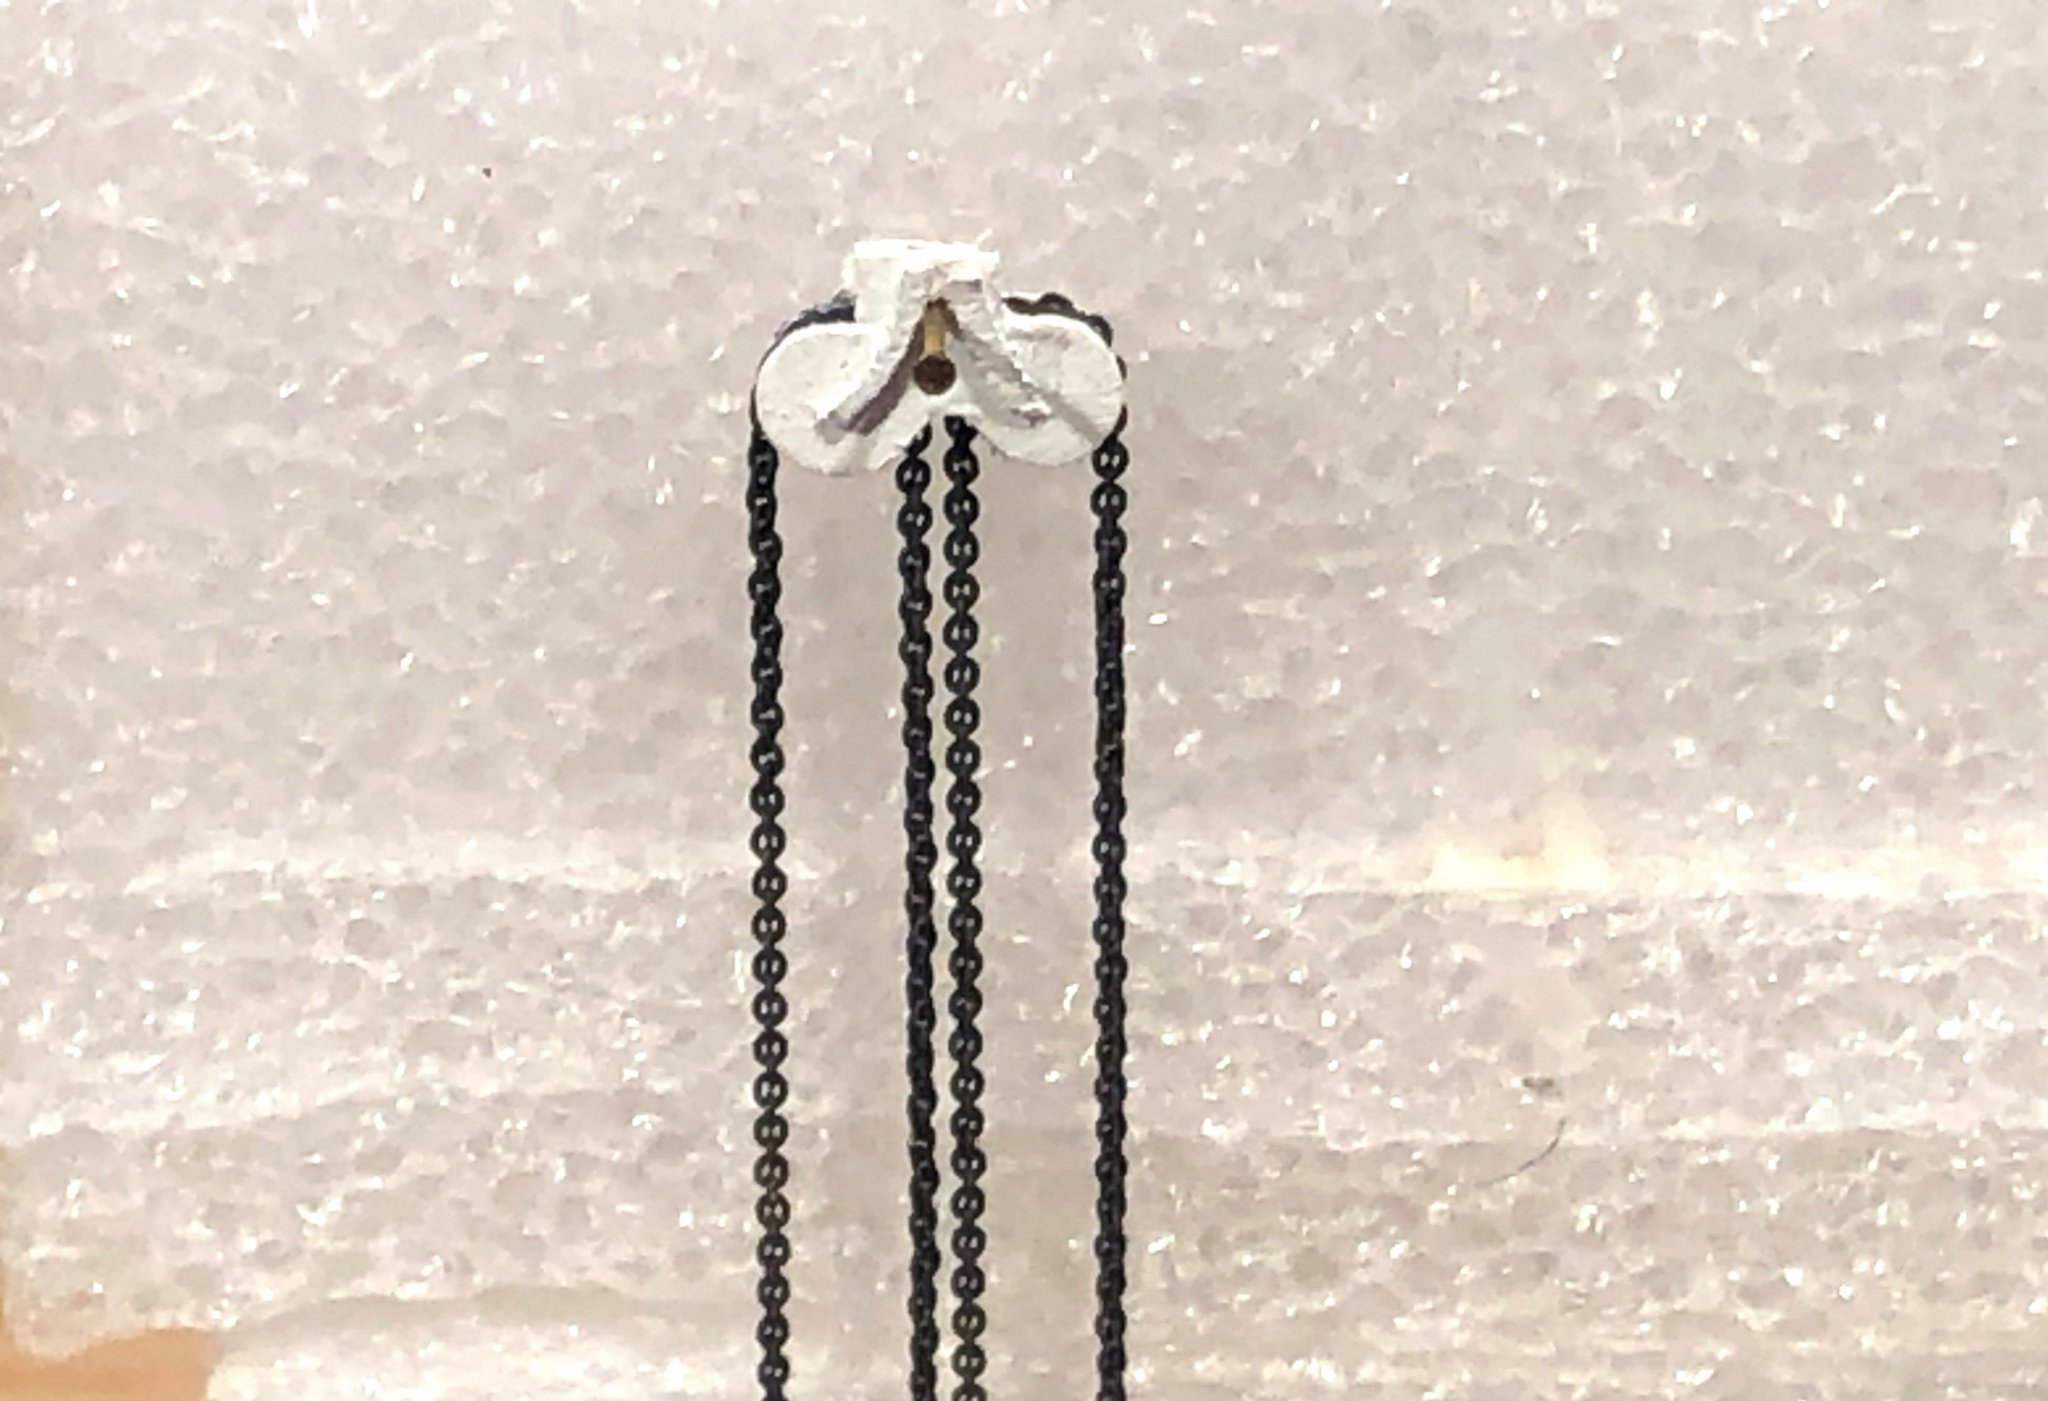
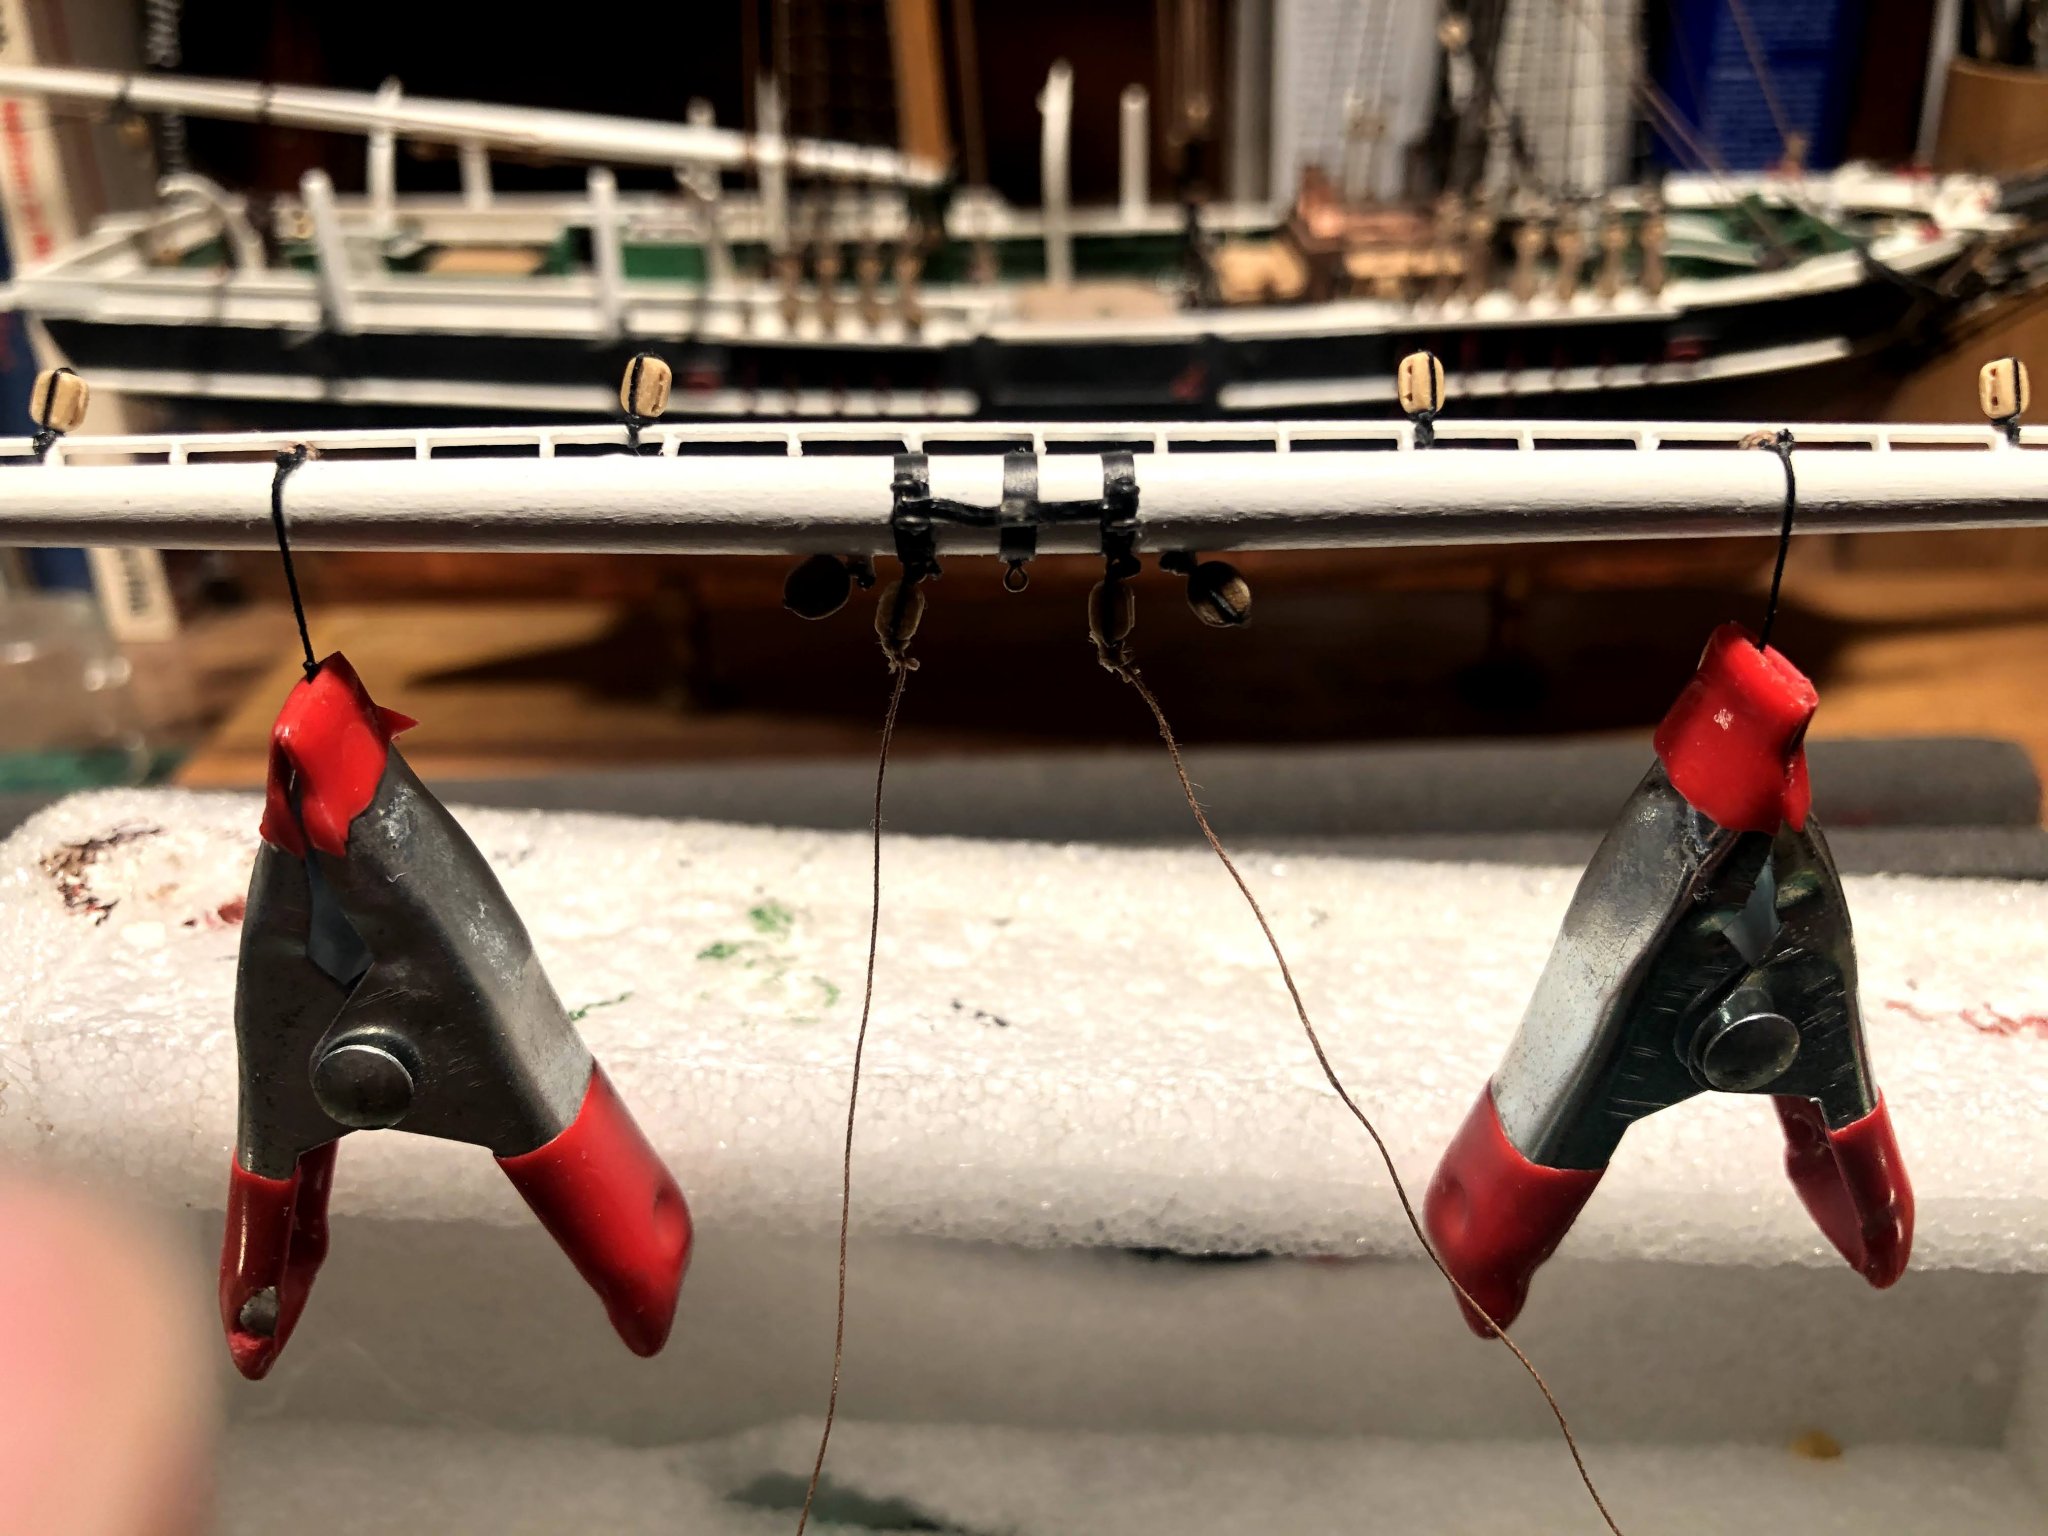
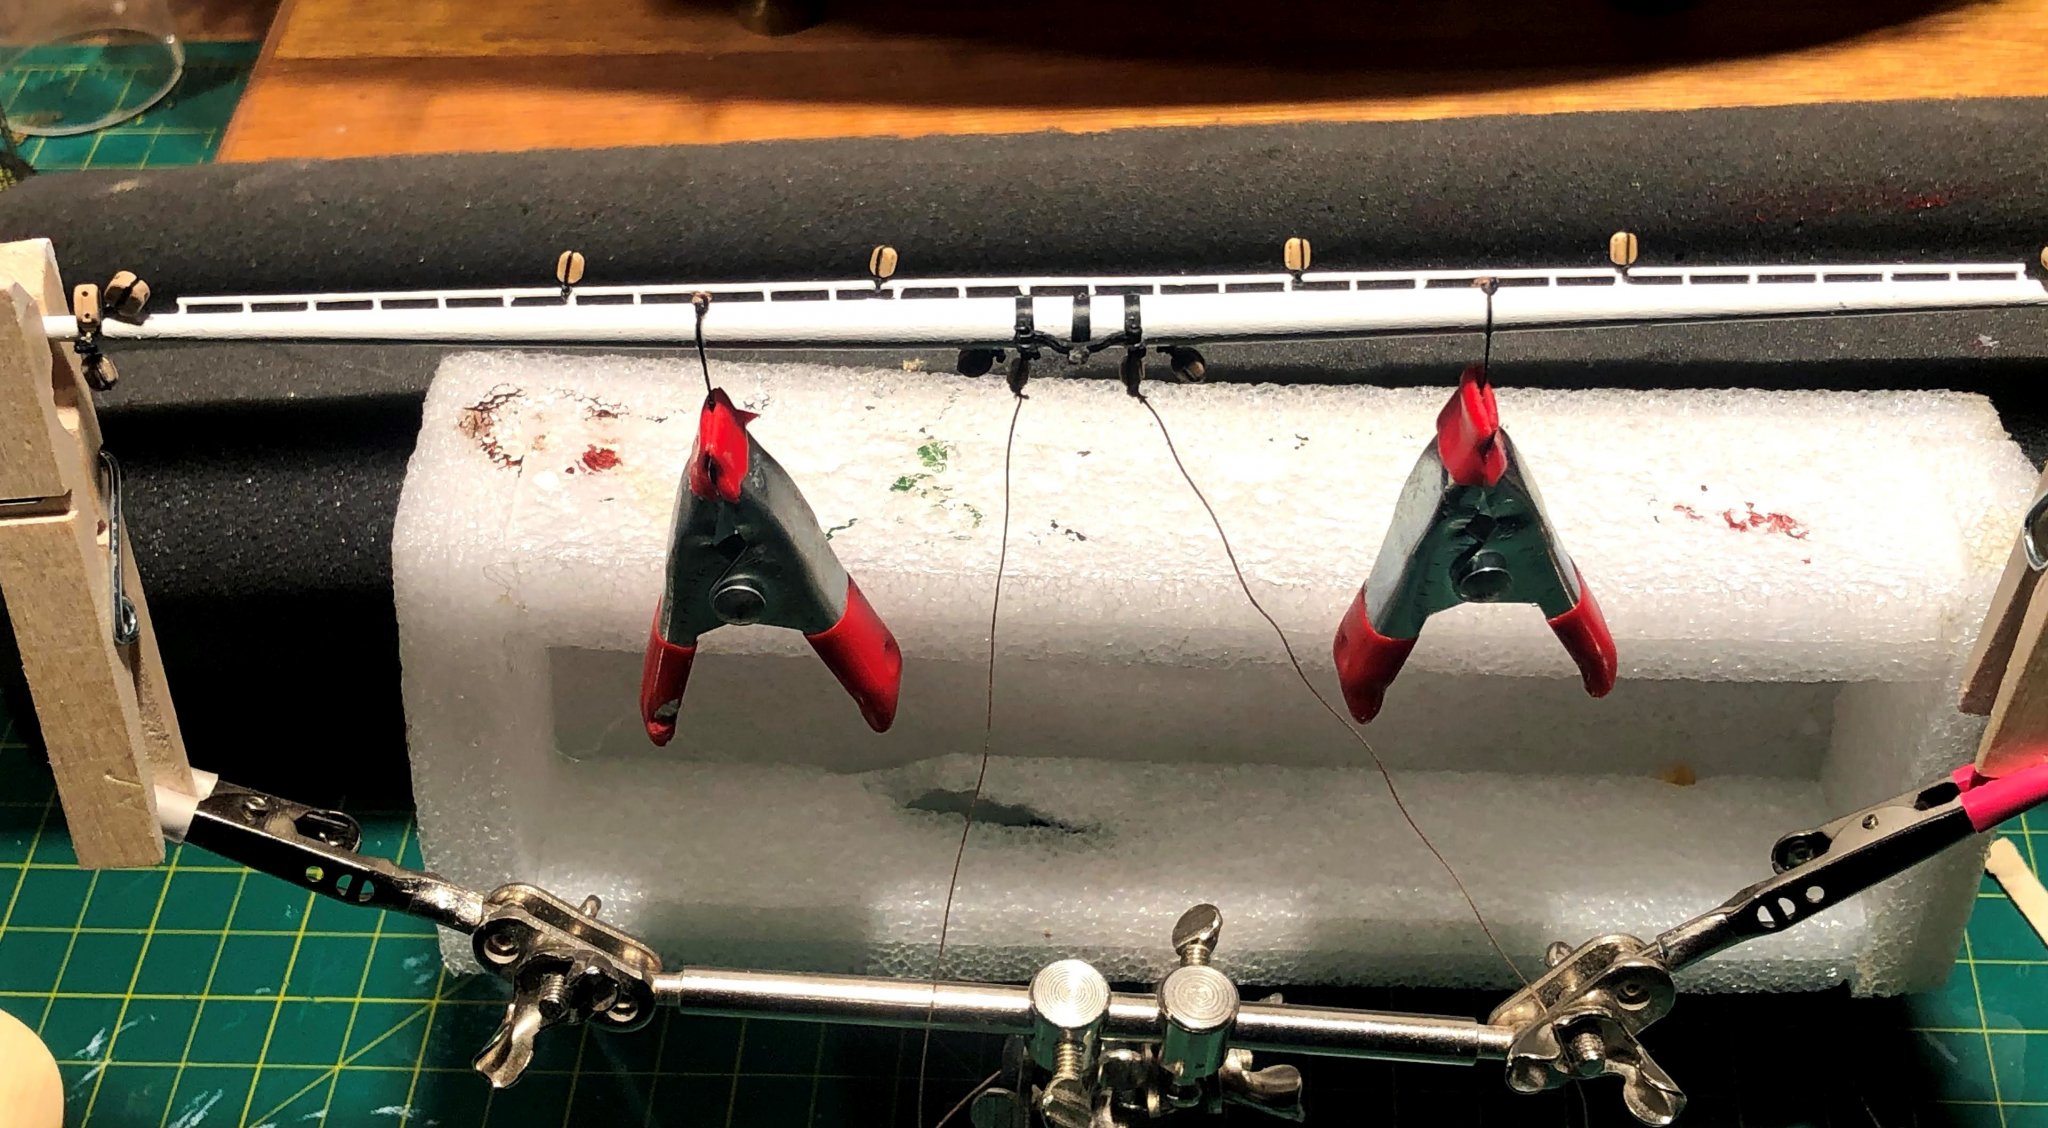
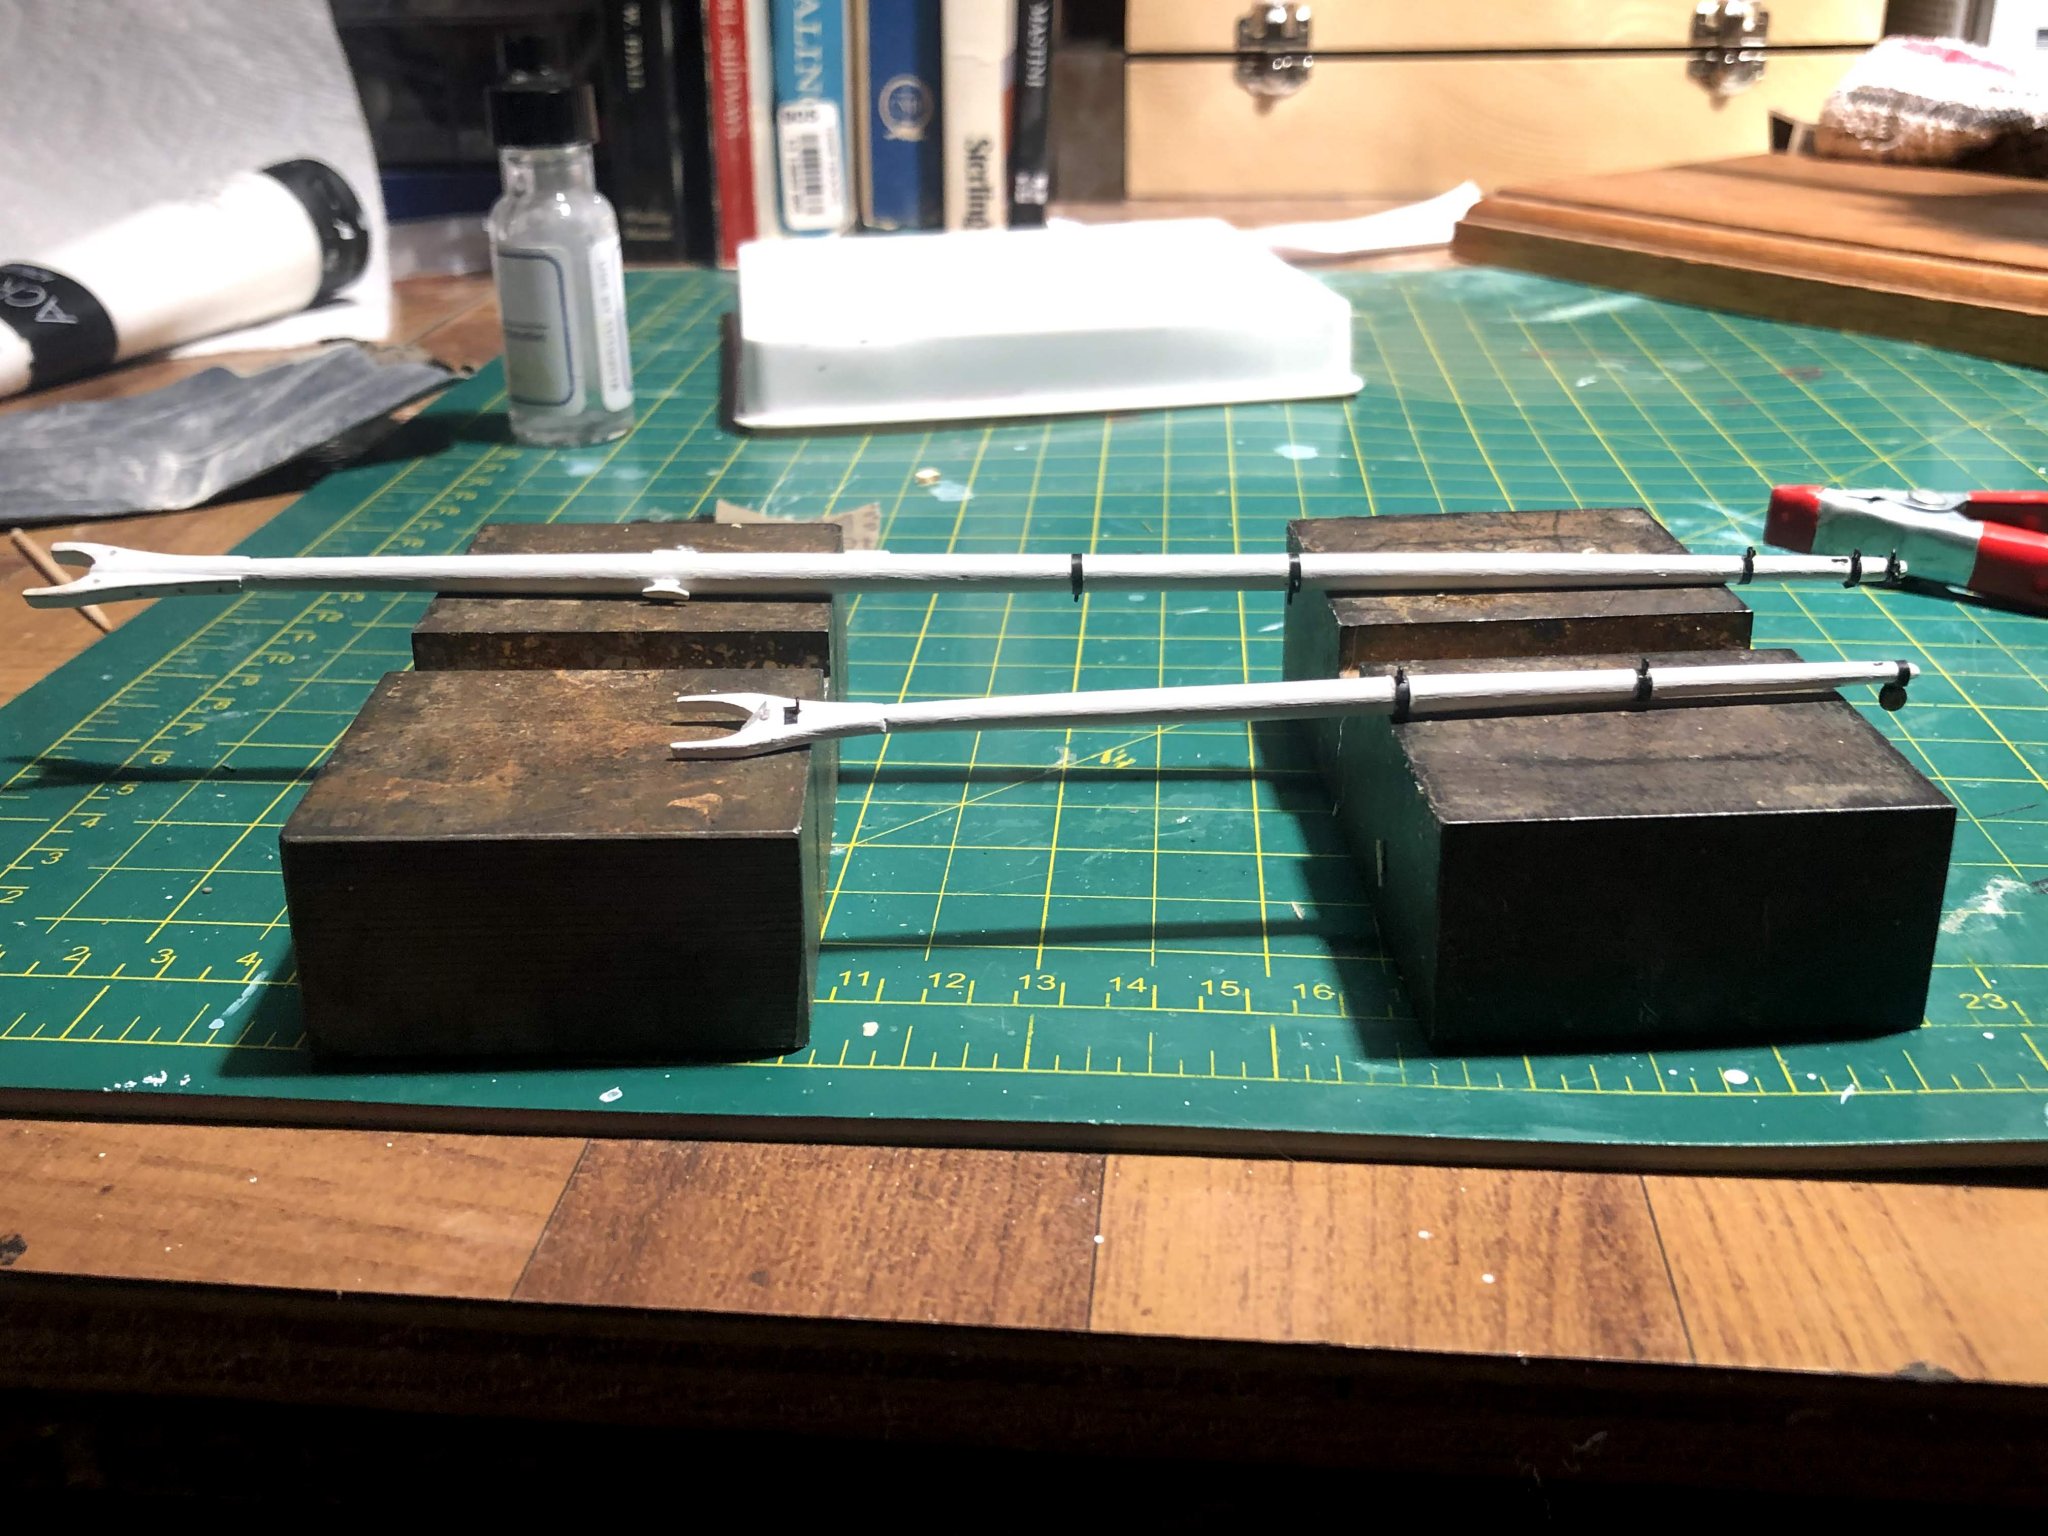
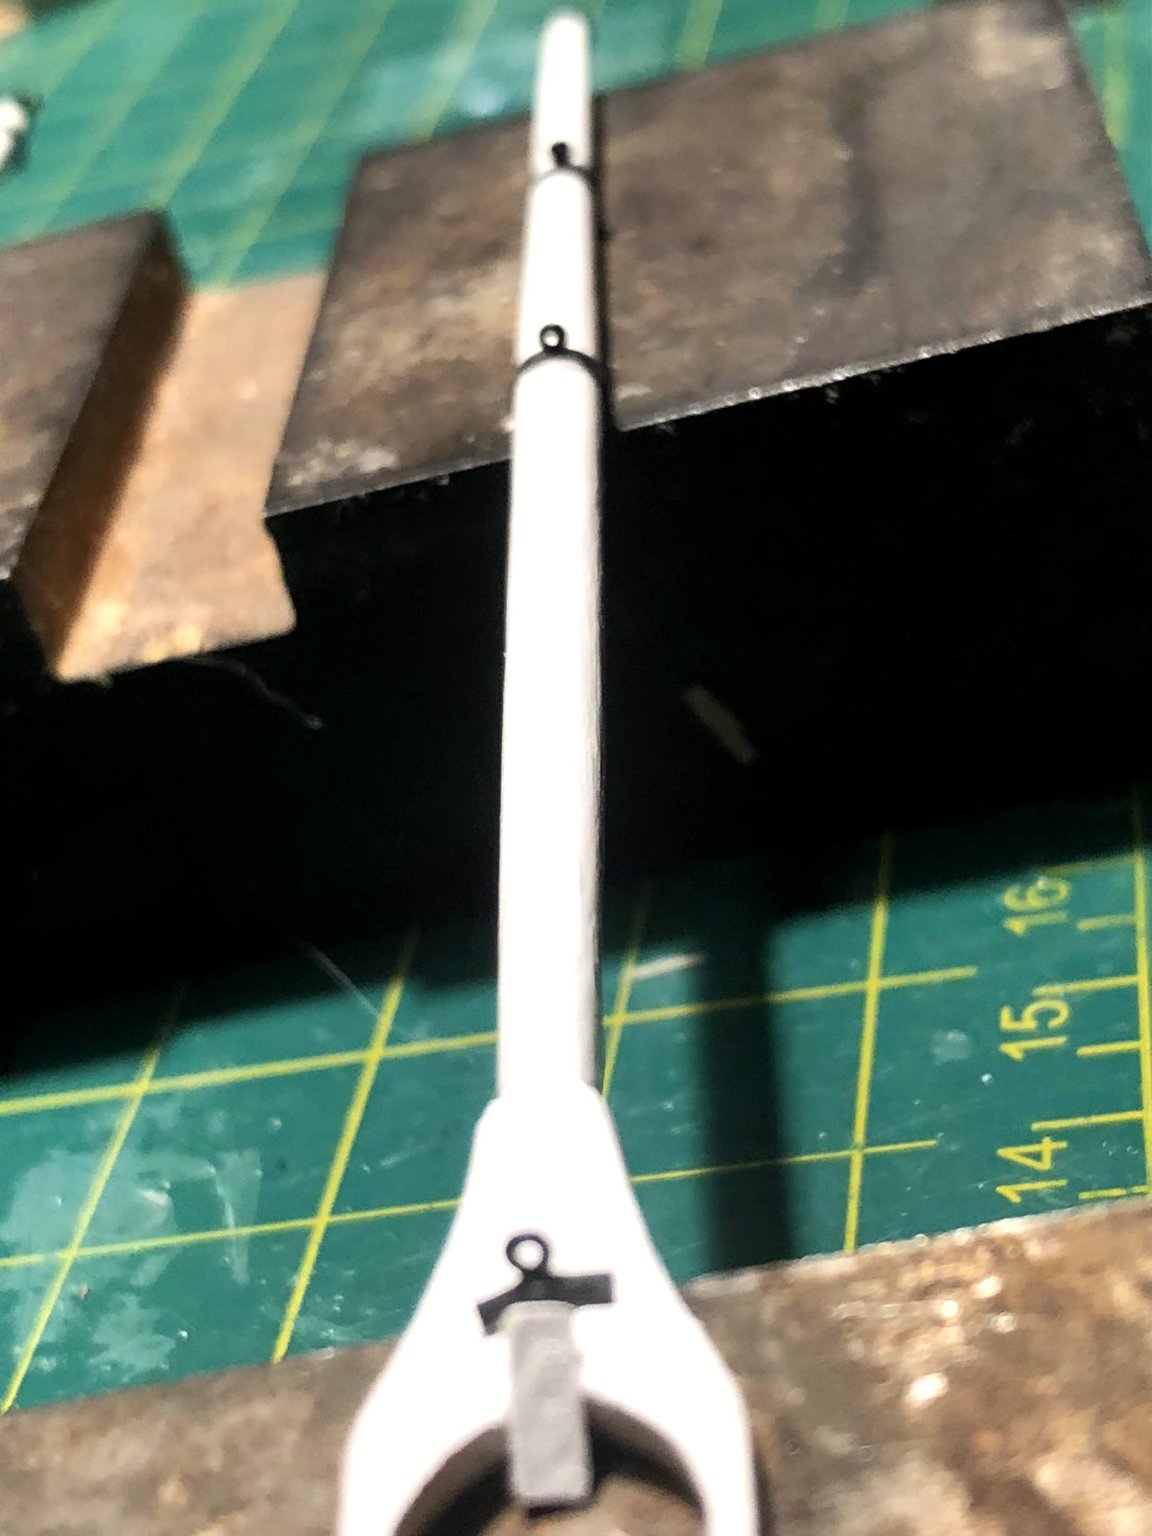
Thanks for the likes guys. A little update on the progress of the fore course. After drilling the sheet sheaves, painting, and adding the iron straps, and multiple eyes, it was time to work on how this truss was going to hold on. Small plastic discs with pilot holes proved to be a futile endeavor. I decided to try making 4 eyes with 24 gauge steel wire, and the truss could slip in between them, and get secured with a brass pin through it and clipped flush. I made another half a dozen before finding 4 I liked and the brass pin slipped through easily. Next was to drill pilot holes for these eyes. I put the yard in a vice, and taped 1/32" square strip of wood on the yard to keep an even spacing between the eyes. This ended up working OK, and it was time to test fit the yard. To my amazement, it seems this will work! I added an eye at the end of the sling chain which I cut to it's proper length, and drilled a corresponding hole on the top side of the yard on the center band that will hold the sling chain. I took the yard off, and added the blocks for the reef tackle, lifts, braces and clew lines. Then it was time to attempt that sheet block for the chain topsail sheet. I cut the rough shape out of a piece of styrene plastic, and then another to make the front and back plates. Then I took 2 - 2.5mm metal bullseyes I had laying around, filed them real thin, and glued them to the plastic to resemble the pulleys in the block. I let that dry, and then filed the plastic to it's final shape, as best as I could. Then I added two very thin strips of wood to the front plate to get the look like the one on the Lagoda. It's very small. It measures 10mm across, 7 mm deep, and about 2mm thick. I drilled a small hole top center of the block, and added an eye on the bottom side of the yard. A pin will be inserted through the front plate, through the eye in the yard, and through the back plate to hold the block in place. I tested it's fit on the yard to make sure I had the eye on the yard the popper distance away from the yard so the block holes for the pin and the eye on the yard lined up. It's looks a little rough, as the camera picks up every little detail, but I'm happy with the result. Once again the "real block" I blackened the sheet chain, and wove it through the block. And here it is pinned to a piece of Styrofoam, waiting to get installed on the yard. It will go on last, after the lines I need to put on like reef lines, footropes, stirrups and flemish horses. Added the jackstay, bunt line and leach line blocks, and stirrups. Coated the stirrups in diluted white glue, and they're hanging straight to dry. I again tried to replicate some detail I saw on the Logada. The stirrups were lashed to the jackstays with manila rope. ..And my attempt. Not exact, but I think a decent facsimile of it...🙂 A few more details and it will be time to get this yard on the ship.


- 109 replies
-
- 6
-

-
- model shipways
- kate cory
- (and 1 more)
-
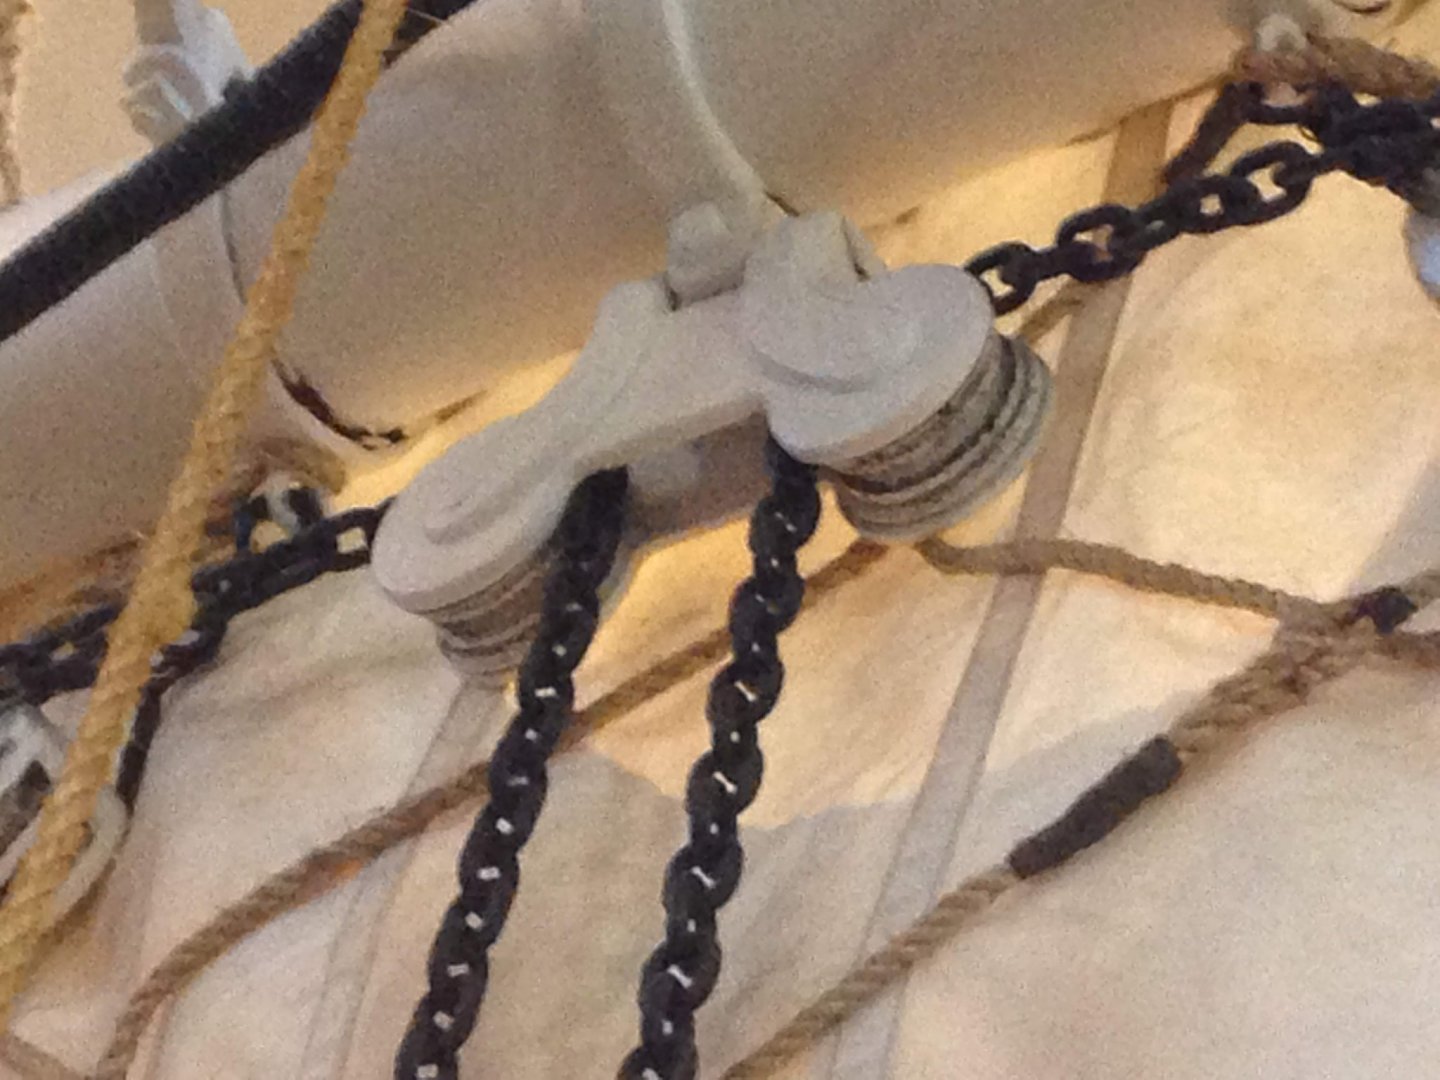
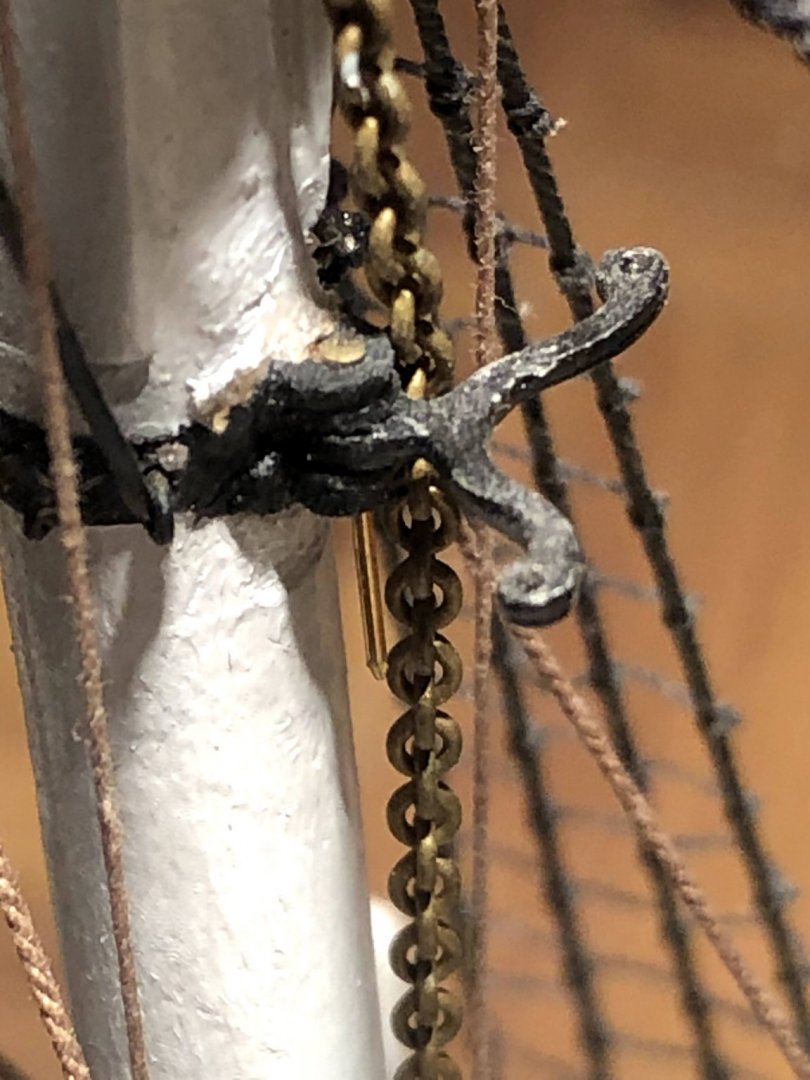
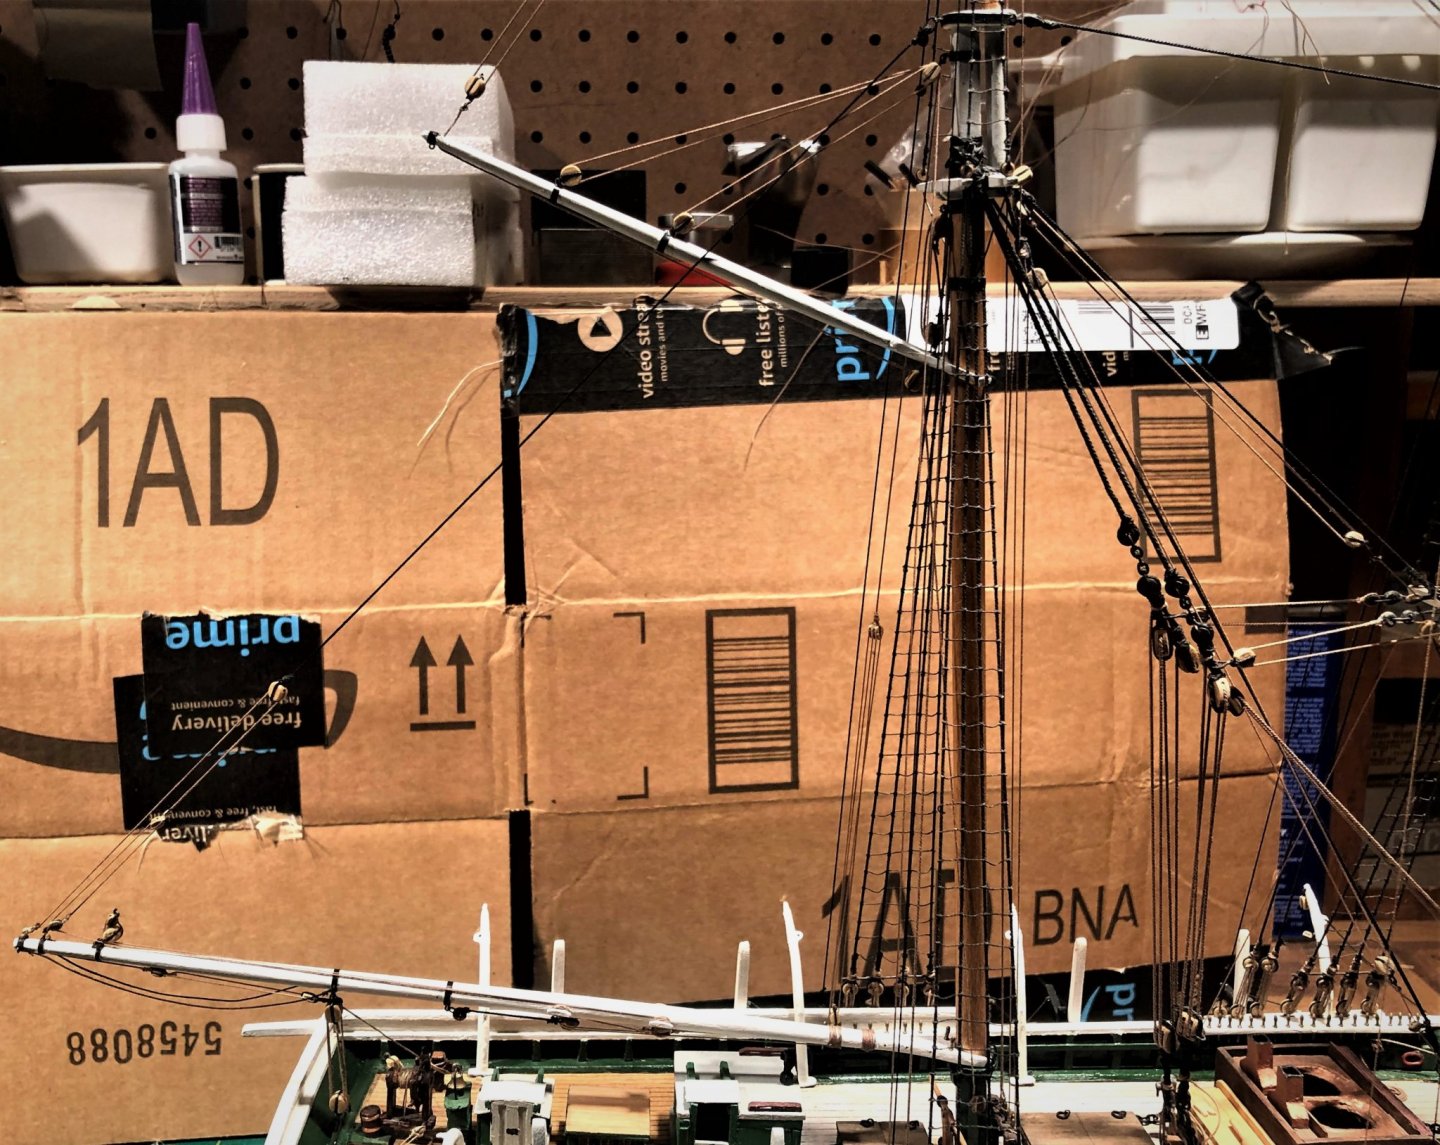
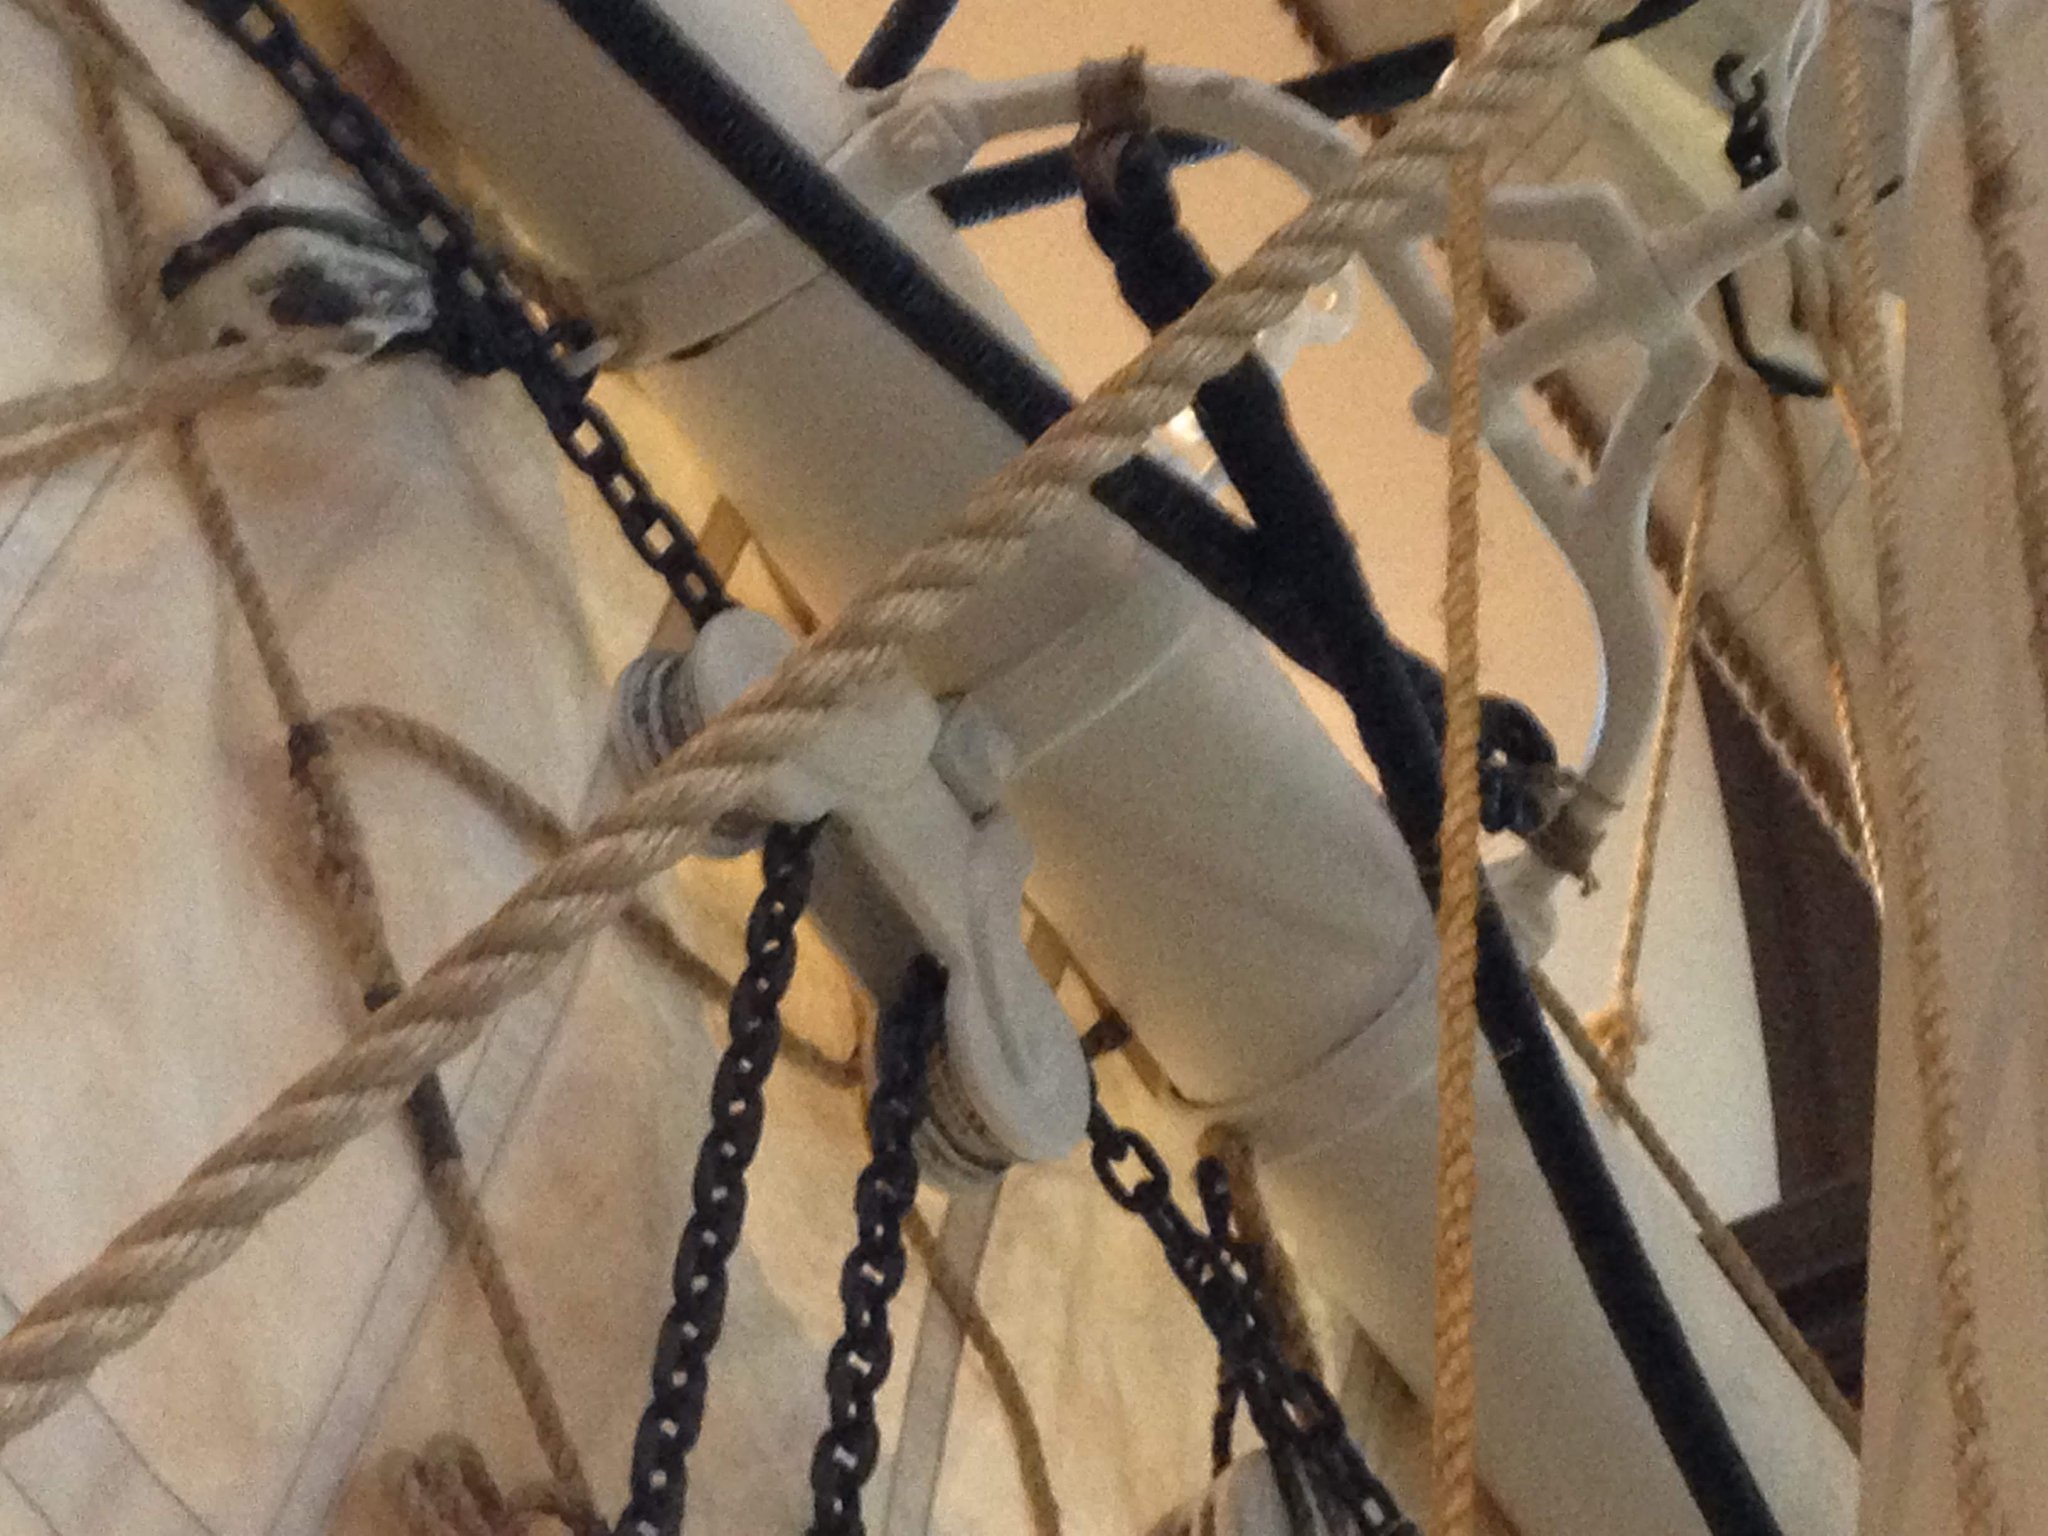
A little thinking out loud as I get ready to start the yards. These are "new" for me. I made the Model Shipways Taurus and Benjamin W Latham eons ago when Model Shipways was in Bogota, NJ near where I grew up. So I'm trying to lay out a plan in my head for the yards. Rig as much as possible off the ship first. I want to add the reef tackles. Again, I want to get as much on here as I can. A block with a stopper knot at the ends of the yard run to the mast and down will suffice. The sheet for the lower yard is chain. I want to have this trough the sheave, with the clew line block attached to the upper end, and the bottom rove through the sheet blocks under the yard at the mast and single block with the standing end of the topsail sheet tackle all together before the yard gets attached. The plans say the sheet went though blocks at the mast. I've seen the iron sheet blocks that EdT made for the Young America, and I saw a similar sheet block on the lovely 1/2 scale Lagoda in New Bedford. I don't think one would look out of place on the KC. I'm not ready to try and make one out of metal as Edt did, but I think I can fashion one out out of a combination of styrene and wood. The Truss holding the lower yard is also something I need to figure out. Right now I have the truss pinned to the mast, between two syrene plates with holes in them epoxied to the mast band. Here's what the truss looks like on the Lagoda. You can see it below, in the upper right of the picture. Here's mine, pinned to the mast. I'm hoping I can make the same sort of fixture with syrene on the yard bands and wedge the truss between them and pin it. Attaching that sling chain to the mast is going to be a challenge as well. That's straight forward, but it sure is a small space to be working in. Jackstays, lift and brace eyes and blocks, reef tackle eyes and blocks, Flemish horse eye in the ends of the yard, stirrups, footrope, bunt and leech line blocks attached to the jackstay...I think that about covers everything needed on the lower yard. Time to get busy. I guess I'll start with some sheave holes and all the eyebolts. Then the jackstay and then some paint.


- 109 replies
-
- 5
-
-
- model shipways
- kate cory
- (and 1 more)
-
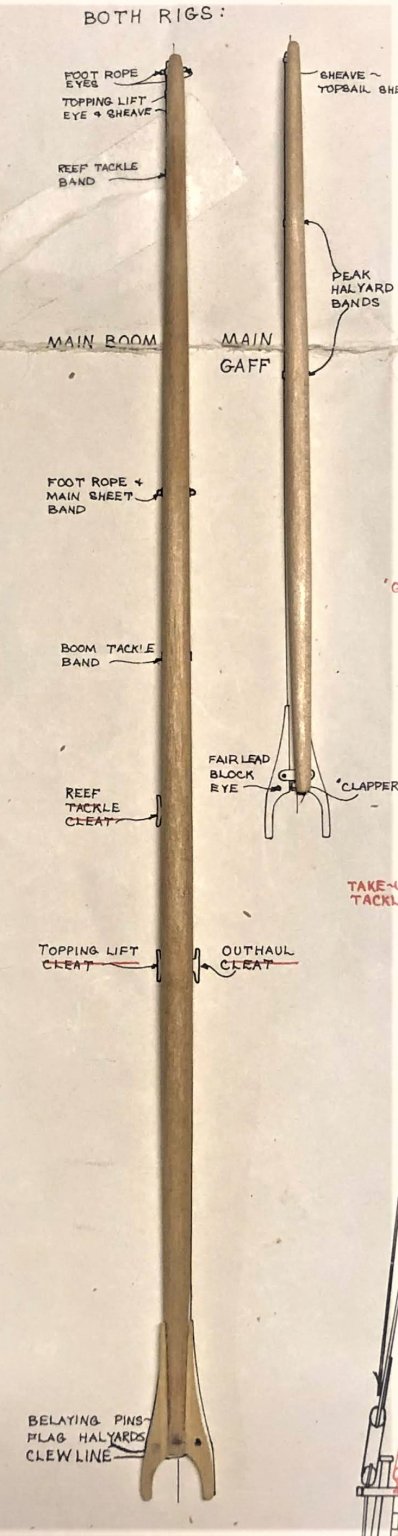
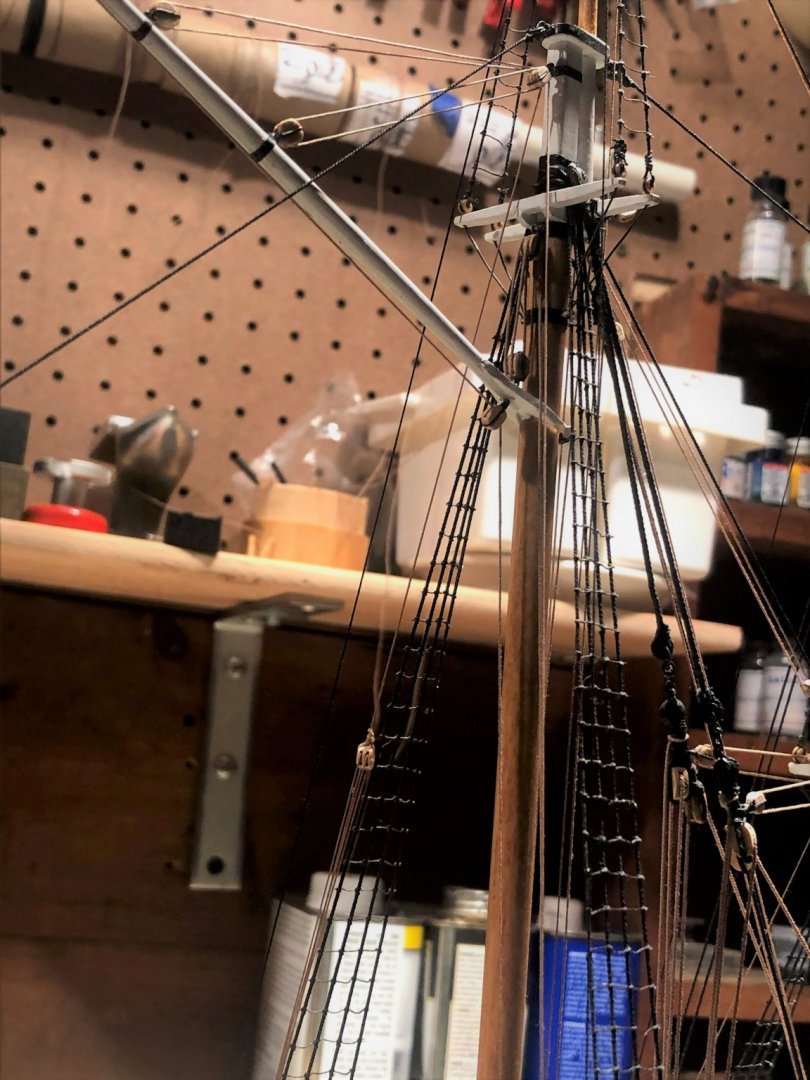
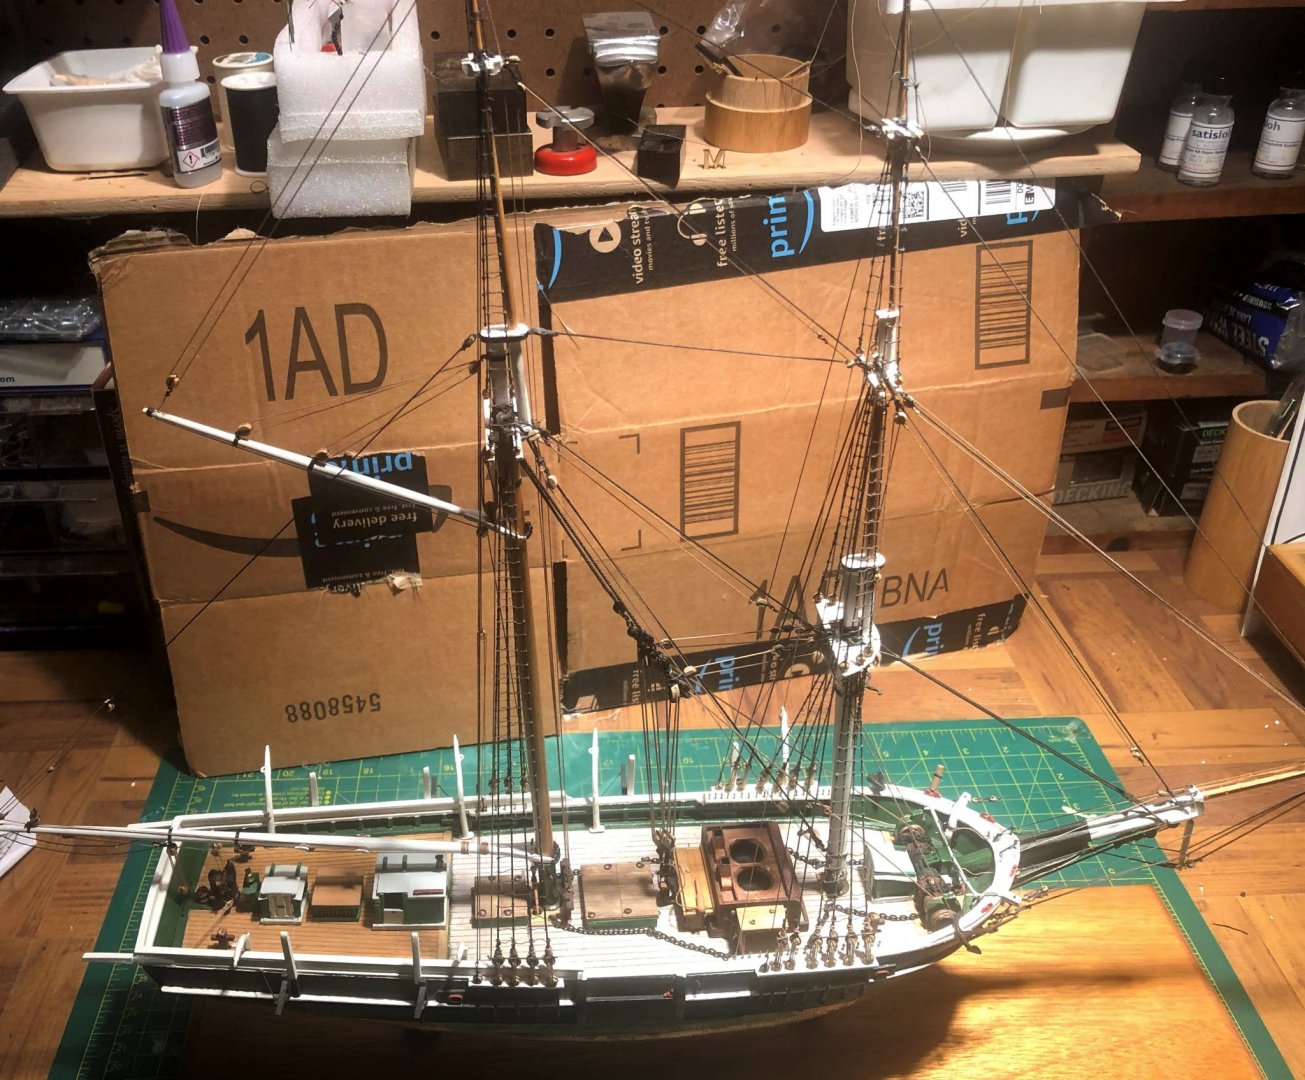
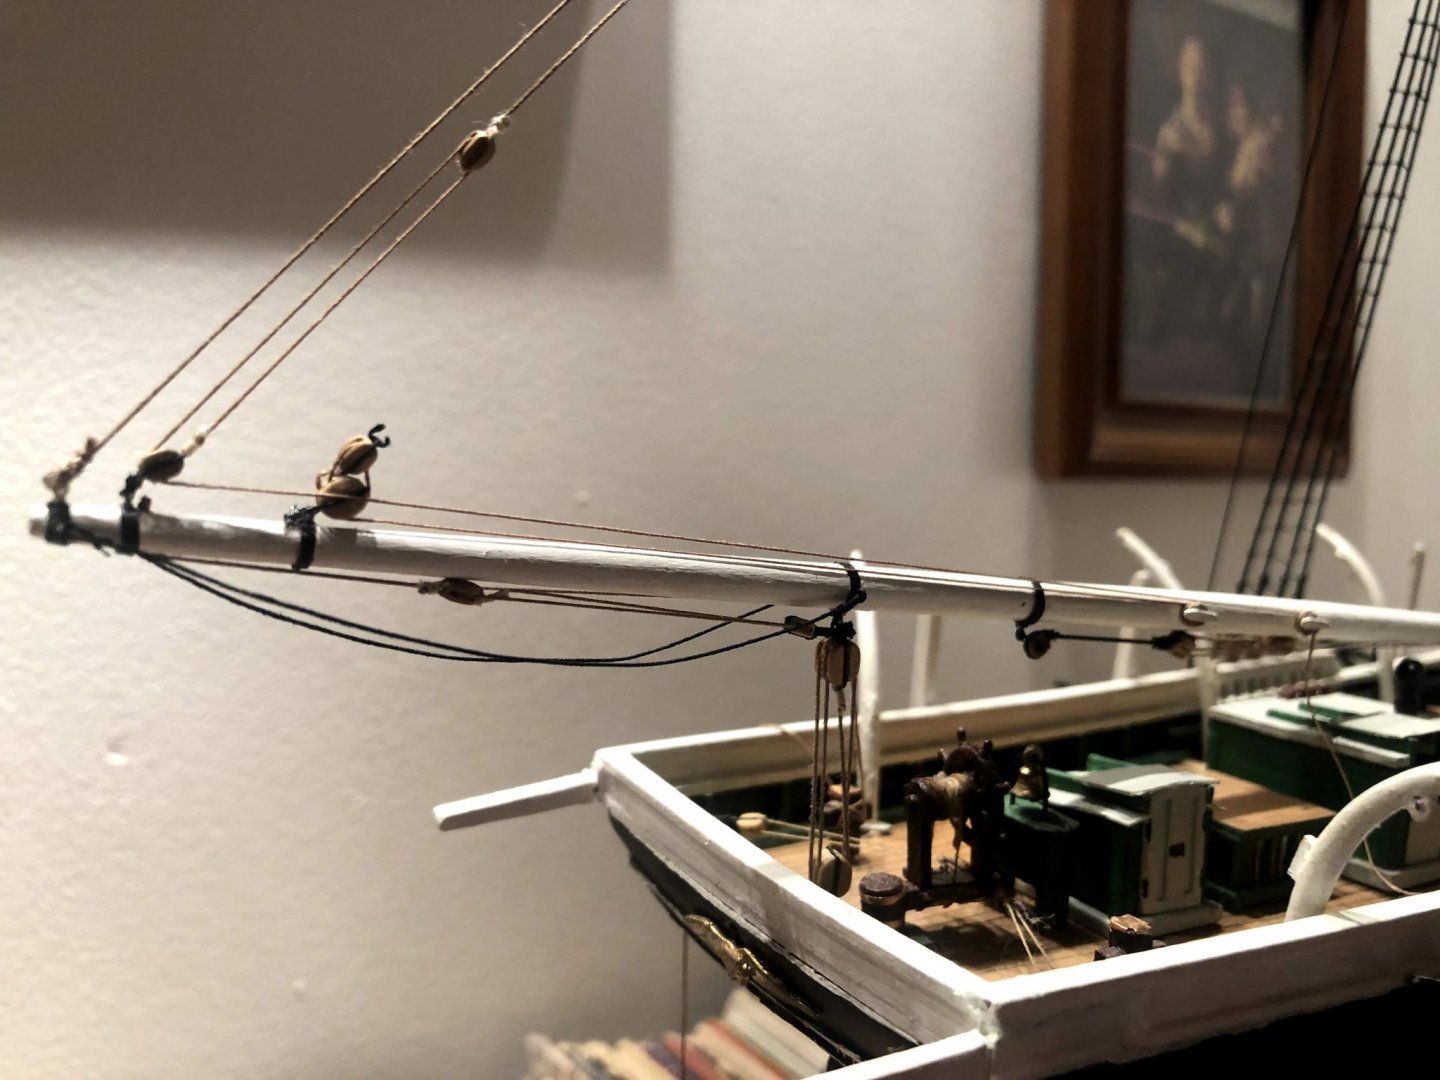
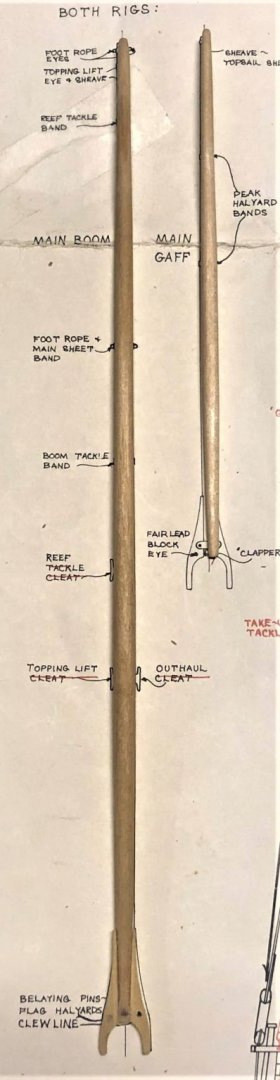
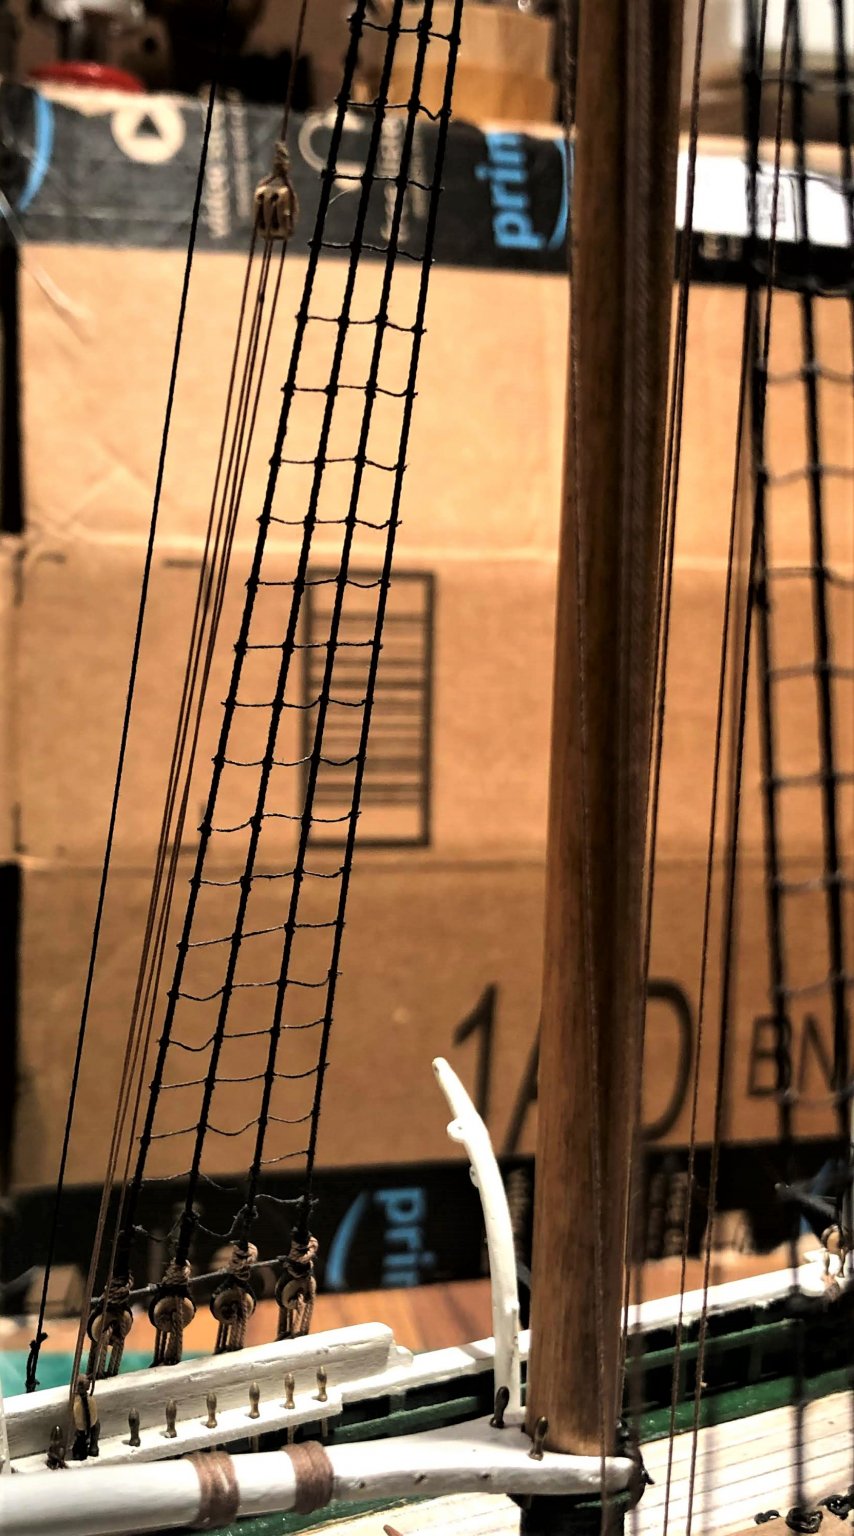
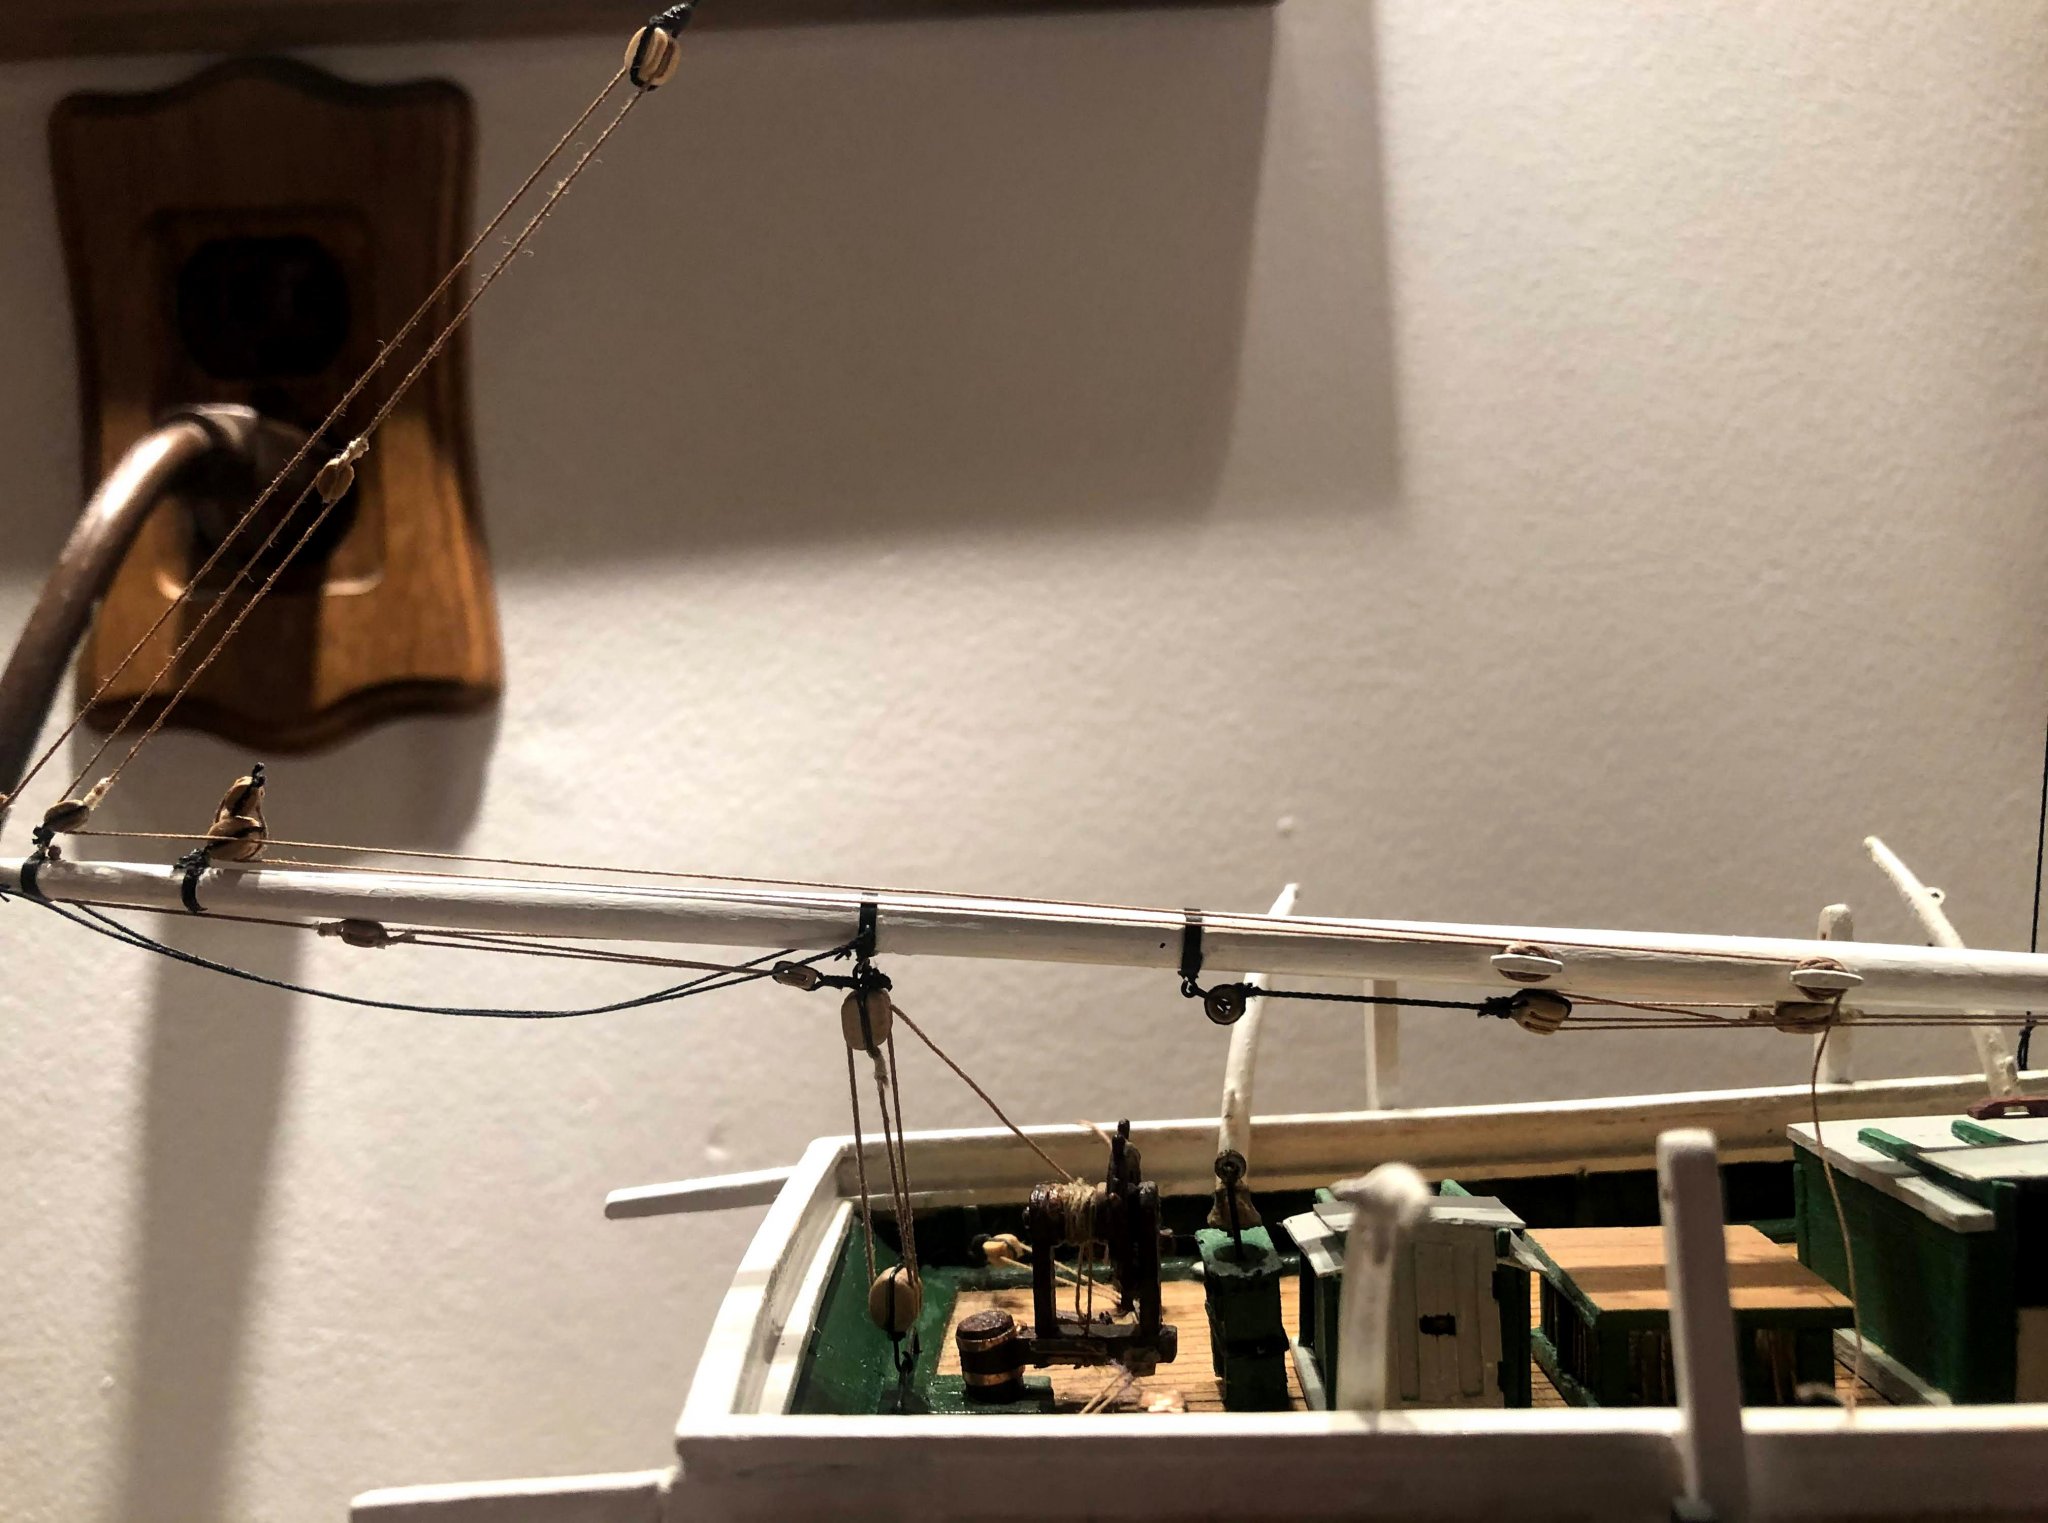
A few looks at the gaff and boom now complete. Special thanks to @michaelmys for explaining how that peak halyard rig works. Both ends belay to the pin rail on opposite sides, starboard side directly the the pin rail, port side with a take up tackle. It appears that the hauling end was used to raise the gaff to certain point, then made fast, and then the take up tackle side was used to further raise the gaff to position, the tackle giving it that added power needed. If you look closely at the above photo, you can see somehow I managed to rig the throat halyard and bring the hauling end down on the wrong side. 😣. I don't think it will bother me enough to go in and re-rig it. It will probably cause more harm than good trying to get in that tight space now. At the end of the gaff, you can see I hooked the sheet to the gaff topsail halyard. Completed boom and gaff That brings me to here.... Long way to go, but it's starting to feel like I can see the finish line. On to the yards!!
_LI.thumb.jpg.144548a809141ea958dcd6a40d7b6d6e.jpg)
- 109 replies
-
- 6
-
-
- model shipways
- kate cory
- (and 1 more)
-
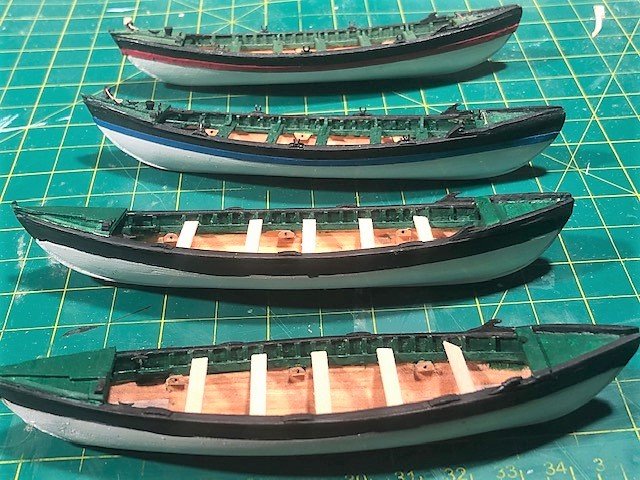
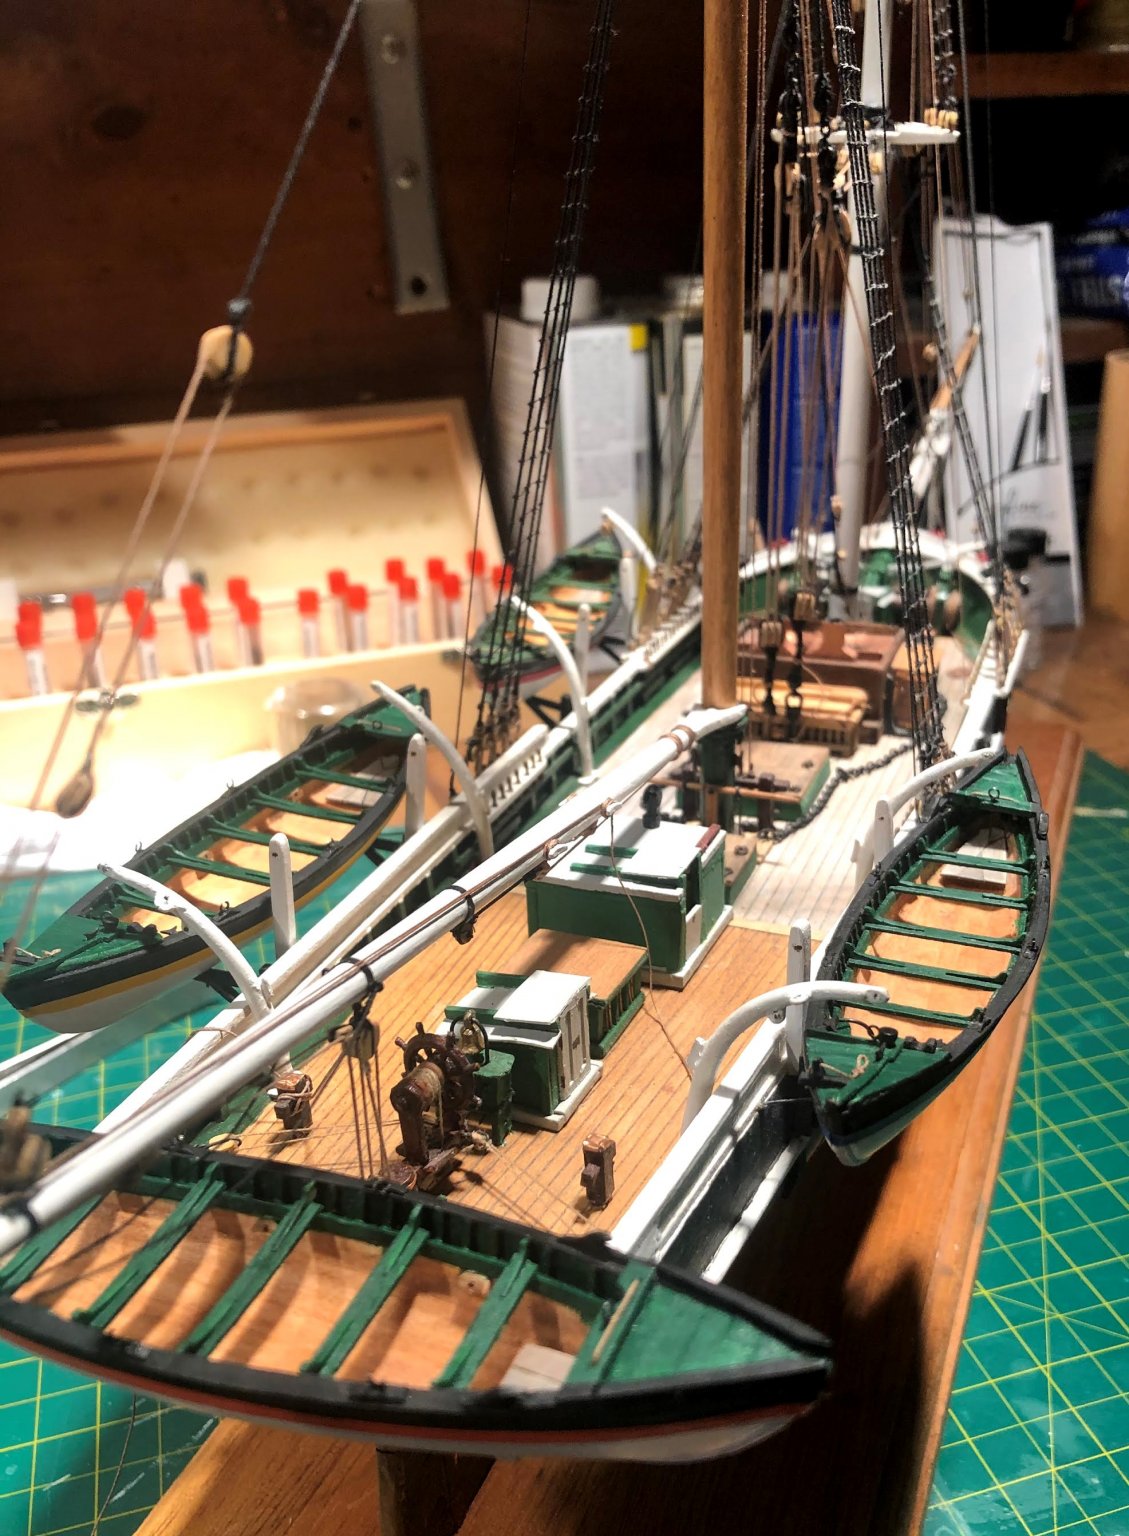
Thanks John. I wish my work was a clean as yours. Plus I have zero photography skills as all these shots are just from my i phone. Your photography is always top notch. As for the whaleboats, it was fun deciding on the color scheme. I've looked at so many pictures, trips to Mystic, and New Bedford...The only constant seems to be pick any color scheme you want! Want to paint the rail a different color than the topsides? go ahead. Want to paint the cuddy board the same as the rail. or the maybe the bulwarks? I've seen both. Paint the thwarts, or leave them wood stained? Go right ahead. The hardware will come last. Right now it's time to move on to the yards. I've been doing a lot of contemplating on how I'm going to secure that fore yard truss and sling to the yard. The gaff is up and rigged. I'll get some pictures up soon.
- 109 replies
-
- 1
-
-
- model shipways
- kate cory
- (and 1 more)
-
Thanks Michael for the great explanation. It's fun for me to learn the workings of this ship as I build it. So, by dumb luck, and just liking the position I achieved for the upper block , I ended up with the block just about halfway up. Fairly close to accurate. Sometimes even a blind squirrel finds a nut. 😎
-
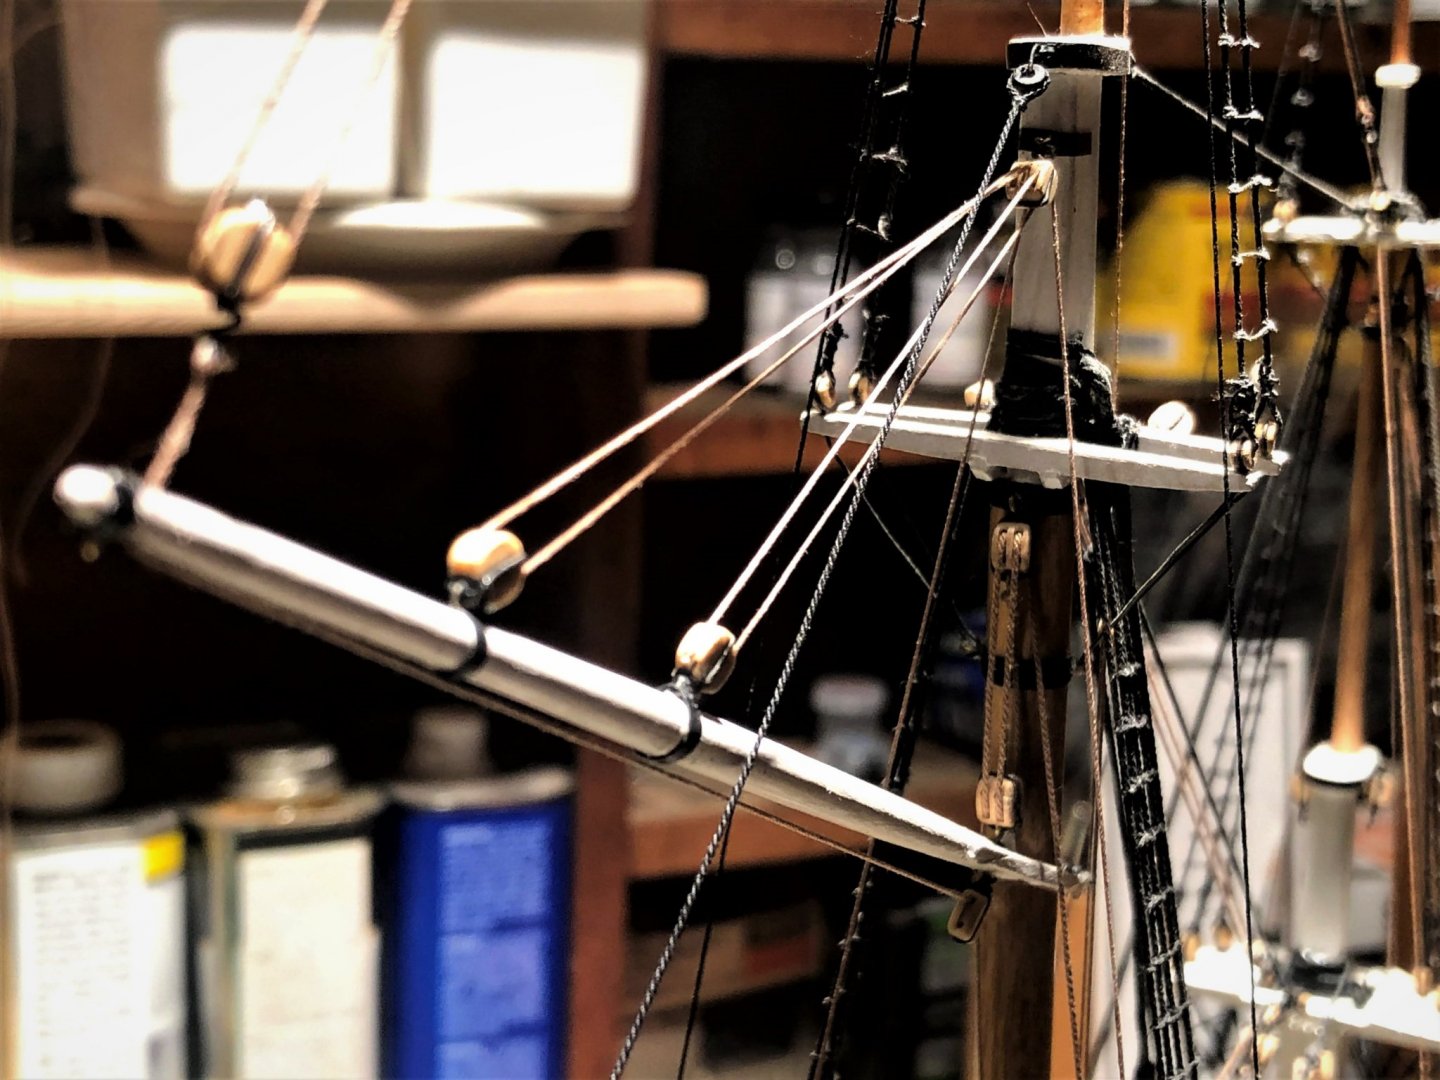
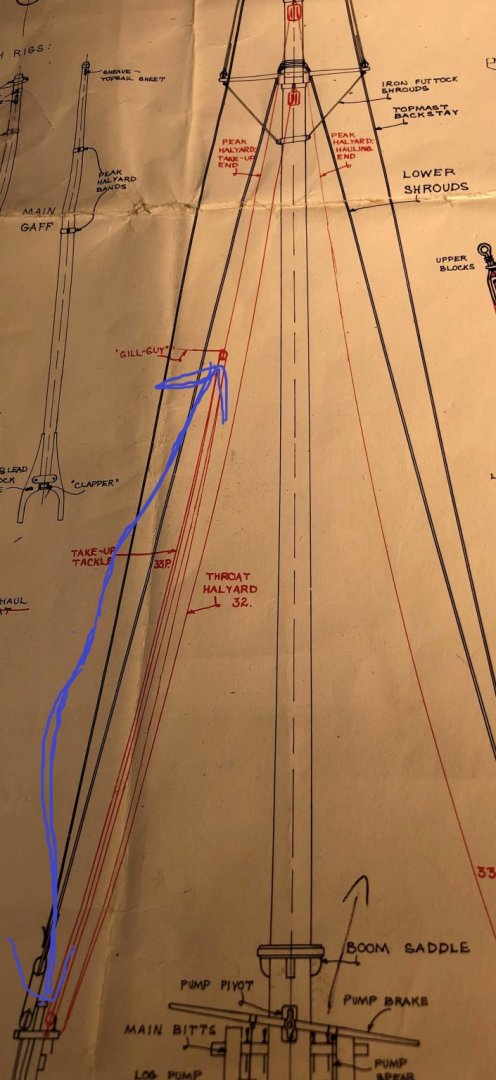
Thanks. That makes sense. After rigging the contraption, and playing with the lines a bit, the two ends seem to work in conjunction with each other. Pull down the hauling end, Starboard side, and the take up tackle, port side simultaneously, (along with the throat halyard) and the gaff would raise, decreasing the distance between the tackle blocks as the gaff rises. That said, since I'm rigging the gaff in the raised position without a sail ...and that's not very realistic to begin with, why fret over the distance between the tackle blocks? So I took a little artistic licence and kept a rather large of space between the blocks. I think it looks a little more dramatic.


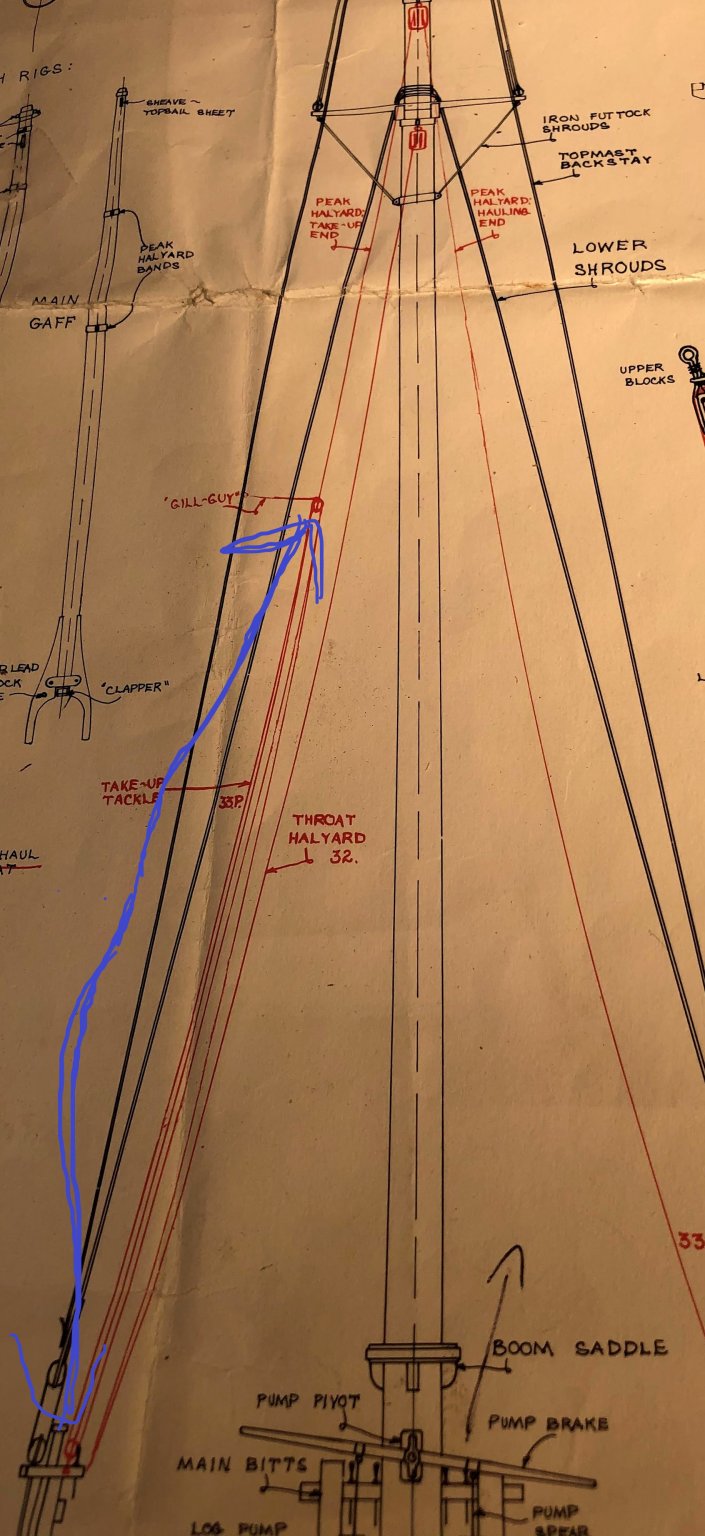
-
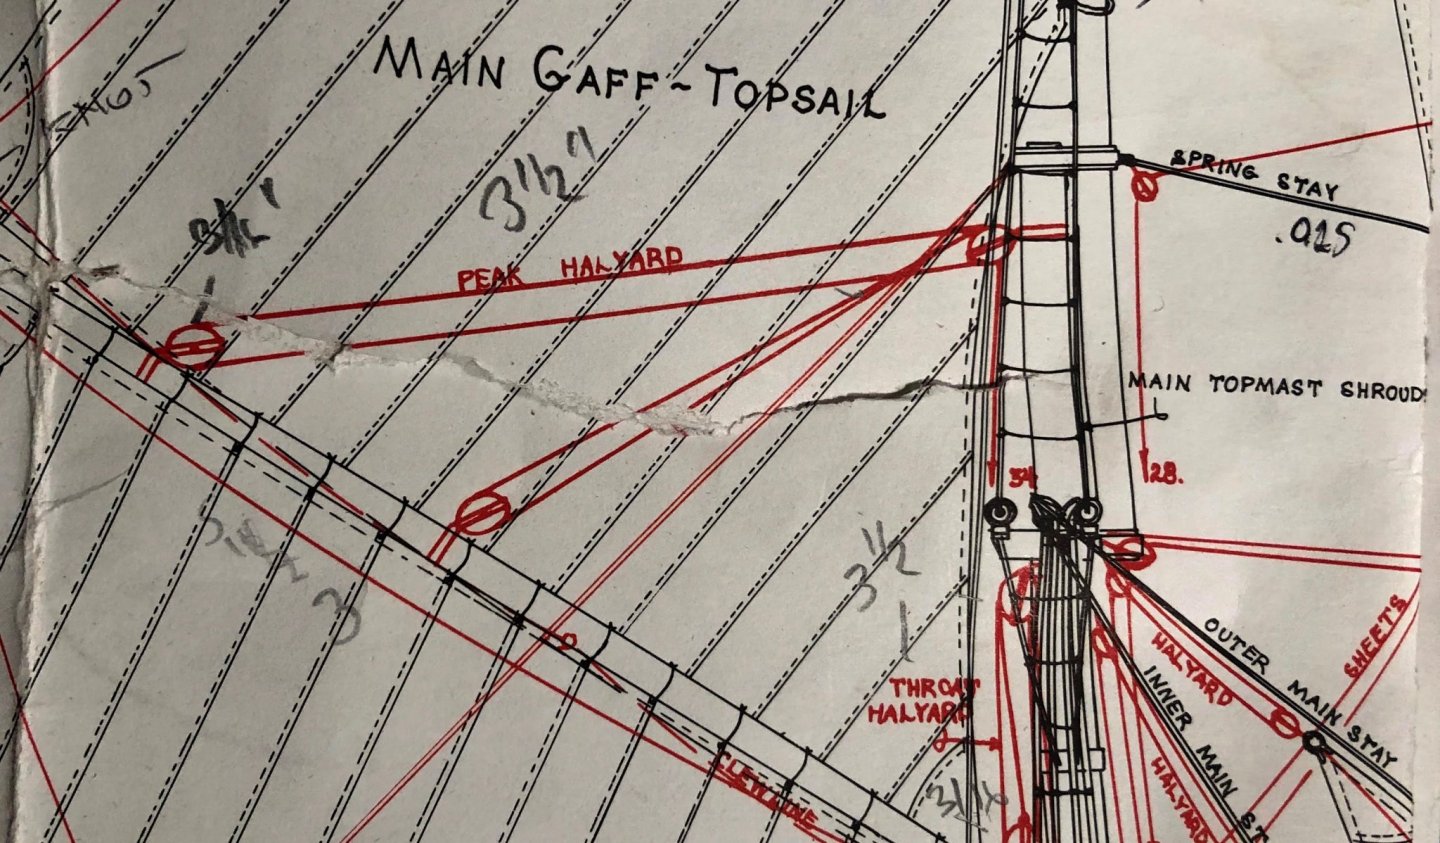
I'm in the process of rigging the main gaff on the Kate Cory. I have a question regarding the peak halyard, in particular, the take up tackle. The Peak Halyard is rove through the two single blocks on the gaff, through the triple block on the mast as shown. The hauling end simple belays to the pin rail, starboard side. The take up fall runs through single block at the rail, and through the double upper block and belays in the rail, port side. So, I'm having a little difficulty working the mechanics of this through rig in my head. Do you "pull" the hauling end down to raise the gaff?? And in turn, does raising the gaff bring the take up tackle blocks closer together, or farther apart? Another way to ask what I'm looking to find out....If I rig the gaff in the raised position, should there be a big distance between the take up tackle blocks as shown in the plans, or should the upper block be down closer to the pin rial block?
-
Thanks Kurt. I do not have a case yet. I need to start thinking about it. Not sure if I have the skills and tools to make a nice one, or if I should order one. Still plenty work to go with the yard arms, and assorted details, but there is light at the end of the tunnel 😊
-
Couldn't resist putting the boats on for a quick pic.

- 109 replies
-
- 6
-
-
- model shipways
- kate cory
- (and 1 more)
-
The boom is rigged and in place. I'm not sure those reef tackle blocks would be there with no sail, but I wanted to get as many lines in as I could. I just knotted the line at the block, then ran it to it's cleat. Same with the outhaul. Knotted at the sheave, single block tackle, and belayed to a cleat. Boom tackle was stored under the boom, and lashed to the boom near the jaw when not in use. Next up, the gaff. This is going to present some issues, I believe. I neglected to drill a hole in the main mast to try to "pin" the gaff to the mast. That seems like too risky an endeavor at this point. Hopefully the rigging, and a little CA on the jaws and the clapper will be able to hold it up.


- 109 replies
-
- 8
-
-
- model shipways
- kate cory
- (and 1 more)
-
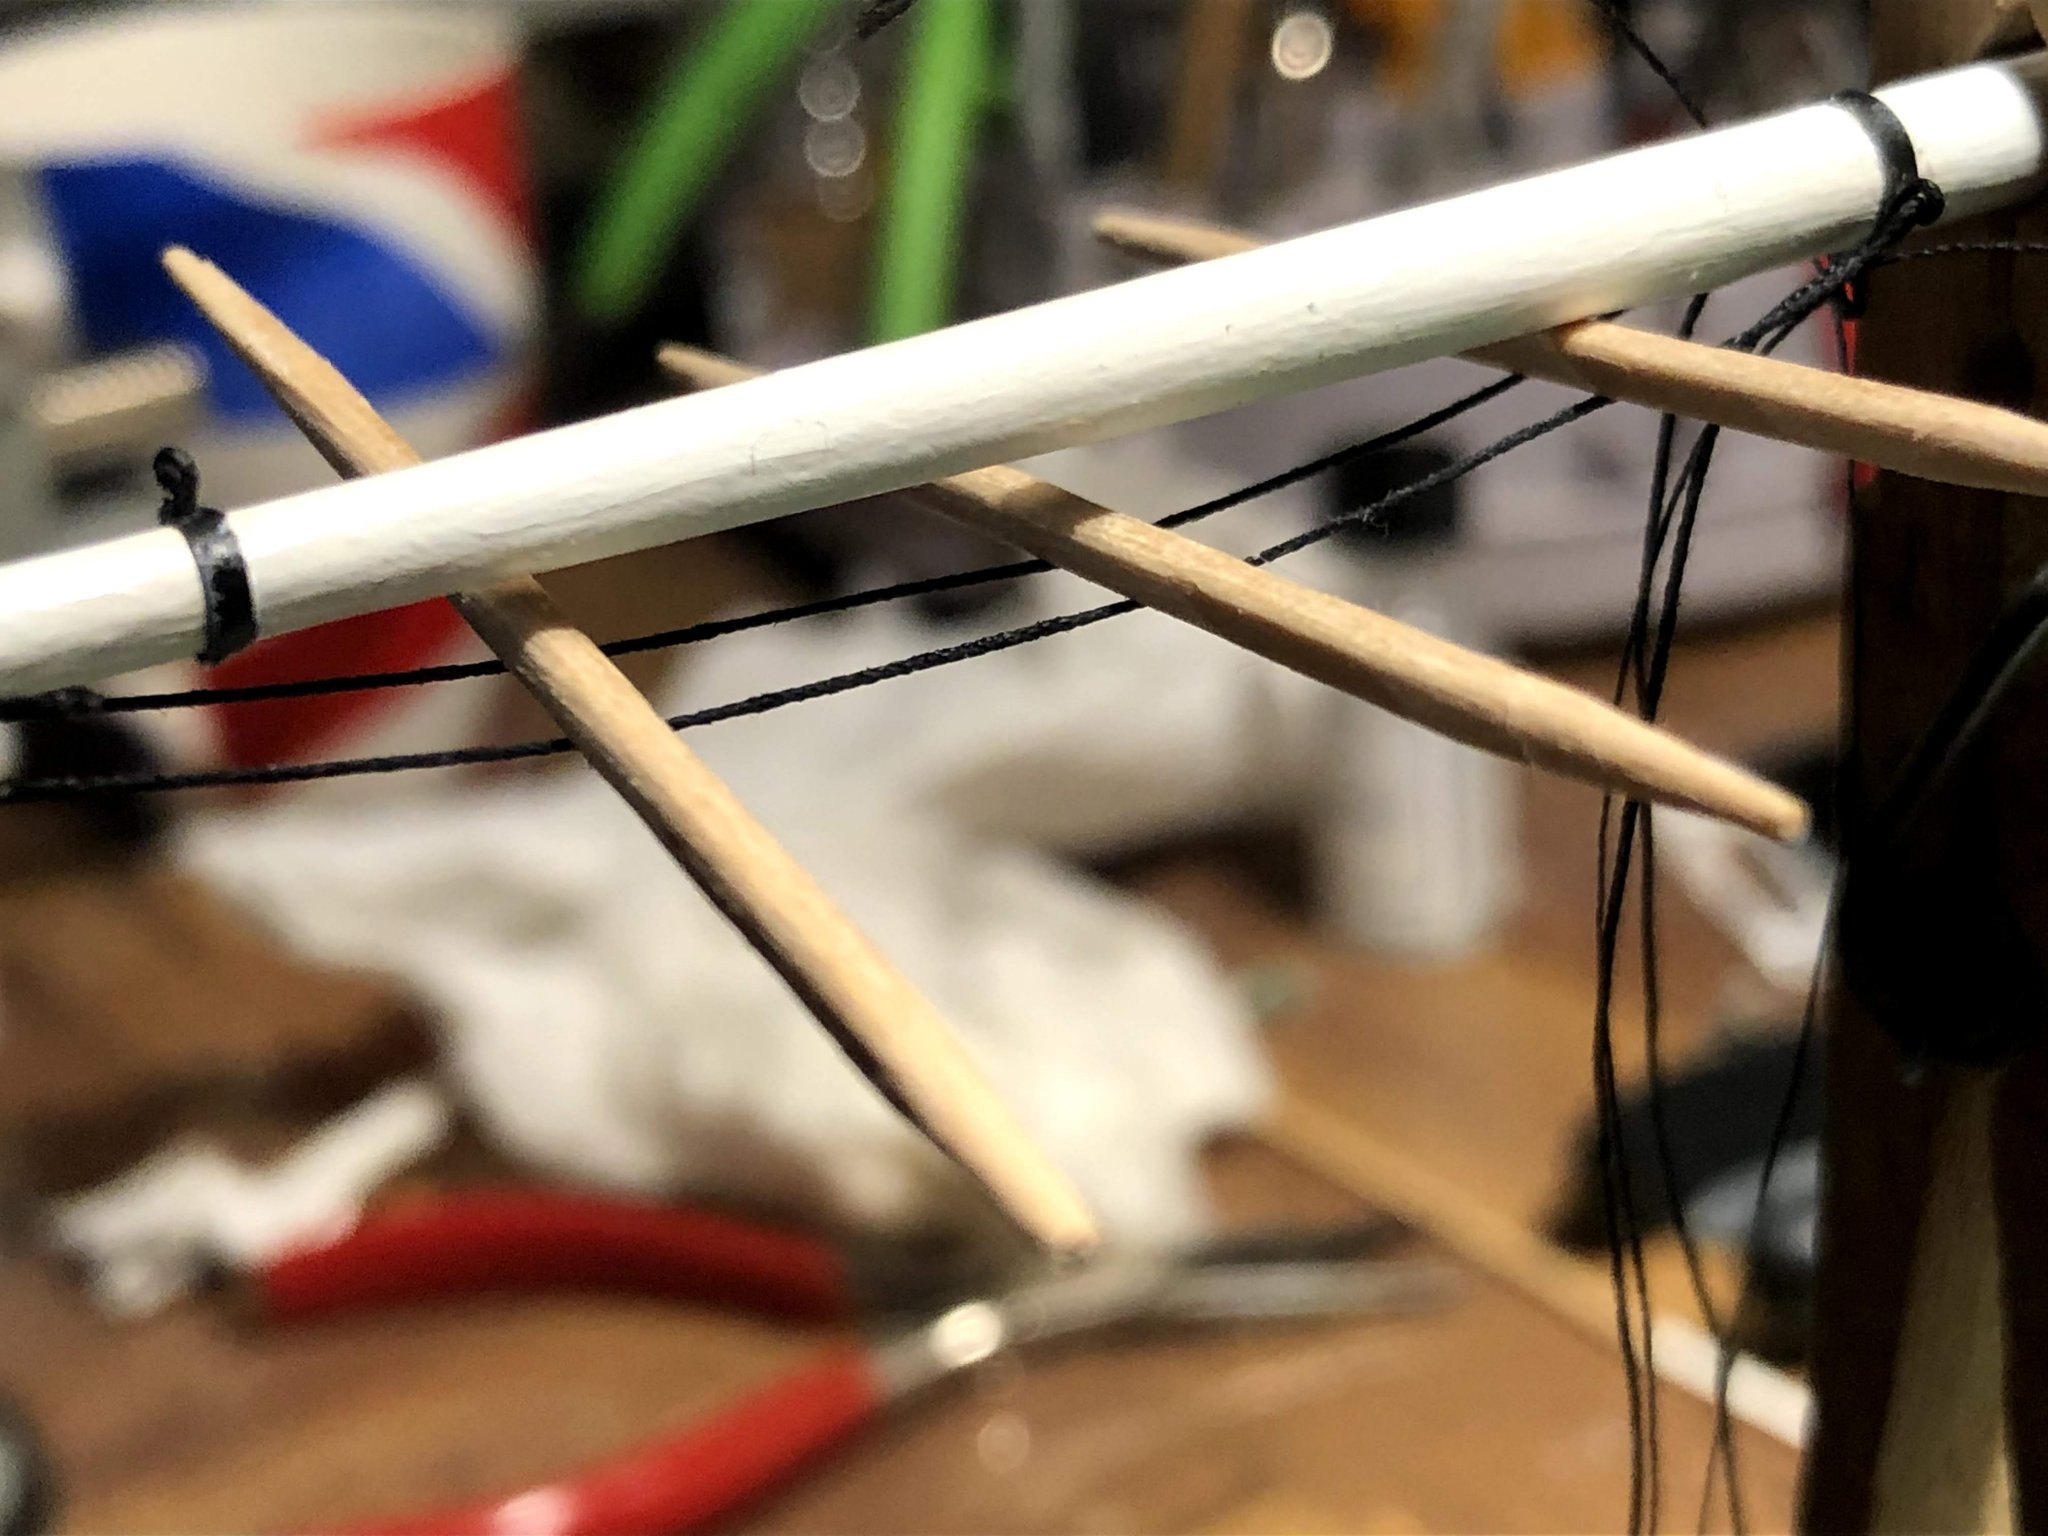
Thanks for the likes and looking in. Paint and ironwork on the boom and gaff is underway. The hoops are thin slices of electrical tape with a drop or 2 of CA on the back to make sure they stay in place. After drying, I added the brass eyebolts and painted them black. As I mentioned earlier with the masts, the ironwork on the KC was all painted white, but I like the contrast. A little artistic license. Next up is trying to get as much rigging on the boom as I can before I mount it. Footropes, Boom tackle, topping lift hardware. I want to show the outhaul, and the reef tackle even though there will be no sails. I'll knot the outhaul at the sheave, and rig it's tackle under the boom, and I'll knot the reef tackle at the block on the boom, and run it to the cleat. Footropes first. Definitely a challenge to get a natural looking hang on them...diluted white glue and a little weight in the right places, but the curve keeps changing as the line dries. I've got a few toothpicks strategically placed to try to coax the curve. We'll see how this looks when it dries, then I'll trim the ends.


- 109 replies
-
- 7
-
-
- model shipways
- kate cory
- (and 1 more)
-
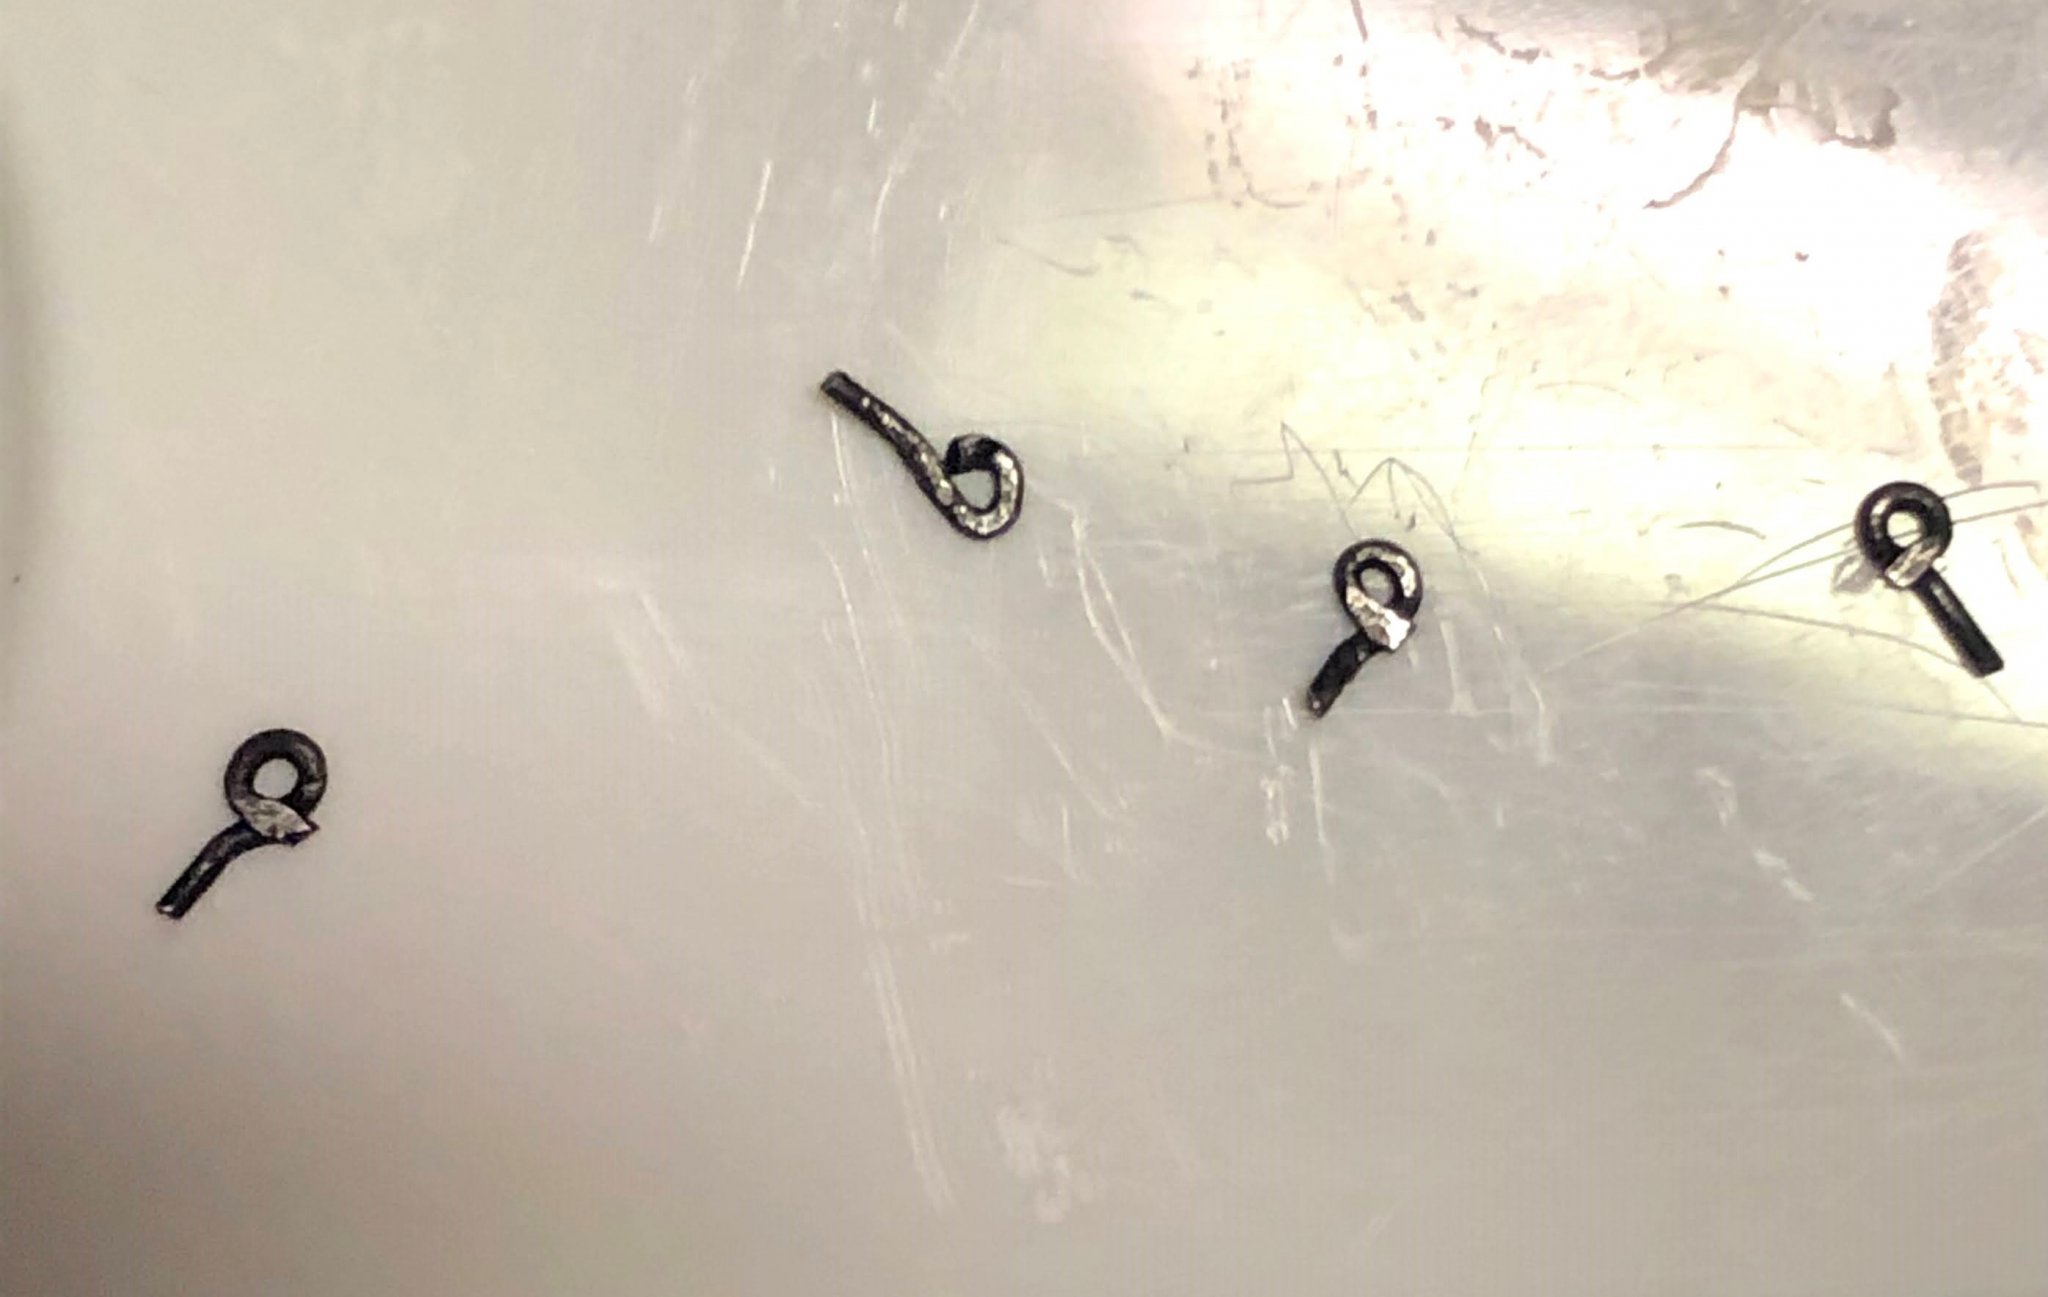
Thanks Chuck. They sure are tiny. Especially after working in 1/2” scale for a while. Yes, I’ve gotten pretty proficient at making those little locks. There’s probably just as many of those on the floor as there are lost thwart knees. 🙂
-
UHG..I see I lost another rowlock on one boat. Better put these things away and stop fiddling with them until it's time to add them to the ship.
-
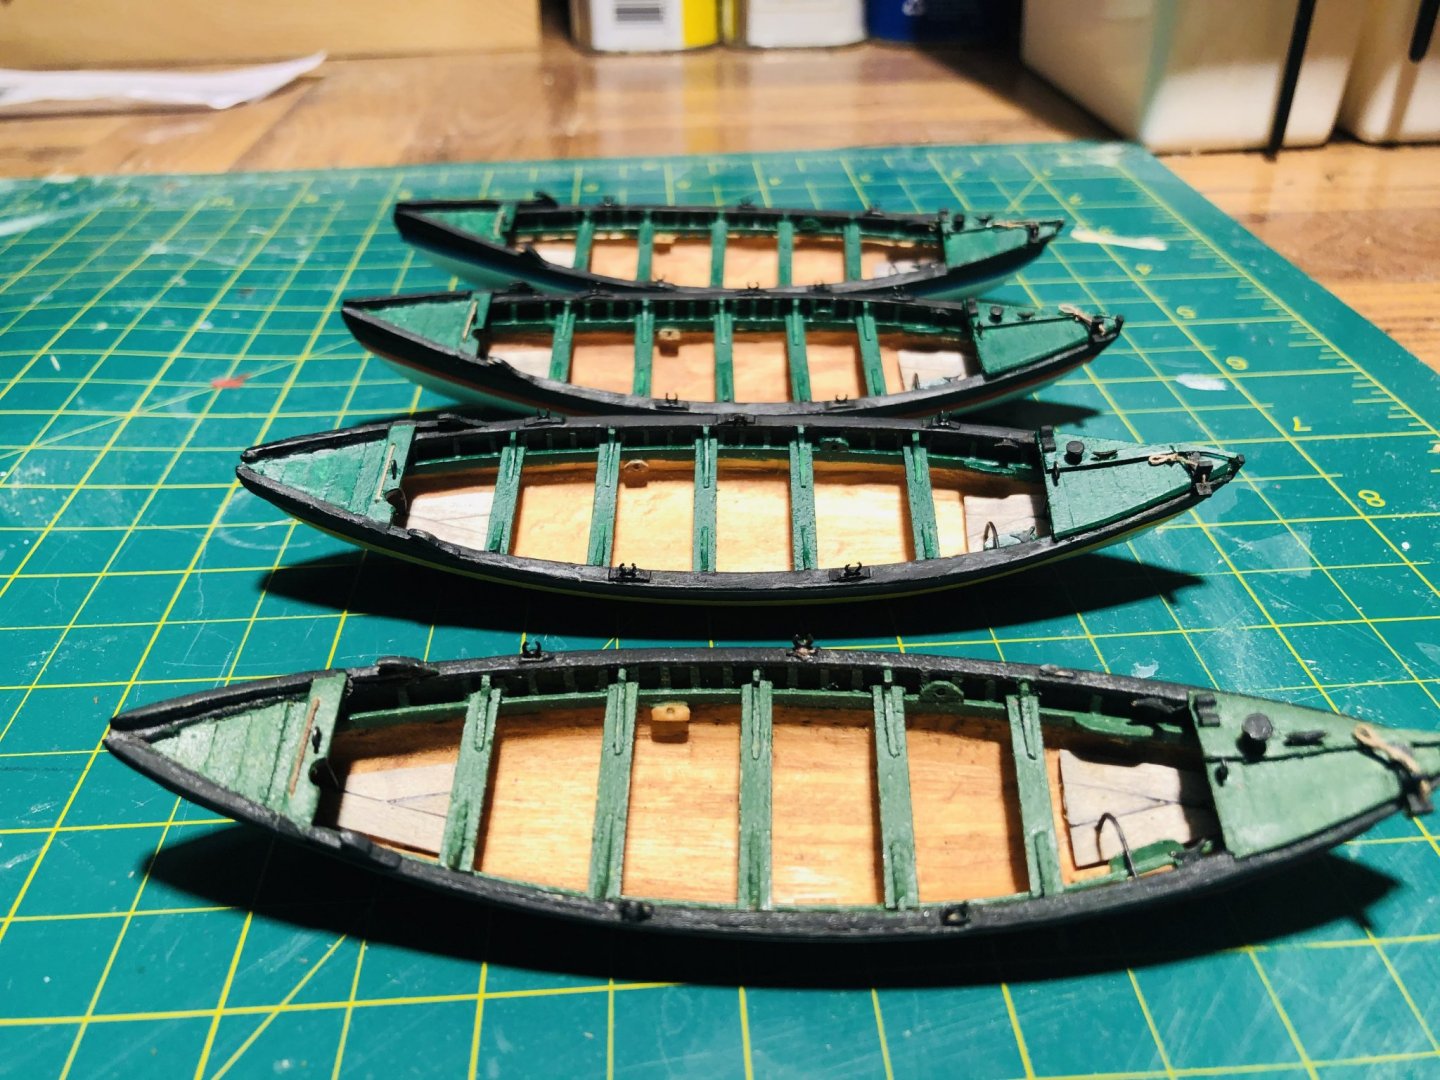
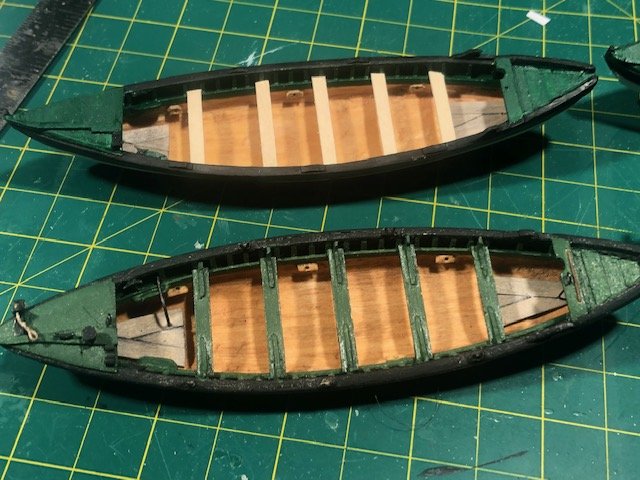
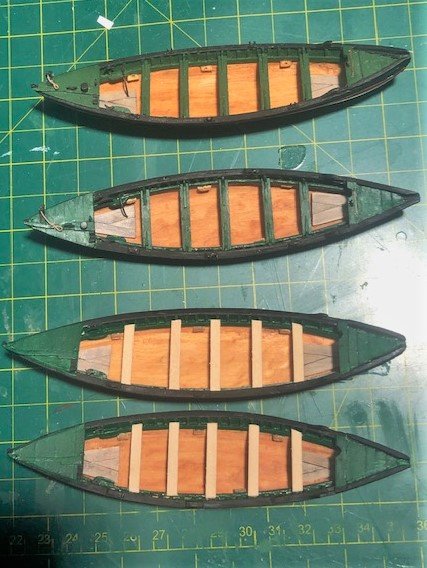
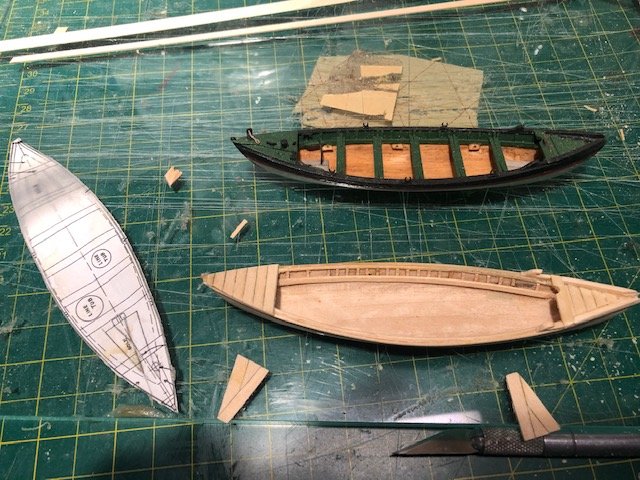
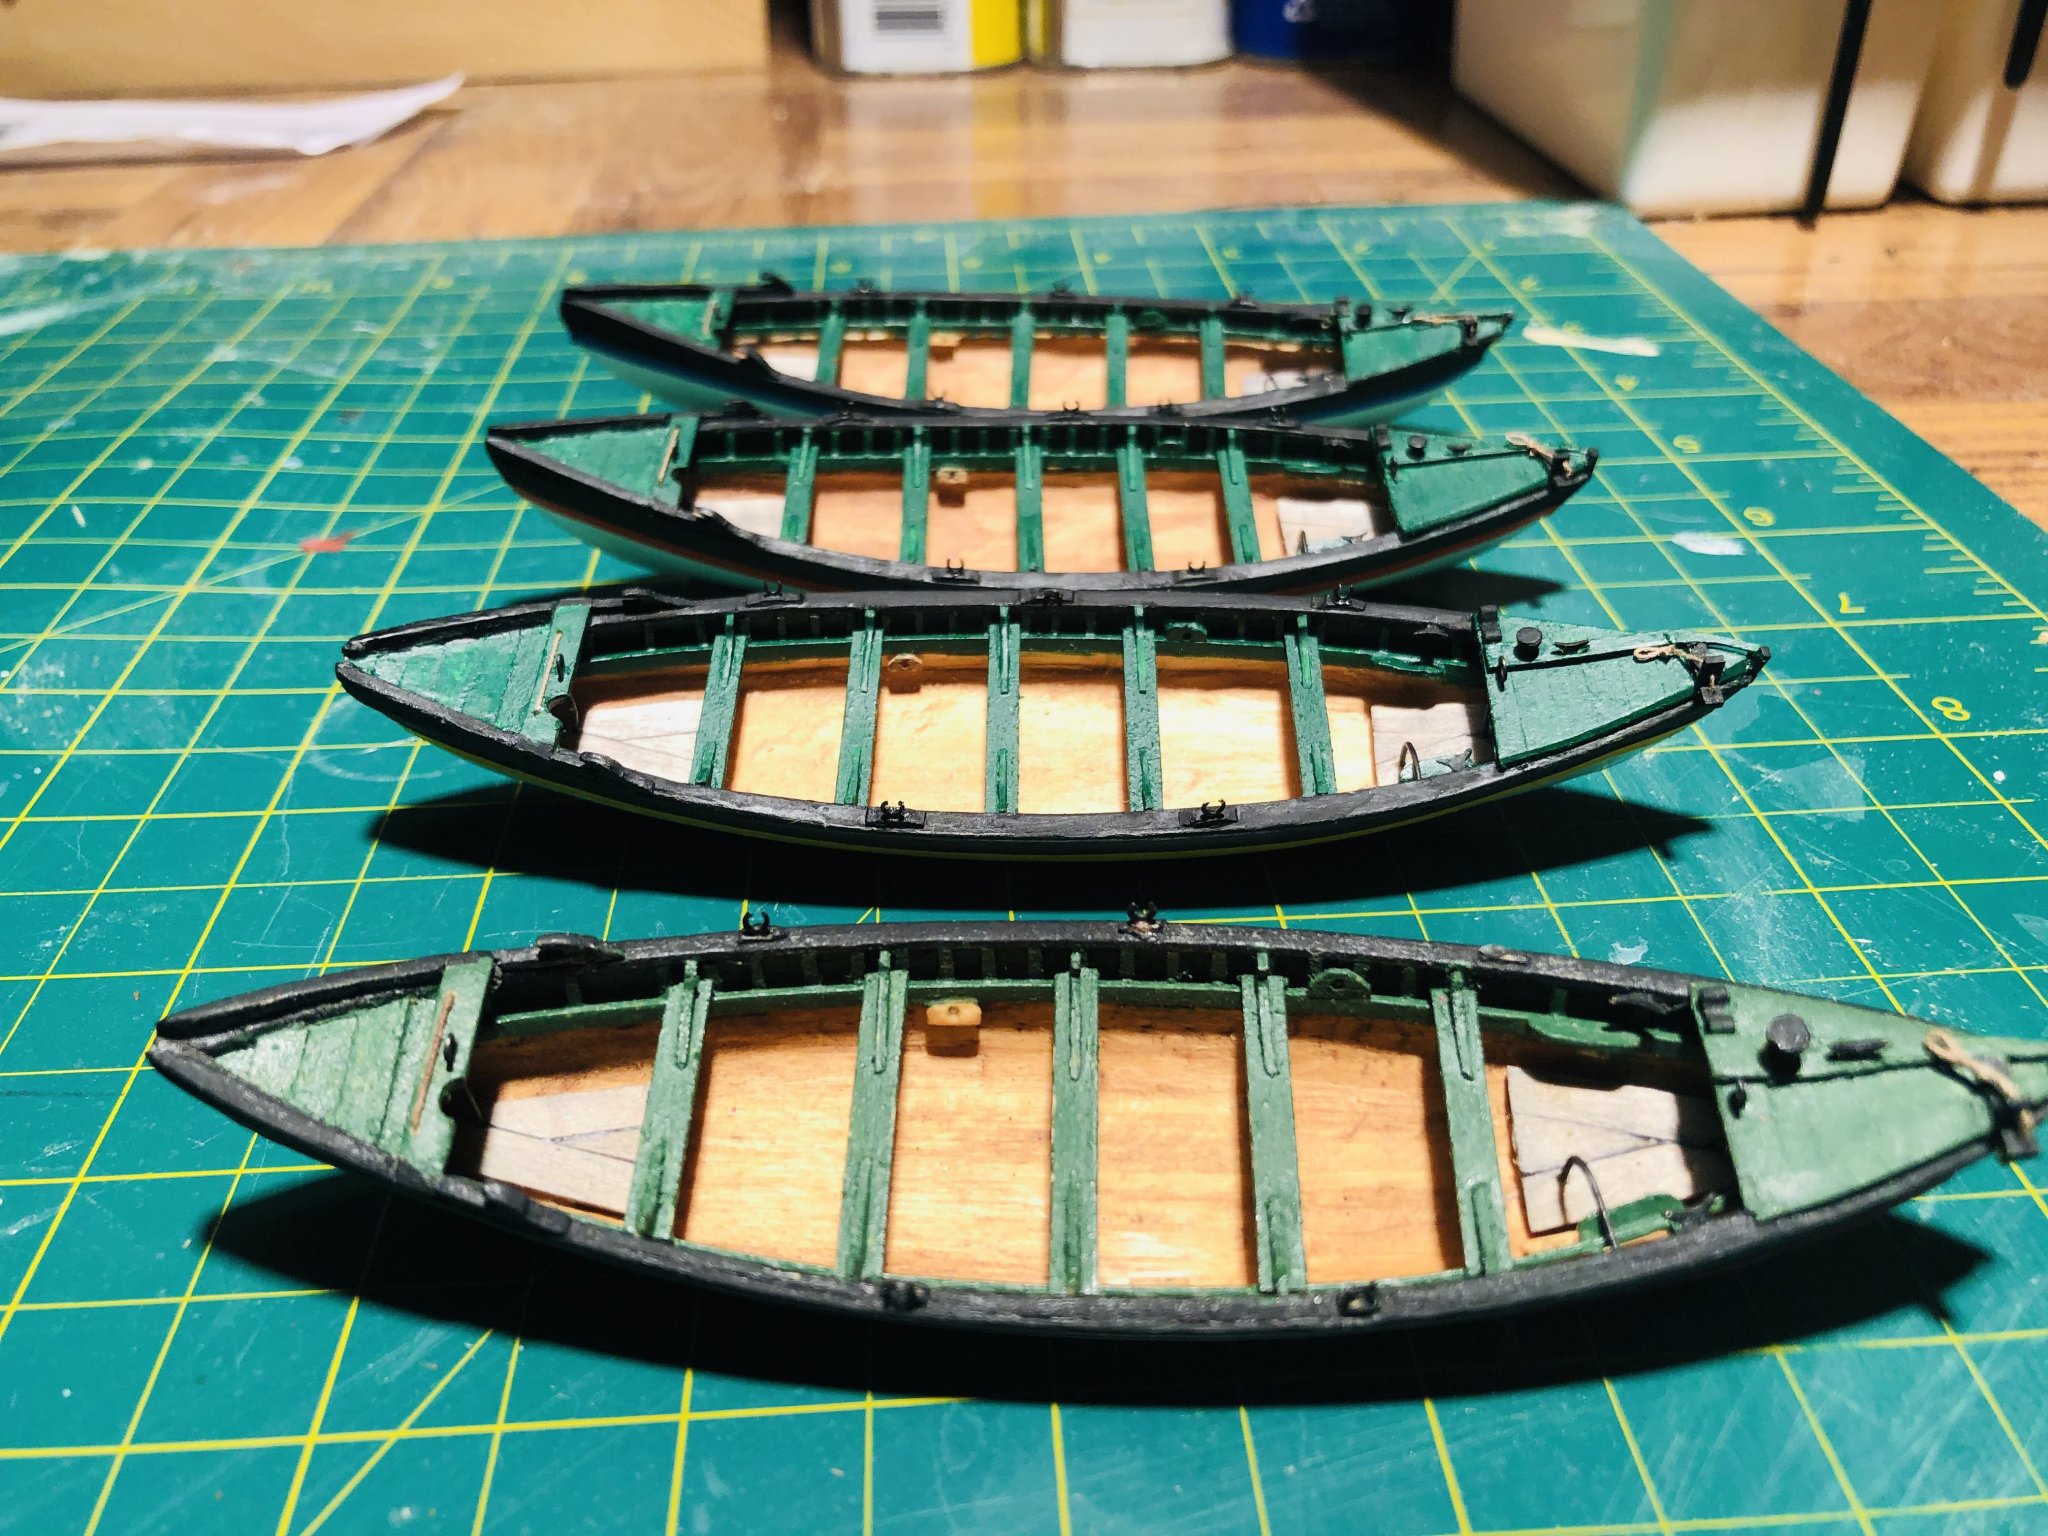
The whaleboats are completed. I think they came came out OK. I think I got enough of the important details in. Once they're loaded with oars, mast, Harpoons, line tubs I think they'll look good. I'll say this, I don't want to make any more little thwart knees for a long time. There must be twice as many that came out looking funny or are somewhere on the floor than there are on the boats. I've tapered the boom and Gaff, and made the jaws for the boom. I wasn't having a lot of success using the method of a drill as a lathe, so these were tapered by hand. A little at a time with 220, and 320 paper, using calipers with approximate diameters marked off every centimetre or so. Then, once the taper looked good, 400 and 600 to finish it off. I'm happy with the look of the taper. Not as happy with the placement of the two holes for the belaying pins in the jaw, hence the filler in one hole.
.thumb.jpg.0dfded5922754ef88556c07997c9e482.jpg)
- 109 replies
-
- 7
-
-
- model shipways
- kate cory
- (and 1 more)
-
Closing in on finishing the last two whaleboats. Some painting, cuddy board details (Loggerhead, cleat, steering oar brace), oarlocks, thwart knees, foot brace, lifting eyes, and they'll be done. (Wow...actually there's quite a few details I still need to add 🙂) I'll save the gear for when I need a break from rigging. I'm going to load all 3 boats on the davits with gear, and leave the spare boat on the tail feathers empty. I know the boats weren't fully loaded until they were about to embark on a chase, but for display purposes, that's the way I'm going to go. Hey, if it's good enough for Ronnberg's KC in New Bedford, it'll be OK for mine as well. Once I have these little guys finished, I can temporarily set them in their places on the ship so I can get the davits at the correct height and aligned with the lifting eyes on the boats. Then I can go ahead and get the blocks on the davits, and secure the davits permanently in place, and add the davit braces. Work has begun on shaping the boom, gaff, and yards. I'm fortunate to still be working through this crisis, but work is slow with lots of down time, so I've been bringing the yards to work and sanding and shaping to pass the day. I've got the boom, gaff , lower and topsail yards shaped, but I haven't trimmed the lengths yet. The plan is to have these ready to paint and start adding details to them as soon as the whaleboats are done.
- 109 replies
-
- 8
-
-
- model shipways
- kate cory
- (and 1 more)
-
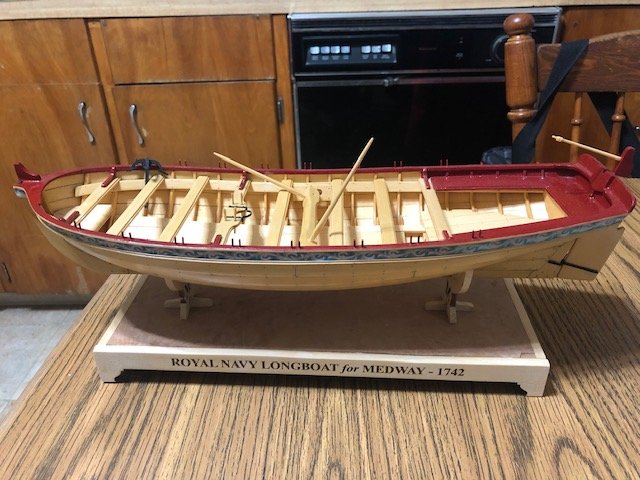
You and me both Bob. I can’t seem to learn thin coats and trust the paint. I keep going over spots Instead of painting a thin coat, let it dry, then another coat-and I get lousy results. I’ll get there. Rayland - Absolutely beautiful!!
- 263 replies
-
- 3
-
-
- Medway Longboat
- Syren Ship Model Company
- (and 1 more)
-
Thanks Bill. Hopefully we’re back to normal sooner rather than later. Be well, see you soon.
-
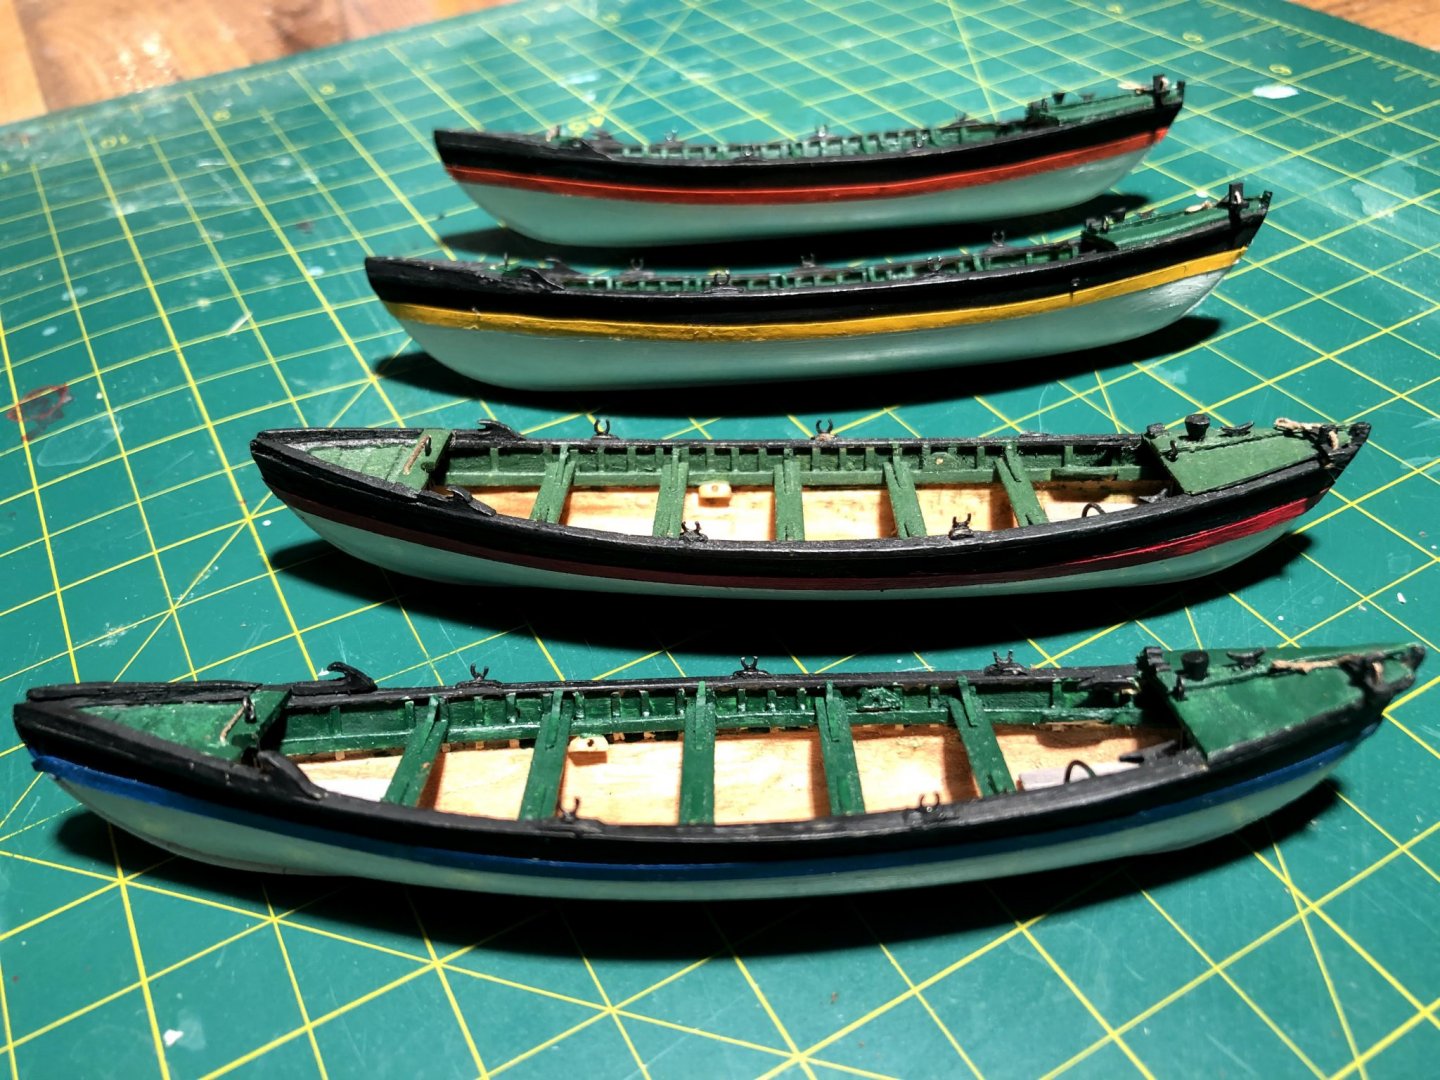
Second whaleboat complete. Half way there. Special shout out to @David Lester for his use of cardstock for the stripe on the boats. Much better than trying to paint that stripe of color between the black and white. I made a red stripe for my original boat. So much better than trying to paint that line, and masking it off. Used a blue stripe for boat #2. . 680 I'll make the next two together and get back to rigging soon.
- 109 replies
-
- 9
-
-
- model shipways
- kate cory
- (and 1 more)
-
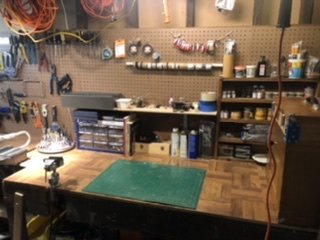
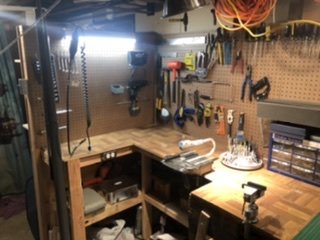
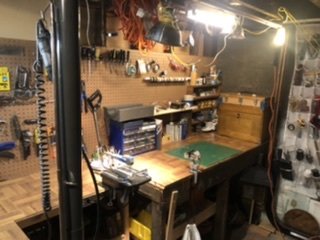
I got to the point where my little workbench was proving inadequate to accommodate some of my recent power tools purchases. Thanks to our club’s annual auction, some nice pieces have been added at some great prices, so it became time to expand the workbench, which once again put the whaleboats on hold. The bench is now complete. Time to start modeling!!
- 109 replies
-
- 5
-
-
- model shipways
- kate cory
- (and 1 more)
-
I look forward to your log. No better way to get help and advice. ( and show off your work a little 😁
-
Thanks Don. Appreciate it.
-
So the hiatus is over. The Medway longboat is complete, sans rigging. I'll save that for another day. Now it's time to get back to this ship and finish her. #2 whaleboat in progress...
- 109 replies
-
- 10
-
-
- model shipways
- kate cory
- (and 1 more)
-
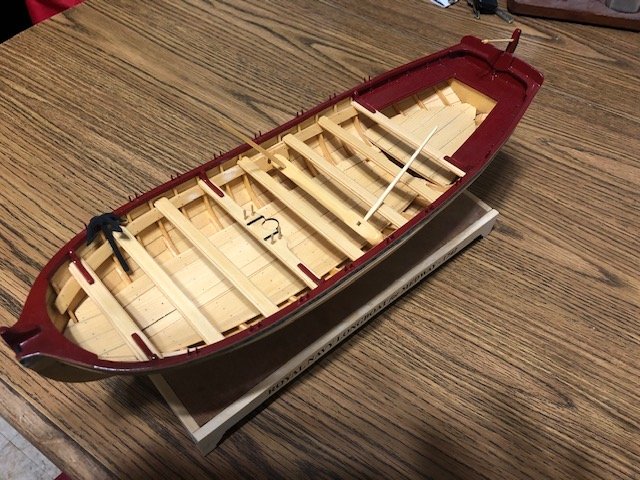
The rudder is done, the thole pins are installed. For now, t's done. I'll come back and rig it at a later date. Right now it's time to get back to the Kate Cory and finish the whaleboats and her rigging. I'm itching to get back to her and complete it. This has been a great kit and a great learning experience. Many techniques I've learned and tried for the first time, and they'll be more when the rigging begins. Thanks for a great kit, Chuck!


_LI.jpg.5b3b5105df57ed8834bdad4b31c0c69f.jpg)


.jpg.0f76ed5ca73ba5ed03d504f2f16dd81b.jpg)