Keith Black
-
Posts
6,735 -
Joined
-
Last visited
Content Type
Profiles
Forums
Gallery
Events
Everything posted by Keith Black
-
 Thank you kindly, John. Thank you very much, James. Thank you, Tom. I like to think Capt. Engel is looking down because I'd like to meet him someday. Thank you, Bob. Barista, a round of your finest for me and my friends. Thank you very much, Paul. Thank you, Chris and thank you for changing the title. 👍
- 359 replies
-
- 1
-

-
- Billy
- sternwheeler
- (and 1 more)
-
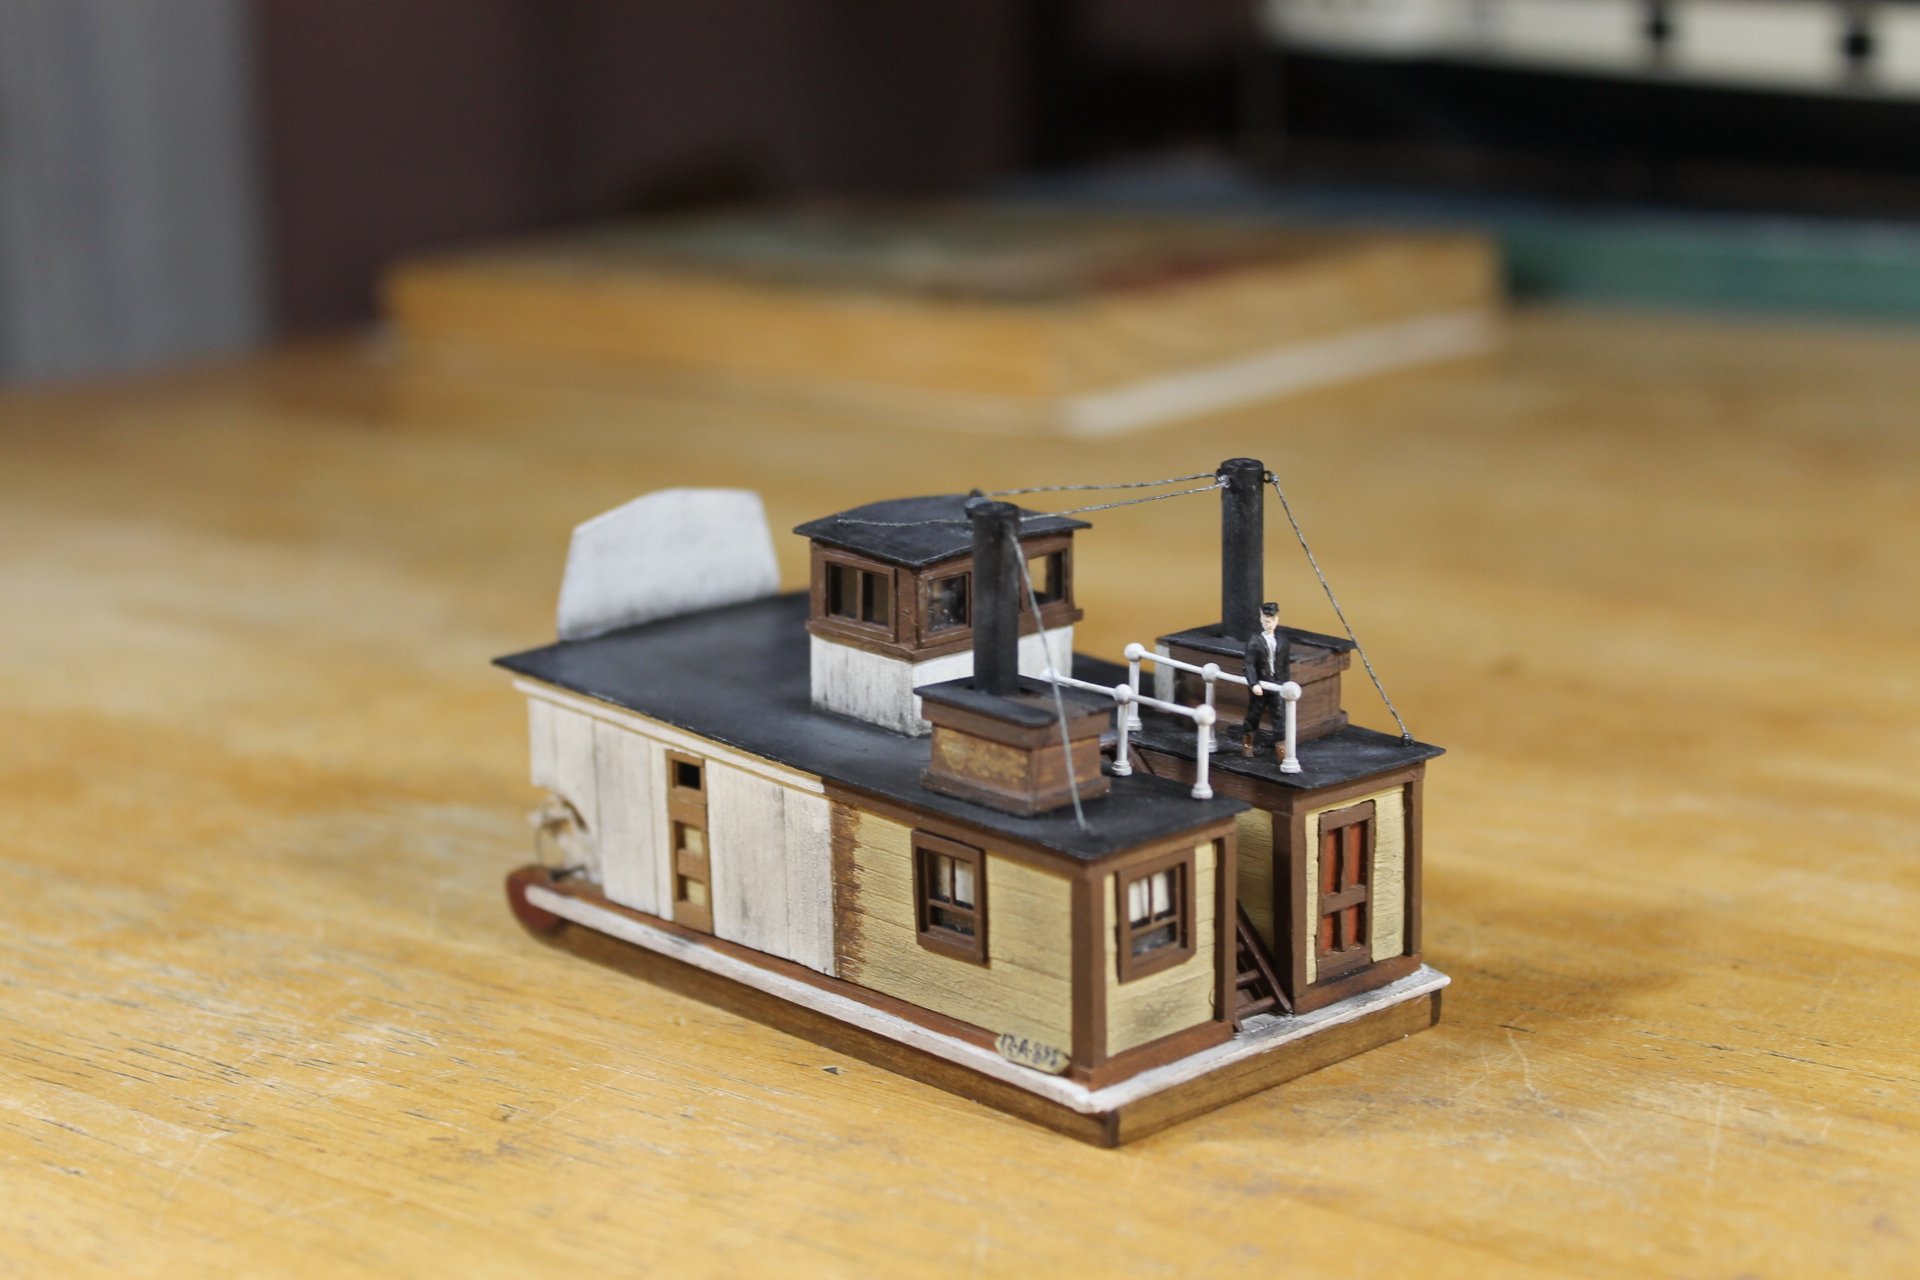
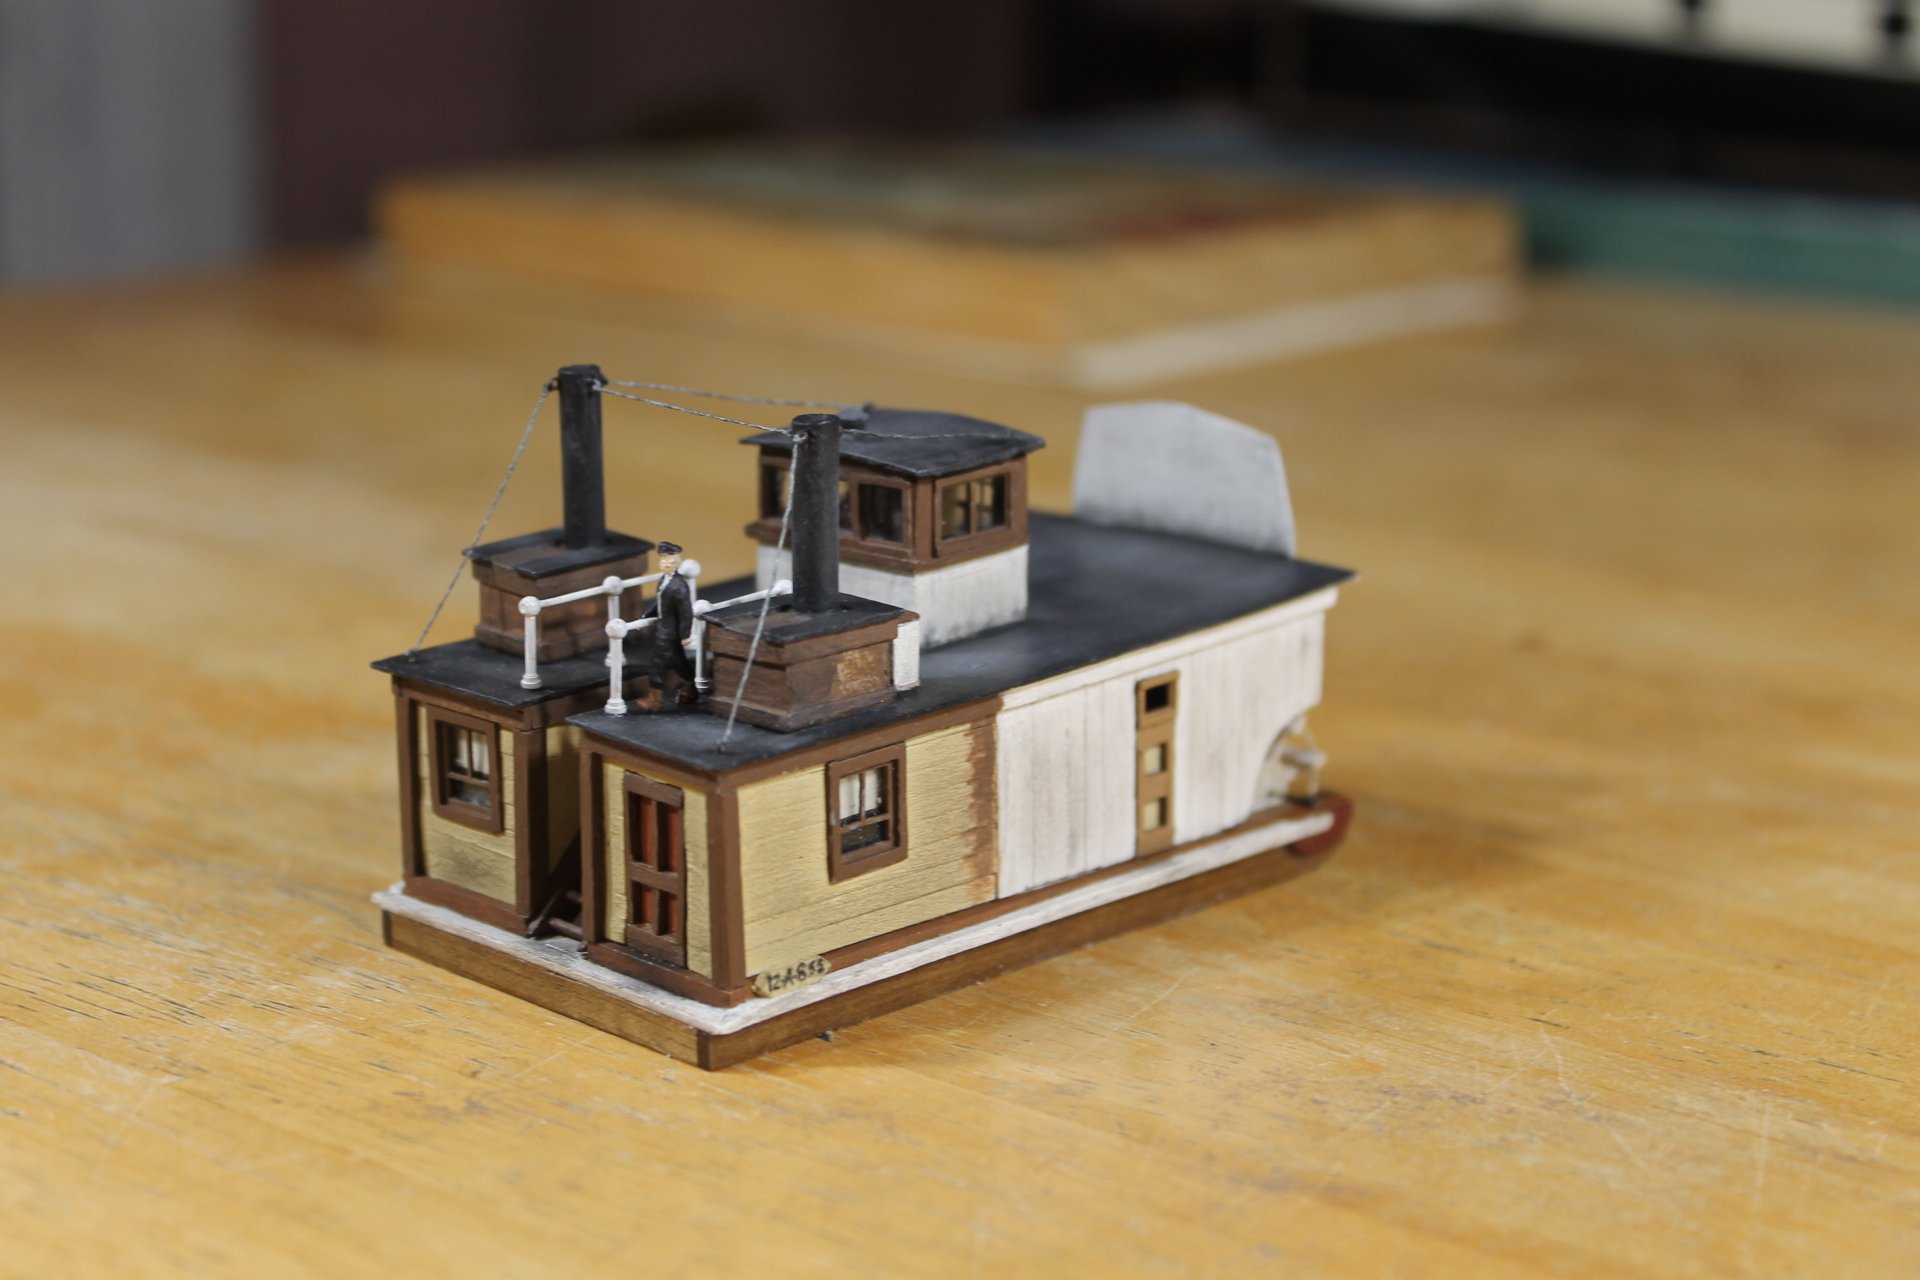
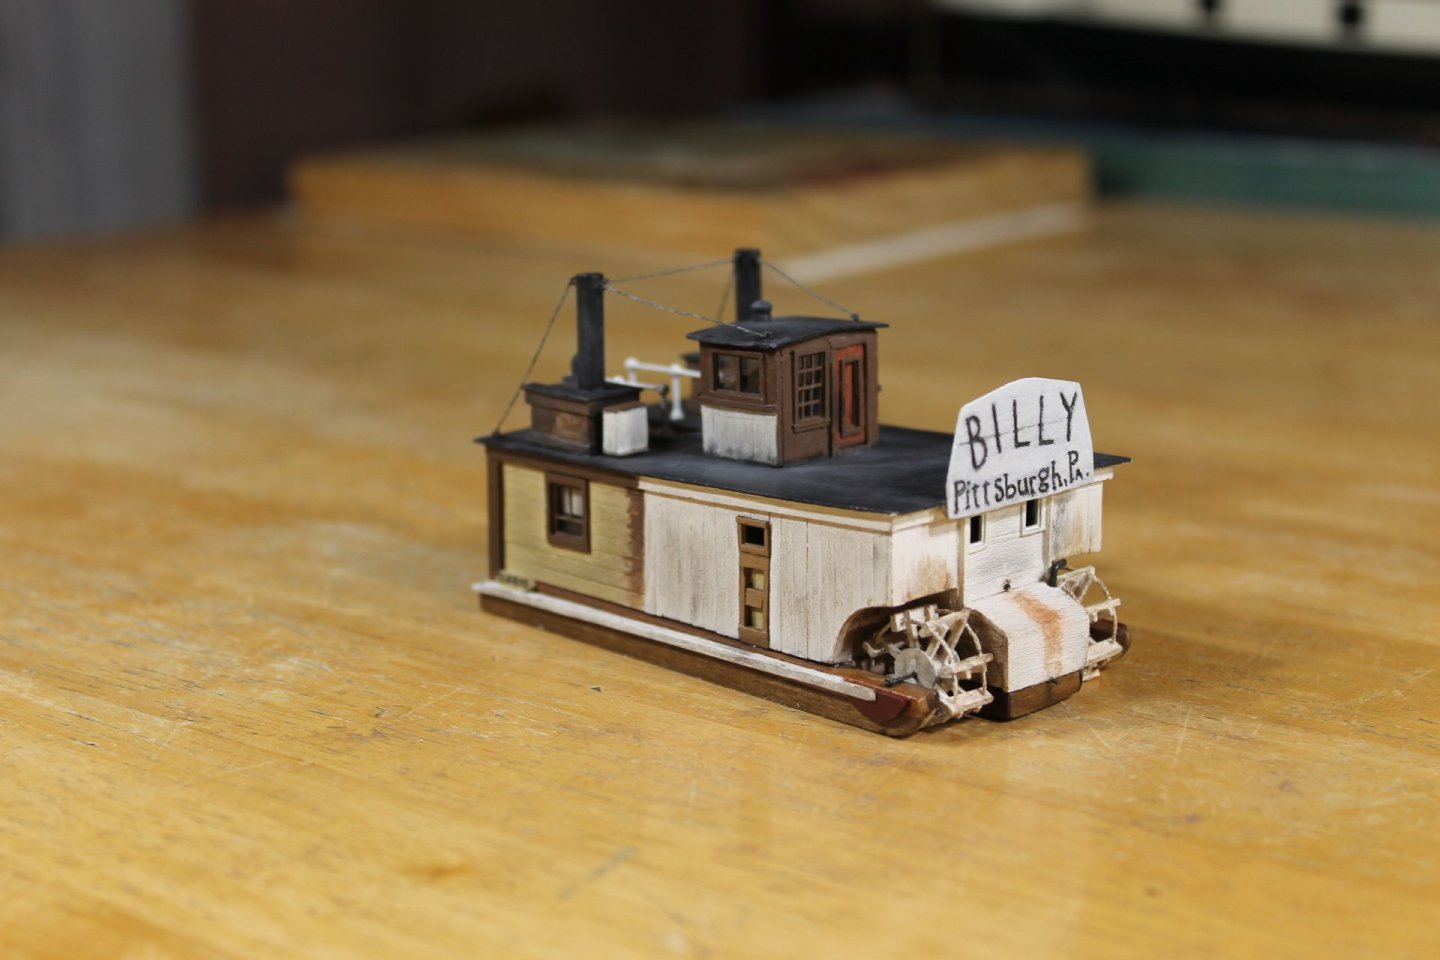
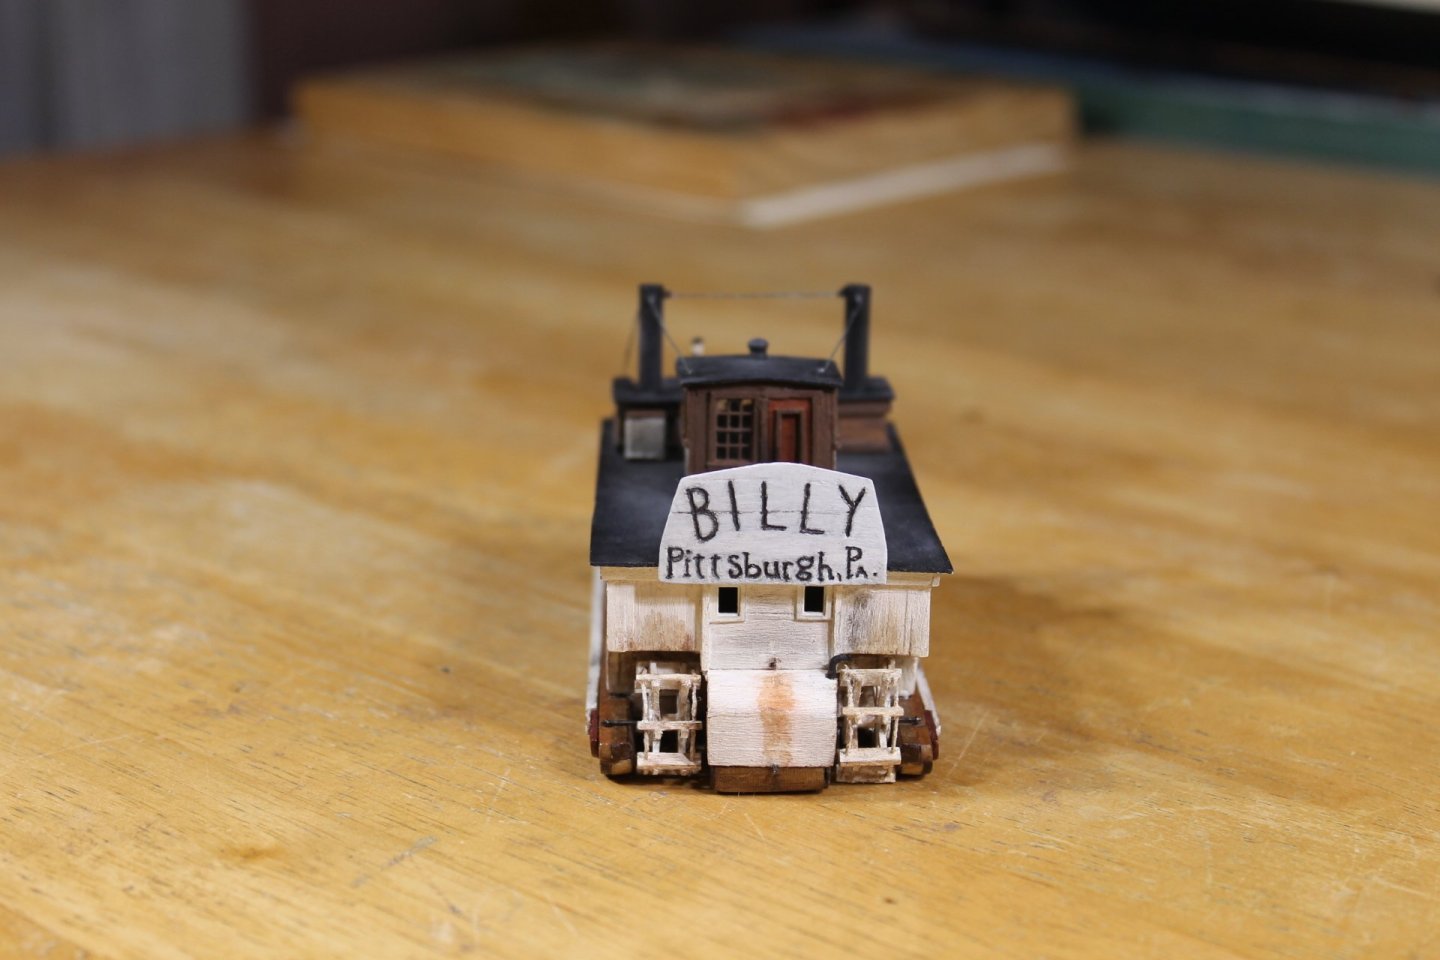
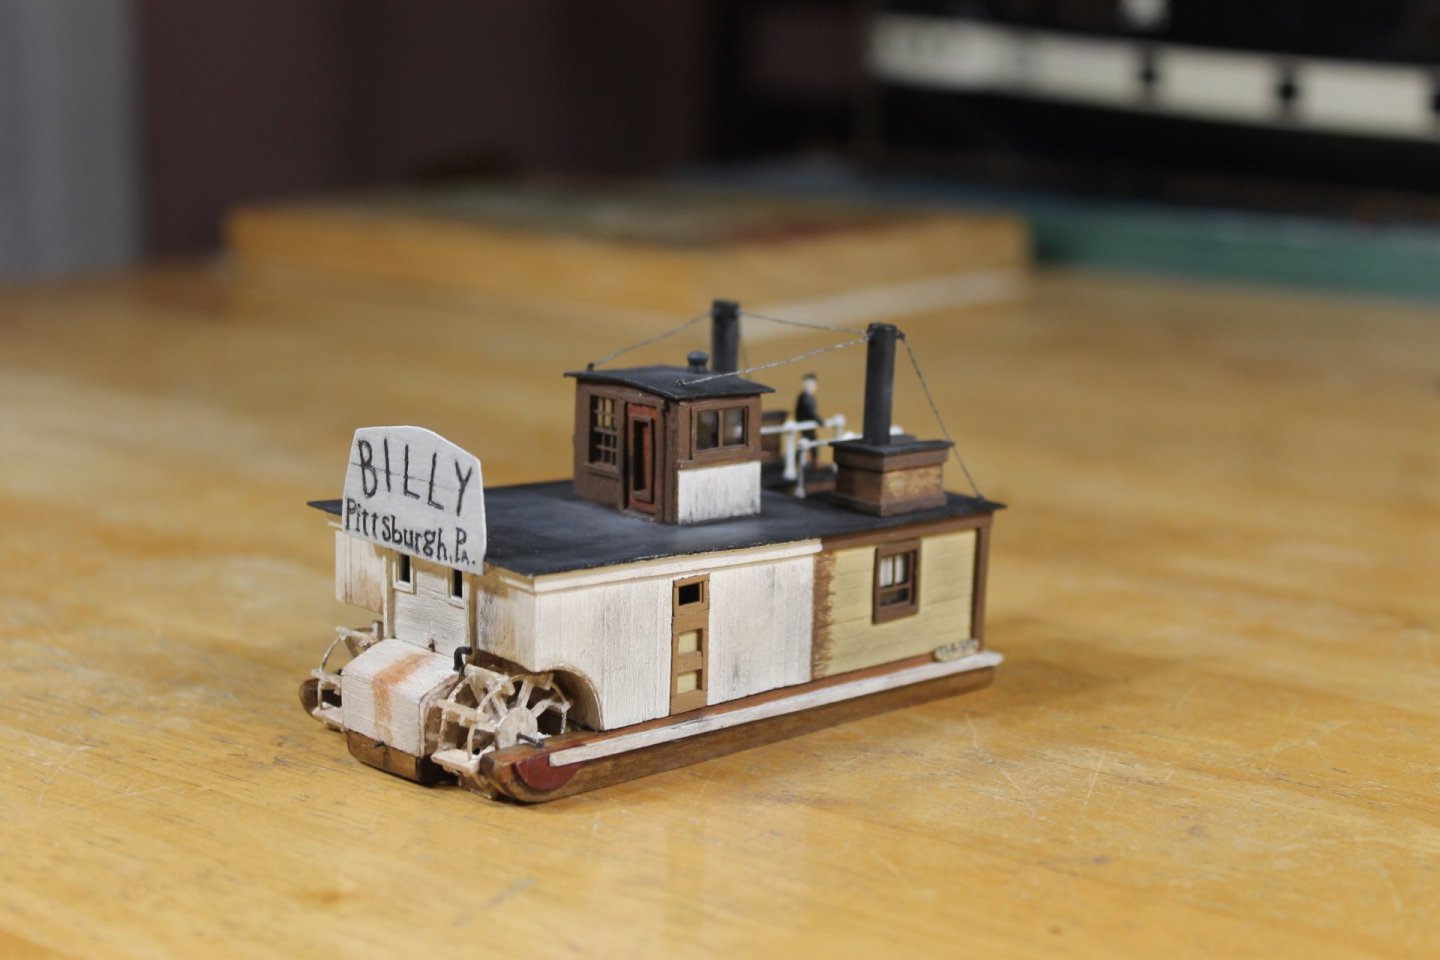
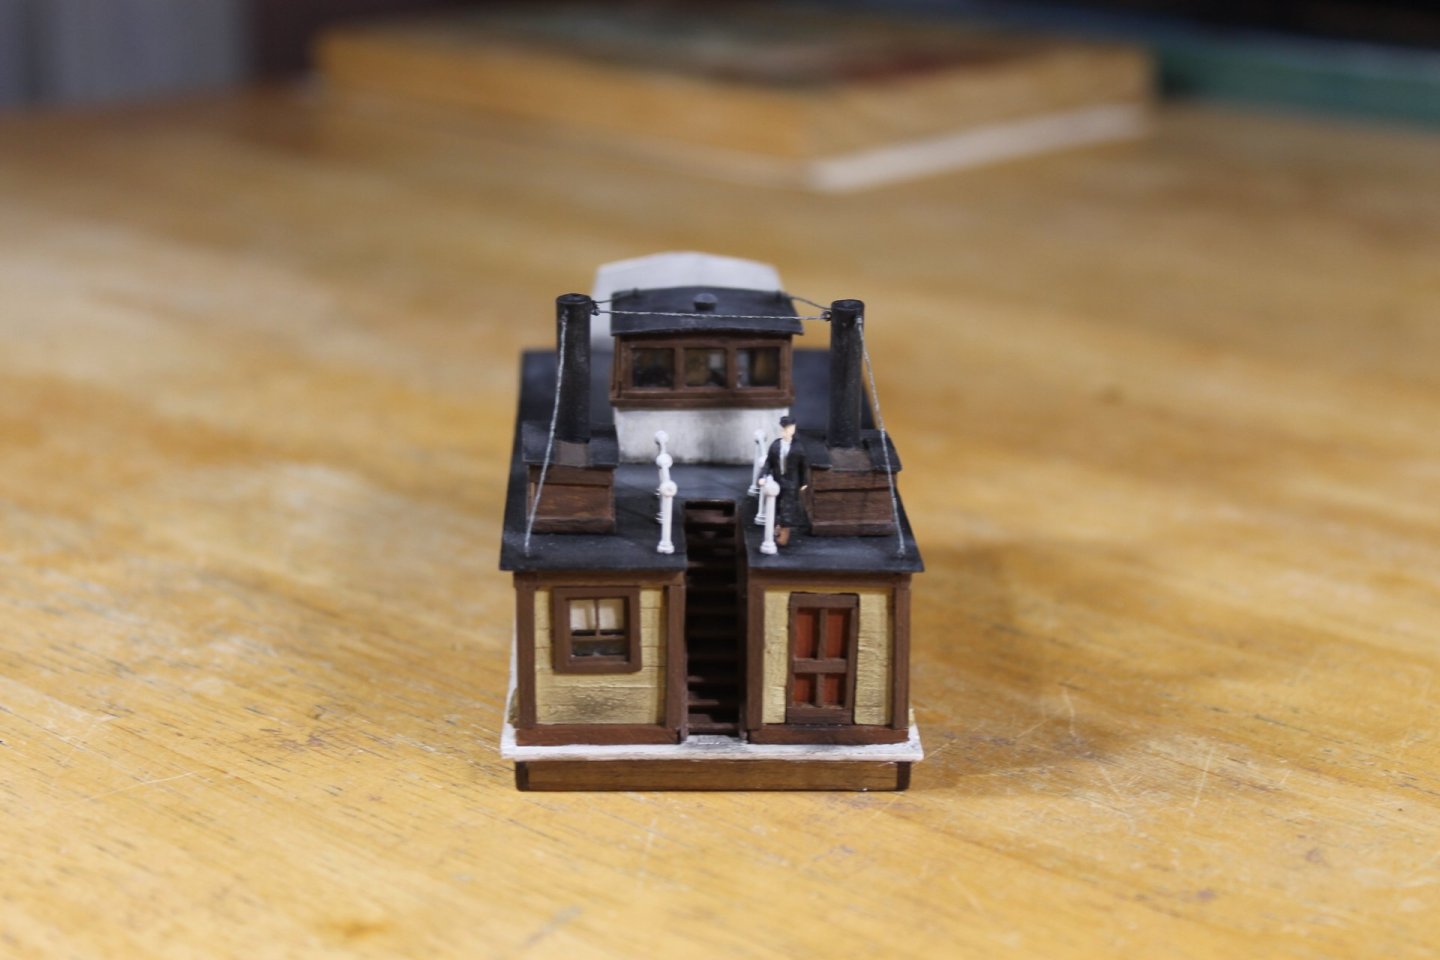
A huge thank you to each of you for following along, for the likes and the kind comments. Your support kept me going when difficult times arose during the course of the build. Billy is finished. After a mere three months my journey with Billy has ended. It started with a chance discovery on eBay of the press photo and press release and I was immediately enthralled by Billy's quirkiness. I've viewed thousands of historical sternwheeler images and Billy is unlike any sternwheeler I've ever seen. I knew instantly that Billy was a subject I wanted to try and model. I tried to adhere to Billy's photo as best I could till it came to adding the dummy stacks, I made the stacks straight. In doing so I moved Billy's timeline forward ever so slightly to a time when A. O. Engel would have had a chance to straighten them. It's here I have to admit that the straightened stacks was vanity. I dare say in time Billy will become separated from the press photo and I didn't want someone in the future thinking I couldn't manage getting the stacks straight. All I could hear in my head was, "the guy was a pretty good painter, you would think he could have managed to get the stacks straight". Once I had moved the timeline forward, at the end of Billy's build I decided I wanted Billy to represent Capt. Engel's finished dream of how he saw Billy in his mind. No lumber or junk on the boiler deck, everything nice a tidy with Capt. Engel at the bow taking one final look forward before entering the wheelhouse to start the journey south. I've enjoyed my time with you Capt. Engel, I feel like I've gotten to know you and you've become a friend separated by time. Fair journey and may the river run smooth before you. These aren't very good photos, I blame it a low camera battery. I promised Keith Aug I'd take and post photos of my working fleet, hopefully the photo of Billy and the rest of the fleet will be better. Again, thank you. Keith


- 359 replies
-
- 7
-

-
-
- Billy
- sternwheeler
- (and 1 more)
-
Remus, welcome to MSW. Glad to have you aboard.
-
Unfortunately the relentlessness of time spares none.
-
Looking fantastic, LJP.
-
And he ain't comin' out! That's nice work, Glen.
-
Alexandr, there is a way to paint where the paint doesn't soak into the wood and can be removed if necessary. It requires that the piece to be painted is first given a coat of polyurethane and allowed to dry, the piece can then be painted using acrylic craft paint. You must experiment on a scrap piece first to make sure this method would/will work for you and the look of the piece is acceptable to you.
-
The deck looks very nice and a great call on not adding treenails. 👍
-
HMCSS Victoria 1855 by BANYAN - 1:72
Keith Black replied to BANYAN's topic in - Build logs for subjects built 1851 - 1900
Great to see work on and images of Victoria, Pat. 👍- 1,021 replies
-
- 4
-
-
- gun dispatch vessel
- victoria
- (and 2 more)
-
The wheels turned out fantastic, Glen. The wheels and covers really make the hull take on the look. 👍
-
Thank you so very kindly, George.
-
Absolutely gorgeous work, Paul. Just marvelous.
-
Absolutely fantastic job on planking the hull, Jacques. The pump is a little jewel, this is going to be one beautiful model.
-
Welcome to MSW, all the best on your Bluenose project. Glad to have you aboard.
-
George, see my humble Tennessee build page 1, post # 6 for how I made cowl vents.
-
The deck looks great and it's nice to see the winch in place, John. Seems like a long time ago when you built that winch.
-
Novice builder and question re: Amati felucca
Keith Black replied to jrbm's topic in New member Introductions
John, welcome to MSW. Glad to have you aboard. -
That's lovely, Adam.
-
Most emphatically! Brave man McGuire but the hull turned out nicely done. Two, zip!
-
Thank you, Rick. Those Stobart prints are a treasure, your brother is very fortunate to be their caretaker. Than you, Keith. As soon as I tie a bow on Billy I'll be sure to take a photo of my humble working boat fleet together and post. Thank you so kindly, Craig. Billy's not quite done but very close. After seeing you work on Twilight's galley (the whole work for that matter) your fingers are far far from clumsy. Twilight is very special as is the work of all of you! I seriously believe my humble work to be the least amongst the lot.
- 359 replies
-
- 7
-
-
- Billy
- sternwheeler
- (and 1 more)
-
*see Keith wag his index finger at Roel.
-
Brig Le FAVORI 1806 by KORTES - 1:55
Keith Black replied to KORTES's topic in - Build logs for subjects built 1801 - 1850
Such lovely work as always, Kortes. -
After the first inning, Glen, 1. Bottle, 0. We're rooting for a shutout, Glen!